As requested from another thread here is a simple how to on painting your car. I hope you find this useful.
Every product I will mention in this thread can be bought at any local automotive paint store.
Here is a short list of what you will need for this project;
-Air Compressor with a minimum of a 30 Gallon tank (this is a must other wise you will not have enough air to complete a paint job, borrow one if you dont have one) -HVLP Spray Gun -Point of use air line filter -Good Clean Air Line -DA sander -Red scotch brite pads -180-320 DA paper -1000-1500 Wet sanding paper -Masking tape and Paper -Wax and Grease remover -Lacquer Thinner -Latex Gloves -3M painting mask (A MUST, paint has not just been linked to cancer, it FLAT OUT causes cancer!! You want none of this in your lungs.)
To start out you will need a clean open area to work. Garages are best but will need to be cleared out, you need a minimum of 3 feet around your Fiero to work. Also this can be done outside but the results will not be as good. Keep your work area clean at all times, you never want any contaminants on or near you car when you are getting ready to paint.
Step 1- WASH THE CAR! Often this step is overlooked but you never want to start any work on a car that is not completely clean. Spend time washing the car, dont forget the under the skirts, under the front and rear bumper, along the wheel wells. Use only a very mild soap, nothing that claims to help shine. Dish soap works well but make sure to use something that will not leave a residue. Spend extra time on anywhere armor all has ever been, dont forget it flys off your tires.
Step 2- Now the car is washed, use wax and grease remover and wipe down the whole car. Once again a totally clean car before any work begins.
Step 3- Assess the damaged areas. Well I'm sure if you are painting you car there is a reason. So any where there is damage repair it. For baked off clear coat use a DA sander with 180 grit and sand it out, but be careful you dont sand all the way through the paint. You only want to remove the bad clear. In any areas where you break through a layer of paint you want to "feather" it back an inch. This means you should see a minimum of one inch of each layer of paint. If you do not do this you will have a lake in your paint. Also when using a DA sander ALWAYS HOLD IT FLAT other wise you will get waves.
Step 4- Primer areas. NEVER USE SPRAY PAINT PRIMER! This primer is not catalyzed, so when you paint over it, the paint will reverse it back to a liquid from. This is not good if you are hoping to fill sand mark etc. with the primer. So spend a few bucks and buy good catalyzed primer from a paint shop. Now onto where you will need to primer, you will only need primer if you have body work on the car, if your have sanded all the way through the paint to fiberglass, or you have spider web cracks your are trying to fill. It is unnecessary to prime the whole car if you dont have too much body work.
Step 5- Prepping the car for paint. Now that you have a clean repaired car you will want to prep is so the new paint has something to attach to. Take a DA sander and sand everywhere with 320 grit, you only need to scuff it so there is no more shine your not trying to sand off the paint. Sand over any primer with 320 as well. If there is any areas you cannot hit with a DA sander, use a red scotch brite pad, like around the windows, under the door handles, etc. DO NOT SAND BY HAND WITH THE 320, this will result in straight sanding lines and will show up once painted. Always use a DA or scotch bright pad on final prep because they have a random pattern and will not show up when painted.
Step 6- Set up your painting area. If your in a garage move everything out that you can, what you do not move will have paint on it forever after. It best to cover what you cannot move with plastic tarps, also line your walls with plastic tarps. Now make sure you have drained your air compressor, water and oil builds up in the tank and will ruin and paint job. Its best to buy a brand new air line for this job, that way there is no air tool oil in the line to screw up your paint job. Then put a point of use filter on your air line right at your spray gun to remove any water and oil before it gets to your gun. Lastly right before you paint the car wet down your garage floor, this keeps the dust down when spraying paint.
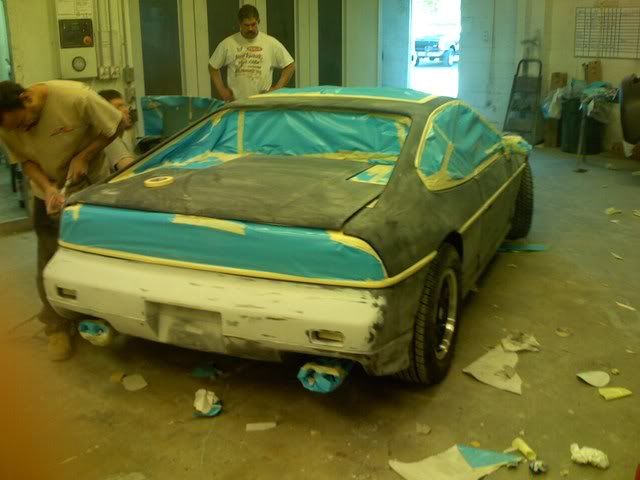
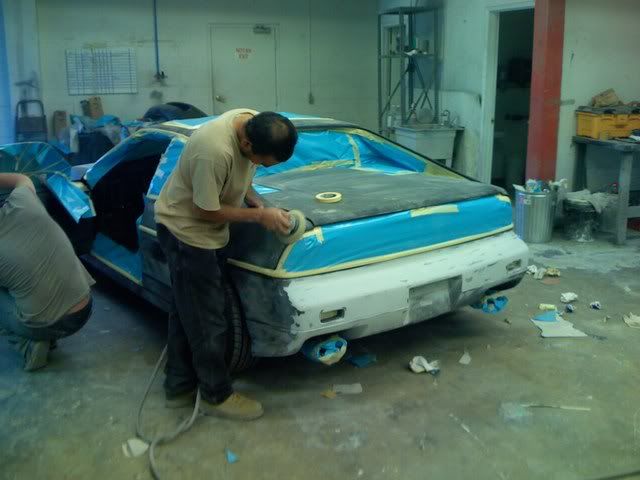
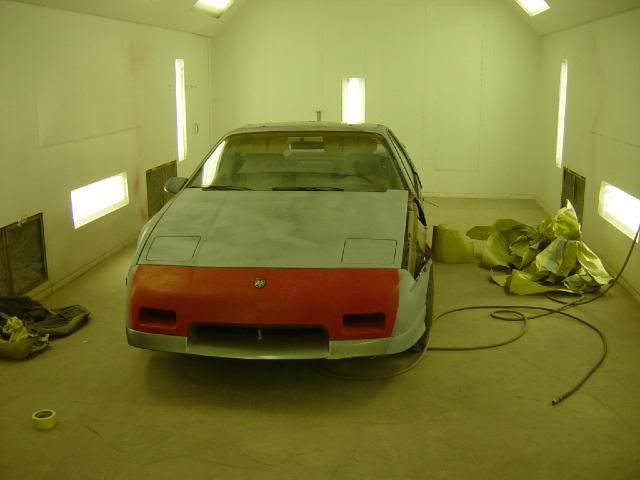
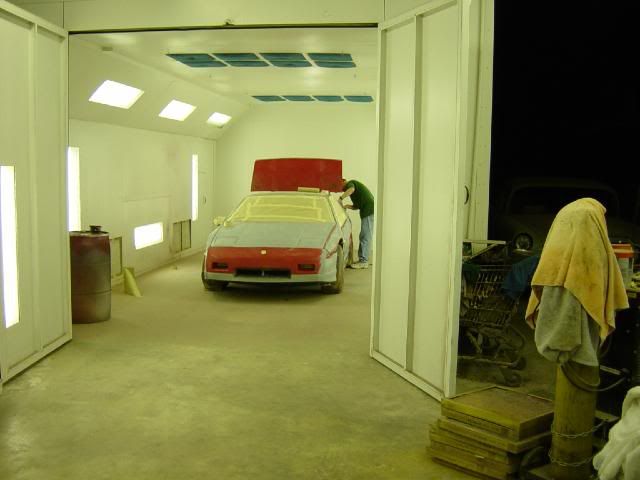
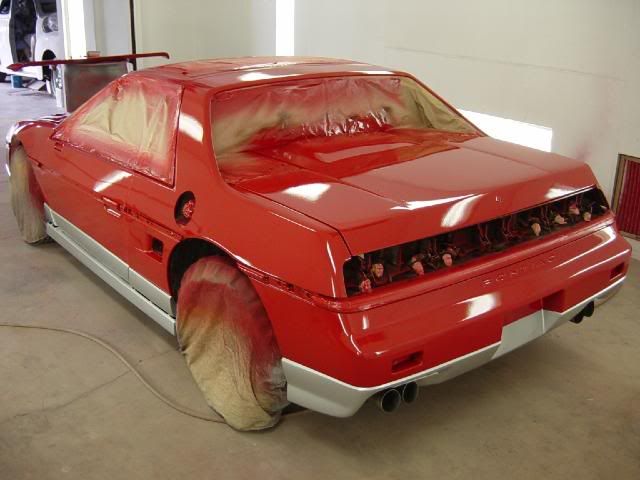
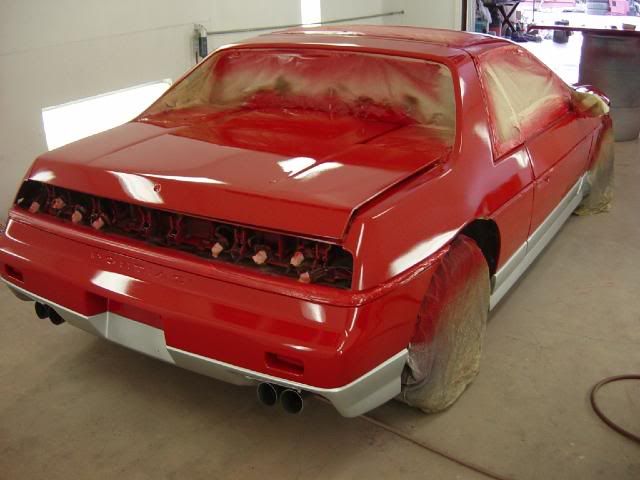
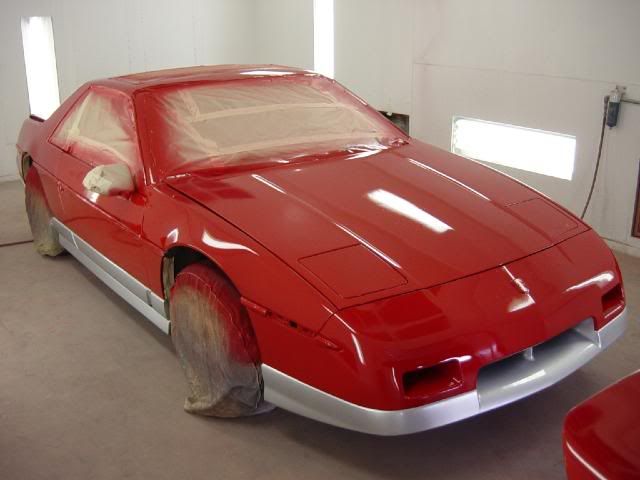
Step 7- Masking off. Mask of everything you dont want paint on, dont forget your door jambs, wheel wells, etc. Your car should now have a dull clean look like in the picture. Any shiny spots need to be sanded and prepped before you start to paint.
Step 8- Final Cleaning. Once again wipe down the whole car in wax and grease remover. Then just before paint wipe the car one more time with a tack cloth.
Step 9- Base Coat. Mix the paint as the manufacturer recommends (ask the paint shop), use a filter and pour it in to your spray gun (filter are free at the paint shop). Now set your spray pattern, using a piece of masking paper taped to a wall set your air pressure on your gun and adjust your spray pattern. Normally 35-40 psi works well, and for your spray pattern you want a 7-8 inch tall 1 inch wide vertical oval. You need to spray holding the gun about 15" from your work. Now lay on the paint, using robotic smooth overlapping sweeps go back and forth from the top of the car down painting the car. Put 2-3 coats, any place you get a run wait tell it dries and sand it out with 600 grit and re shoot that area. Once base coat is complete you can only wait up to 24 hours until you shoot the clear, but I would only wait about 45 mins.
Step 10- Clear coat. Using the same painting method as the base coat apply the clear coat. Do 2-3 coats of clear, if you get a run or dust dont worry about it can be fixed after the paint dries. Wait about 4-5 hours before removing the masking paper. Be extra careful to not pull the paint up with the masking paper.
Step 11- Color Sand and Buff. If you have any runs, dust, or orange peel now is the time to fix it. You can color sand starting about 24 after you finish paint. The sooner you color sand the better, because the paint will not be as hard to sand. If you choose you can color sand at anytime after the paint job, even years later. For run wrap a stir stick in 1500 grit paper and have a hose with water running very slowly and sand with the help of the water until the run is gone. For orange peel, fold a piece of 1500 in to thirds and using a hose again wet sand the area by hand, make sure to use you palm not your fingers, finger will leave lines. Also rinse off you paper so it does not get dirt caught under it a damage your paint. Once all the problem areas a gone, take a high speed buffer with a wool pad using 3M perfect II compound and buff the car until it shines great, be careful around edges you dont want to burn through the paint. Once its all buffed use a 3M swirl remover and a foam pad and polish out the car. Now your car should look like a show car!
Enjoy! Remember this is only a quick description, and is the way I have been doing it for 10 years. Everyone has there own way of doing stuff so please dont flame me!
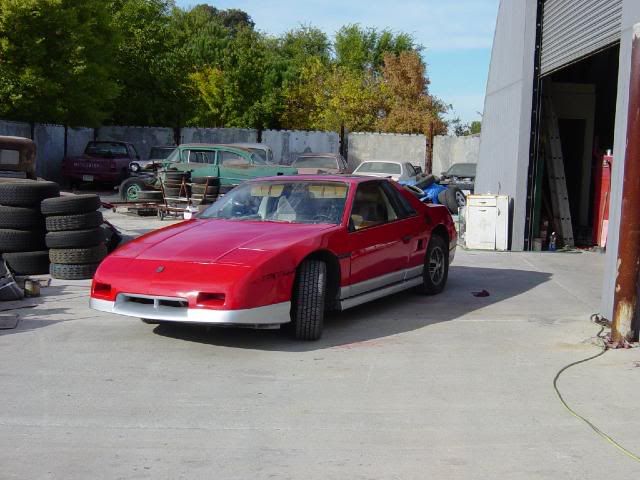
The last Base-Clear paint job on a Fiero I did cost me $186.15 in materials. If you had a shop do it, you would spend $1500-3000
[This message has been edited by DeLorean00 (edited 04-03-2008).]
It works to cover parts that are difficult to tape off, and will wash away when you are finished.
Apply sparingly, with a Q-Tip being careful to only cover where you don't want paint.
Your car looks awesome, great work.
Brad
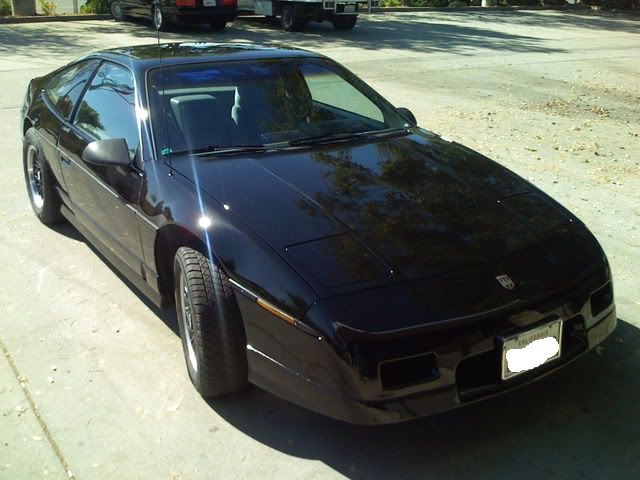
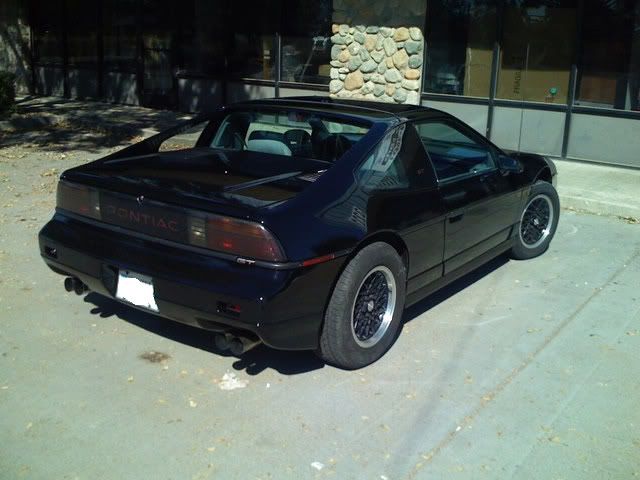
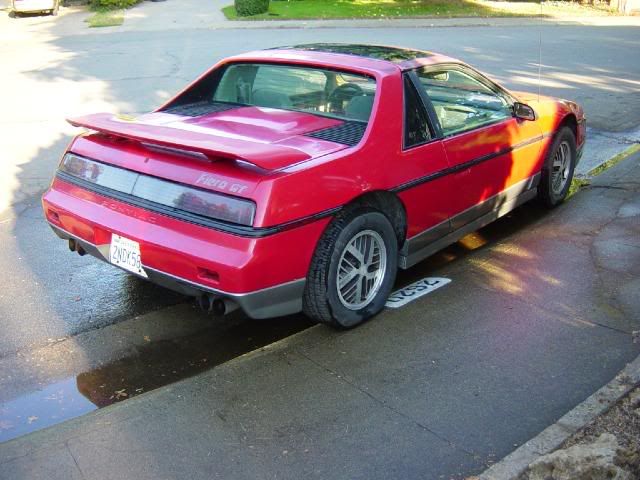
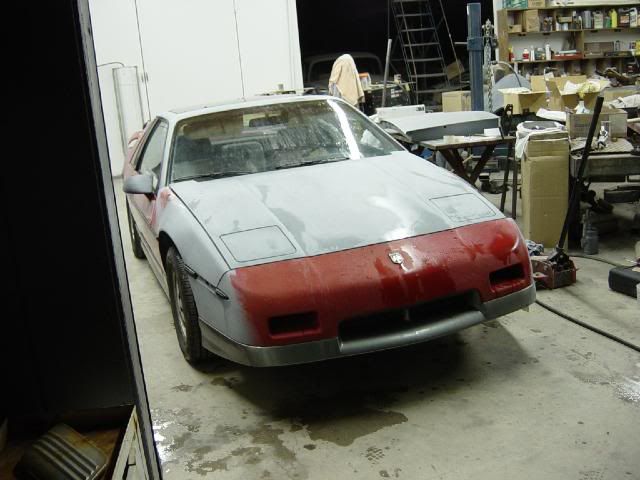
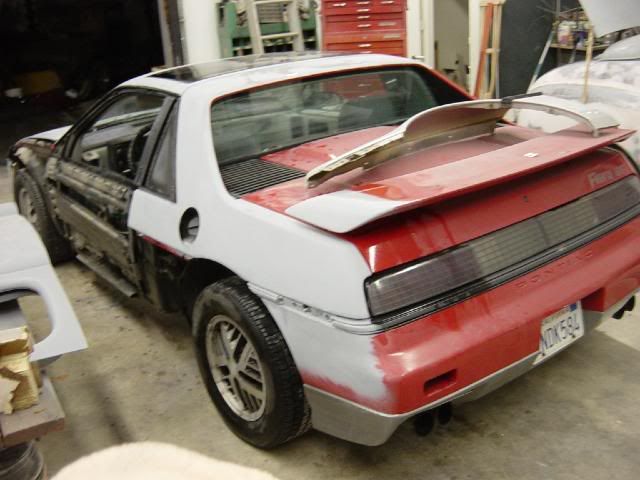
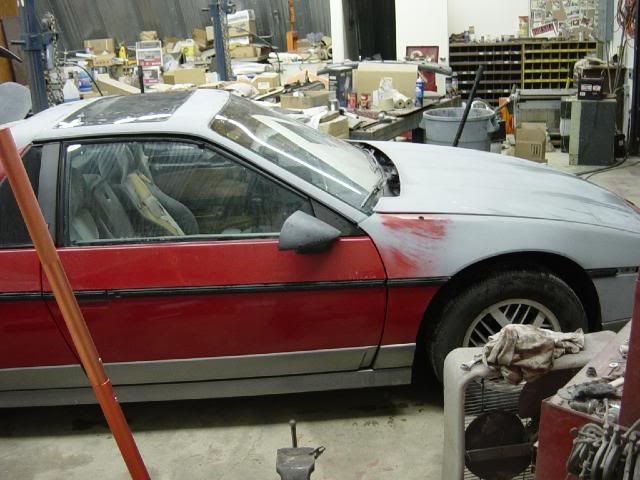
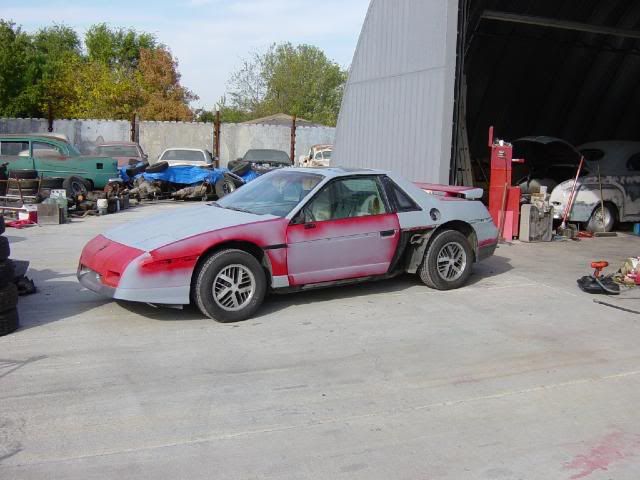
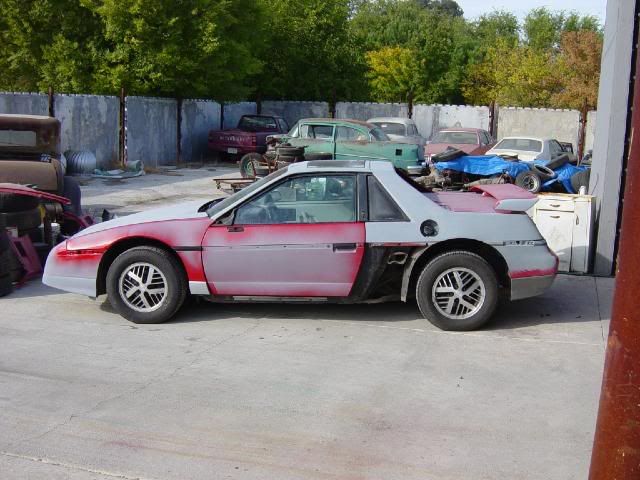
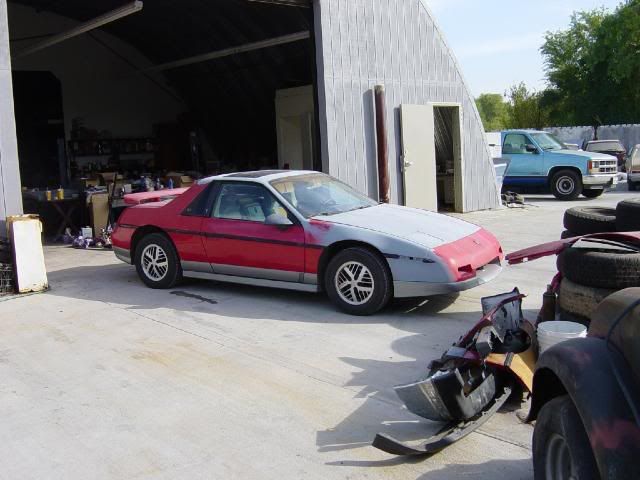
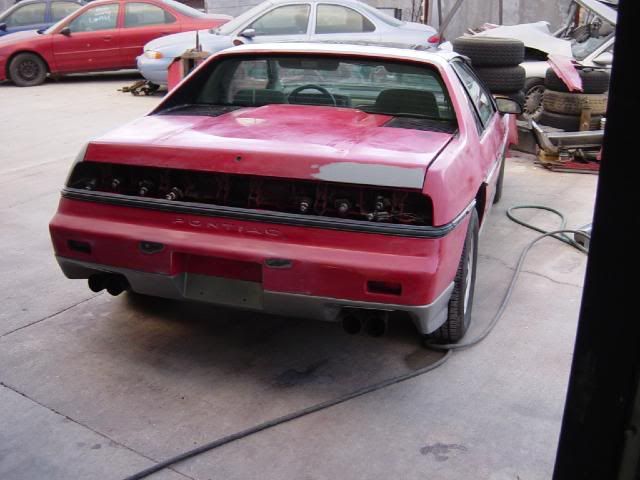
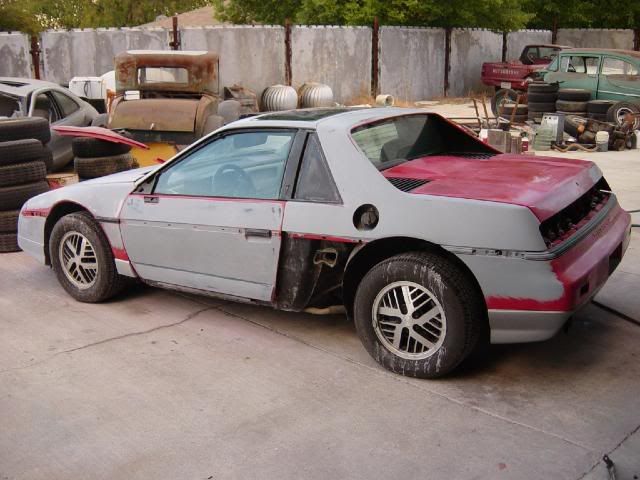
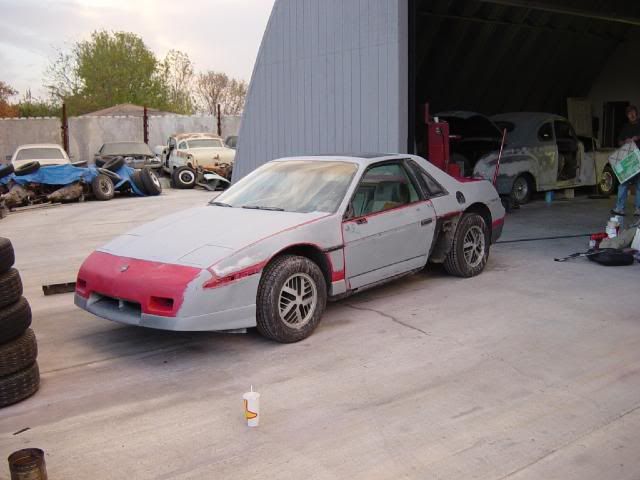
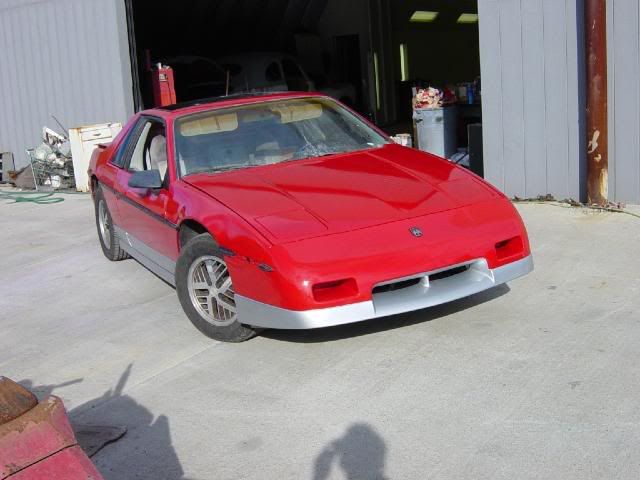
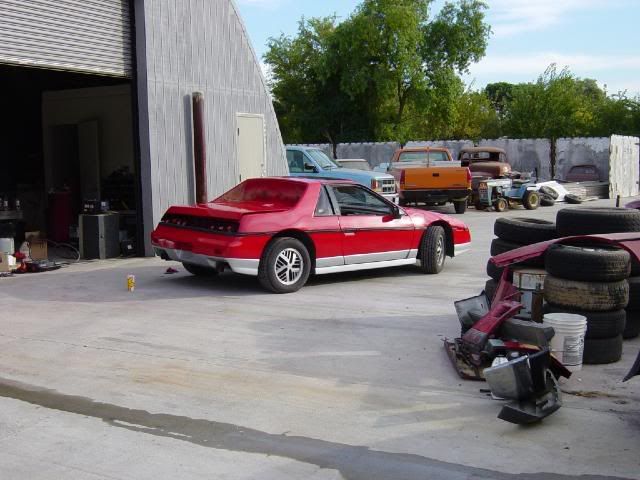
The car now belongs to Brastic on this forum! I sure wanted to keep this one but he had the money and I didnt have the space for it. So I passed it on to him, I had been trying to buy this 1988 GT for 10 years.
IP: Logged
01:35 AM
sjmaye Member
Posts: 2468 From: Hendersonville, TN USA Registered: Jun 2003
It was the economy line made by PPG called OMNI, it has been a couple of years but last I checked the paint was about the same price. Also the price was to just repaint the car the original color, if you want to change the color it would be about $75 more. Remember when buying paint that if you change the color you will need a lot more base, because you need to cover all the other color, and do jambs. Also, I get shop rate for paint.
Heres a tip, when ordering you paint pretend you just opened a shop, ask for the shop price. You will need to make up a name and in California they may ask for a resale card, if they do just say you have not set it up yet and you will pay tax this time. Its a quick and easy way to save 15%.
Plus the price $186.15 was just the paint I used. For a first painter that will need to buy everything on the list including spray gun and DA sander and also is doing a color change, you should be able to get everything for well under $500. Harbor Fright sells alot of the stuff. Also you get a good used spray gun off of ebay, but a Harbor Fright one will work fine. Remember once you have the stuff you then can paint anytime you like. You may find you quite enjoy it.
[This message has been edited by DeLorean00 (edited 04-03-2008).]
IP: Logged
12:17 PM
2.5 Member
Posts: 43235 From: Southern MN Registered: May 2007
Chris, The more you post the more I realize we should carve out some time to visit. It is ironic that you are sharing this wonderful information at the time I need to paint my Fiero. I got your number, you will hear from me, I promise...
Cordially, Kevin 916-600-6482
IP: Logged
01:06 PM
DeLorean00 Member
Posts: 4251 From: Sacramento, CA / Reno, NV Registered: Aug 2005
You can use a sealer if you choose, it helps hold down any problem areas. If you have a pretty clean car dont worry about it.
GOOD POINT
UPDATE*****
Ok, to clean the gun, buy a gun cleaning kit (harbor fright has them for about $5). Remember to clean the gun between the base coat and the clear coat. Rinse out the gun with laq thinner, clean the cup and tip, then spray the gun through with laq thinner. Then shoot your clear.
When you are done shooting the clear take the gun all the way apart and clean all the parts with laq thinner. I like to let the tip soak over night in a cup of laq thinner to ensure everything is out. Make sure all the openings of the gun have been cleaned. When you done the gun should look like new. This is very important if you ever want to use the gun again.
To store the gun. Once its clean and put back together, put about a half cup of laq thinner in it. Then without air hooked up pull the trigger allowing laq thinner to flow out the tip, only a second or two is fine. Leave the laq thinner in the cup and store it upright. Make sure you put is some place that if it leaks it would ruin anything.
[This message has been edited by DeLorean00 (edited 04-03-2008).]
IP: Logged
01:06 PM
DeLorean00 Member
Posts: 4251 From: Sacramento, CA / Reno, NV Registered: Aug 2005
For catalyzed paint, a mask not only may protect you from cancer....BUT it definately will harden overnite in your lungs. I found this out when it first came out ( Imron ). I coughed and had sore throat and chest for a week from one paint job. It will only take several jobs to kill you.
Job looks good and I agree with most of what you said. My own cars usually cost me $200 or so also. My 66 Coronet cost me about double that though because of the yellow and all the jams and under hood, trunk. door insides....not to mention the cars 20' long and HUGE.
I use BASF/ R&M Diamont mostly because its relatively lower priced. Lately Ive been trying out Sherwin Williams Dimension Four basecoat. Ive used BASF 4000 clear for about 10 years and its not very high and its excellent for wear and longevity. Its also what a few of the top custom shops are using.
------------------
Owner / Operator Custom Paint and Body... specializing in Corvette & Higher End Autos for 40+ years Ferrari, Mercedes and Porsche Approved ____________________________________________ 88 Corvette convertible 05 Dodge Magnum Hemi R/T 66 Dodge Killer Bee Coronet
IP: Logged
04:01 PM
ytzman Member
Posts: 106 From: Burlington, Ontario, Canada Registered: Jan 2008
If only it would be as easy as it looks here LOL! Still a very nice HIGH LEVEL write up. I'm talking from experience as I choose this route with a minor deviation at the end. Something very important you missed between step 5 (sanding) and six is that you need to clean very well the car after the sanding and make sure you get rid of all the dust in all the crevices/area or it will end up in your paint job. Only then you should start masking all areas. Never leave tape that was wet. It may cause problems too. Also I don't agree you can paint it very confortable in a garage with only 3' of space around unless you do a section ata a time. Big risk of touching wet paint. Also the paint will leave a lot of dust around so you will (or should) need to clean up very well before you clear. Use a suit to pain or hair/dust from you will fall on something. Finally $186 will be for paint only with a good discount. Thinner, sand paper, tolls etc. will add up quickly. At the end I spent about $400 for paint/primer, other $200 on prep material and $220 in guns. I spent about 80hrs preping the whole car and priming/sanding (hoods inside & out) and painting trip and inside hoods. But I was no expert so there is some learning curve there. When I found that it would take me forever to finish painting a section at a time waiting for good weather, time available, etc. I just took it to a place for them to shoot it and color sand. They charged $600 and took them more time than they thought. At the end I had a very good paint job for the total price I paid and I know the prep was good. But I doubt I would do it again. It is a lot of effort and maybe too much for my HOA
[This message has been edited by Alex4mula (edited 04-03-2008).]
IP: Logged
05:37 PM
Nazareth Member
Posts: 730 From: morristown, TN Registered: Aug 2003
I noticed that you didn't mention the use of an adhesion promoter or any type of flex agent for the paint. On another forum (custom paint ) they said that I would most definitley need to use an adhesion promoter but didn't know about needing to add a flex agent.Is the catalyzed primer an adhesion promoter?? Do you ever use them? I am looking to paint my 84 once things get a little warmer around Michigan, but I want to get it right the first time so I only have to do it once. Thanks Brian
IP: Logged
06:45 PM
rogergarrison Member
Posts: 49601 From: A Western Caribbean Island/ Columbus, Ohio Registered: Apr 99
Yes the Duplicolor IS laquer. I buy the clear. I use it over the basecoat to trim in door jams mostly. It dries within a few minutes. Also use it for small jobs like say the bottom part of a door I repaired. I can spray it basecoat, spray that clear on in and buff it out in an hour or two and deliver it. Yes, clear laquer works just fine over basecoat colors.
Adhesion promoter and flex agent are not needed under basecoat clearcoats any more. The urathane paint flexes more than the flex agent does anyway, and the flex agent when mixed in the paint evaporates in a week or so anyway. If your spraying enamel or laquer, then you can use the flex. Adhesion promoter was invented for dealership body shops that dont want to waste time sanding panels. I cant count how many of those panels I have to strip and repaint the next year when it falls off. There is NO substitute for sanding.
Thanks for all the replys! I would encourage anyone thinking about doing this project to read all the posts on this thread, because many forum members added very important details I overlooked last night. I quickly typed this up after a 10 hour work day right before bed, so some small parts got left out. Also, I am working to get more pictures off of my old computer to show more of the process of painting a Fiero.
I, agree with rogergarrison on everything so far, he seems to have some time spent behind a spray gun. This write up is intended to for a person on a budget, there are always more expansive ways to do things. But if you follow the tips on this thread you will end up with a very nice paint job that you can be proud of for years to come. There is nothing quite like standing next to a great looking car at a show when someone asks where you had it painted, and you can tell them you did it yourself in your garage! That kind of pride seems to be what this forum is all about.
I really hope this helps someone!!
[This message has been edited by DeLorean00 (edited 04-03-2008).]
IP: Logged
09:16 PM
CC Rider Member
Posts: 2037 From: Cameron Park, Ca Registered: May 2001
Very good write up and a cool paint job. What is the best way not to get orange peel on the pait job ? How to get rid of it if it happens?
Orange peel it caused by many things. Your air pressure could be to high, you could be not laying on the clear thick enough, the gun could be to far from the work, etc. It best for a first time painter to practice on a spare part to get your technique down, most local body shops will give you a damaged fender for free. If you get orange peel dont worry it can be sanded out when you Color Sand and Buff.
[This message has been edited by DeLorean00 (edited 04-03-2008).]
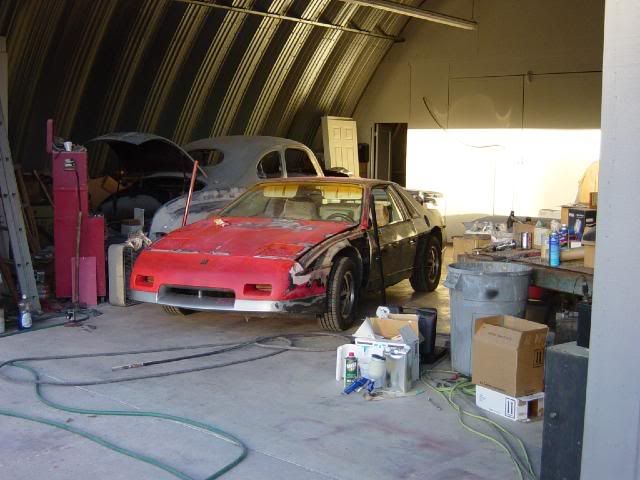
Well, since people seem to like this thread I went to my storage unit and pulled the old hard drive out of my old computer to get these photos. Enjoy!
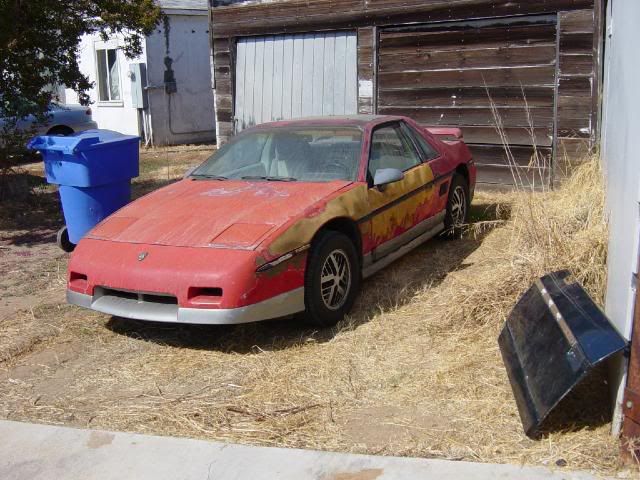
1985 Fiero GT Fire Damage.
This is a 1985 Fiero GT with 23k miles. This poor car was sitting at a car dealership when a building it was parked next to burned down. This was in 1991, the car then sat untouched, outside, until I bought it in 2003. This was still in the car dealers inventory, just after the fire it was never fixed or looked at again. I bought the car for $600.00 and started repairs. This whole job took 5 days from the first photo to the last. And cost me just under $300.00 for all the paint, primer, and supply's.
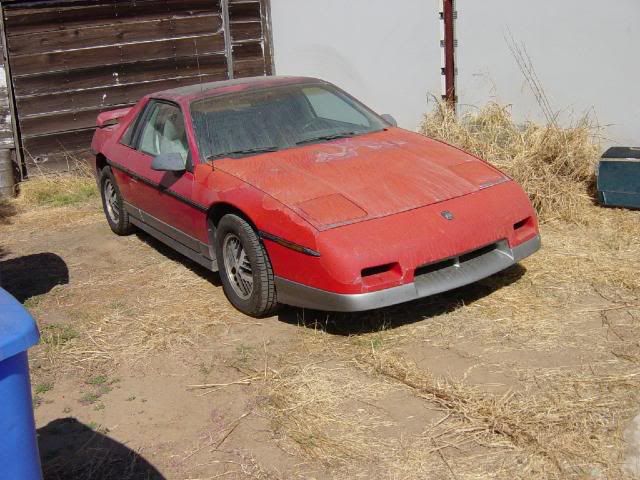
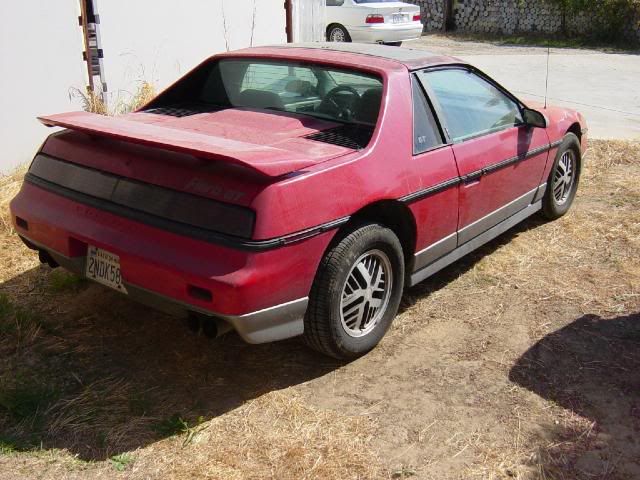
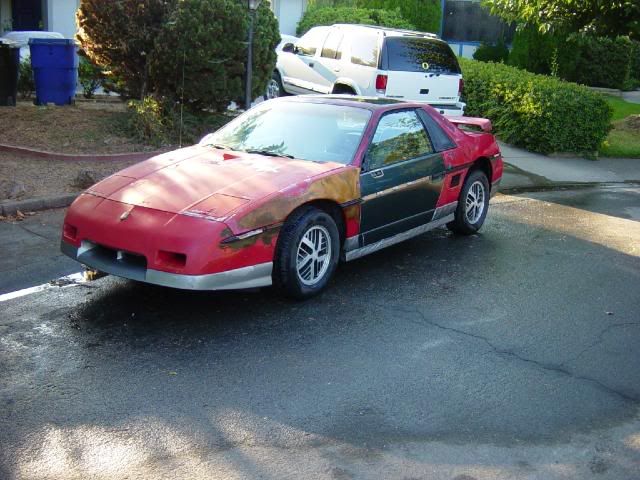
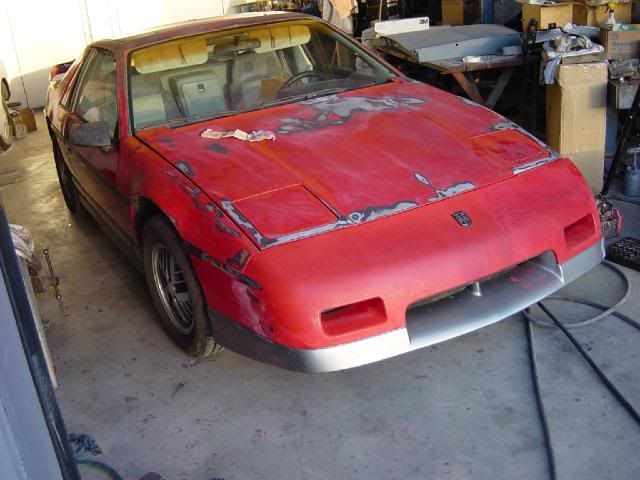
To start the before photos, this car had extensive fire and sun damage.
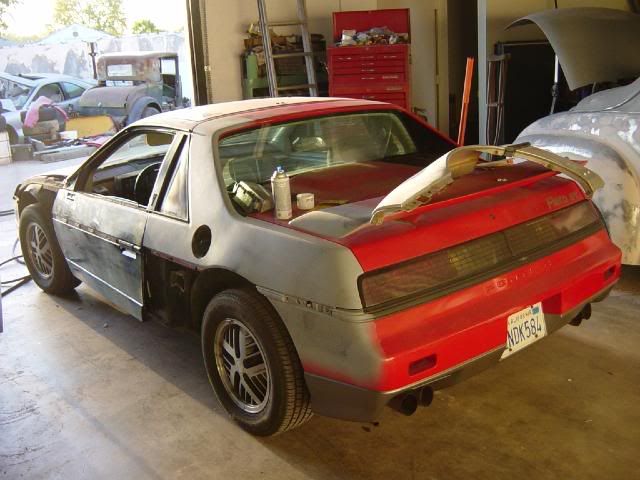
I washed the car and test fit the door skin.
The car was then striped more and a lot of time was spent removing the sun damaged paint. Also in these photos the rear clip had been repaired and primed.
After preping all the damage areas, the car was put into the spray booth and primed the effected spots.
Then I brought the car out of the spray booth and guide coated and wet sanded the primer. This will take out any imperfections.
Now, I painted the back sides and jambs of the panels that were replaced. Then I remounted them to the car.
Here I wet sanded the whole car and any primer areas. Make sure to get off the over spray from doing the jambs. Also note that the area where the "Fiero GT" decal was in now primed, I did this because some times after the car is painted the glue from the decal comes back up and shows through the new paint.
Now, after a really good cleaning and blow off with the air gun the car is brought back in to the spray booth and masked off. Boy I love free help, the guy in the pictures is my dad and he will help me do these projects for just a cost a hamburger and frys! LoL.
Finally after too many paint fumes the car is done! Base coat, clear coat, two tone. I was very happy with the result, and remember this took 5 evenings and $300. I worked everyday and just did this at night and on one weekend.
One more Fiero saved from death. Cant you just see this car on a dealership back in 1985?
I hope this helps someone!
-Chris
[This message has been edited by DeLorean00 (edited 04-15-2008).]
IP: Logged
09:12 PM
DeLorean00 Member
Posts: 4251 From: Sacramento, CA / Reno, NV Registered: Aug 2005
I do. They are a little difficult to remove. If you feel you can put them back on with out damaging the new paint it might not be a bad idea to remove them. Another thing to worry about is if you are painting them the same color as the body it would be best to leave them on for a first timer so you make sure they are the right color. Remember the color of the paint will differ depending on how many coats you do, the air pressure of the gun, the temp, etc. So if you plan on painting your car panel by panel I would advise against it.
Nice post...plus for you. The best thing to do if you don't want dust in your paint is to buy some plastic and wood and make a nice area to work in. You'll want a couple vents so that clean air can get in, plus you'll want it hooked to the ground so that stuff can't get in under the plastic. Also, not a bad idea to put water on the floor in case your floor is dusty. Don't wanna kick up some dust. Cost about $400-500 (if I recall) for two-tone paint, clear coat, plastic, wood, and the vents. The most important part is sanding everything down. make sure you feel it and don't just look at it. It could look really smooth and still feel rough. Also, if you have a wing, you should take the wing off the car, because it's almost impossible to get a good coat under the wing with it on. Hang it from the rafters by the mounts for easy painting. Also, any other body panel that you want to take off will make your finished results that much better. The headlight covers are kinda a pain to get a good smooth coat of paint on, I would suggest taking those off to paint. I left mine on and now my paint is starting to flake in a couple of spots.
IP: Logged
12:08 AM
Kemp3 Member
Posts: 282 From: Carmel Valley CA, USA Registered: Sep 2007
Amazing write up you have done , even more amazing is the work ! I think Since your only about 4 hours away ill just drive up to you and let you paint my Fiero
Seriously nice work
IP: Logged
12:38 AM
exoticse Member
Posts: 8656 From: Orlando, Fl Registered: Jun 2003
So how much paint do you need to buy to paint a Fiero? With no color change. The cheapest quote I got from the paint shop here was $360 for a gallon of red base and $120 for a gallon of clear. He said that was the cheapest stuff they sold, not the good stuff.
Great post! Thanks for taking the time to do this for us. Next year I hope to put your info to work. My 87 GT has peeling clear, and my 84 has 2 coats of paint and now primer I have to sand down:
------------------ Bob 84 SE IMSA Widebody 87 GT 5spd 05 Vibe
IP: Logged
05:08 PM
DeLorean00 Member
Posts: 4251 From: Sacramento, CA / Reno, NV Registered: Aug 2005
Amazing write up you have done , even more amazing is the work ! I think Since your only about 4 hours away ill just drive up to you and let you paint my Fiero
Seriously nice work
Thank you! But now that I no longer have my small body shop, I only paint my own cars.
IP: Logged
06:54 PM
DeLorean00 Member
Posts: 4251 From: Sacramento, CA / Reno, NV Registered: Aug 2005
So how much paint do you need to buy to paint a Fiero? With no color change. The cheapest quote I got from the paint shop here was $360 for a gallon of red base and $120 for a gallon of clear. He said that was the cheapest stuff they sold, not the good stuff.
For the red Fiero GT I used 2 quarts of base (red), 1 pint of base (silver), and a 3 quarts of clear. Your price for clear sound fair, but remember a gallon is more then you need but might not be a bad idea to have incase you need to redo an area. The base coat price it high, I would shop around. Also for a first timer I would buy 3 quarts of base and 1 gallon of clear.
IP: Logged
06:58 PM
DeLorean00 Member
Posts: 4251 From: Sacramento, CA / Reno, NV Registered: Aug 2005
Great post! Thanks for taking the time to do this for us. Next year I hope to put your info to work. My 87 GT has peeling clear, and my 84 has 2 coats of paint and now primer I have to sand down:
Thanks! Thats one sharp looking car you have there! It would be fun to paint!
IP: Logged
06:59 PM
Frizlefrak Member
Posts: 2921 From: El Paso, Texas Registered: Aug 2003
For catalyzed paint, a mask not only may protect you from cancer....BUT it definately will harden overnite in your lungs. I found this out when it first came out ( Imron ). I coughed and had sore throat and chest for a week from one paint job. It will only take several jobs to kill you.
First off....excellent write up, and a big ol' Texas sized + headed your way DeLorean.
Now, as Roger brought up, I'd like to address the subject of what respirator to use. I've always wanted to do some real auto painting, as I've found I'm pretty good with just a rattle can. My concern has always been that I will make a rookie mistake that will destroy my lungs.
From what I've read, the chemicals in the clear and hardener are some seriously bad stuff. I've looked around at breathing apparatus, but I'm confused as to what kind is really safe to use. I've seen some that supply fresh air from a source away from where you're painting with a hood that fits over your head....they're more expensive, but wouldn't this be the safest route?
Again...fantastic write up. We have body shops in the area that do good work for a reasonable price, but I've always kinda wanted the pride of saying I did it myself.
IP: Logged
09:07 PM
DeLorean00 Member
Posts: 4251 From: Sacramento, CA / Reno, NV Registered: Aug 2005
First off....excellent write up, and a big ol' Texas sized + headed your way DeLorean.
Now, as Roger brought up, I'd like to address the subject of what respirator to use. I've always wanted to do some real auto painting, as I've found I'm pretty good with just a rattle can. My concern has always been that I will make a rookie mistake that will destroy my lungs.
From what I've read, the chemicals in the clear and hardener are some seriously bad stuff. I've looked around at breathing apparatus, but I'm confused as to what kind is really safe to use. I've seen some that supply fresh air from a source away from where you're painting with a hood that fits over your head....they're more expensive, but wouldn't this be the safest route?
Again...fantastic write up. We have body shops in the area that do good work for a reasonable price, but I've always kinda wanted the pride of saying I did it myself.
Thank You!
Ok, on the subject of respirators there maybe some debate. Here is a really good mask, it is the one we used in college, and the auto body refresher courses I have taken. I find its always good to take auto painting classes every few years to keep up with the changes in the field.
If you don't paint too often a fresh air unit is not required. If you buy this 3M mask ALWAYS keep it in the bag when its not being used. And throw it away after 20 hours of use, or 6 months after being used the first time.
Also remember to ALWAYS wear latex gloves when working with paint, clear, cleaners, wax and grease removers, laq thinner, etc. The gloves keep your hands clean and keep your skin oil off the surface your going to paint, but most important the stuff your working around will soak into your skin and go into your blood steam. This is hell on your body, liver, etc. and WILL cause cancer overtime.
[This message has been edited by DeLorean00 (edited 04-16-2008).]
IP: Logged
09:17 PM
Apr 17th, 2008
BMTFIERO Member
Posts: 1187 From: Beaumont, TX Registered: Dec 2007