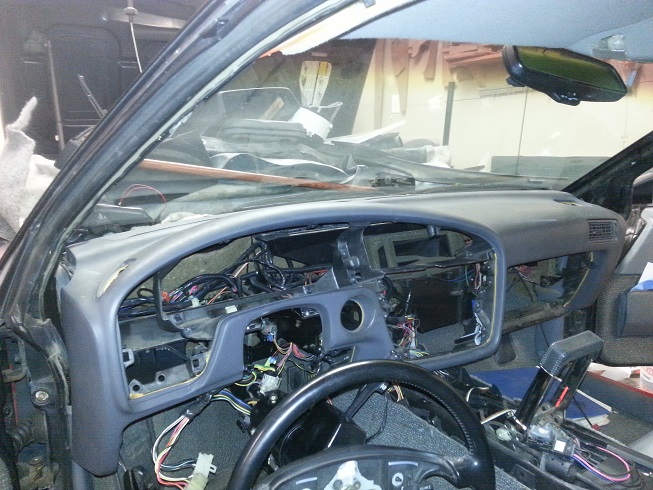
Well, after a couple months of ignoring my car, I'm finally getting going on a few winter projects. I've been contemplating a donor for my dash swap all summer long. After a lot of looking at pics and a few trips to the junk yard to make measurements, I decided on the 1991-1996 Toyota Camry. The width is very close to the Fiero dash, and the curve at the windshield is within a 1/4" of matching perfectly. The bottom flares out a bit and will require some trimming. This particular example came from a 1992 model so it does not have a passenger side air bag, and the color is only a shade off of the Pontiac color. I think like the look, and feel that the size of the dash is in scale with the rest of the interior.
Wow! I got page 7 too!
[This message has been edited by seajai (edited 10-02-2023).]
Read this thread from day one until now, very cool! One thing I was wondering is would it have made any difference if the chassis would have been stretched say 6 inches in the rear? Wondering if it would have made it easier to get clearance from the firewall and axle alignment.
Read this thread from day one until now, very cool! One thing I was wondering is would it have made any difference if the chassis would have been stretched say 6 inches in the rear? Wondering if it would have made it easier to get clearance from the firewall and axle alignment.
I'm about and inch into the firewall and 2.5" axle offset so a stretch on 4" would have been sufficient. The issue with that is a change in the outward appearance of the car. The goal of the swap was to step outside the box of the normal swap to try something that hasn't been done before without changing how the car looks. The double takes by people when they see it at a car show makes me think my goal was met. With 5000+ miles on the swap, the only axle alignment issue is a bit of a shudder under hard acceleration, normal driving is unaffected. I believe this is being caused by the inner tripod joint operating at the upper limits if it's offset angle. I would like to change the inner joints from a tripod to a Rzeppa design, I believe this would eliminate my shudder issue, but will require custom flanges on the trans and a hybrid Porsche-Pontiac axle shaft. I'm still looking into that.
I like how you left out the quarter glass. Kinda reminds me of a Maserati Merak with its rear buttresses. Good job!
Thanks
I'll have to admit though, leaving out the quarter glass was not done as a design element, rather it was because I broke them in the process of removing the rear clip. However, it did make access to the new coolant tank and other electronics more convenient. I'm thinking about using the open sail windows from Fiero Fiberglass to give it a finished look.
I'll have to admit though, leaving out the quarter glass was not done as a design element, rather it was because I broke them in the process of removing the rear clip.
Well, you did a good job of hiding it! I learned, if something is broken, clean it up and paint it, and it will look like it's supposed to be that way!
For other people considering doing a swap requiring interfacing with a transponder key system, you might consider looking at some of the interface modules for remote starts. You could wire it in, program it, then basically wire it to come on whenever you power the ignition on, instead of triggering off of a remote start. You can typically get them for around $50-80. In many cases, they aren't required since you can relocate the "antenna" somewhere else and just put the key inside it, but it's something to consider for other apps where that might not be an option.
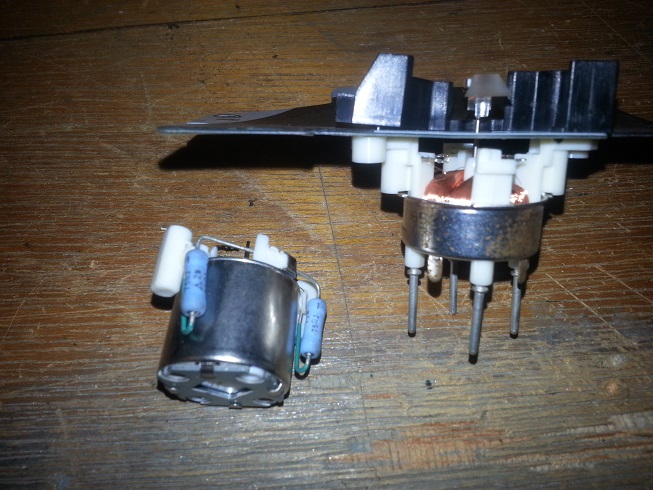
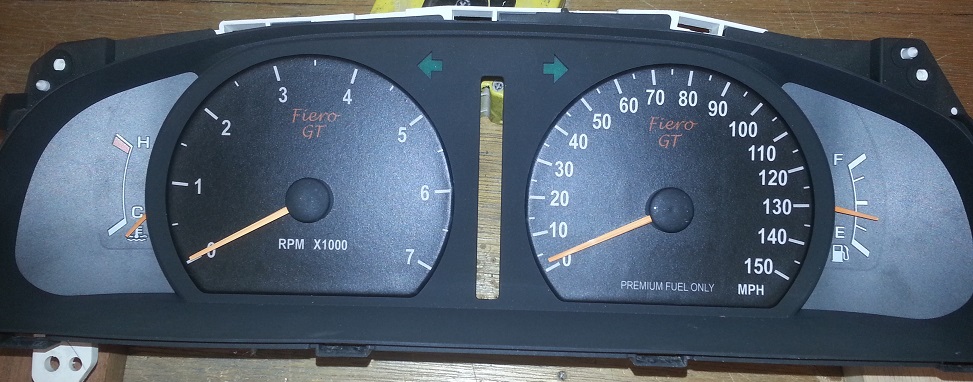
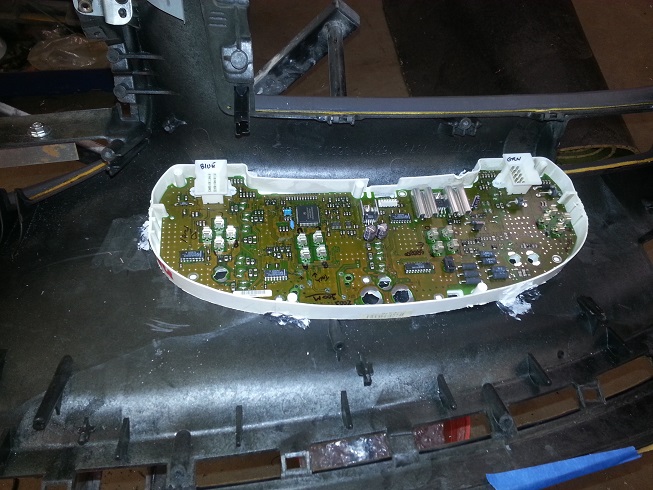
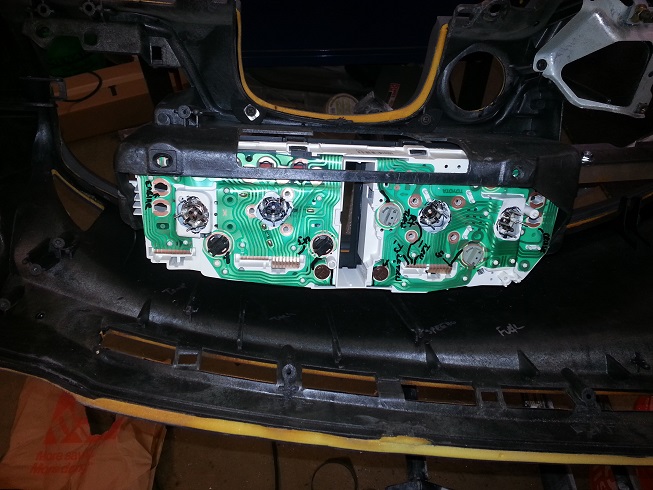
A little more work on the dash swap. The Chrysler instrument cluster will not fit in the Toyota dash so i need to build a hybrid cluster using both Toyota and Chrysler parts. Starting off, I disassembled the Toyota cluster to see what I had to work with. The Toyota gauges use a similar magnetic type gauge as the Chrysler and have the same amount of "sweep".
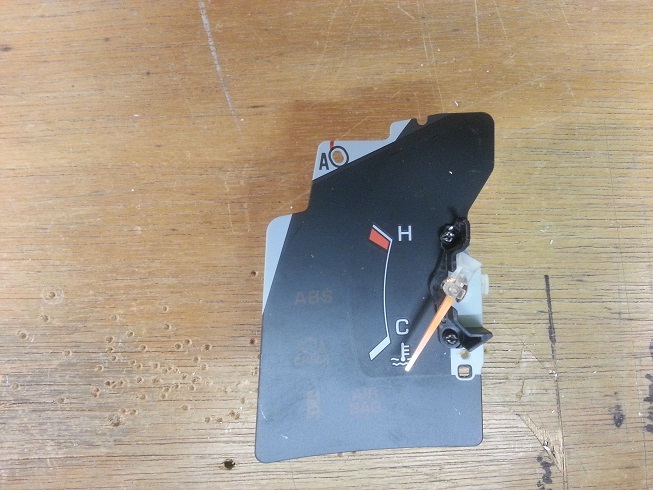
I was able to remove the Toyota gauge acutator and replace it with the Chrysler unit. I had to drill out the Toyota pointer to fit, this is the result:
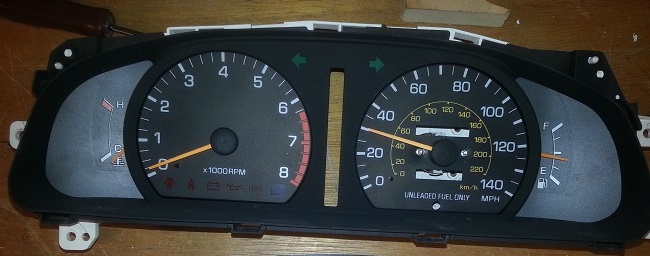
I repeated the process for all the gauges and after modifying the housing, this is the result:
The Chrysler PC board will not fit in the Toyota housing so I am going to remotely mount it and run wires over to the gauges. Also, I am installing 300M special 3:89 gears and computers along with a 150 MPH speedometer (which was standard on the 300M special) so I will need to make custom gauge faces for the tach and speedo. And I need to find a new home for the odometer and gear indicator as well. These are a digital display and are mounted on a separate PC board so that may prove to be a PITA.
[This message has been edited by seajai (edited 10-02-2023).]
Also, I am installing 300M special 3:89 gears and computers along with a 150 MPH speedometer (which was standard on the 300M special) so I will need to make custom gauge faces for the tach and speedo.
The 3.89 gears with that engine drug the 300m down the 1/4 by the front wheels in 15.9s... with a 1000lbs less weight and a mid/rear drivetrain setup, that's going to be a fun Fiero this season.
The 3.89 gears with that engine drug the 300m down the 1/4 by the front wheels in 15.9s... with a 1000lbs less weight and a mid/rear drivetrain setup, that's going to be a fun Fiero this season.
How hard is it to get at the diff on that trans?
All that is needed to change gear ratios on the 42LE transmission is a transfer chain sprocket swap. So I just need to pull the bumper cover and reinforcement and the chain cover is right there. My box of computers just showed up today too, now I just need the sprockets and I'm ready to go.
I'll have to admit though, leaving out the quarter glass was not done as a design element, rather it was because I broke them in the process of removing the rear clip. However, it did make access to the new coolant tank and other electronics more convenient. I'm thinking about using the open sail windows from Fiero Fiberglass to give it a finished look.
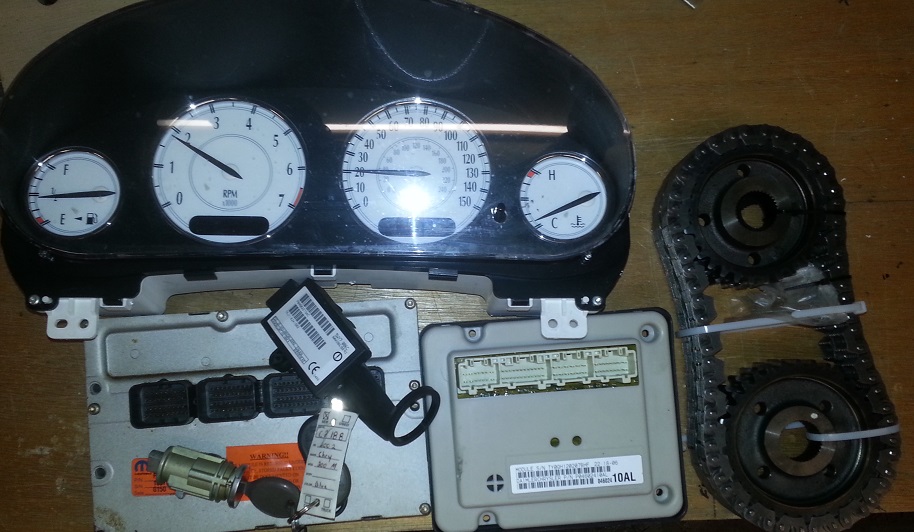
Finally have all the parts needed to switch to a 3:89 gear ratio. The only way to get the speedometer to read correctly is to replace the PCM with the 3:89 ratio programmed into it. But all the computers have the VIN and security key code which means they all need to be replaced with ones from the same car.
I've been working on new speedo and tach faces to go in the Toyota cluster. I downloaded a full function trial version of Corel draw x6 to create the new faces, this is what I got so far:
It's just a rough draft a this point, I'm messing with the font style and graduation marking styles to get a feel on what I like.
[This message has been edited by seajai (edited 10-02-2023).]
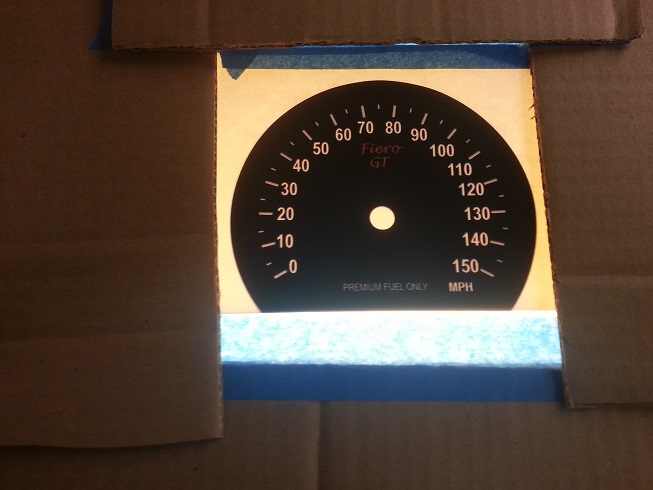
I decided to go with the second version of the gauge faces with a few minor tweeks. After printing the faces on plain white paper, I set them on a light box to see how well the black blocked the light and determined 2 layers were needed.
The Toyota gauge faces are not flat so I needed to use them as a foundation for the new ones. First step was to remove the existing printing from the plastic face.
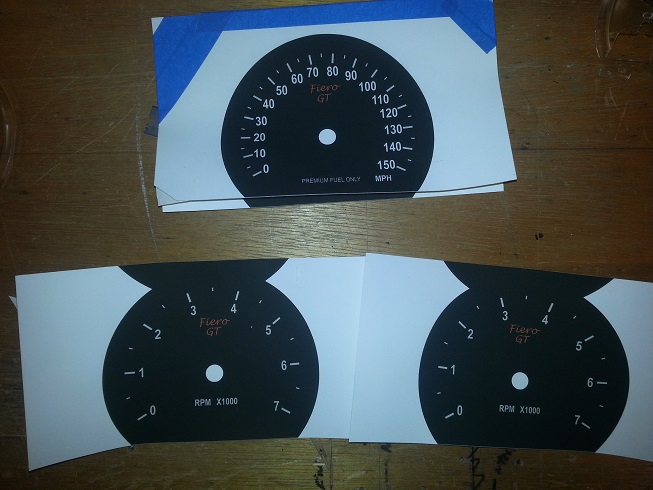
After printing 2 copies of each face on adhesive backed paper, I used the light box to properly align the 2 layers before sticking them together.
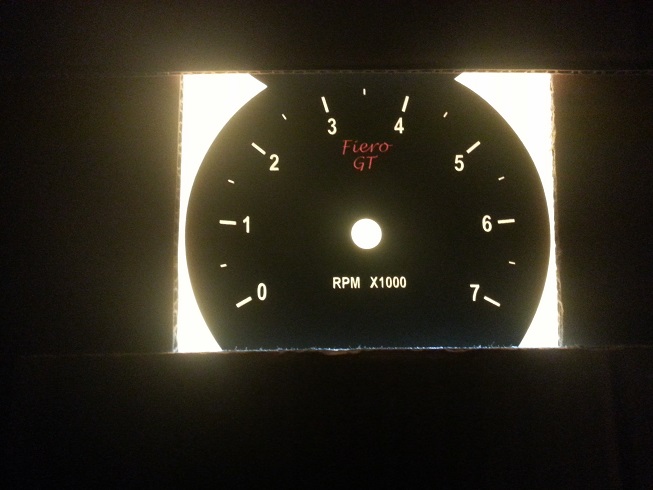
Here they are on the light box after assembly.
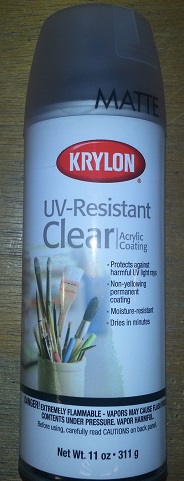
I then punched out the center hole and stuck them to the plastic substrate. I now have finished gauge faces but they are still just inkjet ink on paper and will need a little extra protection. I found this at my local art supply store:
It's a matte finish UV coating. I sprayed on a number of coats until I was happy with the look and here is the result: My Toyota cluster driven by Chrysler electronics ready to go into my Pontiac Fiero......
The center gauges look to be a different color than the side gauges but its just because the side ones are tilted slightly and the camera flash reflects differently. I put power to the backlighting and I think it will be plenty bright. I tried to take a picture but it didn't turn out.
[This message has been edited by seajai (edited 10-02-2023).]
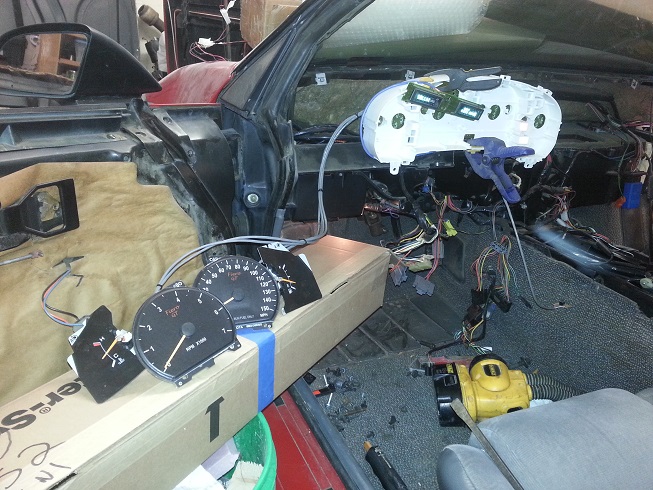
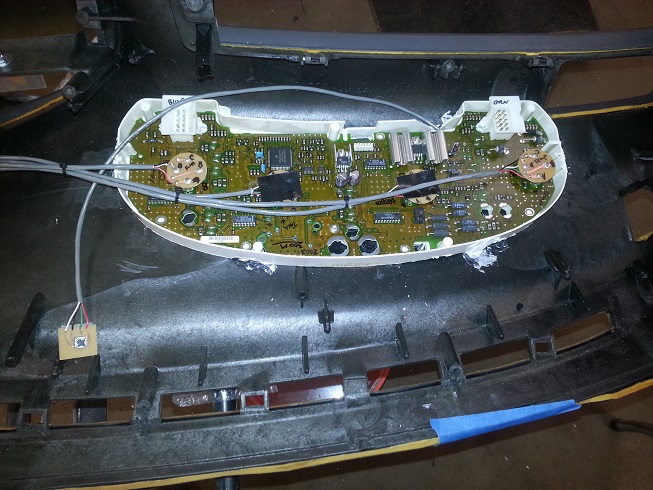
A little more progress on the dash swap. I decided to remote-mount the Chrysler cluster PC board on the passenger side above the glove box. I had a couple of extra clusters laying around so I cut down a plastic housing and mounted it to the dash.
The modified Toyota cluster mounted.
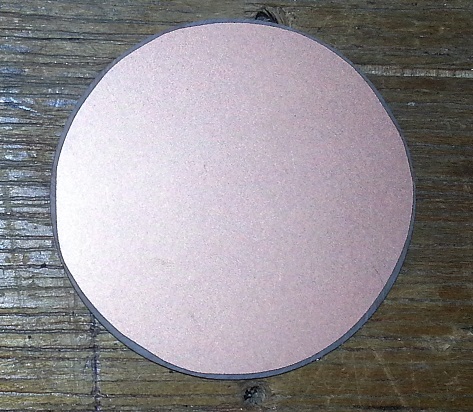
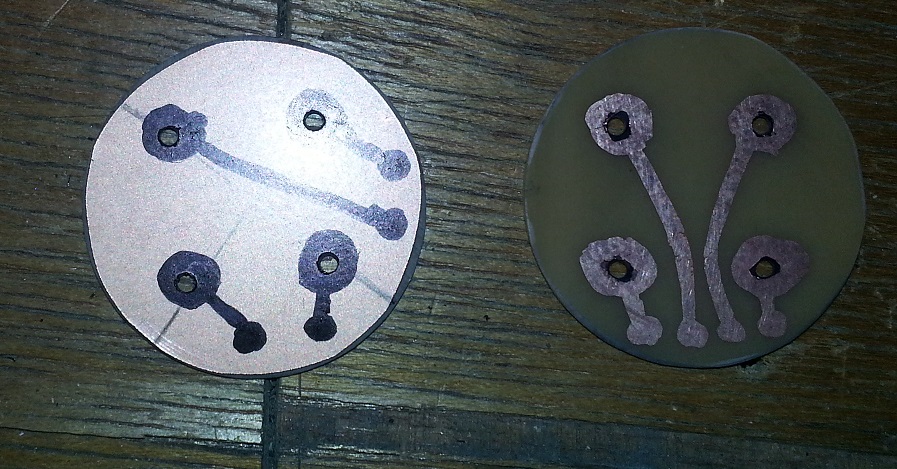
I needed to make four patch cords to connect the gauge actuators to the remote PC board which meant creating my own wire connectors. I purchased a copper clad PC board and etching chemical from my local Radio Shack. I then used a hole saw with the centering bit removed to make the discs for my connectors.
With a black Sharpie marker, I drew on the circuit paths and soaked the disc in the etching solution to remove the unwanted copper.
I removed the pins from an extra set of actuators I had and soldered them to the discs, added the wiring, and this is the result.
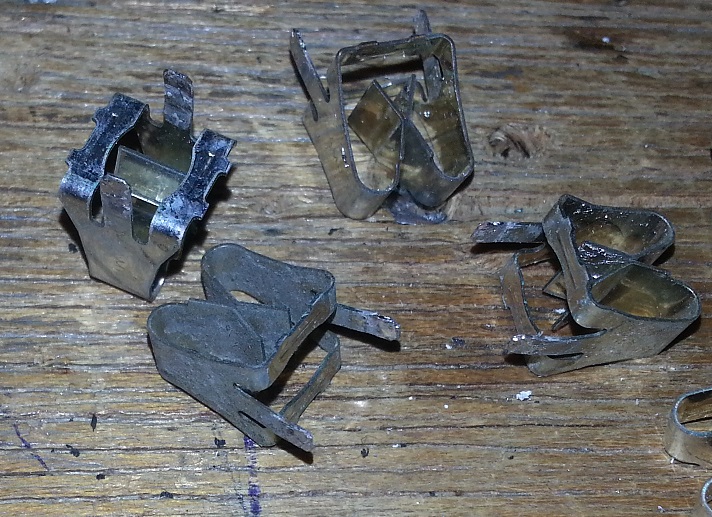
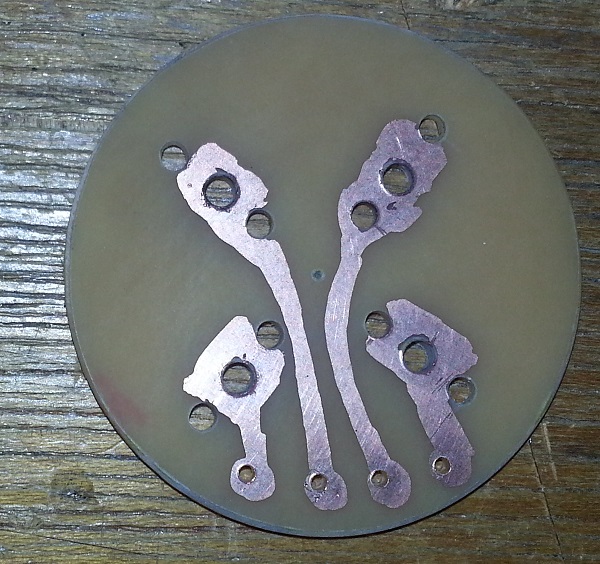
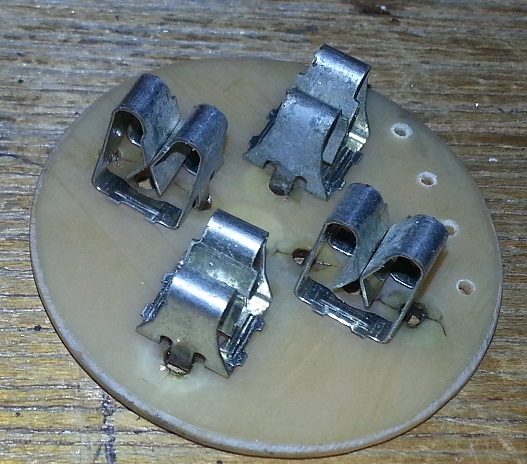
The pin ends will plug into the PC board. The ends for the gauges are similar. I removed the pin clips from an extra PC board I had.
Laid out for and drilled the holes.
Etched the part.
Installed and soldered the clips in place. The solder job isn't the neatest, I'm having issues with my iron not heating evenly.
After everything is tested and working properly, I will encase the ends in epoxy resin to prevent any chance of a short circuit.
More to come.........
[This message has been edited by seajai (edited 10-02-2023).]
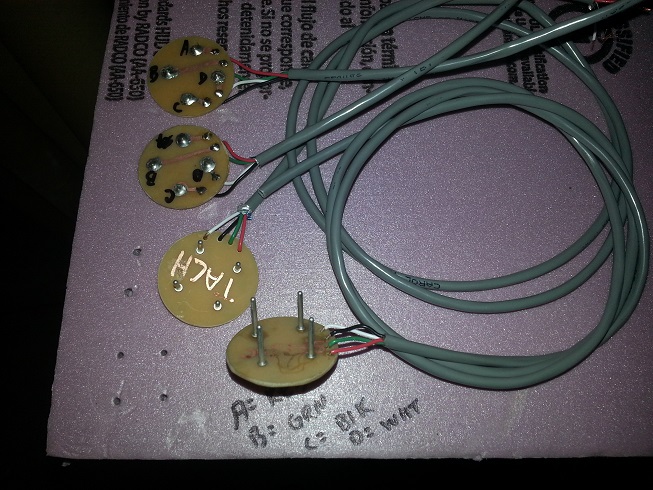
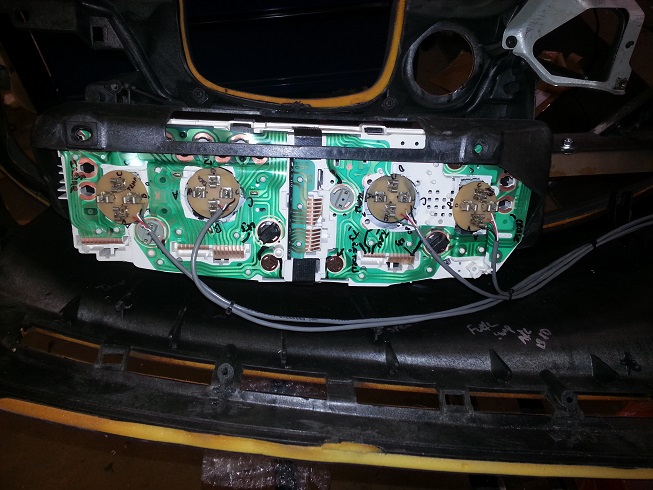
Finished fabricating my connectors and patch cords today. I also had to remove the trip odometer reset switch from the cluster PC board and wire it for a remote location install.
I plugged the cluster into the car wiring and set up my gauges to test the operation and zero out the pointers.
Much to my relief, everything worked, even my remote trip reset button
So this is how it will look wired and mounted:
[This message has been edited by seajai (edited 10-02-2023).]
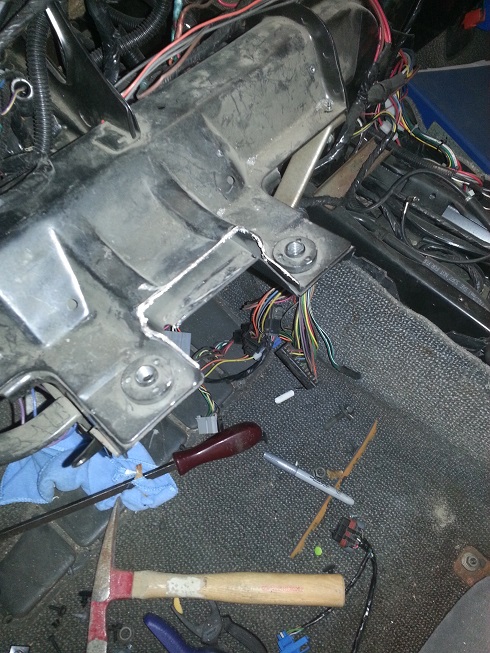
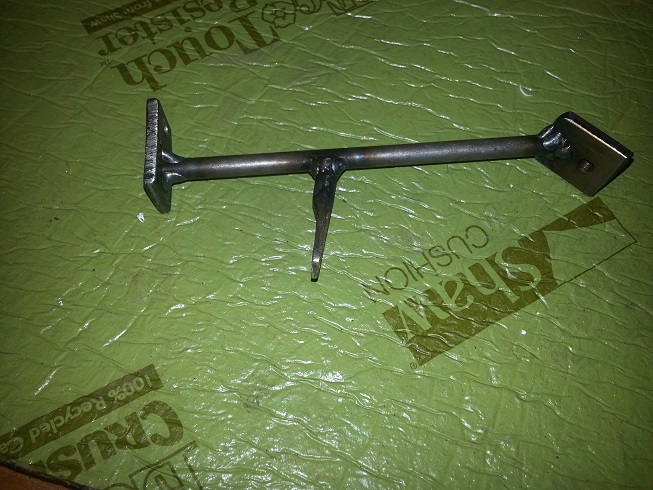
Got a little more work done on the dash swap this weekend. I had already fit the dash in the car but needed to cut off the old cluster mount to make room for the new cluster.
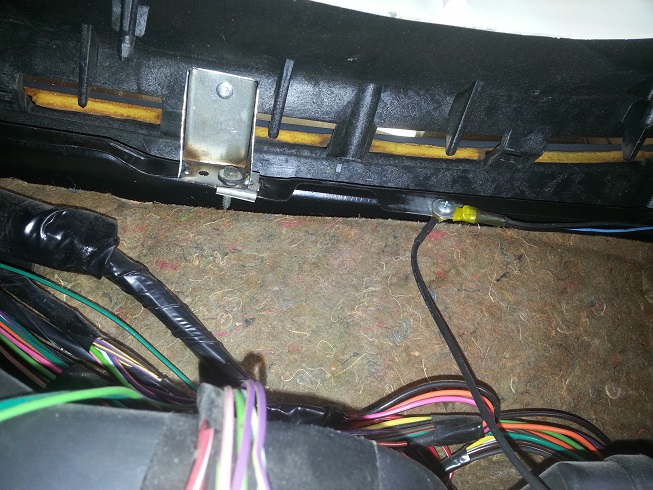
Then I had to make all the brackets to get it bolted in. The upper brackets are made from bent and welded sheet metal. They attach to the old dash mounting points.
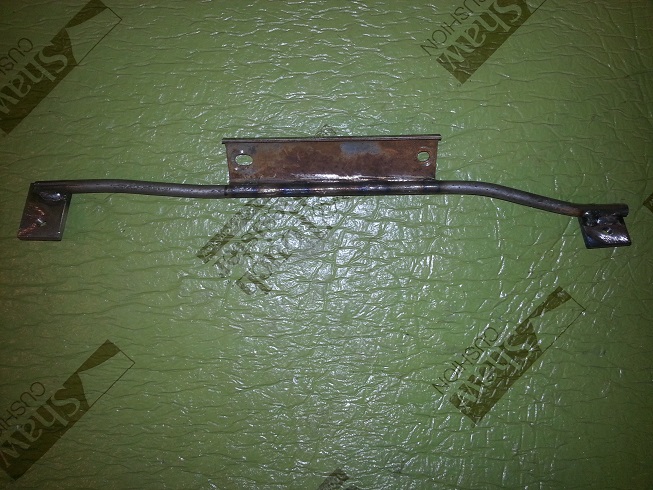
To make the lower brackets, I used 5/16" steel rod and 1/8" plate that I drilled and tapped to accept the factory hardware.
Middle:
Left:
A pic of the left side installed:
The right side is similar to the others.
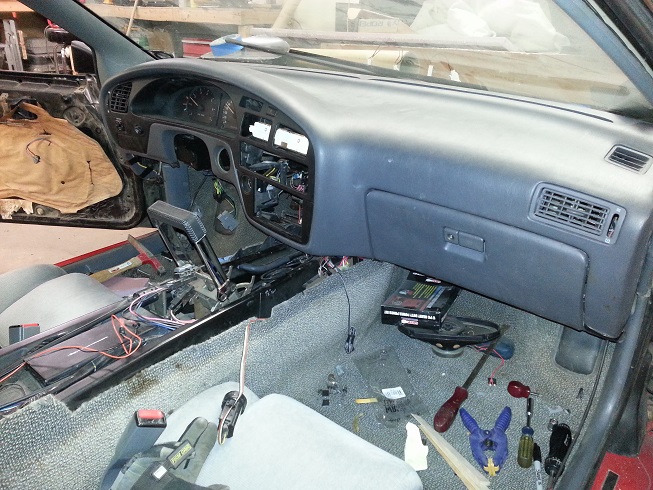
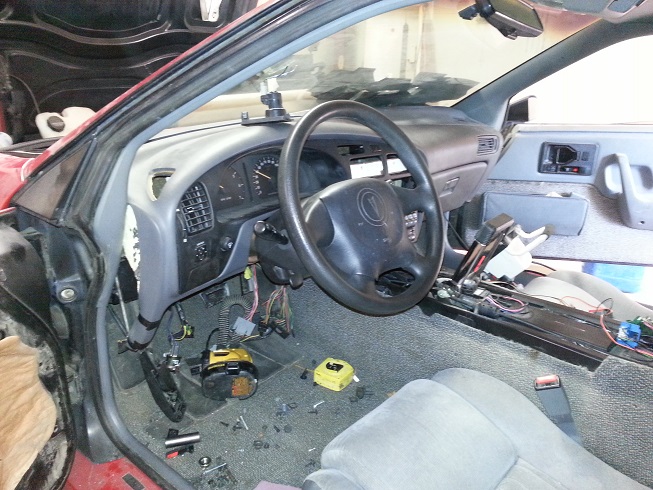
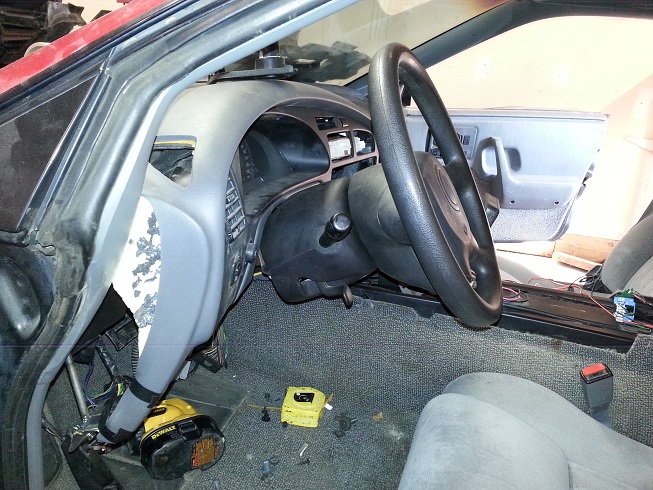
Here is a couple pics of the dash all bolted in and a few pieces installed:
I went to the LKQ pick and pull today and picked up a steering column from a 2003 Grand Am. I need to adapt the Fiero headlight switch to work with the column mounted Grand Am one. The wiper and turn signal switch wiring will have to be redone as well. Stay tuned.......
[This message has been edited by seajai (edited 10-02-2023).]
As the owner of a 2003 Grand Am GT... why did you select the GA column? The lack of a integrated ignition switch?
Yeah, because I have a push button start ignition I wanted a key-less column. I chose the Grand Am because of the size of the plastic surround, it fit the hole in the Toyota dash the best. My other choices were 2004 and newer Bonneville or Grand Prix but the surrounds were too wide.
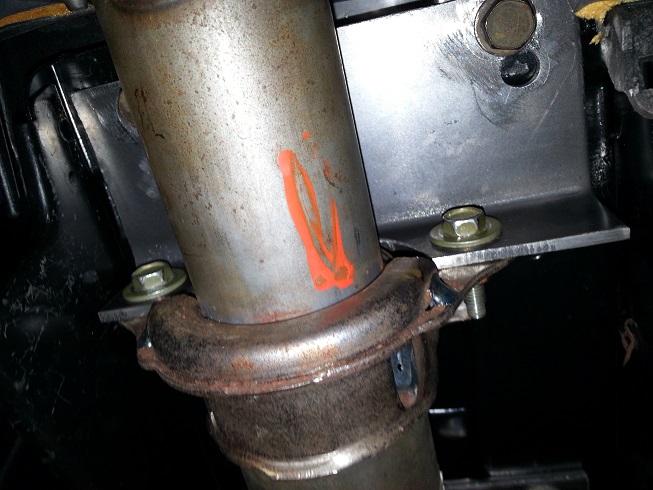
I had to make a couple adapter brackets, the front one is a piece of 3/16" steel with a 90deg bend. For the rear I used the saddle portion of an exhaust pipe clamp welded to the tube with a plate that bolts the original mounting studs.
Front:
Rear:
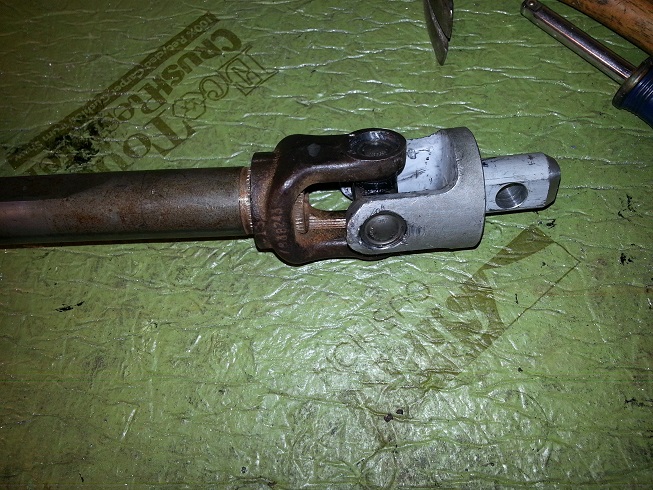
For the lower steering shaft, I removed the old end and U-joint, bored out the cap holes to 5'8" and installed the Grand Am U-joint and end.
Next up: wiring in the new combination switch
[This message has been edited by seajai (edited 10-02-2023).]
Well it was a productive weekend, I got the Grand Am combo switch and the Toyota hazard switches all wired in and tested. The easiest one to do was the turn signals, it's pretty much just hooking up the same color wires from the Fiero to the Grand Am. The hazard switch was hooked into the turn signal wires through a couple diodes to prevent any power back feeding issues.
The headlights were a little more work. The problem to overcome was the Grand Am didn't have headlight doors and the switch wasn't set up for them. To solve this, I tied the high and low beam wires together through a pair of diodes and used that voltage to feed the "doors open" yellow wire to the headlight module. The white "doors close" wire needed a voltage signal when the headlights are turned off, I accomplished this through the use of a relay. I tapped power from the orange park lights feed wire and ran it to the "30" contact on the relay. The white wire is hooked to the "87a" N/C contact which gives me power on the white wire to run the doors down. The control side of the relay is hooked the headlight power wire. When the headlights are switched on, the relay powers up, opening the 87a contact and killing power on the white wire. When the headlights are shut off, the relay powers down restoring power on the white wire and closing the doors.
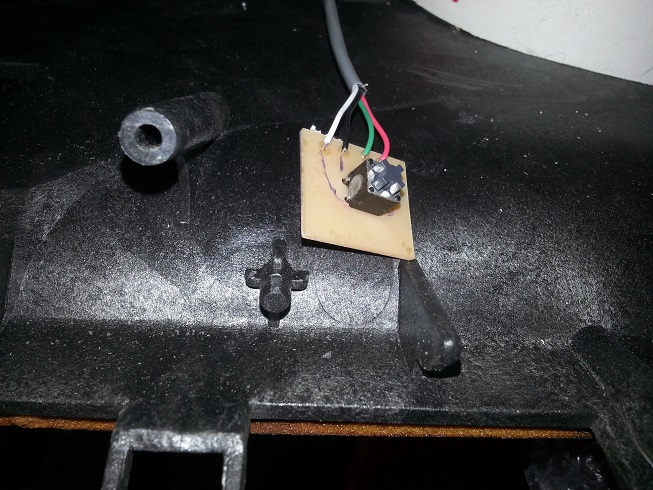
The Grand Am was equipped with automatic headlights, this gave me the opportunity to use the Grand Prix automatic headlamp module I picked up a couple years ago. It has separate outputs for headlights and park lights. The headlight output goes to a terminal on the headlight switch, the other taps into the parklight circuit. I need to mount the sensor in the top of the dash yet. So I'm pretty sure I own the only Fiero with automatic headlights.
Here is a pic of the auto headlamp module and headlight door relay mounted in place:
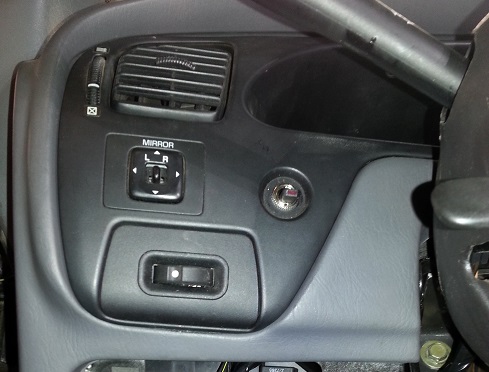
I added a bypass switch to disable the automatic headlights in case I need to sneak away some night without being spotted. The switch has an LED that lights up when the system is bypass mode. I also needed to add a dash light dimmer wheel as well since the headlight switch is now on the steering column. I found a remote dimmer wheel from a 97 Olds Alero that I liked, it works off a remote dimmer transistor just the Fiero one. I mounted it in a blank panel in the dash trim. Here is a pic of the dimmer wheel and bypass switch:
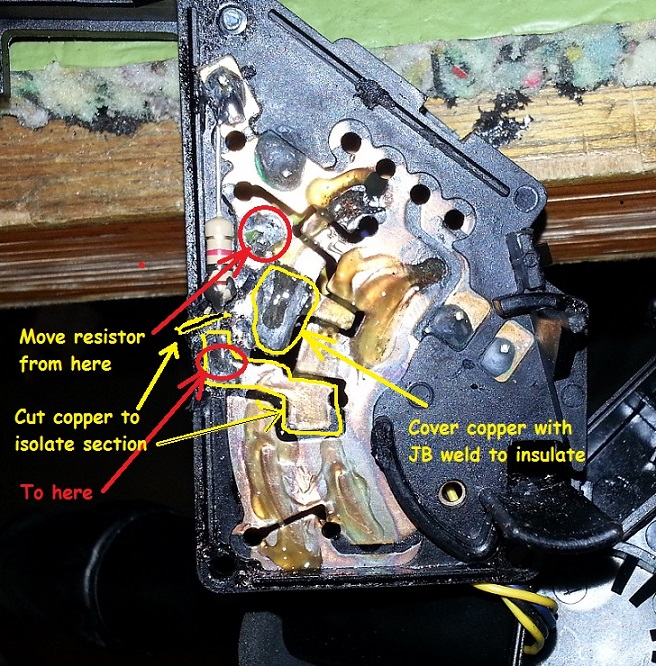
Now the wiper switch was a tough one. The wiper system on the Grand Am uses an extra wire on the switch for the delay mode, a different resistor value, and different outputs for low and high speed. To make it work on the Fiero, I needed to hook the low speed and the delay wires together, but this caused the resistance to drop to zero in low speed when it should have been 1k OHM. After taking the switch apart and figuring out what contacts connected to what, I was able to modify it to work. First off I needed to swap out the 24k OHM resistor with a 1k OHM one to match the Fiero switch. Secondly I needed to isolate an area of contact by cutting through the plastic and copper and then relocate an end of the 1k resistor to that area. This should have given me the correct resistance in "low", but when I checked it was reading through the delay resistors instead. I figured out I needed to insulate an area of the copper to prevent the sliding contact from touching and giving me the wrong readings. I used JB weld to accomplish this. I reassembled the switch and retested the readings, they were now the same as the original Fiero wiper switch. I hooked everything up and tested the wipers, much to my relief everything works perfectly.
Here is a pic showing the switch modifications. It's a little tough to see everything but ya get the gist of things.
I grabbed a Chrysler trunk release button and mounted it to a lower panel trim cover.
I still need to extend the harness to the remote cluster and hook up the turn signals and illumination to the Toyota cluster but the electrical portion of the adventure is getting close to being finished.
[This message has been edited by seajai (edited 10-02-2023).]
The dash project keeps rolling along. Originally I was just going to use the Fiero HVAC controls mounted in the Toyota dash, but after a couple tries, I just didn't like the way they looked so I decided to scrap that idea and use the Toyota push button HVAC control. The problem with that plan was that Toyota designed their system to operate by switching the ground side of the circuit whereas the Fiero works by switching the positive side. This means I needed to make some sort of interface to go between Toyota and Fiero. The blower motor side of things was a somewhat easy solution, I just installed a GM blower switch. The hard part was finding one with 4 speeds and an "OFF" position that fit properly. After a couple hours wandering around the pick-n-pull, I found this one:
It's from a 1997 Chevy Monte Carlo and fits nicely in the Toyota HVAC with only slight modifications.
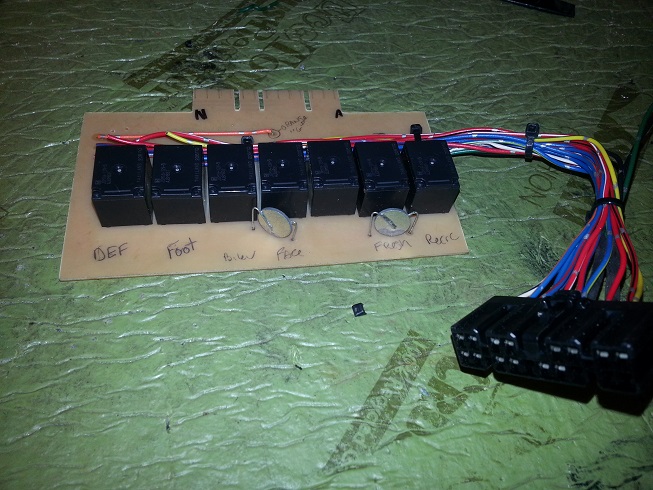
The mode door switches were a different story...... Since the internal circuitry was set up for ground side switching, I needed to build a relay module to make it work. The way it works is that when a button is pushed on the Toyota HVAC control it turns the appropriate relay on or off, the relay then switches power to the mode and recirc doors.
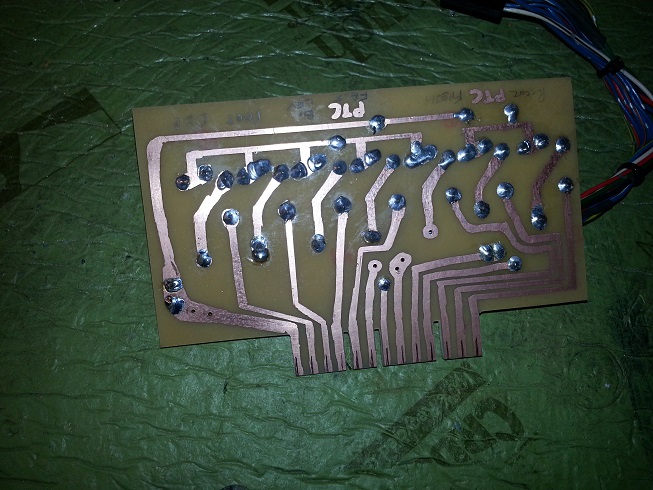
To get started, I purchased a bunch of 15amp micro relays from DigiKey, these will stand in for the old Fiero push buttons. Next I needed to make a PC board to mount them to and keep the wiring simple and organized. I also designed the board to use the factory connector which saved me a lot of soldering time. First I laid out and drilled the holes for the relays and then used a Sharpie marker to draw in the circuit paths. After a short dip in the etching solution, this is the result:
I then soldered on the relays and attached the Toyota wiring connector. I also transferred the two PTC thermistors from the Fiero board to my board to try and keep things like OEM.
I needed to switch a few wires around in the factory connector to line up with the way I laid out circuits on my board. I plugged it in, turned on the power, and crossed my fingers..... much to my relief, everything works perfectly! All the modes switch as they should and the recirc door opens and closes. I still need to buy a plastic project box from Radio Shack to mount my board in to protect it but this part of the project is done.
[This message has been edited by seajai (edited 10-02-2023).]
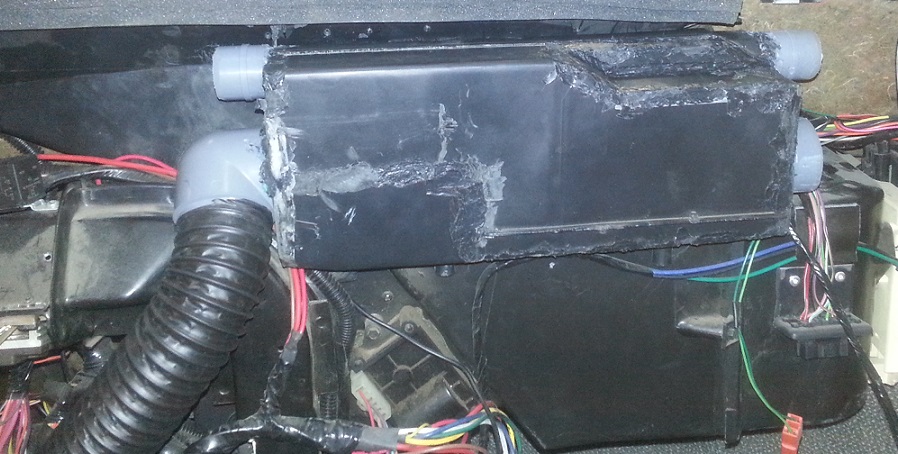
So with the heater controls figured out, it was on to the air delivery. The windshield defrost and floor vents weren't an issue because they're part of the car half of the air box, the side window defrosters and dash vents required a little bit of work. First off i removed the ductwork from the dash and cut out the center section, I then shortened it and boxed in the ends and added round ports for flexible ducting.
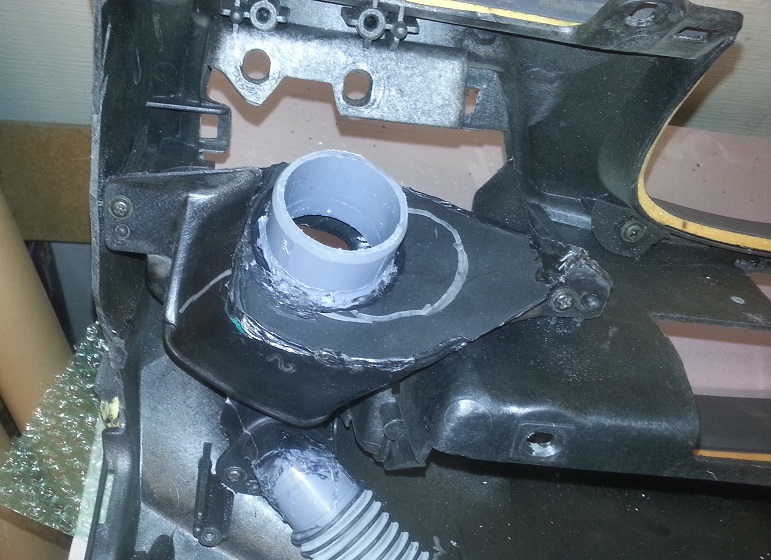
For the dash vents, I cut off the Toyota pieces, plastic welded on a couple bottoms and installed round ports.
Once the dash was installed for the last time, I hooked up the vents with flex hose. For the side window defrosters I used 1-1/4" vacuum cleaner hose. For the dash vents I used 2" vent hose made by Dorman. It was some very nice stuff and worked quite well. http://www.dormanproducts.com/p-20898-96002.aspx
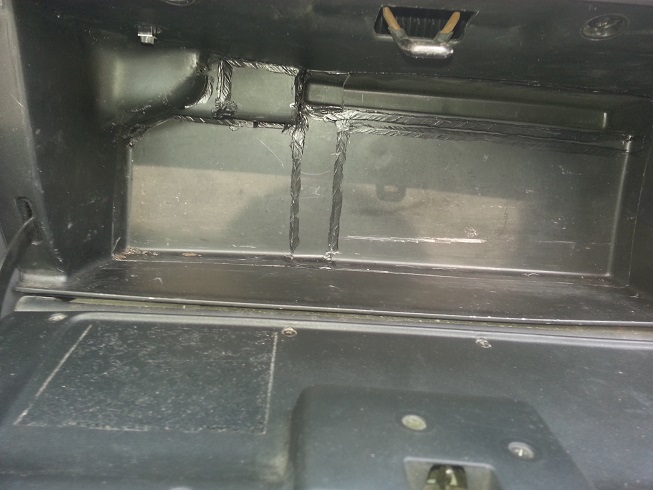
I had to cut 4" of depth out of the glove box insert to get it to fit. I sectioned the back piece and plastic welded it back together. I used the waste to cut pieces to fill the gaps left by sectioning.
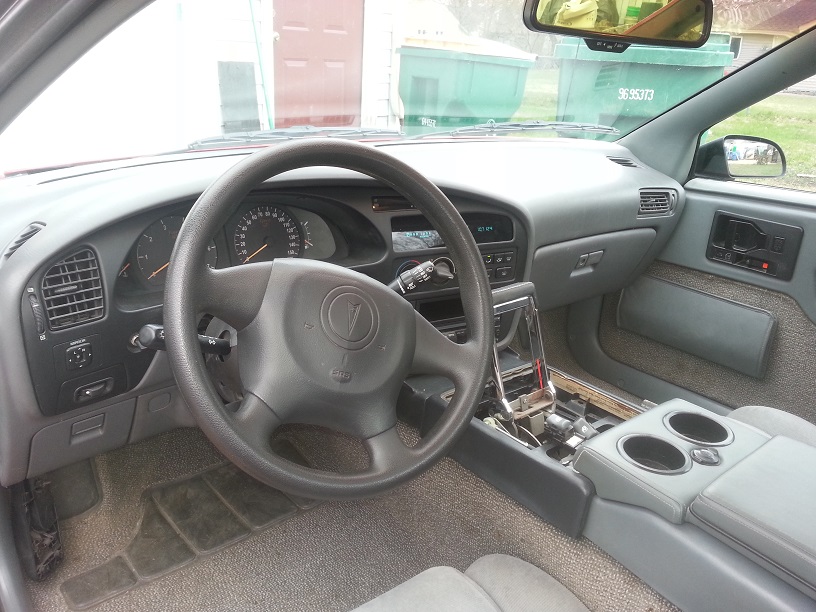
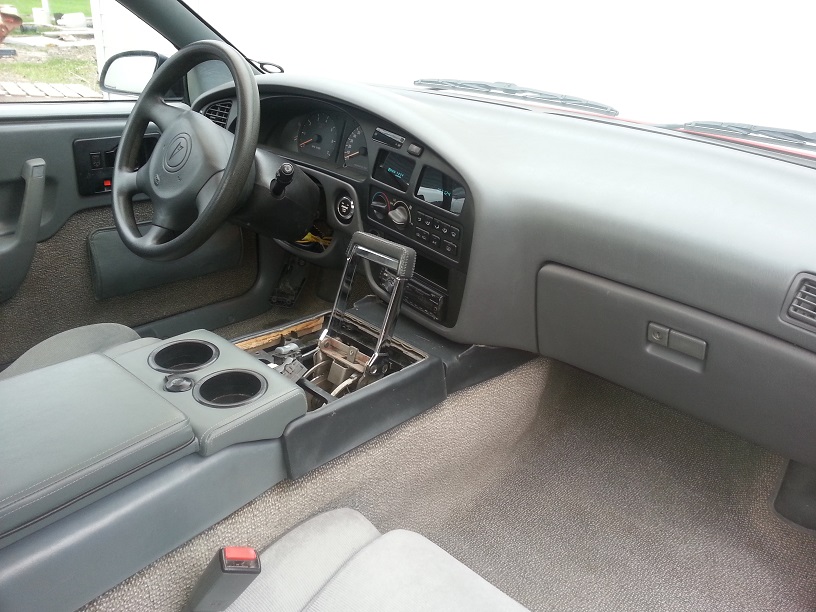
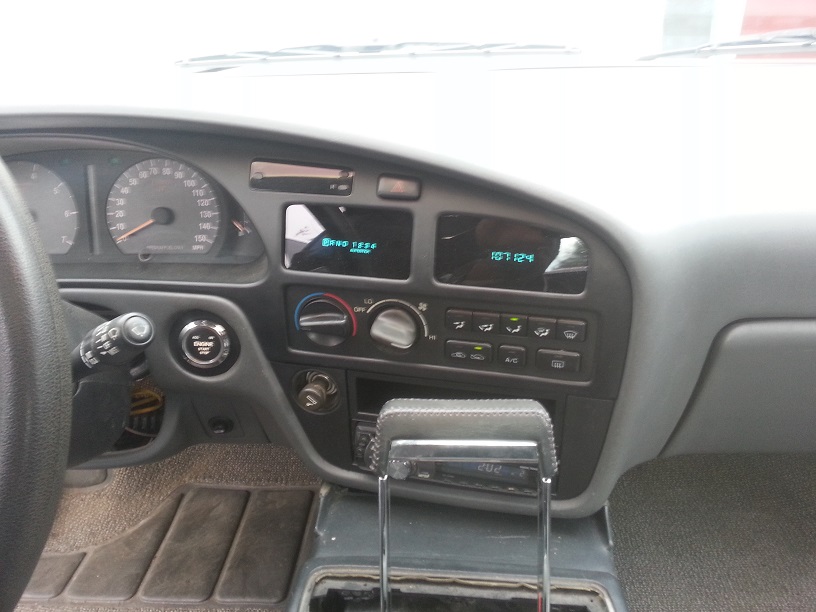
This was a lot of work to go through just to get a glove box but I am really happy with the results. I still need to work on the center console and build door panels but for now I think I will just drive and enjoy it. Here are 3 pics of the finished product:
[This message has been edited by seajai (edited 10-02-2023).]
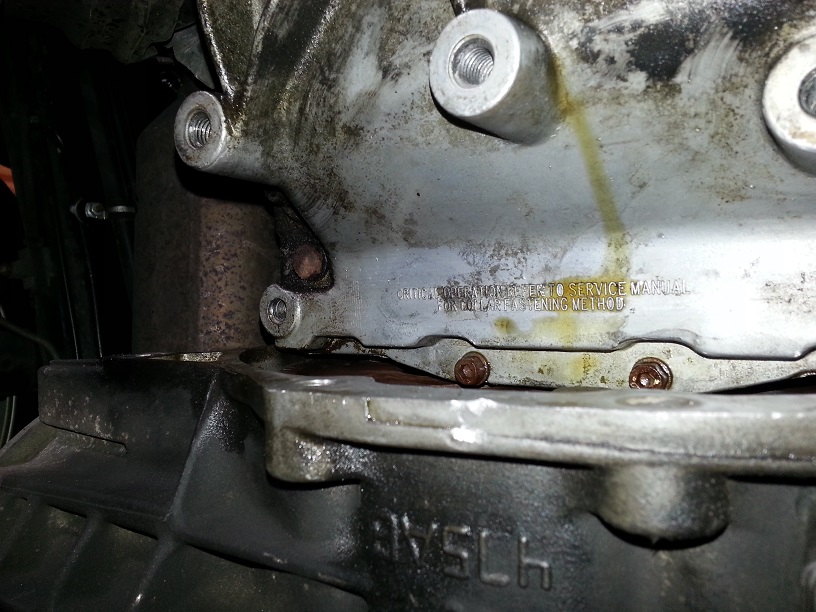
2 weeks to the Dells and my engine has started hemorrhaging oil. Lifted it up and let it idle with the inspection cover removed, looks like its the rear main seal leaking. I designed the rear cross member to be removed independent of the cradle so I can pull the transmission without removing the engine or cradle......looks like I get to test my design.
[This message has been edited by seajai (edited 10-02-2023).]
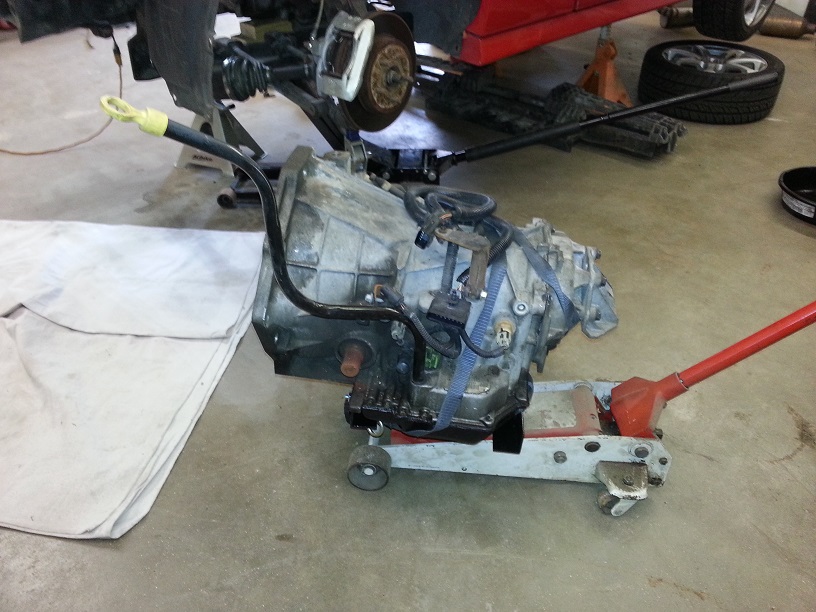
My design worked well, only took a couple hours to remove the transmission. With my high lift jack and a set of tall jackstands I was able to get my car up nice and high, which makes working on it pretty easy.
Spent $50 on a transmission adapter for my floor jack. I'd have to say it was the best$50 bucks I've ever spent.
Plenty of room to work now. I replaced the camshaft thrust plate gaskets as well since both were also leaking.
Got it all put back together and let it run for a little bit and didn't see any leaks, hopefully the seal takes care of it because the oil pan gasket will be a big PITA if it needs to be replaced.
[This message has been edited by seajai (edited 10-02-2023).]
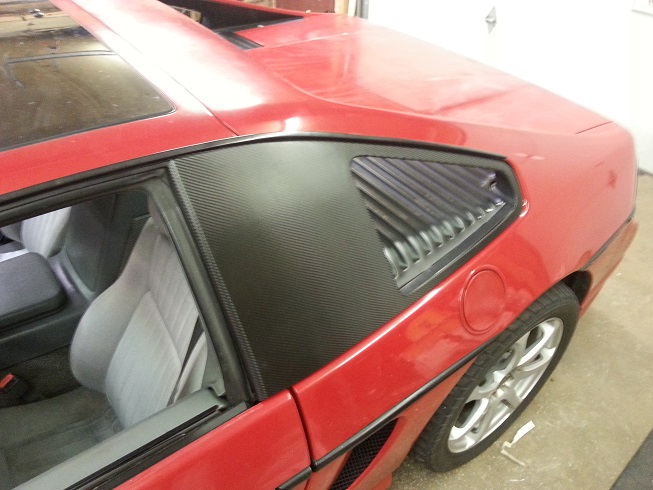
Had an inner C/V boot tear open on the highway yesterday, sprayed grease all over everything including my right side catalytic converter. I had to pull over because I thought the car was burning. At least it was a cheap fix, $17 for a boot and an hour to swap it out.
Also got my Fiero Fiberglass sail windows wrapped in 3M carbon fiber vinyl and installed on the car:
[This message has been edited by seajai (edited 10-02-2023).]


 However, it did make access to the new coolant tank and other electronics more convenient. I'm thinking about using the open sail windows from Fiero Fiberglass to give it a finished look.