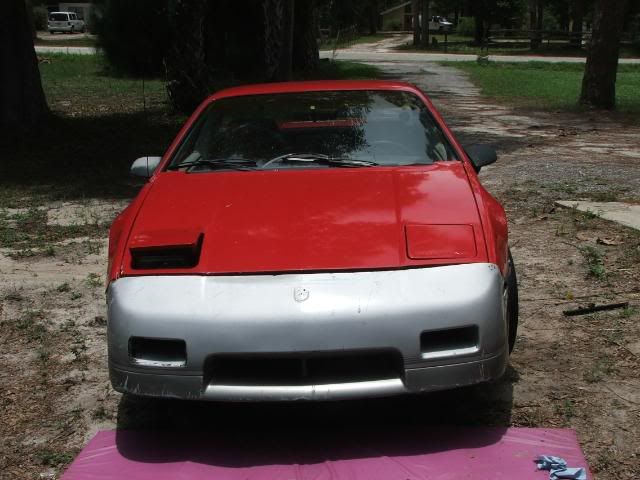
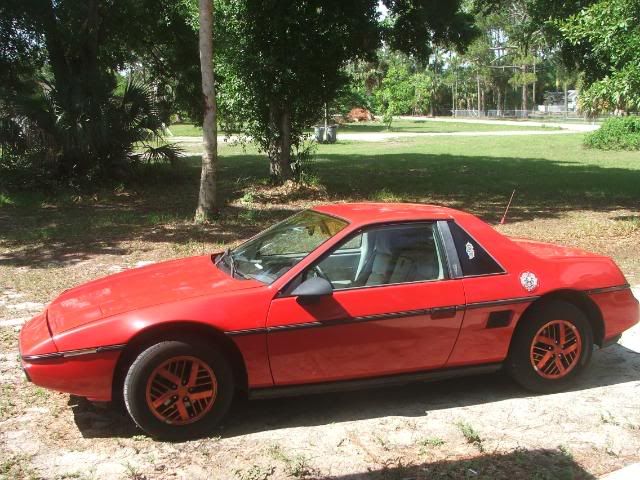
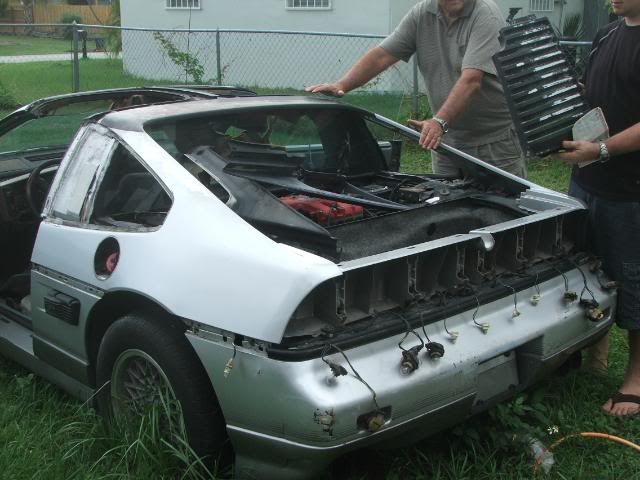
As I have always liked the GT look better than the coupe, I have always wanted to own one. I have just put about $3k into my current 88 4cyl Coupe to fix various mechanical problems, and do not want to part with it as it was my very first car. I have decided to therefore start a swap of body panels in order to get the appearance of the car to my own liking. This car will be a work in progress for the next few months as I have to raise money and put in the time to work on it between my job and college. Here are a couple of pictures of the coupe that will be the base.
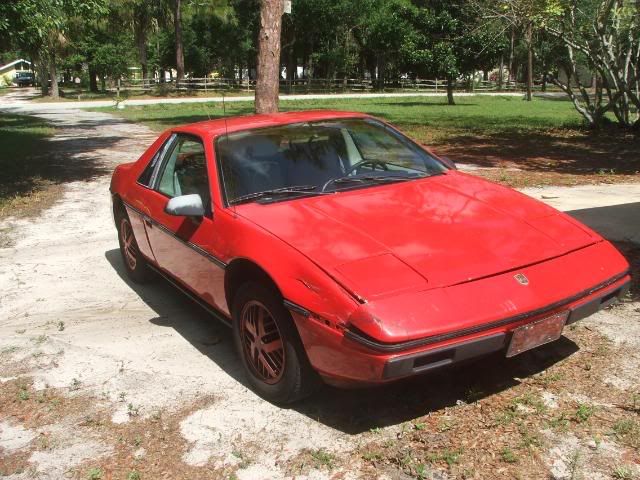
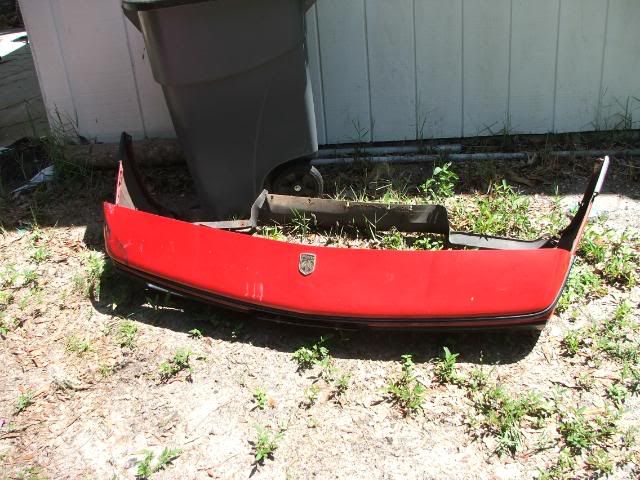
The damage to the bumper and fender was caused by some moron backing into my car while it was parked in the USF dorm parking lot. Of course they never came forward to offer to pay for the damages.
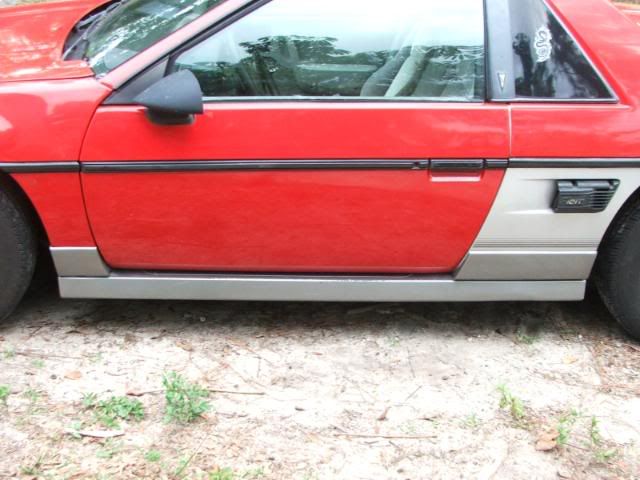
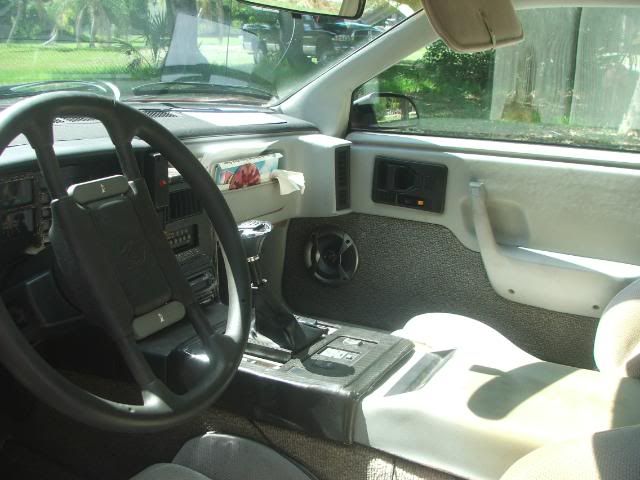
The interior is still in ok condition. It shall be in better condition after I get the money to pay Mr.Mike for some of his interior work.
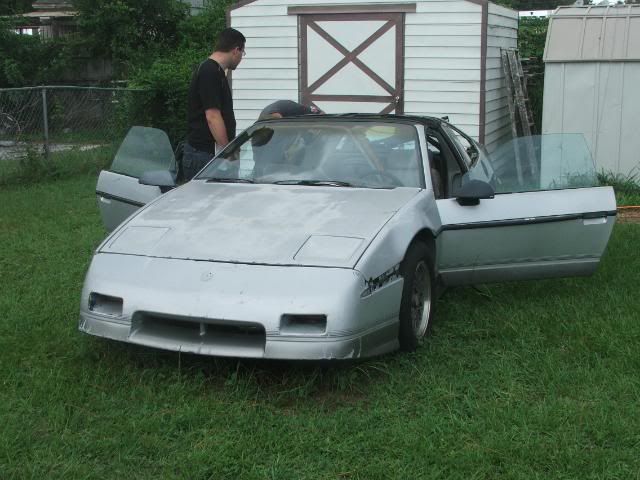
I picked up an 87 GT w/ T-Top and Isuzu 5 Spd tranny. The engine was blown but then again I was buying it for bodywork. Thanks engine man for the car.
Not in mint condition, but godd enough for me to fix up the panels and swap them. Not a suprise, broken tail lights. The T-top and fastback will be a full weekend to weeklong conversion depending on how much time I have to work on it.
As soon as I can start picking up repair materials, the swap shall begin. I shall update this thread every couple of days if I get the time.
[This message has been edited by 88Slayer (edited 06-29-2008).]
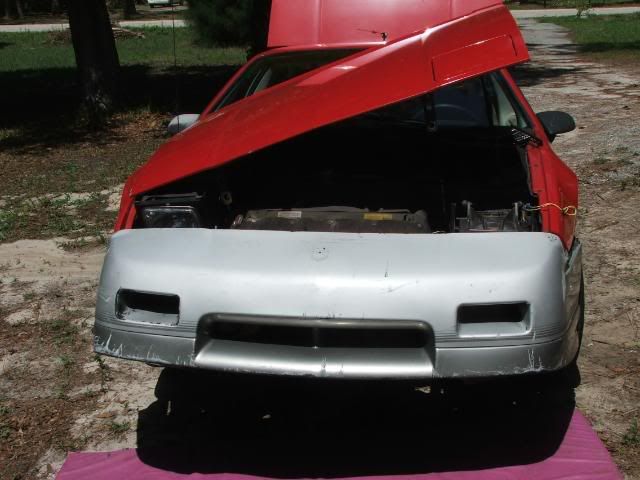
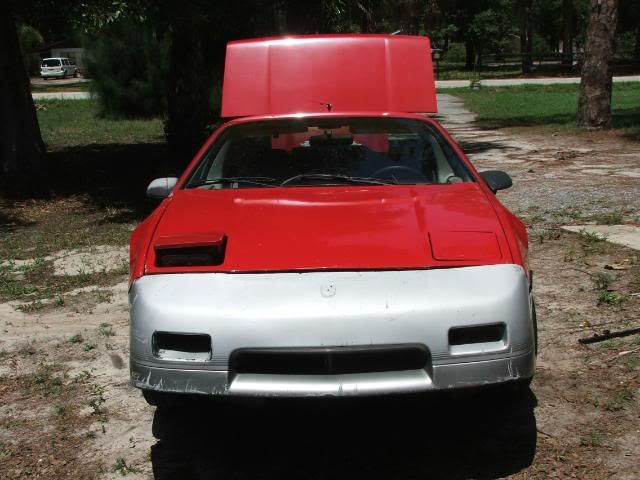
Well front bumper is now changed for the most part. I just have to pull the bottom bracket off of the GT and screw it into my frame and bumper. Later I shall fabricate some new hangars to tighten up the bottom part of the installation.
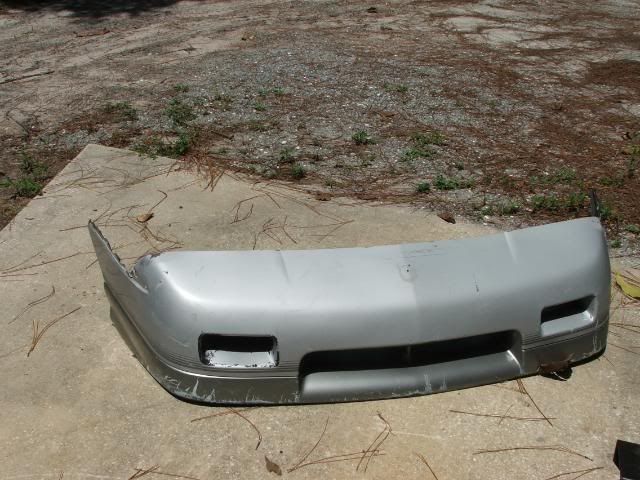
Replacement bumper from the GT. Will need to have my painter work on some spots during prep.
My old torn up front bumper. Those coupe bumpers have alot of screws to be pulled before it can be pulled off.
Had to release the hood to get the top screws.
Almost done with the bumper Install.
[This message has been edited by 88Slayer (edited 06-29-2008).]
Originally posted by jscott1: you won't believe how much more exciting it will be to drive a t-top fastback compared to a coupe.
You are very correct. I don't believe it but, it's all about perspective. But, of course, I'm a notchback guy. T Tops are cool, got one sitting in the shop beside three with moon roofs, but one thing to remember, anything with a sealed hole in the roof is eventually going to leak. Mine doesn't yet but, it's going to someday.
Aye that is true blackrams, That is why I shall Make sure everything is checked for water leakage every year. And if a seal is suspect, then it shall be replaced. Better safe than sorry.
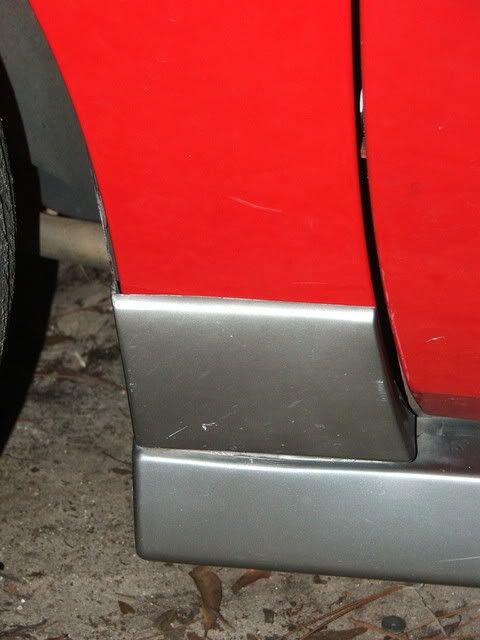
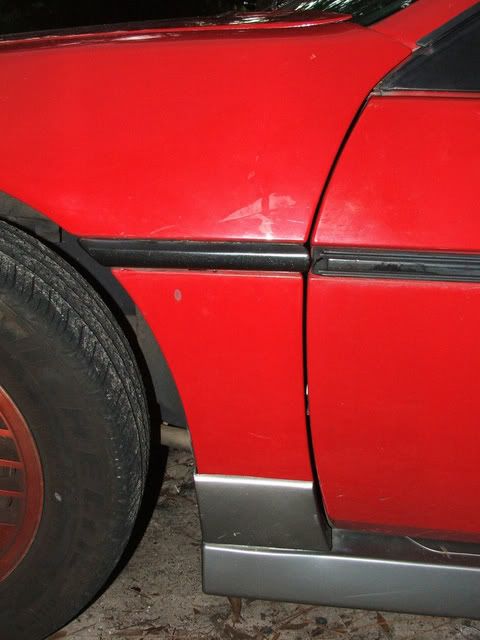
Well bumper is totally done and reinforced. Next step involves me taking off the fenders(sure thats gonna be alot of fun to do).
One last pic of the reinforced bumper.
I shall start on the fenders tomorrow once I figure out how to loosen the lower section.
[This message has been edited by 88Slayer (edited 06-29-2008).]
On the 84 I tore the body panels off it had alot of big rivets holding the rocker panel and lower fender on. Just drill them out and they should come off.
Originally posted by 88Slayer: That is why I shall Make sure everything is checked for water leakage every year. And if a seal is suspect, then it shall be replaced. Better safe than sorry.
While I agree with you, have you checked on the availability of T Top seals?
BTW, I admire your ambition. One of my 88 Formulas is a CJB, factory authorized. Not sure I'd take on installing one myself. I know it would leak.
Well yet another day gone in the conversion process. This process was somewhat slowed by having to find usable body fasteners. Also, a previous owner of the donor car seems to have used alternative methods to keep the ground effects on, therefore making it a PITA for me to remove. Lets just say a big flathead screwdriver and a hammer were my best friends for that part. Now I managed to find a nylon screw type spreader that will keep the panels on quite well while still letting me reuse them when I have to take panels off to have them worked on(ex: painting the ground effects.)
I was kinda busy and forgot to take pictures with the panels off. I shall do that tomorrow when I have to take apart the passenger side to replace the ground effects and rear quarter.
Drivers side finished for the day.
New rear quarter.
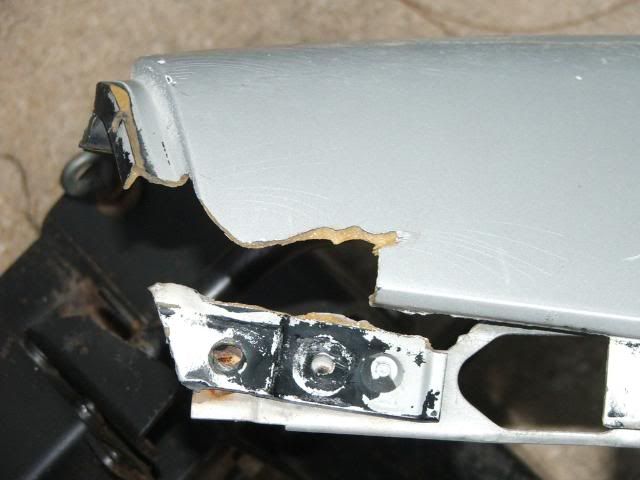
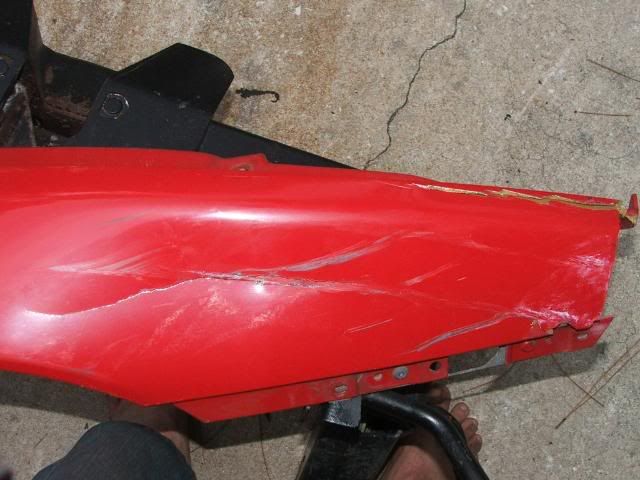
Unfortuanately, the donor GT driver side fender was damaged.
My solution to this was to modify my existing fender by taking off the lower piece of molding(part of the Ground FX?) and switching the sqaured coupe molding and the gt rounded molding.
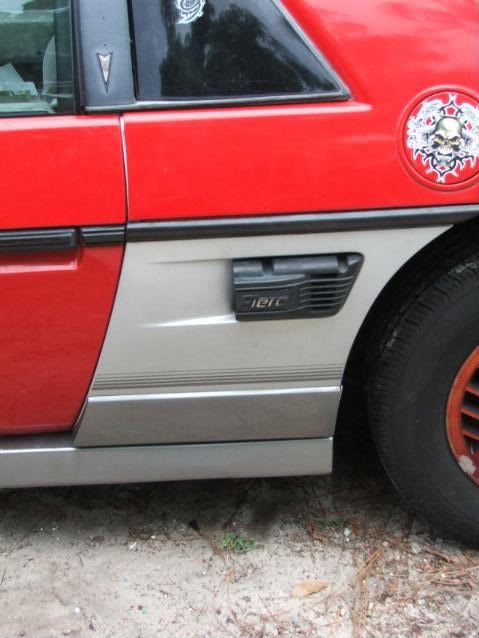
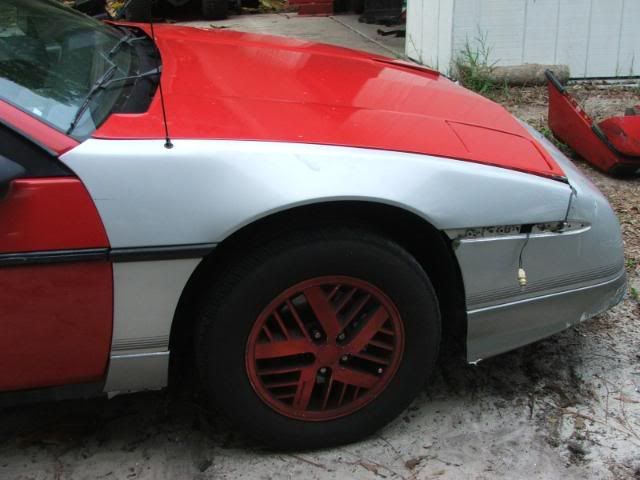
My passenger side fender was damaged by someone backing into it so I replaced it with the donor one.
Well tomorrows job will be to install the passenger side quarter and ground fx. Then I shall have to start the rear bumper switch after I fix the hole in it.
And for those wondering, that is a 1975 MGB the part is sitting on. Thats the other car I fix in my spare time.
[This message has been edited by 88Slayer (edited 06-29-2008).]
Fantastic thread! Thanks for all the documentation, I also own an 84 with the same body style and have been wanting to change it over to fastback t-top too, this thread gives alot of insight into what I can look forward to! Continue to document and post your issues and stuff as they come along, for guys like me who prefer the fastback style as well!
This thread will keep going until my car is finally done. And since I still have to finish the doors, rear bumper, fastback, T-Top, hood scoop, Integrated RockerPanels for V8 Archie, and I still have to find a rear wing as my donor car was missing it.Oh yeah, and then I need to save for 2 months to get it properly painted. Trying to find the right color blue to get it painted is nerve racking.
i like this thread. im hoping to do the sae thing to my car. my car is a notch back with the GT bumpers so i just need to get the fastback rear to put on and it should be completed.
hopfully you will get yuor fastback rear top on so i can see how you put it on
by the way how much did you pay or the fiero? i dont want to go to the wreckers and them wanting $600 for the part.
I bought my donor car from engine man for $400. He lives only 2 hrs south of me and I combined a family trip with the ride down to pick it up. So I didnt even have to pay for gas or shipping. And I would like a lighter blue than that.
[This message has been edited by 88Slayer (edited 06-23-2008).]
oh ok. there is a car that has clutch problems for $1000. someone already did half the GT conversion but somehow didnt finish it. it has the GT rear bumper and rear end area complete. just needs the windows and the front GT bumper and i think the sideskirts and thats about it. ill check the wreckers for the top and see how much they want for it.
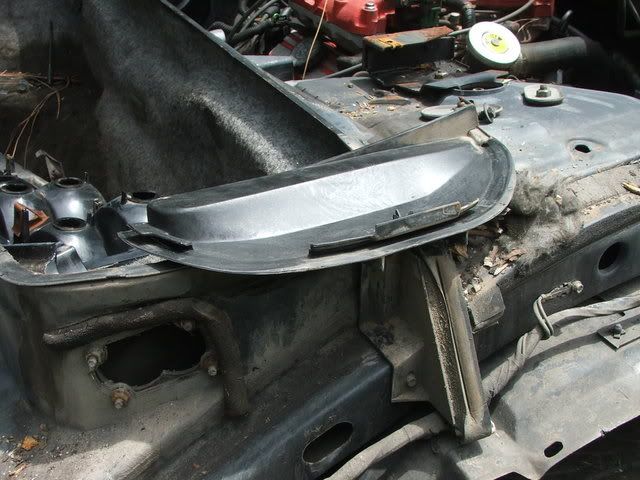
Well todays job was just a lilttle bit easier due to the fact that i had gotten experience at this portion of the work yesterday. First thing to do was to remove the 1/4 panel and the rest of the black ground trim. Al that hold those pieces on are lots of annoying plastic rivits.
The pieces are off. Here is what it looks like.
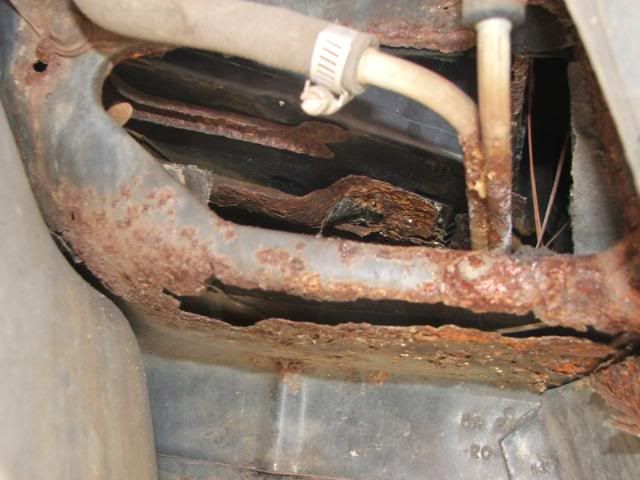
Note to self: Fix battery area. Figures I would have that problem don't it.
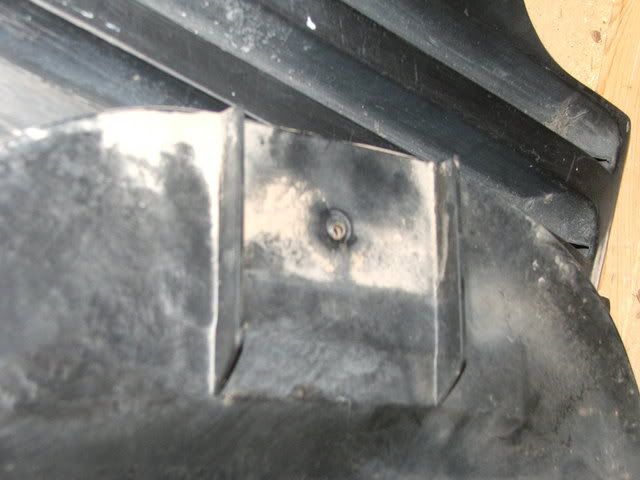
My replacement rivet of choice. Available at the local AutoZone.
The heads need to be slightly squared off to fit in the recesses for the trim underneath the door.
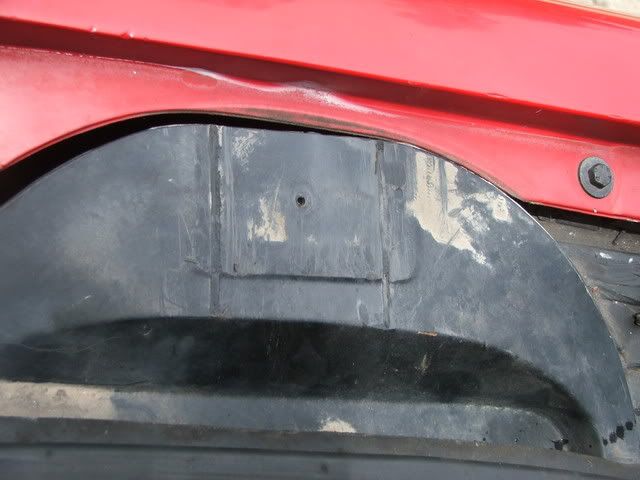
And after all of the parts are in just button up and put your moulding back on. and yes I know I don't have the moulding on. The clips that keep it in place keep breaking on me whenever I remove the piece. Time for new clips.
Tomorrows job(since it's my next day off) I shall tackle the chore of replacing the door skins,and changing the hinges on the drivers side of my car with those of the donor car. Great way for me to save $90 on new hinges.
[This message has been edited by 88Slayer (edited 06-29-2008).]
Well i have some free time on my hands before work so I shall pull the fastback and document it for those who are also doing the conversion. Mine is already partially disassembled by engine man, I just have several more bolts to go.
[This message has been edited by 88Slayer (edited 06-24-2008).]
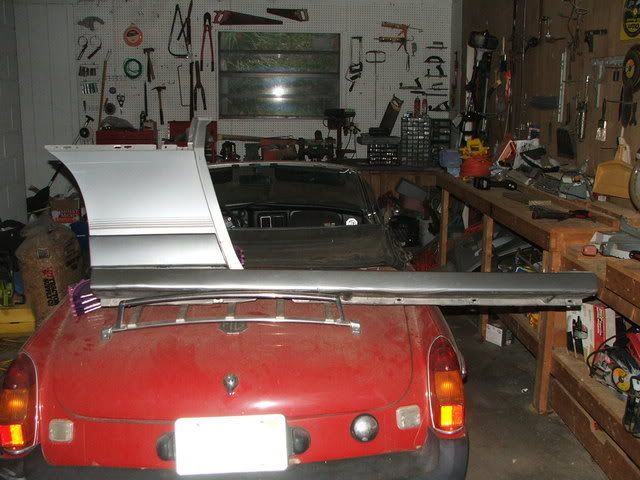
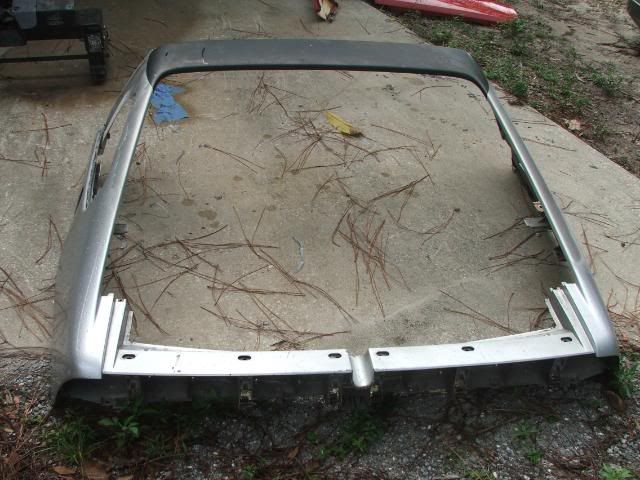
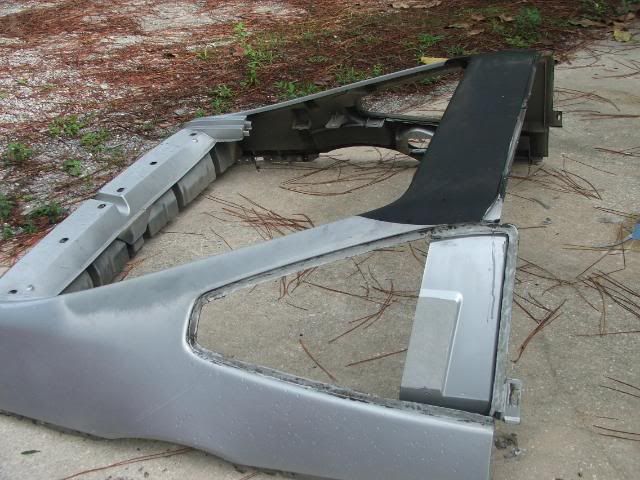
Alright then, time to document the steps I took to finish the liberation of the fastback clip.
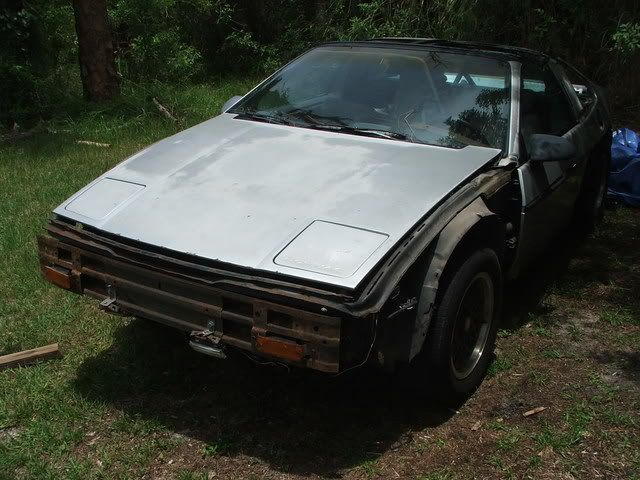
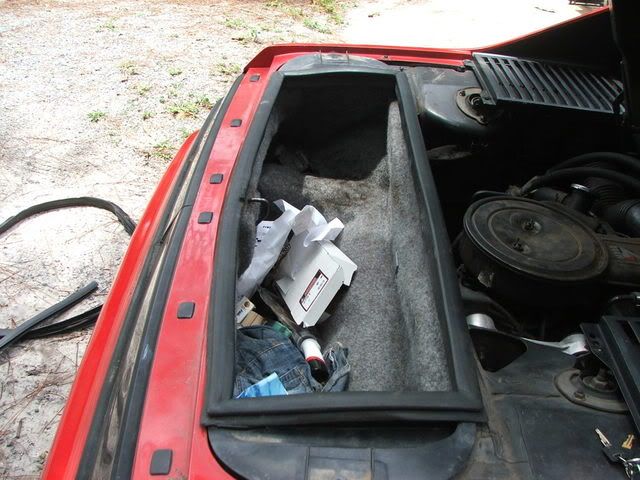
This is how the car looks at the moment before I took off the fastback.
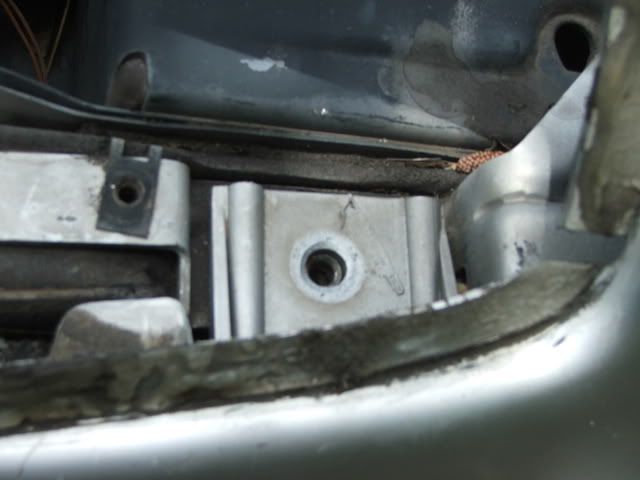
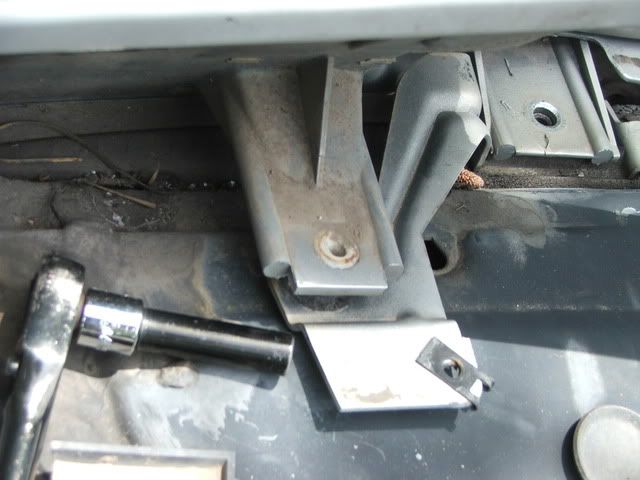
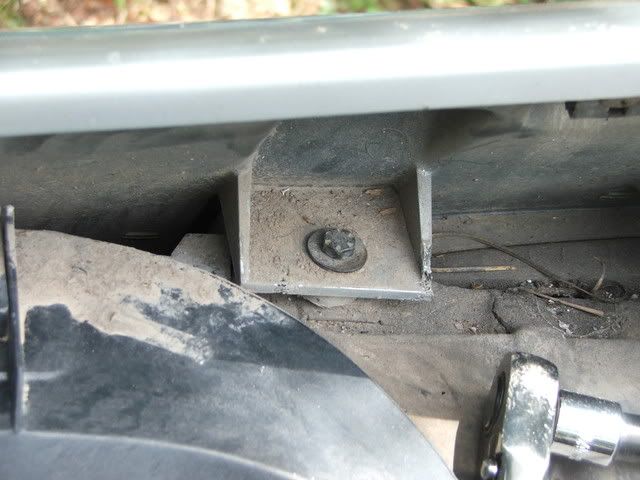
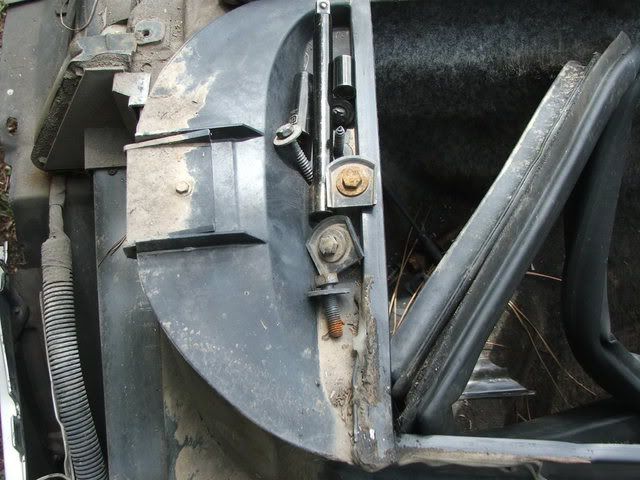
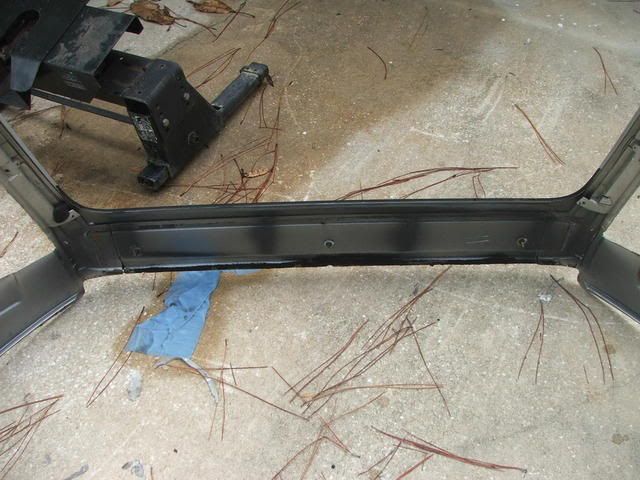
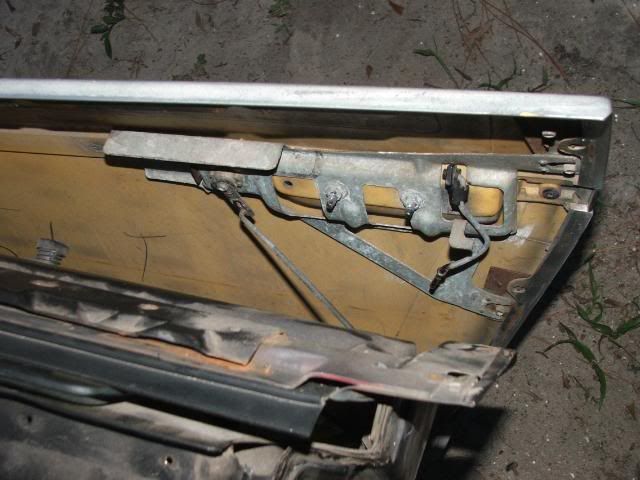
The fastback is held in place by several bolts. 3 of these are inside underneath the headliner.
There are also several on the engine side of the clip.
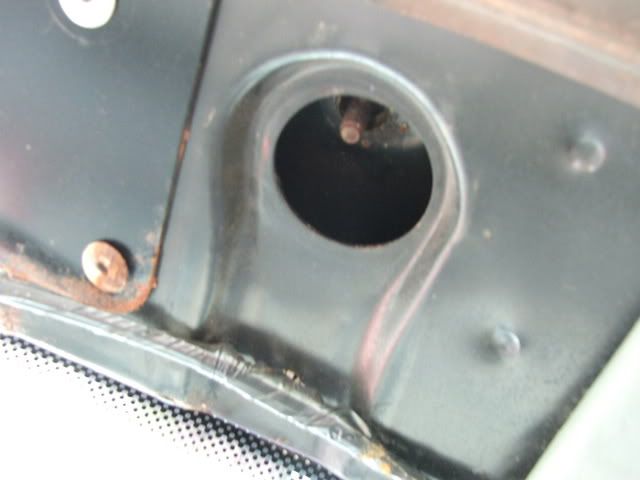
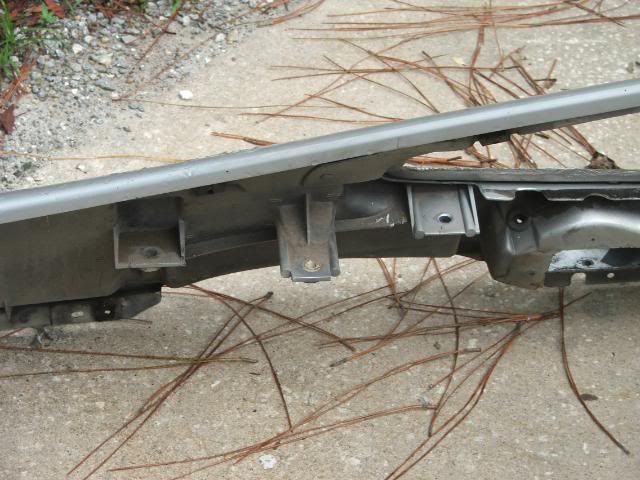
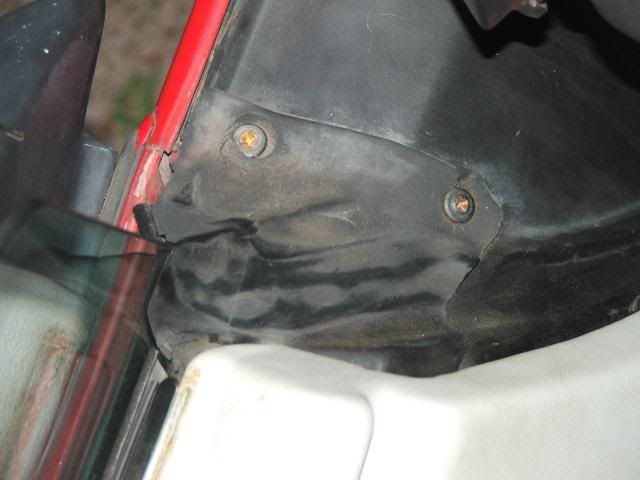
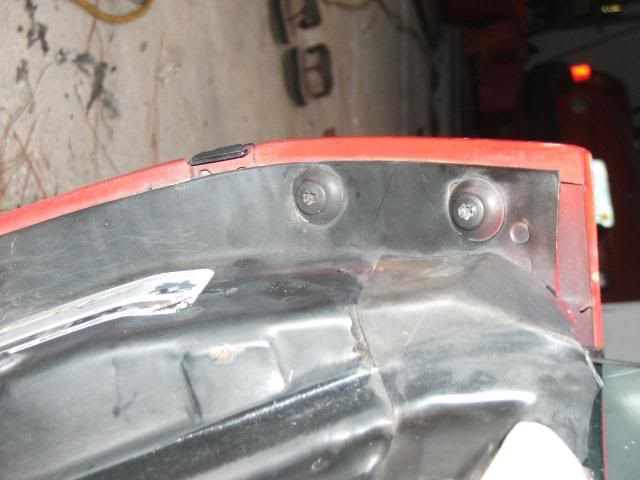
There are 2 of the smaller ones and 1 of the larger one located behind the tailight lenses. These keep that section tied down
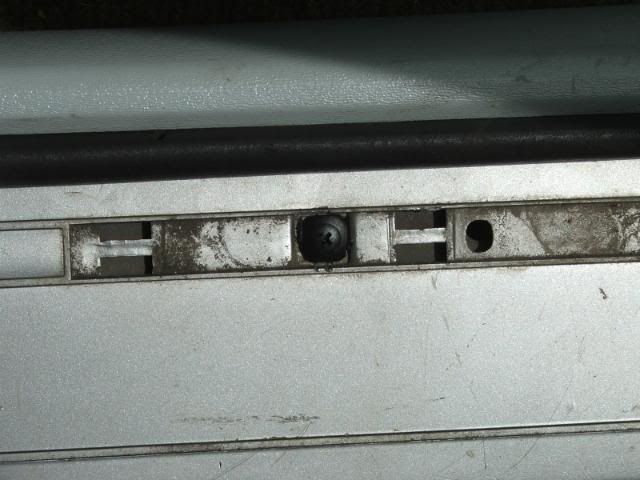
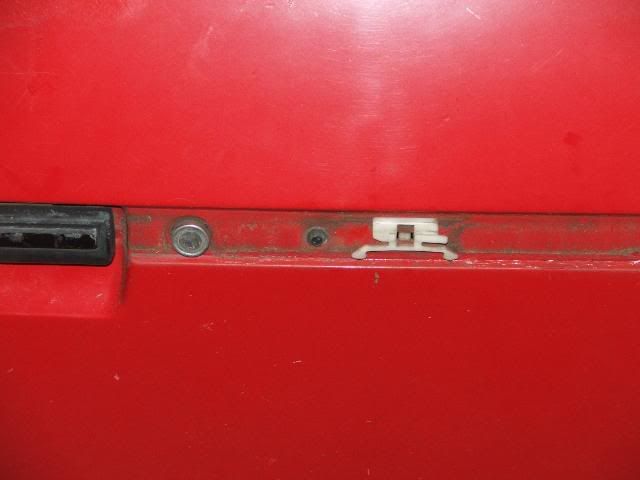
These 3 pics detail where the other 6 bolts are that keep the clip on are located. Also dont forget to remove the rivets located behind the moulding at the overlap of bumper and clip on the sides of the car.
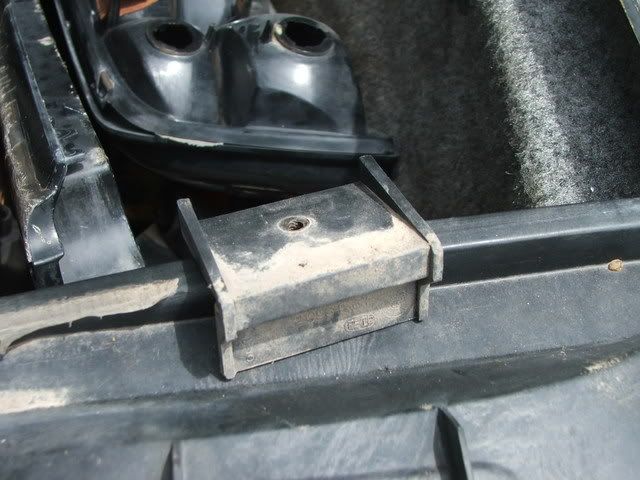
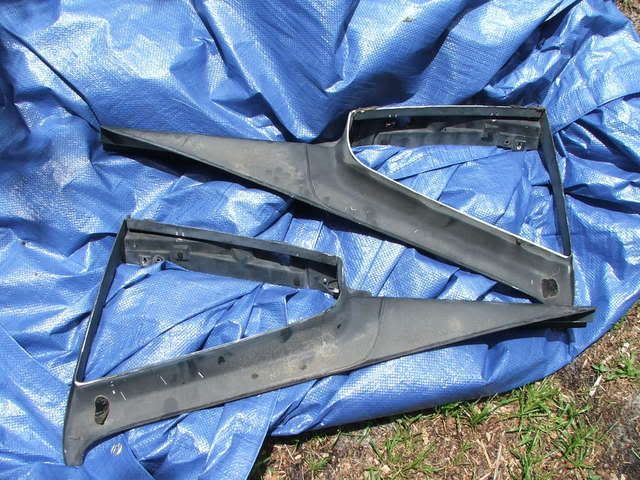
The next step was to take the plastic pieces that enable a coupe to be modified to the GT trunk.
There is only one screw holding each side on by means of a bracket on the side. The pieces of plastic slide out of place one the bracket is removed.
These will slide in place just fine on the coupe until ready to actually swap the clip and decklid.
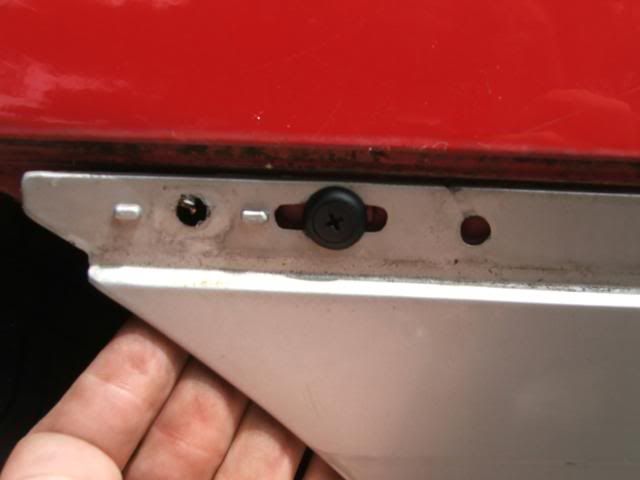
They require a little bit of modification to work if you want your coupe decklid to close. Stock: Modified:
All it took was a bench grinder to get it to where I wanted.
And all done with the trunk.
I wont be progessing much more on the fastback clip until I can secure a pair of fastback lights. No use doing the swap if I cant drive it due to not having working tail lights.
[This message has been edited by 88Slayer (edited 06-30-2008).]
It wont leak enough to cause any damage for the week it shall be like that,at which time I shall have my new tail lights in my hands and ready for install. Also it is now 5 days later, and with many rainstorms here in Florida, my seal modification has yet to leak.
[This message has been edited by 88Slayer (edited 06-29-2008).]
Tail lights are on order and should be here on Friday. Then next time I manage to get 1 1/2 to 2 days off, the fasatback conversion shall proceed. I am currently removing the outer door panels, a problem made a PITA by screws which keep stripping their heads.
Alright, the new door panels are off the donor car. When I install the drivers side tomorrow, I shall detail the on/off procedure for those who have to deal with this.
Fantastic! I didn't know the fastback clip came off so easily, I thought there'd be alot of welding and stuff to get it on. Can you show some pics of the clip all taken off and sitting there so I can see exactly what all came off?
I shall get a few pics of the clip off when im switching my door skins. I have it laying in front of my garage awaiting the arrival of my tail lights. It basically seems as the outside of the fiero is held together with screws and rivets. Even the T-top conversion should not call for welding, as it is held in by an ungodly amount of 1/4 inch rivets.
[This message has been edited by 88Slayer (edited 06-26-2008).]
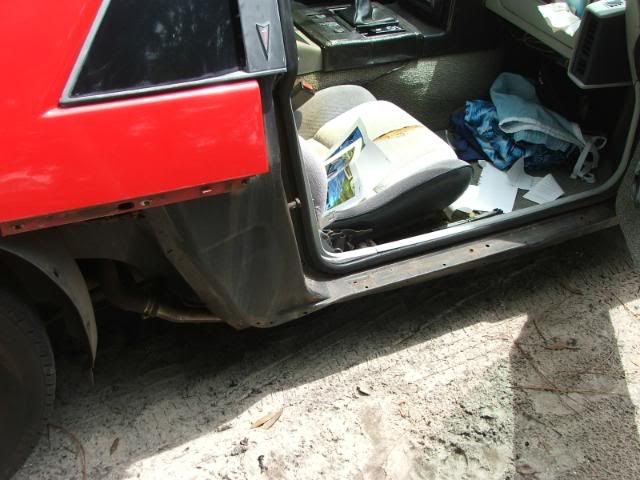
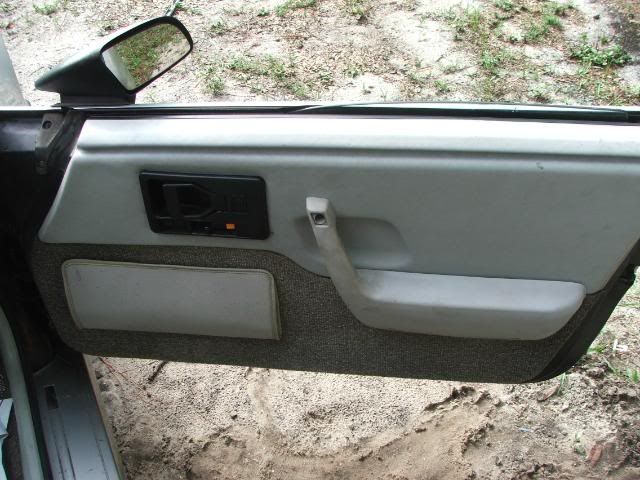
I have actually had the doors done for the last 2 days but due to work, I have not had time to write up a post. So here is the most annoying bit of this conversion so far.
First step is to pull off the inner door panel.
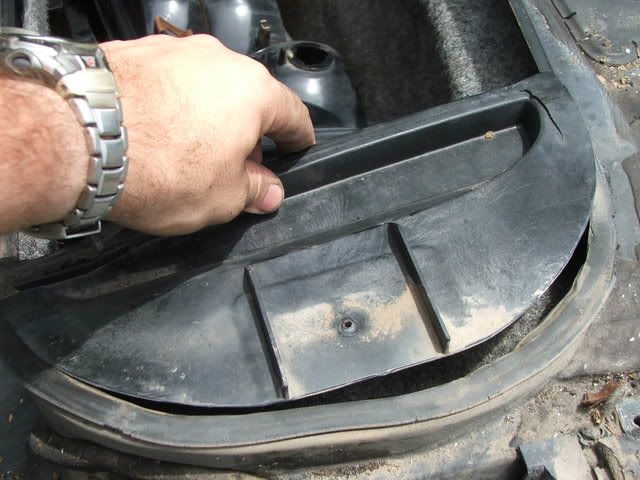
Then pull off the inner dew wipe and the bracket that holds it tight.
Pull off the 2 plastic pieces that help keep the water out of the inside of the door.
Next, there are 7 of these screws holding on the door skin. 4 on the outer side and 3 by the hinges. Also, as they are rarely ever taken out, they have a tendancy to try and strip.
Last step to loosen things from the inside, is to take off the mirror. The its back to the outside to loosen up the last few things. Take off the moulding in the center of the door by using a screwdiver inserted in the top of the strip and pulling downward. You will end up breaking some of the plastic pieces that keep the moulding on so don't worry Fierostore sells new one.
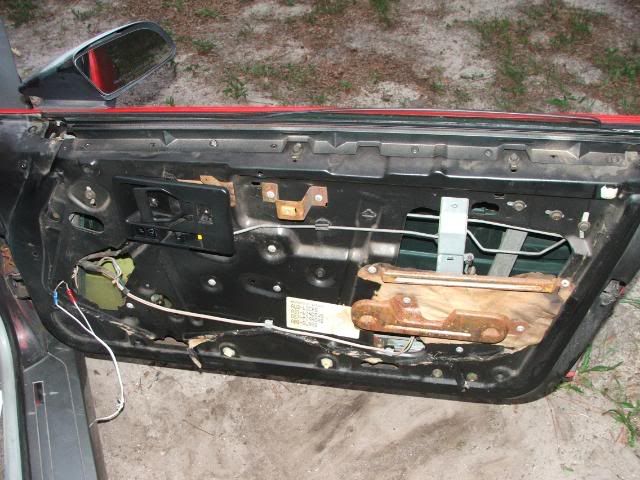
2 screws will be revealed which need to be taken out.
There are also 4 rivets on the bottom of the door skin. These are the last actual retainers left.
To pull off the door skin, pull out from the bottom and then pull up. Assuming that all of the retainers are out, there should be no problems.
When pulling the skin away from the door you will find that it is still connected by a thin rod. This is the rod that actuates the door lock. For removing this you have 2 options, remove the clip holding the rod in place, or remove the 2 nuts holdin the locking mechanism in place. I just took the nuts off as I had the ratchet already handy.
That is Door Panel Removal 101 completed. Reinstalation is the previous in reverse, except you have to put the door handle rod back in place so that it shall open from the outside. It is just hanging there, so all it requires is pushi9ng back into its hole in the mechanism as you are dropping the new panel on.
[This message has been edited by 88Slayer (edited 06-29-2008).]
I really admire the way you are documenting the steps as you go along. I wish everyone would do that as well.
Just one request...please resize the pics to a reasonable size. 800x 600 and less than 150K is plenty for the net. Even on DSL I don't feel like downloading pics at nearly a meg a piece.
Got the boat then engine man? And unfortuanately the works gonna grind to a halt for the next week or so till my bank roll refills enough to cover tools and little parts that are needed.
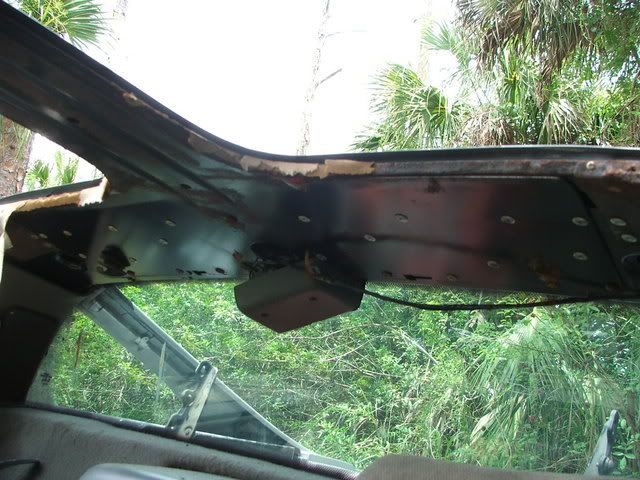
Do you have any pics of the roof, sans GT rear? I have a TTop Coupe that I am going to be converting to a GT. I have not seen the top without the clip on it. What parts did you have to remove from the TTop to remove the clip, or did you not have to remove anything. I know you have to remove the headliner to get at the bolts for the rear clip, but do you have to remove any of the trim from the TTop portion first? or at all?
Thanks for the great pics and write up.
RJ
------------------ 88 TTop coupe (96 3.4DOHC/5 speed in progress) 03 Vibe GT. 6spd 05 GTO, LS2, 6spd 01 Sonoma SLS, 5spd, ZQ8 sport suspension
Alright then, time to break down and try and get some solid ideas set in stone for me to aim towards.
I am either going to get the IMSA ribbed quarter panels or regular IMSA scoops from FieroWarehouse. Looking at getting the shark gill quarter panels from Fiero1Fan or a set with scoops. I am going to end up getting a whole new interior made up over a 3 or 4 month time span, piece by piece. This will include a new set of seat covers and door panel covers with Electric blue and the Silver metallic. I will also be getting a new molded carpet from www.auto-interior.com or another source if y'all know of a better one. I am also looking at getting the Wraparound dash form PISA in a blue as well. Also on the subject of the interior, what type and brand of paint is best for repainting the interior panels of the fiero. I am also going to get the digital gauges from Tom(TBSB9595).
I am also going to get the car repainted once all the exterior work is done, I just need a paint code to go off of. I need a few pics of good looking blues(with code numbers) to help me decide which one I want to end up with.
This is also goin to be posted in another thread to free this one up slightly.
The clip was partially loosened when i bought it from engine man. From the looks of it, the Rear Roof Outer Molding on the top of the clip that joins the t-top to the fastback is all that has to be removed in order to lift off the clip. If I can get engine man or even jscott to get an answer in they might also be able to help.
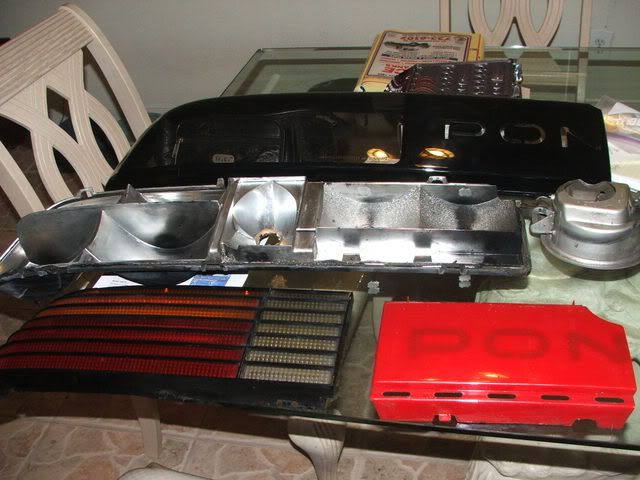
Well the lenses for the tail lights arrived today, so I took out a half hour from my yard work schedule to et them cleaned up and revamped so as to have them ready when I start the final exterior parts of the swap.
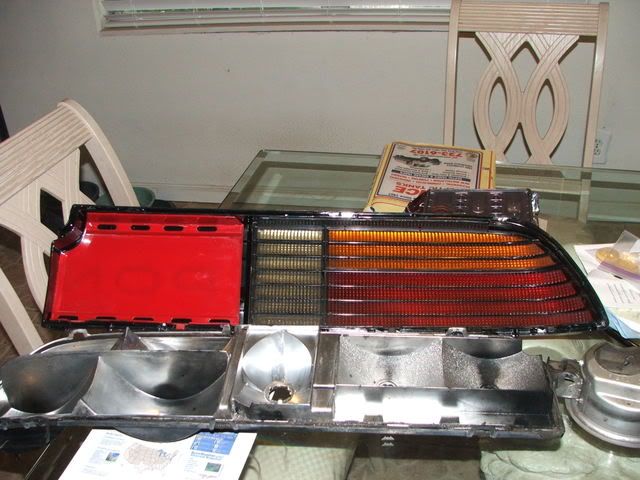
Well the tail light assemblys are rather easy to disassemble. There are 3 latches on top and 3 on the bottom that need to be realeased. Once they are, it is just a matter of pulling the 2 halves apart. At this part, you have the back and the lense with the colored pieces still left on it. These just slide right out without any trouble. Then its just a matter of cleaning up the pieces and reassembling with the new lenses(or old if yours are still good).
I went with the "Special" lenses from the FieroStore as I am on a budget and the imperfections are too slight to really notice. Everything is apart and ready for reassembly
Colored parts are in, ready to button up.
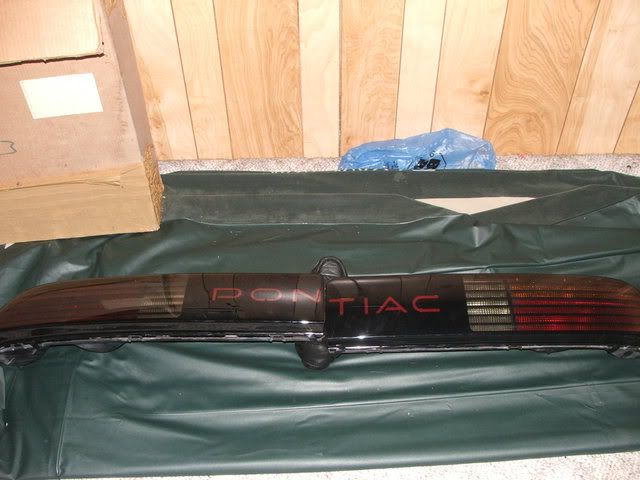
And now the new tail lights are ready fro the install.


 T Tops are cool, got one sitting in the shop beside three with moon roofs, but one thing to remember, anything with a sealed hole in the roof is eventually going to leak. Mine doesn't yet but, it's going to someday.