Took the car for a few drives and kept checking things over every once in a while and discovered that the lower shock mount on the passenger side had developed a bend to it. Every time I came back to the garage I had to adjust the spring on that side to keep it the same as the drivers side. Then I noticed the downward bend on the plate. Took the lower control arm off and hammered it back to shape and added a piece of angle steel underneath to keep it stiff and that solved the problem.
The car rides a bit smoother, no more thumping so the basic design is sound but it needs some fine tuning. The preload on the passenger side is a little over an inch while the drivers side is only 1/2". But the drivers side is heavier than the passenger side so that seems strange to me. And the bending on the passenger side has not occurred on the drivers side. I am going to brace it the same way just in case but there is also something else out of wack. I am going to drive it up on my ramps so I can crawl under and check the arm angles to make sure they are the same. My best guess is that the lower shock mounts are not quite the same side to side, causing the travel distance of the shocks to be differrent. One of the upper control arms will need to have it's mounting tabs cut off and moved i think. I am keeping a close eye on the upper bolt on mounts to make sure they dont bend and so far they look ok. So a bit more work to get it right, but not a big deal.
[This message has been edited by wftb (edited 03-30-2020).]
Everything is the same side to side except for the position of the upper arm shock mounts as I suspected. The passenger side is a little more inboard than the drivers side, and a bit closer to the mounting plate. Nothing major and because I want to continue to drive the car until the snow flies, I am going to fix it when I put the car away for the winter.
I was looking through this thread trying to find the weight of the car the last time I had it on the scales at the local landfill. I guess I didn't post it here but weighed at the 30th it was 2790 lbs. then I weighed it in 2017 at the landfill and it was down to 2746 lbs. Today I weighed it at the landfill and with the recent changes to the intercooler setup it now weighs 2682 lbs. So the weight is down by 108 lbs since I first got it weighed. All weights are with a full tank of gas and me not in the car. The intercooler changes lost 64lbs alone. The steering has noticebly less effort required now, but maybe my new steering wheel has a bigger diameter?
Originally posted by wftb: Today I weighed it at the landfill and with the recent changes to the intercooler setup it now weighs 2682 lbs. So the weight is down by 108 lbs since I first got it weighed. All weights are with a full tank of gas and me not in the car. The intercooler changes lost 64lbs alone. The steering has noticebly less effort required now, but maybe my new steering wheel has a bigger diameter?
Your weights are really getting down there. i wonder how your car compares to mine? My steering effort is greater now that i have put in the three core radiator and the battery under the headlight, but the light front feeling at 140 km/h is now GONE. Well worth it.
jon
------------------ Astronomy says we will find a coded signal from outer space. Then we'll KNOW that life exists there, for coded signals aren't by chance.
Biology says there are coded genetic signals in every cell, but we KNOW that no intelligence created life.
I'm the original owner of a white ' 84 2M4 purchased Dec 10, 1983 from Pontiac. Always garaged, no rust, 4-wheel drifts are fun!
If you live in a small town like we do usually the landfill operators don't mind weighing a car. I would be interested to see how my car compares to a stock 4cyl too. So called factory weights mean nothing because they are calculated without any fluids in the car.
I moved the lower spring mounts on the passenger side and it reduced the preload about 1/4" of thread on the shock. Side to side, everything looks very close so I am calling that job done. It snowed 5" here last night, but I am going to keep driving the car if the snow melts. This time of year snow does not stick around here till december normally.
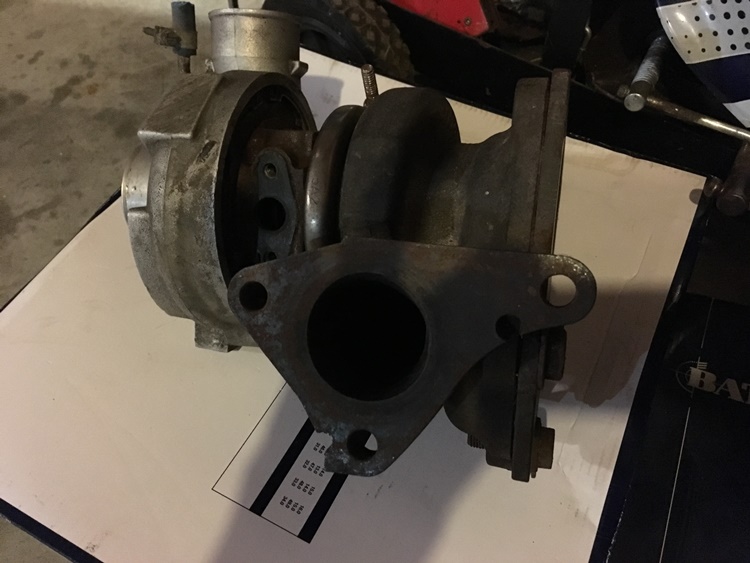
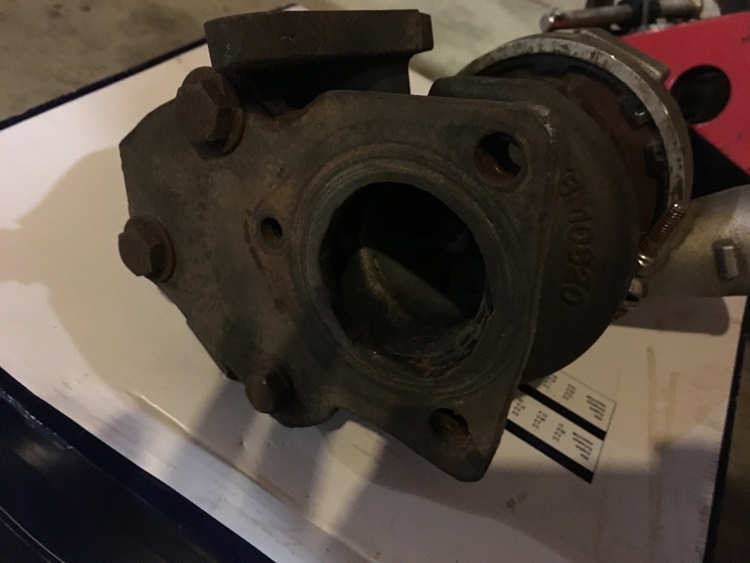
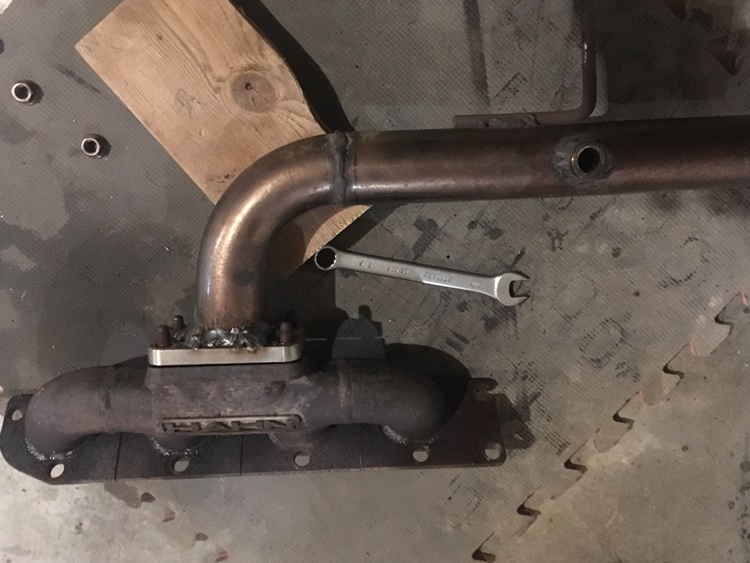
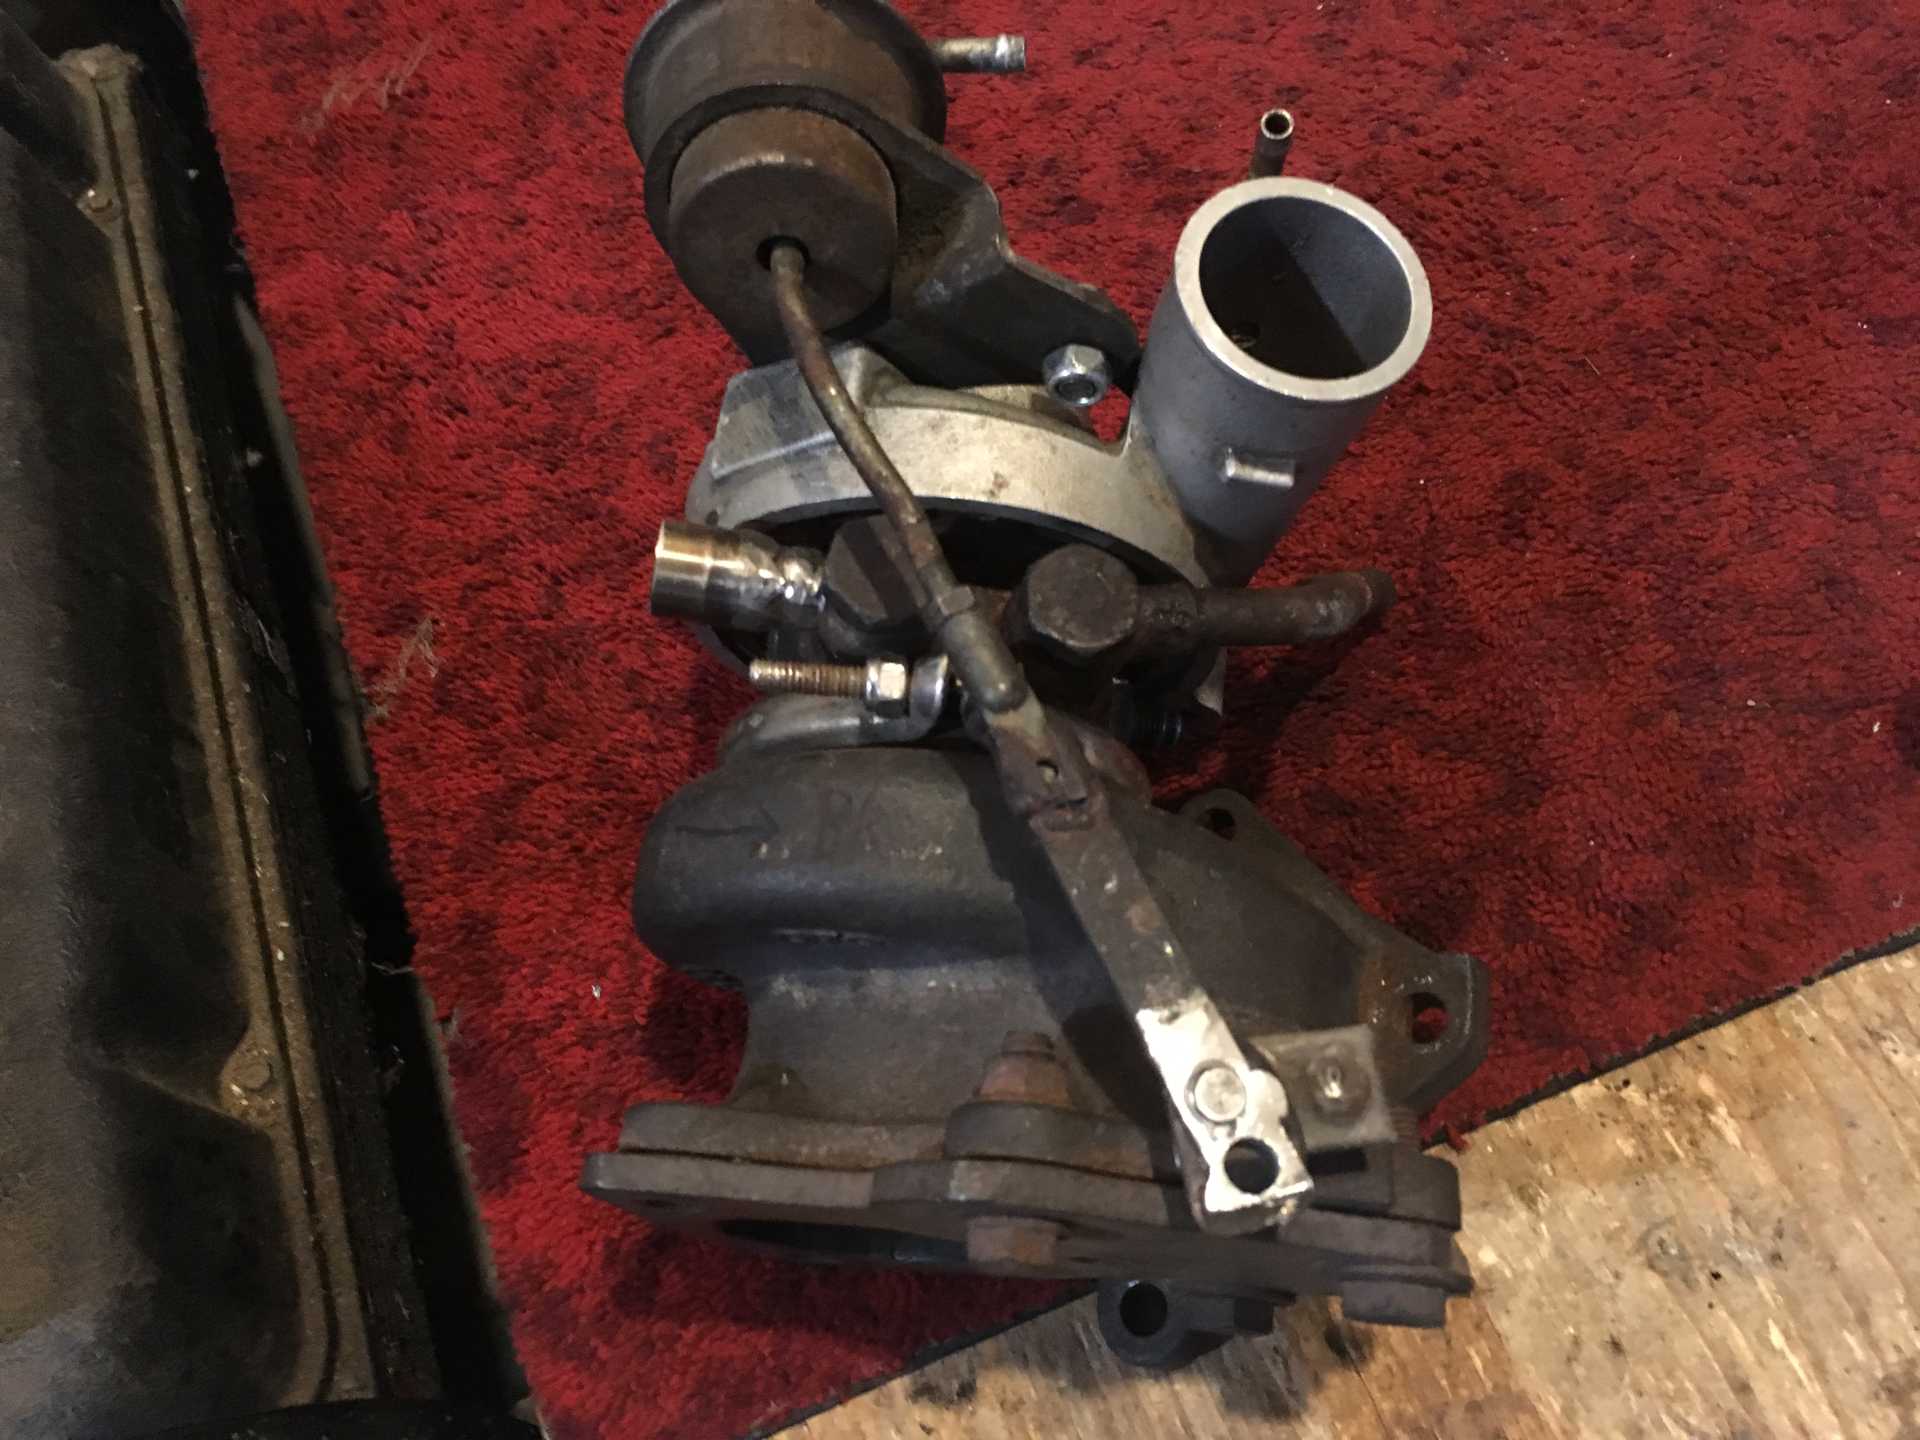
Some time over the winter I am going to swap my 20g turbo for the 16g I used to have on the car. I just think it is a better fit for the engine. It spools up faster and even at high speed in 5th gear it pulled hard. I bought the 20g as a package with the turbo manifold from Hahn racecraft and I should have bought the 16g version. And Hahn no longer makes the 16g version. So I need to make an adapter plate to make the old turbo work on the Hahn manifold. I do not even know if it will fit with an adapter plate on it but if it doesn't I will continue with the 20g.The old turbo with it's triangular turbine inlet:
It was easy to mount this to a stock ecotec exhaust manifold, just drill and tap some holes and bolt it on. The drawback to doing that is I had to use an oil evac pump to get the oil from the turbo in to the sump. And I got rid of all the stock manifolds I used to have. As far as I am concerned the 20g hangs down too far to get good return oil flow but with the big return line it does not seem to back up and leak. The old turbo seems fine, no slop and hopefully it has not developed any leaks from sitting for about 5 years or so. The downpipe mount I made a long time ago should work fine. In the spirit of not spending money this project should just cost me my time.
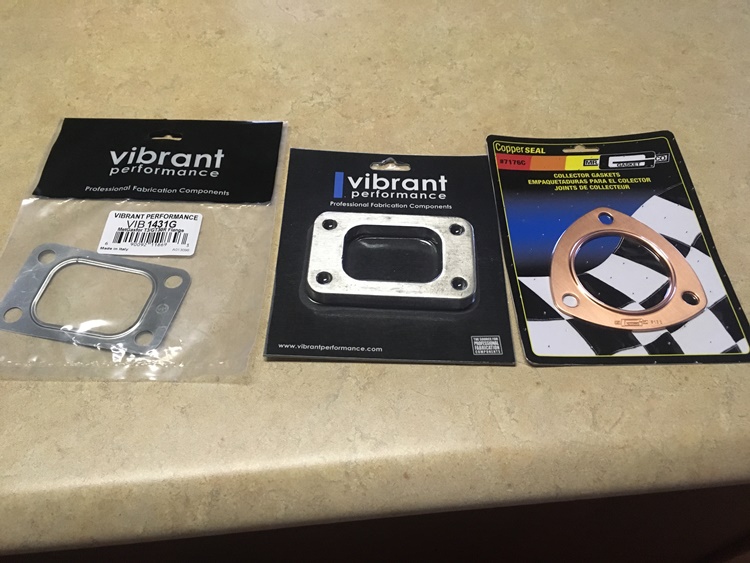
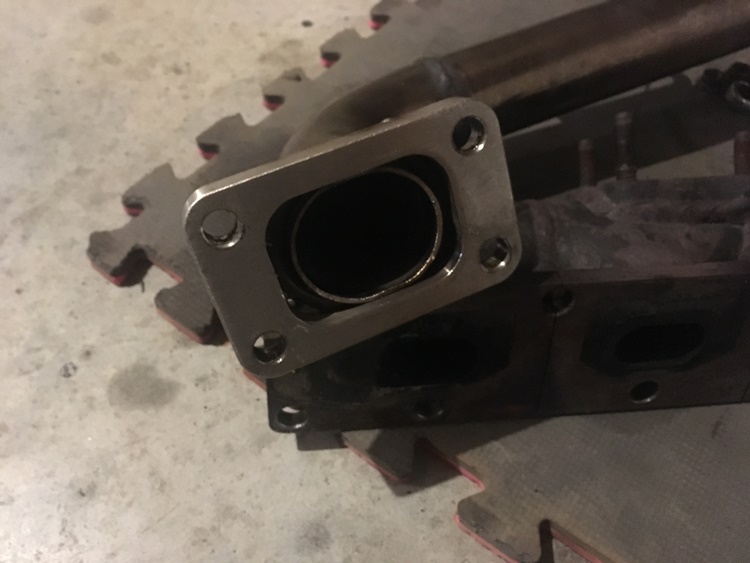
Started working on mounting the 16G turbo this week and ran in to a few snags- Even though the turbo is physically smaller than the 20G, because of the shape of the turbine inlet and where the air feed and pressure outlet faces, it is impossible to hang it off the Hahn manifold the way the 20G is. So I laid out 120.00 cdn for some gaskets and flanges. Was hoping to not have to spend any money but best laid plans etc. Would have been a little cheaper but they only had stainless flanges in stock.
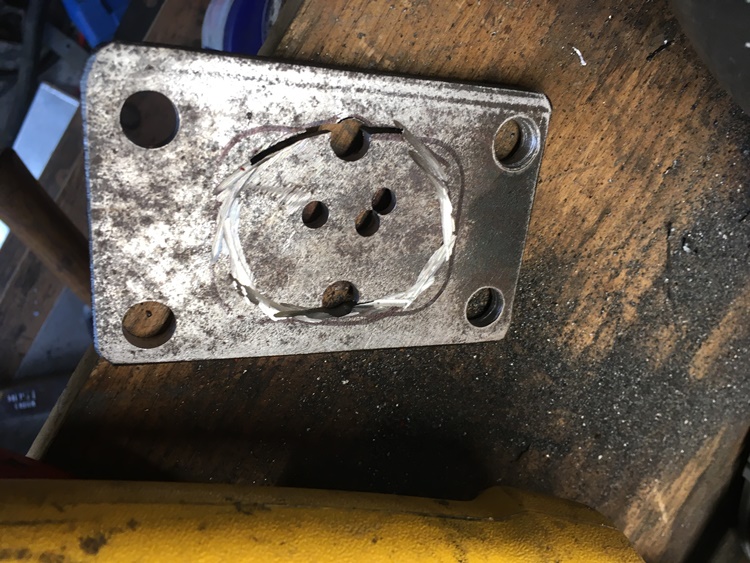
Tried to make a flange but it needed to have an oval shape and my jig saw just will not make a corner cutting 1/4" thick steel. Would have saved 65.00.
I probably could have carved it with my dremel and about 10 cutting wheels but I decided to use the stainless flange:
Yes the welds look terrible but i had to fill some large holes to get the oval pipe sealed in.I have to run a few more beads and then clean it up a bit with the grinder. On the inside I hope I can smooth things out without running any beads in there but we will find out tomorrow.
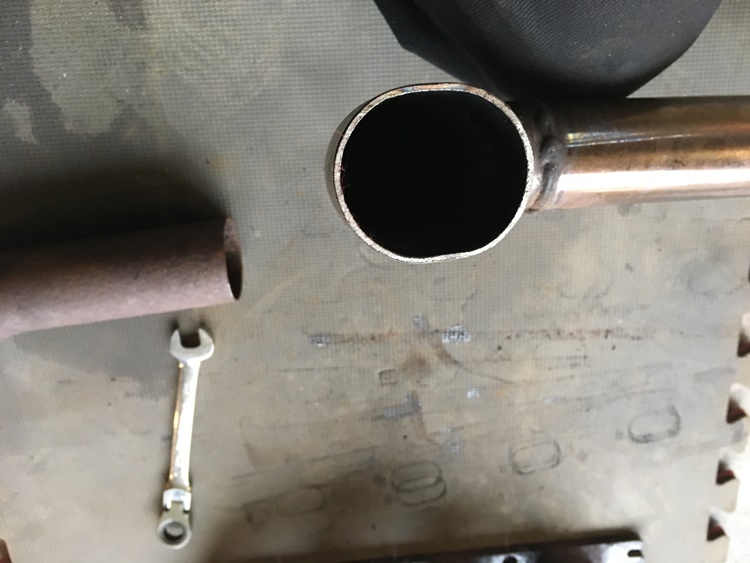
The plan is to run the turbo feed pipe in to the area where the intercooler sits now. The intercooler will be mounted down below, where most Fiero's have their cat convertors. I have had it there before and it works well. I am feeding the turbo with 2" pipe, just slightly larger than the turbine inlet. At one time I had a remote turbo mounted under the remains of my trunk and I fed it with 2" pipe and it worked really well. But the hangers broke a lot and I did not like having to have an oil evac pump. I am hoping to be able to mount the piping for this setup completely on the engine, eliminating the need for flex joints and external hangers. Might not be possible but we will find out.
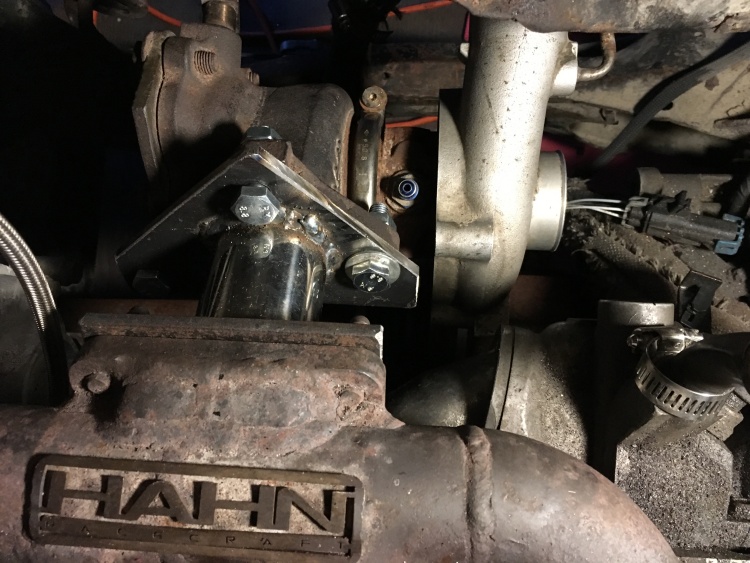
My original plan to mount the turbo on the dirvers side of the engine bay was a total failure. First off I did not get the initial feeder tube right:
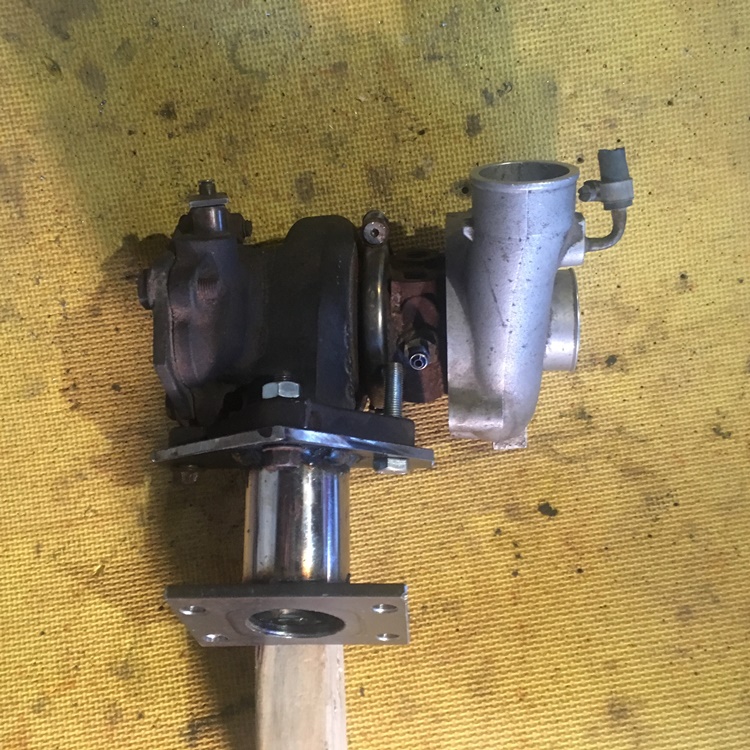
Call it the tube to no where, too low to connect to. While i was mulling over what to do about that, I held the turbo in the desired position and discovered that no matter which way I turned it, the hot side and the cold side outlets were pointing the wrong way. A new plan was needed and I figured some sort of short mount would work. Came up with this:
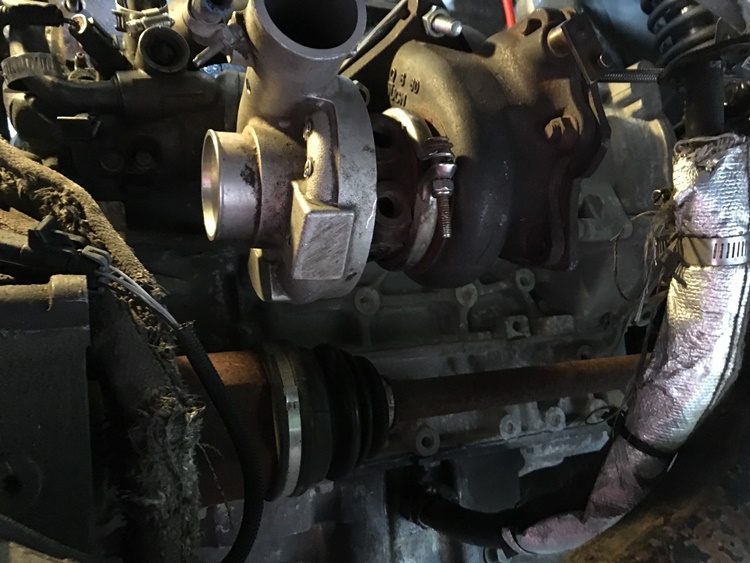
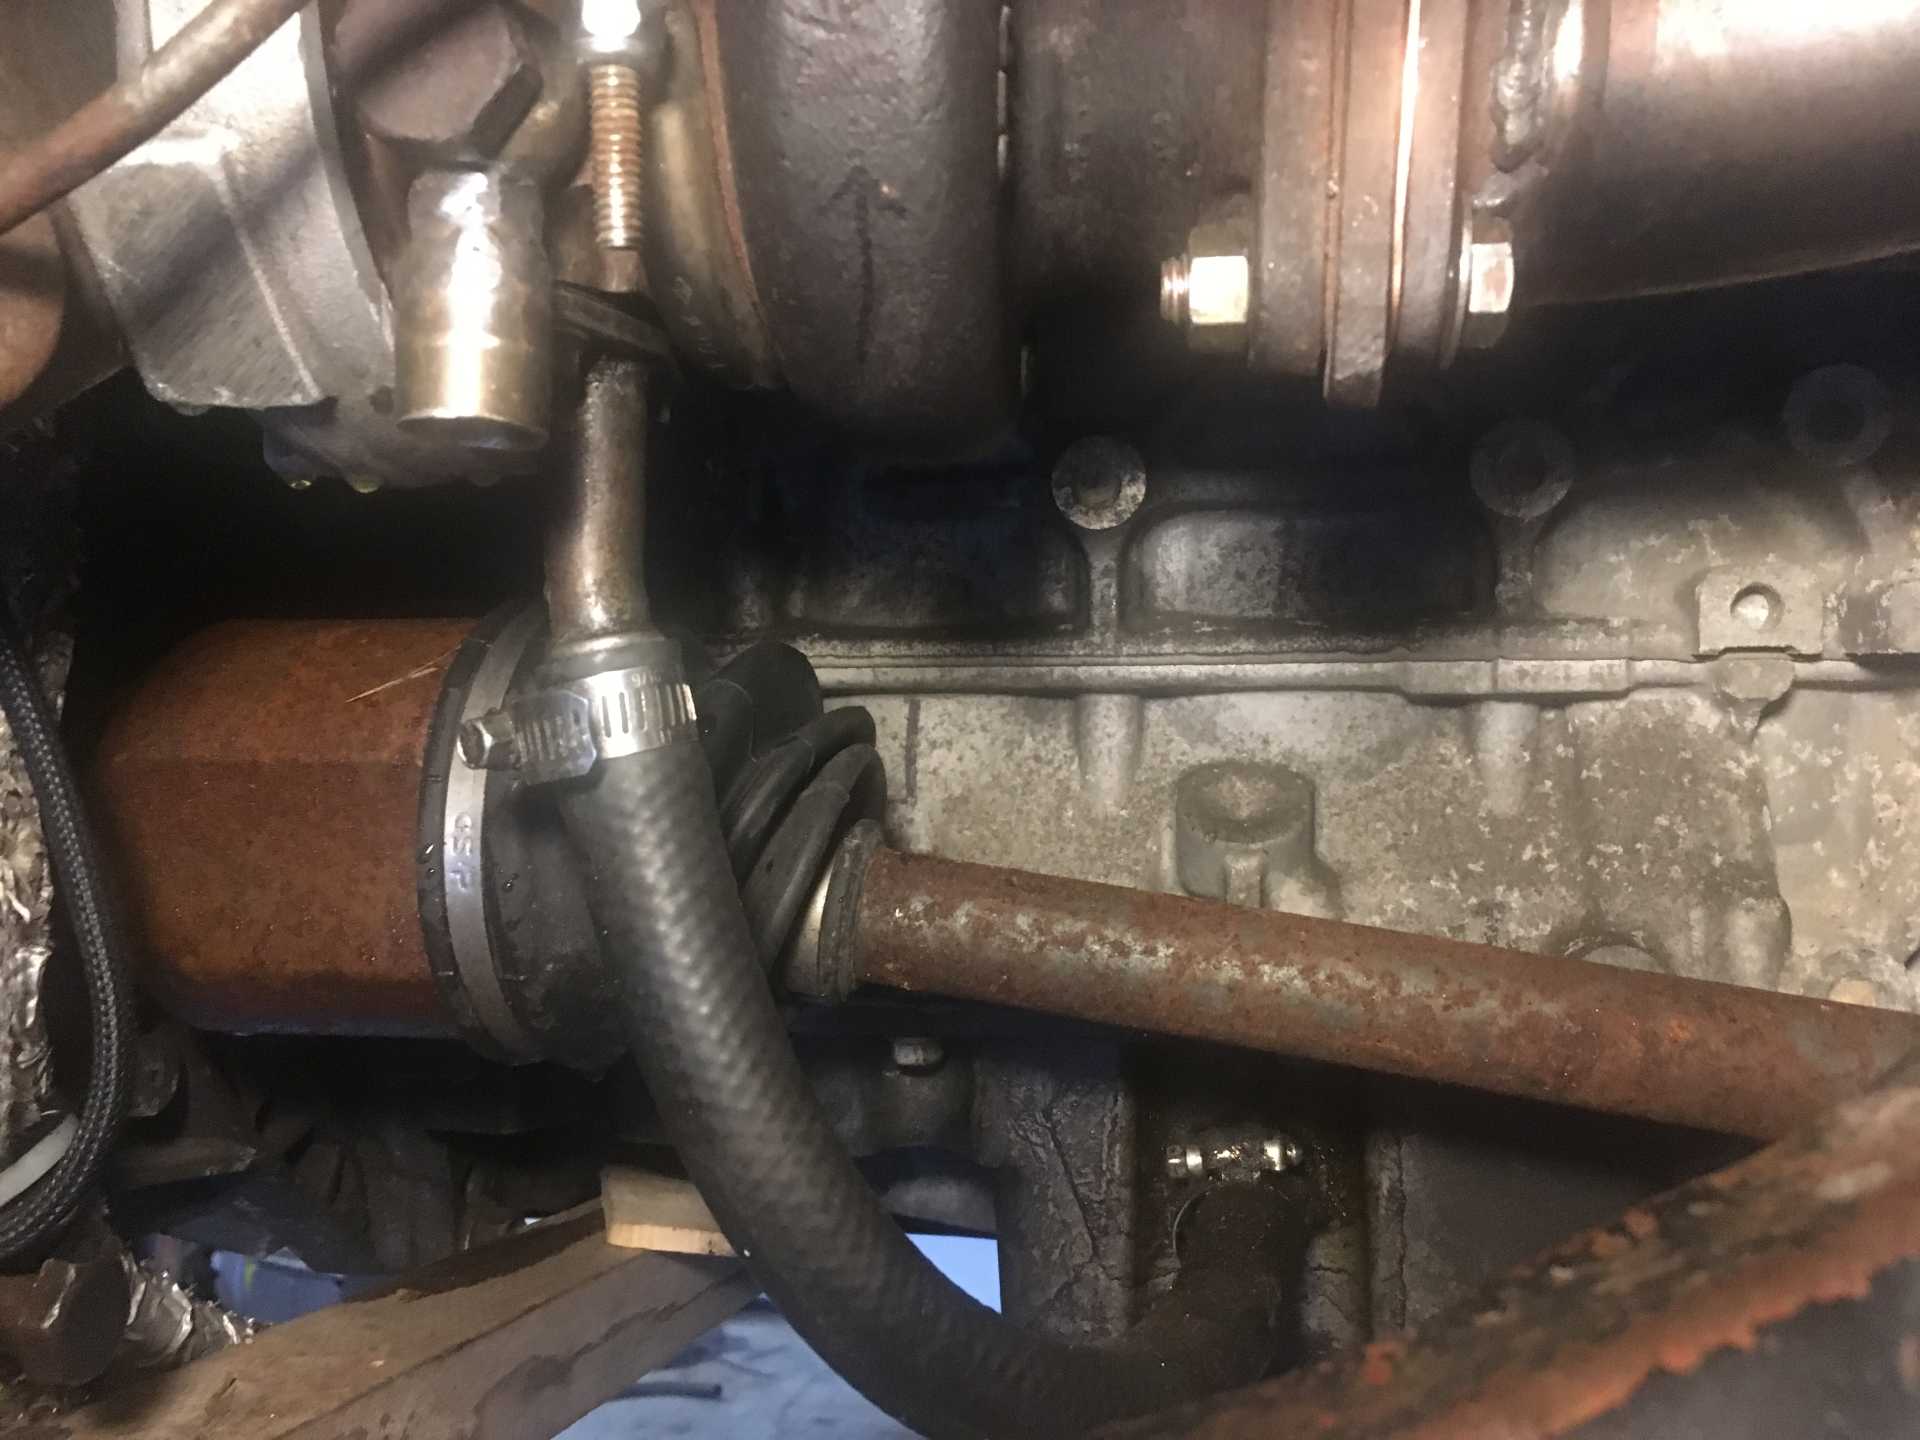
That almost worked, just needed the pipe cut on an angle to clear the axle and water pump plumbing. Finished turbo mount:
This mount does lower the oil outlet about 2 inches but with everything out of the way I can see there is a good drop to the oil pan.And lots of room to run all the plumbing and it will no longer take me 4 hours to take the turbo off if I need to.:
Now I need to order the Subaru gasket for the inlet to the turbo and I can start bolting things back on to the car.
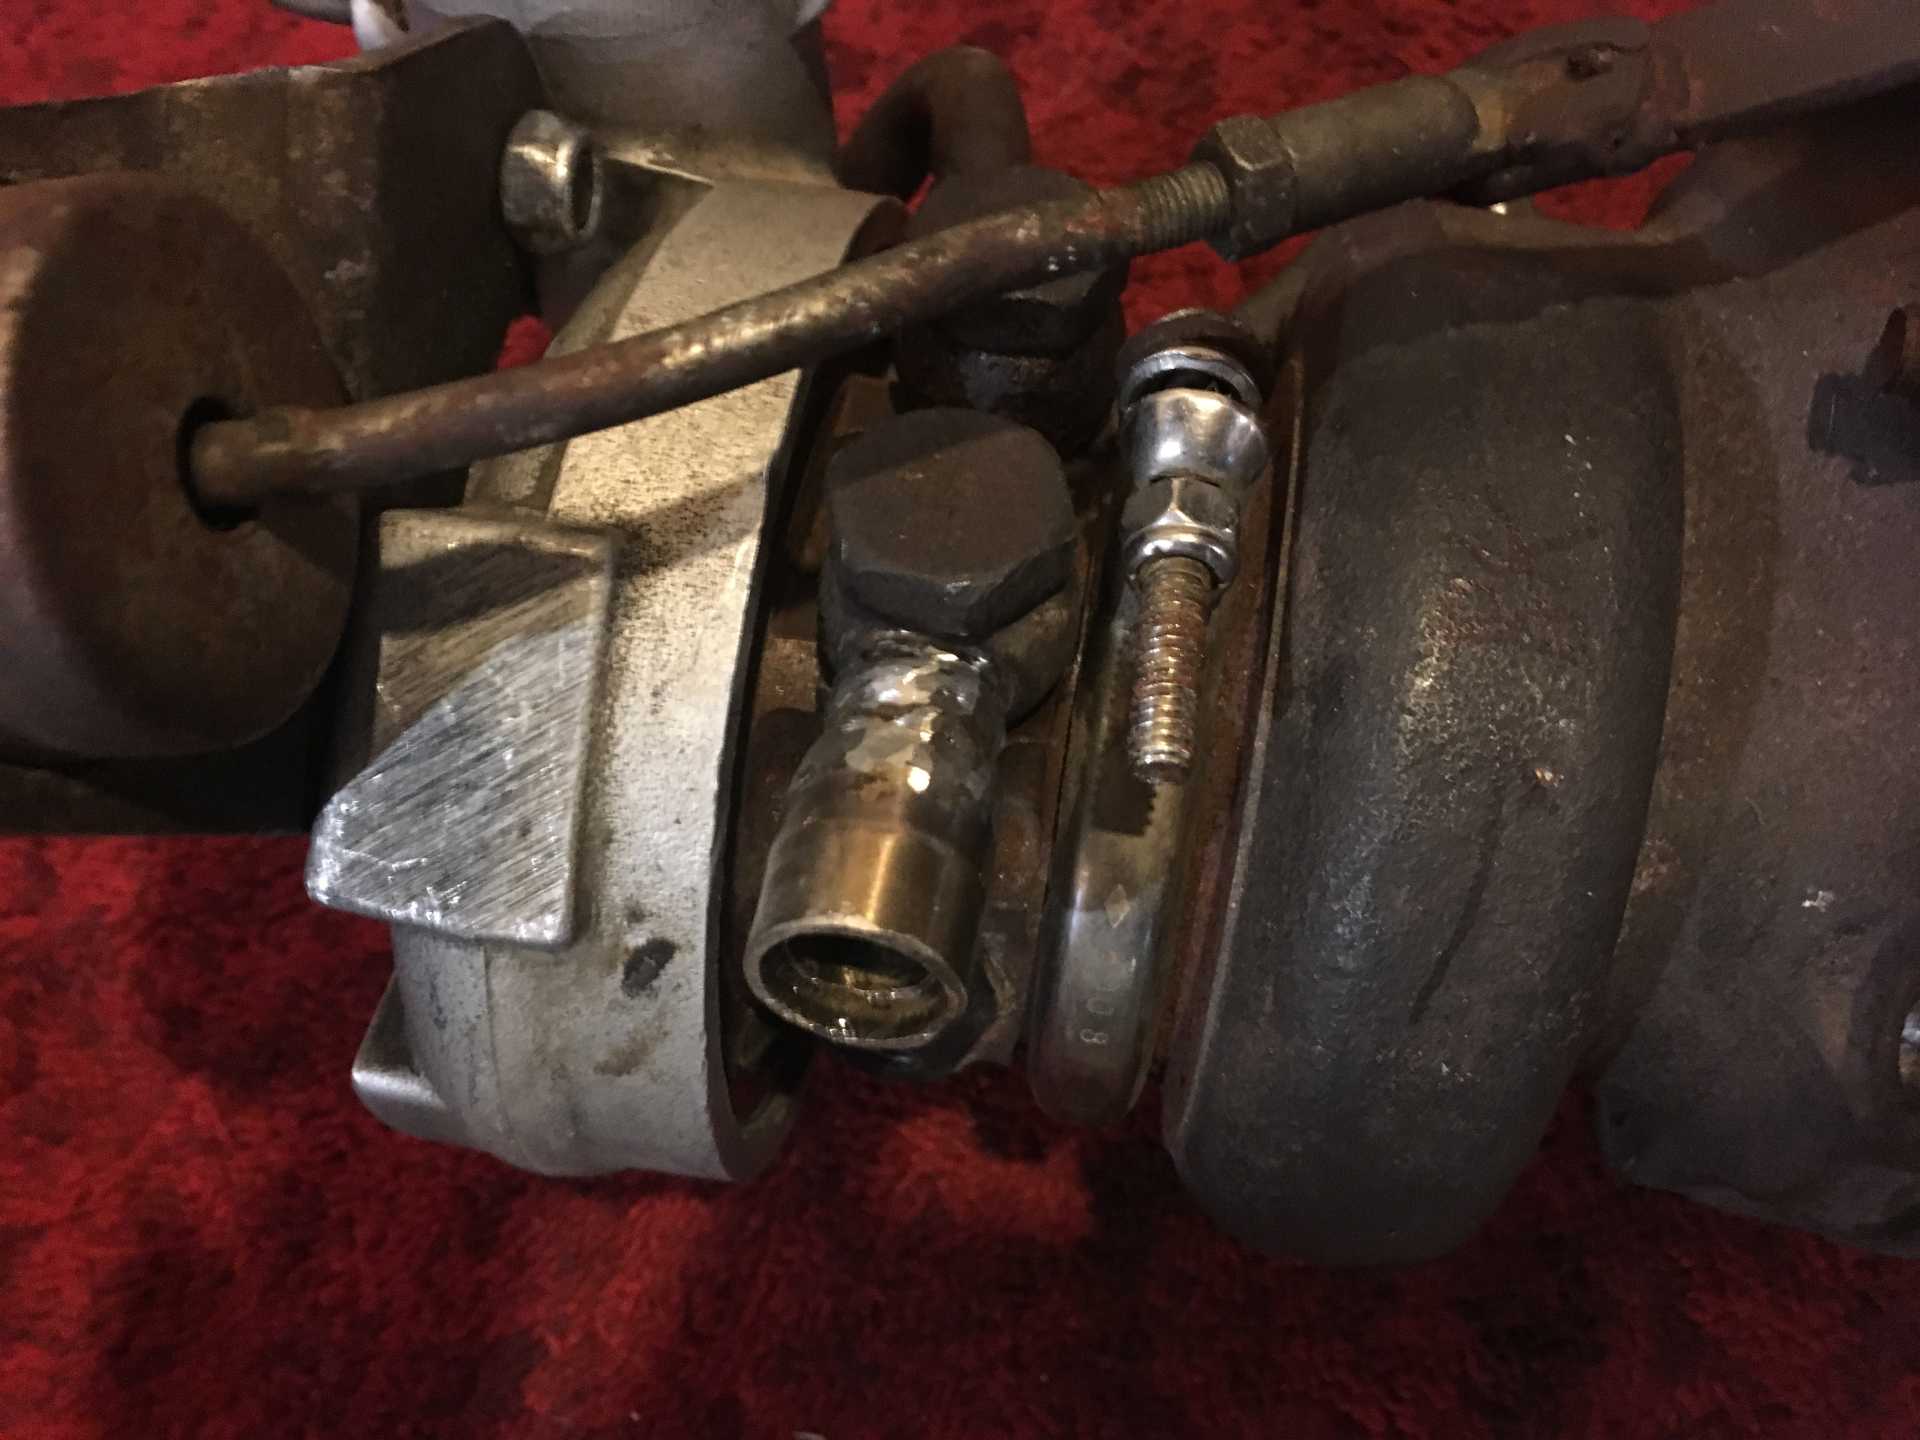
I bolted the adapter on to the manifold with the gasket I bought with the flange. I tightened the manifold nuts and cranked the adapter to manifold bolts up too. I do not plan to take those off anytime soon, the turbo is now removed by taking the three flange bolts off. The turbo is not tightened down as I still need the gasket. But I wanted to hang it and see what kind of room there is to fit things in. It is better than expected and as an added bonus the downpipe from the 20G turbo bolts right up to the 16G. Next step is to get the wastegate installed.
Turbo is ready for install now. Wastegate is on and setup and I welded up a pipe stub for one of the coolant feeds because the original tube was going in the wrong direction. Filled it up with hot water and did not see any leaks. No time tomorrow to work on it but on thursday I will bolt the turbo on and run the oil and coolant feeds and then put it up on the hoist and get the exhaust on.
I was just reading your thread- Interesting read. I noticed the discussion you had about keeping weight down and especially off the tail for balanced handling. I came up with a way of mounting the stabilizer bars to get better turn-in with LESS DTO (Drop-throttle oversteer)
My car had the Fiero-Typical slow steering response and a small amount of DTO. If I tried to improve the turn-in response I would risk much worse DTO. By doing some creative mounting of my Stabilizer bars, I have extremely good turn-in response and almost no DTO......The car is basically "tossable" like a Front-engined car.....
Do a search for "My Stabilizer bar mounting Theories..." and see if it may help you....
[This message has been edited by cvxjet (edited 12-07-2019).]
Yes I have read your thread about the stabilizer bars but I only run a sway bar in the front. I found that once I went to coilovers with 350lb springs ( my original strut/RCC rear suspension) there was not enough roll to worry about. As far as drop throttle oversteer, this car does not have that trait. In the rain or on a gravel road. That is because of the tire size differential between front and rear- 205/16 in the front and 245/16 in the back. All fastback gt's came with 205/215/15 front rear combos but all the old testing and videos I have watched showed that was not enough. I was going to go bigger front and rear when I bought my last set of tires but the sizes I wanted were not available in a 16" rim size.
Typically adding to the drop throtle oversteer problem is when these cars were fairly new most people did not stick to the recomended tire size, opting for the same size all the way around. So they can rotate the tires.
Thanks for the post have a good day.
[This message has been edited by wftb (edited 12-08-2019).]
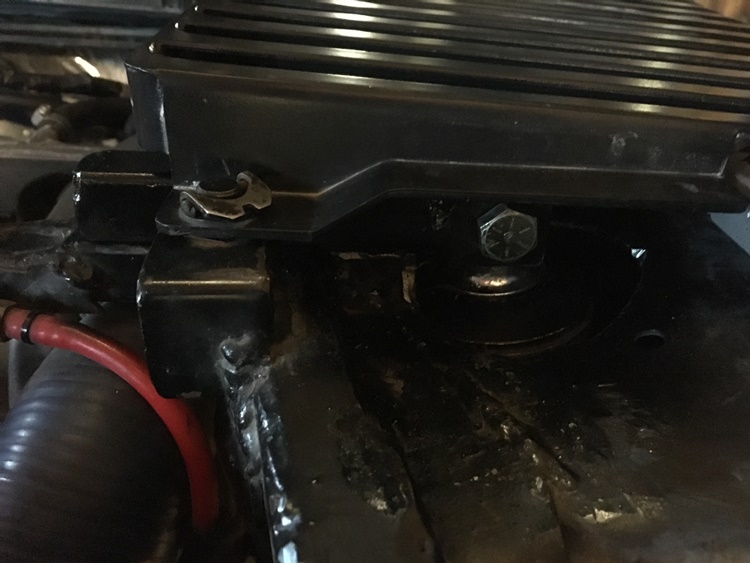
Ever since I swapped in the Ecotec back in 2007 I have wanted to remount the engine because it is not in the engine bay straight. I have not bothered because performance wise it affects nothing. But when I do a big project like changing the turbo and I strip everything away from the engine looking at it just bugs me. So today I decided to do something about it:
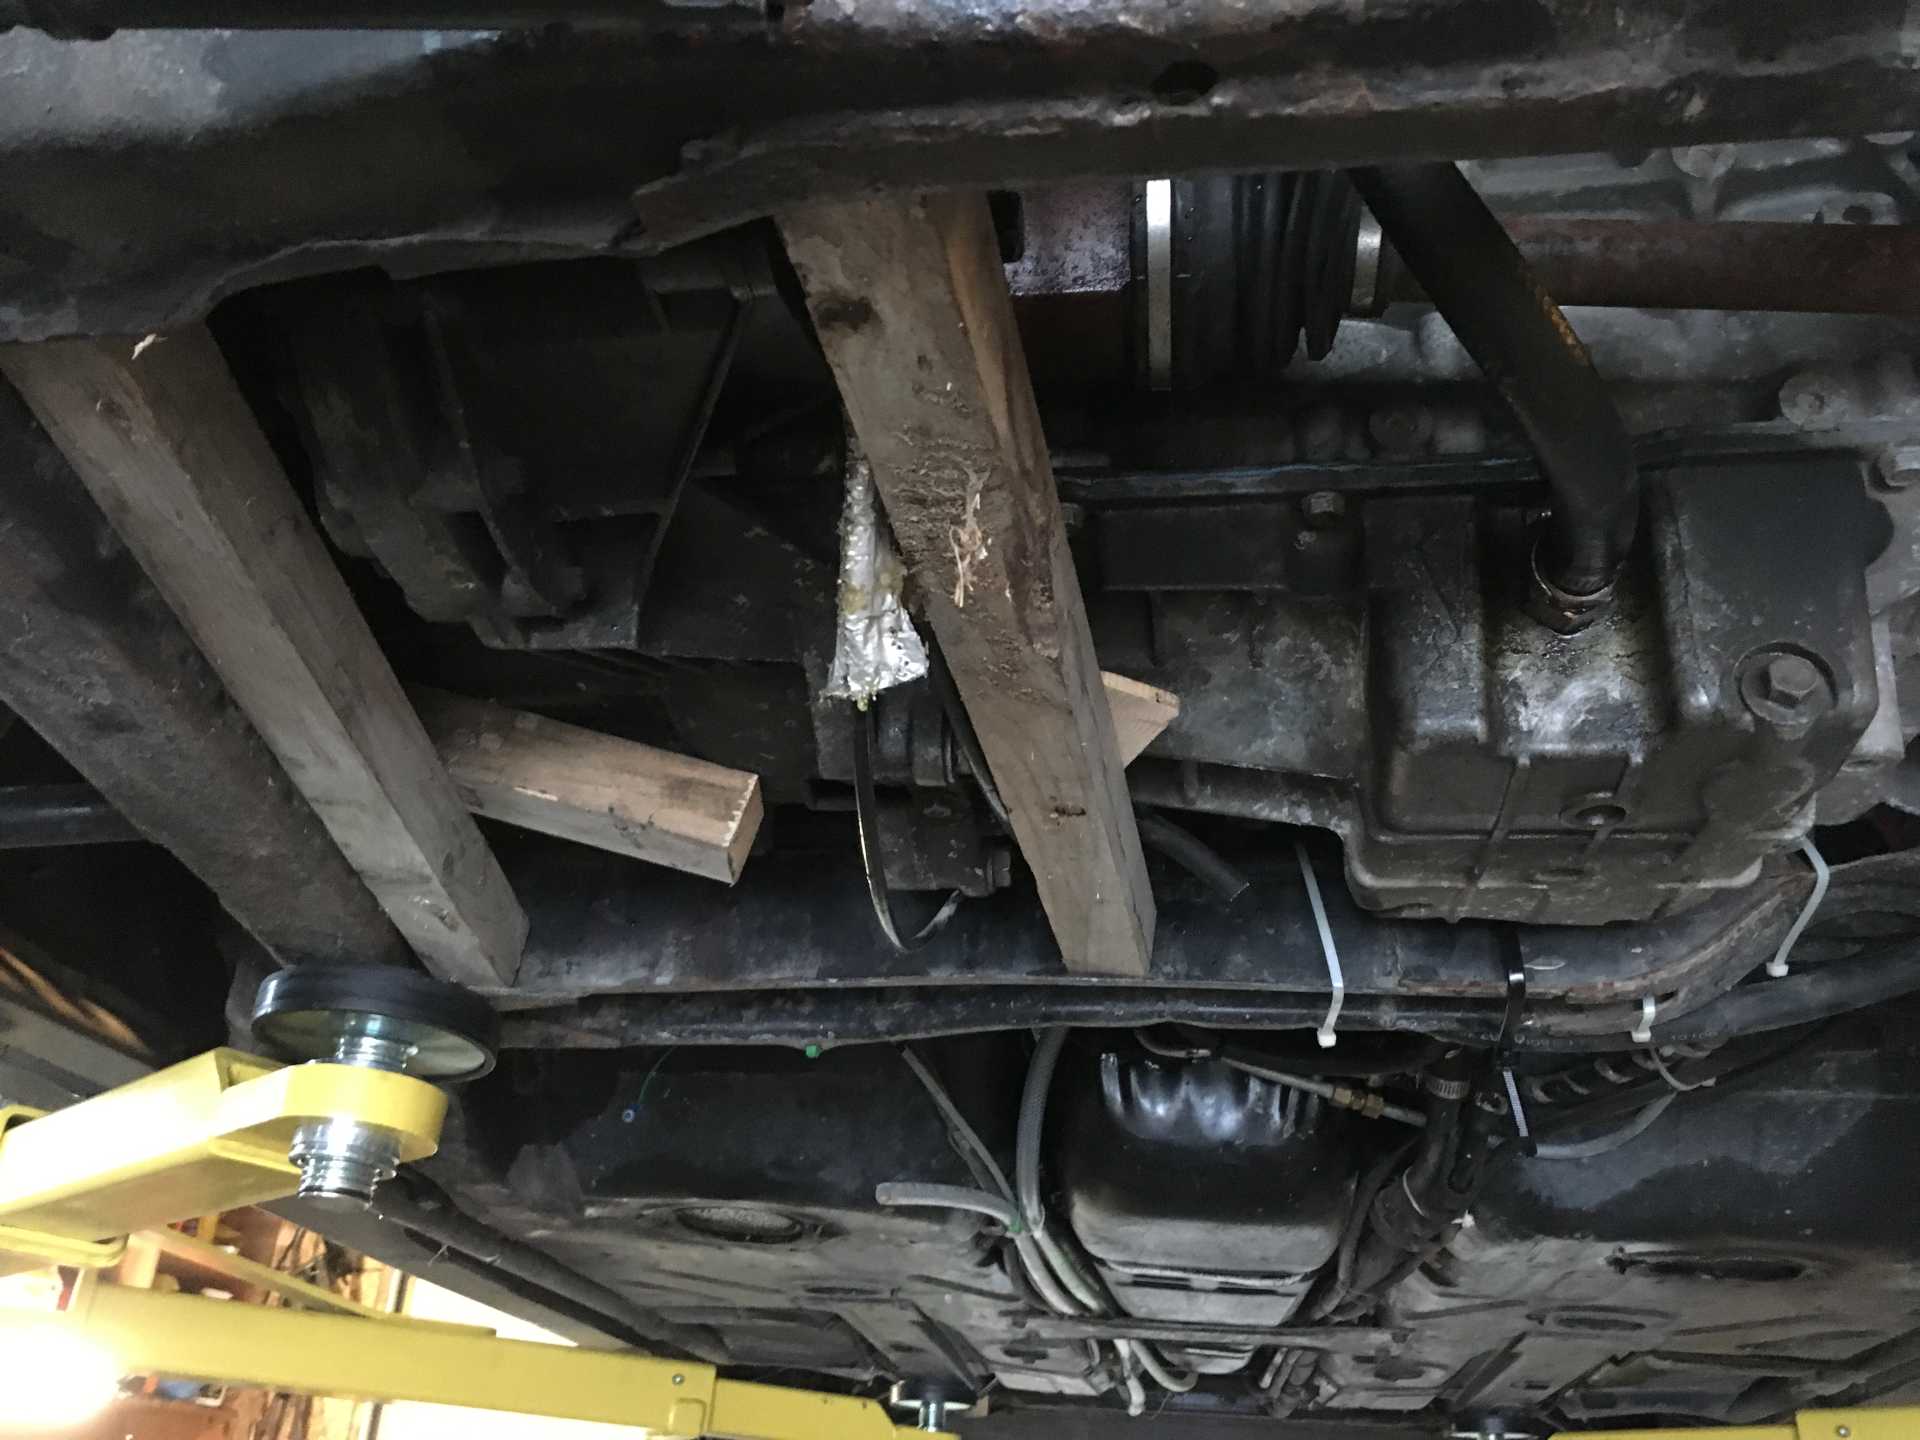
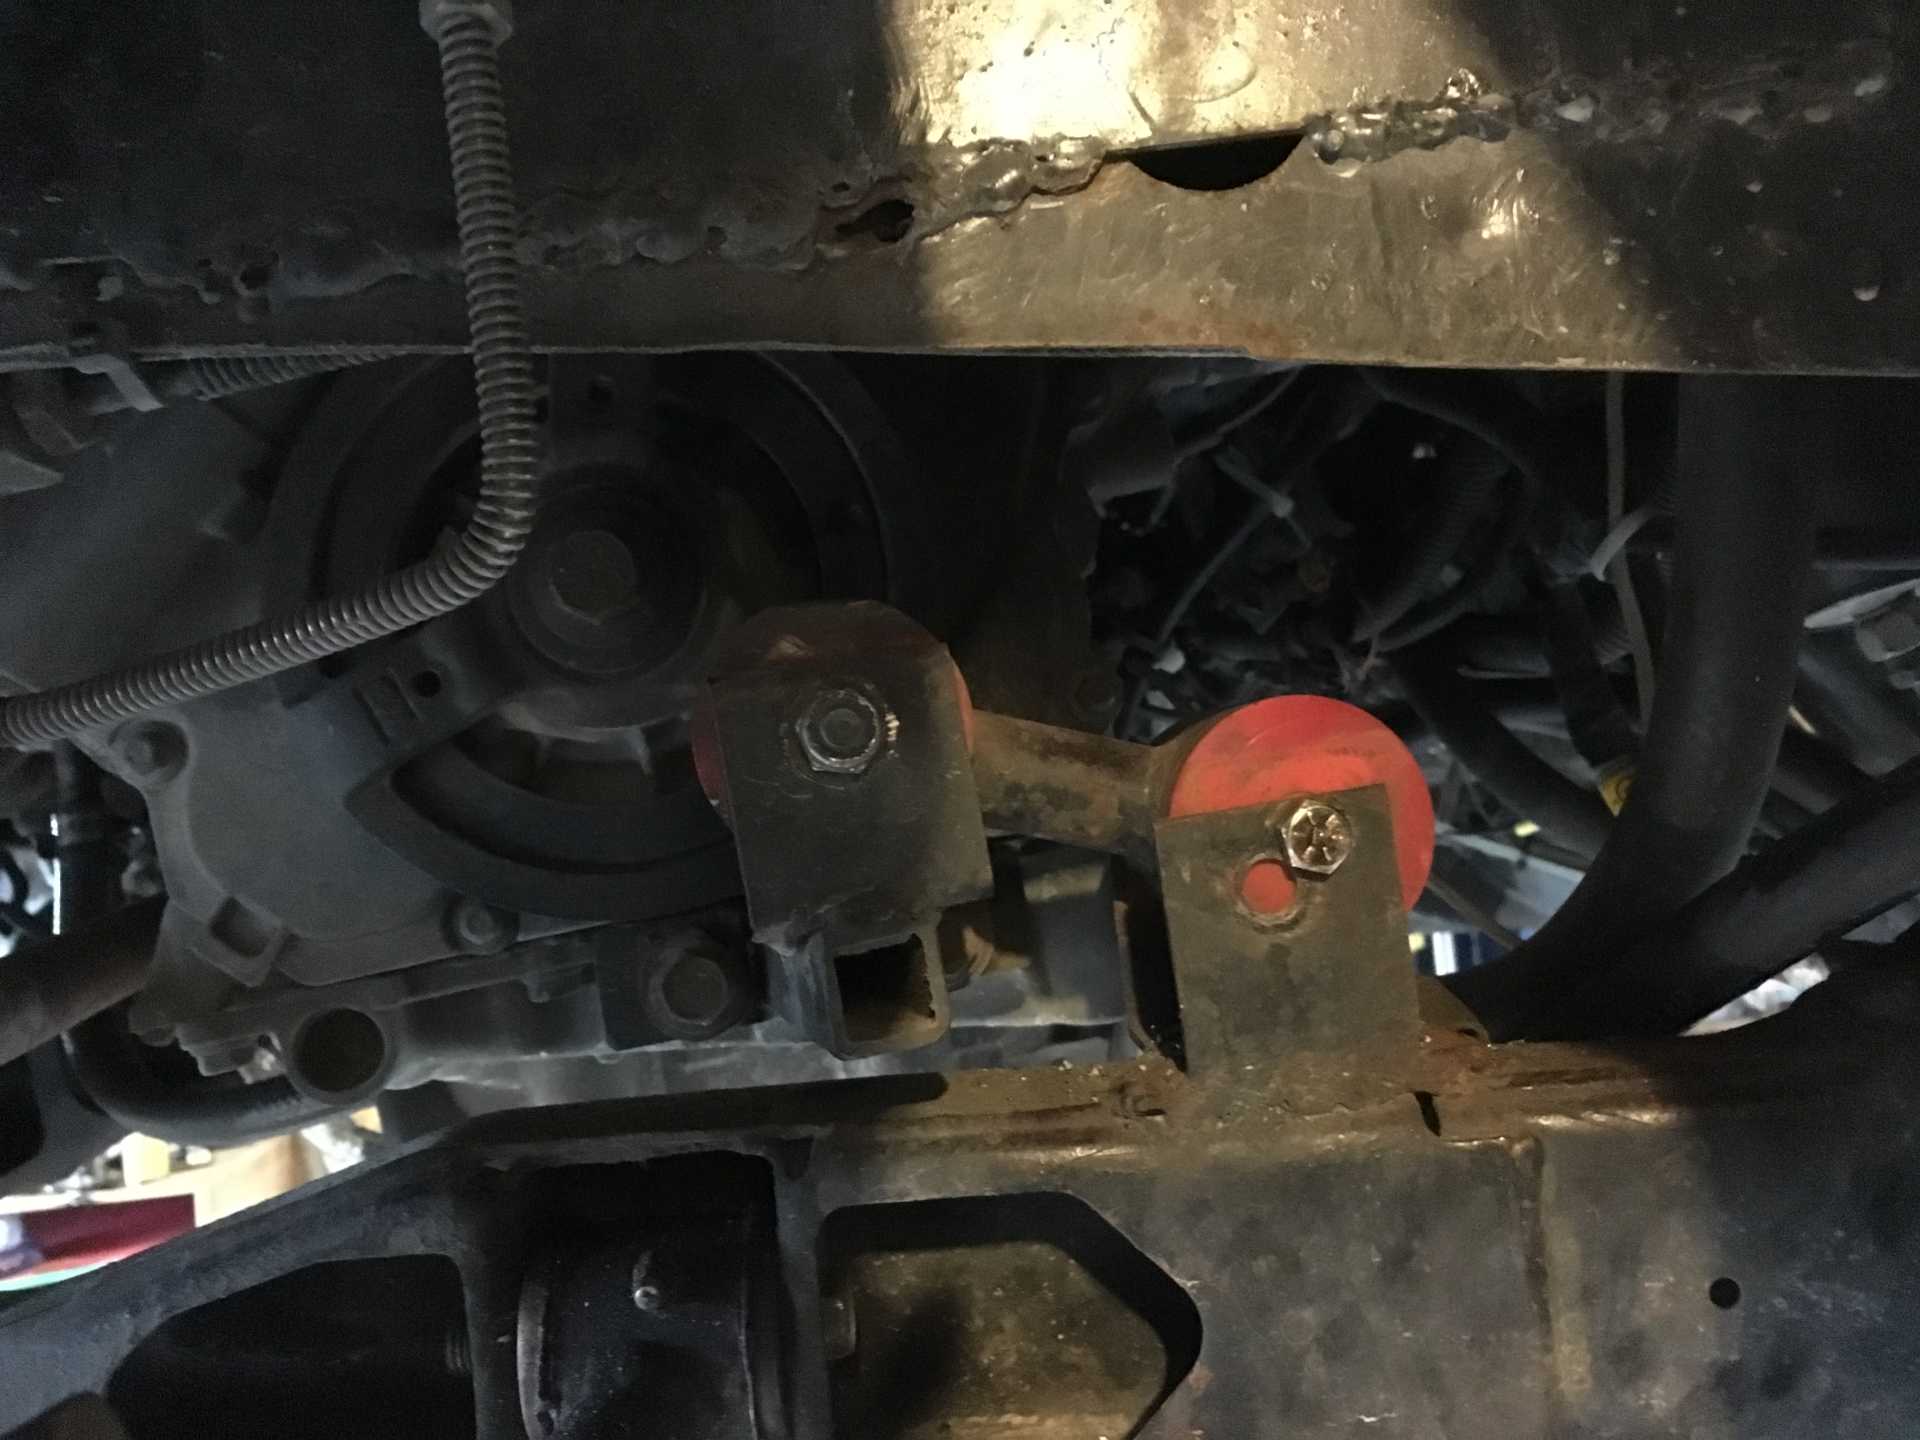
I cut up some wood to support the engine and then removed the bolts from the engine and transmision mounts and the dogbone. Then I pried the engine as straight as I could get it with a crow bar:
I raised it up using the dogbone mount underneath the drive pully:
So now it is as straight and level as I can make it. I will have to make a new upper engine mount, modify the transmission mounts and shift the dogbone mount but I am glad I finally made the effort to fix this.
[This message has been edited by wftb (edited 12-08-2019).]
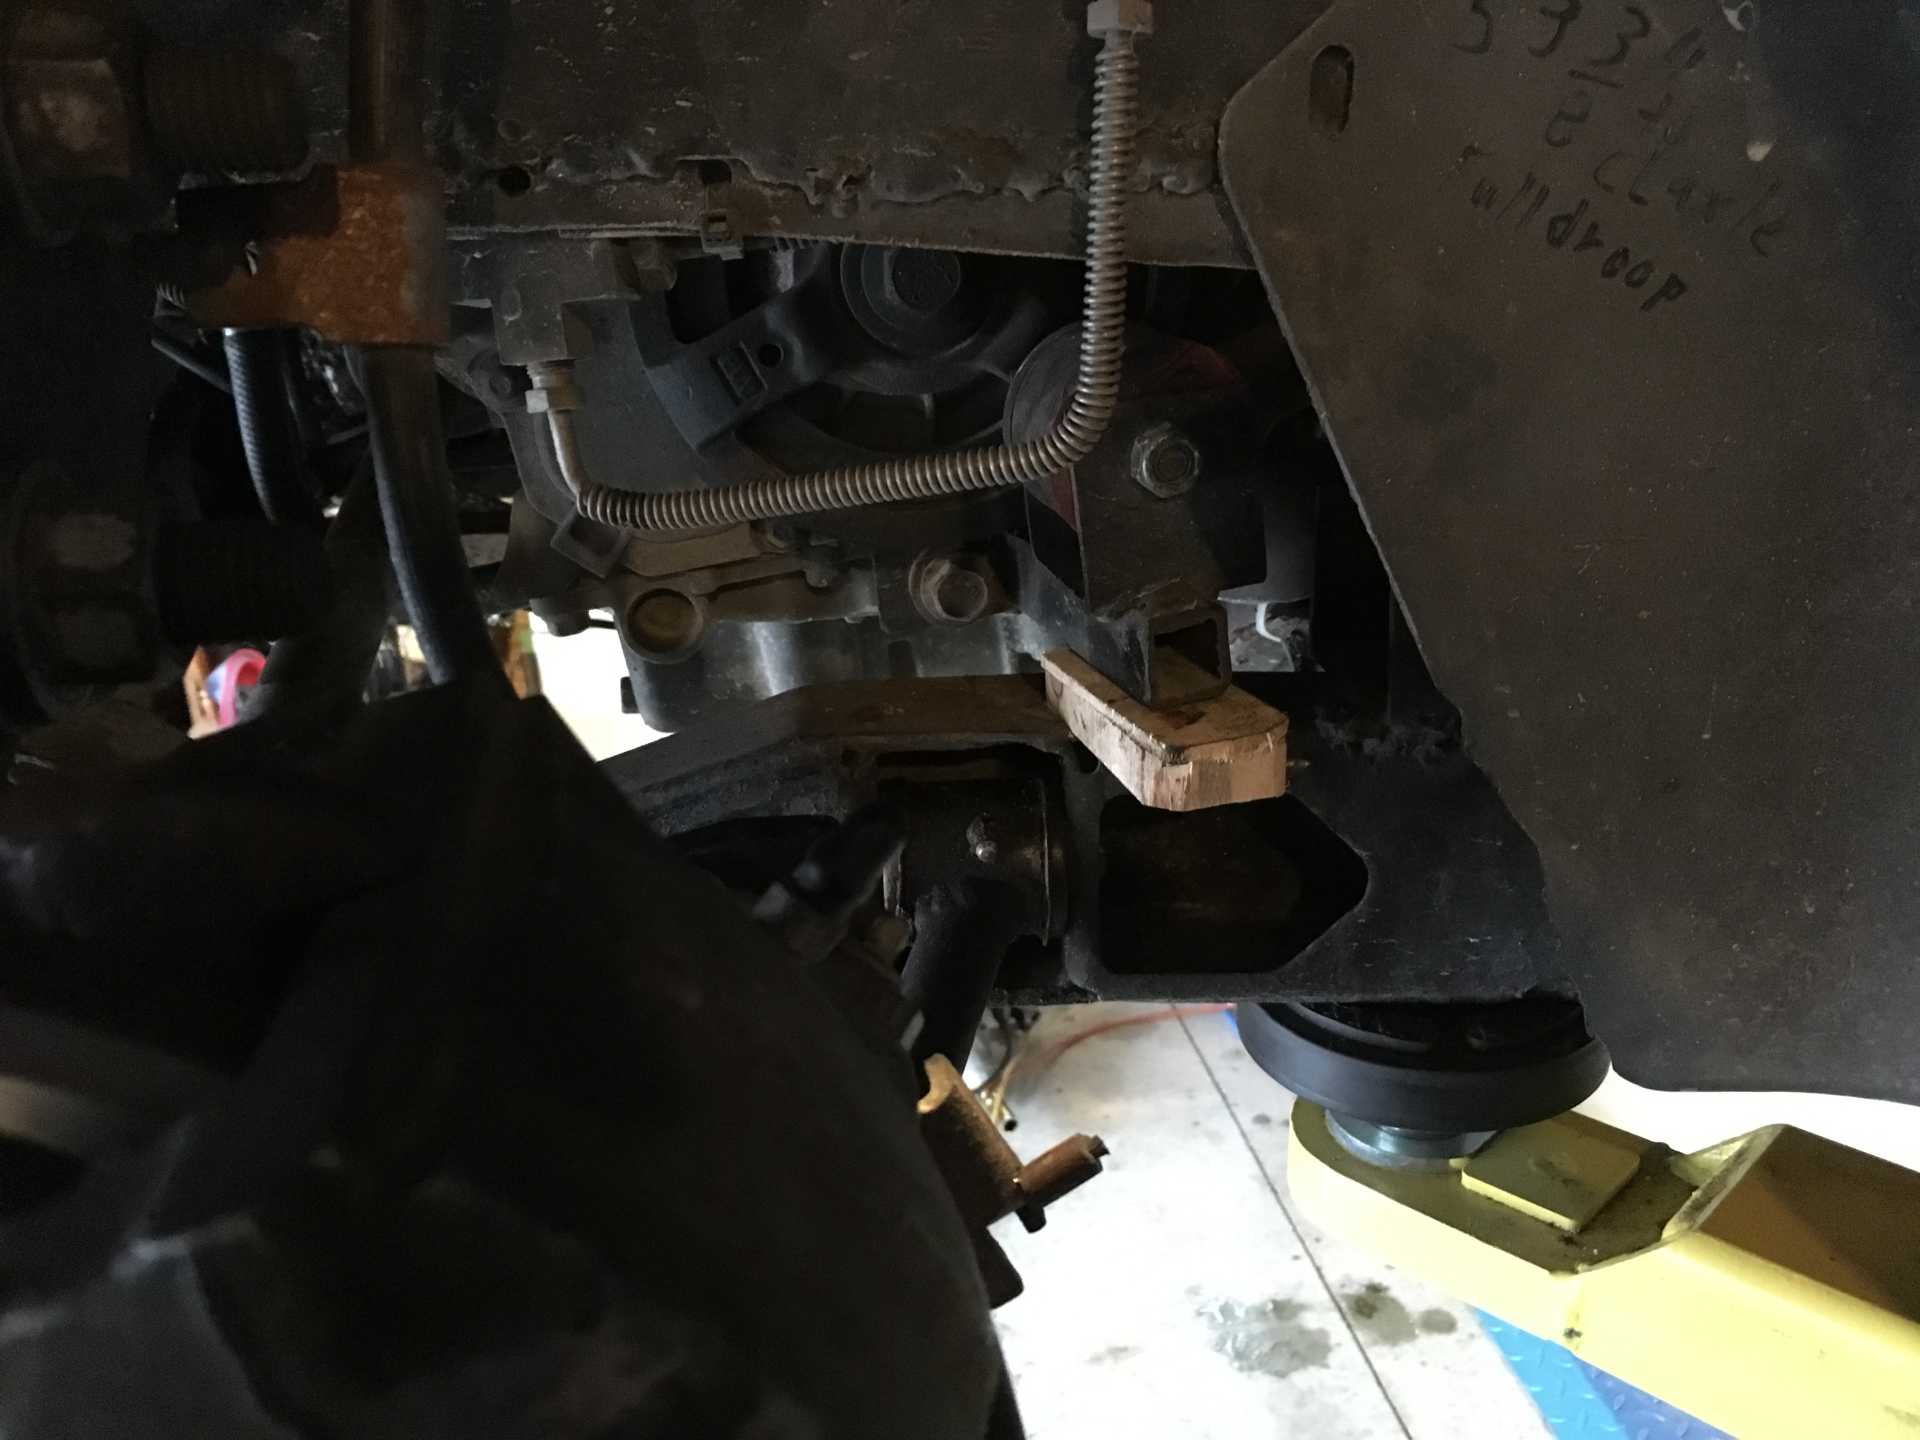
With all the shifting and straightening of the engine, I was a little worried that my axles would end up not plunging in and out properly. So I unbolted the spindle and pushed the axle in until it bottomed out and put a mark on the oilpan:
Now when I put the wheels back on I can check the axle with a glance. All the mounts are bolted back up now, had to drill new holes in the rear trans mount, slightly bend the front trans mount, drill new holes in the dogbane mount and cut off the upper engine mount and modify an old mount I had used before and weld that in.
I also had to put a small notch in the rear cradle cross member because it ended up in contact with the oil pan. Since I have already notched that crossmember once before, I am going to add a brace to stiffen it up a bit. Bit of project creep setting in here.
[This message has been edited by wftb (edited 03-30-2020).]
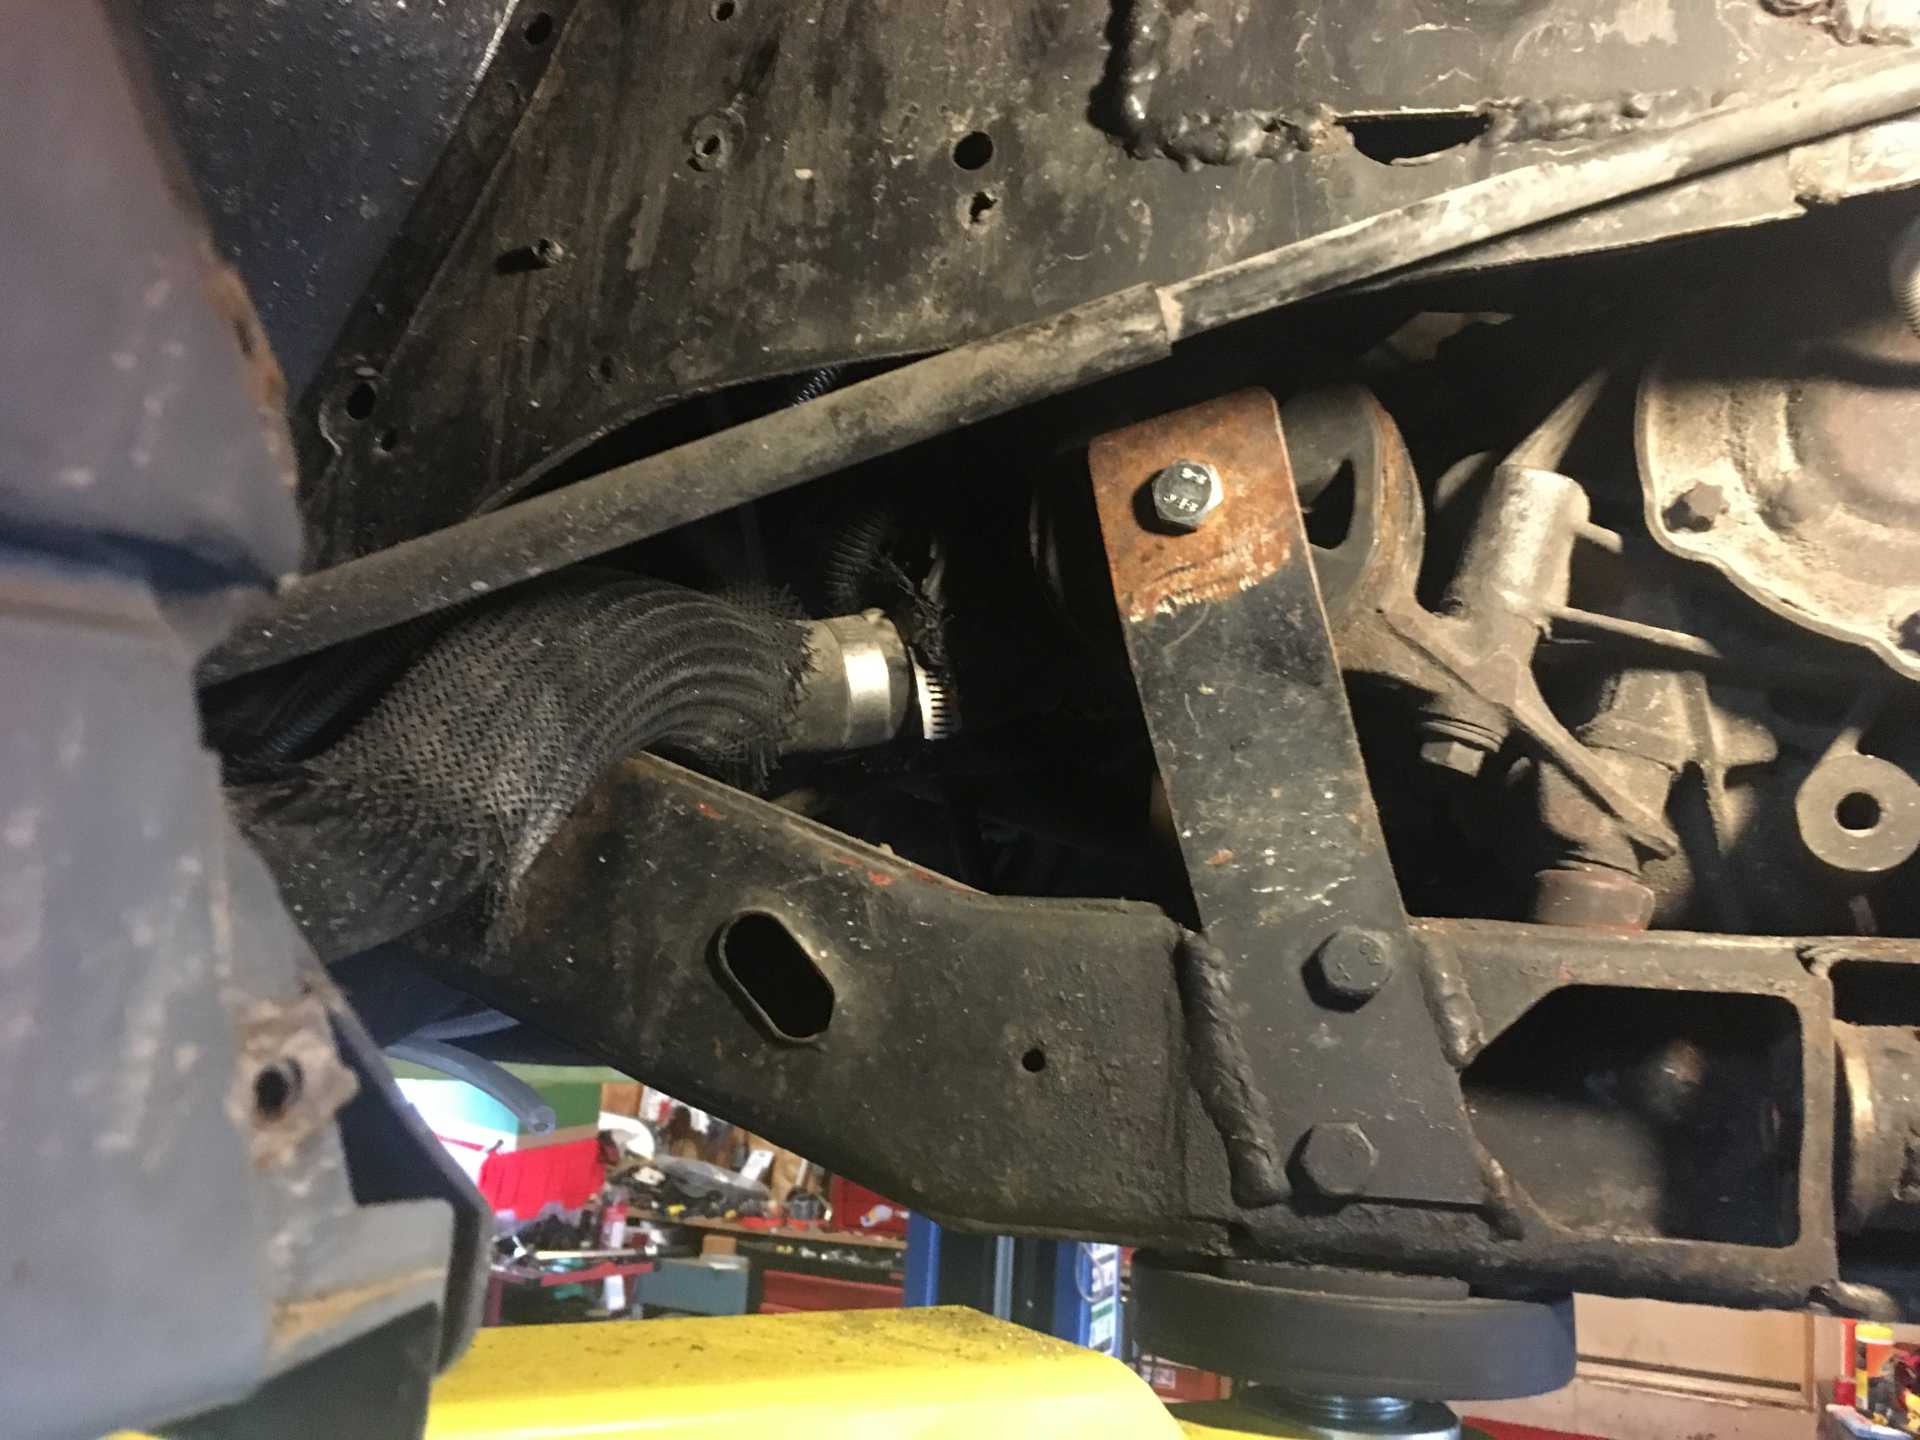
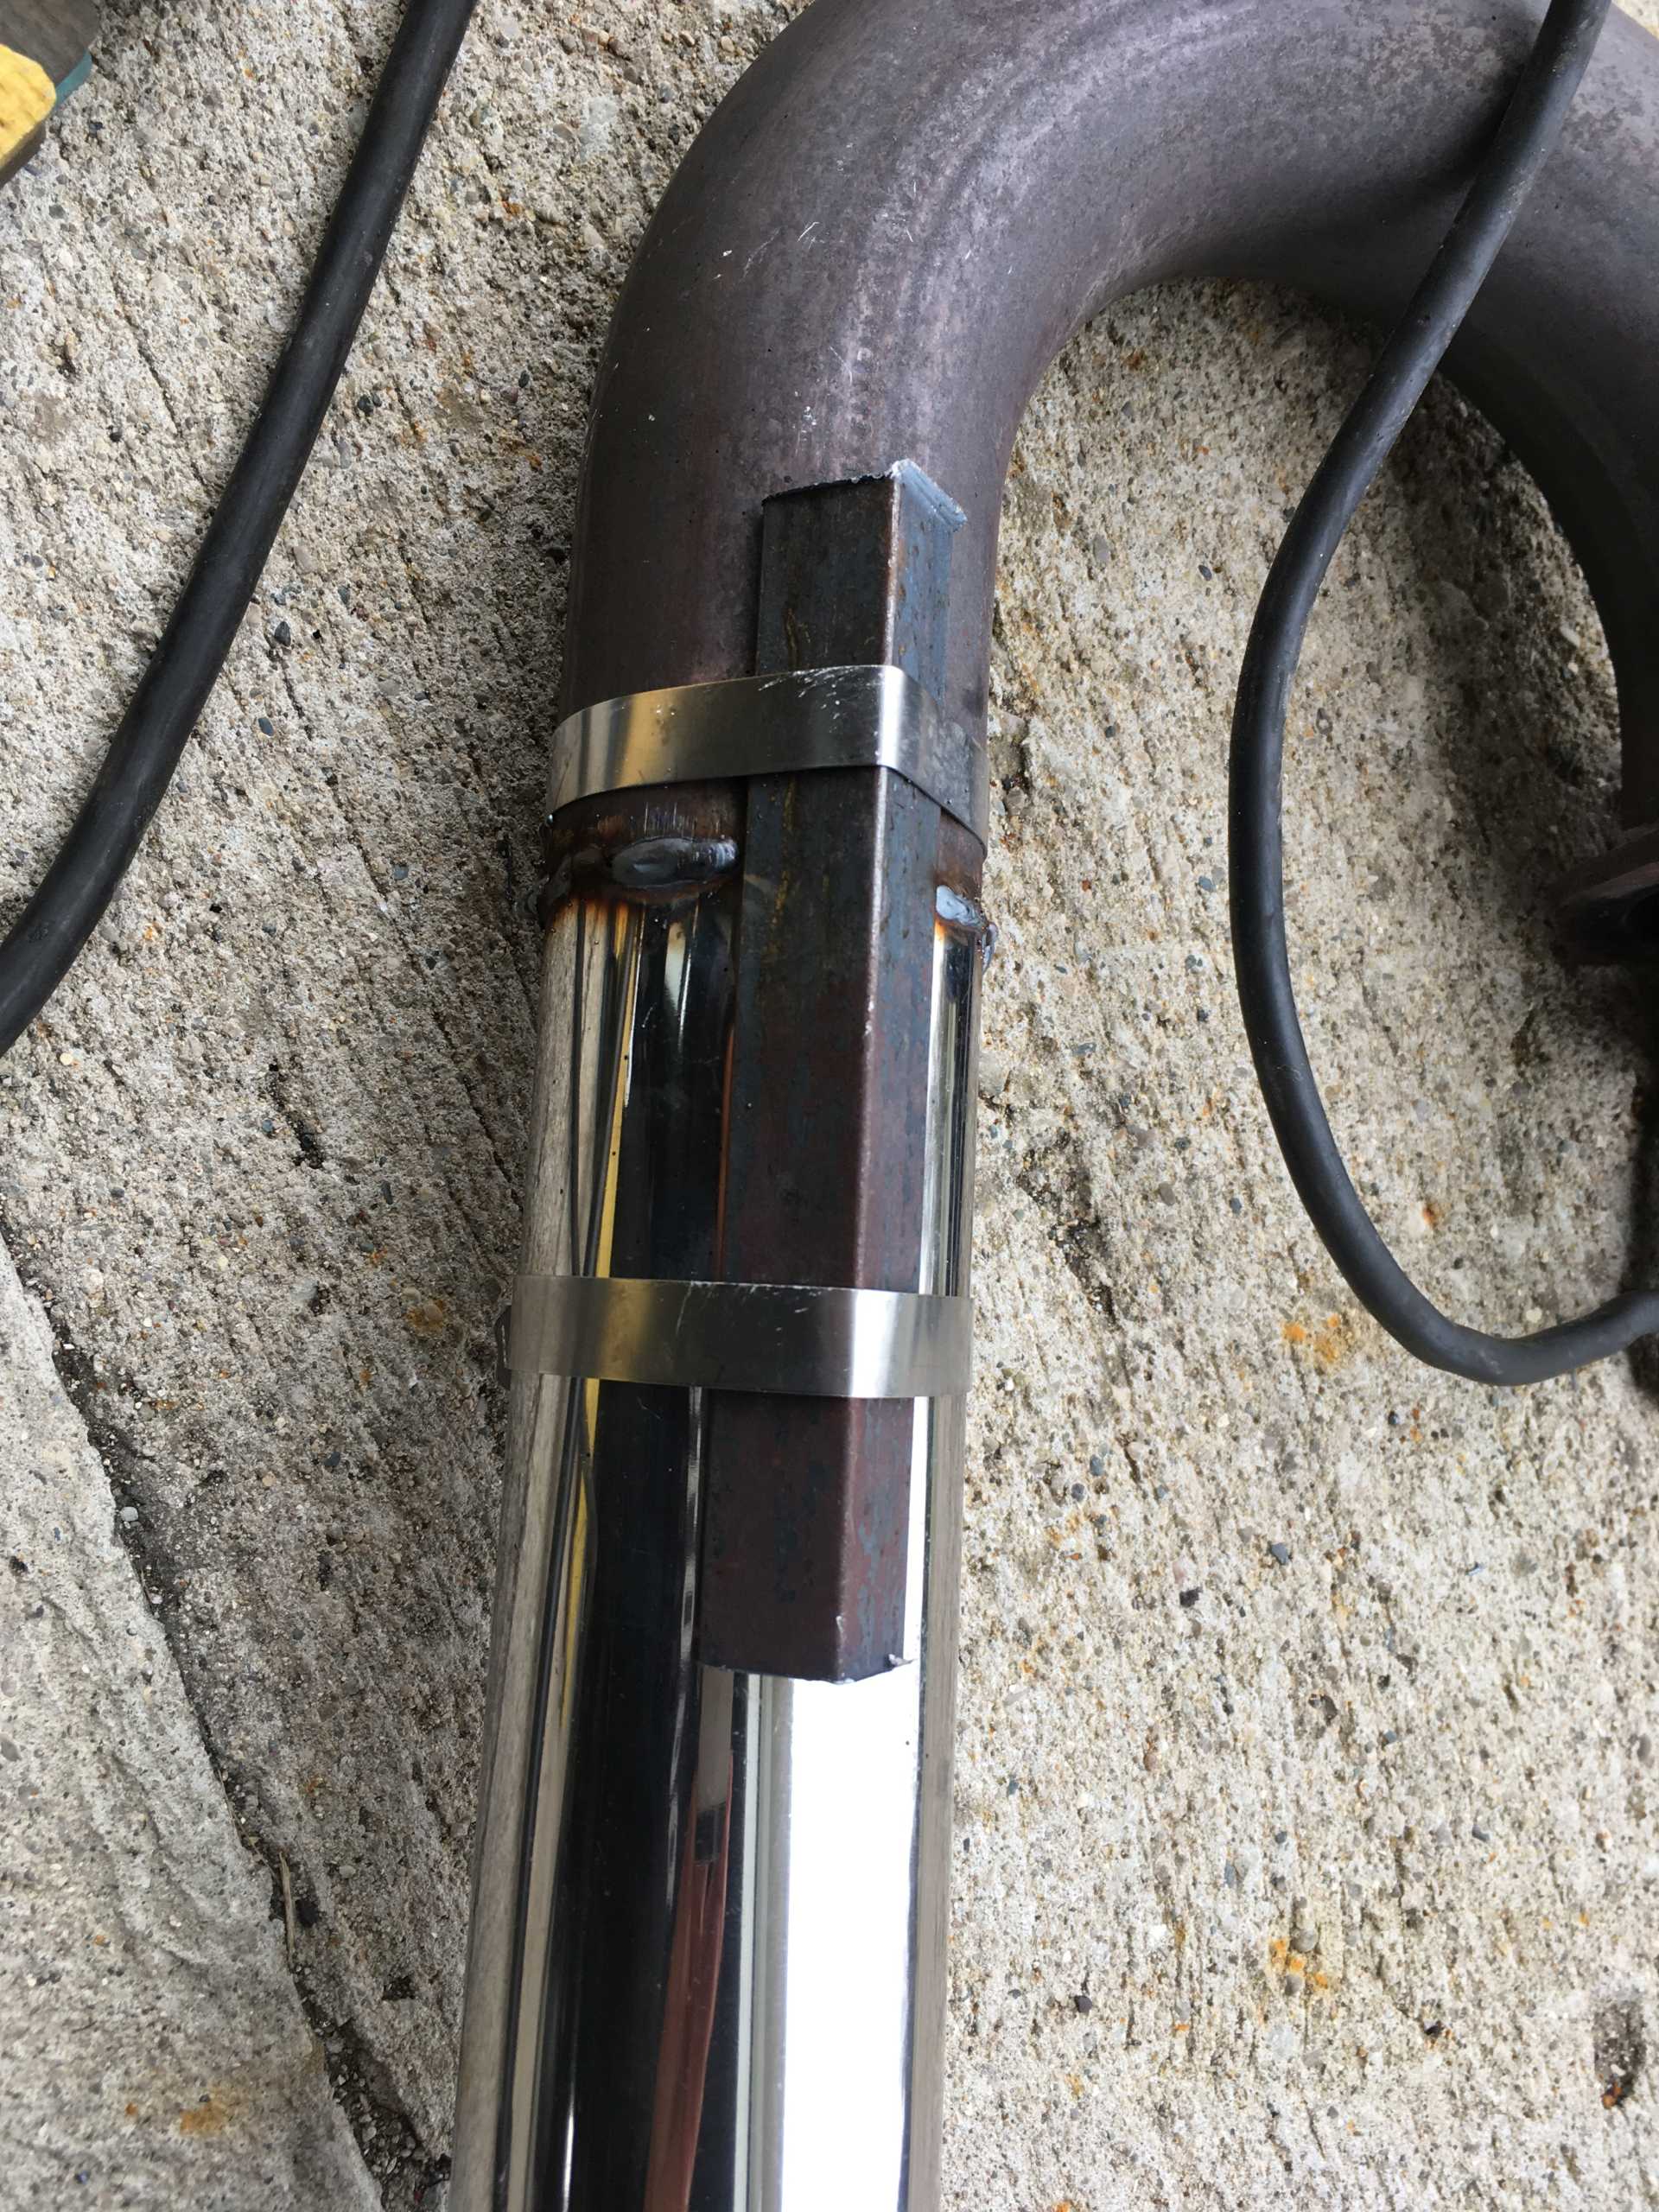
Working on the exhaust now. Progress is a little slower than I would like because although I can reuse almost everything from the old setup, I had to cut off two of the flanges, clock them and weld them back on to get the cat away from the charge piping and the bottom of the trunk. I figured out a new to me way to keep tubes straight for welding:
I have always used a chunk of angle iron but with C clamps, very awkward. Using big gear clamps is super quick and easy.
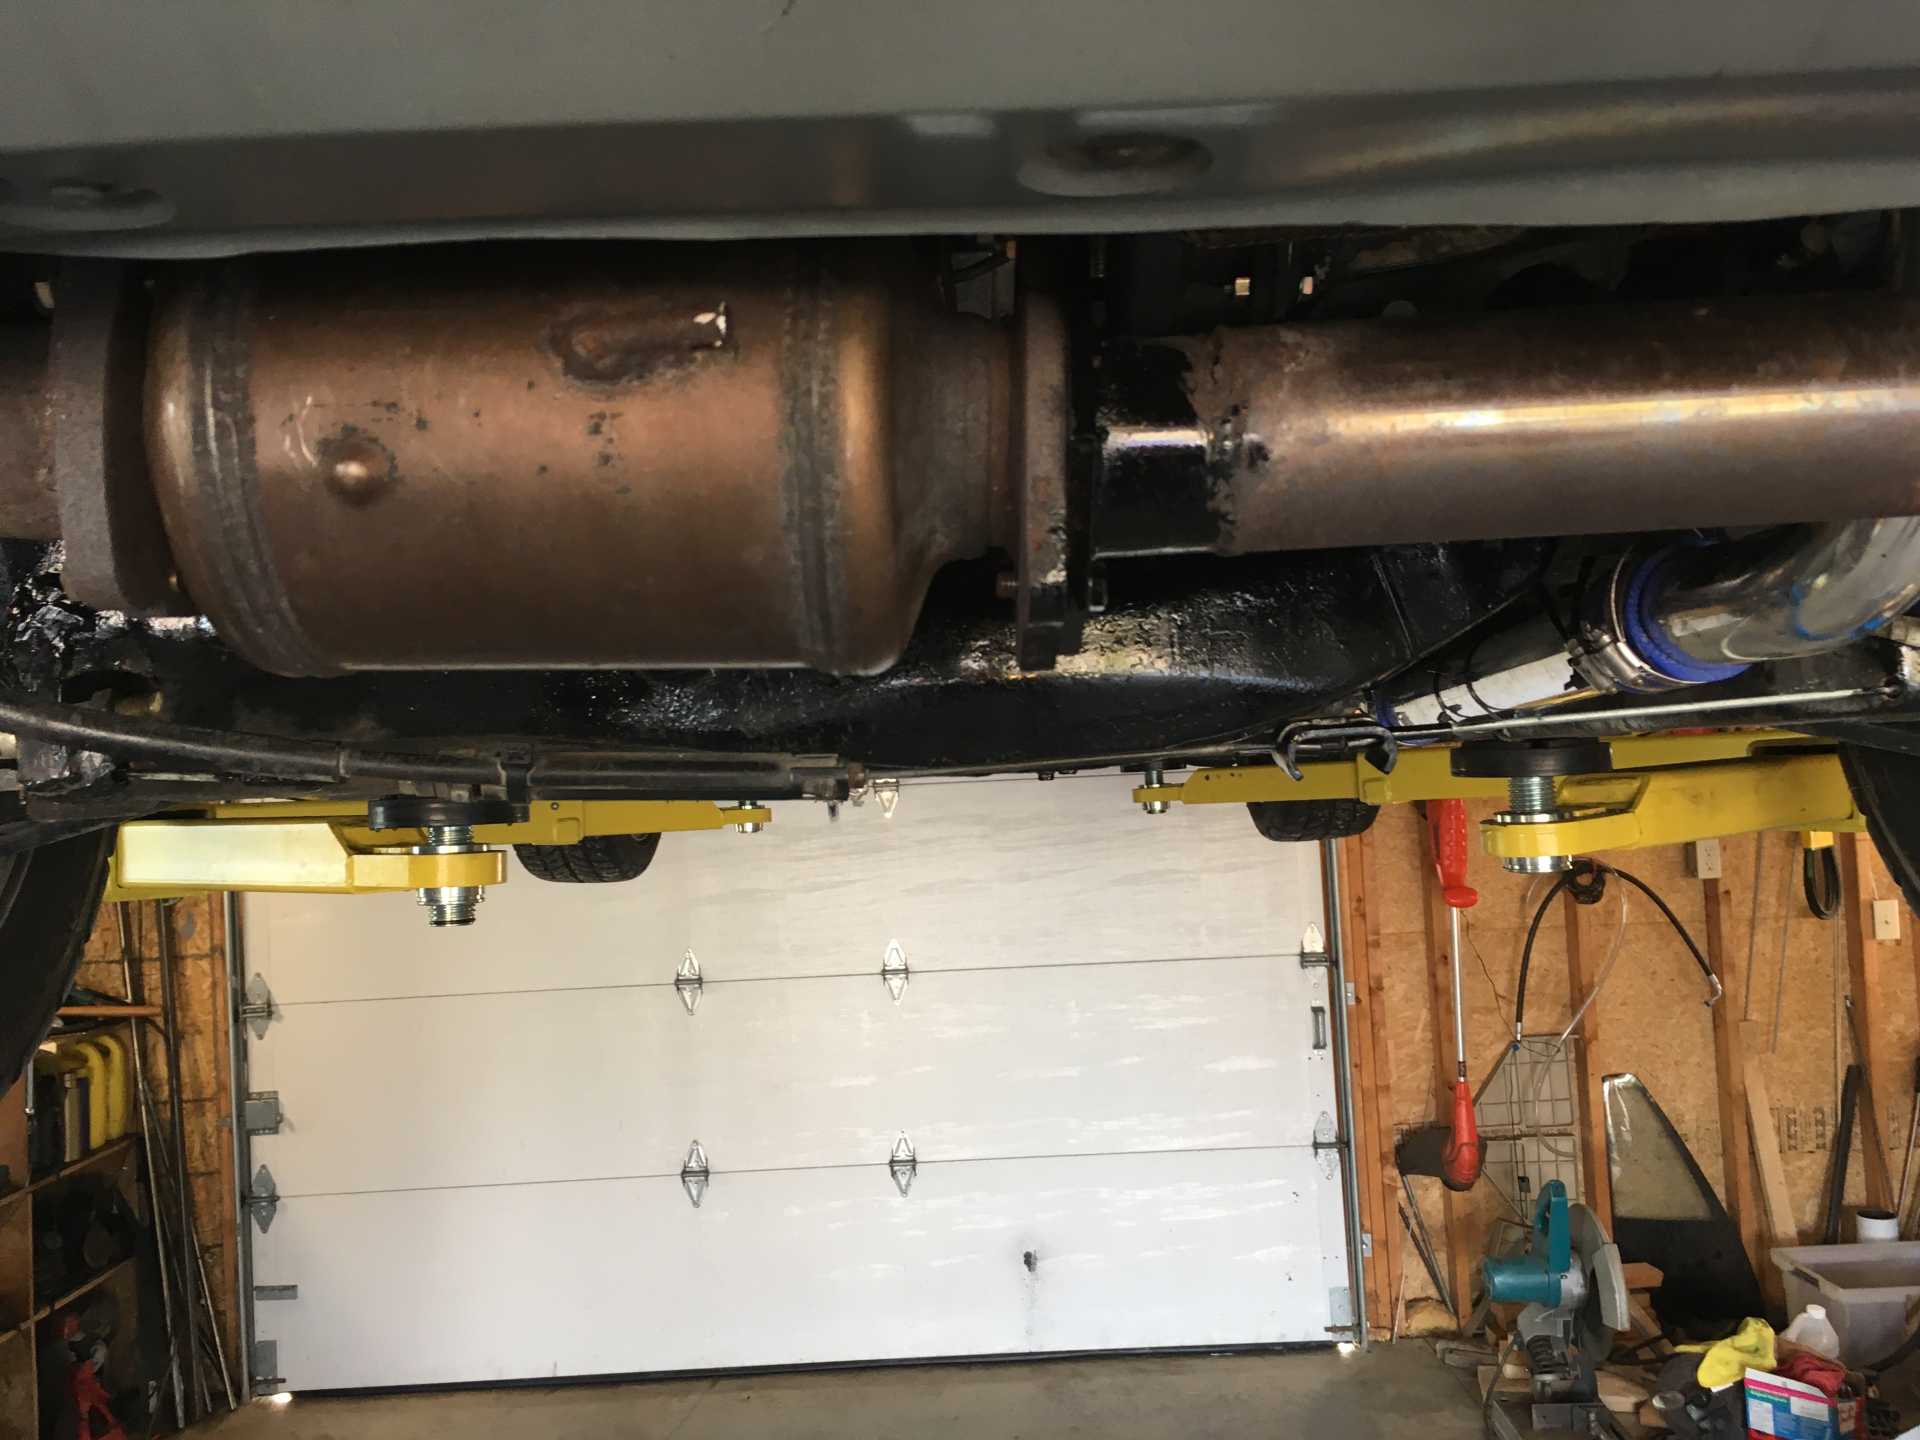
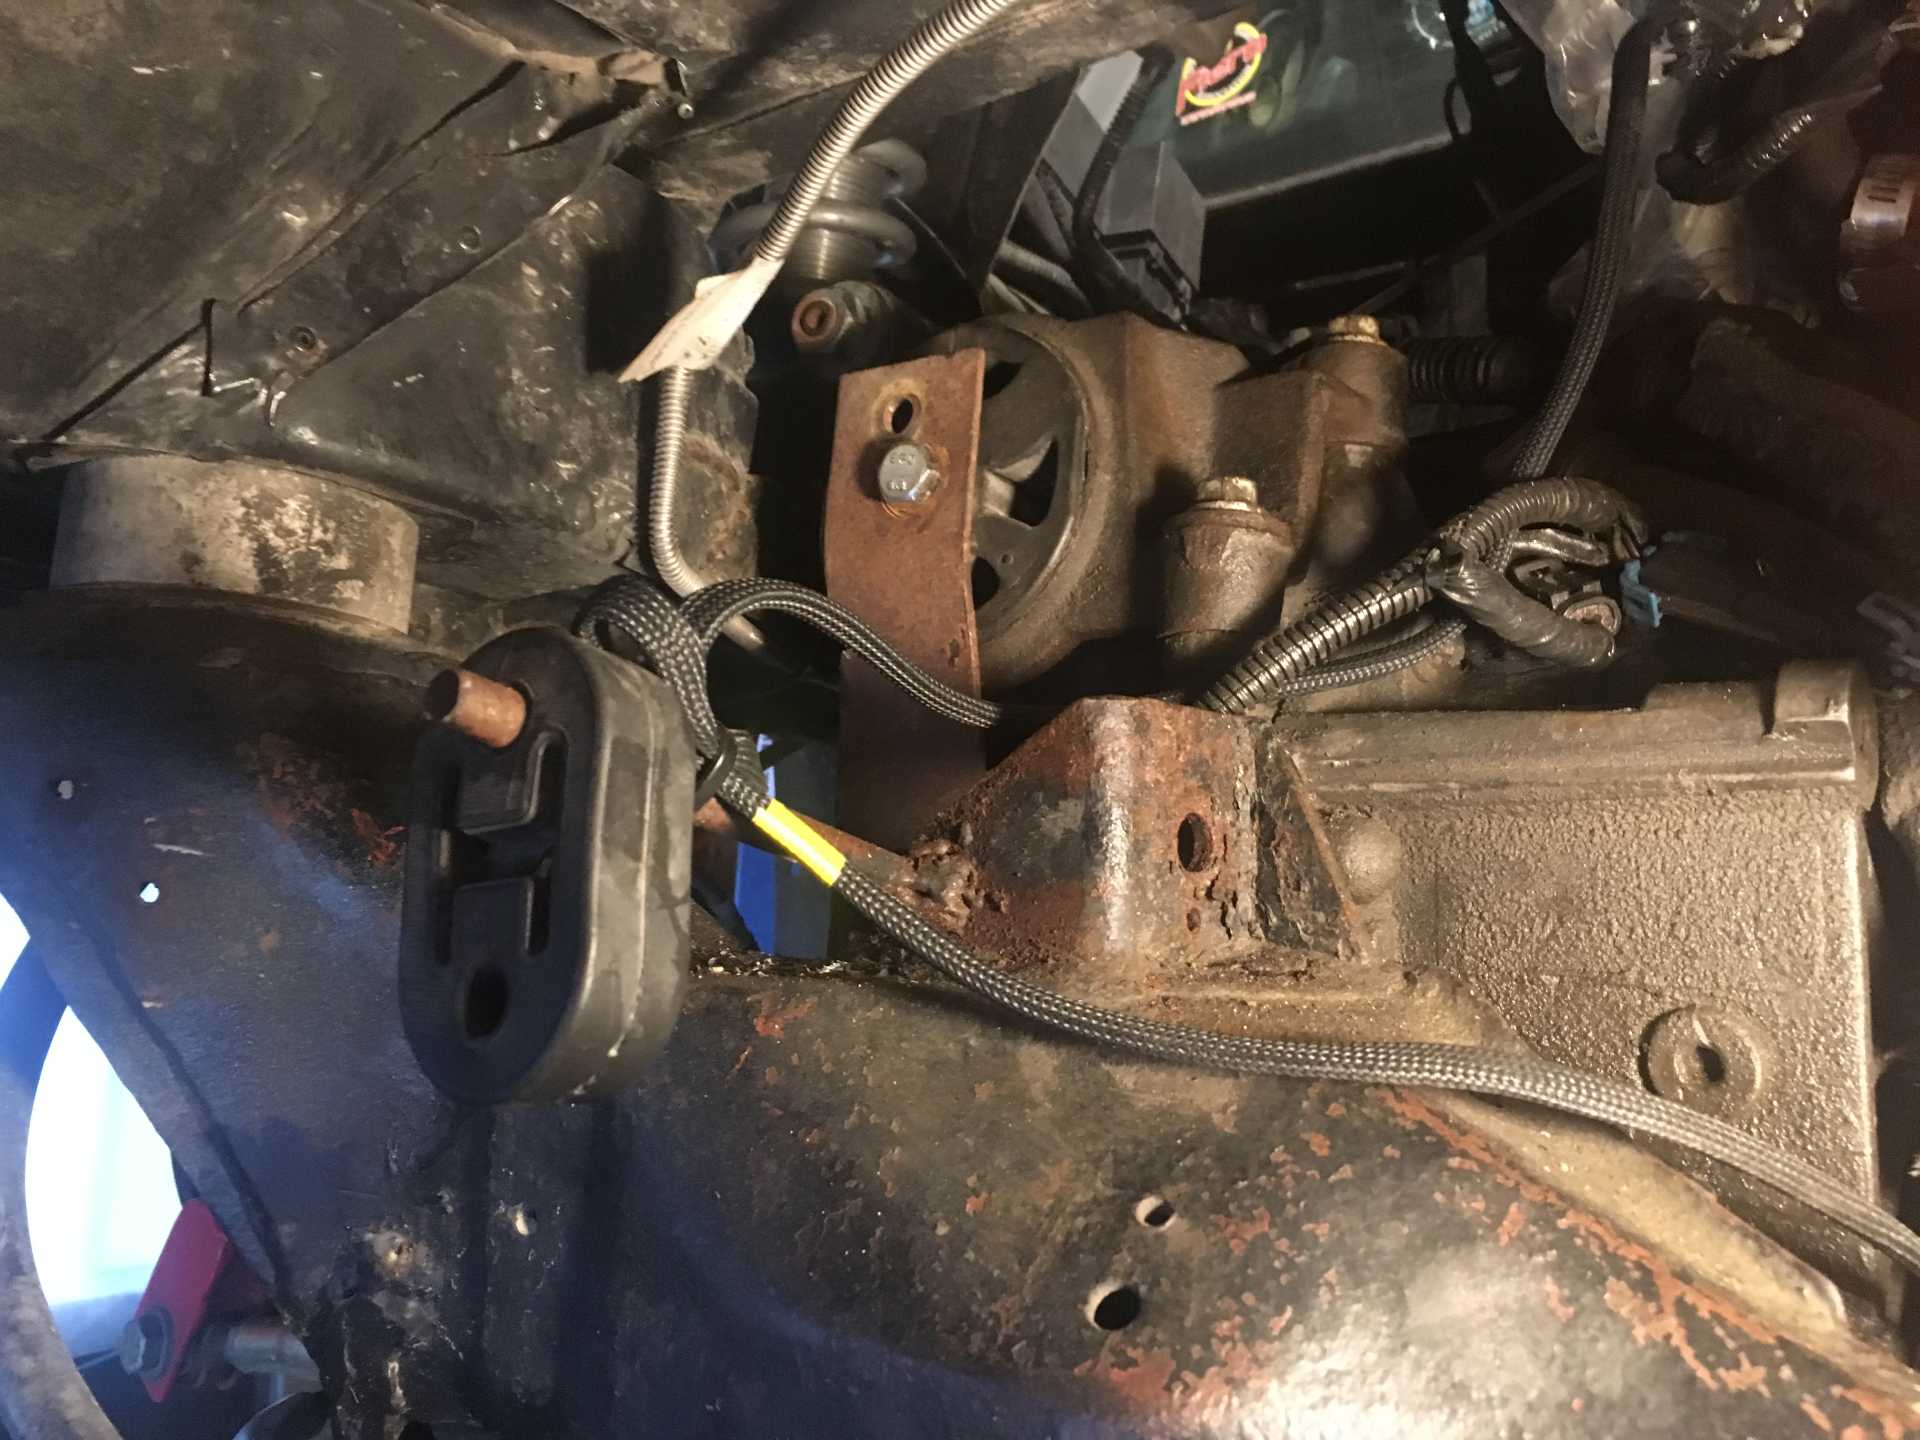
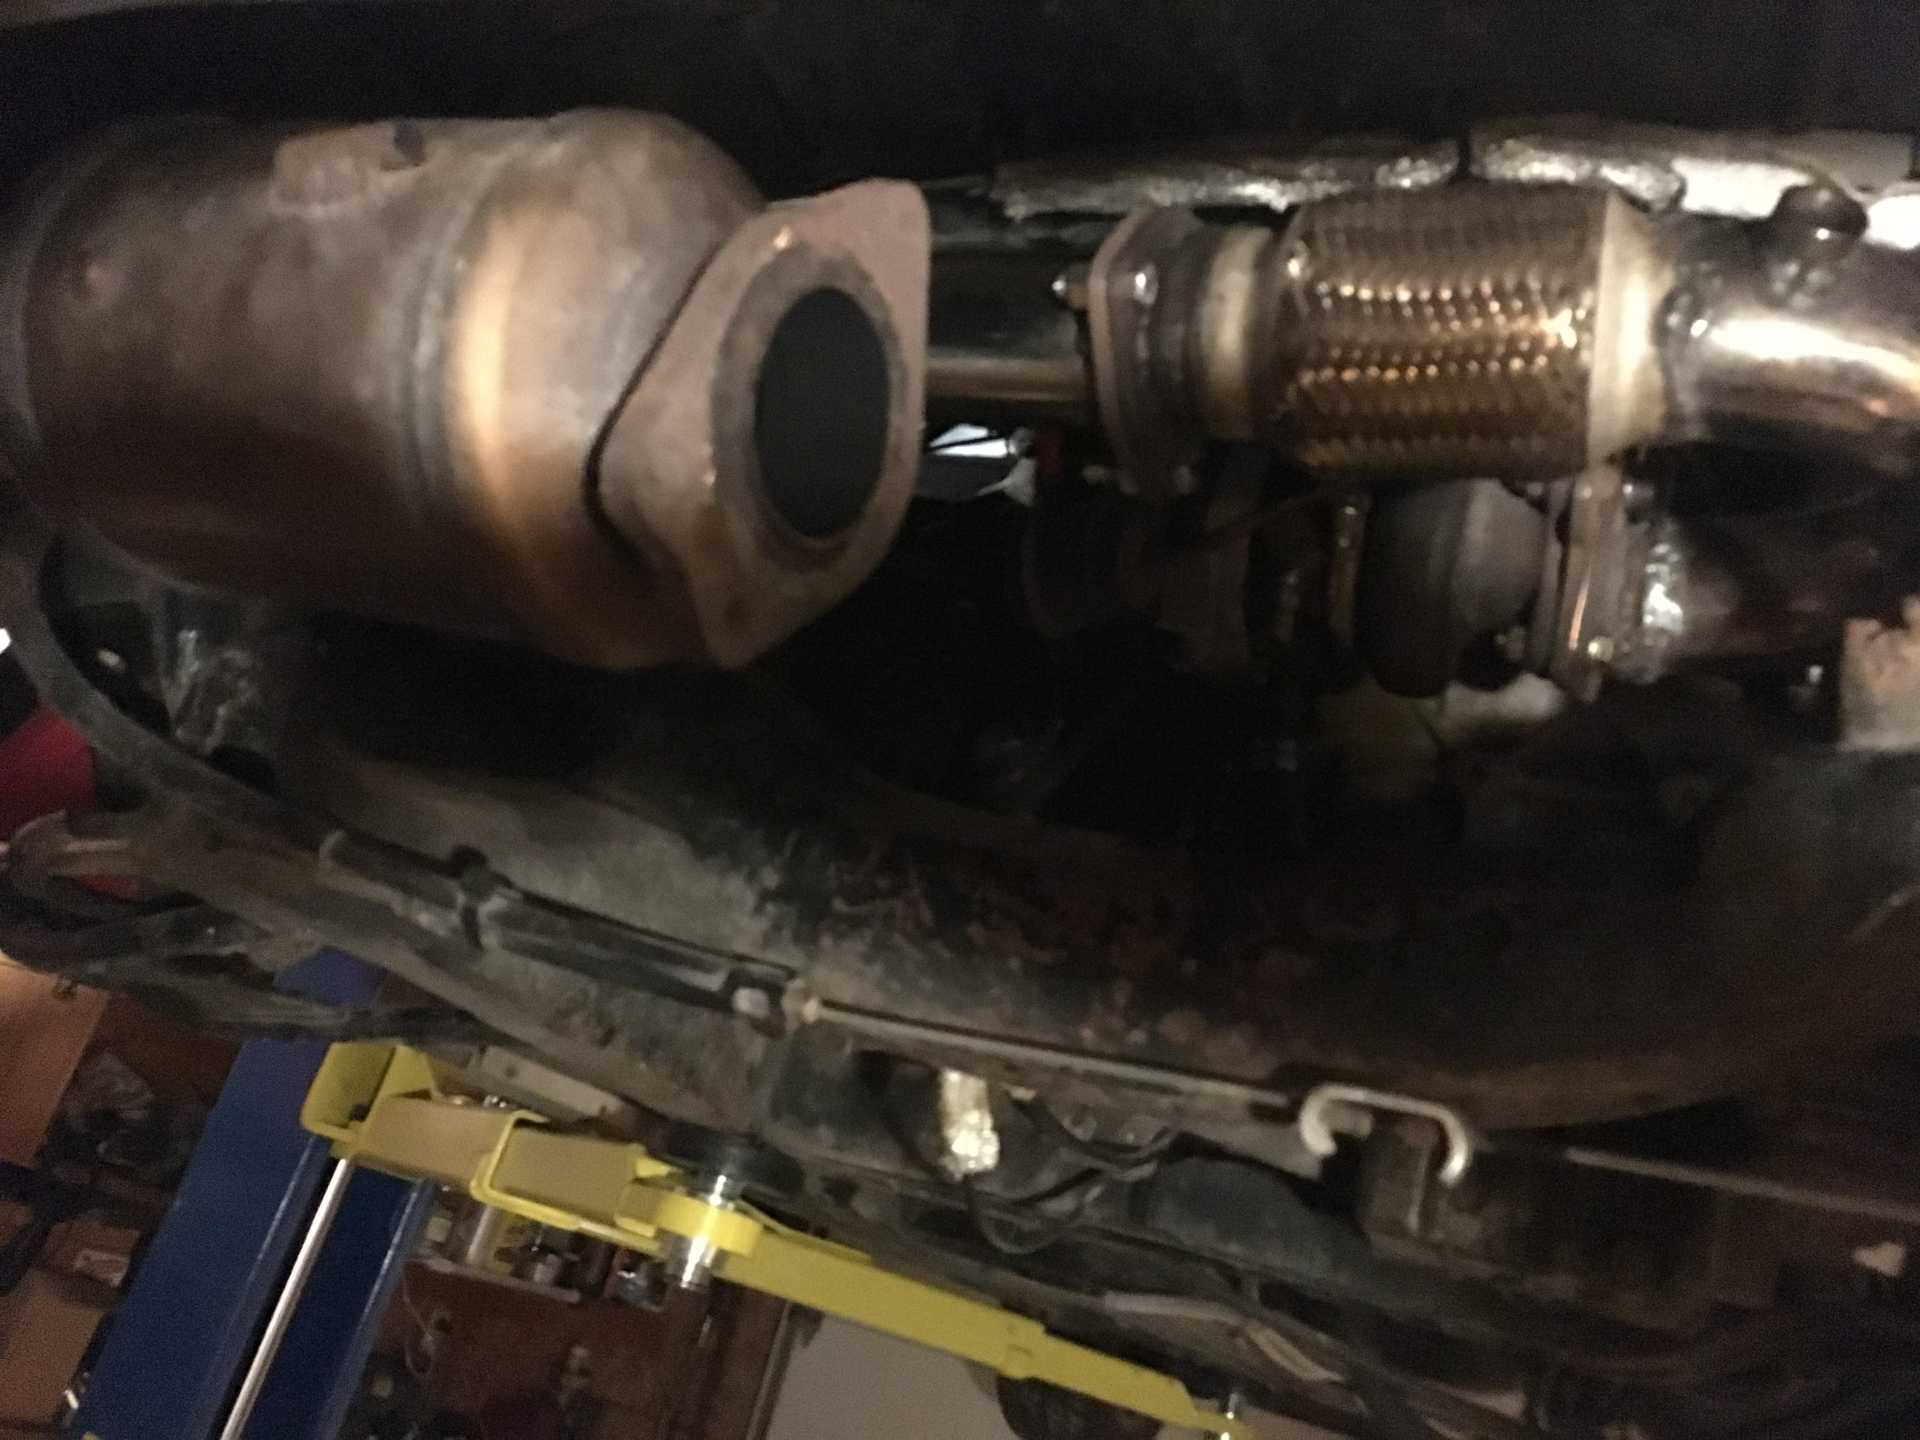
The cat is in place now and everything up to it is welded up and one hanger bracket is installed. I like using the rubber donut style of hanger. No clumsy clamps and all you need is some solid rod to bend up and weld in place. The rest of the exhaust is almost done, I have to make another flange to bolt the tailpipe section to the cat and weld a bung in for the secondary O2 sensor in the tailpipe.
[This message has been edited by wftb (edited 12-13-2019).]
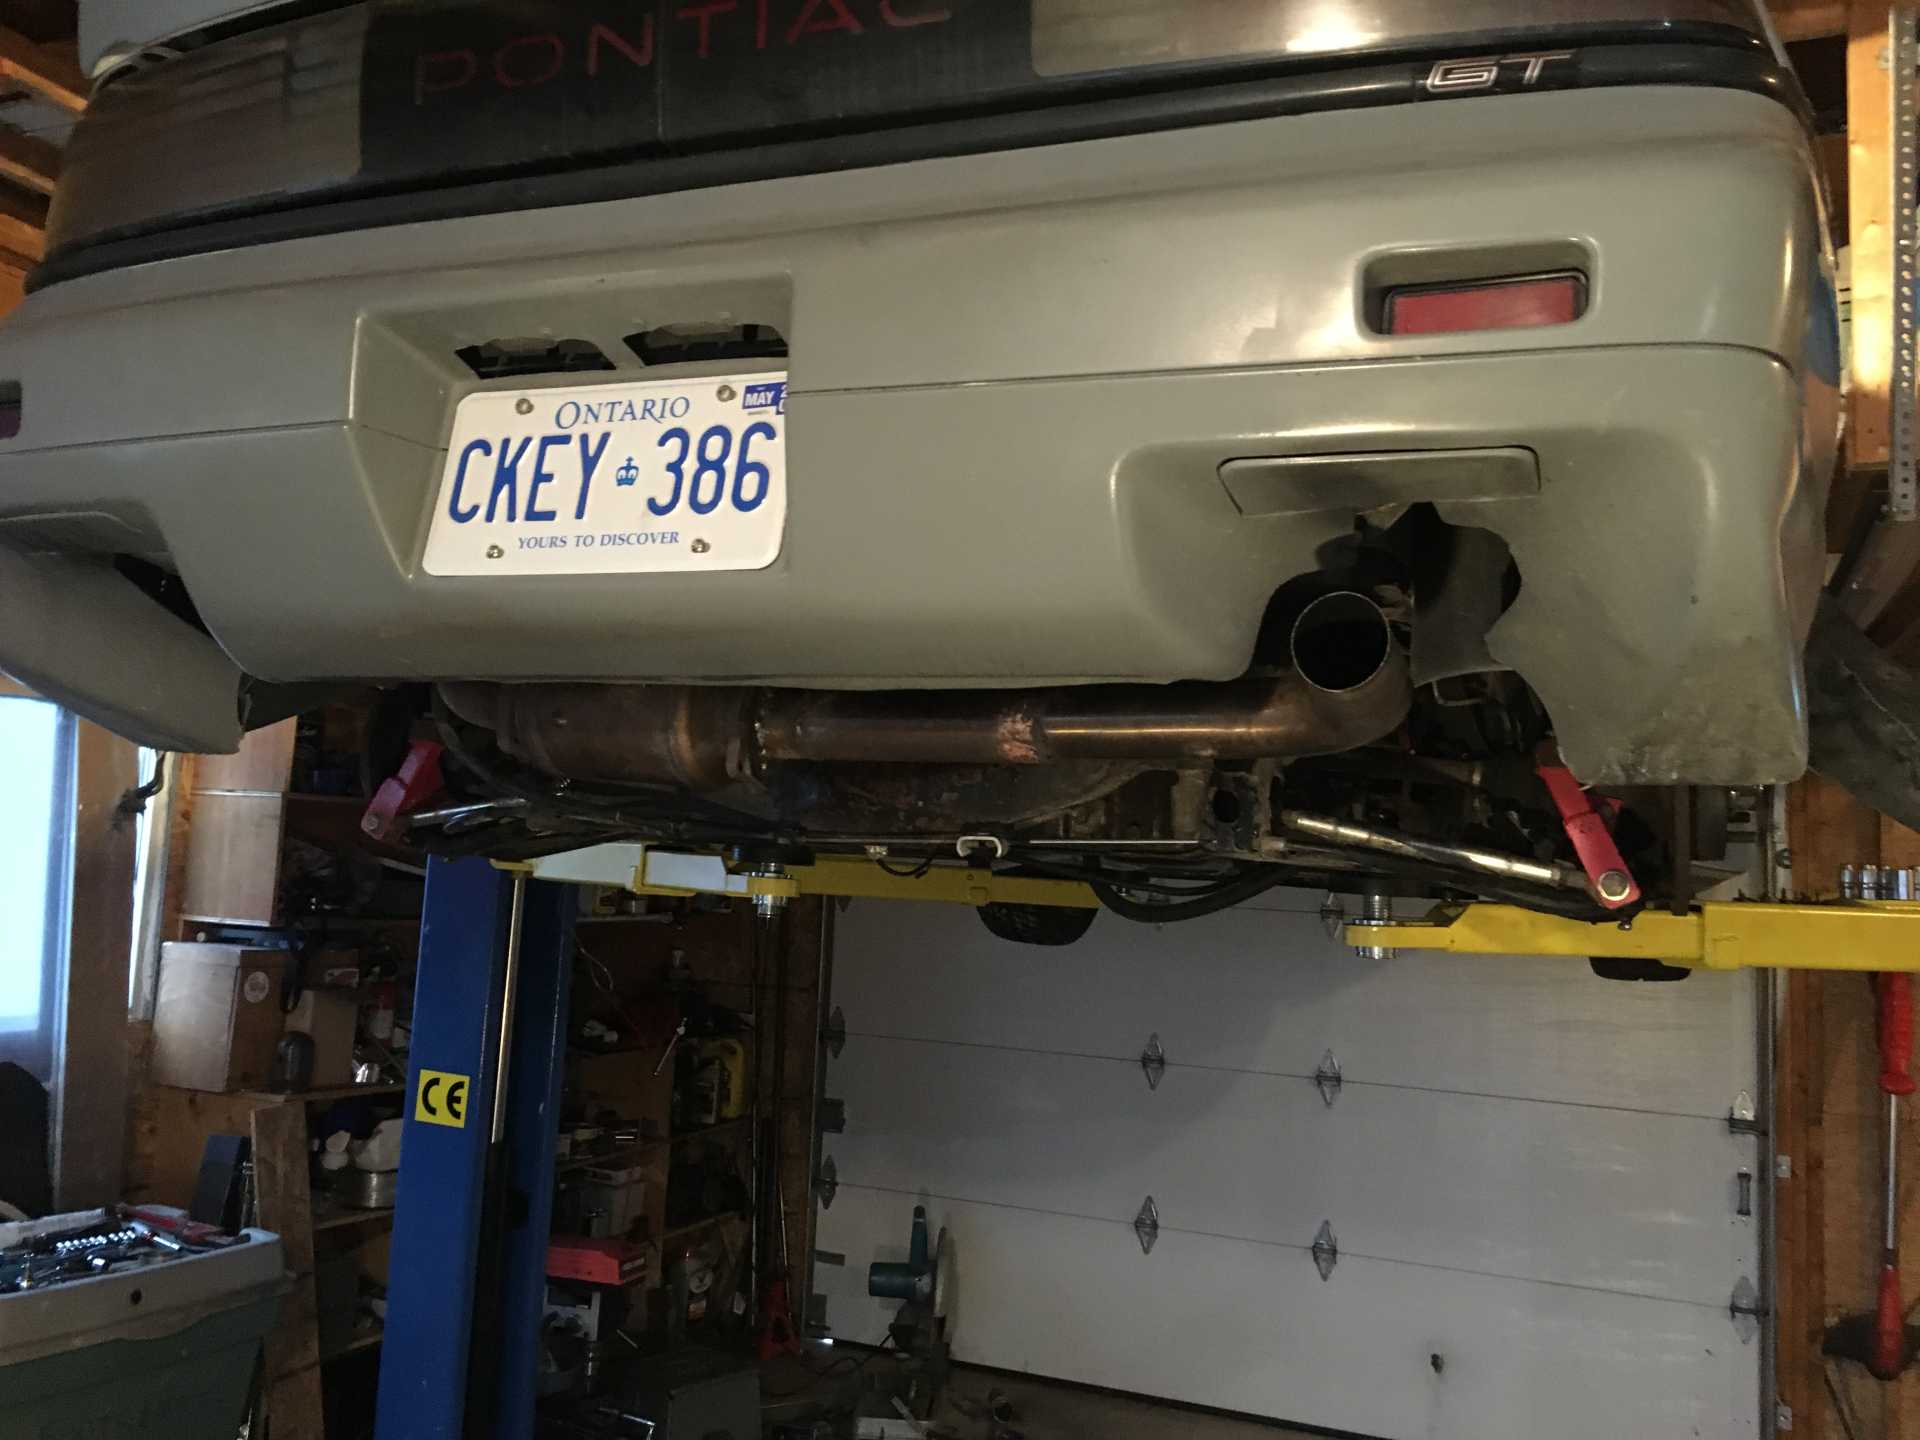
Exhaust is all welded up and hung. Have to take it off and put the gaskets in and a bit of clean up with a grinder and some paint. Have to do the turbo plumbing before I put it back on.
Above post was first time using my phone. I don't know what happened to the third pic, but overall very easy. And my phone is kind of ancient so the fact it even worked is a bonus to me.
Managed to get the charge pipe done, intake done and exhaust hung today. Started it up and got it warmed up and after changing out a short piece of heater hose I am happy there are no leaks. So tomorrow it goes in to the shed for the winter. All that is left is to tweek the tune a bit but do not have to do that now.
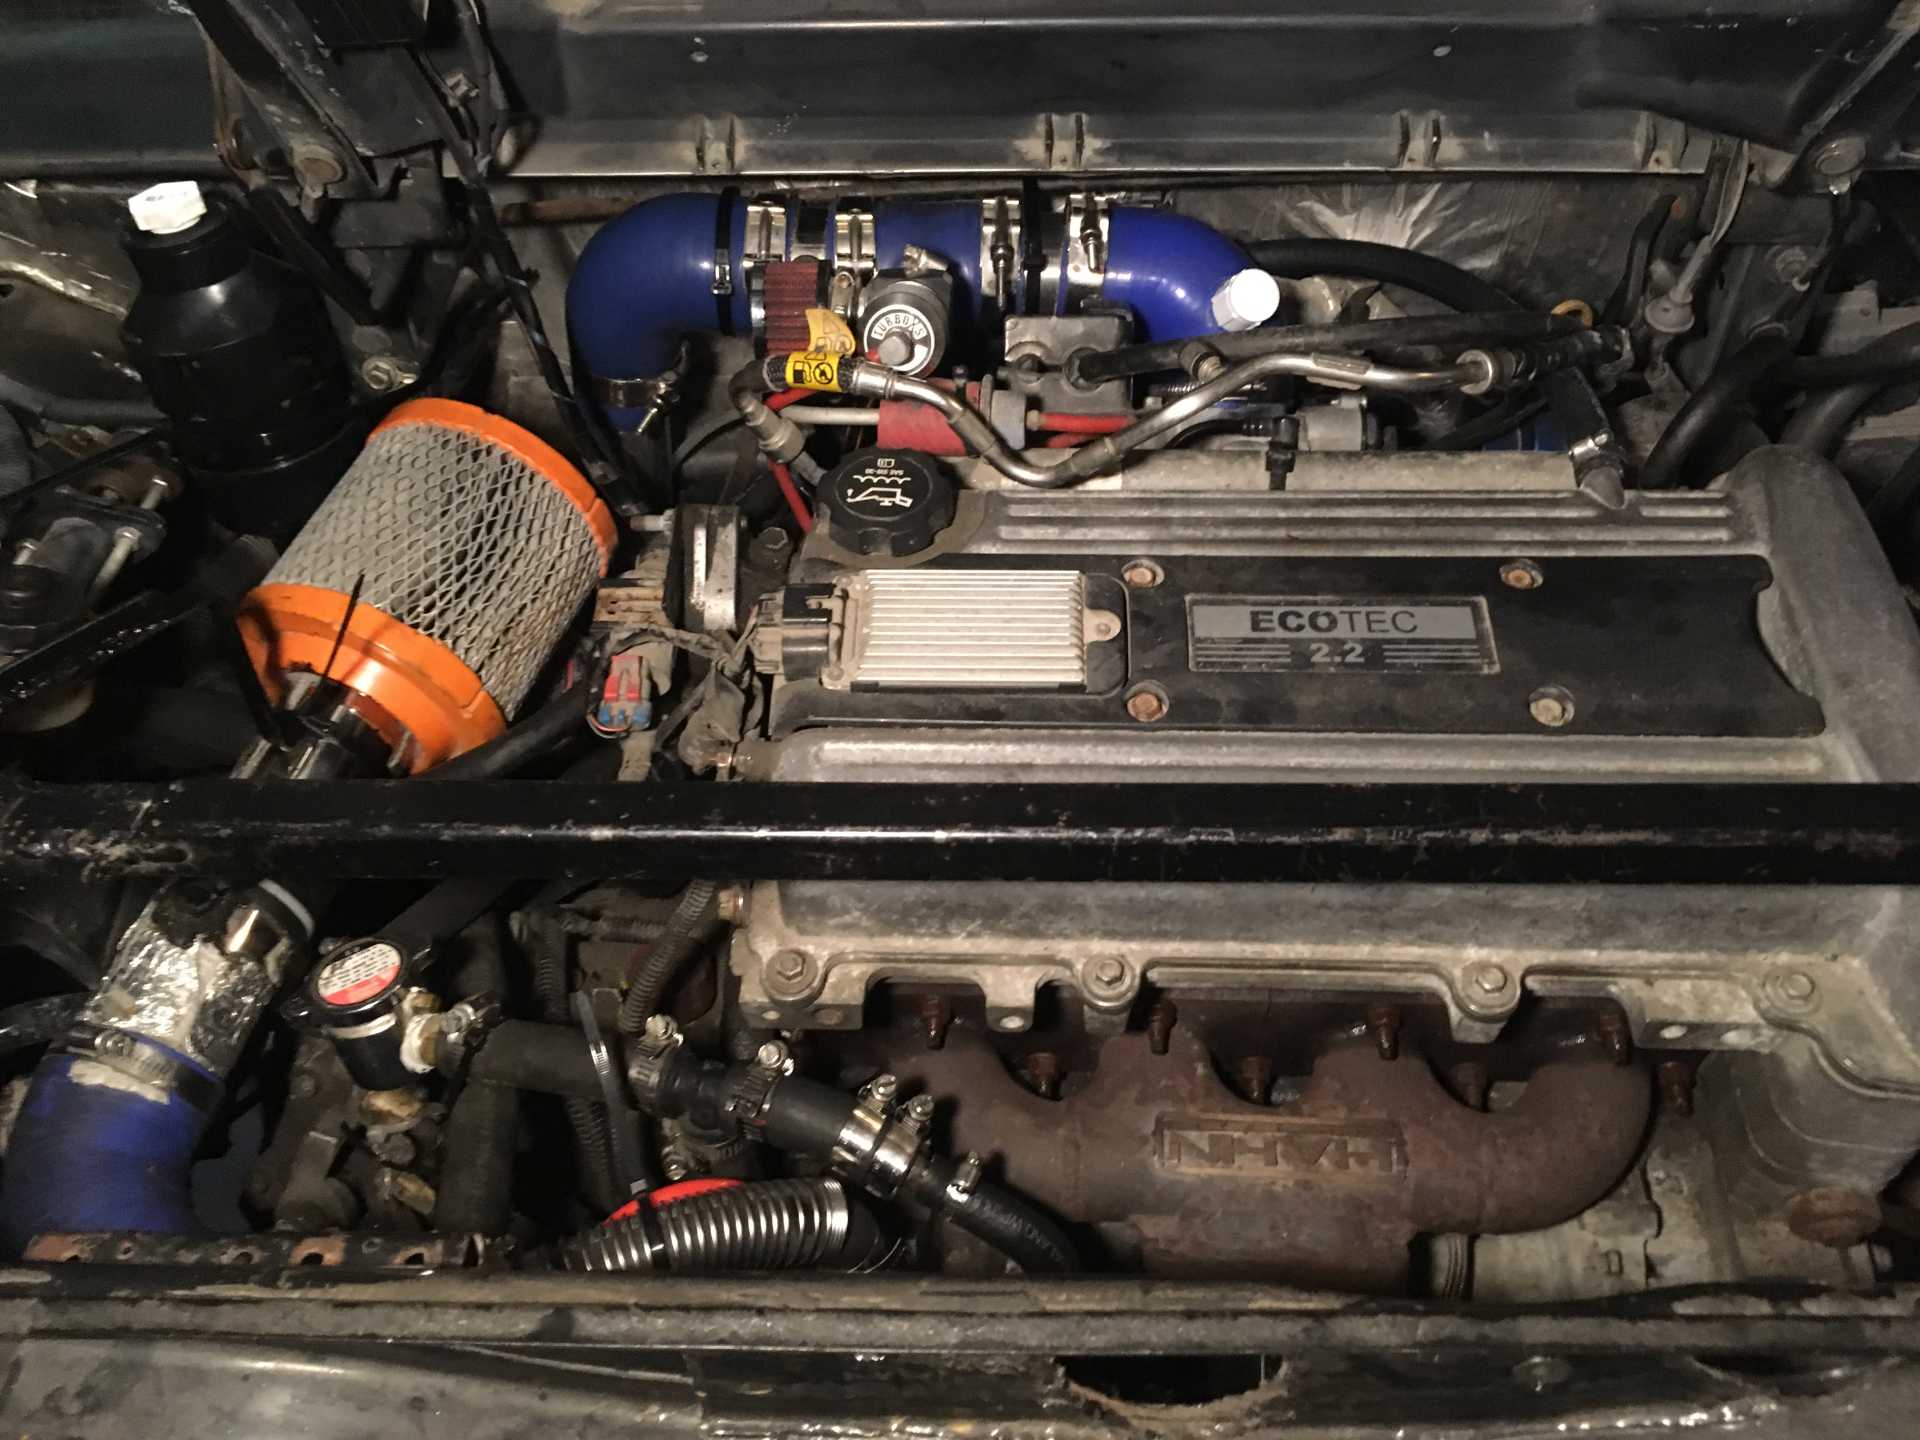
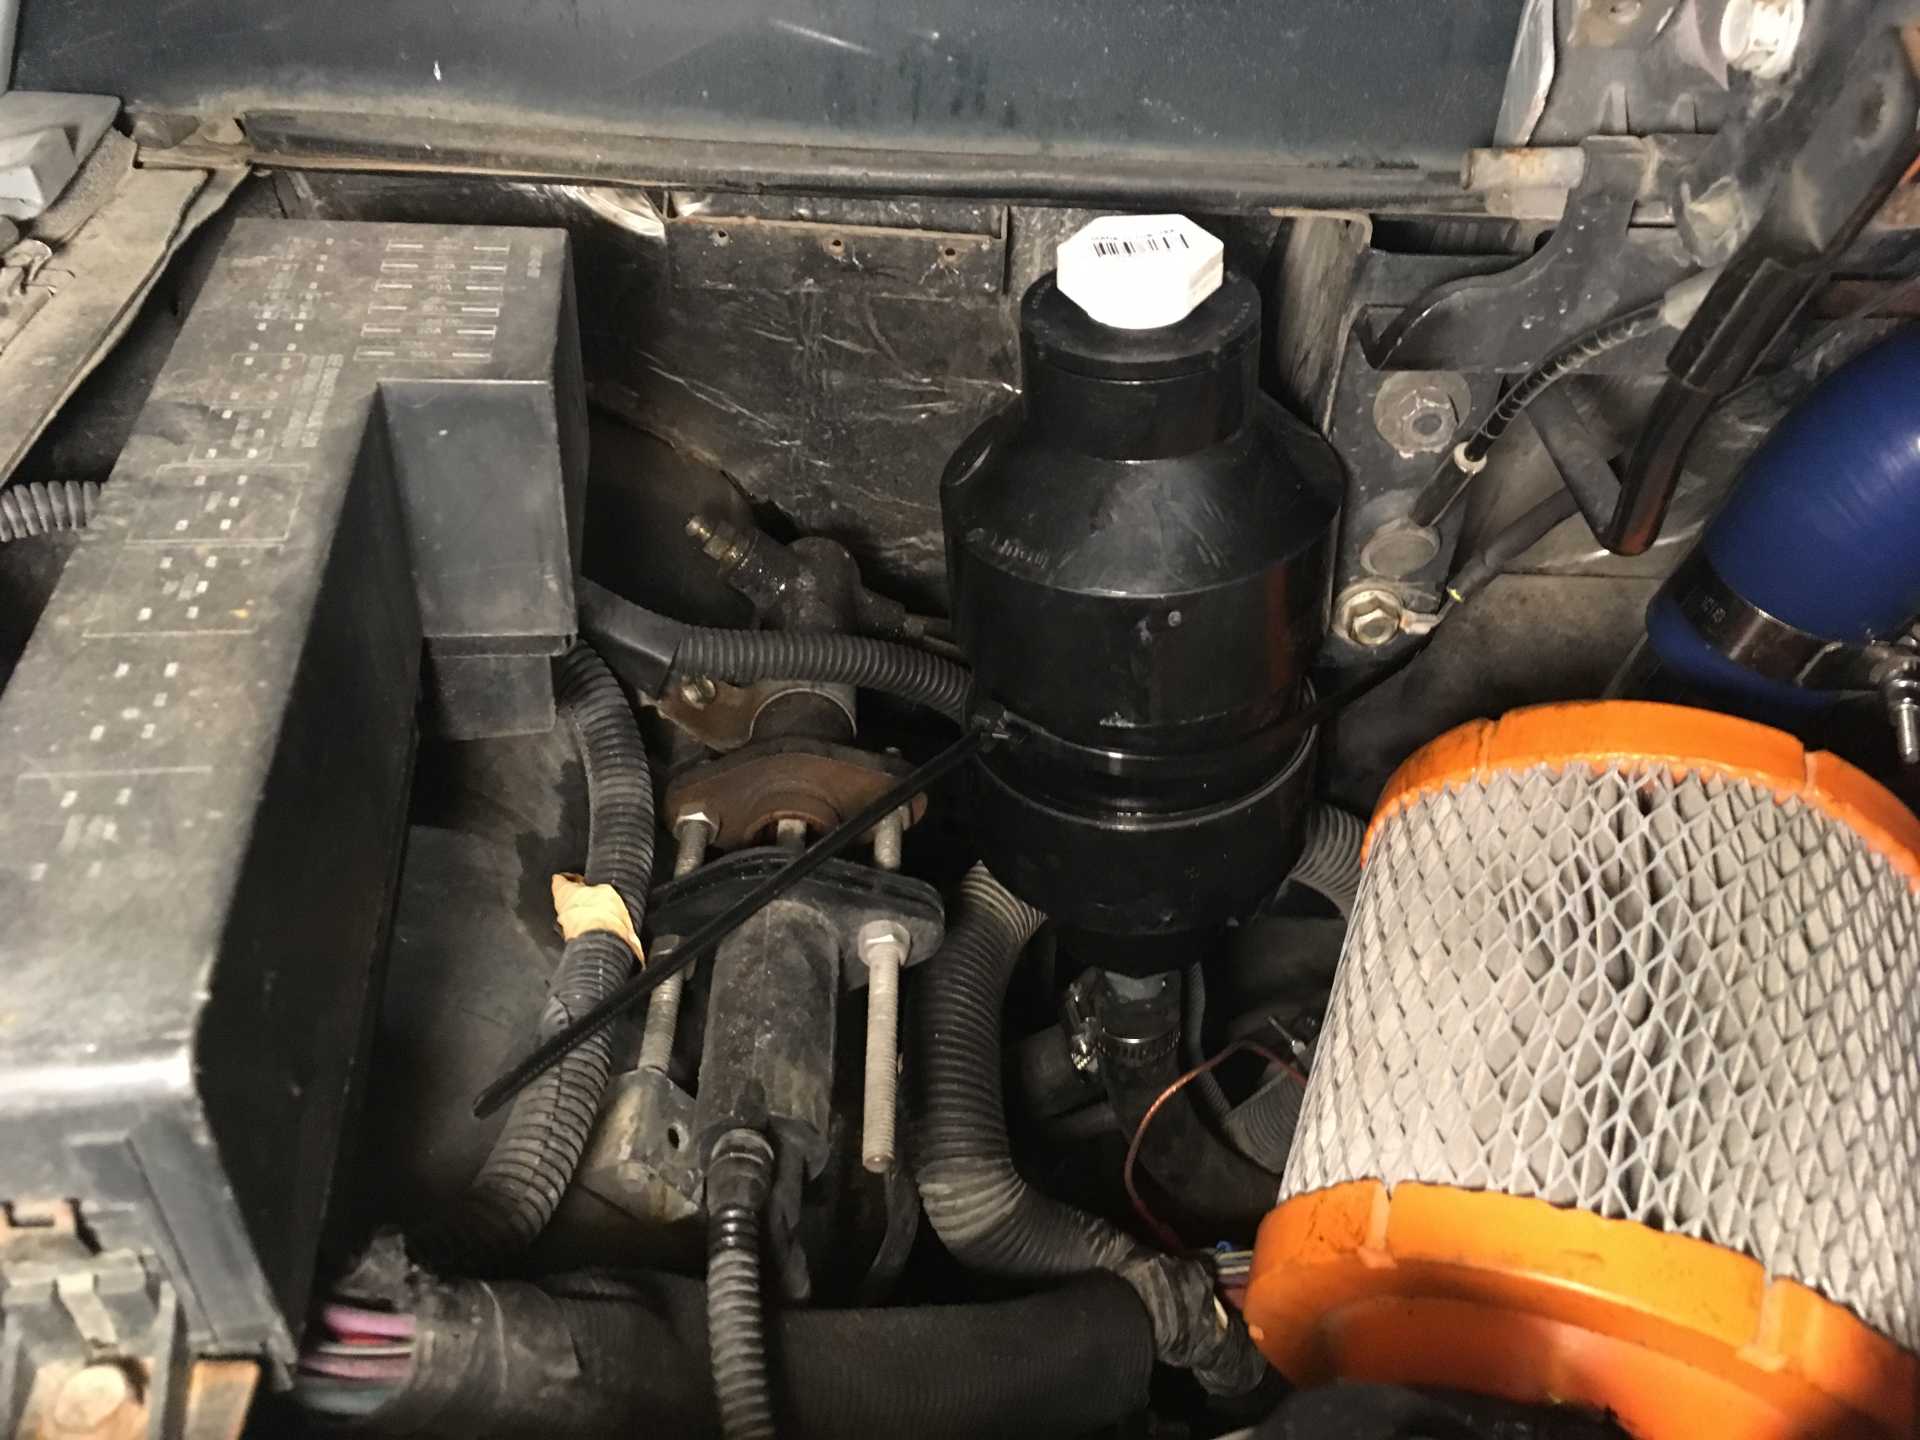
I reused the old coolant reservoir for the air to water IC system only now that the intercooler is down below where the cat used to be I could get rid of the extra piping and just use the white cap you see to top up the system. The tank also provides me a way to get the air out of the system and gives room for expansion. Looks much cleaner now.
------------------ 86 GT built 2.2 ecotec turbo rear SLA suspension QA1 coilovers on tube arms
[This message has been edited by wftb (edited 12-23-2019).]
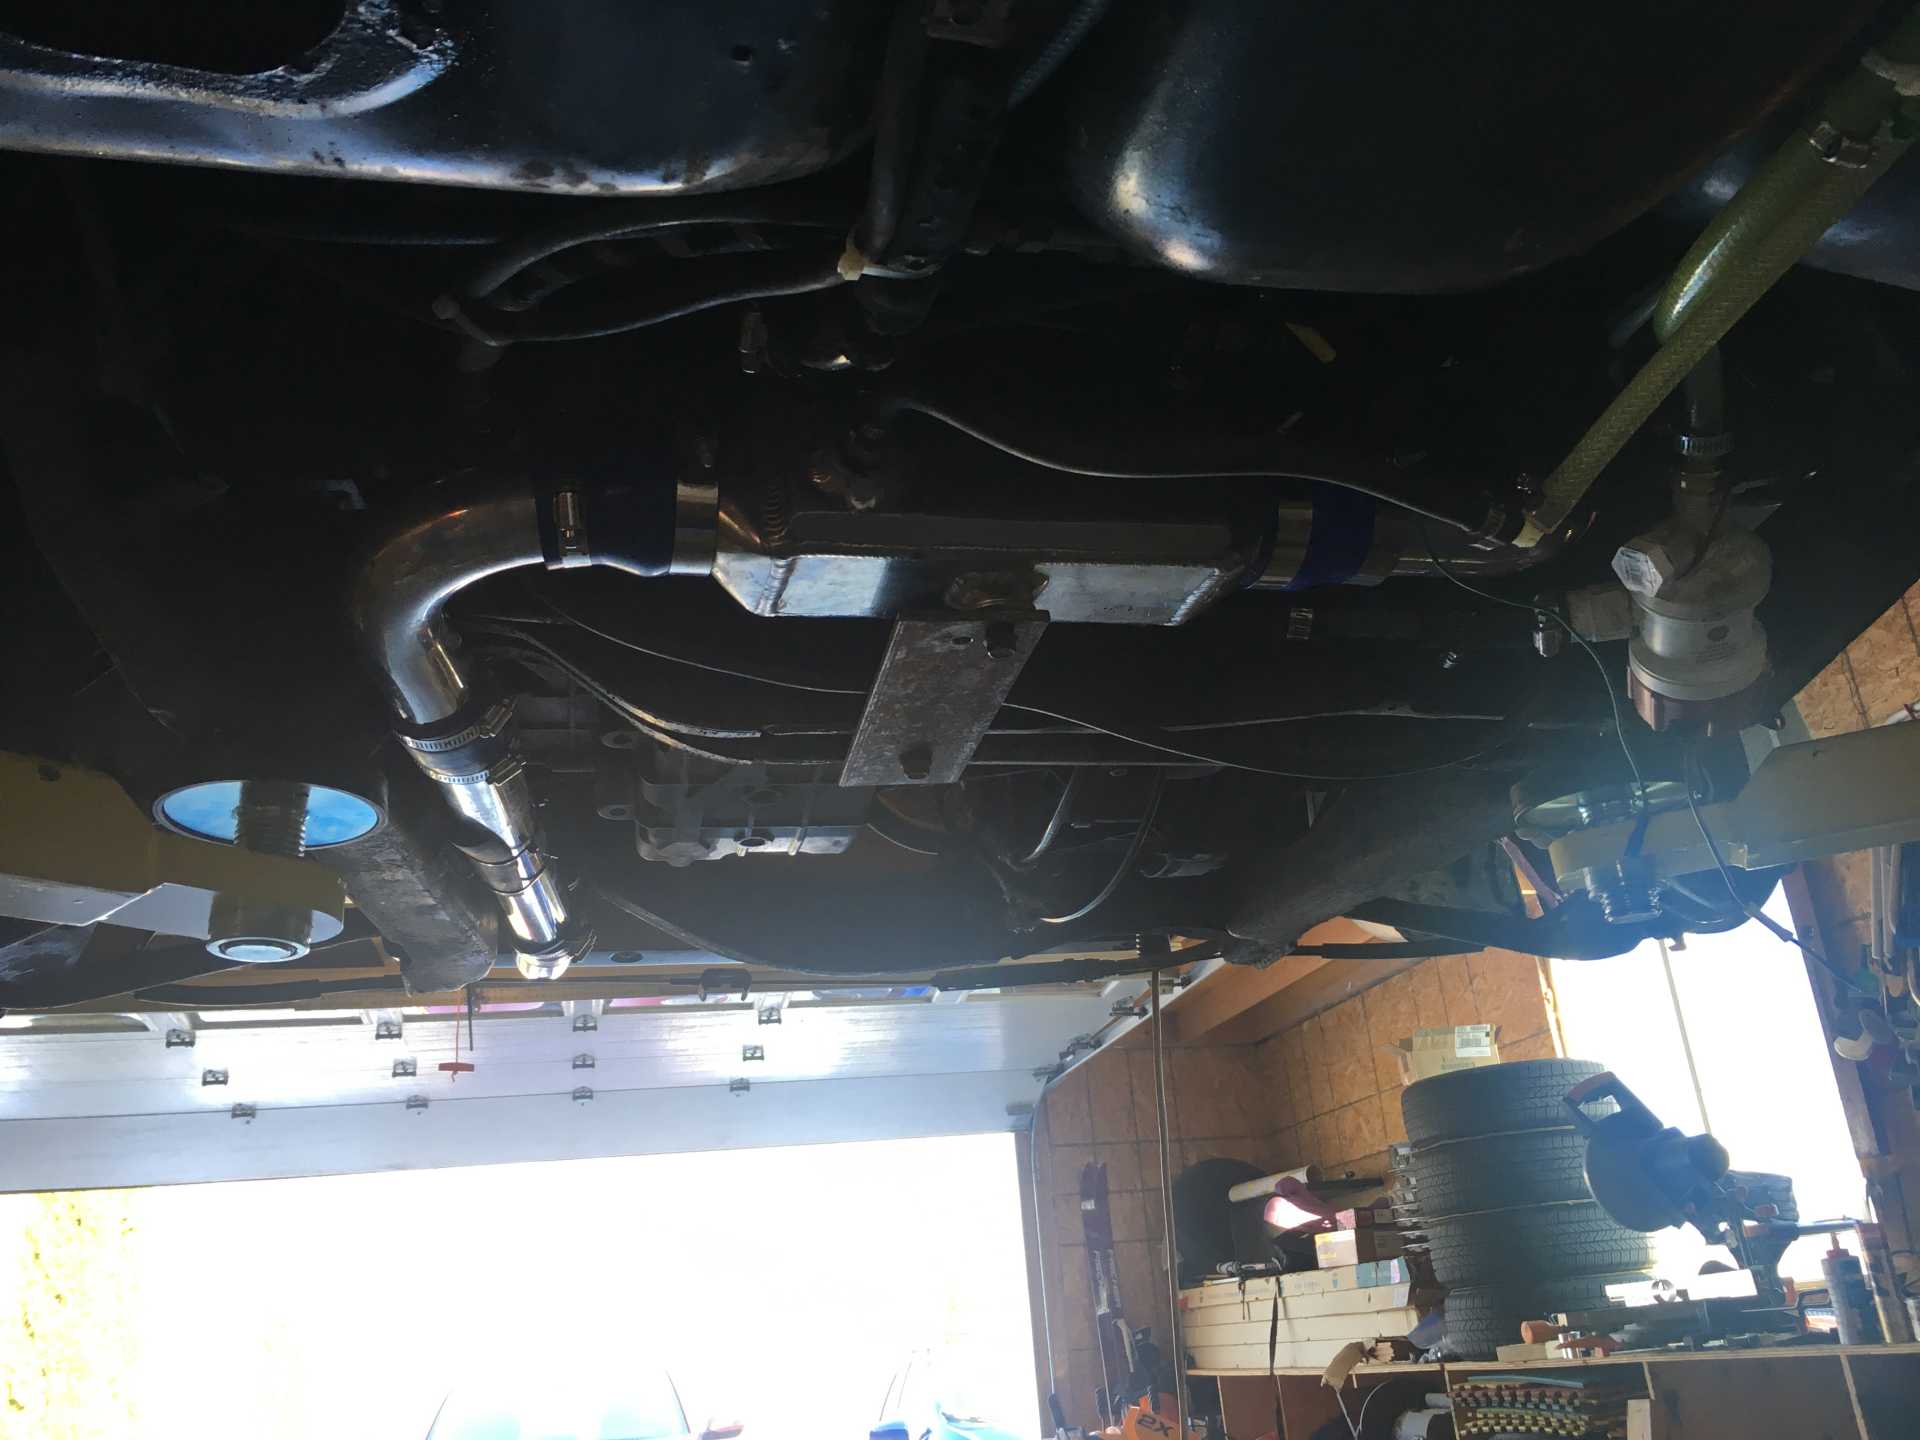
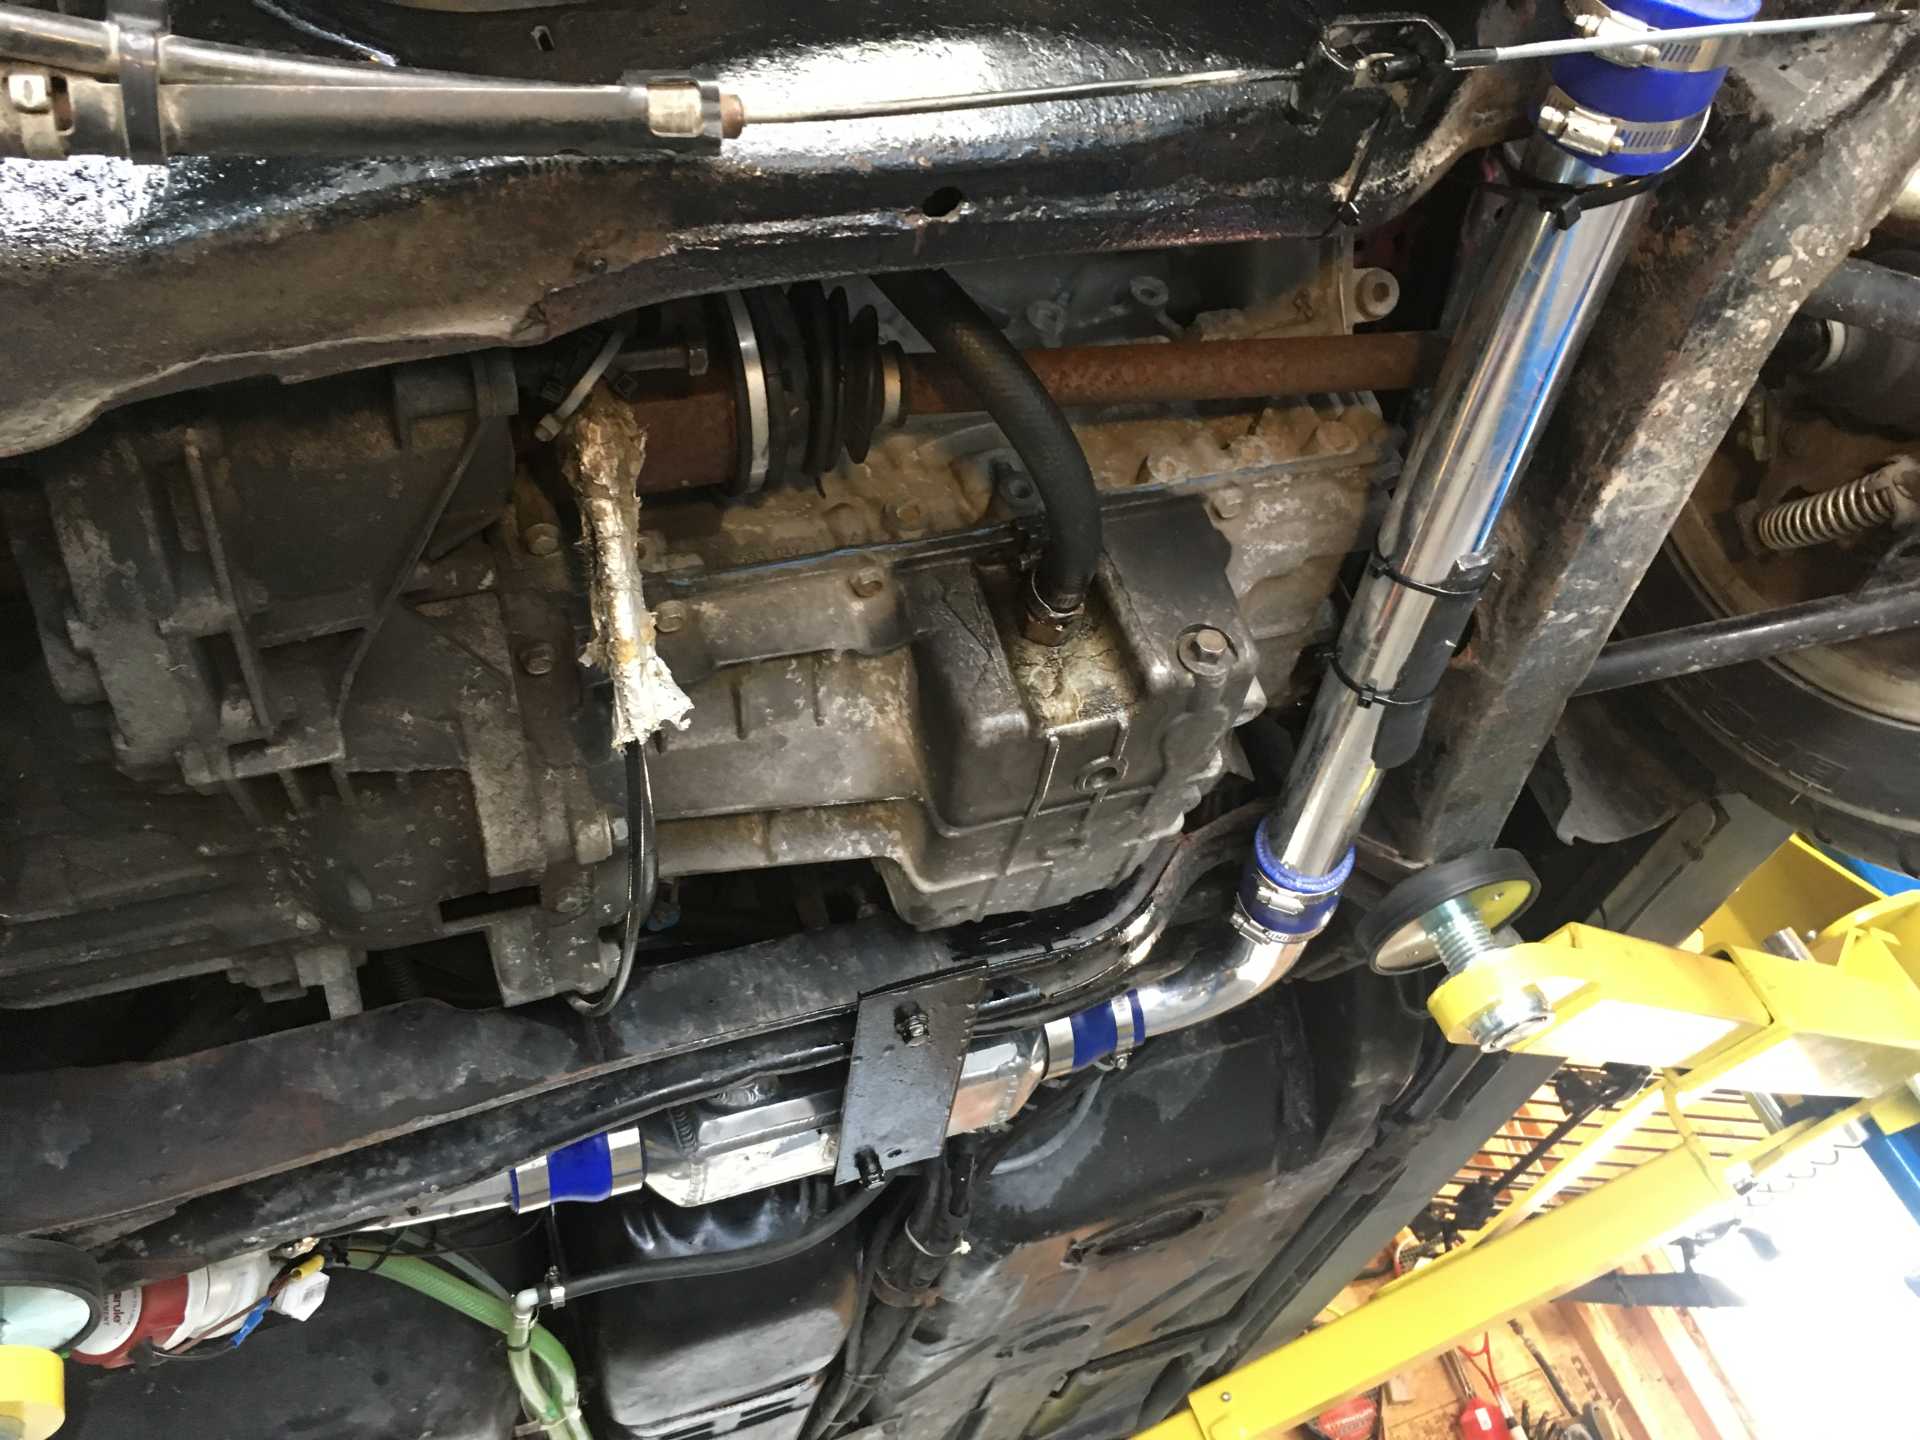
Picture shows the new location of the heat exchanger and the pump. Got rid of a lot of tubing this way. The charge piping is longer now but I have had it this way before and did not notice any difference.
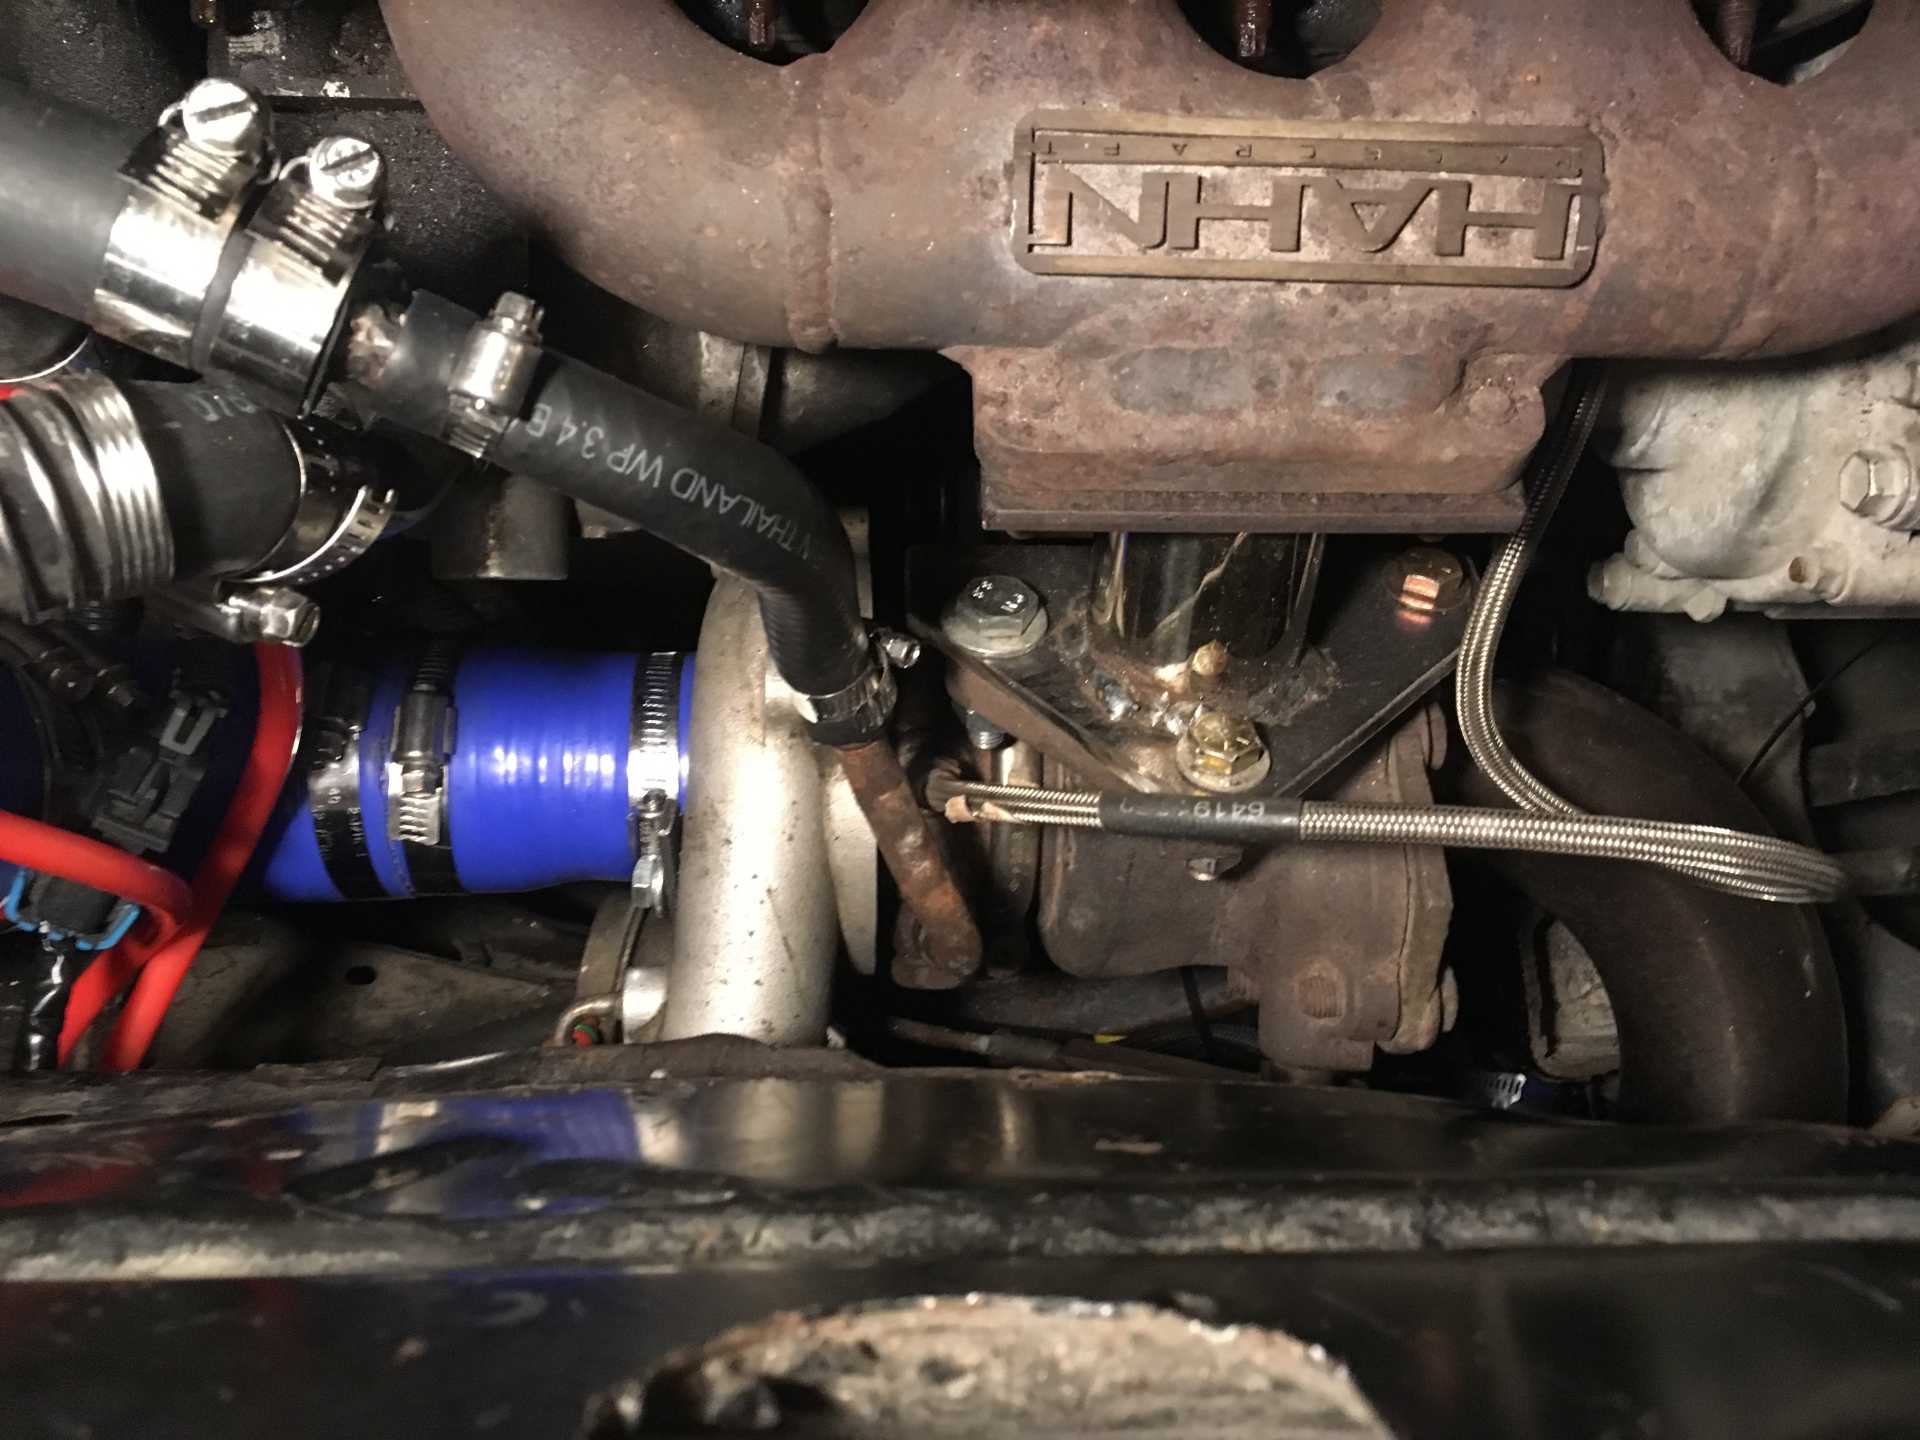
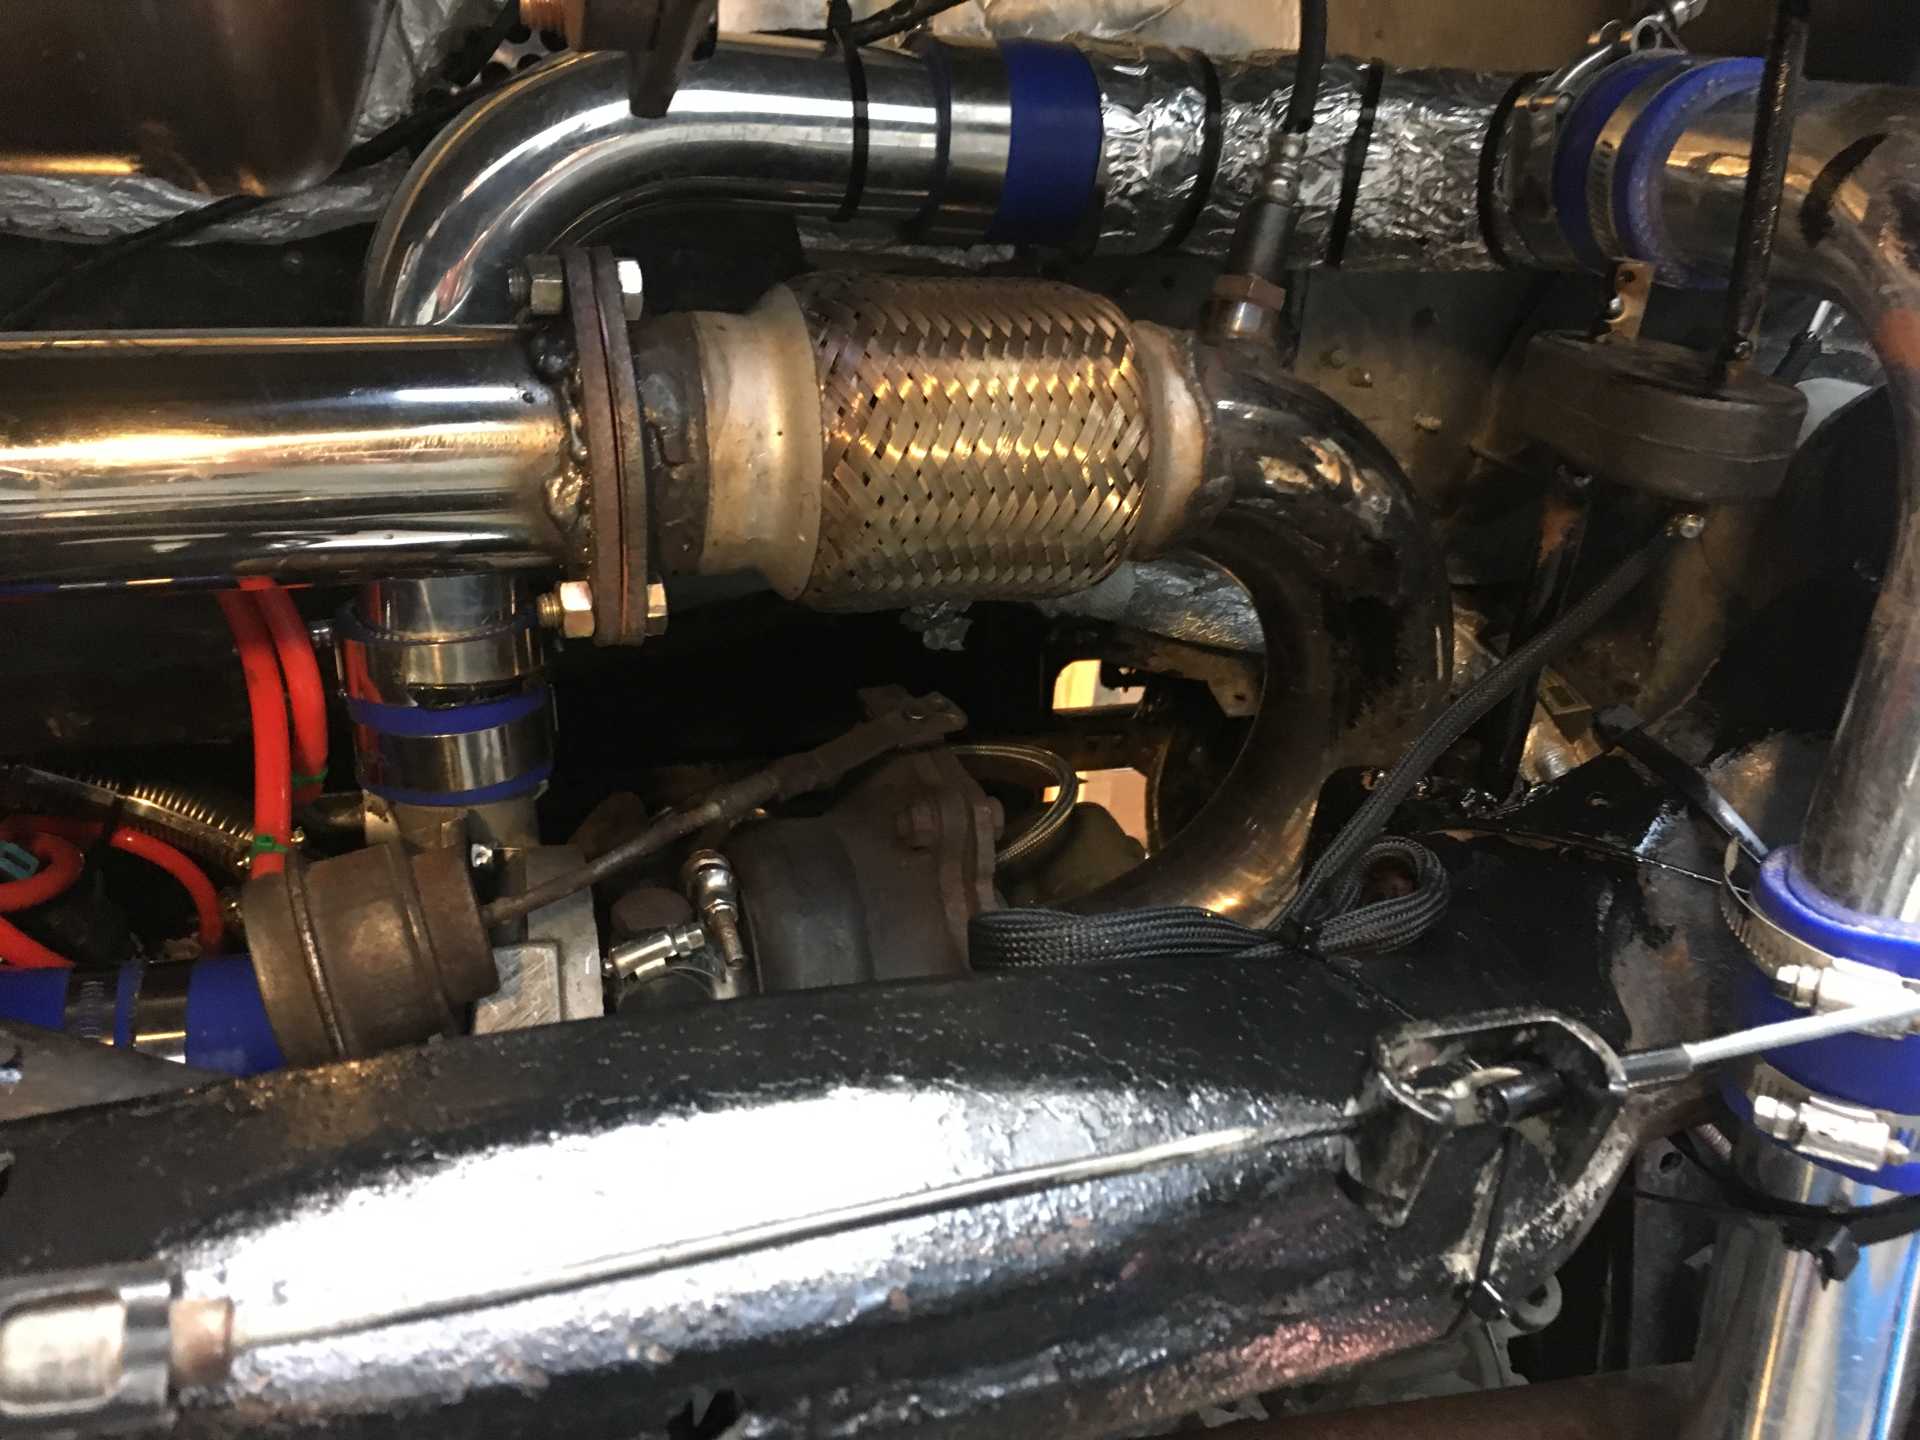
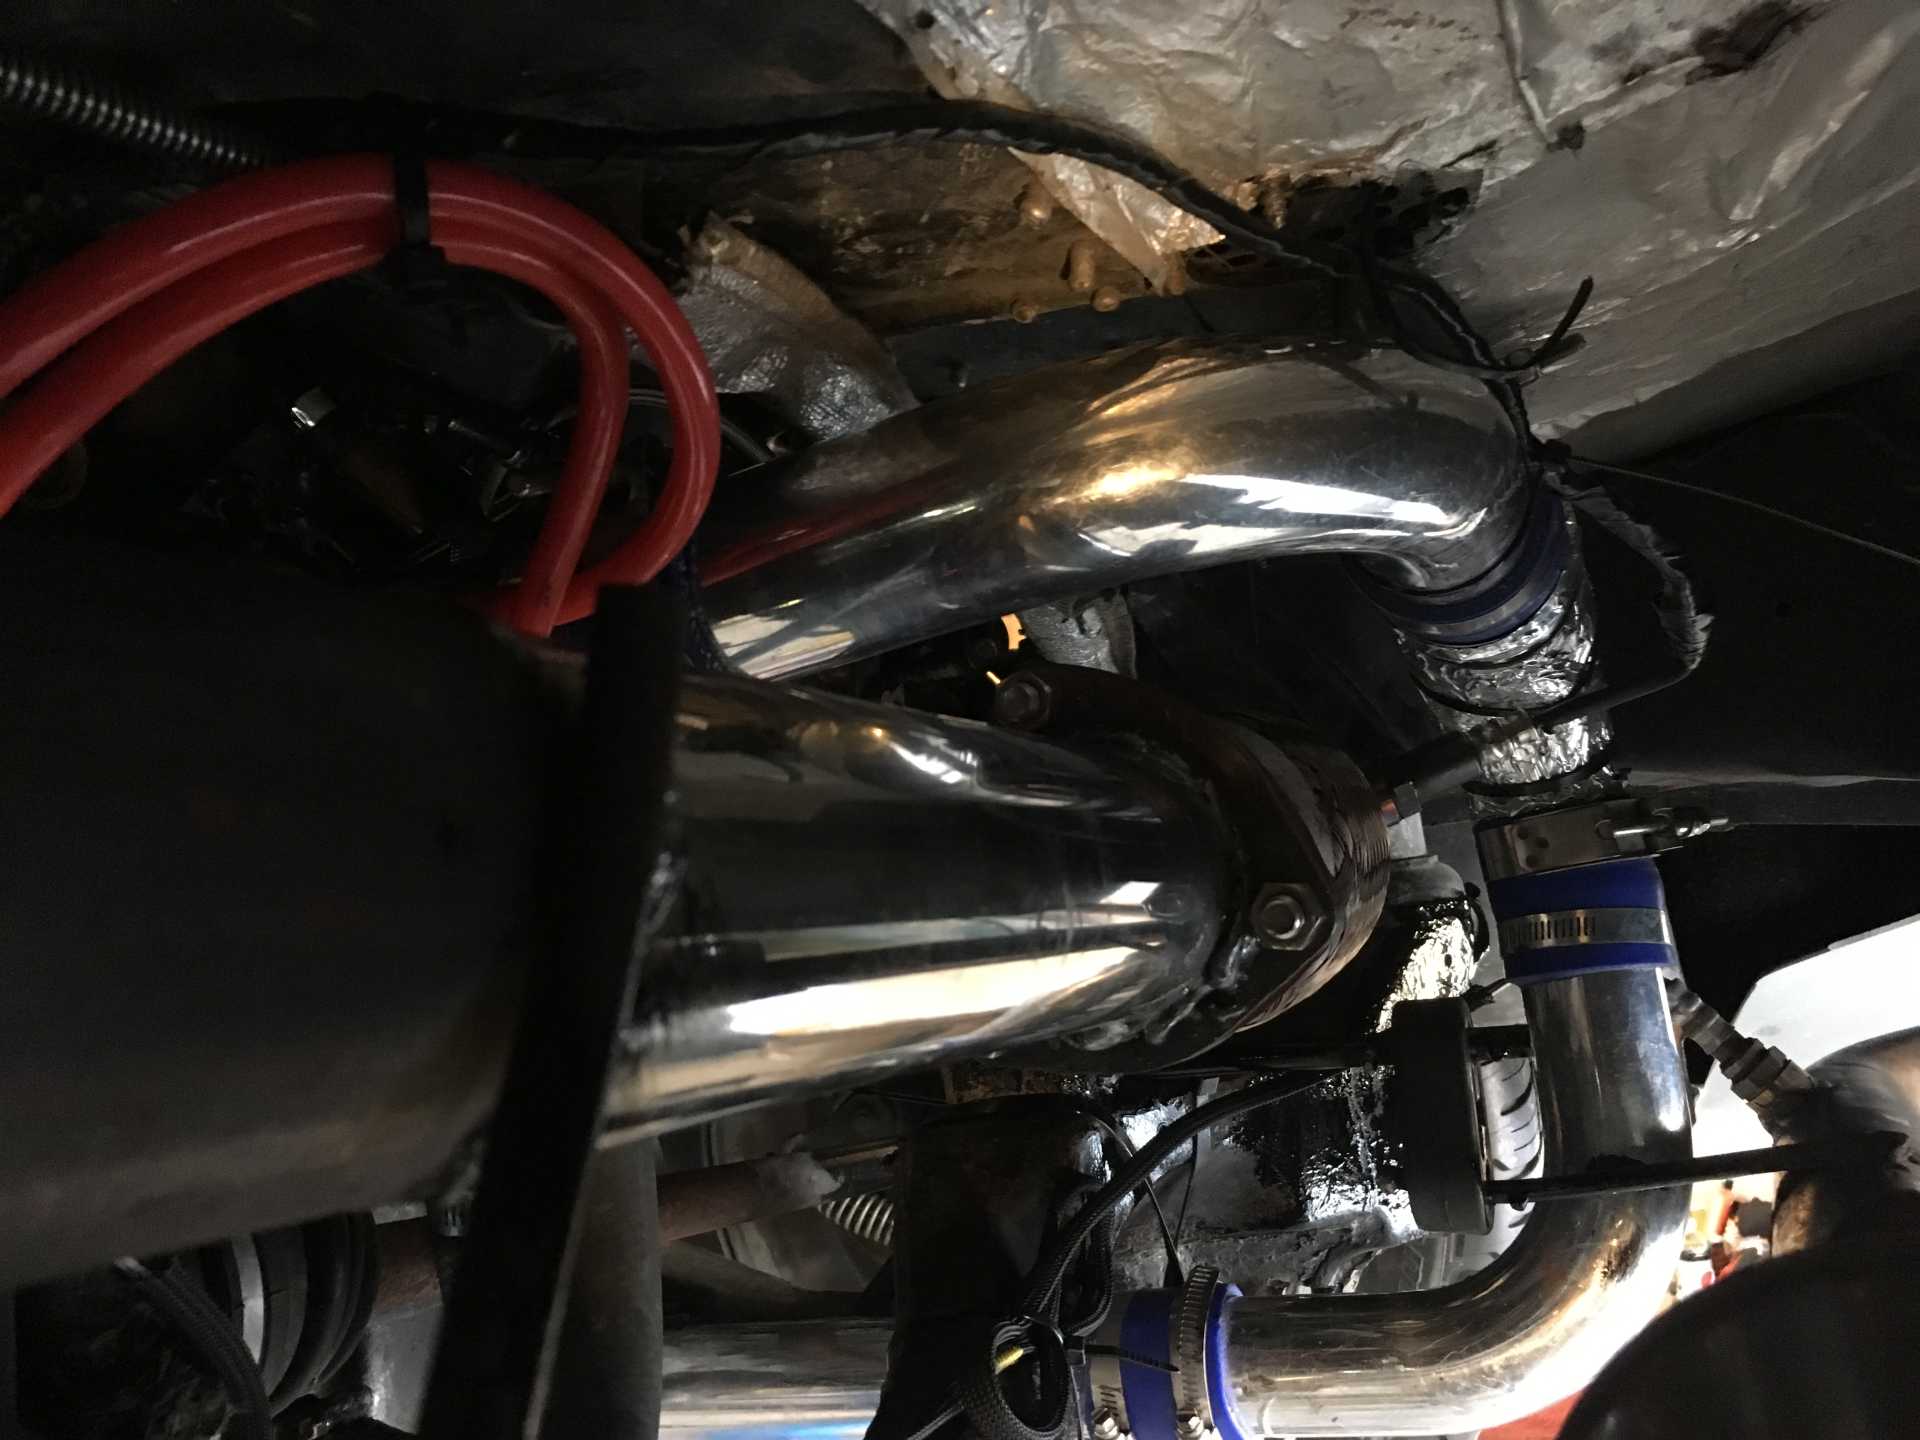
Took these pics just before I put the car in the shed for the winter. All the snow has melted again but the sand and salt and mud is everywhere so no point in driving it. You can see that everything is tucked up above the frame, and how it is a bit crowded around the turbo area. The charge piping runs above the exhaust pipng for a short distance but there is good seperation. Overall there are a lot less places where the charge piping can pick up heat. The area where the heat exchanger is about the coolest spot anywhere near the engine. This is all the work I will do on the car until some time in March probably, when the snow melts again and I can get it out of it's shed.
[This message has been edited by wftb (edited 01-06-2020).]
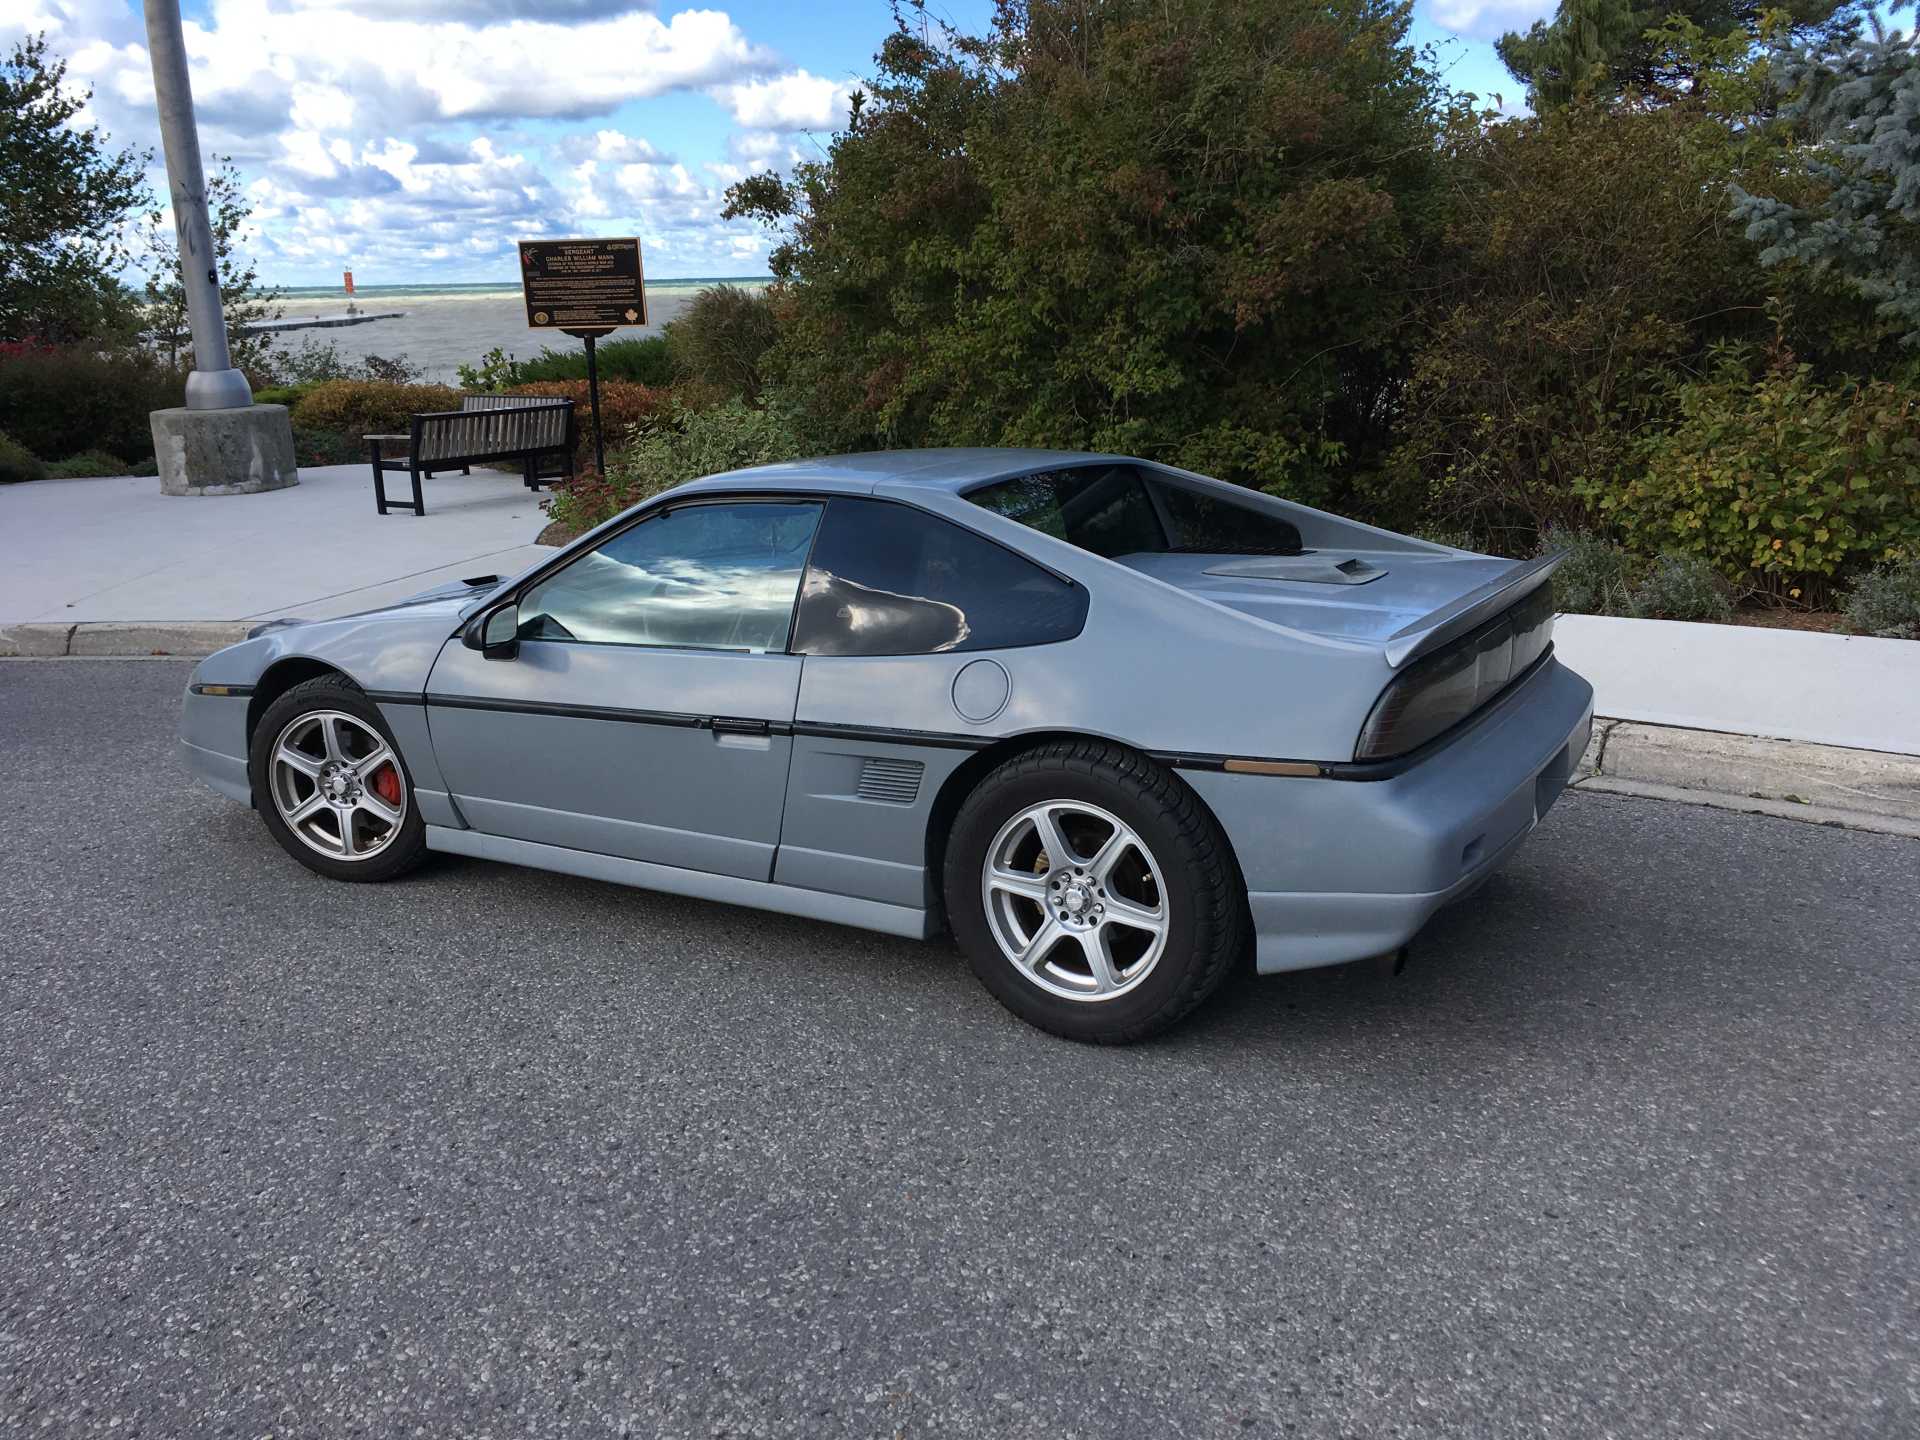
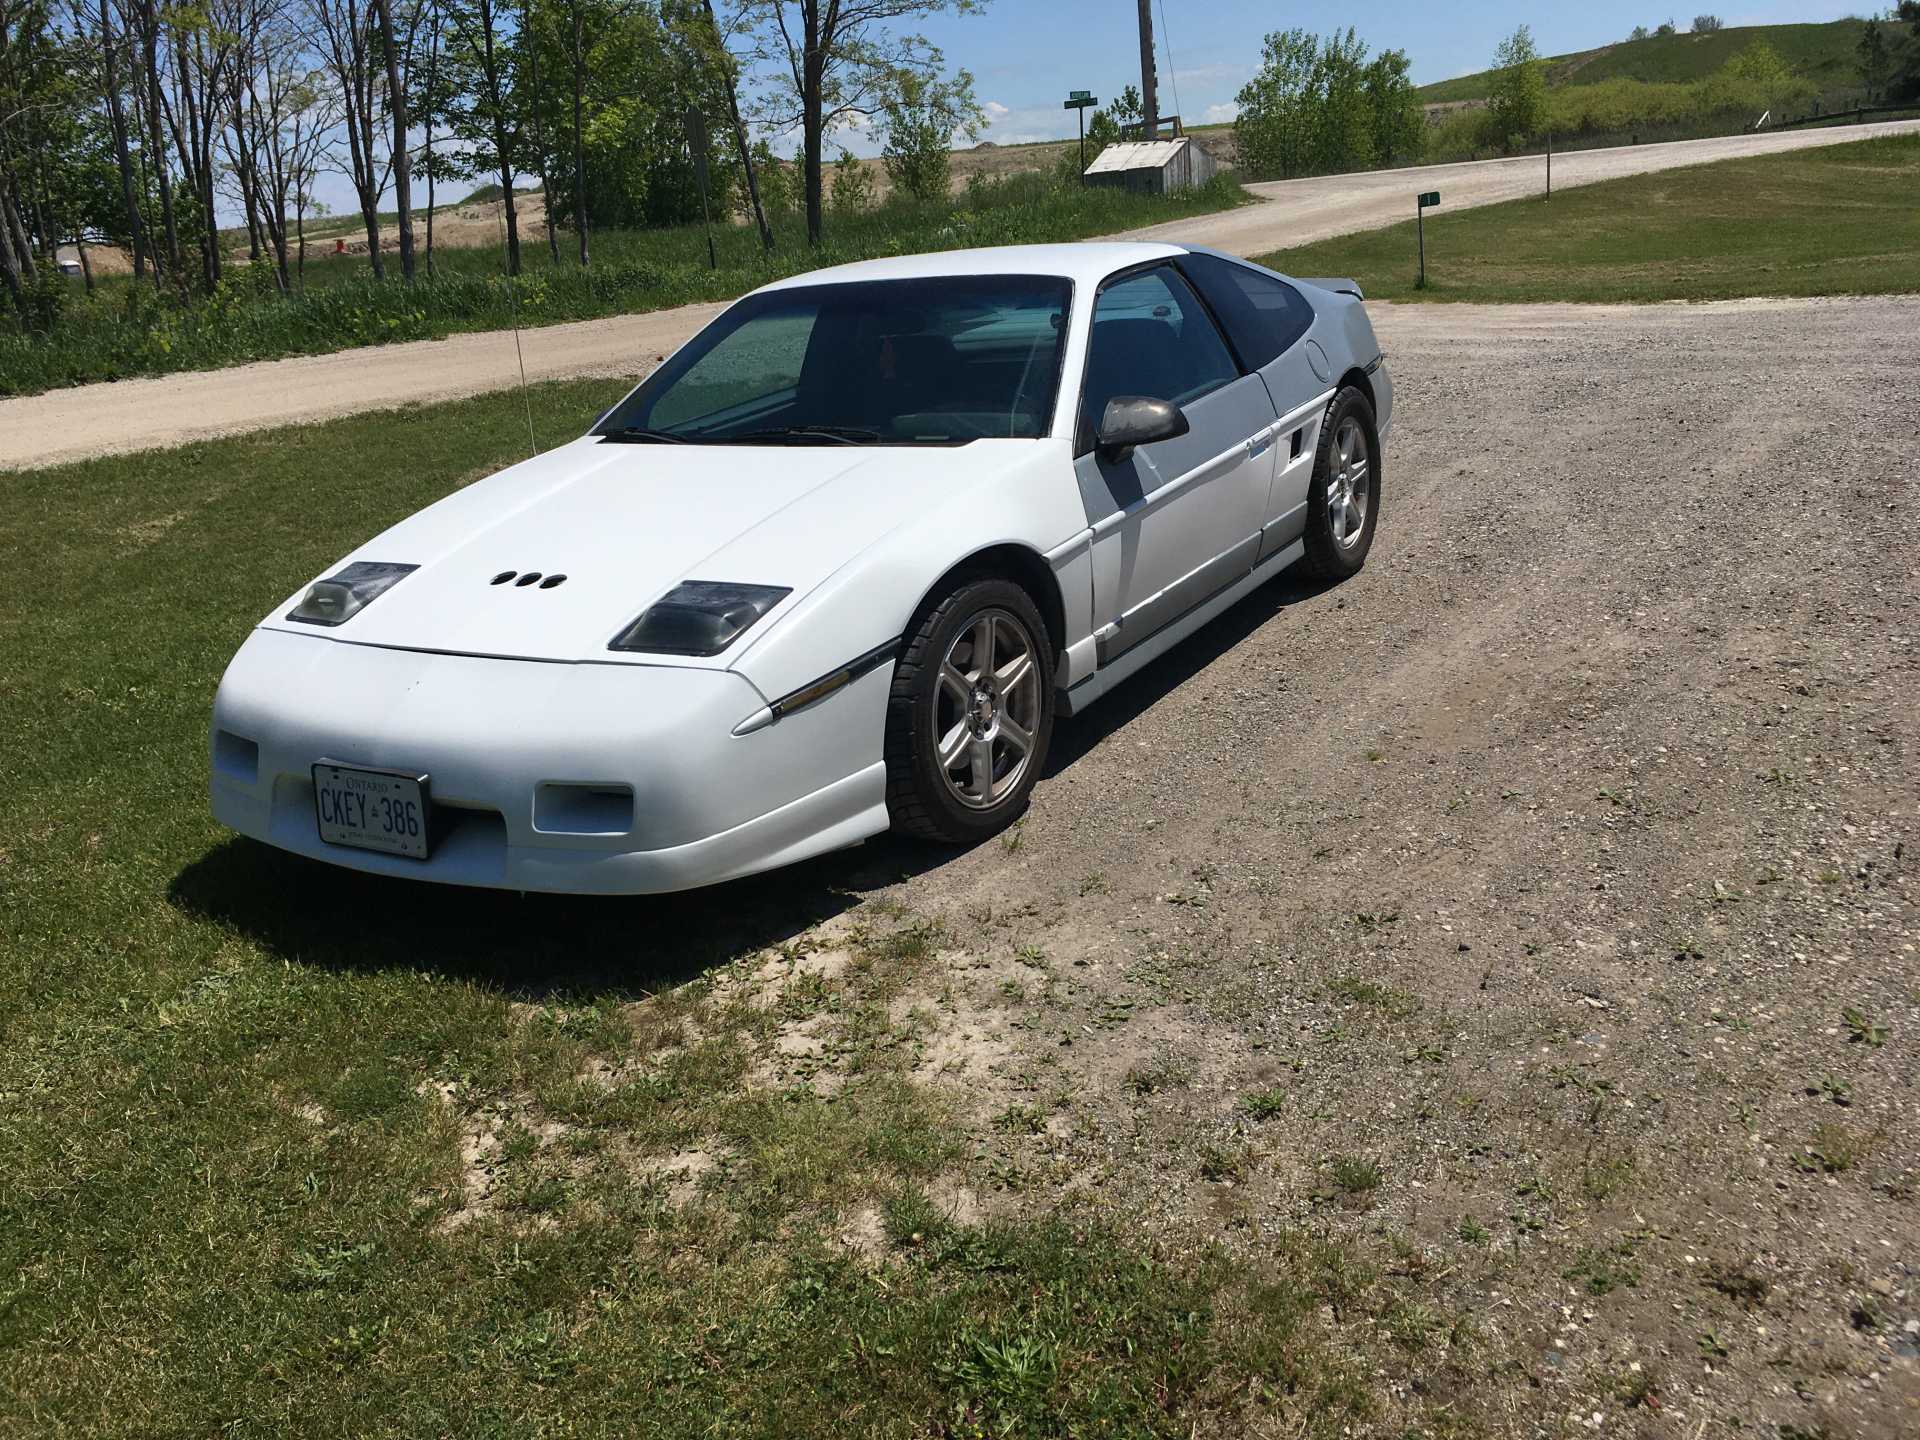
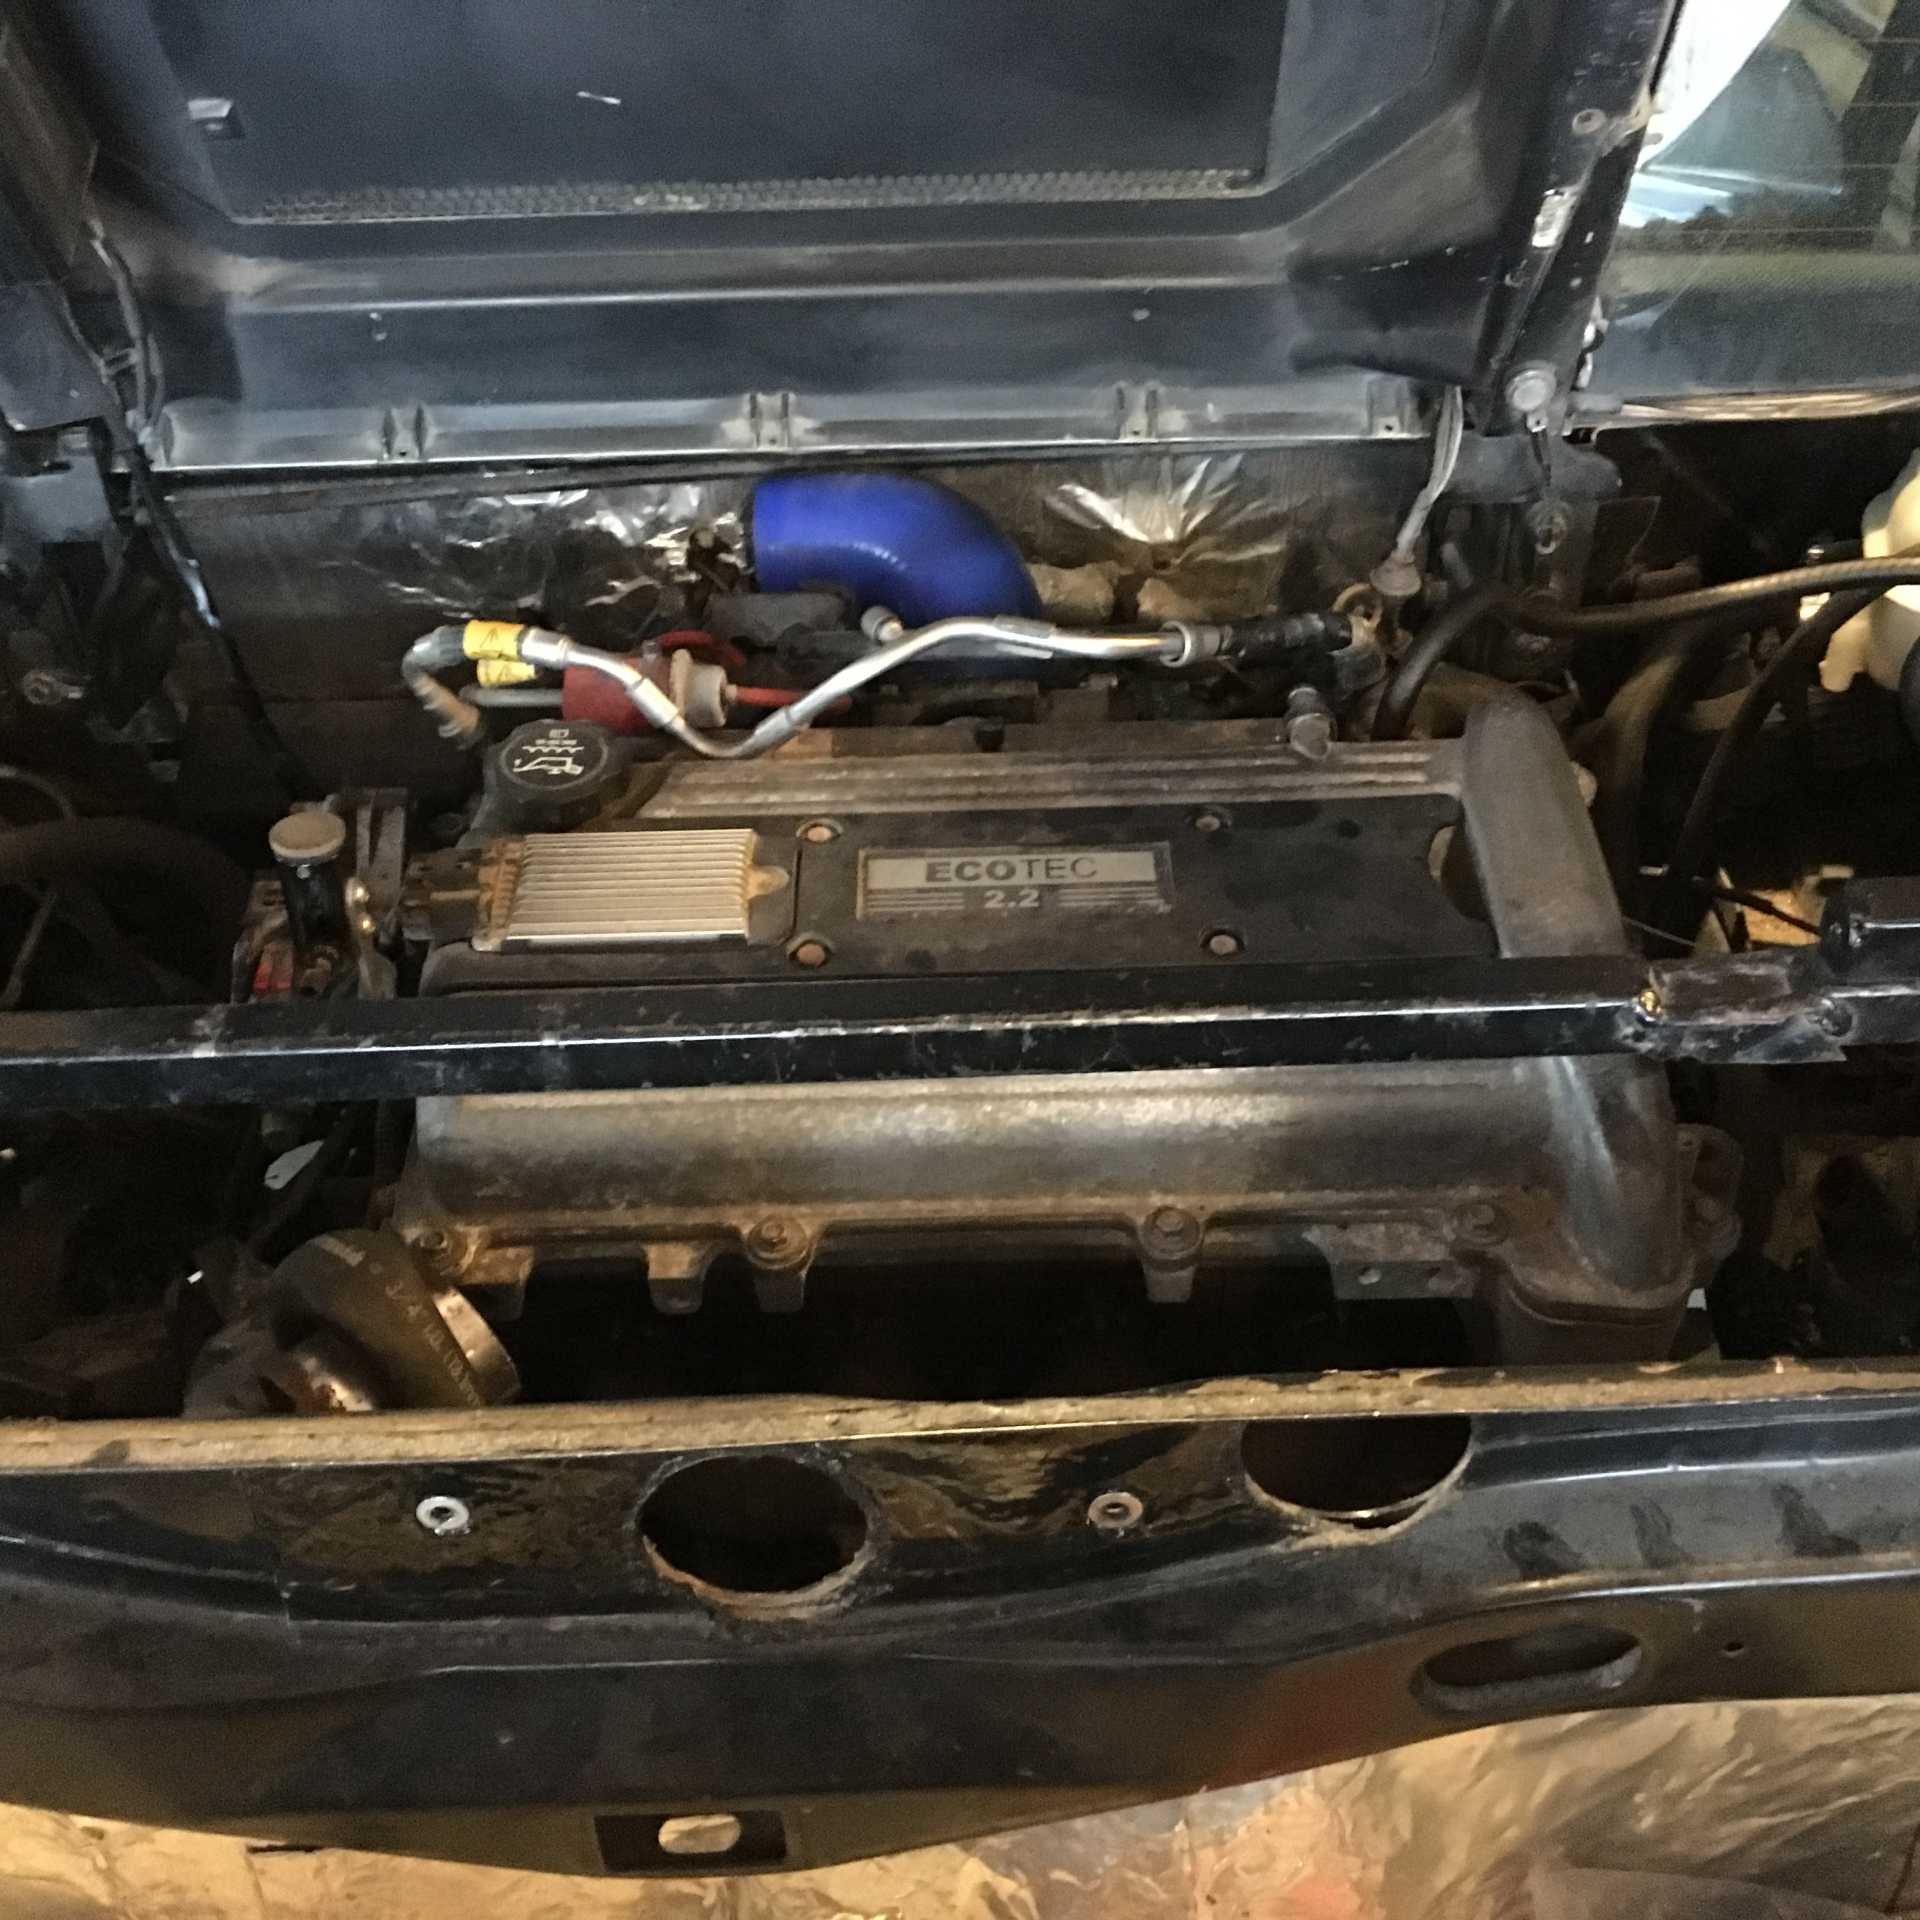
This is my present paint job, done about 7 years ago. It was done with Rustoleum Universal brand rattle cans. It is getting long in the tooth and takes a lot of waxing and buffing to make it look good. I learned a key thing about this paint when I painted a 91 civic wagon: you get a nice gloss and a smoother finish if you paint with the temperature lower than 60F. I had the shed heated to over 70F and that made it impossible to keep a wet edge going as I sprayed. The edge would dry too quick and developed stripes of gloss and semigloss textures. I fixed this by wetsanding and then waxing the finish. And that was a lot of work. I know I can do a better and faster job now. I do not think the colour I have on now is available, at least not at my 2 local suppliers. But gloss white is available, I have always liked white Fiero's so I may go that route. I have time to kill over the winter so this will be a good project.
[This message has been edited by wftb (edited 01-06-2020).]
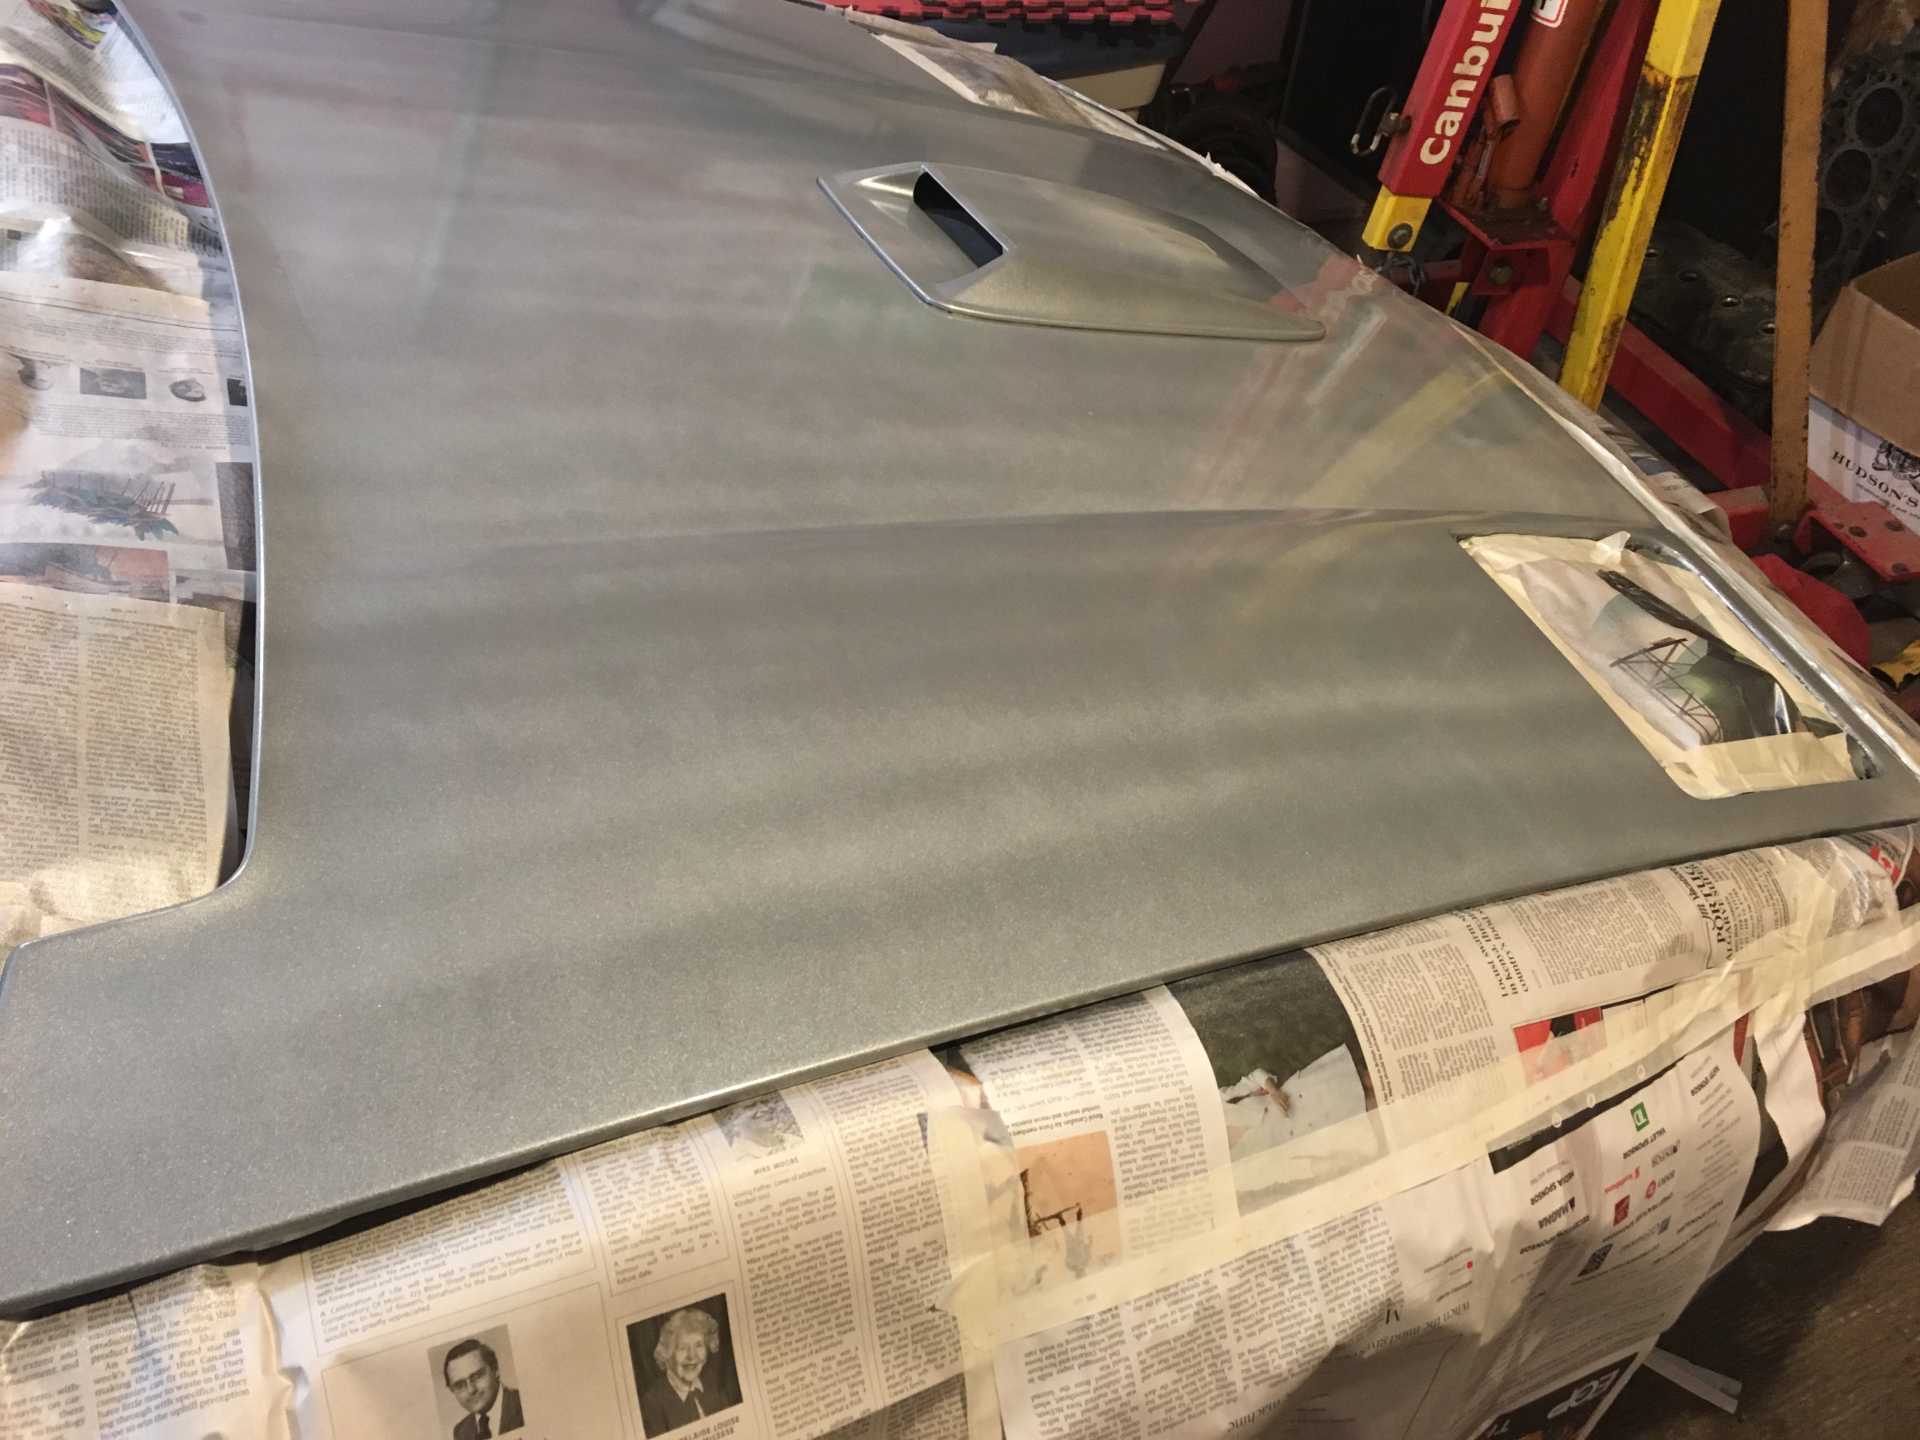
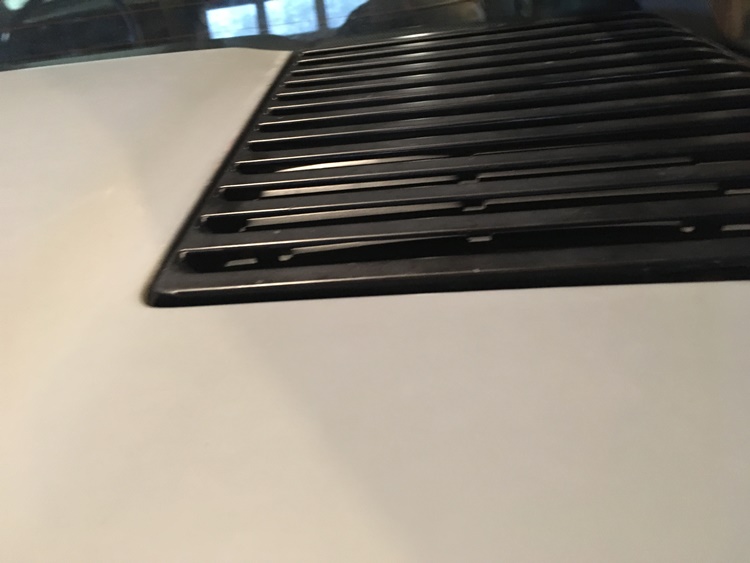
I thought I would experiment on the front hood with some Universal Rustoleum white pearl metallic I bought a while back. The results were bad. I got the same striping that I had trouble with when I painted the grey, even though it was nice and cool in the shed.And it did not come out white, even though the can says paint and primer in one can. I liked the colour it came out but there is no way I can make a good job of it.
I have always found that using mettallic paint out of a rattle can only comes out well on small objects. And this stuff needs a white base to work properly. And none of the stores around here stock white in this product. So I will have to order 12 cans of white gloss unless I find something else.
The reason I like the Rustoleum Universal rattle cans is they can be sprayed sideways, upside down or any angle. And they have a good sized spray pattern making it easy to do large areas.
[This message has been edited by wftb (edited 01-12-2020).]
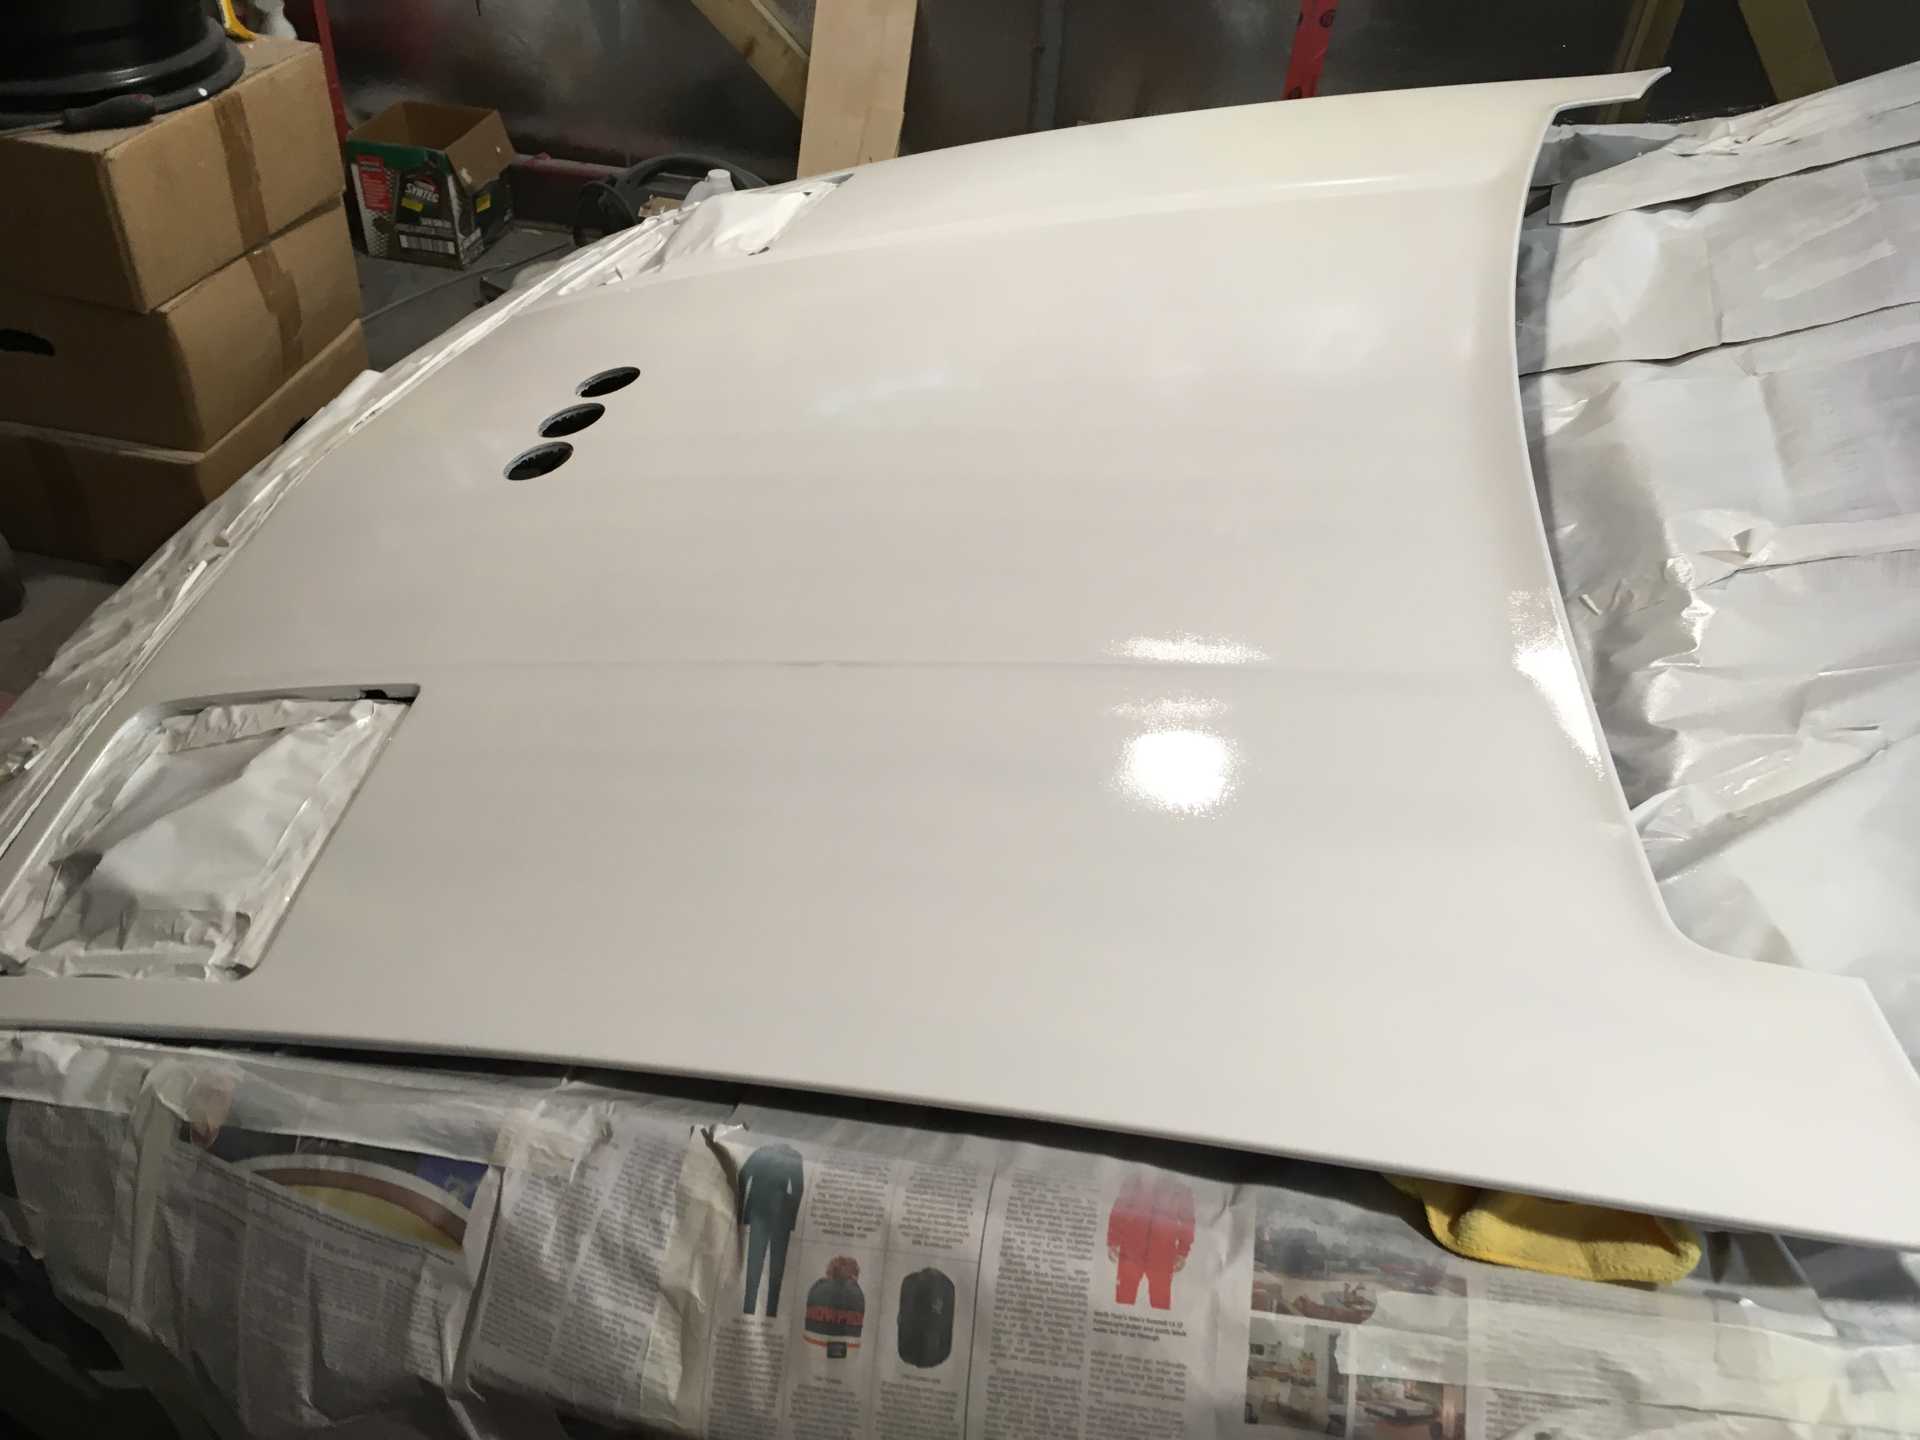
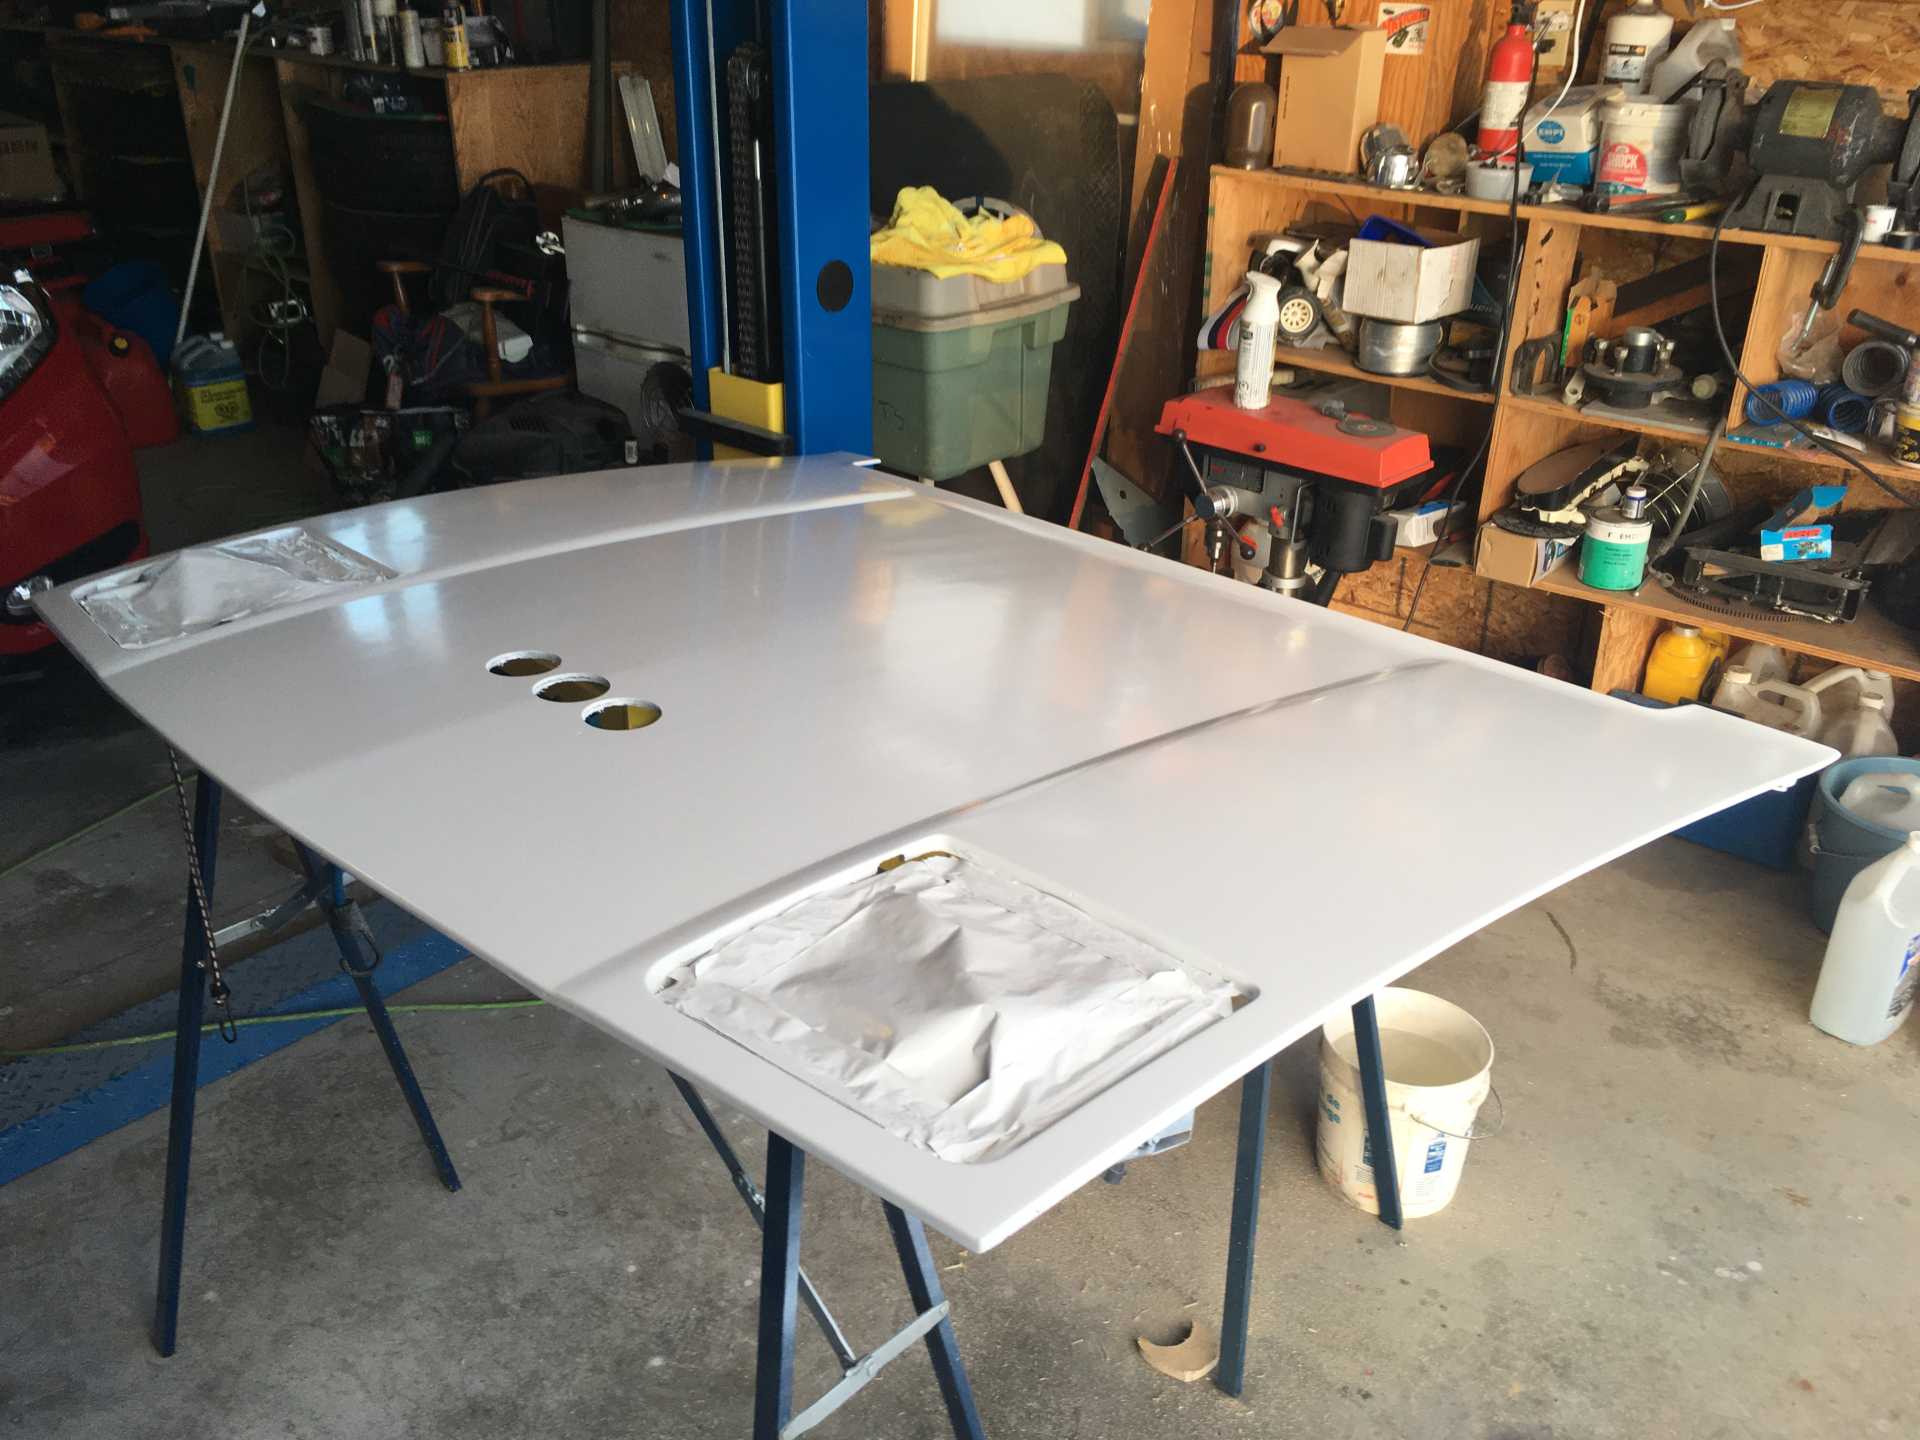
Slowly getting the hood painted. I took most of the old paint off, tried a different gloss white that didn't work out and took it back down to where it was . This was the second light coat of Rustoleum universal . I had to do two more coats and now it looks pretty good but I managed to get two small runs in it, up near the windshield wipers. The up turn makes the perfect place for runs to form. I am hoptng to be able to touch up the runs, I do not want to paint the hood again because it would mean sanding it down again. I have found the hood is the hardest part of the car to paint, with a rattle can anyway. All the other parts of the car(except the roof) can be painted in small chunks, making it much easier.
After the hood dries, then I mask it off and everthing except the roof. I paint that big area and then cover that over and then unmask and paint one piece at a time unti it is all done. It is a lot of work but it keeps the over spray off the finished parts and if I paint too much at once the fumes get really bad. The shed is passively vented and keeps the dust out. I wear a resperator designed to eliminate paint fumes and you can not smell the fumes while painting but I still like the idea of short exposures.
[This message has been edited by wftb (edited 02-09-2020).]
It is starting to look like I am going to have to give up on using these white spray bombs. I cant seem to get a nice even gloss and the nozzle keeps dripping paint on to the hood surface. They worked really well when I painted the civic wagon but now it is impossible to not make a mess. Not sure what I am going to do now, may just have to try to paint the hood grey and quit while I am ahead. I have 3 full cans of the grey leftover from the first paintjob so unless I want to spend a bunch of money on spray painting equipment that is my only option right now.
These cans are supposed to spray any direction without dripping. But they are terrible at anything but straight up and down. But your suggestion is what I have in mind for one last try at using the white colour. I took a can out to the Fiero shed and painted a 3' by 3' part of a side wall and got a nice finish and no dripping. I am going to hang it up vertical in the garage and give it another try.
I spent today wet sanding and then using a dry scuff pad and now the hood has the same sort of finish as the grey colour. I could just use my buffer and some rubbing compound and then wax it and have a nice finish. But the sun wrecks havoc on a finish like that, it needs to be waxed a lot to keep it nice.
The civic wagon I painted 5 years ago and managed to get the gloss to come up just by painting it has only been waxed twice and still looks good.
So tomorrow I will give it one more try with the hood hanging vertically.
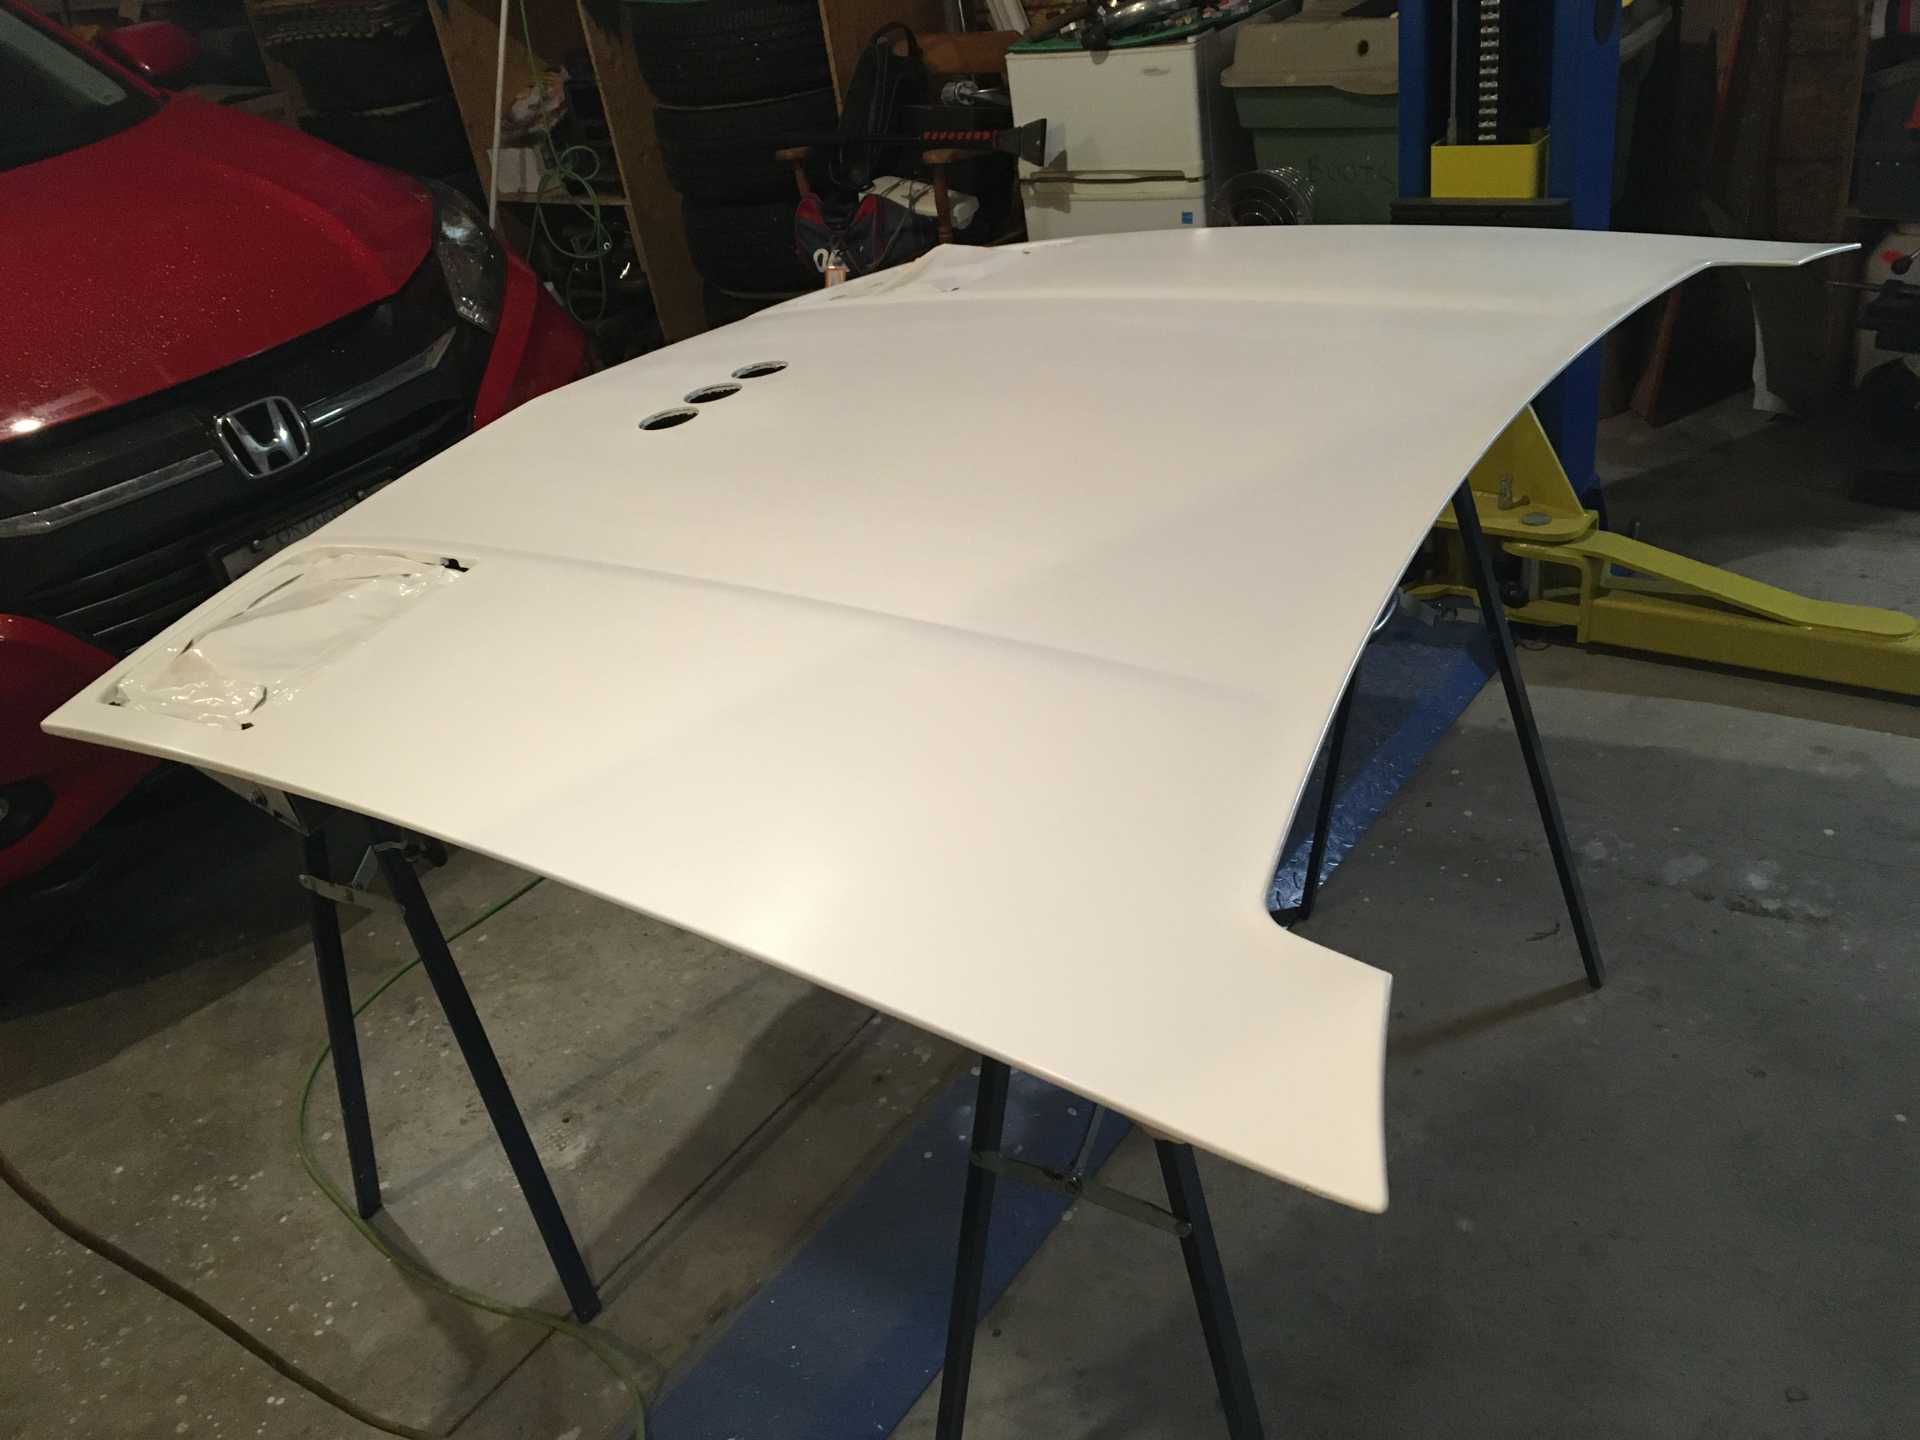
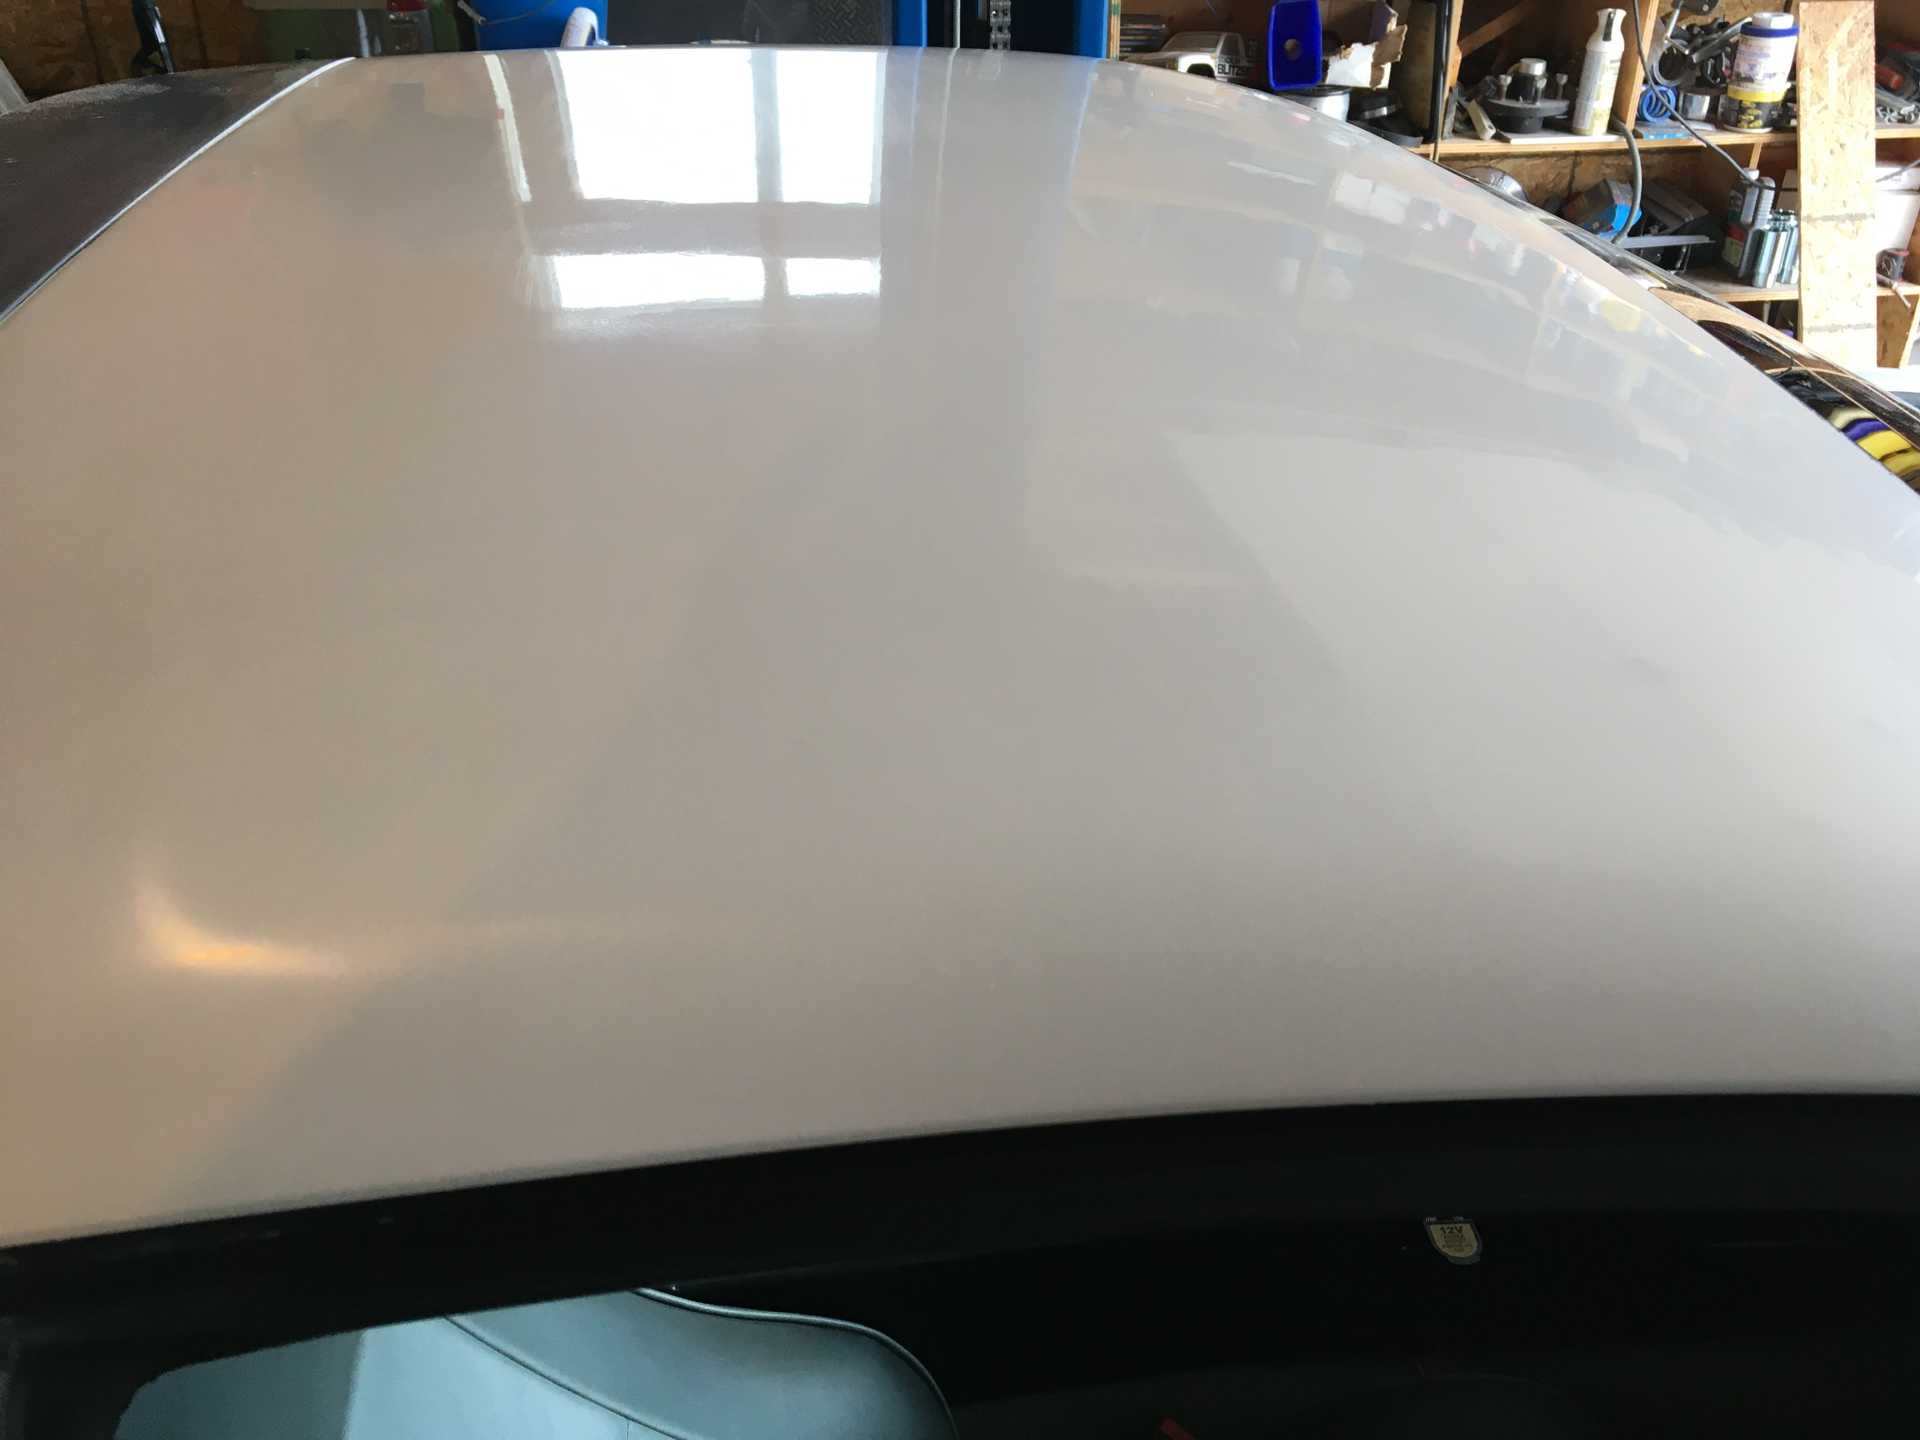
So I hung the hood up sideways and vertical and gave it another coat of paint . Came out much better but not perfect. No drips this time and I should be able to buff out the imperfections so I am going to call the hood done.
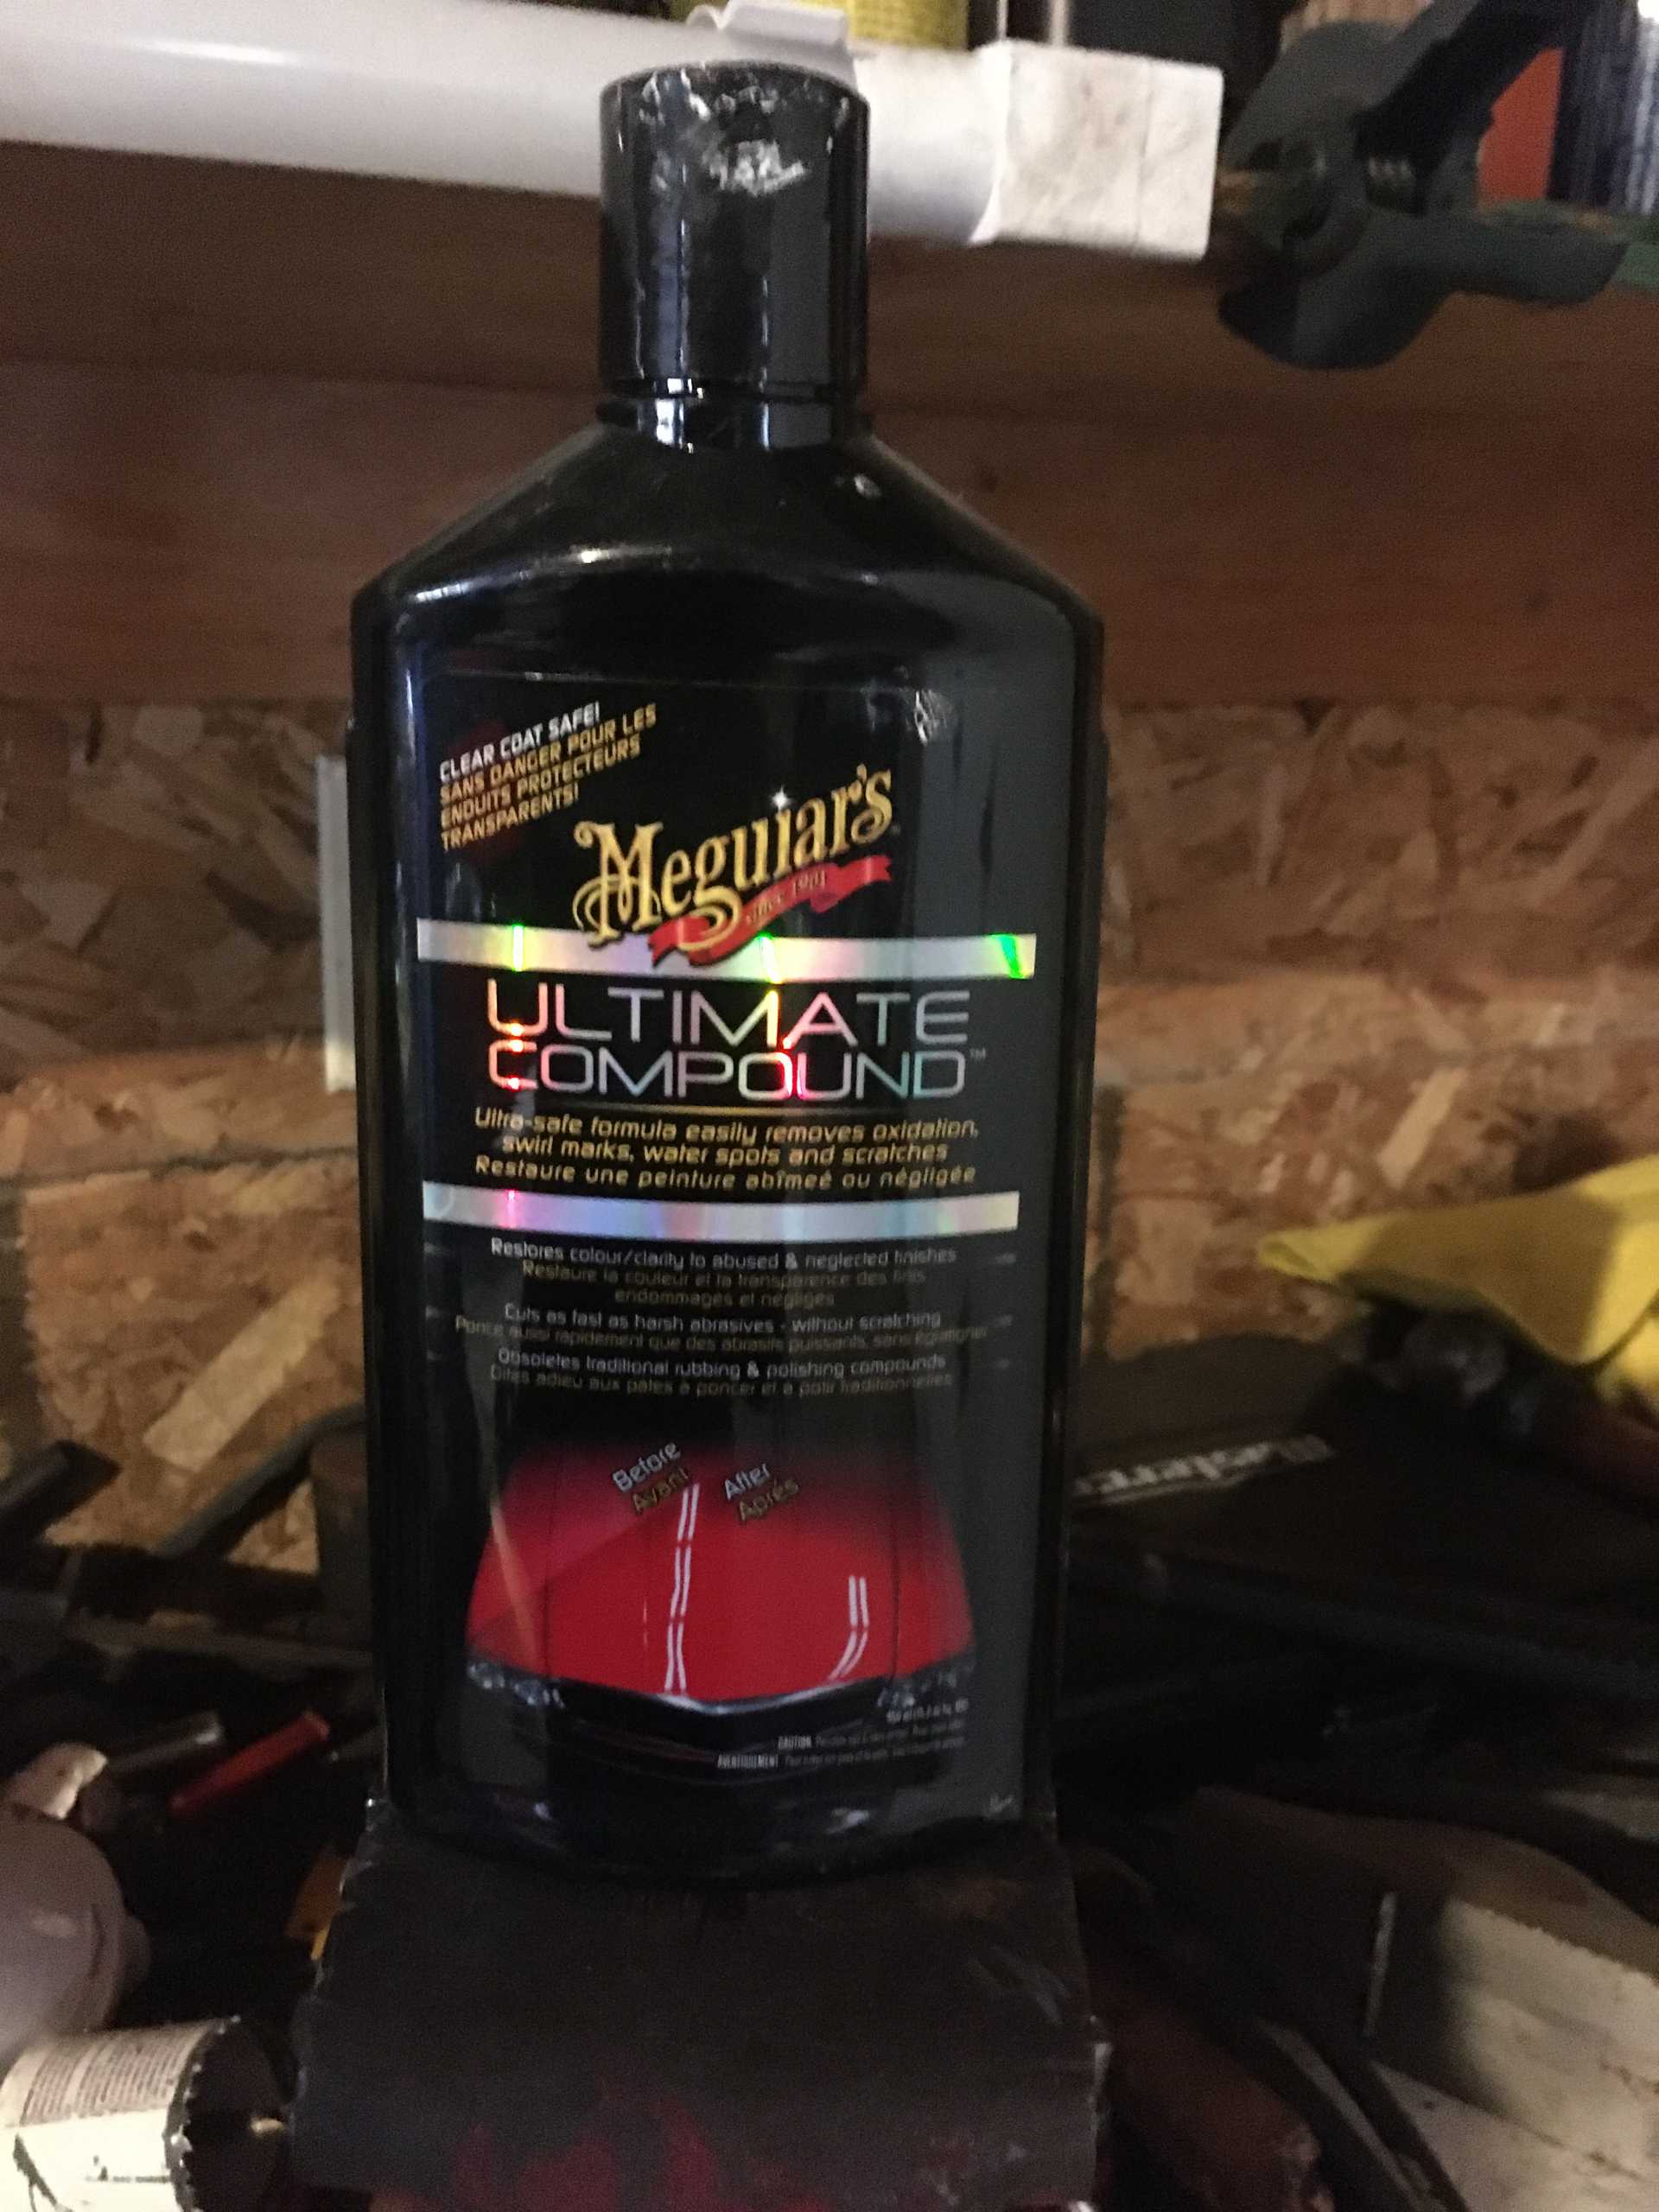
I use this product to buff the finish. It is the only compound I have found that is compatible with this paint:
I have found one problem with the white colour. If you use anything other than the cheap blue windshield washer fluid, you can end up with stains on the finish. Not a problem for me because I always use the blue fluid because the washer bottle also feeds the water meth injection system.
The hood scoop is out in the shed, have to get some double sided tape on it and stick it back on. I will paint the rear decklid the same way with it hanging sideways and vertical. The sides of the car should be fairly easy to do, but the roof might be a problem. Luckily it is much smaller than the front hood.
[This message has been edited by wftb (edited 02-29-2020).]
Painted the nose with the spray bombs and got no dripping and I got it to gloss up nicely. There are a few minor imperfections but you have to really look to find them. The front hood ended up getting wet sanded because I couldn’t buff out the rough parts of it. I may give it another coat since I know I was the victim of some defective spray bombs.
I bought a new compressor to be able to use my hvlp spray gun but after reading reviews of the paint I was going to use I decided to stick with the spray bombs for now. I am putting three coats on everywhere so if I want to wet sand I can with out burning through.
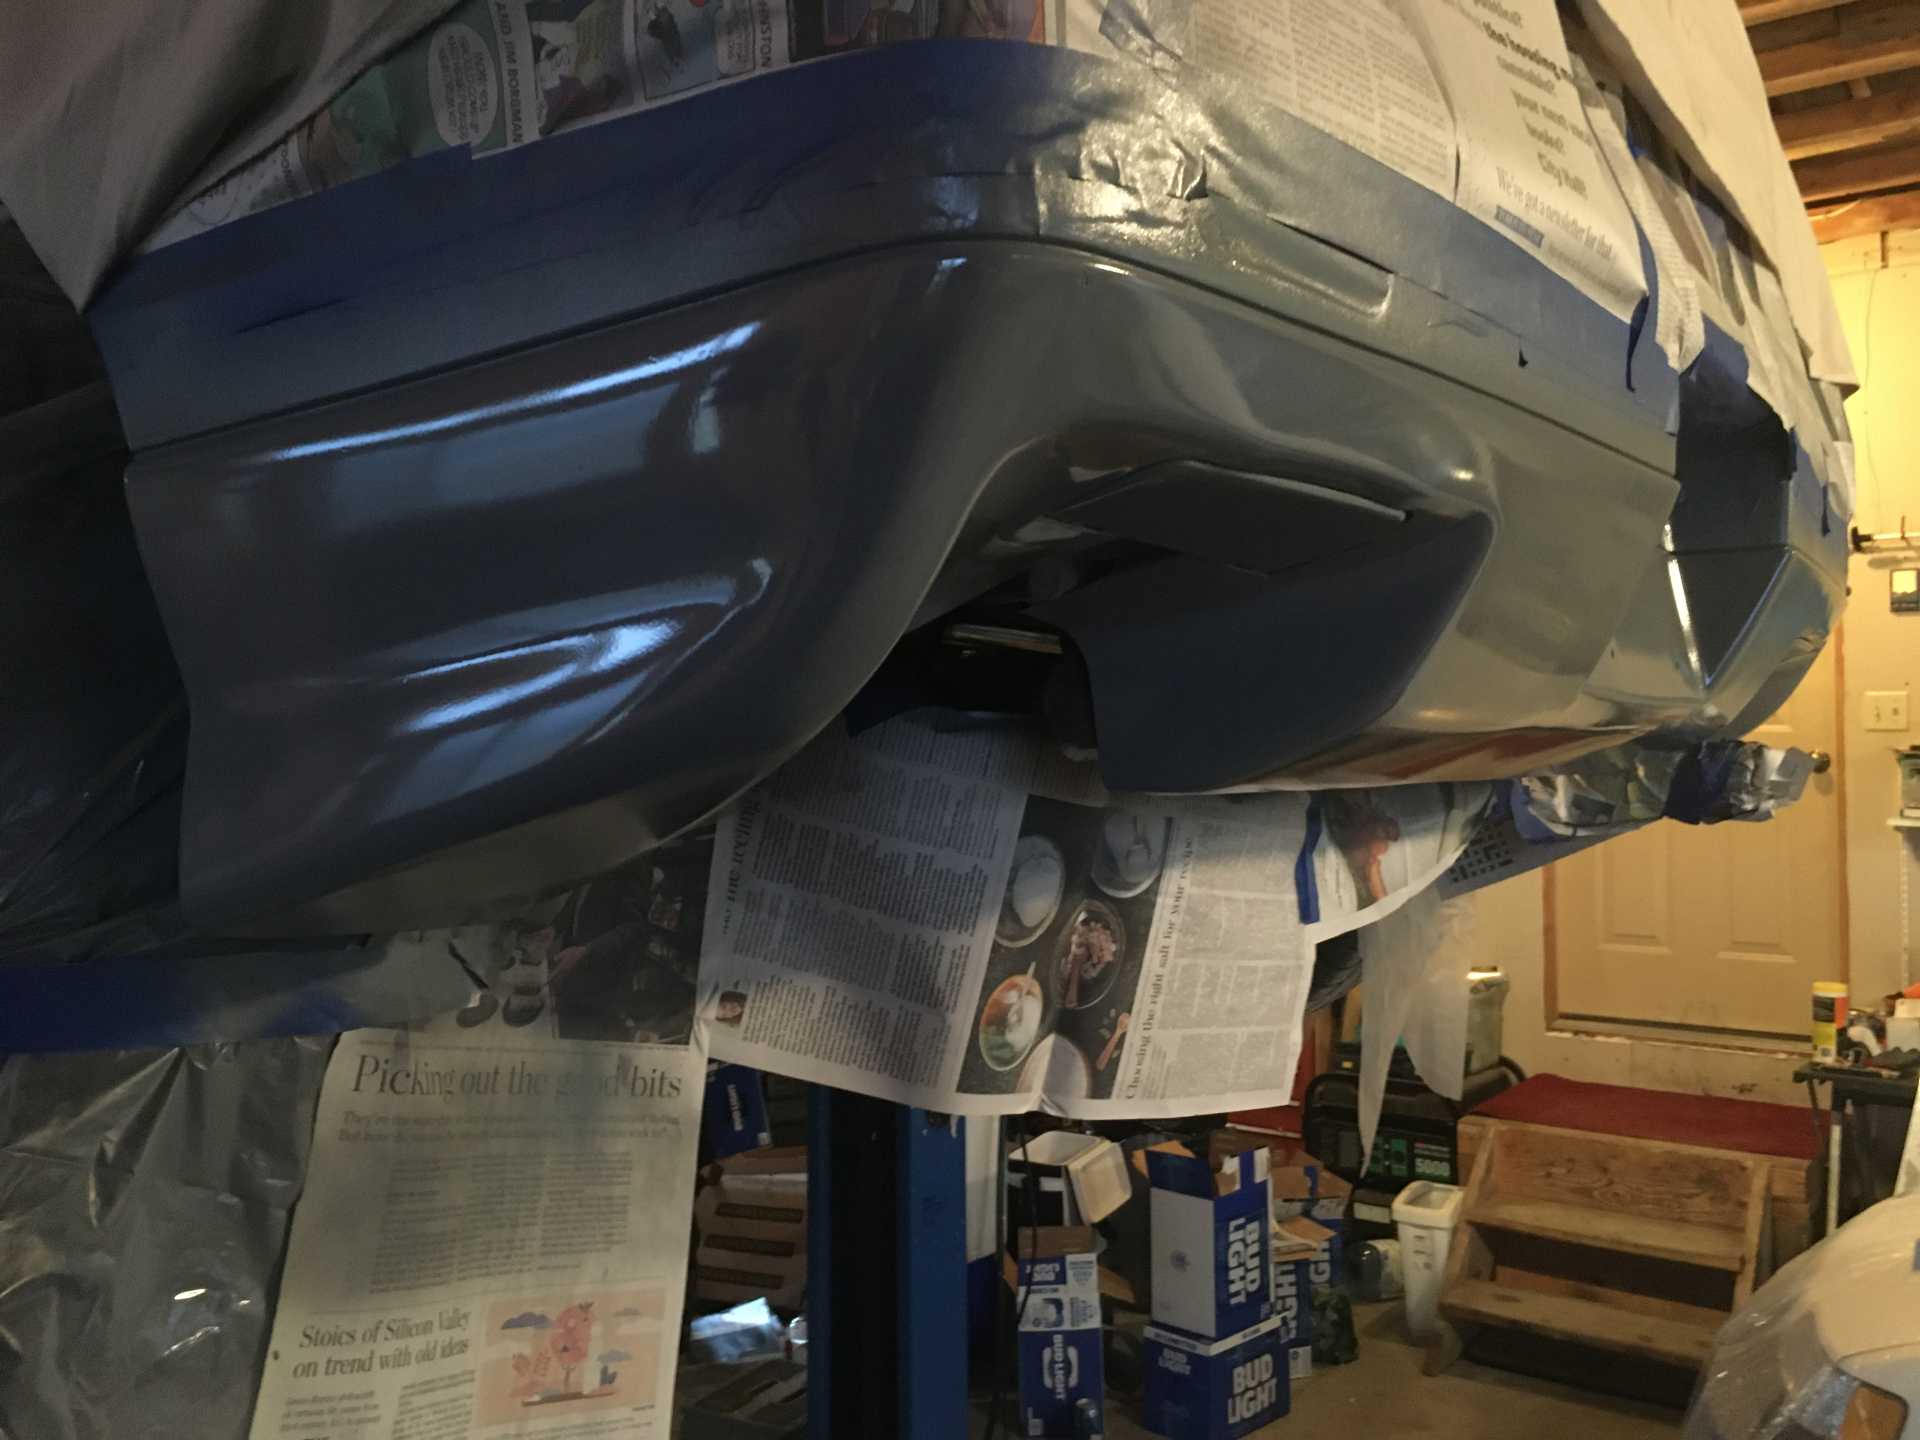
I decided not to paint the whole car white. I wanted to do a two tone paint job with black gravel guard coating on all the aero bits but I thought maybe that would not look that great . I did find a white Fiero with grey aero and lower bumper covers and I thought it looked good so that’s what I am doing. I have four cans of the grey that the car was painted with from 7 years or so and compared to the white cans this stuff is amazing. I do not know what they changed but this stuff doesn’t drip and using it in around plus 4 C temperature it glosses up evenly and looks great. The new white cans have been nothing but aggravation. Any way here is the lower half of the rear bumper:
[This message has been edited by wftb (edited 03-26-2020).]
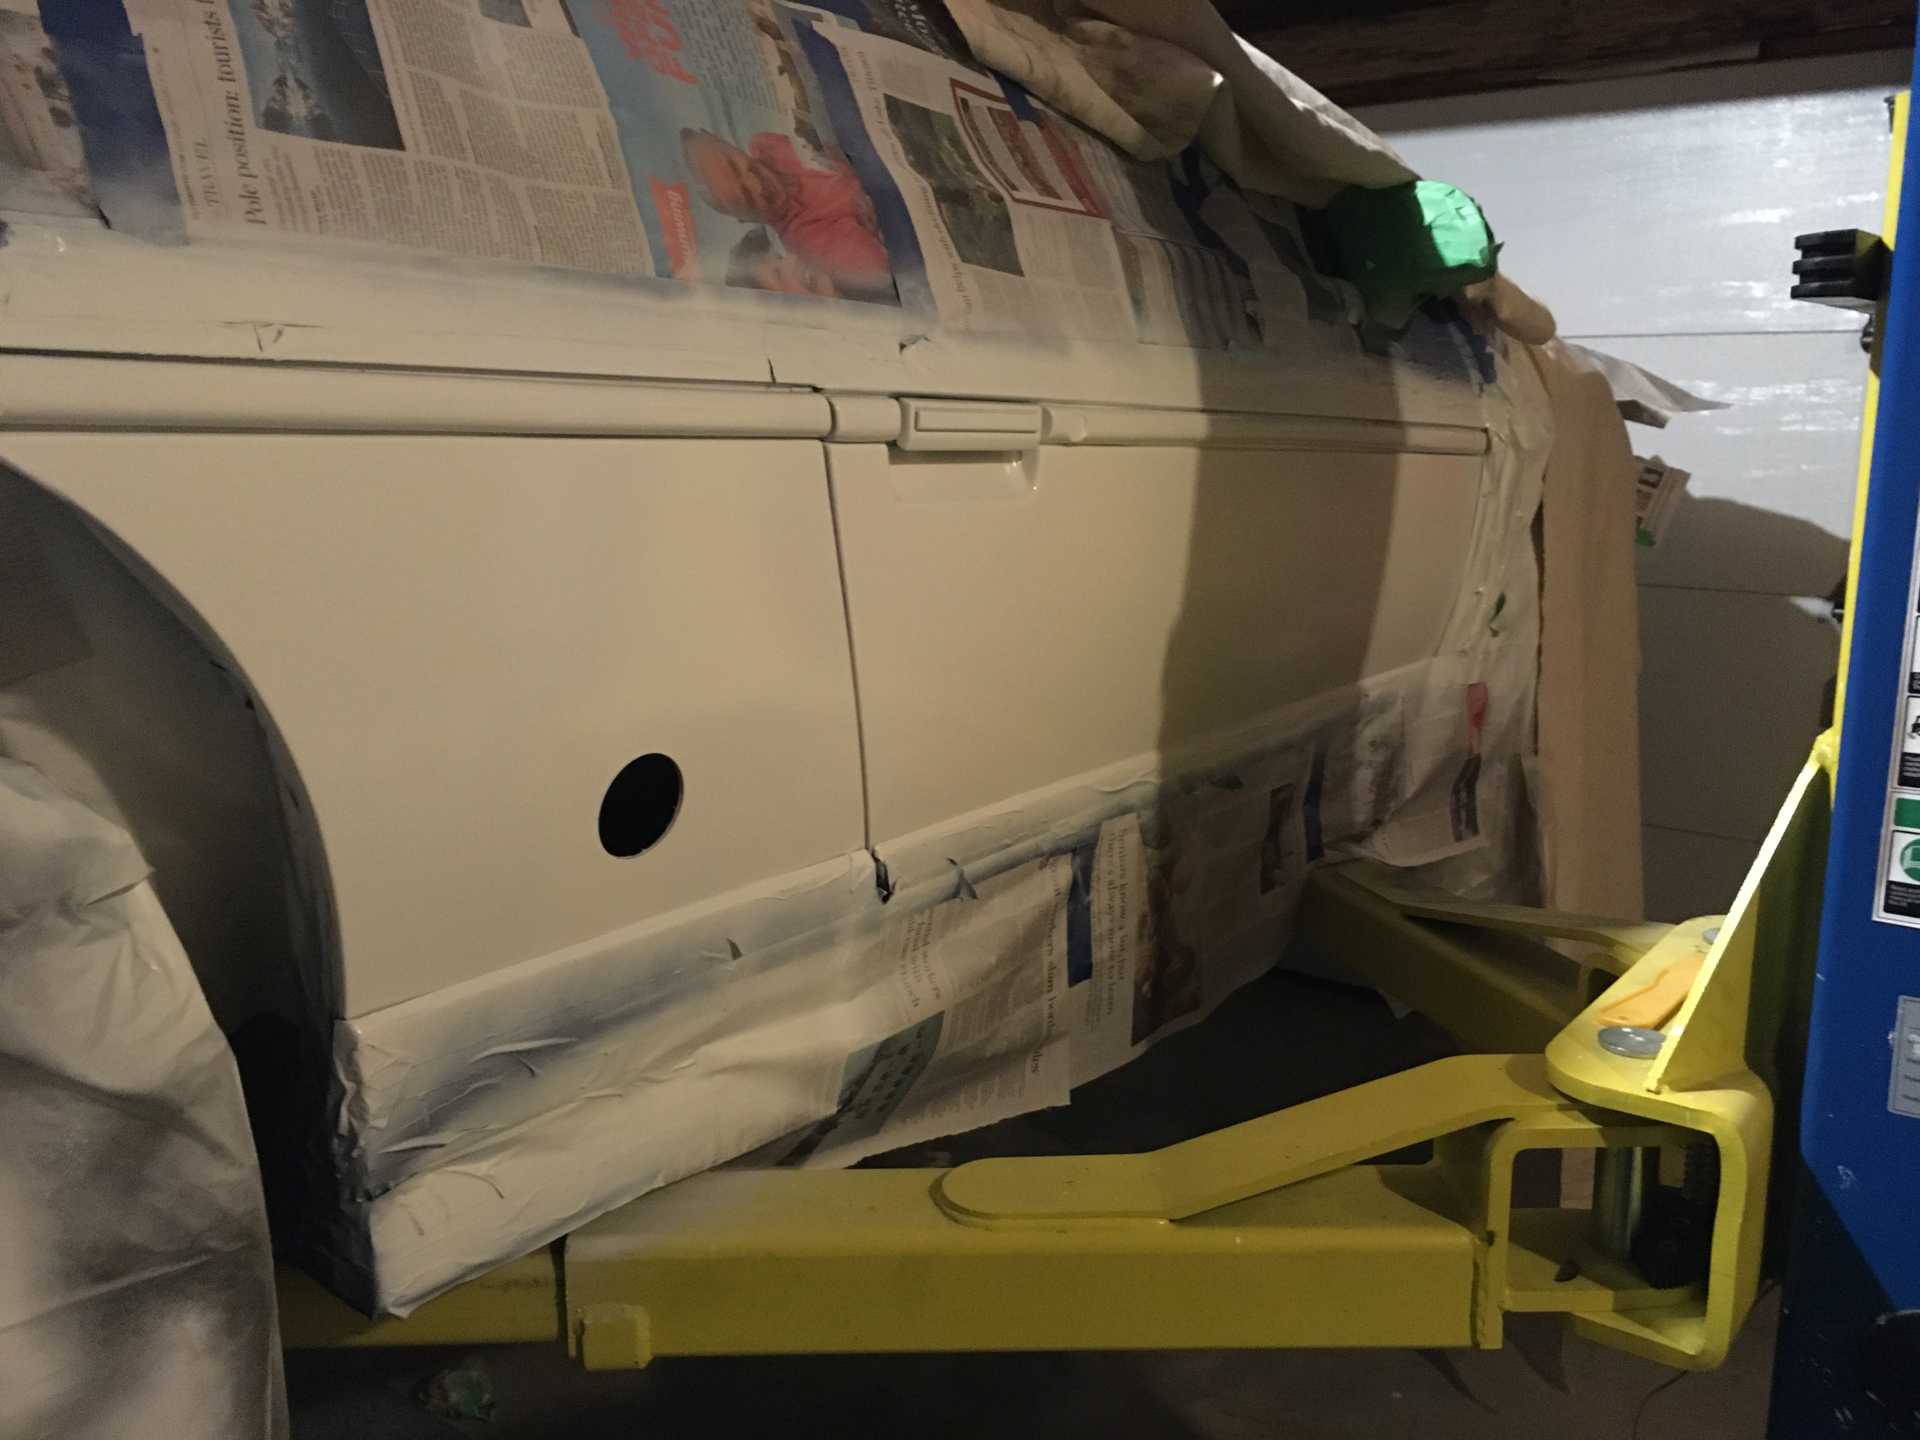
Got the bottom of the doors and area in front of rear wheels done over the last couple of days. Slow going because of lots of sanding to get rid of splatter.
Bought a Simonize buffer/polisher the other day. It has a hook and loop base and I wondered if I could get a synthetic steel wool pad to stick to it to speed up the sanding process.
I am amazed how well that works.
[This message has been edited by wftb (edited 04-07-2020).]
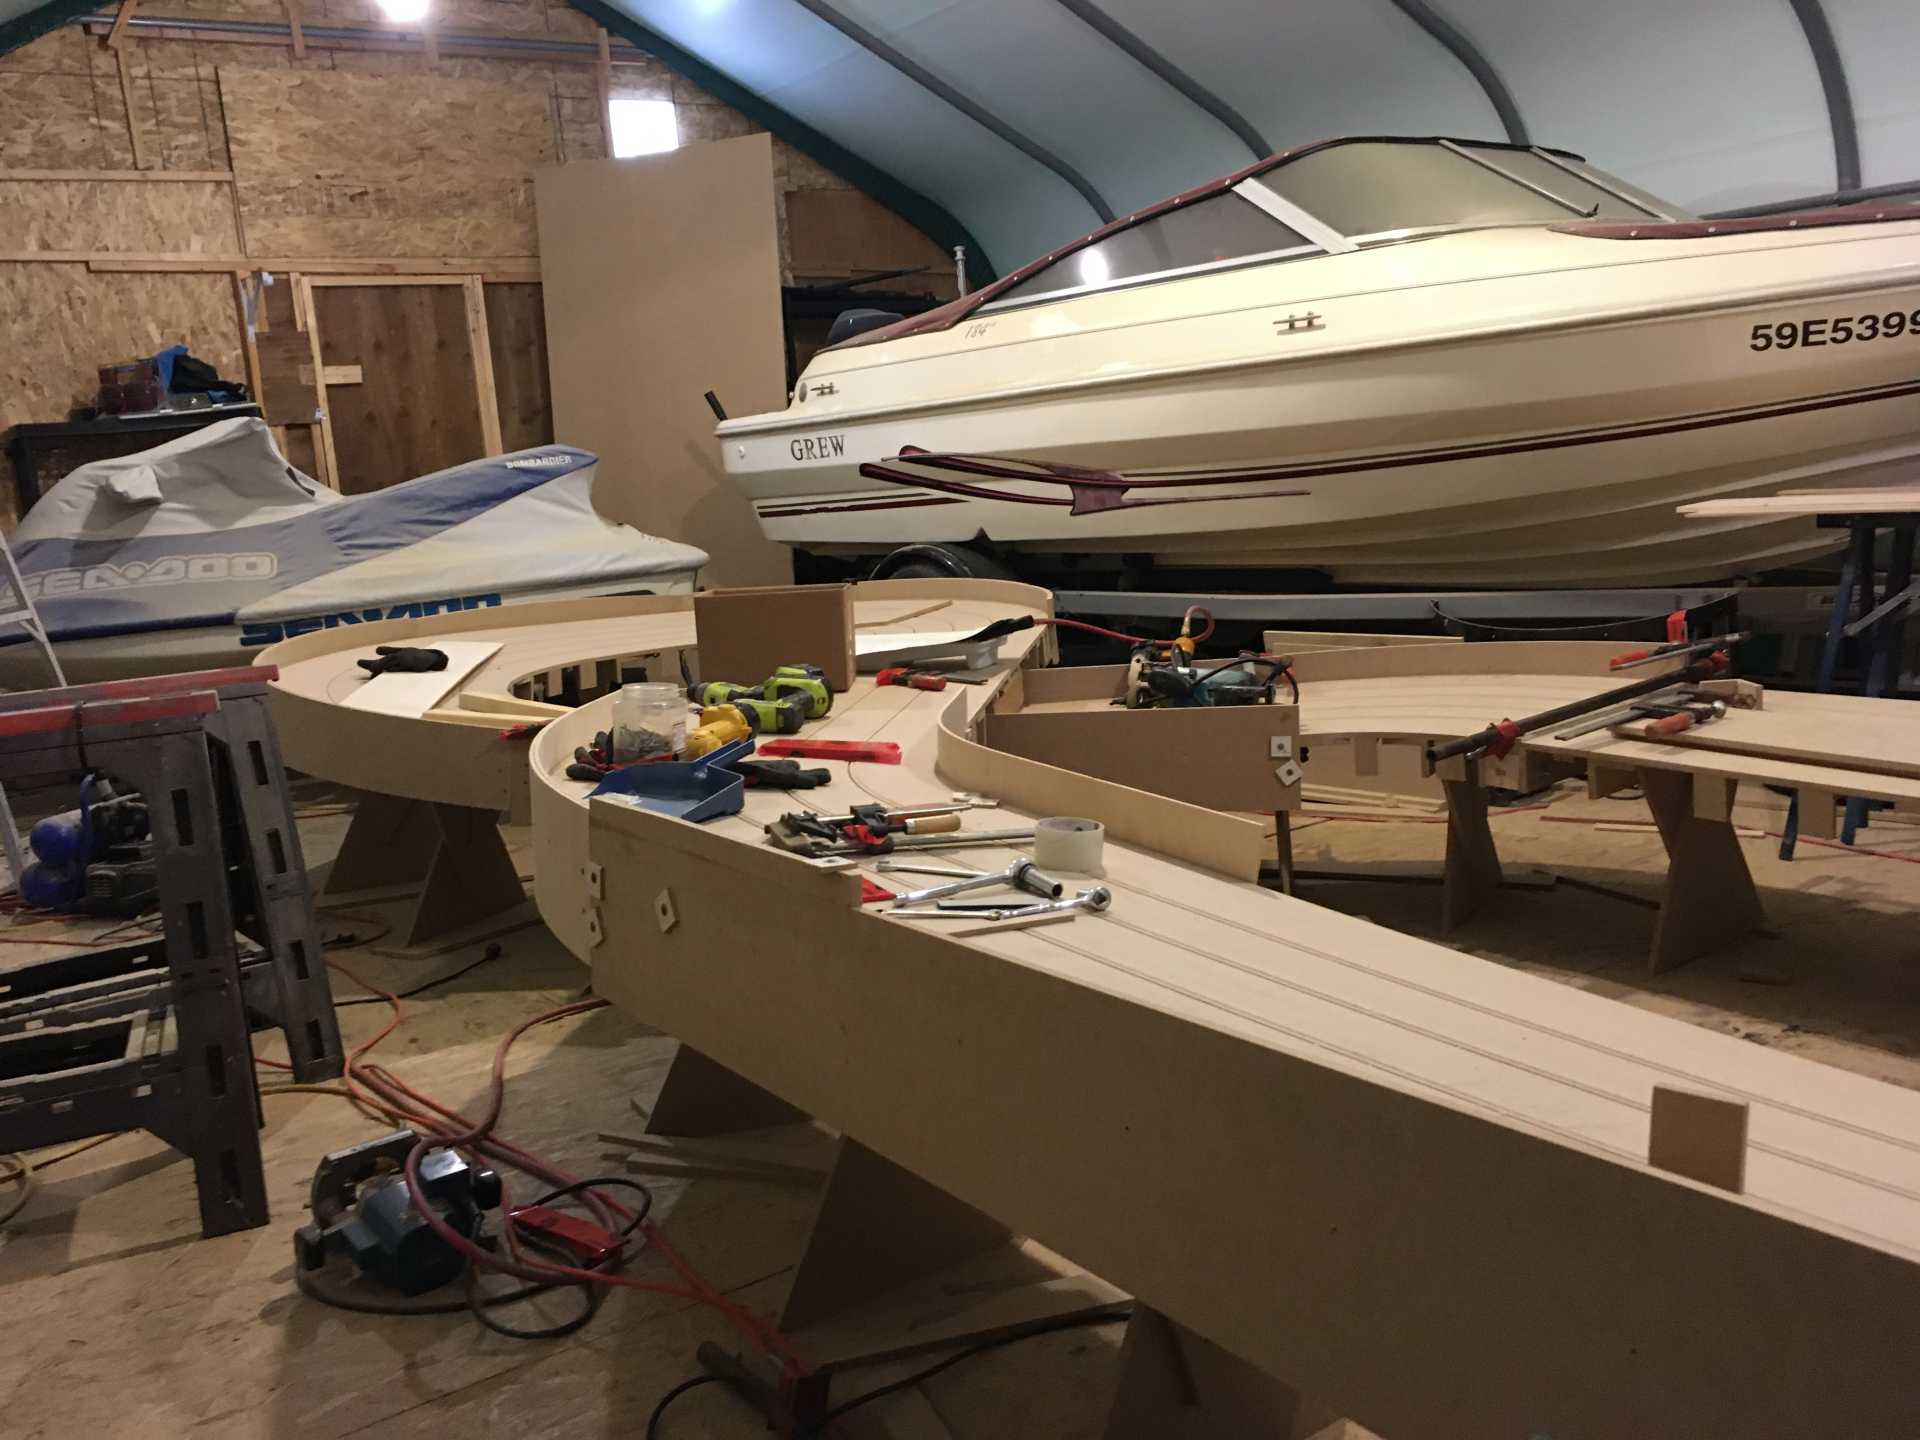
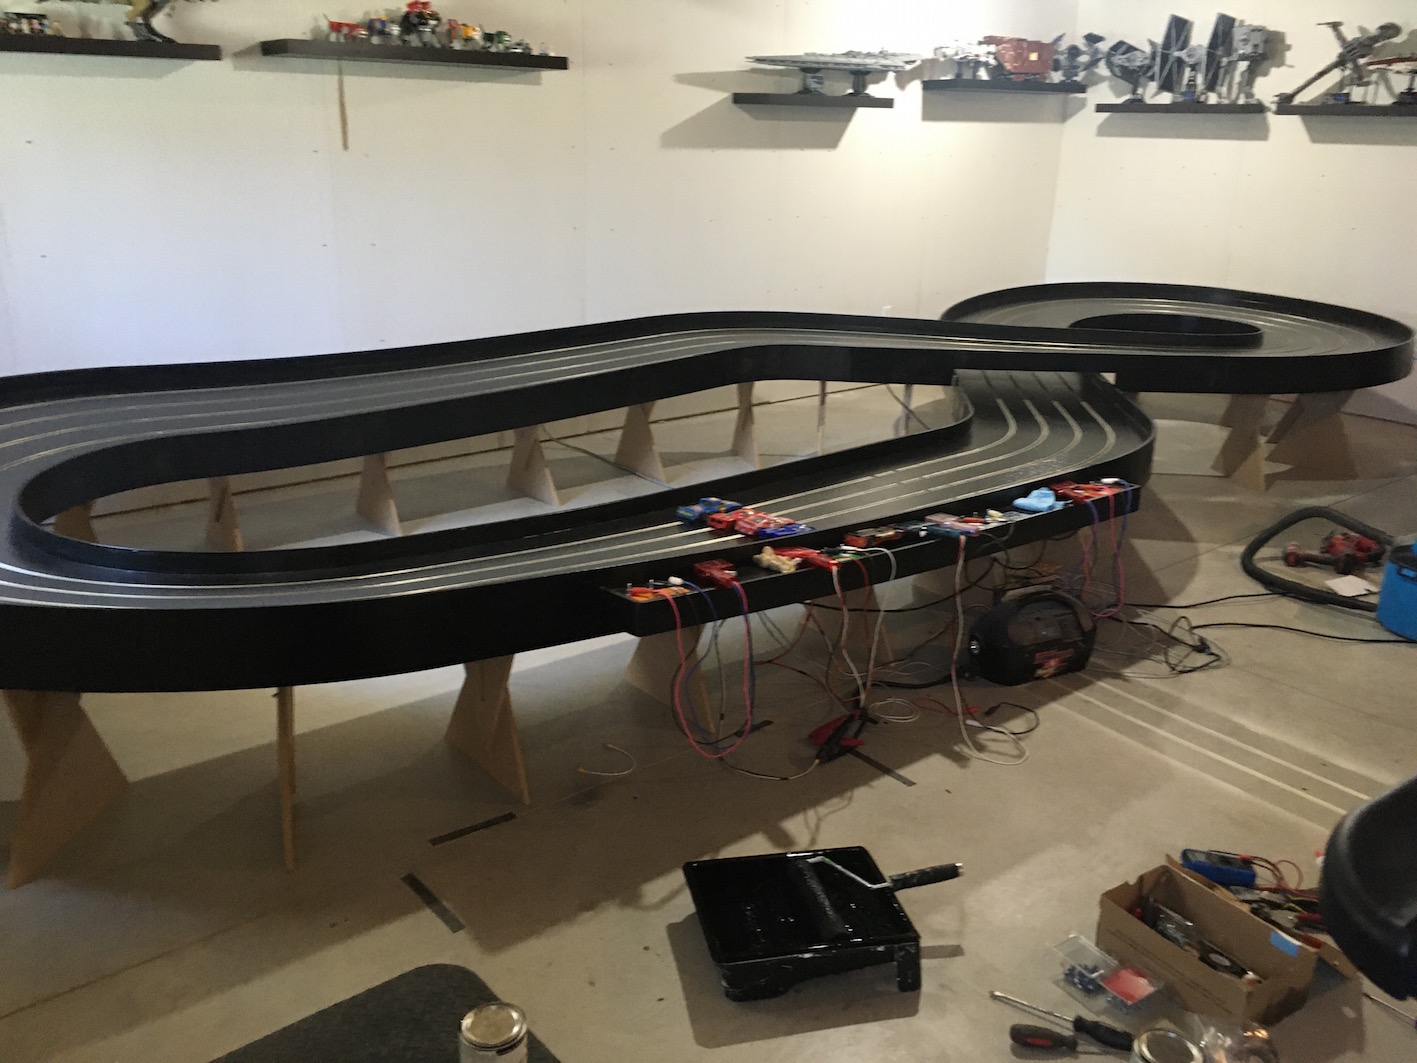
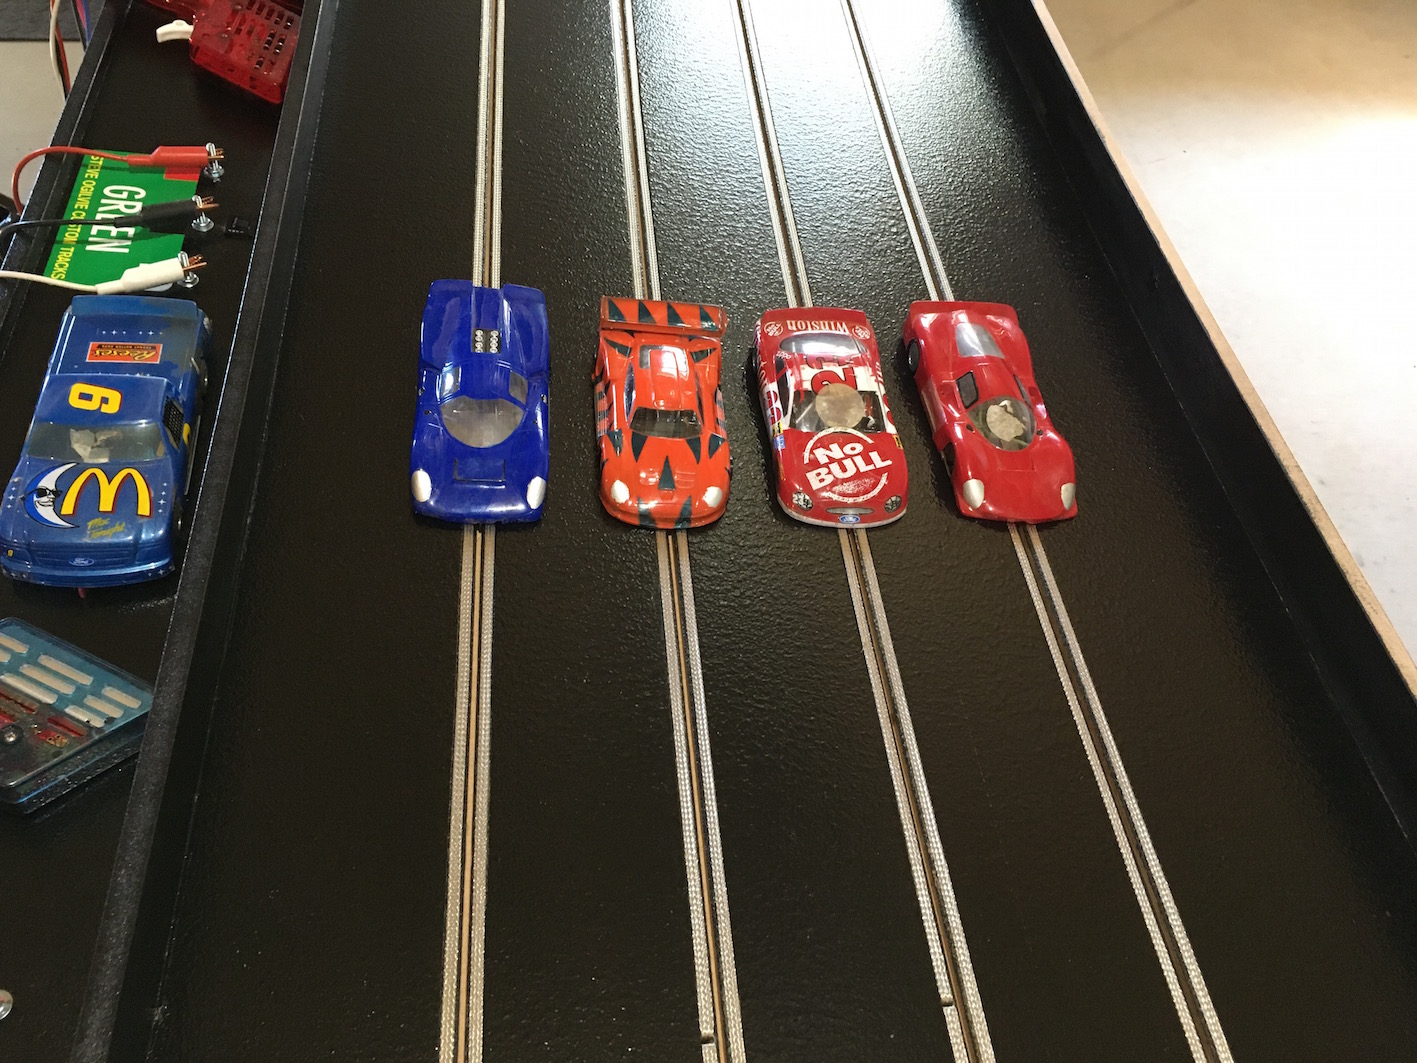
Since I am waiting to get more paint and we all have time on our hands I decided to build a 4 lane 1/24 scale slot car track. Coming along nicely should have all the wood work done in a week or so.
I put the insurance on the car so I could test it out since I have not driven it since making all the changes to the turbo and intake and charge piping. I am happy to report that the car is running much better now. First drive I popped a charge pipe hose off. Fixed that, was a clamp I forgot to tighten up. Second drive, popped another hose off. Different spot, changed to a better clamp, tried again and everything went really well. Today I took it out and ran a scan on it with my HP tuners. With it set at 11 psi max boost I ran it through the lower gears up to 6700 RPM and the scans show everything in the green and only the odd KR of .1 to .4 degrees. And that was in totally random places, not where I thought I woud see KR.
For once I accompished everything I set out to do with this mod. The smaller turbo spools up quicker, it has more power when I leave it in fifth at low speeds and floor it. Intake air temps never went above 28 C (23C out at time of drive). Nothing leaks, I am happy.
But I am probably not going to drive it much till the fall or maybe next year. I took advantage of being able to drive with expired plate stickers because of covid19, so if I turn in the plates now I can avoid getting stung with a 2 year bill next may. In Ontario if you do not turn in the plates when the car is not insured, they ding you for the year it sat anyways. There might be a way I can avoid buying new plates next year, saving 40.00 but I will talk to the Service Ontario people on Monday.
I do not want to drive it until I can finsh the paint job. As you can see, the car looks like sh!t. There are so many little things I want to fix and finish that driving it now is just going to delay things. I have new headlight lenses to put on, I need some new pieces of trim and hope to pick up some rear lower quarters at the wreckers once they open. I am going to take off the aero bits, fenders, rear bumper and door skins so I can do them up right and get the fit right for once. And finally get some new dew wipes on. I will probably miss the track again this year oh well.
[This message has been edited by wftb (edited 06-06-2020).]
My tune turned out to be not as perfect as I thought. Yesterday, thinking I had everything right, I took the gopro and went for a spin. At about 6400 RPM I was getting a drop in power sometimes. So I decided to not publish that video. I took a look at the tune and the problem was that I forgot to look at the power enrich spark tables and they still had a huge amount of advance reduction at higher rpm's. I didn't notice it the other day because I did not put the pedal close enough to the floor to get PE to come in to play. A scan does not tell you what spark table you are running off of, just the amount of advance and KR at the time. So I put the PE spark tables back to stock and that problem got solved. The PE timing is abit too aggresive now, I am getting some KR from about 4400 to 6500 rpm. I can take some timing out of the PE tables to fix this or I can up the amount of watermeth injection. It is set to come on at 4 psi and hit max at about 14 psi. Setting the max at about 8 psi should do the trick. The whole KR episode starts and ends in 4/1000 of a second if I am reading the graph right.
Good job that thing runs good! Rarely had good luck w the rattle cans on anything big, especially w metallics. Love the slot car track that things awesome! Do a build thread on that!


.JPG)
.JPG)

 ]
]
 [img]https://images.fiero.nl/userimages/wftb/I MG_2540.JPG[/img]
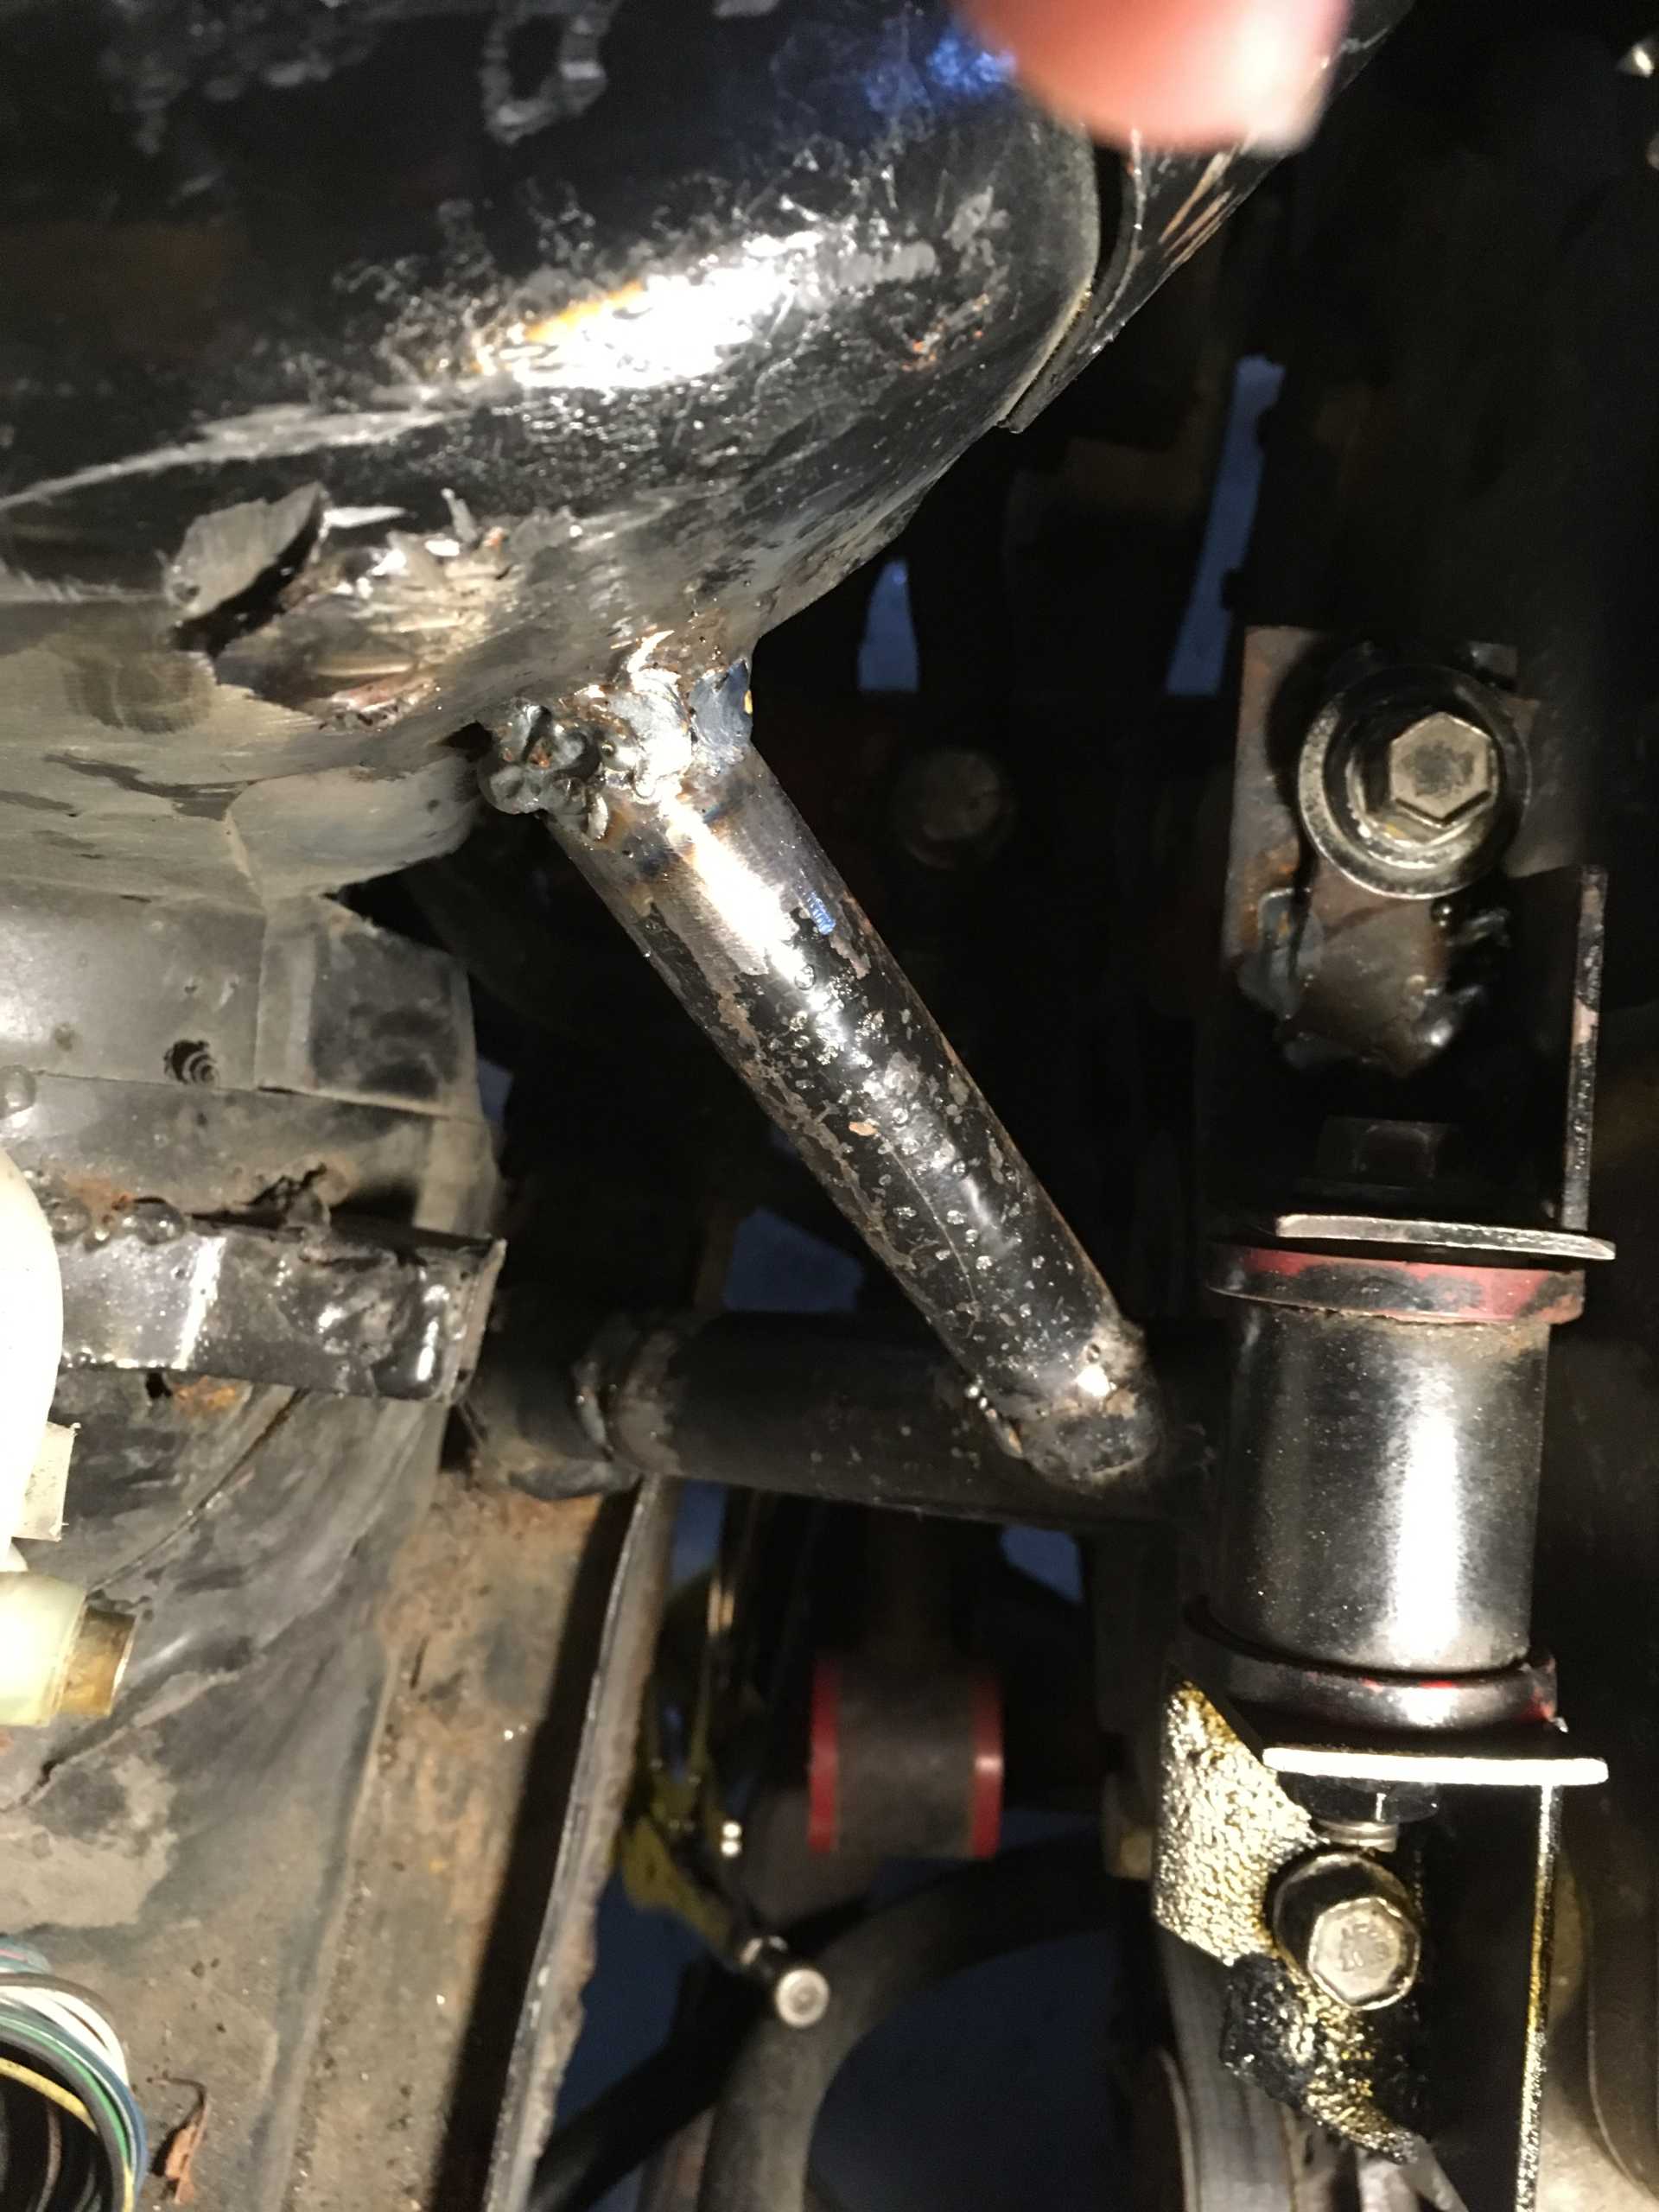
 [img]https://images.fiero.nl/userimages/wftb/84CE1290-109 B-4C81-A8F3-EE0ECBD86829.jpeg[/img]