Hello all, I need to remove the rear deck lid on my ‘87 Fiero GT. I’ve read everything on this page and I’m still a little concerned.
Is it as simple as removing the four bolts that hold the lid on to the brackets as someone wrote?
Also, everything I’ve read indicates to put plywood on the rear window to protect it. The problem is that there is no room to do this when the lid is raised. The plywood would rub against the lid itself causing damage. But I could put a heavy blanket between the window and the lid. Whether this will be sufficient protection, I don’t know.
I don’t have anyone to help me. I’m thinking of putting a blanket over the engine so I can rest the lid on it assuming I can remove it safely. I have already removed the wing.
And as far as reinstalling the lid, how can this be done safely? Is it installed from a lifted position by aligning the four bolt holes? is it possible for one person to do this? I don’t see how it’s possible for one person to accomplish this.
It is just the 4 bolts and whatever electrical harness for the trunk release. You should put something there, because if either one of the retaining straps on the hinges are broken, that hinge will go into the window, there should be room. It is possible to remove and reinstall entirely by yourself, but it is extremely difficult, and I only attempted that after successfully having someone help me about a dozen times. For the first time, you need someone to help, otherwise a "surprise" (like a hinge releasing and swinging towards the window) could upset your balance and cause a lot more damage. Once removed is easiest to just lay it down on some grass, don't worry about pulling it up and off, then bringing it back in to lay it on top of the engine, by the time the lid is out of the hinges, it's halfway off the car anyway, easiest to just put it on the ground. It isn't heavy but it is unwieldy.
I think I can get it out by myself, but reinstalling it is another matter. I can cover the engine with heavy blankets and lay the lid on them. But I assume that I must lift the lid on its end to reinstall it because the hinges will be angled up and not horizontal. I hope I’m wrong.
At this point I’m not sure what I’m going to do. The purpose in removing the lid is to get to the rear plugs. I tried getting a socket in there with the lid on but couldn’t do it.
And now after removing the oil dip stick, I can’t locate the hole where it goes back into. There are hoses and brackets everywhere. I checked the drawings and know where the slot is supposed to be, but after shredding my hands and fingers, I still can’t locate it. After everyone stops laughing, I’d appreciate any advice. I removed the large hose at the thermostat housing, but I don’t wish to go any farther.
When I remove the decklid, I place a large piece of corrugated cardboard (ie the flattened box from a hot water tank) on the roof, and then I stand in the trunk and lift the decklid onto the roof.
The cable restraints on the hinges will prevent the hinges from hitting the rear window... but just in case they're corroded and/or damaged in some manner, place a length of wood along the entire width of the rear window before removing the decklid. It's very unlikely to occur, but you sure wouldn't want an accident resulting in a broken back window. Better safe than sorry.
The purpose in removing the lid is to get to the rear plugs. I tried getting a socket in there with the lid on but couldn’t do it.
The rear plugs are easy to get to. It's the front ones which are more of a challenge. All that's required though is a 3/8" drive ratchet, a 3" extension, and a spark plug socket. A universal may also be required, but I forget, as it's been years since I've needed to change the plugs. (And yes, I put anti-seize on them.)
[This message has been edited by Patrick (edited 08-26-2025).]
Did you have help reinstalling the lid or tackle it on your own?
I have no friends... I'm forced to do it all on my own. Seriously though, I re & re the decklid by myself. When placing the decklid back down onto the angled-up hinges (again, while standing in the trunk), I have some folded corrugated cardboard down near the rear window to sort of help hold the decklid in place when being reinstalled.
[This message has been edited by Patrick (edited 08-26-2025).]
I replaced the front (Firewall-side) plugs a few years ago- What I did was to release the Engine torque link, and then release the subframe REAR bolts- with a jack under the rear of the subframe!- and then tilt the engine/subframe down a few inches at the rear which opened up the access to those front plugs- sounds crazy/complicated, but it is very simple and worked well. No harnesses or water lines had to be un-done....
Also, I used compressed air to blow away any debris in the plug holes BEFORE I removed the plugs- had a whole pile of leaves, dirt and other debris on the floor under the car afterwards!
I used compressed air to blow away any debris in the plug holes BEFORE I removed the plugs...
And for those of us without access to compressed air... a shop vac works very well for this (to vacuum the debris, not blow it). I just put the end of the 1-1/4" hose right over each spark plug (with the high tension lead removed).
[This message has been edited by Patrick (edited 08-26-2025).]
The purpose in removing the lid is to get to the rear plugs
I have never removed the decklid to change the right-hand bank of spark plugs...
For me, I start by removing the rubber air duct from the filter housing and the throttle body, then the wires from the front spark plugs.
Then:
quote
V6 Front Spark Plugs Procedure by ‘olejoedad’
Stand on driver side of car, use left arm to reach between firewall and engine.
Dislodge debris from around plug bases; blow out with compressed air or vacuum debris.
*Soak with penetrating oil if they won’t yield / Use the pick, air and penetrating oil again and again until plug well is free of debris.
{It's recommended to get the plug wells cleaned out and then soak the plugs with penetrating oil overnight if they’re ready rusted and dirty.}
This is all done by feel, and it may help to close your eyes when reaching around the engine. (Seriously)
Use a plug socket, short extension and short ratchet to remove the plugs.
Apply a LITTLE of anti-seize on the threads and do not over tighten the new plugs. *Cone head plugs only need ~ 1/8 Turn after tight by hand. *Casket head plugs only need ~ 1/4 - 1/3 Turn after tight by hand.
And that's assume you have New Plugs that need to crush the gasket. When reused them, often only ~ 1/8 Turn
Torque Spec (only 7-15 ft-lb for Fiero stock engines)
------------------ Original Owner of a Silver '88 GT Under 'Production Refurbishment' @ 136k Miles
I’ve spent the last two days trying to grasp a new spark plug which had dropped behind the engine near the firewall. It fell as I was attempting to install it. I’ve tried everything from pickup tools to coat hangers to vacuum hoses. It’s down there wedged in between parts of the engine.
I’ve spent nearly a week trying to install the three plugs adjacent to the firewall. I got one in, two to go. Ridiculous! I’ve had a variety of different problems. Everything one can think of.
I’m considering just leaving the plug there unless someone knows a way to get it out of there.
Not that it needed to come off for this, but I suspect you didn't remove the decklid?
quote
Originally posted by Gene1000:
It’s down there wedged in between parts of the engine.
Try looking at the area from a different angle... like from below (in a safe manner).
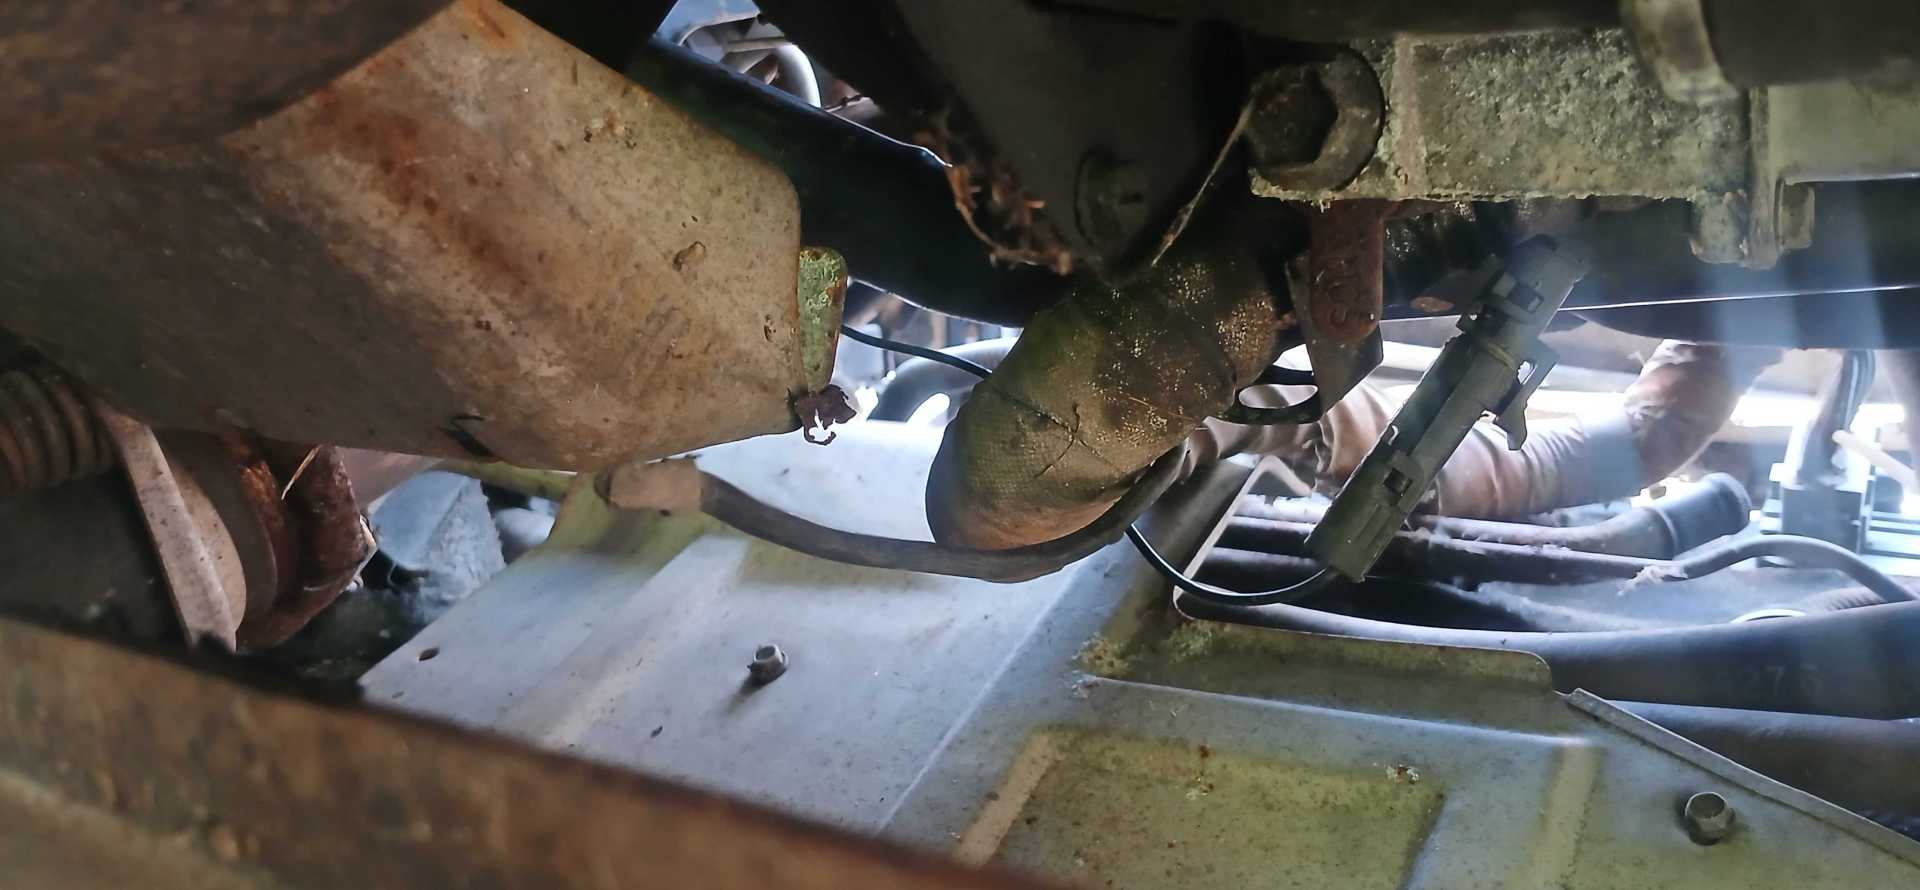
I'm not 100% sure it would fit, but are you sure the spark plug didn't drop down and get wedged between the heat shield and the firewall? It's just four or five bolts that hold that heat shield in place.
[This message has been edited by Patrick (edited 09-01-2025).]
After many attempts over days, I was finally able to recover the spark plug that had fallen onto the engine near the firewall.
However, I have just about given up trying to install two new spark plugs on the bank adjacent to the firewall. I managed to get one in on the end of the passenger side. The center one has been impossible. I can get a new plug into its chamber, but I’m not able to align it so the threads catch and I’ve tried 100 times. I haven’t tried the one on the driver side.
For now, I’ve walked away. I’m not sure if I’m going to remove the deck lid because I think reinstalling it by myself will be tough to accomplish. Also, installing plywood on the rear window will damage the surface of the deck lid if it’s in a raised position.
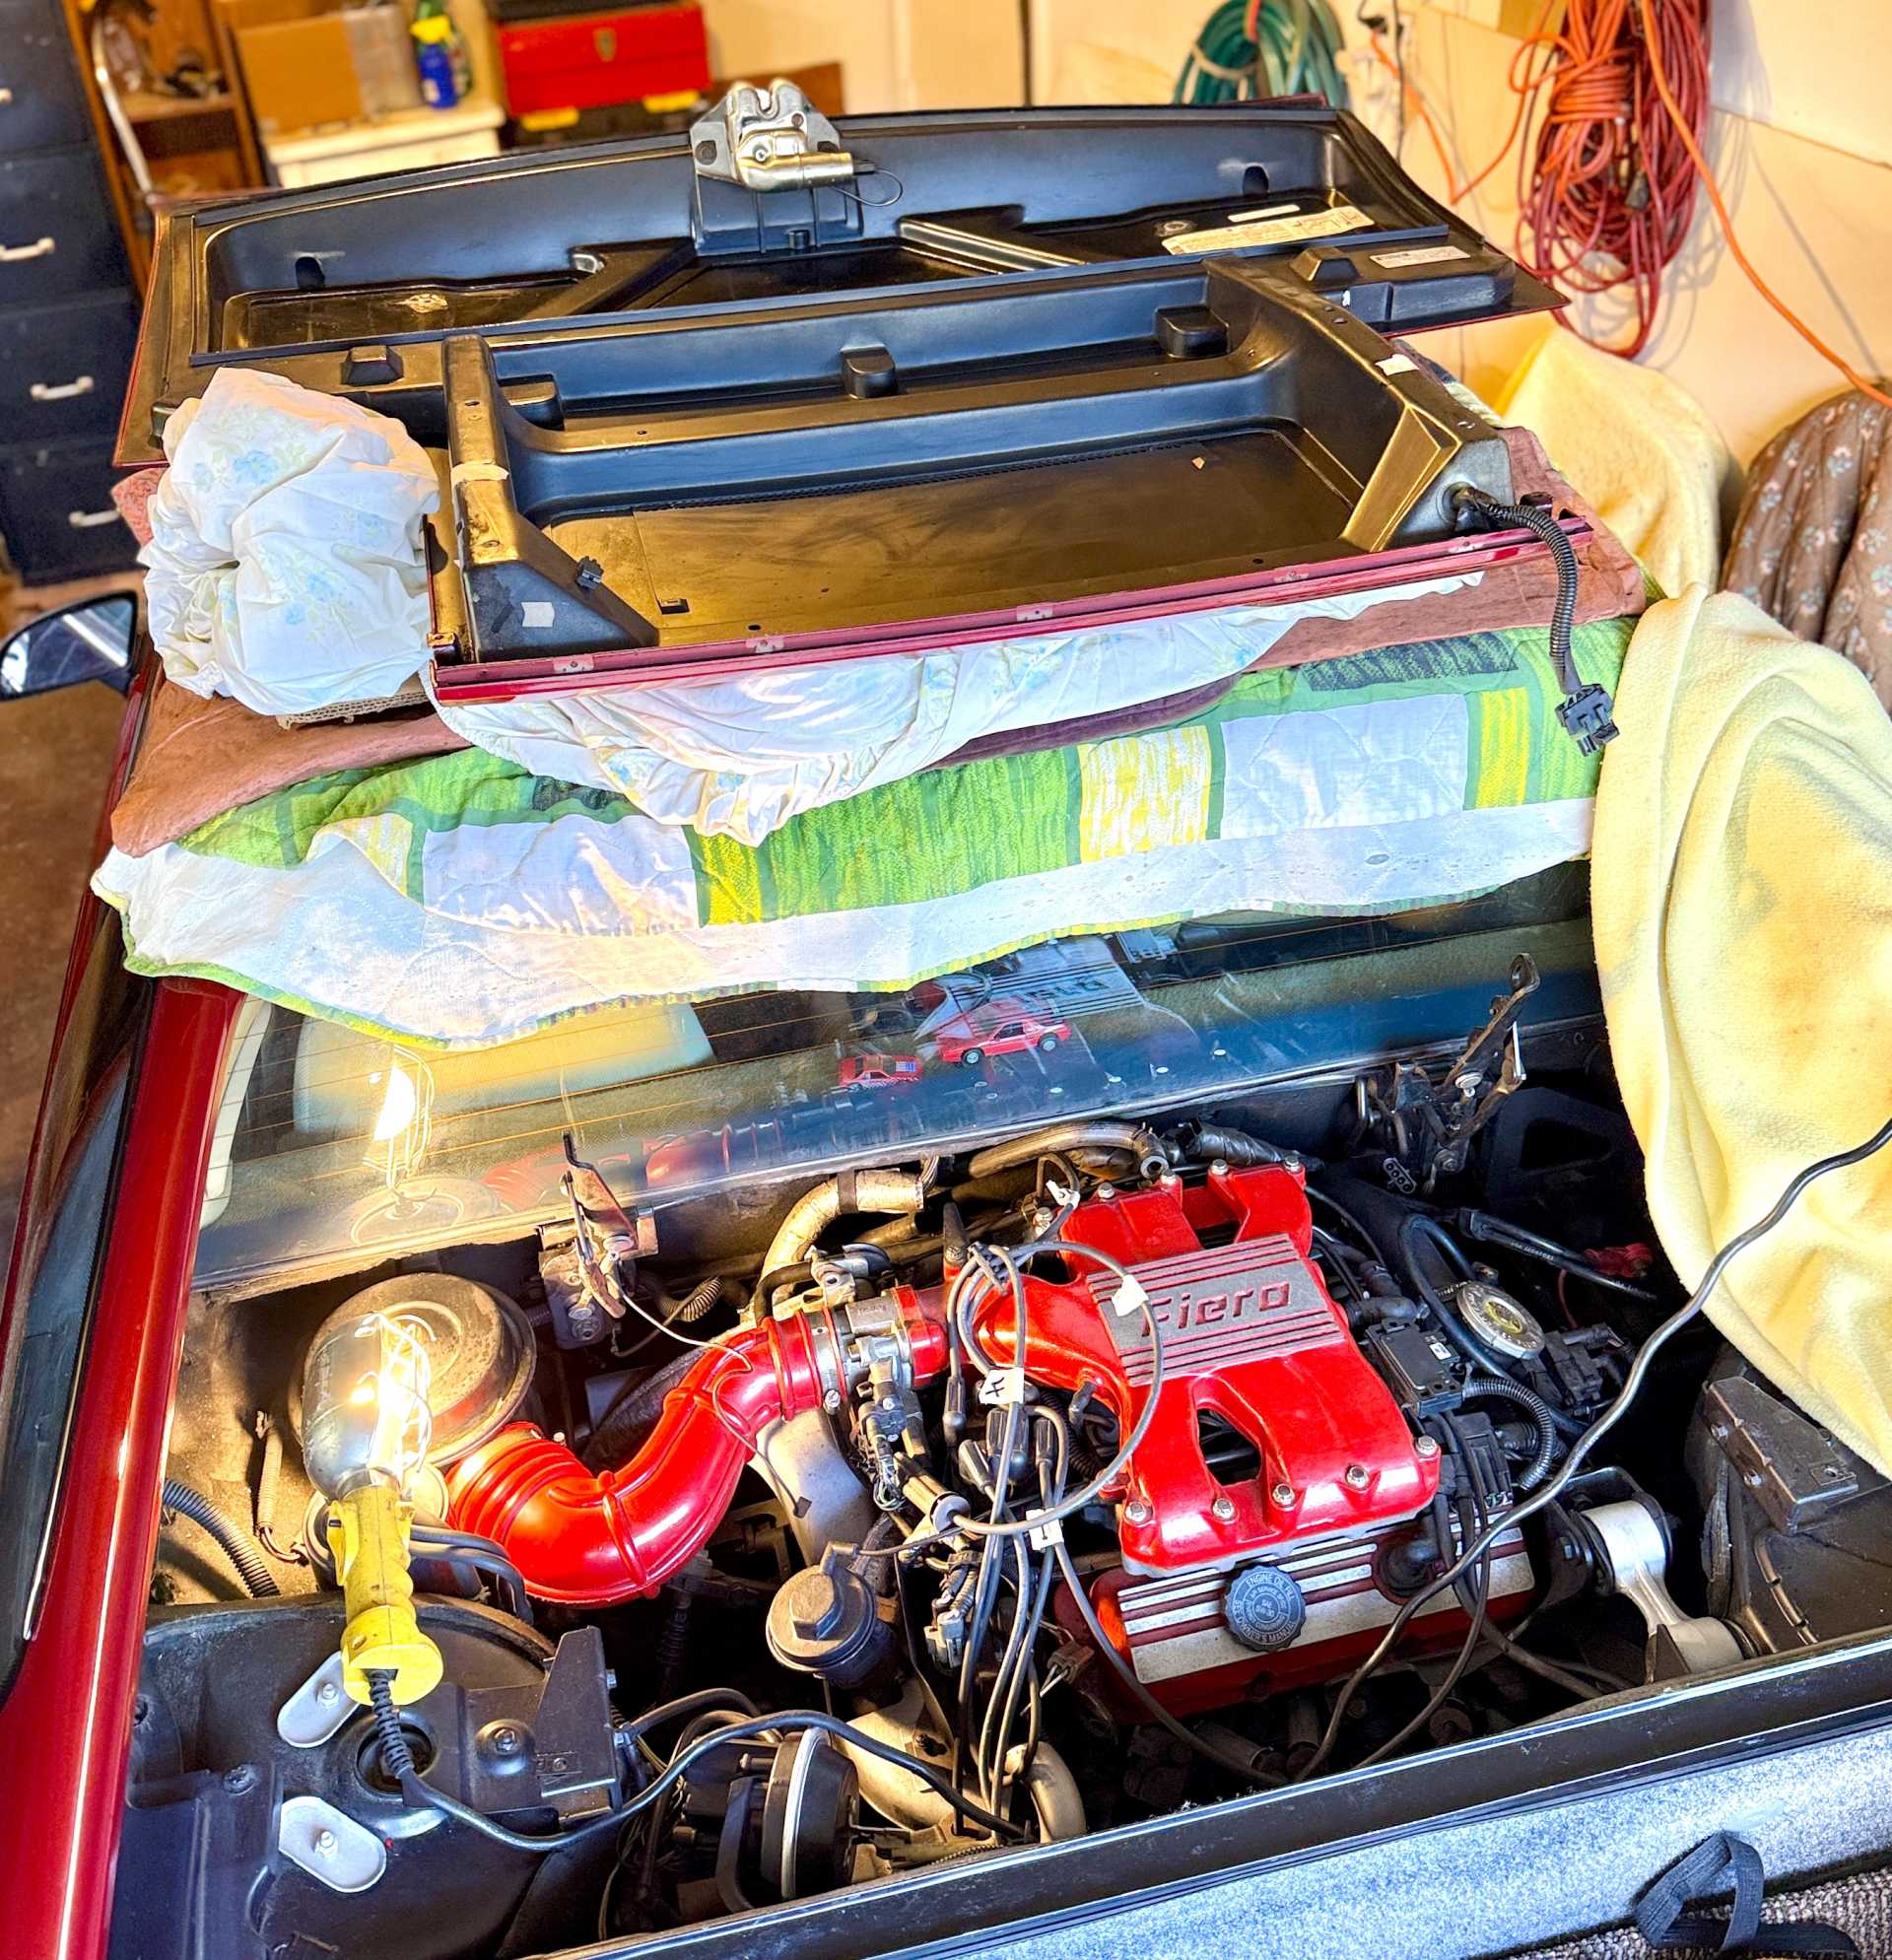
Well, I didn’t wait until tomorrow. I went back today to see what I could do. I had a neighbor help me lift the deck lid off and and and we set it on the roof of the vehicle with blankets and pillows for protection. The rear window is fine.
In a 100th attempt to install the center plug adjacent to the firewall, I dropped it again. I think it could be wedged between the engine and the heat shield as Patrick had mentioned. Not sure what I’m going to do about it.
Even with the deck lid off, it was hell attempting to install a spare center plug. After more hours of trying, I was finally able to accomplish the task. Tomorrow I’ll tackle the one on the driver side.
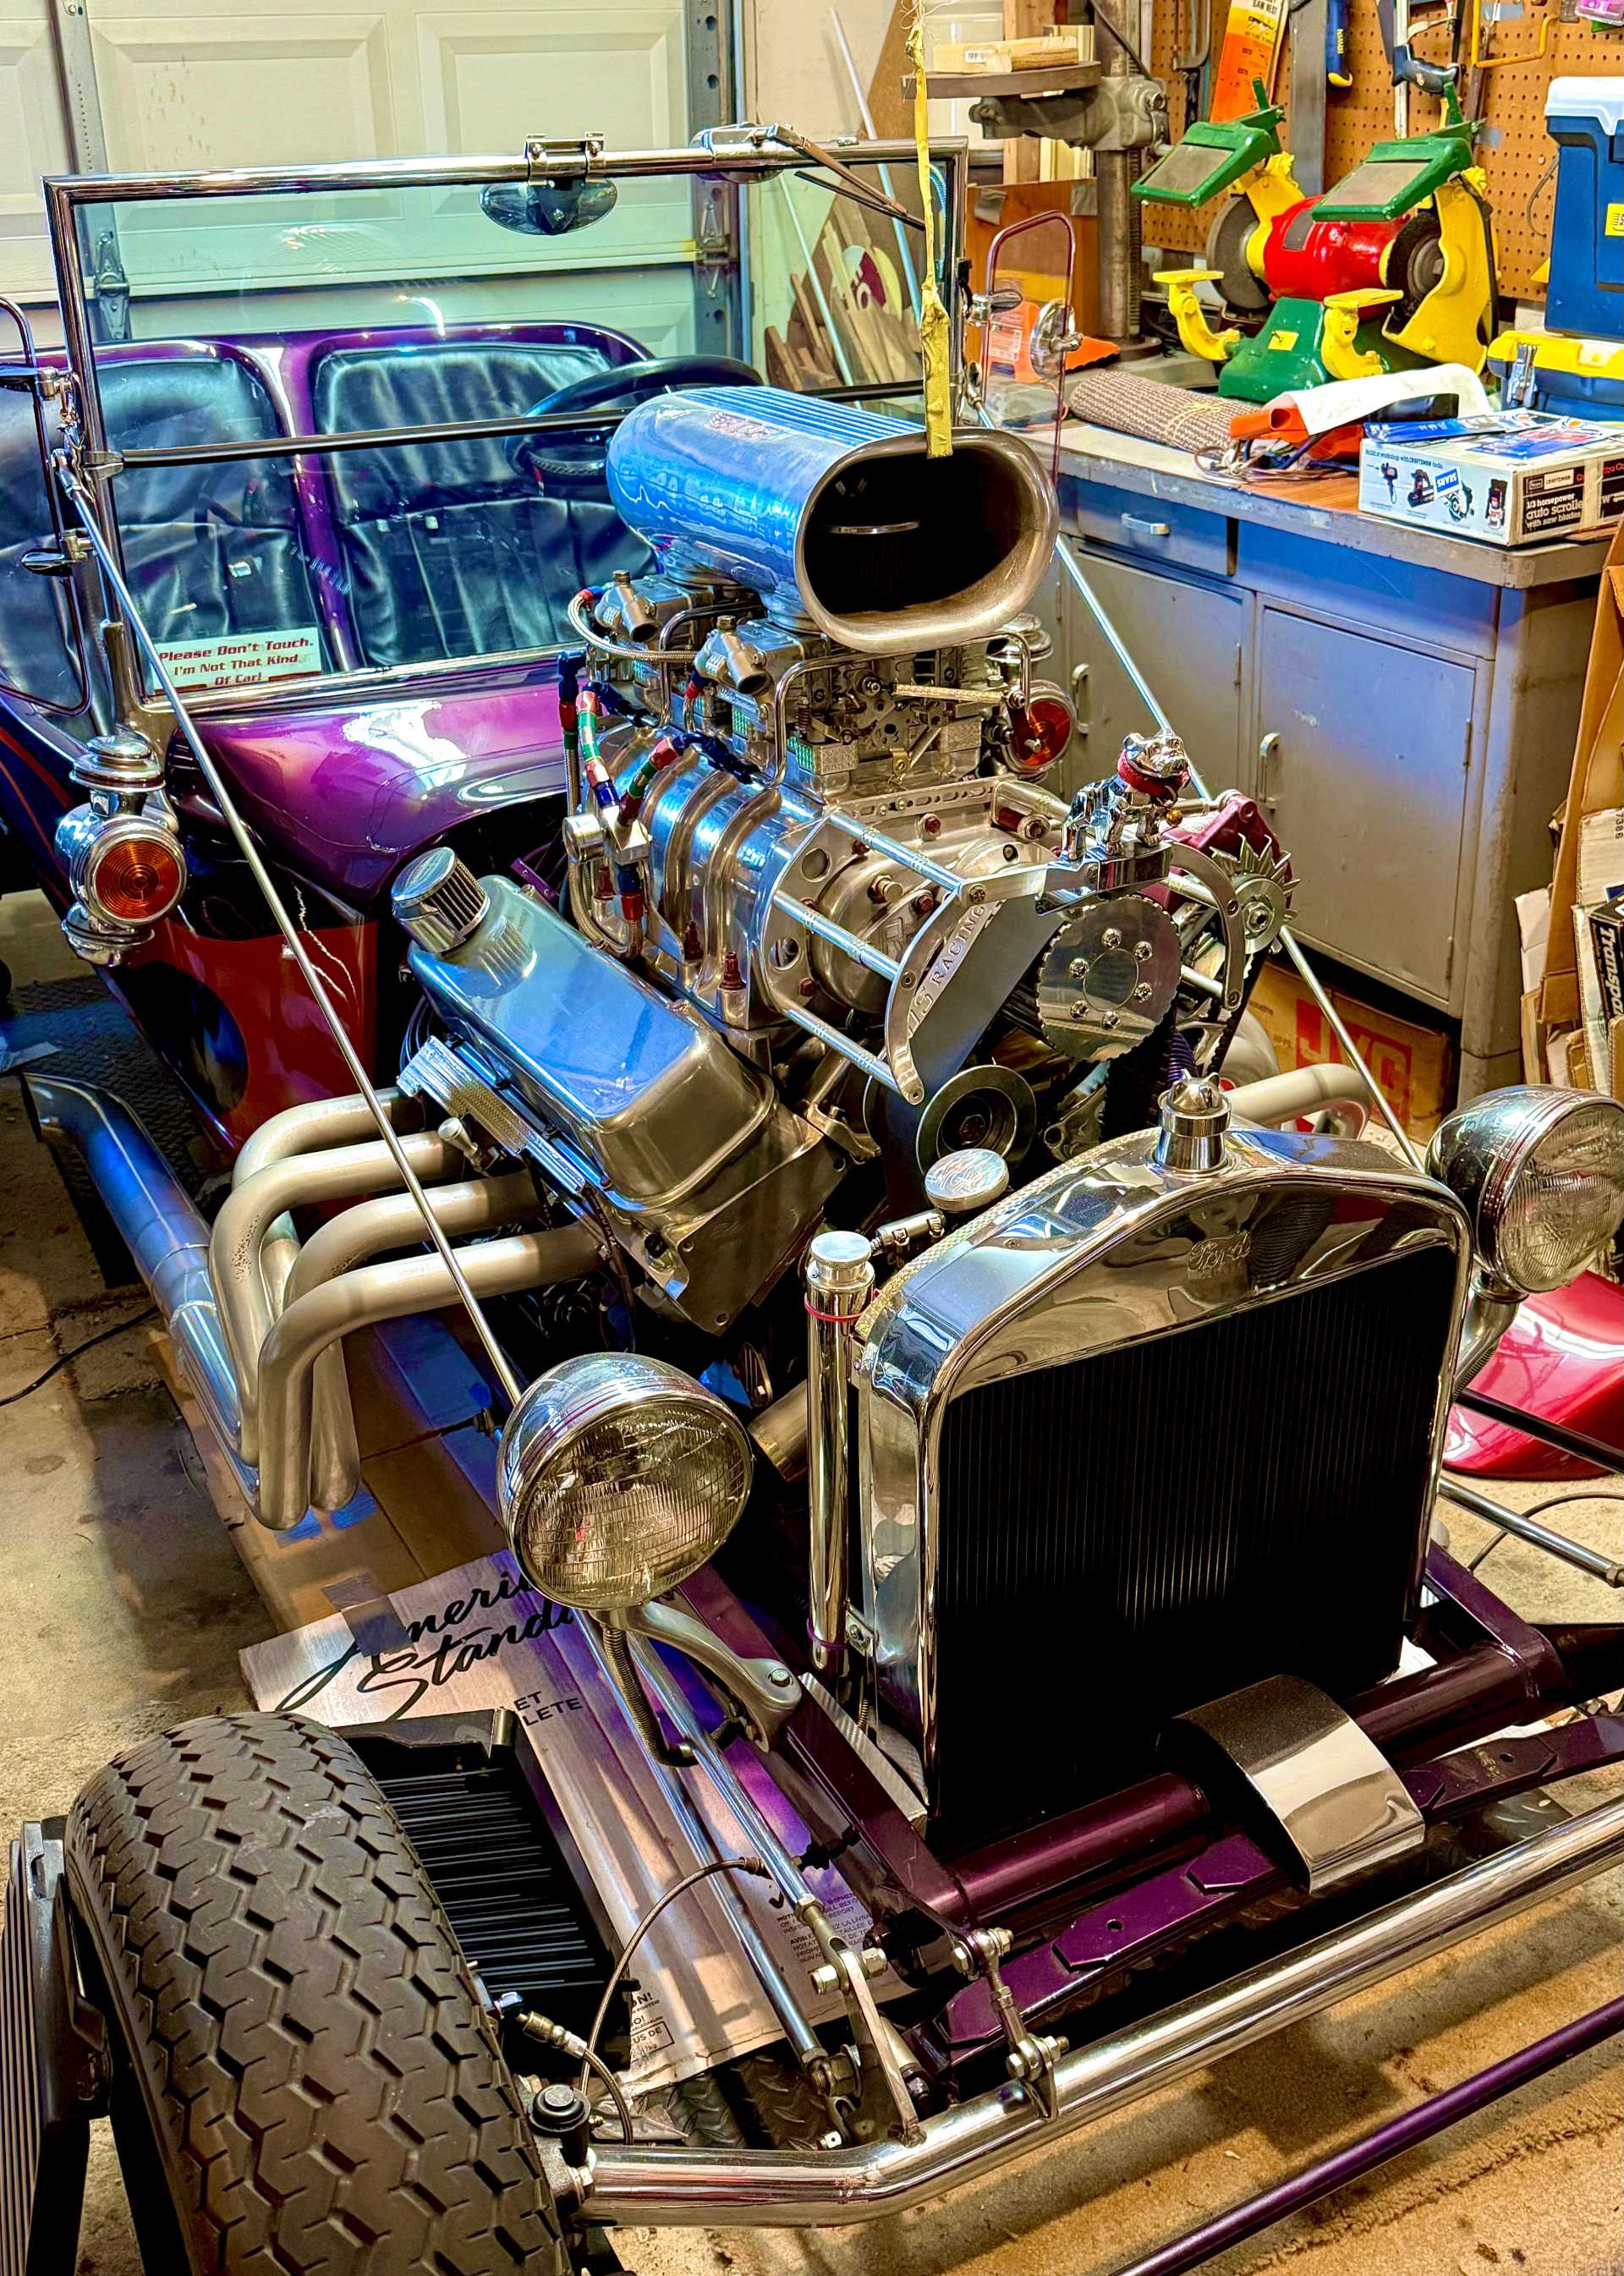
I’ve included a couple of photos of the deck lid on the roof of the vehicle. Also, attached is a photo of the vehicle parked next to the Fiero in my garage. It’s a beast and a joy to ride. All 800 horses.
...attached is a photo of the vehicle parked next to the Fiero in my garage. It’s a beast and a joy to ride. All 800 horses.
Sweet! What's it powered by? (All I can tell is that it's not a SBC.)
quote
Originally posted by Gene1000:
In a 100th attempt to install the center plug adjacent to the firewall, I dropped it again. I think it could be wedged between the engine and the heat shield as Patrick had mentioned. Not sure what I’m going to do about it.
Even with the deck lid off, it was hell attempting to install a spare center plug. After more hours of trying, I was finally able to accomplish the task.
Unless you've got forearms the size of Popeye's, I'm not sure why you're having so much trouble with this! lol
[This message has been edited by Patrick (edited 09-02-2025).]
Patrick, Thanks for the tip about putting the lid on the roof of the car. Looks like it worked out well.
The engine is an original 454 BBC, dstroked down to 427. Racing engine built by Russ Miley racing engines of Petal, Mississippi. Forged max-strength internals, aggressive cam, balanced & blueprinted, aluminum heads, dual holly 850 blower referenced carbs, 671 Roots, currently 9% overdriven, built 2800 stall, built 2-sp quarter mile Powerglide, allowing full power to rear wheels, Hurst, Ford 9”, Wildwoods, heavy duty cooling and more. Runs a blend of racing fuel and 93. Nosebleed acceleration. Made many modifications myself back when my body allowed me to do them.
Took so many trophies that I ran out of room to keep them. Had to throw most of them out. No one wanted them.
Thanks for the tip about putting the lid on the roof of the car. Looks like it worked out well.
Of course, when I did it (while standing in the trunk), I just laid it down right side up... but I'm glad that flipping it over worked out for you.
quote
Originally posted by Gene1000:
The engine is an original 454 BBC, destroked down to 427.
I suspected it might be a BBC, but I couldn't tell for sure with all the aftermarket goodies on the engine. I love BBC engines. The nicest car I ever had (back in the 70's) was a '67 Chevelle SS396 that I had done a lot of work to the engine. Damn, that engine had balls. I'm sure your lil' hotrod is an absolute blast to drive!
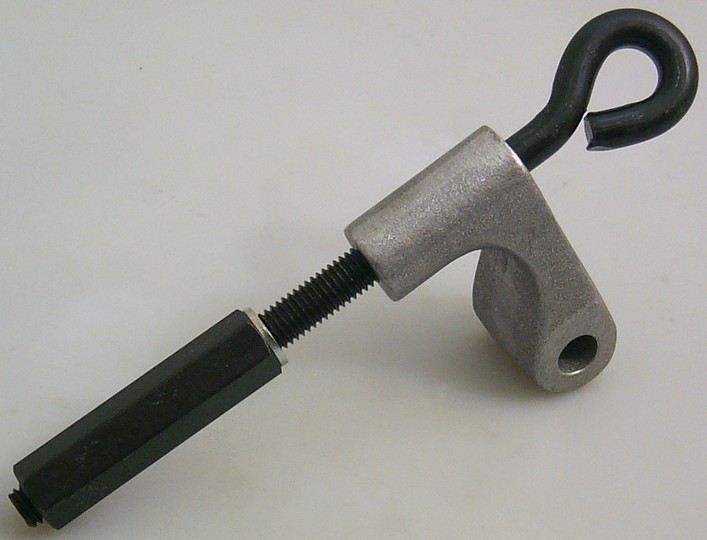
The easy way to change the spark plugs on the front side is to use an engine tilter. You remove the dog bone and place the tilter in place with the two bolts. You tighten the tilter it and the engine will tilt to the trunk side allowing plenty of room to work. Check out Lisle 22550 engine tilt tool. Thats the way we do it here. The tool can occasionally be found in the used market on eBay. ------------------ " THE BLACK PARALYZER" -87GT 3800SC Series III engine, custom ZZP /Frozen Boost Intercooler setup, 3.4" Pulley, Northstar TB, LS1 MAF, 3" Spintech/Hedman Exhaust, P-log Manifold, Autolite 104's, MSD wires, Custom CAI, 4T65eHD w. custom axles, Champion Radiator, S10 Brake Booster, HP Tuners VCM Suite. "THE COLUSSUS" 87GT - ALL OUT 3.4L Turbocharged engine, Garrett Hybrid Turbo, MSD ign., modified TH125H " ON THE LOOSE WITHOUT THE JUICE "
[This message has been edited by Dennis LaGrua (edited 09-07-2025).]
This tool is periodically listed on eBay, Unfortunately used is the only way to find this tool but it may be possible to make one with two eye bolts and a long nut.. If you can find this tool the last ones that I saw went for $50-$75. Not cheap but it saves your knuckles.
------------------ " THE BLACK PARALYZER" -87GT 3800SC Series III engine, custom ZZP /Frozen Boost Intercooler setup, 3.4" Pulley, Northstar TB, LS1 MAF, 3" Spintech/Hedman Exhaust, P-log Manifold, Autolite 104's, MSD wires, Custom CAI, 4T65eHD w. custom axles, Champion Radiator, S10 Brake Booster, HP Tuners VCM Suite. "THE COLUSSUS" 87GT - ALL OUT 3.4L Turbocharged engine, Garrett Hybrid Turbo, MSD ign., modified TH125H " ON THE LOOSE WITHOUT THE JUICE "
[This message has been edited by Dennis LaGrua (edited 09-07-2025).]


 Seriously though, I re & re the decklid by myself. When placing the decklid back down onto the angled-up hinges (again, while standing in the trunk), I have some folded corrugated cardboard down near the rear window to sort of help hold the decklid in place when being reinstalled.