Yeap, still here and continue to work on my 3.5 v6 swap.. R&D takes a lot of time especially when you are in unchartered territory.
As i had mentioned earlier, I was toying with the idea of doing mods to the transmission (4T45e) to fit my needs. I was not in the mood of getting another transmisson. I have already gone through three tranny's.
I have relocated the transmission connector location. The stock location of the transmission connector interferers with the exhaust manifold and exhaust crossover. I am now happy with the final results.
First things first: I removed the side transmission cover to access the transmission connector. I removed the transmission connector from the transmission and cut back the connector housing.
Photo of the connector housing cut back.
Photo of stock transmission connector housing with 36mm expansion plug installed.
I have my son fabricate a new transmission connector housing. Basically, just an Aluminuim block, 5/8" thick that has been machined.
Photo of the transmission side cover modified to accept the new transmission transmission connector block.
Photo of transmission side cover modified with transmission connector block in place.
Photo of transmission case (exterior) with transmission connector block installed.
Currently I am waiting on a number of items to complete the connector relocation. 1. RTV specific for auto transmissions. 2. A new transmission connector and wiring harness. Once those items arrive, I should be able ot complete the connector relocation and move on to the next item, axles!!!
I know such fun. Hopefully I have figured out what items I will need to complete the axle installation.
I'm having a couple of electrical issues with my swap!
Question, for you guys that have done a simular swap did any of you develop a wiring pin out or diagram of the wiring conversion? If you have would you be willing to share that information?
I have scrapped the 4T45E idea! I am just not comfortable with the exhaust crossover so close to the top of the transmission cover (actually touching it). I have ordered another 4T65E. Should be in a couple of weeks.
In the mean time I have shipped my ECM & TCM to Sinister Performance for some custom tuning.
Recently I have worked on the fuel delivery system. No my design, copying anothers idea.
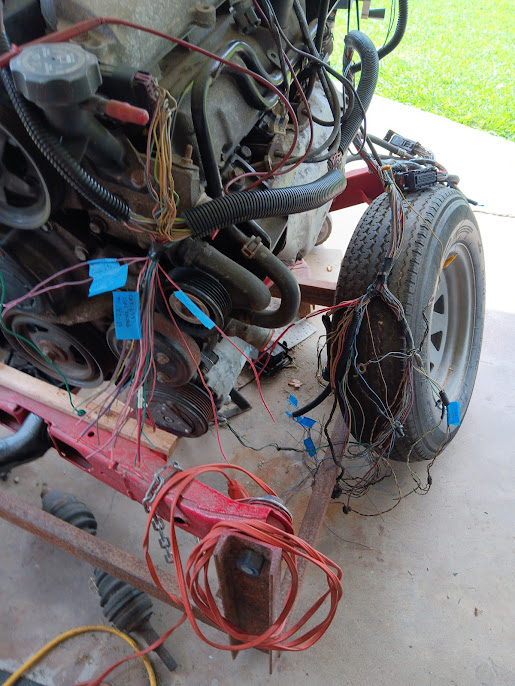
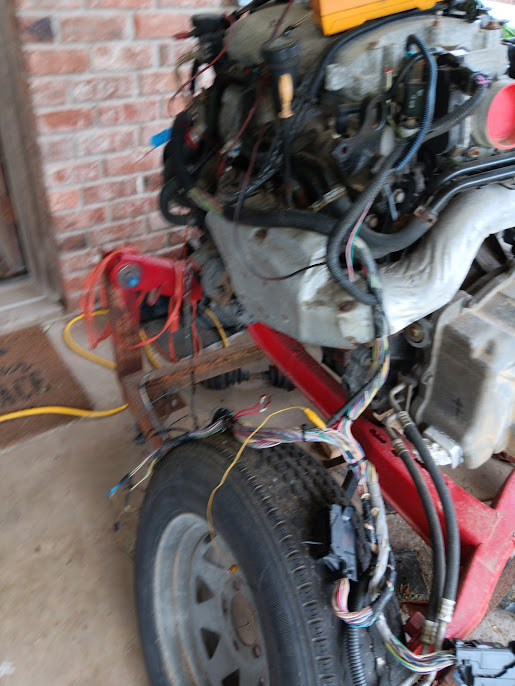
I am back to building a wiring interface harness for the 3.5 V6 to Fiero swap.
Basically, I have started over with building a harness. I was having some issues so rather than continue troubleshooting I decided to start from scratch. One of the main drivers is because I want to minimize the number of wires that go from the 3.5 into the passenger cabin. Basically, the only wires going into the cabin with be the wiring needed for the drive by wire, minimal BCM wiring (that will be restricted to the OEM Fiero ECM location), etc.
Just about finished building the wiring harness for the 3.5 v6 swap! Only have a couple of wires left to identify. Needless to say, it has been eating my lunch. The reason being is that I wanted to minimize the number of wires for the 3.5 v6 enter the passenger compartment. In case, you don't know or I failed to mention, I am not using a traditional instrument cluster for the swap. I wanted to retain my current IC (Instrument cluster) which is a 93 Buick Riviera IC (digital). Which means I will be adding the OEM Fiero engine sensors to the swap; i.e. Oil Pressure, water temperature sensors, etc. For additional monitoring of the 3.5 v6 I will utilizing an Android Tablet connected to the BCM via a Bluetooth connection.
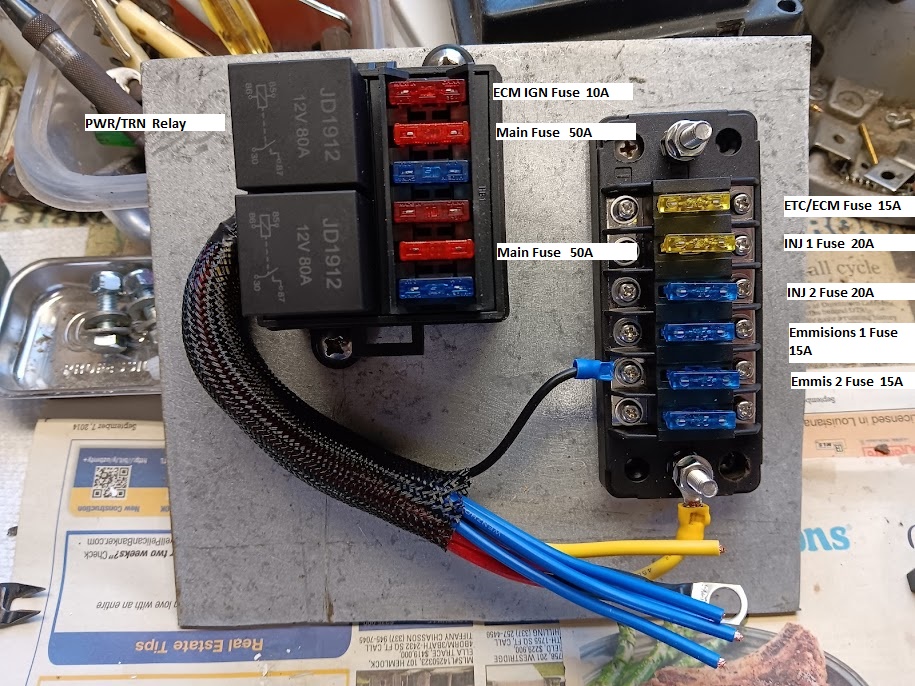
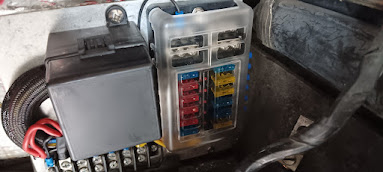
For power to the 3.5 I will be using the following:
This fuse block arrangement will be the power source for the 3.5
IIRC, the N* uses a similar coil mounting ( with 4 coils ).
The TACH signal may come from the ICM (high level signal) or it may come from the PCM (low level signal) If it is a low level signal, you may need a Dakota Digital unit to feed your Tach.
i just read this all the way through.i had a g6 convertible with a 3.5.great engine.3.9 sounds even better.hopefully someone will come out with engine mounts and a wiring harness for it in a fiero.i can't even weld. i have an engine hoist from when engines came out the top.
[This message has been edited by richard in nc (edited 07-06-2024).]
I am or was in the process of getting the engine ready for a test start & run! The engine is not yet in the car but still on the test stand. I want to get everything squared away before installing the 3.5 in the GT.
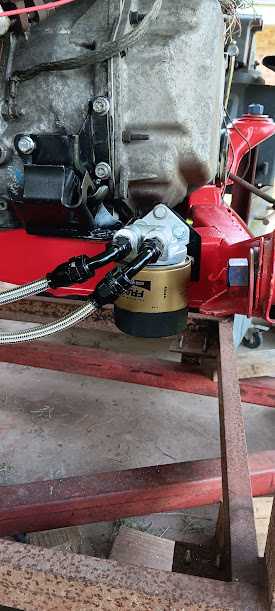
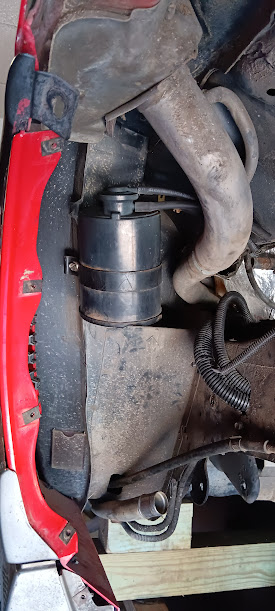
While in the process of getting ready to put oil in the engine and a new oil filter I discovered that the oil filter does not fit. When attempting to install the oil filter the filter hits the cradle not allowing installation. So, back to the drawing board. What I wanted to do from the get-go was install a "remote oil filter kit".
I have ordered a Remote Oil Filter Mounting Kit from NAPA, P/N #ATP 18428. On their web site NAPA indicates they guarantee fit for a 2010 Chevy Impala 3.5 v6.
Yeap, I am still at the install... as everyone can understand life has a way of interfering with projects. I hadn't realized how long it has been since I last posted on the project.
Some up dates: 1. The remote oil filter unit arrived and was installed (temporally for the moment - until the engine is in the car) 2. The 2010 3.5 v6 wiring harness has been sorted 3. The Fiero wiring harness has been modified for the conversion 4. In the process of rebuilding the new (to me) transmission (4T65e) Currently waiting on parts to arrive in order to complete the re-build 5. The 2010 3.5 v6 ECM & TCM has been reprogrammed by Sinister 6. Working on hijacking the 2010 Impala BCM to run cruise control and other support functions 7. In the process of removing the 2.8 v6 & 4T60 from the car for the conversion
Pending items: 1. The engine cradle for the conversion is being powder coated 2. Clean & paint engine bay on the existing engine has been removed 3. Build custom CV axles for the conversion - parts on order
[This message has been edited by Cajun (edited 05-07-2025).]
Having the engine cradle powder coated was a bad idea!! When attempting to re-install the engine/transmission the cradle got all chipped up. Back to the drawing board, had the cradle sand blasted and painted.
That way any scratches, bruises etc. can be easily repaired with a little paint touch up.
I am confident now that I have high jacked the BCM? [plan is to have cruise control with this swap} I am just about completed the wiring for that puppy.
This is basically a test run of the "Upload Media" function. I was having issues with PIP and asked the question on the General Discussion section regarding my PIP issues. A couple of members stepped up and responded to my question. Thanks guys....
The weather here in South Louisiana has not been cooperative of late! Rain for the better part of two weeks now and more to follow in the coming days.
I have managed to get a little work done on my engine swap.
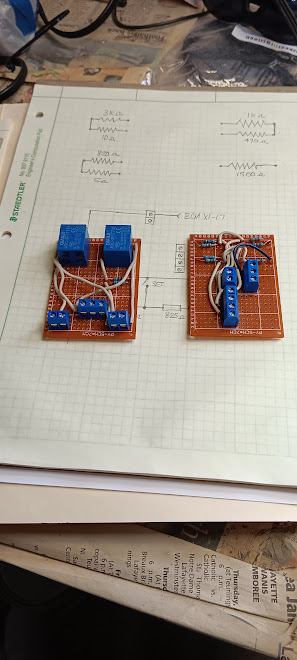
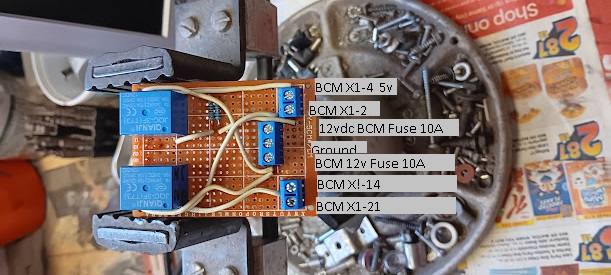
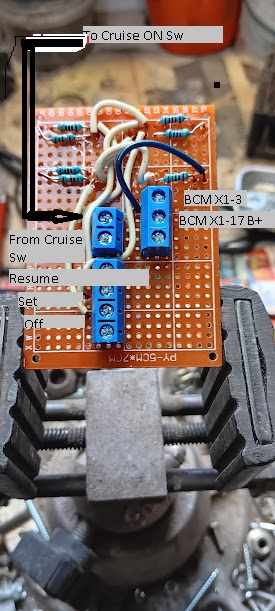
With regards to hi jacking the BCM, I have fabricated two circuits to trick the BCM into thinking that I am using the ignition switch from a 2010 Impala. Another circuit to allow me to utilize the Fiero cruise control stalk with the 2010 Impala cruise control system. This circuit is basically the resistive ladder in the steering wheel on the Impala
The circuit on the left is the ignition switch; the one on the right is the cruise control resistive ladder.
[This message has been edited by Cajun (edited 06-15-2025).]
Once my son completes fabricating the rear transmission mounting bracket, I will be able to secure the engine to the cradle. Once I get that mounting bracket I will post photos of both transmission mounting brackets, front & rear.
I have upgraded my fuse block for the swap. I needed additional fuses (BCM).
The high torque starter has arrived and installed.
I have pretty much decided to completely overhaul the rear suspension on the GT. I have ordered a pair of rear wheel hub & bearings, Poly Cradle mounts & bushings (they have arrived), a pair of rear struts, a set of 12"-300# coil over springs, and sleeves to match. Now, waiting on parts.
The wiring harnesses for the swap is pretty much complete. The balance will or has to be done after the engine/transmission is has been installed in the GT.
In case I haven't mentioned it, I am trying to get the GT ready to make the trip to St Charles, Ill. for Fierorama!! I have been traveling to the Fierorama event pretty much every year for the last 8 years or so.
Great show, really great people, well worth the trip. For me that's 1010 miles one way.
[This message has been edited by Cajun (edited 07-07-2025).]
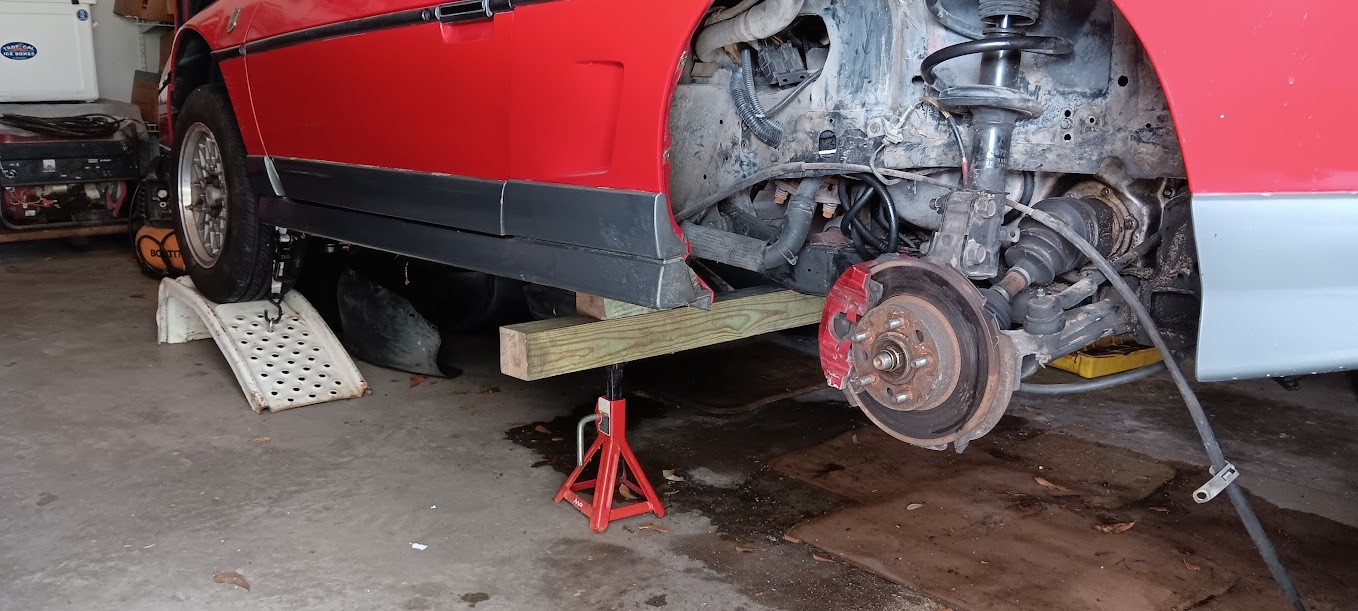
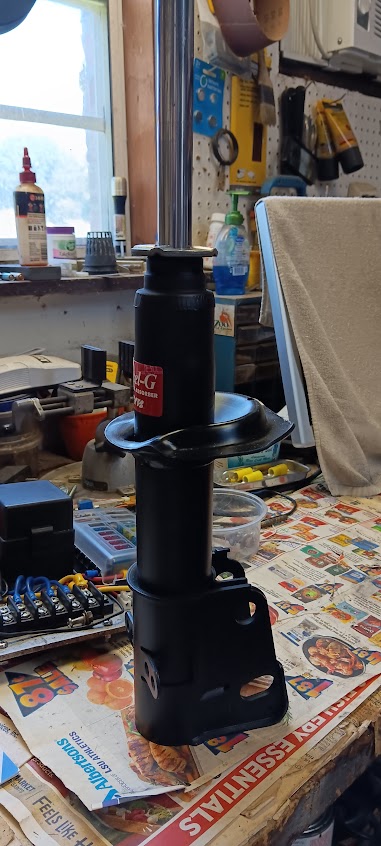
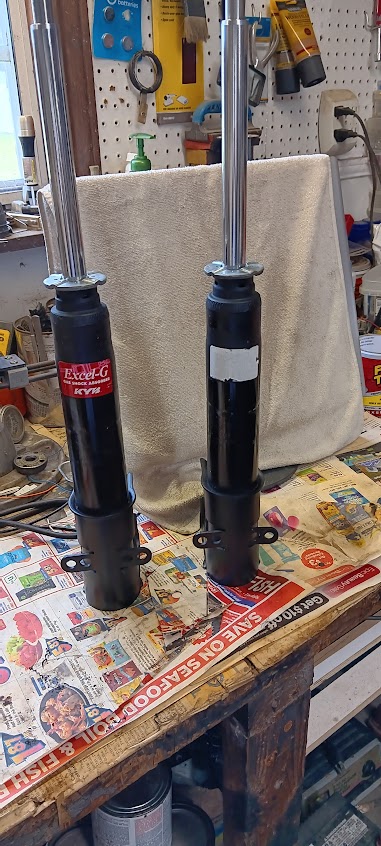
Finally got around to removing the springs from the rear strut towers! Wow, both struts were totally gone. Replacement are on order.
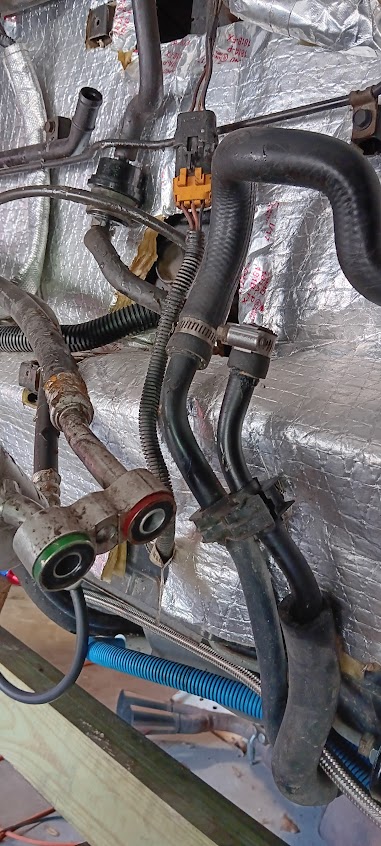
Fitted the coolant tube from the passenger side.....
Man, surprising how much bad stuff one discovers when they begin taking the vehicle apart. For starters: 1. Driver side front caliber leaking 2. Bad struts 3. crushed driver coolant tube (the car has never overheated on me - that was a total surprise)
I have cancelled my order for coil over kit (parts). Mainly because I'm not sure of the new struts that I have ordered. Once they arrive and can determine their diameter I plan on reordering the coil over kit.
Waiting on the following parts: 1. pair of rear wheel hubs & bearings 2. Rear struts 3. CV Axle for the passenger side
I know that I have posted a large amount of photos. I am doing so to help folks out there with their future build.
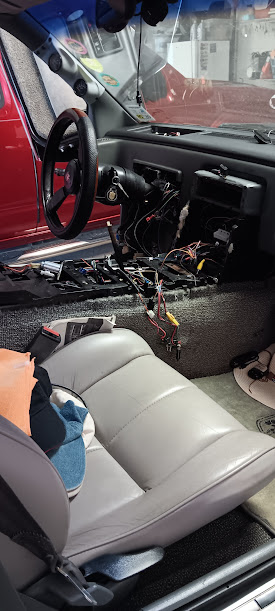
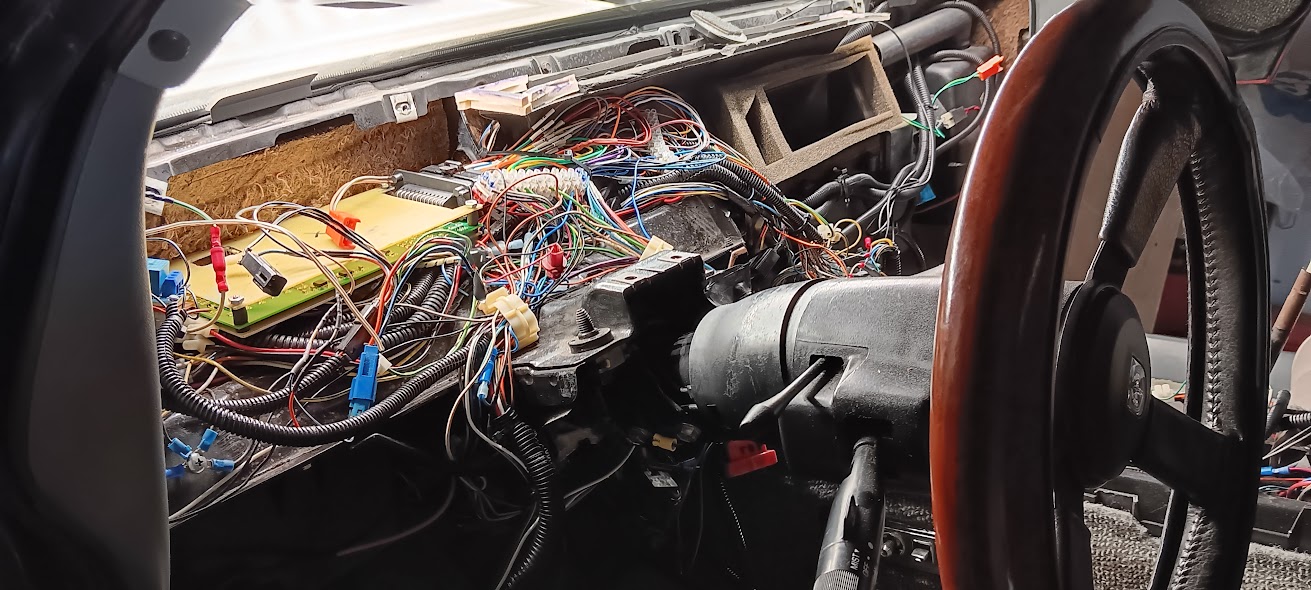
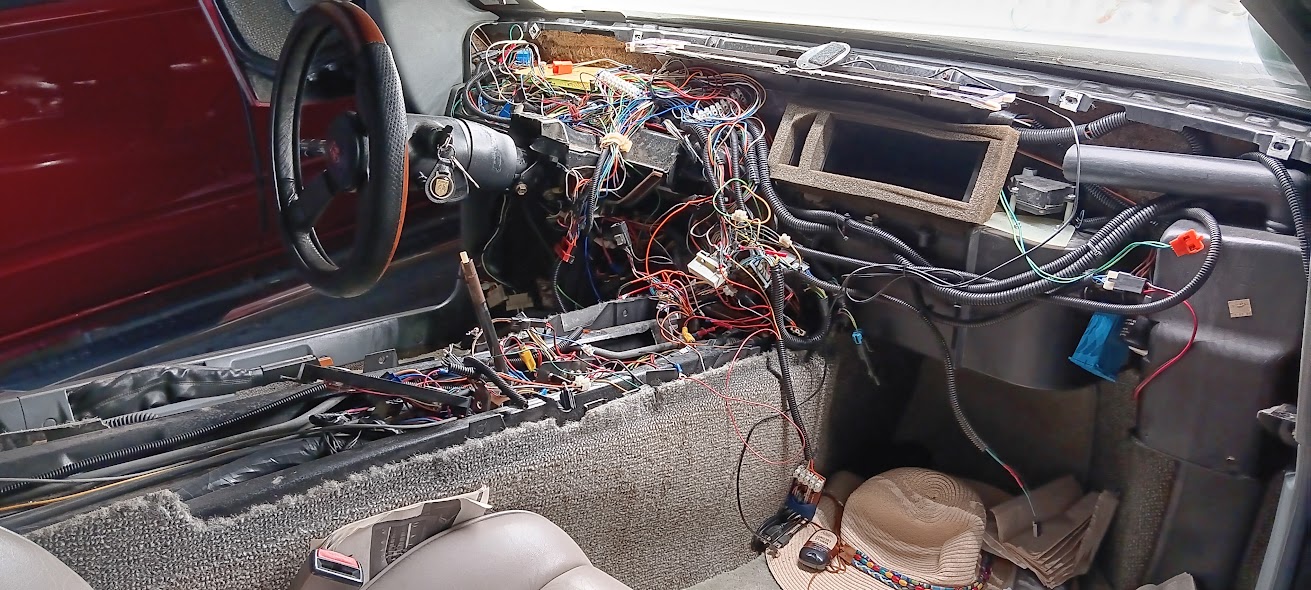
Currently in the process of removing the dash and center console. This operation is necessary in order to remove some previously added wiring that is no longer required, remove the accelerator cable and pedal (no longer needed - drive by wire) and to add wiring needed for the engine/transmission swap.
At this juncture in time it doesn't look like I will be making Fierorama this year as a couple of suppliers have informed me that a couple of parts I have ordered are on back order. The delivery dates are estimated to be 3 to 4 weeks. That sucks....
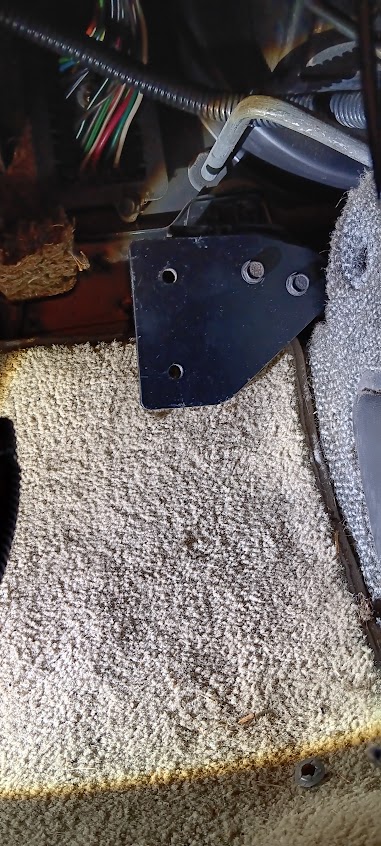
I have removed the accelerator, cable and associated hardware. What a pita....
New Accelerator bracket:
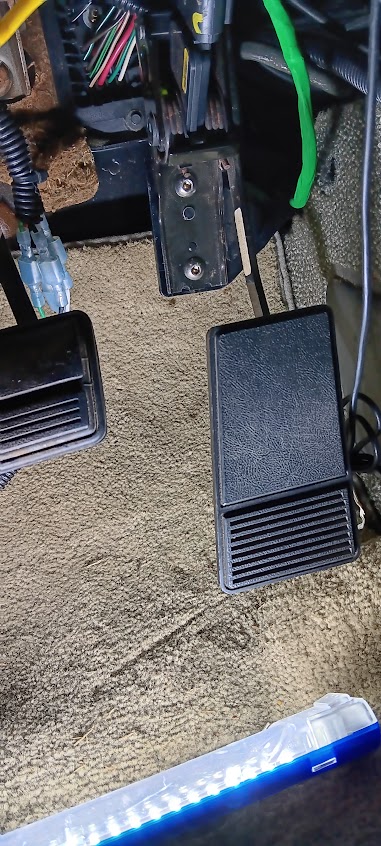
New Accelerator installed:
I have also began replacing the fuel system. Which will include a new fuel filter, fuel pressure regulator, and piping:
Photo of the old fuel system:
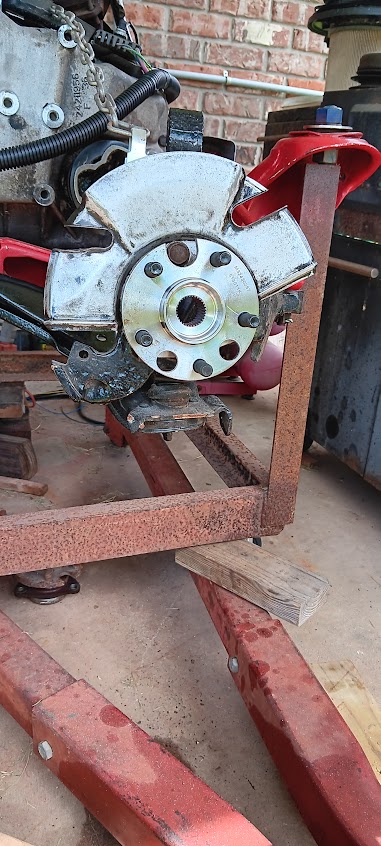
In addition, I am overhauling the rear suspension. I have replaced the rear wheel hubs, bearing, seals and brake dust shields. The new struts have arrived and I have begun removing the bottom seat on the struts in order to install coilovers.
Photo of new rear wheel hubs, brake dust shields:
I am still waiting on parts. Things like; new fuel filter, 6AN connectors for the fuel system, Coil over springs and sleeves.
I have removed the accelerator, cable and associated hardware. What a pita....
New Accelerator bracket:
New Accelerator installed:
almost identical to how I did mine, it's worked like a champ.
------------------ "I am not what you so glibly call to be a civilized man. I have broken with society for reasons which I alone am able to appreciate. I am therefore not subject to it's stupid laws, and I ask you to never allude to them in my presence again."
I invited Lou Dias to trash me in my own thread, he refused. sorry. if he trashes your thread going after me. I tried.
I am getting this same combo delivered today. (Well, a wrecked car, gonna strip it out) I read your thread and is wonderful at showing me the stuff I need- going with a manual though… and gotchas besides the oil filter and alt mount??
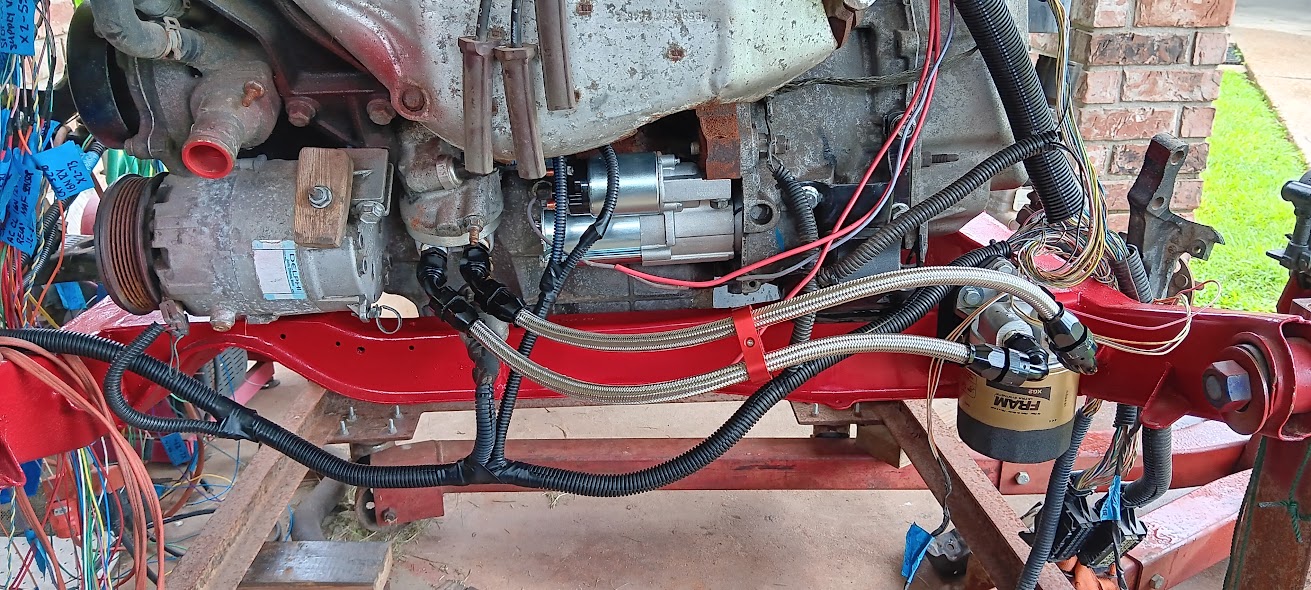
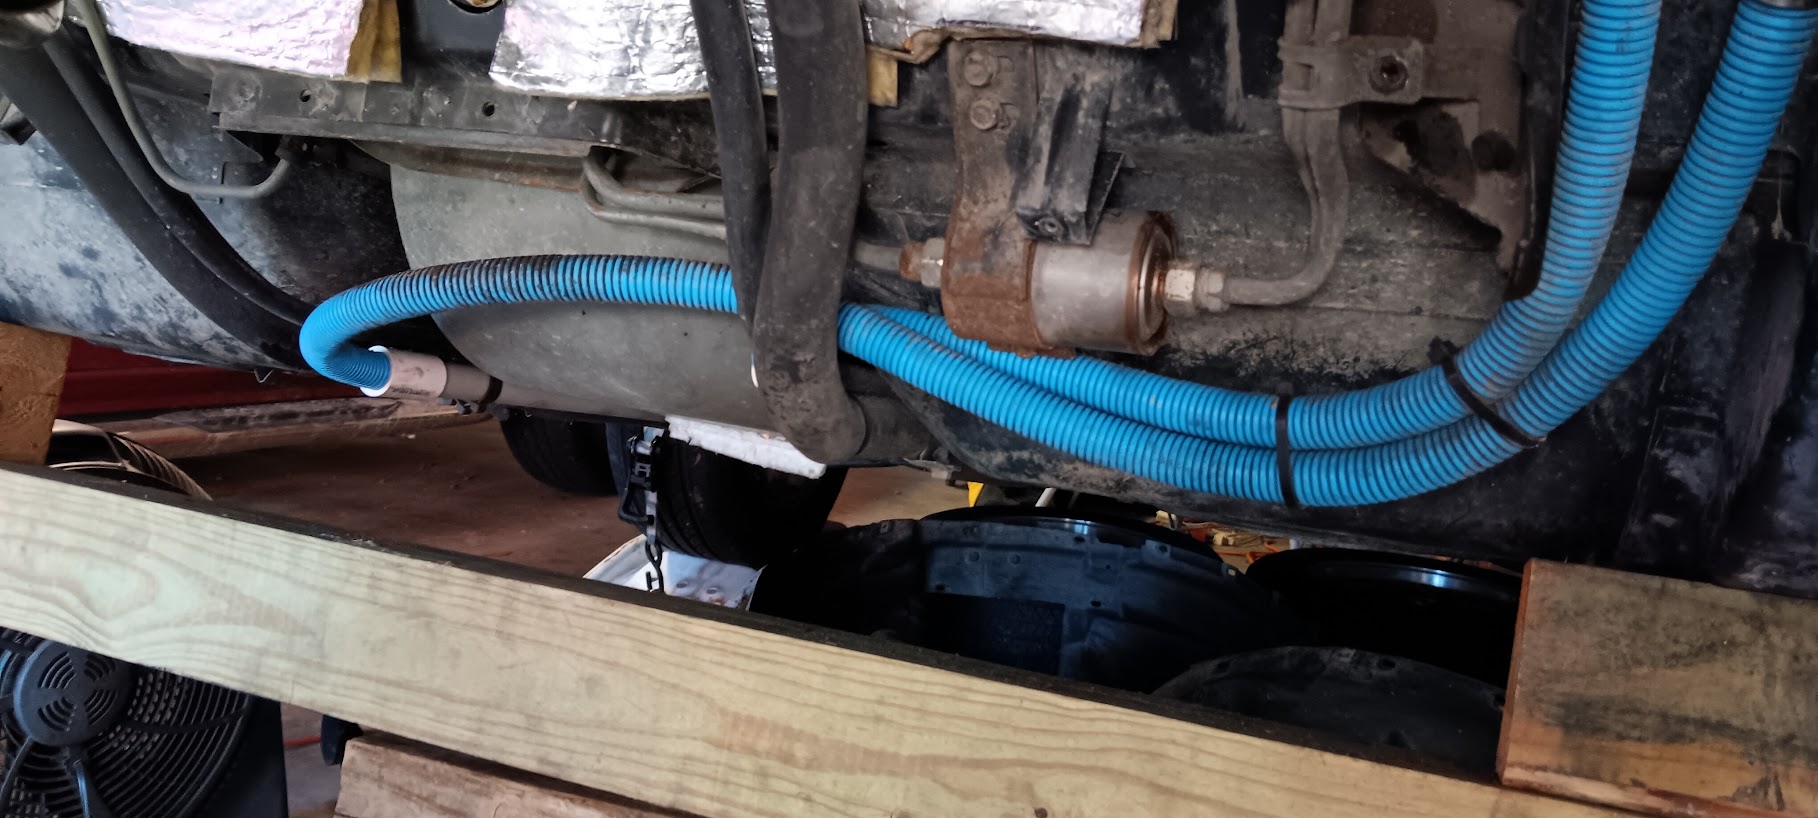
The new fuel delivery system has been installed. Having said that, I will be adjusting the piping once additional AN fittings and fuel pressure gage & sender arrive.
In case anyone is wondering what the 2 blue tubes are, they are PVC tubing that holds 2/0 welding cable to the battery which is located in the front.
[This message has been edited by Cajun (edited 07-25-2025).]
The new fuel delivery system has been installed. Having said that, I will be adjusting the piping once additional AN fittings and fuel pressure gage & sender arrive.
In case anyone is wondering what the 2 blue tubes are, they are PVC tubing that holds 2/0 welding cable to the battery which is located in the front.
Of your heater tubes in this photo, is the bigger tube on the left or right? I don't think I can tell reliably from this photo.
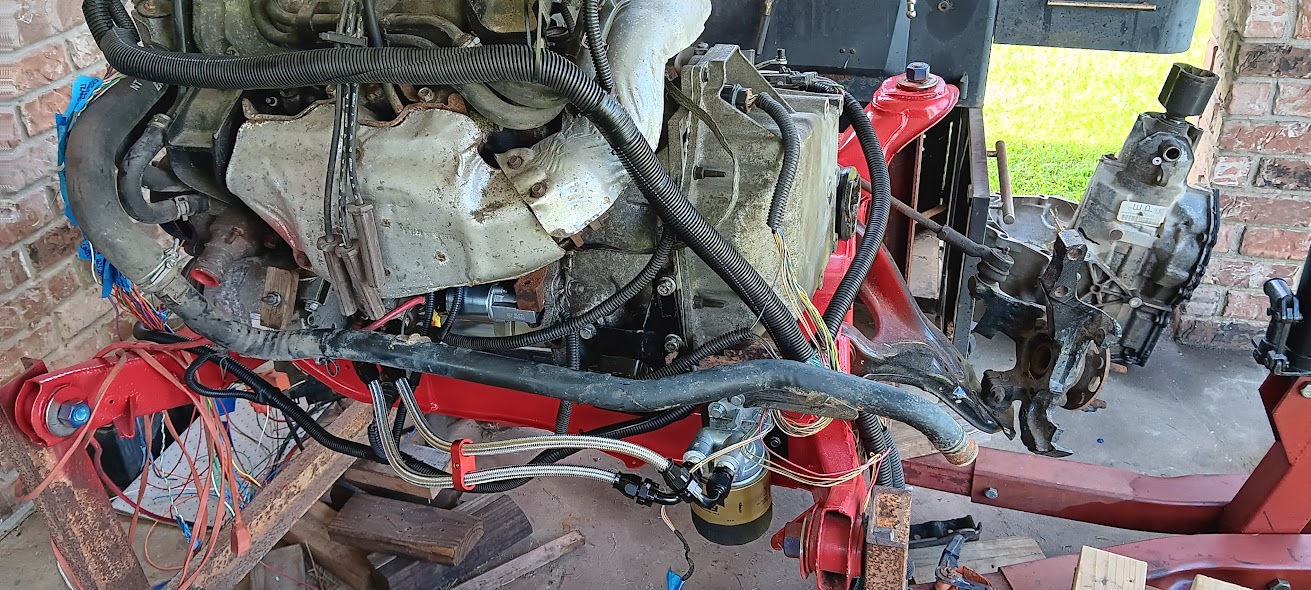
I was finally able to get the old engine/transmission out of my way so I could clean up the engine bay.
In the process of cleaning the engine bay area; have removed all the vacuum lines and tubing that will not be needed or used for the 3.5 v6/4T65e install.
Also, I have ordered additional 6AN fittings to re-pipe the Fuel delivery system. I will be adding a fuel pressure sensor in the system.
I have installed but not yet wired the new Power Distribution-Fuse block for the 3.5 install:
I have ordered 1 coil over 7" sleeve to check for fit. Making sure that the sleeve will fit the KYB struts before I commit. So, once again I am waiting on parts in order to move forward.
[This message has been edited by Cajun (edited 08-09-2025).]
I have re-piped the fuel delivery system, adding a fuel pressure sensor.
I have received the coil over sleeve however, I have returned it due to the fact it would no slip over the strut. It's pretty difficult to fit a 1.95" ID sleeve over a 2" OD strut. Another coil over sleeve has been ordered.
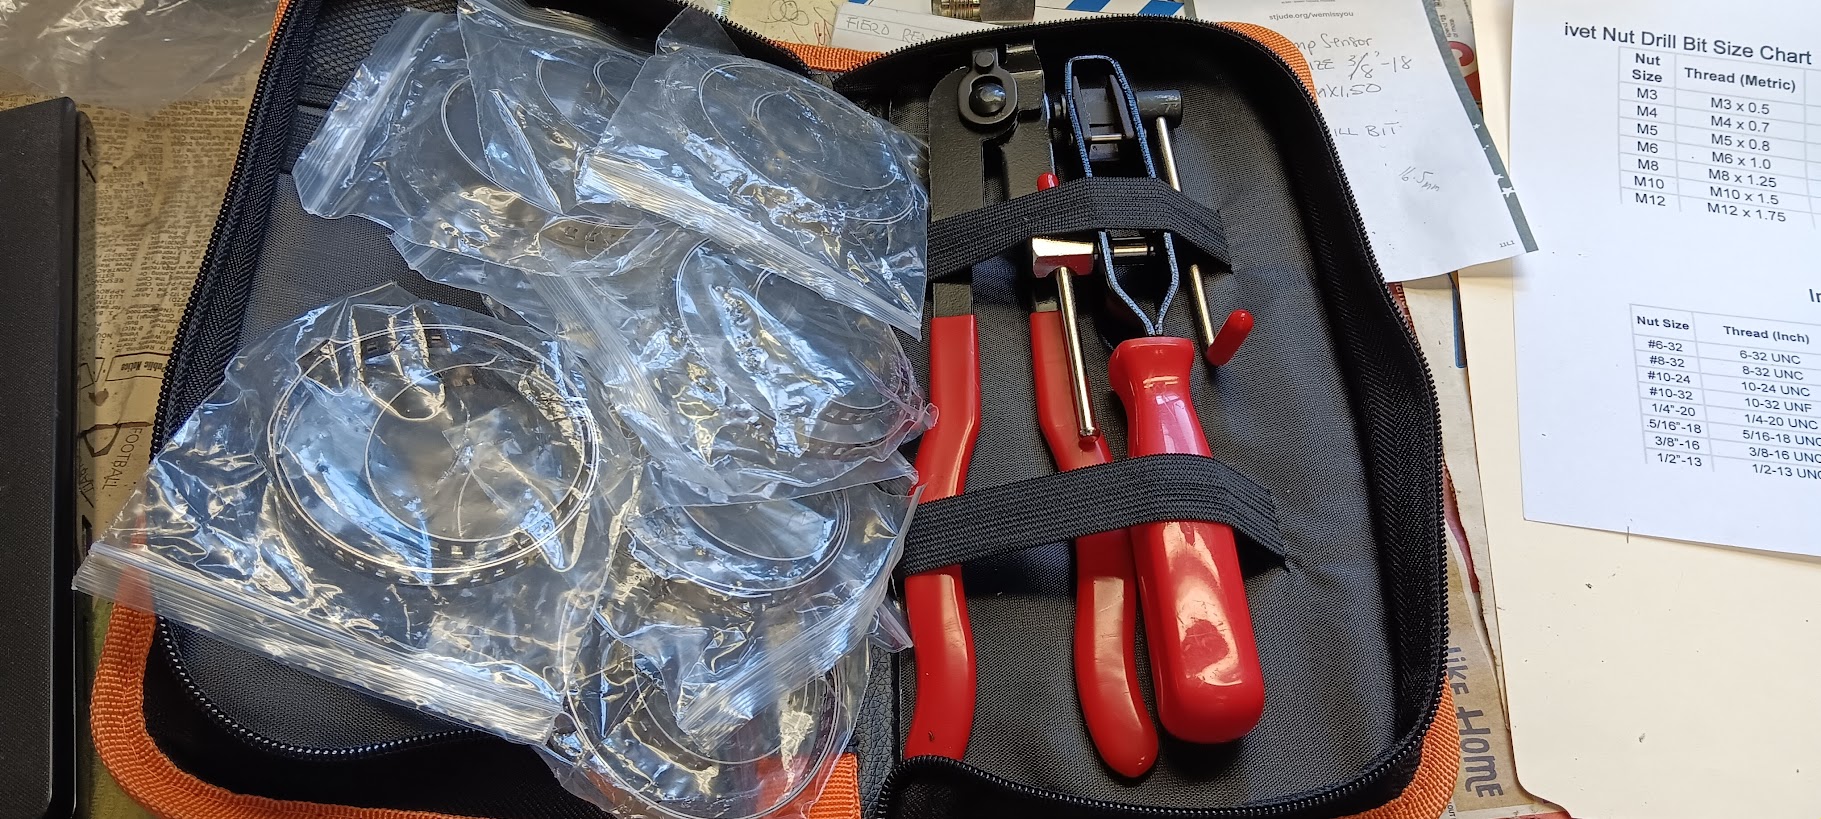
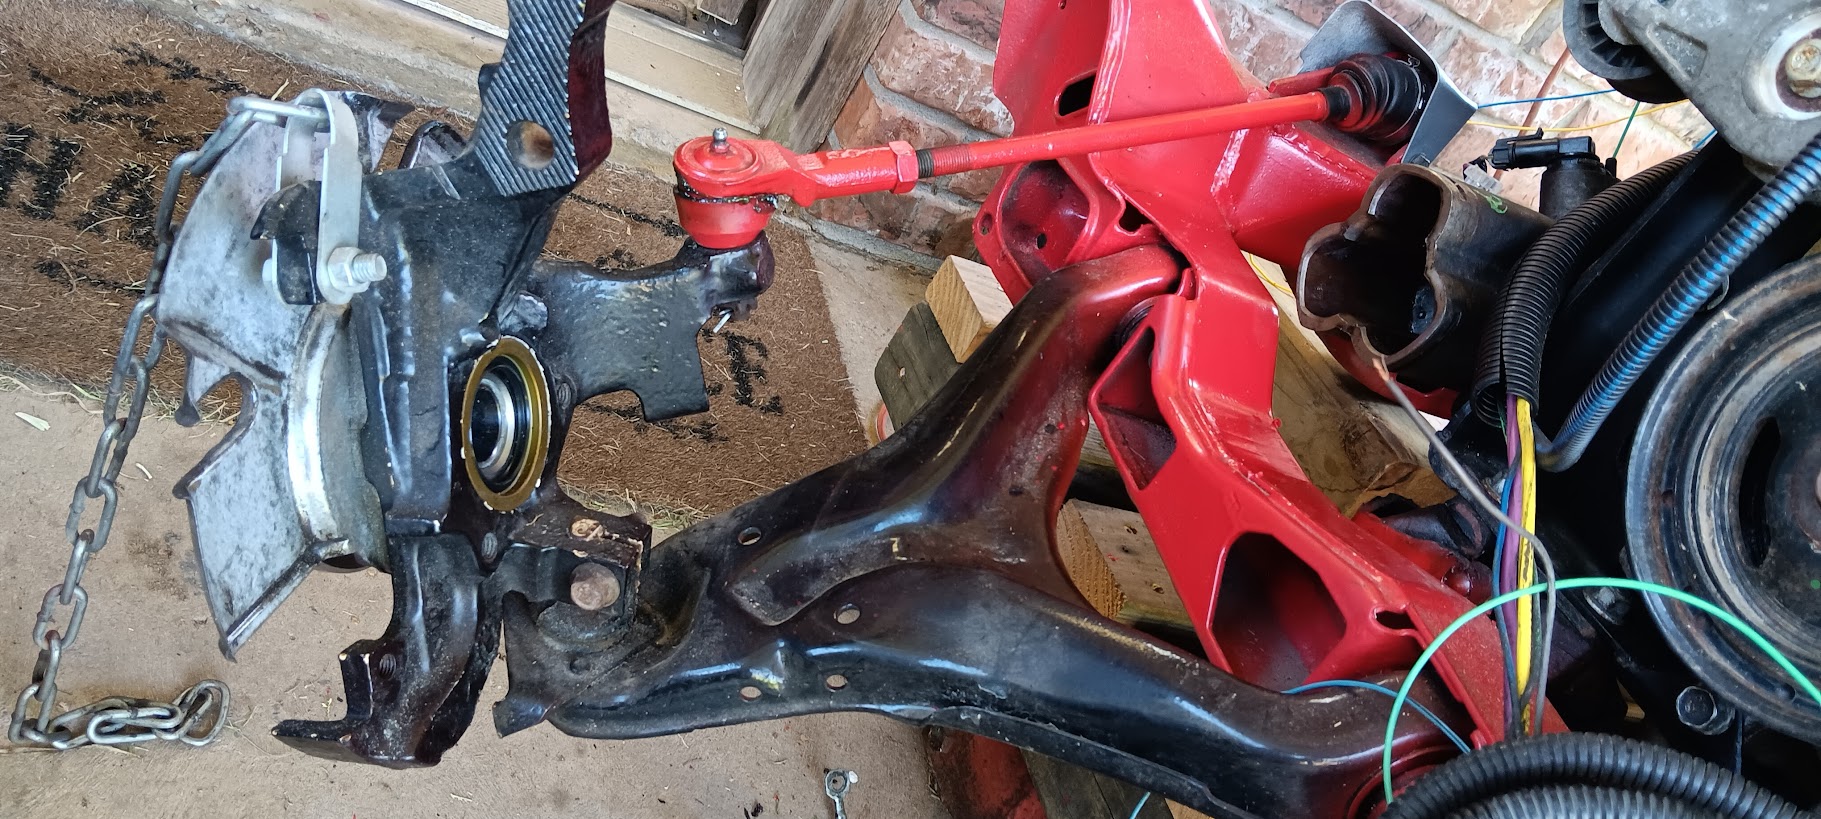
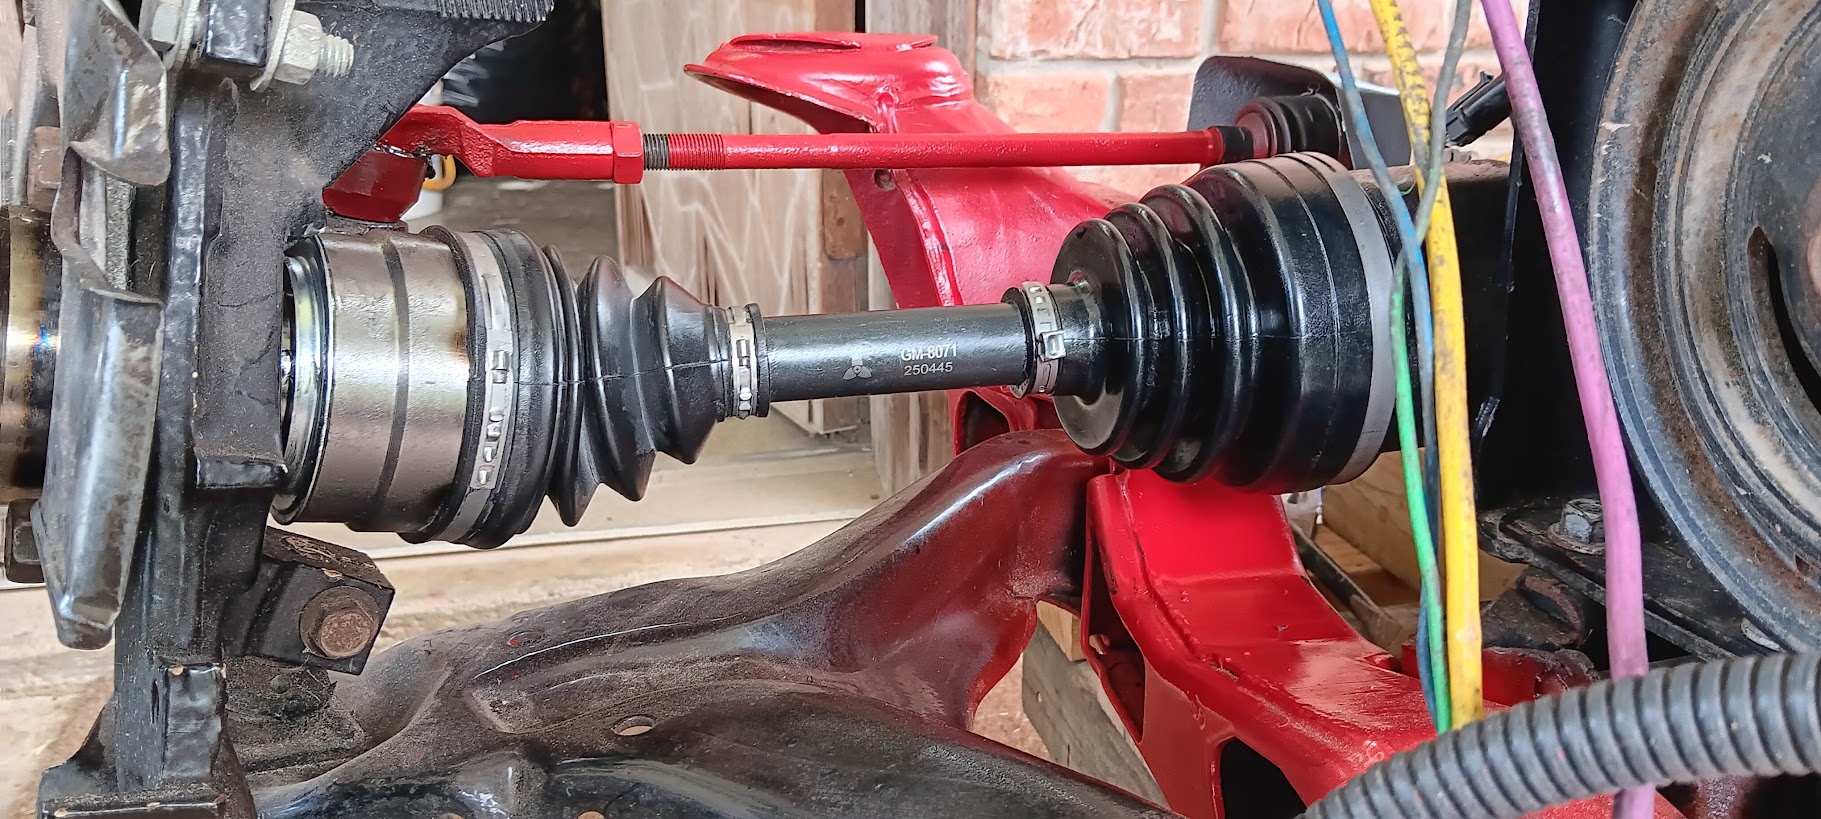
I am also in the process of building the passenger side CV axle. What a nerve racking experience. Again, waiting on crimping tools for the booths.
Yes, I am still at it....these dog days have slowed down the work with the shop temperature hoovering around 100 plus degrees.
Of late I have been attempting to build CV axles for the build. Lots of information on how to build and what to use. However, all have failed to indicate that one needs some specialty tools and materials for the job. Tools like banding tool, CV booth installation cone, etc.
Currently working on the passenger side CV axle. Again, waiting on an inner CV booth. I found out the hard way that the inner booth on a manual Fiero CV axle is not the same size as the inner CV booth for a 4T65e transmission. Oh well....
I have also ordered from Rock Auto a driver side CV axle for a 2004 minivan for the driver side.
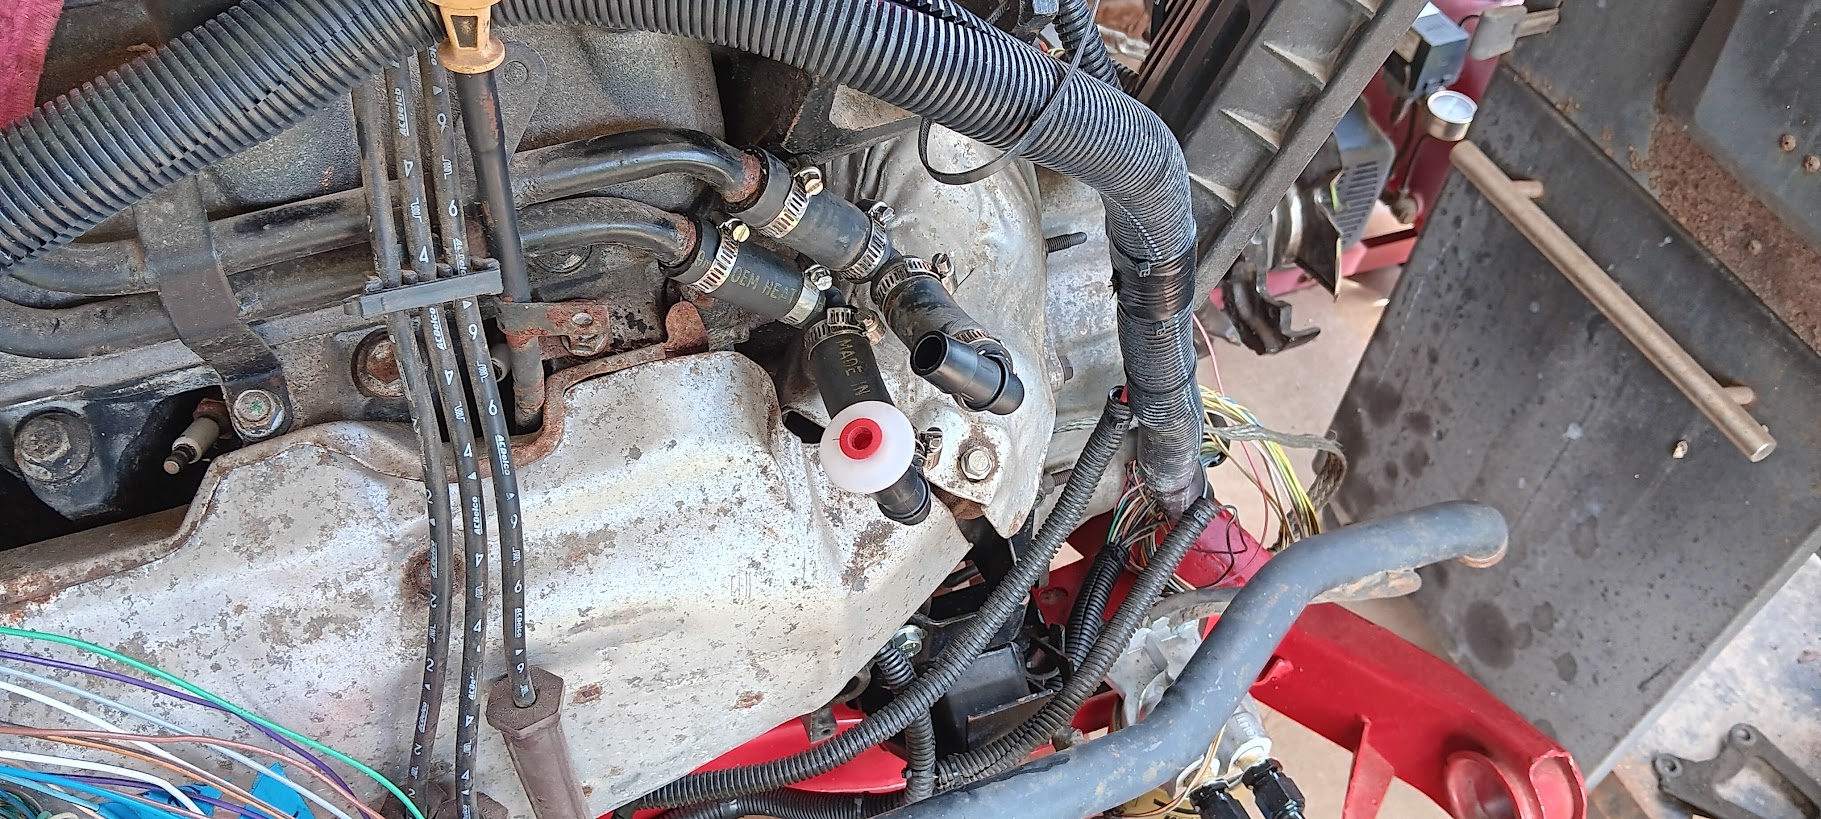
In addition, I have removed the Fiero heater hoses in the engine bay for the new install. Also removed have of the heater hose setup on the 2010 3.5 v6 so I can pipe up to the Fiero heater hoses on the firewall of the engine bay.
For whatever reason I could not get Google Photos to update my photo album so photos of the progress will have to wait.
[This message has been edited by Cajun (edited 08-20-2025).]
The CV booth has arrived for the passenger side CV axle build. Hopefully I will that that accomplished today.
Also, the driver side CV axle arrived. Looks like I will be tearing that one down and building another CV axel? I have ordered another Fiero driver side Manuel CV axle from RockAuto for the build.
In addition, I have ordered 5/8" 90-degree barbed couplings and the necessary hose clamps to pipe up the heater hoses for the conversion.
Building custom CV axles is not, at least from my prospective is not a walk in the park! It's nerve racking. To build two (2) CV axles for my swap I had to end up purchasing 4 or 5 different CV axles to obtain the correct axles. That's gets to be a costly affair in short order. Anyway....
The passenger side CV axle has been installed. Now, once again waiting on parts to complete the build of the driver side CV axle.
As mentioned earlier, I am working on the heater hose piping. Hopefully I have come up with the right combination and routing. I have ordered the 90 degree heater hoses to go from the engine piping to the Fiero heater hose piping located on the firewall of the GT.
I am still in the process of cleaning up the engine bay area for the install of the 3.5. Once the engine bay is cleaned up I plan on installing the 3.5 v6. I have a lot of wiring to deal with so I figured I could work on that while I wait on parts.
This basically a bump.... I am still fighting building custom CV axles for the engine swap. It's not as straight forward as everyone makes it out to be. That is especially true when the axle does not separate as they are supposed to. I could not separate the outer knuckle for the passenger side CV axle. So, what to do.... I brought the axle to an auto shop that specializes in CV axle repairs. Long story short they spent almost a full day attempting to separate the outer knuckle without any success! Yeap, that's what I said that sucks. So, what to do now?
Gonna go so some extremes to separate the outer knuckle. Hopefully by tomorrow I can post the results of the experiment.
In the meantime, I have ordered 2 more CV axles from Rockauto just in case of failure.