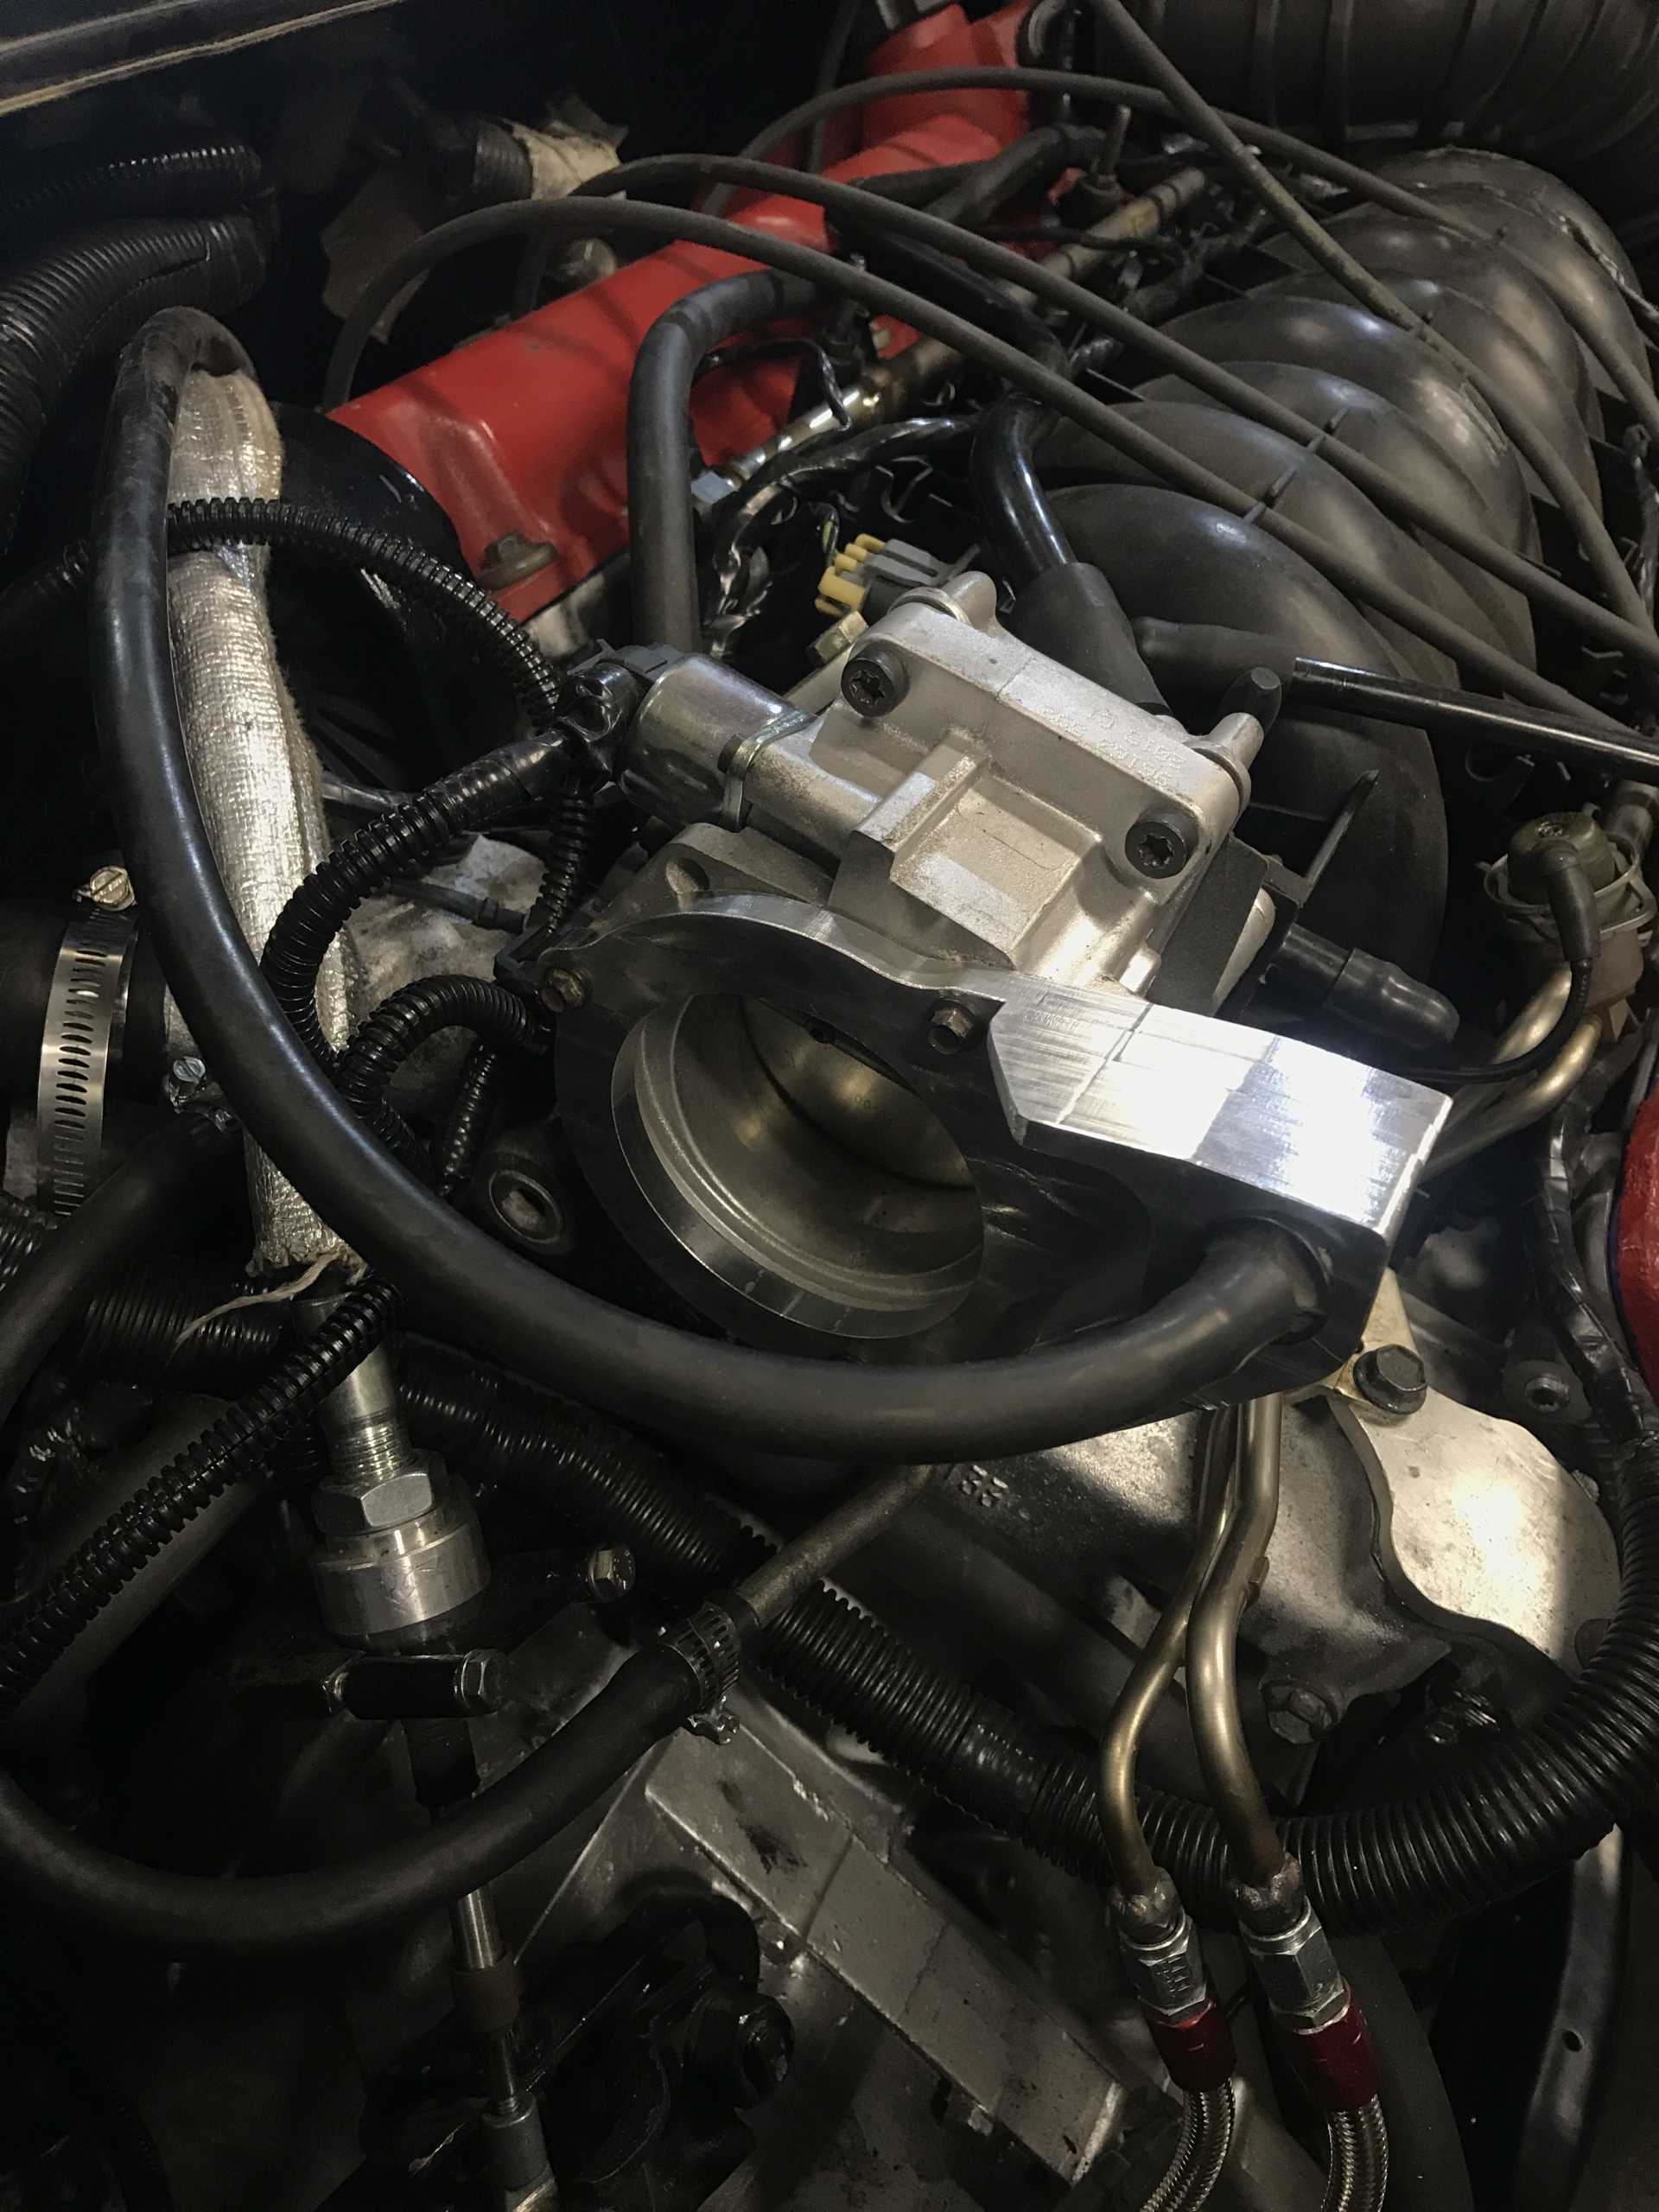
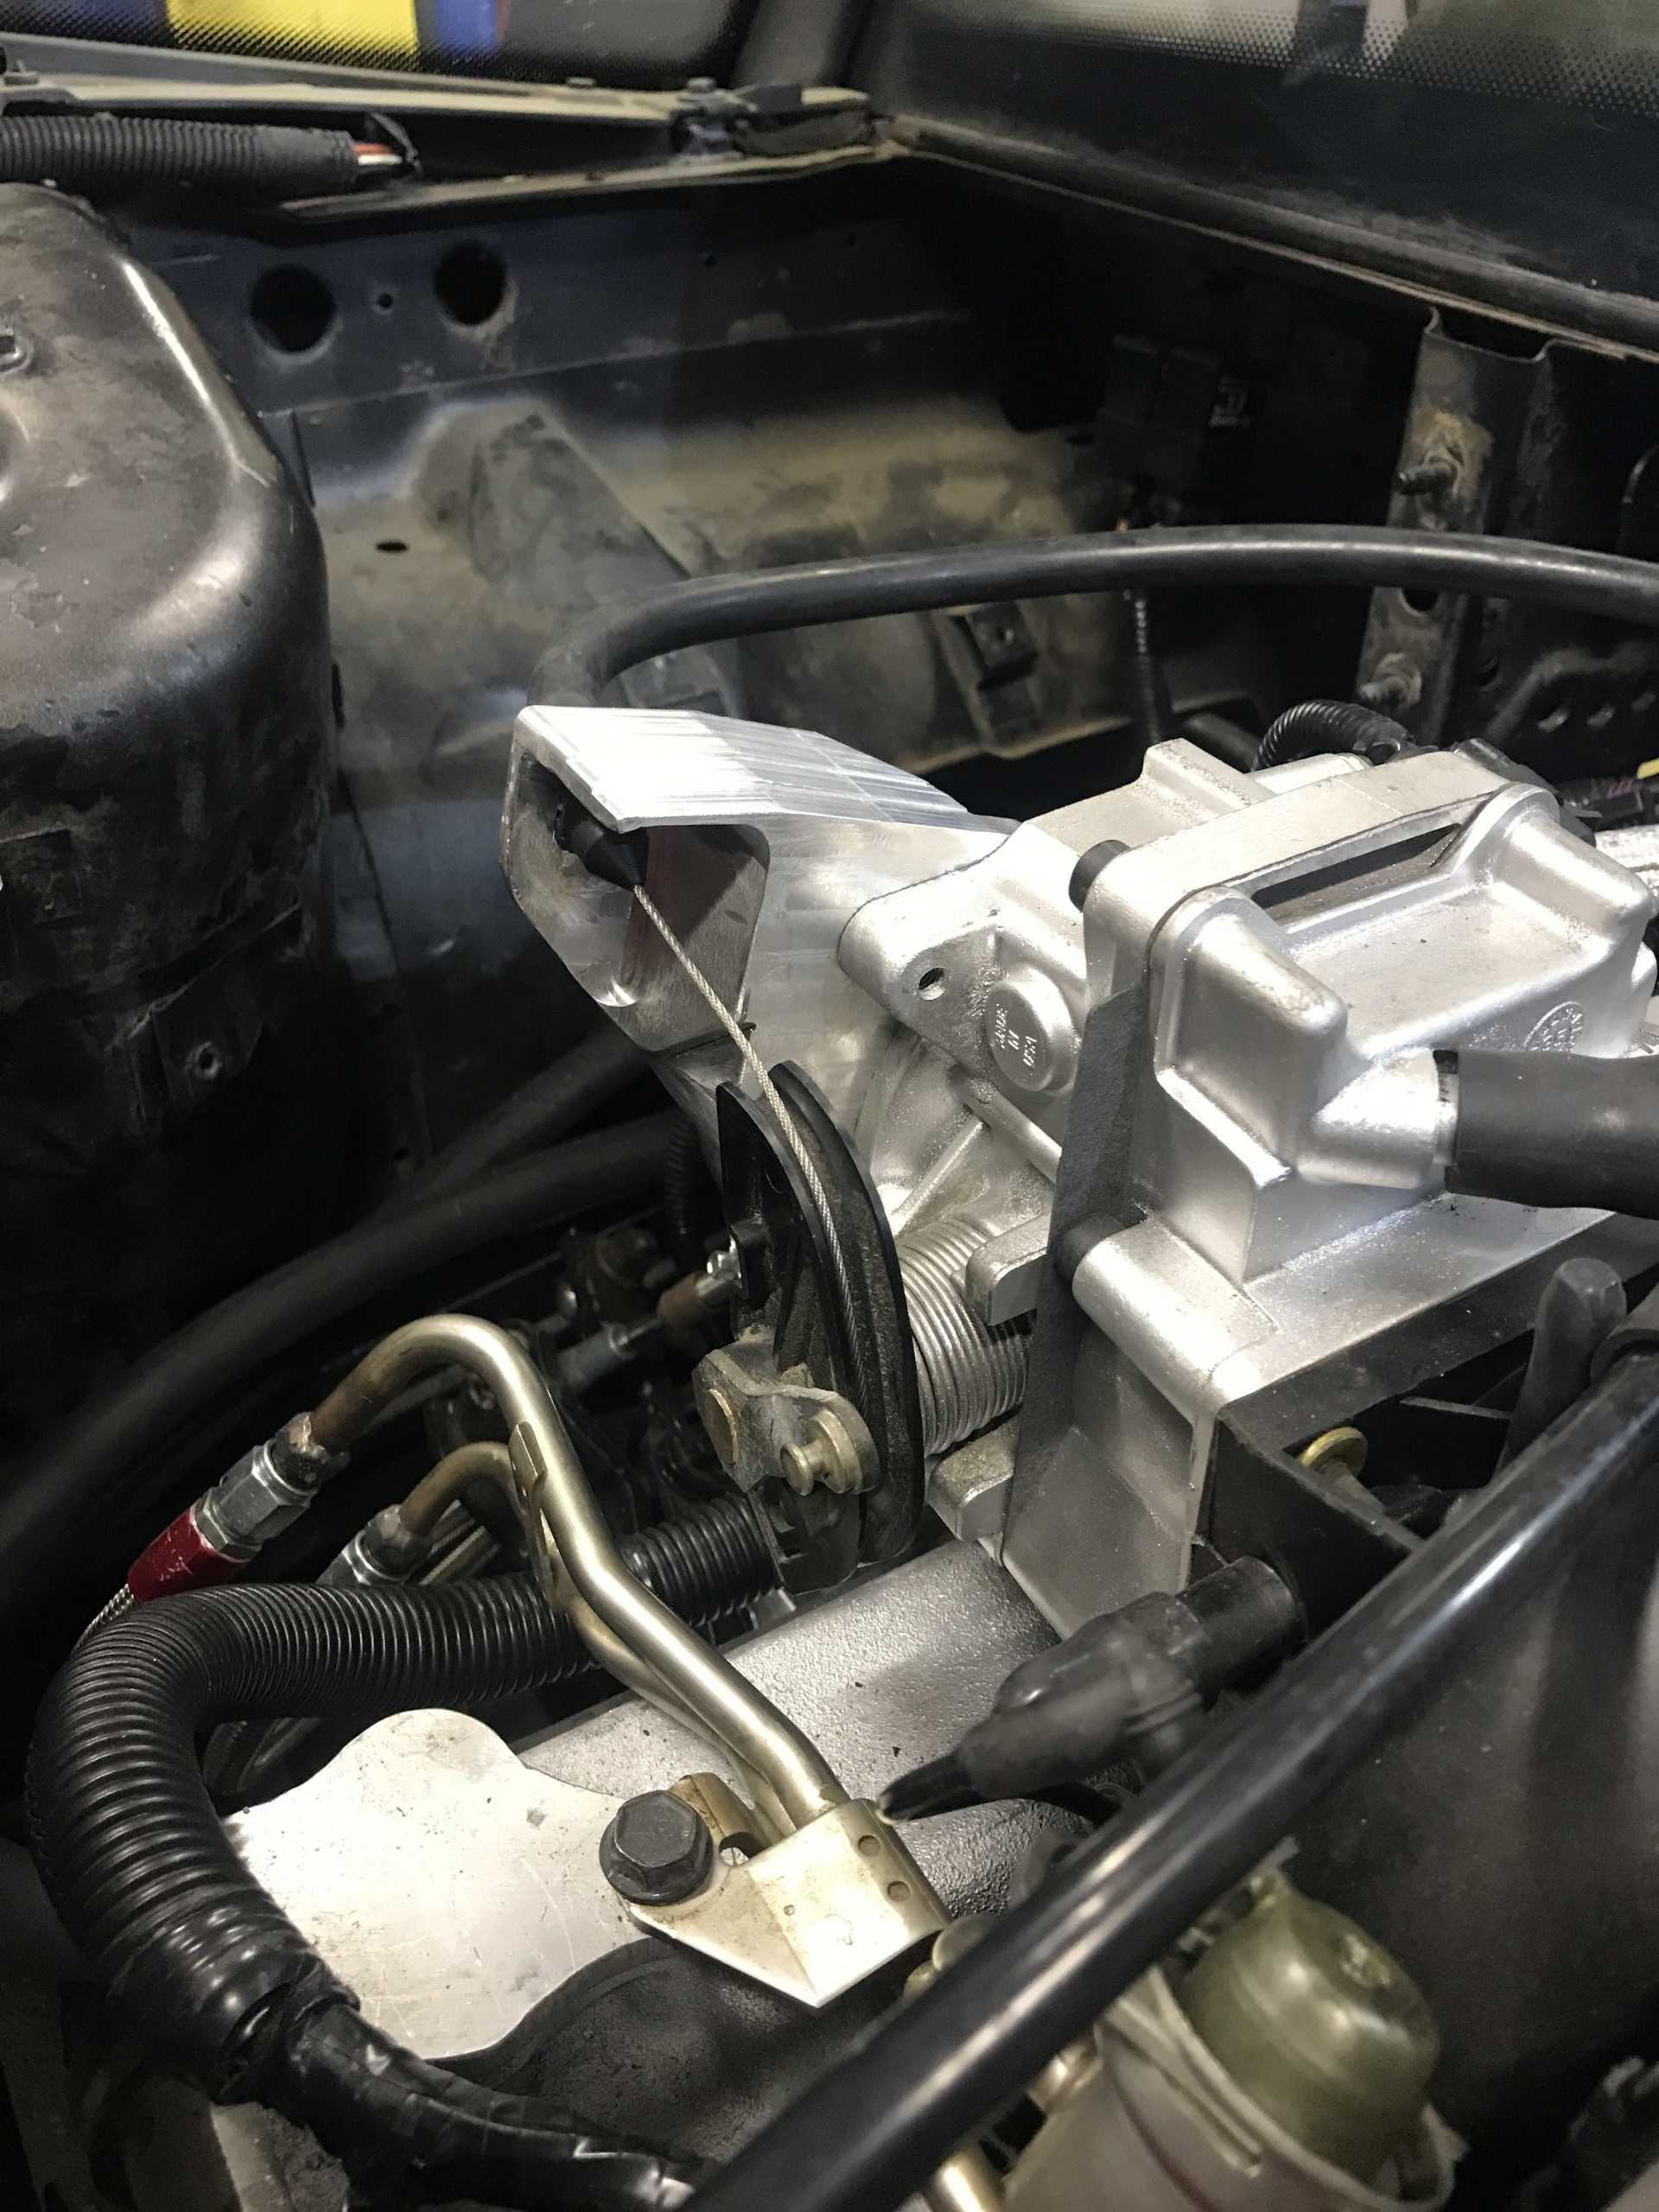
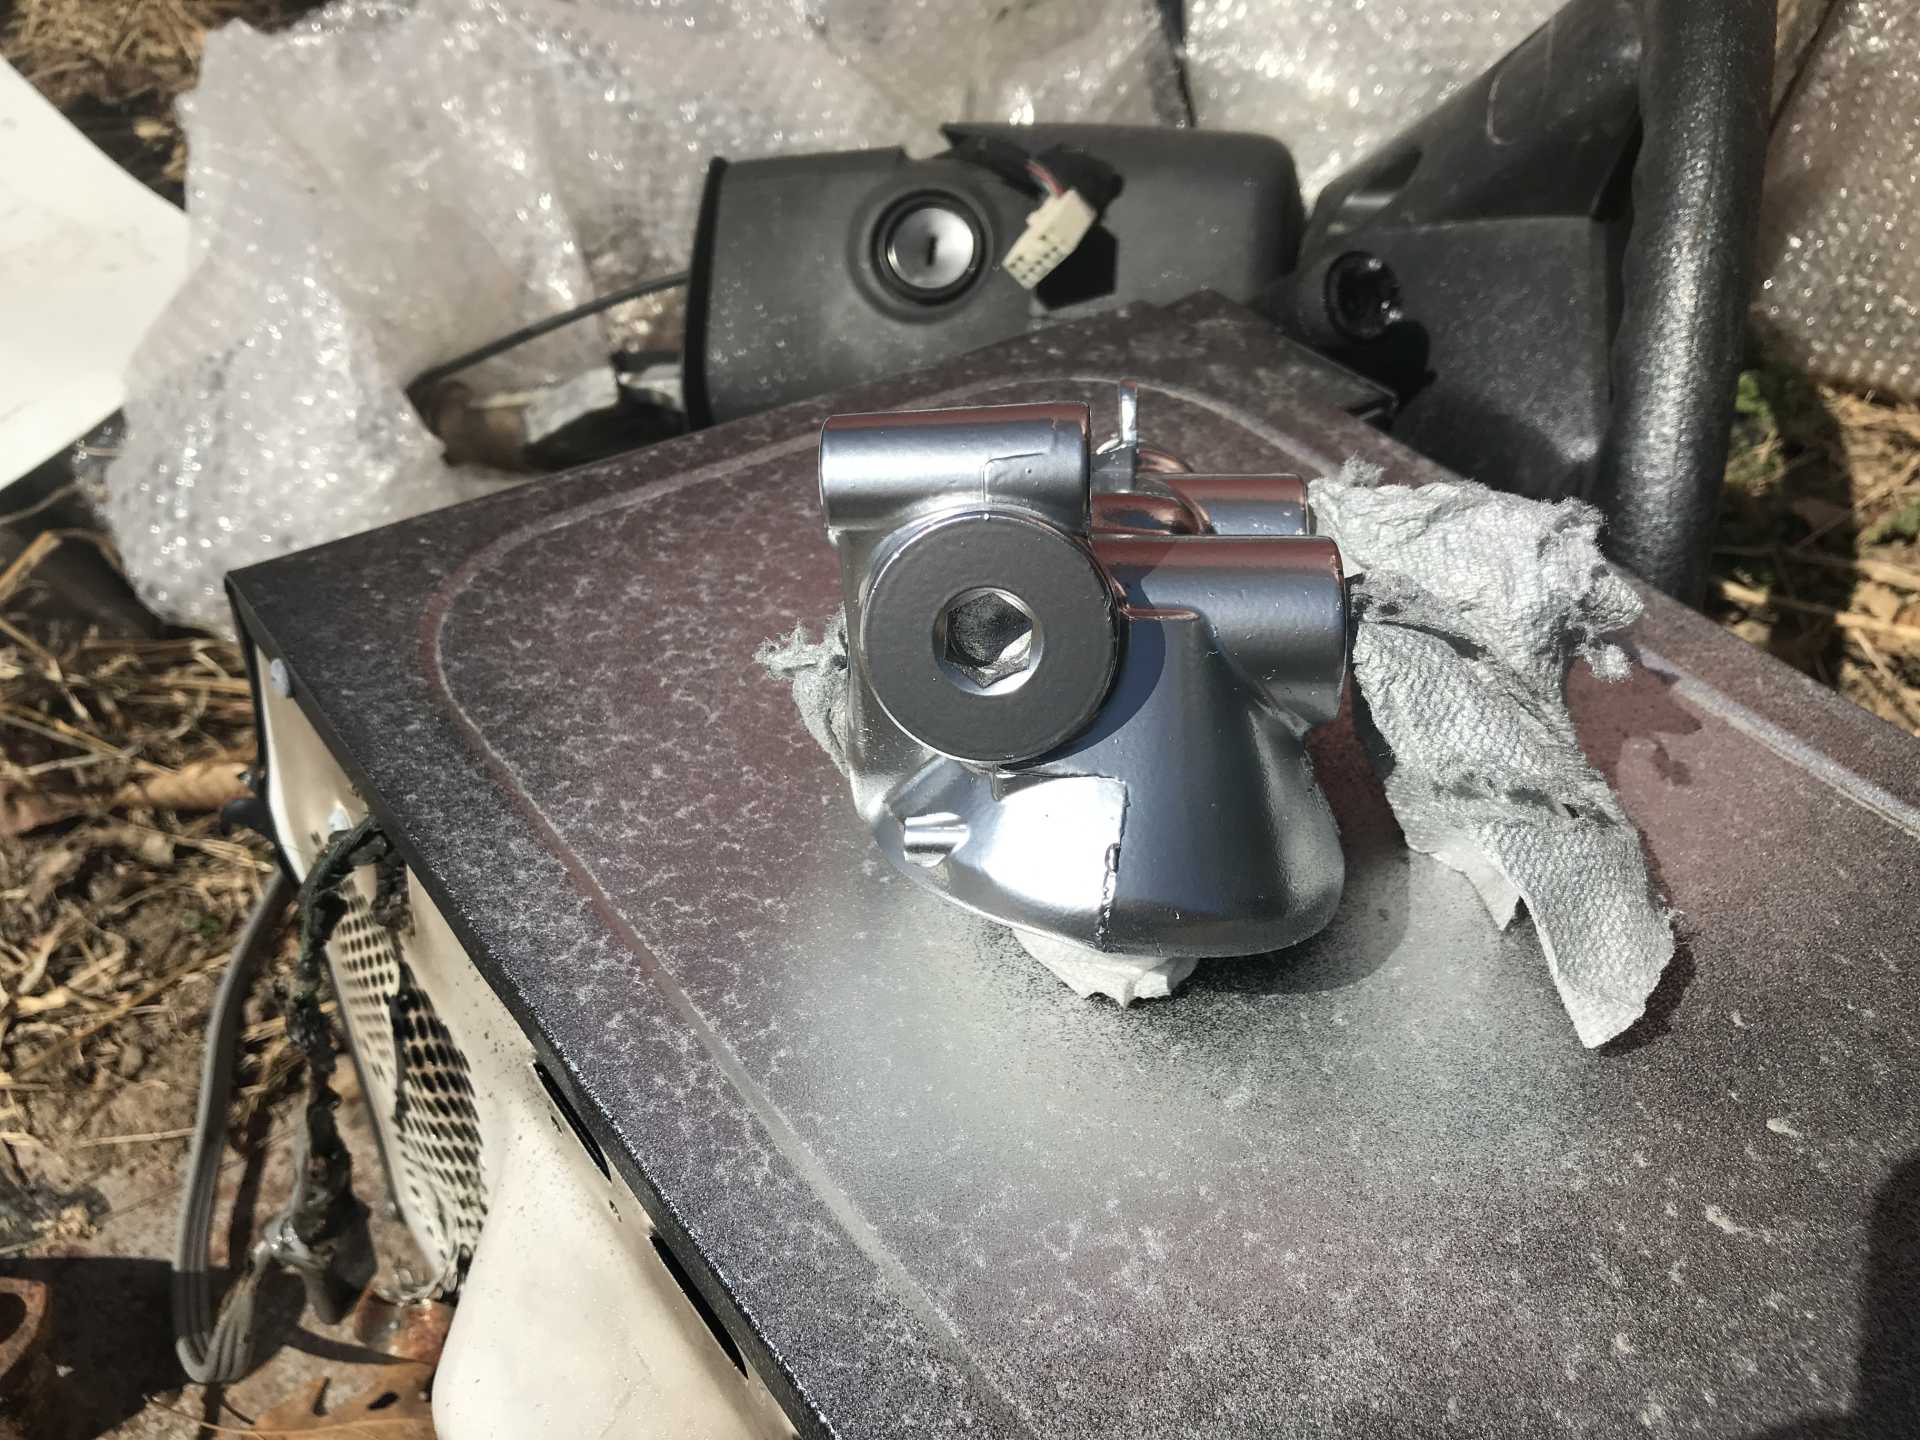
It’s an adapter for the throttle body for the cable to mount to. It has an o ring grove cut on the other side.
There is great throttle travel now. With an accelerator pedal, we were able to test putting it into gear. It does move forward and backwards under its own power. It won’t go into first. We haven’t adjusted anything trans-wise which is prolly the issue. Also, the new cooling system seems to now work with no leaks! The heater core lines heated up, and eventually the radiator got warm, and the fan turned on and off when needed and moves a ton of air.
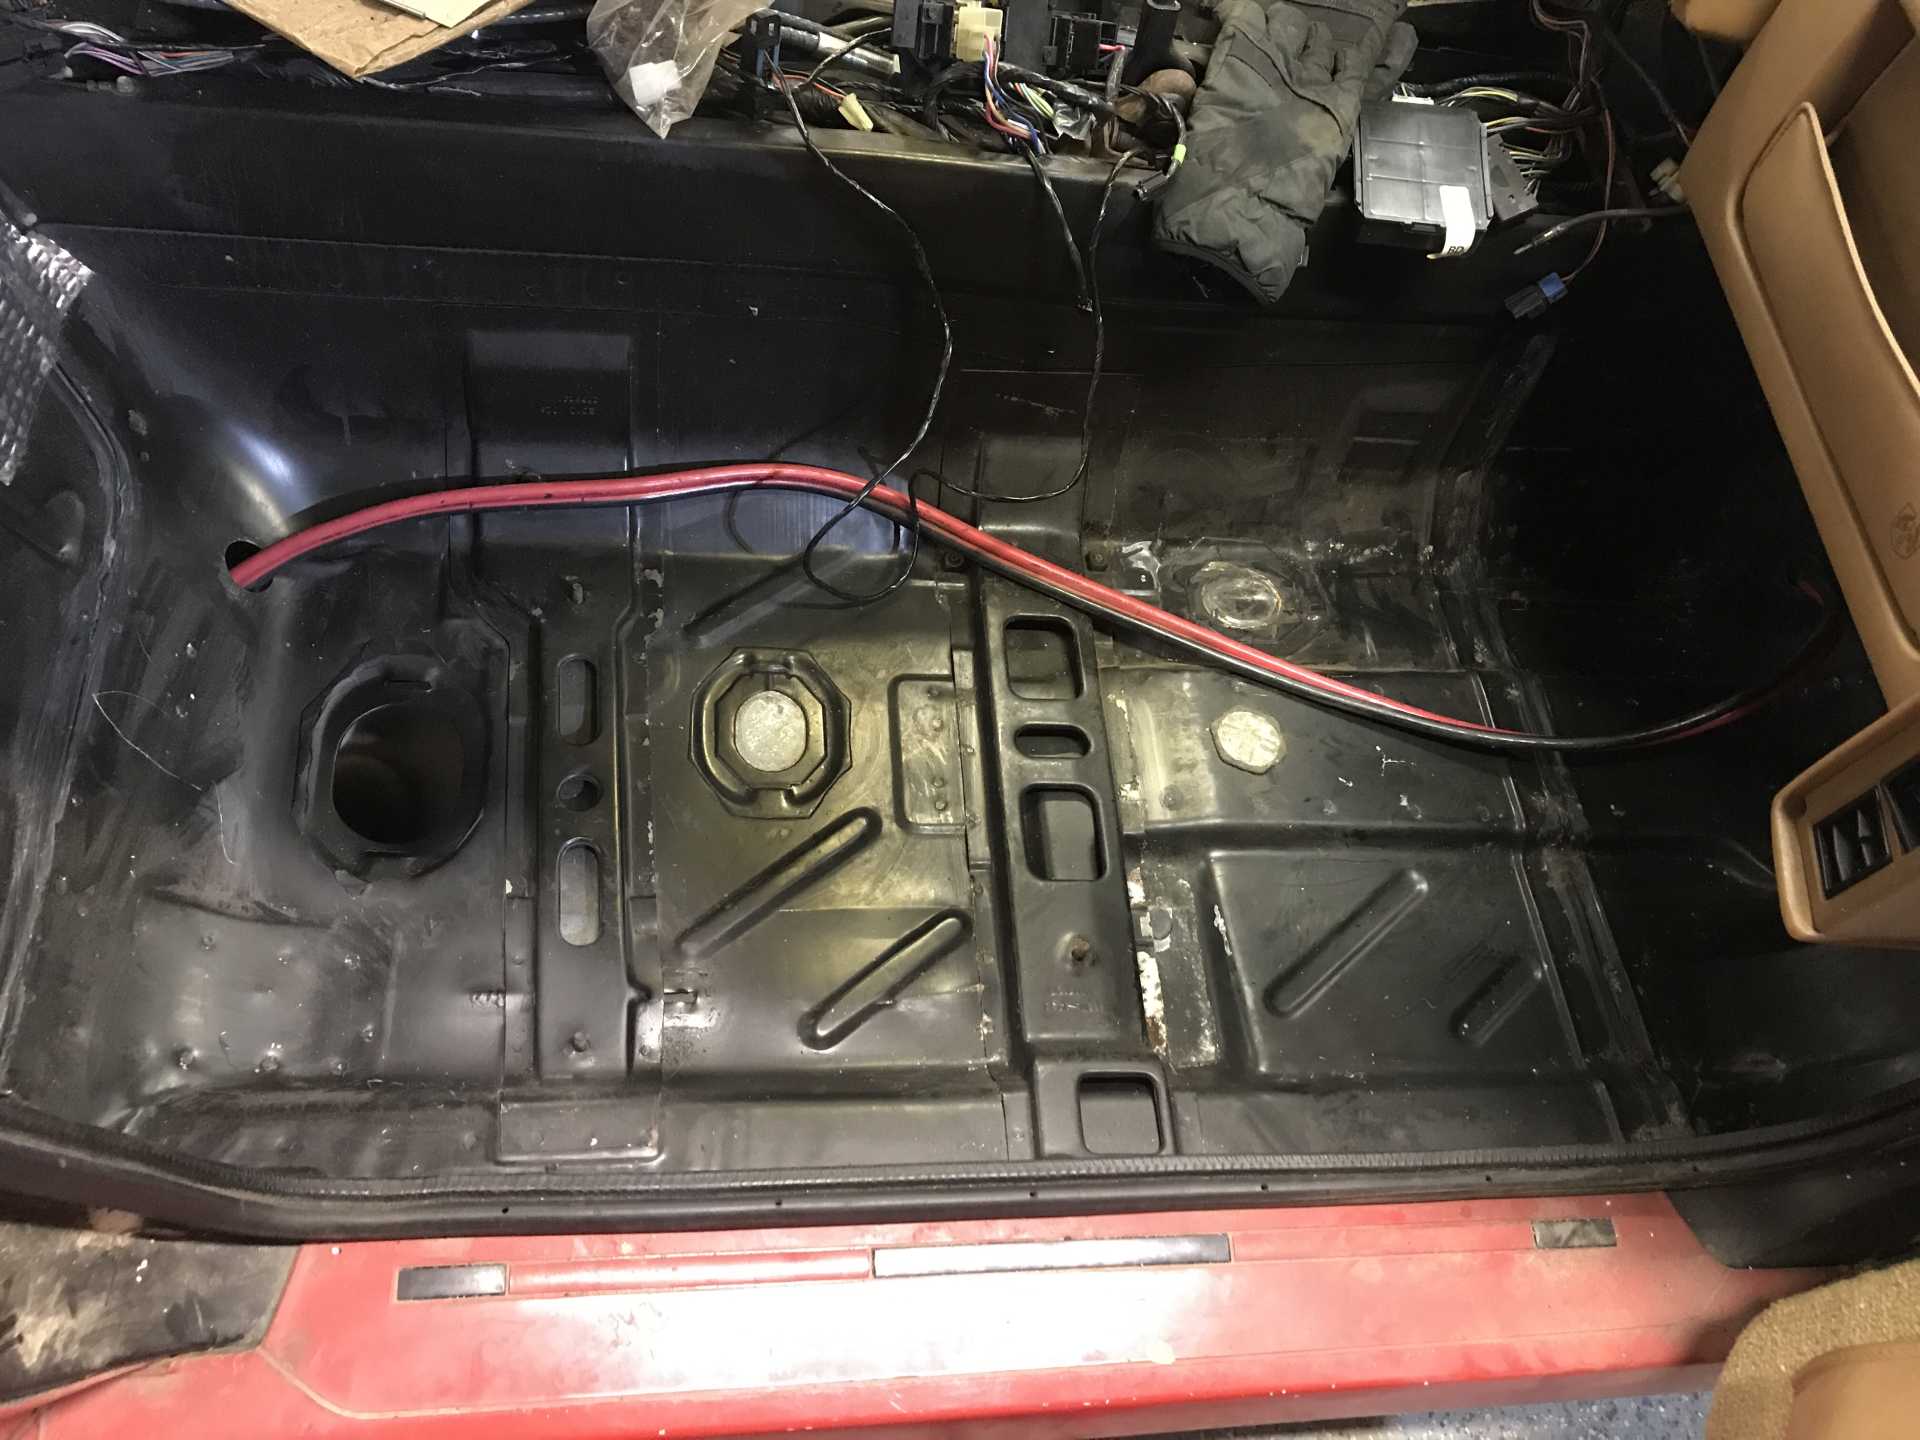
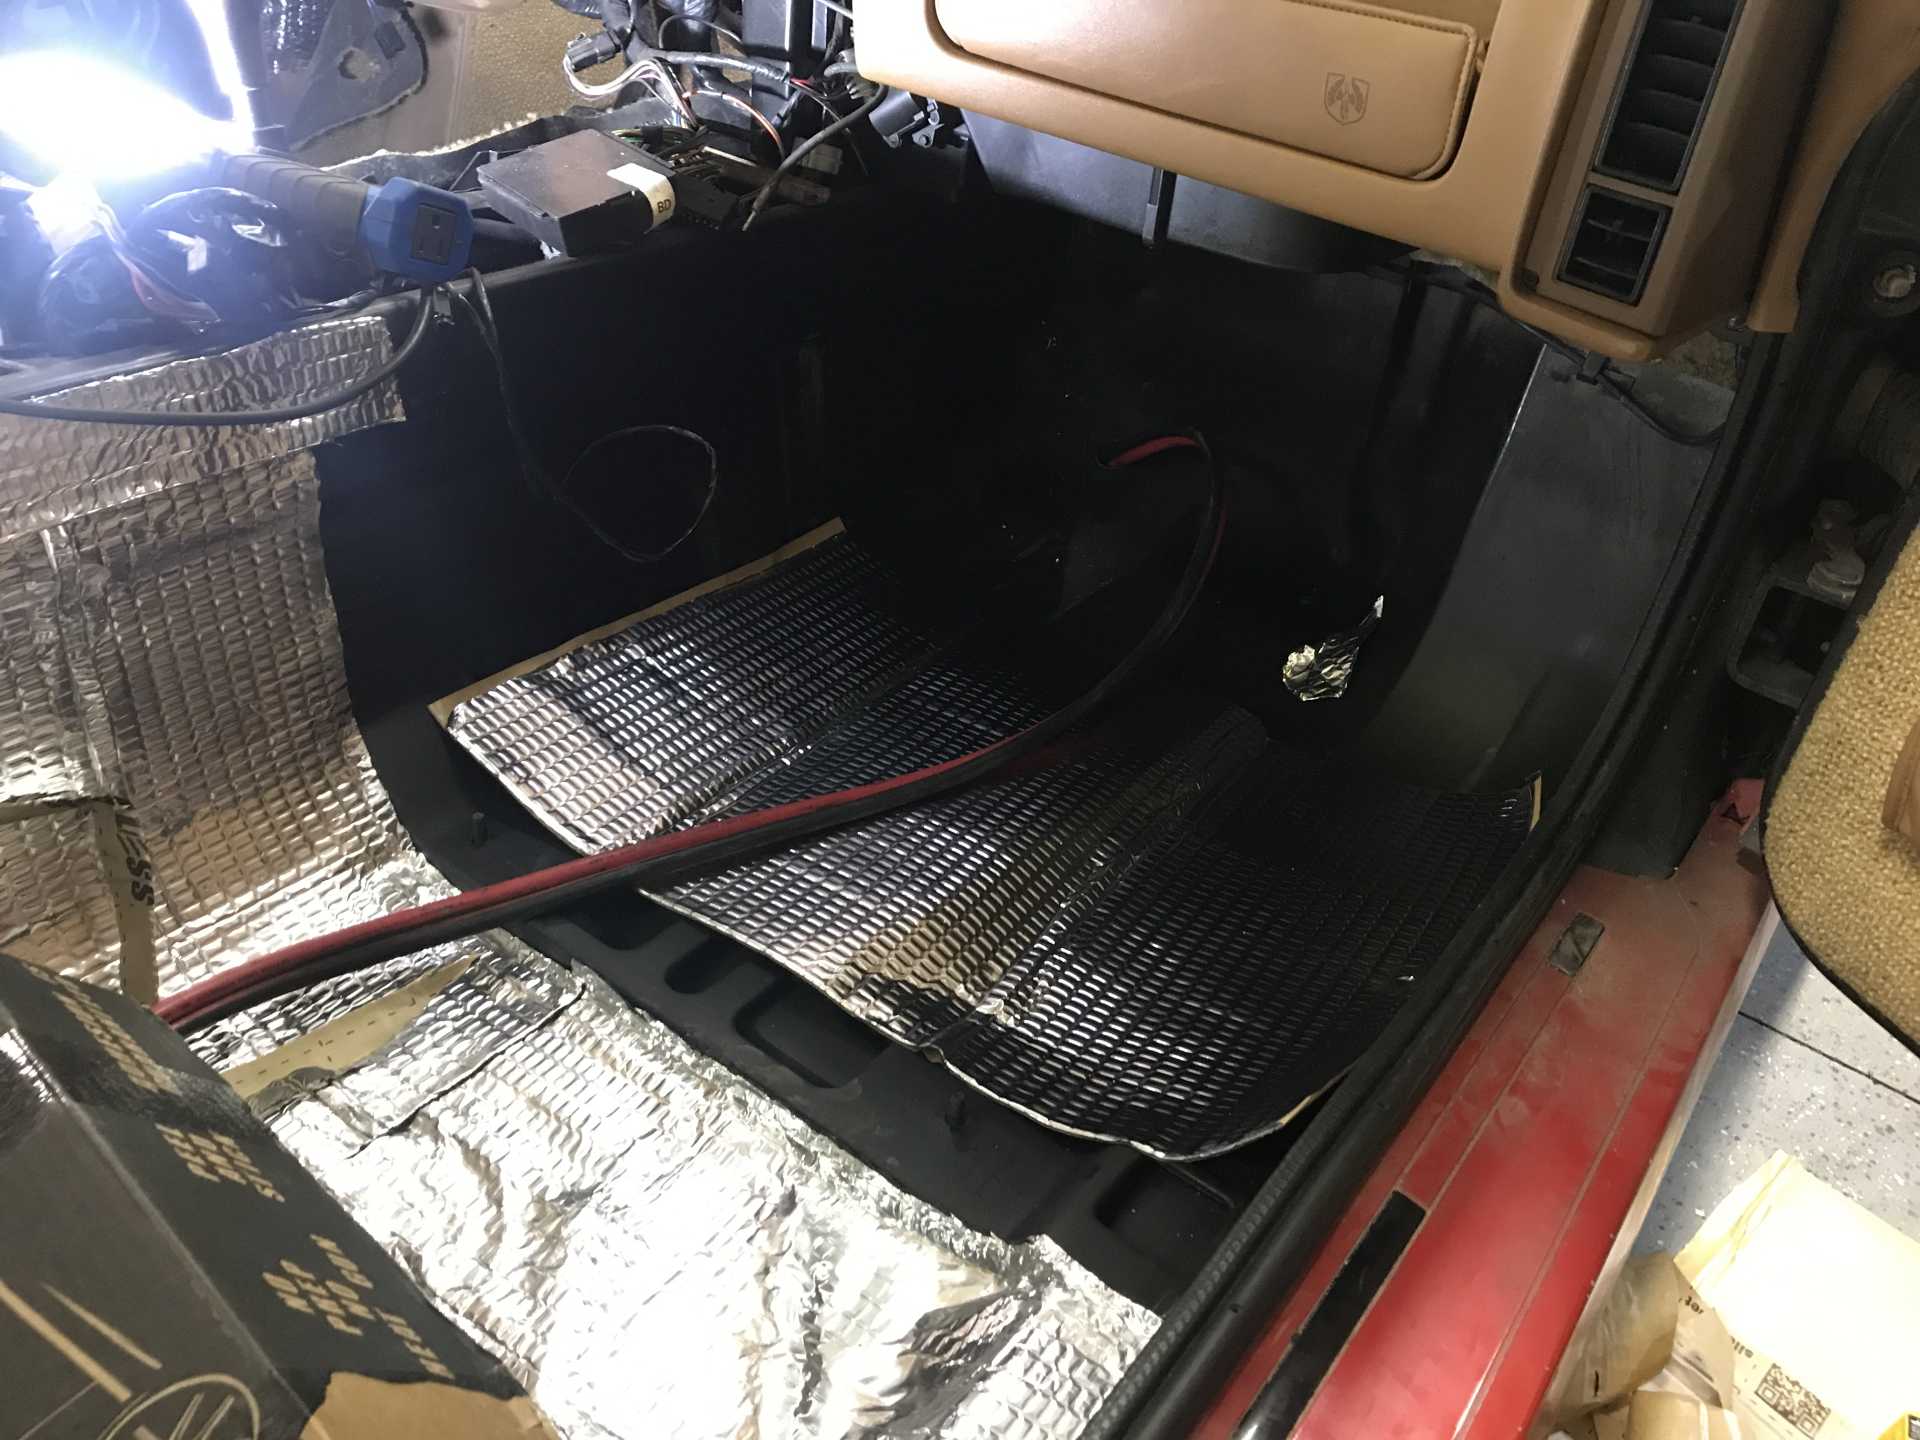
On the 24th I did some more prepping on the passenger side.
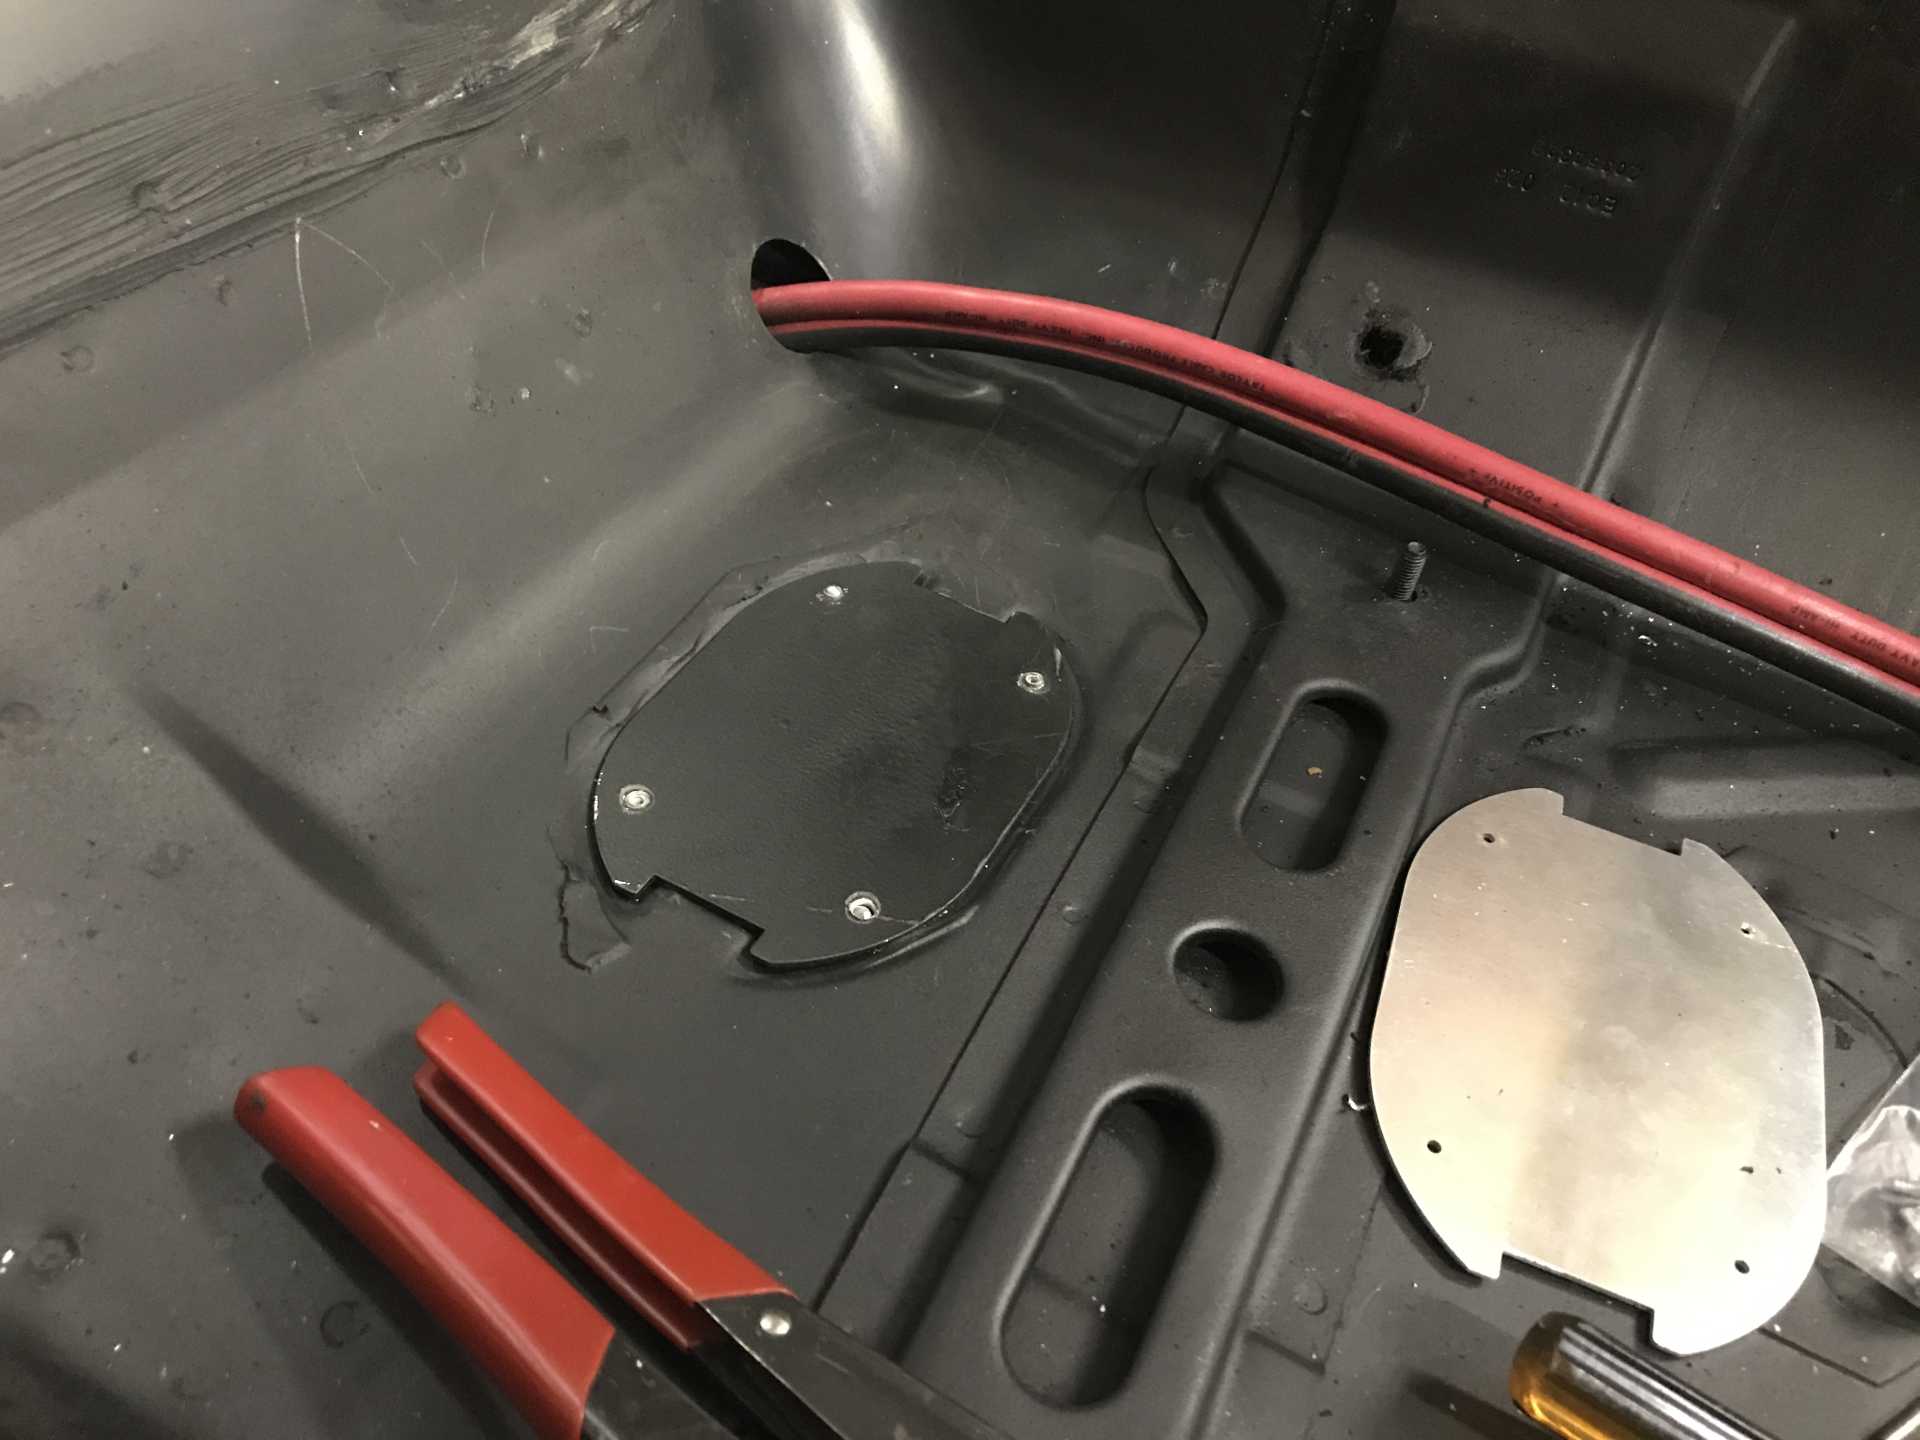
Rodneys floor plug in place. My drain plug was missing for whatever reason.
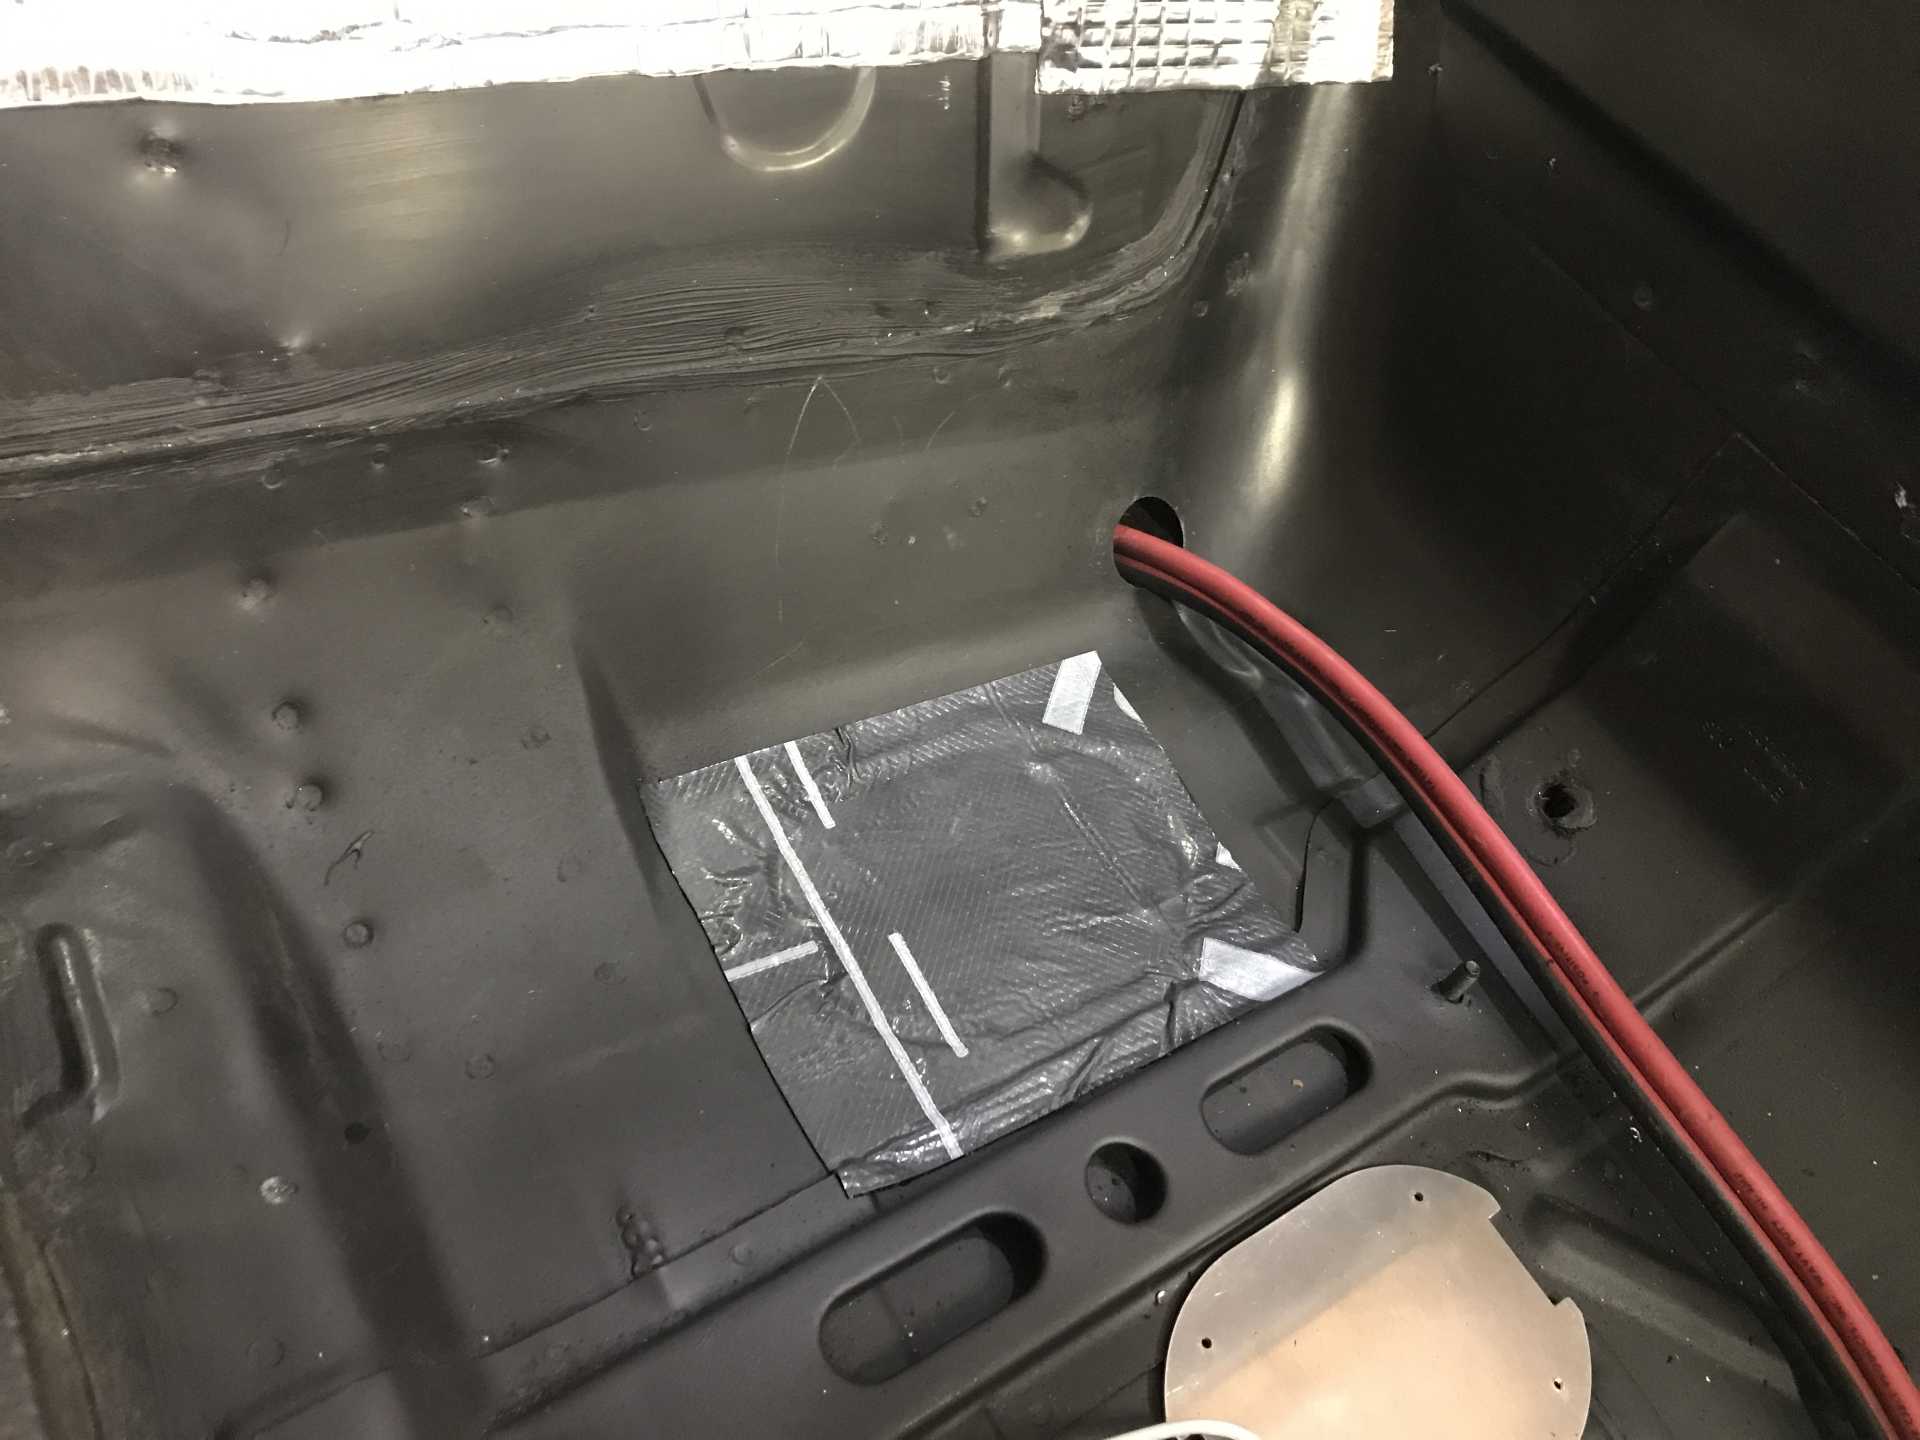
Roof tar to seal it up. Now that the holes were fixed, I could finished the sound deadening.
I got a lot of the deadener in, but ran out for this front part.
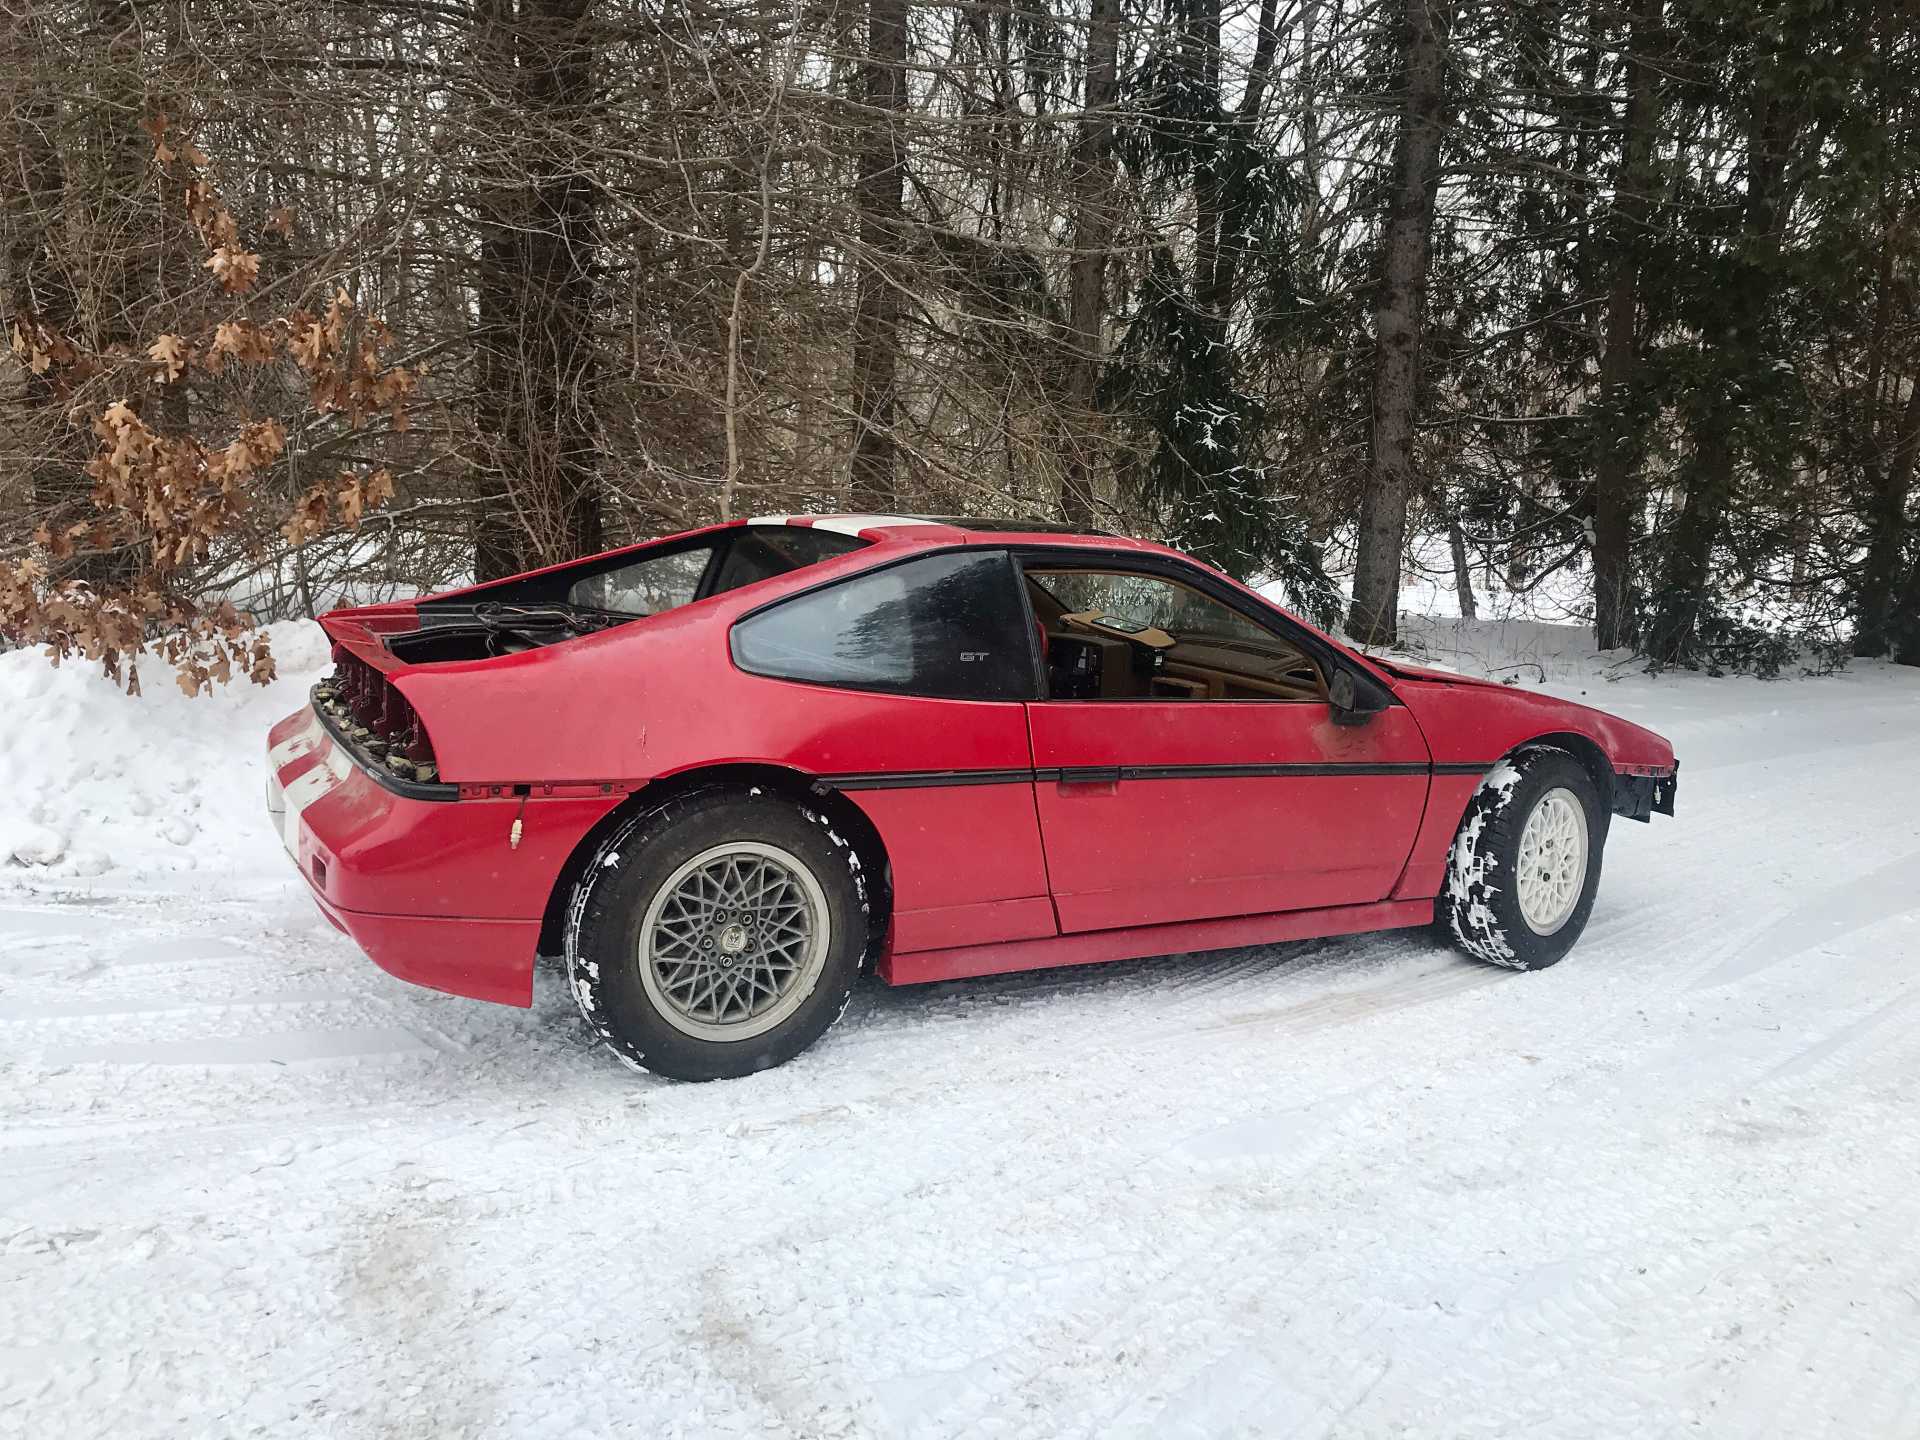
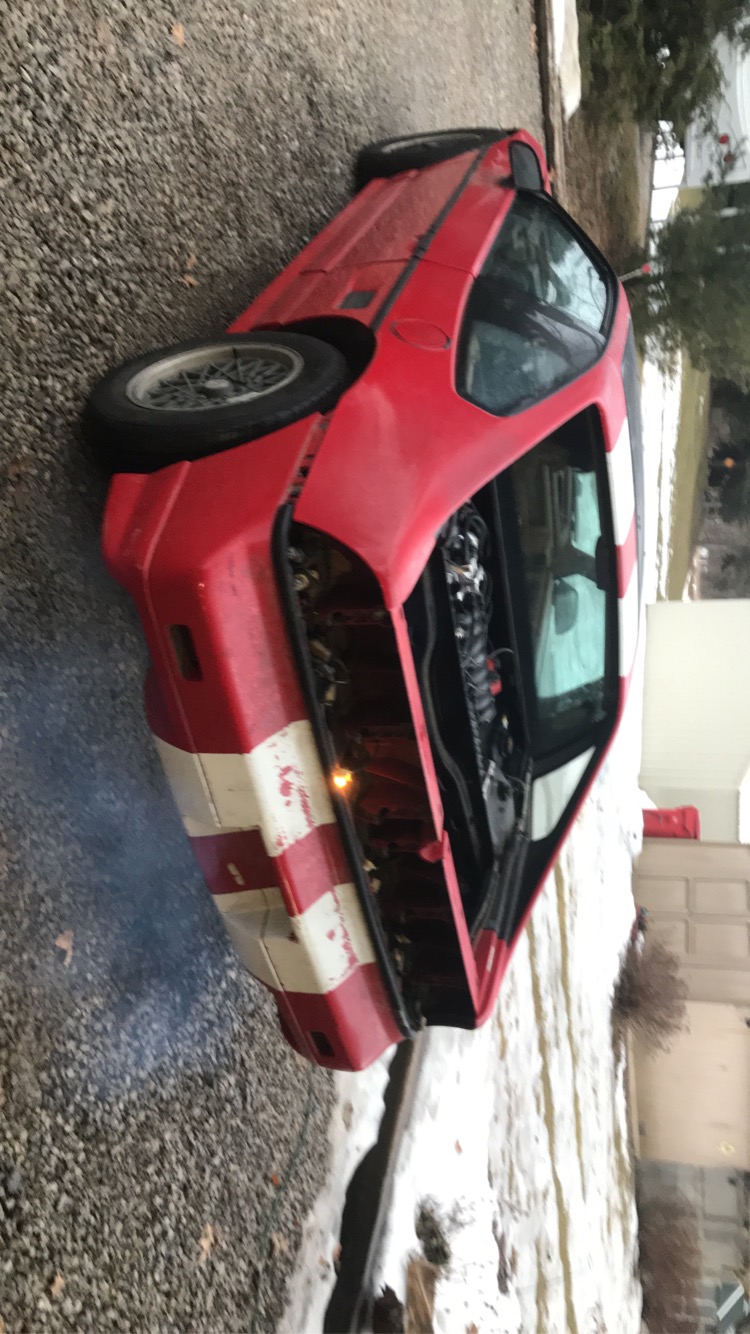
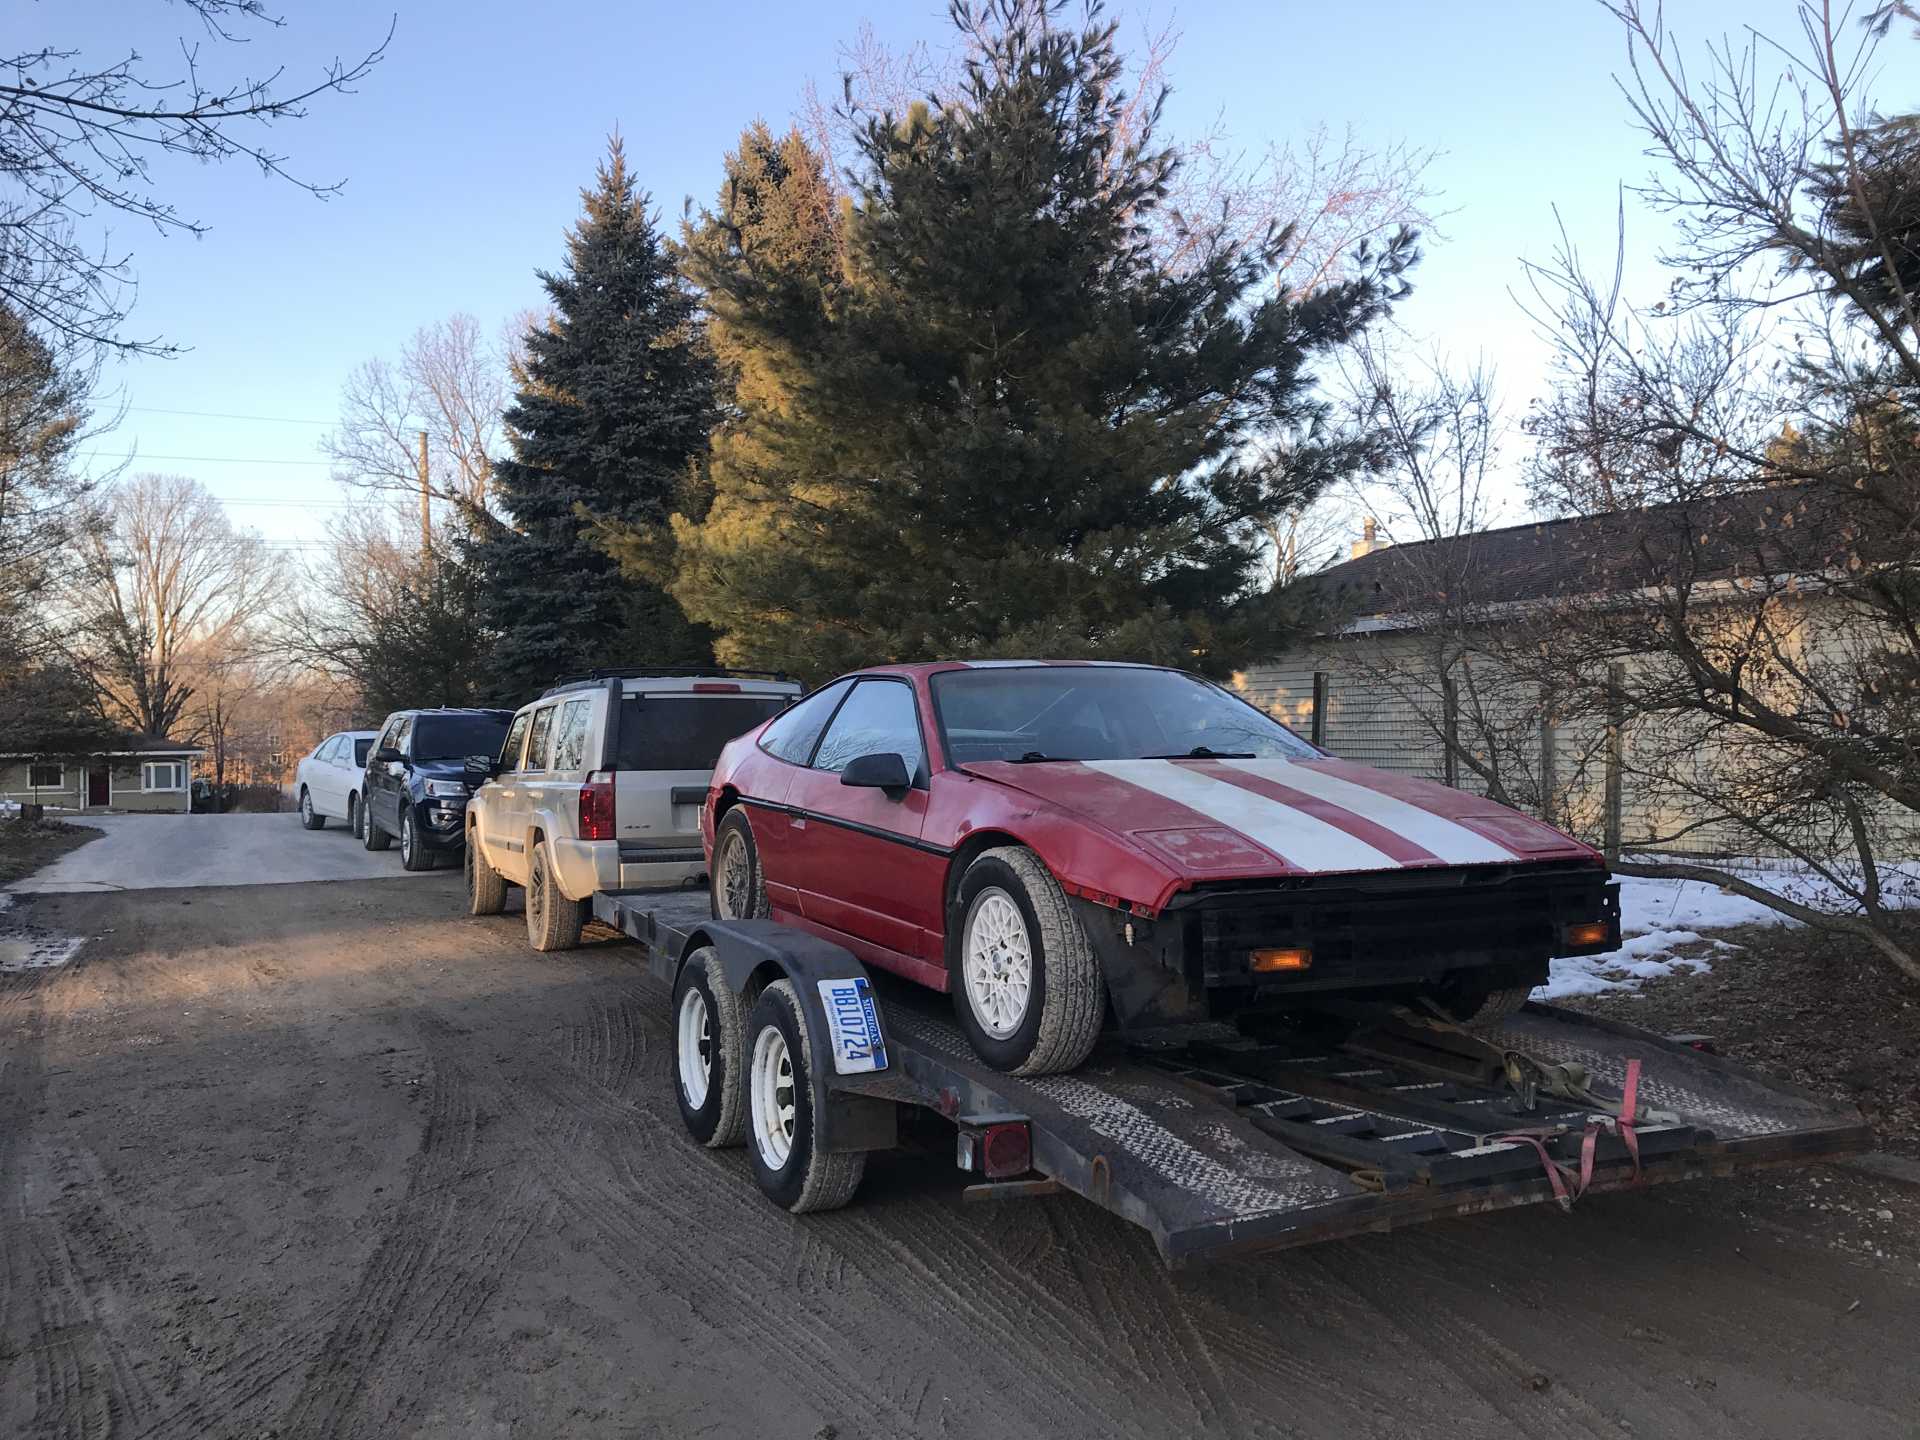
On the 31st the car drove two miles home. It is very illegal to drive since it’s not plated, insured, and missing parts so my dad drove it. He said it was super sketchy and one of the scariest things he drove because it needs an alignment so bad, and there are things that just need to be worked on the motor. It drove through deep snow(no salt on the back roads luckily) and did well all things considered.
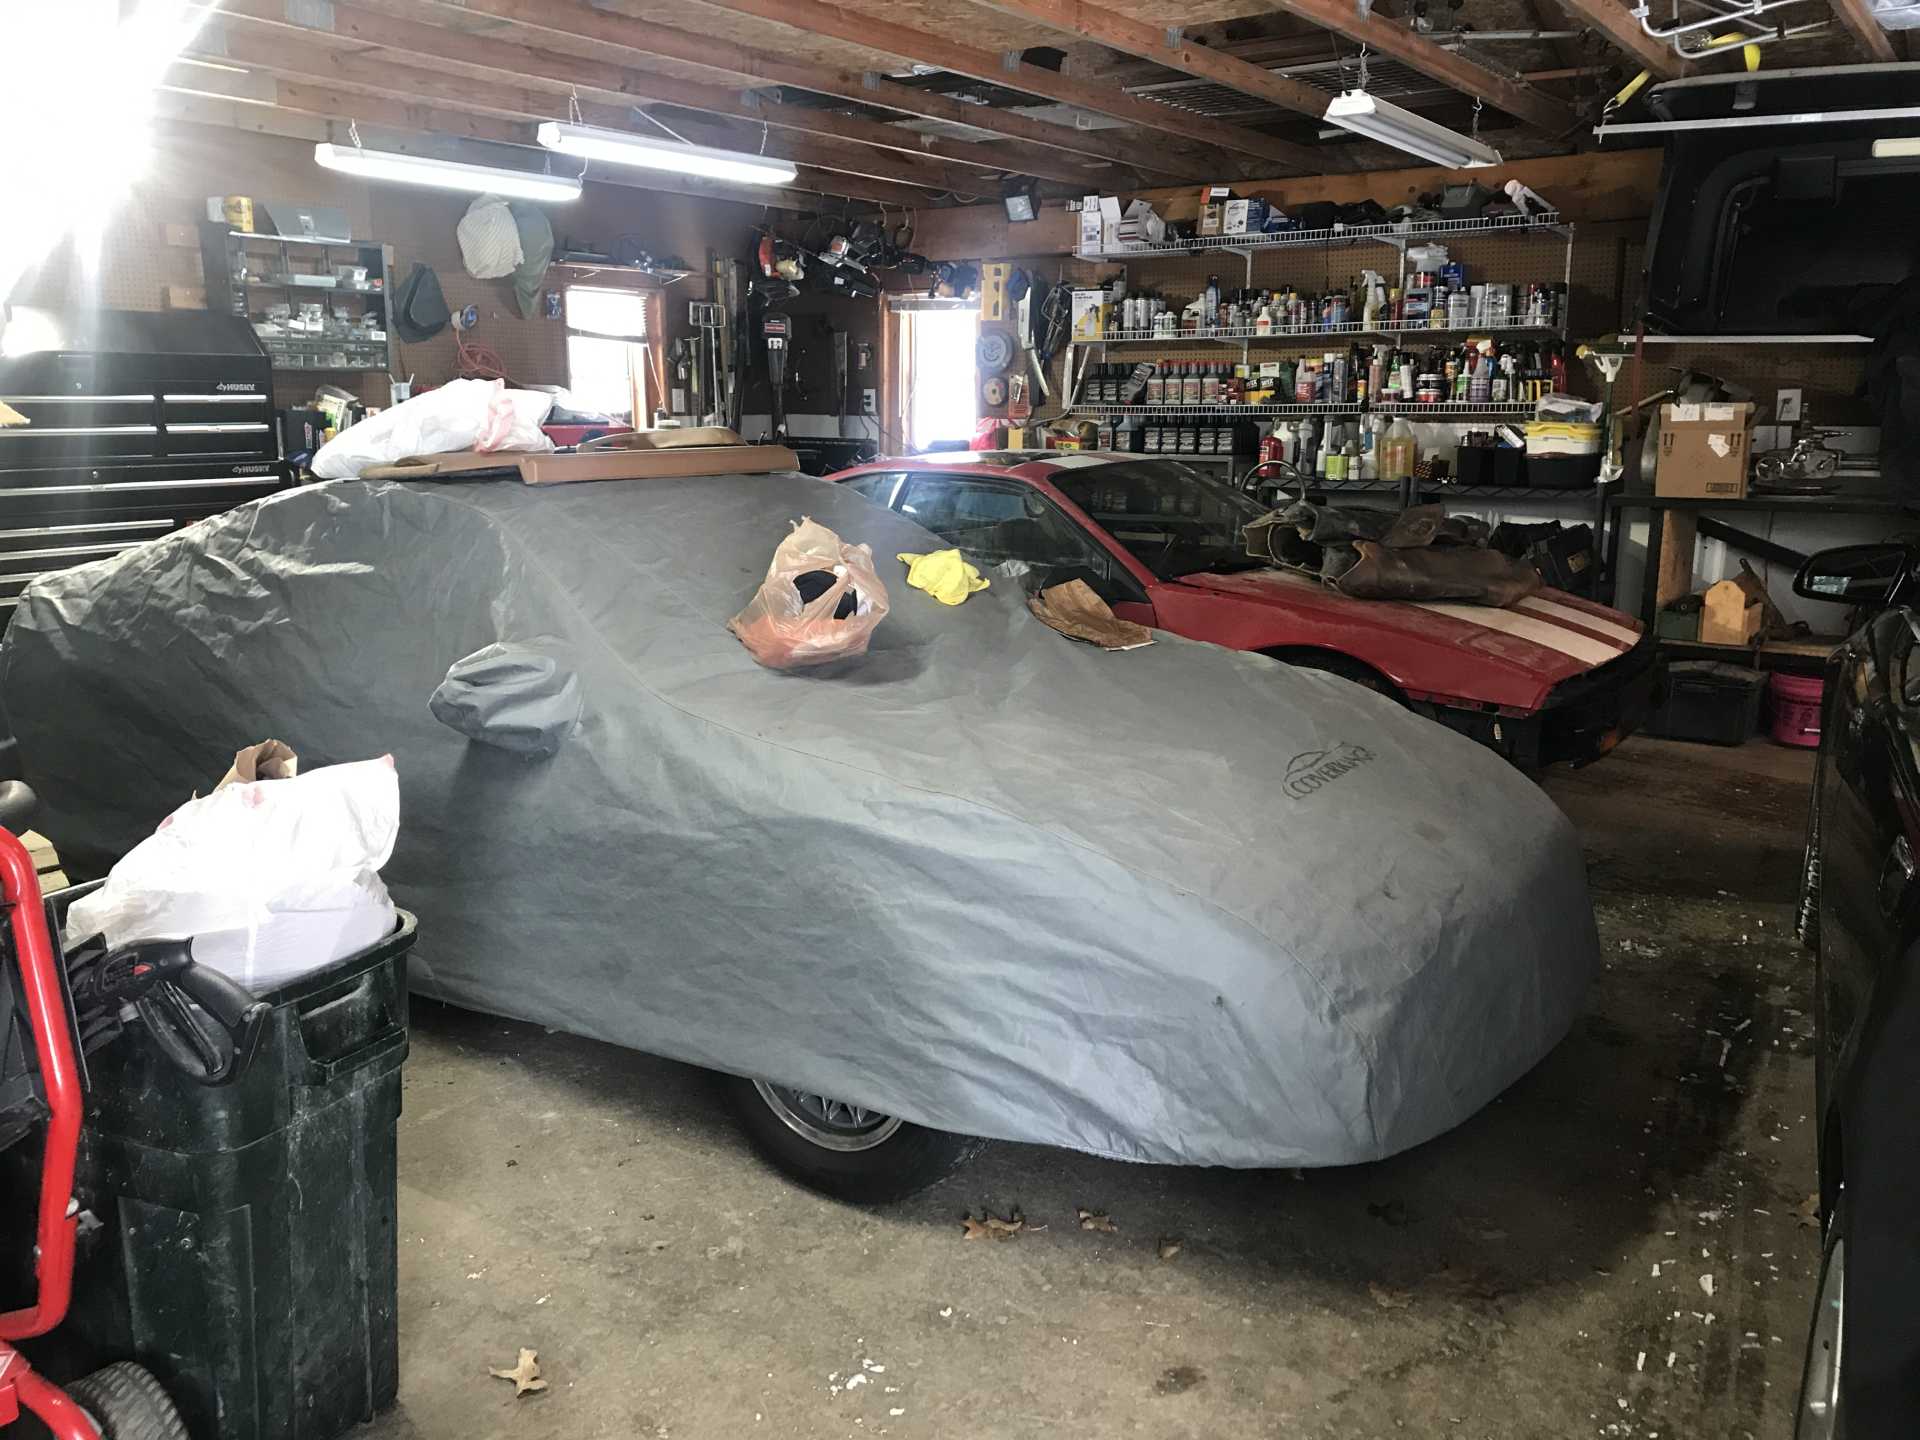
In our garage... I’ve tried to work on it but even with a heater blowing on the car, it’s too cold for me to work comfortably which really sucks. This garage needs to be installed so bad.
[This message has been edited by copperhens (edited 02-09-2021).]
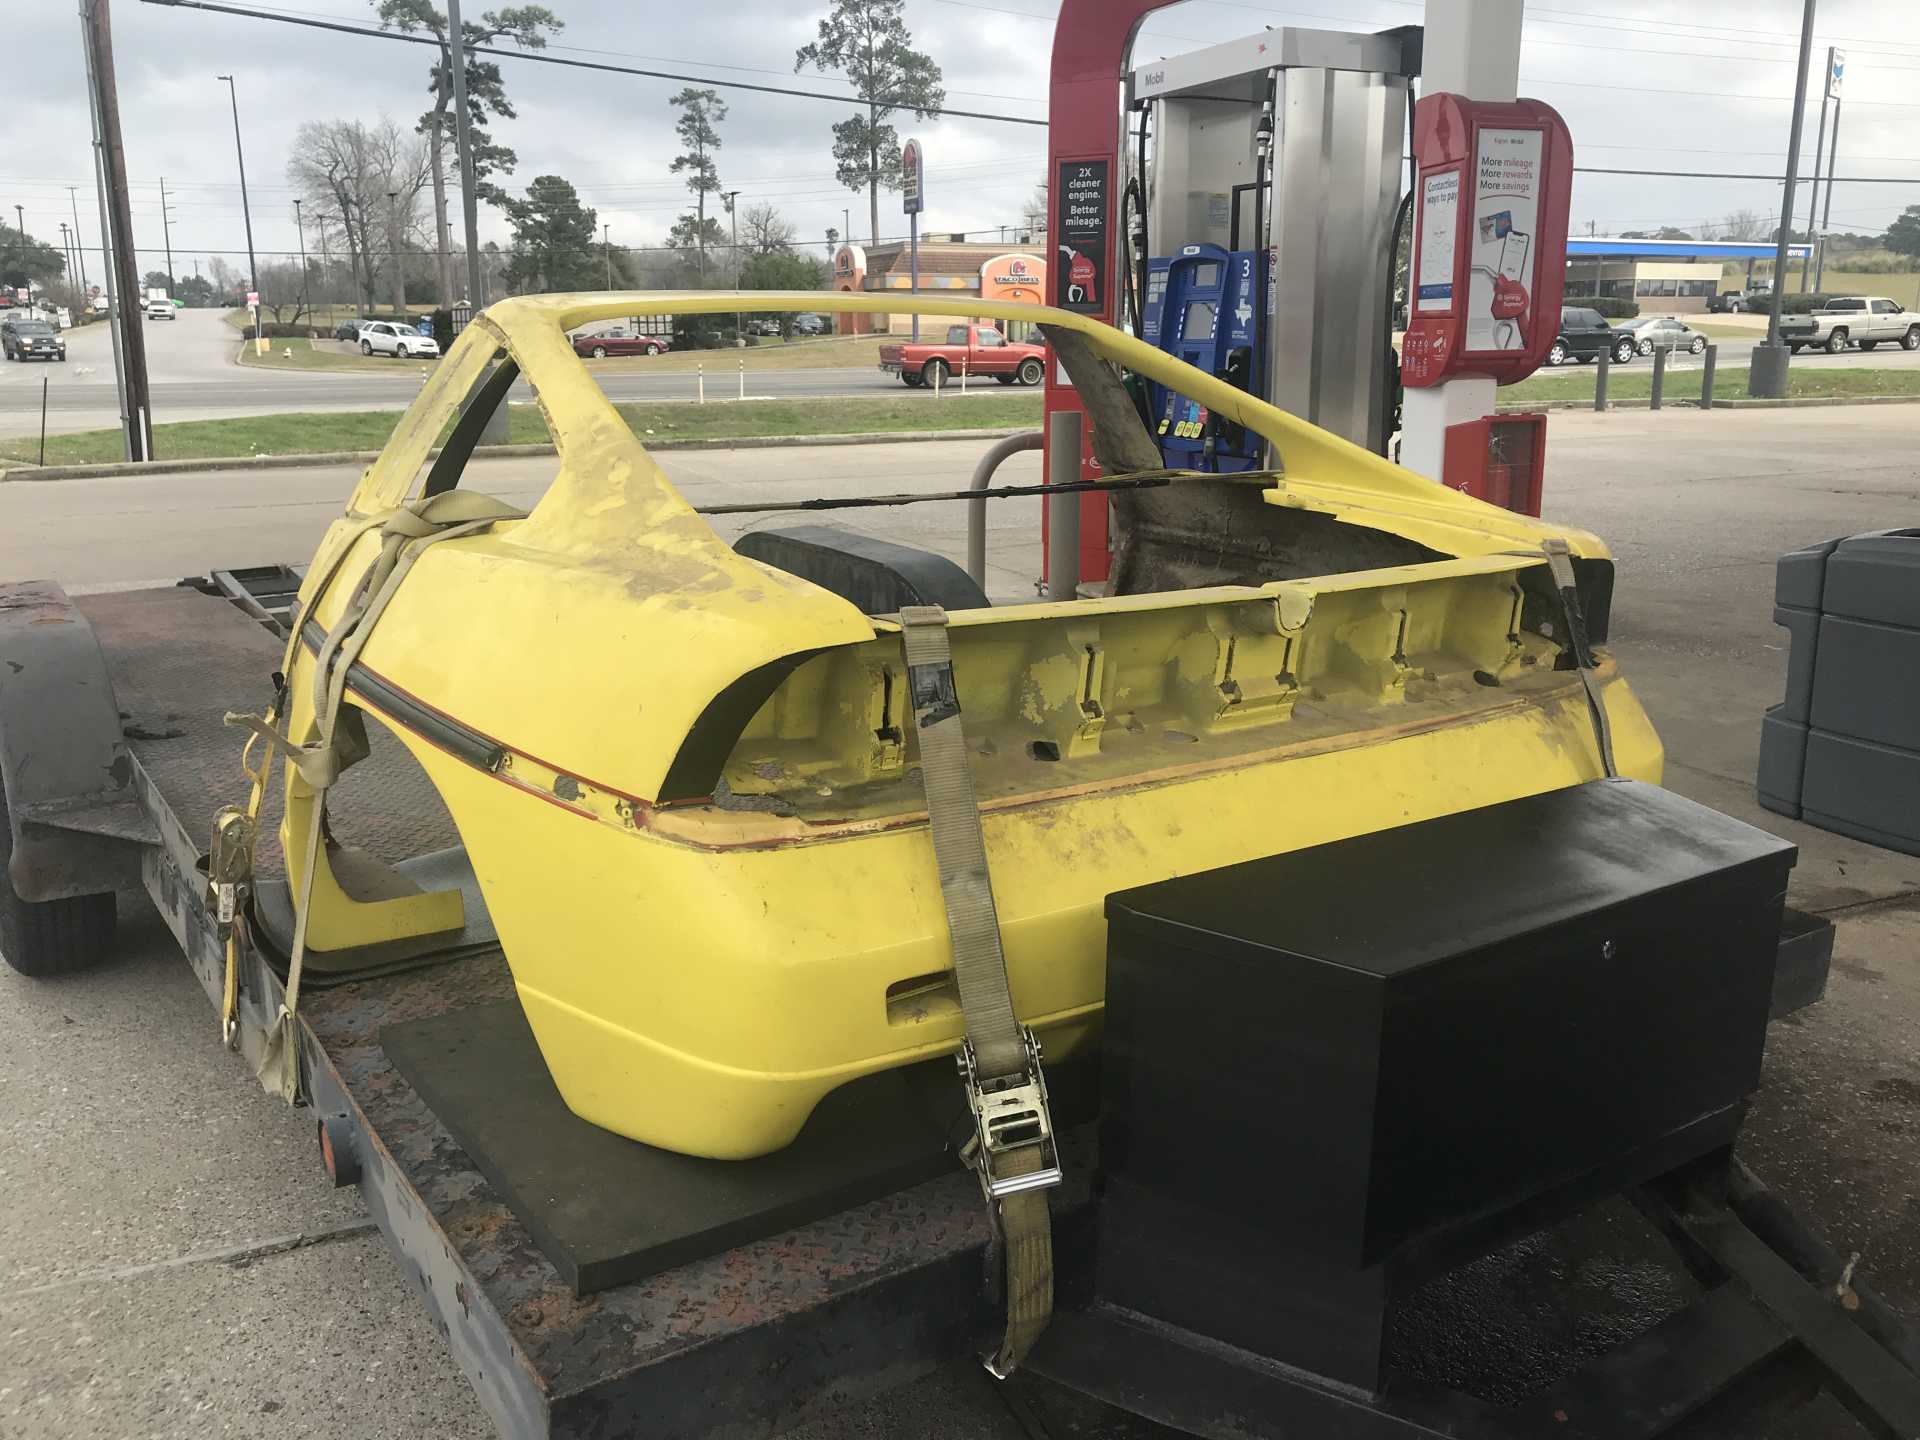
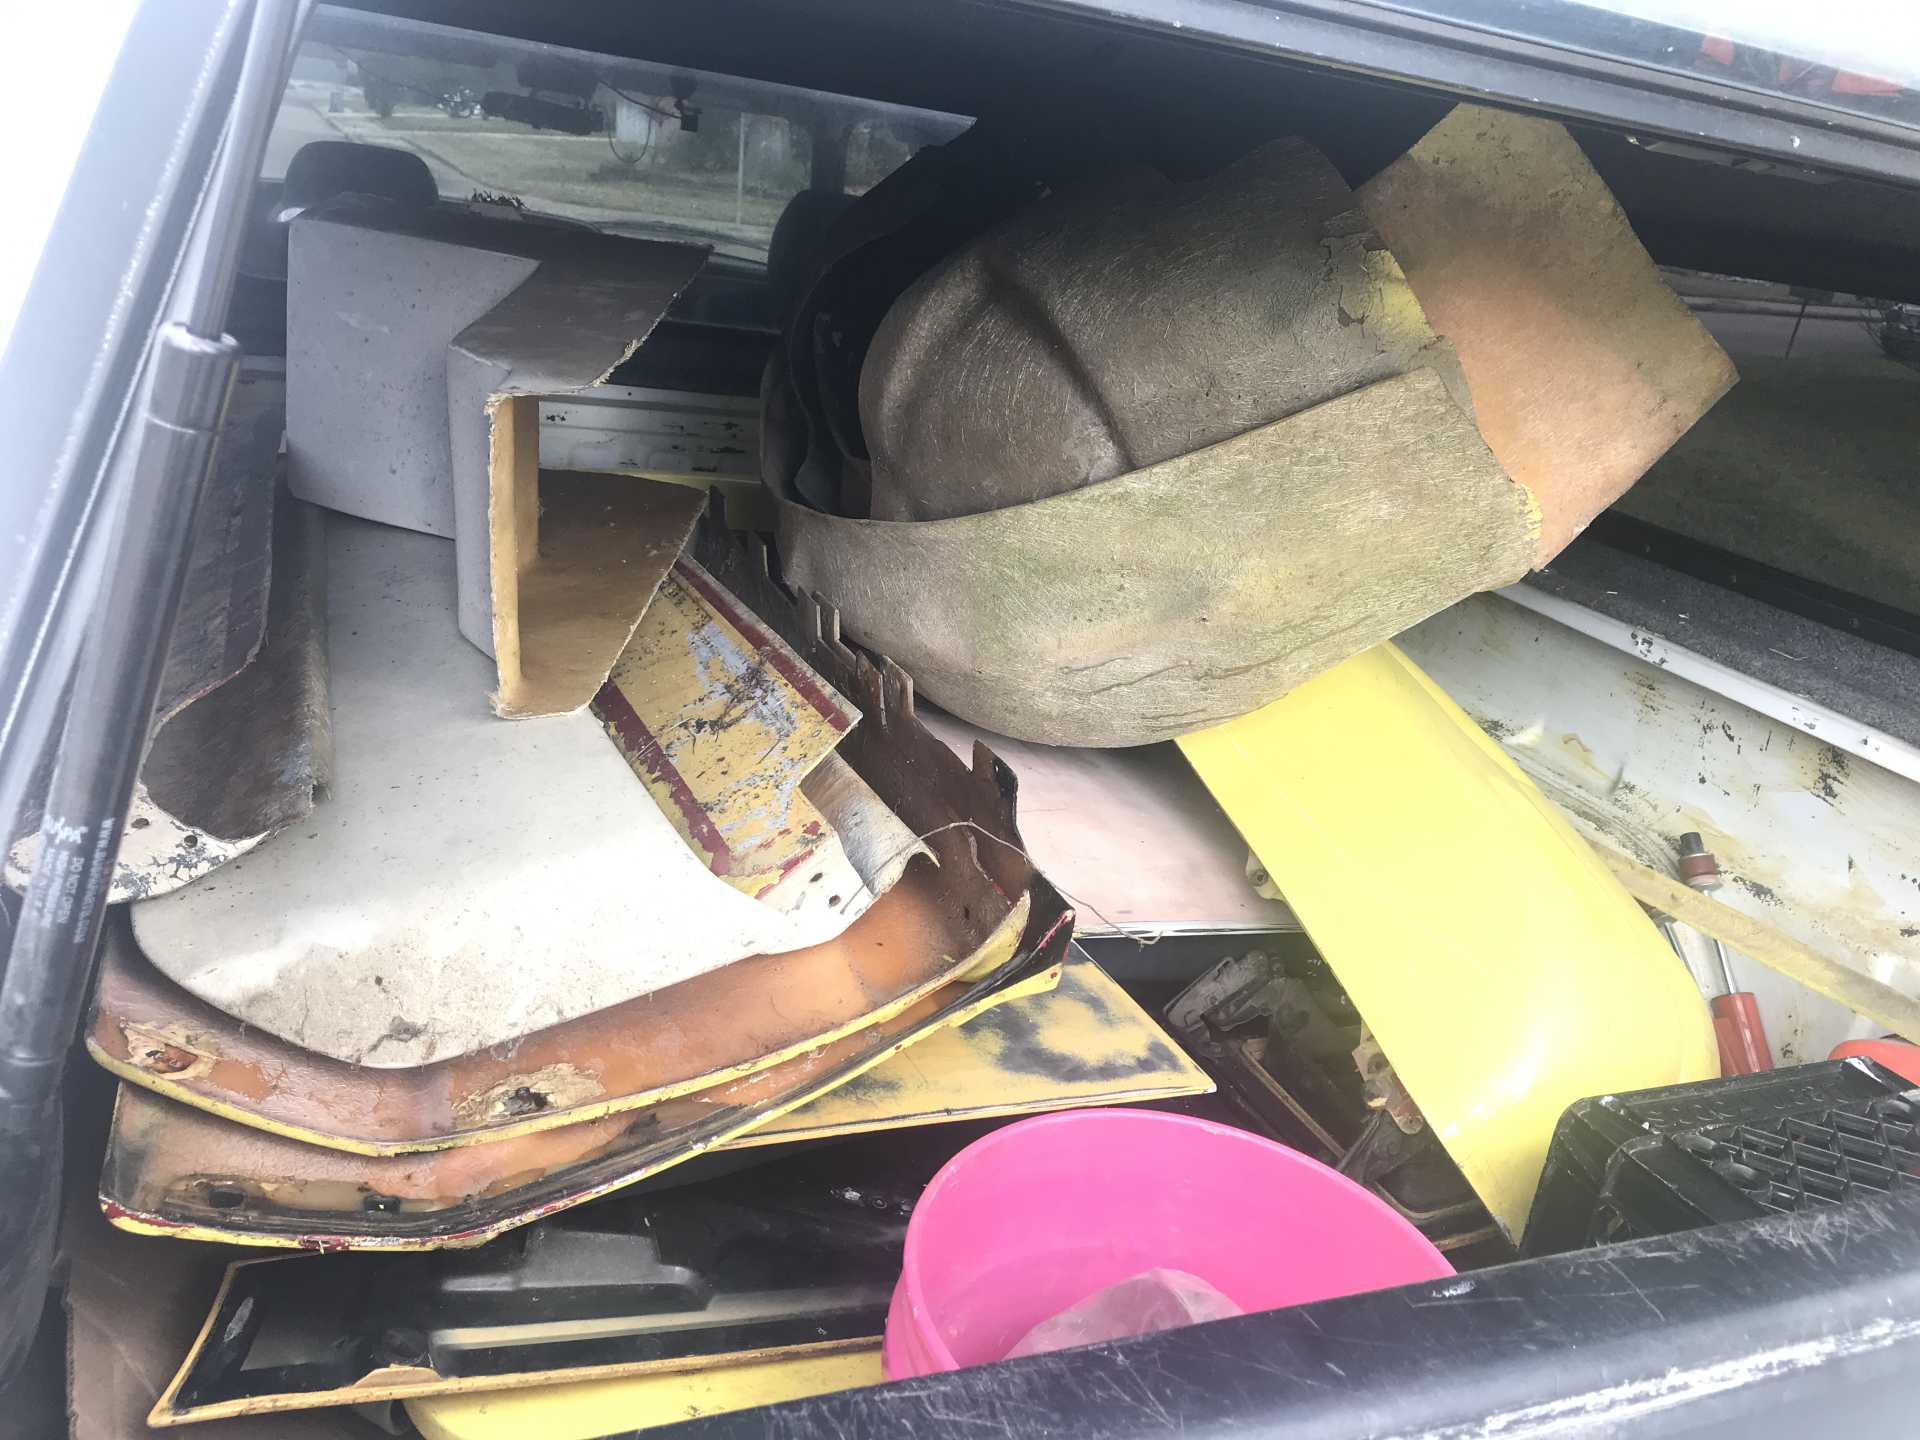
I picked up some panels today in Houston from ccfiero350. It was awesome to be able to meet a Fiero person in the Southwest. Thanks for everything, Chuck! It’s an early IMSA that has all of the widebody panels. I’m dreading going back to Michigan because it’s subzero temperatures. This ‘88 is slowly but surely making a lot of progress.
[This message has been edited by copperhens (edited 02-09-2021).]
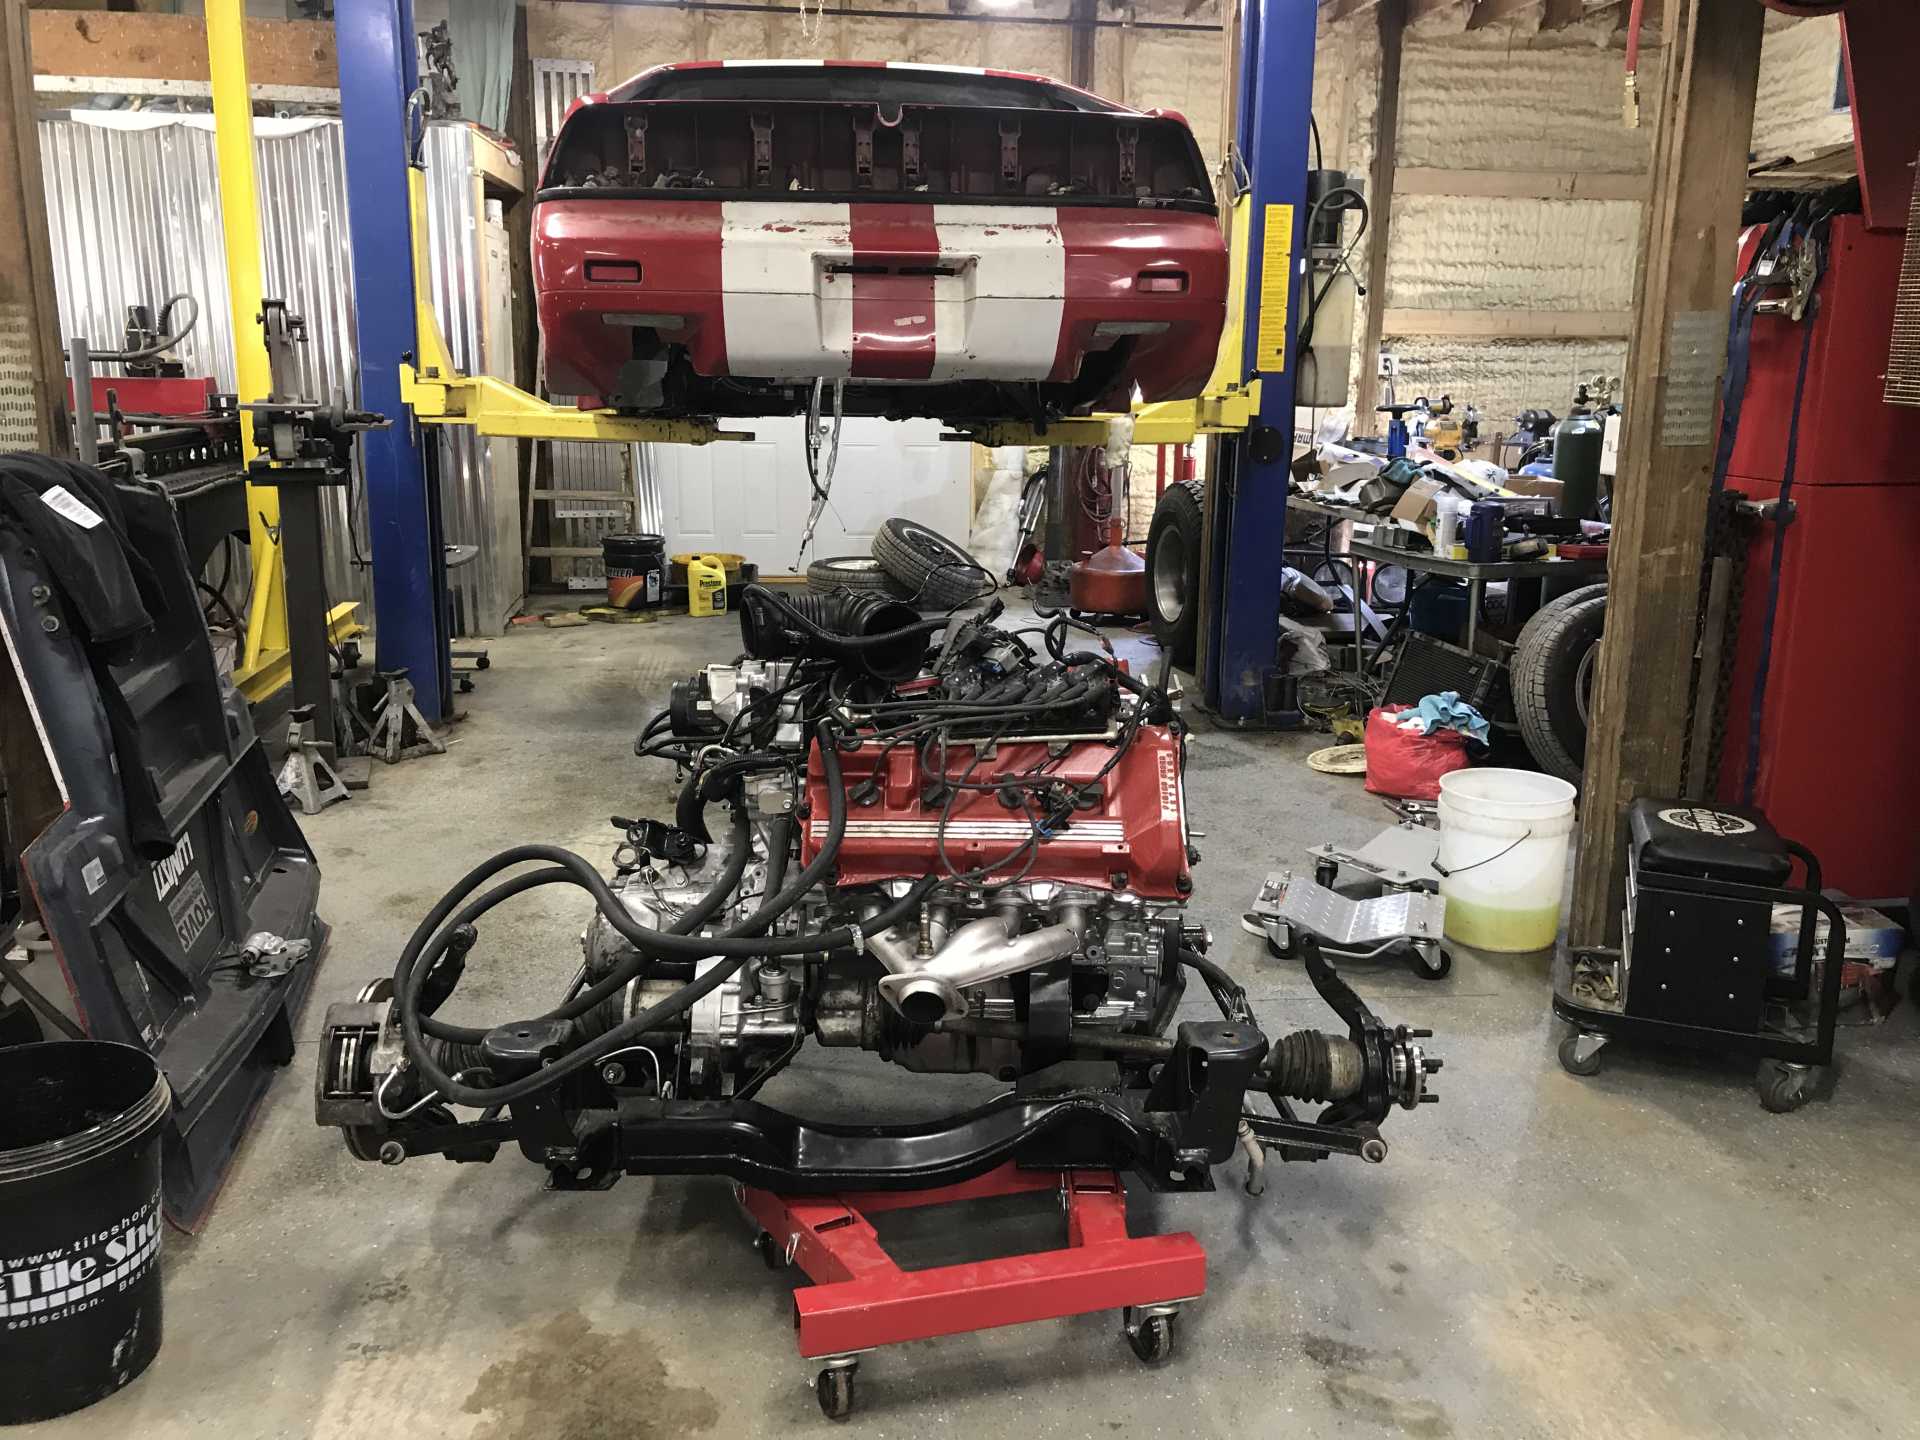
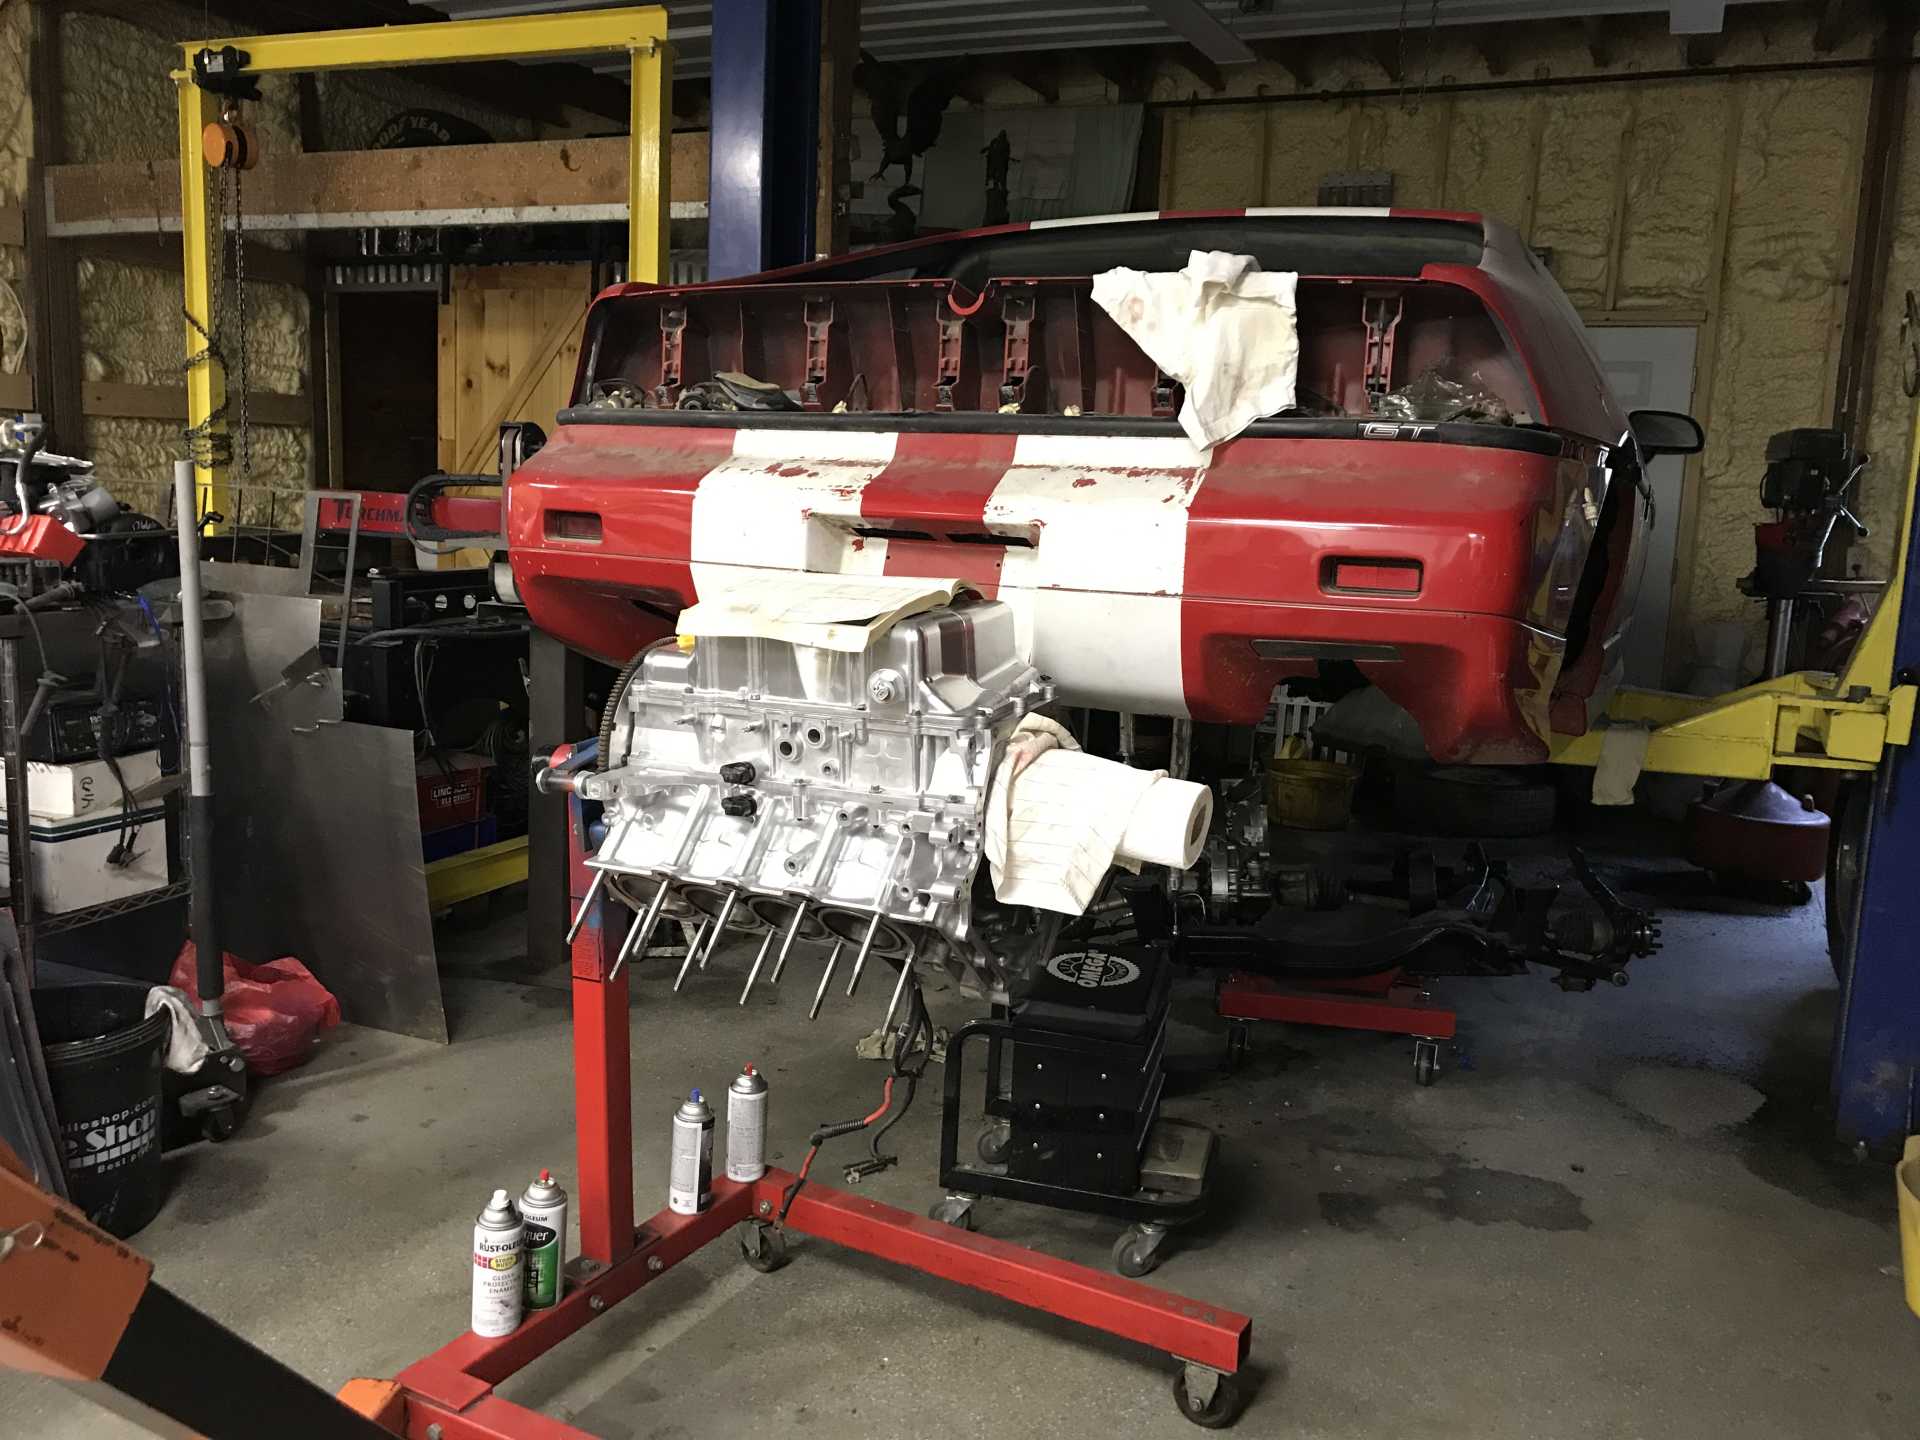
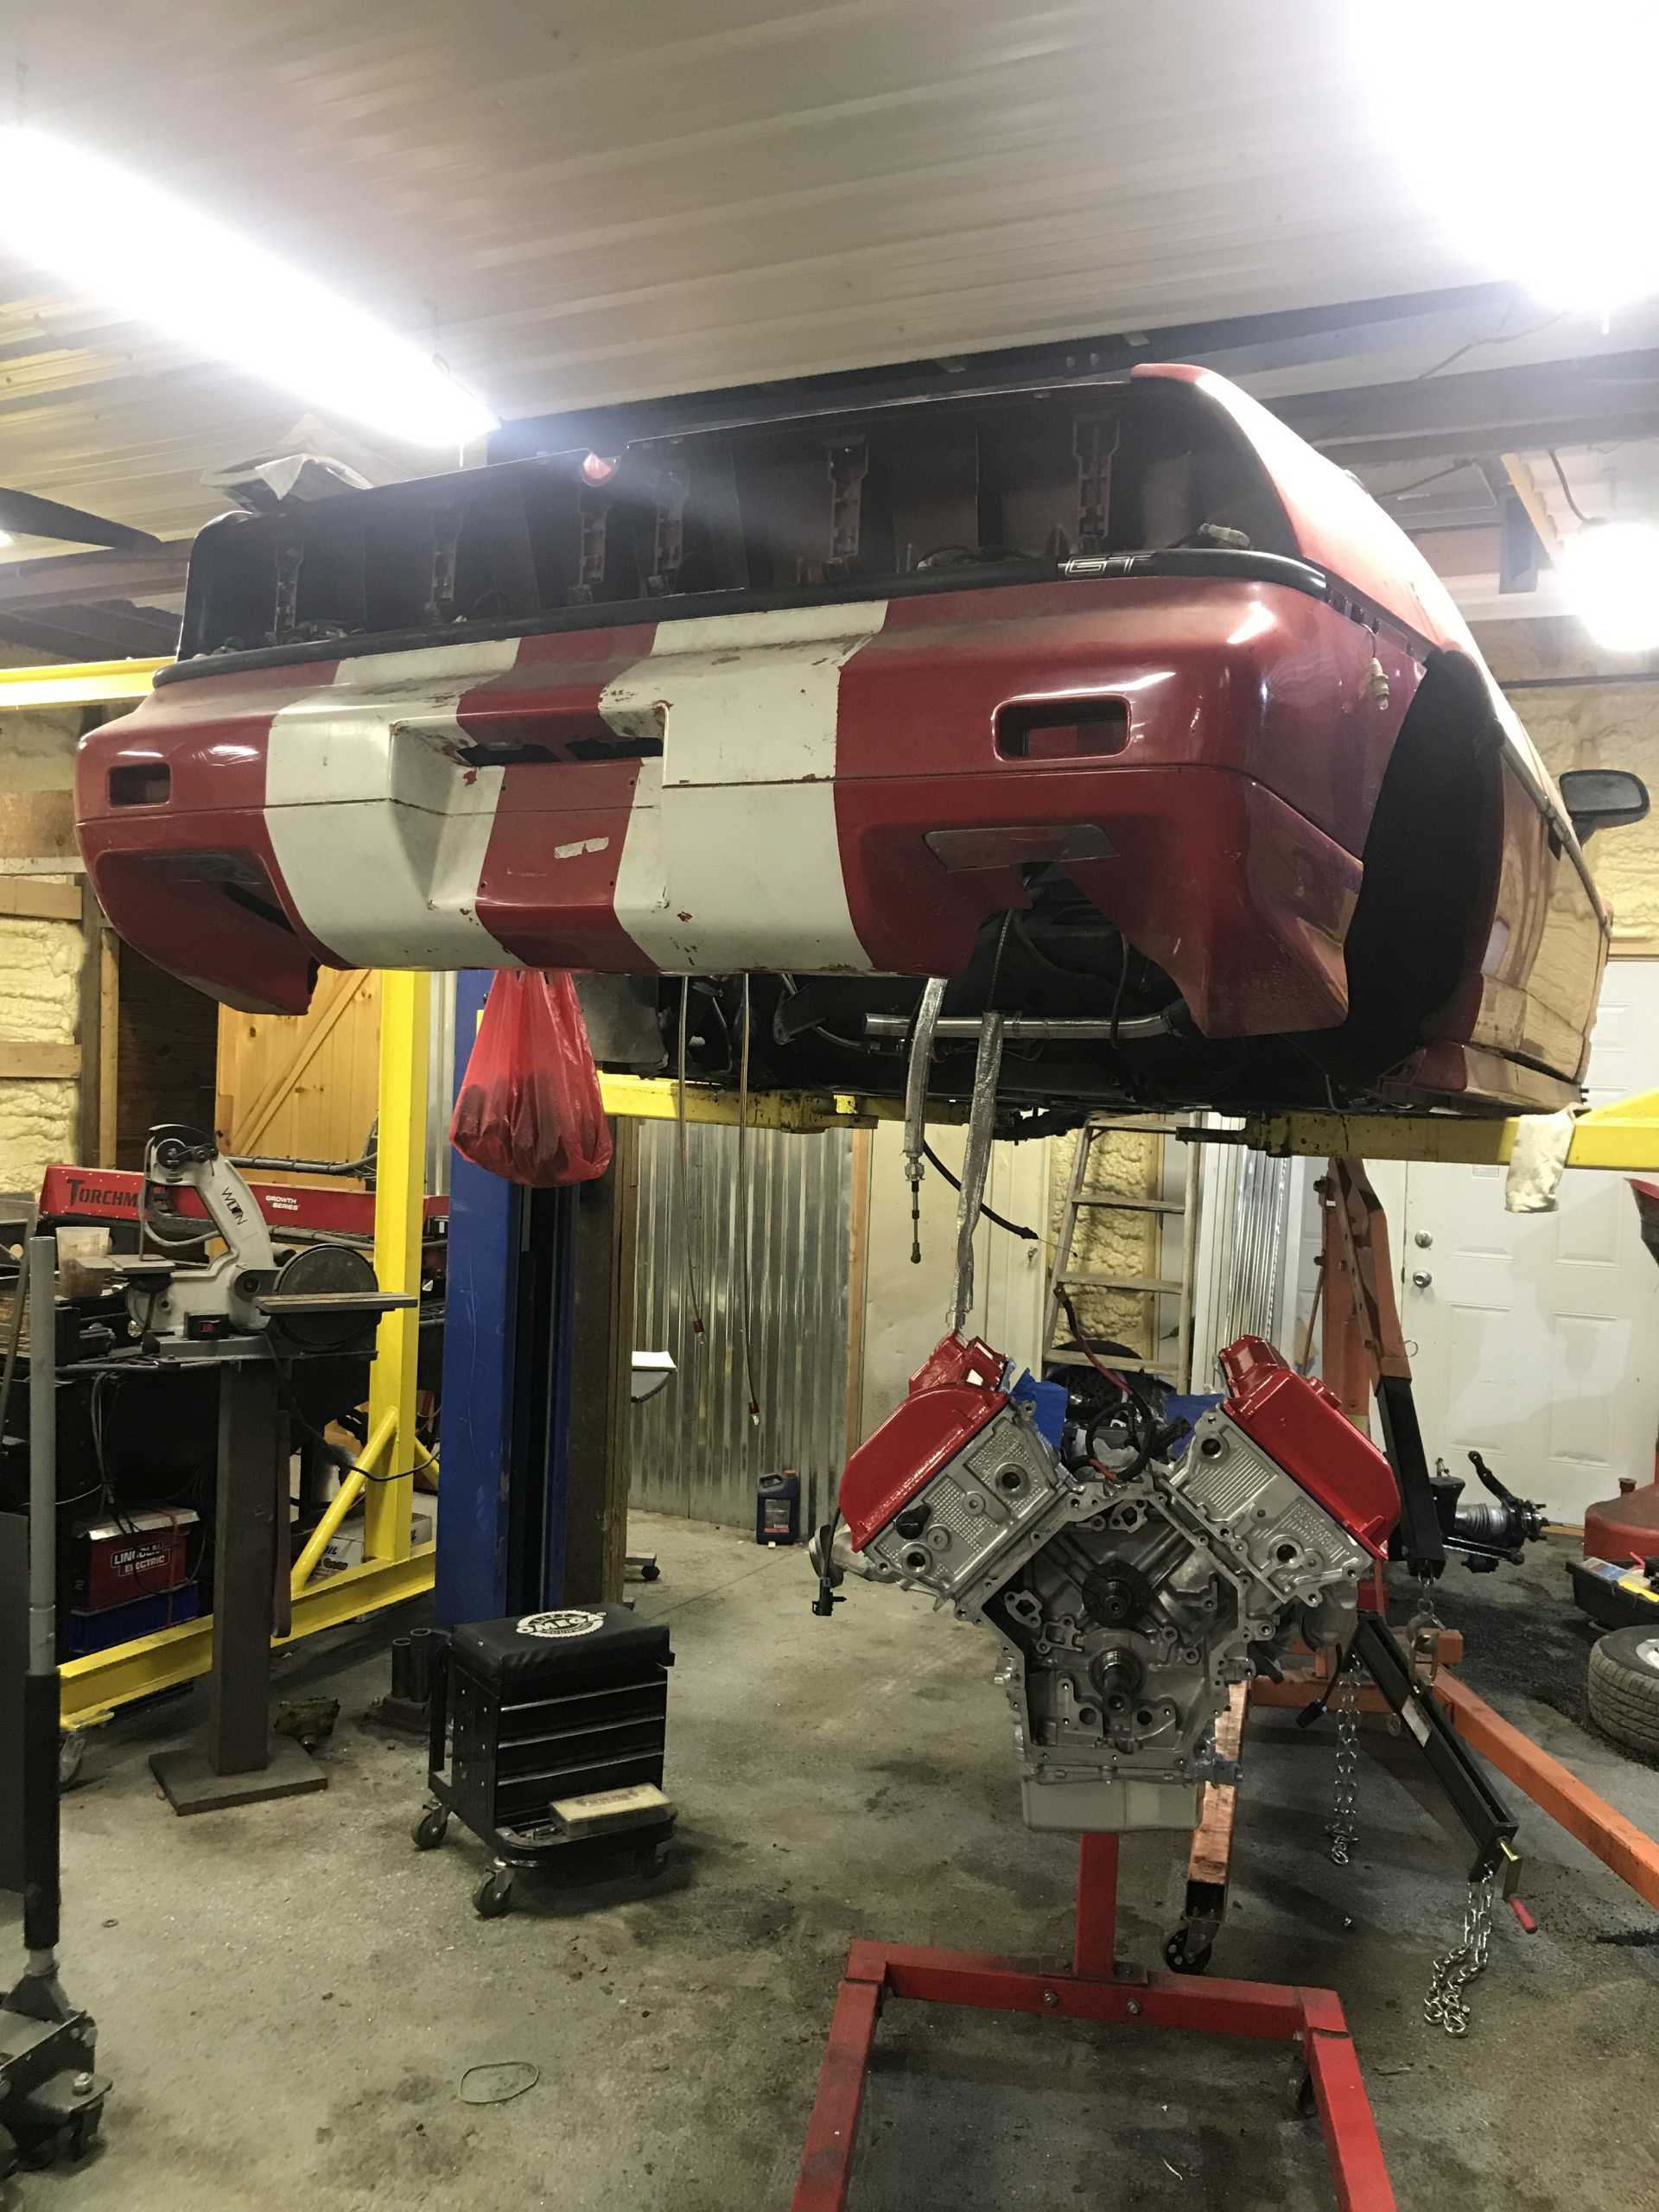
3/13/21 Brought the Fiero back to Mr. Eric’s, I appreciate him letting me use the lift. My boyfriend Paul and I got the engine dropped in just a few hours.
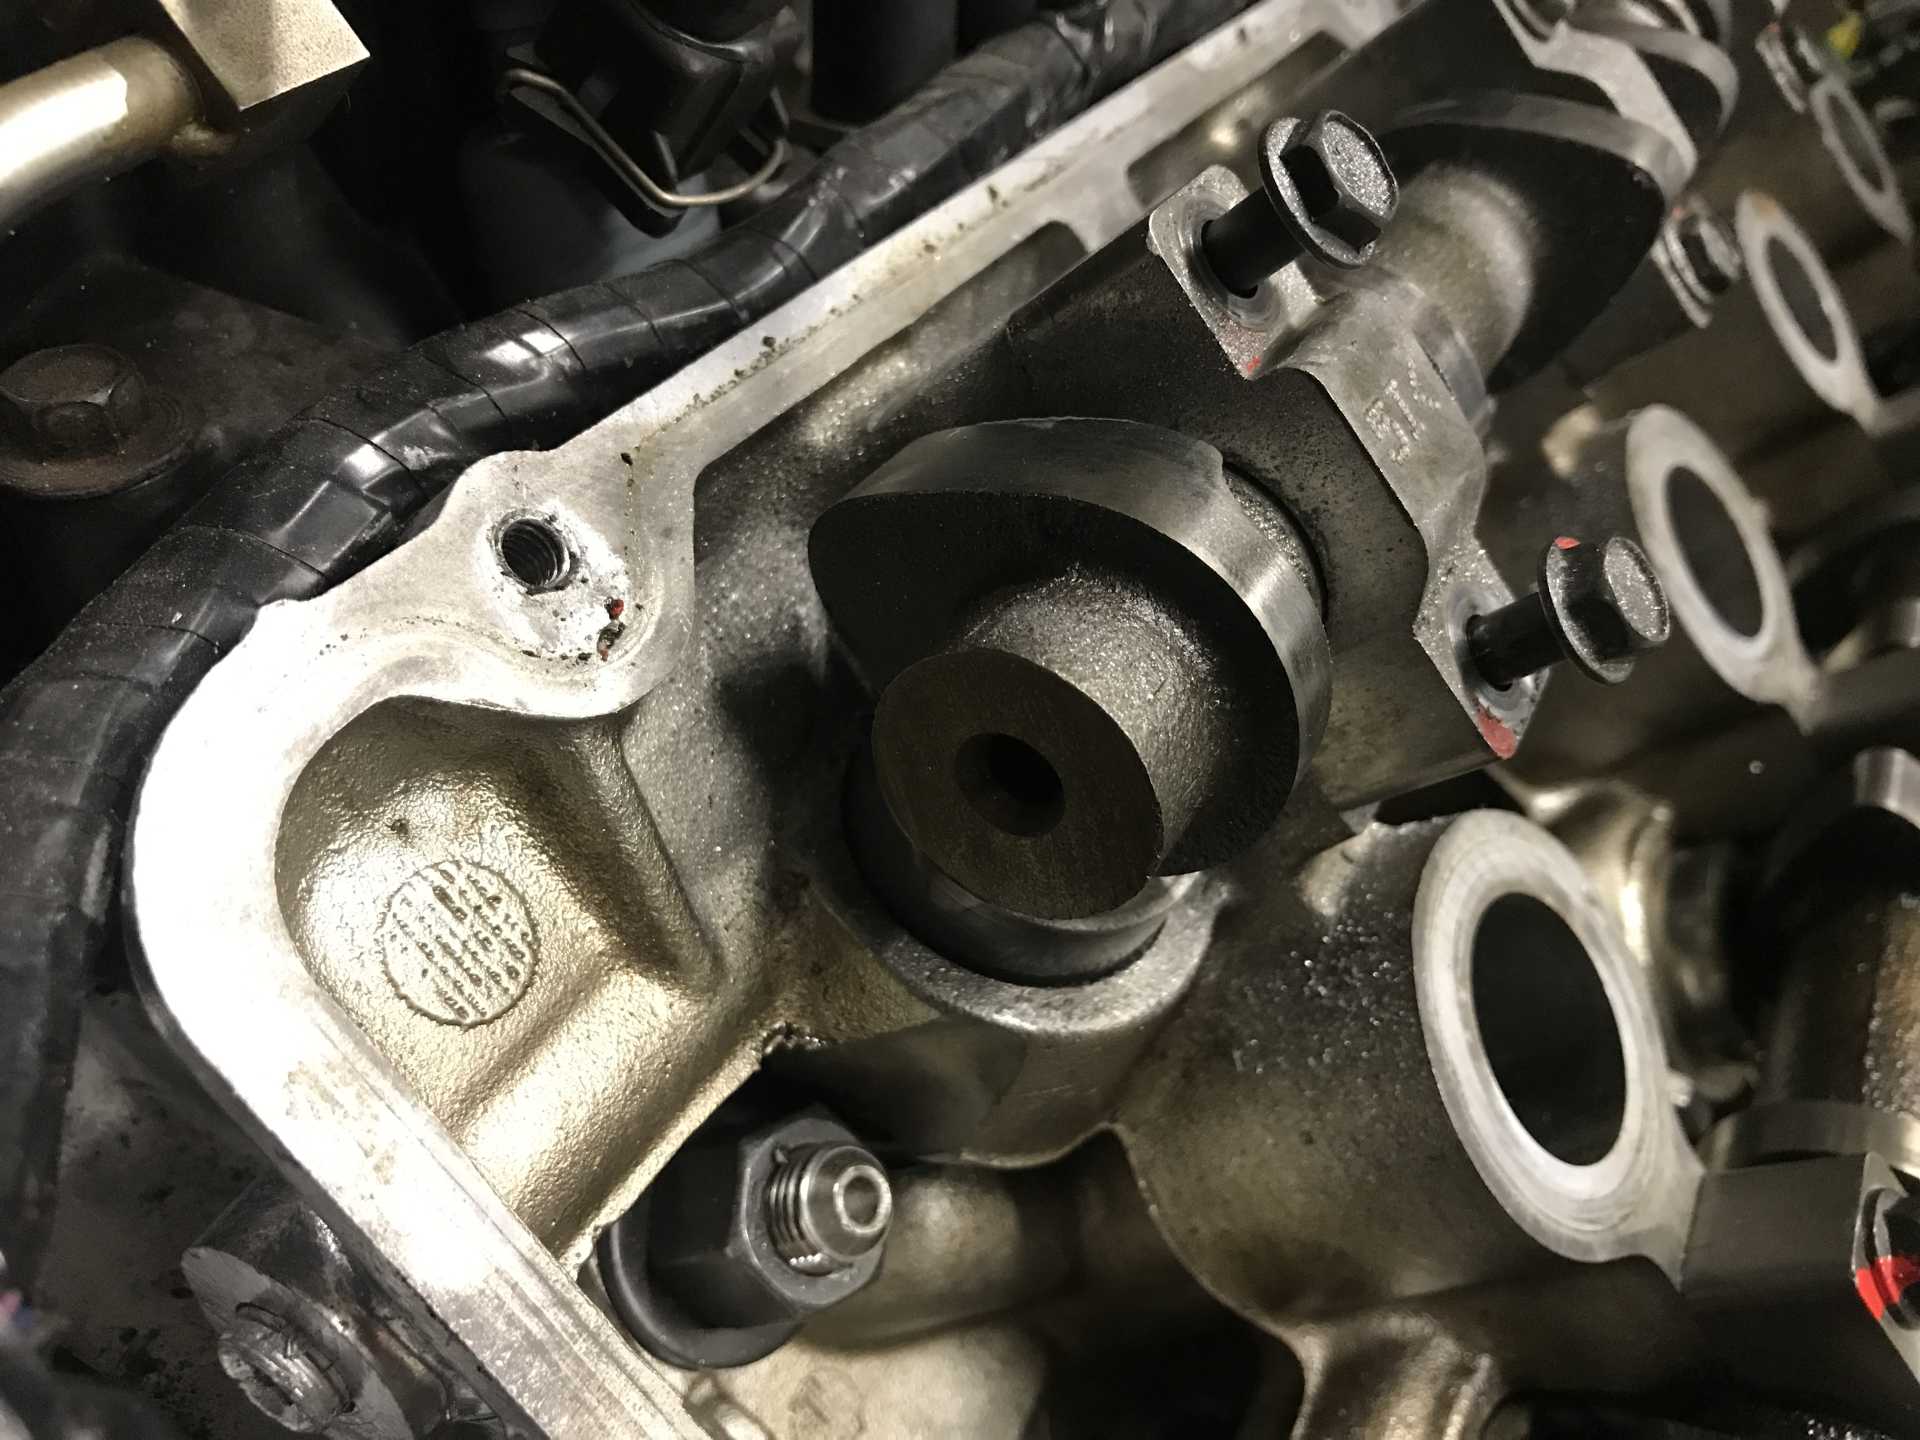
The tick came from the cam eating into this cam cap. This was the farthest point away from the oil flow.
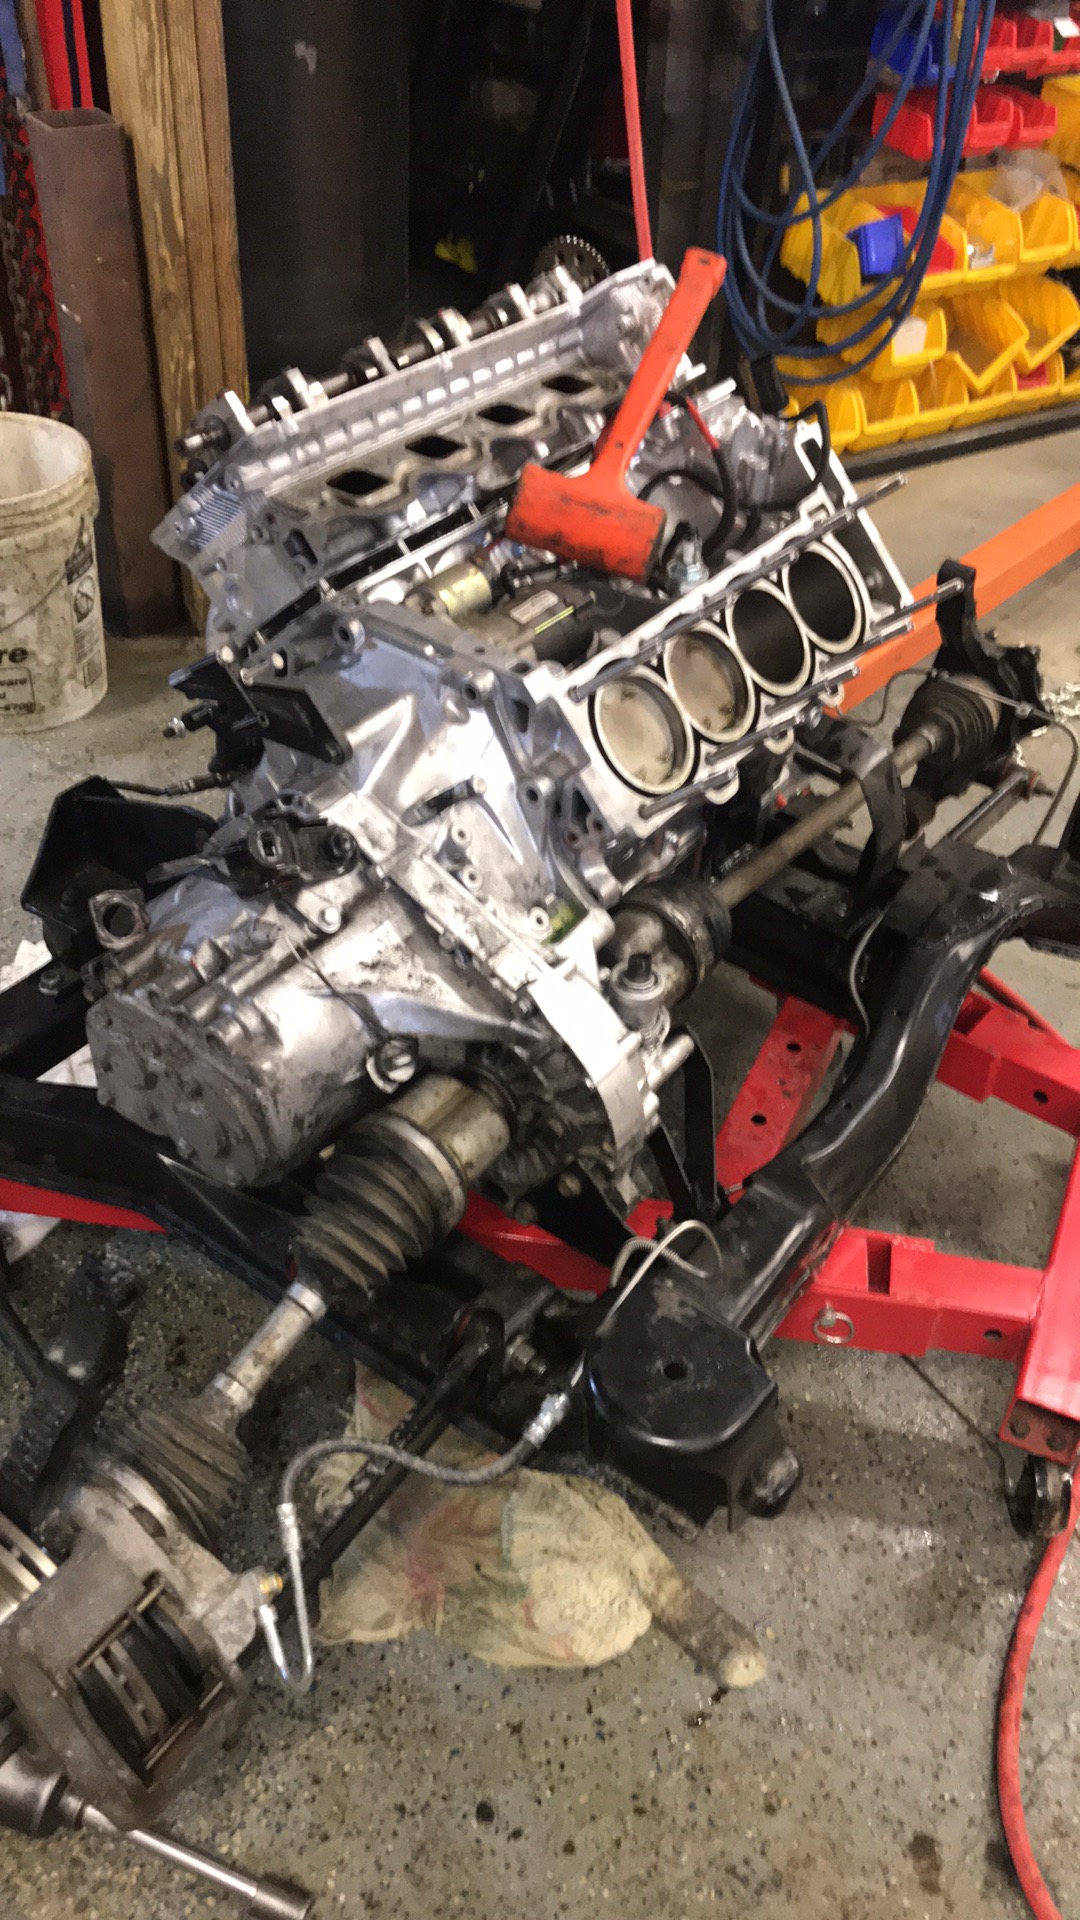
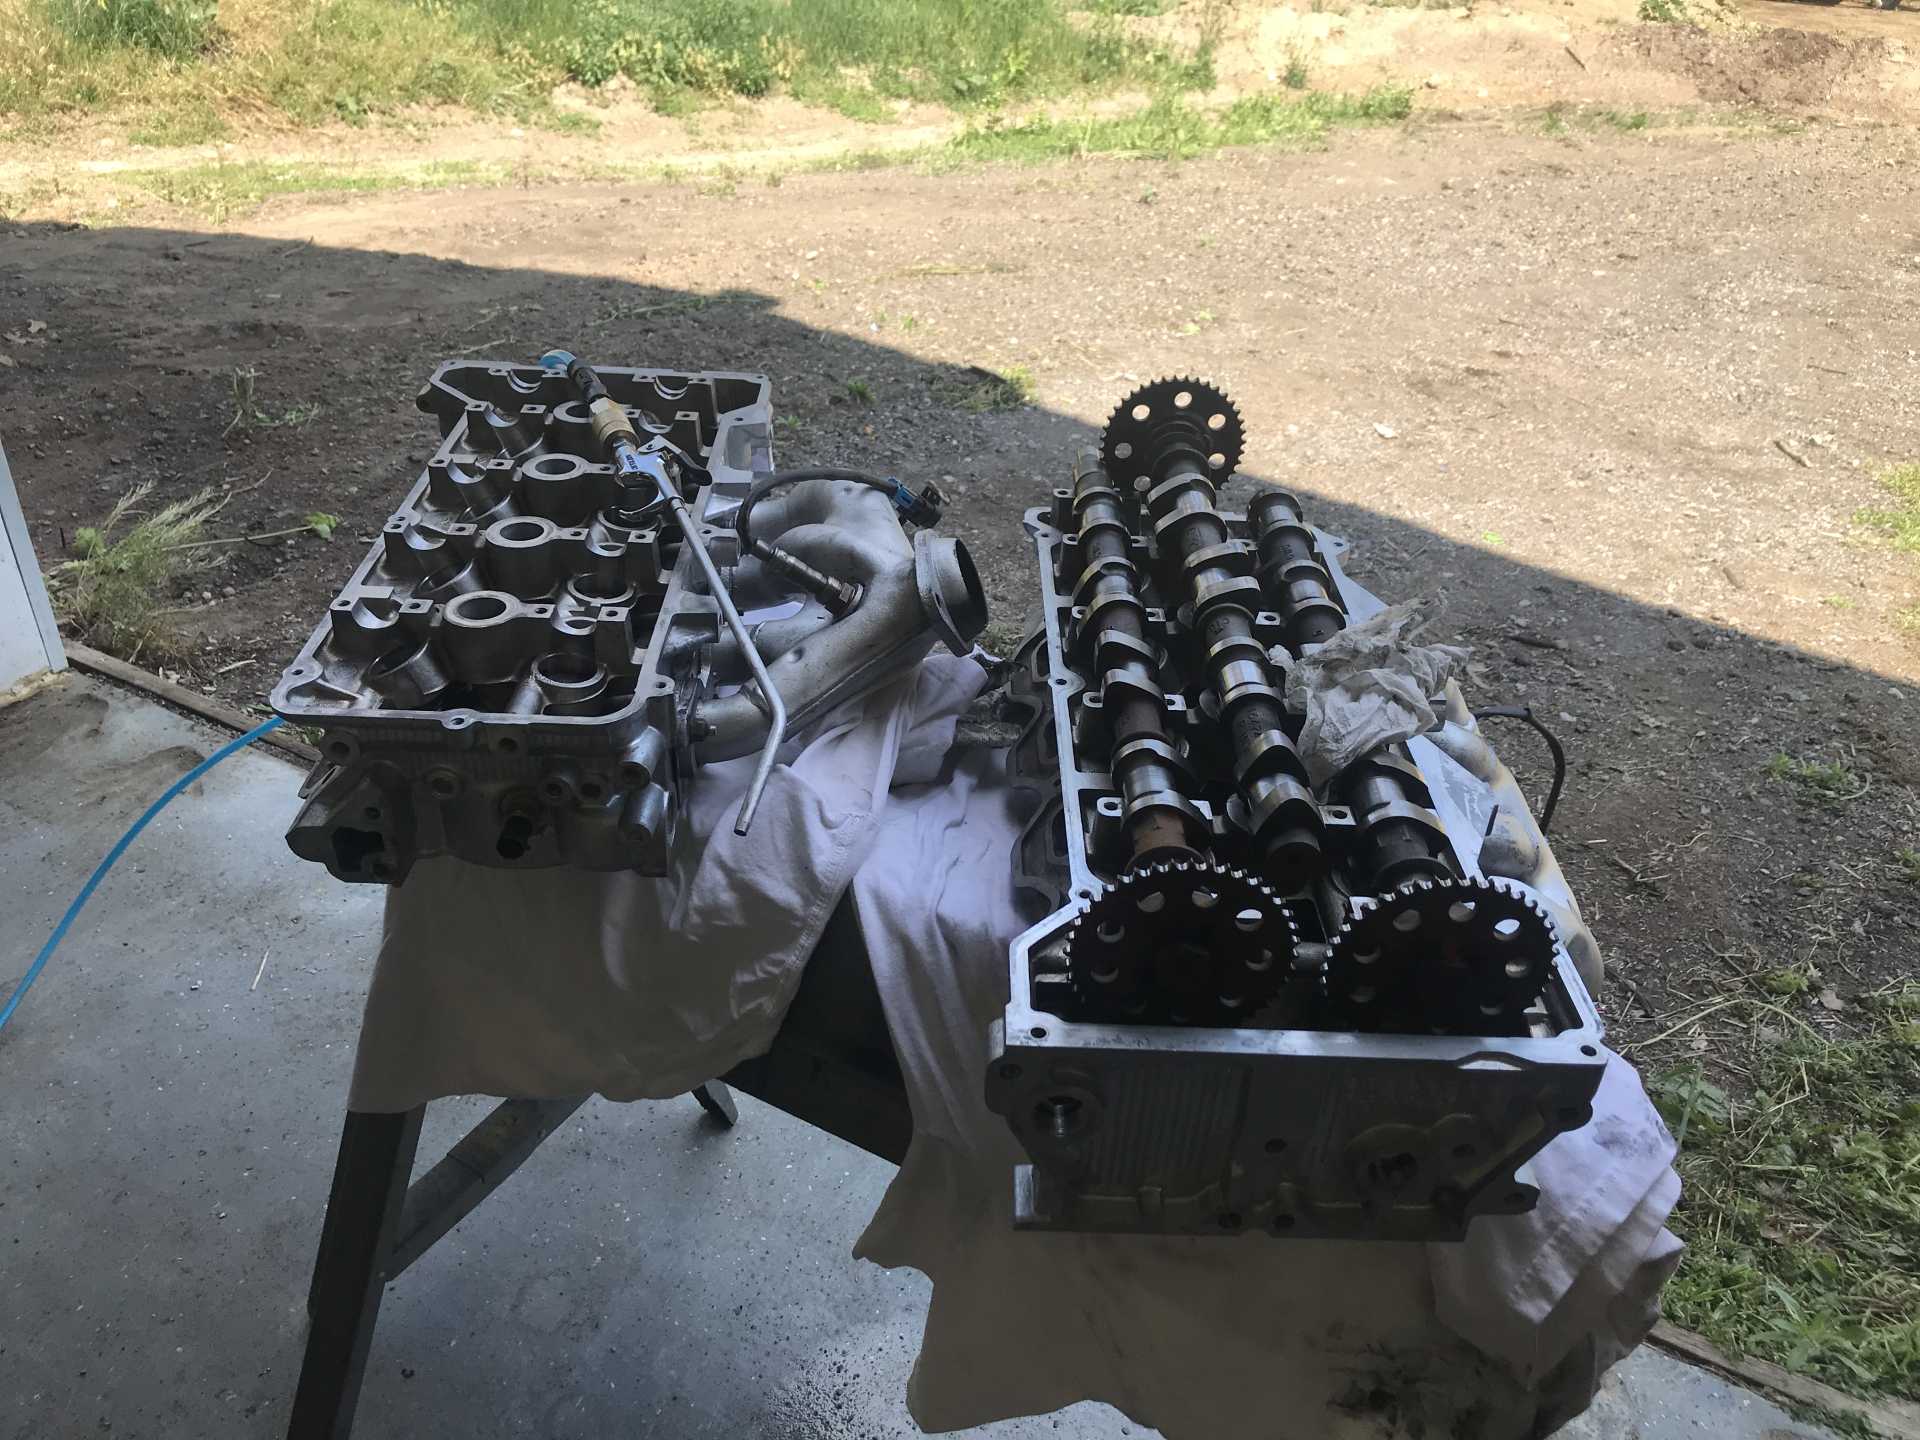
The engine tear down begins.
So to recap, because a lot seems to have happened. I thought the Fiero was fine, and running. It developed a tick after sometime, presumably when the assembly lube wore out. There was no oil pressure to the top end. Why? The harmonic balancer bolt backed out, or was never torqued down. It had to be tighten in order to put the pulley back on, but regardless of if it was done or not, it was pretty loose and backed out somehow. This bolt put no pressure on the oil pump causing it to run very little, if at all. Should I have ran an oil pressure gauge? Yes. The gauge in the car never worked, and the car ran long enough we never expected anything of it. Obviously, when this goes together again we will verify there is oil getting to the car! Very frustrating, but the car isn’t toast yet.
3/14/21 Mr. Eric and I got the engine torn down in a day. We needed to assess the damage and check it the crank was good.
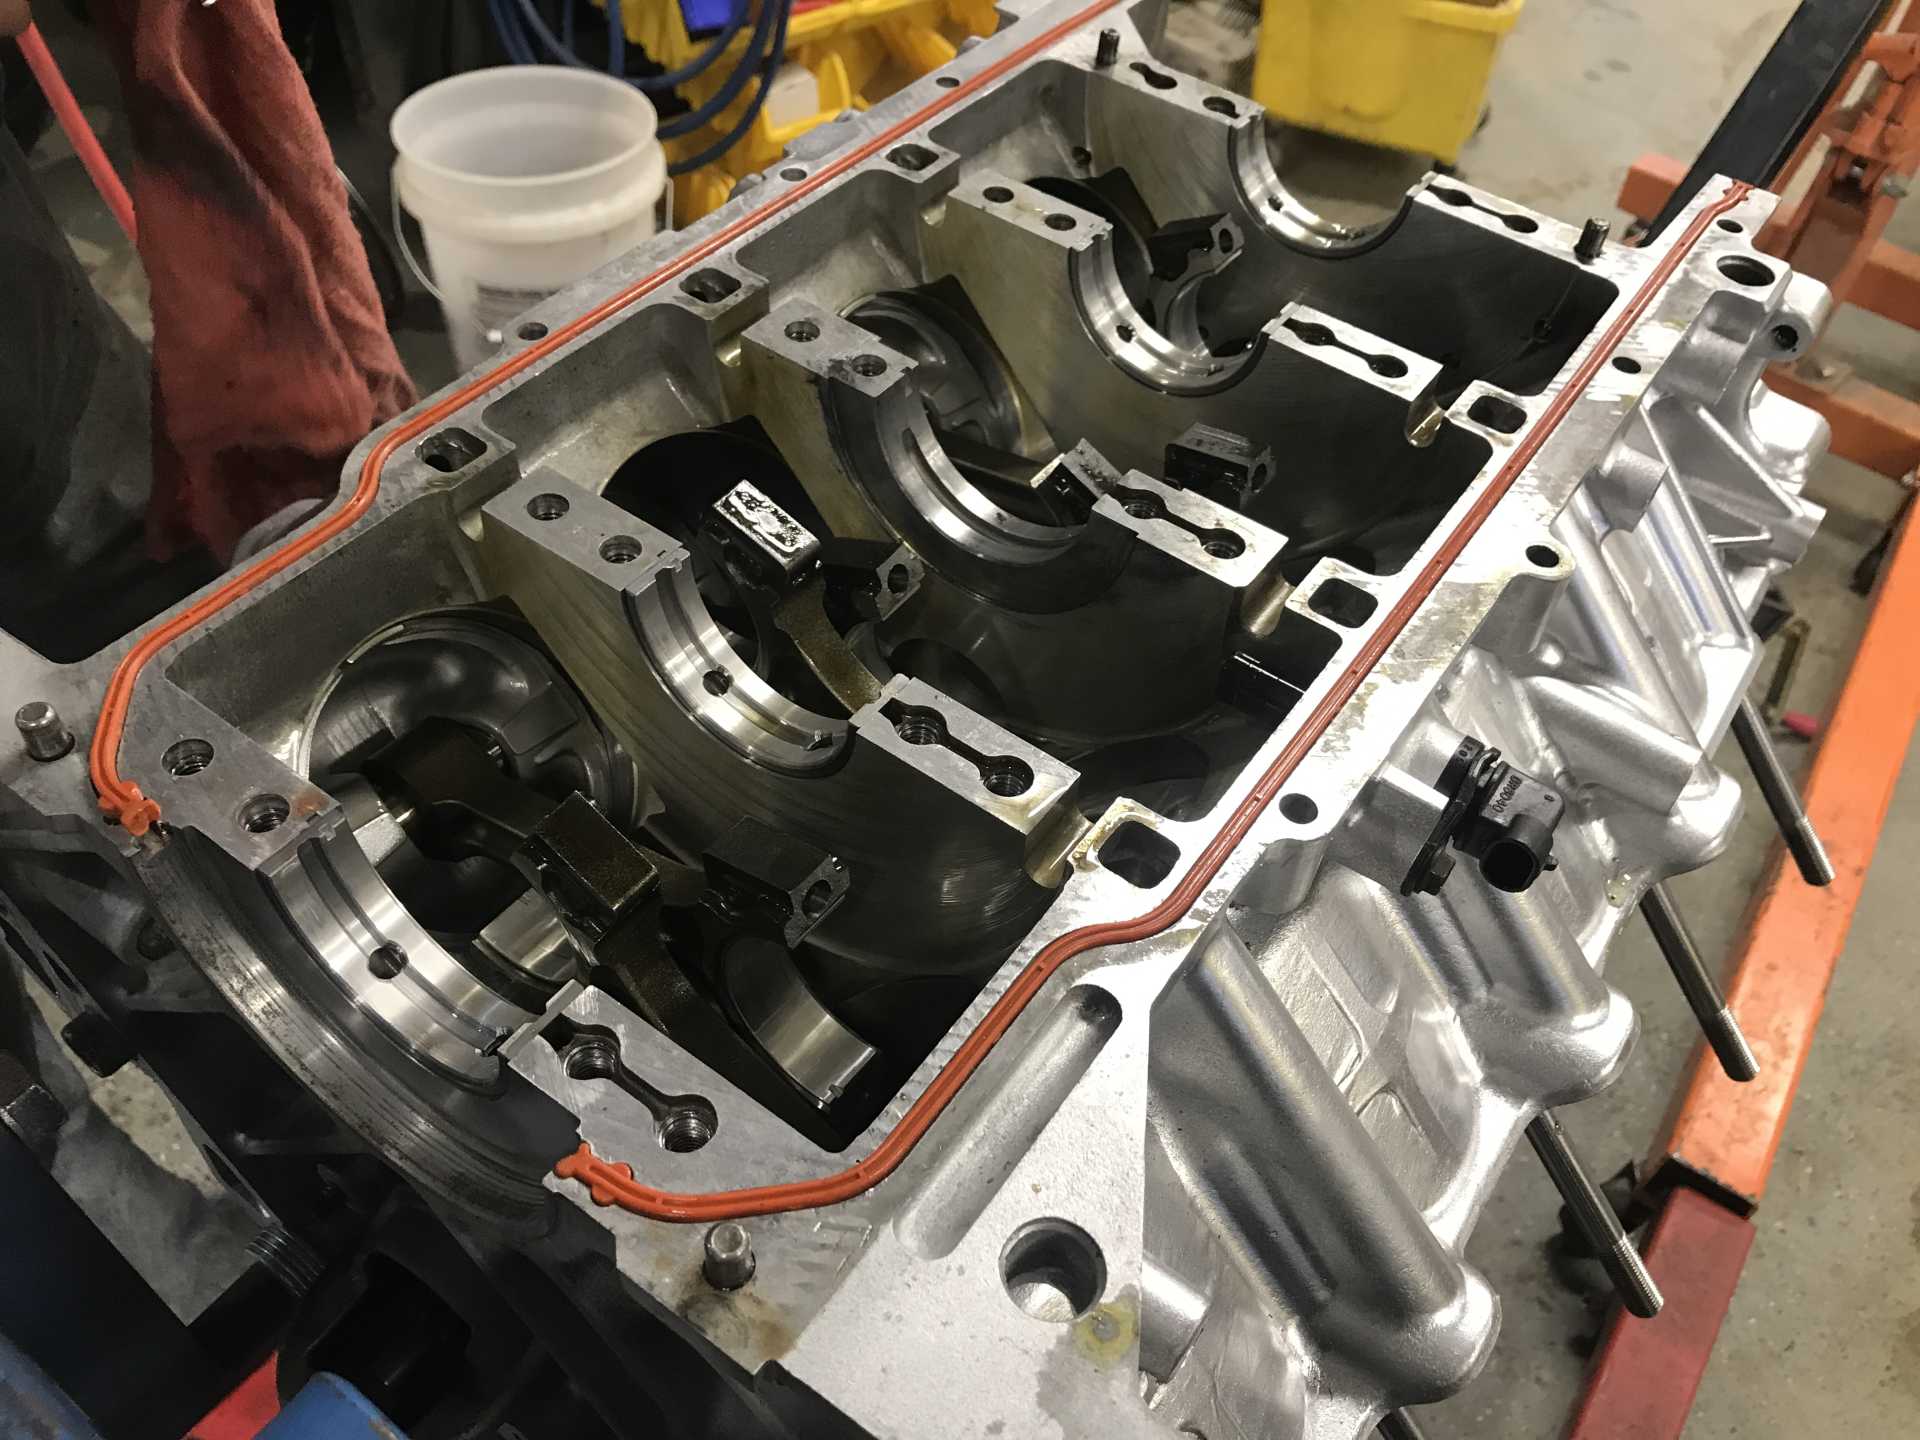
Good news. Everything seems to be okay. The main thrust bearing had .01 of wear on the driver side. The crank still felt smooth, and nothing was critical. All I need to buy to put there engine back together are new main bearings, and new rod bolts since they’re TTY. This engine could have been a lot worse with an oil pump that wasn’t working.
Man, that's a bummer. I would look over the cam lobes and lifters very carefully. this may be a good excuse to put in a 06+ N*, with it's forged crank, 10mm flywheel bolts, better heads, 58x wheel ect.
Good luck.
------------------ "I am not what you so glibly call to be a civilized man. I have broken with society for reasons which I alone am able to appreciate. I am therefore not subject to it's stupid laws, and I ask you to never allude to them in my presence again."
Man, that's a bummer. I would look over the cam lobes and lifters very carefully.
Yeah, bigtime bummer... Check with a local dealership to make sure you have the most up-to-date parts. IIRC, there was a TSB on the balancer bolt & oil pump issue.
quote
Originally posted by ericjon262:
this may be a good excuse to put in a 06+ N*, with it's forged crank, 10mm flywheel bolts, better heads, 58x wheel ect.
Good luck.
Easier said than done at the moment... I'm figuring out the engine management for that combo. It has 11mm flywheel bolts. The heads are not necessarily better on the roller cam engines. The intake ports are better but the exhaust ports are worse.
[This message has been edited by Will (edited 07-26-2021).]
Easier said than done at the moment... I'm figuring out the engine management for that combo. It has 11mm flywheel bolts. The heads are necessarily better on the roller cam engines. The intake ports are better but the exhaust ports are worse.
thanks for the flywheel bolt correction. getting engine management right could be handled by using a later PCM and DBW, GM got fairly standard with their crank and cam position stuff in the mid-late 2000's I would be very surprised if the OS used for an LS engine isn't the same as the later N*, or compatible. that being said, I haven't tried it. Unfortunately, that would require a re-wire, or at least all new connectors for the PCM.
------------------ "I am not what you so glibly call to be a civilized man. I have broken with society for reasons which I alone am able to appreciate. I am therefore not subject to it's stupid laws, and I ask you to never allude to them in my presence again."
thanks for the flywheel bolt correction. getting engine management right could be handled by using a later PCM and DBW, GM got fairly standard with their crank and cam position stuff in the mid-late 2000's I would be very surprised if the OS used for an LS engine isn't the same as the later N*, or compatible. that being said, I haven't tried it. Unfortunately, that would require a re-wire, or at least all new connectors for the PCM.
The engine management can run the engine... that's no big. BUT, all the ancillaries like clutch switch, VSS, AC request, speedometer output & cruise switches that are handled via the bus in the car the 58x ECM came from are handled by discretes in the Fiero. I'm going to end up with a CANBus I/O gateway to make those work.
The engine management can run the engine... that's no big. BUT, all the ancillaries like clutch switch, VSS, AC request, speedometer output & cruise switches that are handled via the bus in the car the 58x ECM came from are handled by discretes in the Fiero. I'm going to end up with a CANBus I/O gateway to make those work.
My buddies LZ9/Getrag swap has an E67 and the VSS is input to the PCM, and a 4000PPM output runs the speedometer just like anything else. the E67 actually uses a clutch pedal position sensor IIRC. my buddy doesn't have one installed and the car seems to behave fine. I can't speak to the AC request, I would guess that it is only VIA serial line/CAN bus.
------------------ "I am not what you so glibly call to be a civilized man. I have broken with society for reasons which I alone am able to appreciate. I am therefore not subject to it's stupid laws, and I ask you to never allude to them in my presence again."
My buddies LZ9/Getrag swap has an E67 and the VSS is input to the PCM, and a 4000PPM output runs the speedometer just like anything else. the E67 actually uses a clutch pedal position sensor IIRC. my buddy doesn't have one installed and the car seems to behave fine. I can't speak to the AC request, I would guess that it is only VIA serial line/CAN bus.
And cruise control... There are several choices that have one or two of those functions available, but only one that has all of them.
The only 58x V8 PCM that has all of the functions I mentioned is the SSR PCM, and it's $600+ since GM hardly built any of them.
And cruise control... There are several choices that have one or two of those functions available, but only one that has all of them.
The only 58x V8 PCM that has all of the functions I mentioned is the SSR PCM, and it's $600+ since GM hardly built any of them.
Everything I'm seeing for the SSR is 24x, that being said, I didn't look very hard.
I wonder how much of that is software, and how much is hardware. There's a guy who has been advertising a marine based PCM on some of the 60V6 facebook pages that claims support for all sorts of stuff, (including DI!) but I haven't been able to find much out about it.
------------------ "I am not what you so glibly call to be a civilized man. I have broken with society for reasons which I alone am able to appreciate. I am therefore not subject to it's stupid laws, and I ask you to never allude to them in my presence again."
Originally posted by ericjon262: My buddies LZ9/Getrag swap has an E67 and the VSS is input to the PCM, and a 4000PPM output runs the speedometer just like anything else. the E67 actually uses a clutch pedal position sensor IIRC. my buddy doesn't have one installed and the car seems to behave fine. I can't speak to the AC request, I would guess that it is only VIA serial line/CAN bus.
The E67 discrete inputs that work changes based on the OS and calibration. I don't think any E67 V8 calibration has a functioning discrete VSS input. All the auto calibrations route the VSS to the TCM first, then serial line/CAN bus to the ecm.
quote
Originally posted by Will: And cruise control... There are several choices that have one or two of those functions available, but only one that has all of them.
The only 58x V8 PCM that has all of the functions I mentioned is the SSR PCM, and it's $600+ since GM hardly built any of them.
All the later model (2005/2006) SSR ecms are E40/24X. I swapped reluctor wheel and cam gear on my E67/58X LS4 so I could run it for all the discrete inputs, factory manual transmission calibration, and working factory cruise. I sent one of my E40 ecms with a VIN# from a 2006 LS2/T65 SSR to Darth and had him load the factory OS/calibration to it.
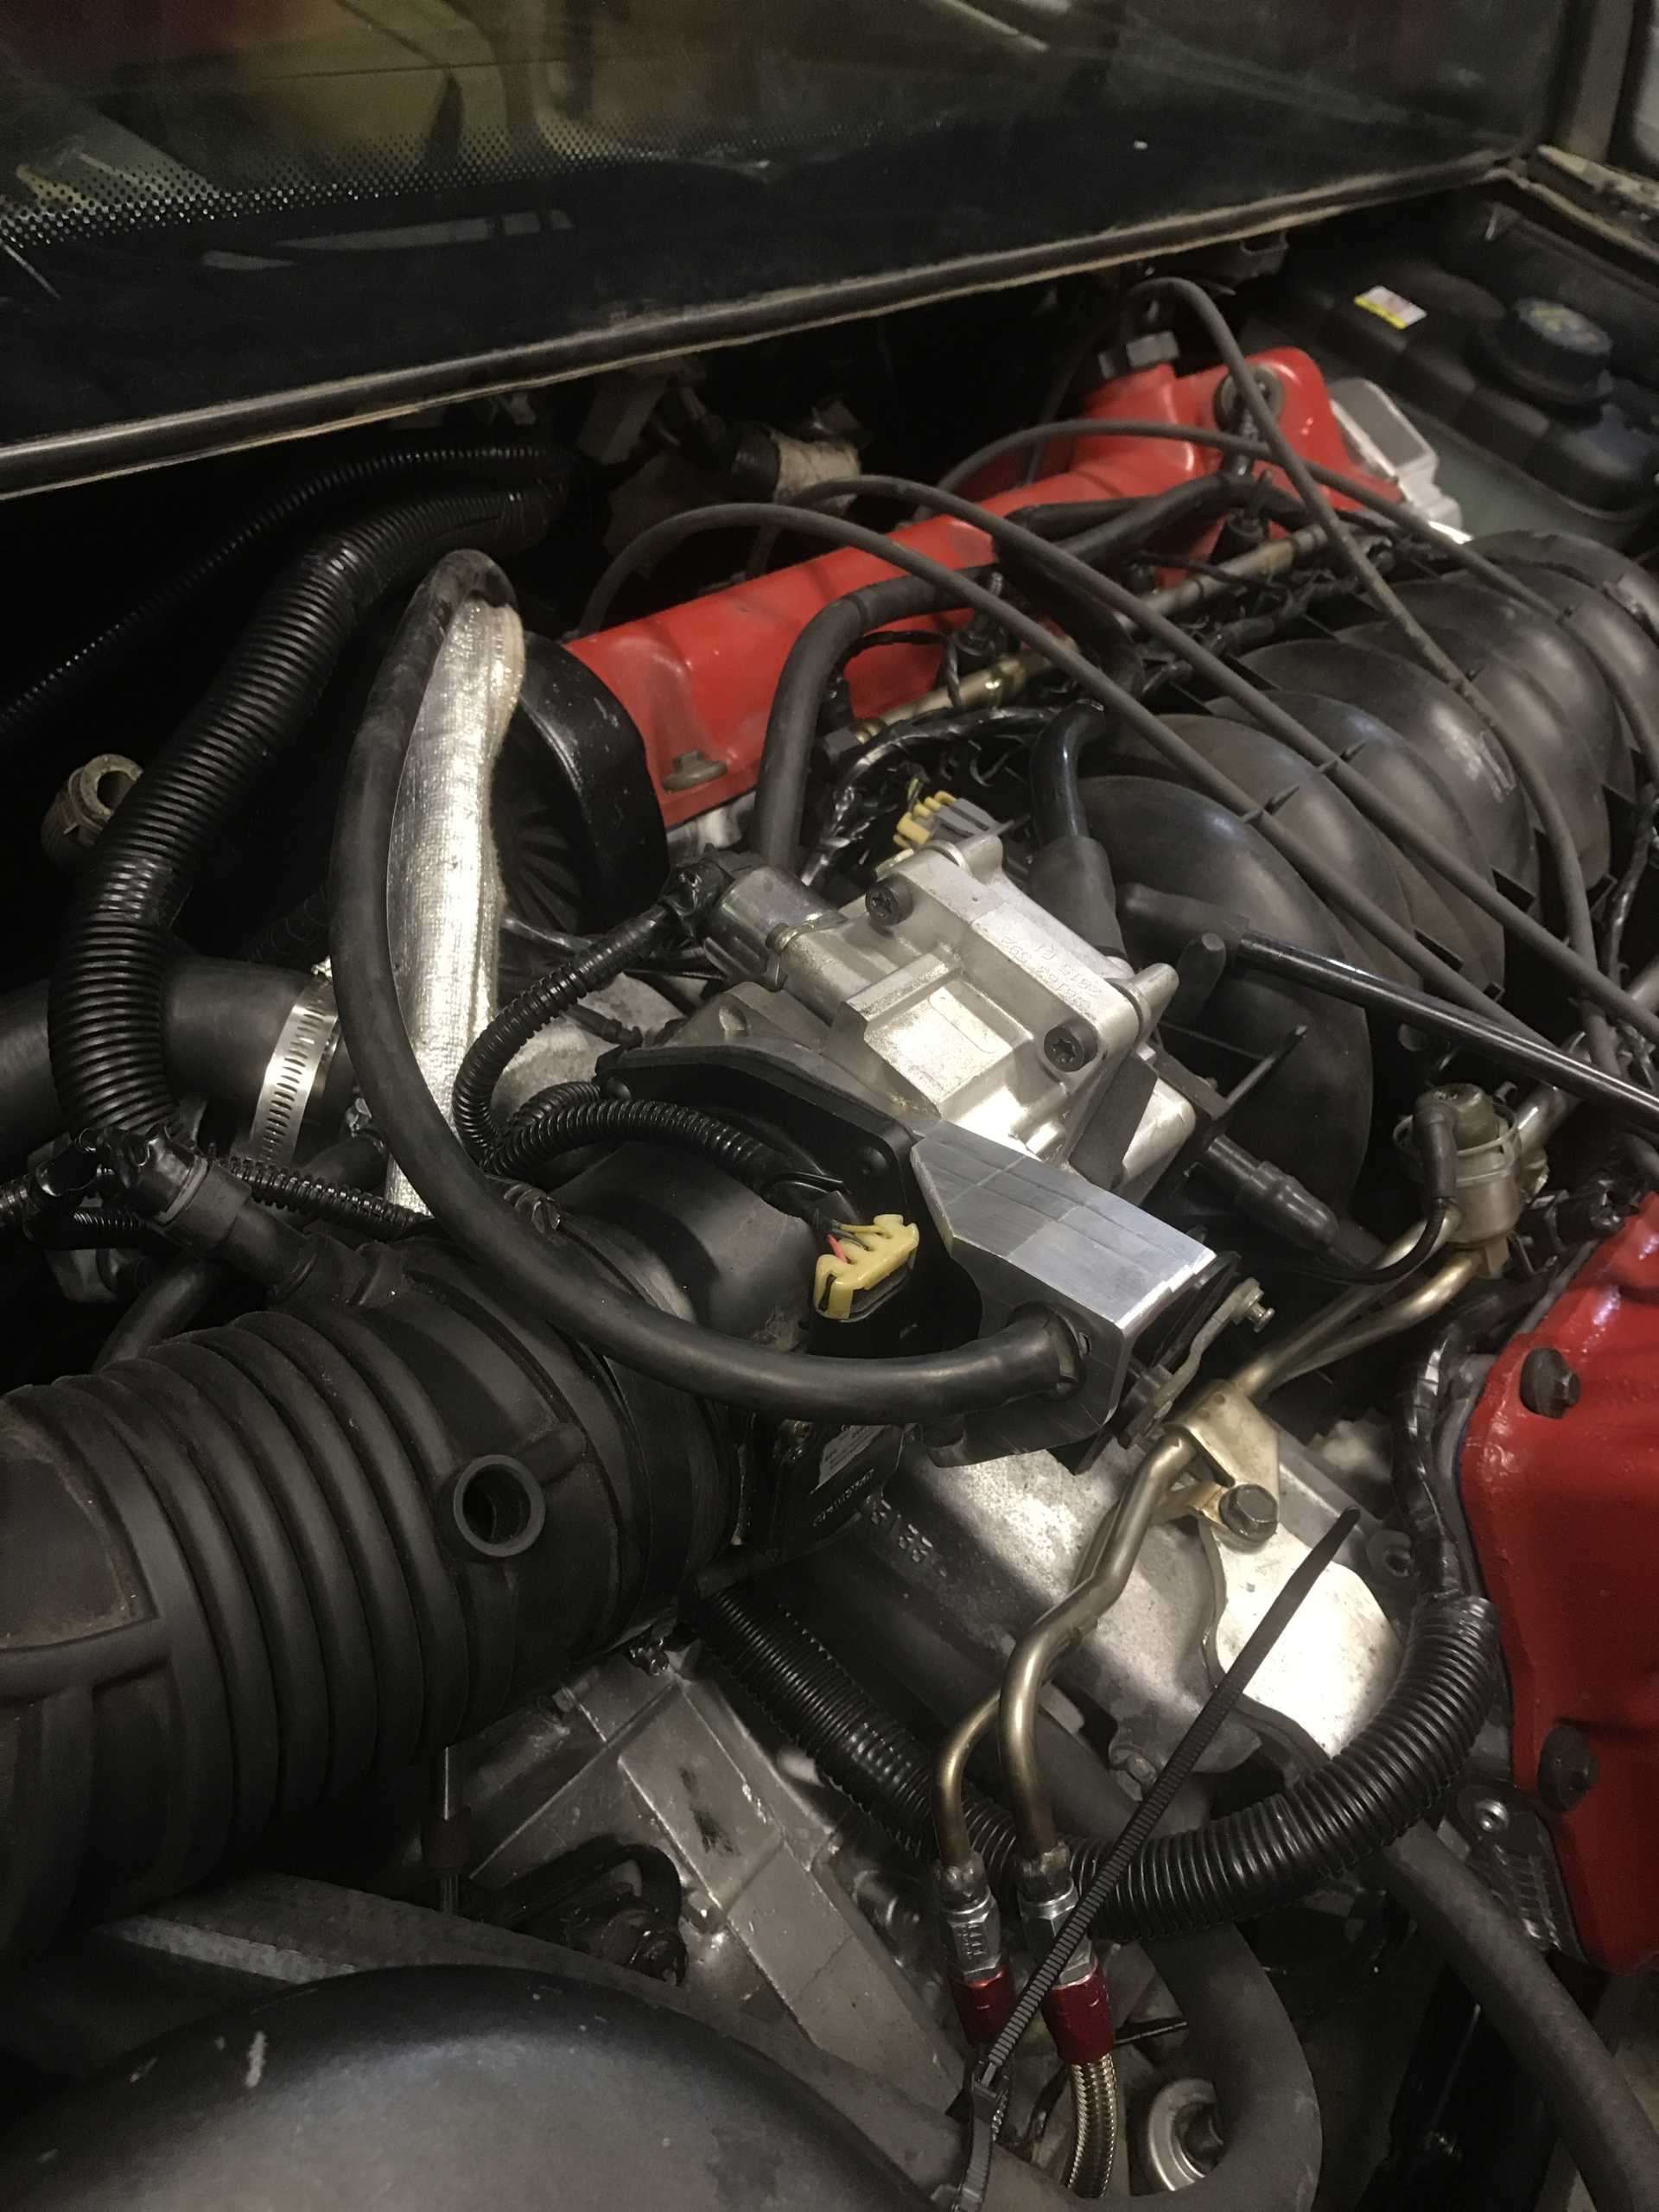
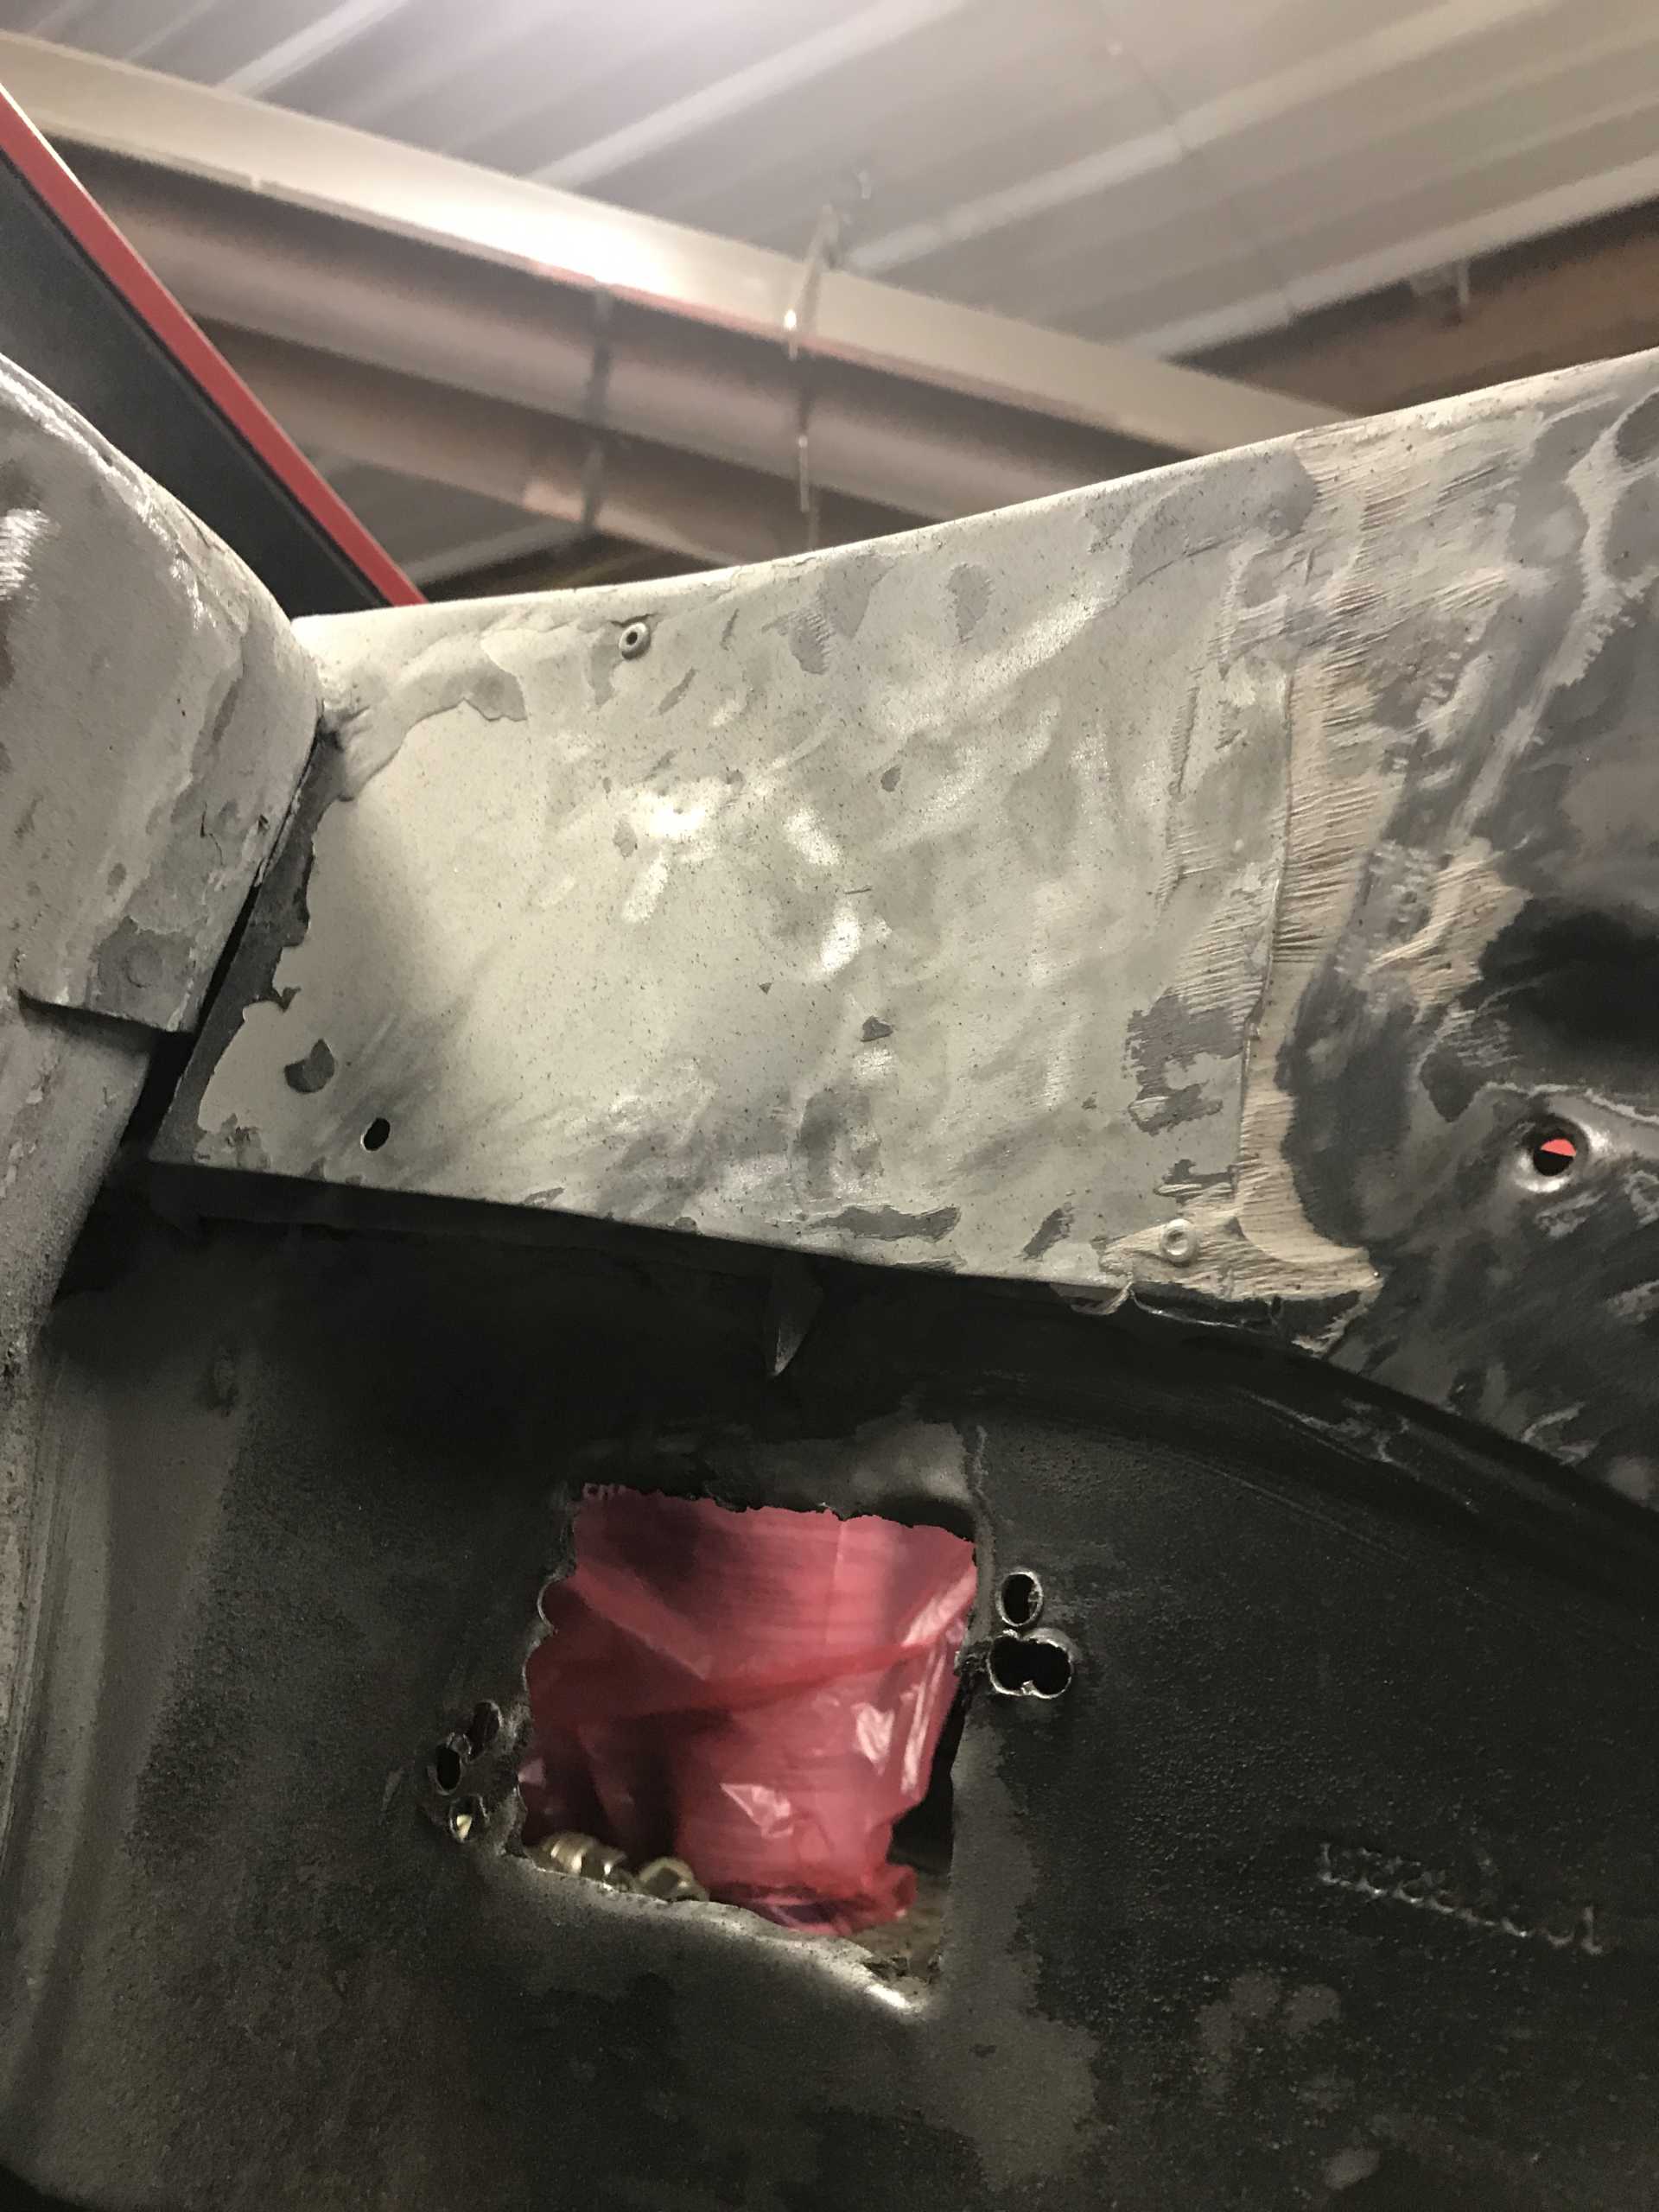
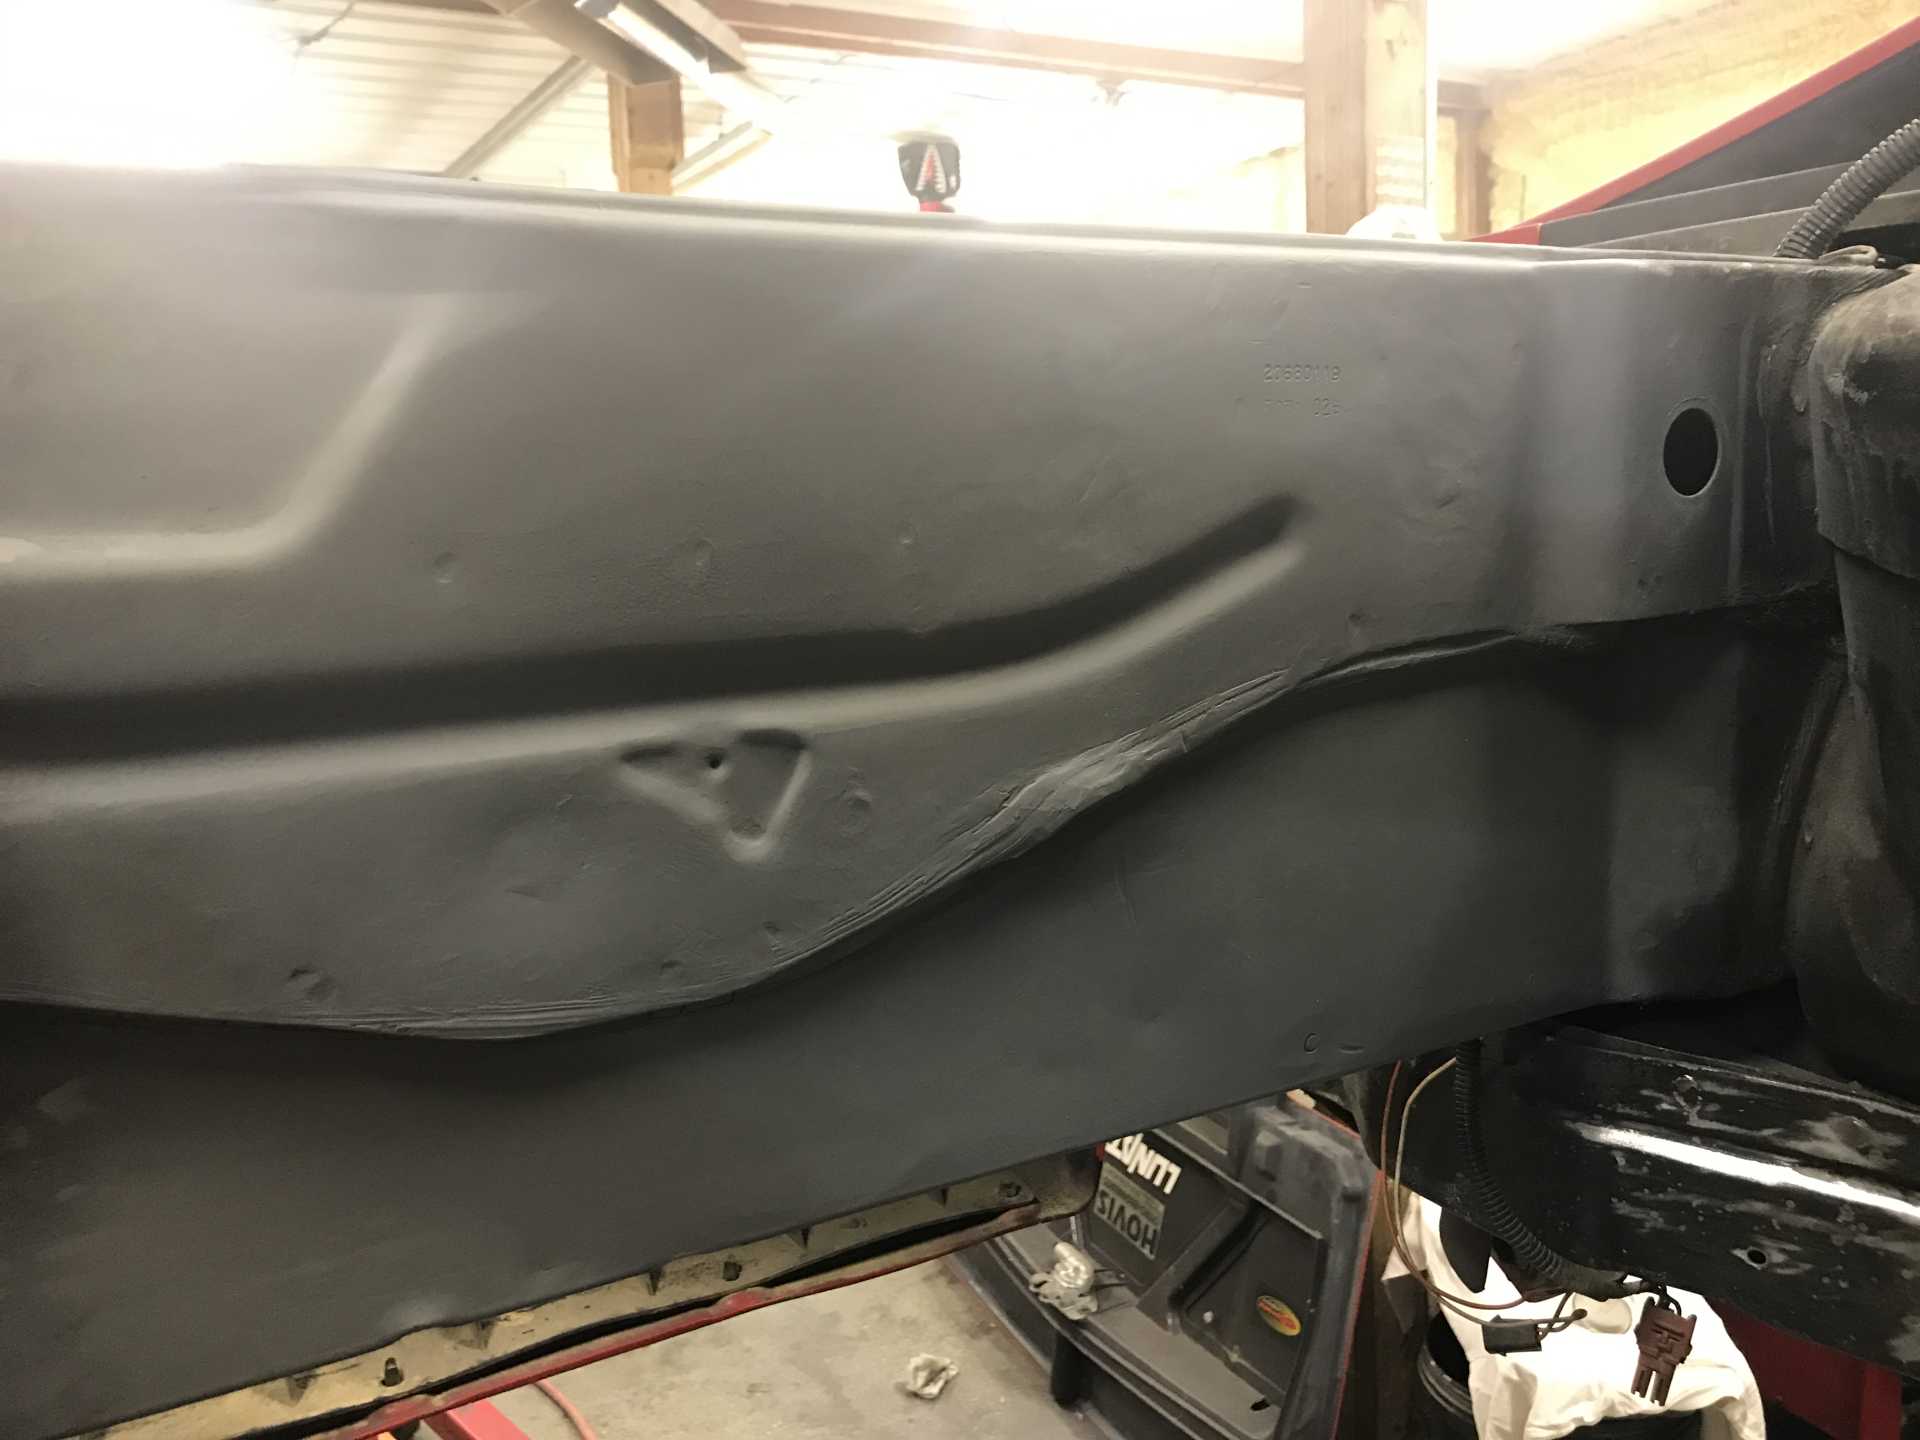
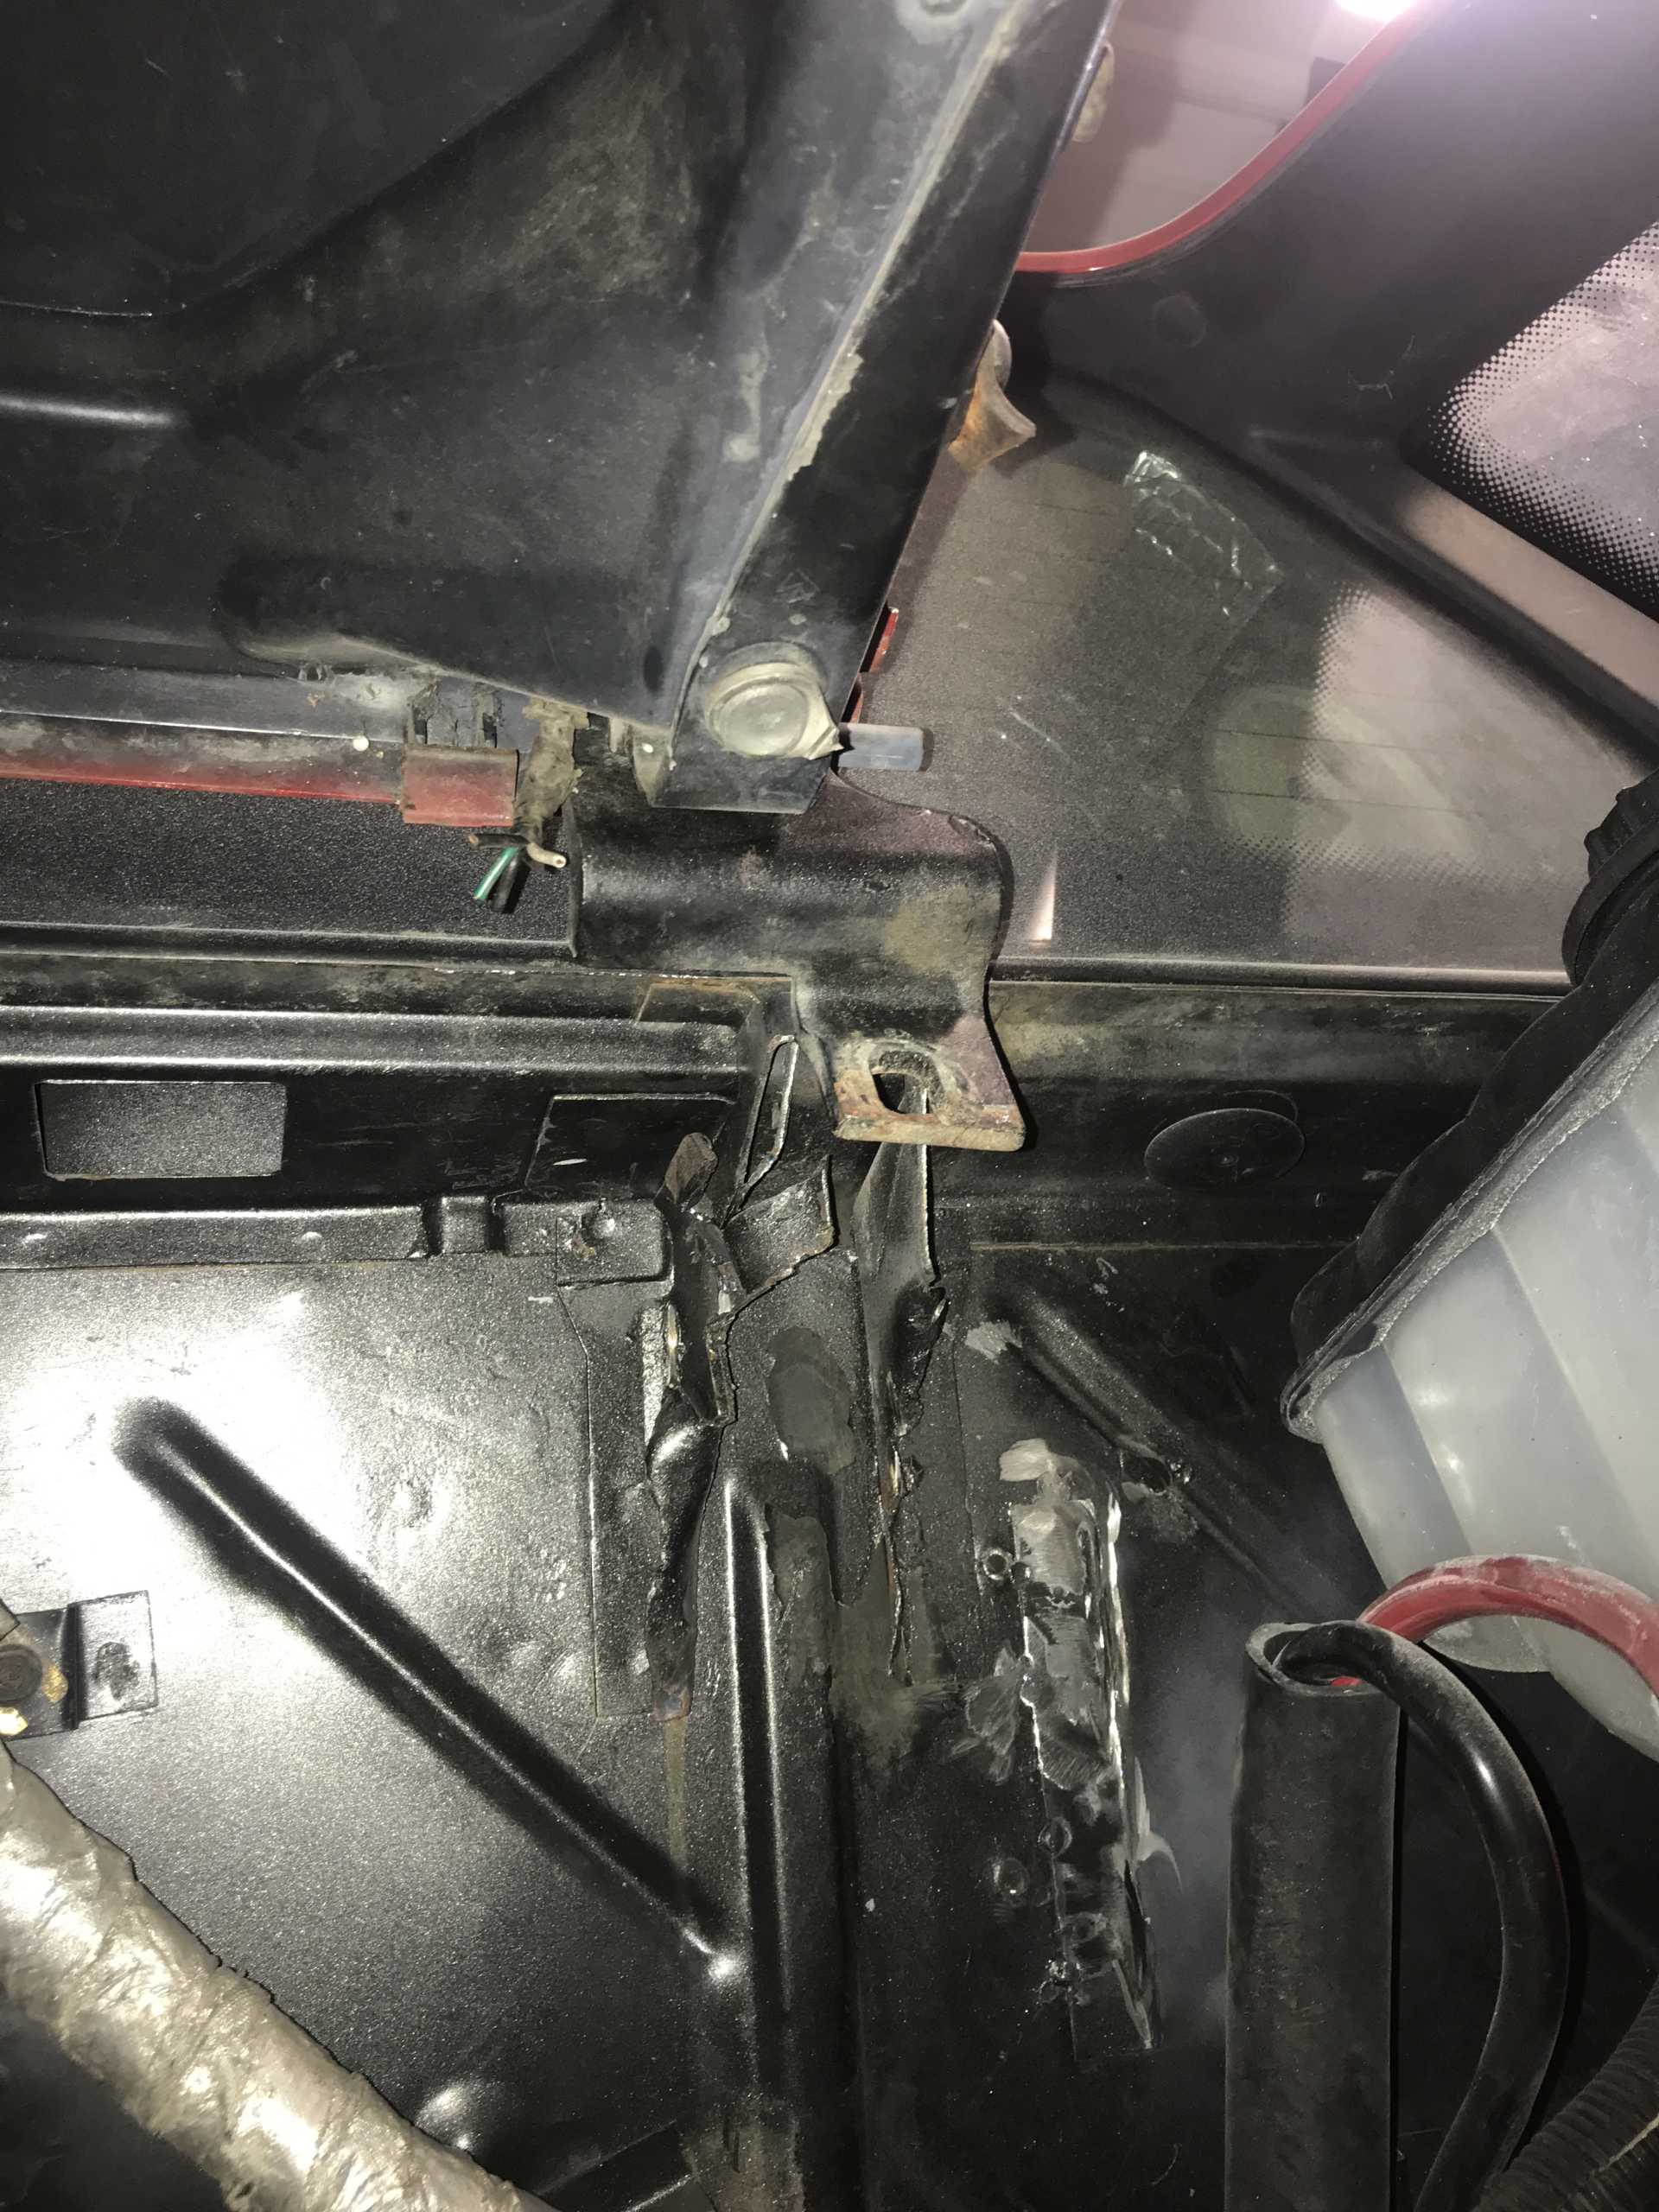
While waiting on things for the motor, I had time to make the engine bay nicer. I neglected doing this before due to time constraints… I was going to sand down and paint it, but I came to discover some bondo.
After drilling out some rivets, I pulled the plate off. Well that’s just dandy. The PO did a pretty good job covering this up with bondo actually. I am not sure what would have caused these rust holes originally. I assume the PO was cutting the trunk out to run something.
[This message has been edited by copperhens (edited 07-22-2021).]
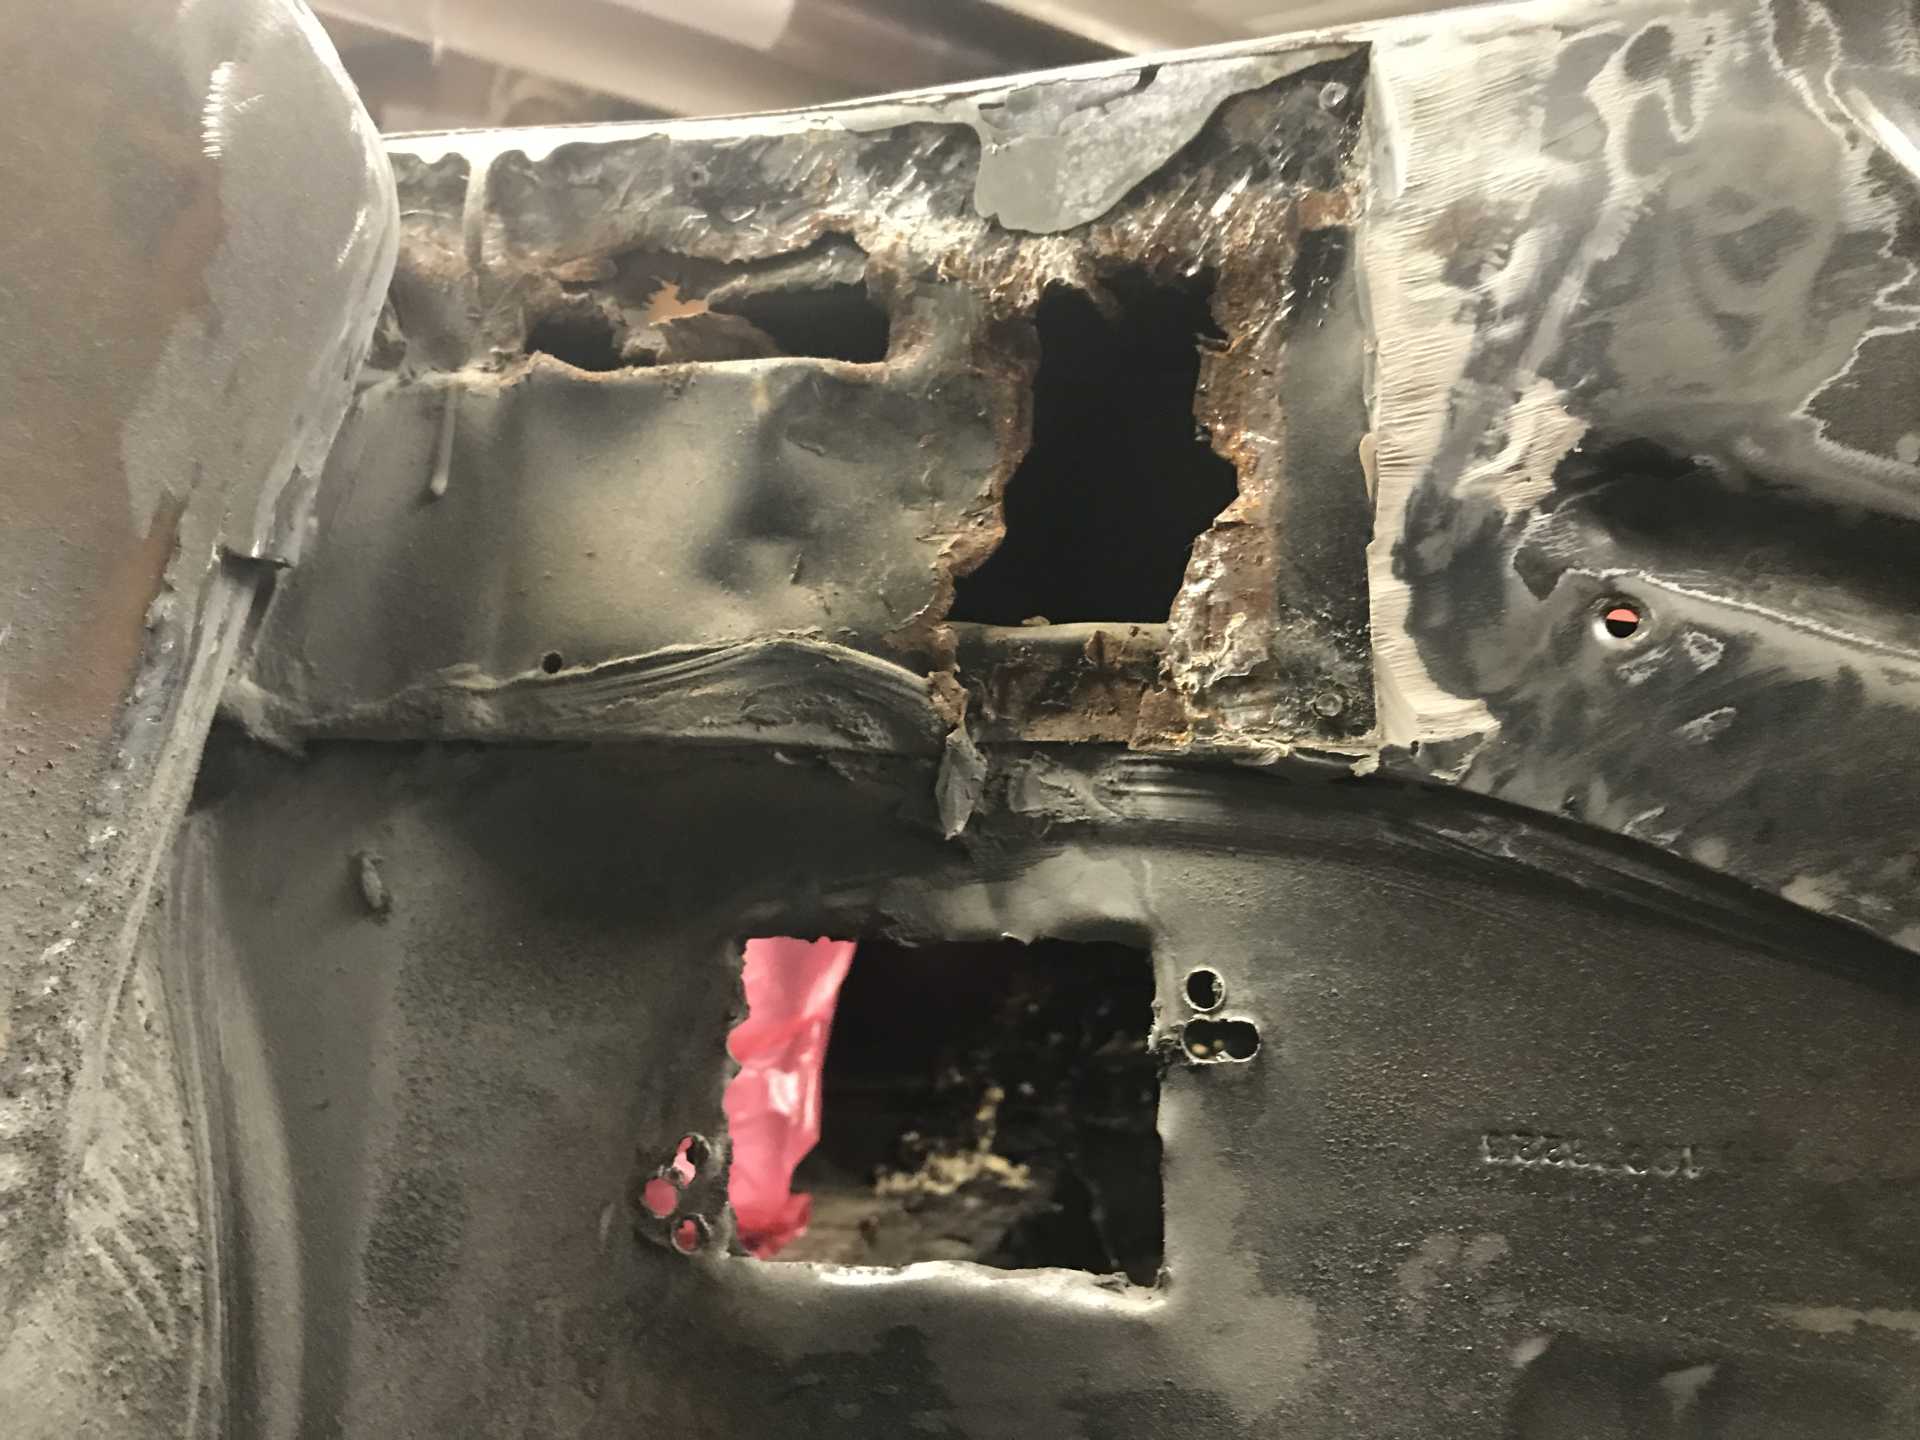
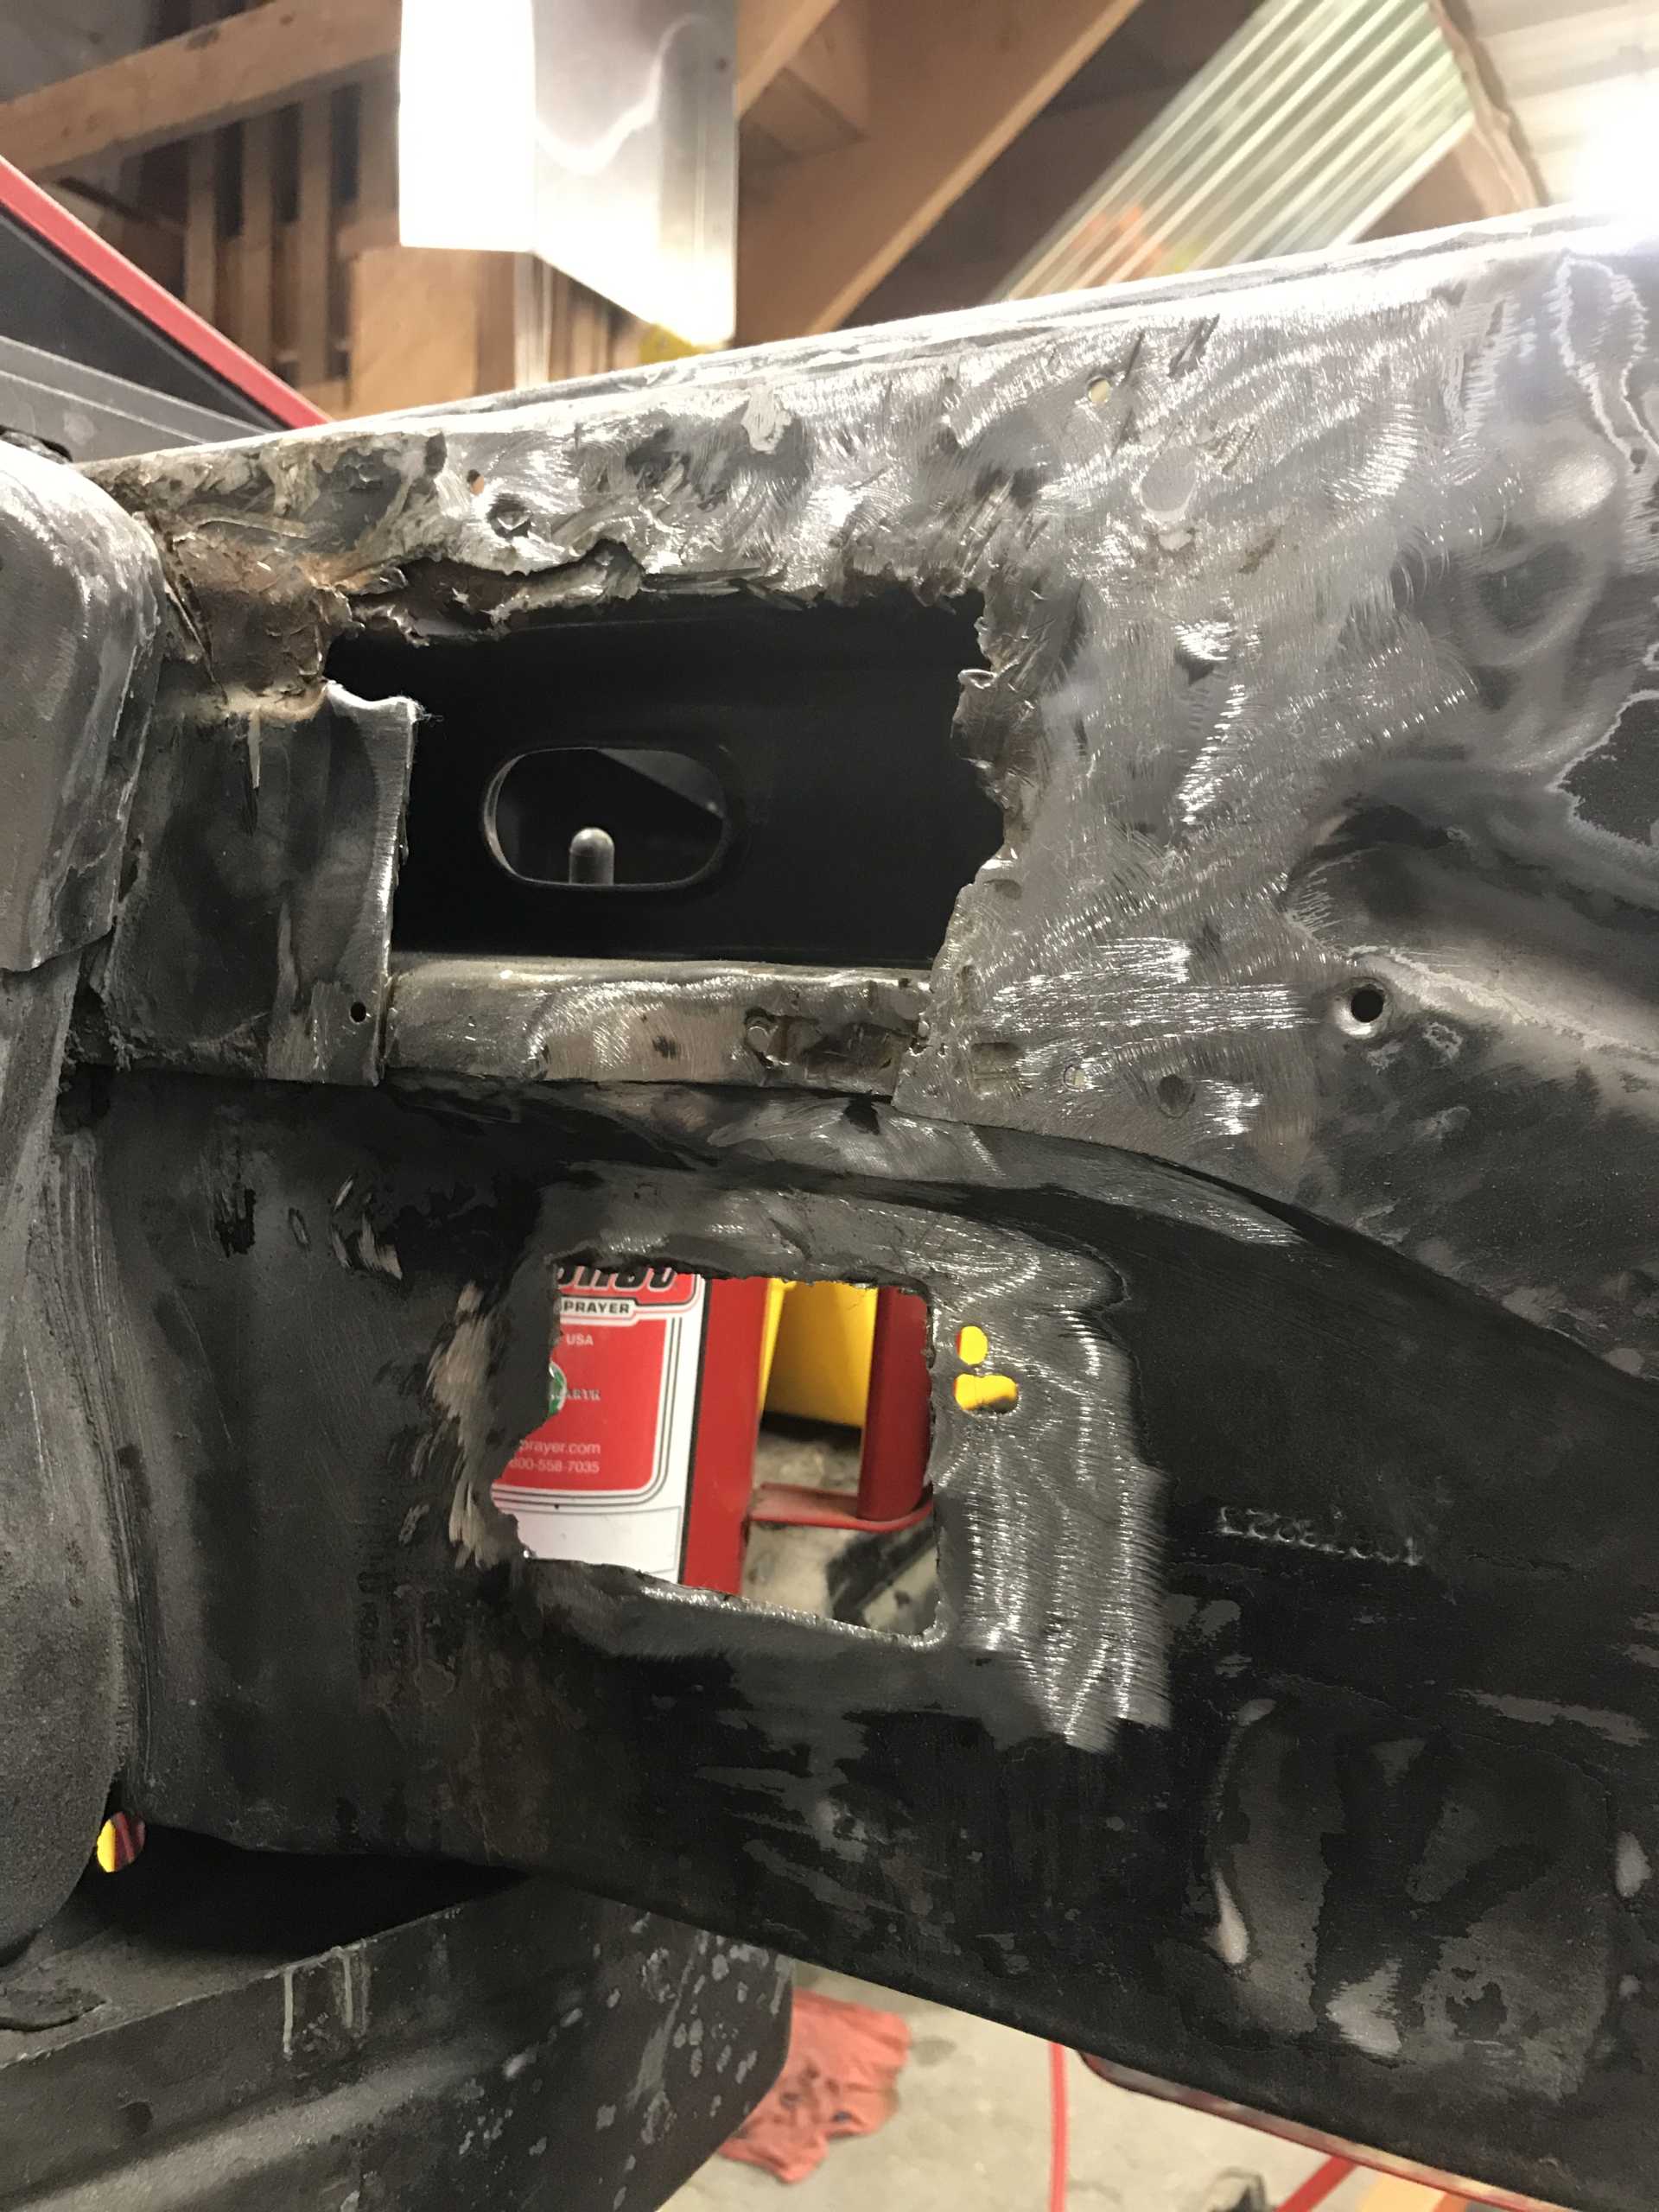
I was gonna take the time and fix it of course. I had to cut out a lot of the bad areas and make it much smoother so we could weld a fresh plate down. The bottom hole was there before, but that was gonna get patched up too.
I started to go a bit crazy with the grinder and delete the cruise control brackets and extra little ones.
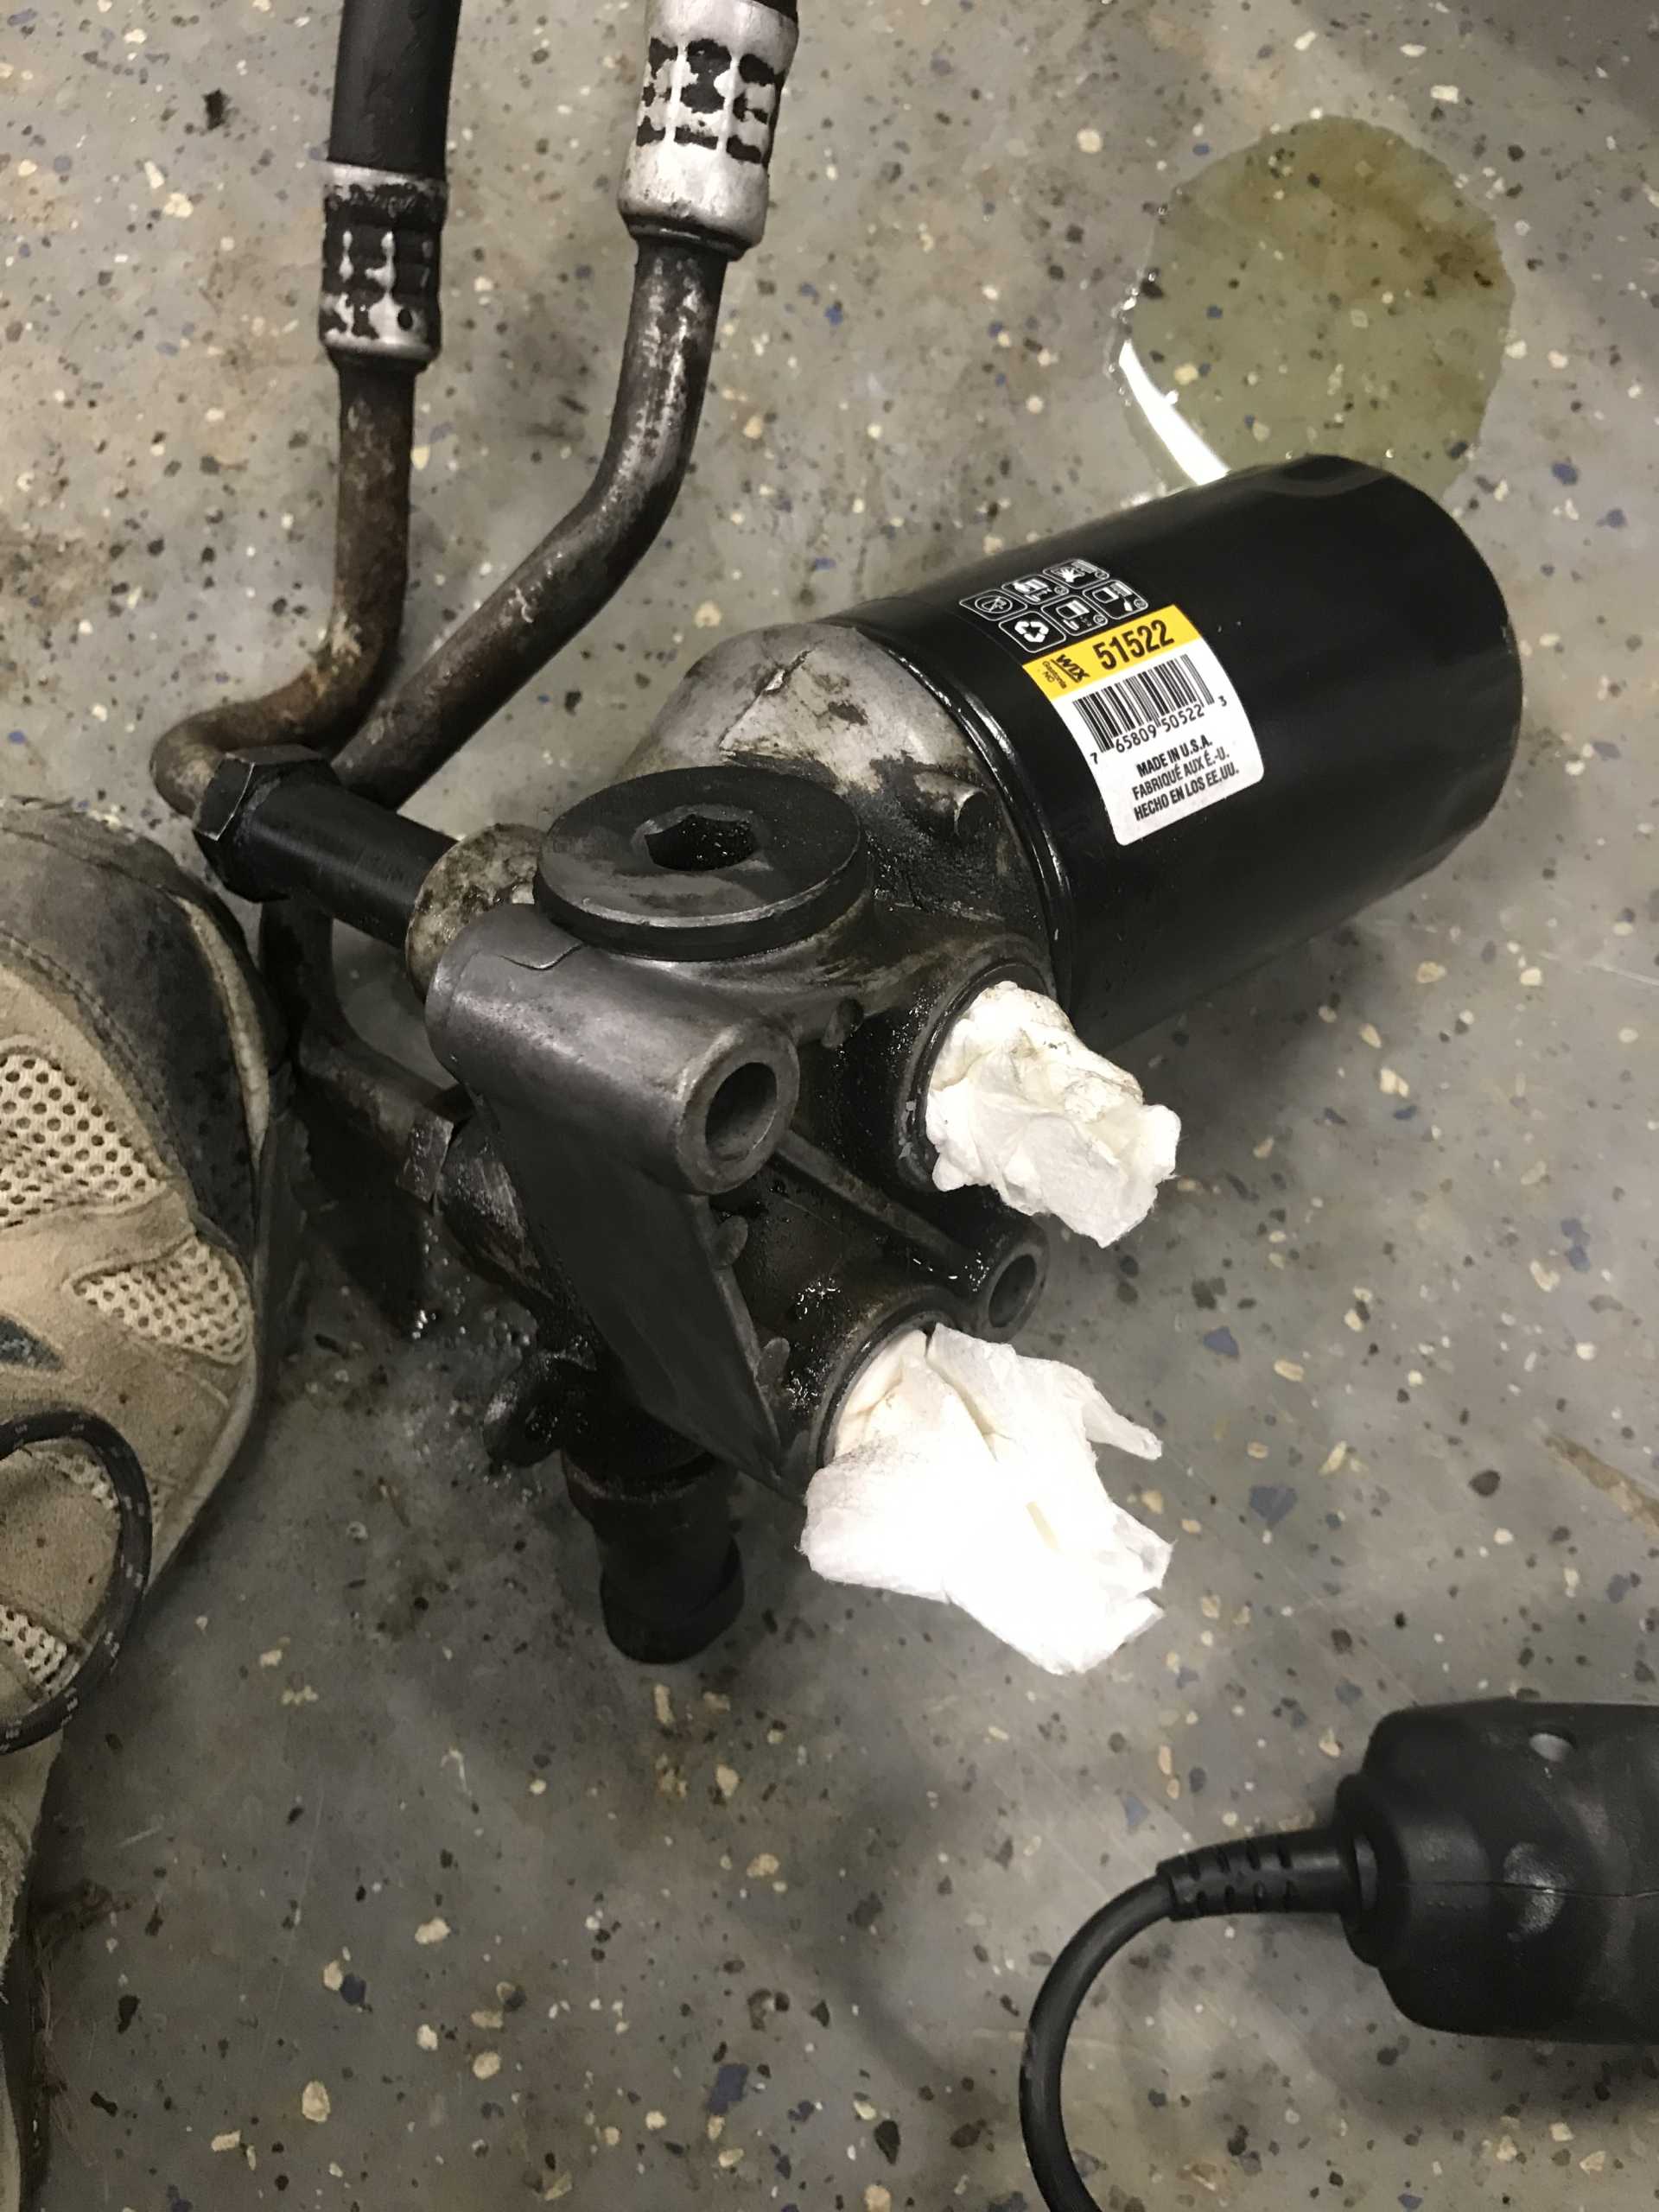
I’m ashamed that I even installed the oil filter housing in this shape.
But I cleaned it up this time.
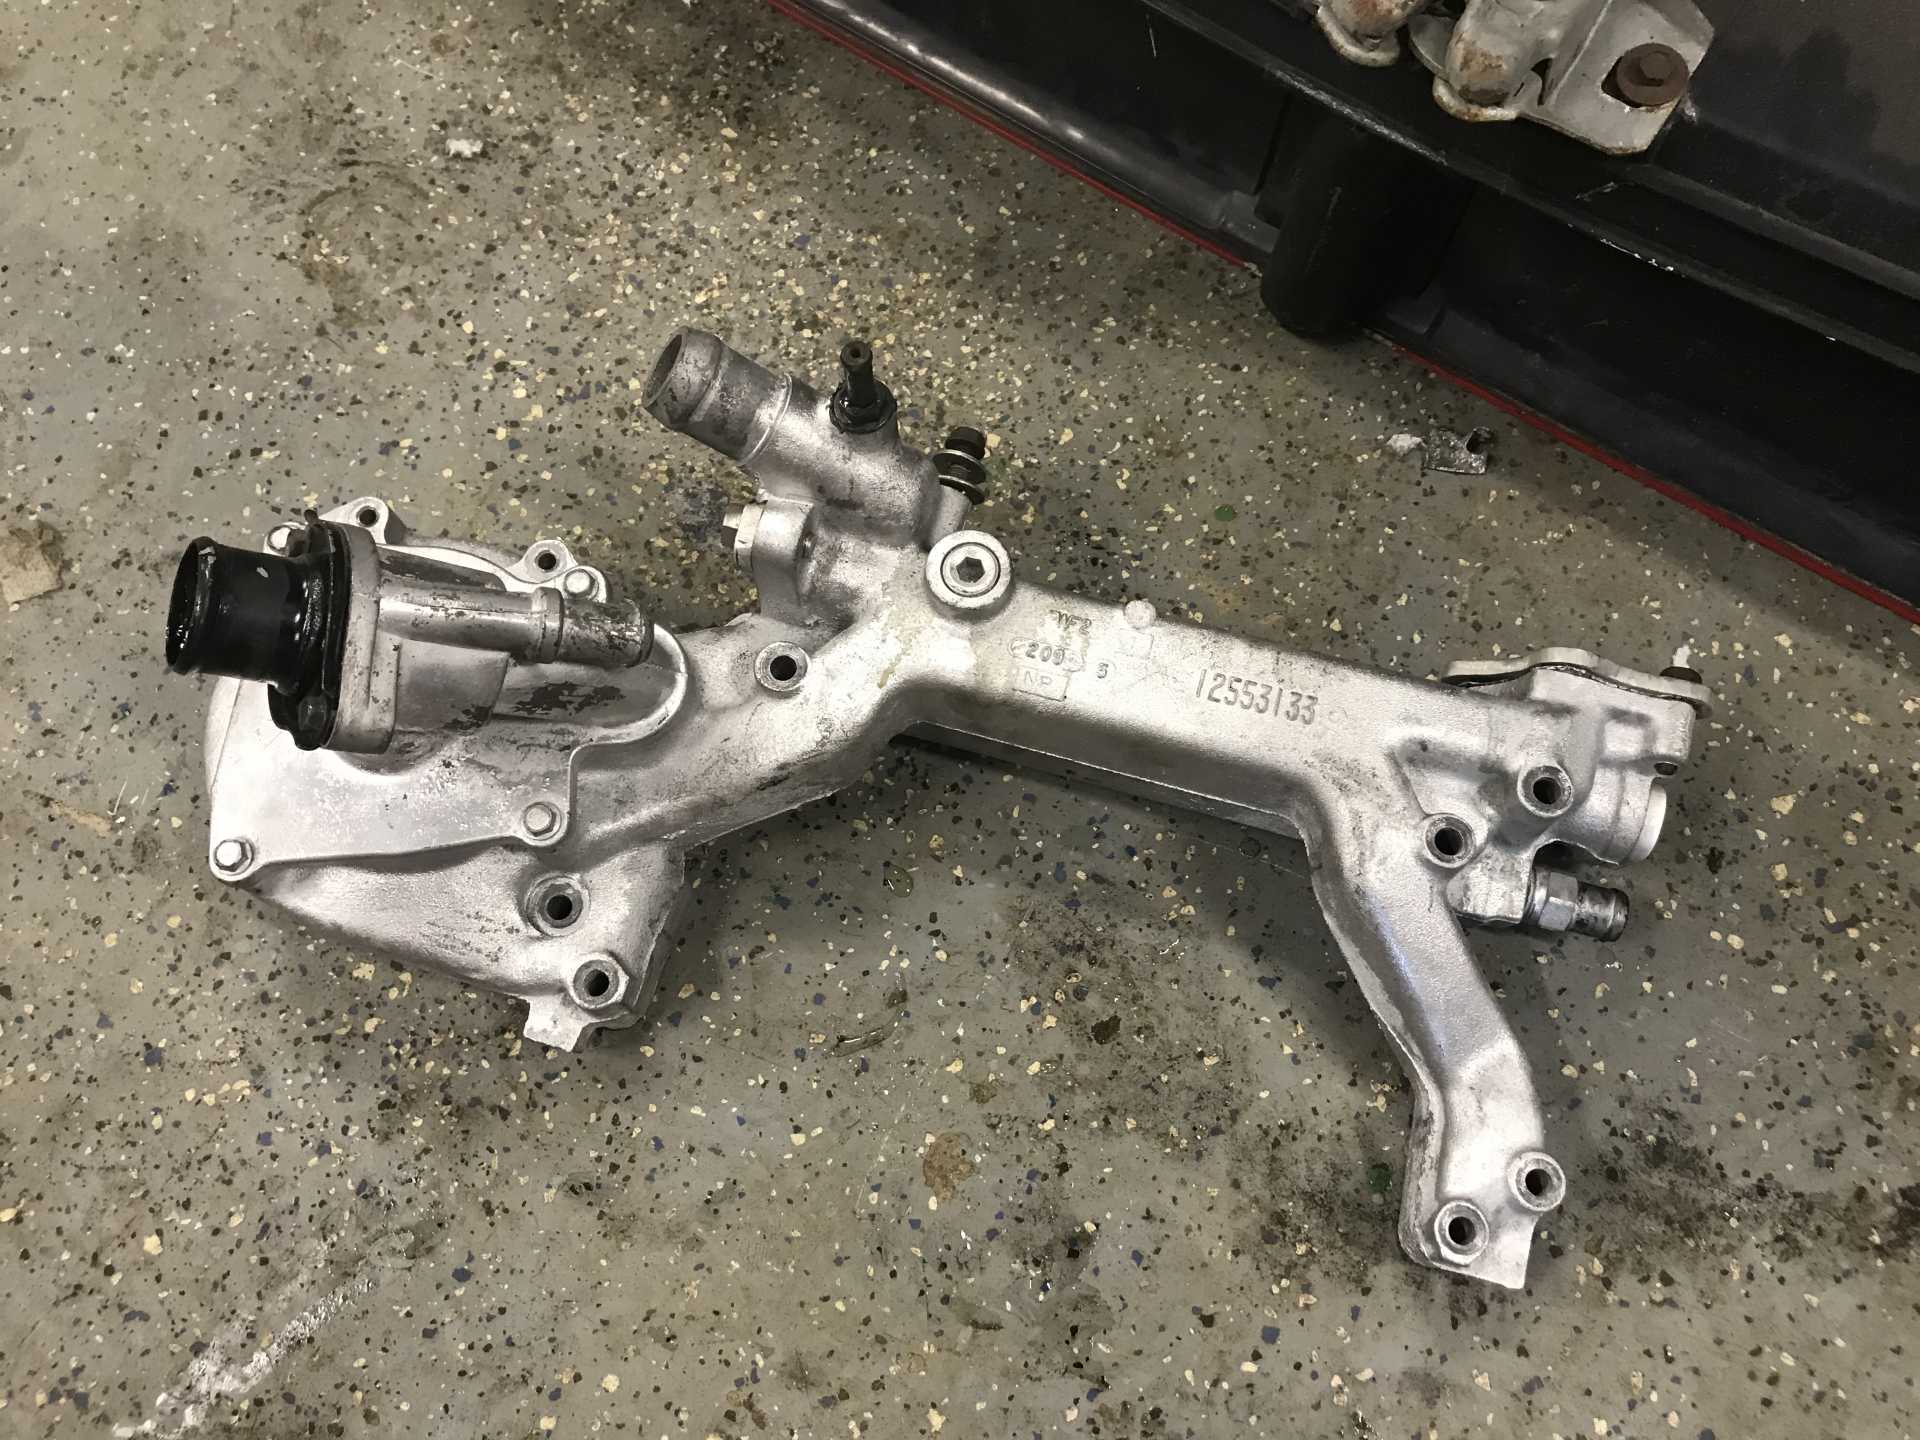
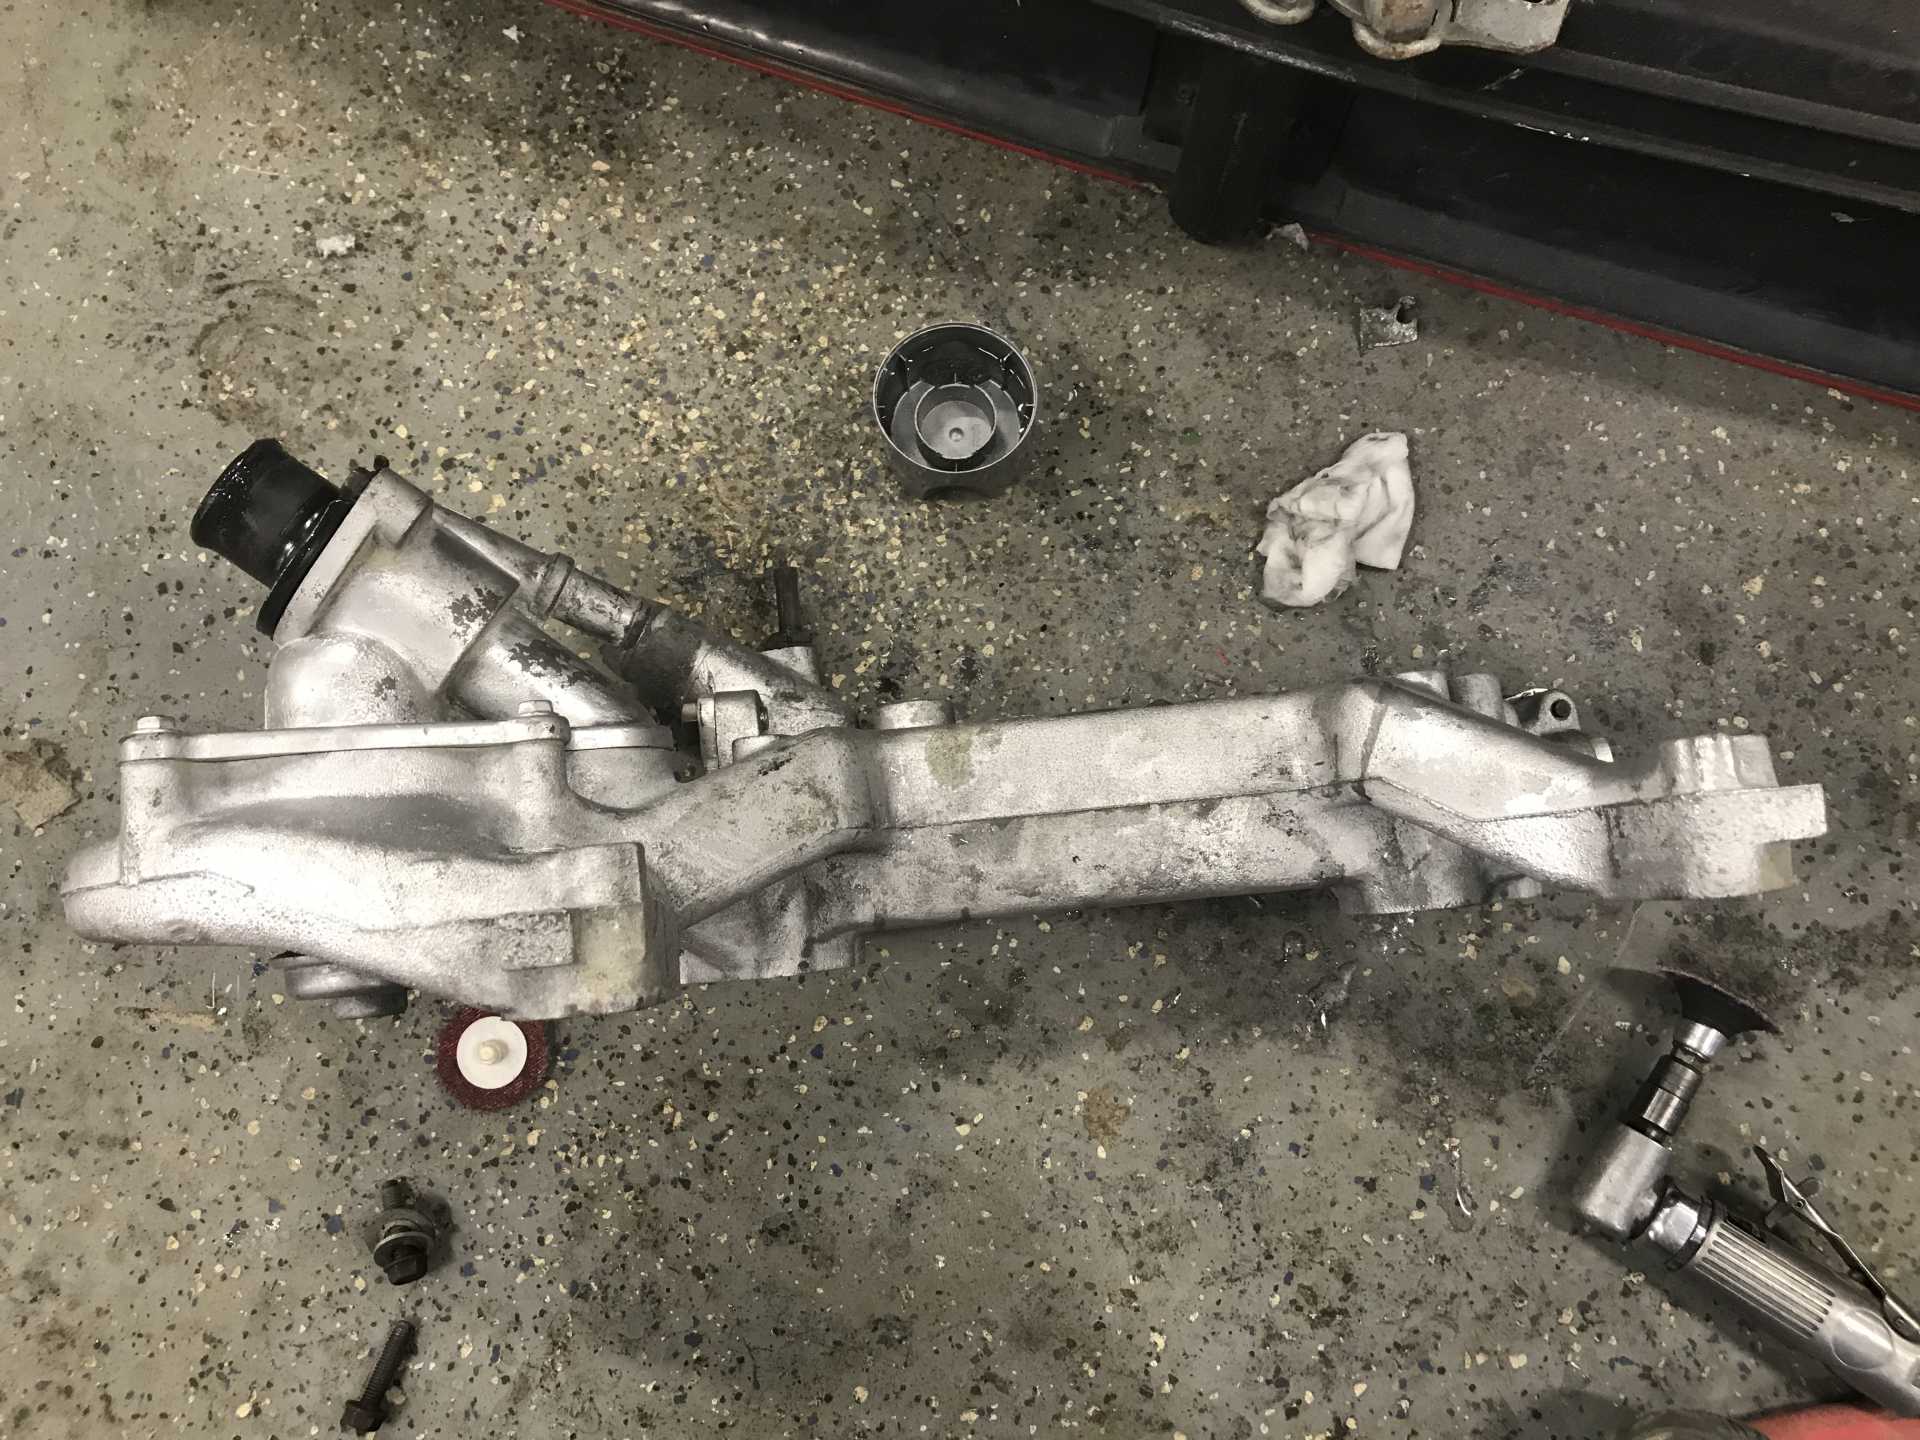
I ended up redoing the water pump again. It was mostly clean but not shiny. I would end up sanding it all down and getting rid of casting marks, and then painting it nice.
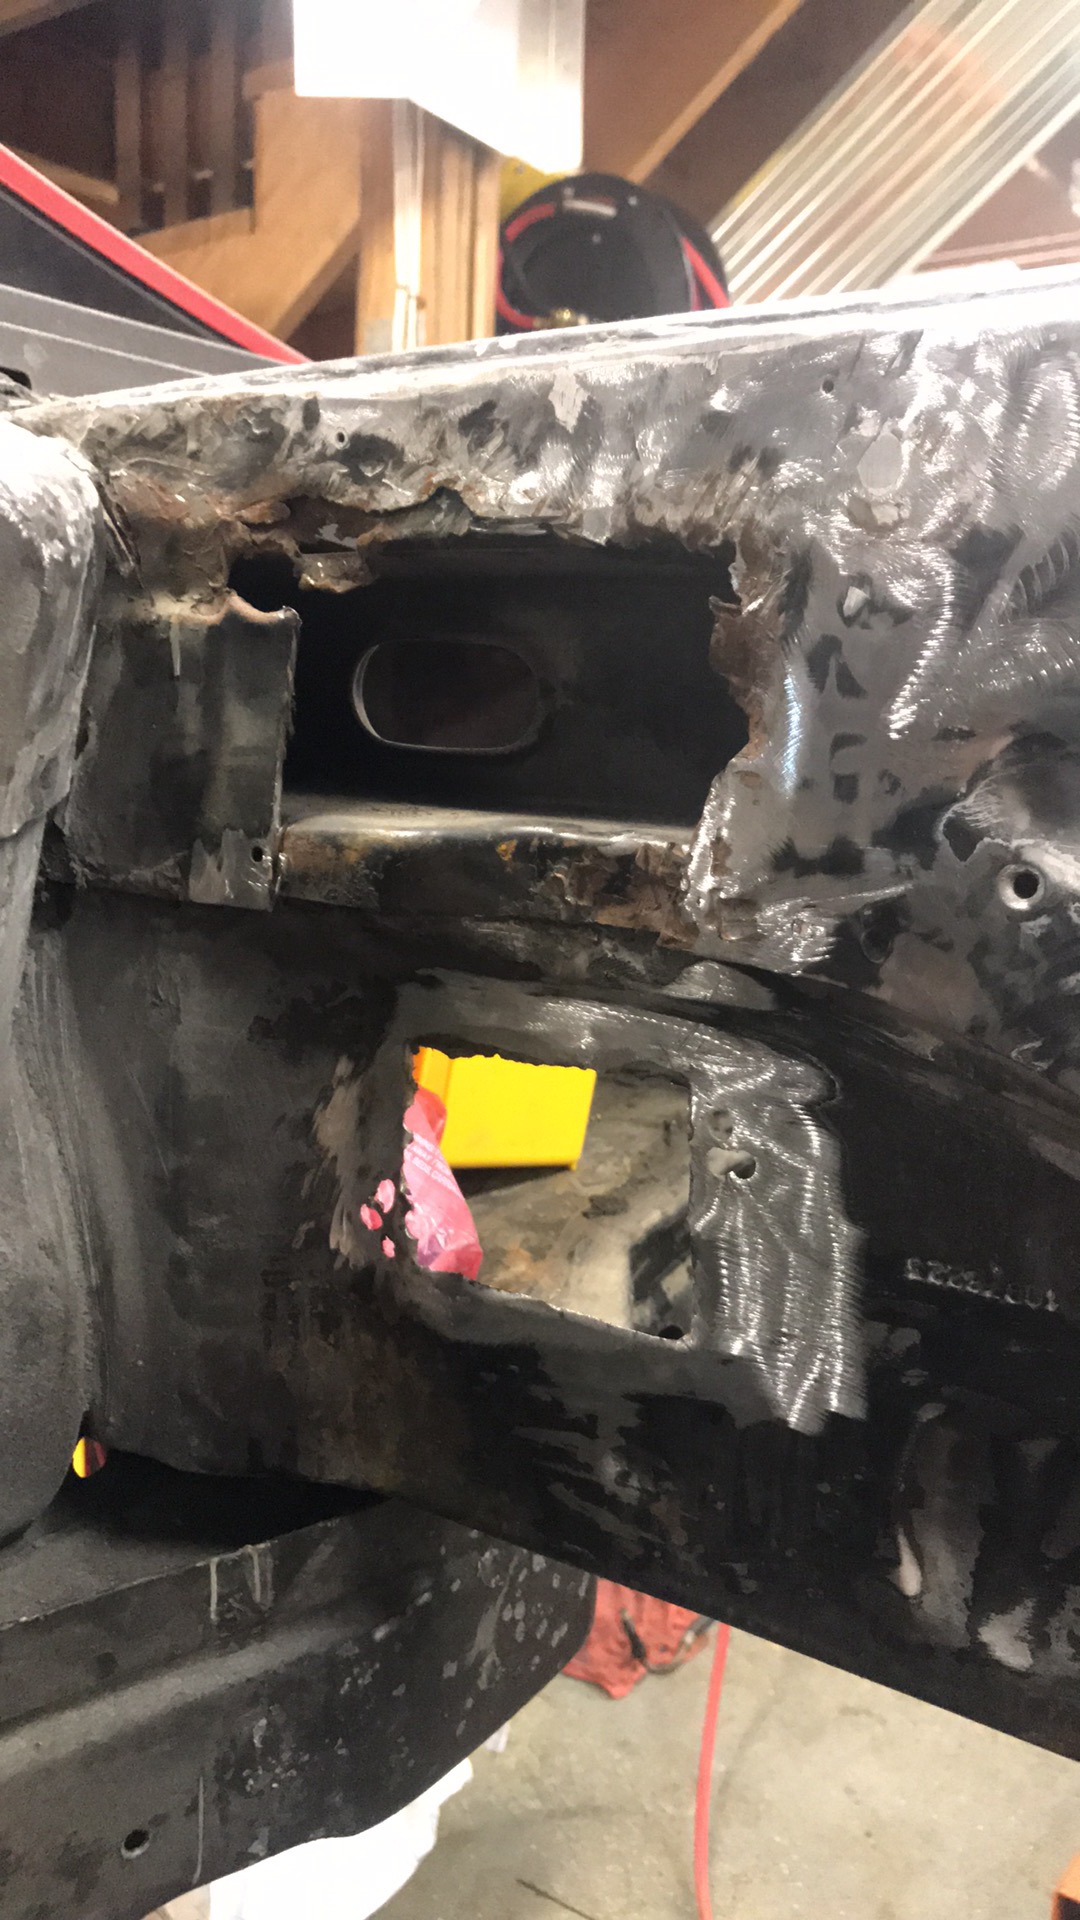
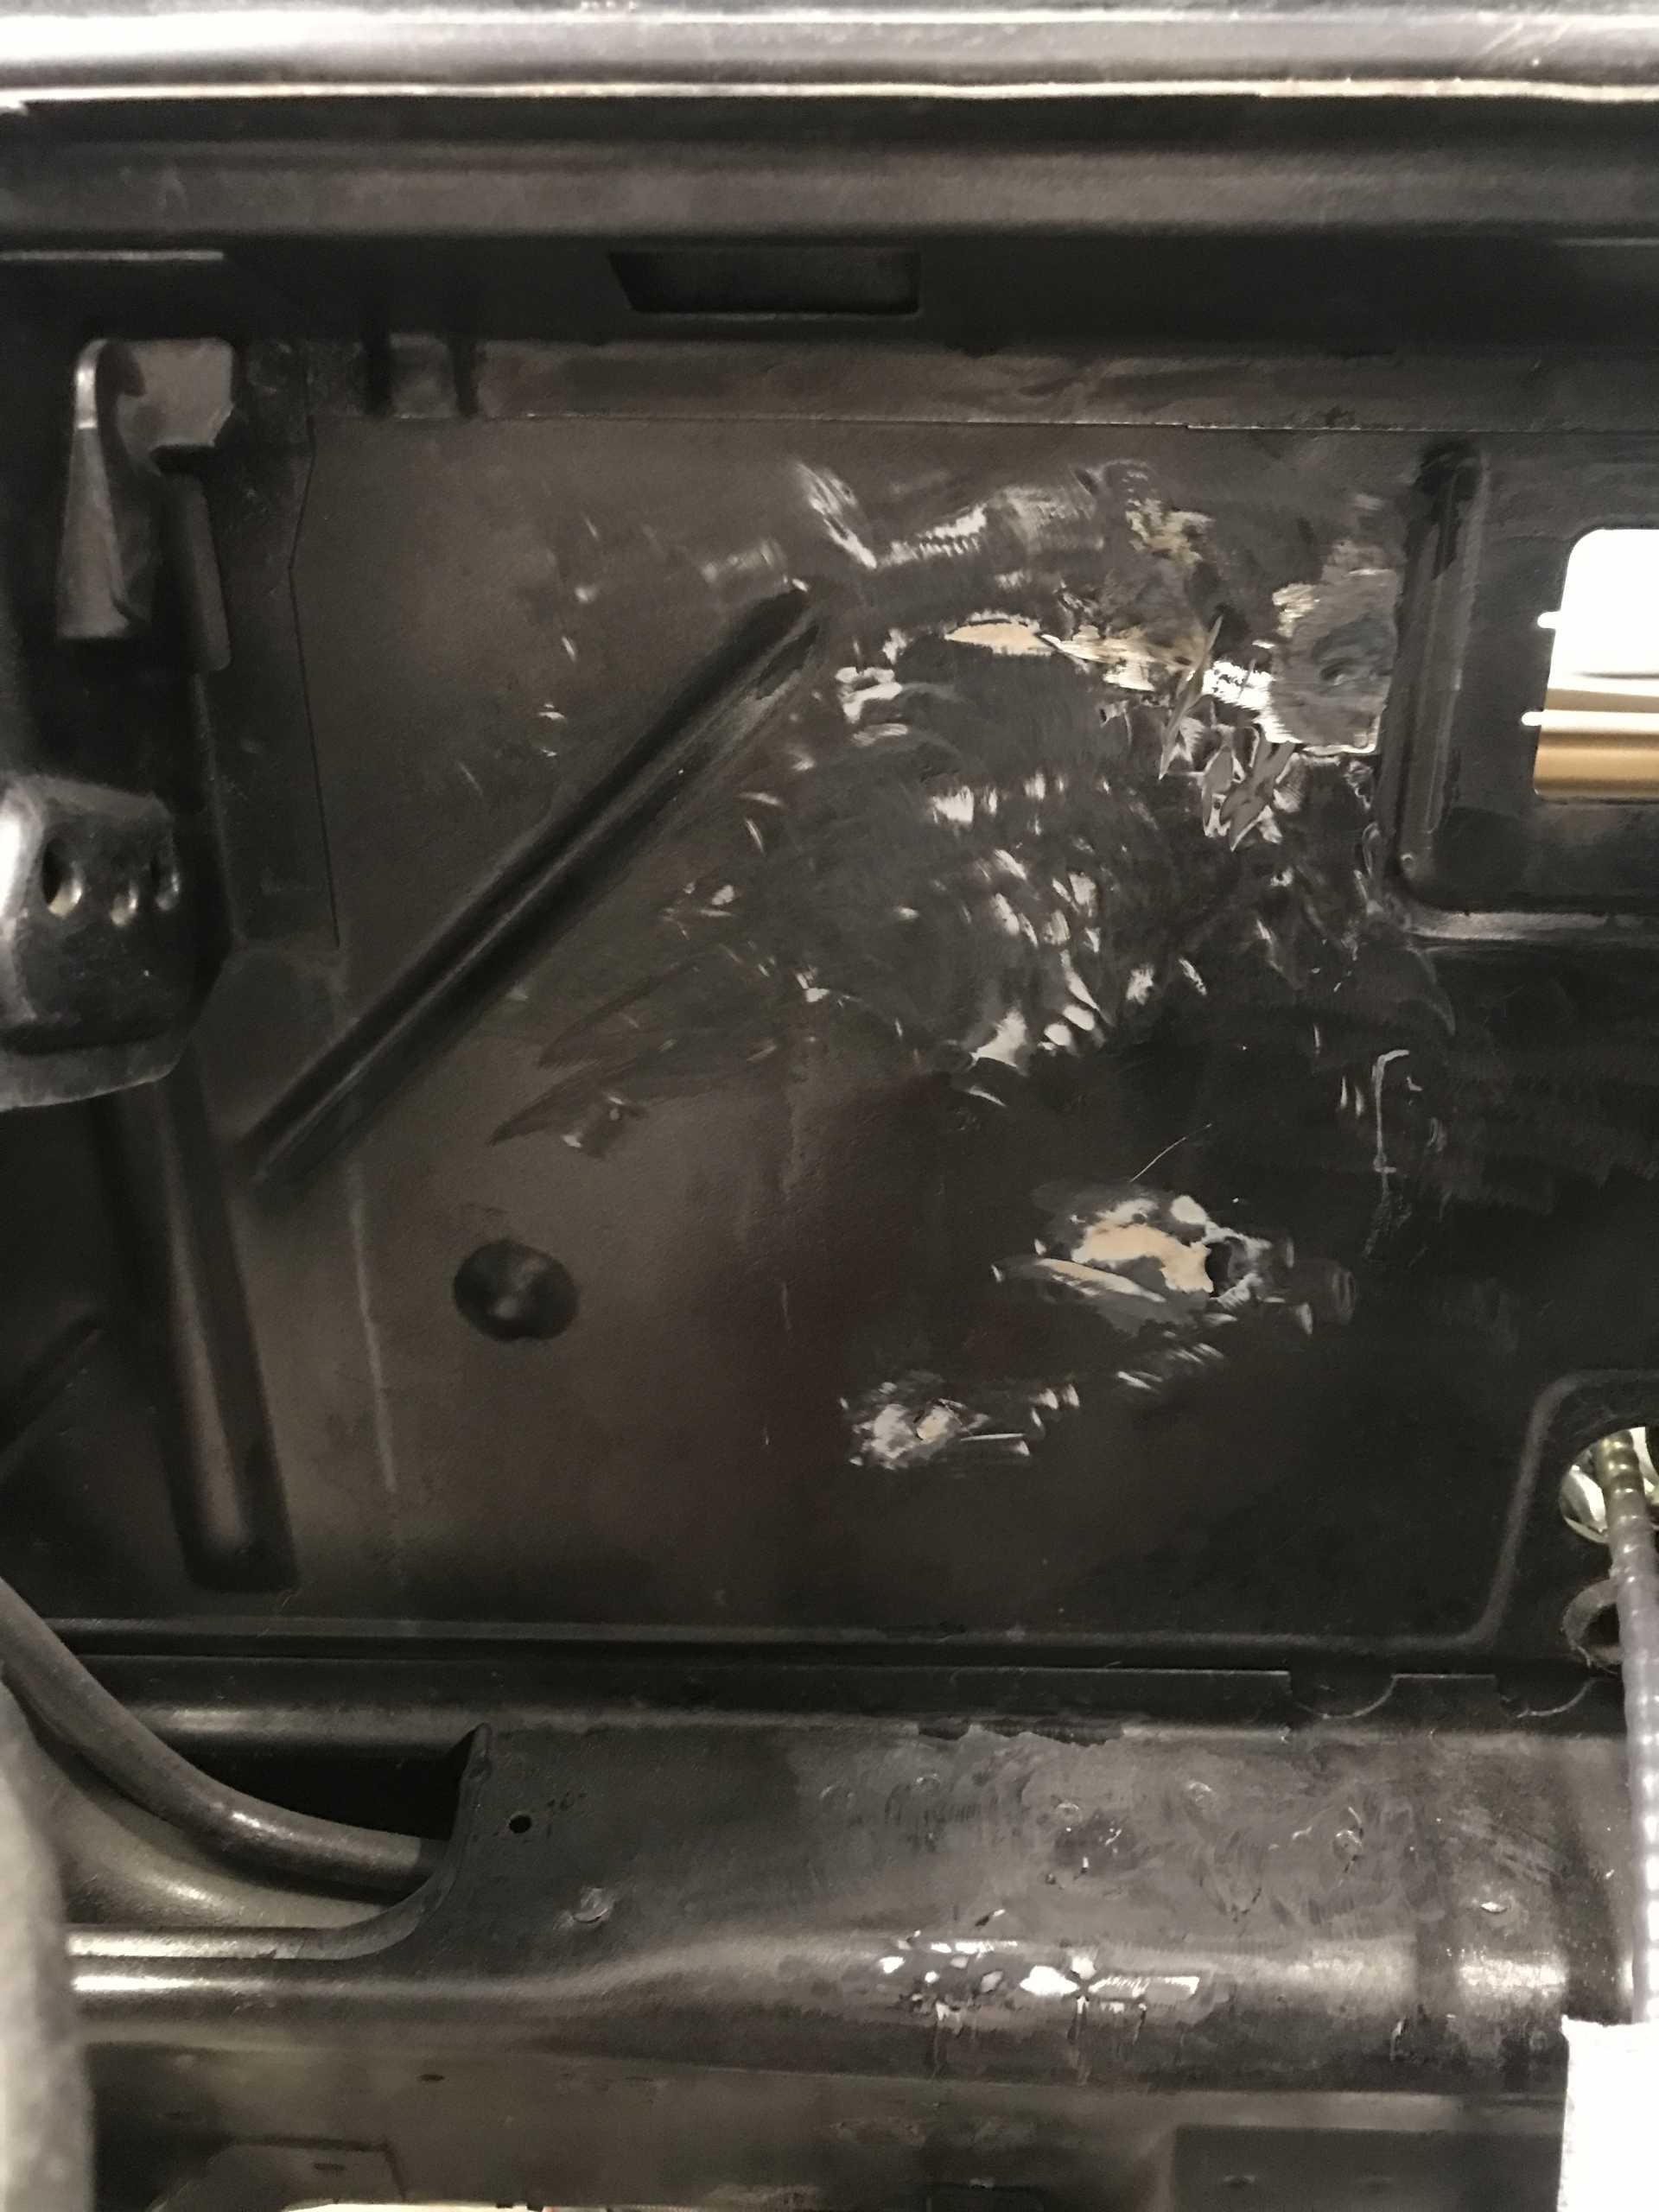
Some progress on the trunk wall. Not yet done of course.
More scotch brite and grinding.
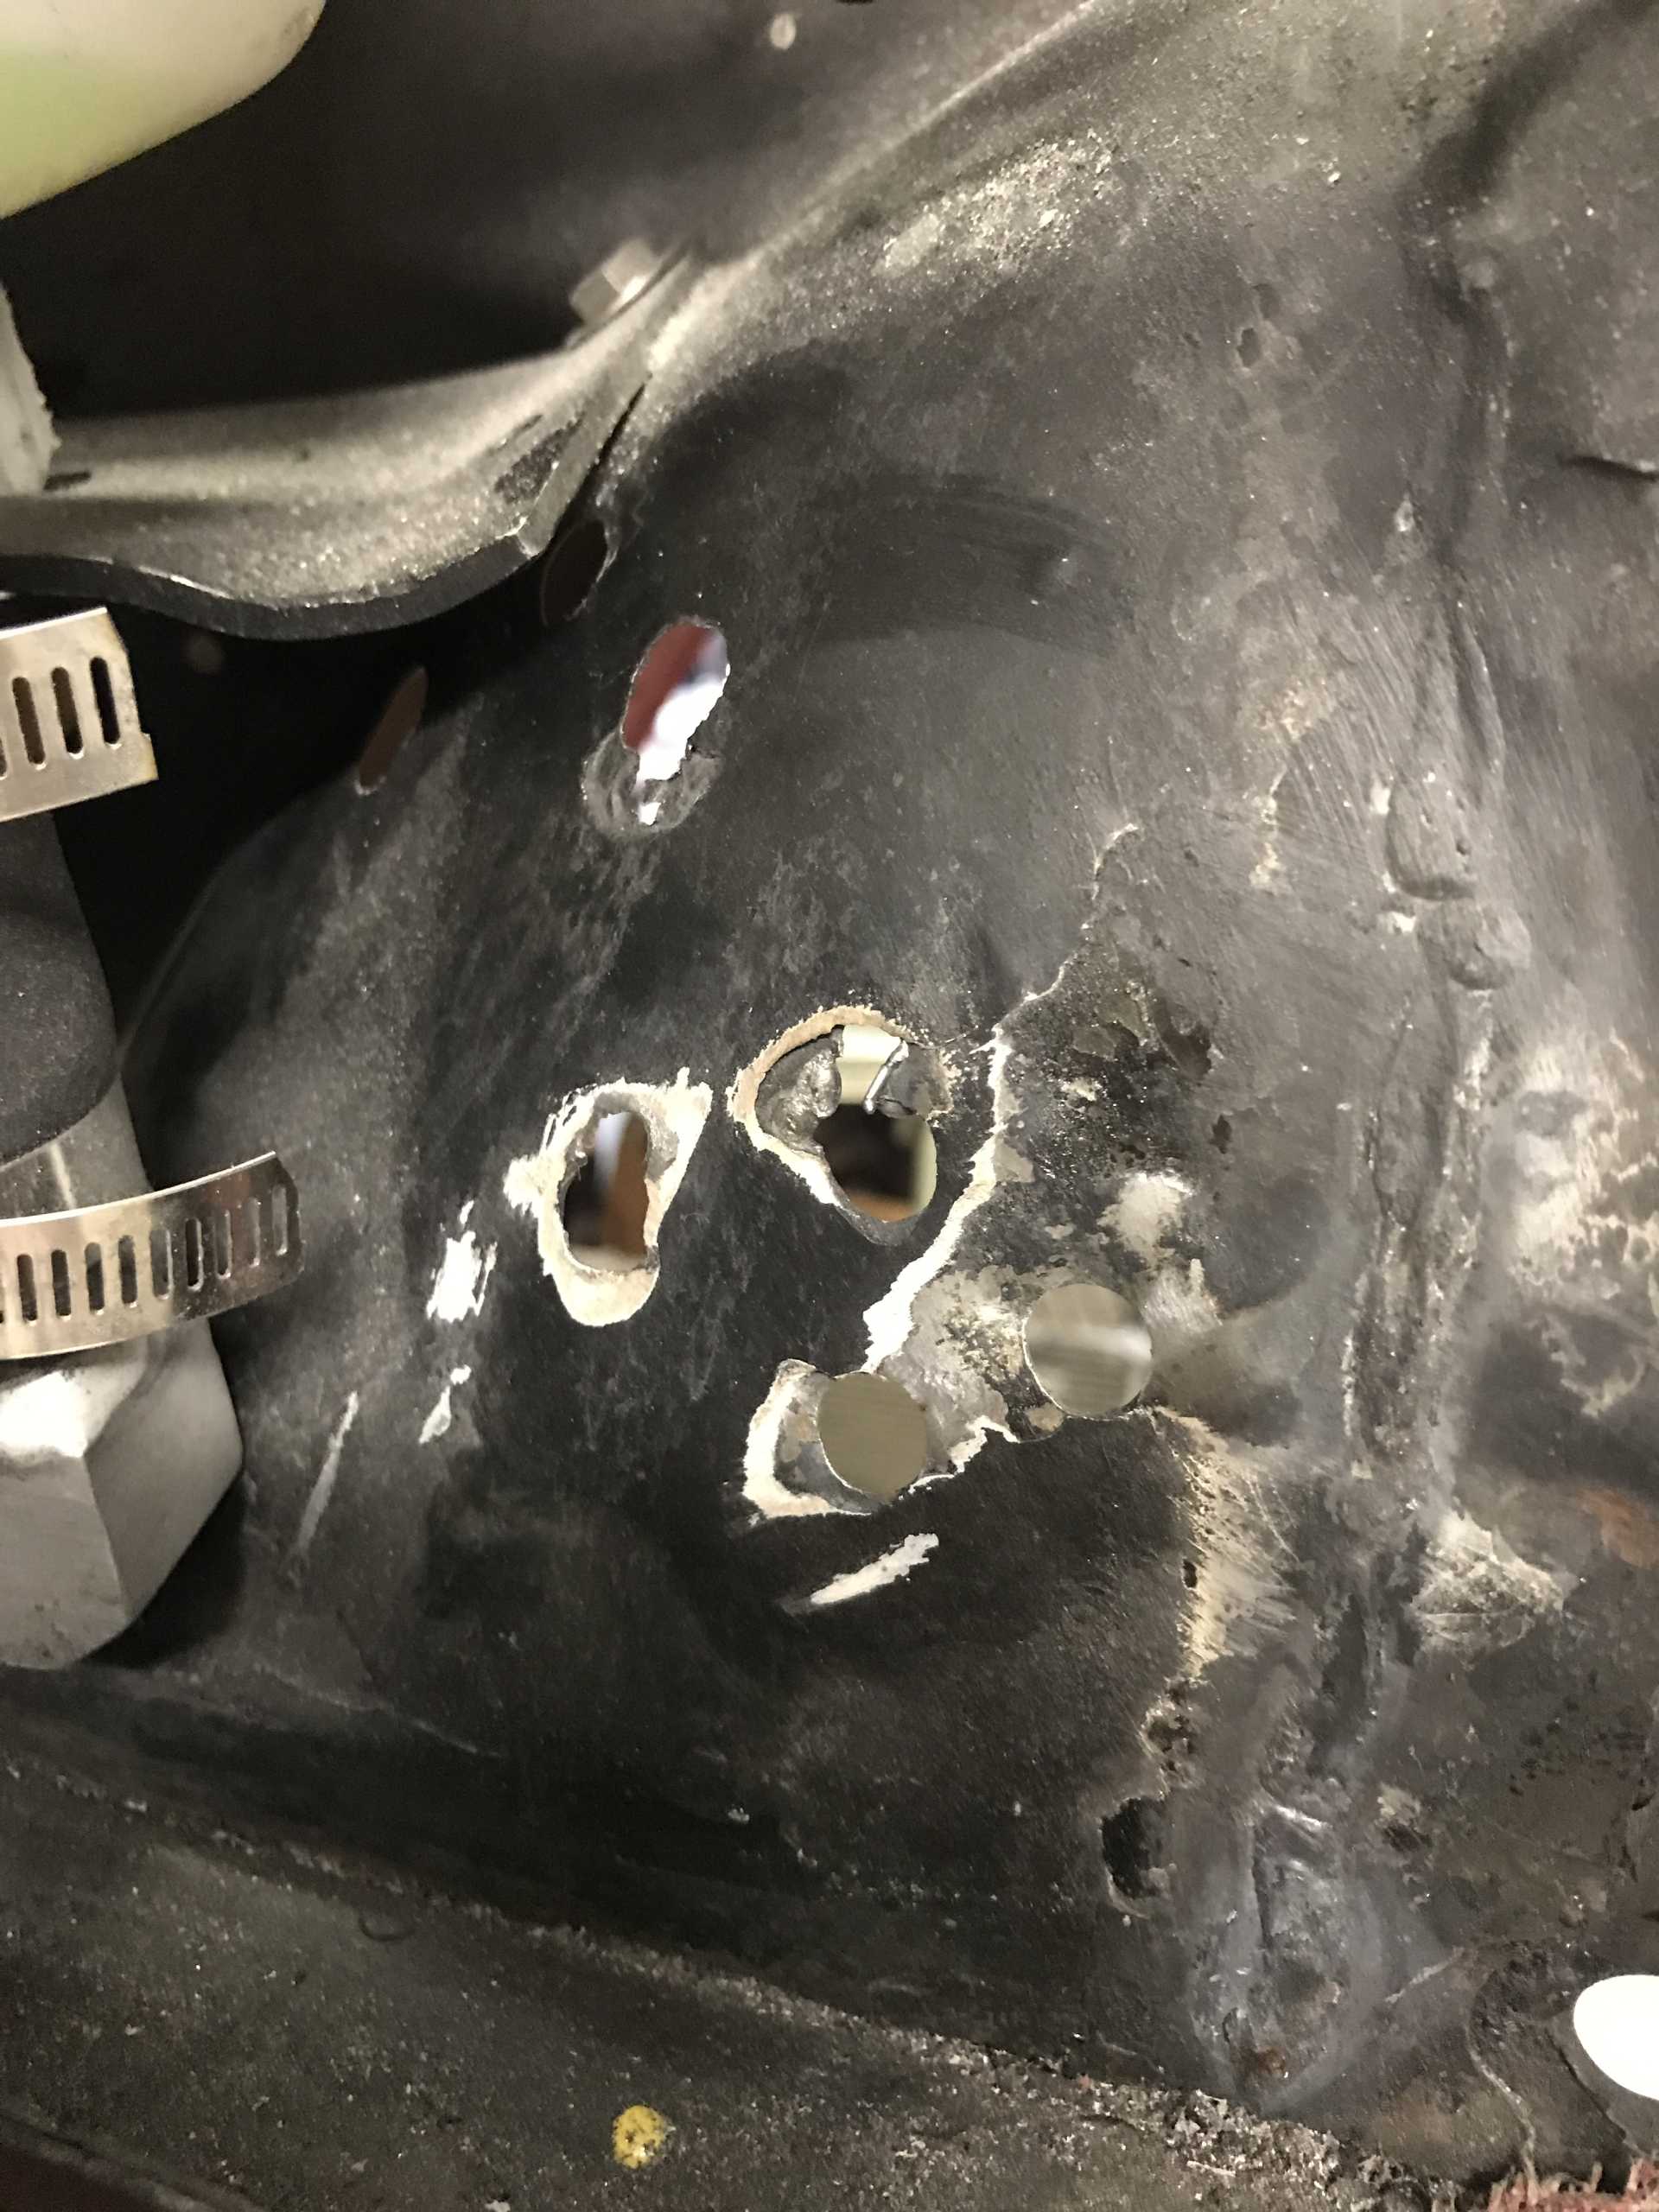
Sanding revealed more bondo! I sanded as much as I felt comfortable to reveal any rust holes and found nothing concerning. I think they were trying to patch these holes here. At one point there was body filler in them I popped out and I never got around to patching them until now. I’m not sure why there were holes here to begin with.
[This message has been edited by copperhens (edited 07-22-2021).]
I ended up redoing the water pump again. It was mostly clean but not shiny. I would end up sanding it all down and getting rid of casting marks, and then painting it nice.
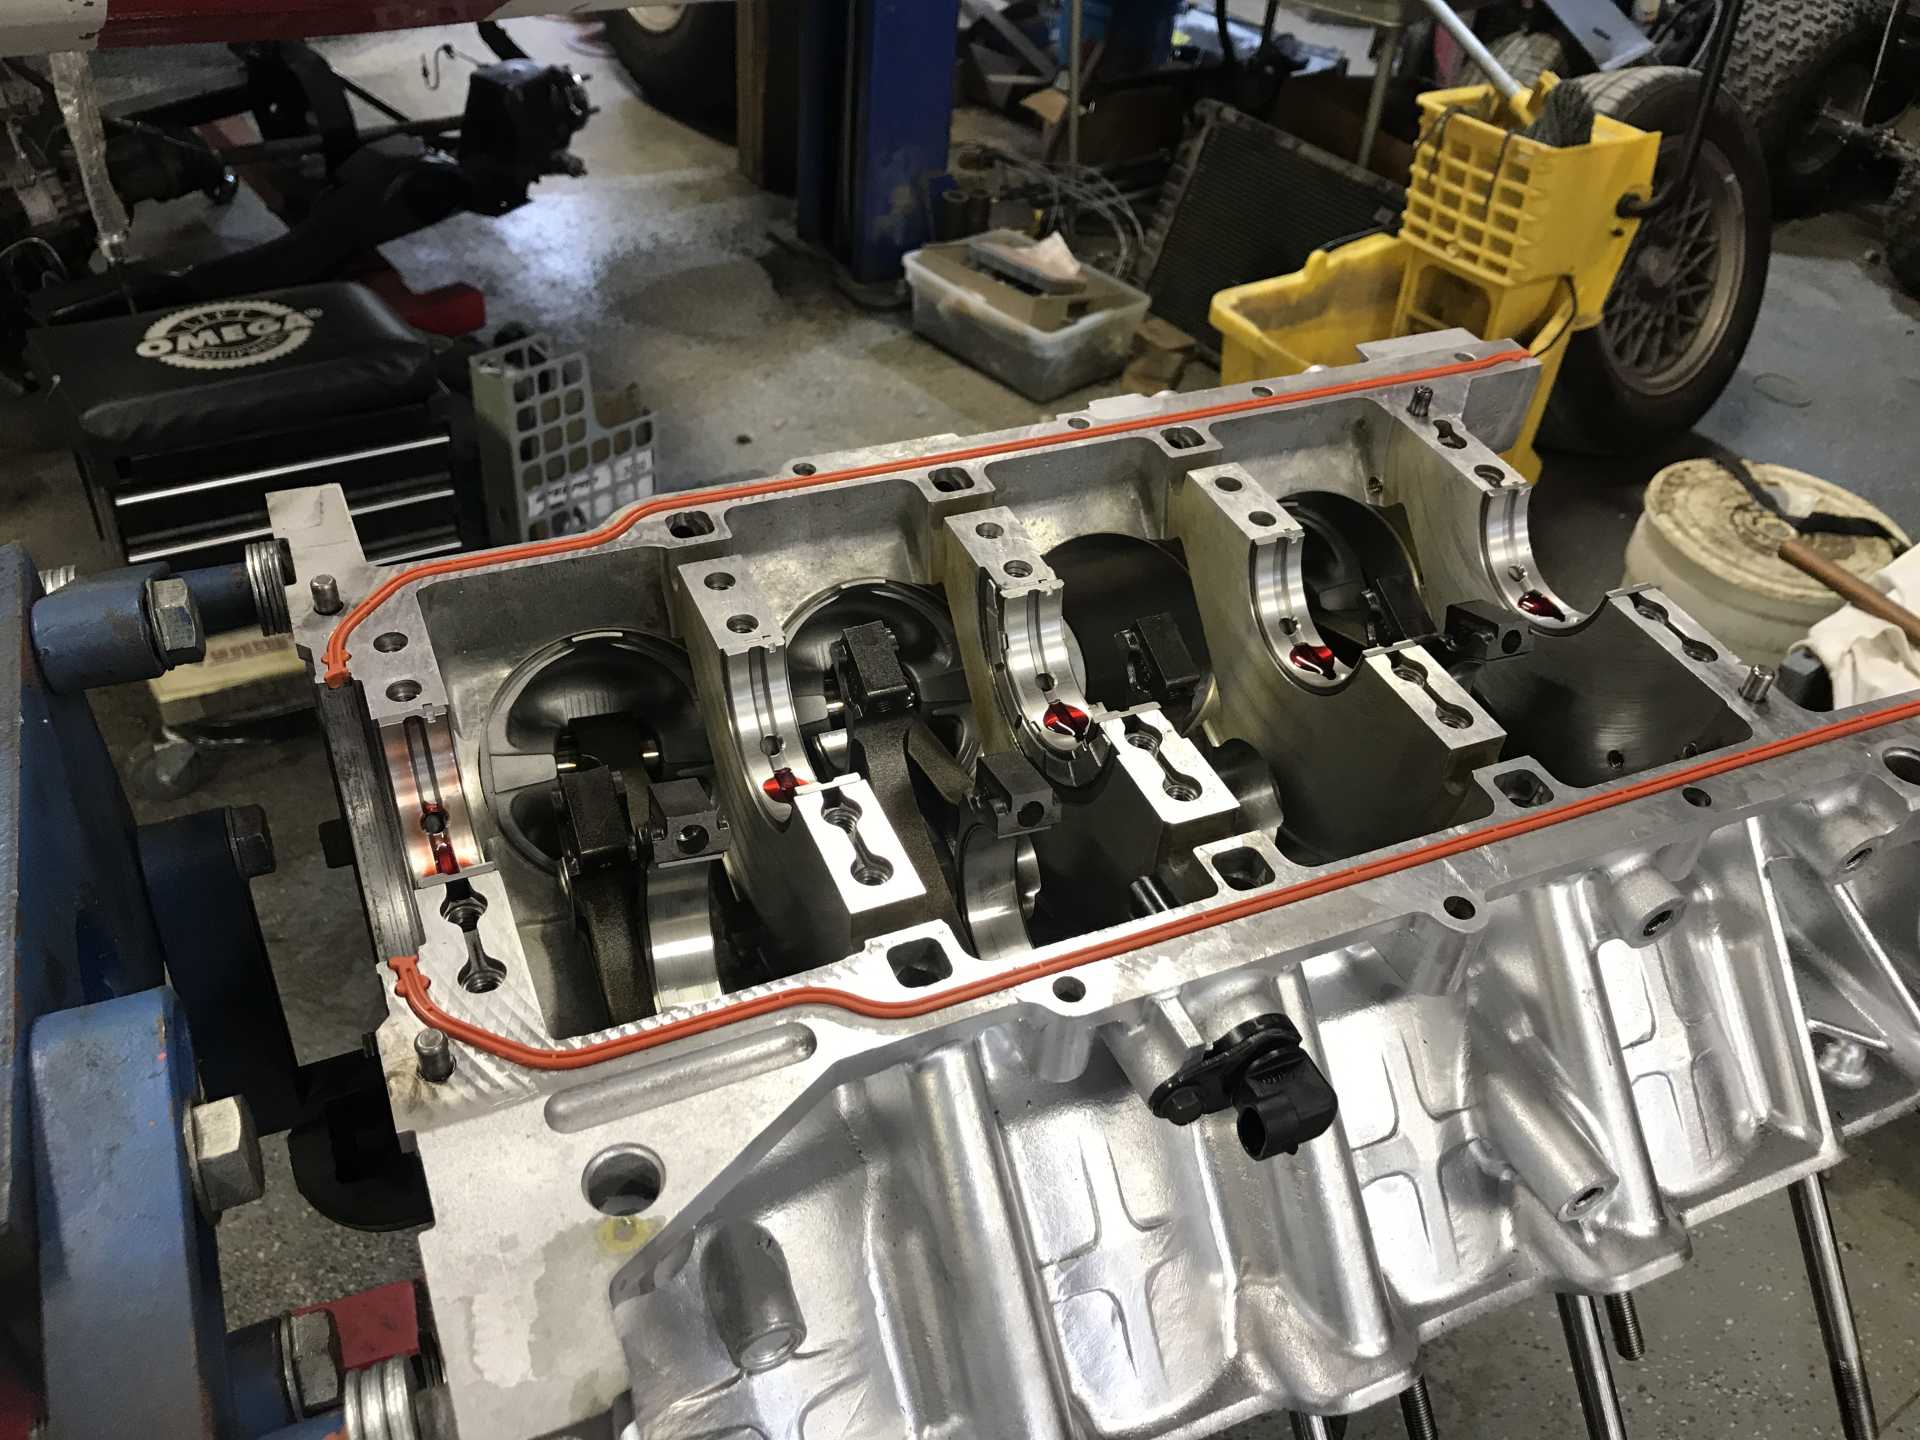
4/11/21 Back to the motor. My new bearings came and Mr. Eric and I installed all new main bearings. Even though the thrust bearing was the only bad one, might as well.
Got the bottom end together more.
And now all the way together! It helped a lot of this stuff was clean from the first time around. Of course I had to flush everything again to get metal flakes out.
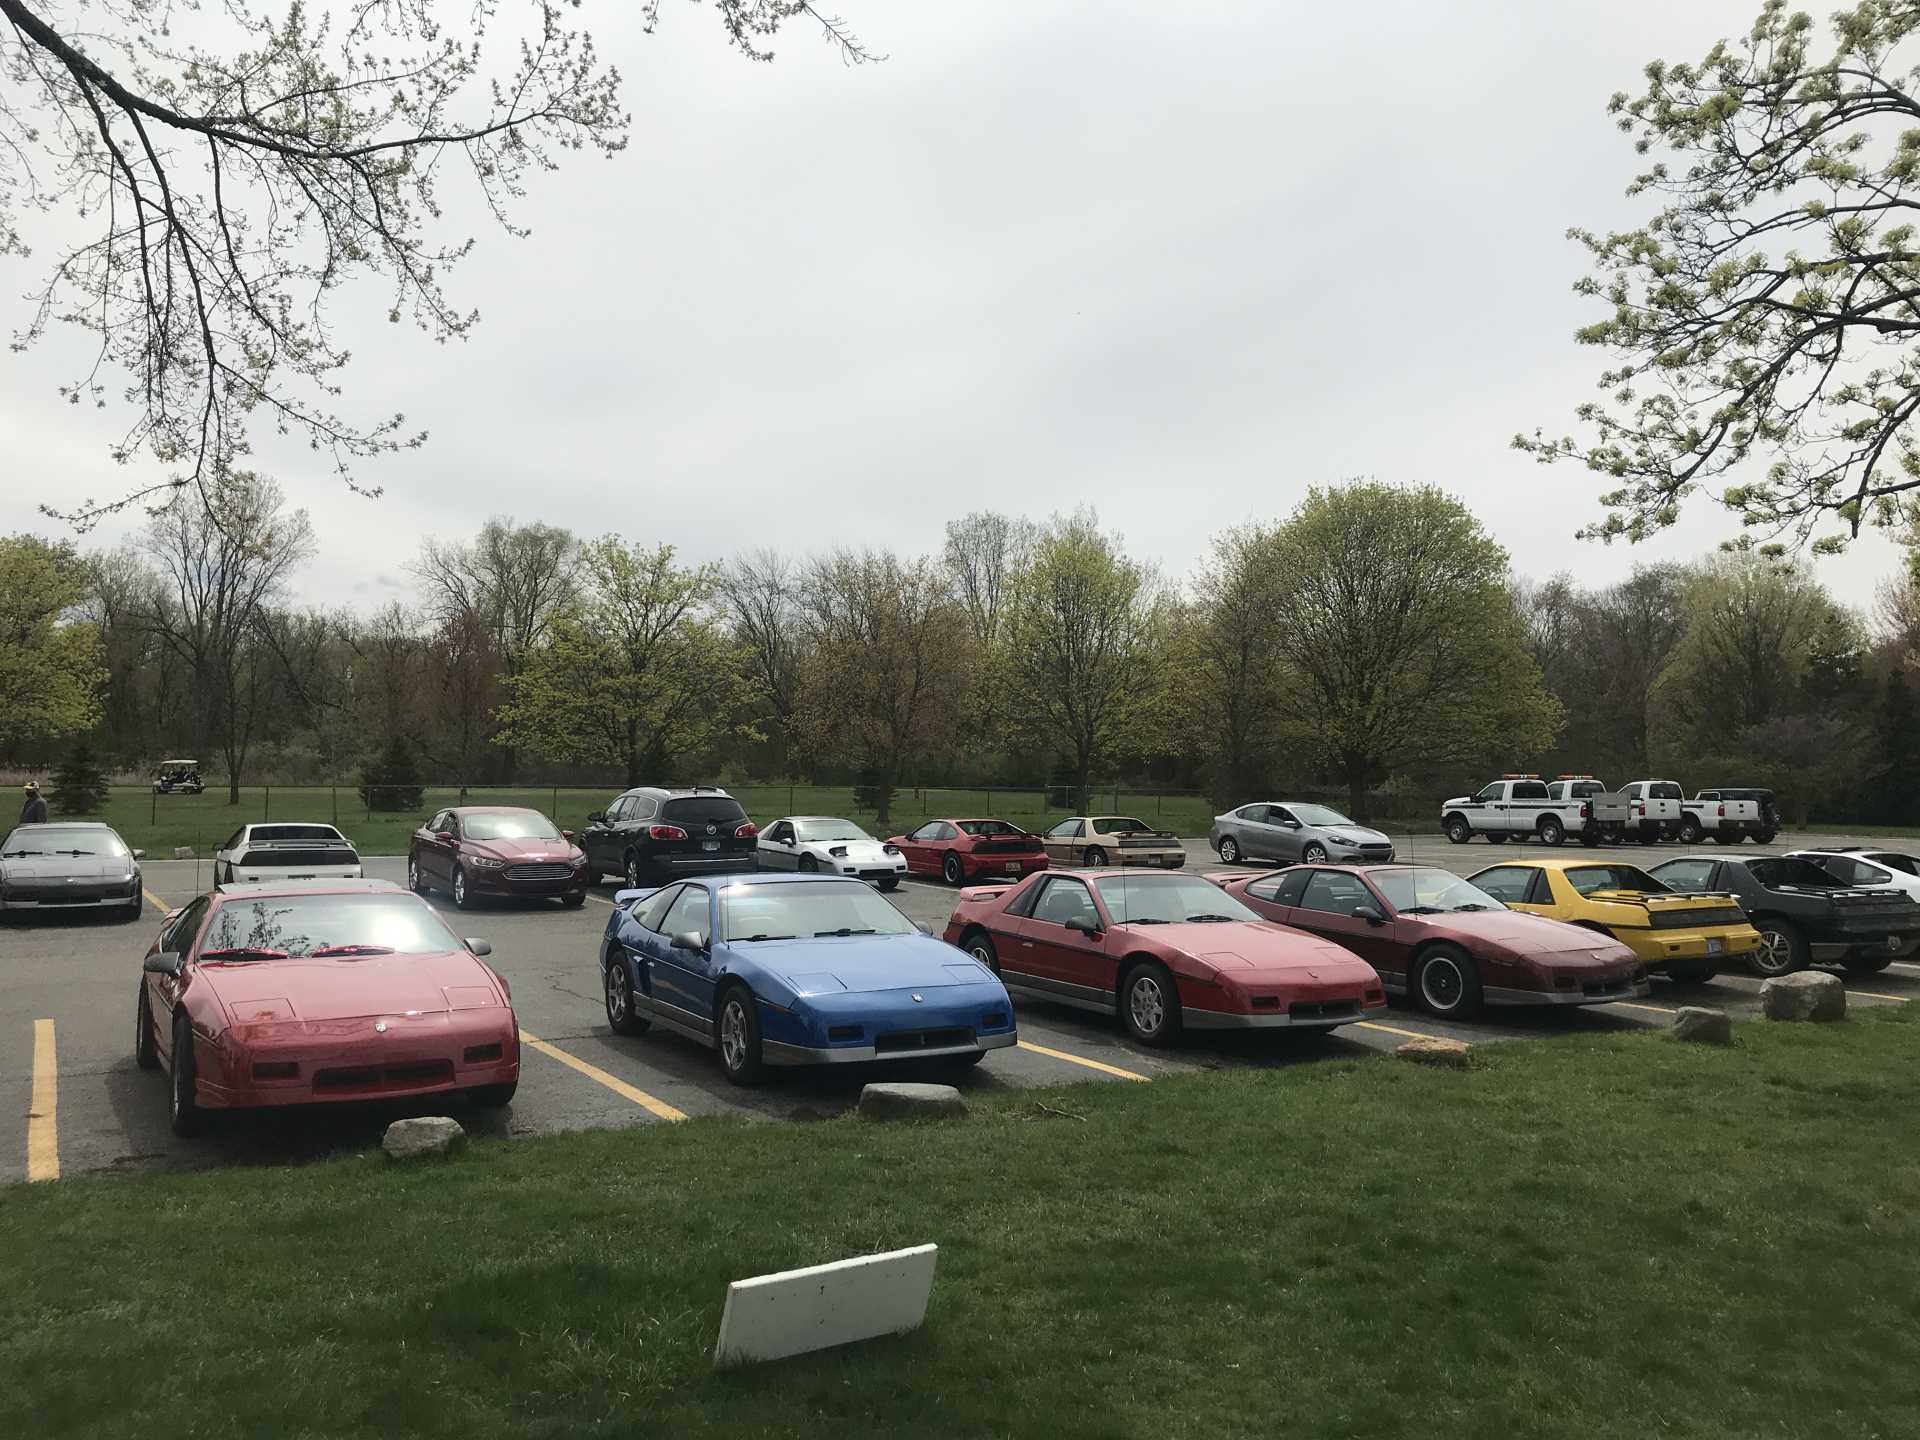
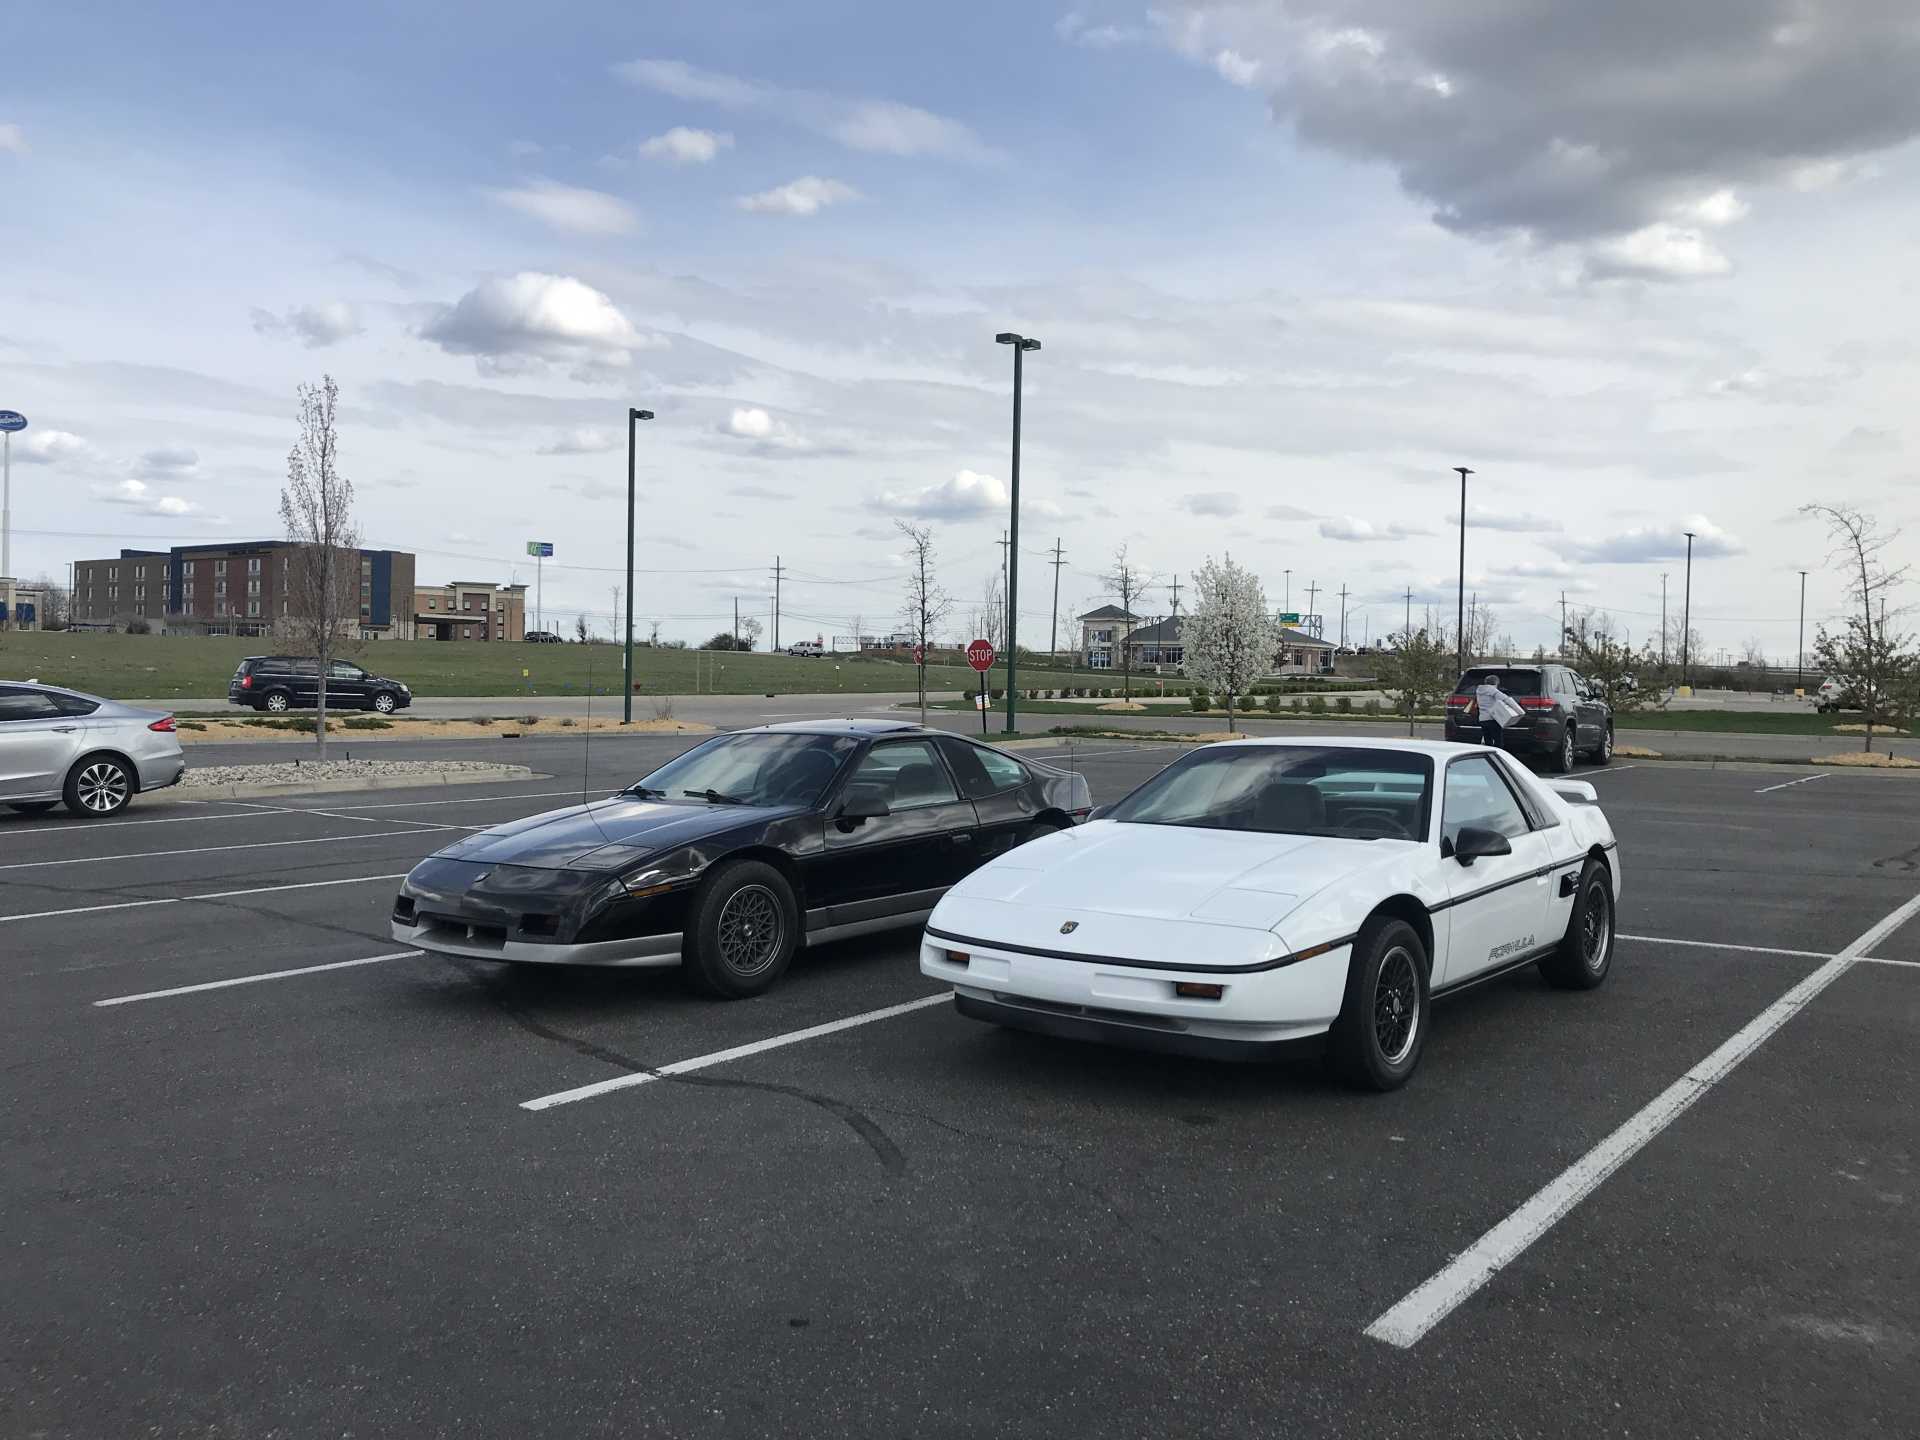
4/18/21 A day for a break. My boyfriend, Paul, and I went to the MI Fiero Club general meeting to take a break from all the work we’ve been doing on the Northstar.
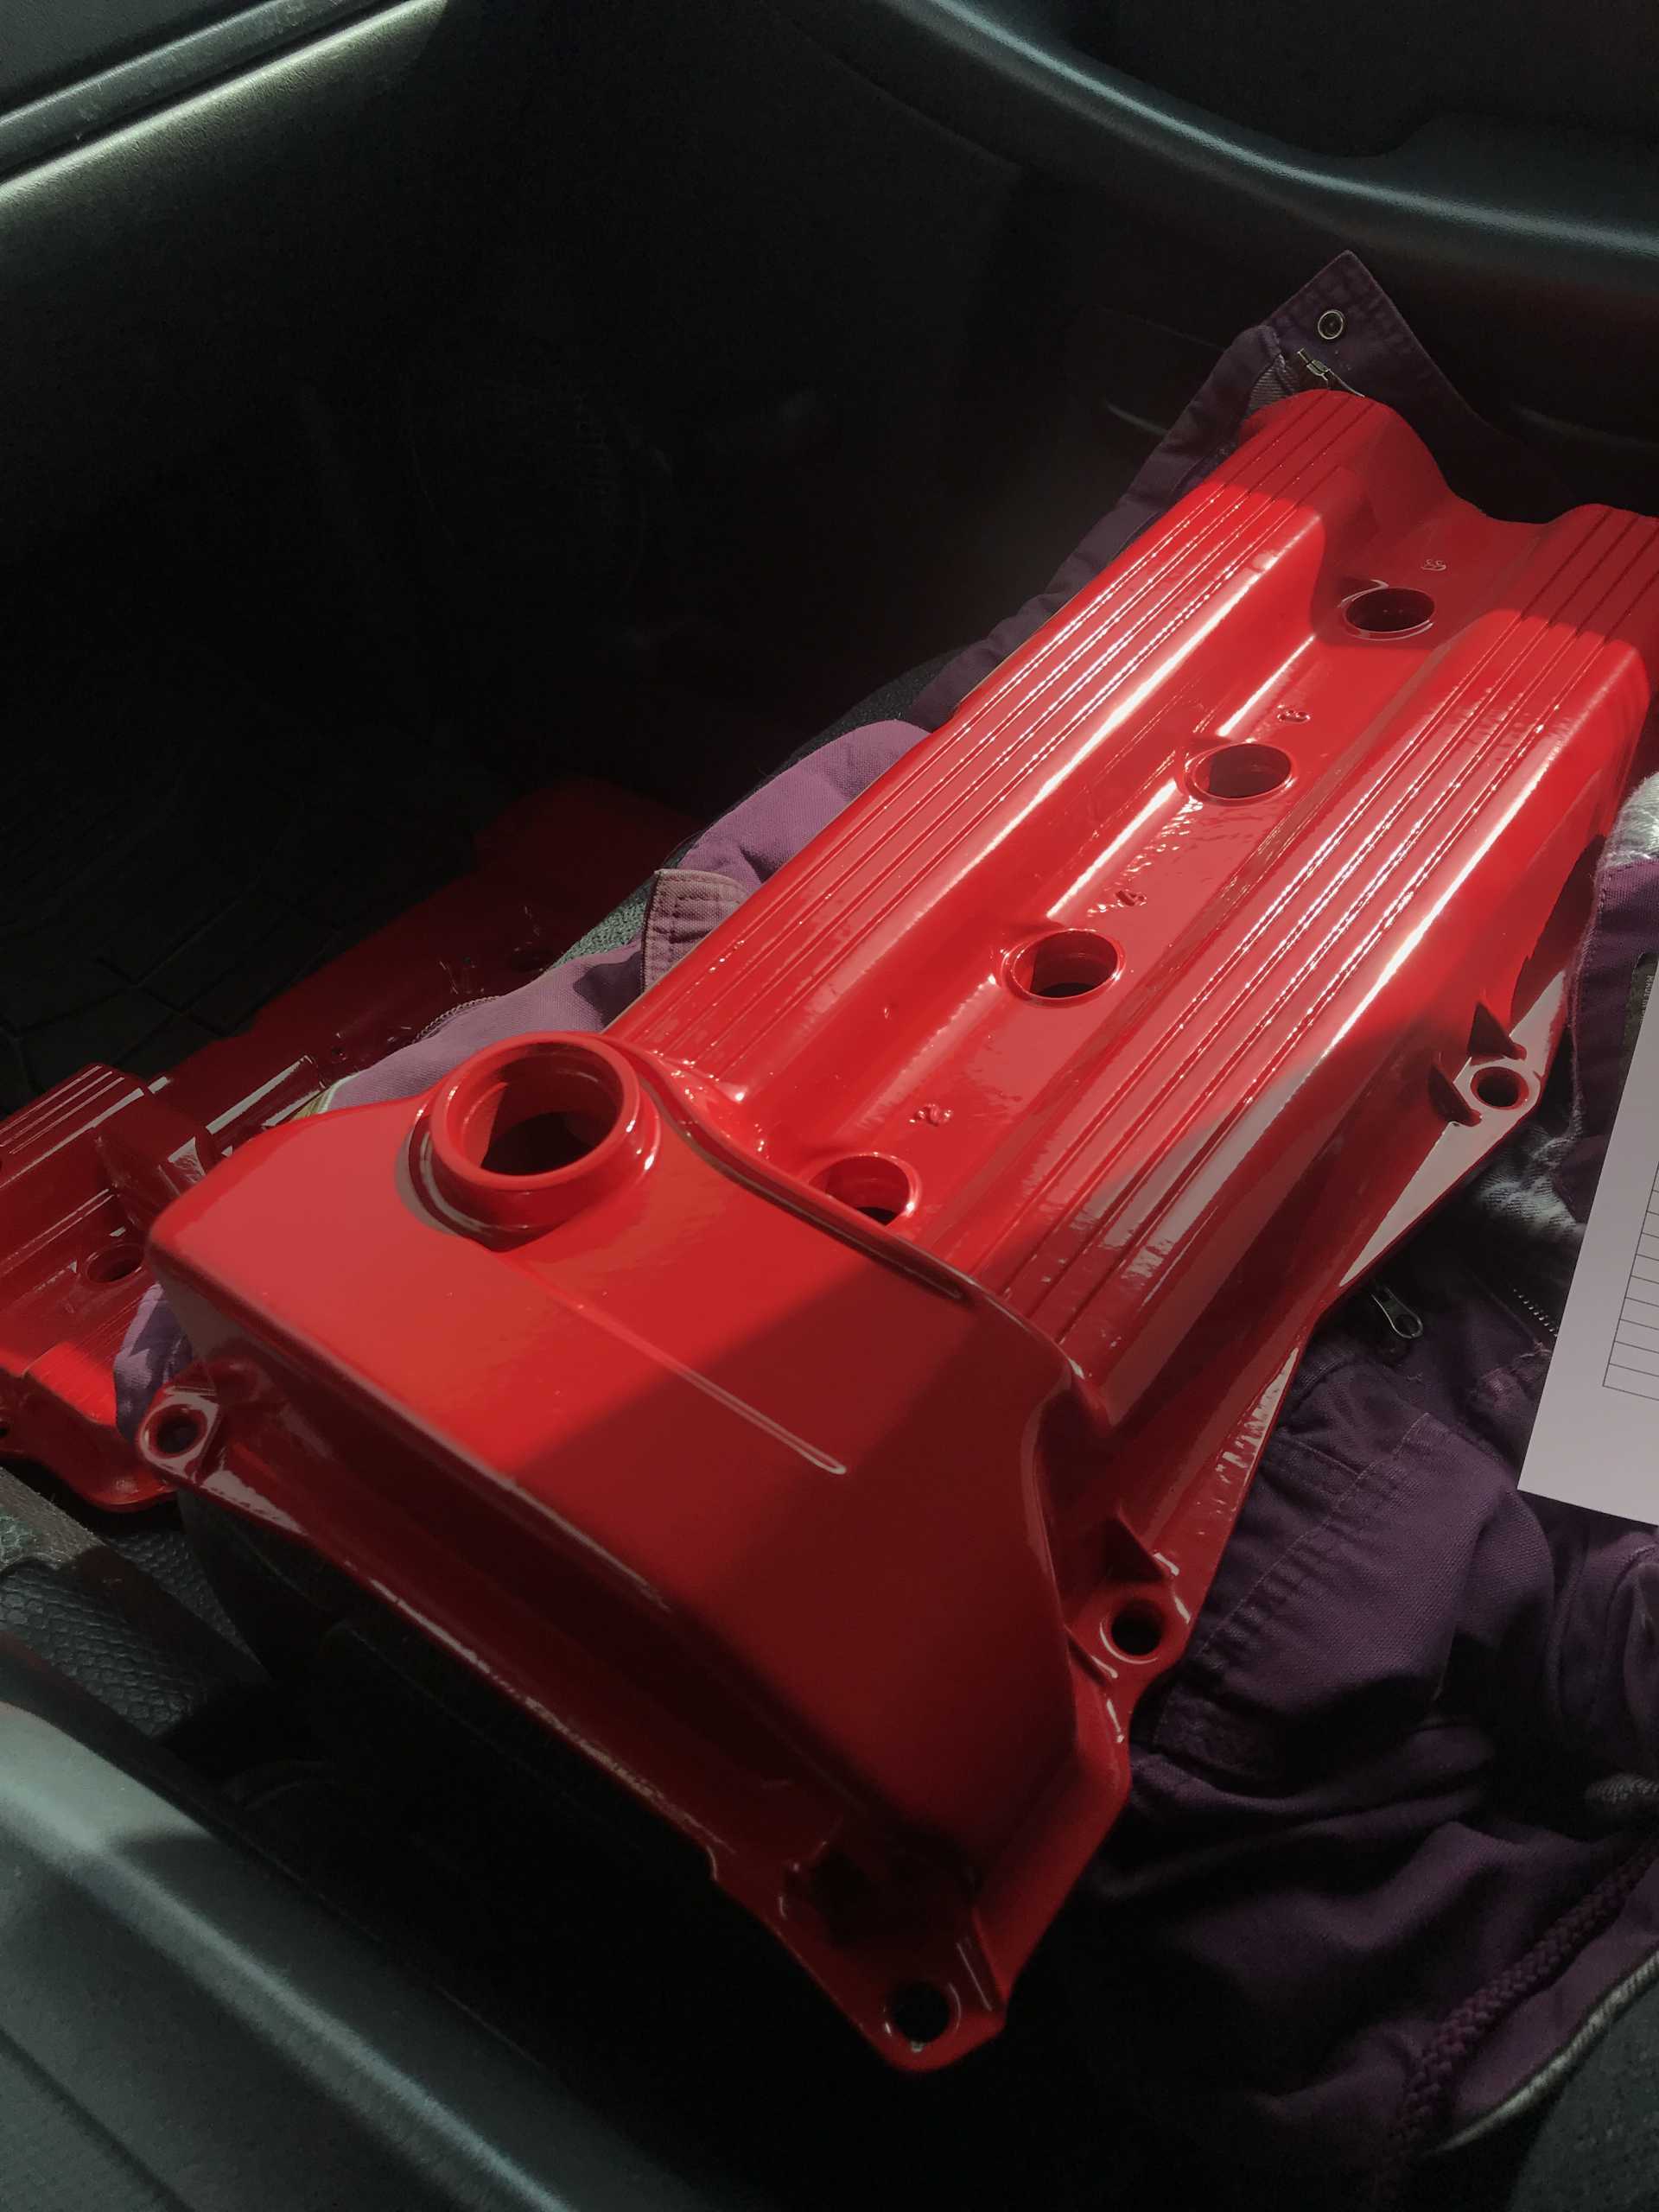
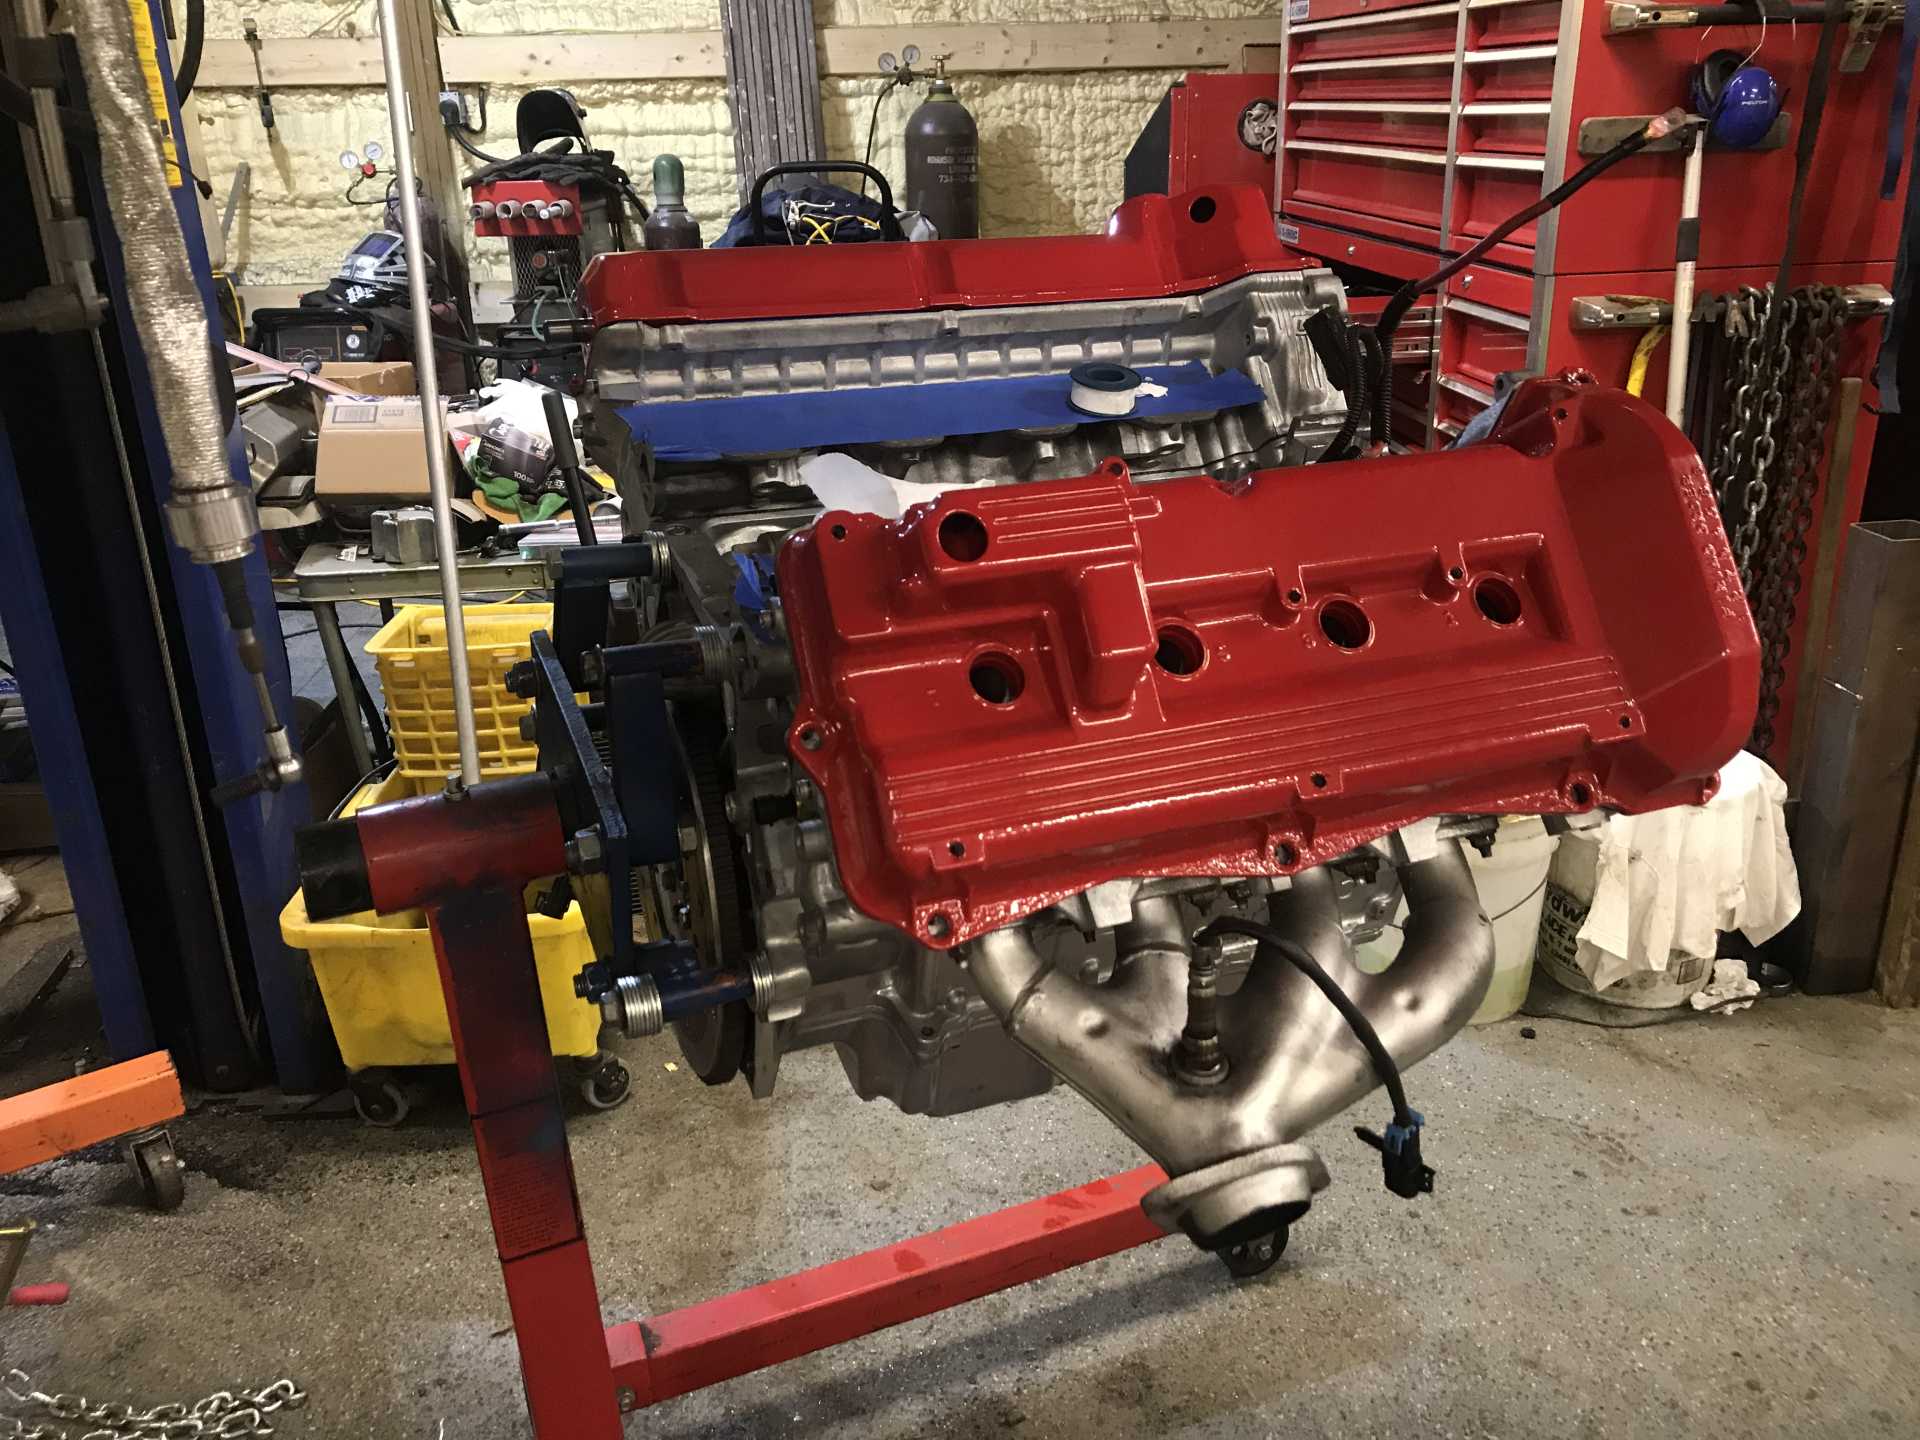
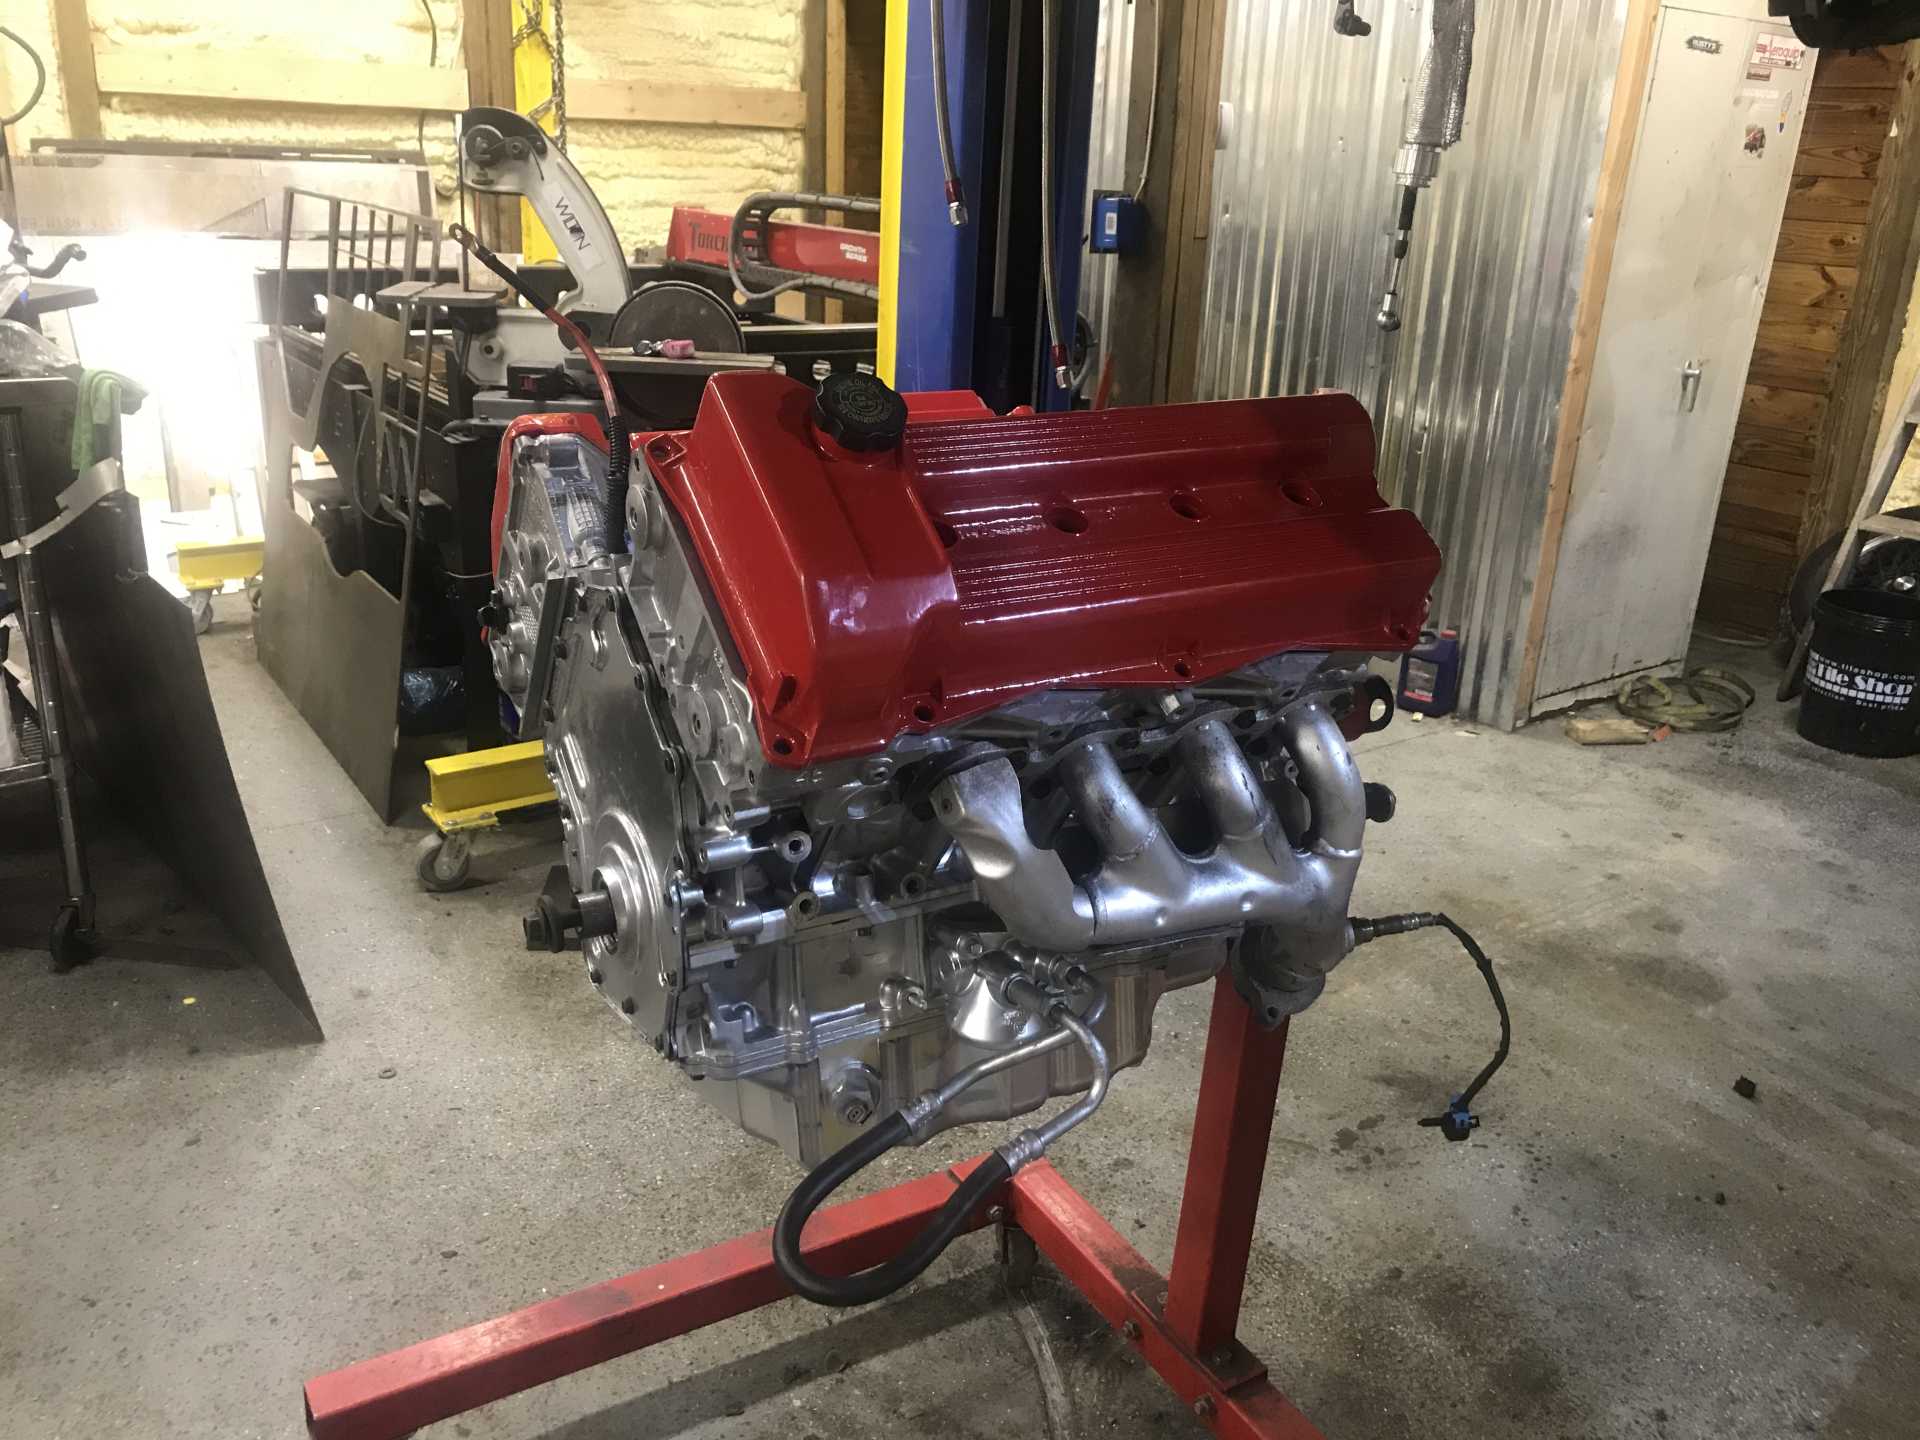
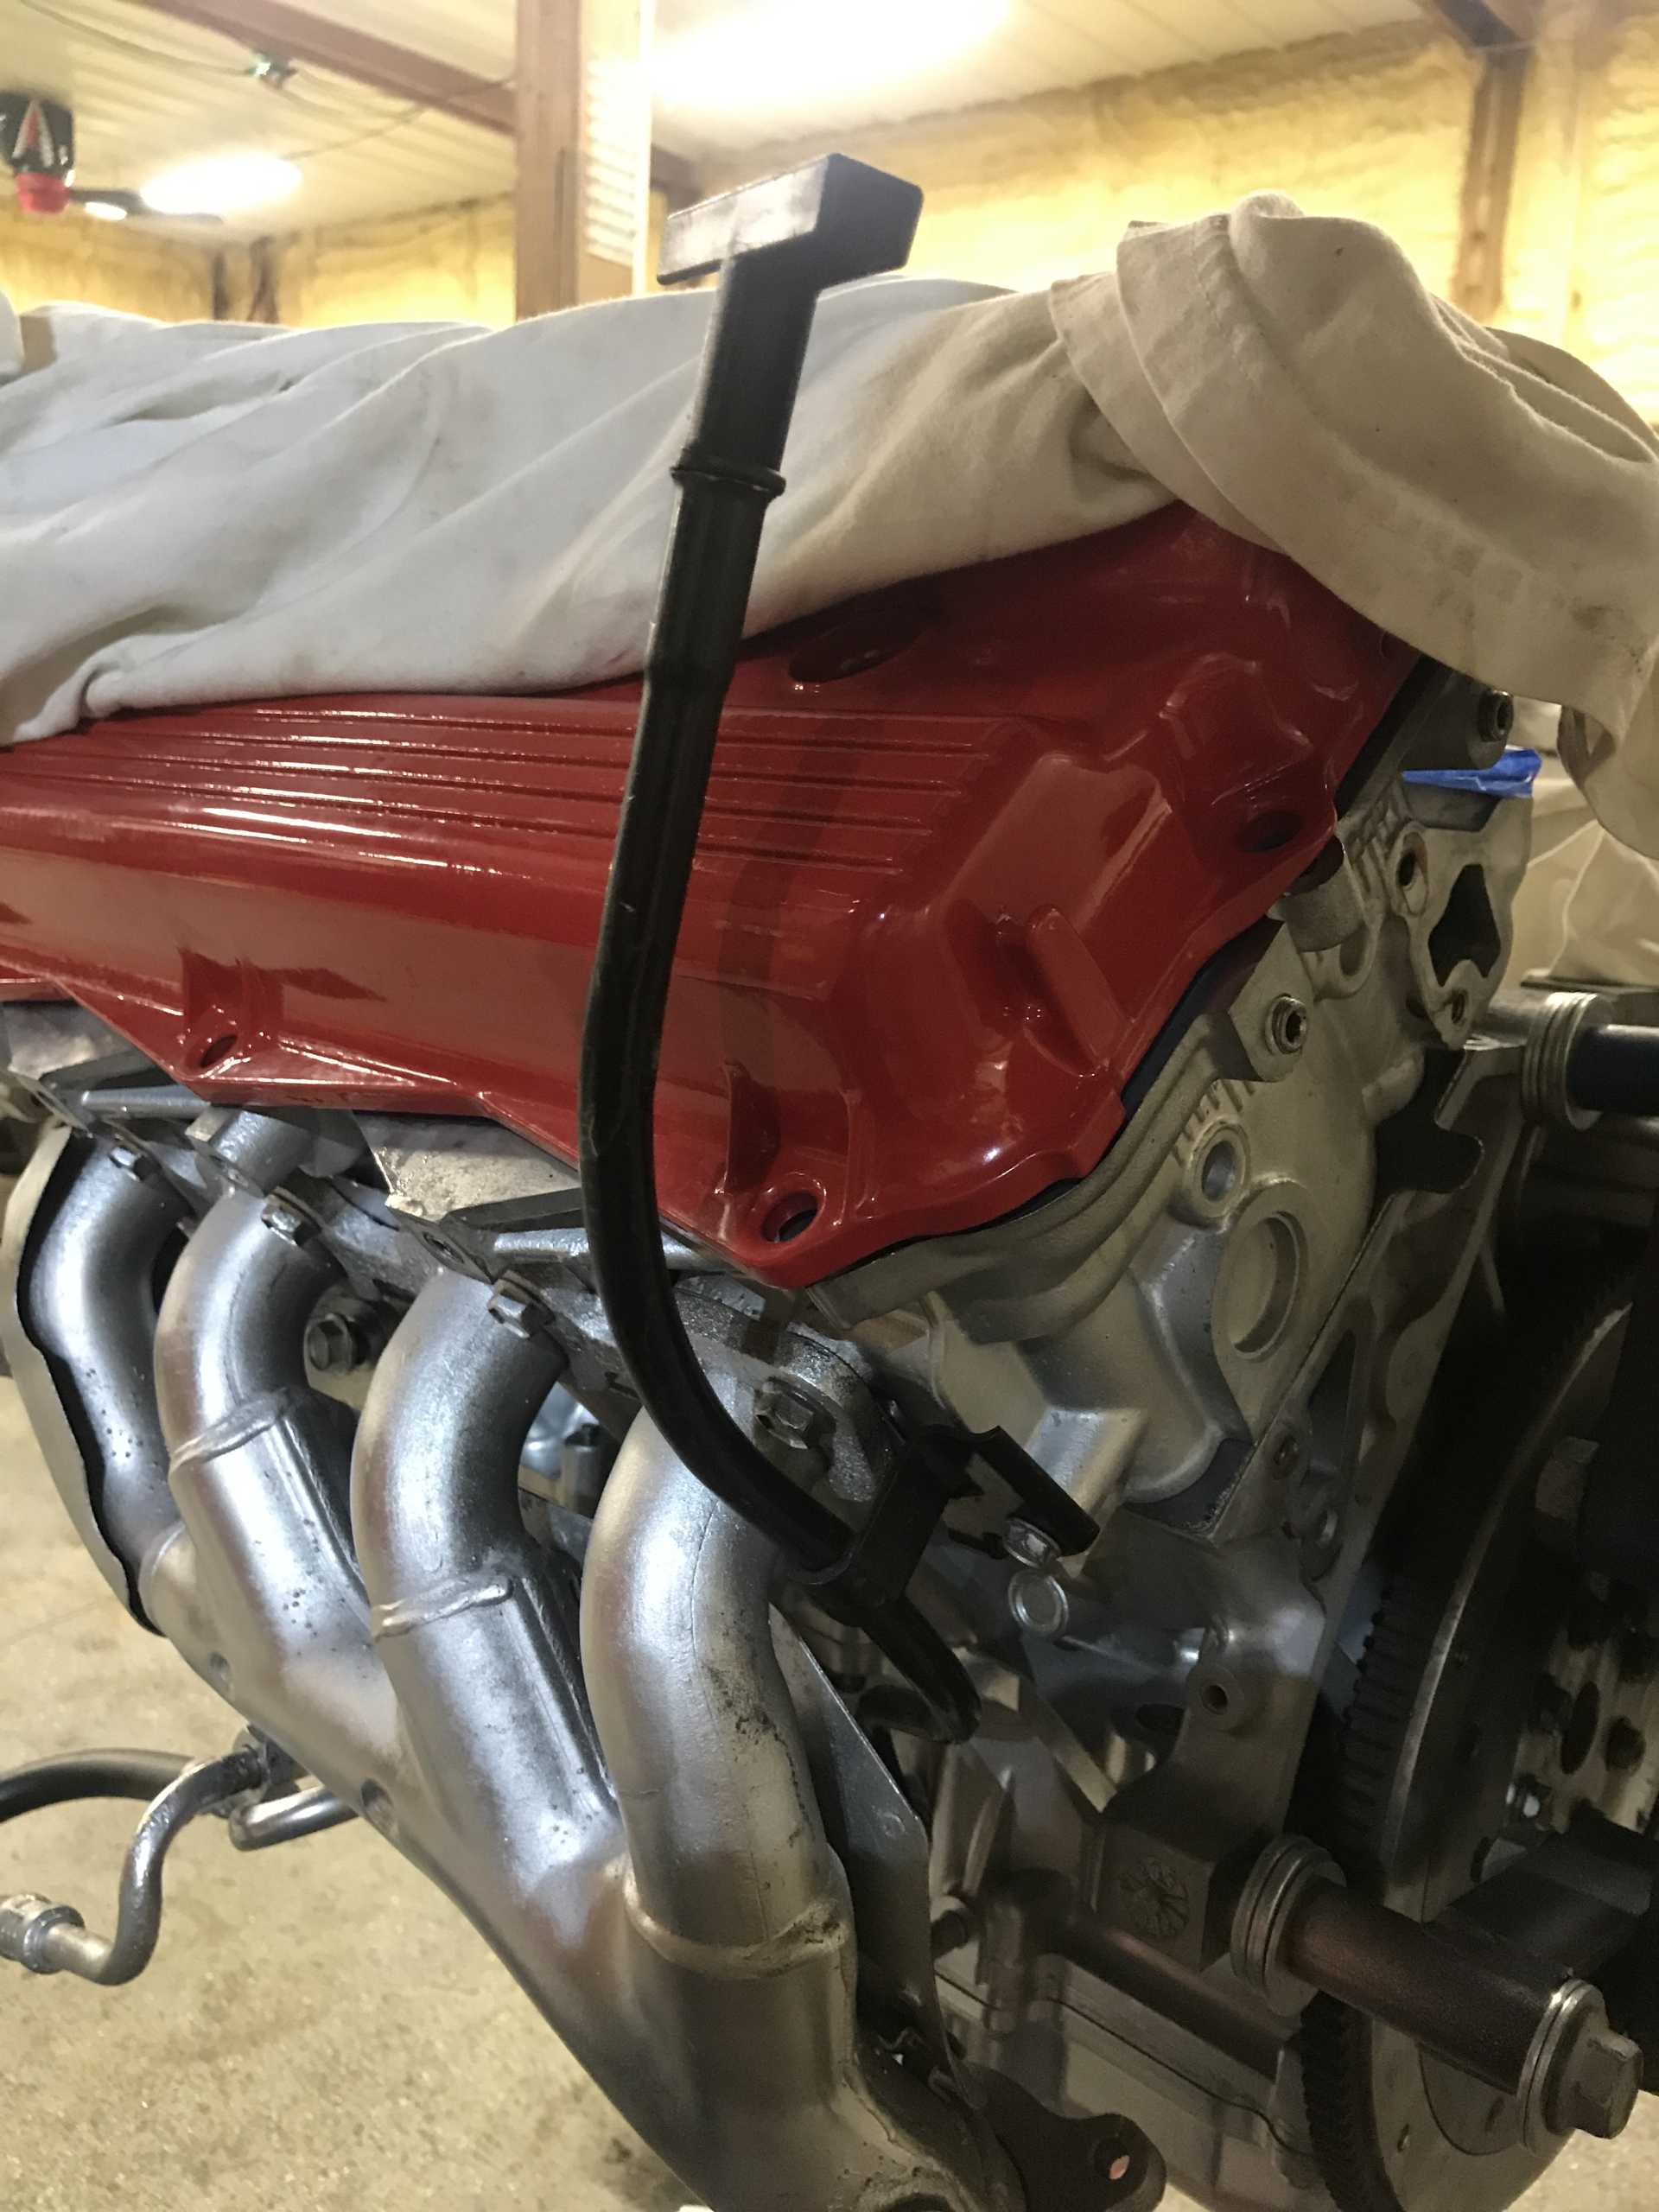
4/23/21 Got my valve covers powdercoated. Before I painted them with expensive Eastwood high temp paint, but with everything that went on with the engine, they got chipped on some spots.
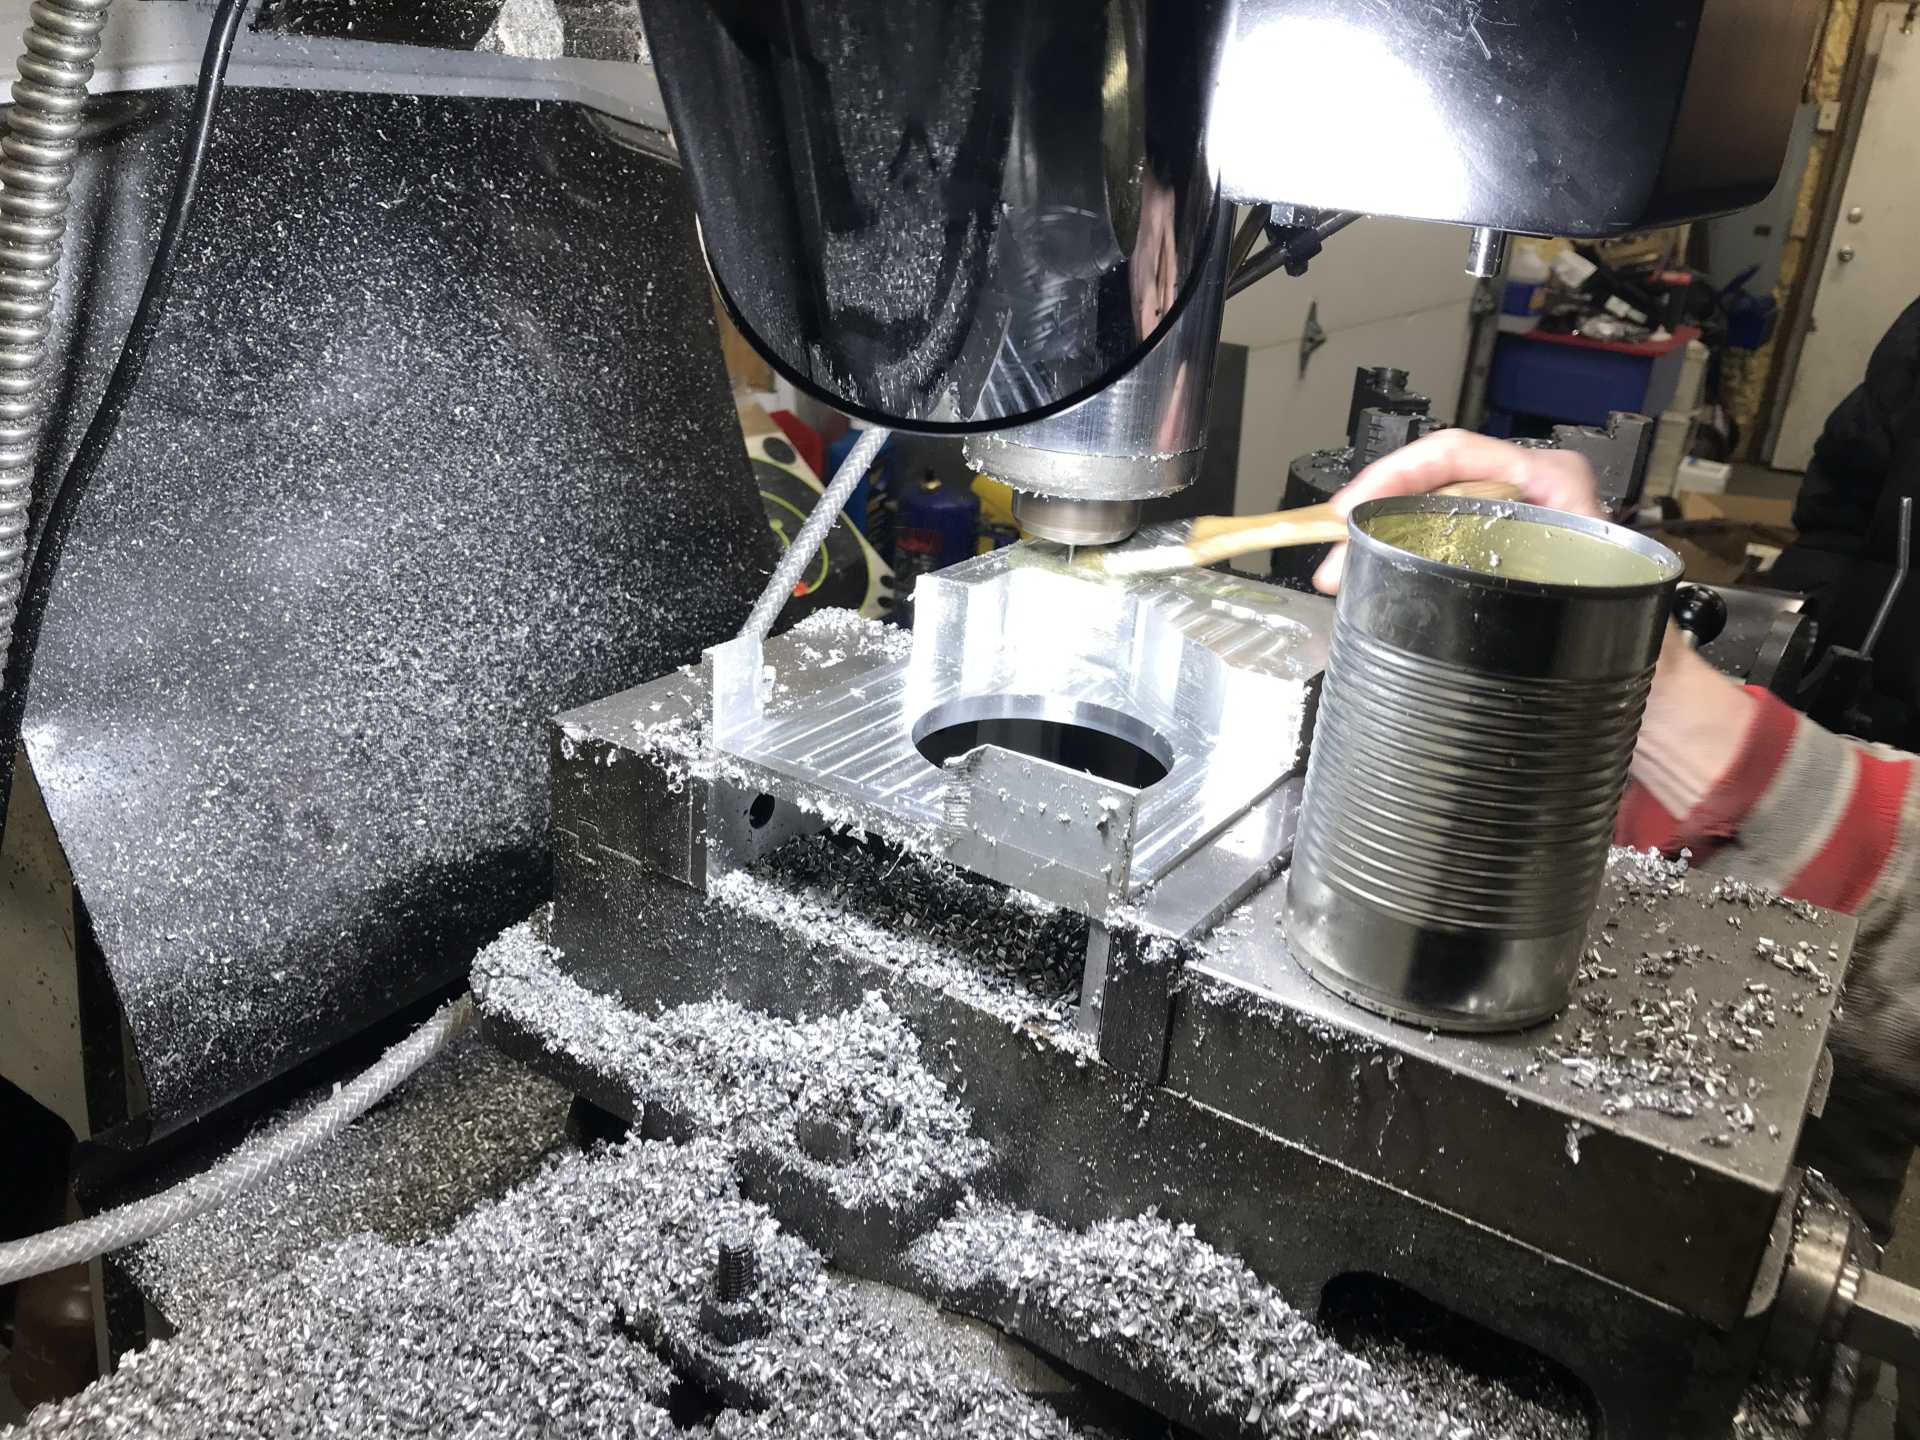
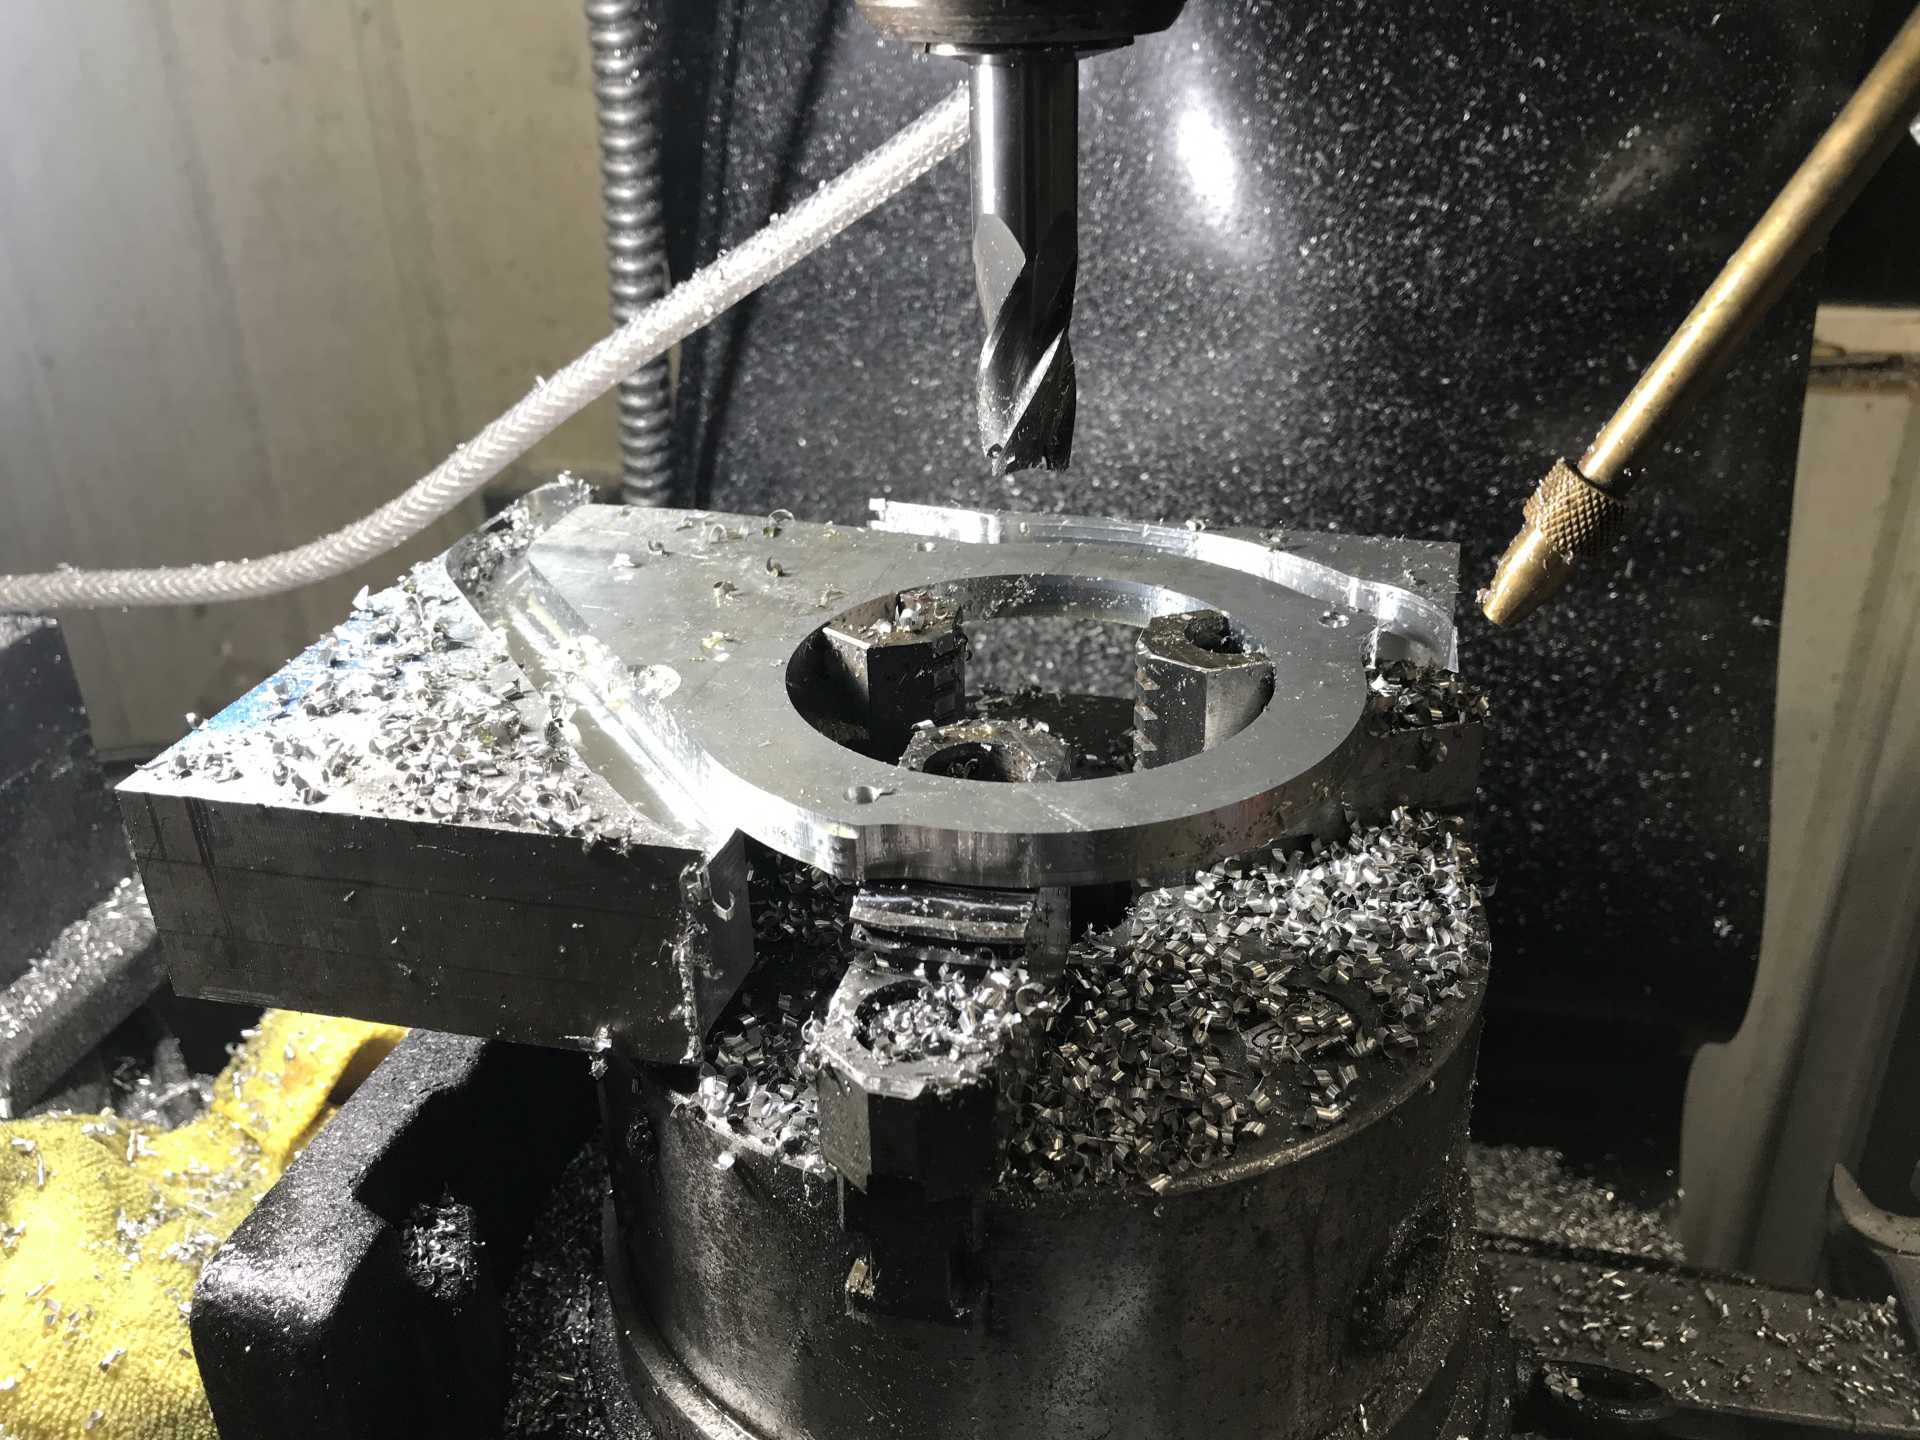
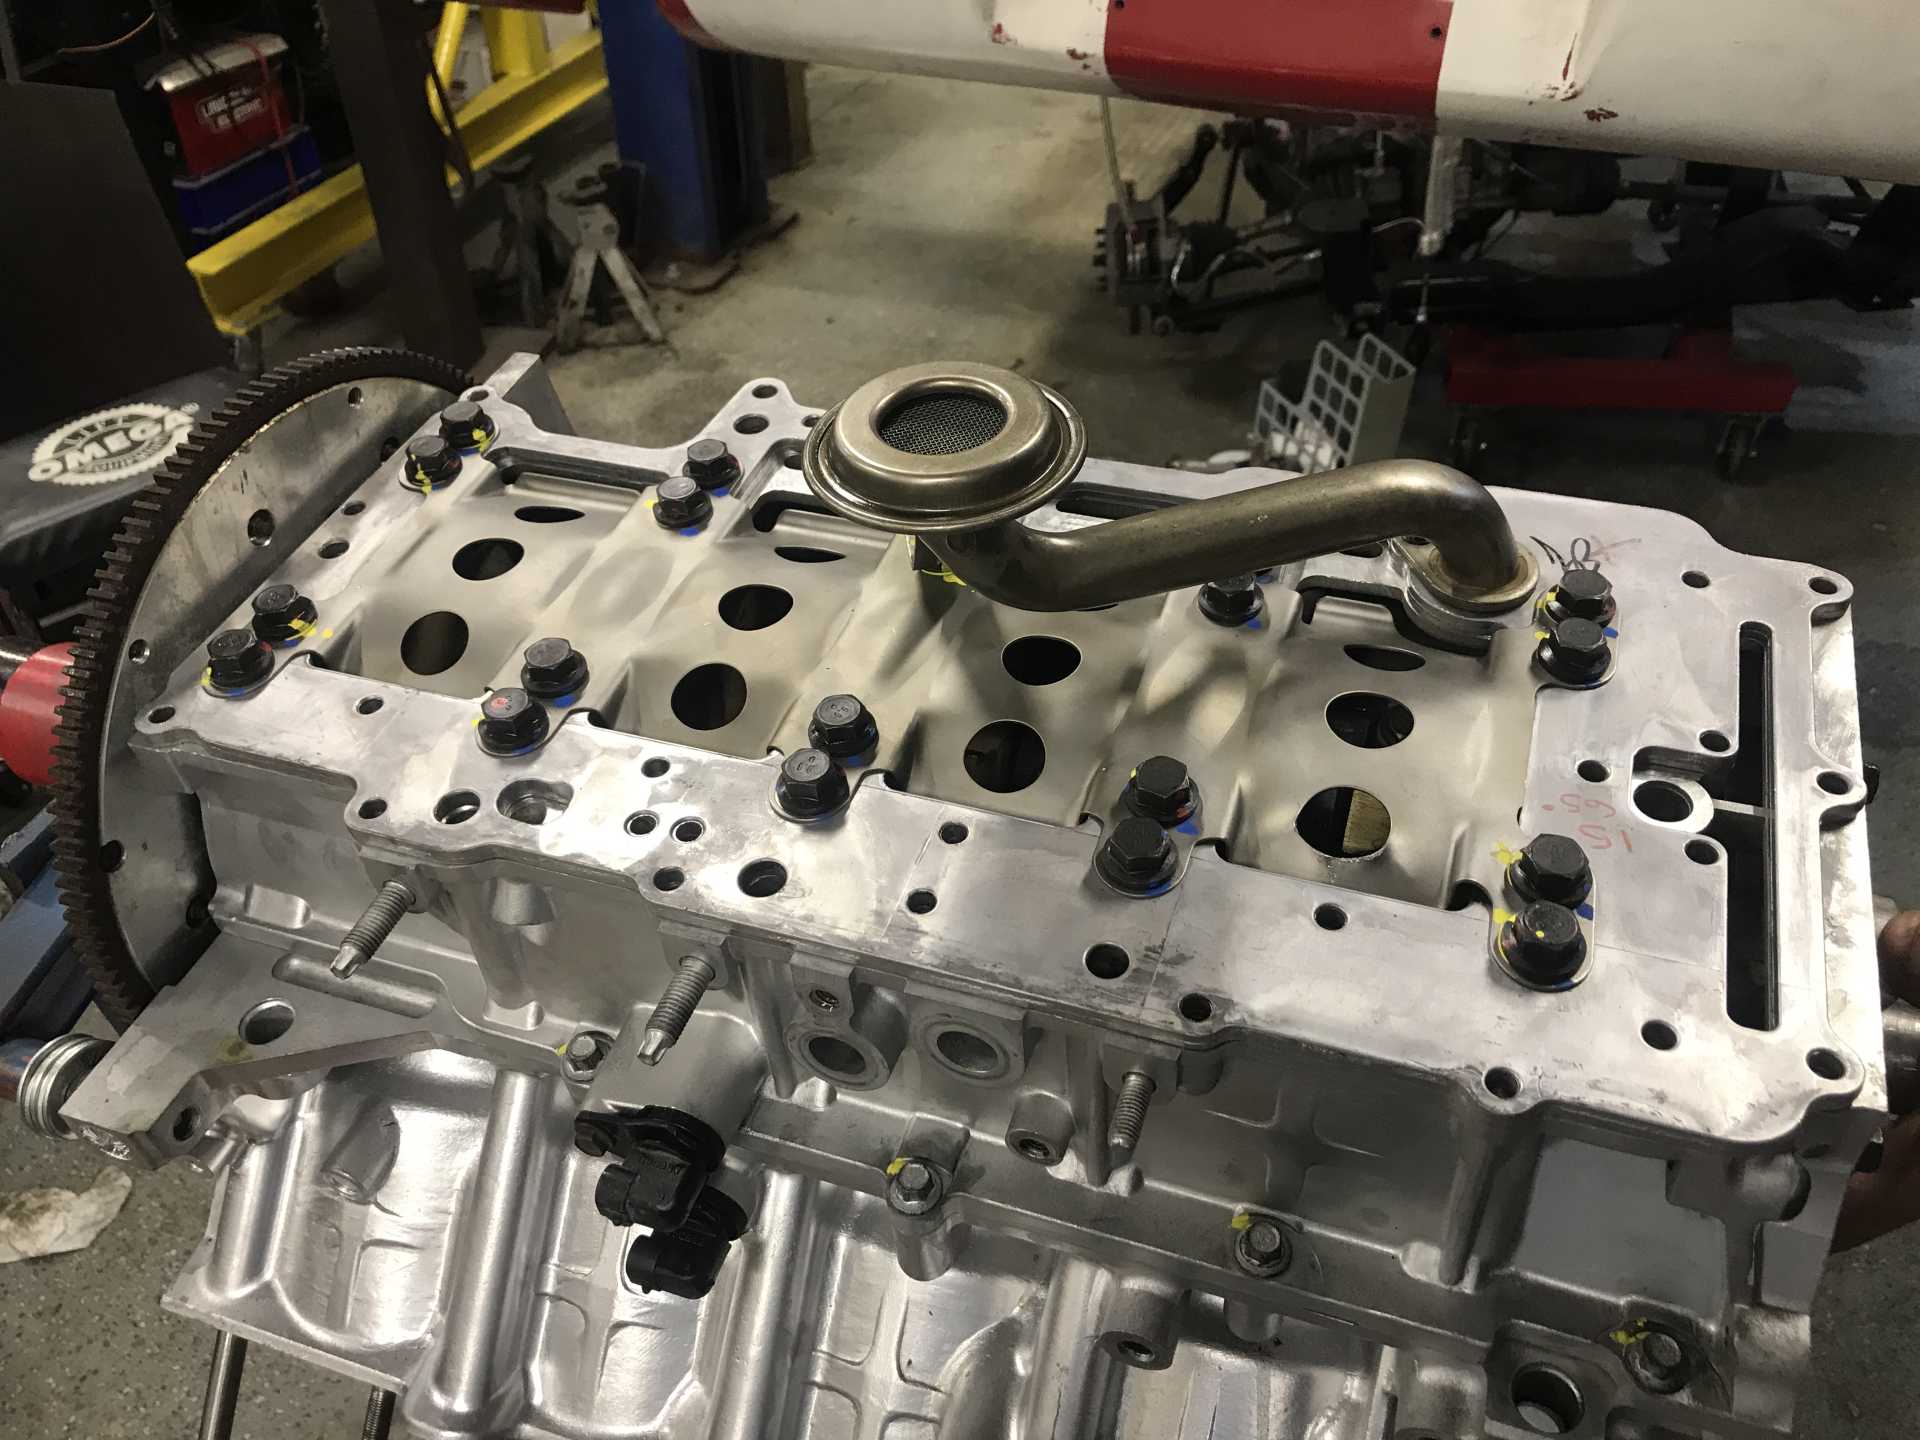
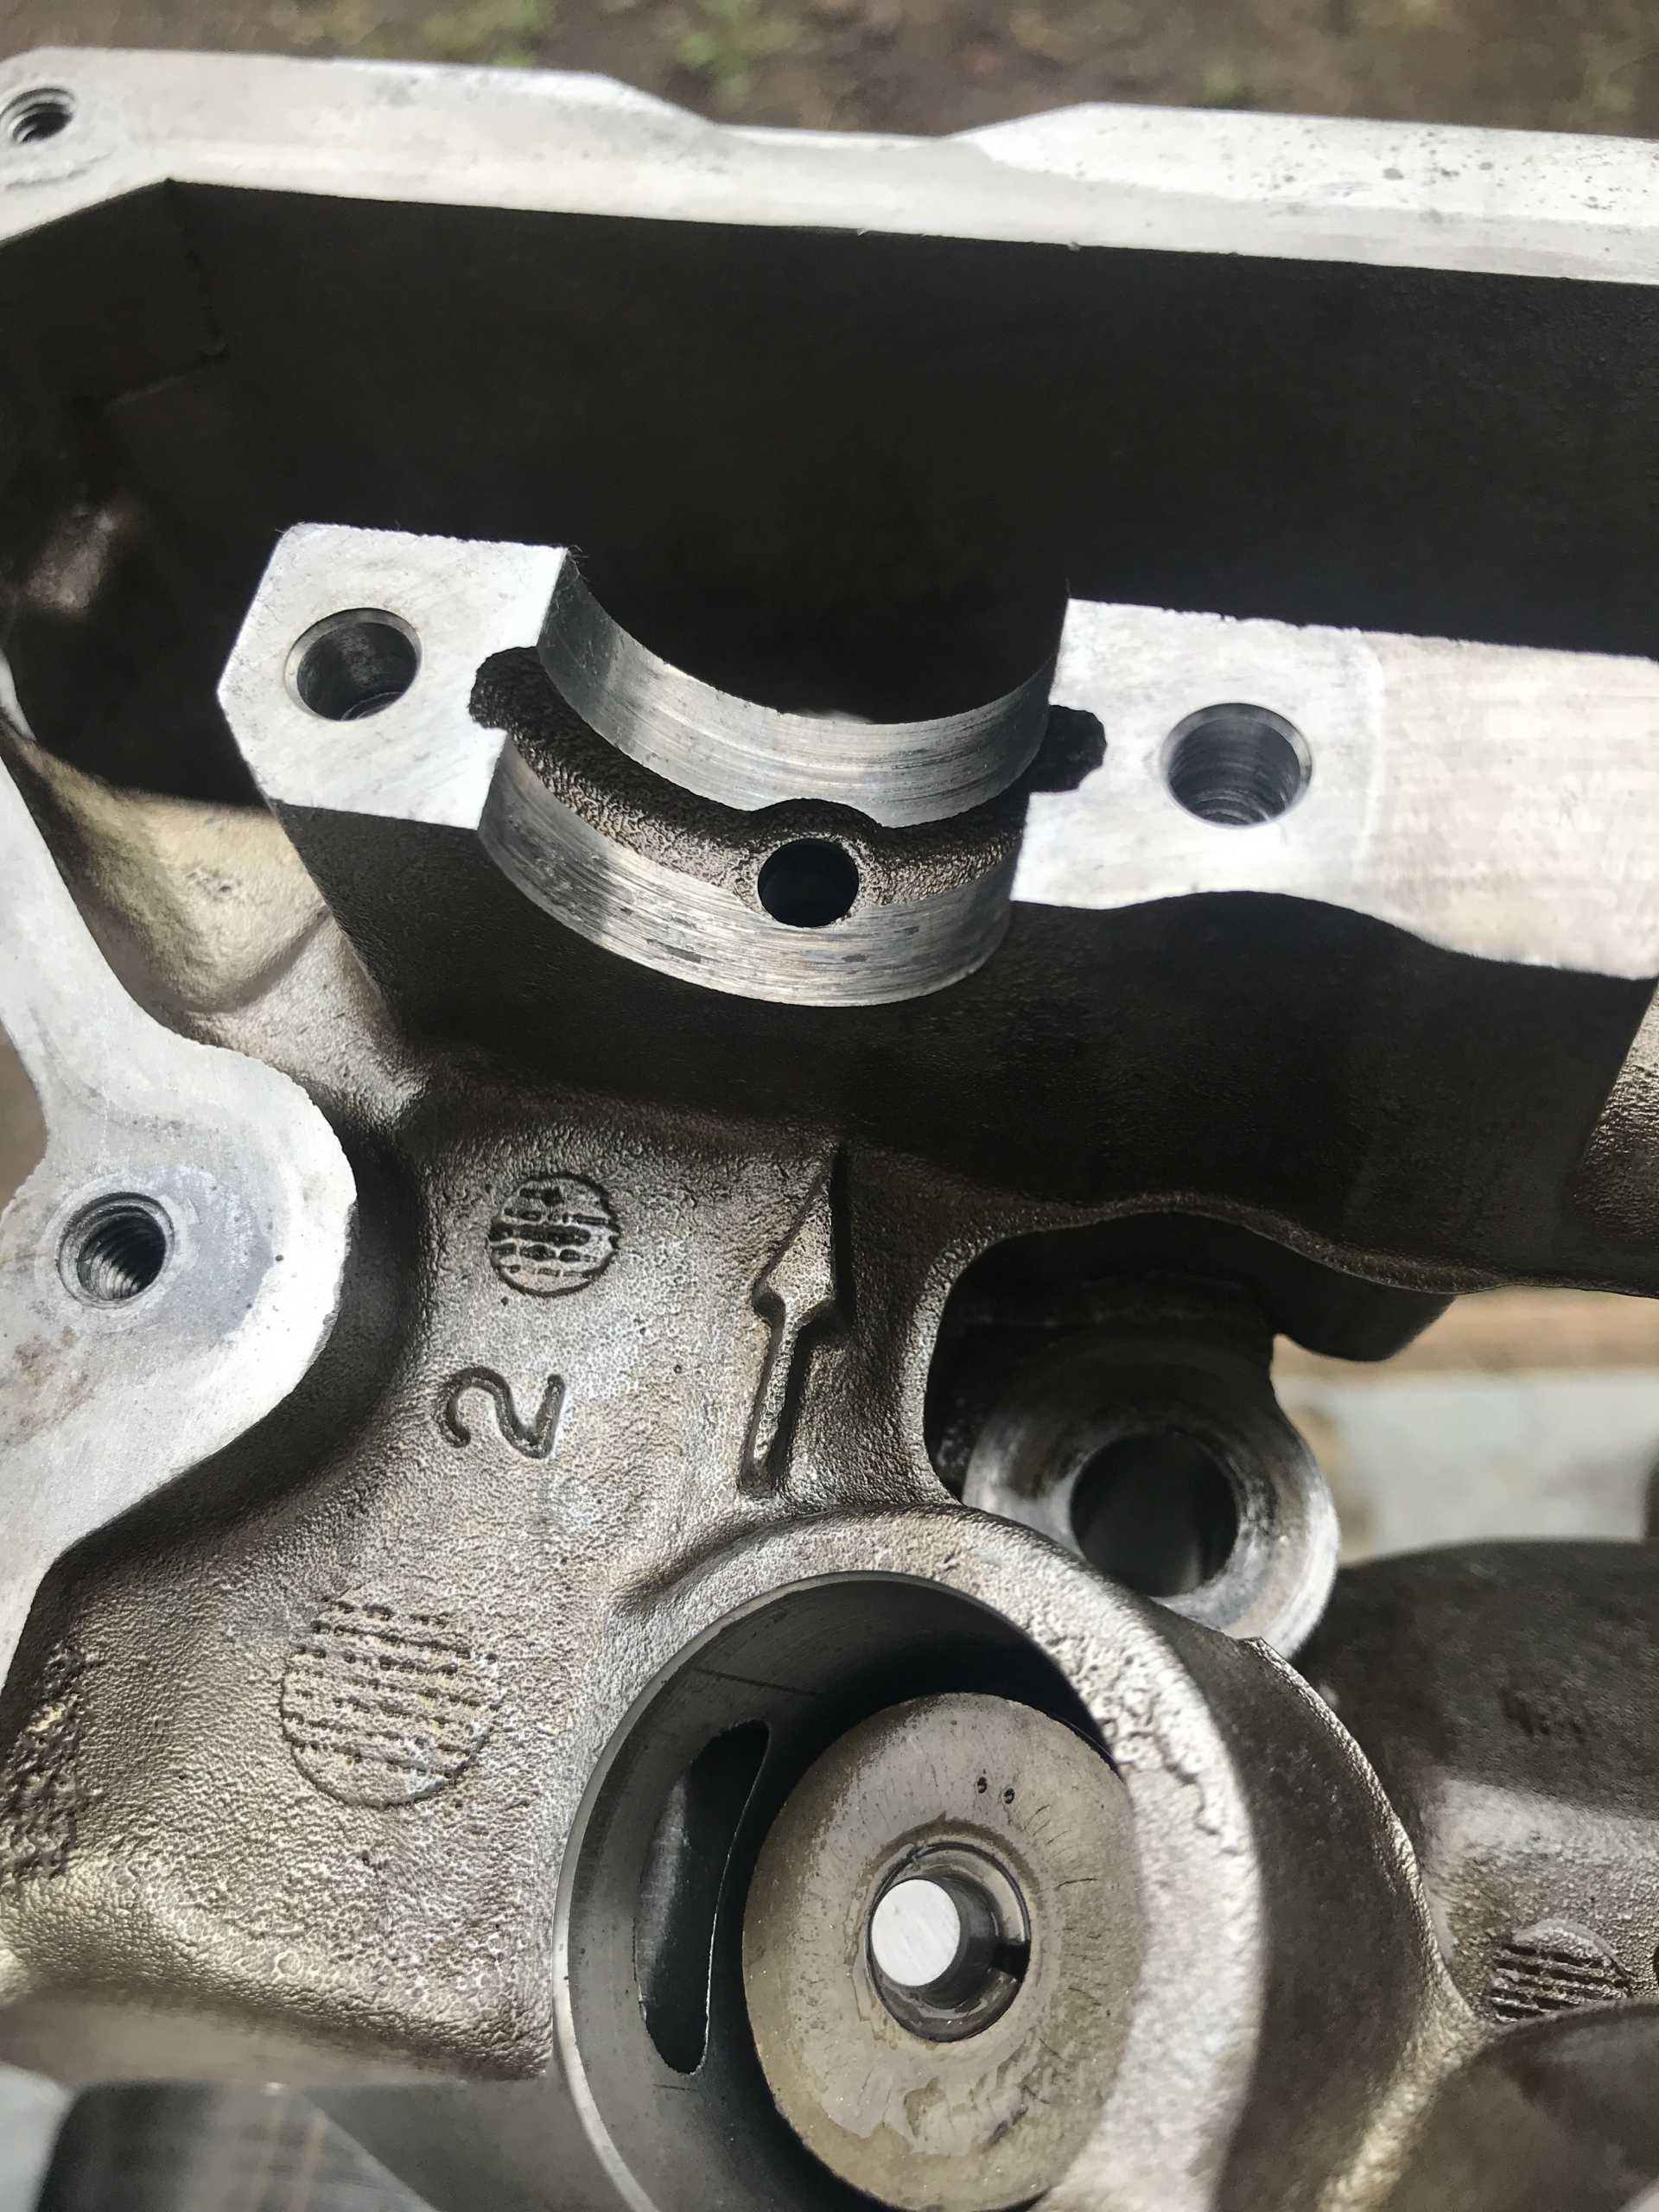
5/16/21 Head rebuild day! As a recap, lack of oil pressure ruined some of the cam caps. You can’t just buy new ones because they are machined for each cap. So, Mr. Eric made a program to remachine the caps. All the program did was cut mere thousandths of an inch off the cap, and to compensate, cut the same amount off the mounting points so it would sit flush again. Here is a picture of the damage on the head that sanded out. I thought I had a picture of the caps. There were 3 that needed to be remachined. The cams on the rear head were polished as well as all the cam surfaces. Clearances were measured and were good.
I did not take apart the front head. There was no damage to any of the caps. I did clean it out really good though. Both heads were cleaned in the parts washer and blown out to dry.
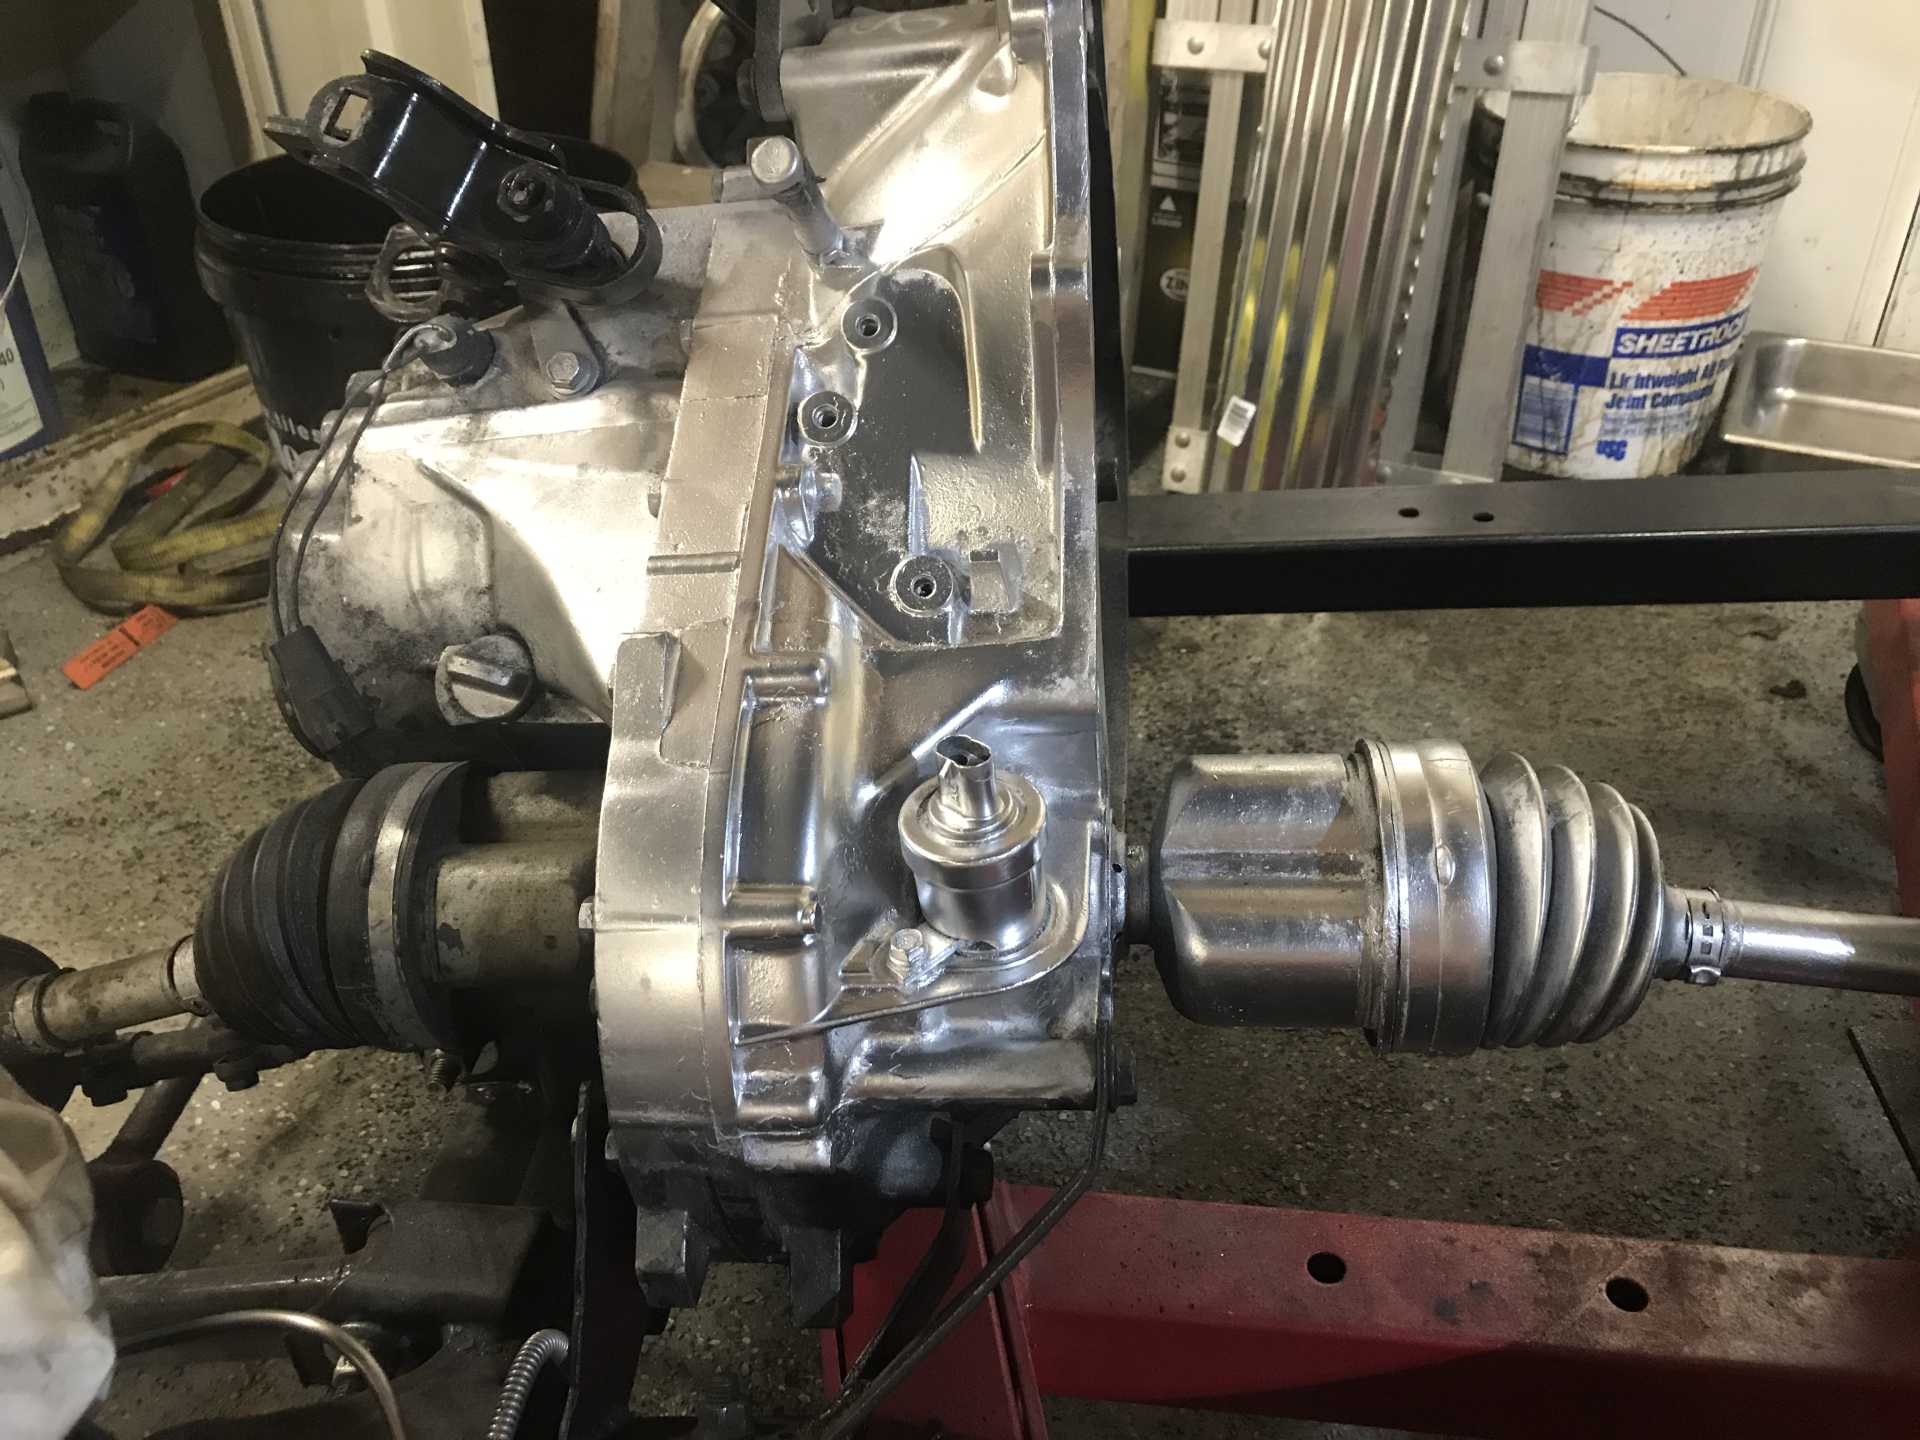
5/23/21 I half heartedly painted the transmission to make it appear better. While the getrag should hold up, I have plans to upgrade to an f23 or f40. I also hit the axles too, and I’ll apologize now for painting the boot too.
Mr. Eric and I got the heads back on. I remember we put the one on backwards, don’t ask me how, but it was very difficult to get back off lol.
Alright now I’m drooling a bit.
I again sound like to thank Mr. Eric for the lift. The car was up there way too long.
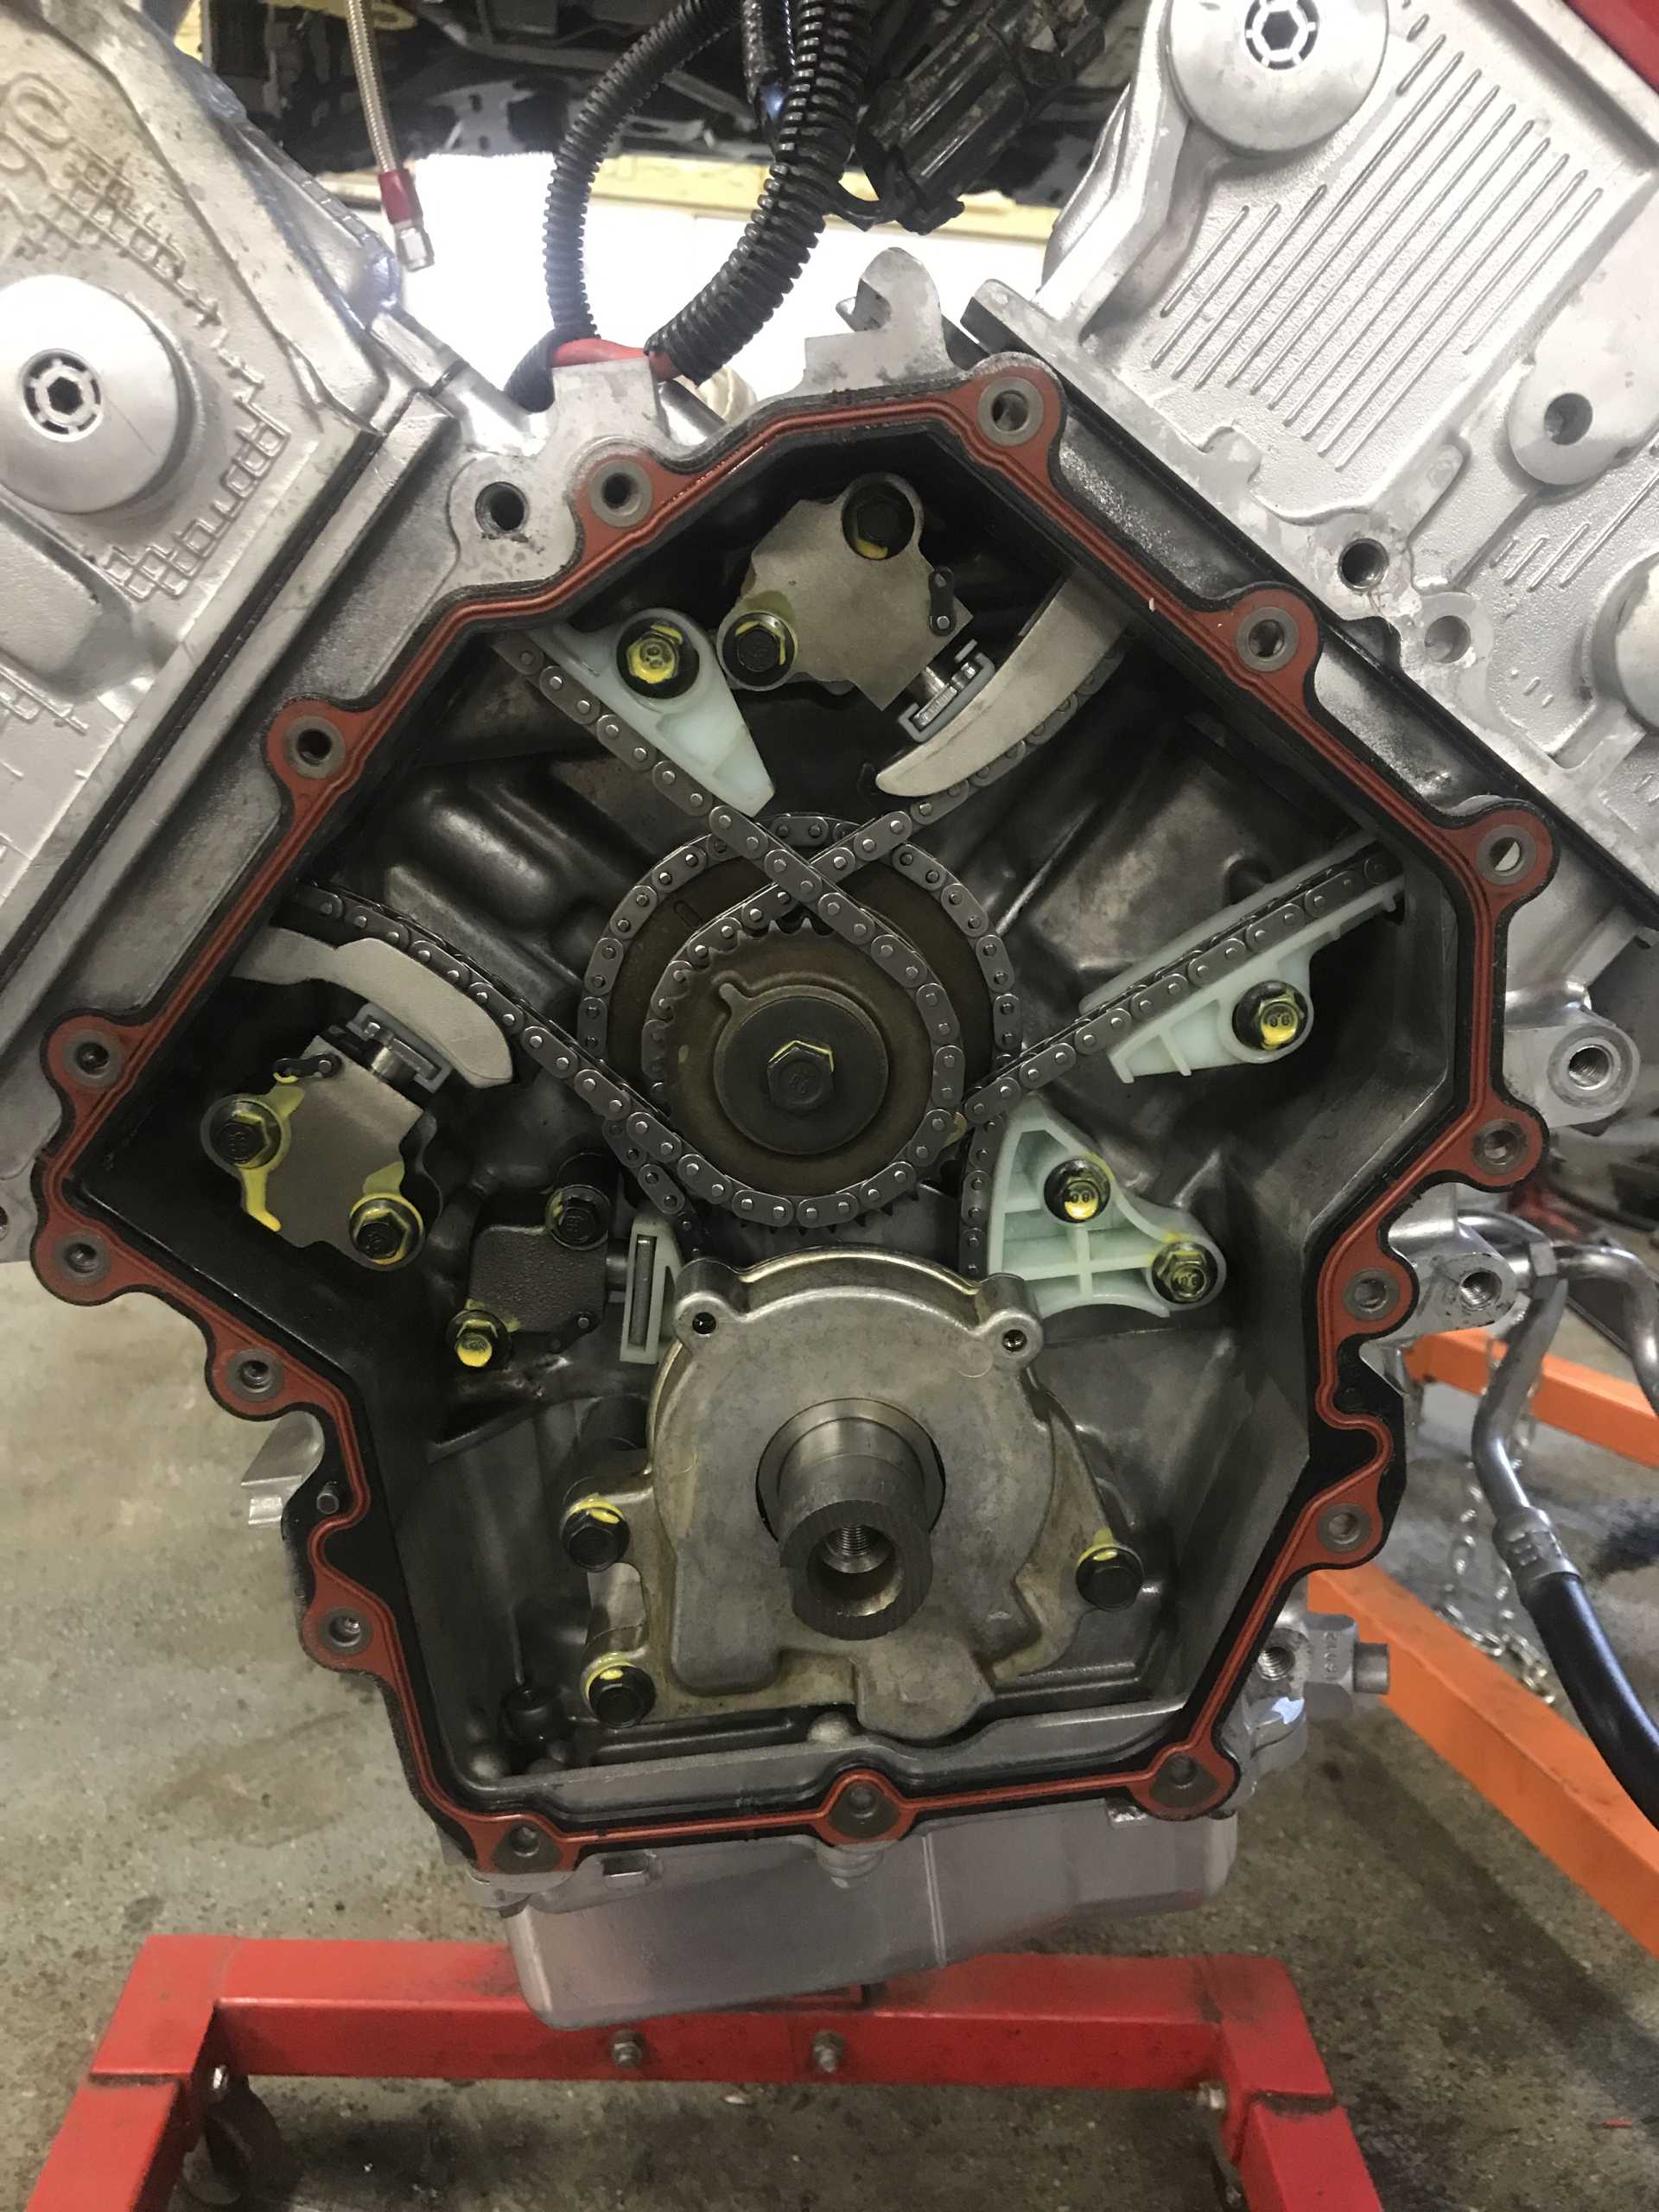
5/24/21 Mr. Eric and I worked on the timing. There was a bit of trouble on the caps that were remachined. We pulled them and had to sand them even more because the slightest imperfection caused the cam to drag. You can see the faint darker spots that we polished smooth.
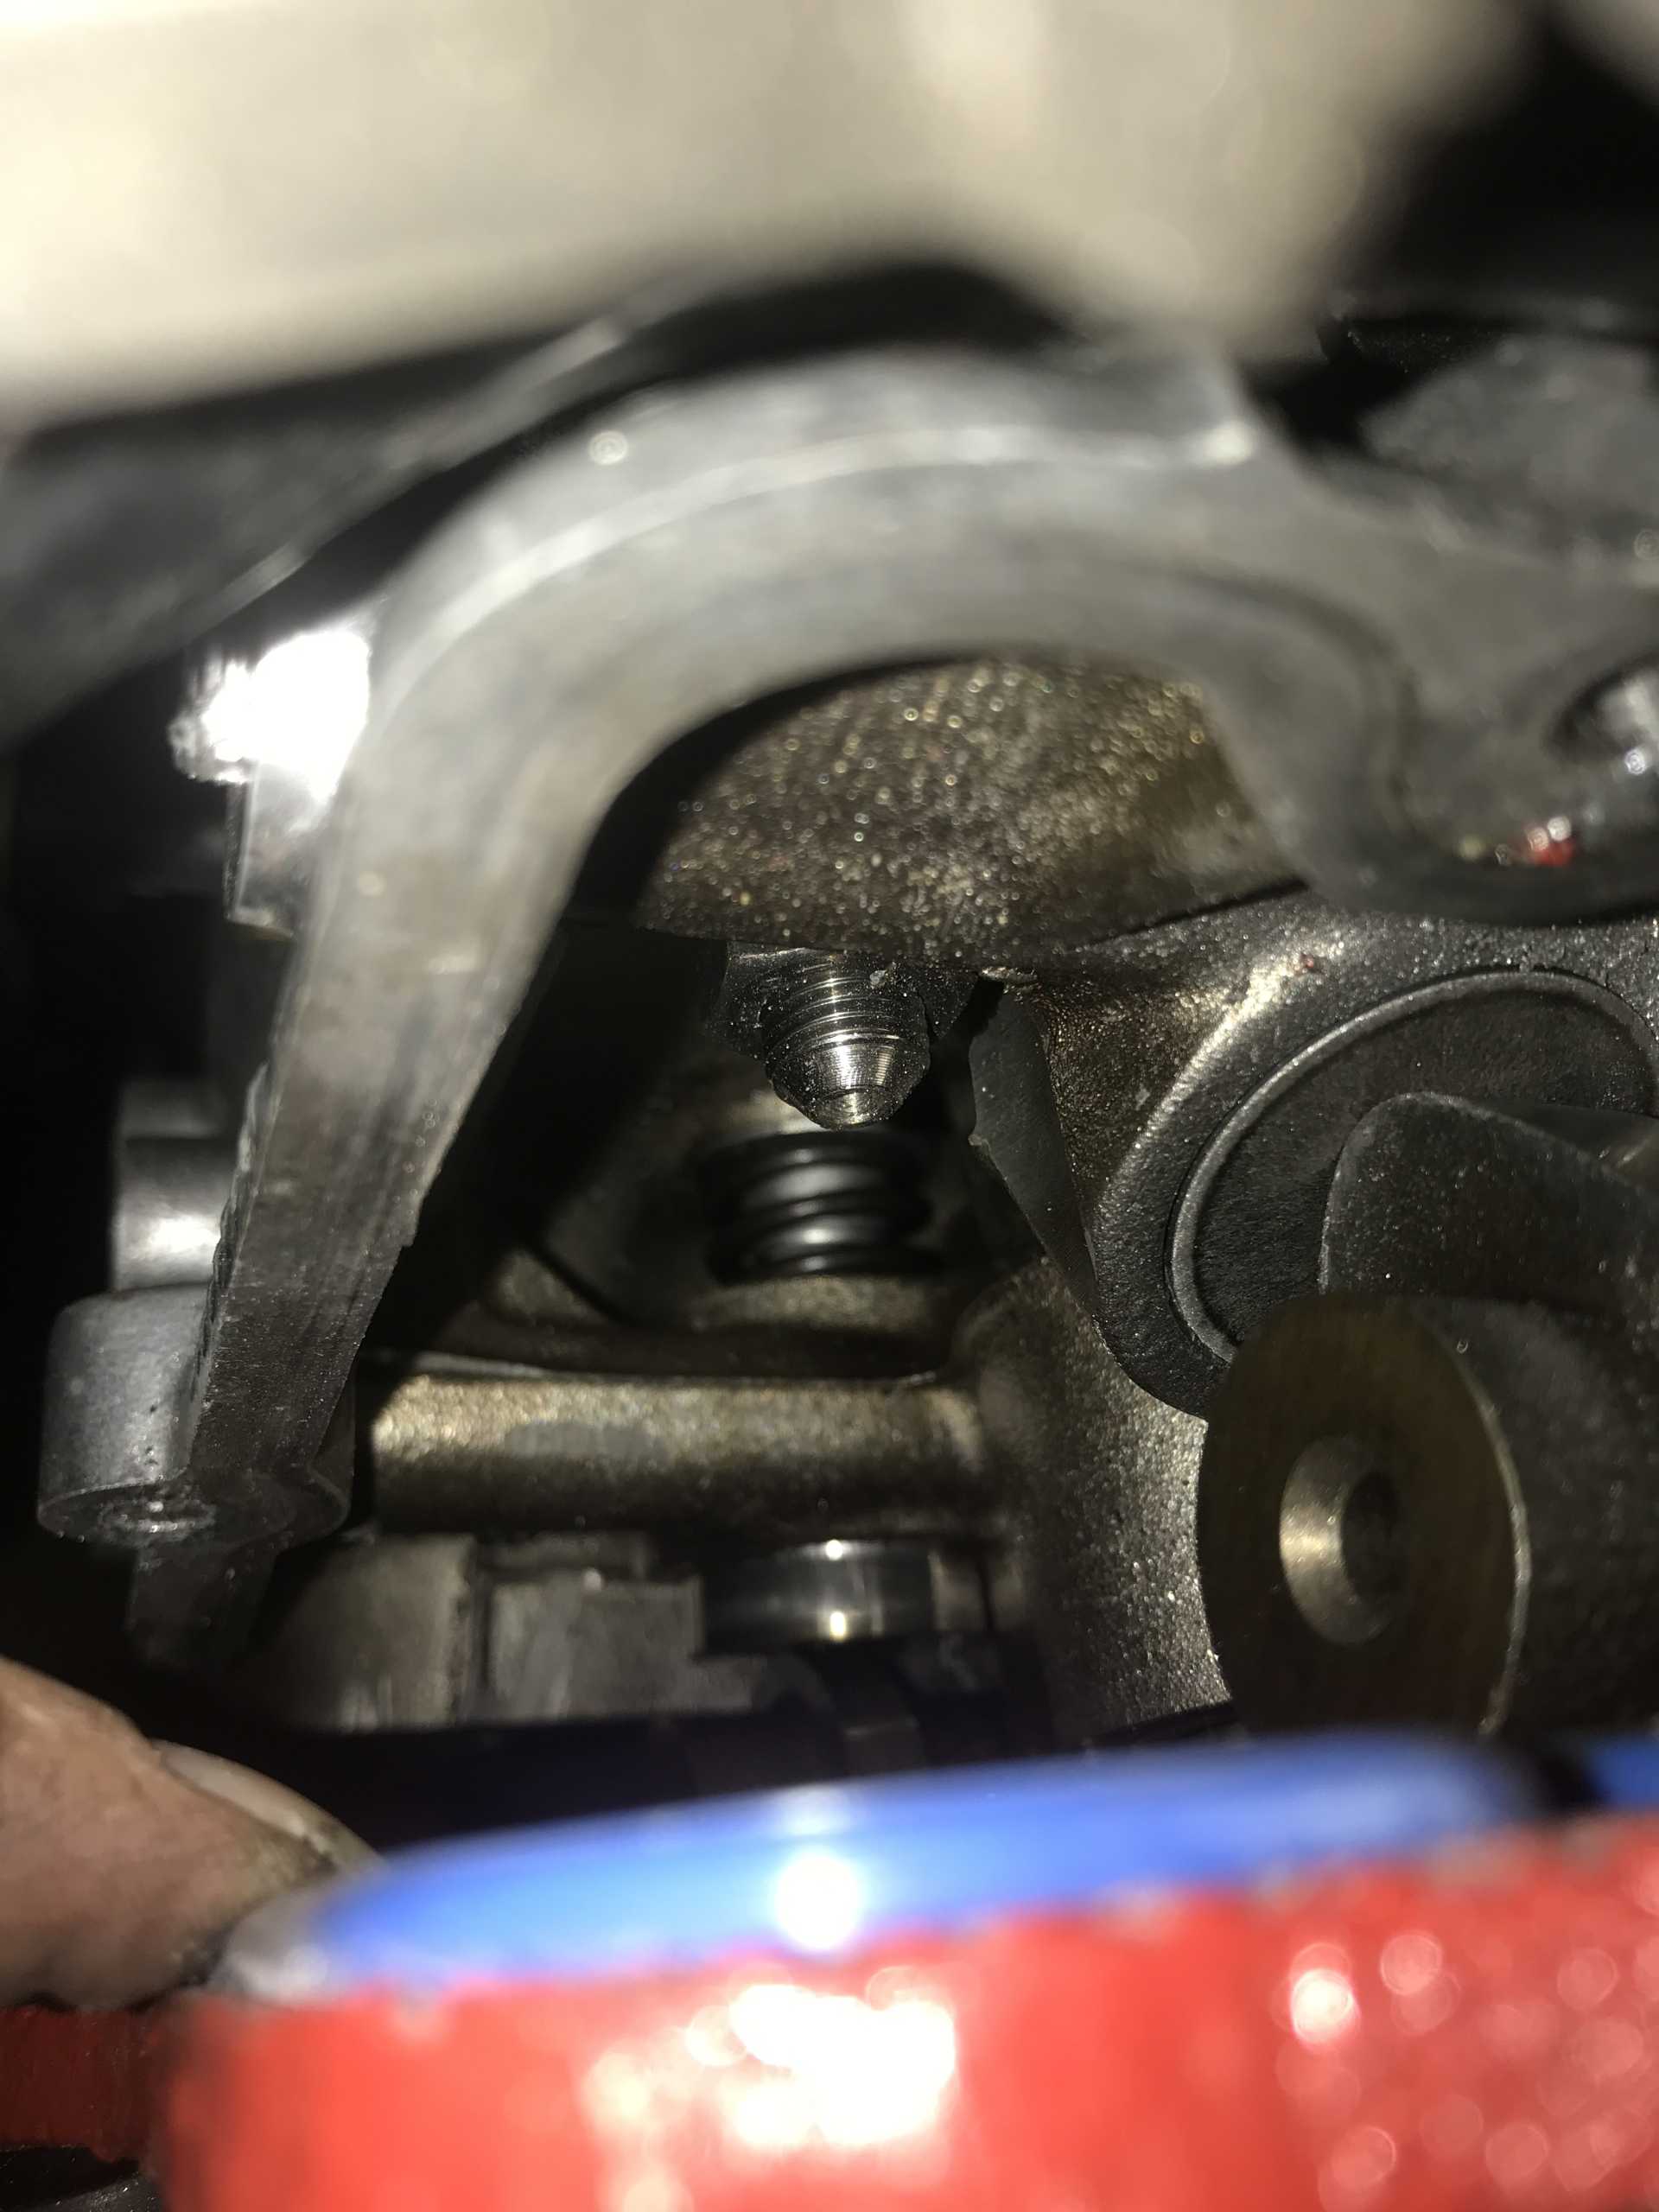
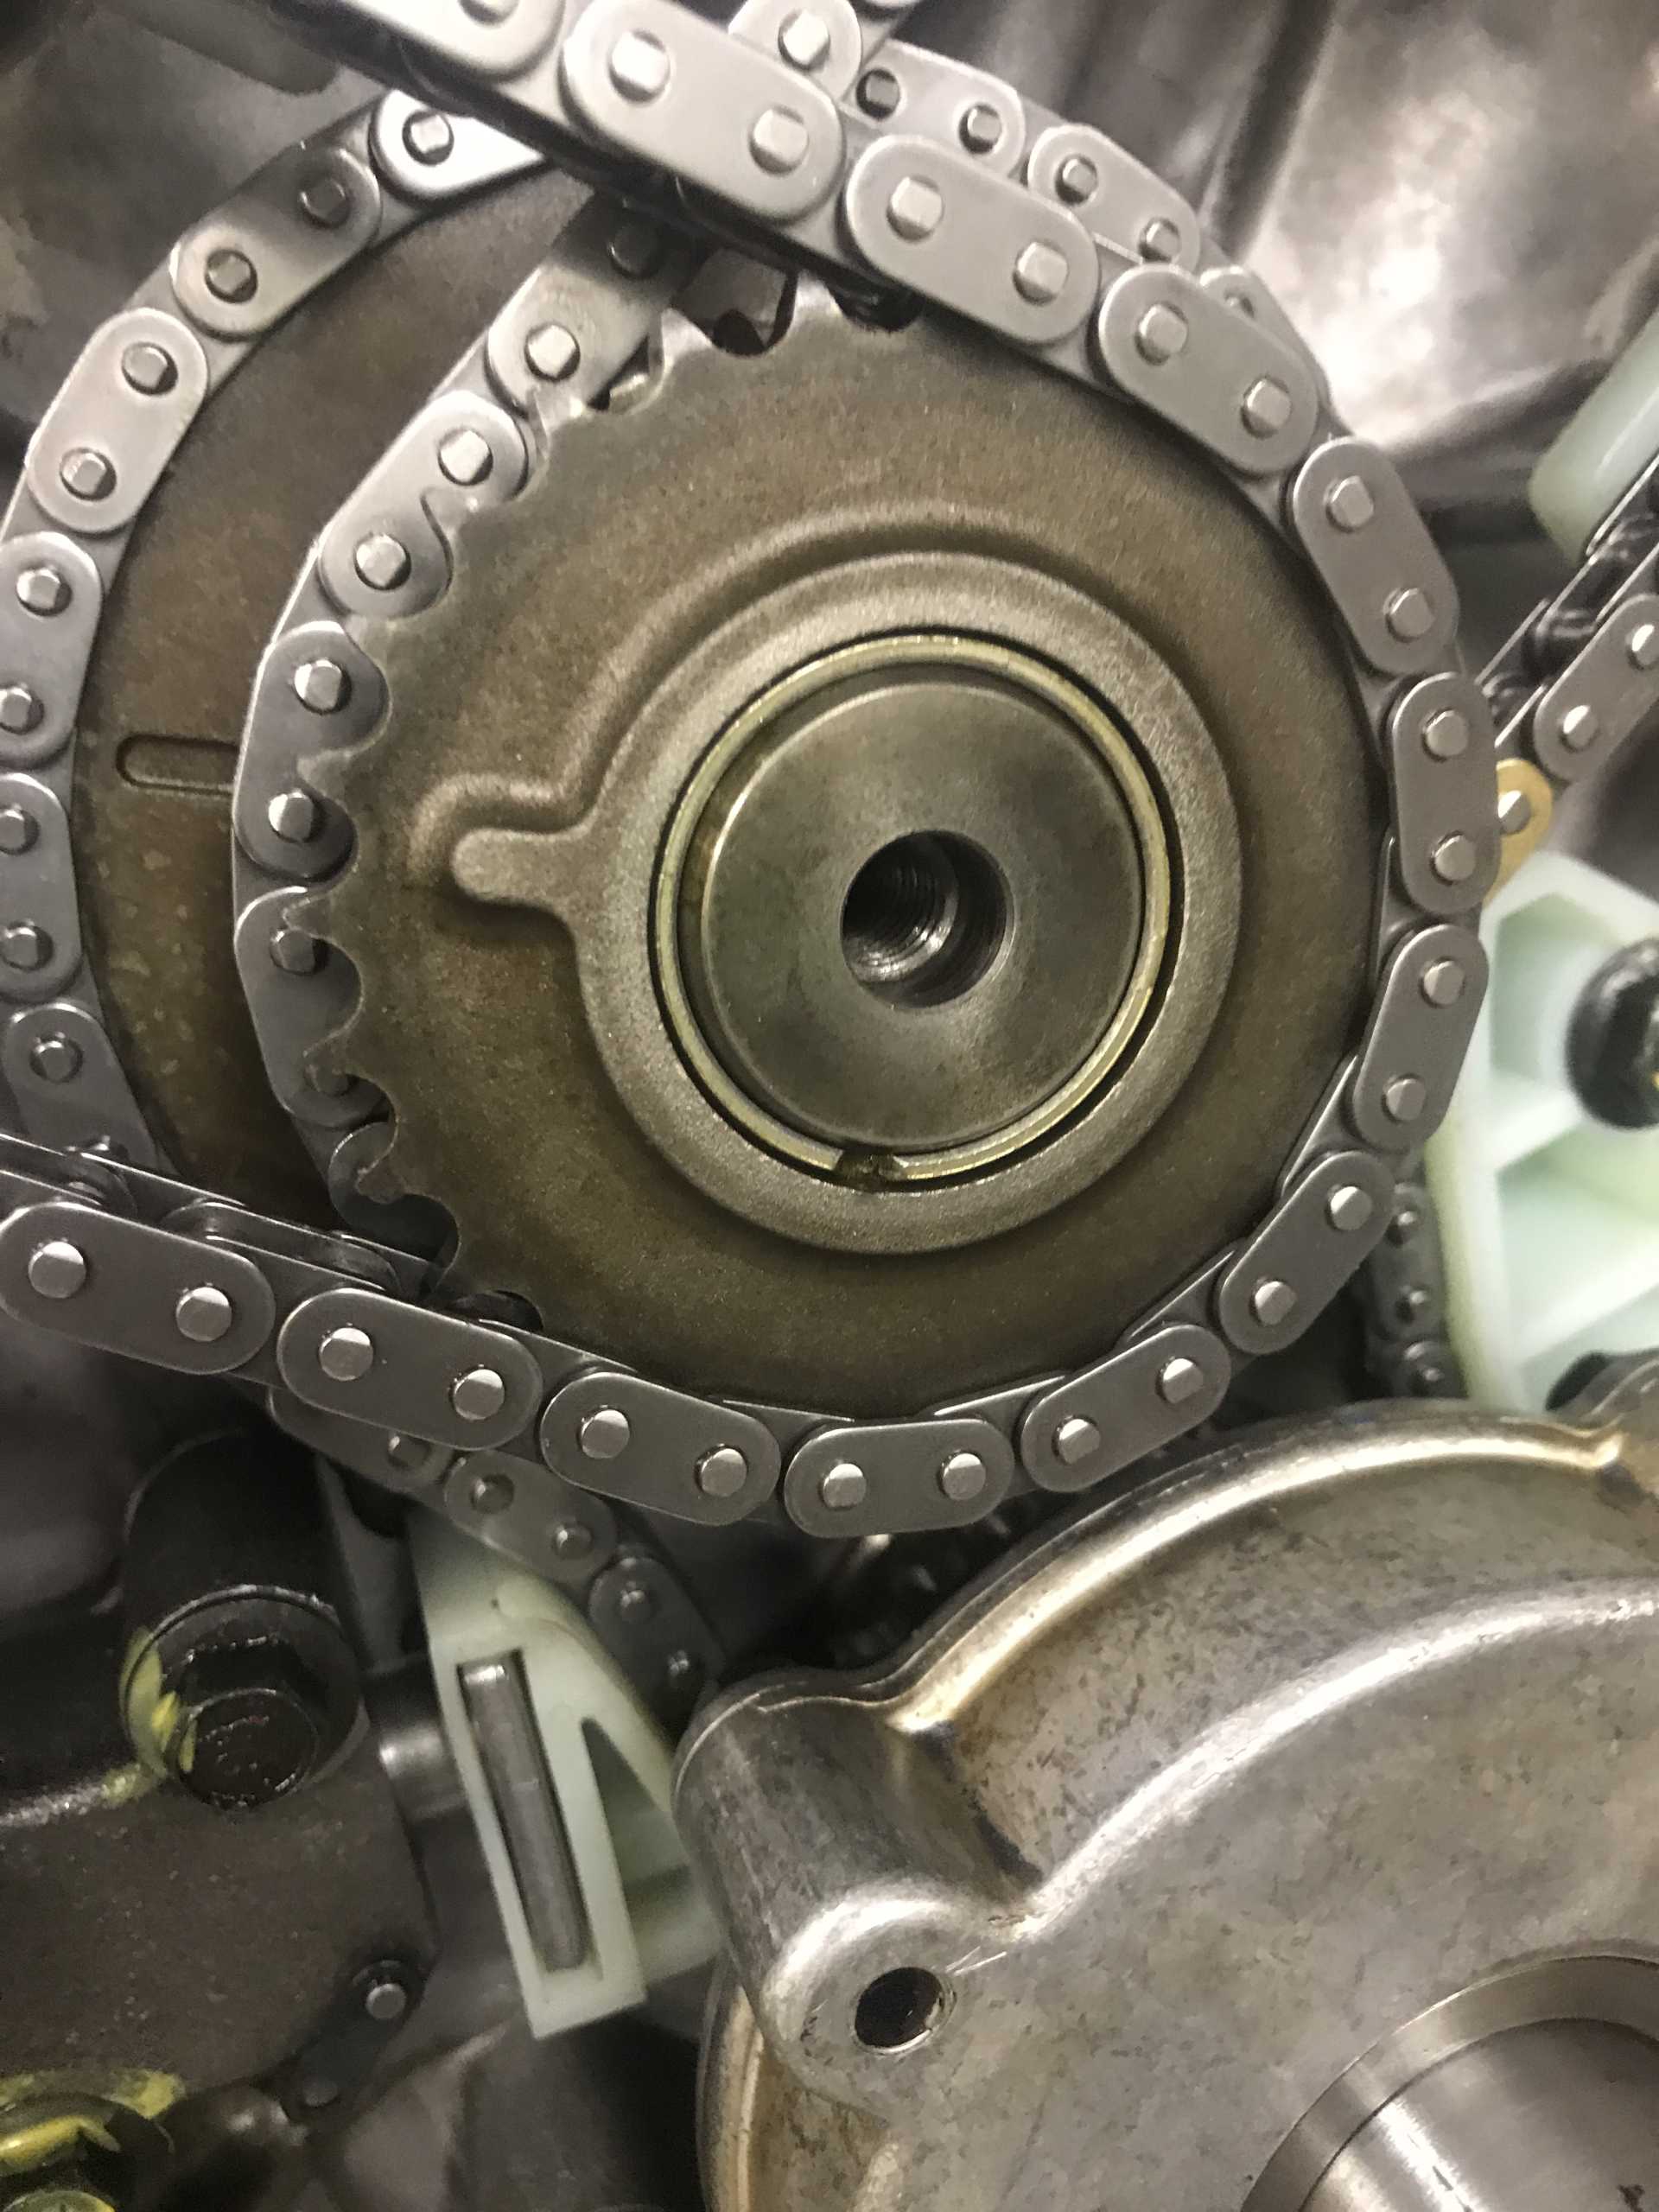
I’ll include this for educational purposes. Where the timing chains wrap around the gear, there is a threaded hole. I did not have a bolt in my bag that would go here. I instead found the bolt with the massive washer that threaded in there in my engine mount bag…
Where I’m going with that is, when I took the engine apart originally, my organizational skills were subpar. I believe I never put this bolt in, and instead recycled it as an engine mount bolt. When we took it apart a second time, I don’t recall if this hole was plugged or not. If it wasn’t, it would hemorrhage oil due to the galleries that run up through it. My oil pressure problem either occurred due to a loose harmonic balancer, or the lack of this bolt. The first time around was user error though, and I gotta say I learned from it. This time around, the Northstar and the car are better than ever. Live and learn.
Here is the bolt hole I am talking about.
The timing is now all together, and torqued to spec. You can tell be the excessive paint marking.
5/27/21 I have a picture here of my dipstick. You can’t tell from this angle, but the tube is bent. The bend caused my dipstick to crack at the bottom and not read oil level unless at max. While I wouldn’t fix this until June, it ended up being a big production because Northstar dipsticks and tubes are impossible to find apparently.
I also took my alternator all the way apart and painted it. It was brand new, but the exposed aluminum would corrode over time.
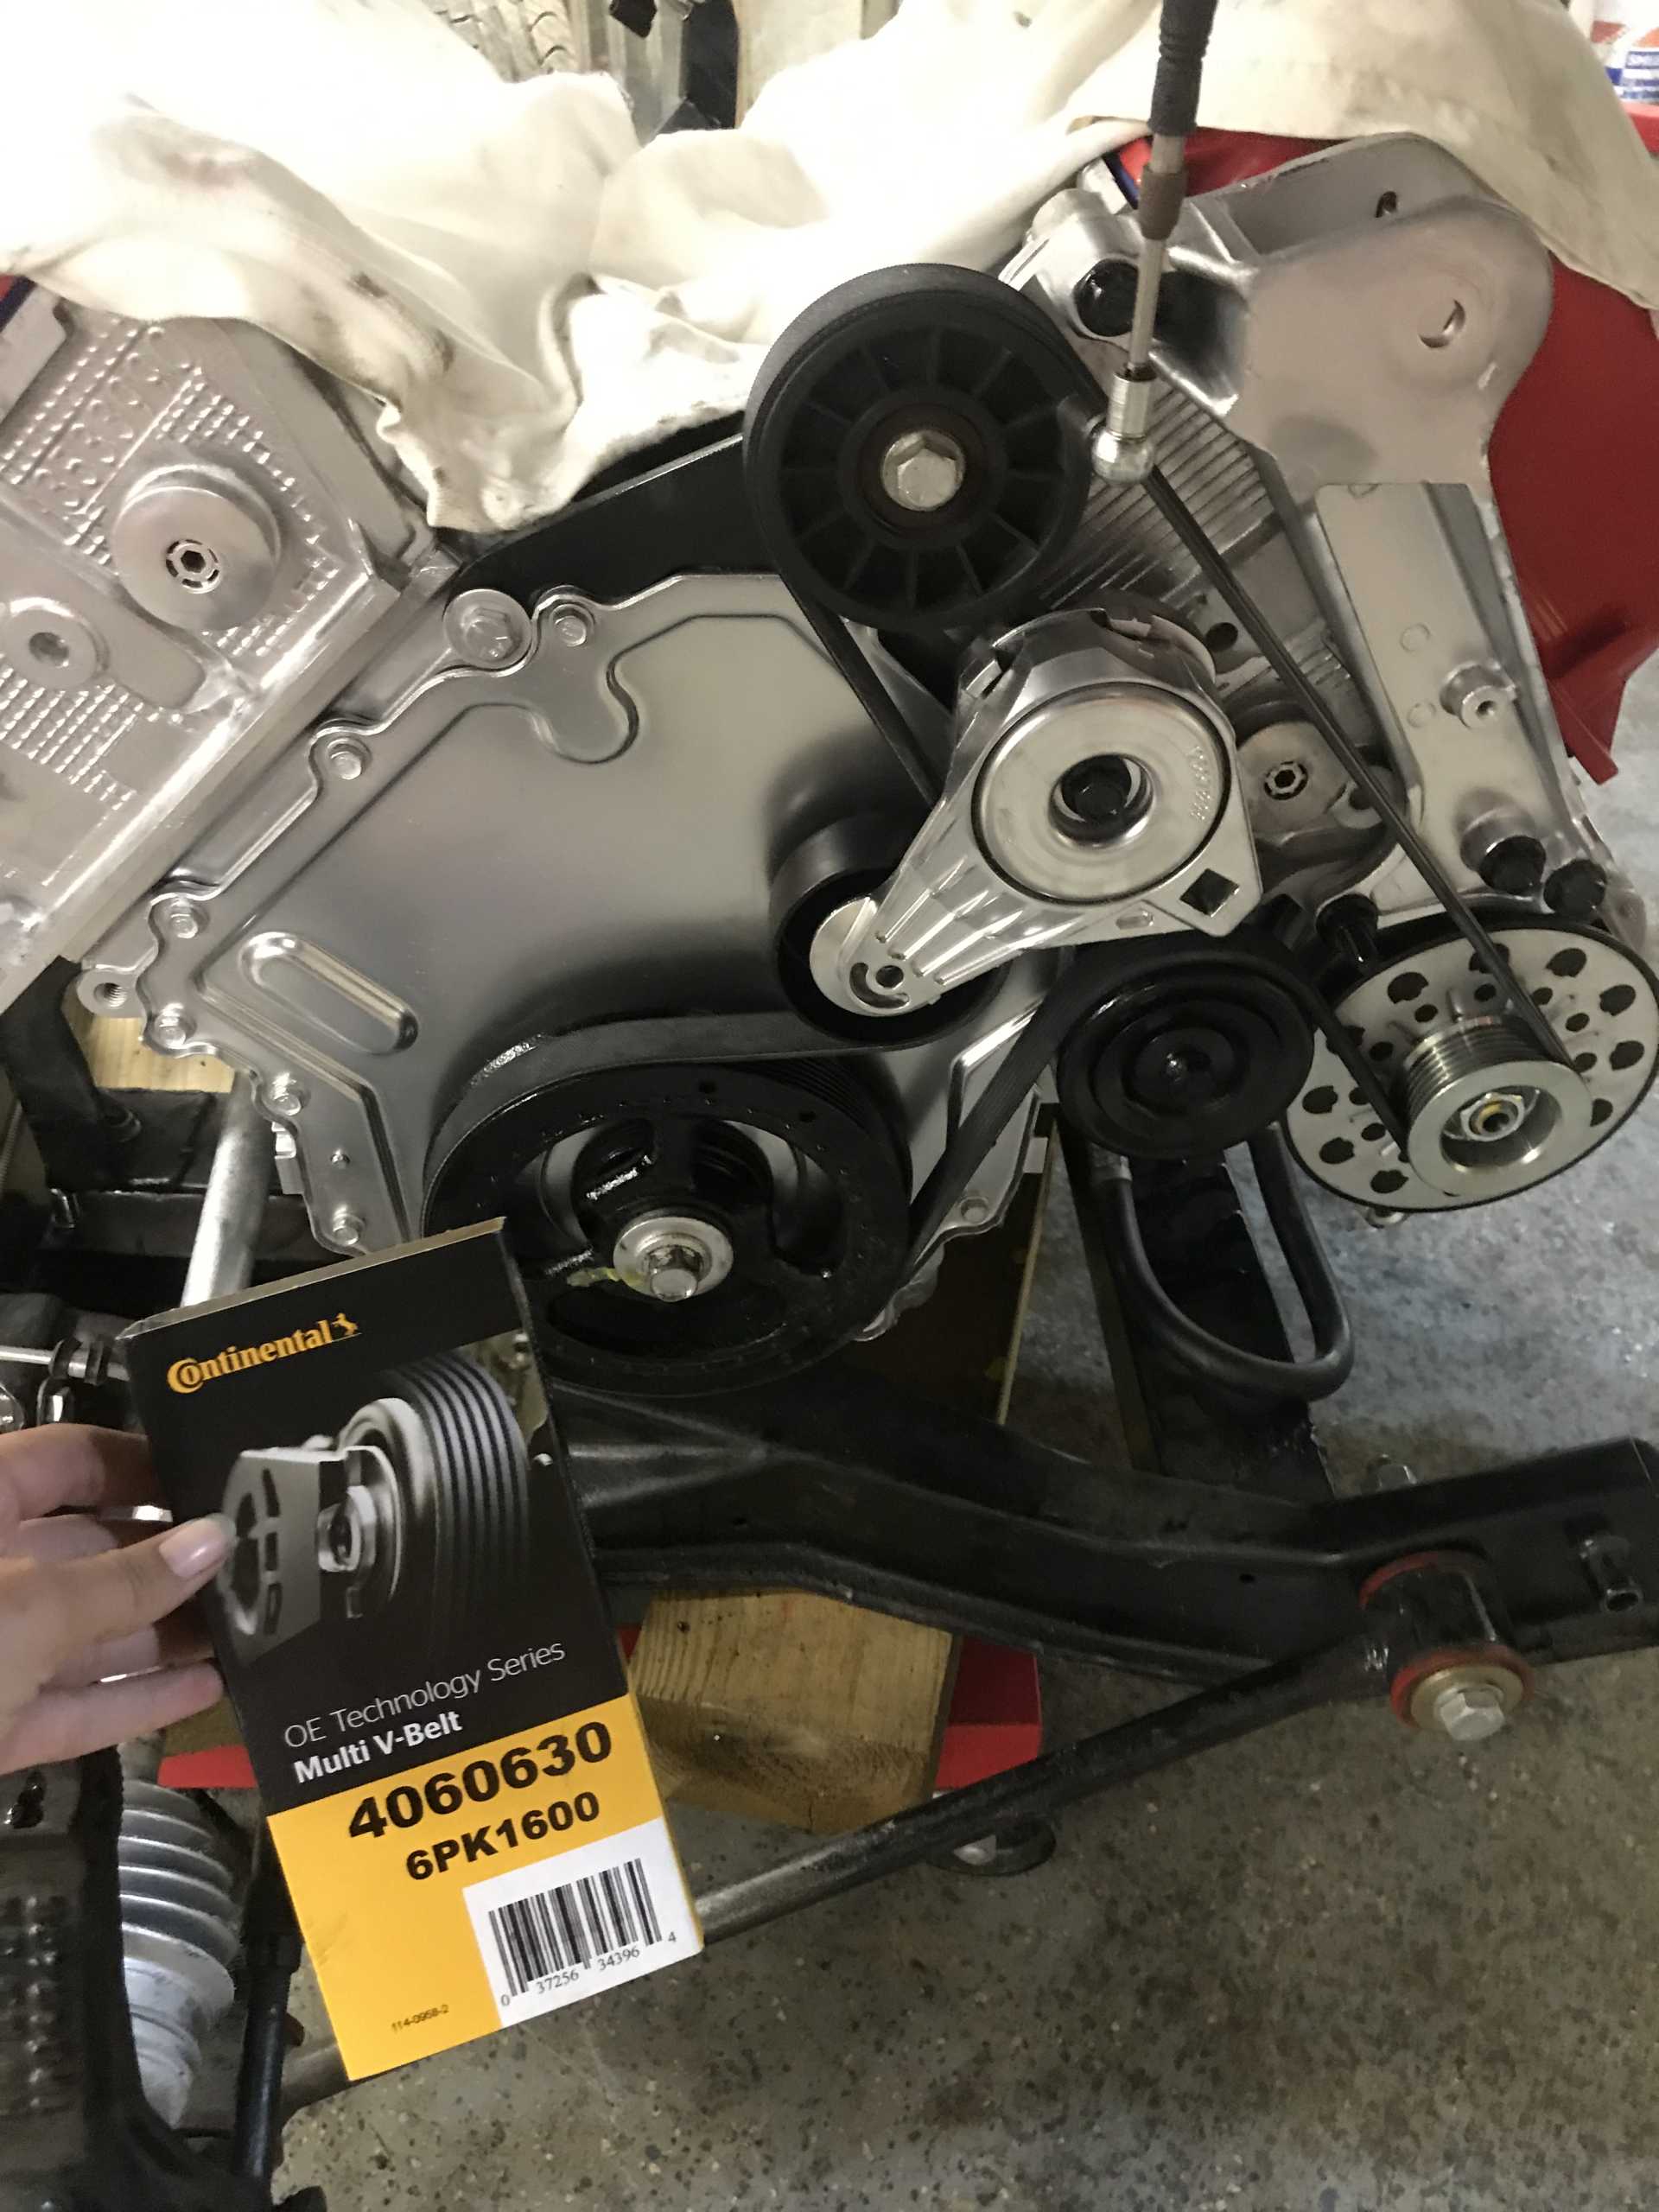
5/28/21 I worked on installing the belt drive system. I took apart every pulley, sand blasted it and painted them again. I even stripped and painted the bolts again too.
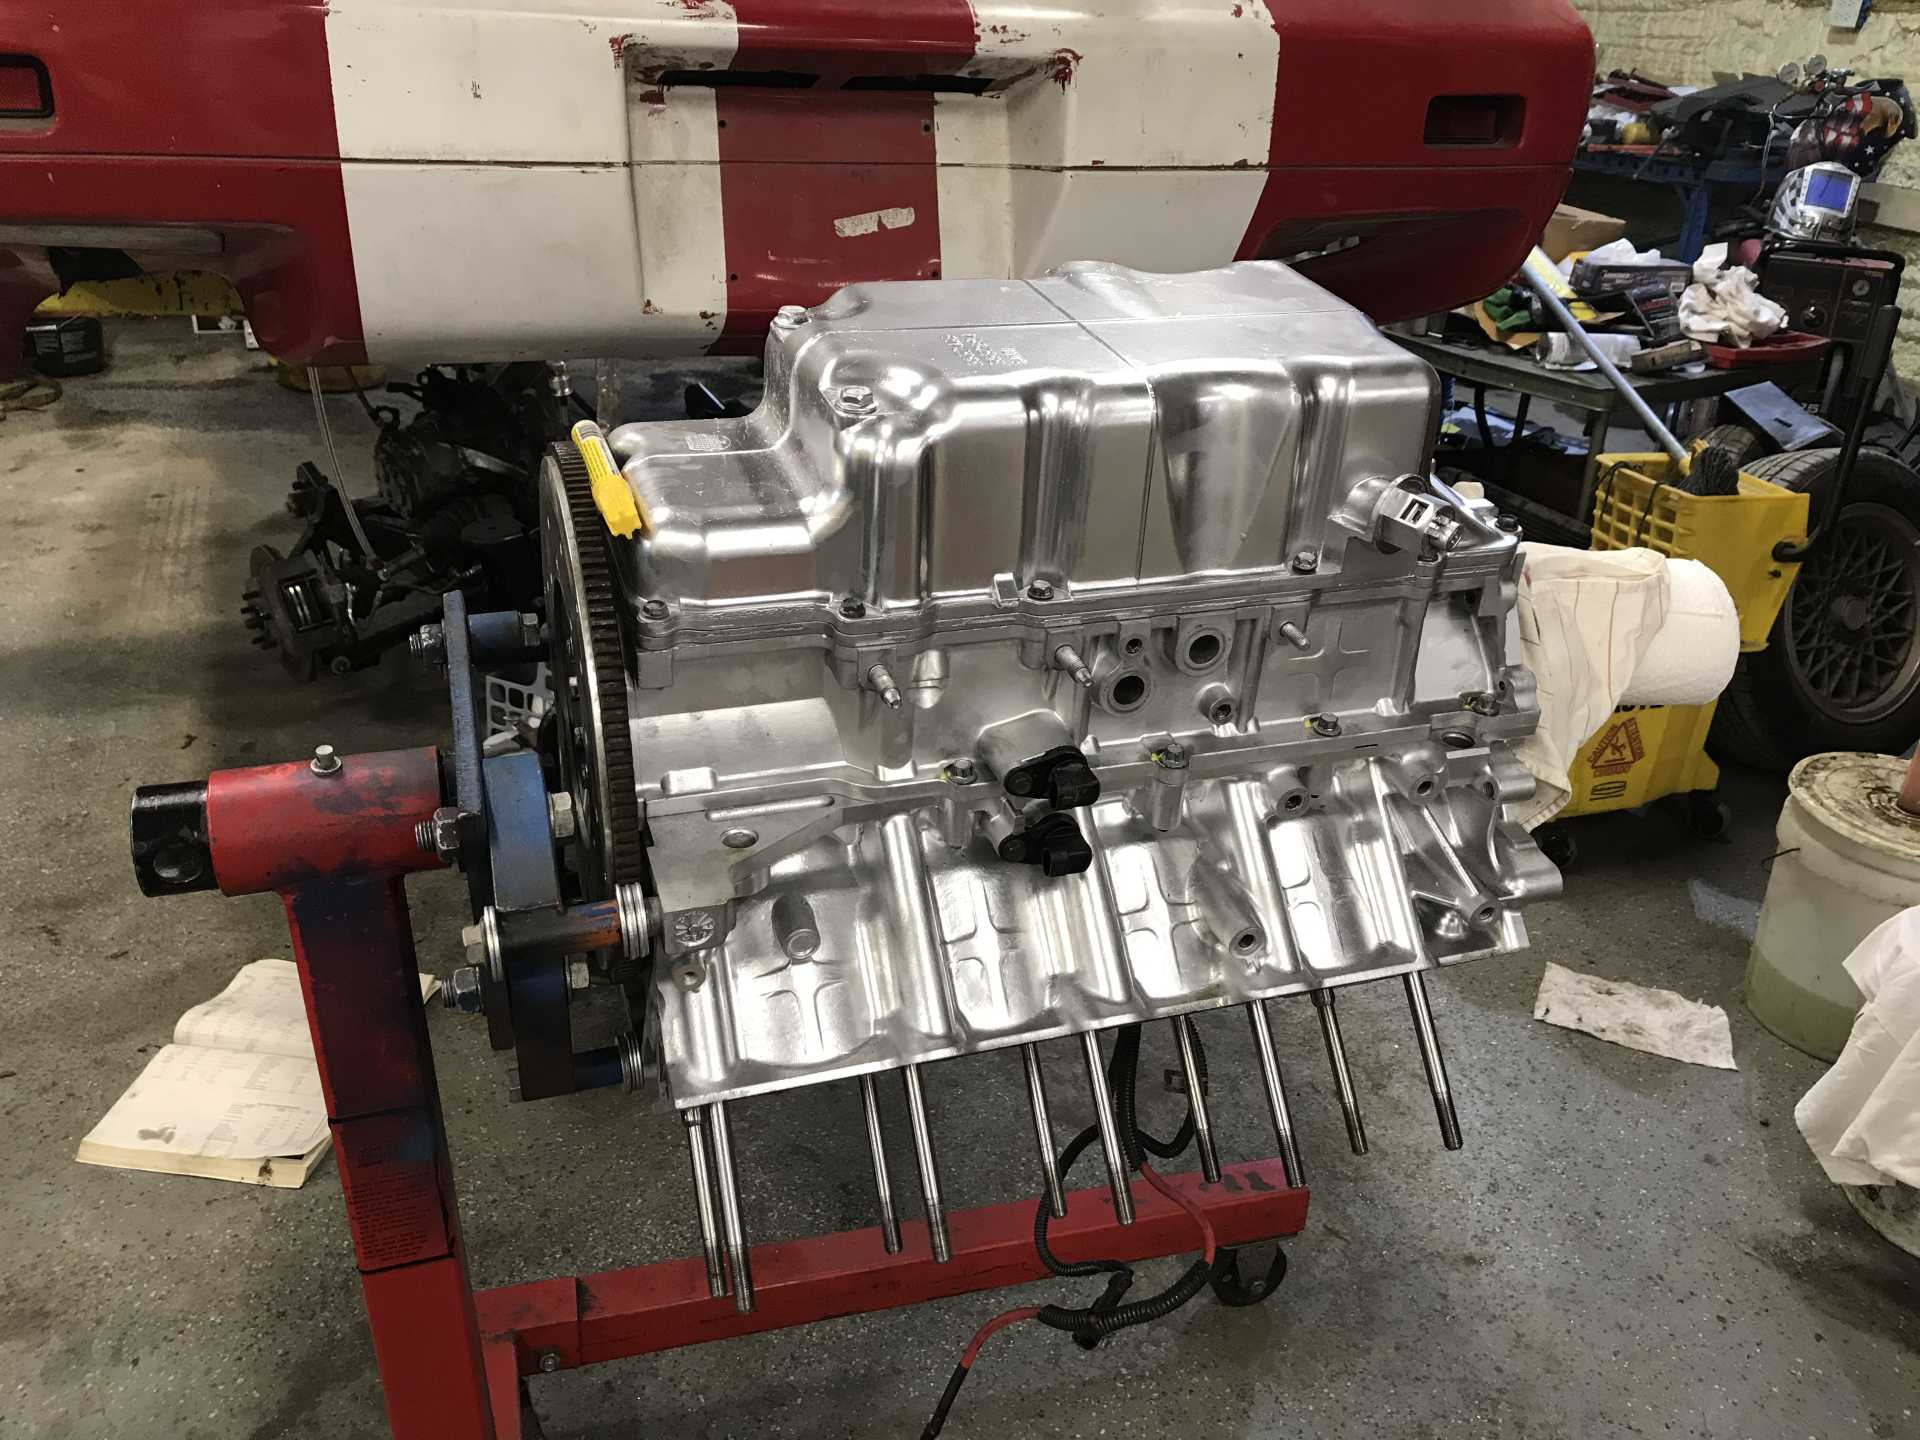
6/4/21 A big day for the Northstar. It’s going back on the cradle! However, we first wanted to test for oil pressure. We did this buy putting a drill on the harmonic balancer and turning the engine over. It is a brand new engine. It seemed to take forever for any oil to come up. We took the filter off. It took a second, but oil started pouring out. We put it back on. Still no oil to the heads. We took off the oil cooler bypass tube. Took a second and those poured oil. Eventually, the drill method worked and oil started coming up through the cams. If it made pressure now, surely it would under real power.
I will attach a video of the oil flow here at some point.
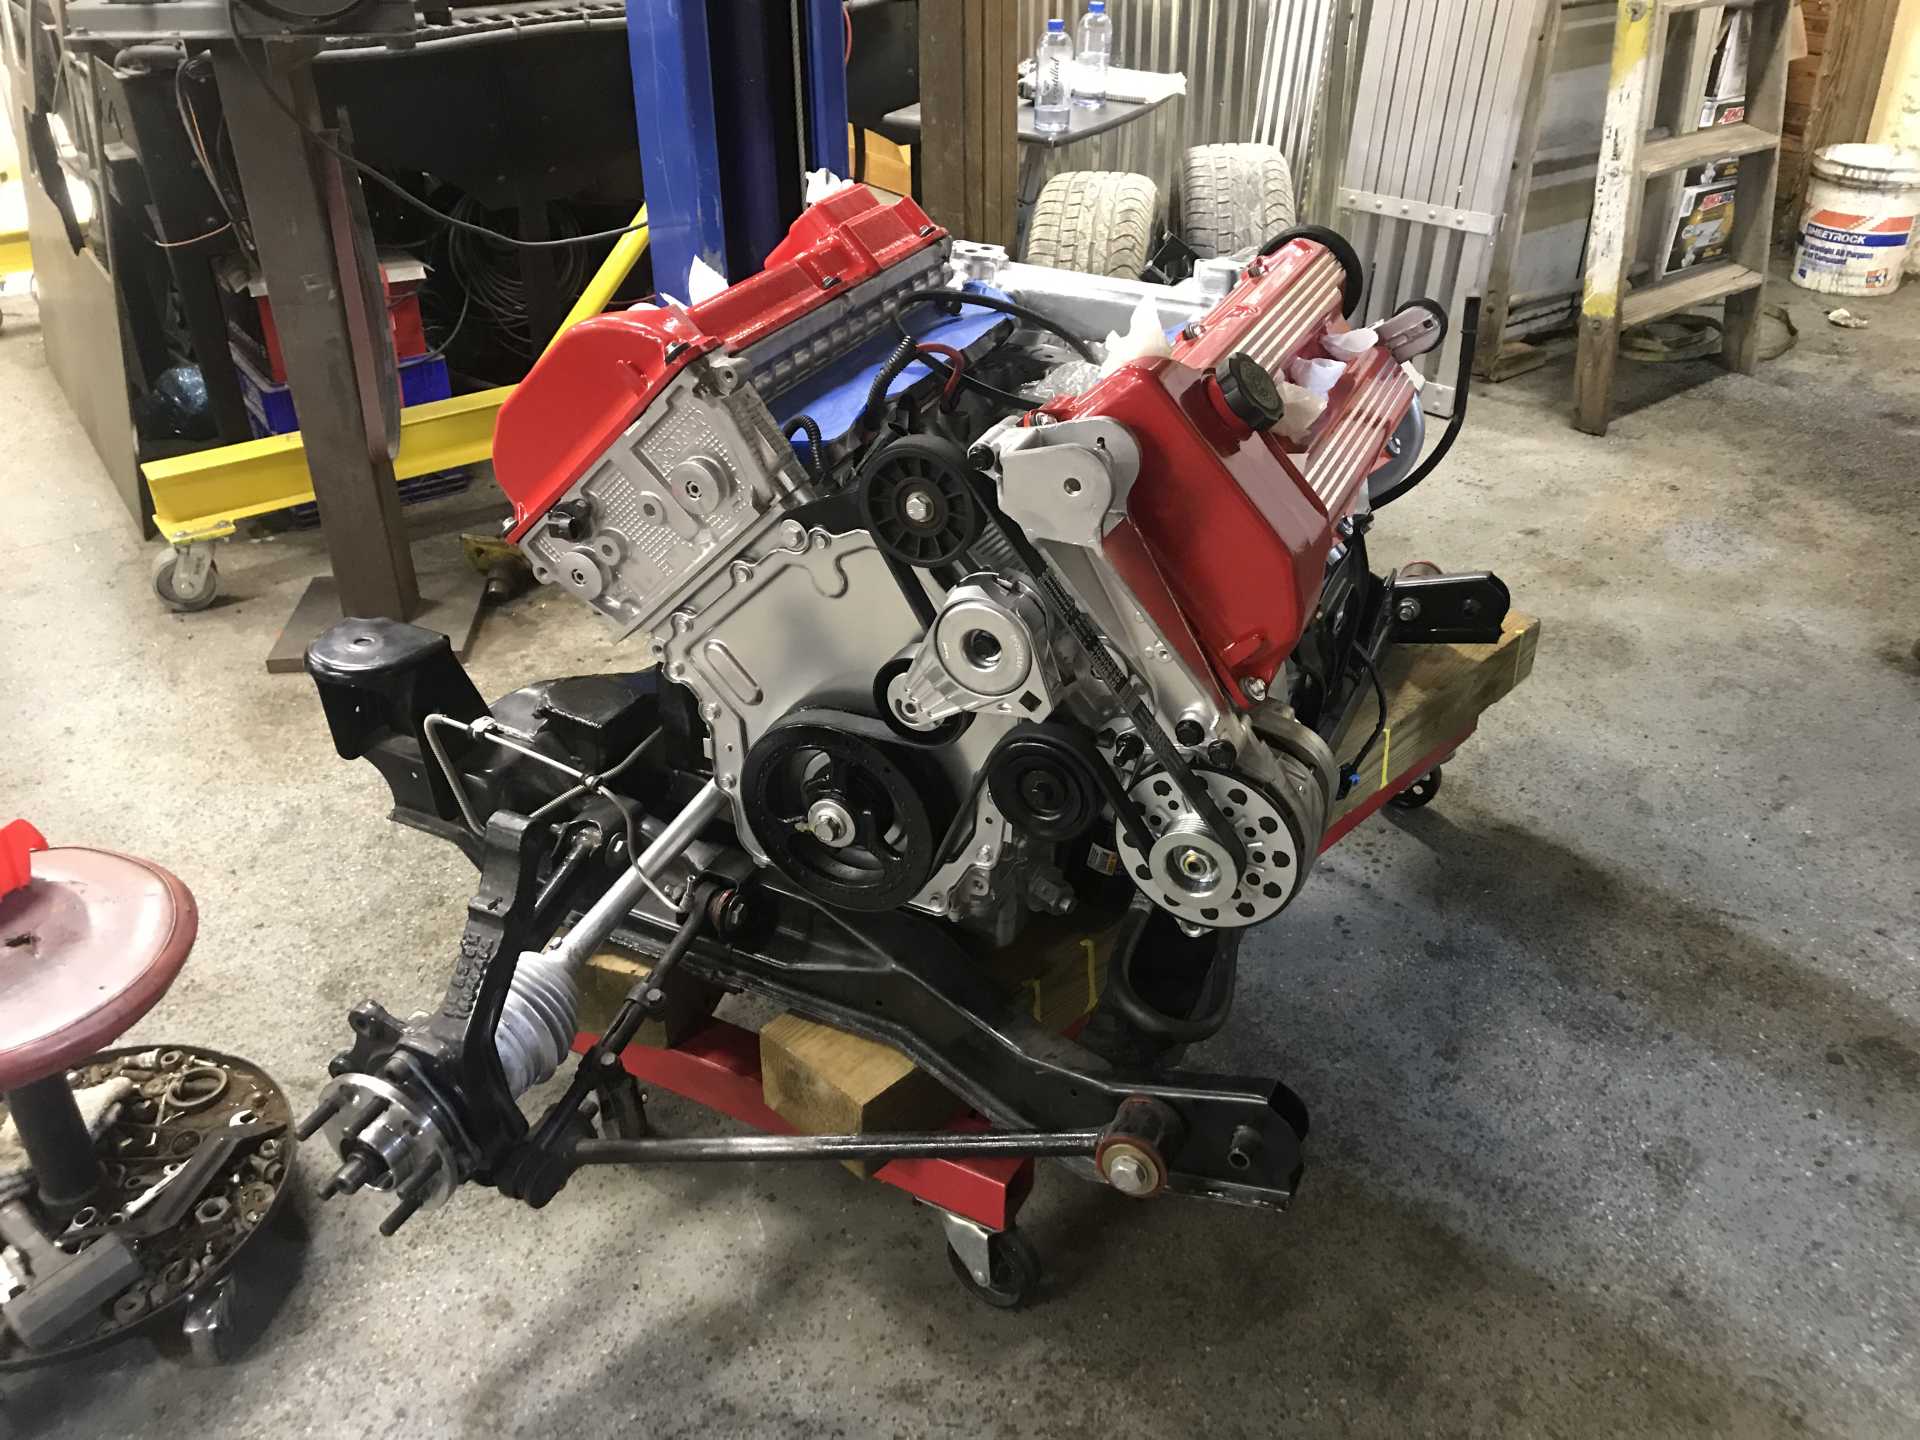
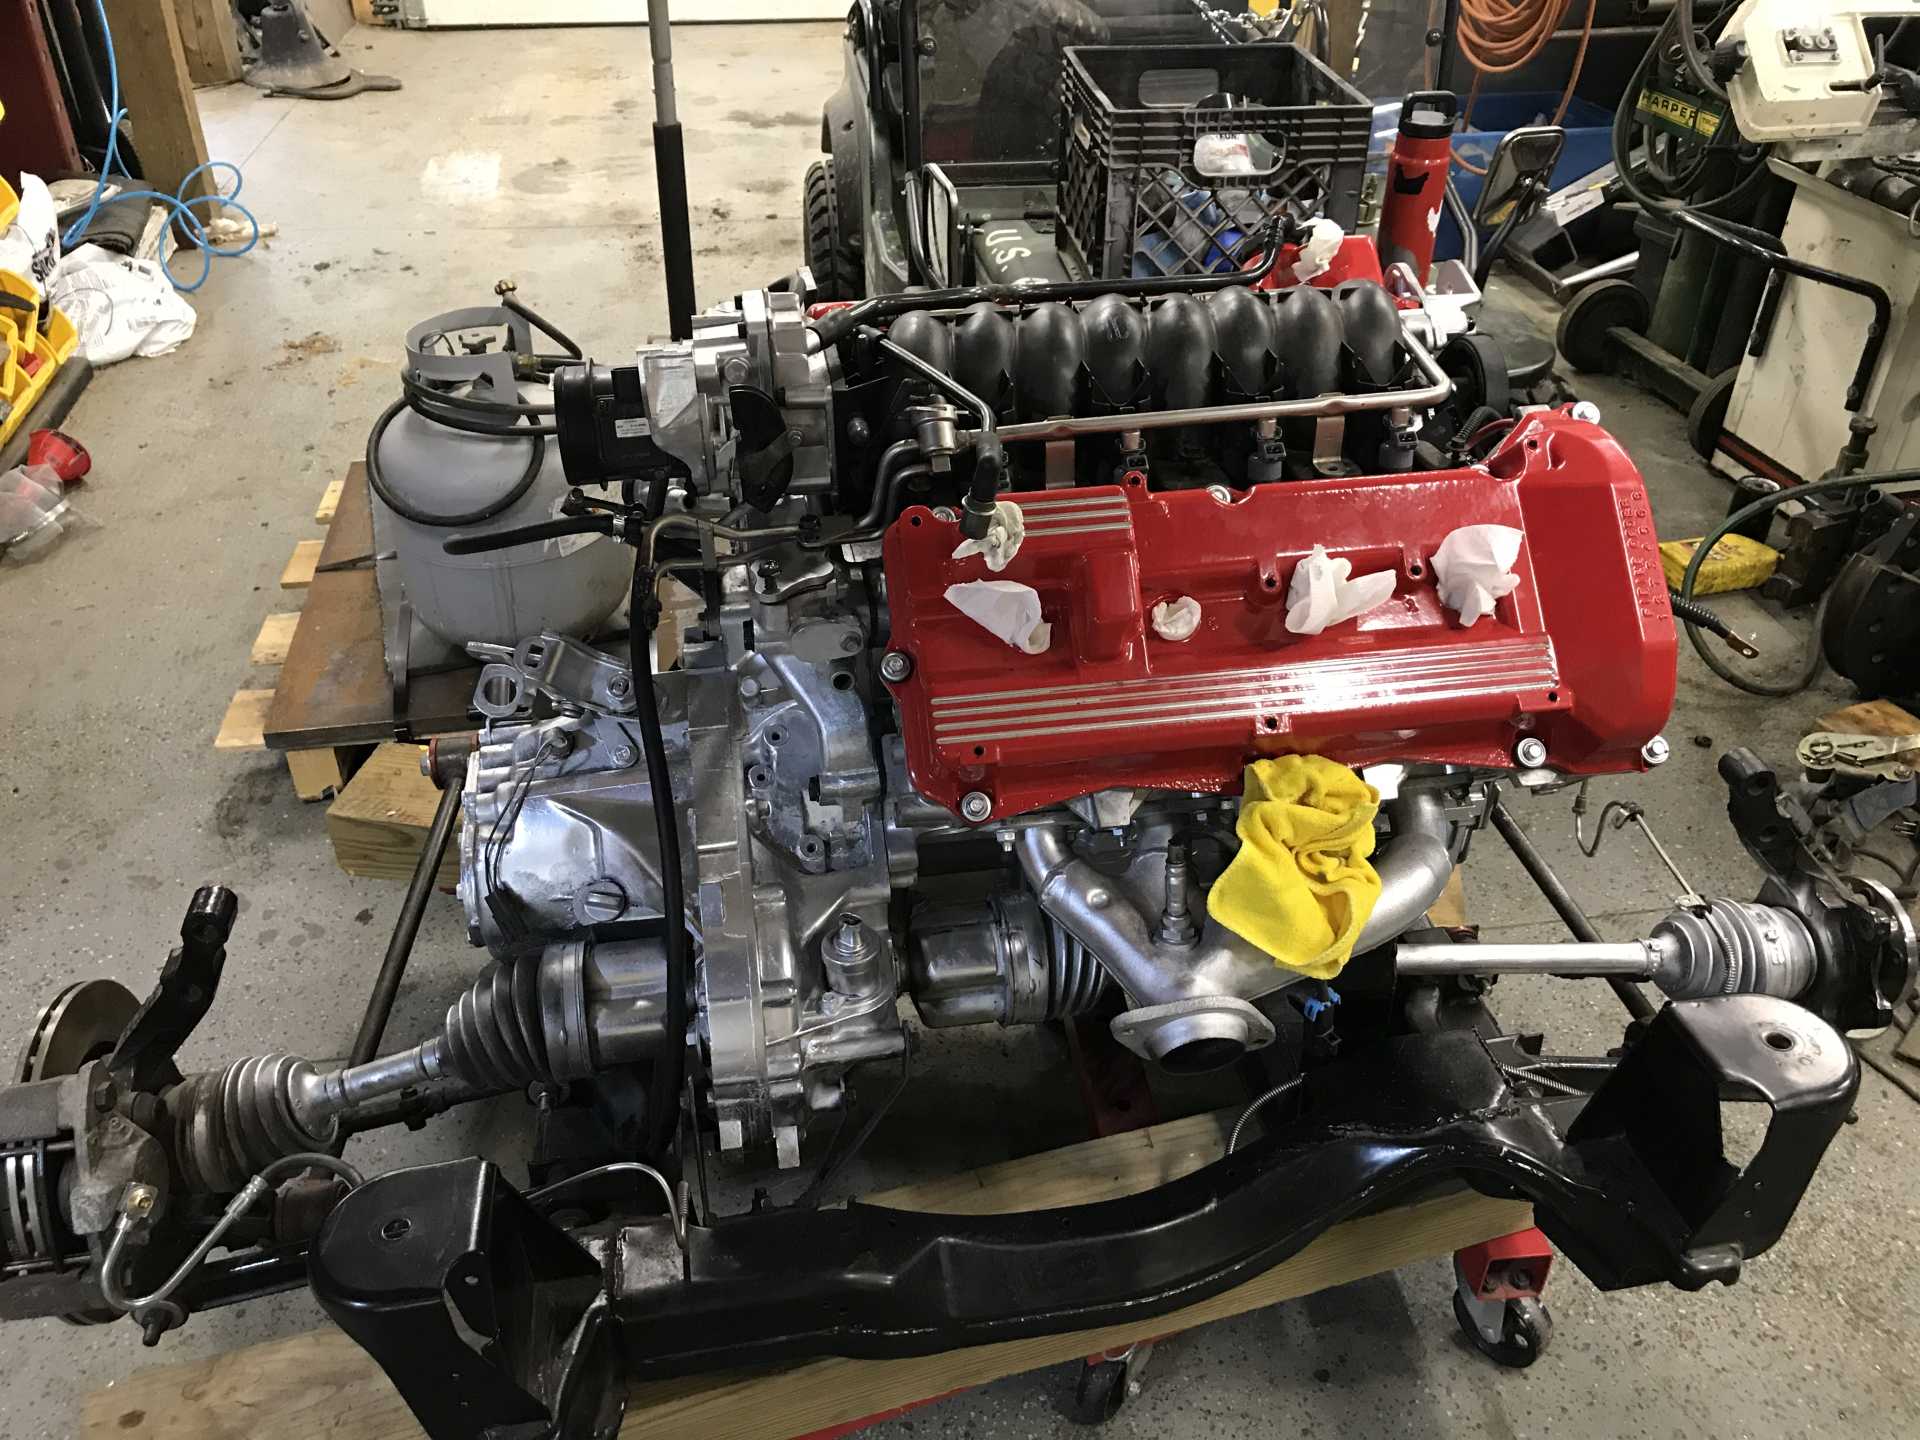
My dad helped me get it on the cradle. It was a bit tricky to line on the trans, and my dad wanted to take the trans off, but with some fineness I got it lined up and on by some miracle.
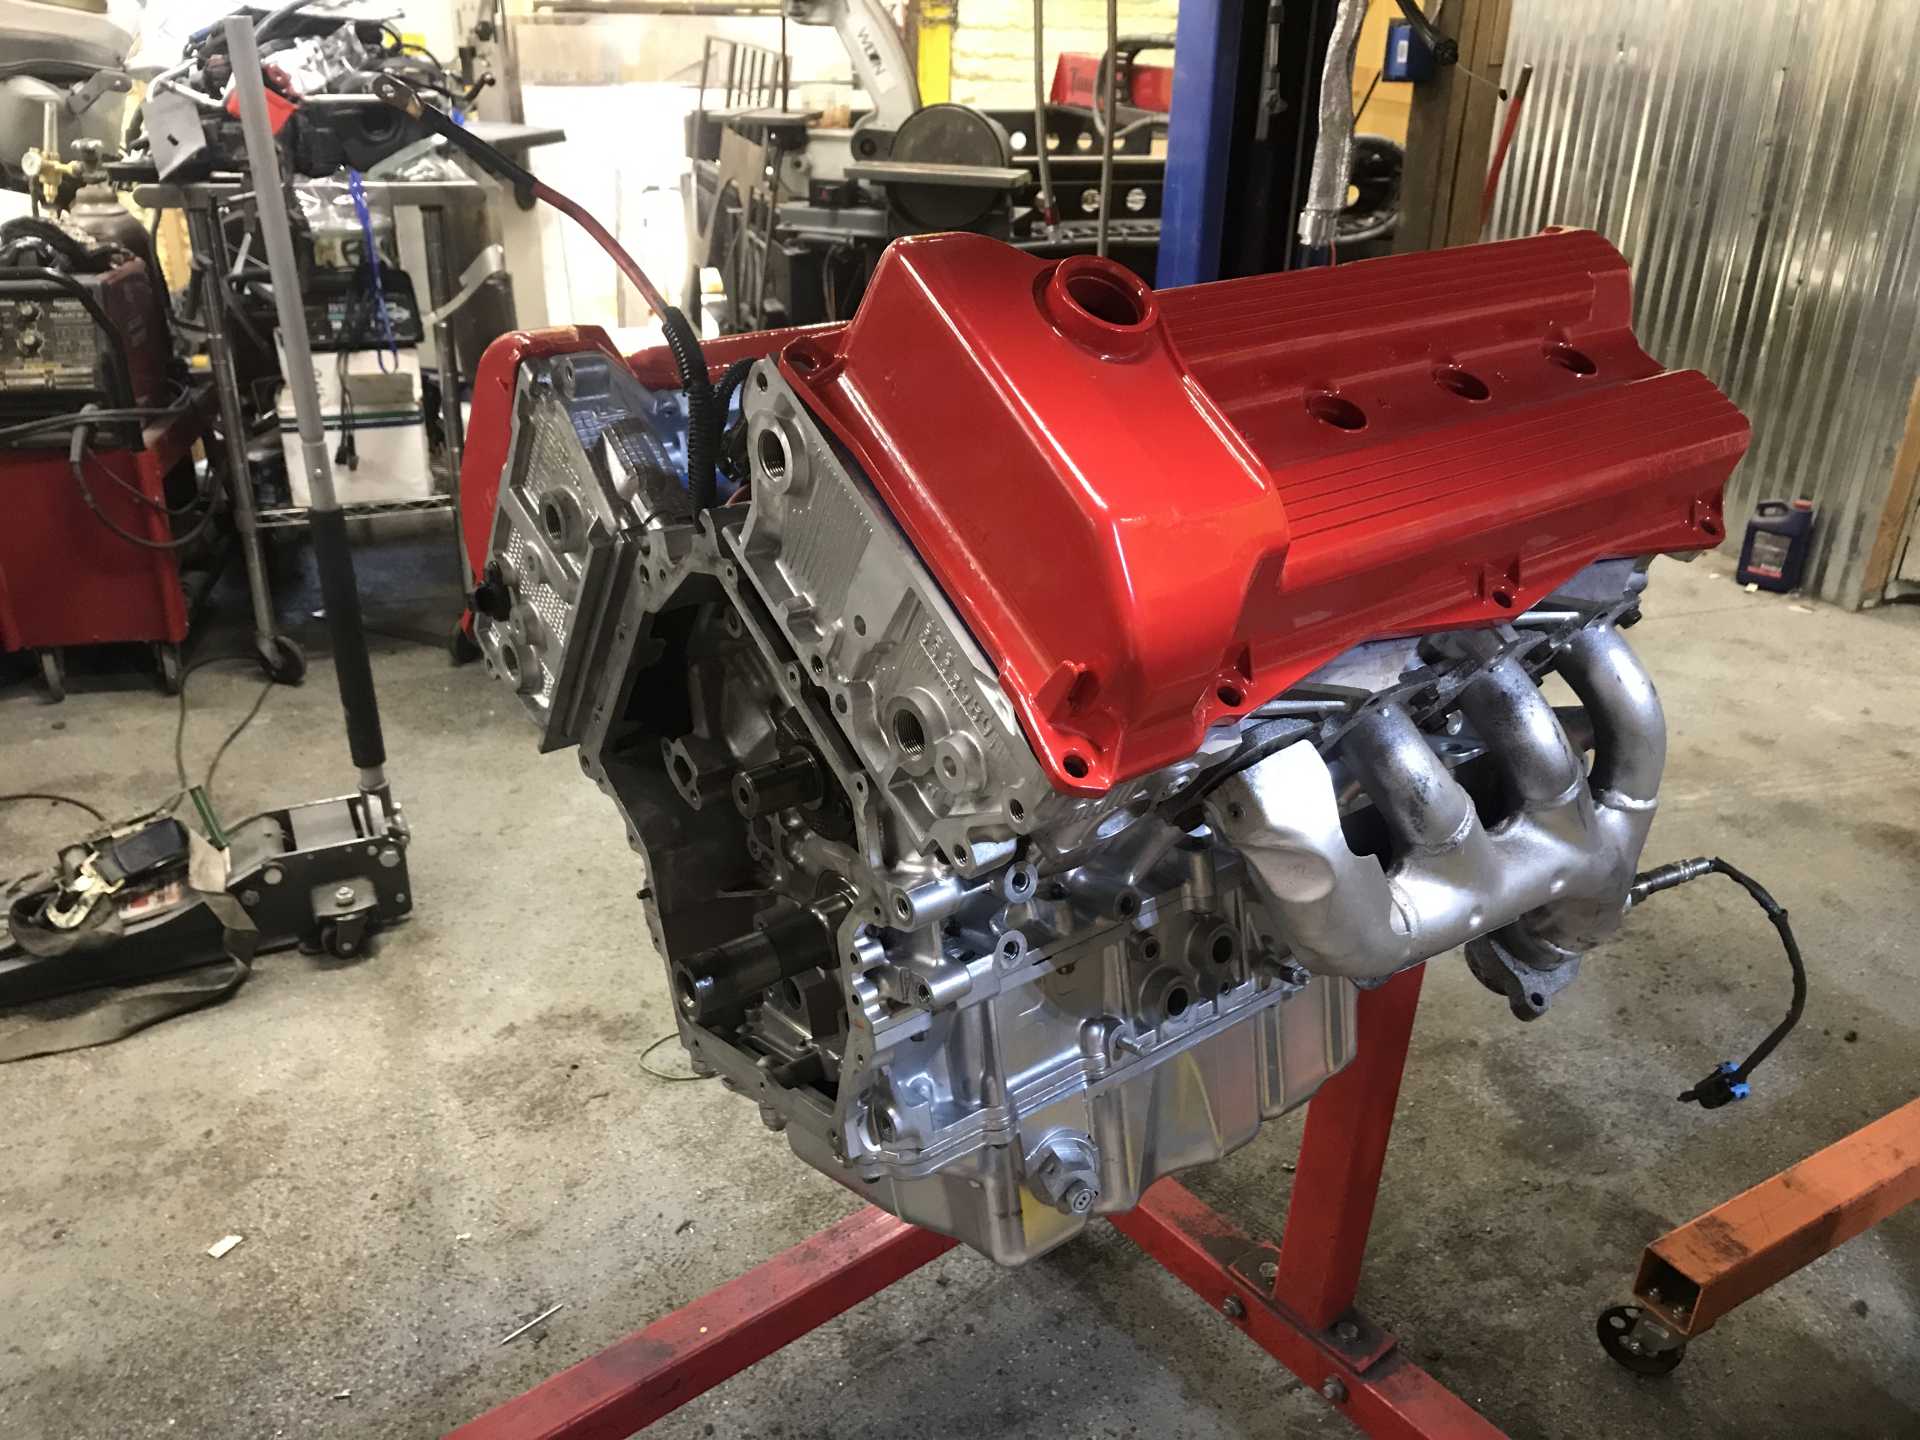
It’s looking good. Notice anything? Mr. Eric machined the silver striping back on. The lines are not raised, so sanding would have not been easy to make look clean,
The next big engine bay project… fixing this mess.
5/16/21 Head rebuild day! As a recap, lack of oil pressure ruined some of the cam caps. You can’t just buy new ones because they are machined for each cap. So, Mr. Eric made a program to remachine the caps. All the program did was cut mere thousandths of an inch off the cap, and to compensate, cut the same amount off the mounting points so it would sit flush again. Here is a picture of the damage on the head that sanded out. I thought I had a picture of the caps. There were 3 that needed to be remachined. The cams on the rear head were polished as well as all the cam surfaces. Clearances were measured and were good.
I did not take apart the front head. There was no damage to any of the caps. I did clean it out really good though. Both heads were cleaned in the parts washer and blown out to dry.
You pulled the pipe plugs on the outside and blew the oil galleries out, right?
[This message has been edited by Will (edited 07-25-2021).]
6/5/21 With my old setup I left my AC compressor on in case I were to put AC back on. The POs ripped out everything, including the blower motor. At this point, AC is a long way off if I ever do it, so I decided to delete the compressor. After doing some internet research, I could either get an idler pulley or a shorter belt. The idler had bad reviews, so it seemed better to get a shorter belt. After making several runs back and forth to AutoZone, I finally got one that would be the right tension.
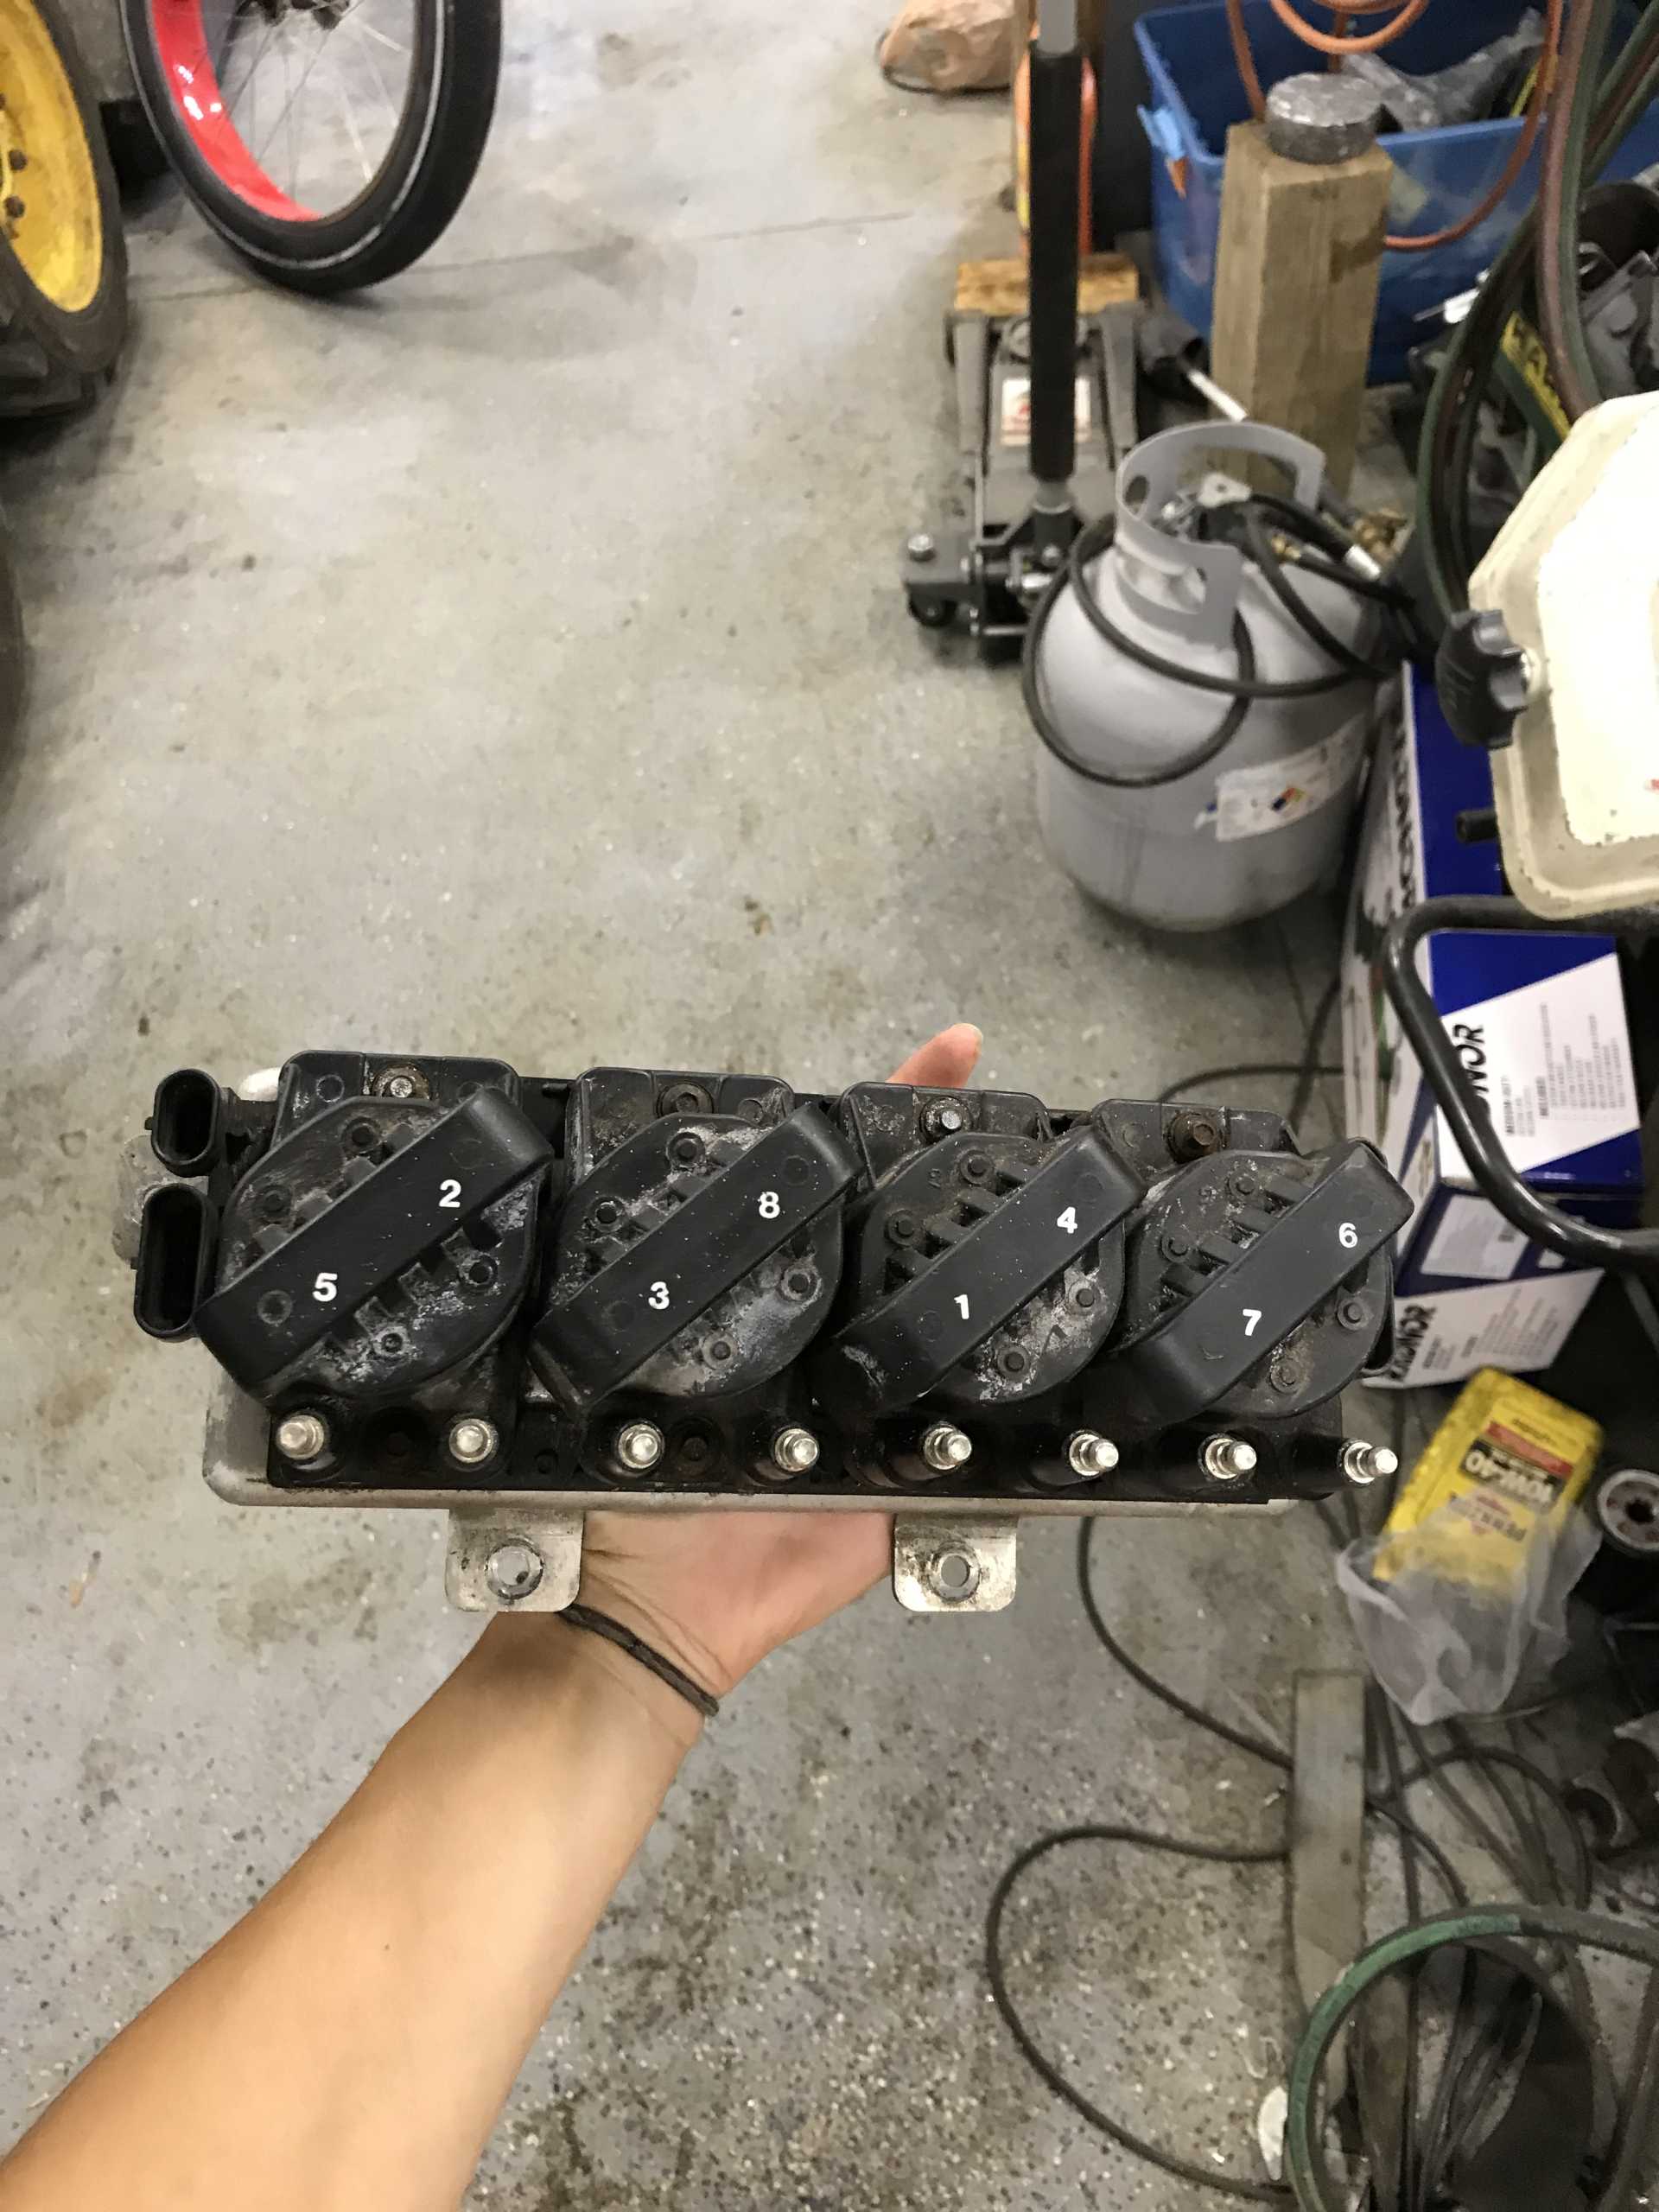
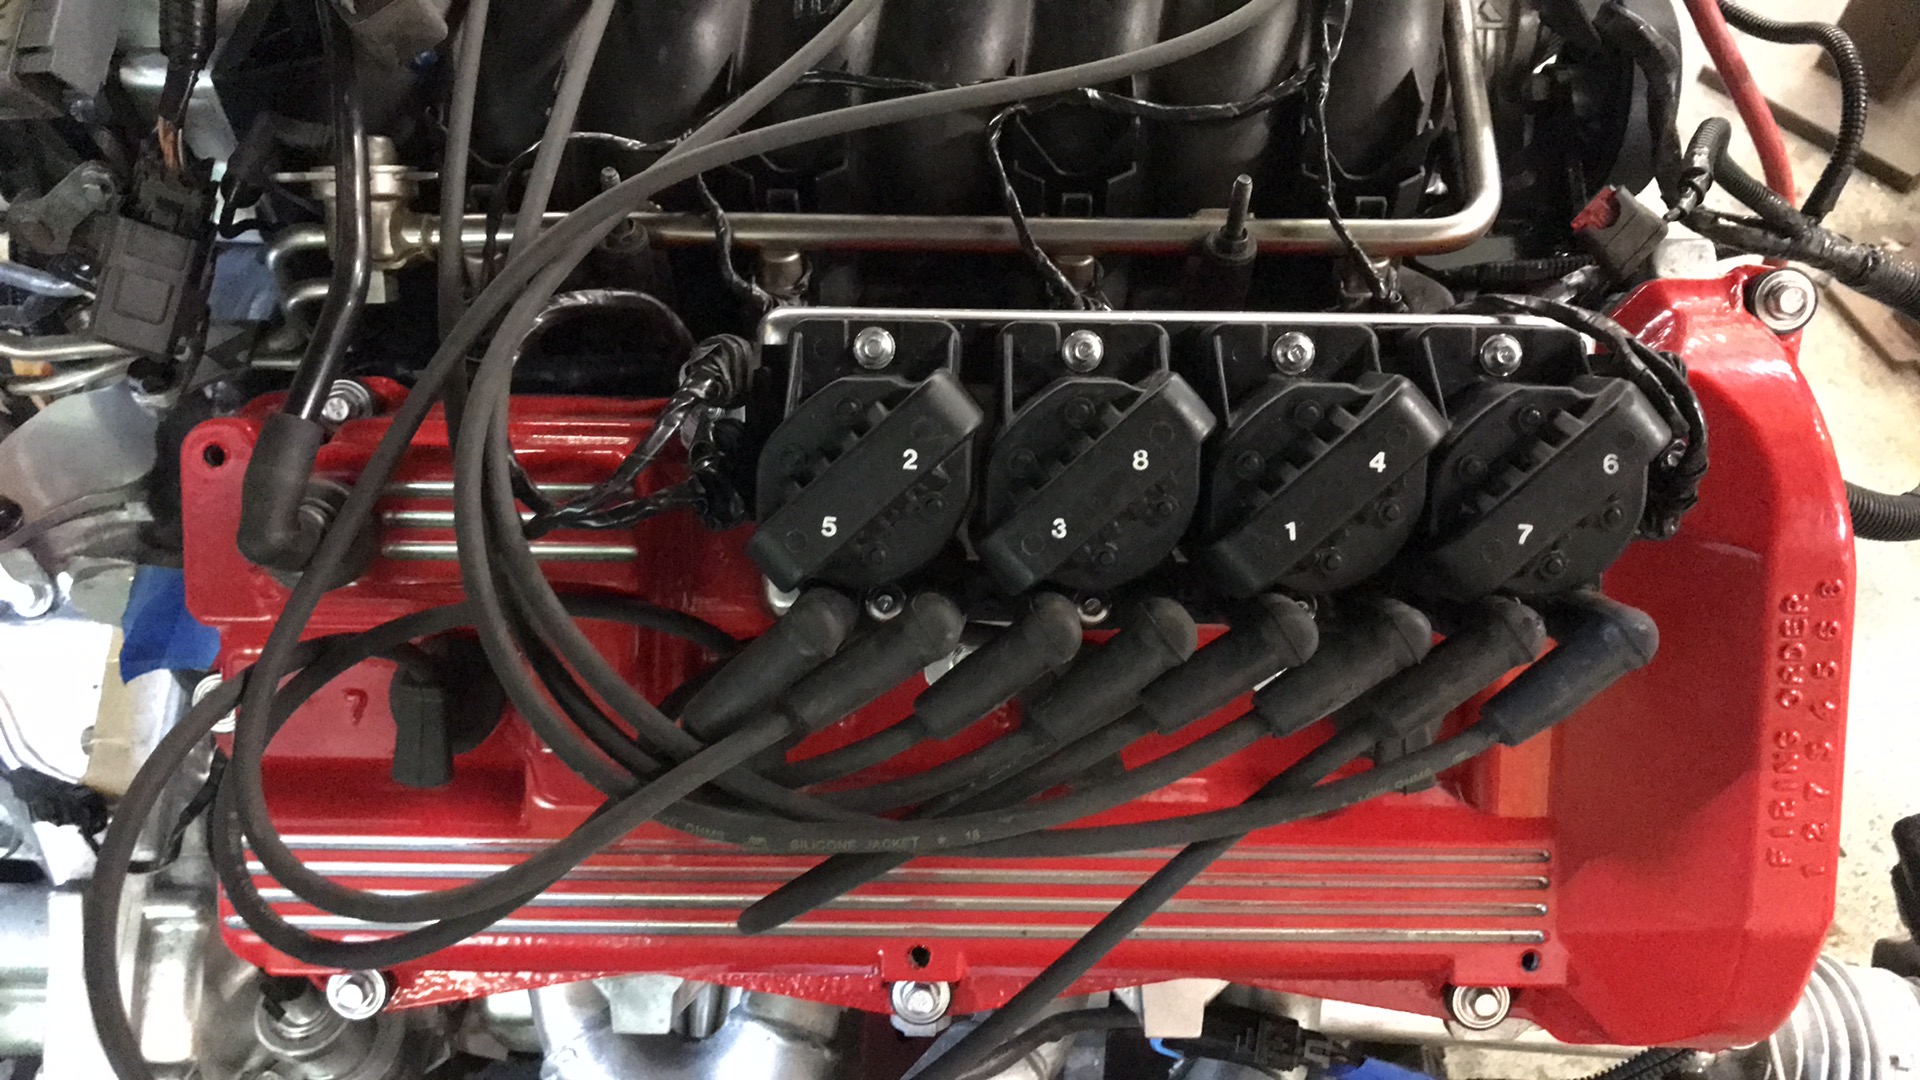
I took them apart, blasted and painted the bottom plate and bolts. I cleaned the packs off too. A later project will be shortening the spark plug wires, they are all over.
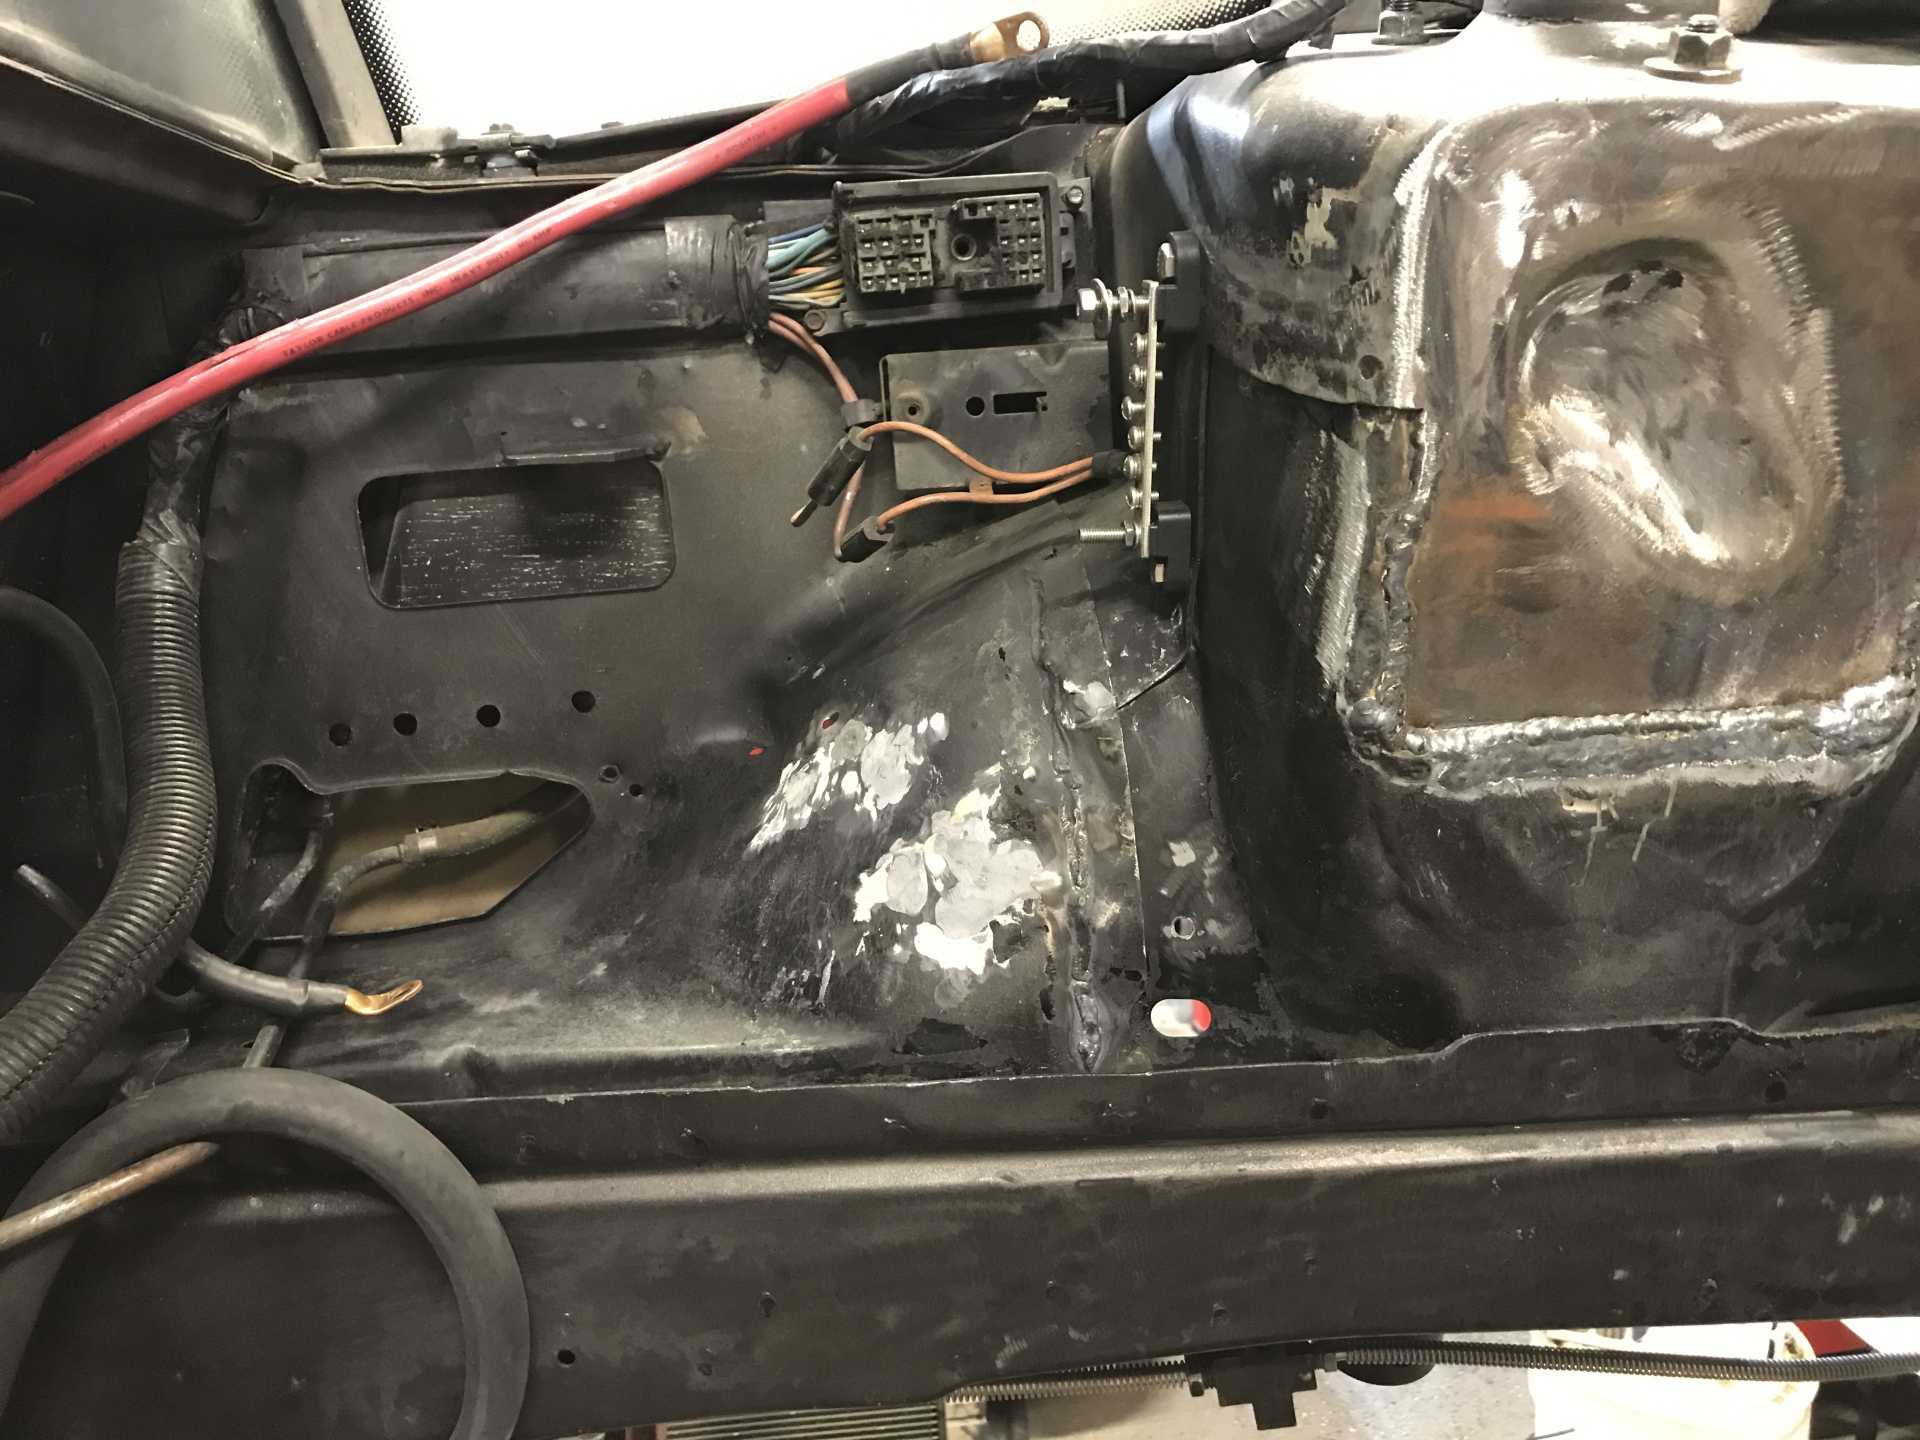
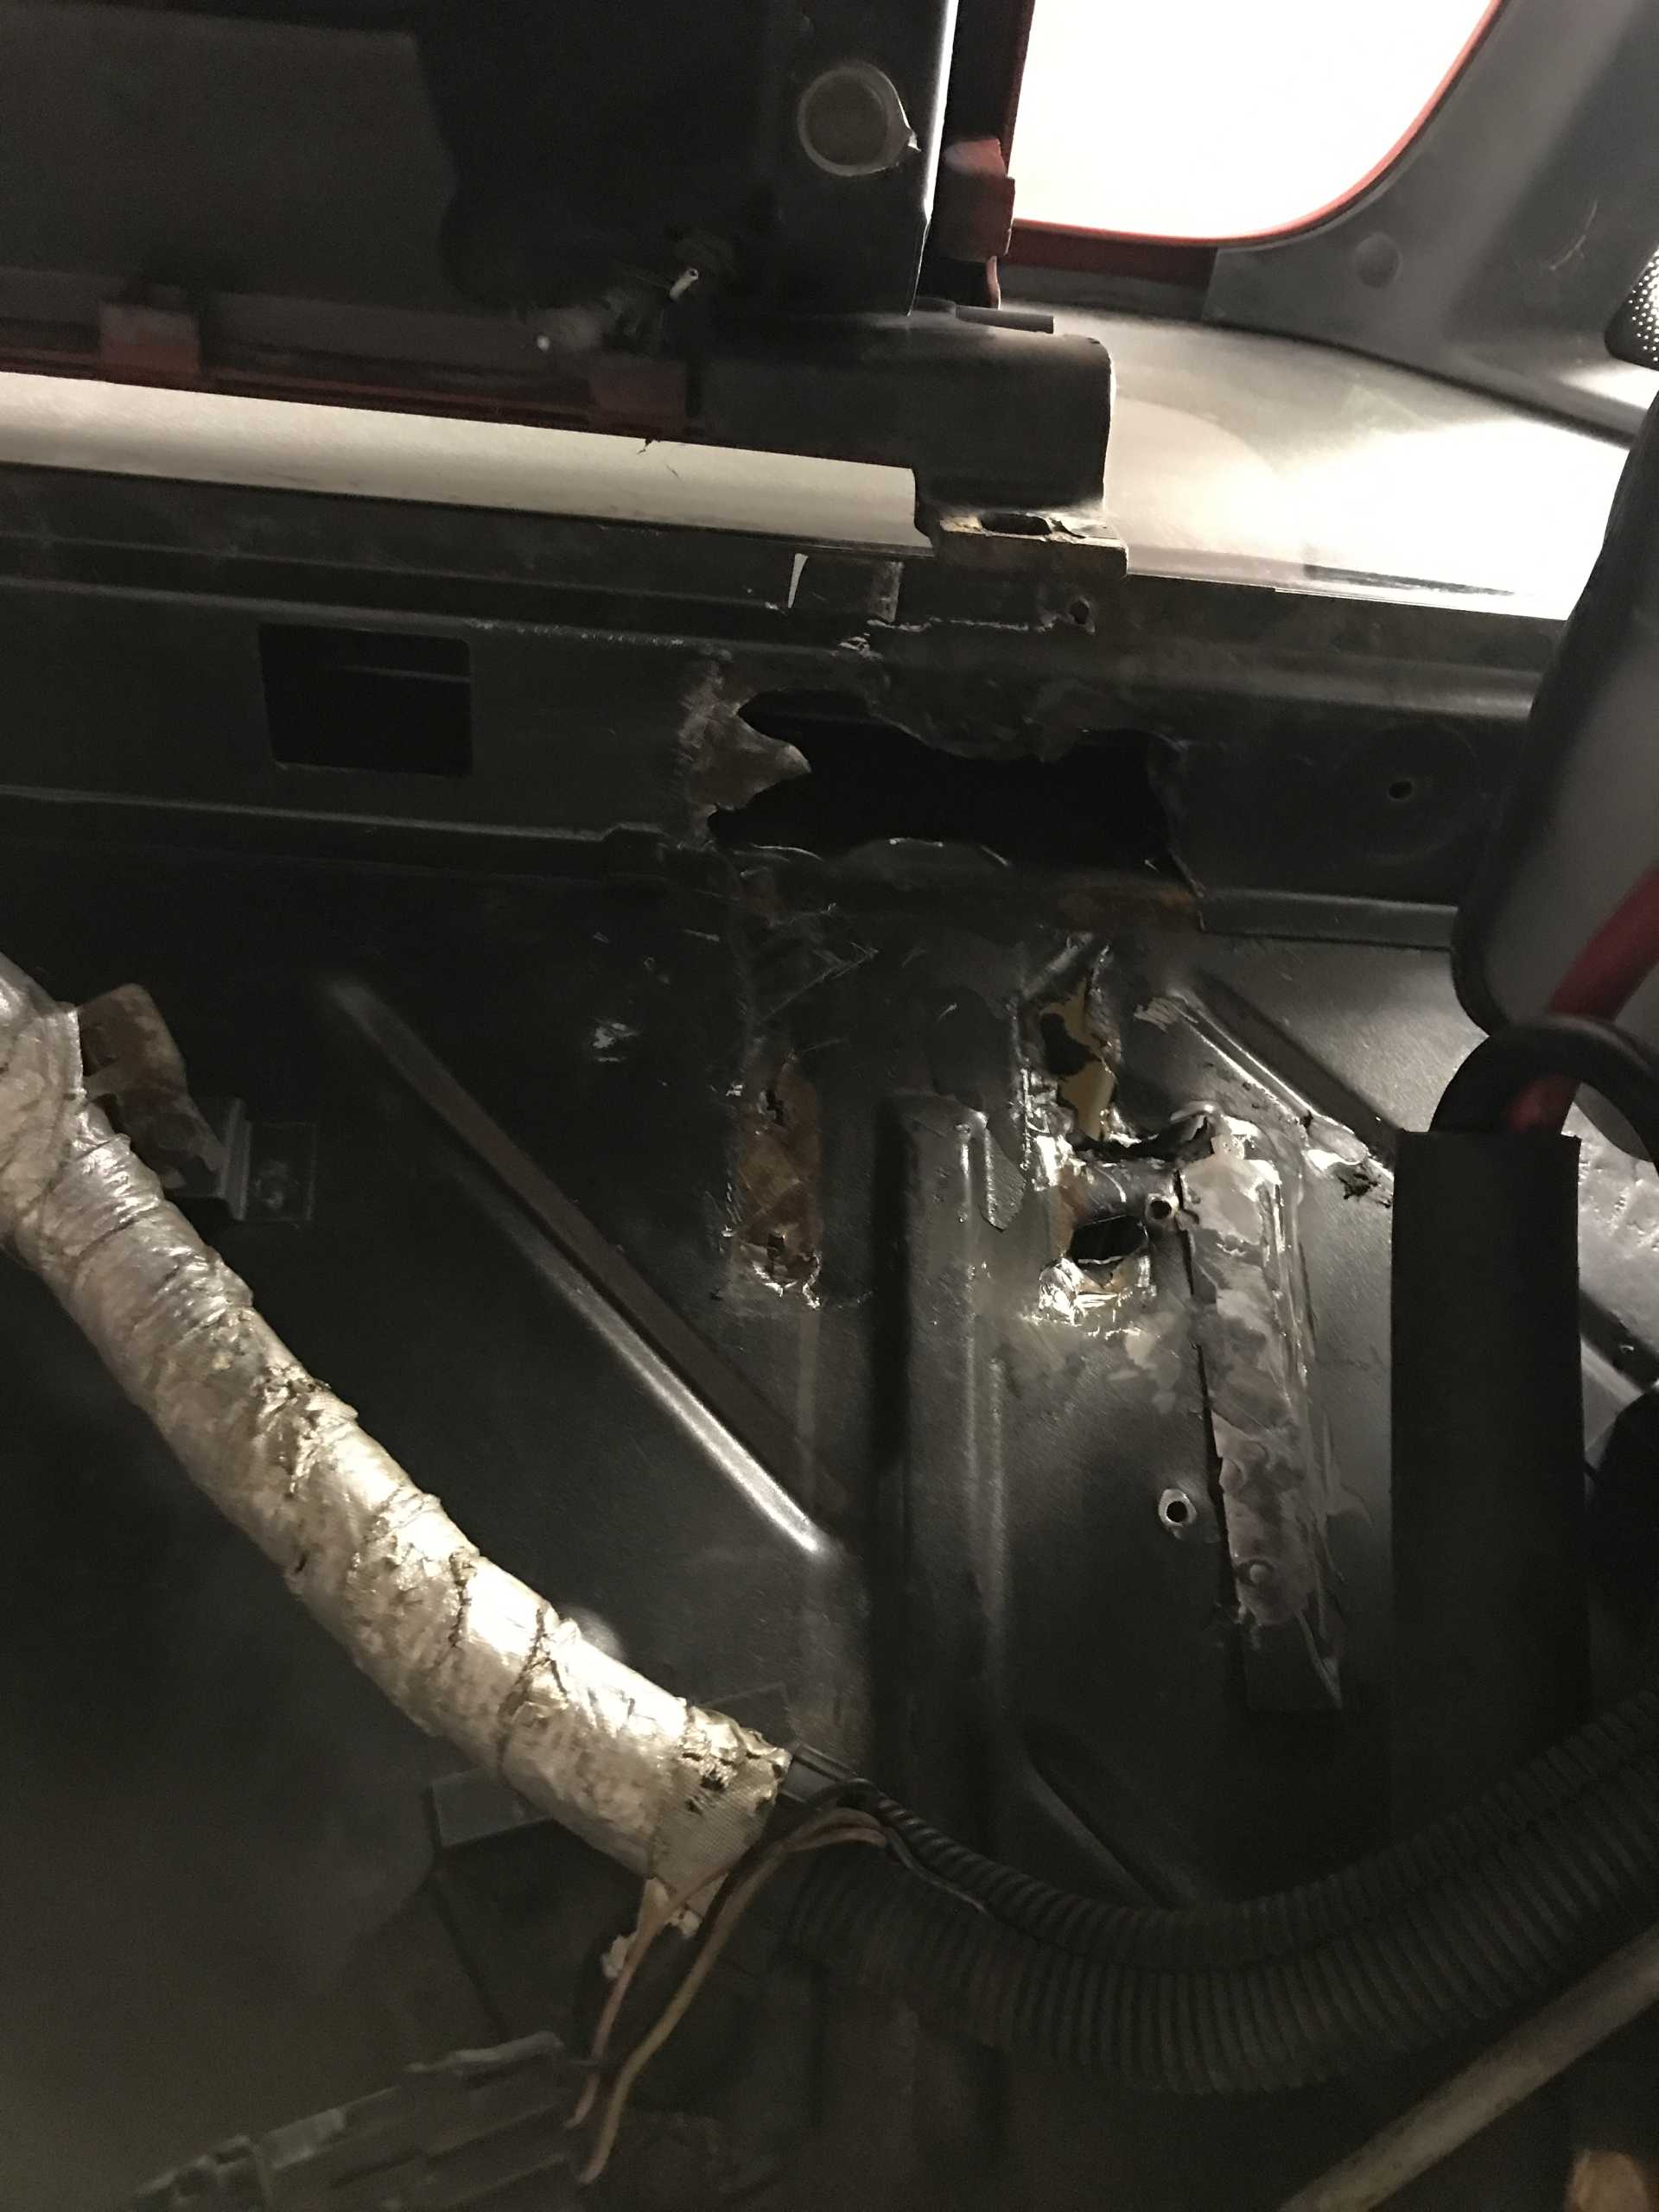
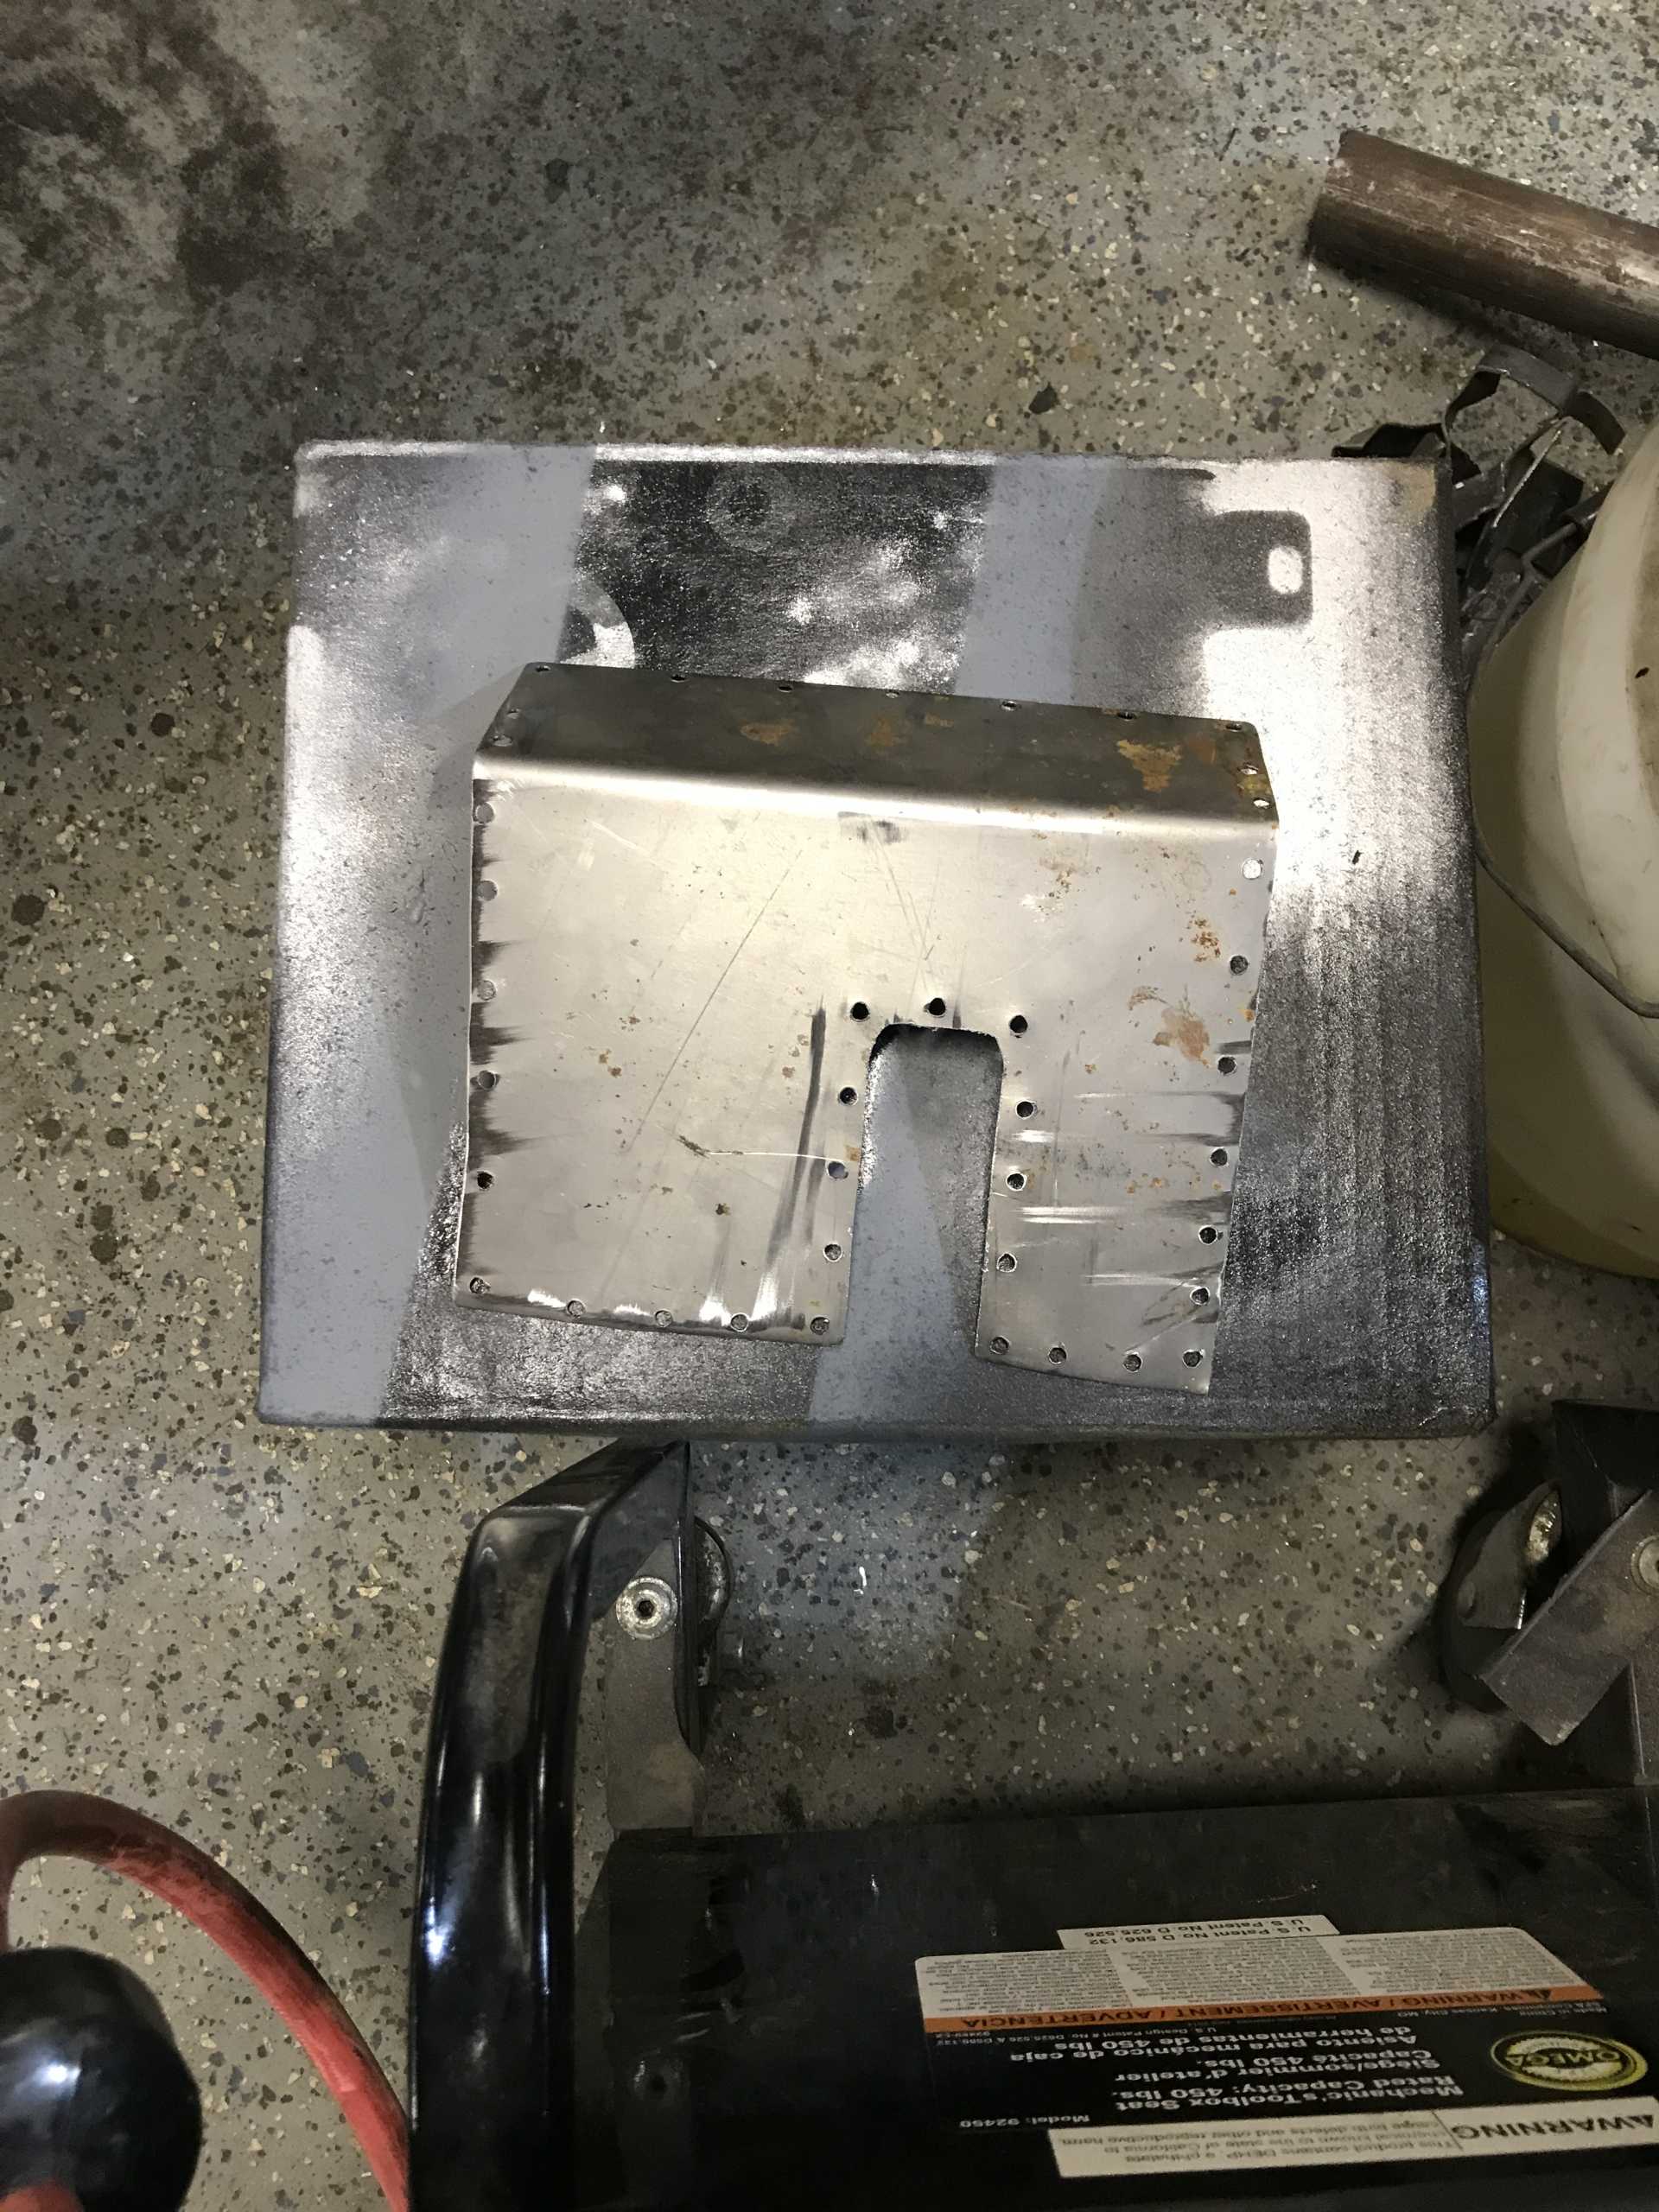
6/21/21 Working on the firewall. Here is the replacement plate to reinforce the wall and patch the holes.
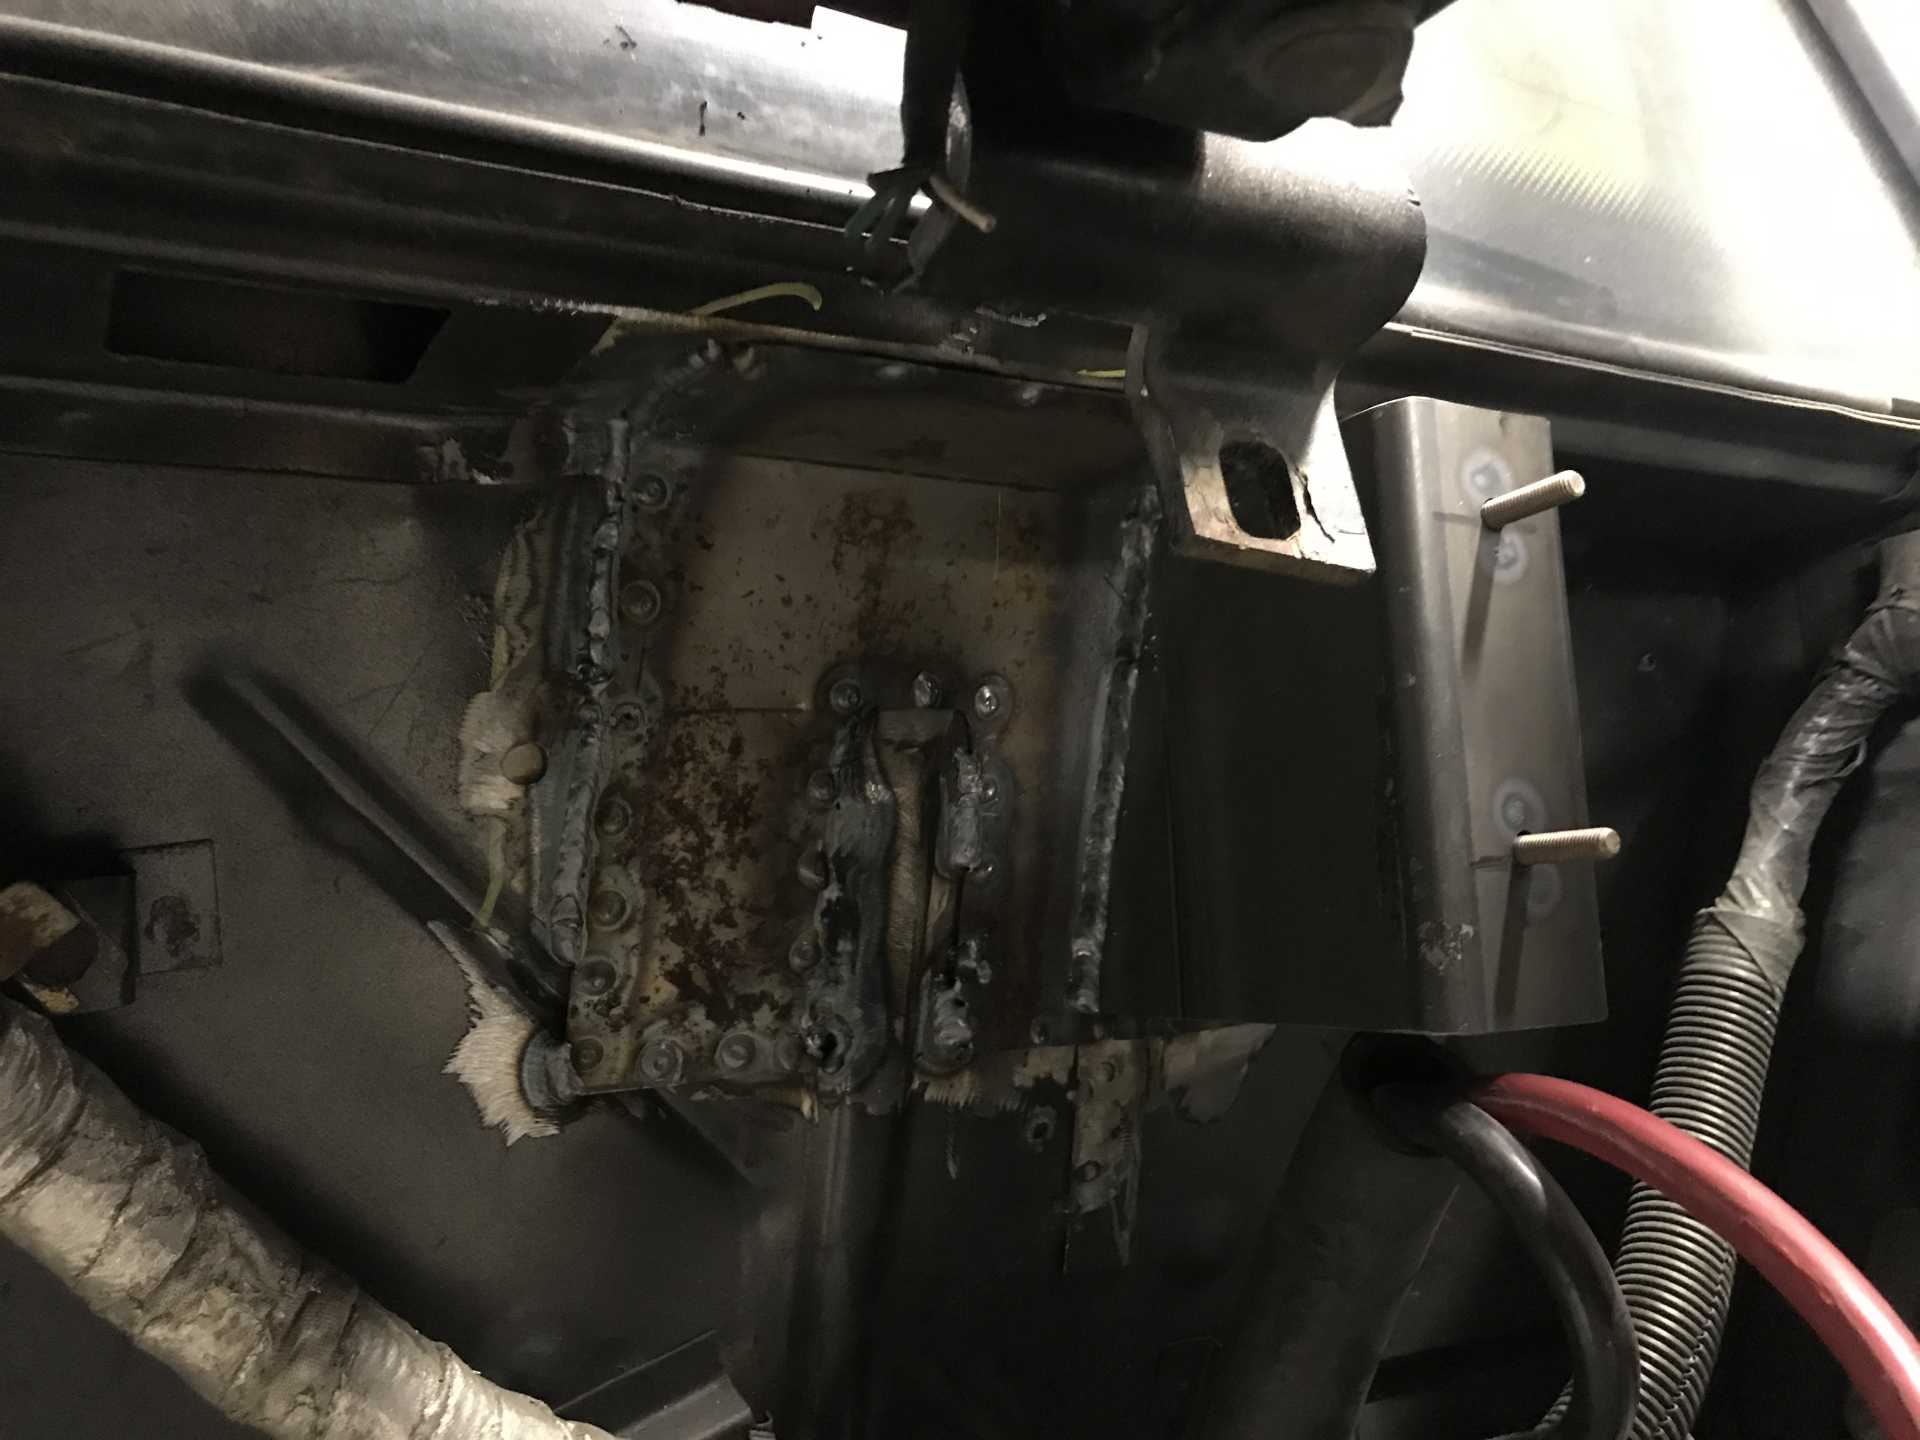
Here is the plate spot welded in to resemble the other side. The hinge mounting point got moved over too. While the studs are what was available around the shop and don’t match the other side’s thread, it looks pretty darn good. Mr. Eric had trailer frame laying around that was the same look of the stock hinge mounting point, and with the right angle cut off it fit perfect. Obviously the deck lid hinge needs to be modified, but that can be done later when the engine is in.
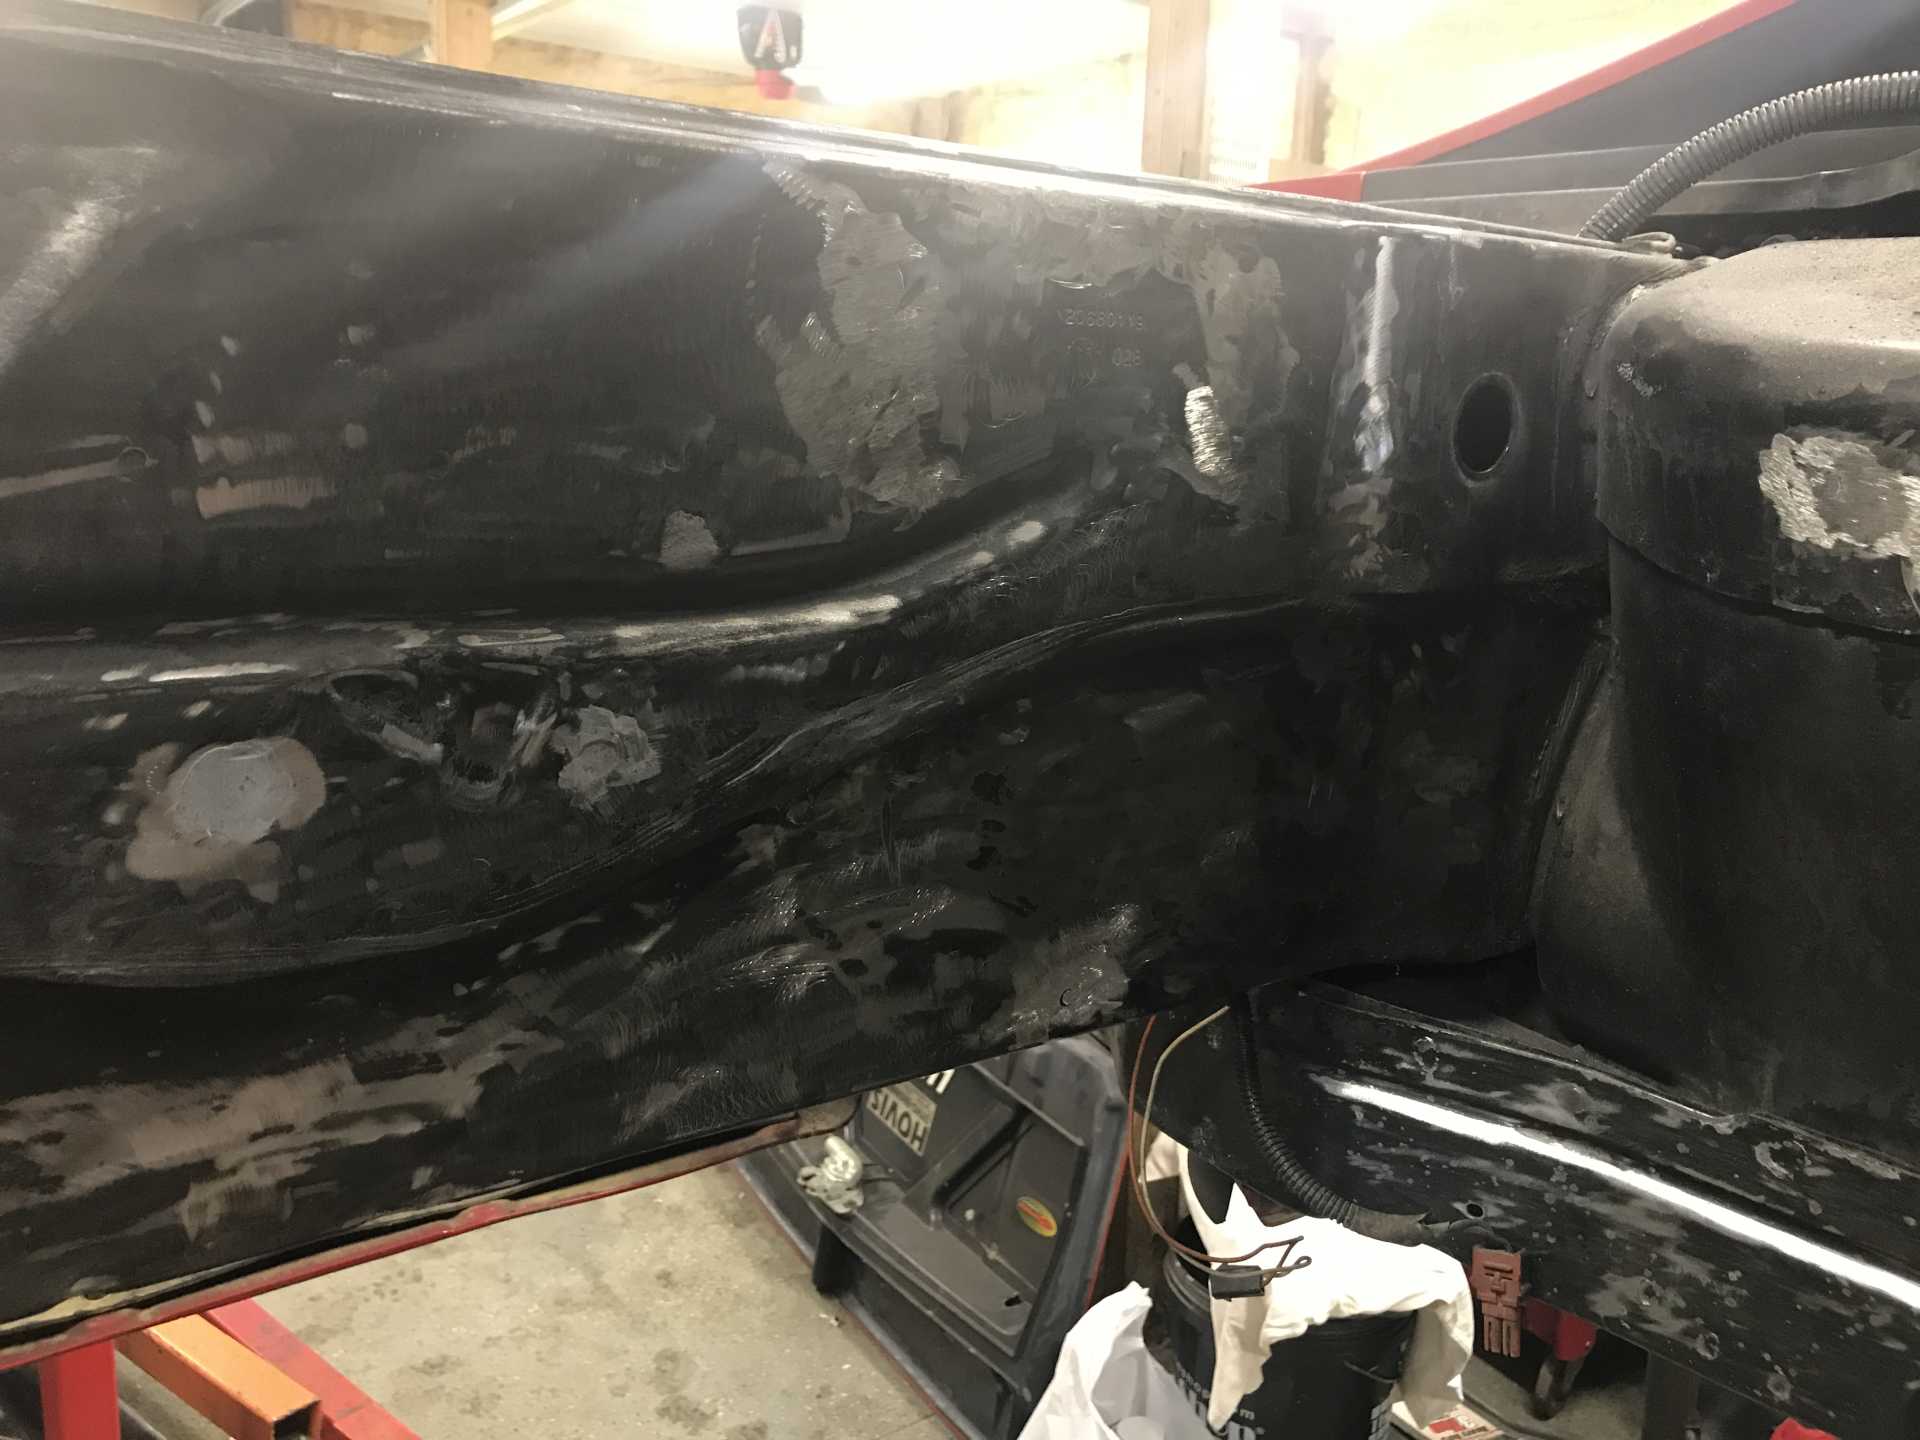
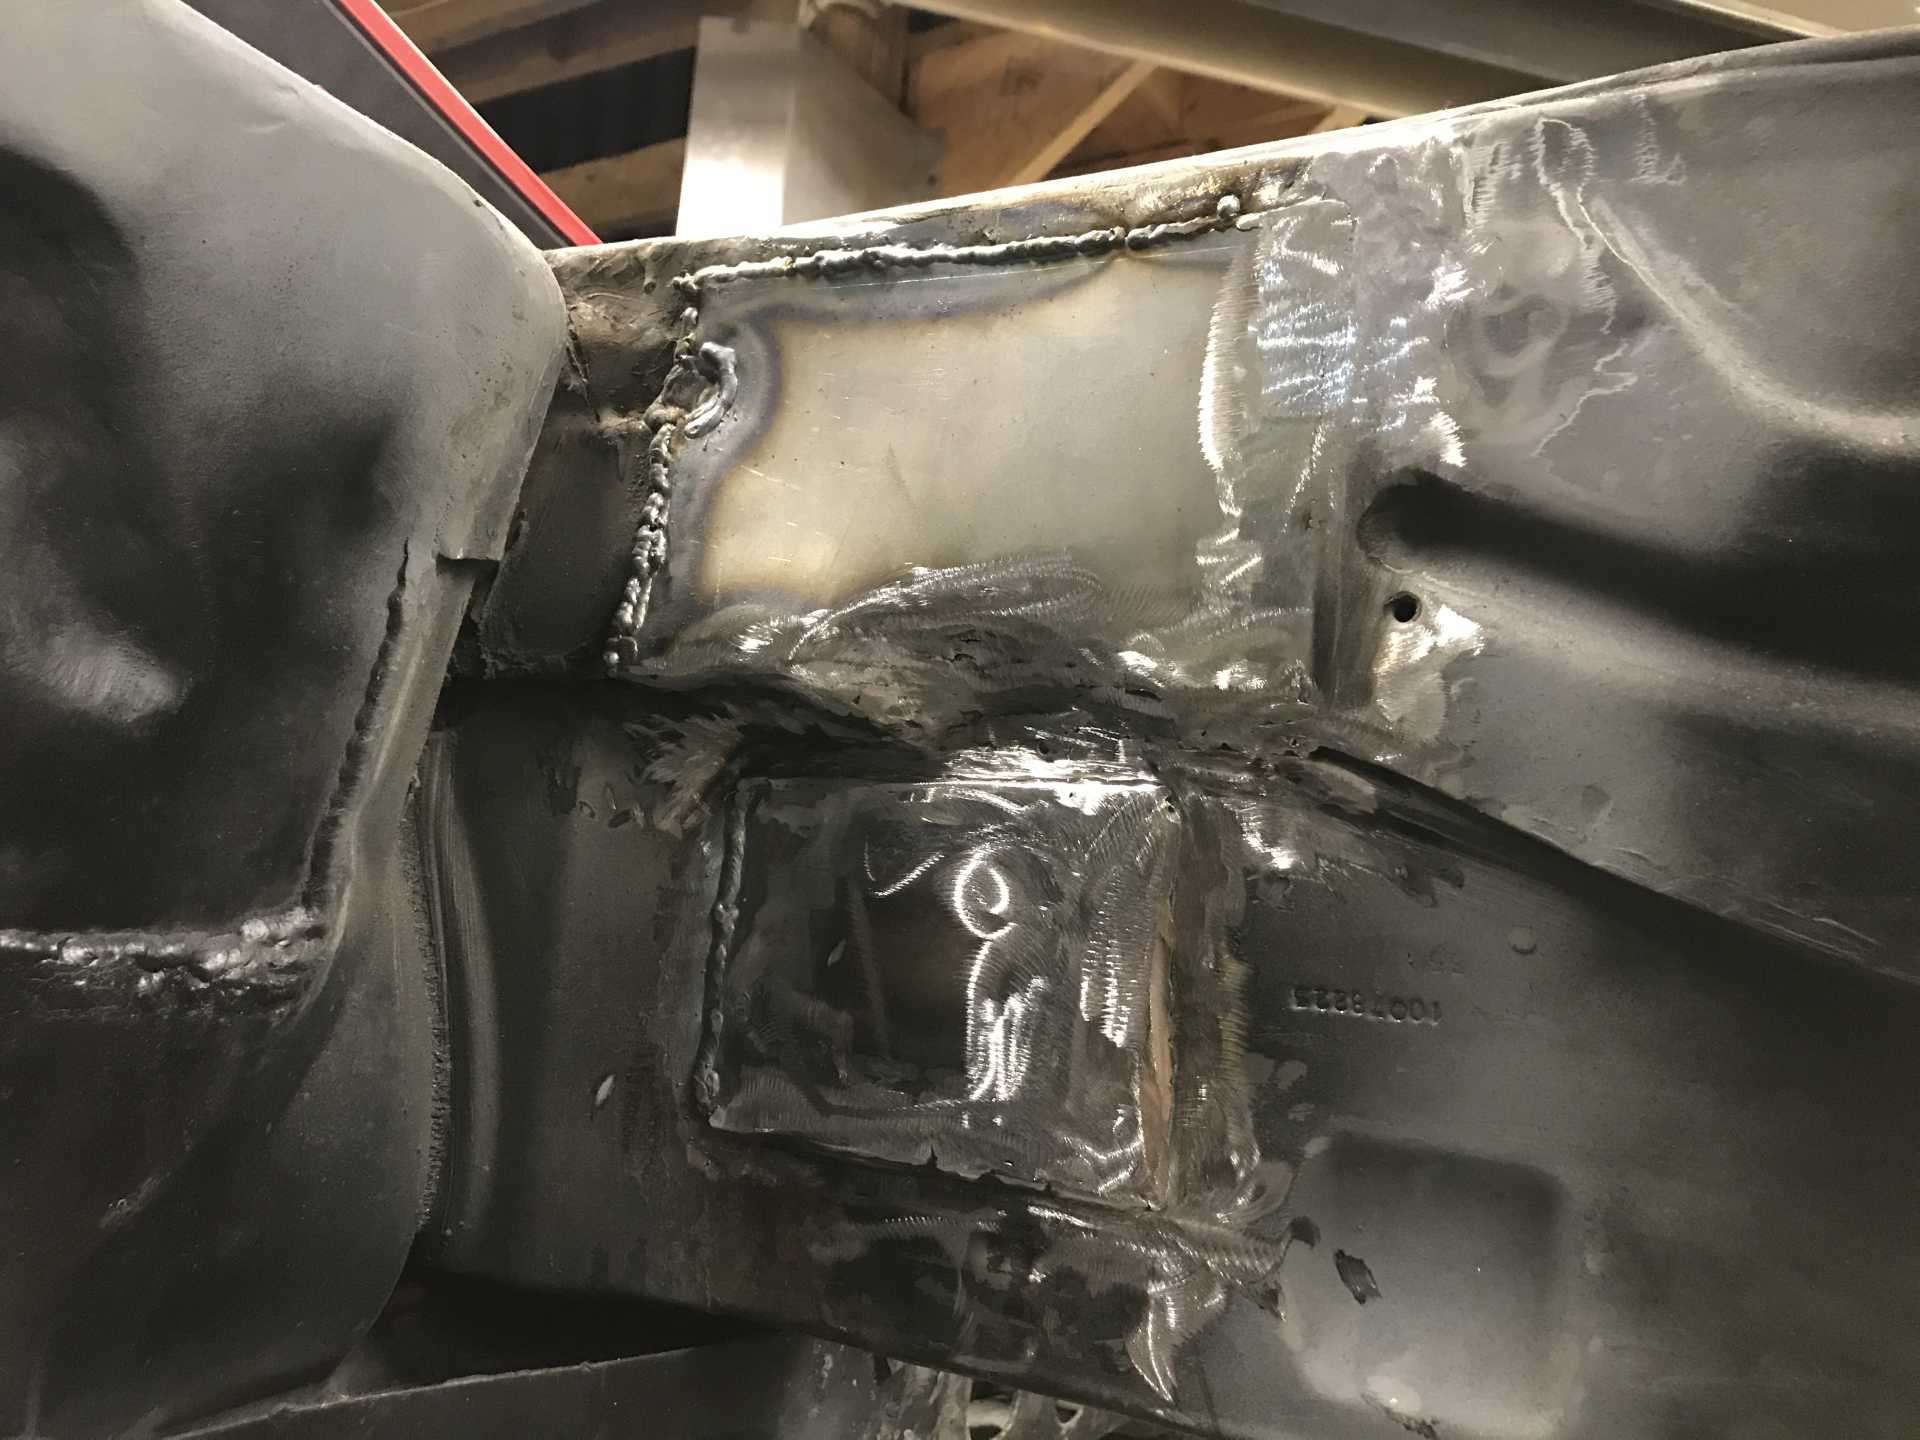
Here is the rear wall welded in. The welds are half ground smooth.
Picture of the front firewall that needs a bit more preparation.
I took them apart, blasted and painted the bottom plate and bolts. I cleaned the packs off too. A later project will be shortening the spark plug wires, they are all over.
You can still ground the baseplate, right?
An extremely solid ground connection on the baseplate is vitally important to the coil pack for correct operation... Note that GM has a 8-10ga jumper from the baseplate to the cylinder head. The baseplate does NOT ground through the cam cover because the cam cover is rubber-isolated from the cylinder head.
The ignition will NEVER run right without that ground connection on the baseplate.
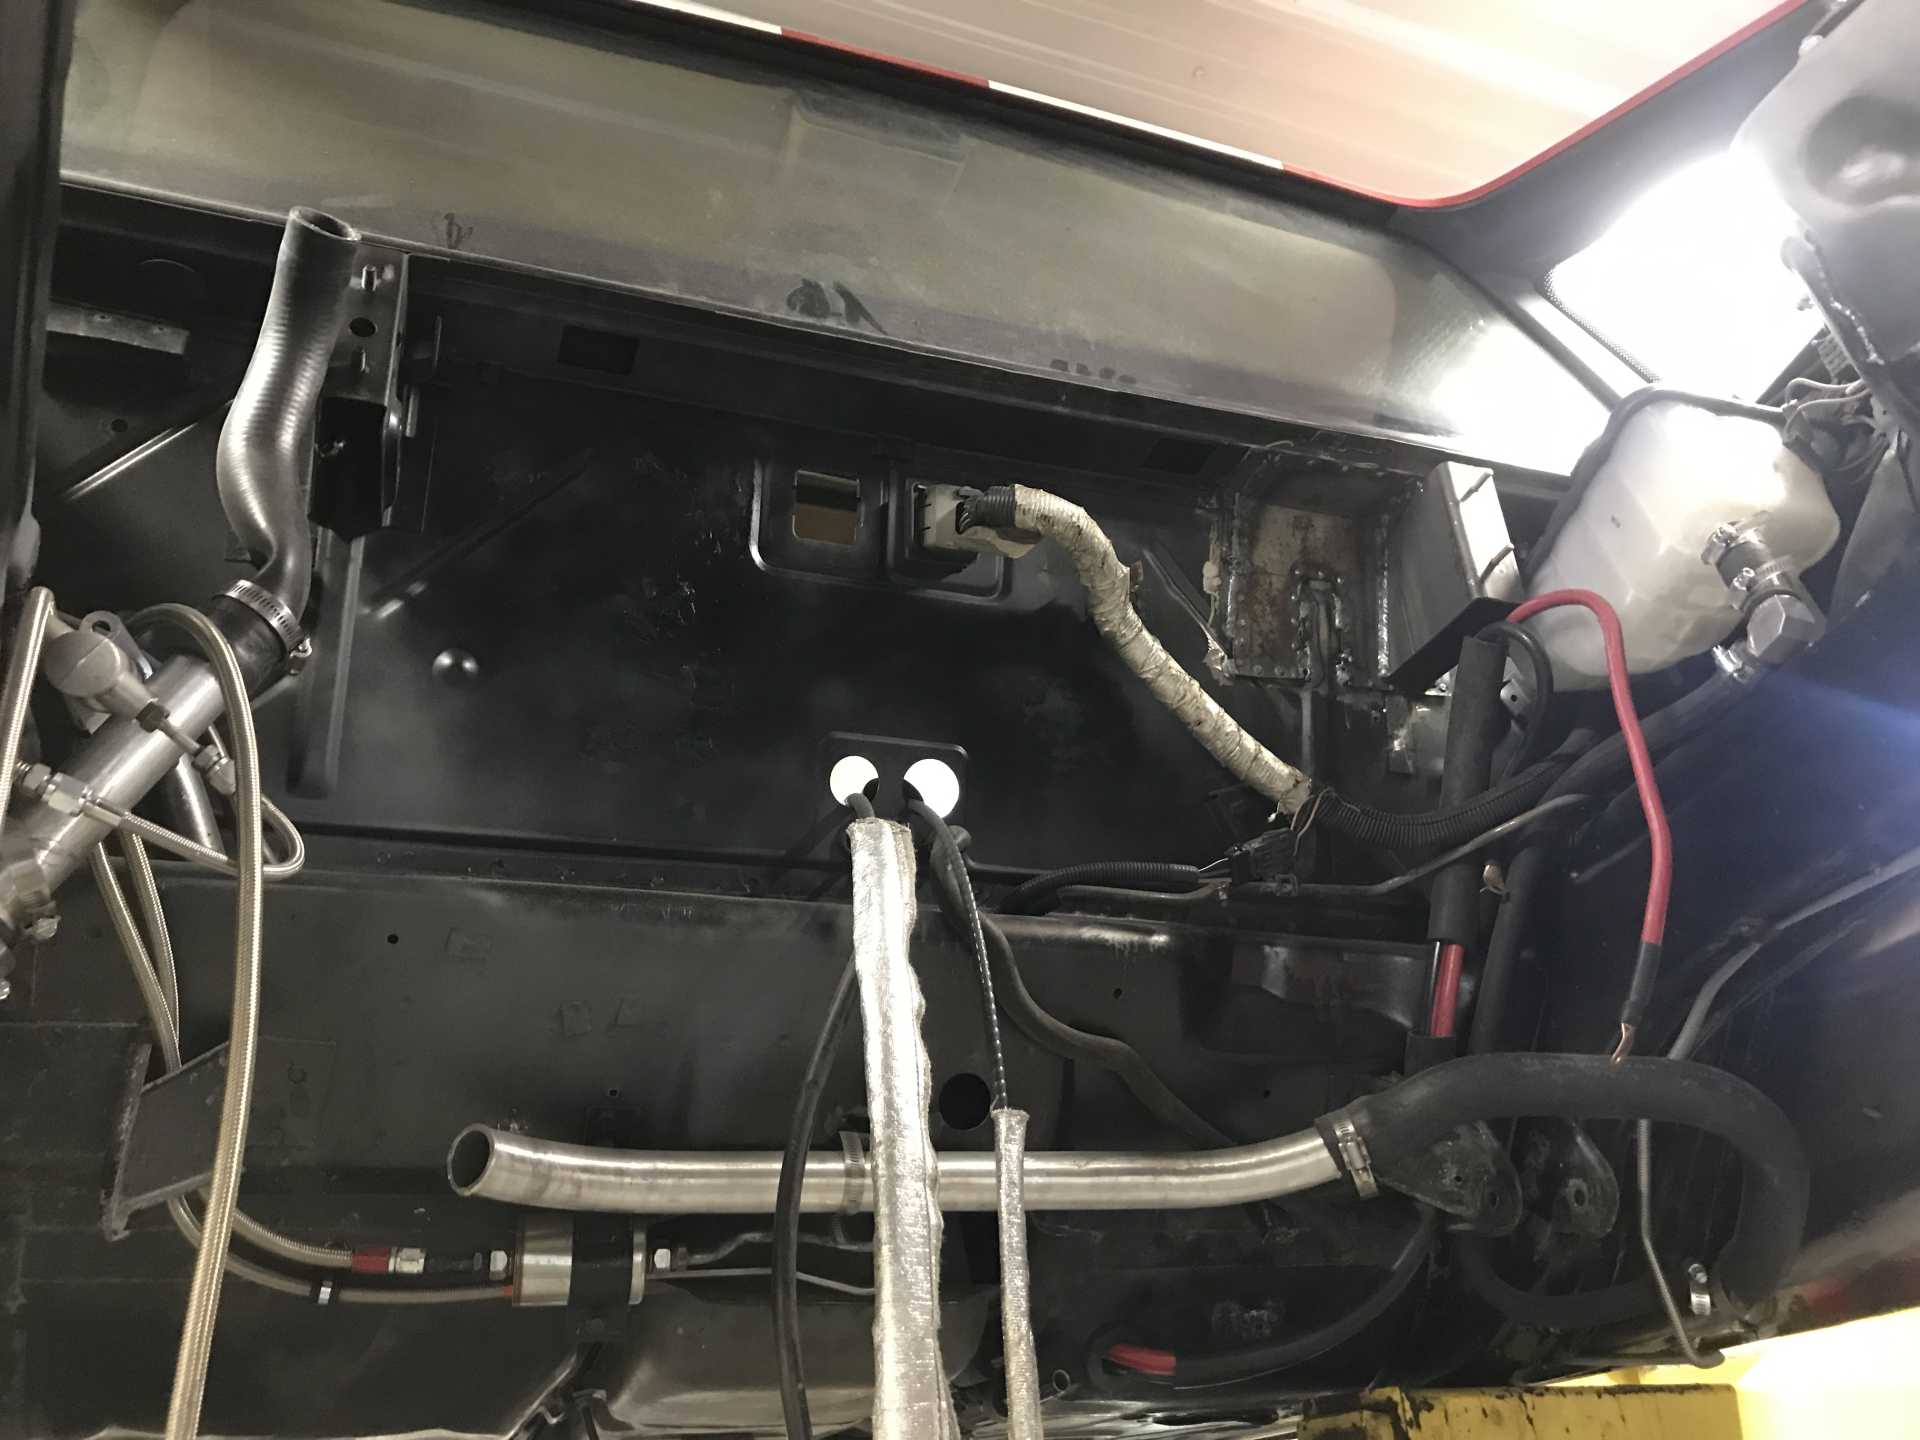
Sorry if you mentioned this and I missed it -- is that header wrap around the wires? Did you put it on just to protect them during the welding, or is that going to be a permanent thing to help protect them from heat in the engine bad?
It's a neat idea. I had picked up some high temp insulating wire loom, but it's meant to be put on wires that are being build, it's not a wrap (and it will be used on new wires going in). I might adopt this idea!