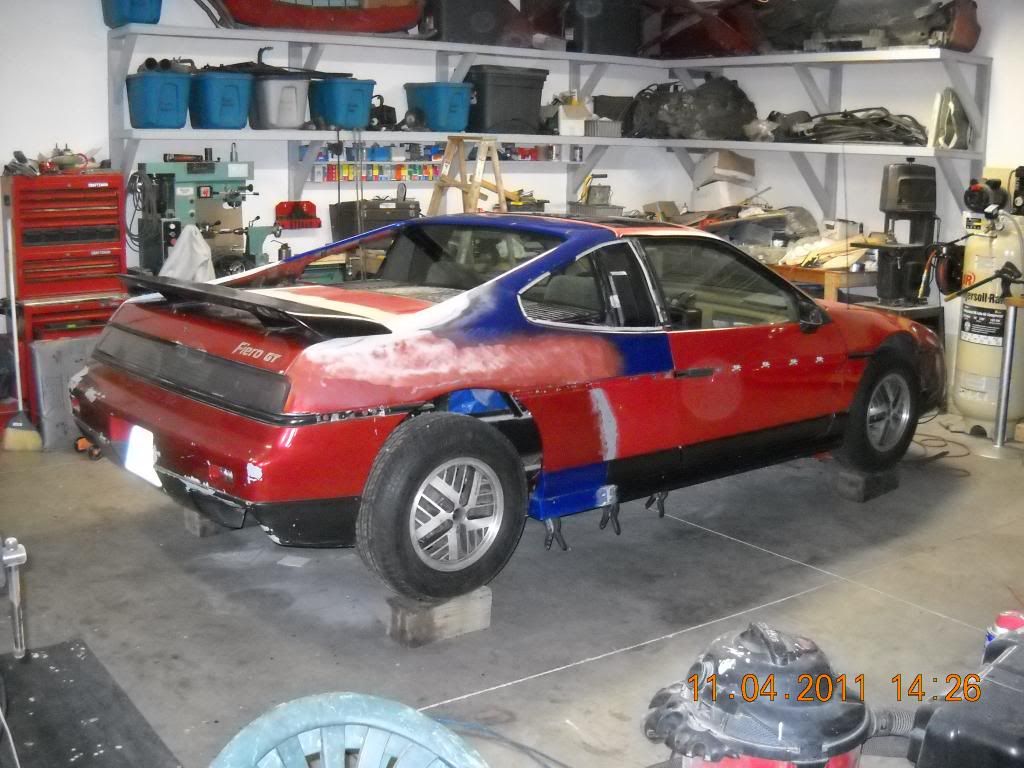
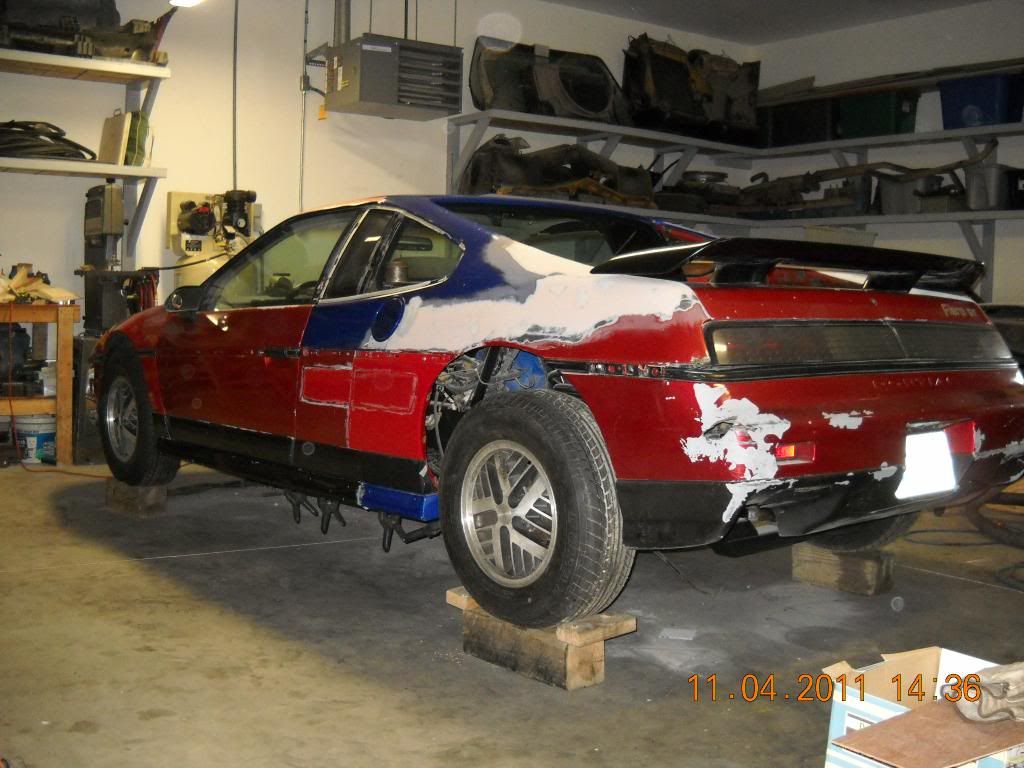
I had this in my head for a many years and finally get a chance to build it. It is a bubbajoe inspired streched fiero with a Northstar and Audi transmission. Here is where I'm at now. More pics to follow. Photo Shoppers welcome for tweaks !
OK, here's how it started, I bought a 1984 Nochie with plans to do a engine swap. I've been reading this forum for years then I came across BubbaJoes build thread and thought it was amazing. I always liked the Cadi Northstar but I new the eletronics would be a problem. I don't have a pic of the original car but it was a basic red 84 nochie with air conditioning as the only option.
[This message has been edited by Nebraska (edited 11-11-2012).]
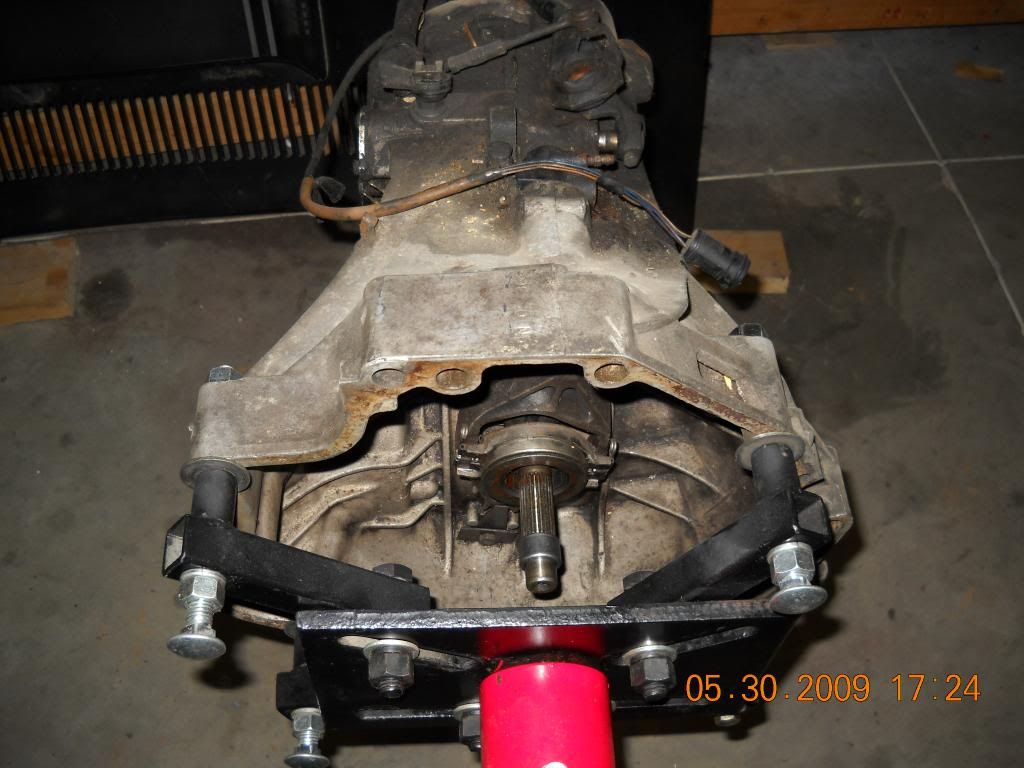
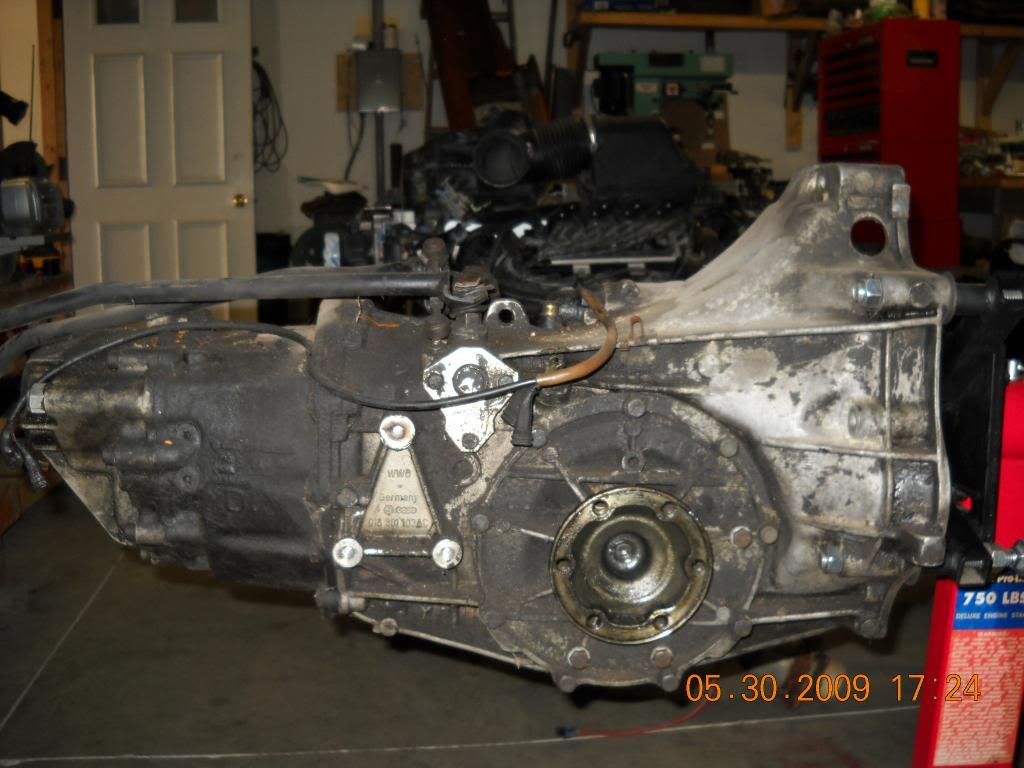
I was also reading the Lambo kit and GT40 forums. I found that a lot of them used a Audi transmission from a Audi 5000. It seemed like that tranmission was very plentiful but I could not find one locally. I ended up buying a whole running car that I drove for a couple of months. Then I remove the transmission and any other parts that I might need. I got the trans, flywheel, pressure plate, clutch, axles, and shifter. Here's what it looked like.
[This message has been edited by Nebraska (edited 11-11-2012).]
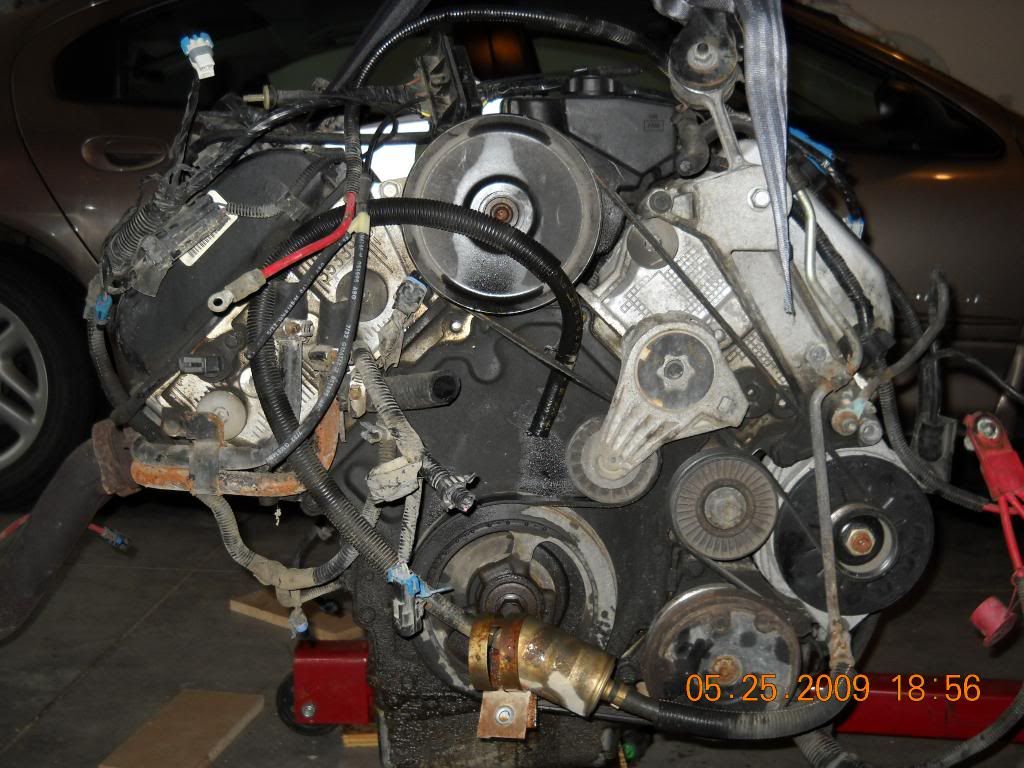
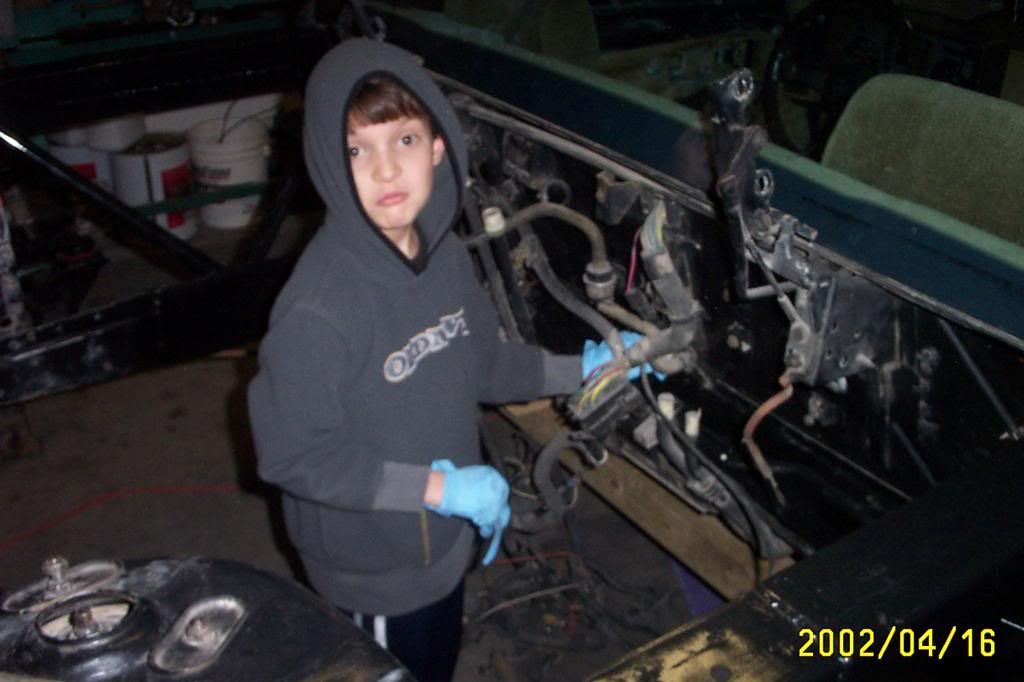
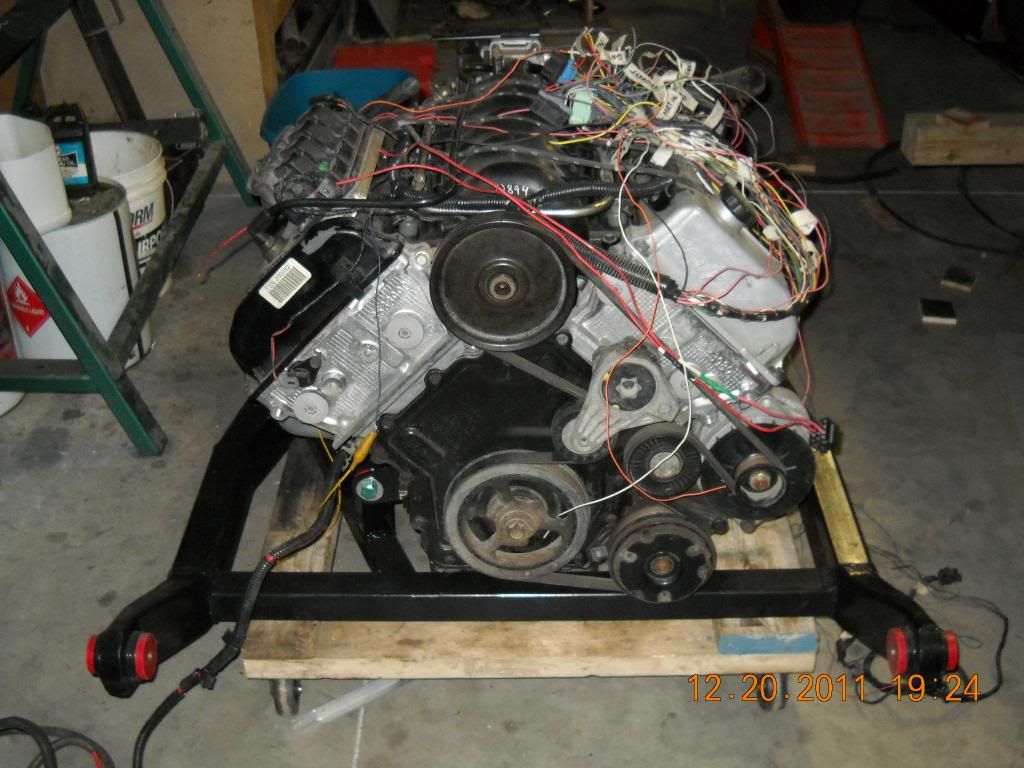
The next thing was the engine. I almost bought a Cadi with a 4.9, but I really wanted a all aluminum NorthStar 4.6. I passed on that car and continued searching. I found one in a U Pull junkyard. I wanted to keep the computer and wiring harness intact and didn't want a hack job in removing the engine from the car by the yard crew so I did it myself. It took two days, about 6 hours total. Here is the engine.
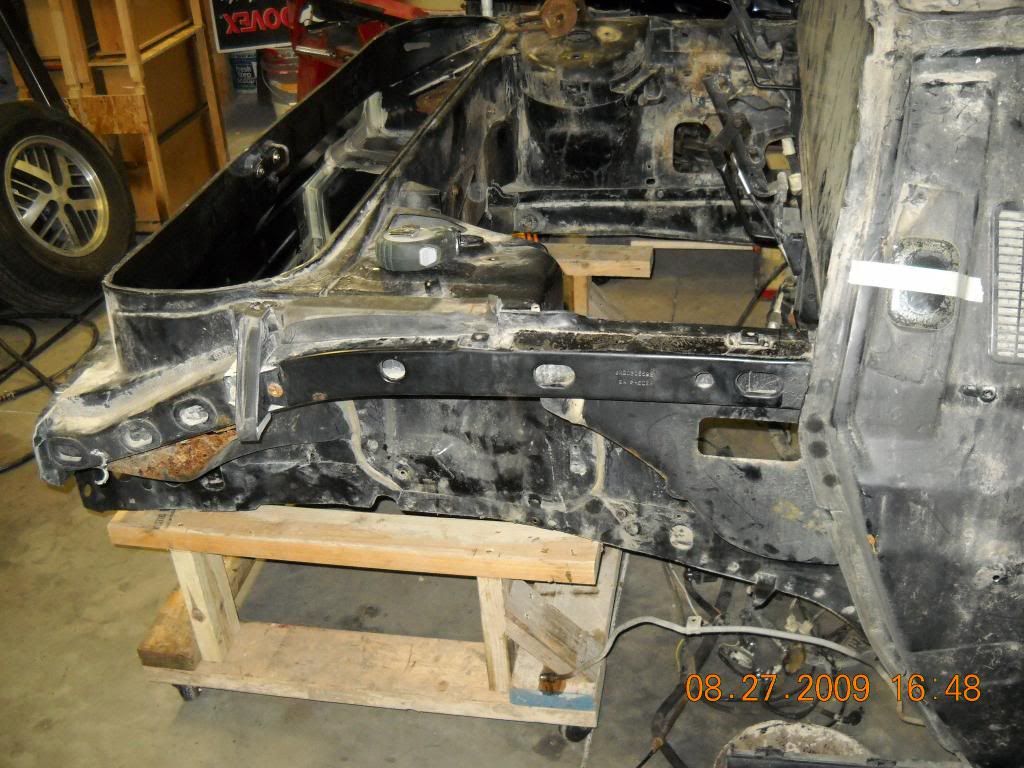
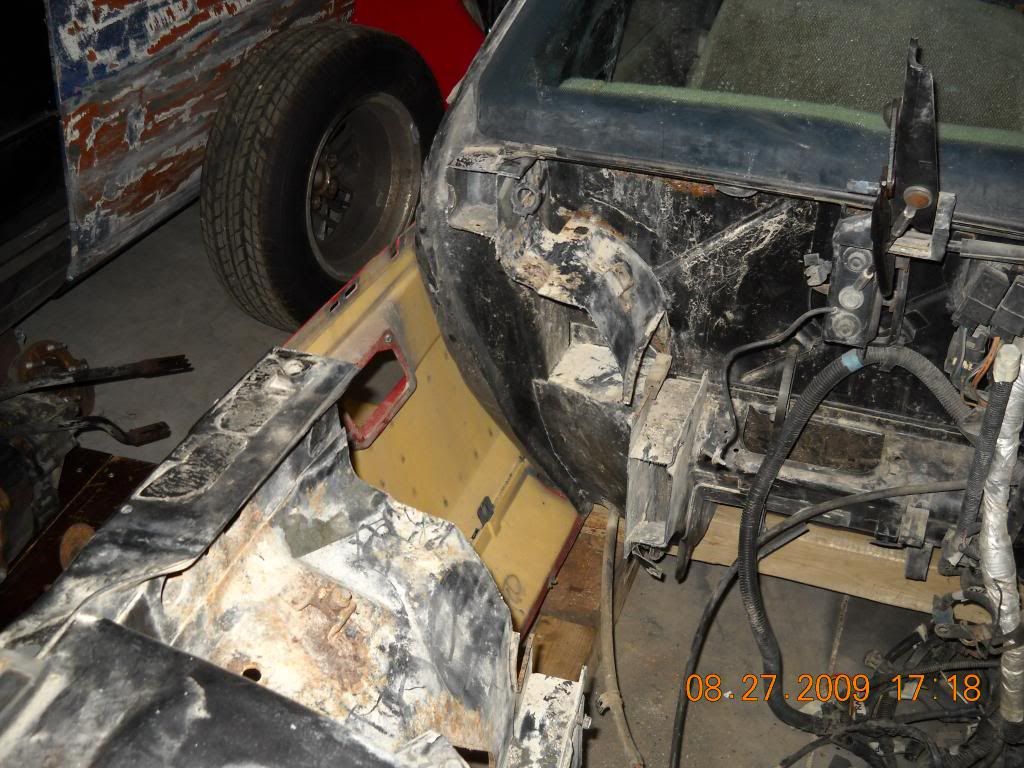
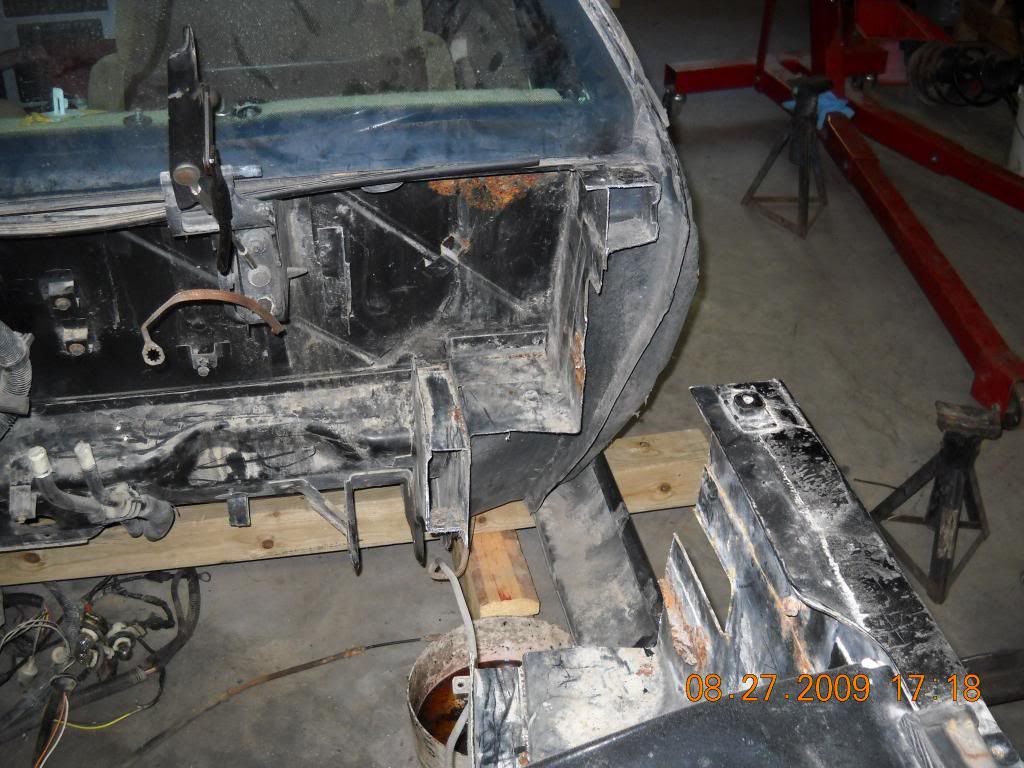
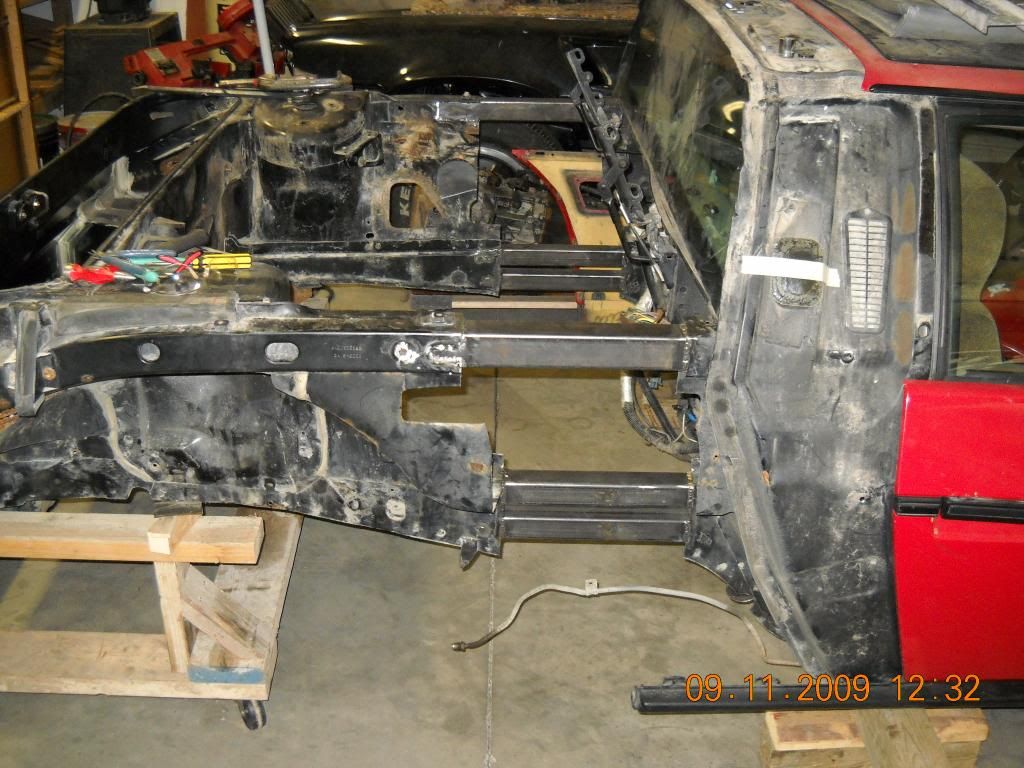
The next thing was to take lot of measurements to determine how much a strech I would need to fit the engine and trans. I figured that I only needed 10 inches of strech but rounded it up to foot (12 inches). I removed the old Iron Duke 4 banger, then blocked the car up and made a frame cradle to keep the back half car from falling to the ground. I marked the top frame rail 4 inches from the firewall and the bottom frame rail 6 inches from the firewall. With a new blade in the trusty swazall and the car on blocks and the frame cradle it was time to cut it apart. Here are pics of the results.
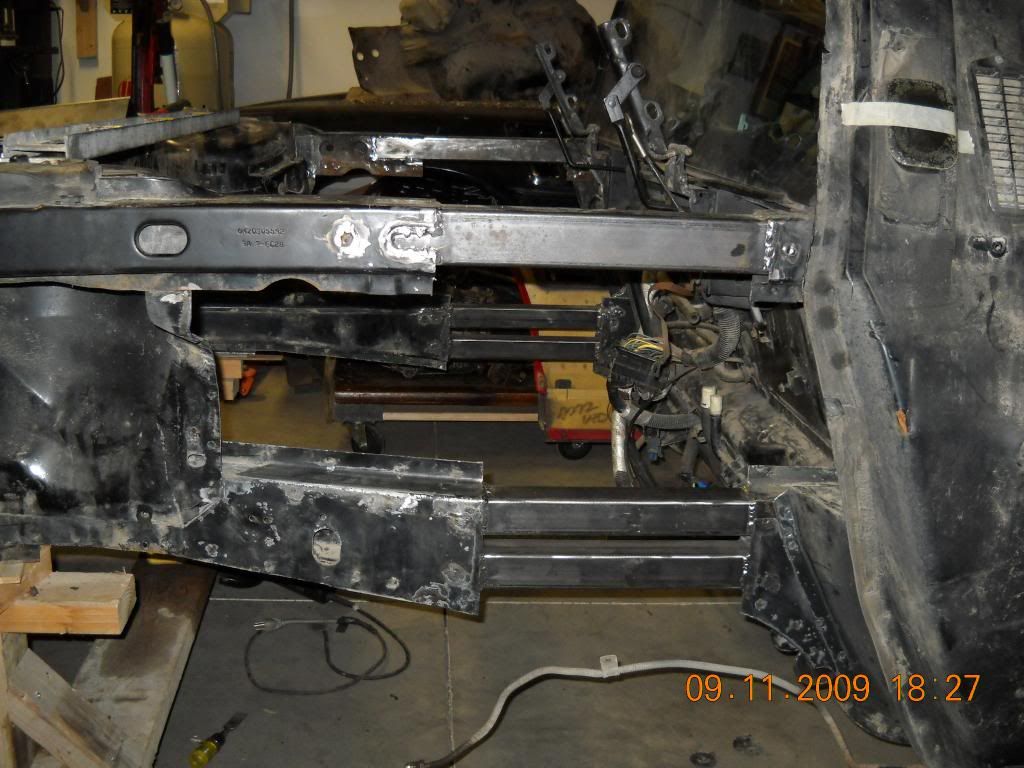
As I was cutting it I expected after the last cut the back half would shift or drop compared to the front half. It did not move a millimeter. After the cuts the frame rails were still lined up with only a sawzall blade space between them. I first thought i missed cutting something until I nudged the back half and it moved away freely. WOW that was EASY. The back half was on the frame cradle that had casters. All I had to do was to pull it back 12 inches and it was streched. I welded on 1/2 x 1/8 steel strapping on each frame rail leaving exactly 12 inch gap in the rails. These were strong enough to keep the spacing correct but flexableenough to adjust for squareness. The next thing was to see what steel I needed to put it back together.
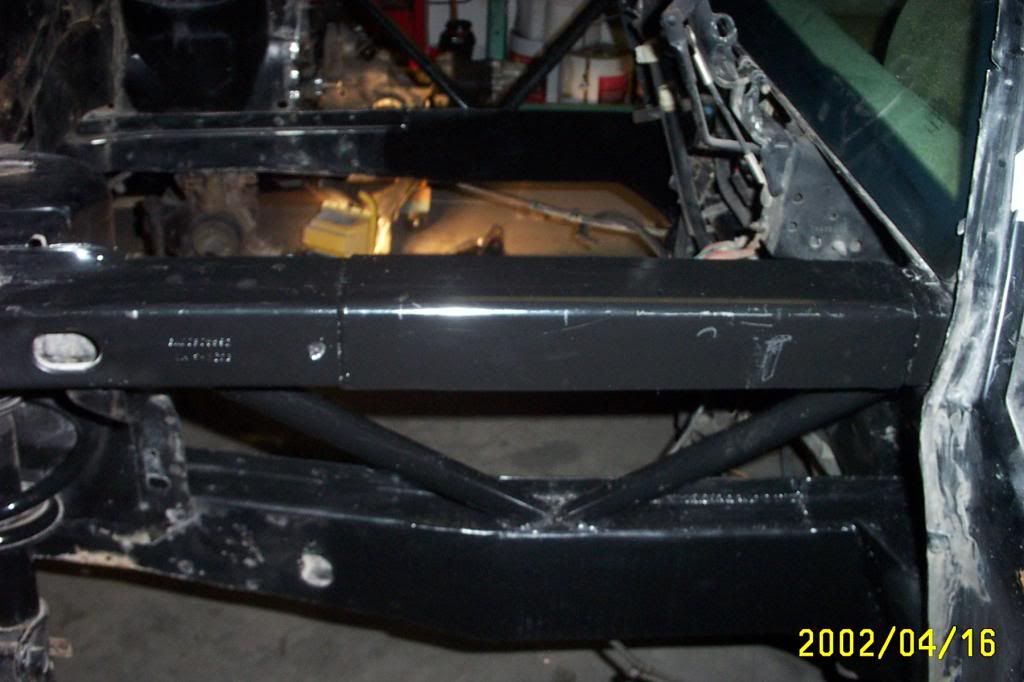
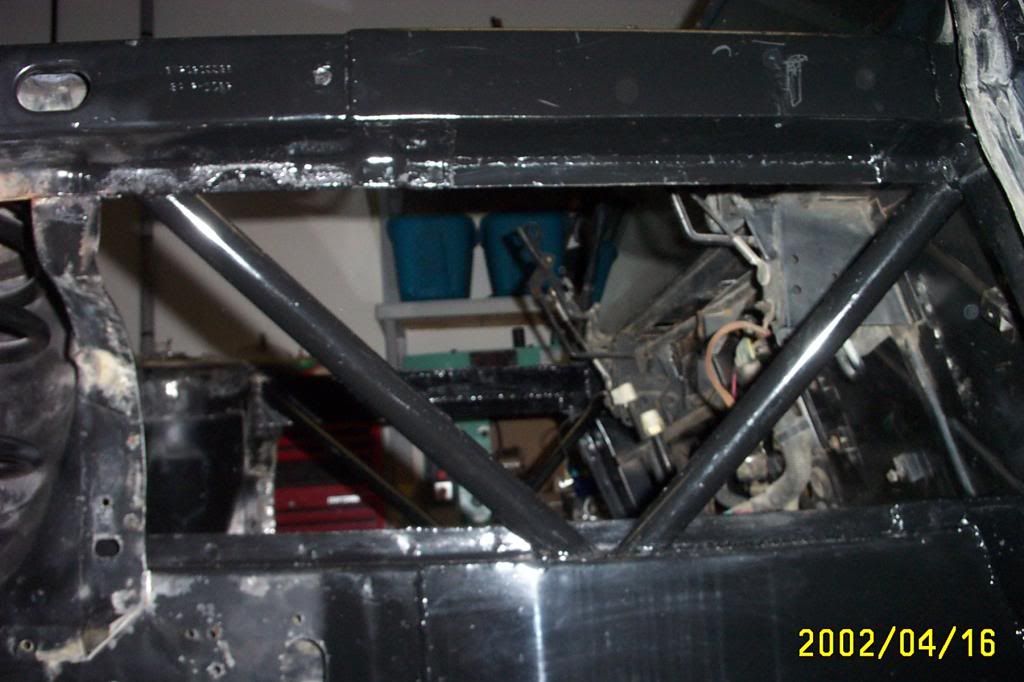
After taking a few measurements and reading what other people used I decided to use 2" x 2" x 18" for the top rails and two - 1 3/4" x 1 3/4" x 16 for the bottom rail. On the top rail the 2 x 2 extended 2" in the front of the top rail and 4" into the rear part of the top rail. I cut a notch in the inside of the top rail and added plug welds to the top, bottom, and outside of the rail. See pics.
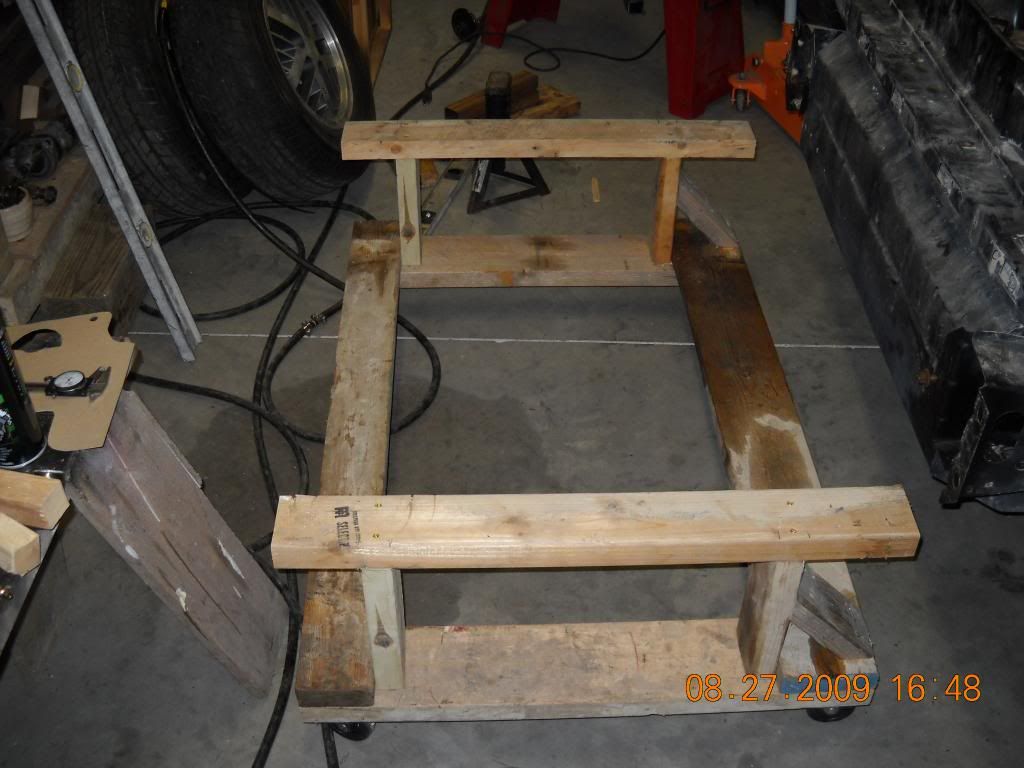
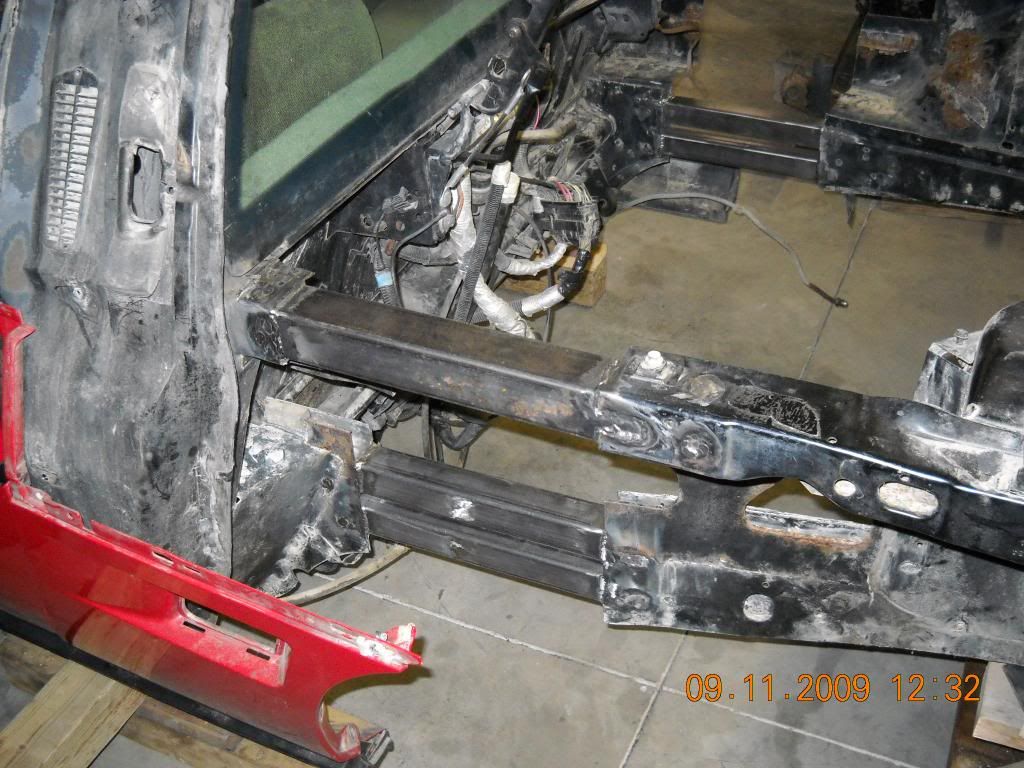
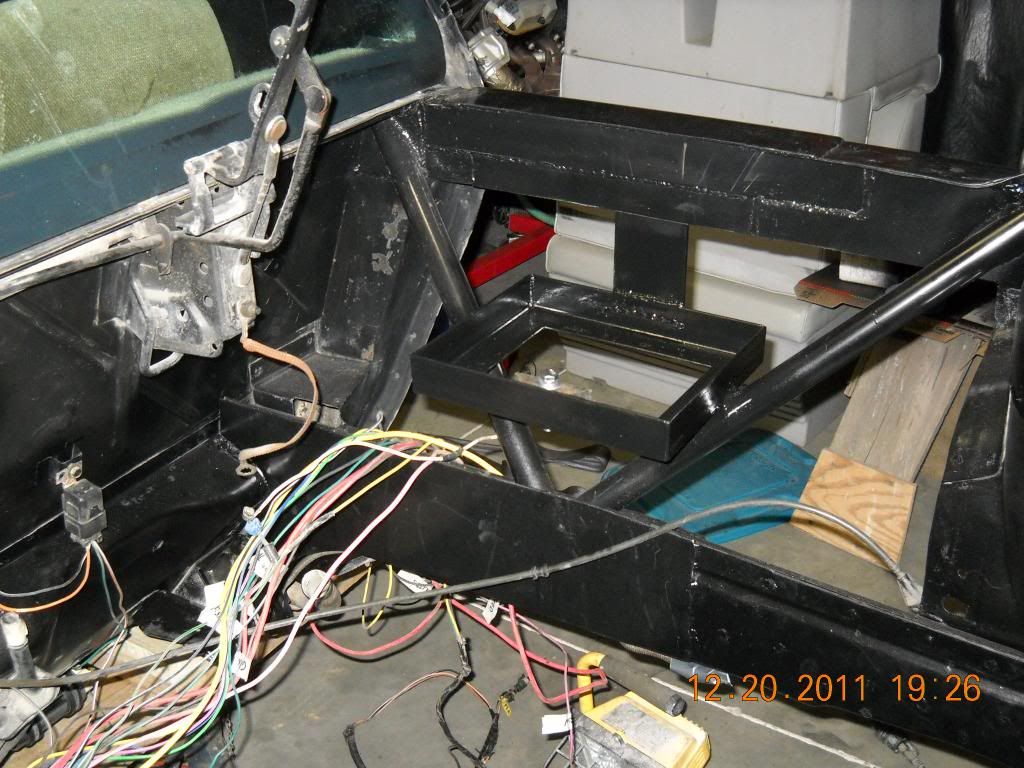
I boxed in the frame rails with heavy sheet metal to give it a more factory look. I added some round tubes for more strength. Next will be streching the cradle
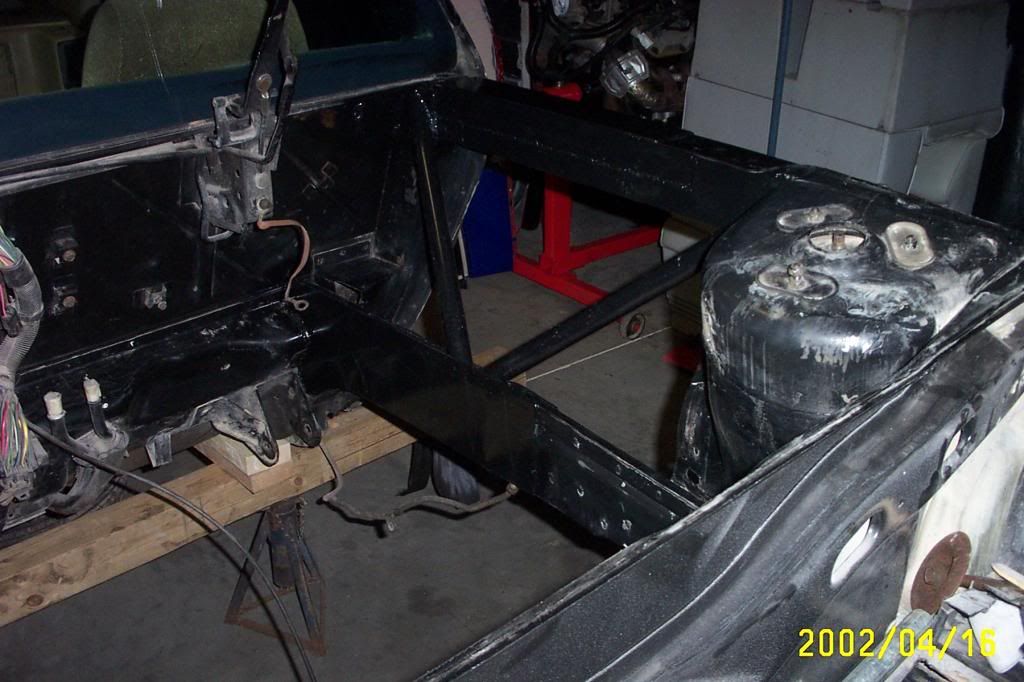
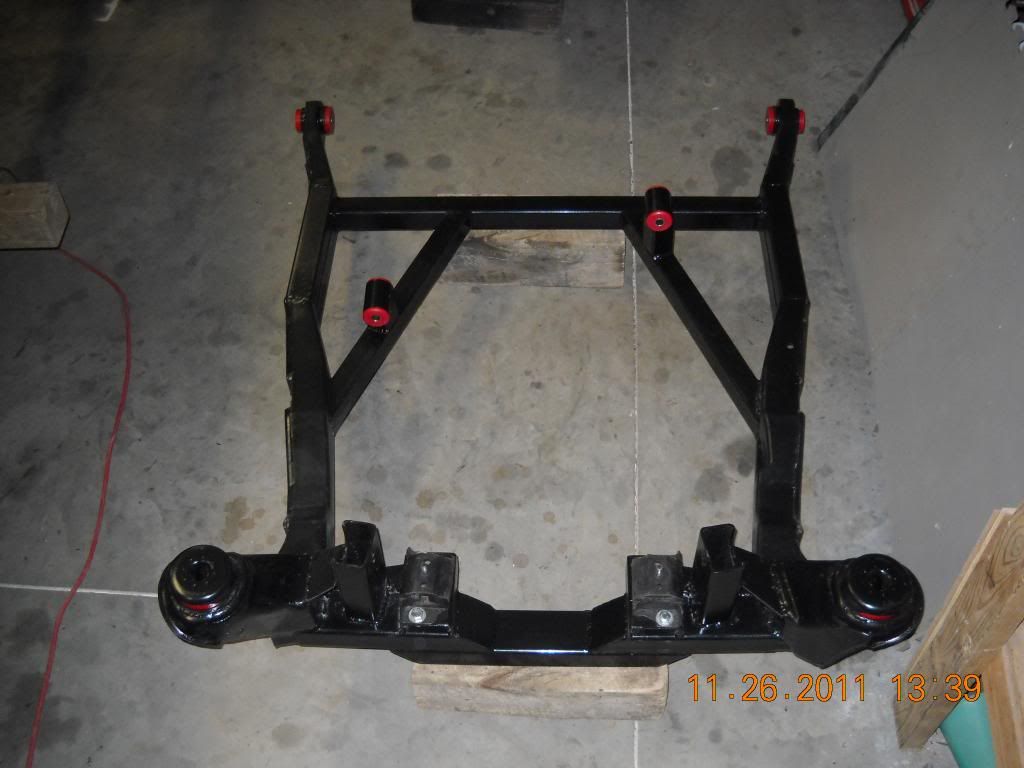
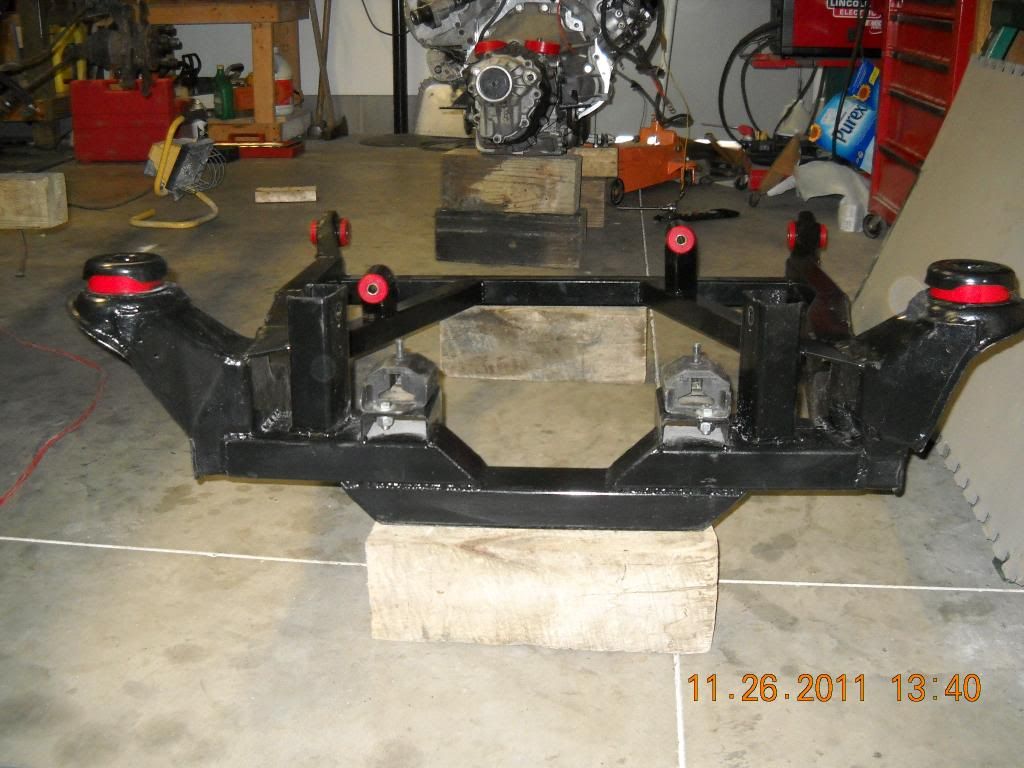
I also streched the cradle 12 inches. I cut it about 6 inches behind the front bushing. At that point the cross section was 2 x 3 1/2. I could not find any square tube that dimension locally so I used a 2 x 1 1/2 on top of a 2 x 2. I butt welded it in and added 1/8 plates at the seams. I had to totally rebuilt the back section to make the transmission fit. Here are the pics of the cradle.
I do have a question for anyone who has a opinion. The way the A/C and Alternator are mounted to the Northstar the easiest way to mount the motor was to use the existing mount on the drivers side and to fab up a mount on the pass side. This makes the engine mounts stagggered. I was NOT planning on using any type of torque dogbone. I could add one if I really need it. Once I get the mounts finnished I will post more pics. Does anyone see any problems with the staggered mounts without a torque dogbone ??
I do have a question for anyone who has a opinion. The way the A/C and Alternator are mounted to the Northstar the easiest way to mount the motor was to use the existing mount on the drivers side and to fab up a mount on the pass side. This makes the engine mounts stagggered. I was NOT planning on using any type of torque dogbone. I could add one if I really need it. Once I get the mounts finnished I will post more pics. Does anyone see any problems with the staggered mounts without a torque dogbone ??
The dogbone used in FWD transverse applications is more for resisting drive line torque (engine tq * gear ratio * final drive) vs. just engine torque. Since you are longitudinal, there is no need for a dogbone.
Thats kinda what I was thinking. A front engine rear wheel drive car only has three mounting points with no dog bones. I'll going to try it without a dog bone.
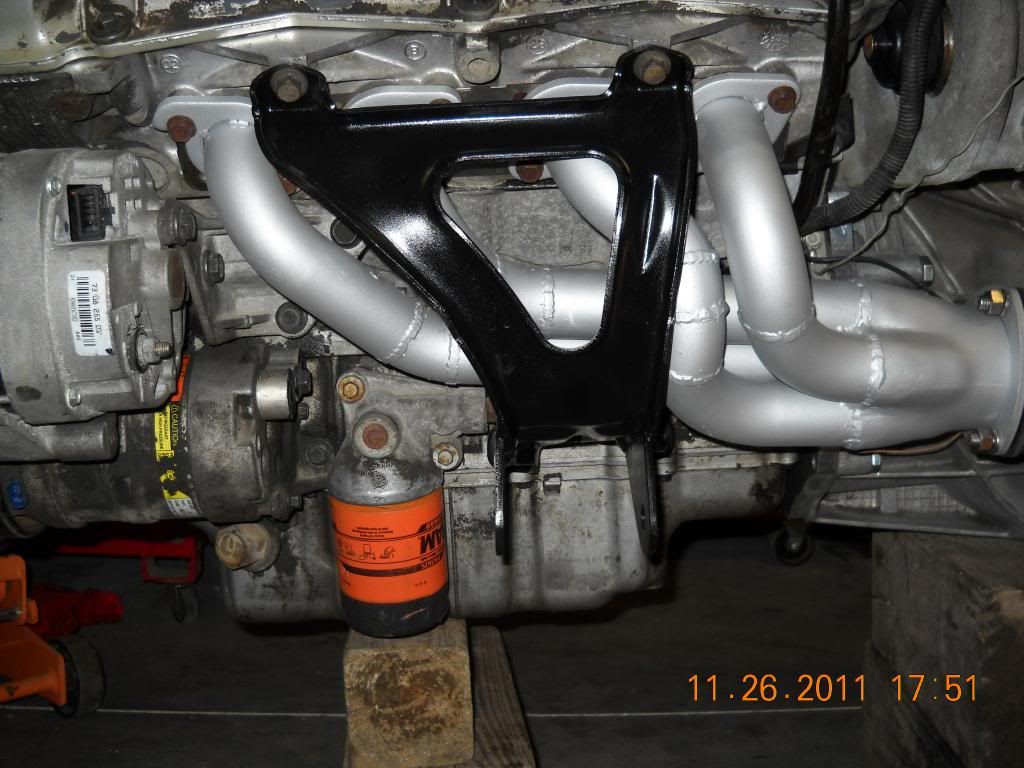
I got the motor mounts done and here are the pics. By the way, the header is the first one I ever built. I know the tubes are unequal length but getting to fit behind the original motor mount was a pain. I not trying to get every HP that I can but I think it will be better that the stock system. Next will be the other header then I will mount the engine/trans on the cradle hopfully for the last time.
I don't think the staggered motor mts. will be a problem. I do think you should use urethane for all 4 mounts instead of mixing urethane & rubber... NICE work BTW. ~ Paul aka "Tha Driver"
I'm not worthy to have the original Bubba Joe comment on my build. His streched fiero is the inspiration for this build. I guess I need to post some progress. You guys keep me om my toes.
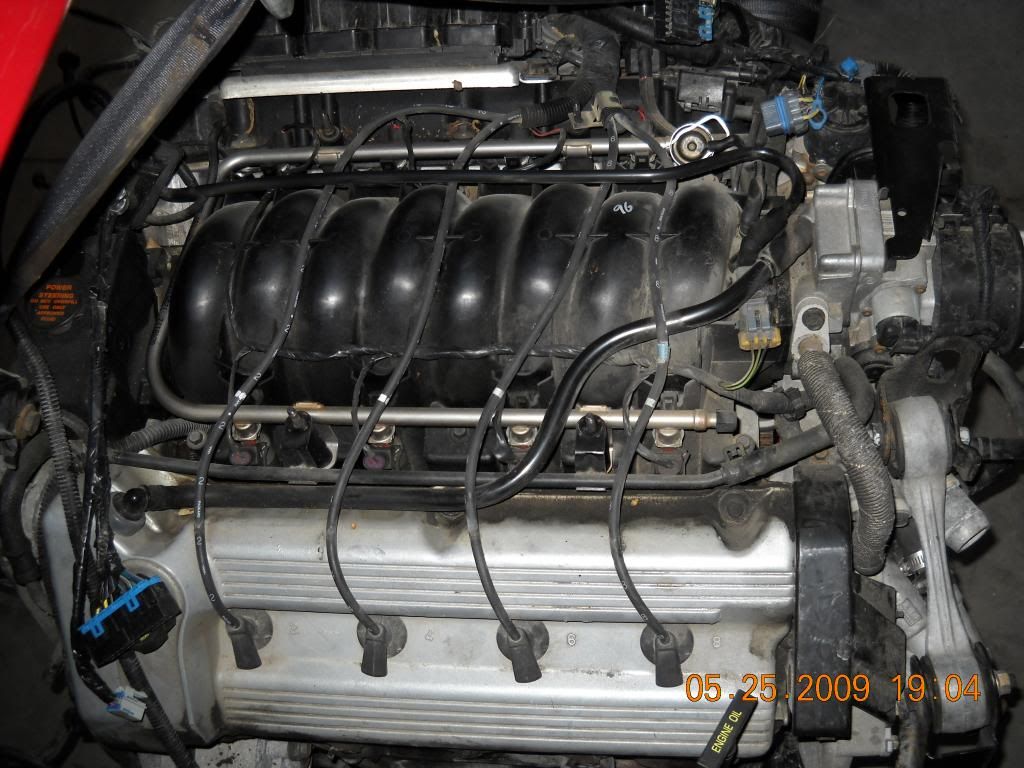
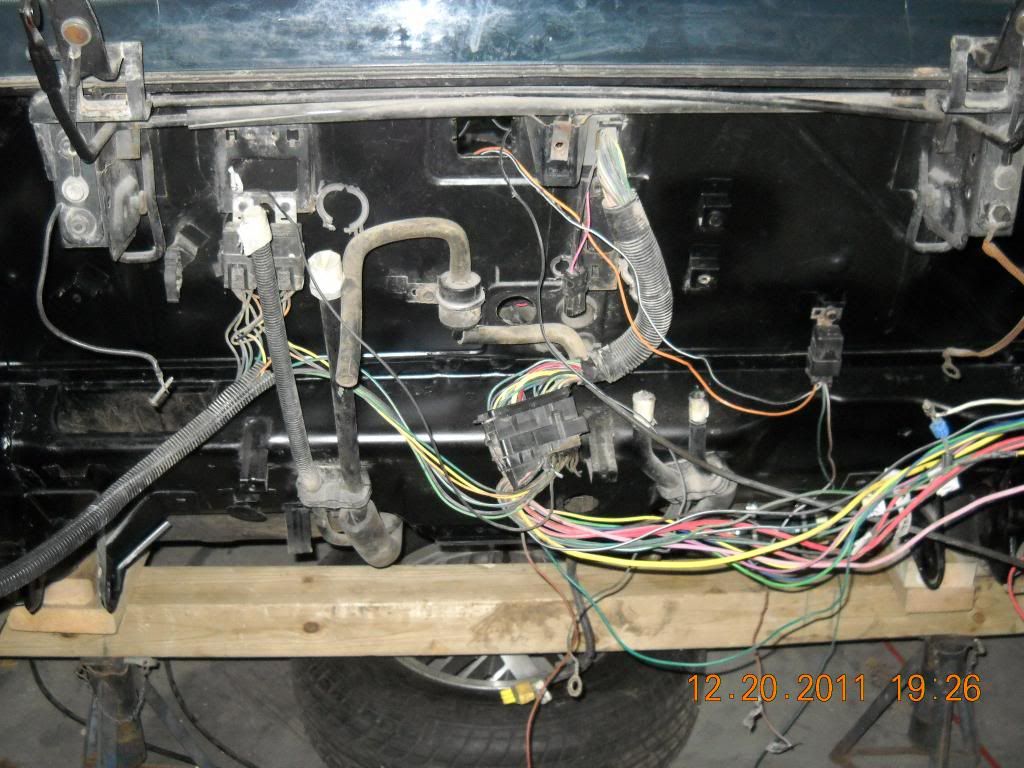
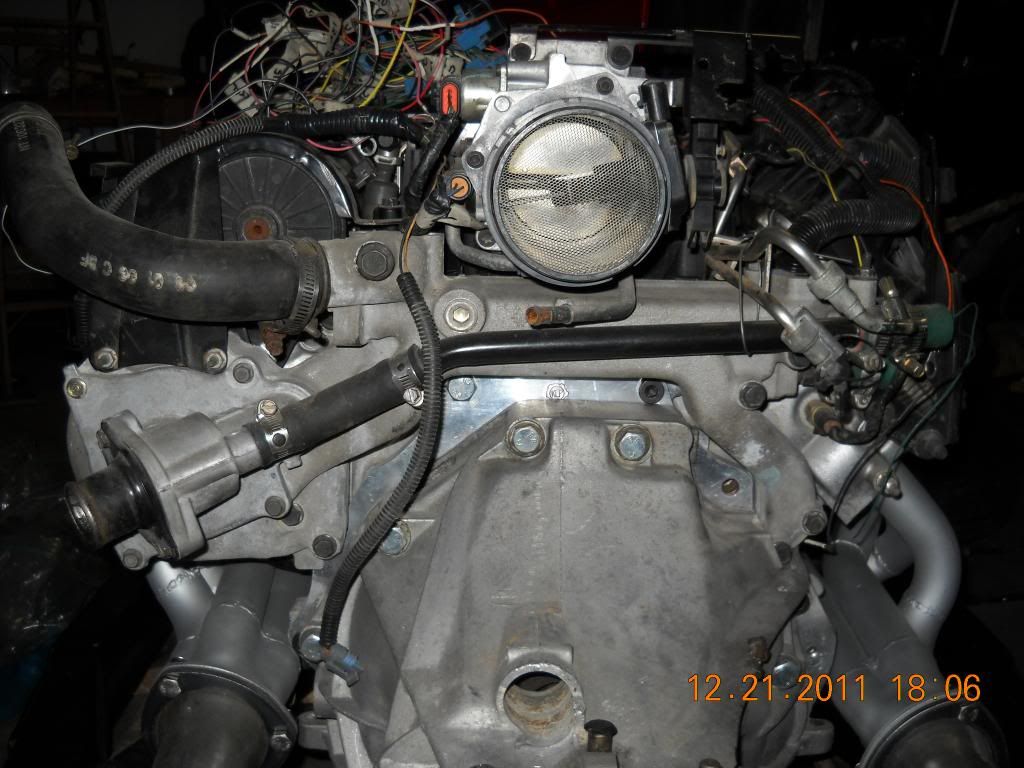
It seems like the 84 Fiero was the odd ball when it comes to wiring but I think I got it figured out. My goal is to get the engine installed and get it started. The ECM is a 7730 with Ryan Hess's tune for the Northstar. I know at will run because I had it running on the cradle earlier. Now I just need to connect it to the fiero's wiring. I also welded in a battery holder. Here are some more pics.
I have been looking at building a set of 180 degree headers once I get the engine running in the car. Has anyone had any experince with 180 degree headers on a V8 ?
I have wanted to do this exact thing for years. Glad to see that it looks like I imagined. Only difference is that I plan to use a LS3 motor vice the N*. I will also lose the rear wing or use a different one and I'll use GT tail lights.
Great looking metal work too. nice looking mods to the cradle.
Please add more pics when you can. More of the car from different angles.
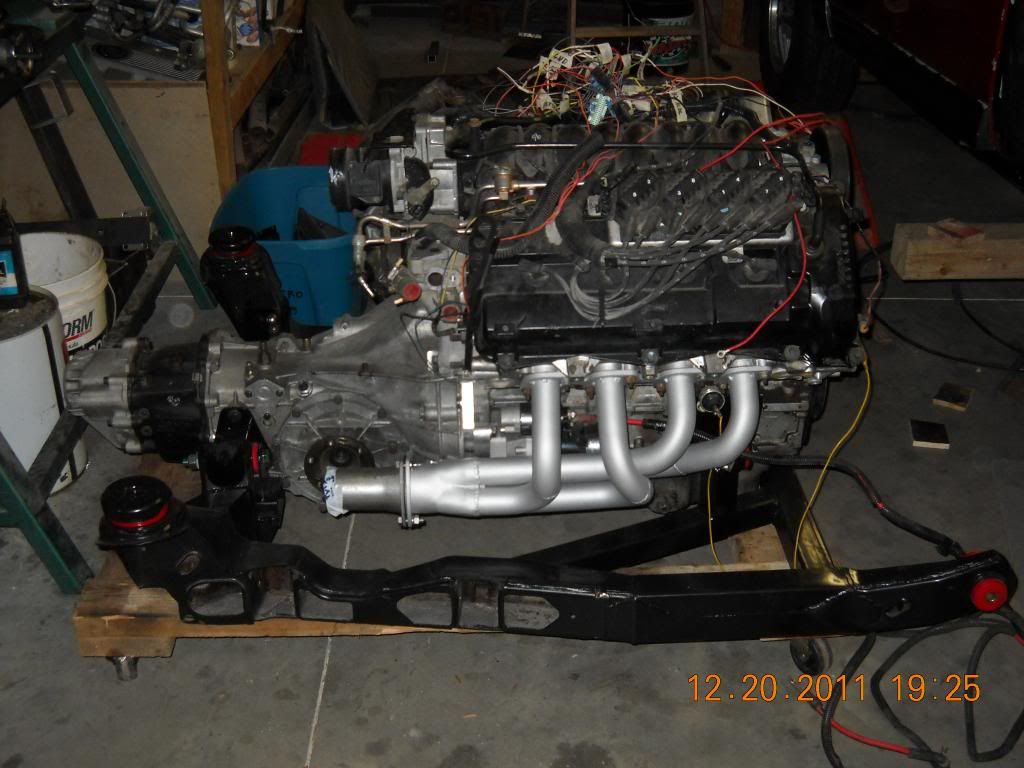
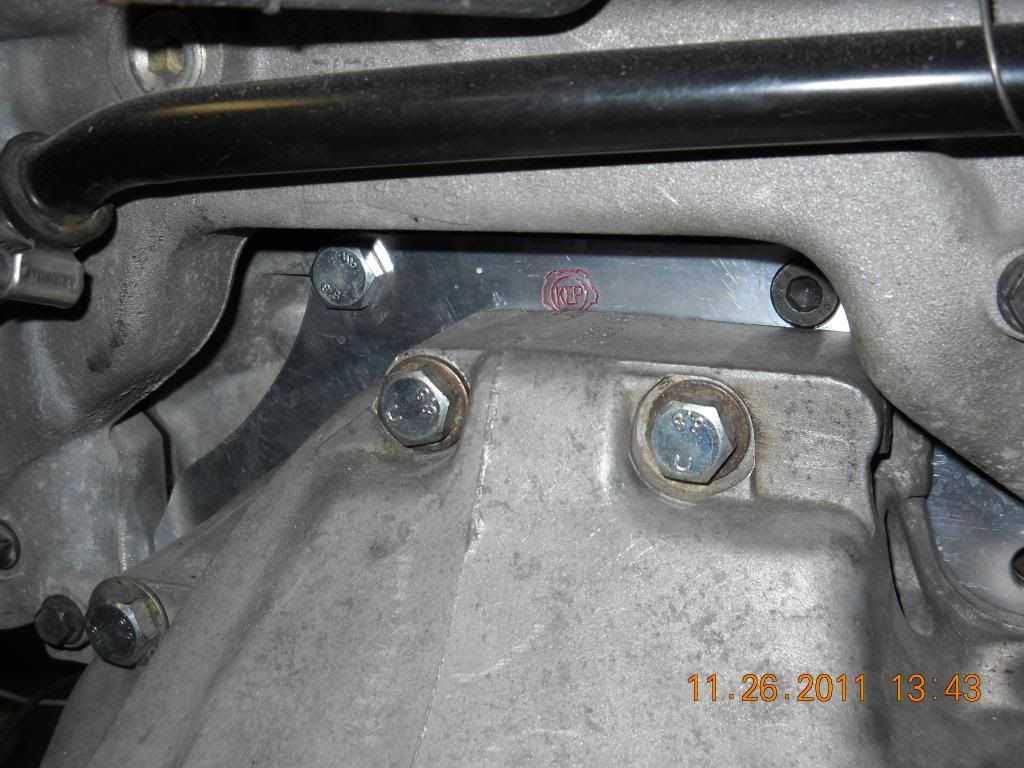
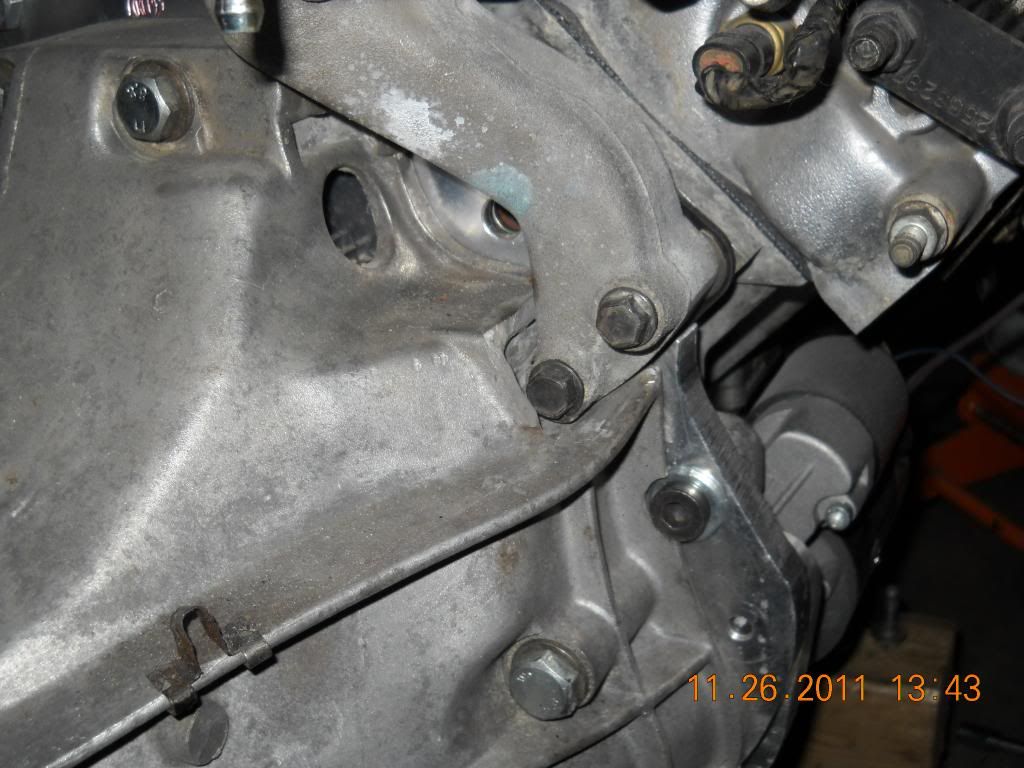
Adapting the Northstar to the Audi trany was tricky. I spent many, many hours trying to figure out the easiest and least expensive way connect engine and tranny together. I don't know how much everybody knows about the Northstar but the water pump is at the back of the engine where the tranny mounts. Along with the water pump there is a big alumium piece called a water log the connects the two heads and the contains the water pump. This water log interferes with the tranny mount. see pic.
Adapting the Northstar to the Audi trany was tricky. I spent many, many hours trying to figure out the easiest and least expensive way connect engine and tranny together. I don't know how much everybody knows about the Northstar but the water pump is at the back of the engine where the tranny mounts. Along with the water pump there is a big alumium piece called a water log the connects the two heads and the contains the water pump. This water log interferes with the tranny mount. see pic.
One good thing is that the Northstar has thesame tranny bolt pattern as a 60 degree V6. Kennedy Engineering sells an adapter for a 60 degree V6 to a Audi tranny. So I bought one. I figured that they did the hard part in getting everything lined up but I knew the adapter would need to be modified to fit adapter around the water log. The big problem is that where the adapter needs trimmed there is a alignment dowel for the Audi tranny. What I did was to mount the adapter to the tranny with both alignment dowels between the adapter and tranny. Then I drilled a hole through the adapter into the tranny and added my own dowel/pin. So now there are three alignment dowels. Next I removed the adapter from the tranny and cut the adapter to fit the Northstar. This cut removed one of the original alignment dowels but I sill had the other original dowel and the one that I installed to keep the tranny lined up to the adapter. Next I had to notch the tranny bellhousing to match the adapter and fit around the water log. I had a local welding shop weld in a braceon the belhousing just for extra protection. I don't have any pics of this procedure just the finished product, tranny mounted to the engine.