I think once you drill out the oil filter housing you HAVE to put those plugs in and can't put an oil cooler in later if you feel it's needed. I eventually want to install the lines and an oil cooler so I decided to use a length of stock oil cooler hose for now. Of course temporary solutions often be come permanent and 5yrs from now I'll still have the loopy hose...I just don't plan on it. If I didn't want the cooler I'd use that kit for sure...looks like those plugs would polish up nicely too...hmmmmm.
Been awhile since I checked in here and looked at your thread, but looks like you have everything figured out. I wouldn't worry about any damage that was done with the squealing as long as it stopped - I personally found the 4.9 is fairly bullet proof (long story short, thought I had siezed mine when it over heated, but it started and ran just fine the next day).
Good to see that you have it up and running (especially with the snow that we now have ).
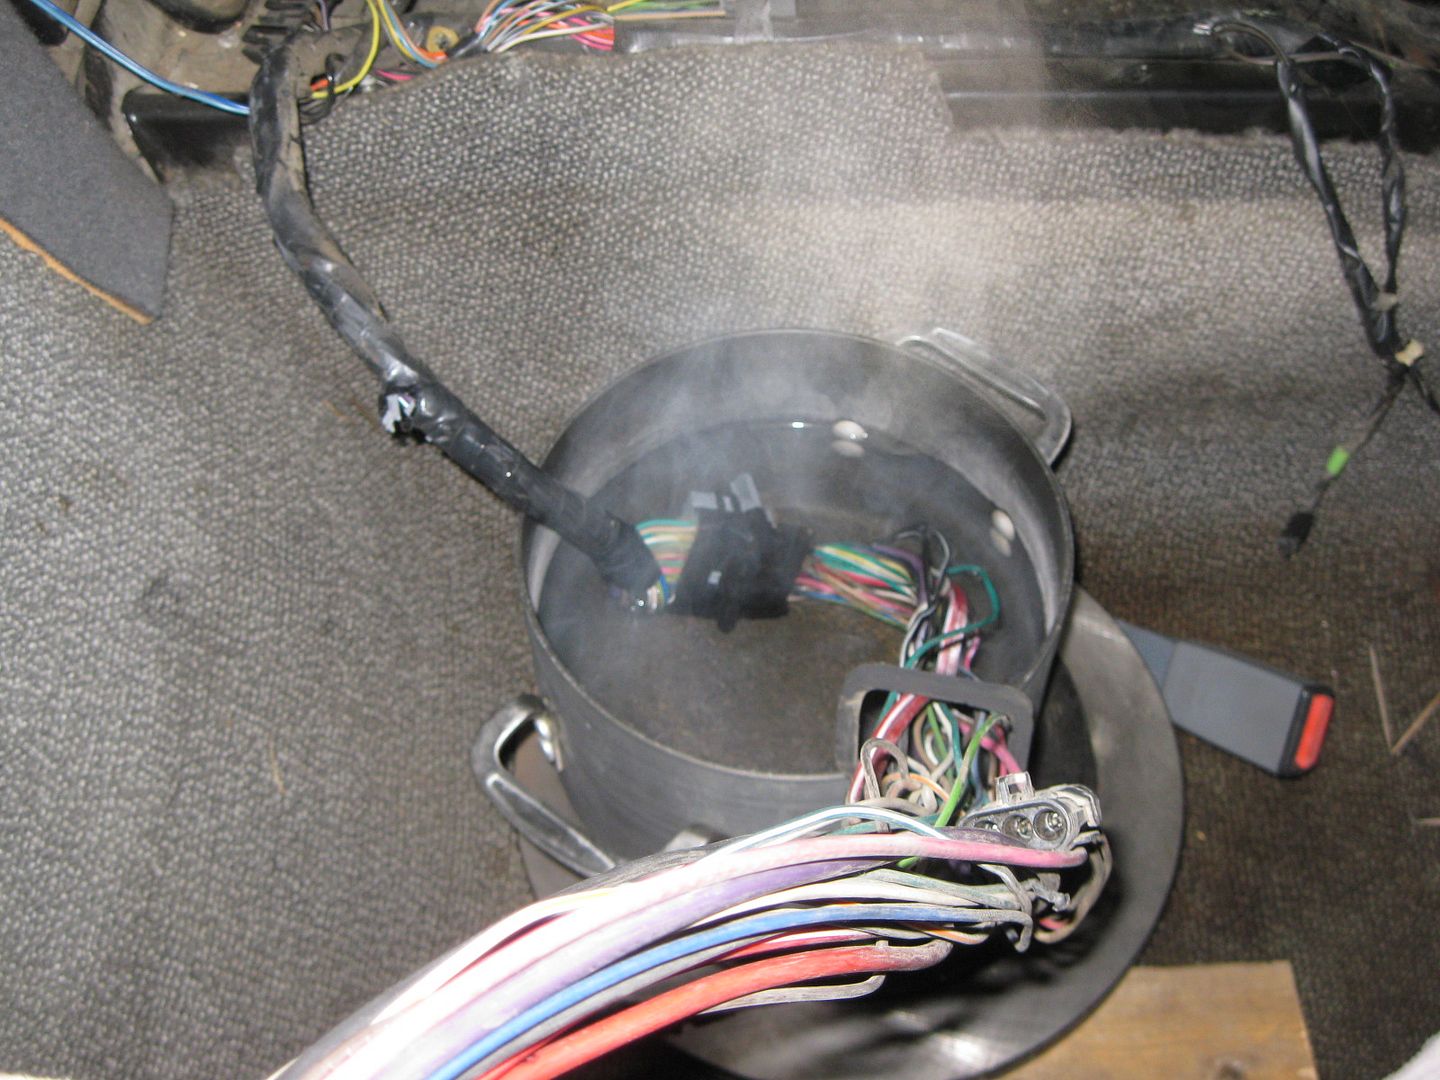
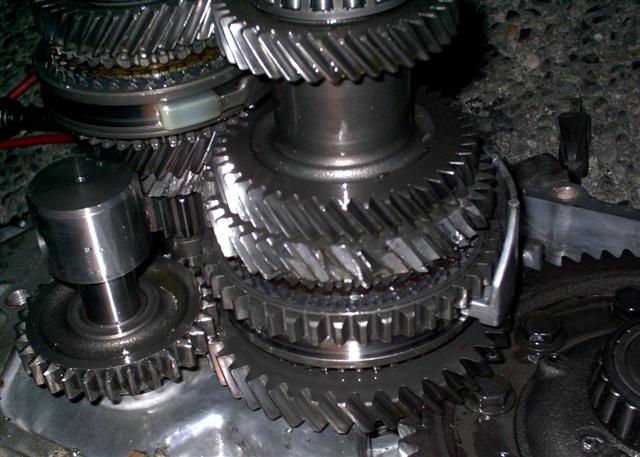
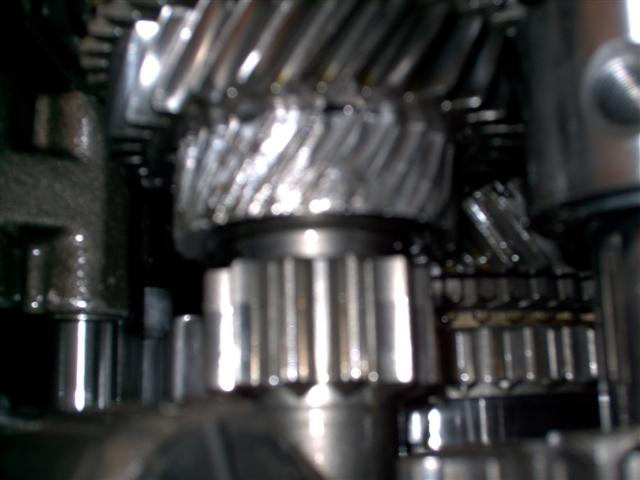
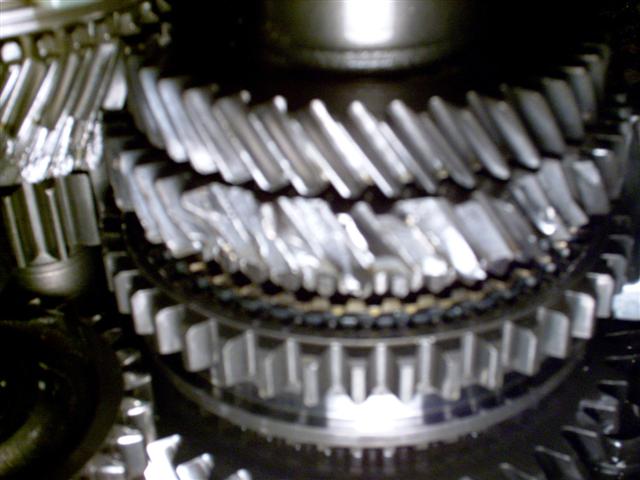
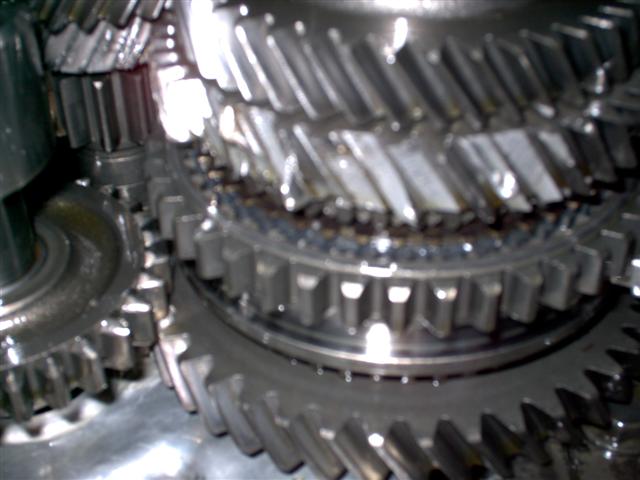
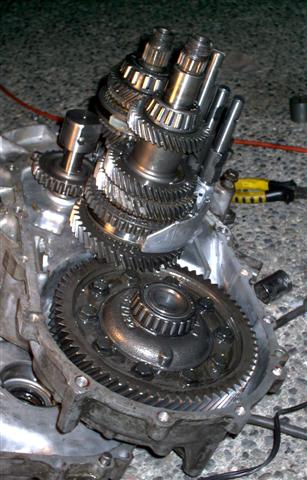
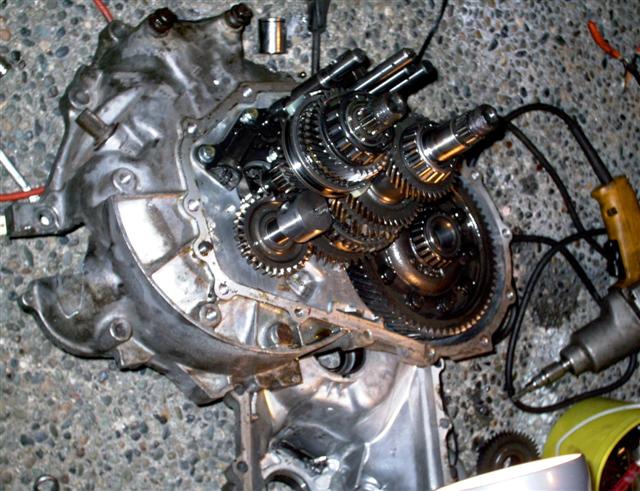
I can't find the thread even after an hour searching, but here are the pics.
This is an Isuzu 5spd after 6 months behind a 4.9 with sticky 245/50/16's and more than a few hard shifts into 2nd gear going sideways.
If you drove it like a sain man it would last for at least a few years at least.
------------------ 857GT Part 85GT Part 87GT Part Caddy, 93 Eldorado 4.9, 5spd Dual O2 Custom Chip, Custom Exhaust. MSD Everything Now with Nitrous. Capt Fiero --- My Over View Cadero Pics Yellow 88GT 5spd Full Poly Suspension, Lowered 1/2" in front, Corner Carver.
Been awhile since I checked in here and looked at your thread, but looks like you have everything figured out. I wouldn't worry about any damage that was done with the squealing as long as it stopped - I personally found the 4.9 is fairly bullet proof (long story short, thought I had siezed mine when it over heated, but it started and ran just fine the next day).
Good to see that you have it up and running (especially with the snow that we now have ).
Thanks for the reassurance on the squealing. Yeah, the reputation is a strong reason for my choosing this engine. I'd seen lots of caddies on line with over 300k kms while searching for a donor. I once ran a 66 mustang's 289 dry until the engine stopped banging and died. Let it cool off, tightened the rad hose, topped her up and drove away...not too many engines will do that any more. Good to hear you had that same luck with a 4.9. Not that I plan on testing it out. I've been hoping for a good day to do an engine start up, idle sound and short run video...still waiting...damn snow.
I can't find the thread even after an hour searching, but here are the pics.
This is an Isuzu 5spd after 6 months behind a 4.9 with sticky 245/50/16's and more than a few hard shifts into 2nd gear going sideways.
If you drove it like a sain man it would last for at least a few years at least.
Hey Capt'n, I love the work you have done on your car and are currently doing! Your threads have been a big inspiration for my swap and I enjoy your documentation. I especially love this clip you posted " http://captfiero.com/videos...ierobrakestand49.wmv ". Any chance that brake stand was done with that Isuzu you killed? Poor transmission...and clutch. I am running 225 40ZR 18's on all 4 corners and have yet to break them loose. Can't say that I am really trying though. The cops in my area like to hand out tickets like candy on halloween. With Alberta insurance, my premiums would double with a stunting ticket...still, they'd be less expensive than what you guys pay ICBC. I'm running my car like a 37 yr old should and not beating on it too hard. At least I did before the snow. Really, the clutch is just broken in. Aside from a couple of stalls, I have yet to dump the clutch, just kinda lean into the pedal from a rolling start.
I grew up in Ladner, just south of Richmond B.C. ; 24years. All the background details in your video sure bring back memories...I can almost smell the salt in the air! Looking forward to friday's report of the progress on your custom 4.9 intake!
Hey Captain, I love the work you have done on your car and are currently doing! Your threads have been a big inspiration for my swap and I enjoy your documentation. I especially love this clip you posted " http://captfiero.com/videos...ierobrakestand49.wmv ". Any chance that brake stand was done with that Isuzu you killed? Poor transmission...and clutch. I am running 225 40ZR 18's on all 4 corners and have yet to break them loose. Can't say that I am really trying though. The cops in my area like to hand out tickets like candy on Halloween. With Alberta insurance, my premiums would double with a stunting ticket...still, they'd be less expensive than what you guys pay ICBC. I'm running my car like a 37 yr old should and not beating on it too hard. At least I did before the snow. Really, the clutch is just broken in. Aside from a couple of stalls, I have yet to dump the clutch, just kinda lean into the pedal from a rolling start.
I grew up in Ladner, just south of Richmond B.C. ; 24years. All the background details in your video sure bring back memories...I can almost smell the salt in the air!
Looking forward to Friday's report of the progress on your custom 4.9 intake!
You should check out our Hells Gate Video's up the Fraser Canyon to Boston bar, 1/2 dozen Fiero's all running balls out, up the Canyon. We went through China Bar (I think it was China Bar) Tunnel at over 160 it was a ball.
I have tons of videos at www.captfiero.com/videos The main Boston bar video I am thinking of is titled something like WOT49 (here is the video http://captfiero.com/videos/mycar/wideopen49.wmv )and WOT49p2 Part one is running redline 3rd and into 4th then dropping down to redline 2nd in the tight corners and the transmission explicitly telling me NO it won't go into 2nd at 100kph. LOL. Part 2 is me pulled over on the side of the road trying to burb the cooling system because I over heated just West of Hells Gate. LOL. If you look in the club runs folder there are lots of BC Runs. Hells Gate Lisa is also fairly decent. I hope you have a broadband connection though.
Ok back to the trans stuff, oddly enough, all of the Isuzu's that I blew up, popped during normal driving, nothing too hard. It seemed like the harder I beat on them, the longer they lasted. The attempted brake stand video was done with the Getrag 5spd and the 6 Puck Clutchnet clutch. So far the Getrag has taken all the abuse I can throw at it and laughed. The trick to launching a 4.9 is get the power on smooth enough that the back end hunches down and the front end lifts to transfer weight to the back, if you do it too quickly or too abruptly it breaks the tires loose and its game over. In that video I was trying to light the tires up, so I had half my hoot on the gas pedal, half my foot on the brake pedal and my other foot on the clutch. I would get the rpms up by leaning my right foot to the right, then snap the clutch up, and try to press the brake and the gas at the same time with my right foot, then slide my left foot over to the brake pedal and modulate the throttle with my right foot. I imaging ball room dancers would have been impressed with my footwork LOL. In the end though, my rear tires just had too much bite and even when they were spinning they were still pushing the locked up front wheels. I can't remember the brand of rear tire off the top of my head, but I bought them from some autocross guy that never installed them and was getting out of the sport. They are amazing in the dry, down right dangerous in the rain and snow.
Yes we hate ICBC. I have a perfect driving record no so much as a speeding ticket in over 5 years I have the biggest discount ICBC offers, and I pay $1300 per year on EACH Fiero I want to insure. I figured my new motorcycle would be cheaper, Nope, I inherited my fathers Goldwing when he passed its an 85, 1200GL Interstate and when I went to get insurance for it......... Take a Guess, Take a Wild Freaking Guess......... $1600 per year, something like $135 per month to insure a motorcycle. I told them to skip the damn insurance for now, its Fall Winter, I'll put 5 months insurance on it come summer. About the only good thing with ICBC is, if you are in a wreck there are no fights between insurance company's. ICBC knows they will have to pay for it, so its just a matter of deciding who's premiums get dinged. My 88GT got hit in a parking lot 3 weeks ago. The driver that hit me, admitted it and accepted fault. I took my car in, I have a free rental car with unlimited mileage, my rear bumper skin is being fixed with a base / clear paint job, and any other damage under the skin. I don't have to pay for any deductibles or fee's of any kind. Didn't have to meet with an adjuster at all. Just one ICBC rep to take pics and asked me what body shop I wanted to take the car to. Gave me a form to take to the body shop and away I went. (latest report says around $1000 in damage)
------------------ 857GT Part 85GT Part 87GT Part Caddy, 93 Eldorado 4.9, 5spd Dual O2 Custom Chip, Custom Exhaust. MSD Everything Now with Nitrous. Capt Fiero --- My Over View Cadero Pics Yellow 88GT 5spd Full Poly Suspension, Lowered 1/2" in front, Corner Carver.
Dude, that's crazy. 2 cars, home, and wedding ring for under 190/mo over here. But that'd double with one at fault claim of any amount. I caused $400 damage to someones truck years ago. The woman put in a claim and my insurance doubled. The down side for sure is it can take months to get your car fixed, years for accident injury claims. They usually drag it out hoping you'll die before they have to pay. I'm gonna have to set aside some time for those videos soon! They sound like fun. I'm looking forward to next summer when I can spend more time behind the wheel. But out here in the flats, we don't get those twisty roads through the trees and mountains...just looooong flat straight roads to seemingly and often nowhere. I guess a few trips to Golden or Salmon Arm would do the trick.
I picked up a pair of rear decklid vents a while back as I didn't want to modify the stock 88's to fit around the modified rear strut hat. Besides, the pre-88's seem stronger. Here is a pic of the pre-88. You can see there is a vertical rib on each vent louver for support.
You can see them through the honey comb leaf catcher screen. I think their purpose was to act as a visual shield from seeing the engine bay but there was still a bit that could be seen.
All things considered, I think these ribs actually contribute to less airflow through the louvers as there is less area for the air to pass through...perhaps more turbulence too.
Here's the view through the 88 vents. Without the support rib the louvers are more flexible, lighter as a whole, and have a greater area for air flow.
That being said, the louvered sheet that prevents you from seeing into the engine bay seem considerably more restrictive than the honey comb one on the pre-88 vent.
I am hoping that the total area is greater than the earlier style and that they flow air better. I'm going to install the 88 vents and modify them...its just a bit of trimming anyhow. I figure there is a reason they changed them. Most likely for visual reasons. Possibly for better air flow out of the engine bay.
Here is the problem when the strut hat is flipped upside down. Flipping the hat gives you an extra inch of travel if you decide to lower the rear suspension on an 88...at least if you are doing it the cheap way.
There is just a small area that needs to be trimmed. I have it marked out with a sharpie to match the other side so it's not noticeable when all is said and done.
Wow have I forgot about this thread, I have been busy working at my new job. Great job getting it all put together, running and driving! Makes me reconsider selling my 4.9 swap. I could just swap in a manual, but I rather not use an Isuzu. There is the Hybrid Muncie 4-speed option, but finding an MY8 would be tricky and expensive. My exhaust system would need to be totally redone as well.
Wow have I forgot about this thread, I have been busy working at my new job. Great job getting it all put together, running and driving! Makes me reconsider selling my 4.9 swap. I could just swap in a manual, but I rather not use an Isuzu. There is the Hybrid Muncie 4-speed option, but finding an MY8 would be tricky and expensive. My exhaust system would need to be totally redone as well.
Hey thanks! Haven't seen you post anywhere lately... I've missed the Isuzu bashing . Luckily Captfiero has taken up the slack! I couldn't imagine driving it with the automatic, it's just too much fun rowing through the gears and having that added control over the car. Maybe make the hybrid 4 speed a casual project and install it when you have time, I'm sure you won't regret it. As for the exhaust, I kinda like that side exit exhaust Captfiero put together...simple and effective. It's given me too many new ideas for a different setup! The plan this weekend is to get that video of it running done while the snow is in retreat.
Hey thanks! Haven't seen you post anywhere lately... I've missed the Isuzu bashing . Luckily Captfiero has taken up the slack! I couldn't imagine driving it with the automatic, it's just too much fun rowing through the gears and having that added control over the car. Maybe make the hybrid 4 speed a casual project and install it when you have time, I'm sure you won't regret it. As for the exhaust, I kinda like that side exit exhaust Captfiero put together...simple and effective. It's given me too many new ideas for a different setup! The plan this weekend is to get that video of it running done while the snow is in retreat.
I would like to try to clean up the "clutter" a bit too, you did an amazing job with that.
[This message has been edited by mattwa (edited 11-05-2012).]
It's meant to look like the other side and appear stock; as to not draw any attention to the fact it's been trimmed. Hopefully only the purist will notice...and everyone who just read this.
LOL, I was never into Bashing the Isuzu's Hence why I replaced my trans every 6 months for 2 years with a new Isuzu, I loved that trans, I just got tired of wasting a weekend working on the car when I should have been driving it. Fortunately it always broke in the summer months (when traction was at its highest) and most likely to break from a burnout. During the winter months I ran 205/65/15 snow tires, that torque being able to take off smooth from idle made it a breeze to drive in the snow. I thought about going 6spd, or F23 but practically got a given a complete Getrag with cables so I went with the Getrag, I bought an 87GT V6 5spd with Mint Interior, Body Kit installed needing a clutch and TLC for the low low price of 300 bucks. So thats how my 85GT turned into an 87GT.
------------------ 857GT Part 85GT Part 87GT Part Caddy, 93 Eldorado 4.9, 5spd Dual O2 Custom Chip, Custom Exhaust. MSD Everything Now with Nitrous. Capt Fiero --- My Over View Cadero Pics Yellow 88GT 5spd Full Poly Suspension, Lowered 1/2" in front, Corner Carver.
Well, I figure it's time to make use of all those wiring pics I took. I know I had one of both the fiero and caddy harnesses hanging next to each other but can't seem to find it. If I do, I'll edit and post. In the mean time, I'll try to post what I have and go step by step. I don't really expect this to be a "how to" but if it helps any one out, it's worth it. Sad part is it'll probably confuse more people than it helps. Here's the caddy harness all taped up and separated into bundles. I wanted to keep everything together while I routed and deleted wires but in hindsight, it may have been easier to just cut them close to the ecm plug and resolder once I was happy with the routing. I just ended up cutting and resoldering every wire in the end any how.
Here's the Fiero harness...no AC. I circled the key components that are needed in one way or another. Can you name them? RED ORANGE YELLOW BLUE PURPLE PINK
Originally posted by Reallybig: Here's the Fiero harness...no AC. I circled the key components that are needed in one way or another. Can you name them?
RED - 500C connector ORANGE - Alternator (orange and yellow look very close in color) YELLOW - ALDL connector BLUE - 203 connectors PURPLE - Don't see a purple oval/circle... but do see a WHITE one - ECM connectors, not needed PINK - Fuel Pump Relay
Other ends you will need but are not circled: Oil Pressure Sender Coil wires (power and tach) Starter wires VSS connector
It was actually kind of mauve, not purple. I thought the dark purple might not show too well. I'd repost with better color but PIP isn't working for me right now. The ECM connectors were a trick question...I didn't use them either. I used the oil pressure sender from a 89? cavalier as my duke one melted with the plug. I also used the oil pressure sender plug from the 4.9 harness. Even though the 4.9 only had a oil pressure dummy light, the plug had enough wiring for the gauge as well. As this is the first automotive harness I have built for an ECM equipped car, I went the extra mile to make sure I had my i's dotted and t's crossed. You can see on the fiero harness wires with tags and writing on them. I ended up tagging and labeling just about every wire; where it came from and where it supposed to go to. The process was time consuming and somewhat messy but you sure learn the harness and take the mystery out of wiring when you know it inside and out. It also helps to separate the wires you need from the sections you don't and clear up the confusion.
Here's the C500 plug which runs from the passenger side of the engine bay infront of the shock tower to some engine components on the 2.5. Help me out here if I'm wrong. RED ground ORANGE trans reverse switch YELLOW oil pressure sensor LT GREEN GREEN starter solenoid BLUE alternator plug and power terminal on back of alternator PURPLE power distribution block under C500 plug, attached connector for? and fusible link PINK DIS system
Edit to add; The other wire that runs with the pink wire to the DIS system is C3-black/white on my harness and feeds the tach. next post filled in the blanks for me.
[This message has been edited by Reallybig (edited 11-23-2012).]
Here's the C500 plug which runs from the passenger side of the engine bay infront of the shock tower to some engine components on the 2.5. Help me out here if I'm wrong. RED ground ORANGE trans reverse switch YELLOW oil pressure sensor LT GREEN GREEN starter solenoid BLUE alternator plug and power terminal on back of alternator PURPLE power distribution block under C500 plug, attached connector for? and fusible link PINK DIS system
YELLOW is the temp sender connector for the gauges. The oil pressure signal goes through the 203 connector. LT GREEN - this is probably a Grn-wht wire that used to go to the ECM for turning on the radiator fan. PURPLE - that connector end is the ECM battery power wire. It allows you to reset the ecm and erase the codes from the engine bay without killing power to all the radio presets.
[This message has been edited by fieroguru (edited 11-23-2012).]
YELLOW is the temp sender connector for the gauges. The oil pressure signal goes through the 203 connector. LT GREEN - this is probably a Grn-wht wire that used to go to the ECM for turning on the radiator fan. PURPLE - that connector end is the ECM battery power wire. It allows you to reset the ecm and erase the codes from the engine bay without killing power to all the radio presets.
Your right! (of course). LT GREEN - The single wire is for the coolant fan that goes to the caddy ecm A11 YELLOW - is for the guages; My C2 was grey/yellow on the harness to engine side and feeds the variable temp guage while the D3 was dark green and feeds the instument panel temp dummy light. PURPLE - I did not know that. That's actually really good info to have on hand and should come in handy....if I wired it right. I'm gonna have to look into that to make sure.
Here's what I found when I removed the loom from the alternator wiring. Despite it's green fuzzyness, it metered out quite well at .2 ohms. That being said, it had to go. I ended up resizing the wires to the alternator and it proved a good place to shorten things up. I found the wires to be impossible to solder and read in another thread that the large red wire to the alternator is "resistance wiring" and doesn't take solder willingly. I mean, I had the wire glowing red hot and the solder just beaded up and rolled onto the floor. I ended up using a clamp in a similar fashion as the factory. The clamp I used was actually one of those aluminum clamps they sell for making loops in aircord. Worked quite well!
Here's a better shot of that ECM power disconnect plug Fieroguru was talking about. Also in picture is the fusible link (to the black plastic cylinder) and two hole connector that goes to the power distribution block under the C500 plug, infront of the shock tower, passenger side.
Here's the fiero harness as it came out of the cab and into the engine bay. You can see the C203 connector and fiero ecm connectors on the top. The green circle is where the firewall mounting plug was located. The wires are basically sandwiched in between two plastic pieces and sealed with hot melt glue. I would have figured that the glue would melt with the heat of the engine bay but obviously not.
[This message has been edited by Reallybig (edited 11-23-2012).]
Kudos to you. Sweet build and excellent documentation.
Thanks! I'm glad you're enjoying it .
Here's how I got that firewall pass-thru plug off the fiero wiring harness. I set up my heat gun (under strict supervision) to warm the glue after pulling the plug apart by force. There's a connecting plastic pin that holds the pieces together. Learned that the hard way.
Here's a better shot of what it looks like and the two halves on the floor. Conveniently there is a "comb" in the middle of this blob that makes it so much more enjoyable to pick all that crap out of. An important thing to note at this point is that one firewall pass-thru plug connects from the inside of the car to the engine bay (that would be the passenger side connector) and the other firewall pass-thru plug is installed from the engine bay into the car (that's this one I'm taking apart). I didn't have to deal with the passenger side pass-thru plug, but if after all is said and done, and you hot glue this plug onto your newly made harness facing the wrong direction or from the inside of the car instead of from the engine bay....needless to say there will be colorful words. Measure twice-cut once... or in this case, think 5 or 6 times before you apply the glue. I guess when it comes to wiring up your swap there are different ways of skinning this cat but I wanted to keep things as stock in nature as possible.
Here you can see the comb making its way out of the glue. It is used to separate the wires inside the plug. I didn't want to just heat up the glue till it melted everywhere, just a little at a time and pick it off. This worked for my goal of not damaging the wires. Anyone just melt it till it hits the floor?
Ta-Da! What a pain.
And here's the firewall pass-thru plug in all its glory...and the clip that helps to hold it in place...but not the rubber foam gasket that seals the plug to the firewall...don't forget that. I had to cut mine and fit it around the wires because I forgot about it until the wiring was done.
[This message has been edited by Reallybig (edited 11-24-2012).]
I boil the connector loose (others have placed the whole harness in the oven). Here I am doing the other side. Another trick is if you use nitrile gloves... wear two pairs. The double thickness will allow you to quickly pull off the glue chunks w/o burning your finger tips.
When I put the harness back together, I do not use the comb piece and just clamp the shell around the wires. Once the swap is done and passed all the final checks and test drives, then I fill the bulk head connector with some expandable foam and trim off the excess when it sets.
[This message has been edited by fieroguru (edited 11-24-2012).]
Those are some good suggestions Fieroguru. Tried, tested, and true for sure! On the other hand, I'm wondering if deep freezing it would allow you to just break it apart with a hammer once it's out of the plastic shell. Might cause damage to the wires. With the heat blowing on the closest wire and glue, I would pull them out one at a time when the glue was soft enough. This way I could pick the glue off the wires when it cooled and pull off the larger warm chunk of wireless glue so I could get to the rest. I noticed that lacquer thinner on a rag worked to wipe the glue off the wires quite easily. Perhaps soaking the glue block this way would allow it to just fall apart. I'm going to have to do a few more engine swaps to find out!
Ok, found that pic of the two harnesses hanging next to each other. I blocked out the embarrassing mess on either side. The longer, fuller, more luxurious harness is from the caddy.
To get things started and to feel like I've got something done, laying out the fuel injector harness is an easy task. At first the idea was to reuse the loom that was on the 4.9 and 2.5...should be plenty right? I even ran it all through the dishwasher to try and clean it up a bit. (when the wife was out for a while) After all that work making the engine pretty, I couldn't bring myself to do it. So I went out and bought all new loom. In hindsight, I wish I had run the injector harness under that vac line I built.
Call me crazy, but here's the ECM side of the harness...every wire labeled where it comes from, where it went to, and where it needs to go. If you want a crash course it harnesses, this is how to understand them...or confuse the heck out of yourself.
My caddy harness was not the same as what is posted in the well documented 4.9 wiring thread: https://www.fiero.nl/forum/Forum2/HTML/098096.html . The wiring prints in this thread show that the ECM wiring goes into a massive plug and the other side goes to the engine harness. On the harness from my donor caddy, the ECM plugs went to the caddy firewall plug filled with that glue just like the fiero, and out to the sensors etc. Here is one of the rogue plugs that thew me off and really made all that tagging necessary.
Some of the harness went to this plug on the drivers side of the caddy. Really confusing stuff without the accurate prints. Yes, I tried to find them but couldn't...at least not for free.
After careful consideration, I decided to pull the plug on this side of the harness (get it? ha ha.)
I like that car dolley and the batery box turned out GREAT allso.
Just curious; what was the reason for taking apart the pass through connector?
Thanks. The dolly was a lifesaver in a tight garage. Just turn the wheel and push the side of the car for better access. It also held it off the ground just high enough that I could crawl under the car and work in the engine bay. It was low enough that I could lean over the back or sides and work from outside as well. Being 6'2" helps though.
I was happy with the battery box but would change a few things if I were to do it again. Mainly sit the battery another inch towards the front and tilt it for fluid drainage.
The ECM in the caddy sits above the front passengers right foot under the dash. The plugs from the ECM run up to a glue filled rectangular firewall pass-thru plug and then to the engine sensors, a/c, trans etc. The fiero firewall pass-thru plug is a different size and shape but still capable of handling the additional wires. As I didn't want to alter the stock fiero firewall, I chose to remove the pass-thru plug from the fiero ECM harness and put it onto my newly made caddy harness. This allowed me to use the factory means of sealing the cab from the engine bay and keep things looking stock. I hope that explains it for ya. I got more pics that should help coming up!
Well, here's the caddy harness fed though the firewall from the ECM. The ECM fit so well in the stock location it just seemed natural to keep it there...and by natural I mean easiest. It's semi layed out, just got to figure out which plug is which.
One thing that really got me was that I didn't label all the plugs when I pulled them off the donor. You can figure it out just by following the wires but I never did see a good collection of pics to help me out. I took a pic of just about every plug so hopefully it will help anyone watching with their own harness. Pay attention to the wire colors as well and if I'm wrong and you know it, make sure to correct me. Also keep in mind that this harness is a bit different as it is from a 94 Deville and I believe as the ECM is different from earlier caddys, so are it's plugs. This is the Caddy ECM plug A-B
Here's the Caddy ECM plug C-D
This greenish plug is Caddy ECM E-F
This one goes from the ECM to the fuel injector harness
Here's the transmission plug for the electronic automatic caddy 4T60-E
This is the Oil Pressure Sensor plug on the caddy harness. It worked with the sensor that supplies both the dummy light and variable gauge. The caddy engine comes with a sensor that only actuates the dummy light. I got the sensor from an 89 cavalier with an oil pressure gauge in it's instrument panel.
From caddy ECM to Distributor.
My 4.9 had the head mounted Temperature Sensor, and this is it's plug.
Manifold Absolute Pressure (MAP) Sensor plug
Caddy Cruise control system plug.
Power Steering Pressure Switch plug
EGR Solenoid plug
Throttle Position Sensor plug
O2 Sensor plug. My engine had two O2 sensors and thusly, two O2 plugs from the ECM
Idle Speed Control Motor plug
Transaxle Range Switch plug
Vehicle Speed Sensor plug
Intake Air Temperature Sensor plug
Here's that curious green plug that's inline with the alternator. It's used to short the alternator to ground during certain engine procedures. Any one want to elaborate?
Plugs into the side of the alternator. brown wire goes to the C500 plug and red to the power distribution block.
I think this one's the engine coolant level switch. It went to the large grey plug I cut off and as I couldn't find a good 94 wiring print, I couldn't be for sure.
These two went to the 4.9 destributor. One's the tach feed, and the other's...well, I gotta check into it and edit the post later.
This is the engine bay power distribution block, passenger side of the engine bay, front side of shock tower, as it gets wired up
This is the C500 plug that mounts above the power distribution block. The plug that's plugged in feeds the tail light assembly for the most part and the plug that's off to the side is the one that feeds the engine.
Here's a close up of that C500 to engine plug.
The Transmission reverse switch plug goes to the C500 plug to activate the reverse lights.
This plug went from the 2.5 engine temp sensor to the C500 plug to feed the gauge and dummy light. It's missing it's locking tab.
[This message has been edited by Reallybig (edited 12-01-2012).]
This is the Oil Pressure Sensor plug on the caddy harness. It worked with the sensor that supplies both the dummy light and variable gauge. The caddy engine comes with a sensor that only actuates the dummy light. I got the sensor from an 89 cavalier with an oil pressure gauge in it's instrument panel.
You can use the same connector on the proper sender. The two outside pins parallel the fuel pump relay contacts. The upper center pin feeds directly to the gauge.
quote
Manifold Absolute Pressure (MAP) Sensor plug
Note that the caddy uses a slightly different MAP sensor than the normal GM 1 bar and 2 bar. I don't have a source for the gray weatherpack 3 tower connector. GM made different key cuts in the connector and they correspond with the colors of the connector. The gray connector matches up also with the red. If you want a connector with the locking tab not broken off, you could just cut a new key slot in your green Fiero MAP sensor connector.
quote
Caddy Cruise control system plug.
Caddy ECM controled vacuum cruise module. It is my suggestion that you change to a GM digital servo cruise and ditch both the Fiero and the Caddy vacuum cruise servos. There is a good chance the caddy servo doesn't work anyways. The GM digital cruise wiring can be found at http://gmtuners.com
quote
Power Steering Pressure Switch plug
Ditch the connector and just run switched +12 to the power steering input pin of the ECM.
quote
Vehicle Speed Sensor plug
You will need the two pin WeatherPack connector from your Fiero harness since you are going with a manual transmission
quote
ere's that curious green plug that's inline with the alternator. It's used to short the alternator to ground during certain engine procedures. Any one want to elaborate?
The green connector is on the brown wire that runs from the CHARGE light to the alternator. Grounding the green connector will light the CHARGE light, but will also have the effect of disabling the alternator. That is needed when you are performing the Idle Speed Motor setting.
quote
I think this one's the engine coolant level switch. It went to the large grey plug I cut off and as I couldn't find a good 94 wiring print, I couldn't be for sure.
Not used on the Fiero swap
quote
These two went to the 4.9 destributor. One's the tach feed, and the other's...well, I gotta check into it and edit the post later.
Distributor power - C500 E2 - I run a 20A fuse at C500. Your donor Fiero harness might have a fusible link there. The Caddy circuit had it fused. There is no fuse from the battery to the distributor if you don't add one.
quote
This plug went from the 2.5 engine temp sensor to the C500 plug to feed the gauge and dummy light. It's missing it's locking tab.
Thanks Phonedawgs, lots of good info...saves me from having to dig up the details! My fiero didn't have cruise but I want it to. I have that plug and wires coiled up in the engine bay waiting to be used. I do plan on going with the digital servo cruise system. I can't bring myself to put an ugly vacuum canister in the engine bay knowing there is a cleaner option. The digital cruise has an "AR" on the side if I remember correctly...any idea what the best car and year to get one out of might be? I used the stock fiero wiring to the caddy alternator including the fiero harness fusible link "E". Not quite sure what it's rated at. Frighteningly enough, not one of 4 caddy prints I have show there being any fuse between the battery and the alternator. Hmmm.
[This message has been edited by Reallybig (edited 12-02-2012).]
I hope the 666th post wasn't a bad omen and you're done posting build information on your thread. Are you still liking your 4.9? I have held off on my conversion until winter is over and watching/reading your thread has kept my interest going...unbelievable how many pictures you have documenting your progress, great job.
I hope the 666th post wasn't a bad omen and you're done posting build information on your thread. Are you still liking your 4.9? I have held off on my conversion until winter is over and watching/reading your thread has kept my interest going...unbelievable how many pictures you have documenting your progress, great job.
No bad omens, I haven't stopped posting...still lots to do and even more I want to do. I kinda wanted to see how long it would take for someone other than me break the silence . Glad to see there's still some interest.
The fiero has been sitting outside in the snow and cold with the summer slicks on it. I just put the 14" pontiac snowflake wheels with the snow tires on it this past weekend...it looks so sad and unhappy with them on.
After a few hard launches with a friend in the car, it developed a few problems. When I accelerate, the car pulls (steers) to the right, so I turn the wheel to the left to keep it straight. If I let off the pedal, my steering wheel correction causes the car to turn to the left, let go of the wheel and it will coast straight. After just changing to my winter tire, that problem seems gone or maybe just minimalized. Time will tell. The Idle seems all over the place now too. It will sail on until the car comes to a complete stop. The idle then drops down to around 900. If I'm on the highway for a while then come to a stop, it idles at around 1300. (the tach isn't truely set up yet) Shut the car off and the idle servo seems to be hunting around. Hmmm. The mileage is getting worse, but that might be the cold weather. I've got to figure out how to pull codes etc from this 94 ecm. I'm not even sure how the ALDL plug is supposed to be wired...I think it should be wired like the Caddy's was and not the Fiero's. But the 94 was wired different than the ALDL plug that is show on the prints I pulled of PFF here. I can't find a set that show where they come from for the 94 ALDL...ugh.
Today after driving a while, I checked the engine bay and found that the carefully prepped and painted valve cover at the back side has potato chip sized paint flakes peeling off. I can't tell you how pissed that makes me.
As for pictures, my camera's SD car shows over 1800 pics...but to be fair at least 20% are from vacations and family.
Well, the Christmas Holidays are coming to an end...I should get back to posting some more pics and progress... tomorrow.


 ).
). 


 .
.