Here are some pics and details on the serpentine conversion I am putting the finishing touches on.
The car started out with a typical Archie setup running an electric water pump and due to the use of a milodon 12000 gear drive (protrudes from the block an extra 1/4") the passenger frame rail was already notched when it came to me. The only downside to the serpentine setup on an Archie kit is it requires a frame notch, but since this car already had one there really wasn't any reason to not go with a serpentine setup.
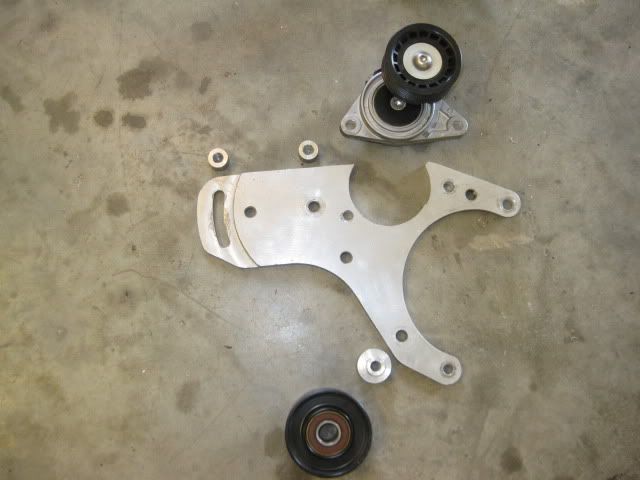
The plan was to retain as many original components of the Archie kit, while incorportating the serpentine belt, balancer, pulleys and spring loaded tensioner.
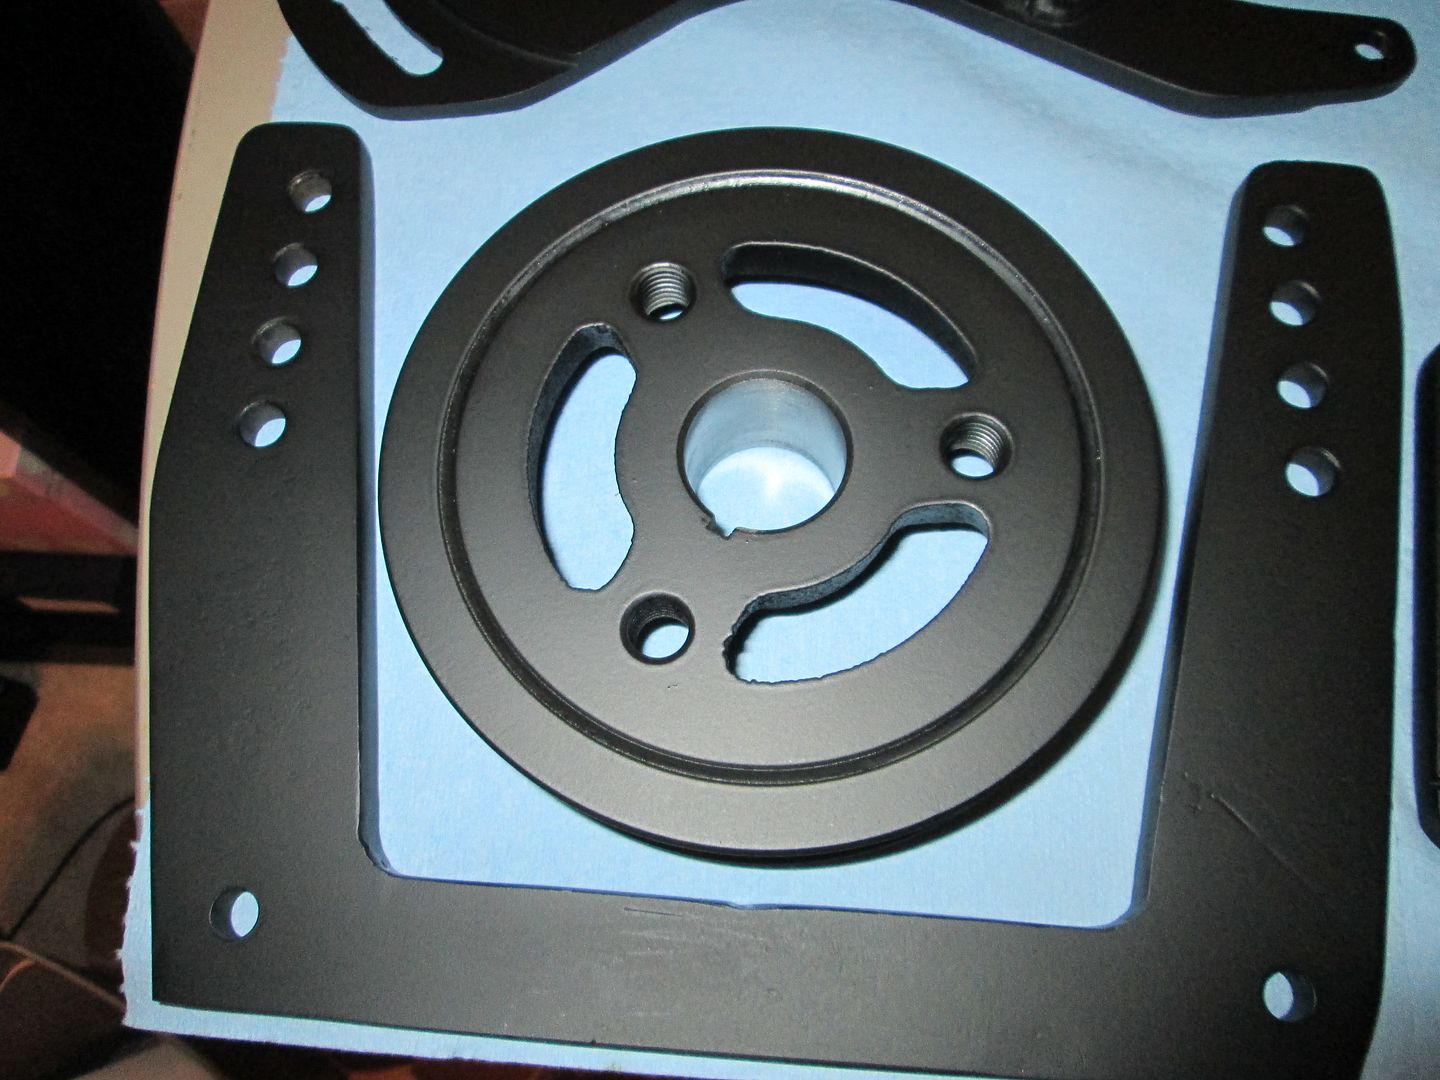
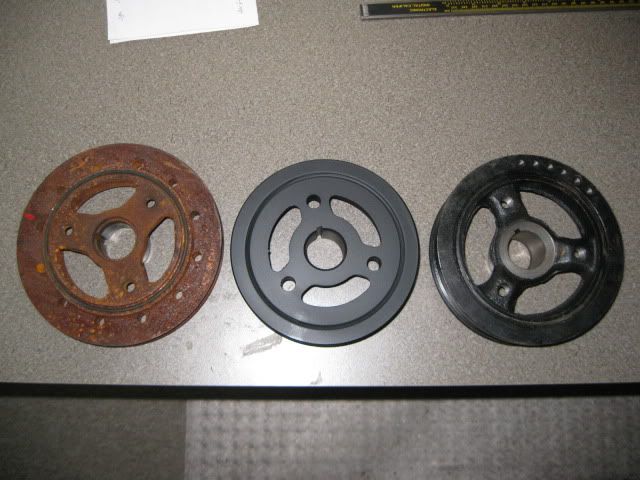
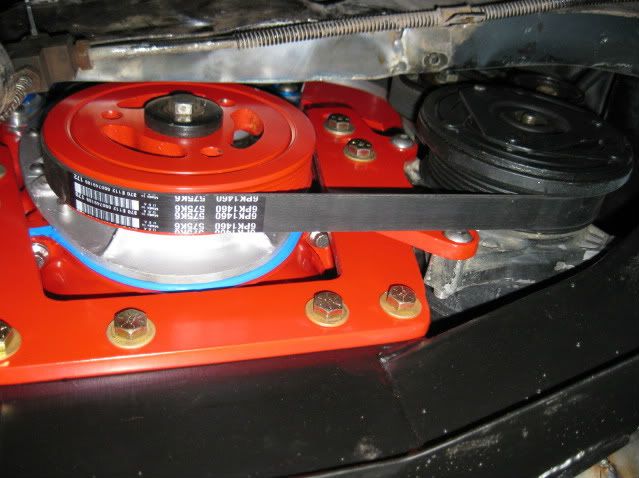
The new balancer is a 87+ GM FWD 2.5 balancer. It is a compact 6 rib balancer that slides right on the SBC crankshaft with a short crank seal flange and no extra material on the face. Here is a pic comparing an Archie V-Belt balancer on the left, the 87+ FWD 2.5 balancer in the middle and the 3.1 FWD balancer (the one I have used in the past) on the right:
As you can see the 87+ 2.5 FWD balancer is very similar in overall width as the Archie balancer, but it is thick for its entire diameter vs. the stepped profile of the Archie balancer. This is why a small notch will be required to use it. The 87+ 2.5L FWD balancer is readily available under the following part #’s: Dorman 594-027, Autozone price $70.99 Pioneer DA-151, Autozone price $45.99
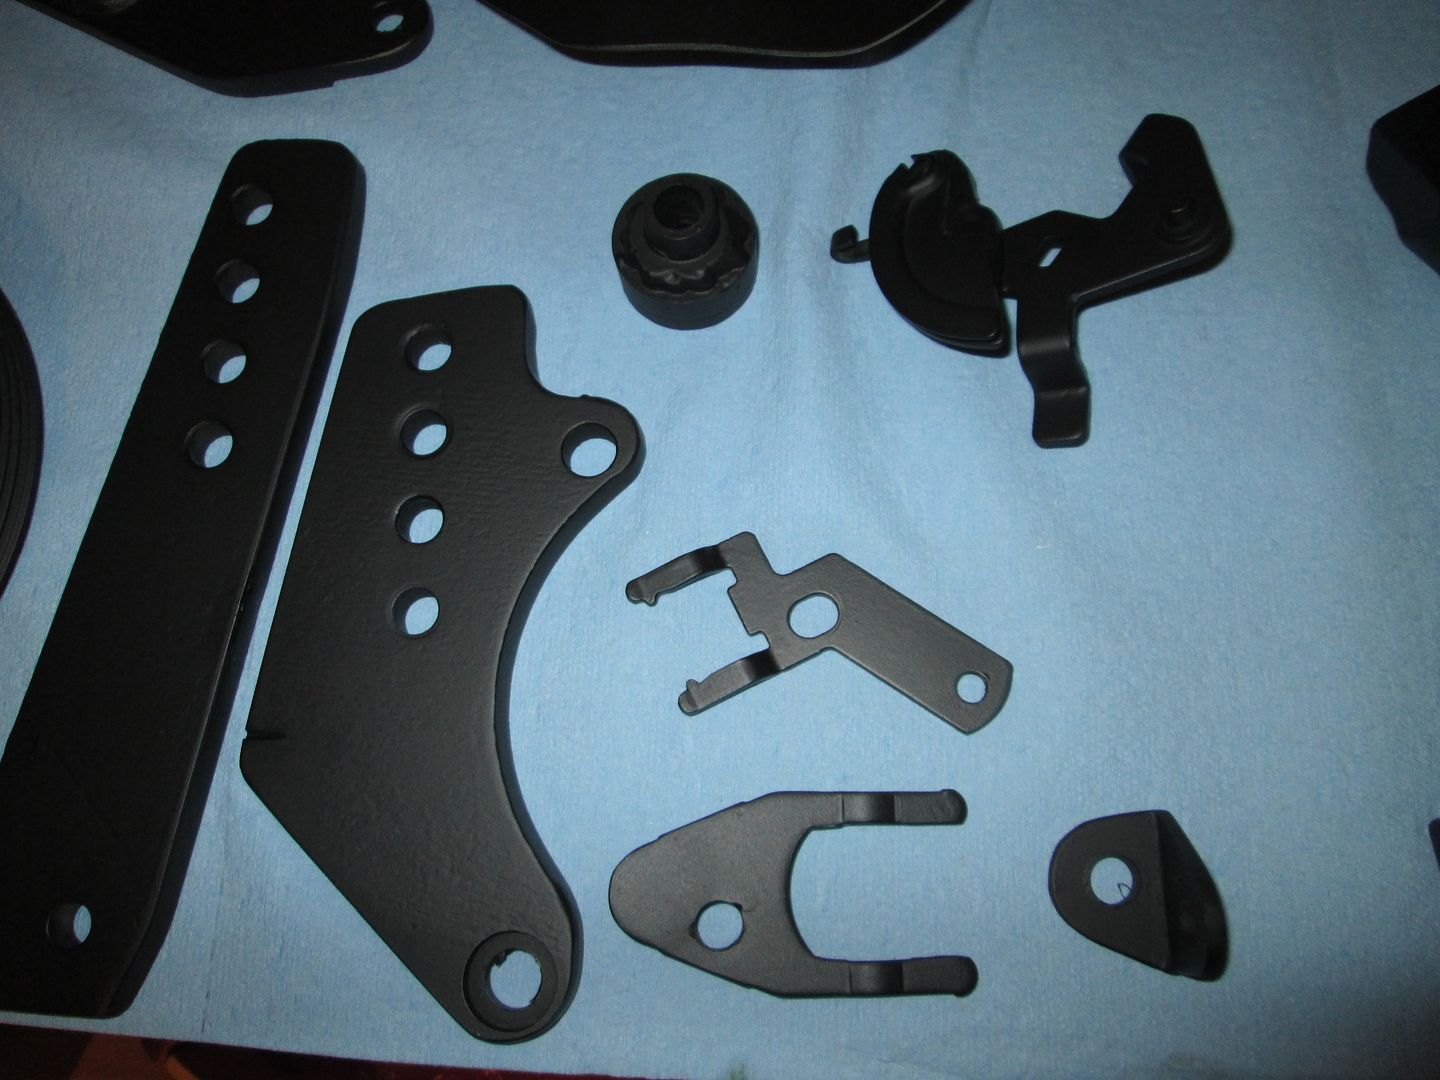
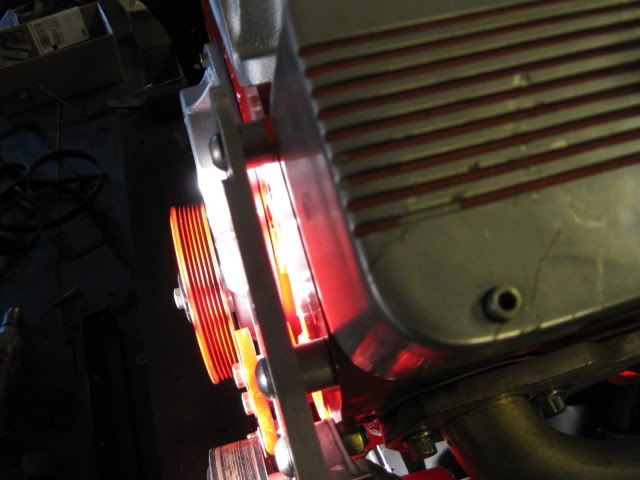
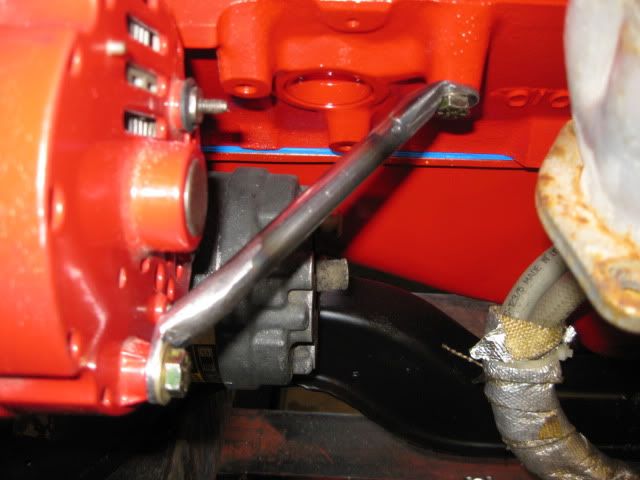
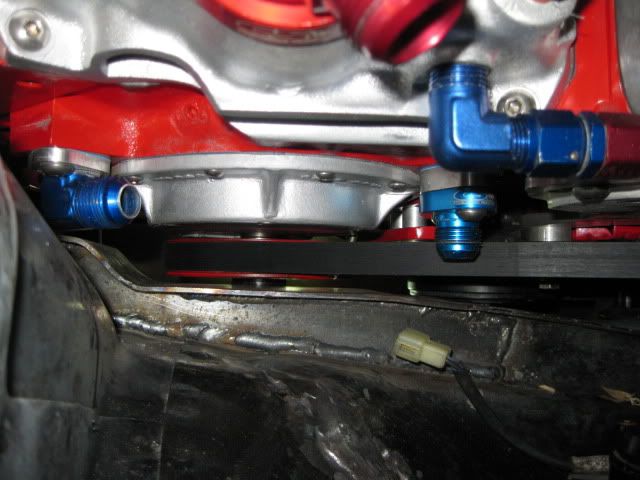
The Archie alternator bracket is modified to accept the tensioner (autozone part # 305232) and the pulley swapped out for a 6 rib version. The lower idler pulley mounts in an existing hole in the Archie bracket and just needs the proper shim/stand to space it properly. The spacers at the upper left are needed between the head and Archie bracket to properly line up the pulleys.
The Archie AC bracket needs the proper sized shims to line up the pulley on the AC compressor and the bottom bolt hole needs counter bored (or counter sunk) so the bolt head will clear the belt path:
The pulleys on the AC clutch and Alternator will need to be converted to the 6 rib style. For the AC compressor, I used the stock V6 fiero compressor and swapped over the clutch setup from the same application as the balancer, but you could use the 88 4 cyl AC compressor or some latermodel one with the serpentine clutch already installed.
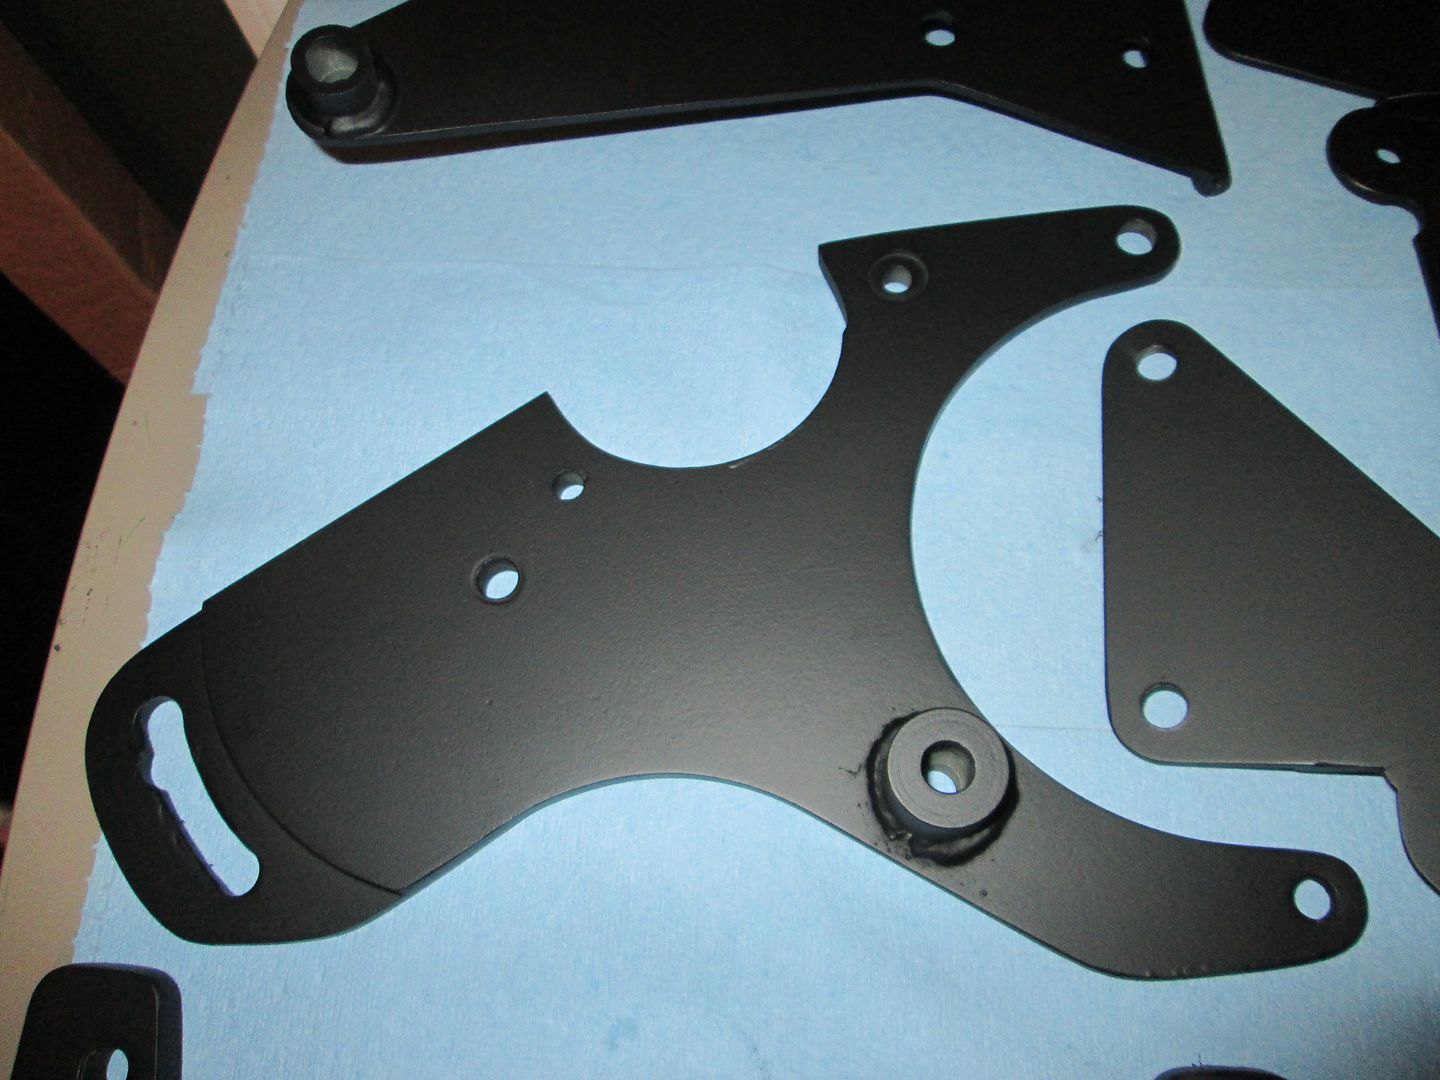
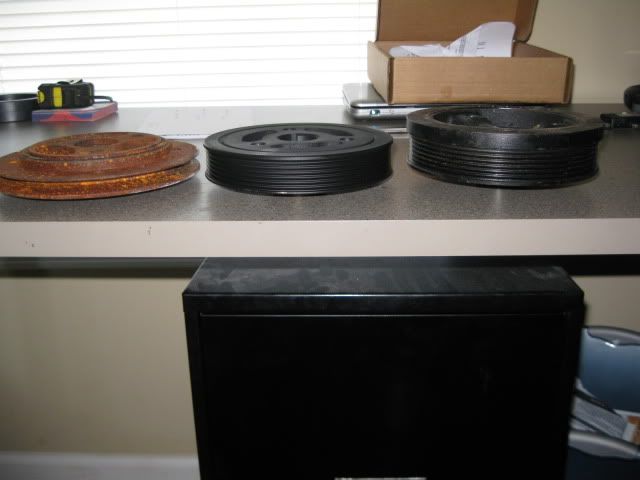
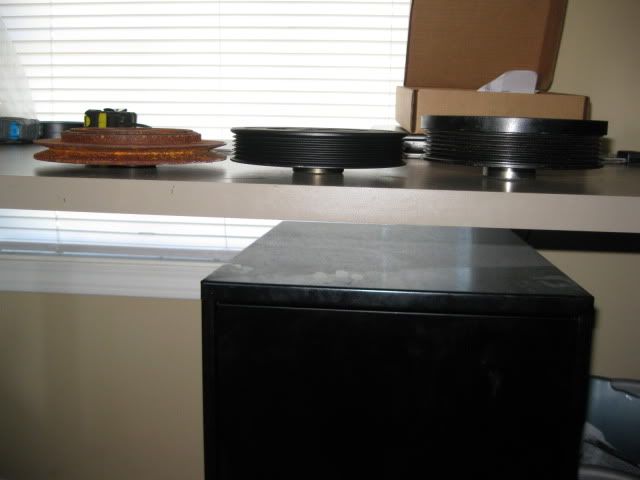
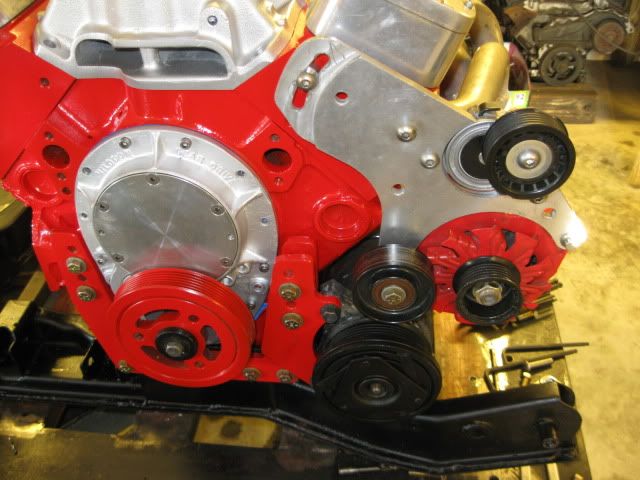
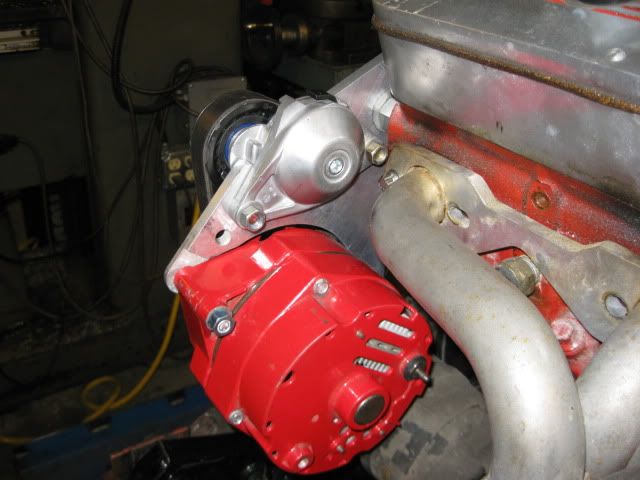
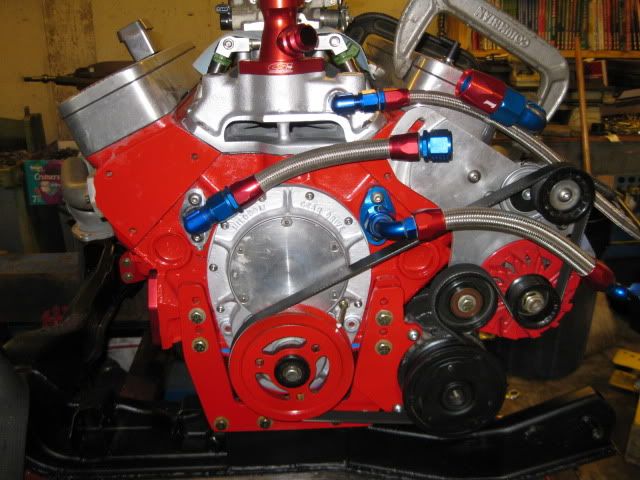
Here are a few overall pictures of the assembly:
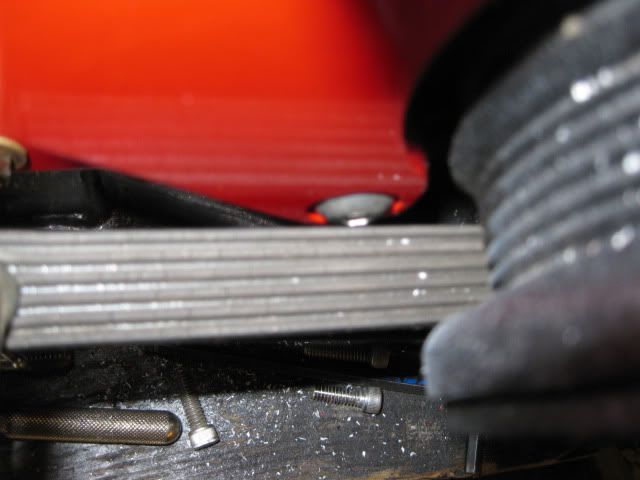
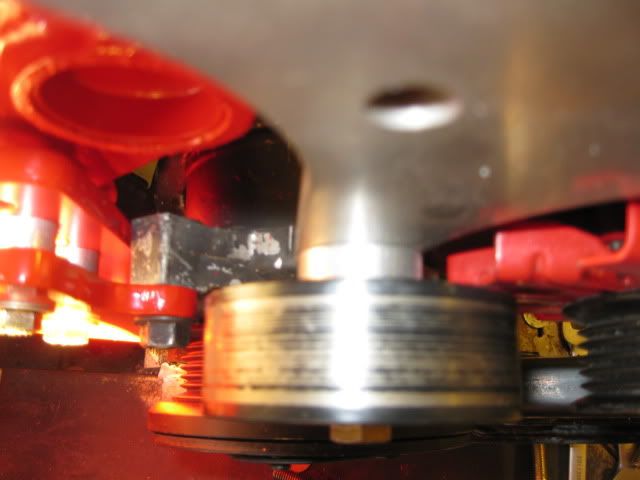
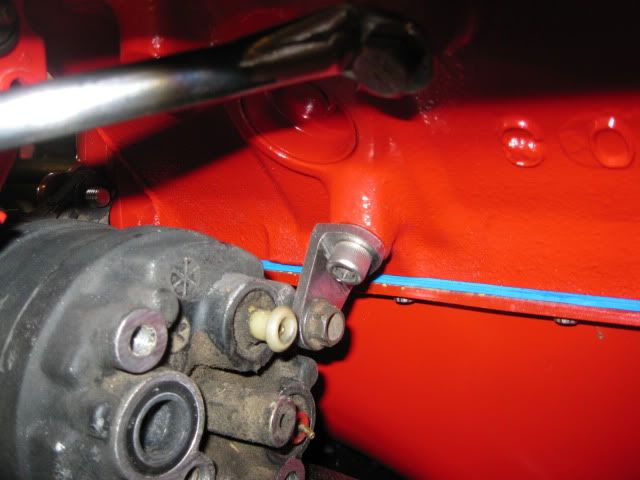
You will need to locate TDC and make a timing mark and notch the balancer in some manner. I used an existing hole and a 5/16" bolt that I ground a point on the end and bent it to be very close to the balancer. I uses a cut off wheel to notch the balancer and then painted the pointer and notch white to make them more visible:
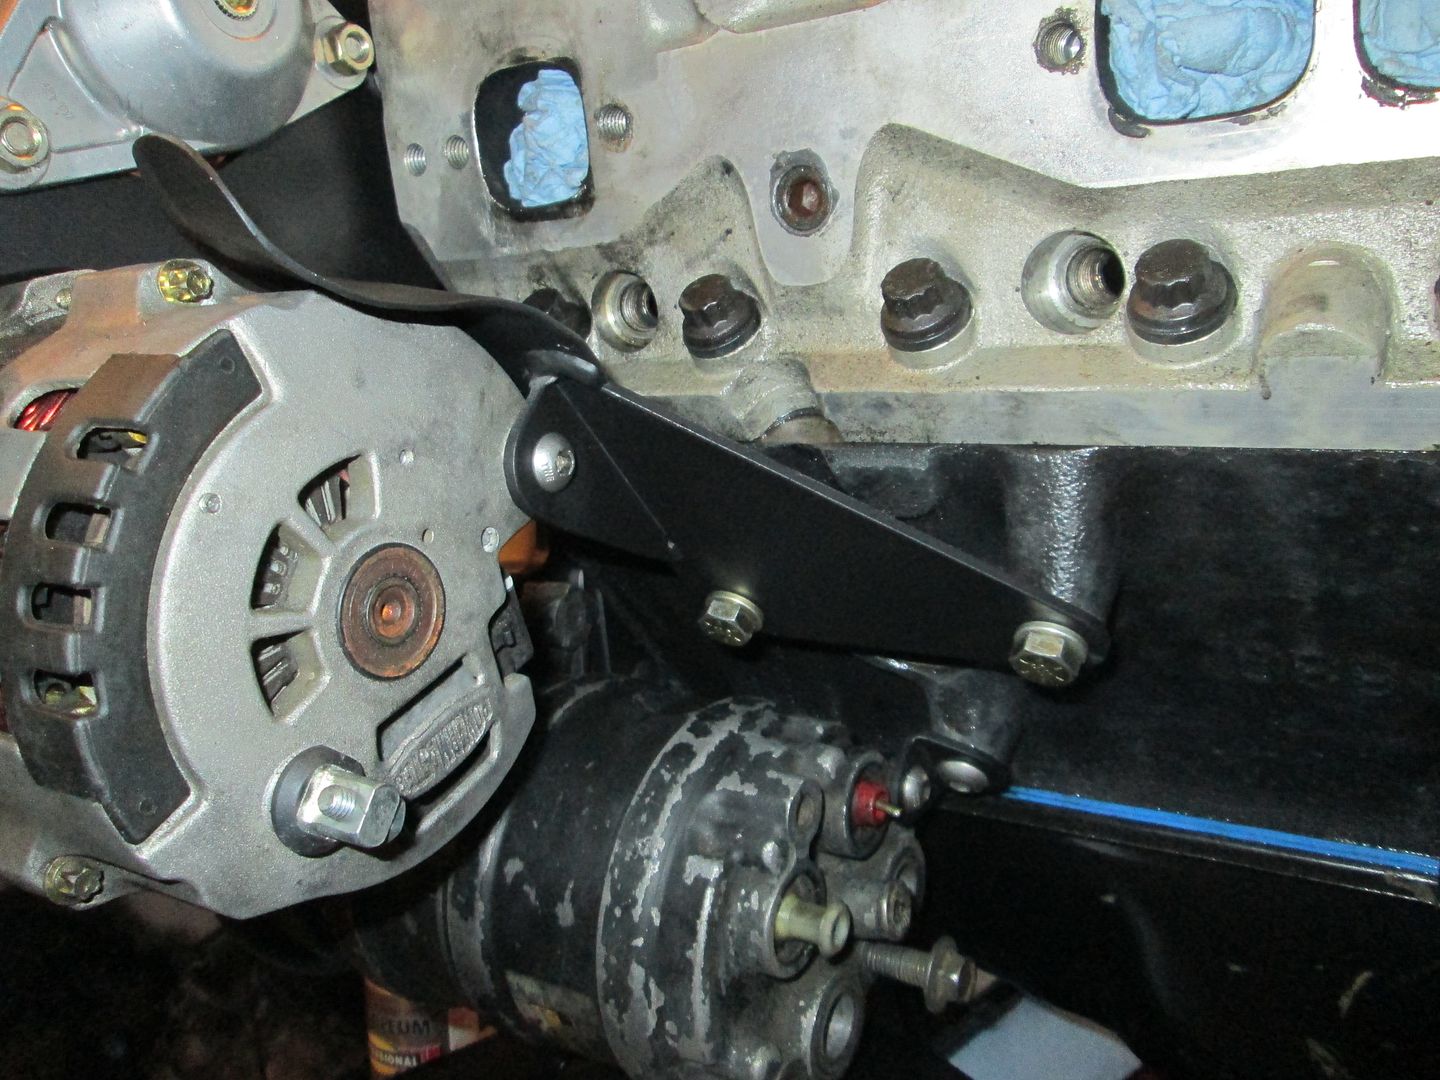
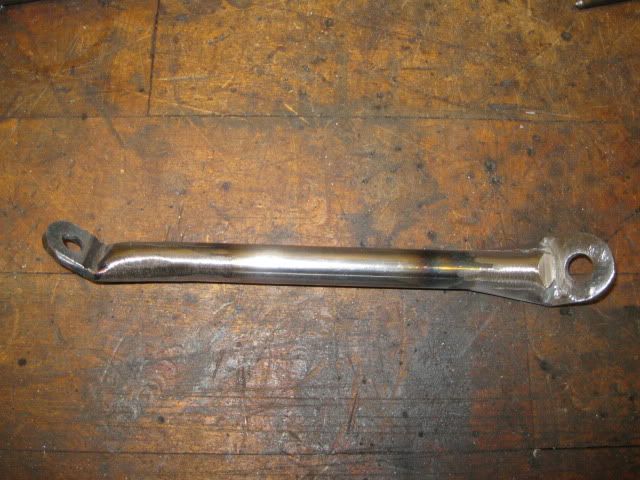
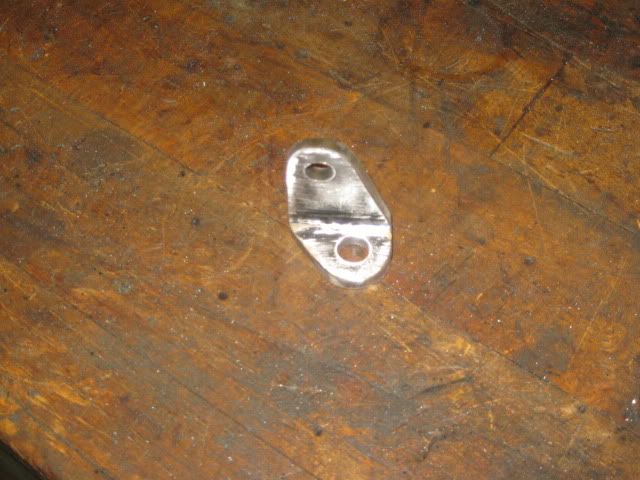
I also fabricated 2 additional brackets/braces to support the back side of the alternator and AC compressor to ensure they will not deflect under WOT loads:
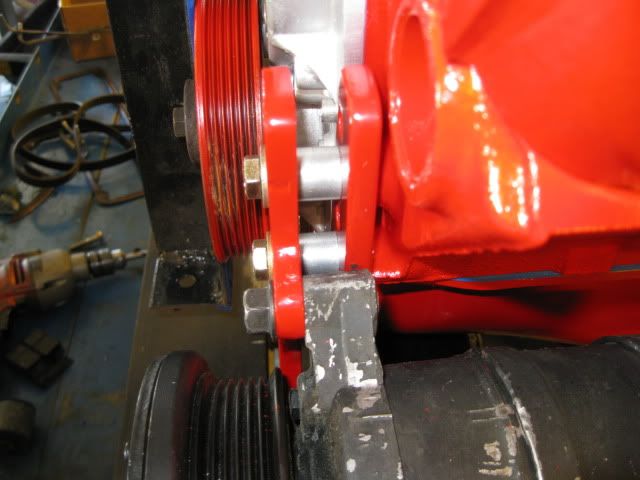
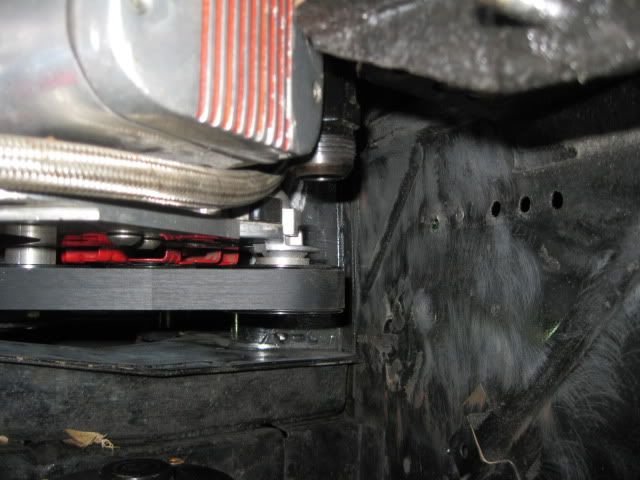
The original frame notch was much larger than needed, so I went ahead and cleaned up the notched area to better match what was needed. This notch is 1/4" deeper into the frame rail due to the use of a gear drive, and I left enough room to pass the serpentine belt between the frame and the balancer to allow a belt change w/o needing to rock the cradle back to slide the belt on:
[This message has been edited by fieroguru (edited 08-17-2011).]
Thanks for sharing your insights and solutions, Guru. Your explorations are contributing to saving my bacon with my v8 - F40 conversion. And this solution shall also elegantly contribute it appears. All credit is given.
Nice writeup. I may need to do this next time I drop the cradle for clutch job. I hate cutting the frame rail but I also really hate the belt whine when it gets wet when I drive in the rain.
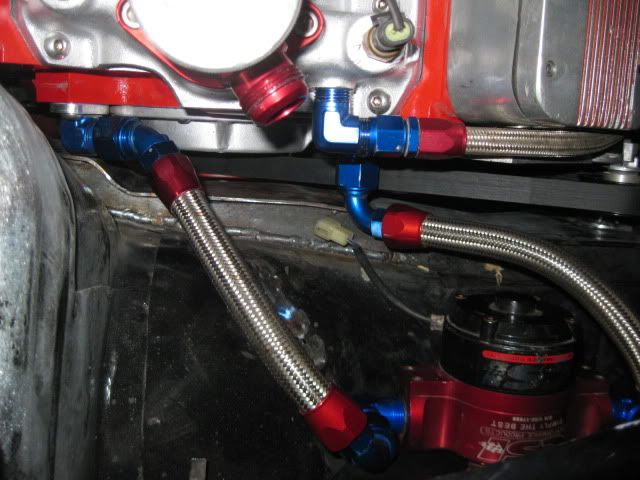
Here are a couple more of the assembly during another test fit: Notice the aluminum block thickness differences between the two coolant inlets. I had to mill the left (rear) one down and thread the 90 degree AN fitting much further up the shank to get it to be short enough to fit. It now clears by less than 1/8", but that is plenty with the engine solid mounted.
[This message has been edited by fieroguru (edited 09-05-2011).]
Does the 2.5 balancer rear go into the motor further like it should? Nice work, Ray
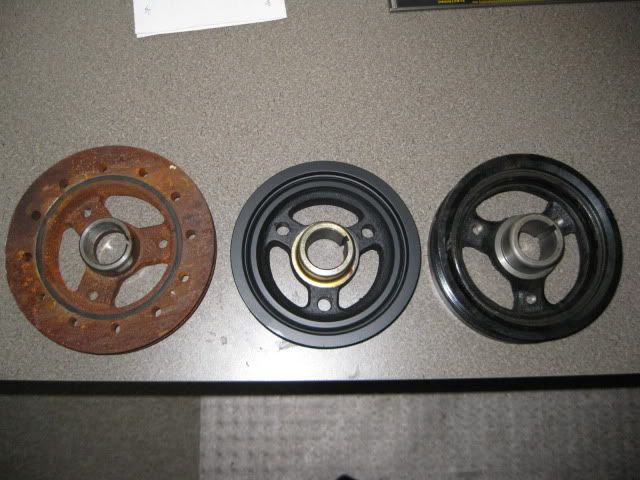
Yes, it has the same back spacing as the Archie V belt balancer and can be installed without any need for further machining or modification to the balancer. In this pic the 2.5 balancer is in the middle:
Now, if you are using a plastic vortec engine timing cover (or this milodon gear drive), then you will need to make a spacer (about 1/4" thick) so the balancer can bottom out on the spacer while still clearing the timing crank sensor boss (or the excess protrusion of the timing cover), but this is needed if you use the V belt balancer as well.
[This message has been edited by fieroguru (edited 09-05-2011).]
I know this is an old thread but it wasn't archived so I thought it best to post to this one, instead of starting a new one.
I just finished installing the 2.5 serpentine pulley. I was wondering if you have done this on a motor with a regular timing cover?? If you have, what kind of clearance did you end up with between balancer and timing cover? Also what is the best washer and bolt to use? It seems I have a gap still where the balancer isn't flush with crank snout, is this normal? Thanks Ray
I have used them on the L31 plastic timing covers, but not the stamped metal ones.
When I set up the balancer on the crank, I use a 3 step operation. First with the timing cover off, I slide the balancer all the way on the crankshaft and measure the depth (with digital calipers) of the crankshaft end to the face of the balancer. This is the needed dimension to fully bottom out the balancer. Then remove the balancer.
Next step is to install the balancer with the timing cover in place. I slide it on as far as it will go w/o any interference. Once I am happy with the placement, I check the depth of the crankshaft again. Whatever the difference is between the two measurements is the needed thickness for the spacer. Then remove the balancer.
If the spacer is less and 1/8" then you can use a large washer if you notch it to clear the crankshaft key. If it is wider, I use a junk balancer and cut the seal surface off it and turn it to the right dimension. The spacer from the junk balancer can be installed through the hole in the timing cover, but the spacer from a washer might need the timing cover removed to install.
If you have access to a lathe, you can remove some material from the backside of the balancer to pull it even closer to the timing cover.
Not only is this an awesome belting solution, but it shows a MUCH better way to do a remote electric water pump. When I looked into trying to do that, all I found was these "remote water pump bars" that connect to the block. I got one and we realized there wasn't going to be a way to get that to work. But if it's done as pictured above... that's just all sorts of awesome!
(I really like the fixes to stop deflection under WOT, I've had the current v-belt pop off at both the dyno and the track because of that!)
I did this more than a year ago and it works well. I did find the end of Archie's mount where the alternator bolts on began to bend. The aluminum is thinner there. I just added 1/4" steel plates on the front side of Archie's mount to reinforce those areas.
Will this function properly as a vibration damper at high RPM on a V8? It would seem that the V8 vibration dynamics would be much different than smaller 4-6 cylinder engines.
Will this function properly as a vibration damper at high RPM on a V8? It would seem that the V8 vibration dynamics would be much different than smaller 4-6 cylinder engines.
Over the years of SBC's there have been about 15 different shape/sizes/styles of balancers. This balancer is very close in shape/size/mass of the OEM Corvette LT1 harmonic balancer, so it should work in a similar fashion. It also has about the same damper mass as the Archie V-belt balancer that came from an I-4 and I-6 application that have been used on countless SBC swaps for decades.
Where does the tensioner end up relative to the battery tray?
That's a good question... never had a SBC come to me with a battery tray still in it, before I did the belt conversion. I have a conversion underway, so the next time I have in the engine bay, I will measure back to the sheet metal wall on the passenger side and then measure from that wall to the edge of the battery tray on my 88 2.5/125C Fiero.
Belt to battery tray is pretty tight on the 4.9 and this belt drive is about 1" closer to the passenger side, so I don't expect it will fit, but don't know for sure.
Here are some pictures of the current serpentine upgrade going back together:
If you notice the notch on the left edge of the AC bracket, that is the timing mark! I added a groove on the balancer as well.
This one as also done with the L31 timing cover and everything clears:
Here are the brackets on the rear. I used a different bolt boss for the rear stabilization. The rear bracket has a built in heat shield so keep the exhaust heat off the alternator housing.
[This message has been edited by fieroguru (edited 12-21-2013).]
An ingenious, neat bit of engineering work and fabrication. Really looks like it belongs.
------------------ " THE BLACK PARALYZER" -87GT 3800SC Series III engine, custom ZZP /Frozen Boost Intercooler setup, 3.4" Pulley, Northstar TB, LS1 MAF, 3" Flotech Afterburner Exhaust, Autolite 104's, MSD wires, Custom CAI, 4T65eHD w. custom axles, HP Tuners VCM Suite. "THE COLUSSUS" 87GT - ALL OUT 3.4L Turbocharged engine, Garrett Hybrid Turbo, MSD ign., modified TH125H " ON THE LOOSE WITHOUT THE JUICE "
Can anyone help me out with PN's for changing an 88 GT - V8 over to serpentine for AC and alternator pulleys? I also need PN for the idler pulleys.
Thanks!
For the AC and Alternator pulleys, I just cannibalized stock 88 Fiero 4cyl parts and swapped them over (Factory 6-rib Serpentine setup). The pulley and clutch from the AC compressors are interchangeable once you buy the removal/install tool: http://www.ebay.com/itm/A-C...330611199240&vxp=mtr
If you don't have 88 Fiero 4 cyl parts, then a trip to your local junk yard for a late 80's/early 90's FWD 2.5L car is what you are looking for. This grouping of parts (Balancer, AC Pulley and Alternator pulley) are a matched set to keep the speeds of the components at their stock speeds.
Another option is shops that specialize in automotive AC should have a pile of junk compressors with good clutches sitting in the corner, same for a shop that specializes in Alternator rebuilds.
The rest of the parts: 87+ 2.5L FWD balancer: Dorman 594-027, Pioneer DA-151, Tensioner: autozone part # 305232 Ribbed pulley (from LS4): Duralast 231015 Smooth idler (From LS4): Duralast 231107 Belt: 575K6 – this will change depending on placement and rotation of the tensioner, diameter of the AC compressor (V6 style vs 4cyl style), and diameter of pulleys used.
The tedious part with this setup is lining up all the pulleys. Since you are converting an already built car, you might be able to add the shims between the front engine bracket and the angle welded to the frame to get the AC pulley to line up, but if not, you will have to cut off the angle from the cradle and reposition it.
Sequence of aligning. Install balancer all the way on. Align AC pulley (normally requires shimming front engine mount), then align Alternator pulley and tensioner pulley at the same time. You might need to use some shims between these two ribbed pulleys and their mounts to get everything to line up. Last is the flat pulley.
Guru, Thanks! My entire 88 cradle and ZZ4 are now on sawhorses and I'll figure it out. My front mount kept loosening where it was bolted to the angle iron, so I had it all welded a long time ago. I'm also adding an F40 6 speed so at this point, my options for moving the angle iron are limited unless I grind off all the welds. I think I'm better off to align the pulleys by moving the accessories themselves.
Hey guru, I'm swapping my motor into a gt I just bought. When I do I want to add the tensioner (used an older design before). Do you have measurements as to where to cut archives alternator bracket? Thank you, Ray
This is very nice. I might have missed it somewhere (haven't been on this site in a while) but why did you do this conversion? I have an engine mounted electric water pump now; sticks into the wheel-well area. I also had to notch the frame since a SBC with a 4T65E-HD makes a pretty long package. I haven't driven it much yet, just putting it on the road now after years of mods. Is there an issue with the standard belt setup?
thank you,
Rick SBC/4T65E-HD Ferrari Dino body Miata dash Coil overs front and rear A lot more little things
Originally posted by couldahadaV8: I might have missed it somewhere (haven't been on this site in a while) but why did you do this conversion? Is there an issue with the standard belt setup?
1. The auto tensioner helps maintain proper belt tension vs. the manual pry the alternator up, tighten the bolts and do it again as the belt stretches. 2. With this modification, the alternator never moves, so you can add the rear support to help stabilize it. Quick revving SBCs can flex the stock aluminum alternator mount enough to throw the belt on occasion. 3. Helps reduce belt squeal in the rain. 4. Improved belt wrap around the AC compressor (eliminates belt squeal while running AC)
Awesome work adapting serpentine belts. I definitely want to do this on my sbc.
Currently I just have my alternator mounted down low where the ac compressor is supposed to be. My Archie kit is very old... like from the mid 90's when he used all flame cut steel. I don't even know where my Archie alternator bracket is. Lost is two moves ago. But somehow I gotta figure out how to get this done!!
I'm having trouble with the Dorman harmonic balancer listed above. I bought it from Rock Auto and it's not a press fit on the nose of the new crank. The engine builder tells me the crank is fine but the balancer inside diameter measures 1.2490" and it's oversize. Has anyone come across this? The O'Reilly equivalent says it's supposed to be 1.245. We don't want to proceed without a press fit.
[This message has been edited by V8Steve (edited 08-10-2016).]
I'm having trouble with the Dorman harmonic balancer listed above. I bought it from Rock Auto and it's not a press fit on the nose of the new crank. The engine builder tells me the crank is fine but the balancer inside diameter measures 1.2490" and it's oversize. Has anyone come across this? The O'Reilly equivalent says it's supposed to be 1.245. We don't want to proceed without a press fit.
Sounds like it was machined wrong or boxed wrong. I would return it and get one from another vendor.
quote
Originally posted by 2.5: To run the 88 4 cylinder AC compressor on the SBC, can one just use the 88 4 cylinder hoses as well, or are do they need modifed?
The stock 4cyl hose would still be a little short. However, you can move the bracket where the engine AC hoses attach to the chassis AC lines over a couple of inches to use the stock AC hose. Or just get some new hoses made up.
I phoned Rock Auto but there was no menu choice to discuss this return. It directs you to the Return portion of the website. When I processed the return and had to select the Model Year I made Mistake #1 of 2. I selected "Unlisted" and then it told me it was not returnable.
I phoned Rock Auto again and finally got a real person and explained the situation. Mistake #2 - I was honest and explained what I was doing with it. They called up my record and could see the return was refused. I explained that O'Reilly publishes the crank bore diameter and it shows the measured Rock (Dorman) bore to be oversize. Their canned response was that someone else's website data could not be used. (Archie gave me the O'Reilly number and a big thanks to him today).
I was planning to buy a lot more parts from Rock but so much for their customer service.
Will buy the O'Reilly balancer tomorrow. Maybe I should bring the engine with me to make sure it has the proper interference fit?
You told them their own damned part was out of spec? It doesn't matter what spec O'Reilly's has for it... Chevy has a spec and if their part doesn't meet that spec, they owe you your money back.
Update: The Dorman 594-027 balancer was a loose fit and Rock Auto refused to take it back. We bought the Pioneer DA-151 from Autozone and it was surely a press-fit..just what we wanted. The press was a bit too much and we knew it would go on and off a few times to get things properly fitted so it was necessary to hone the bore. Once on and bottomed against the timing gear, we found it to be too far onto the crank such that the end bolt could not fully torque the balancer against the timing gear, even though it was a suitable press fit. Eventually we used a shim, around .030" to go between the balancer and the timing gear which allowed the bolt to fully clamp the pressed balancer against the timing gear.
Lessons learned: The Dorman, at least the one I bought, is a loose fit and has the potential to ruin the end of the crank. Rock Auto - I won't buy anything from them again. The Auto-zone Pioneer balancer is a press fit but not exactly a bolt-on as it still required careful assembly and shimming.


.jpg)
_(640x480).jpg)