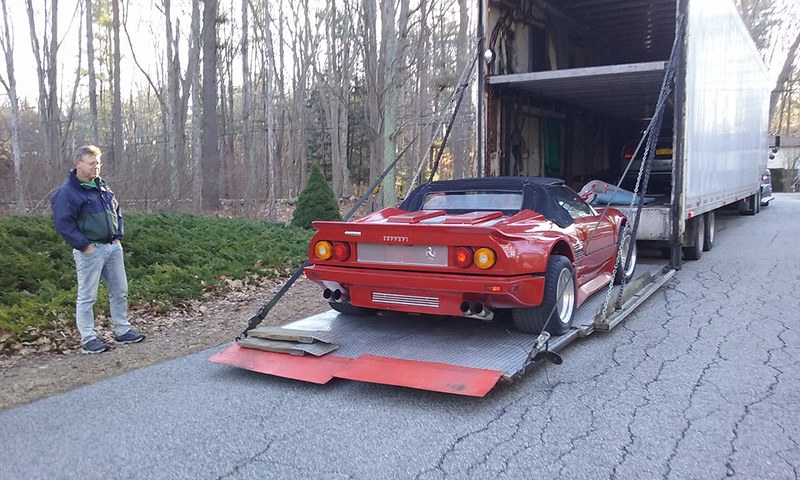
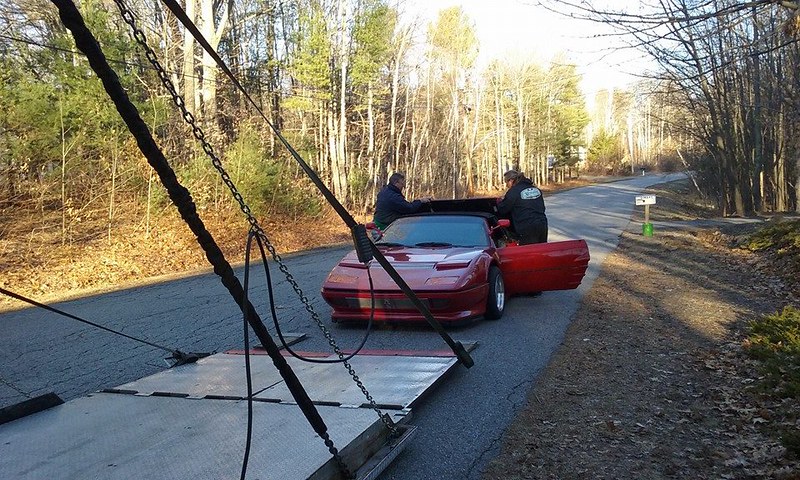
Here we go the restoration of an Aldino Spider I acquired this past March. Not much known about its past other than it appears to have been built from a second hand body and not from a kit. The front support frame assembly, rear end support subframe and mid-section support bracket are homebrew. The front amber marker lights are homemade! With this said and known, why did I buy into this project? Yes it is a piece of crap, needs a lot of work but for the price I paid, I could not buy the donor, the body kit, made it a spider and do the 3800 SC engine swap. With this said here we go . . . . . . Car was delivered from Florida to Maine on March 19, 2016 by 4 D’s Trucking, Inc out of Reddick, Florida. Highly recommended, an enclose transport for the price of an open one, only hatch, they only do the east coast. Here is the car arriving, photos thanks to my neighbor Steve.
Before I get to the restoration of the body panels there are a lot of smaller items to take care of, so stay tuned.
[This message has been edited by Fieromaineac (edited 08-12-2017).]
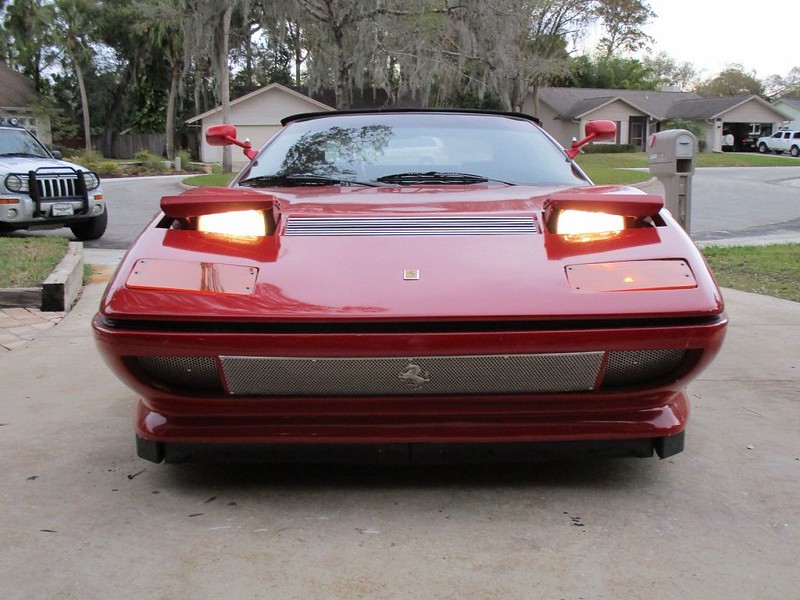
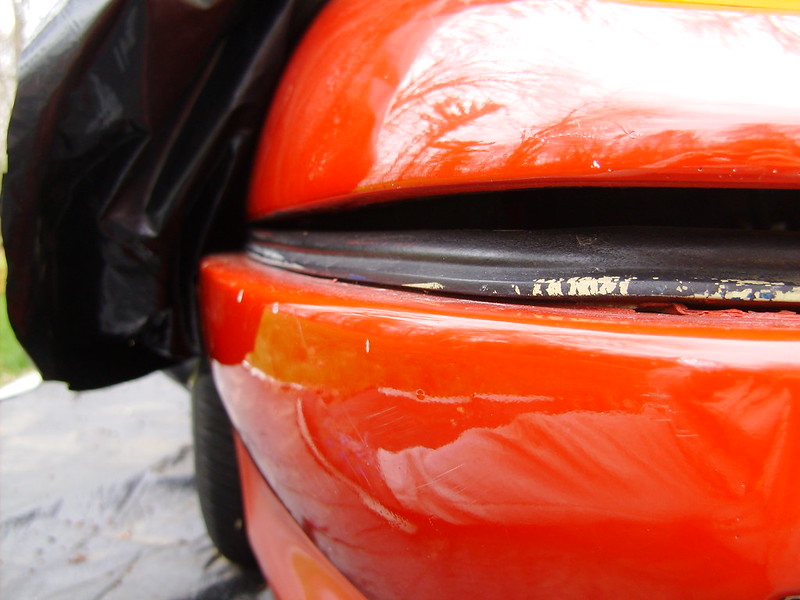
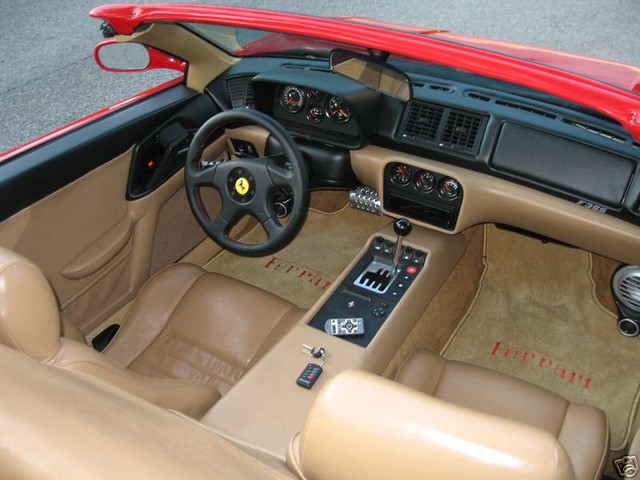
The car looks even better as you step further back. All panels will need to be stripped and repainted then aligned. Gaps are all over the place around this car. Still has original Fiero interior, in a Ferrari replica spider?? Rear trunk has a complete 99 Buick wire harness in a big ball, with the Buick ignition key wire tied in the on position! As I said loads of work to get this one right but that is why it's my hobby!!
[This message has been edited by Fieromaineac (edited 08-12-2017).]
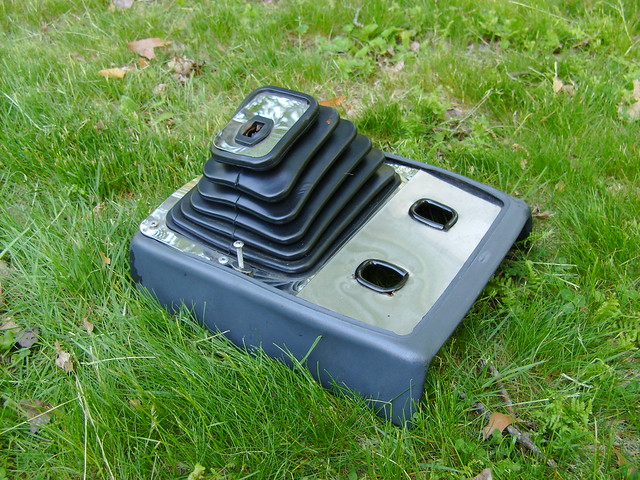
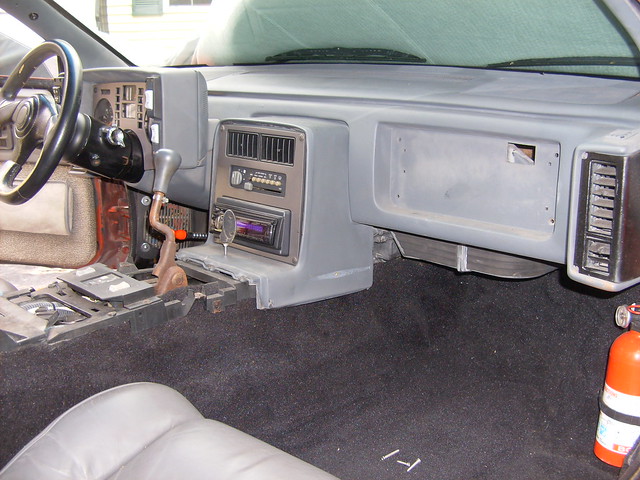
First order of business get rid of that shifter boot and homebrew glove compartment, previous owner must have been a truck driver! All ready have my interior order in with Amida.
[This message has been edited by Fieromaineac (edited 06-14-2016).]
This car done right will be sick ! You look like you are headed in the right direction ! 👍 Do you plan on going with a shortened shifter ? Lol that glovebox was hideous ! 😮 Good move on the amida interior.
[This message has been edited by exoticse (edited 05-26-2016).]
What I like about this particular car is that without the roof, it hides the "shortness" of the Fiero and the roof height. Plus, I like the fact that the previous owner went away from that huge rear spoiler that comes with the Aldino.
Here is the real deal. Your car looks VERY similar. You got lucky on this one
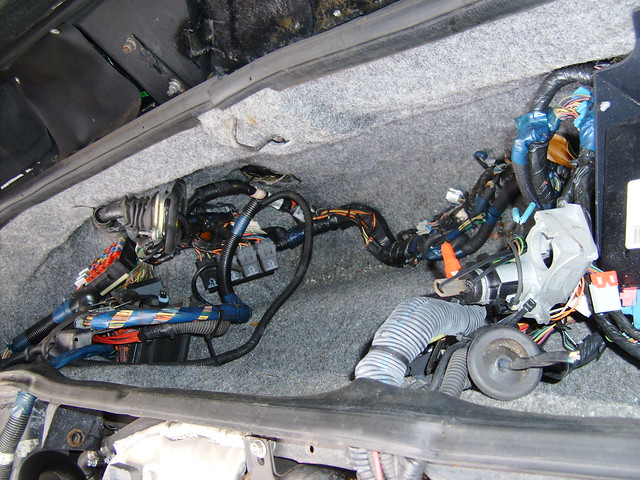
Thanks for the encouragements! Here is my electrical nightmare, a complete 1999 Buick Regal 3800 L67 Series 2 Super Charged engine with 4T65EHD Automatic transmission wiring harness in the trunk. Please note right side of photo you can see the ignition key, wire tied in place in the “ON” position. Buick computer is in the trunk while the Fiero computer is still between the seats. Not sure if Fiero computer is doing anything?? I’m willing to take the Buick harness apart but really need some expert help, schematics pictures, etc. Currently have to disconnect battery because Buick harness is “HOT” all the time.
[This message has been edited by Fieromaineac (edited 06-14-2016).]
What could have been a great looking car is going to be a challenge. I hate when you buy a car and see all the previous owners "short cuts" and "bad ideas". I just can't believe that the PO actually looked at the interior and the wire harness and said to himself "man, did i do a great job or what". Good luck.
I hate when you buy a car and see all the previous owners "short cuts" and "bad ideas". I just can't believe that the PO actually looked at the interior and the wire harness and said to himself "man, did i do a great job or what".
Agreed.
But as he pointed out, starting from scratch would have cost a lot more than a "redo".
However, it can be a real pain and cost a lot more $$$ than expected to set things right. We've seen some on here that are never seen again after the "redo" got started.
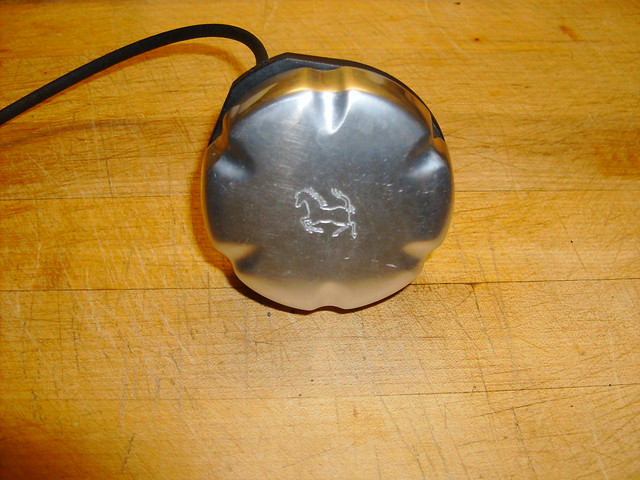
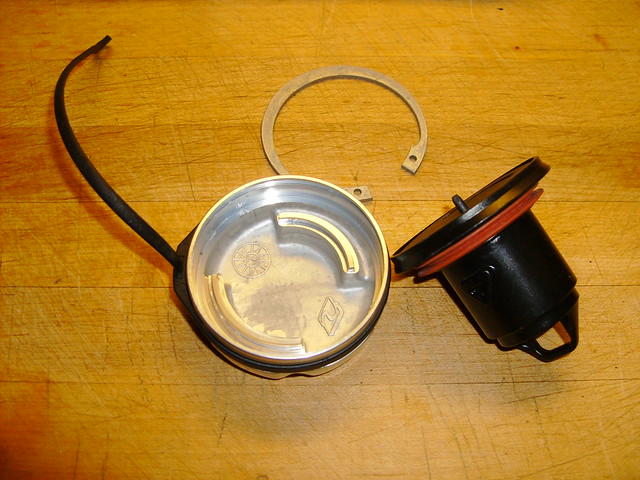
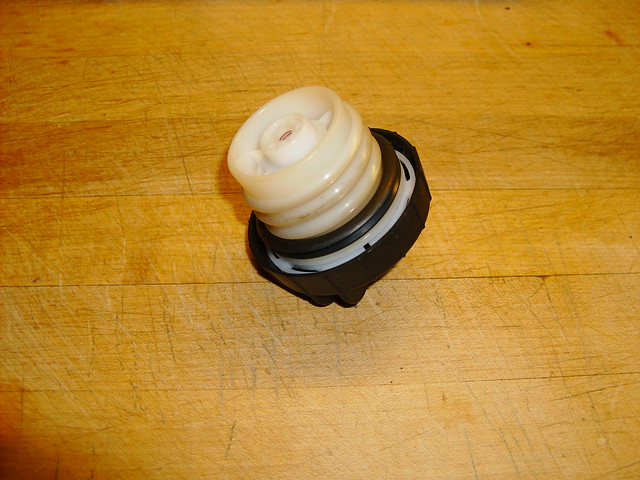
Thanks for the comments! My Aldino has homemade front support frame assembly, rear support frame assembly and mid-section support frame. This is the cause of the front and rear body panel misalignments, so I have ordered factory made supports from Aldino. While waiting on the new supports, I have other fun projects to do, so I made up one of my Ferrari / Fiero gas caps.
Step 1: Purchase Ferrari 430 gas cap on Ebay, this one sold for $100.00.
Step 2: Remove slip ring and remove lower assembly.
Step 3: Buy replacement GM gas cap from Walmart.
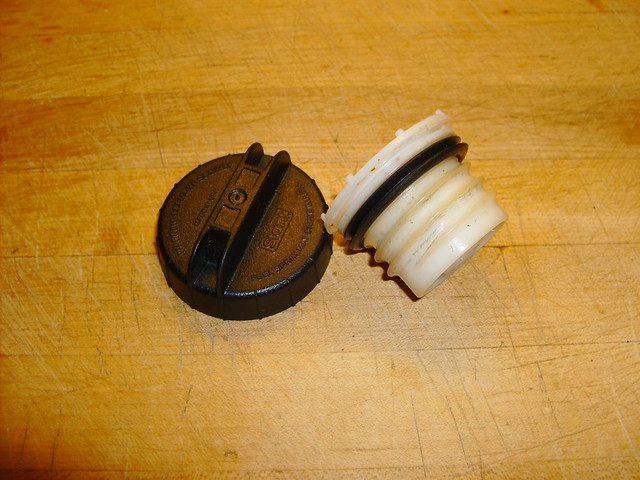
Step 4: Separate the plastic cap from the lower section.
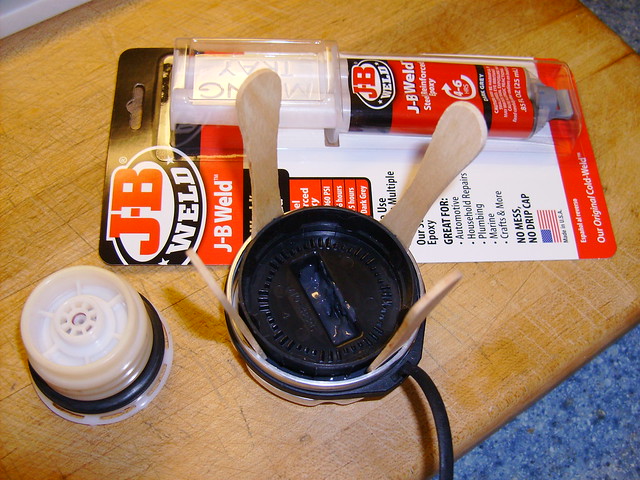
Step 5: Drill holes in plastic cap and epoxy plastic cap in Ferrari cap. Center plastic cap ensuring epoxy flows inside plastic cap holes for a strong bond. Don't get epoxy on ratchet teeth! This will require the whole tube of epoxy.
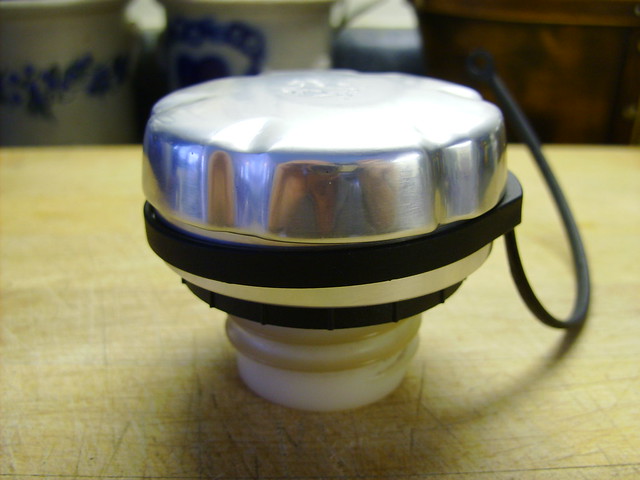
Step 6: After epoxy sets up overnight reassemble the GM lower piece to the plastic cap. You now have a Ferrari gas cap to replace that old Fiero gas cap!
[This message has been edited by Fieromaineac (edited 06-14-2016).]
I bought a Fiero with a Ferrari Dino body on it years ago that needed work. Pretty much every panel was cracked or damaged. How can people have such a nice car and then let it get abused like that? Like fixing rust, the closer you look the more damage you find. Fortunately fiberglass is easy to work with and repair. You've got the bones of something very nice there. I'm sure it will get more frustrating before it gets better, but in the end it is going to look amazing.
Rick
ps. A man after my own heart.............Walmart parts and JB Weld. Love it!
[This message has been edited by couldahadaV8 (edited 06-04-2016).]
Man this has the potential to be a really beautiful and unique car. Great choice on the Amida interior which will really bring the outside and inside together in a nice way. I am sure you will take your time and do a great job on it, this car deserves a chance to be great again! Good luck
Pete
------------------ "May the grins begin when you turn the key and hear the engine roar over your shoulder" ......Gall57 (slightly modified LOL)
Pete Matos A&N Precision Machine CNC Machining and prototyping Port St.Lucie, Florida A&N Precision Machine on Facebook!
Rob, you can see from the interior pictures just how badly I need your interior package, any update?
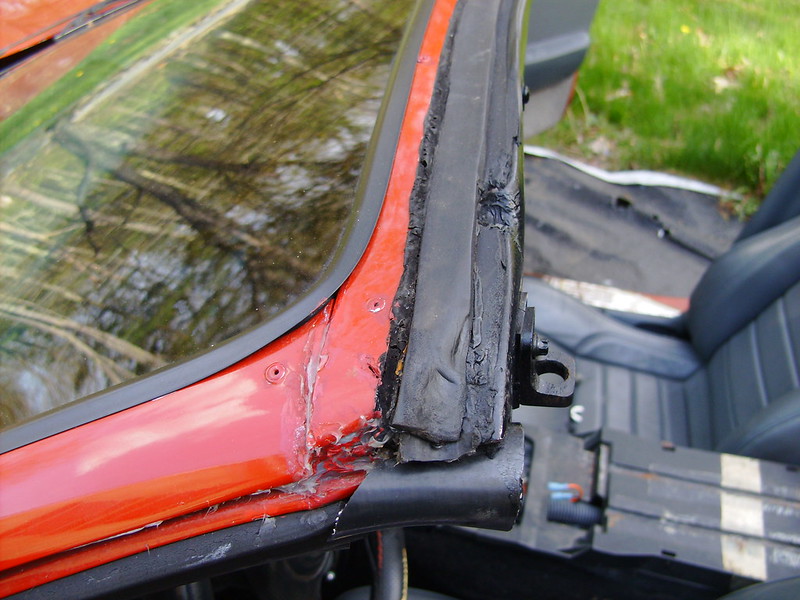
The top is not aftermarket Fiero, I'm not sure what car it came from or was for. This top has been modified showing signs of re-stitching and the frame being cut and welded. I put the top back only to find out that it will not lay flat. So another job, if I can’t figure it out, I’ll have a convertible shop take a look . . . . . .
[This message has been edited by Fieromaineac (edited 06-05-2016).]
Huge thanks to Amida for rechecking again his 355 interior parts inventory to see if he had the parts to build one more and maybe the last 355 interior package for my project! This Aldino Spider needs a great interior as I intend to drive with the top down offend. Amida found the parts and the order is in, so let the interior building begin and hopefully the stars will a line in time for some Fall top down drives!!
[This message has been edited by Fieromaineac (edited 06-14-2016).]
I believe that interior was done about 10 years ago. Mr.Mikes Light tan vinyl if I'm not mistaken. Since then the door cards were redesigned, steering cover changed, and defroster bezels now made of aluminum.
Amida, thanks for checking in, I have an update for you, the 355 dash air vents were shipped this past Friday and arrived this morning from Italy. I call that fast service! They look great, let me know when you have a dash ready to receive them.
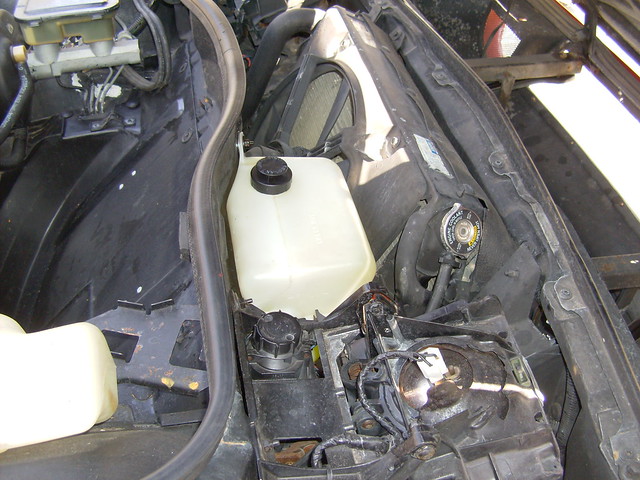
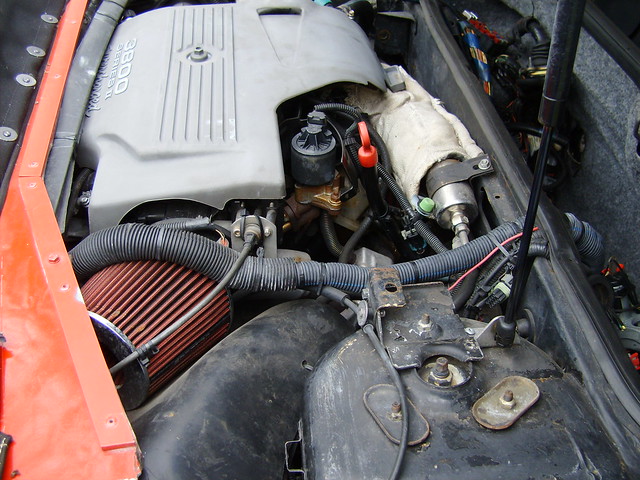
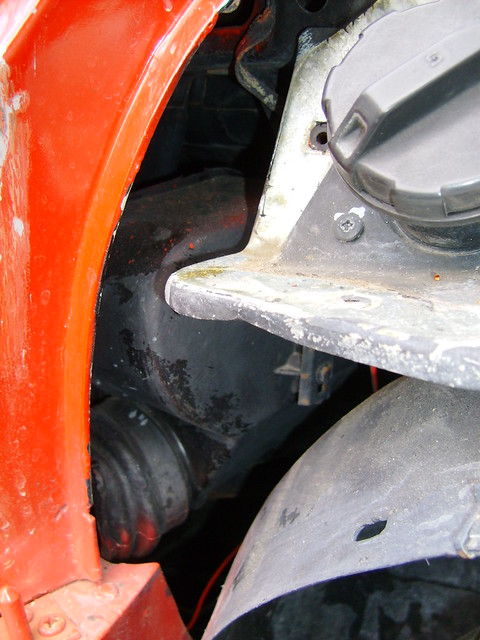
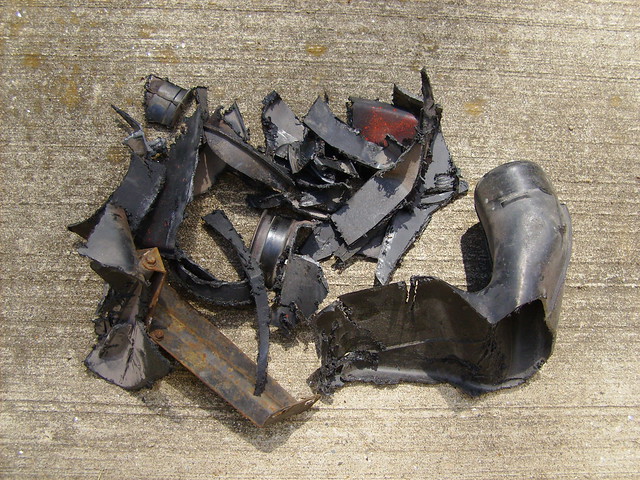
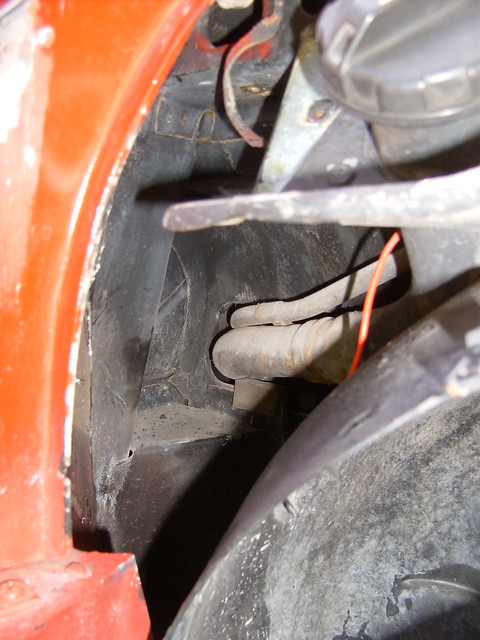
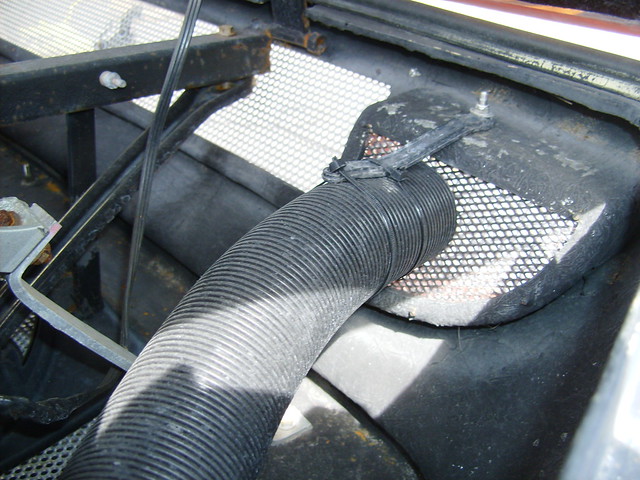
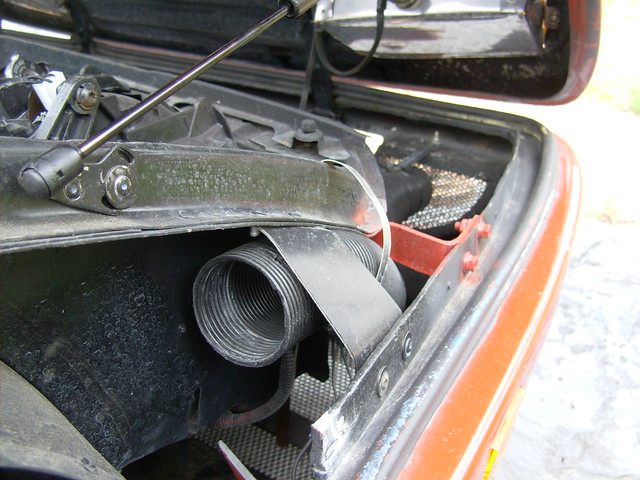
The car has these flex tubes up front on each side, but they don’t go anywhere or serve any function. I could see if they delivered cool air to the brakes and this car was a race car?? For me they serve no purpose so out they go!
Much better!
By the way, who can see the next problem in the above picture?
[This message has been edited by Fieromaineac (edited 06-14-2016).]
Fieromaniac, just a suggestion... Unless it's being done on purpose, wouldn't you prefer your images to be posted without the extra text? Like the following...
And since you'll (hopefully) be posting lots of images... feel free to make them 1024 pixels wide. We want to see as much in these pictures as we can!
Turbodad2, that is one, I have ordered new front and rear body supports from Aldino to correct that issue. Look again there's another issue in the picture.
Patrick, yes how do I get rid of that extra text on the pictures??? I was using Photobucket which did not have that issue but switched to Flickr because Photobucket kept locking up . . . . .
Patrick, yes how do I get rid of that extra text on the pictures???
Just click on EDIT of my post with your images and you'll see how I've done it. The URL info has been taken directly from your post, so there's no trickery involved.
quote
Originally posted by Fieromaineac:
I was using Photobucket which did not have that issue but switched to Flickr because Photobucket kept locking up . . . . .
It's preferable that you not use Photobucket or Flickr... as sure as heck one day all your images will disappear from your thread(s). And that would be a shame.
If you're running Windows, a much better way to host/post images here is to use PIP which was designed specifically for use with this site. This is the only way to ensure that your images will always be here as long as PFF exists.
Images can be a maximum width of 1024 pixels. Height can be anything. Maximum file size is 300 kb. A great free program for re-sizing and/or re-compressing images is IrfanView.
[This message has been edited by Patrick (edited 06-13-2016).]
Patrick, thank you for your help with the pictures!
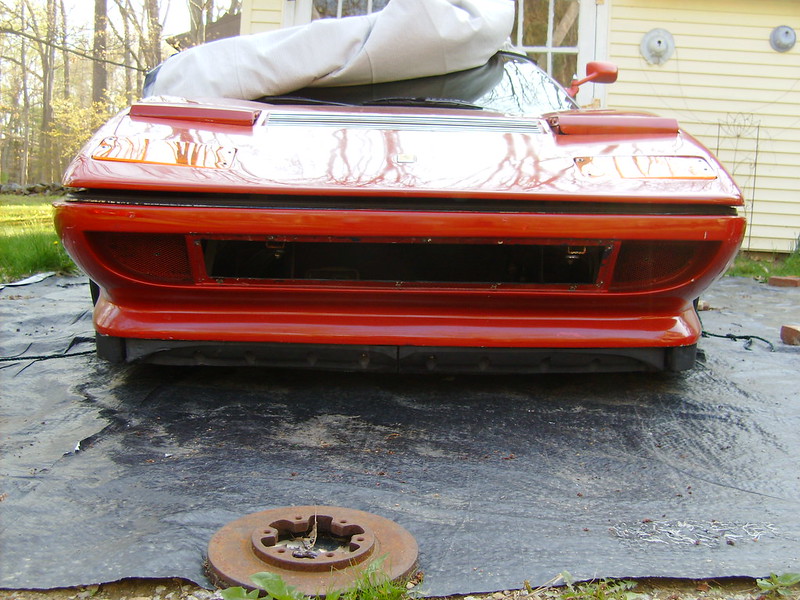
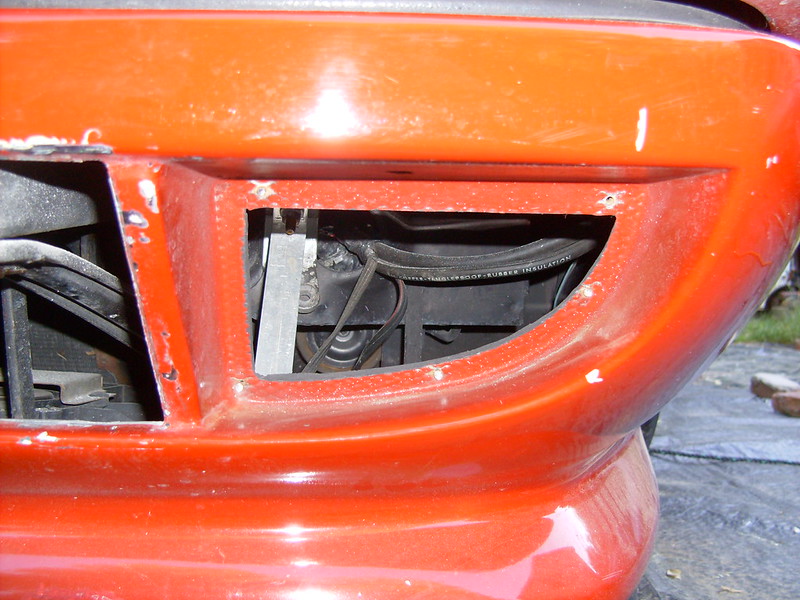
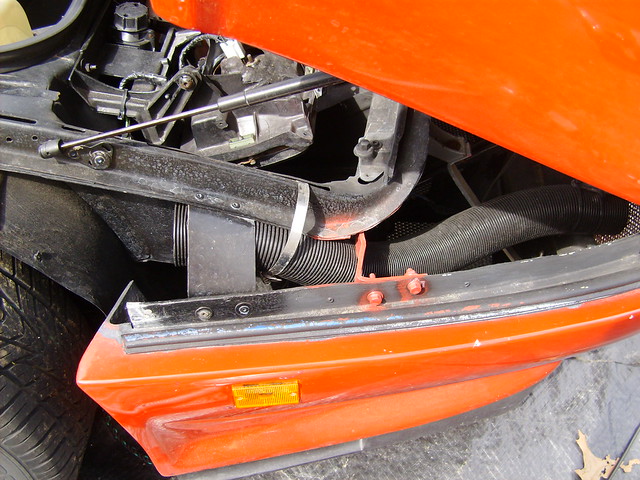
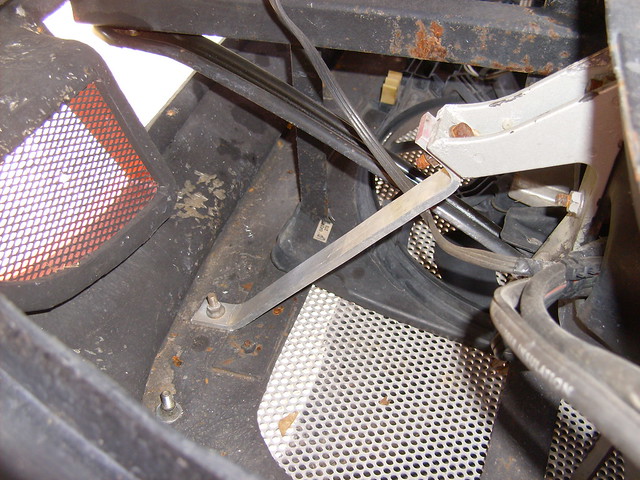
Ok back to the last picture, the correct answer is “all of the above”! In this picture of the front nose interior you can see the homebrew front supports. The rusted black square tubing is supporting the hinges for the front hood and the aluminum bar stock, etc is supporting the lower nose panel. The black tubing supports have homemade hinges that are way off causing the misalignment of the front hood. I have the same problem with the homebrew rear hatch hinges, so I have ordered the factory supports / mounts from Aldino. Hoping Aldino ships them soon, would like to get going on the body issues.
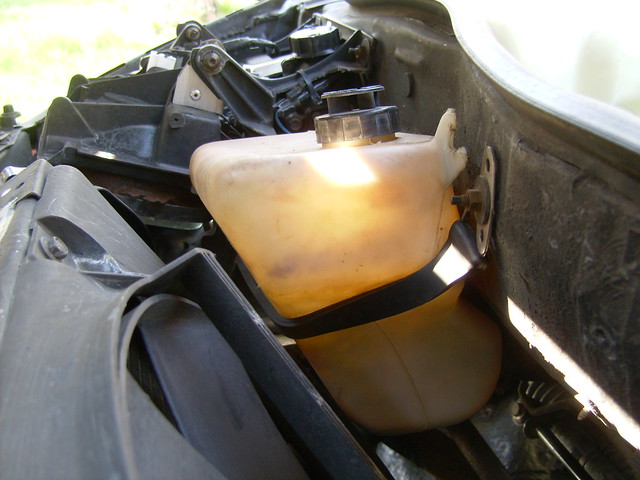
The other big item in the picture is the lower twin fan unit?? This pulls air and dirt up from the road in front of the radiator. The stock radiator fan is also operational in the stock location. I’m a retired mechanical and electrical engineer having worked in the nuclear submarine industry and I freely admit not the automotive industry, but see no purpose for the twin fans. If the compartment in front of the radiator was sealed, ok but the nose is open and the stock radiator fan is doing its job. So unless someone can show me sound science to justify these noisy twin fans blowing air and road dirt in front of the radiator, they and their clothes dryer power cable go when I remove the front panels!
When I started this rebuild I was concerned for the future of Pennock's. They had just loss a major sponsor and the future was looking grim. When I came on this forum I appreciated what I saw and felt compelled to donate. I believe everything is ok now, but at that moment I started this rebuild, I also started posting both forums so not to lose any postings in the future. Ether way I see in both forums amazing people doing amazing thing with their Fieros. As an old retiree I can only appreciated the wealth of knowledge.
[This message has been edited by Fieromaineac (edited 10-06-2016).]
Amida, thanks for checking in, I have an update for you, the 355 dash air vents were shipped this past Friday and arrived this morning from Italy. I call that fast service! They look great, let me know when you have a dash ready to receive them.
Are these F355 vents used/refurbished? They tend to have broken mounting tabs from my experience which makes mounting more difficult. I'll let you know when I'll need them.
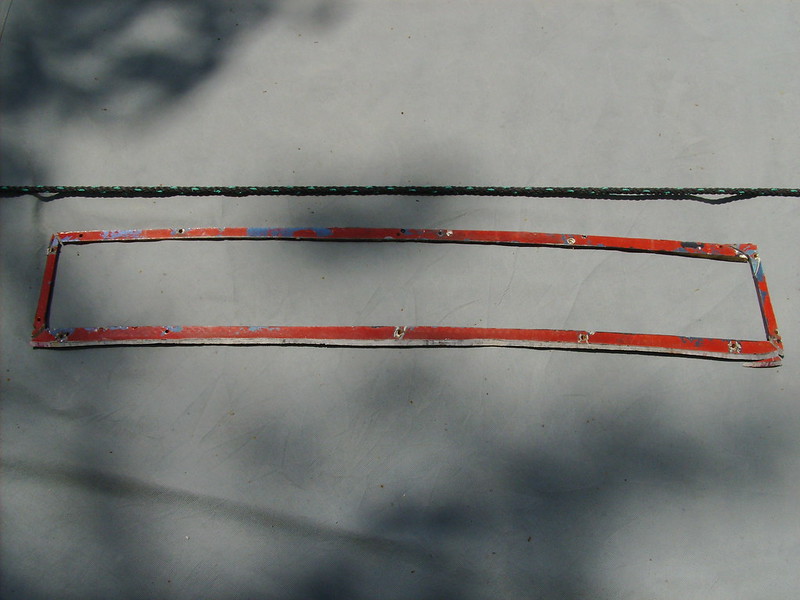
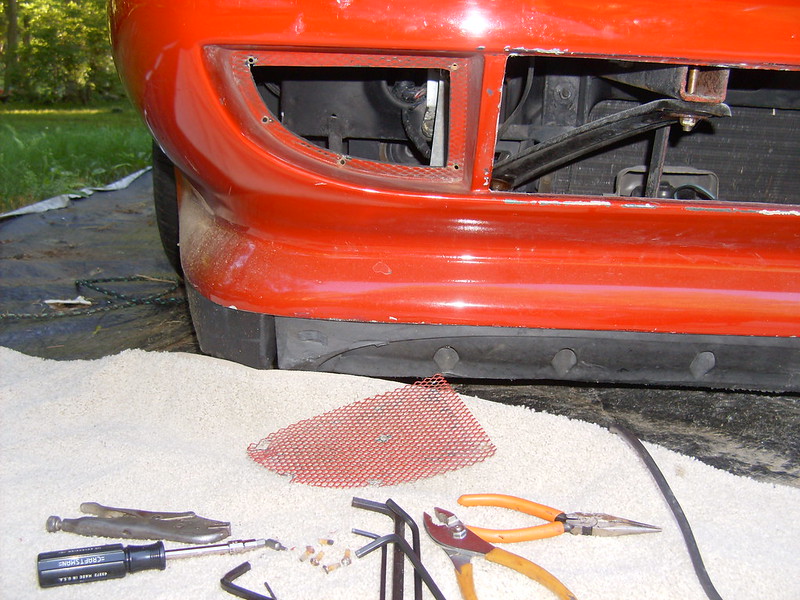
Today I worked on the car’s nose to get it ready to receive the BB512 grill I picked up. I want these jobs done before I head to the body shop. First order of business, remove the aluminum plate installed by previous owner.
Next step cut off the lip Aldino designed into the front nose to install the kit provided plate.
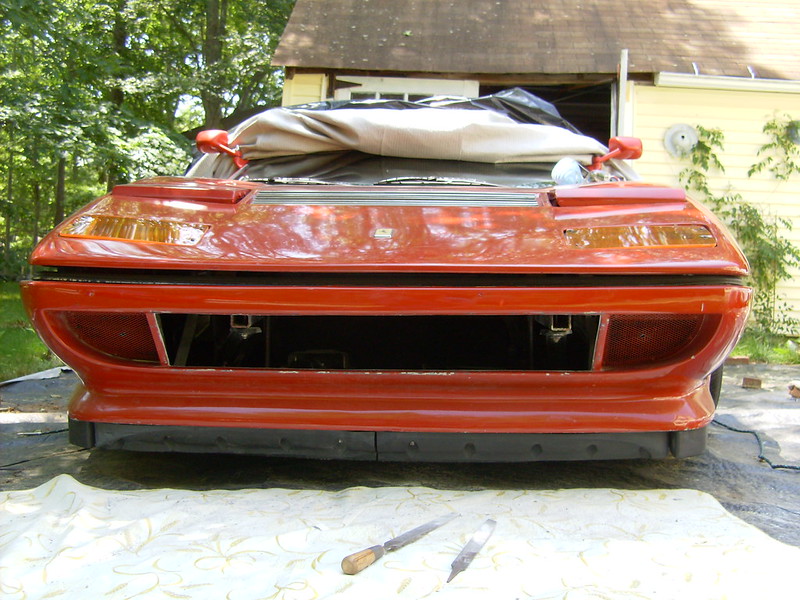
You can see in the above photo just how far off center the homemade front panel mounts are. I did hear from Aldino that the new mounts I ordered will be shipped soon!
One Ferrari BB512 front grill ready to install when the car comes back from the body shop with a new paint job!
[This message has been edited by Fieromaineac (edited 06-24-2016).]
Your Aldino parts are ready to be shipped...just need to know where to send 'em. Looks like you've got plenty of work ahead of you. Just let me know what I can do to help.
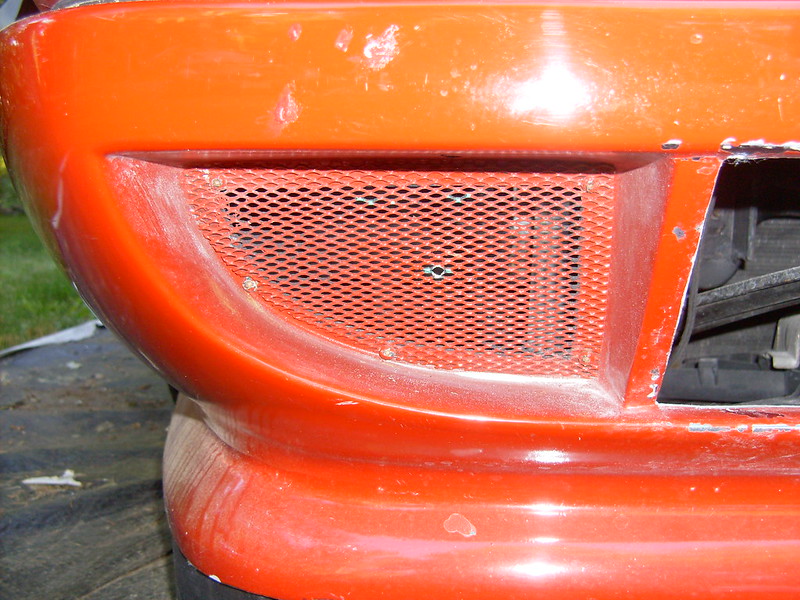
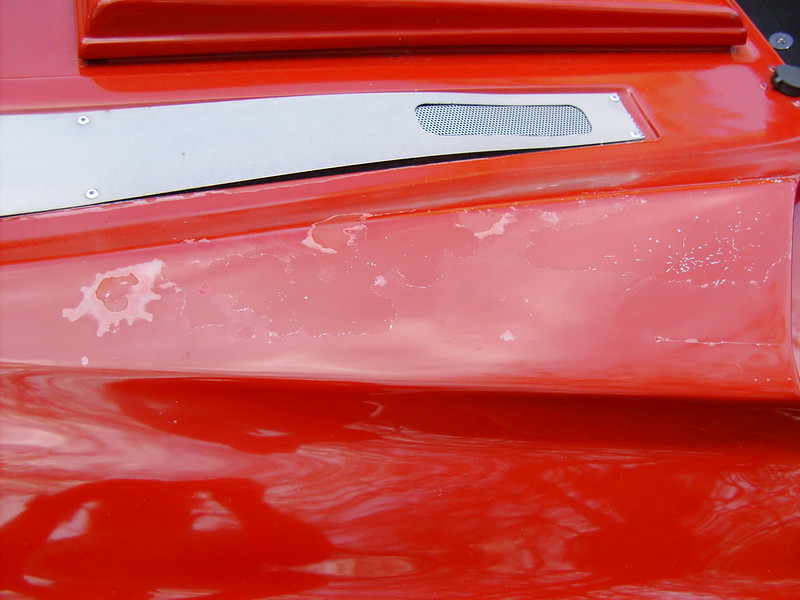
Today’s project removing the old front air vent screens. Seemed like an easy job but steel screws rust solid in fiberglass and all needed to be drilled out. I will use Stainless Steel hardware when new screens are installed after paint.
Just off the phone with Aldino, front support bracket, rear support bracket and front marker lights are on there way!


 And that would be a shame.