Ok the plan for the Fiero is slowly condensing into something haha
My plan is to get the cheap Regal running and driving again, and make sure there aren't any issues with the engine. I'll go ahead and clean up the new cradle and paint it and install some adapter mounts on it. Then once my El Camino is up and running again I'll move forward with the Fiero swap.
This way I still have a daily (my S10) and a backup (the Regal) and I can just plug away on all the little Fiero issues.
And so in building towards having the Regal running I went around and looked for pricing on parts to rebuild the transmission myself. Then I decided its a bit much to think I could do it myself without a work bench and no space in my garage right now. So I talked to a mechanic friend as well as looked at rebuilt units and those were all crazy expensive, so I went back to my favorite source: Craigslist. Found a guy parting a Regal GS in my area and he only wanted 200 for the transmission and its got similar miles; but the fluid looks great and was working when the car got crunched. I pulled that transmission today and cleaned it up once I got it home. Now I just need to get a good weekend when I'm not working to get it swapped into my Regal.
I'm still working on wiring the relays and the switches in the Fiero and once I get some progress worth taking a picture of I'll post it up
I'll probably be asking a lot of questions in the near future about how to do a 3800 swap (if I can't find it searching the forum) so if any of you have advice let me know. Jessica
Yes, some Oregonians present. Lucas M. and I have had some preliminary discussions about an early summer outing. This is one busy, persistent Fiero owner attacking this project. Keep up the good work.
Thank you both for the kind words. I'd love to go on a Fiero cruise, but it won't be this year :-(
I've been working a lot of extra hours and traveling for work lately (my boss likes to send me on a Sunday so as not to burn a working day traveling) so I don't have my evenings or weekends to do anything on the car right now. Plus with it still getting dark kind of early that sucks. So I don't know when I'll have any updates on any of the cars or trucks. But me saying this might just mean I'll get some time to do something soon haha
spent $10 on 14 or 16 gauge metal at the steel yard from their scrap cut bin.
It was a 27"x27" sheet and everything fit. I got the plans off this forum somewhere, its simple and easy to build and took about 2 hours so far.
I bent the bottom part in my vice and on the edge of my work bench. I cut the box with a band saw and used an angle grinder only a little for the angled side pieces. I'll weld it up tomorrow night and figure out how big of a hole to cut in the top flange portion. It seems very simple to mount in the frunk under the tire so if the weather is on my side I'll attempt that as well :-)
Jessica
[This message has been edited by 78_elky (edited 02-19-2016).]
I've built several of that style battery box. Some people install the battery cables inside the trunk, others feed them through the front bulkhead by cutting holes in the box for a sidepost battery. That way seems much cleaner to me and keeps the cables out of the front compartment. You just have to be careful to insulate around thebattery box openings so you do not end up with a dead short from contact with the battery box or metal bulkhead. Note the stud installed for the battery hold down. The spare fits easily over the battery using this method. Yours looks great.
bjc 350, that looks really cool, and it helps a lot to see another finished product. I like the idea of running the wiring through the box and out, I was a little concerned with having the side post battery terminals against the steel spare. Where do you run your battery cables? I was thinking just down near the coolant tube on the passenger side and snake them up to where the stock battery location was. I have a positive isolated battery terminal I got with a full size chevy truck engine wiring harness I was thinking of using so I'd have a jump point in the rear of the car and I can still use the stock battery cables. Also I've read mixed things about running a ground wire all the way to the rear of the car; obviously it'd be cheaper and easier if I just terminated the ground wire to the space frame in the front and rear and didn't run a wire the whole way. I've been meaning to pick up a couple stupid little parts at the junk yard so I may make it a point to swing by and get one of those hold downs (and an oil fill tube/cap for my S10 that I always forgot to look for) Jessica
I discovered a few more pictures of my first homebuilt battery box. I have always run both the neg. and positive cable from the battery to the rear engine compartment. I run the cables alongside the fuel tank,(one each side of tank) while enclosing them in flexible pvc conduit. Just have to make sure there is no chafing of the cables insulation wrap against anything that could, down the road, cause a dead short. Hope the pictures are more descriptive than my babbling.
Note, there is no protective insulating material installed at the openings where the battery posts protrude. This was done before final install. The terminals were Plastidipped. After several years of having battery problems, I installed aluminized firewall type insulation on the bulkead to help with a battery overheat problem. Also added a ground wire to the driver side chassis framerail. You need to make sure the box clears the antiroll bar. And, you may need to relocate the brake line that runs nearby.
[This message has been edited by bjc 350 (edited 02-22-2016).]
A round hole with the correct size grommet may be the best way to run your battery cable's through the battery box. The idea of having a ground wire up front as well as running the negative battery cable back to the engine is a great idea as well, one never has too many grounds of these cars! One idea worth consideration is having a master battery cutoff somewhere up front with an extra bypassed lead to run accessories. Get for working on the engine or for added theft protection.
So I'm not sure what happened with my dimensions, they were what the plans said but the battery box had no way of fitting. I think if my car had not been equipped with a steering damper or a sway bar it would have worked. Seeing as how my car has both I made a change. I ended up cutting the bottom of the box off and flipping it over, then I redid the back with a notch for the sway bar. The battery fits right in and I can still get the spare in and out alright, plus it give me some clearance between the box and the terminals. I still need to finish welding it up and grinding down the welds (again) and then I'll cut the holes for the wires and paint it up.
I took the cover off my spare 3.8L and trans this weekend, and tried to turn it over, the good news is that it moves fine and all the fluids look great. The bad was that there was a little water in the intake, but I cleaned it out the best I could and turned the motor over and it spit all the water out. I sprayed some oil in the cylinders and then put the plugs back in.
I've got it up on Craigslist to see if I can get it sold and thereby out of my side yard and my way. If anyone local wants it let me know, my ad is for $400 OBO Most of the accessories are there except a starter and exhaust and all the sensors are intact but the harness was cut by the guy who pulled it. I'd let it go for less, and I'll be honest it looks like a perfectly fine engine but I'm not ready to do a swap right now and I'd like to go supercharged when I do.
Jessica
***EDIT*** Not enough done to warrant a new post so here it is. I got the battery box painted and the holes cut (with a dremel as my hole saw wasn't up to the task). I split some hose down the center and I'll be using that as a grommet. I need to just drill some mounting holes and spray another layer of paint over that and I'll have it in the car. I really like how the bed liner paint looks on the box, I'll probably use that other places as well its a nice textured finish without being gross like undercoat. Doesn't look like I'll have a day or night free anytime soon so don't hold your breath for an update ;-)
[This message has been edited by 78_elky (edited 02-29-2016).]
It fits! and its all attached and ready to go! Between rain showers yesterday I got it installed and also put my headlights all back together.
Now correct me if I'm wrong but I need something like 2 gauge or 0 gauge wire and about 14 feet for the positive and negative correct? I saw that in another thread and my rough measuring with a tape measure on top of the car and stuff came to a bit over 12 feet.
Once I get the wires and some flexible conduit for the underbody section I'll get that all hooked up and I'll cut out the battery tray I made in the back of the car.
I saw this thread, unfortunately my local yard doesn't have any Auroras or Rivieras. So I may have to drive farther to go pull these cables, not sure what will cost more (gas or new cables)
The first box I did, I was able to buy the wire from the local NAPA store. The second one, I think I bought it from Amazon or such. Less expensive. Would have to research the wire size that I used. Both cars crank easily.
It sits above the torque bar so you have to cut about an inch out of the bottom of the front cross member but doing it this way lets the battery sit tat little bit further forward and lets me put the spare wheel in there without it interfering with the battery at all.
Holy smokes I've been busy! Been working 7 days a week and I'm looking at more of the same for a while. Well with the weather and time change things have freed up in the evenings at least. Its also the one year anniversary of me buying this yard art! I was able to get the spare Buick engine and trans sold (well I took an XBox 360, games and some other stuff in trade) That means my parking pad is empty and I was able to make it a little longer and more suited for my transmission swap on the Buick. I dismantled the rear cradle I have to get it ready for paint and such. The first pass was with a wire brush to get the old undercoat and all the old greasy gunk off after I burned and pried the old bushings out. It took a few hours to get the majority of the crud off but its almost ready for paint. I'm going to hit it with a media blaster soon. Its so nice to work on a little subframe after having done the exact process on my El Camino. I also made some ramps for getting the Fiero up off the ground a little bit. After I installed the drop springs its kind of a pain to get my low profile jack under it ;-) They only bring it up 4.5" but its enough to make my life easier!
The next steps are to finish the battery relocation and paint this cradle. Then I guess I'll have to spend some money on engine mounts and stuff like that to get it ready for the swap. Jessica
Glad to see you're still at it. For the cradle, two part epoxy paint works well. Very hard and good against oil and fuel
Thanks for the tip. I've used some POR15 like stuff in the past and have mixed feelings about it. Every time I ask for advice on what to coat a frame with I hear those POR15 like products and then 2 part epoxy...I think its about time I tried painting with a gun instead of spray cans!
Well I've been busy and traveling with work again! Then I got back in town and spent a week putting in a border and barkdust in my front yard (because really thats what people see so the back can wait). I finally got a carport tent. I was about to order a new on on Amazon and I happened to check craigslist and a nice lady was selling a used one for $30! Yes its used and could use a new top in a year or two I think, but it keeps the water out and my Buick has a nice home till it goes off to the scrapper. That is the other big news, I've decided I really don't want to use the Buick so I'm just going to pull the running gear and parts I need and send the rest off. I'm only out $400 for the car and another $200 for the used trans that works so I think I'll do alright. I may put it up on Craigslist and see if I can get rid of anything else. I'm going to also sell the Fiero engine and trans, or try and sell some of the new parts I put on it and get rid of it and then get the 3800 into the Fiero as a roller. So things are progressing and getting further along; which makes me feel a lot better than having that Fiero sitting for who knows how long without any real progress or plan.
And here we have the Buick
The major reason I'm not going to try and get this running in the Buick is complicated but mostly I don't want to reinstall the drivetrain and then remove it again. Plus I found a lot of deferred maintenance so to really drive the car safely for any length of time I'd need to address them and that would mean putting money into a car I'm going to scrap.
That is my update, maybe I'll get he engine pulled this week but I'm not holding my breath.
Always keep your expectations low and your determination high...or something like that. My Dad came out last night and I had just finished getting all the hoses and junk unhooked from the motor so we decided to pull it. It was around 8pm by the time I got the pictures so they are a little grainy because it was dusk. Not too sure those pacesetter headers will work the best; because I'd like to keep my trunk. I saved a set of factory exhaust manifolds off the 3800NA I had but I will still need a crossover pipe for them.
I'll start cleaning and separating the engine from the trans soon and get it on an engine stand.
What all do I need to pull from the donor car? I'm taking the whole underhood engine harness and the fuse panel and any other wiring I can. I noticed the cruise control wiring goes into the firewall along with the ABS unit and stuff so I'll try to get that from the inside; I assume it goes to the column, brake switch and body control module? I'd just hate to miss something while I have the car here and send it off to the wrecking yard just to have to go pull something I forgot.
Thank you all for all the help and support with this build, its been really fun and I can't wait to start this stage. Jessica
P.S. Anyone want a good running 2.8L or any parts?
Those long tube headers are really fancy and surprisingly easy to take off because someone used nylon lock nuts Now that the engine is on a stand there are a few maintenance items to address: one tensioner pulley is stuck, oil pan is leaking, heater hose nipples are bent, and some other stuff I can't remember. It also desperately needs some paint to make it shiny and pretty The torque converter I removed was painted blue and had GM 51 written on it so maybe this car had a trans rebuild at one point. I also noticed the head gaskets are completely new looking and all the upper intake and valve cover gaskets are new as well.
I'm getting the local pick-n-pull to come out and remove the Regal later this week.
I got the rear cradle blasted with my little harbor freight blaster tonight. I also cleaned and degreased the engine. I'm going to order/buy some paint and primer for the cradle. I may paint the engine at this time too but I'm not sure what color. The Buick has a date with the junkyard on Thursday afternoon and it can't possibly move out of my driveway soon enough. Hopefully I'll be getting an axle soon and I can build my swap axle. If I run out of stuff to do I may just start the wiring process Then I guess it'll be time to throw some money at this project and get engine brackets and mounts.
Well I got some pictures the last couple days; and just last night the Buick took its last ride to the pick-n-pull. I got a whole $55 for the carcass but I'm ok with that because its out of my way/yard! Its surprisingly easy to push without any running gear or axles Sporting that lifted look! The cradle is looking a lot better, and by grinding it first I didn't have to spent too much time all suited up blasting. I coated the cradle with some zinc phosphate stuff to keep it from flash rusting and promote adhesion with the primer. Its still not 100% ready for paint but my paint hasn't been shipped yet so I have some time to finish getting it there. Two nice guys came by and got the Buick, I had thought of parting it out but I didn't want to have it in my front yard slowly losing pieces for months. Plus I paid $400 for the car with an extra engine and trans; sold those for an X-box and some stuff and picked up a good HD trans for $200 So I'm into the Buick $545 after selling it and I got a really good 3800sc, trans, axles, wiring, computer, cruise, a/c, and headers. The Pick-n-Pull quoted me $500 just for a bare engine and $400 for a transmission if I pulled it without any wiring or extras. I may start to do some work on it this weekend; or maybe I'll just continue with my barkdust/yard work. Jessica
The cradle is prepped and ready for paint! I've also got all my painting supplies ready to go; I really hope this goes well I want to be able to paint my cars in the future I've also been taking things off the engine, the valve train looks so clean. This engine has really turned out to be a good score so far. Lots of axles, I have the ones in the car as well as another still stuck to a knuckle, I should be able to build my swap axles with all these. And if that wasn't enough I'm going to try and redo my visors, because they are gross. Plus you can only do so much outside and in the garage, then it gets late and its time for more quite activities.
So that is it; all caught up to speed. I'm going to spray some primer on the cradle after work; and maybe paint it. I can't wait to see how it turns out. I've also got some parts coming for the 3800 and will order my mounts soon so I can bolt this all together and get it in the car! Jessica
Thanks! I didn't expect to spend this much time (or money) on this car. I really just wanted a beater second car to use but its been so much bother this whole time. I just decided I'll do it right and do it once, plus it gives me a good guinea pig to test my painting skills on. I've got a full frame off El Camino project that I want to be more show quality work so if I can learn on this one that is all the better As an added bonus this little car is a blast to drive with the 2.8L so I hope the 3.8L SC will be scary fast. Jessica
Valve covers in aluminum paint. I painted the SC housing but I didn't paint the snout or the throttle body, I may do the throttle body in black later. The frame is in epoxy primer now! I love painting with a hvlp gun; its so much better than a spray can. The plan for the weekend is pretty full: I'm going to paint the cradle this weekend in black chassis paint. The block is going to get painted black, and the trans aluminum. I'll build one axle and pick the best shape one for the other one. Then I'm going to focus on my El Camino a little bit; blast the frame and prime it, weld in bracing, build a rear shock brace, etc. Then I'll paint the frame and it'll be ready to be reassembled and I can get all the suspension back on it; which will clean up the garage so much!
Cradle all black and ready to go in! The engine is painted, and I threw the header on just to see how it looks. Got this bracket modified, so that the unused dog bone mount isn't in the way to removing the valve cover anymore. Tried to build an axle the other night, but one of the axles from the Regal was an aftermarket replacement so nothing fits. I'll have to buy a new axle, and it looks like it'll cost me almost as much as I sold the entire Buick for
All things considered its been a good weekend of work, and I should have the axle done this week if I can get my parts. Then I've got to do some El Camino work but once thats finished the engine is coming out of the Fiero and this is all going in!
Got my order from Rodney Dickman, I have to say it was packed great, got here fast, and the parts look amazing! I decided to paint the transmission so it'd be easier to clean. I decided to paint it semi gloss black the same as the block and heads. I figured if it gets dirty then it won't show much I got this press a little over a year ago and was a bit annoyed I had to spend money on it to do some bearing work on my axles. Its paid for itself a few times over already, plus this picture looks pretty wild. Gotta love being able to lift the subframe by yourself! The parts look great and fit great, and I'd be more than happy to recommend them to anyone. I can't wait to get this in the Fiero its almost too nice for my little bucket. Waiting on my Fiero Rog order to get here and I'll be putting the driver train in and pulling the old cradle and stuff out of the car. Jessica
Not a ton of room, but I think it'll be OK. I got my friend to come give me a hand moving some stuff. I had my El Camino frame in the tent and I blasted it and primed it. Once we carried that back into the garage, I moved the trans and stuff out into the tent and got the Fiero backed in. I'm going to start taking the rear apart and maybe the cradle this weekend. Its supposed to be near to 100* and as a true NW wimp I may just hide from the heat. Jessica
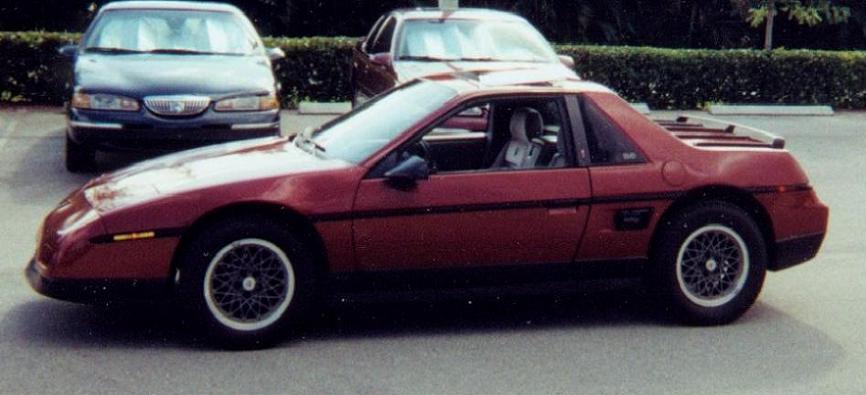
Hey Jessica! Just in case no one has mentioned it, with the exception of the Fiero Indy, the 87 SE Fiero is one of the lowest production Fieros ever made. They made something like less than 4,000 that model year, and only a little more than half of them had V6s in them. I don't know if that necessarily makes it worth more, haha... but back when I actually used to take my Fiero to car shows, I was the ONLY one that had a 1987 Fiero SE.
Hey Jessica! Just in case no one has mentioned it, with the exception of the Fiero Indy, the 87 SE Fiero is one of the lowest production Fieros ever made. They made something like less than 4,000 that model year, and only a little more than half of them had V6s in them. I don't know if that necessarily makes it worth more, haha... but back when I actually used to take my Fiero to car shows, I was the ONLY one that had a 1987 Fiero SE.
No one had told me that. Its pretty cool to know some of the history on these cars.
So I was going to pull the engine last week but it was 100*, then I was planning to do it over the weekend and this happened! My $30 used carport roof ripped! I was very lucky to even notice it, and I got the engine all covered in 2 tarps before it rained. The new top should be here in a few days (but not in time for this weekend) so I'll just have to postpone the heart transplant a little longer. Jessica
Well happy 4th of July to me Took the rear bumper and deck lid off, I'll likely lift the car with the hoist and a strap over the crash bar. Decided to pull the front bumper so if I have to tip the car forward a lot I won't damage the bumper (my parking pad isn't completely level and the front would have hit bad) Took the rear suspension and everything off, I'll move it to the new cradle after its got an engine and trans on it and its in the car. All back in for the night (hood isn't pictured). It took a night after work and a total of 9 hours. The cradle is resting on the legs of the hoist. The dolly I had under it broke.
I'm going to try to work on the sun visor at some point this weekend. I will also start the color change at some point soon. It just makes it easier to do it now while its all apart.
Finished the weekend playing around with my band saw and drill press. I decided to delete the trunk fan and pipes in the engine bay, so I made up some block off plates so I wouldn't get bugs and gunk in the holes.
Then I decided to clean up the headers I got with my Buick, I'm just going to sell them. I really don't want to cut the trunk. I also found a rust hole in the trunk (it wouldn't get cut out if I used the headers) so I'll have to address that before I put the rear bumper back on. Its funny the drivers side of the trunk has rust, but the passengers side is mint. The passengers side of the frame has rust but the drivers side is mint. Who knows why this car is the way it is
If anyone is interested in them let me know, I'm going to put them up on craigslist in the next few days. I've also got the other side of the collector flange and a flex joint that I cut off the Buick before I parted it.
I should be able to get my Dad to come out and give me a hand or at least keep an eye on me while I try to get the engine out this week. Jessica
[This message has been edited by 78_elky (edited 07-05-2016).]
Lots of room all of a sudden! Not the easiest thing to get out from under a car on an uneven little parking pad with gravel around it. I would have much rather done this in my garage but that just wasn't meant to be! My Dad came to help out with all the shenanigans Now its a matter of getting the parts I need for my swap off this engine, and then dismantling it so its easier to move and sell. I've got someone interested in the cradle, and another person interested in the engine. It makes me happy to be able to help out Fiero enthusiasts when I can, its much better than me taking this stuff to the scrapper. My Dad was playing candid camera and got a picture of me inspecting the rust. Its not as good as I'd like, but its better than I've seen. I think I can get away with wire brushing the rust off and using a rust converter/inhibitor and then paint. The car won't see anymore salt or much horrible conditions with me owning it so it shouldn't get much worse. If there is a problem in the future I'll try to fix it right. I'm just very realistic and I don't think I can get my huge welder out to my side yard to work on this. Jessica
Got the old parts taken apart, I am trying to sell the big pieces locally, but I may end up parting the engine out and then I'll ship stuff. The cradle will hopefully go to a good home, its not nearly as bad as I thought, but it still made things easier to have another one to work on. This is the extent of the rust, I'm not super happy about it but its also not really pitted and although the top of the frame rail is a little worse for the wear its still sound. I decided the best course of action at this time is to cover it in rust converter and primer sealer, then paint. If it is still an issue later on in the years to come, I'll try to deal with it. I'm not done with it yet, it'll be done well just not perfect. These all had to go back together, and what a pain that was! Then I painted the engine bay, as well as the crash bars on the front and back of the car, because they had some surface rust. The weird little curved brackets that hold the rear section of the front bumper cover on are very rusted, and I might have to rebuild them. Other than that, and one small hole in the trunk I'm feeling pretty good about the car. I also go everything I wanted to on the cradle by the end of the weekend
I still need to buy and install an alternator, and I need to start work on the wiring and modifying the thermostat housing. I think while everything is out I'll also replace all my coolant hoses, they look pretty rotten. I also need to get some fuel line, and install my new pump in the tank. The junkyard is having a 1/2 price special sale this Thursday so I'll probably go and get some of the exhaust parts I need as well as anything else I can find. This project has really started to come together rather fast in the last few months! Jessica


.jpg)
.jpg)
.jpg)
.jpg)
_(640x480).jpg)