Wow Rob that is some pretty amazing work you are doing there. I noticed you are in the Knoxville area and I am in Maryville, just south of you a bit. I go to K-town often to pick up welding supplies and whatnot. Perhaps if you are not too damn busy making glass parts you would not mind a visitor to see your work. I have never seen anything like that in person and would absolutely love to meet you and see your beutiful mera build. You mentioned that you want to learn to weld, I am no expert but I am a fair tig welder and work from my home shop here. If you would not mind a visit shoot me a PM and I will give you my number or leave one you can be reached at. I just sold my current Fiero and I am now looking for a good deal on a project fiero locally. I have never actually seen a mera before....peace and nice work man!!
No good progress pics to post as of late. Progress is being made but nothing visually interesting. I have just been doing a lot of sanding getting the car ready to primer hopefully this Friday. I will definitely have some good pics by this weekend.
@pete matos I will PM you when I get this thing a little closer to completion and you can come by and have a look
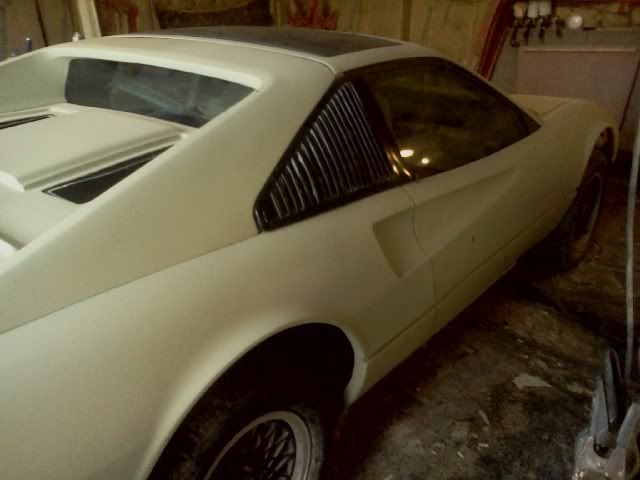
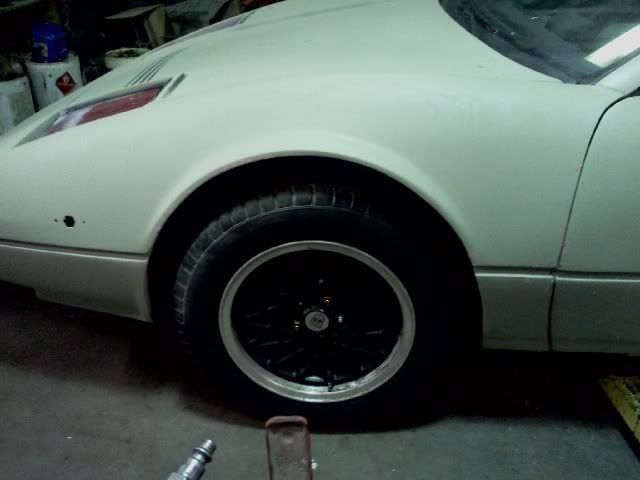
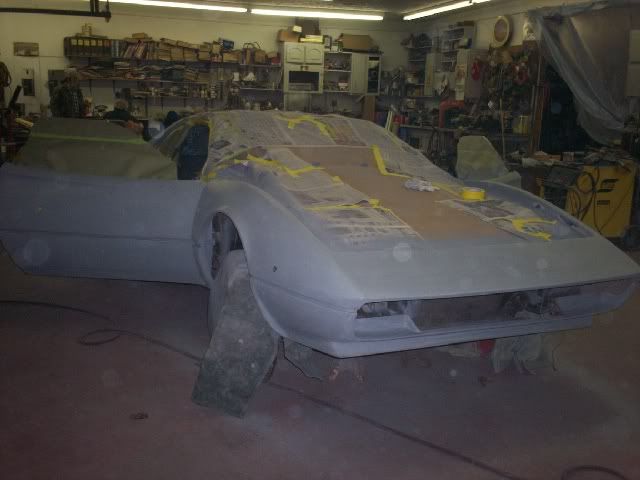
Spent the better part of the last week sanding the whole car to get it ready for primer. I got some goodies in the mail also. My wheel adapters came in this week. They are 1.25" thick. I stuck one on to have a look and it looks just about perfect. The wheels come out to where they should now
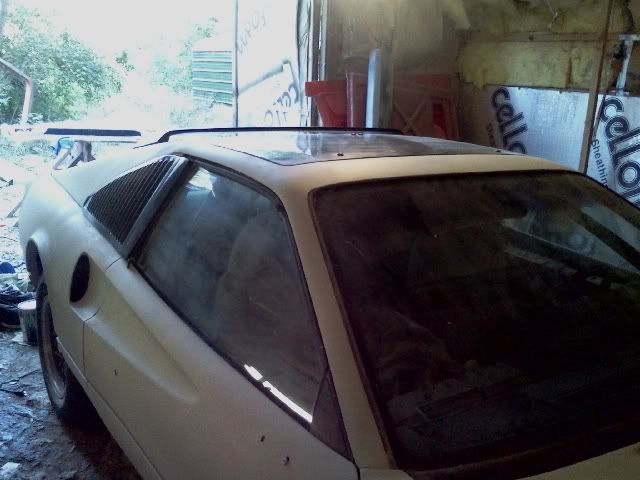
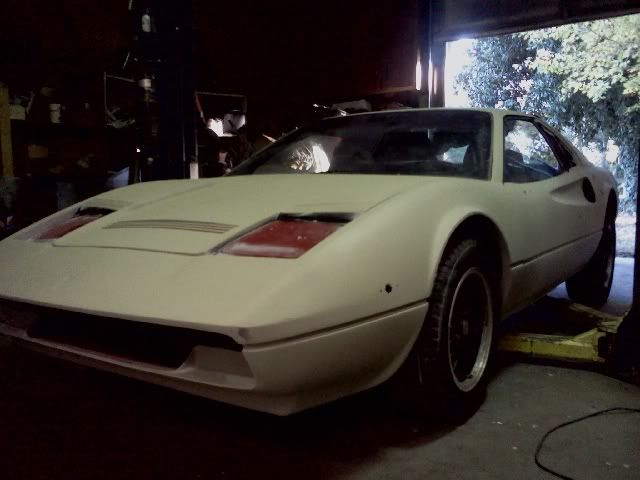
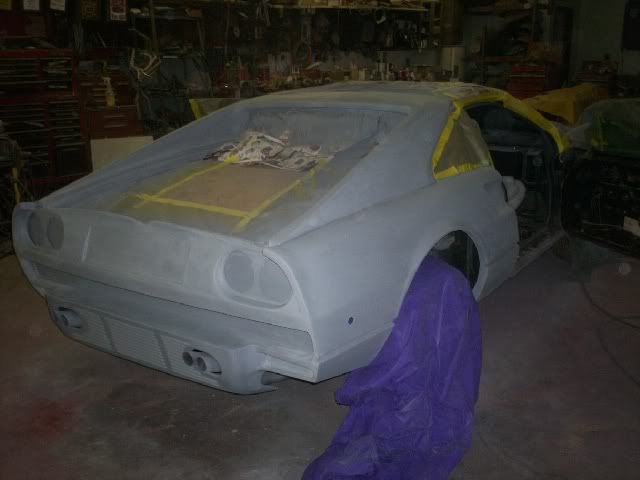
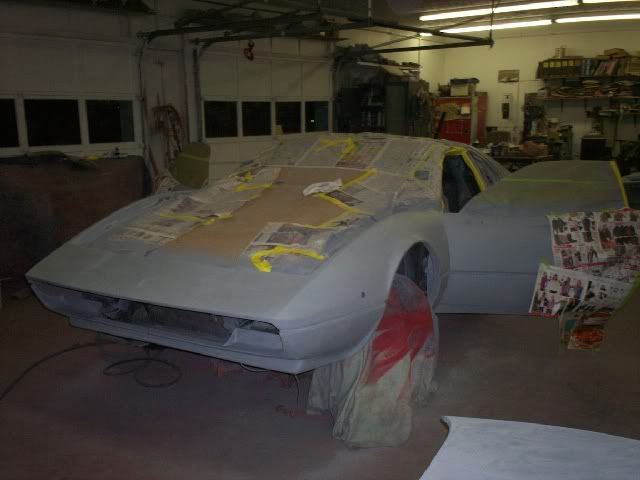
I got the car in primer yesterday. I must say it is very gratifying to at least see the car all one color ;D I used a medium build urethane primer. It does a great job of getting the tiny pin holes, chips and scratches to show up. So far everything is looking good.
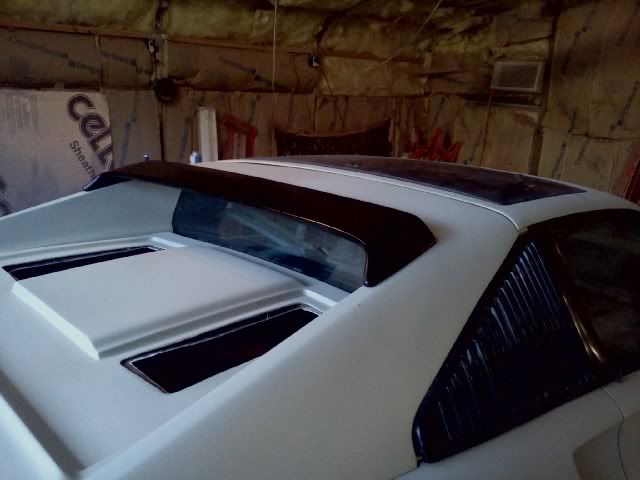
I got my spoiler finished up and painted. I am very happy with how it turned out considering I had to make one from scratch with only pictures to go by.
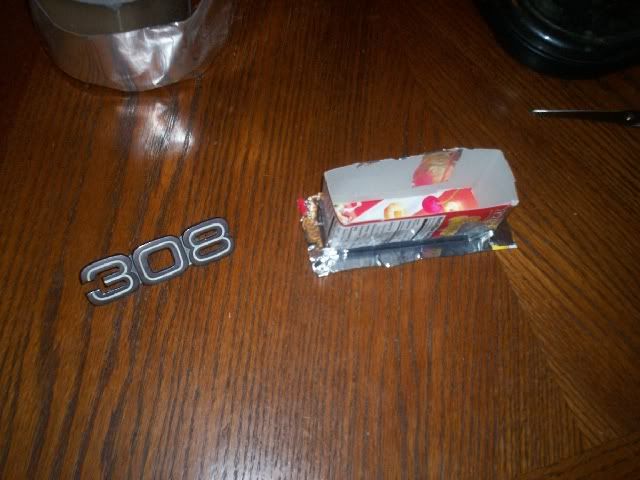
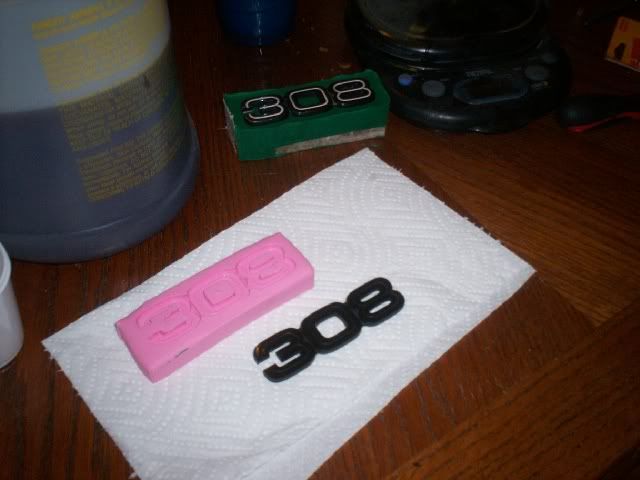
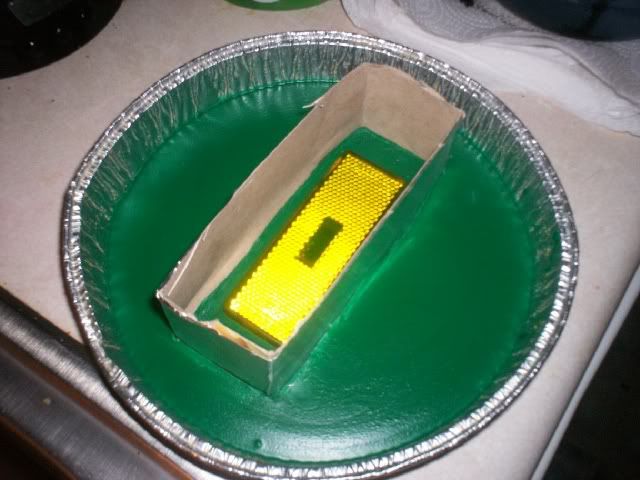
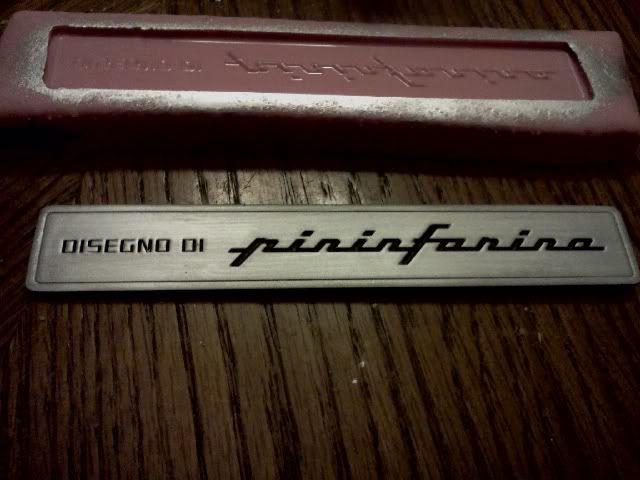
My 308 badge came in the mail and I decided to make the mold off of it. I plan on building several of these cars and spending $100 just for the 308 badge is too much. Not to mention another $100 for the GTS emblem. I have one of those on the way and will be making a mold from it when it gets here. Here is the process of making a simple 1pc mold of the 308 emblem
I made a mold box out of cardboard and held everything together with aluminum duct tape.
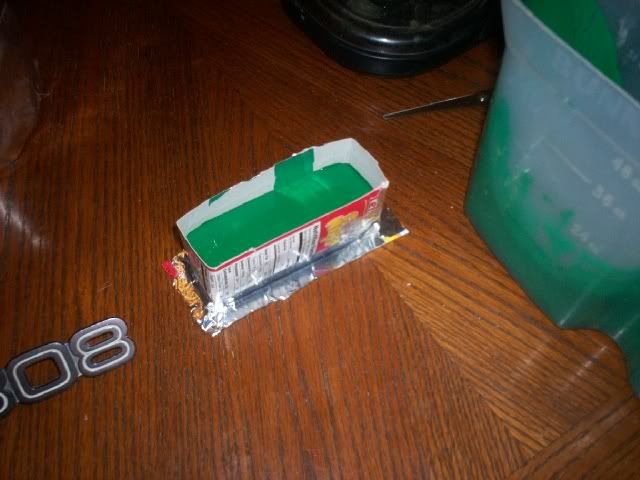
Then I melted down some modeling clay and poured it into the mold. I poured enough so that the emblem would seat firmly against the clay without the mounting studs bottoming out.
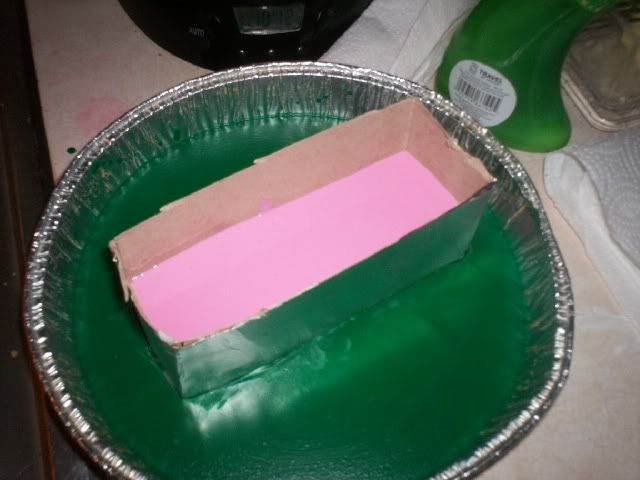
I mixed up the silicone rubber and poured it into the mold enough to cover the emblem by about 3/8"
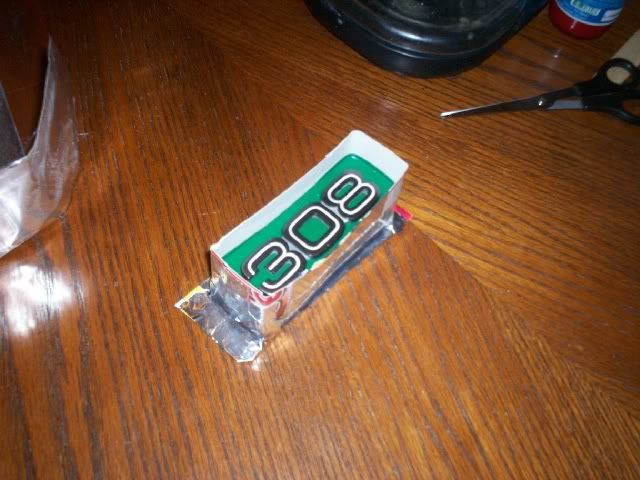
I let it set up for 16 hours then de-molded the part
Next I mixed up the plastic and poured it into the mold. It only takes about 20 minutes to set up
After it set up I de-molded my new copy
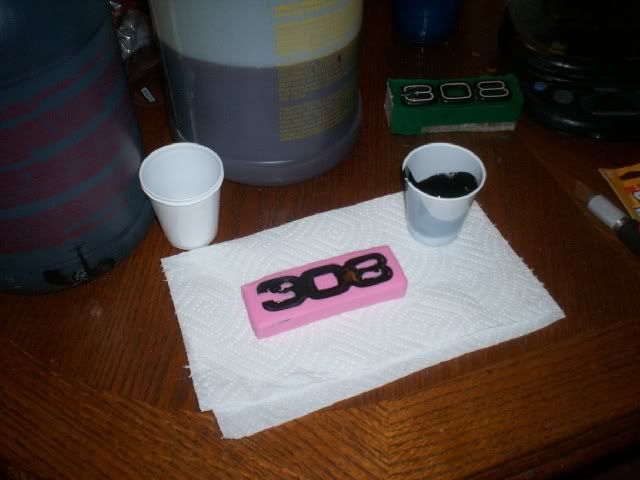
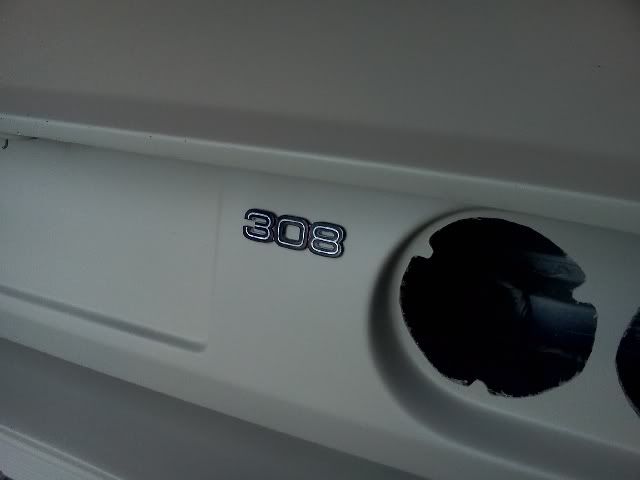
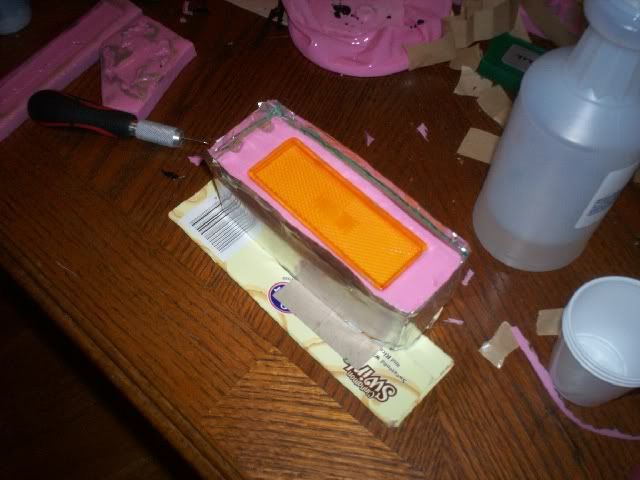
After that I sprayed the face of the emblem with white paint then wiped off the excess with a paper towel damp with paint thinner leaving the white paint only in the groove in the middle of the numbers. I stuck it on the car with some double sided tape just to see how it looked
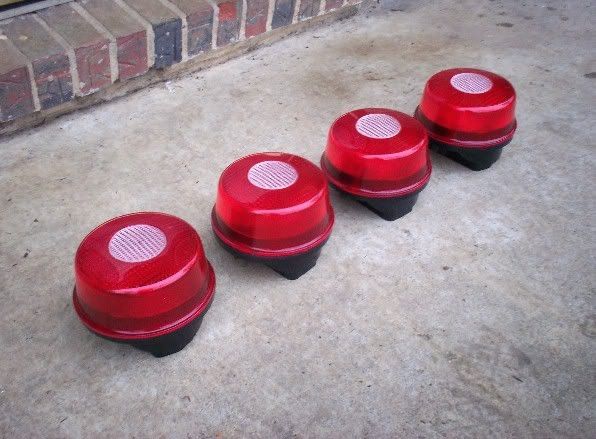
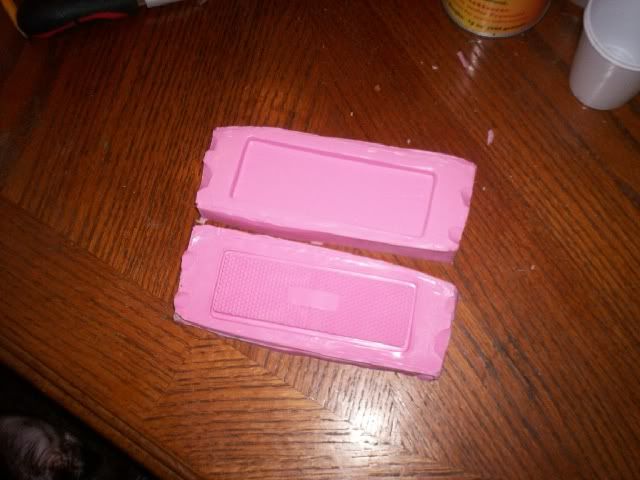
Making parts like this is pretty simple. Making light lenses on the other hand is a bit more involved. Those are two piece molds. You must vacuum the rubber before pouring it and you have to cast the parts under pressure. I have to replace my side marker lens mold in a few days and I will post that process also.
[This message has been edited by EVM_Rob (edited 10-07-2011).]
Car looks amazing in primer. Can you give a product name or number for the primer? Kinda reminds me of old school feather-fill, but not sure if you can even get that anymore.
Very interested in the plastic molding process. Your emblem looks fantastic. When you say you melted the clay, how was that achieved, a vessel inside a vessel, clay in water? I've had clay get so soft it was hard to work with, but never to the point it could be poured. Also, would you be willing to pass along the source for the plastic, or do you mix it yourself?
Again, very impressive work. Looking forward to the lens production.
HAGO!
The primer is Keystone Platinum Refinish Key 3-N-1 Primer. You can use it as a heavy build primer, medium build or a sealer depending on the amount of reducer you use.
I melted the clay in a pot on the stove over medium heat. I use the clay that doesn't ever dry out. Not sure if that makes a difference though.
I buy my casting plastic from Alumilite and I used to use their Dow Corning Silicone RTV Rubber for the molds but its just too expensive. I now use Smooth-On Mold Max 30 Silicone. It works just as well as what Alumilite sells but is about half the price (10lbs for $165 vs 11lbs for $96).
I have molds for all kinds of plastic parts now. I have the 308 side markers, tail lights, 355 tail lights, Ferrari script emblem, prancing horse in two sizes, 308 badge, lambo bull emblem, 25th anv countach wreath emblem, the door push buttons I use and will soon have molds for the Pininfarina side badge, GTS badge and 308 Front Turn sigal assemblies.
Thanks a bunch for the info. I use "Kleen Clay" which never really "hardens", but gets less plyable in lower temperatures, guess I'll have to try puttin' it on the stove! I've used the two part silicon to make molds for small parts, similar to what you've shown for the 308 emblem, but I used fiberglass to make the parts. One in particular that I'd really like to do in plastic is a power seat switch bezel for an 81 Vette seat. I'll have to get some of the stuff you mentioned here. Thanks again for sharing.
Hope you have time to show us how you make the lenses, I've seen it done before, but it didn't look like something I'd want to mess with at the time.
Keep the updates coming as you can, I and I'm sure more than a few others, are really enjoying your experience and willingness to share it.
I would love to see your 355 taillights. My kit came with some but I'm not really inpressed with them. You attention to detail really has me curious about yours so If they look good you deffinately got a customer in me. I wish I had half of your fiberglass skills. Truely amazing work. Keep it up.
I would love to see your 355 taillights. My kit came with some but I'm not really inpressed with them. You attention to detail really has me curious about yours so If they look good you deffinately got a customer in me. I wish I had half of your fiberglass skills. Truely amazing work. Keep it up.
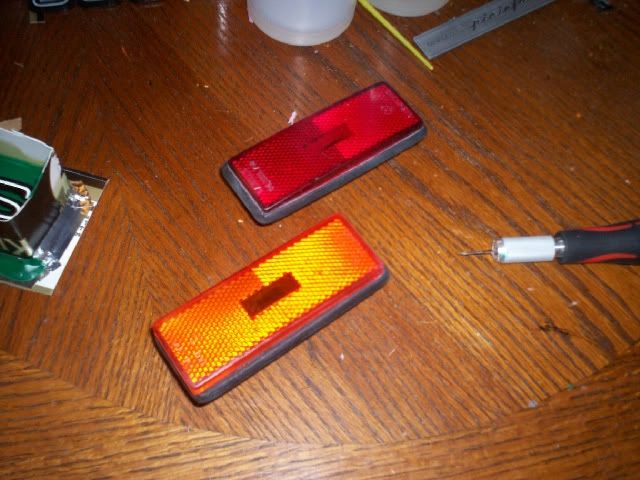
Thanks a ton. Here are a few pics of the 355 lights I make
[This message has been edited by EVM_Rob (edited 10-10-2011).]
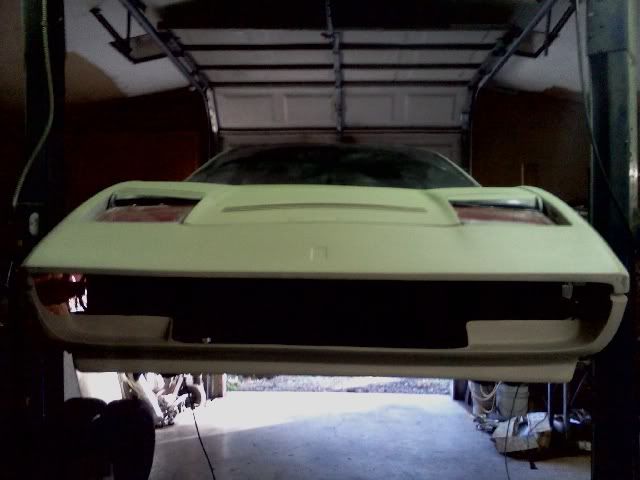
Time for a much needed update. I am getting ever closer to doing the final prepping for paint. I still need to get the car on a lift this coming week and install the new lowering springs as well as re-route the exhaust and install a new fuel pump. Once that is done I will need to get my deck lid hinges and lock/latch squared away. All of that should happen this week. Oh yeah and I still have to make the front and deck lid grills.
Here is what I was up to this past week.
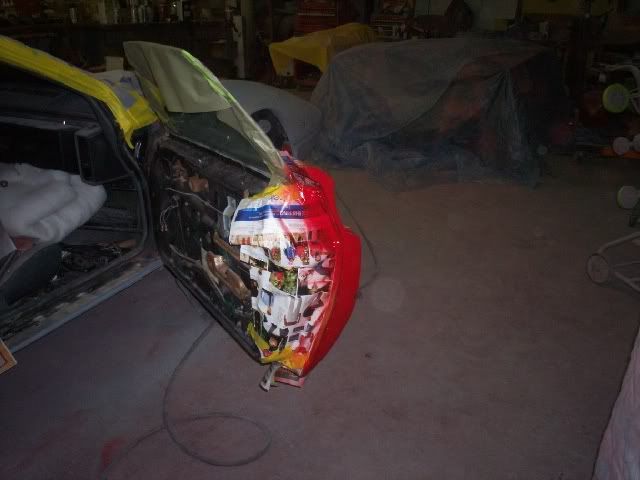
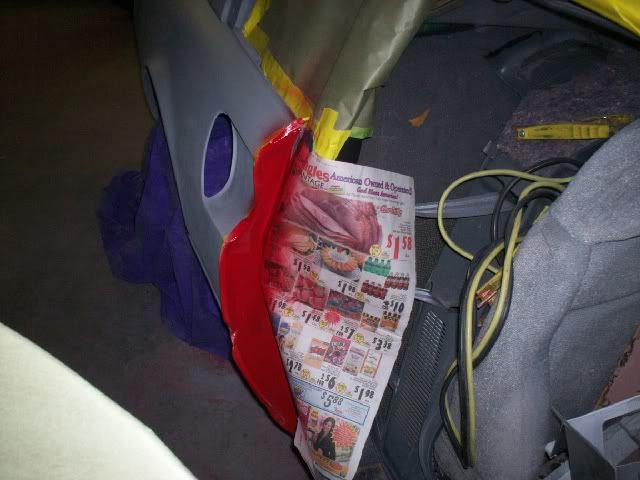
I made a new mold for the marker light lens. I melted down some clay and poured into a pie pan. Once it was set up I pressed the lens just slightly into the clay making sure it was making contact and sealed into the clay all the way around. Then I made a cardboard mold box and pressed it into the clay until it bottomed out. The reason I didn't just pour the clay into the mold box itself like I do when making 1pc emblem mold is because I would run the risk of pushing the lens to deep into the clay or not deep enough. Putting it into the clay without the mold box around it makes it easier to see since you can look at the lens from the side to make sure its properly seated. If there is even one tiny little space between the clay and the lens the silicone will run underneath the lens, fill up the void and ruin the mold. It is also important that the clay is thick enough since the 2nd part of the mold will take its place once the mold is flipped and the clay removed. If its only 1/4" thick then the 2nd part of your mold will only be that thick also. Depending on the over size of the mold I am making I like for the silicone to be about 3/8" - 3/4" thick so it can better support itself.
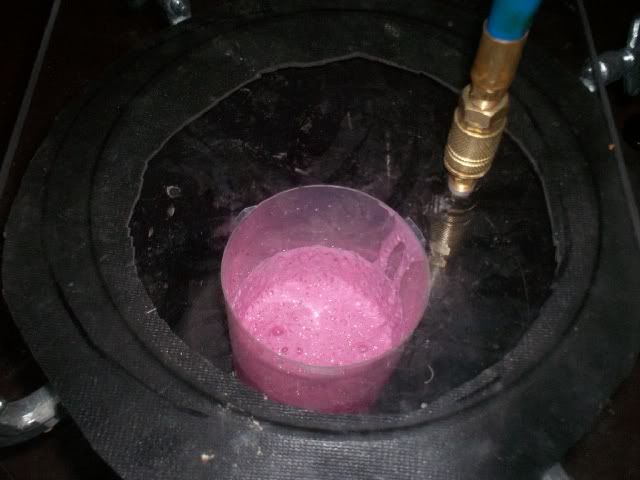
Once the mold box was ready I mixed up some of the silicone and placed into a vacuum chamber and sucked all of the air in the silicone, You force a lot of air into it while your mixing. Translucent plastics like lenses are cast under pressure and if the silicone is not vacuumed the microscopic little air bubbles will make voids in the mold that will expand under pressure making tiny little pin holes in the surface. This would make the finished cast part have a "gritty" surface.
When vacuuming the silicone its wise to use a container at least 3 times the size of the amount of silicone your vacuuming as it will expand in size. As the air is being sucked out the silicone will start to bubble up really high and then it collapses down again. Here is a pic taken just after it bubbled up and collapsed back down.
After letting it sit in under vacuum in the chamber for about 5 min it was ready to pour. You will never get 100% of the air out but so long as it bubbles up then collapses back down it should be good enough.
I used enough silicone to cover the part just over a 1/4". I let it cure for 16 hours. Once it had cured I flipped the mold upside down and removed the clay. I cut little notches out of the edges of the rubber with a razor knife. They will act as alignment markers in the finished mold. After that I sprayed the surface with a rubber to rubber release agent and vacuumed and poured the second part of the mold.
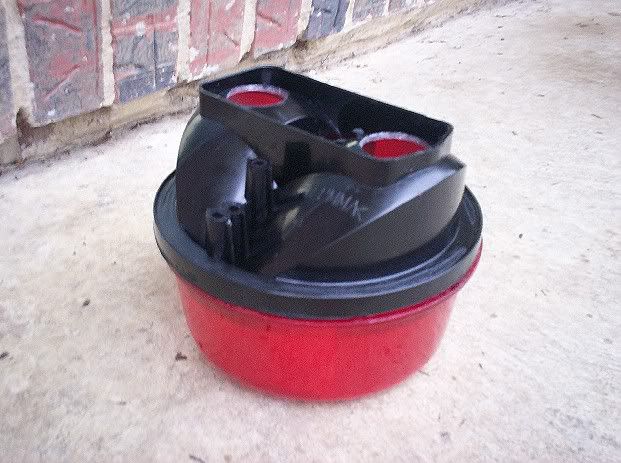
Once it was cured I pulled off the cardboard mold box and separated the 2 parts of the mold.
Now it was time to make a lens. I heated the mold in the microwave a couple of minutes to get it really warm. It helps with the curing of the plastic. I placed the mold into my pressure chamber and poured to the plastic in to the mold and onto the top portion filling in most of the little details that create the reflective surface on the inside of the lens. These are bad about trapping air bubbles. The plastic comes crystal clear and you simply dye it the desired color.
I put the two halves together, letting a little squeeze out the sides and secured the lid. I hooked up my air line and pressurized the chamber to about 28psi.
The reason for casting the clear plastic parts under pressure is that it basically crushes the tiny air bubbles in the plastic while it cures. If you where not to cast it under pressure you would end up with a cloudy looking part from all of the air trapped in the plastic.
After about 45m under pressure I removed the part and let it sit about another 30 min. After that I usually remove just the top half of the mold leaving the part inside and place the mold into a toaster oven for about 3-4 minutes. Just enough to get it to about 160-180 degrees. Once its gotten hot I turn off the oven and let the mold cool slowly in the oven. Once cooled I demold the part. The heating then slow cooling ensures a really thorough cure to the plastic and makes it totally rigid.
Here is a pic of an amber lens I did later that night.
I got some more of my emblems in the mail this past week and took molds off of them. I got my GTS emblem and the Pininfarina side badge. Here is a pic of a side badge I made from my new mold.
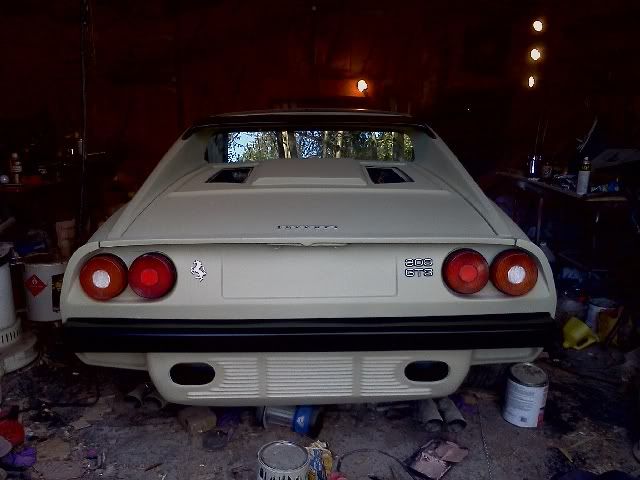
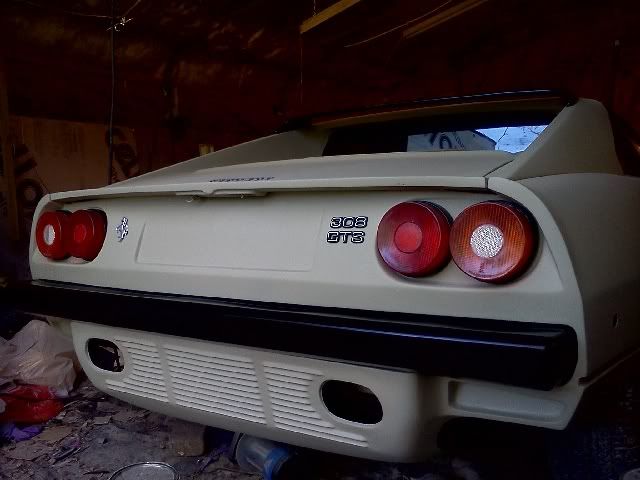
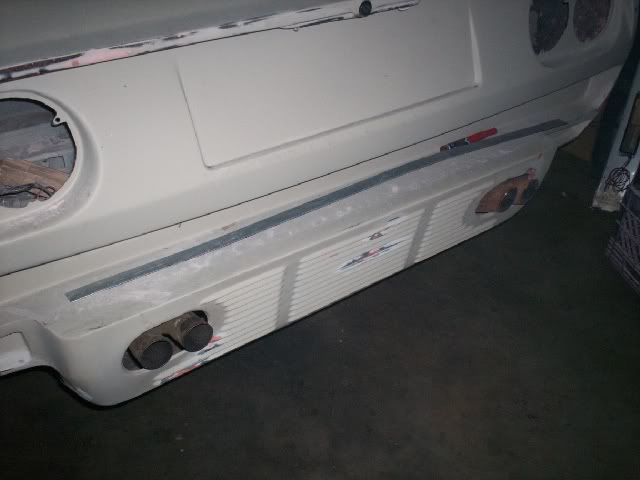
I also got my rear bumper finished and painted and all of the rear lights made and test fitted onto the car. I stuck all the emblems I made on the car with some double sided tape to see how it all looked (and to give myself a little thrill) ;D
It was really gratifying to step back and look at everything and to know that I made every single part I was looking at
[This message has been edited by EVM_Rob (edited 10-17-2011).]
Many thanks for the demo. That is truly amazing. Were there books that you got the plastic molding process from that explain it, or did you learn from someone in the flesh? Would like to know the source of info that got you started. No, I haven't been to the library, just asking since you've obviously learned from somewhere!
Keep the updates coming, and you can add admiration to that thrill from seeing your work. Wish I lived closer so I could pop in on you!
How do I add this to my favorites and then check it later? I love this plastic building process. I think I would eventually like to try this. Thats amazing!
How do I add this to my favorites and then check it later? I love this plastic building process. I think I would eventually like to try this. Thats amazing!
Go the the top, left of this page and click on the link "Subscribe to this topic"
Many thanks for the demo. That is truly amazing. Were there books that you got the plastic molding process from that explain it, or did you learn from someone in the flesh? Would like to know the source of info that got you started. No, I haven't been to the library, just asking since you've obviously learned from somewhere!
Keep the updates coming, and you can add admiration to that thrill from seeing your work. Wish I lived closer so I could pop in on you!
HAGO!
I got most of my info to get me started from watching the "how to" videos and reading the instructions on the Alumilite website www.alumilite.com Beyond that, it was all just trial and error....lots of error
Thanks Rob, I'll definatly check that out. You must REALLY learn from your mistakes, your parts look perfect to me.
When the apprentice asked the master how long it would take to become as good as he was, the master answered, "You will have to make 2,000 mistakes, so you better get busy!"
I finally got the car to the shop where the lift is and where it will be painted. The next time it comes home it will be bright red, 90% finished and driven here!
Here she is getting loaded up. The first time its seen the road in a few years...even if it is not under its own power.
Got it up on the lift. Having the right tools for the job makes things so much easier. Already got the new fuel pump in it. Would have taken forever to get that tank out and back in doing it on jack stands!
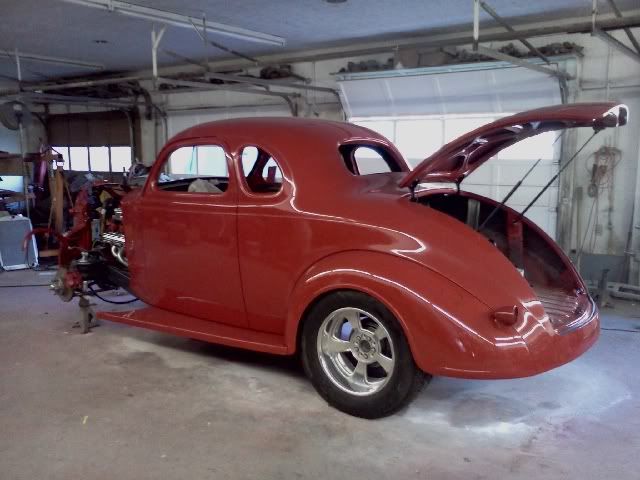
Here is another project going on in the same garage. The same guy that painted this car is the one that is going to spray mine. He does great work.
Next up, installing the lowering springs, wheel adapters and re-routing the exhaust. I am taking the weekend off from it for my birthday. My fiance has a bunch of stuff planned for me. I will be back at it full steam ahead on Monday though.
[This message has been edited by EVM_Rob (edited 10-22-2011).]
Haven't updated in a while since there hasn't been much going on that is really picture worthy but here are a few anyhow.
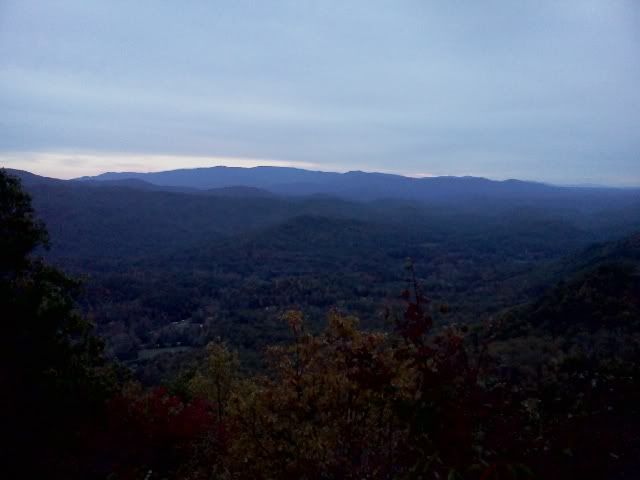
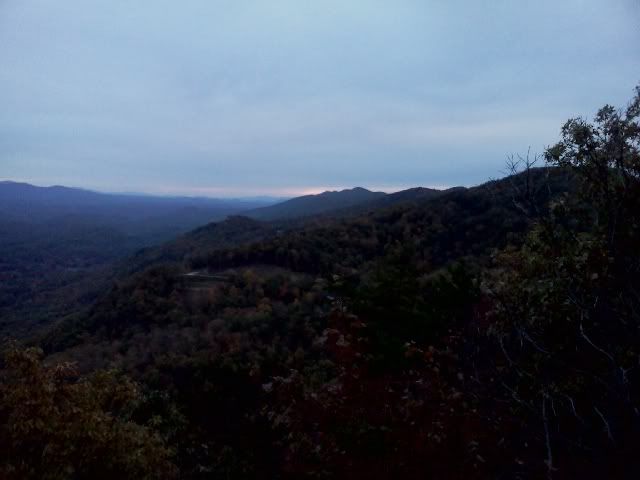
I took a couple days off for my birthday and didn't get much done. Here is the view from where I was on my b-day.
When I got back to the shop where my car is I ended up having to do a little project for the person the shop belongs to as a bit of payment for keeping the car there. I had to paint the lettering on an old 50's coke cooler he restored for someone. They are going to use it as a battery box in the back of their street rod. I had to do it all free hand using a small detail brush. Didn't turn out too shabby considering I had never done anything like that before.
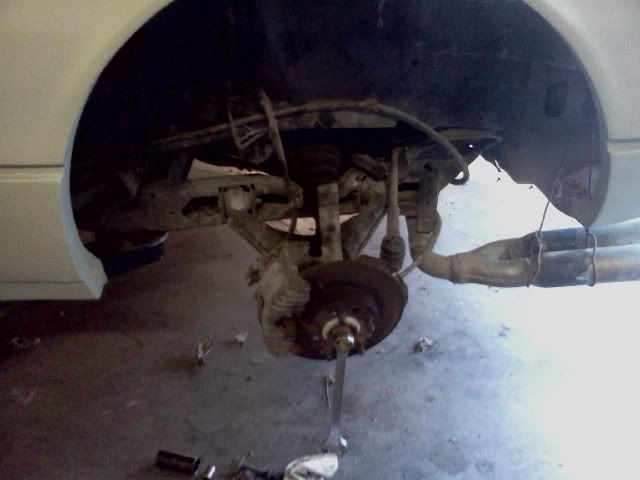
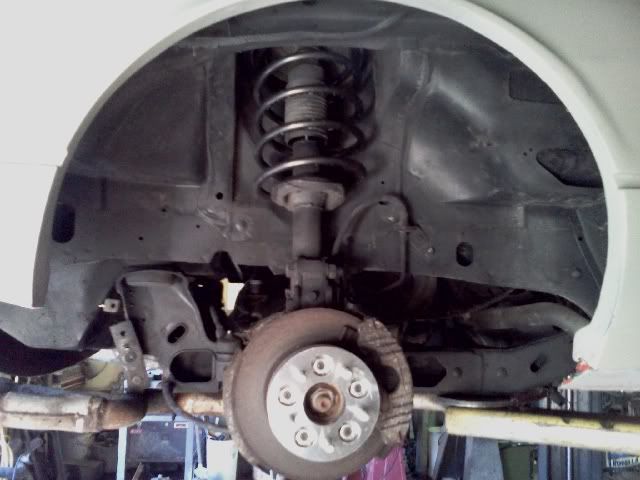
I got the lowering springs installed and cleaned up the wheel wells and under carriage of the car while I was at it. Gave it all a good pressure washing and some new black paint.
Before:
And After:
Snapped a few pics of the car in interesting angles when it was up in the air.
Took this one while It was in the air and I had to stand in the trunk trying to get the top of the rear struts lined up in the holes and the nuts attached. Getting them out wasn't to bad but getting them back in was a pain.
Once the job was done I put all of the wheel spacers and wheels on and put the car back on the ground to have a look. The front looks perfect but the back needs a bit more drop. I am sure it will come down some once the car is driven around some. The suspension will need to settle in before I really now how it will look. You can compare these shots to the ones I took when I had the car on the street loading it up to see the difference.
I have finishing up the body work as well. Its about ready for the final prime, sand and paint.
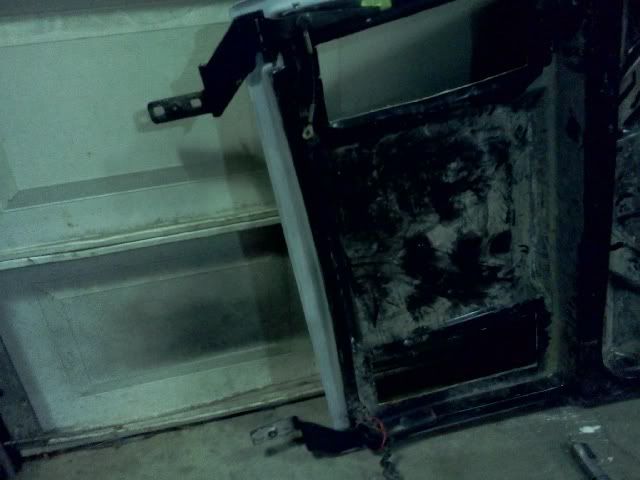
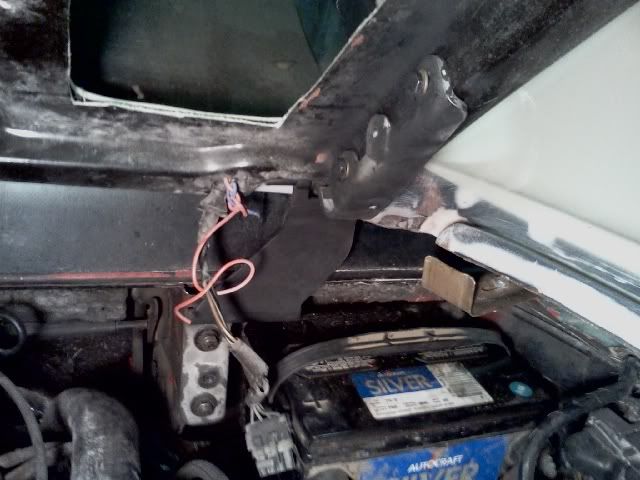
I have been making the hinges for the rear deck lid. I used the stock hinges but switched the right to left side and left to right then cut the hinge in half and welded in a piece of steel to move the hinge over 2.5" and up 2.75". It still needs a bit of tweaking but it looks like it will work.
They are 1.25" spacers front and rear. Once the car is done and I can really have a good look at it I may end up bringing them out another 3/16" or so.
I think this thread should be moved to the Construction Zone.
Lots of neat stuff going on here.
I've owned & we've built several of the old 308 & 328 replicas over the years & they are beautiful cars if built correctly.
The 308/308 replicas were real popular in the late 80's & thru the '90's.
The problem was that people who wanted to be in the business would buy a body kit & then splash it before even building it. They'd sell 6 or 8 of them before they would build an in house car. Several of those bodies that were sold would then be splashed in the same way.
After 3, 4 or 5 generations, & the shrinkage involved in each generation, the body gaps would be as wide as an inch. This made them harder & harder to build.
Then it got to where 8 or 10 people had copies of these molds & they were all competing against each other for sales. The quality was bad & people were buying based on price only. It got to the point where you could buy a body for less than it cost to make it. Eventually all these people put each other out of business. The molds became lawn decorations or land fill & good 308/328 kits all disappeared.
I've always thought that someone with good molds & some skill could bring the 308/328 kits back. That would last until someone would start copying them again.
It has been a while since my last update. There was a death in the family and all work came to a stand still for over a week. I am back working on the car now though and really trying to pick up the pace as well. Not only will it get done faster but it helps keep my mind off of other things.
Here is what I have been up to lately.
The hinges for the deck lid are finished and the deck lid is installed.
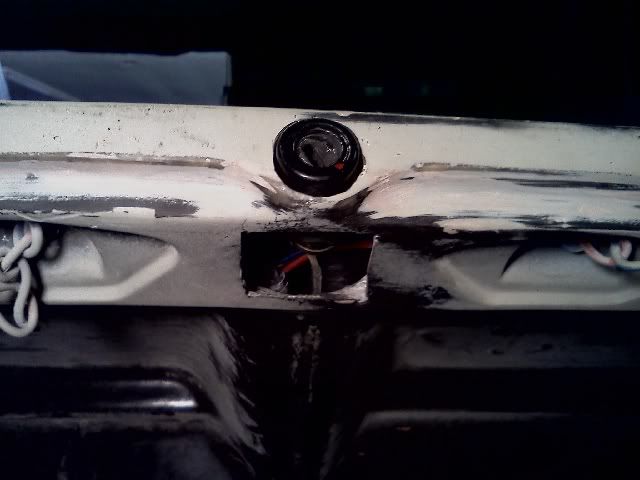
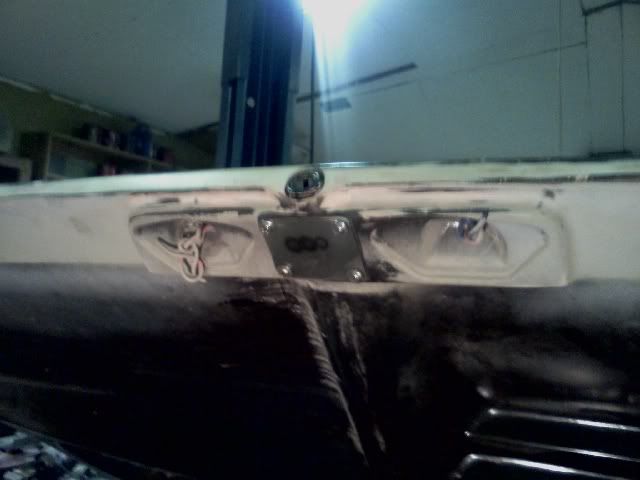
I finally got my key lock installed in the deck lid and it functions perfectly.
I still have to make the metal plate to cover the install hole in the bottom of the deck lid. It will also have two prongs on the plate that will go inside the deck lid to hold the key lock in place. I also still have to install my prop rod for the deck lid.
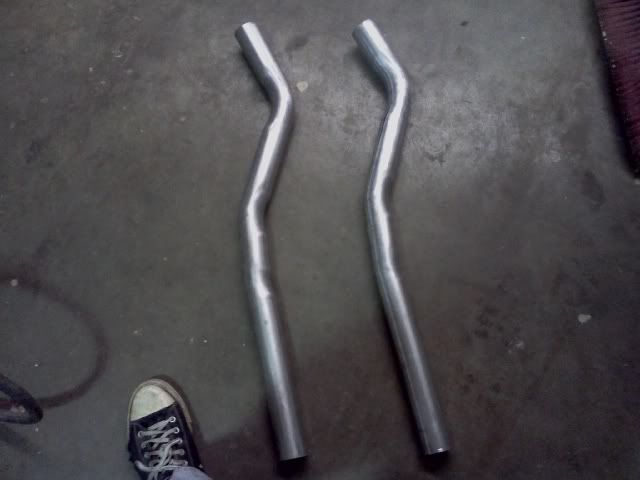
I had a muffler shop bend my exhaust tubing and got it welded in. I used two stock Fiero 4cyl tail pipes and welded them on. So with the exception of a little black header paint for the tips, the exhaust is done.
I have also spent quite a bit of time doing body work, sanding the primer and filling in little pin holes, chips and scratches with spot putty. With any luck it will be ready for its final coat of primer in a week.
I am going to try my best and get this car done before Dec, 5 when I will be leaving for a week to visit my fiance's parents in FL
A lot has been done on the car lately but not much picture worthy for a while until now. Mostly been doing a lot of sanding/body work getting it ready for its final coat of primer. After that it will just be a matter of block sanding then its paint time!
Here are few things other than sanding I have been working on
I got the key lock on the deck lid finished. I covered up the hole with a little metal plate. I also installed a prop rod for the rear deck. Its simple yet very effective. The deck lid is done now minus sanding, repriming and painting the underside. I also need to instal the license plate lights.
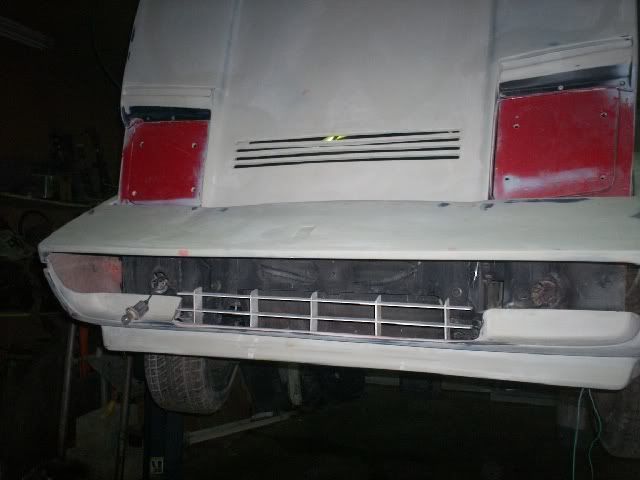
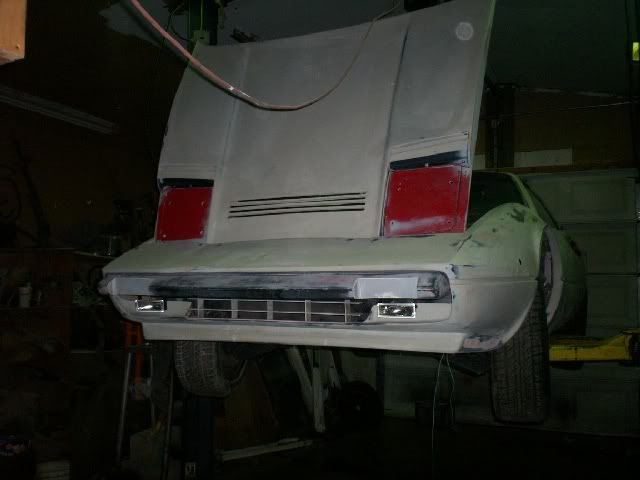
I got the front grill for the car made. Its all aluminum.
I also got the fog lights installed. I wish they were a little larger but they will effeminately work fine. I installed them by attaching the brackets to the back, under side of the bumper similar to the way the turn signals were installed on original Mera's. Just need to get my turn signals installed and the nose of the car will be done.
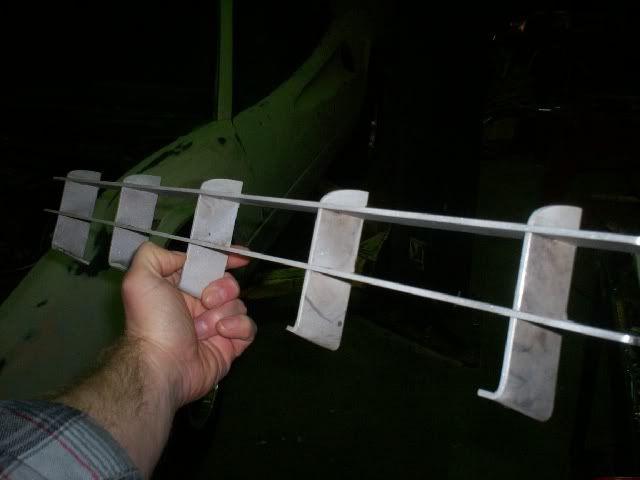
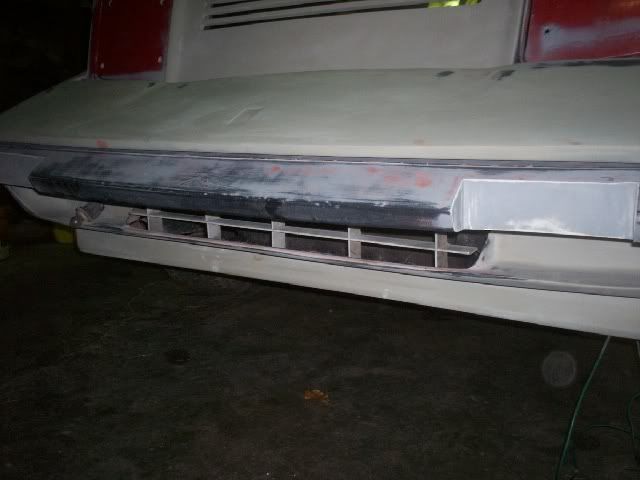
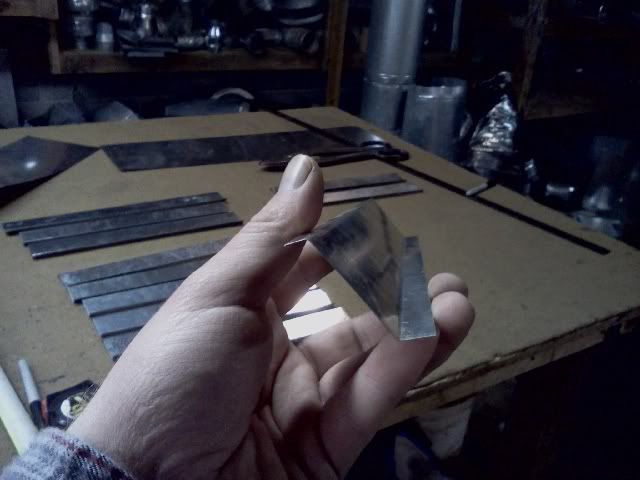
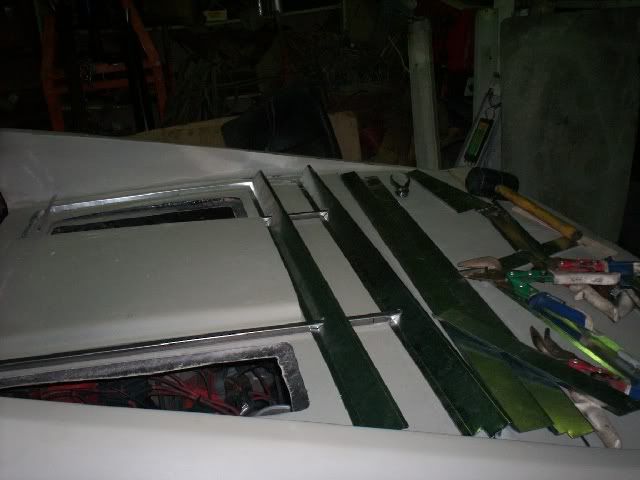
I finally started making the rear grill. I have both outside pieces of the frame made out of 1/2"x1/2" angle and the inside edges of the frame made out of 1/2" box tubing. I am making the louvers myself out of sheet metal. My dads cousin (where the car is now) has a professional quality metal bender and sheer so it makes it pretty easy. They are bent into kind of a z shape. Here is a pic of the profile.
I have all the pieces cut out and bent. Now they just need to be trimmed to the right widths and notched out for the framing. Tomorrow I will start mocking it all up and with any luck have it all finished and welded up by the weekend.
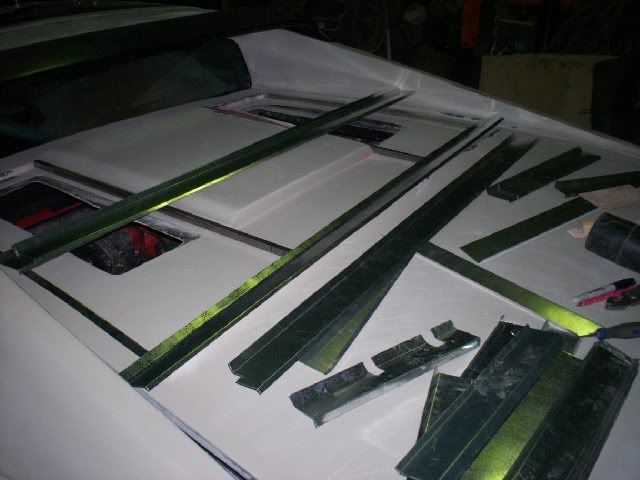
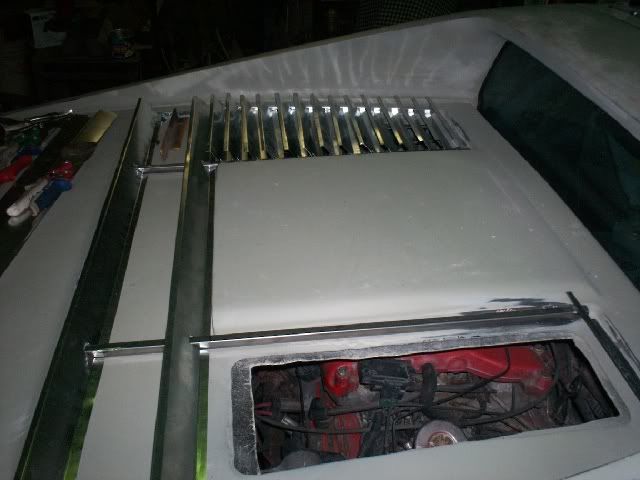
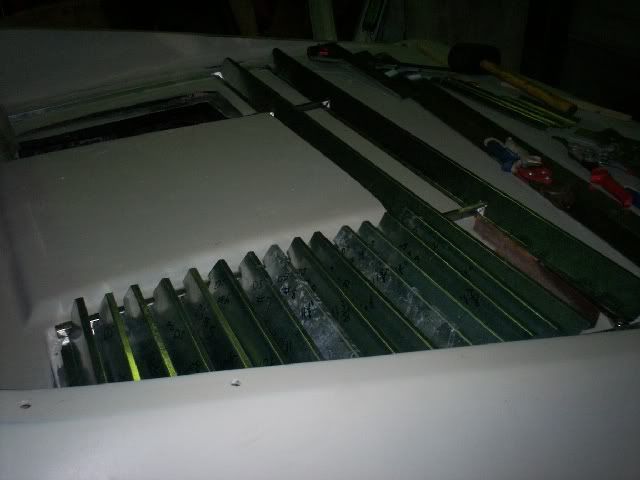
Getting close to finishing up the deck lid grill. Here are a few pics of getting everything mocked up and all the louvers cut.
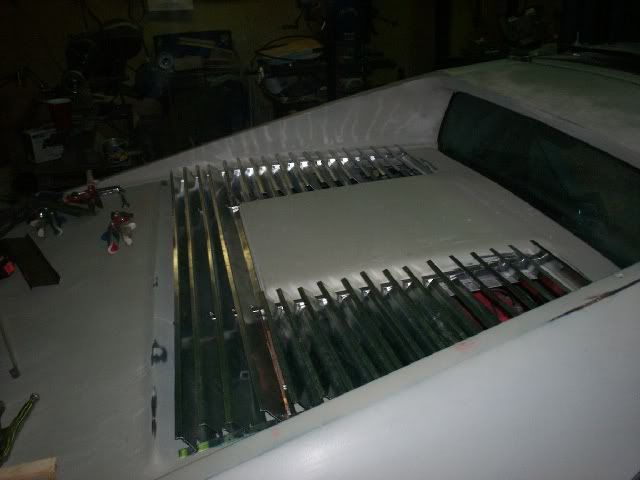
To attach it we drilled a 1/4" hole all the way the 1/2" box tubing at each end and inserted a piece of 1/4" all thread into the holes with about 3/4" sticking out the bottom and flush on top. Then we welded over the tops of the holes and ground the welds smooth. Now you wont be able to see the mounting points from the top since the grill has studs on the bottom.
Here it is all mocked up. The pieces are just laying in there right now. Nothing left to do but get them lined up one at a time and weld them in.
I wrote down the dimensions of every part of the grill so next time we can skip the measuring and go strait to cutting and bending. The next one should come together a lot faster.
Haven't updated in a long time. I have been out of town more in the past 3 weeks than home. However, some great progress has been made and I have a lot of pics to post in a few days.
Here is the deck lid grill after completion. I just finished painting it today. Pics of the final product will be posted soon.
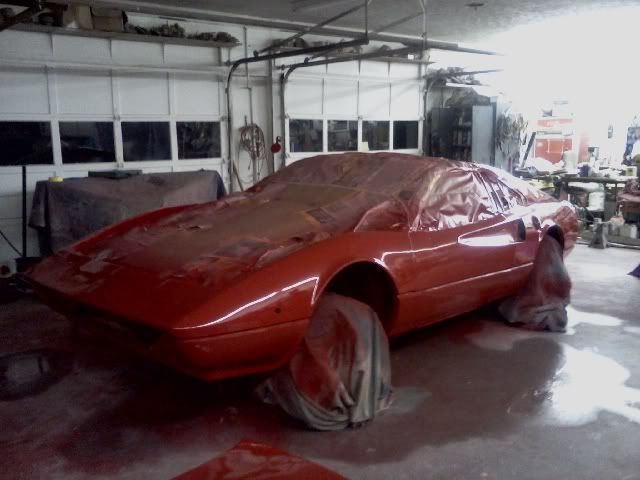
Here is the car a couple weeks ago after its second coat of primer and final sanding
Here it is getting ready for the door jams to be painted. Getting everything taped off.
Door jams done. It was nice to finally see some red on the car. Though be it a very small amount. Still satisfying none the less.
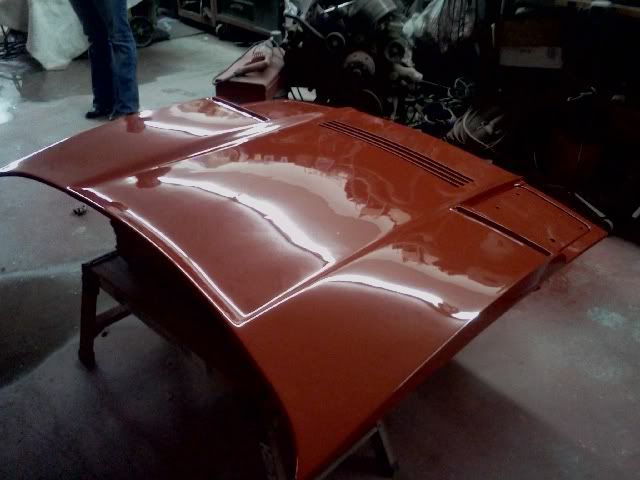
Here are some pic taken the day after painting
It turned out very nice. It will be going back to the shop the 2nd week of January for wet sanding and buffing. It should come back with nice smooth finish.
Here is the car shortly after getting it back home
I jacked it up and removed the wheels to get them finished up and painted. While it was up in the air I taped off the line on the bottom half of the doors and roughed up the surface to get it ready for a coat of satin black.
The exhaust grill is half way sanded now. It will be painted flat black. I will sand the other side of it as well at the drivers side bottom half tomorrow. I plan to do all the black paint work on the car Saturday, including the roof.
I attached mounting studs to the backs of my replica emblems and drilled the holes for them for a test fitting.
Here is the car back on the ground sporting nicely restored rims including some new prancing horse center caps. I also experimented with putting the black in the groove that runs down the side of the car just to see how it was going to look.
I still have finish up the headlight covers and get them installed. I got the bumpers, side louvers and rockers painted black today and will start test fitting everything Monday. I will probably not attach everything permanently yet since a lot of it will need to come back off the car when it is wet sanded and buffed. I still need to take off the hood and rear deck to paint the underside black. A lot left to do but its all the fun stuff!
Looks great! You certainly don't dissapoint. Can only imagine what it'll look like after cut&buff! Very nice work, but nothing less than expected judging by your previous examples.
Thanks for the update.
Don't see you having any problem selling it, even in this economy.
Its just acrylic enamel and the color is a dodge truck red. My dad bought it to repaint his 02 Ram and donated it to me to save me some money.
Nothing wrong with acrylic enamel. You don't have to worry about the clear coat going bad, and it is pretty durable. Great paint for a daily driver. You should at least put it in a car show before you sell it.