Hello all. I have a build thread on madmechanics but thought the folks on here might be interested in my project as well. So here is part one of my 308 build saga. I will give you a little back story first.
So I bought a set of 308 molds several years ago and they laid around for a couple years since I didn't have the time to mess with them when I bought them. I bought them off ebay with only a few pics to go by. I drove about 11 hours to pick them up and noticed just how chewed up they were. To say they were rough would have been a gross understatement. Words cant begin to describe. But I had paid for them (about $1k I do believe) and I had driven a long way so I loaded them up and headed home. After they sat around for a couple years I finally got the nerve to bolt them together and make a body. I used no less than 6lbs of modeling clay just to get the seams, gouges, chips, chunks filled in. Some of the more intricate details were so far gone I had to shape entire sections out of modeling clay. Such as the recesses in the front clip where the fog lights go. One of them had an entire corner missing. Some of the seams where the mold bolt together were nearly 1/4" inch wide in some places. Some of the shotty-est workmanship imaginable.
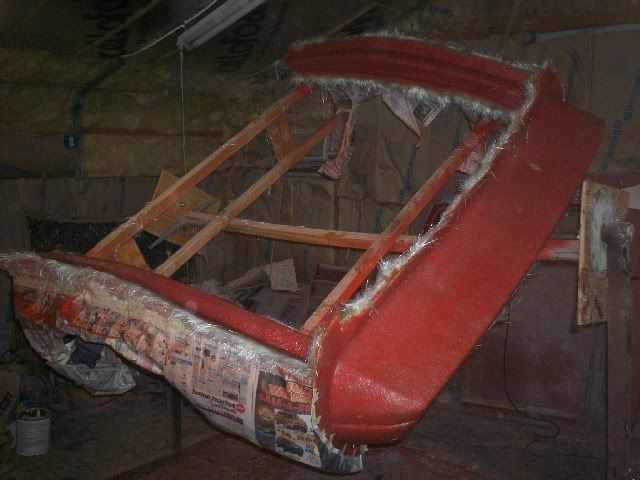
I finally get all of the parts made after about 3 weeks of laying them up here and there when I had the time and ended up with some body panels that at least still had the over all shape of a 308, though be it a 308 that looked like it spent some time in a war zone. I still had something to work with. Or so it seemed. The next step was to remove all the body panels from my 87 GT and start fitting the 308 body. My first problem was the rear clip. The sides and the rear fascia where three separate molds so the parts had to be glued together. Of course nothing fit right but after a lot of cutting and tweaking I got them glued together to form the rear clip.
Once the rear clip was in place I put on the sail panel (fast back panel, whatever you wanna call it) and the fit wasn’t too bad. The flash left behind from where the mold bolted together was terrible. About 3/16” wide and just as tall in most places. An easy fix though. Just needed to build up some more fiberglass on the inside where the seam was and then sand down the flash. The extra fiberglass behind the seam would ensure I wouldn’t accidentally sand through the part. The top of the sail panel where it meets the roof was messed up a bit. It had quite a sag in the middle of it. I put some pieces of foam rubber underneath it where the sag was and that pushed it back up to where it needed to be and looked pretty good. Next was fitting the doors. I put them both on and it wasn’t too bad but the were some spots where the seam between them and the rear clip was a bit off. A little to far in here, a little too far out there. Next I fitted the front clip and it was after that I felt like just quitting. Where the fenders meet the doors was absolutely atrocious! The seam was terrible and the bottoms of the fenders where they meet the doors were about 1” too far in and to make matters even worse they even flared out toward the wheel well. That whole part of the front clip was completely twisted out of shape. Not to mention all the dips and waves in the front clip. But that was the least of my worries. I decided to tackle the fender problem and began by cutting the wheel well liners and the edge of the fenders where they turn back in and meet the door completely off. Once they were off that whole part of the front clip was really flimsy and could be bent back into shape pretty easily. To ensure that the fenders had the same contour as the front of the doors where the two meet I drug out the door molds again and laid up some glass just on the ends of the door molds where they meet the fender. Once they cured and I took them out of the molds I trimmed everything away leaving only the front edge of the door remaining. I then took those pieces and glued them to the insides of the fenders and recessed an inch or so in. Presto! They pulled the fenders into the exact shape as the front of the doors. I didn’t have the front clip fixed but at least I had a good game plan in mind to get it done.
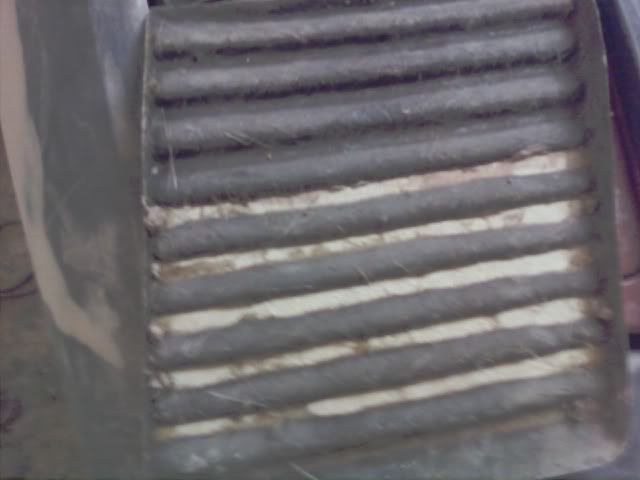
After the front clip fiasco I laid on the hood skin. Didn’t fit. Surprise, surprise. Both side edges of the hood where warped inward so there was no way at all to get them to bend out so that they could fit over the sides of the Fiero hood. The car came with the Mera style headlight covers. The ones that were all louvered. And no, they didn’t fit right at all either. To add to the ill fitting head light covers the very last louver closest to the windshield was a separate piece for what ever reason. Most of the kits I had seen had the last rear lover as part of the hood. I tried fitting the bumpers and they fit ok but where just beat up and really rough looking. The side window louvers didn’t fit at all. They were all warped and about ½” too short in both length and in height… in most places. Not even when it came to parts being the wrong size were they even remotely uniform. Sigh.. After getting the whole car pieced together I surveyed the piece of crap before me and it sat there in the driveway untouched for about 3 years
Back in December of last year I decided to hit this project hard and get it done. I pulled it into my shop and got to work. Its come a loooooong way since then.
Well, enough of the back story. Time to start getting you up to speed on the progress so far.
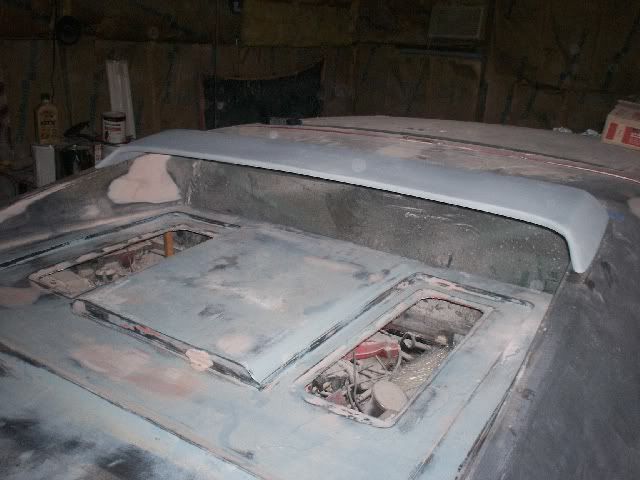
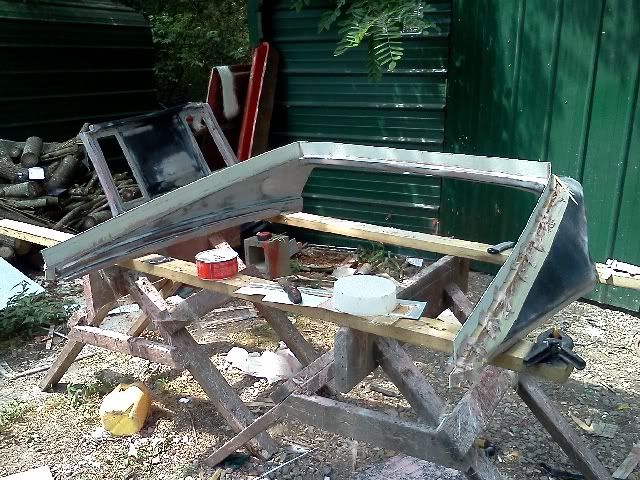
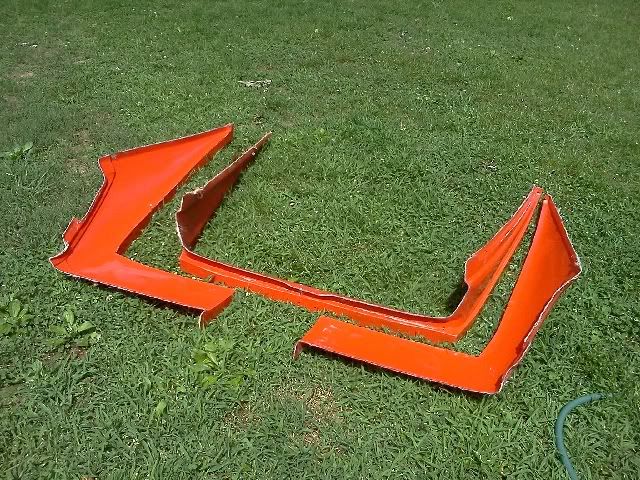
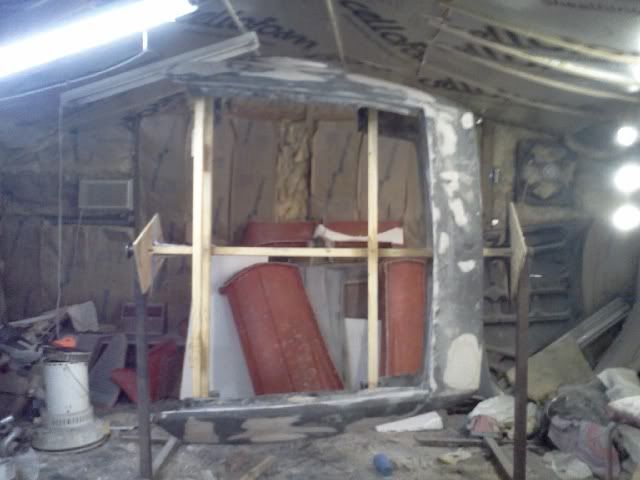
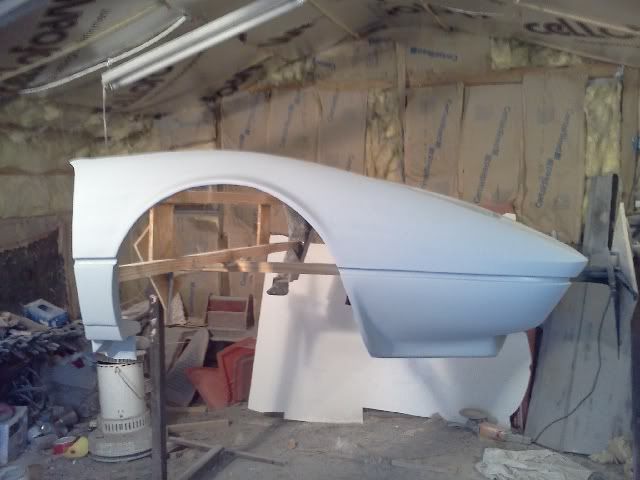
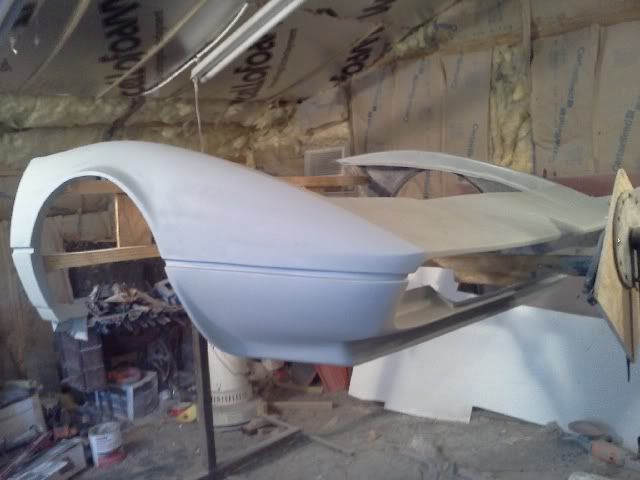
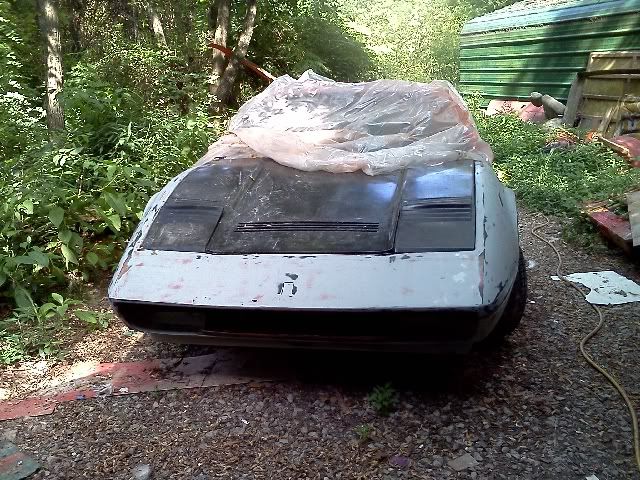
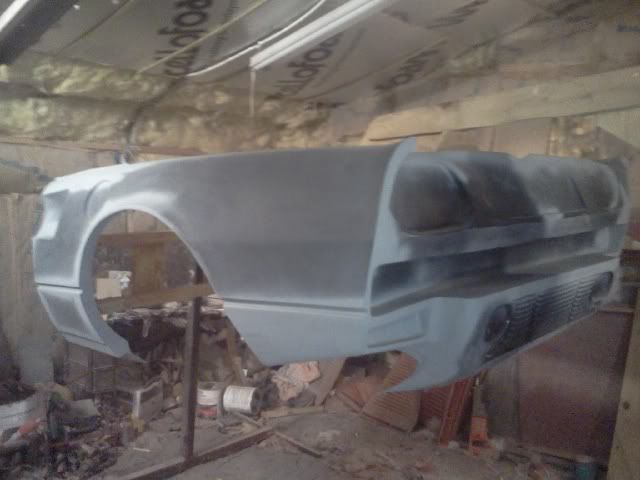
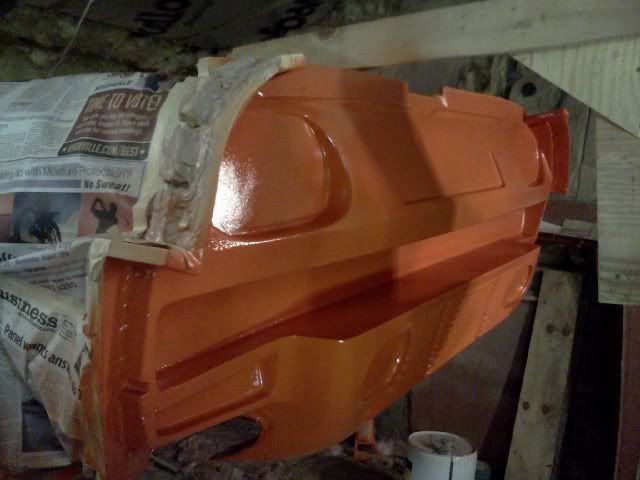
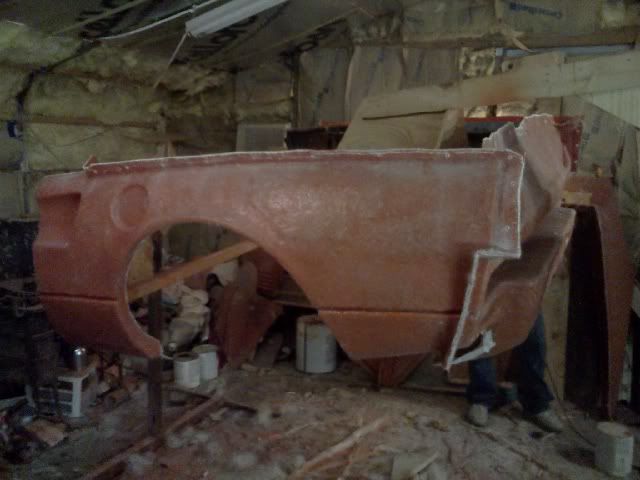
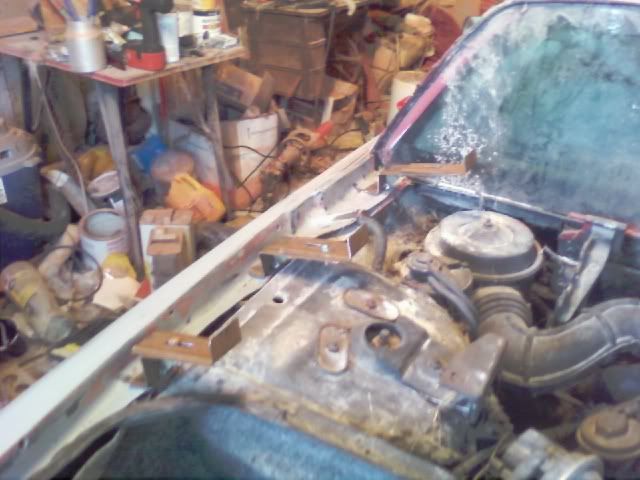
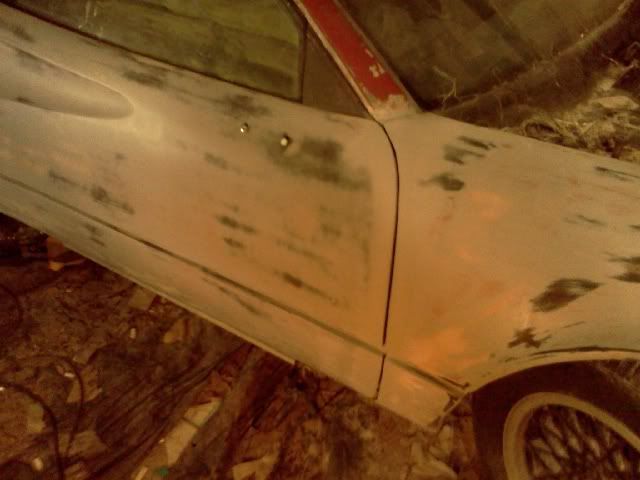
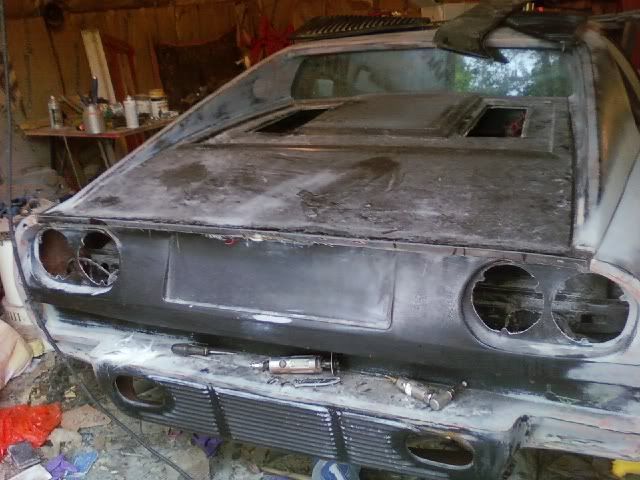
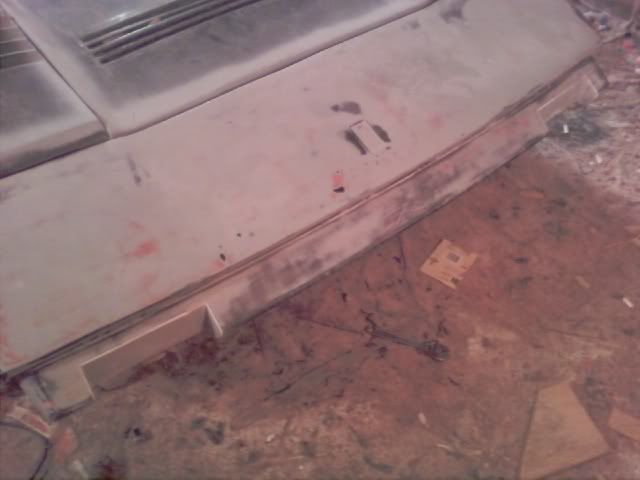
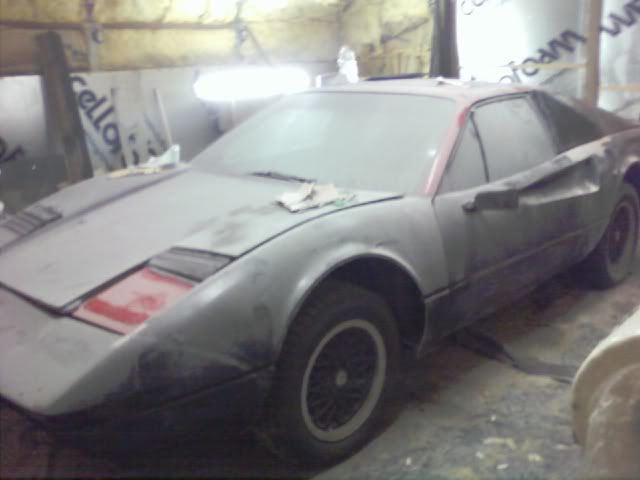
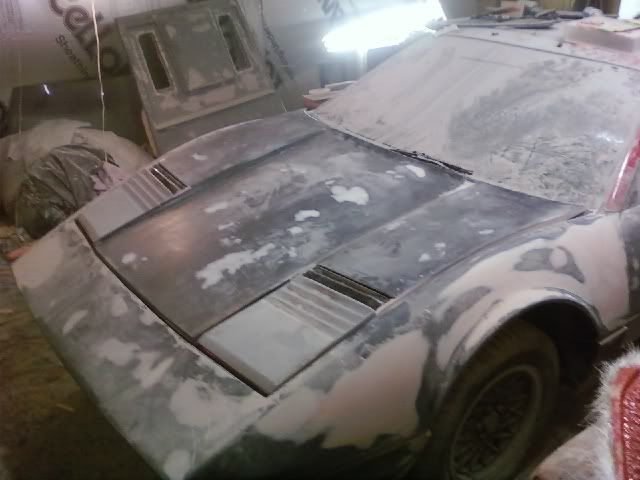
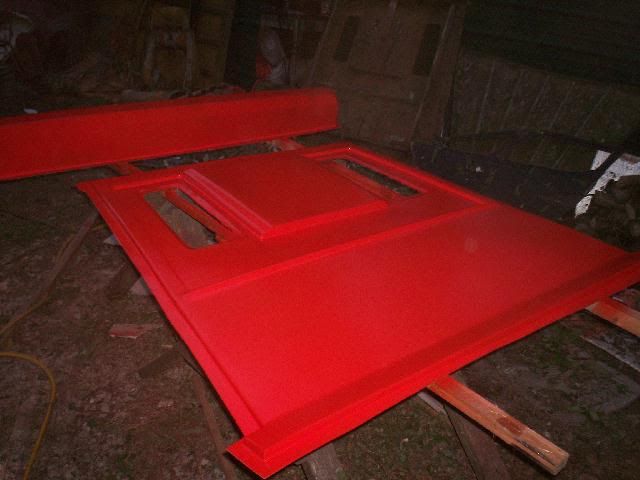
Here is a pic of the car once all the body panels were initially fitted.
As you can see from the pic the car didn't look too awful from a distance...of about 25 feet
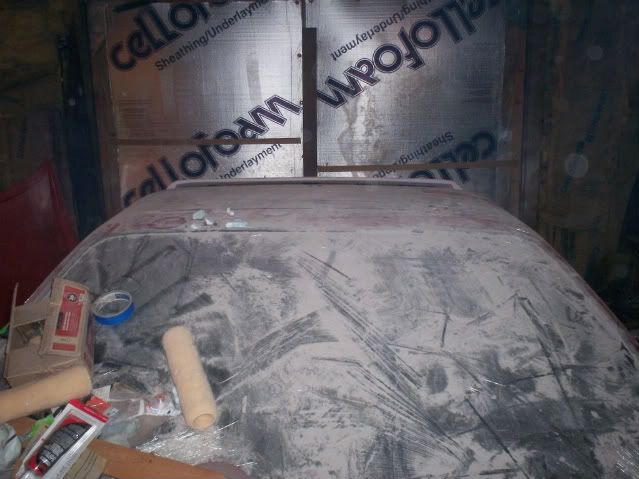
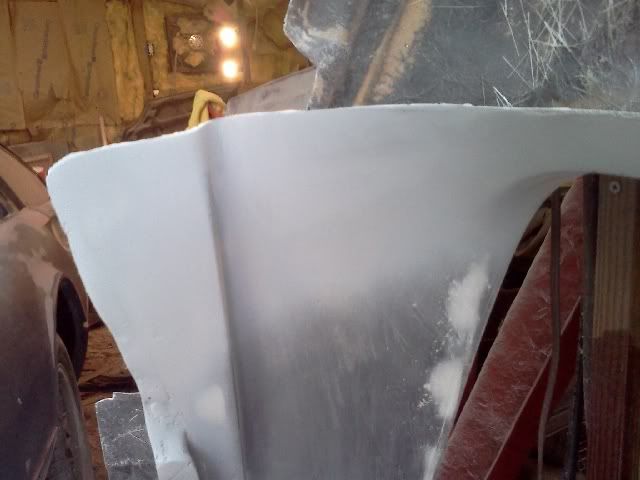
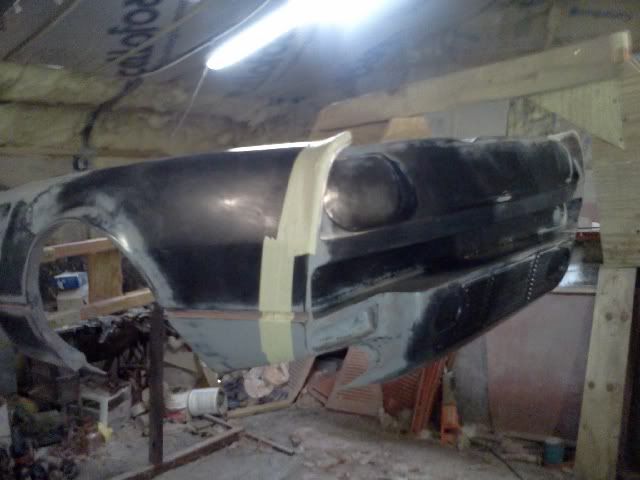
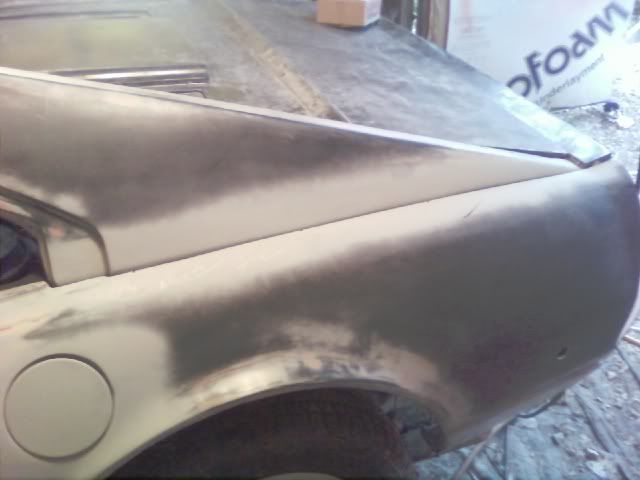
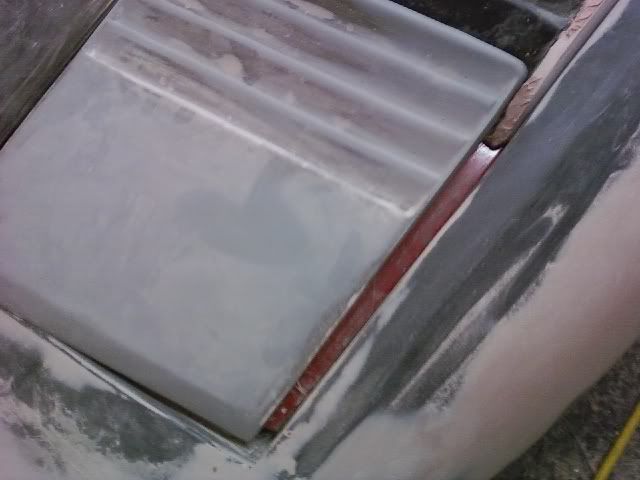
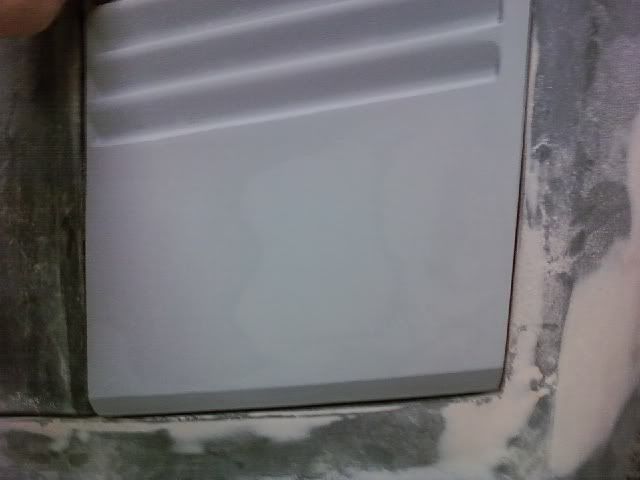
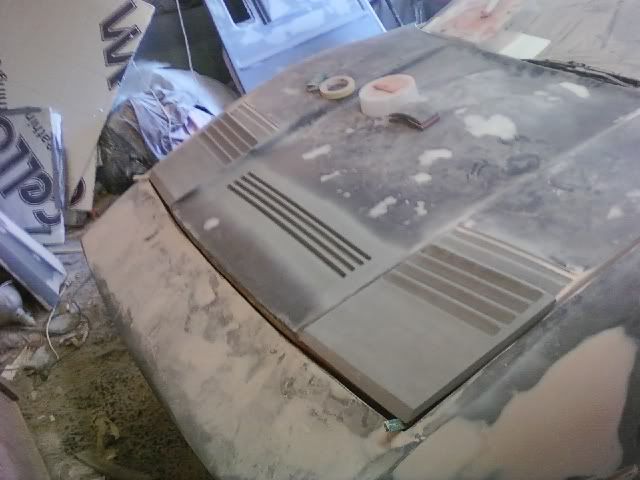
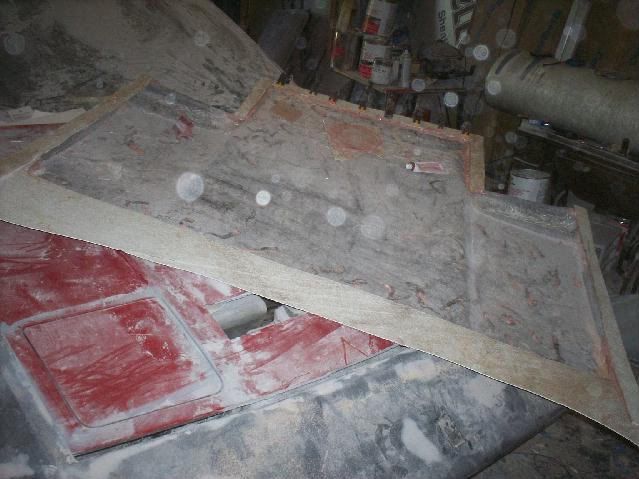
Once I got it into my shop I started on some basic body work. The car was full of waves and dips.
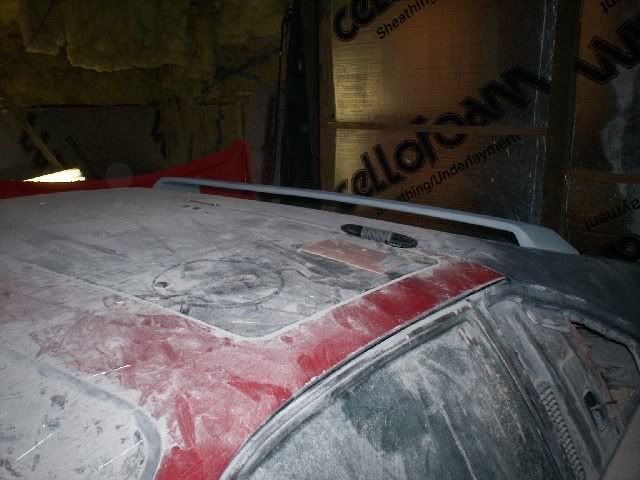
At this point I had already gone through 1 and 1/2 gallons of bondo!
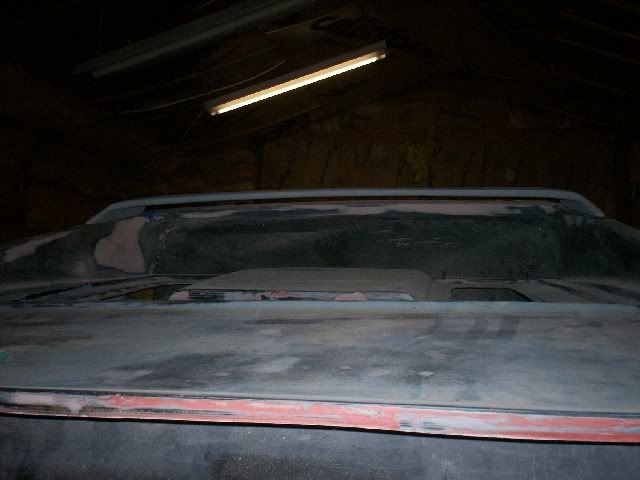
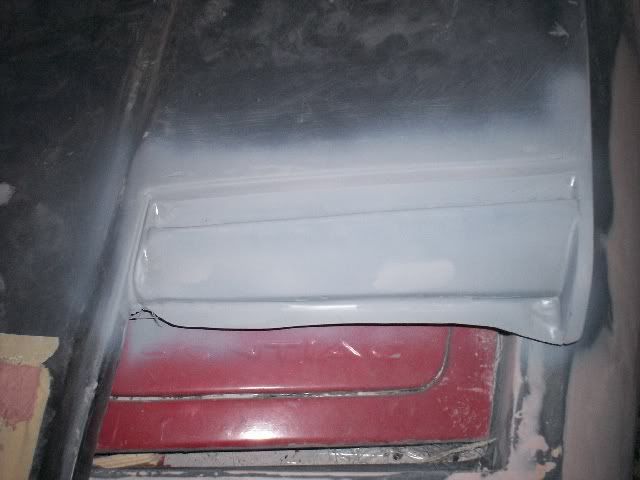
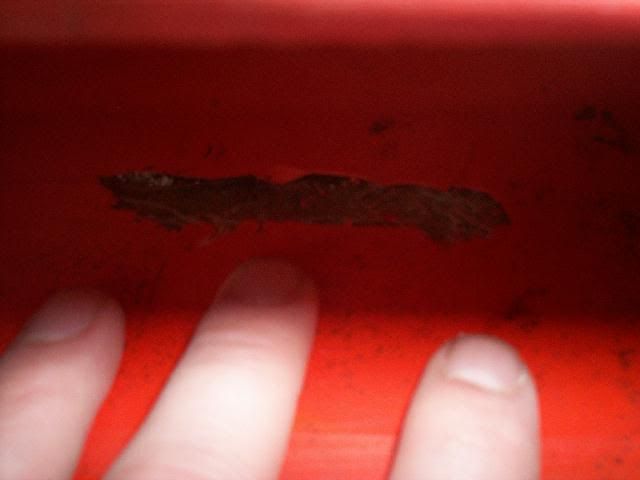
The deck lid looked like the mold was taken off a car that was totaled in a hail storm. How fiberglass got looking that way is beyond me. I had about 2 dozen little dings to fill in.
I didnt like the look of the head light covers being all louvered so I wanted to make them look like a head light cover with louvers behind them to look more like the original car. To do this I ground off the tops of the first 5 or so louvers and placed a fiberglass board on to of them and glued it down from the inside and blended in the seams from the outside.
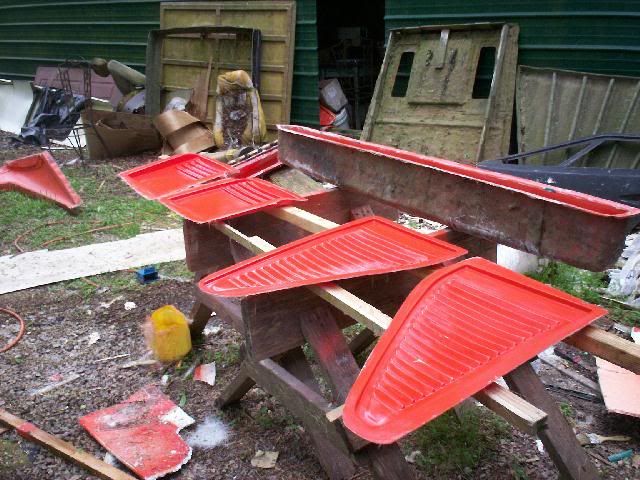
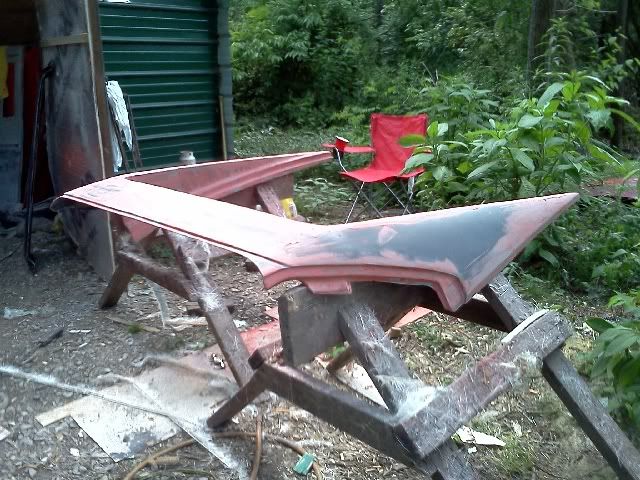
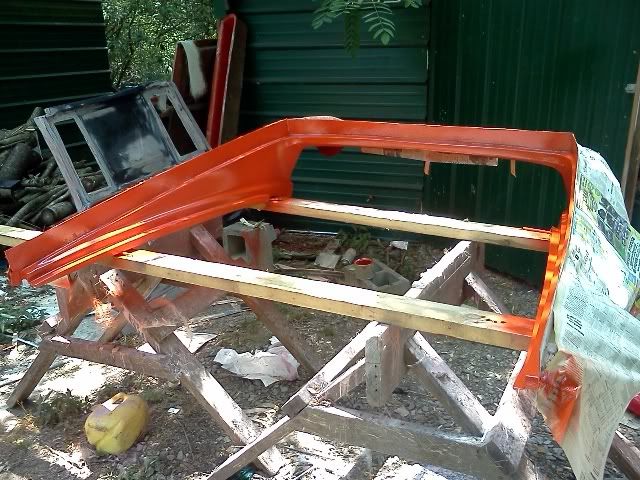
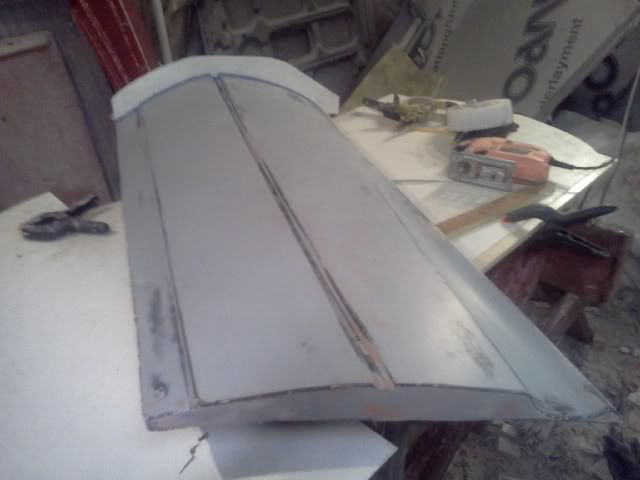
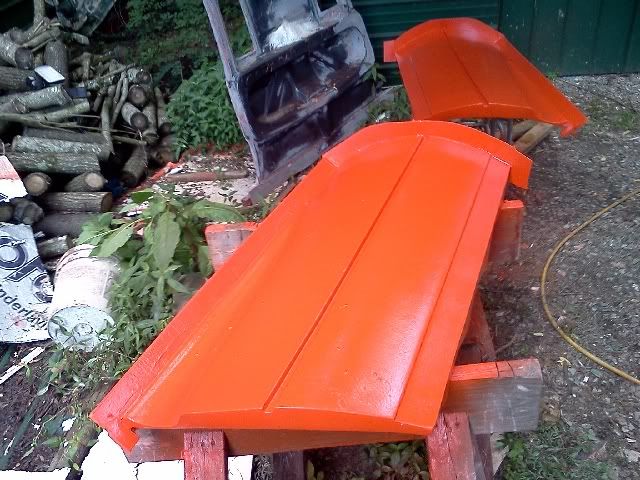
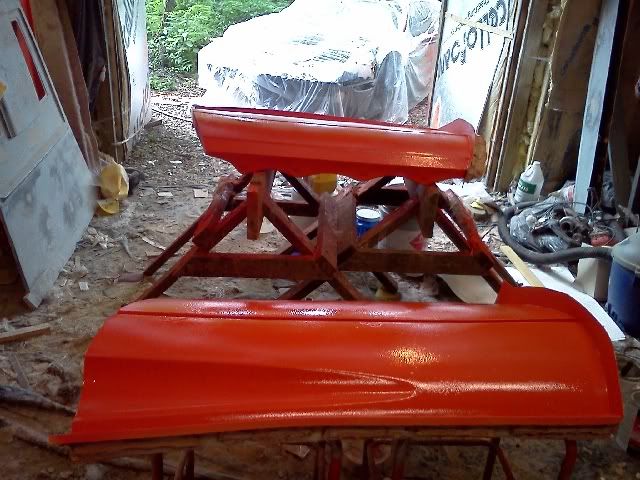
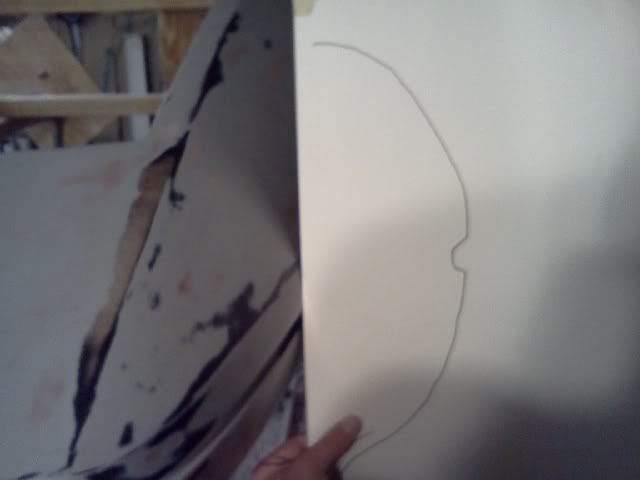
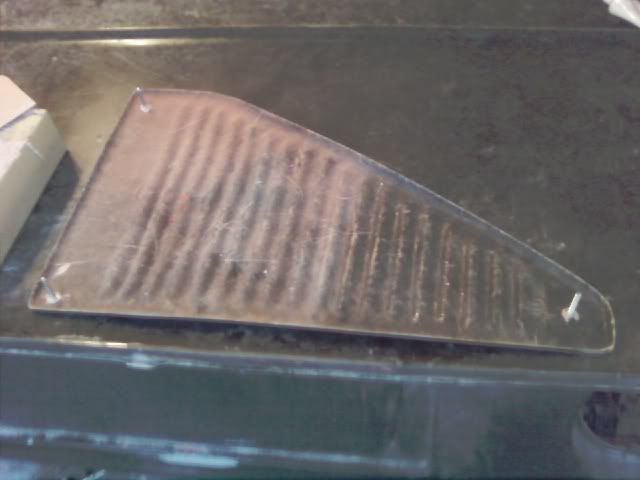
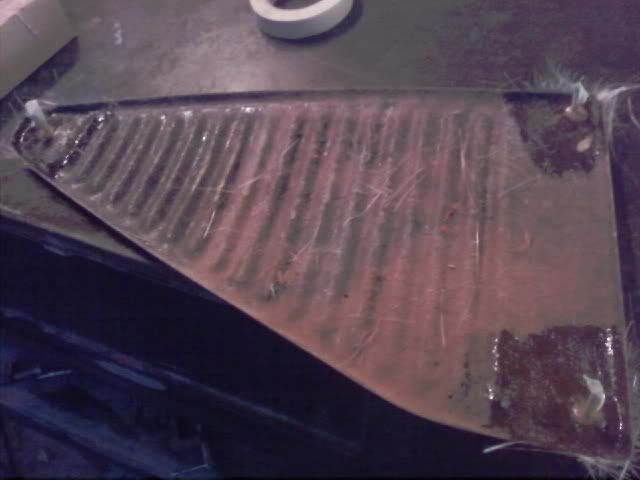
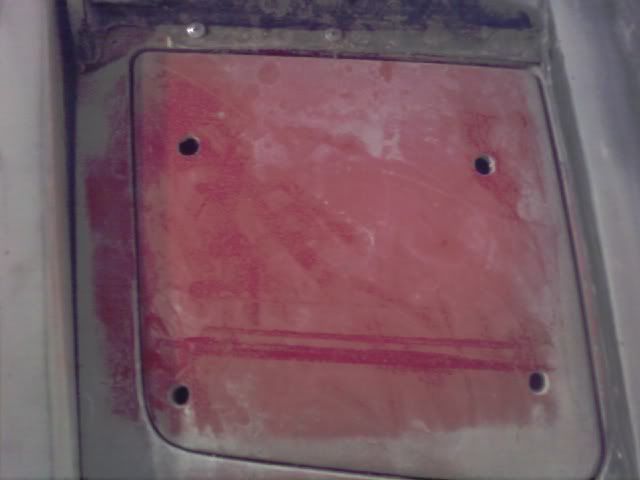
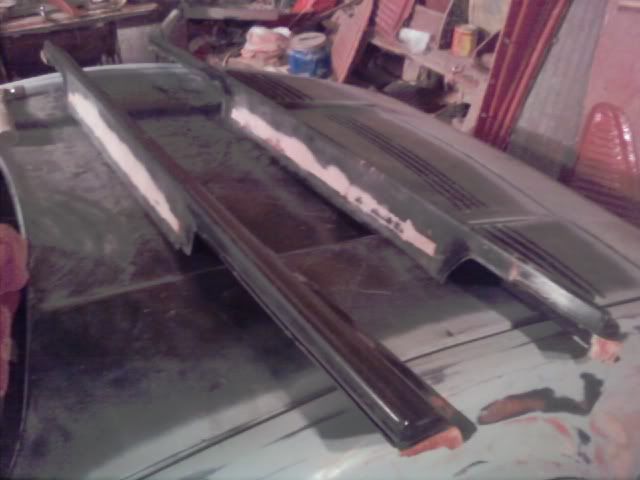
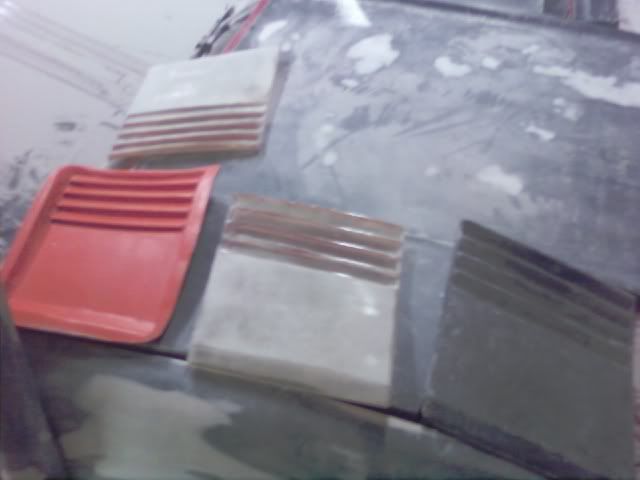
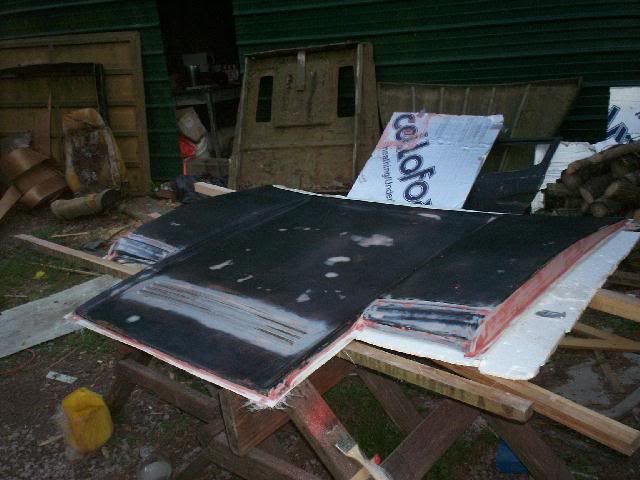
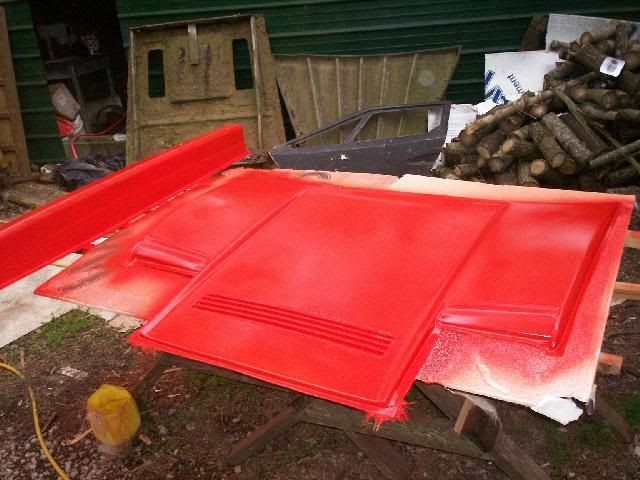
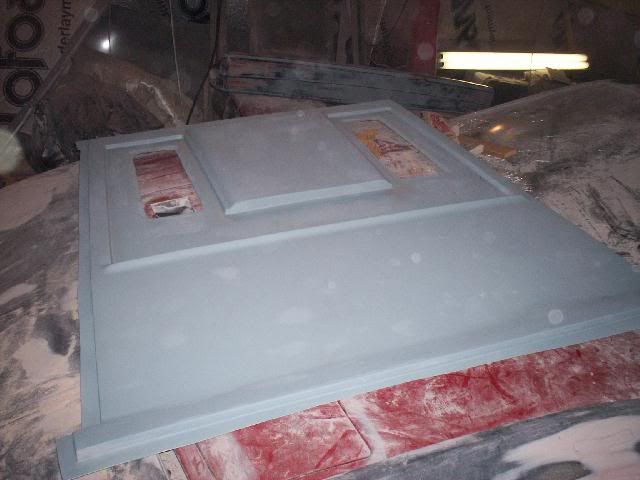
In the next pic you can see the progression of parts for the headlight covers. The black part it the original plug I made. The orange is the mold I made of the part and the one in the middle is the part made from the new mold. Now I had something solid to work with to get the finished piece the way I wanted it.
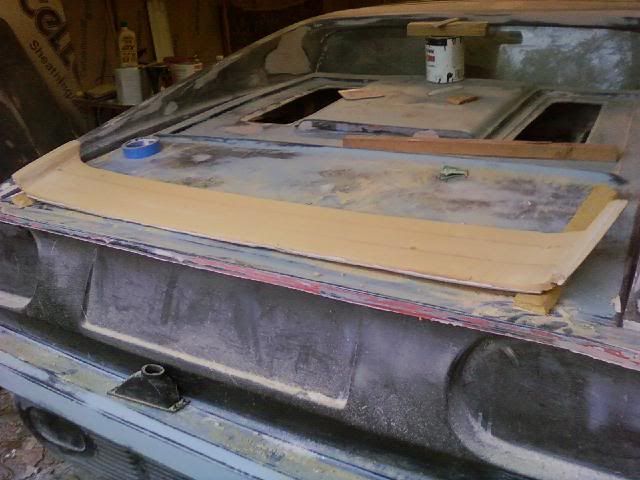
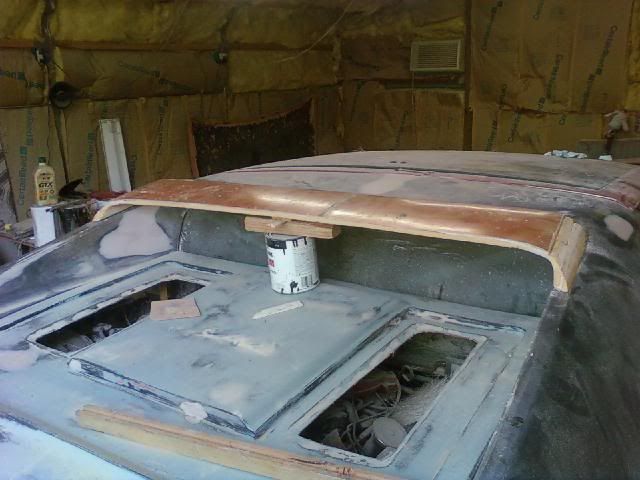
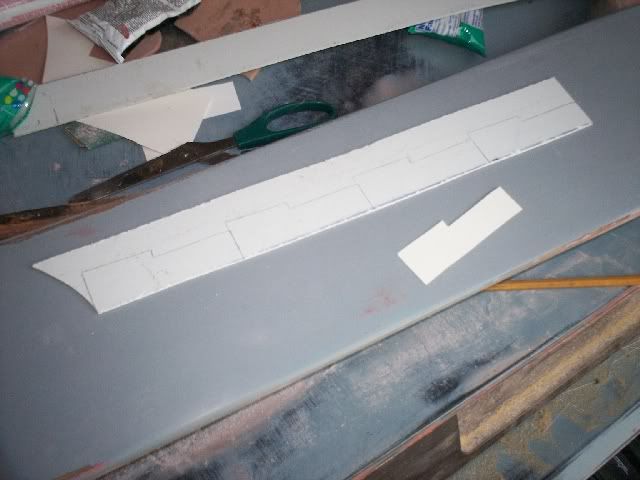
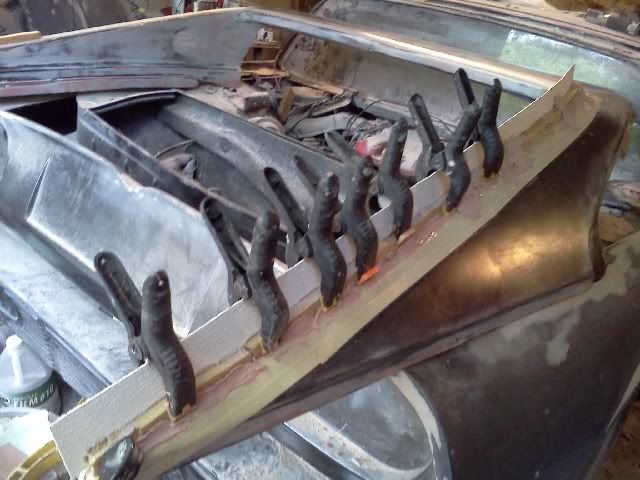
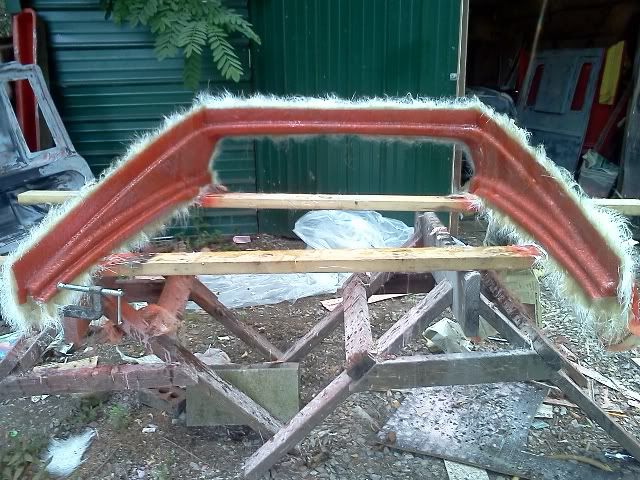
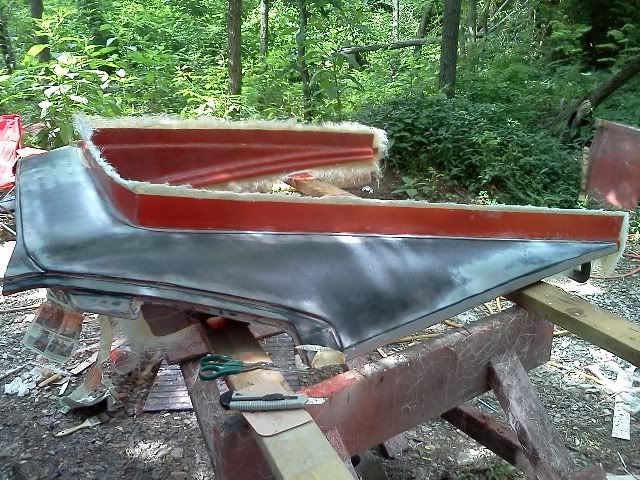
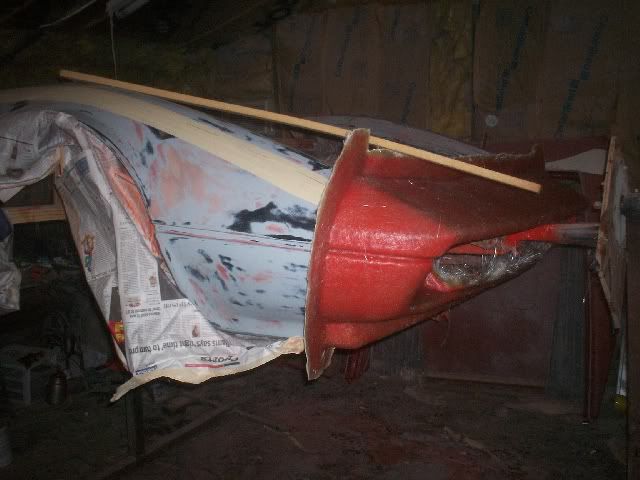
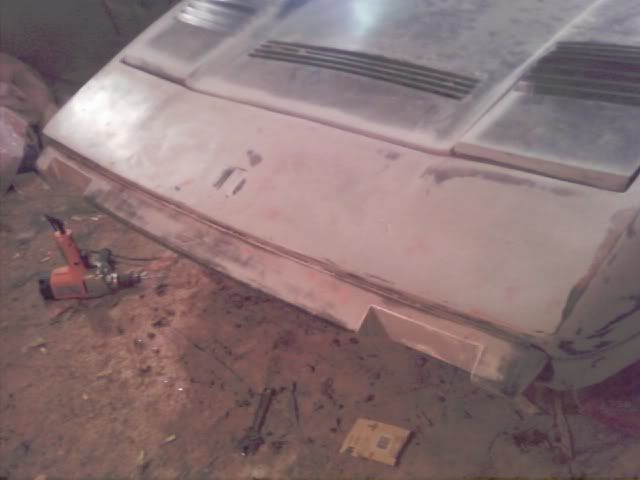
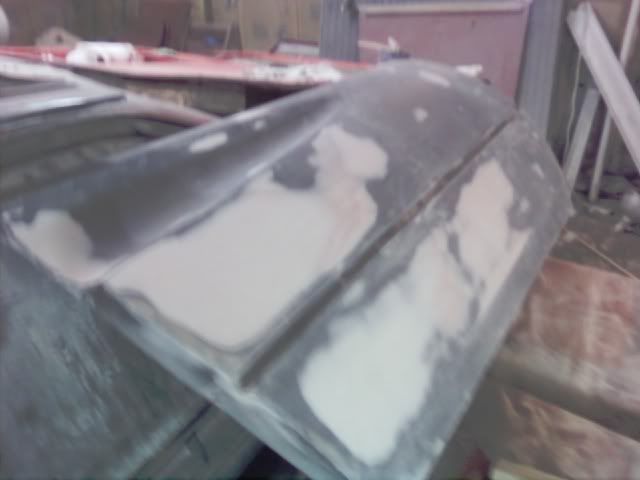
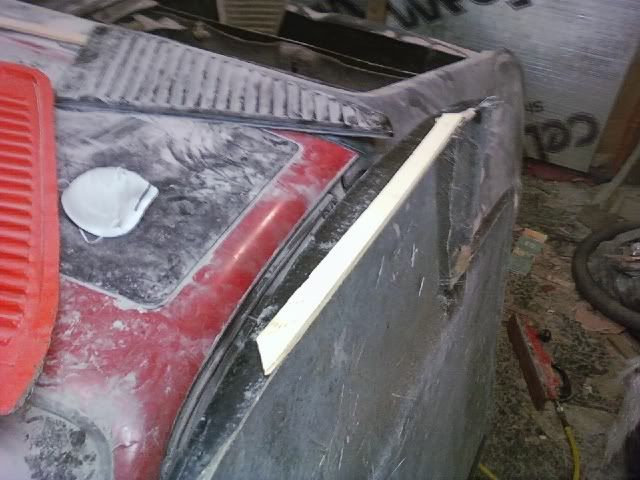
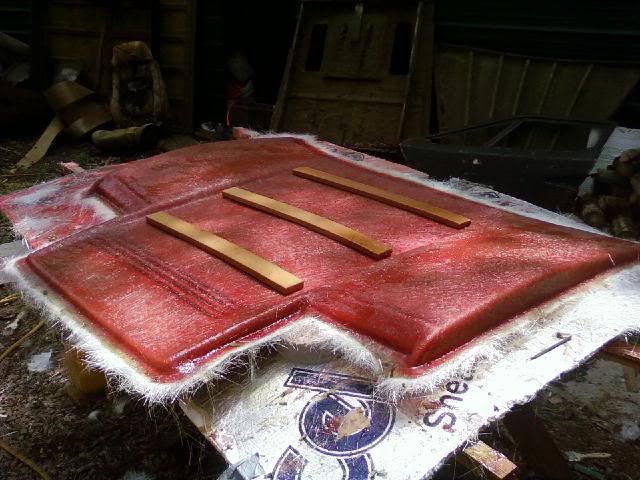
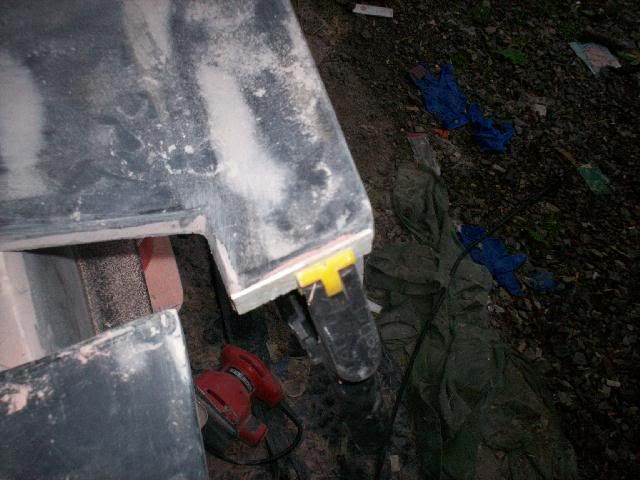
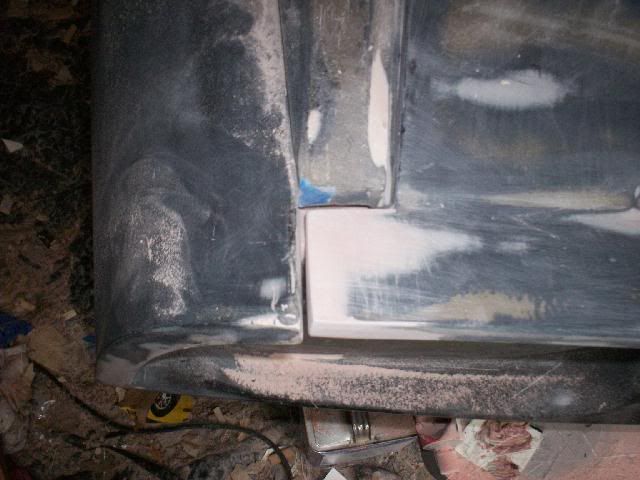
Here is how I fixed the problem with the sides of the hood being warped inward. I cut a piece of wood in a long wedge shape about 3/16" on one edge and tapering to nothing on the other. The strip was about an inch wide. I glued the strip to the side of the hood with the thick edge of the wood at the bottom. This brought the bottom edge of the hood outward to about where I needed it to be so it wasn't bent inward anymore. Once it was glued on I put a ton of bondo in the middle between the top of the hood and the bottom edge. Then I took my bondo spreader and ran it the length of the hood. I did this several times to get the desired effect. You can see in the last pic that the bottom edge of the hood ended up being built up almost 1/2 and inch by the time it was all said and done. I wanted it to flair outward just a hair as apposed to being a square 90 degree angle. I figured this would make it a bit easier to fit the fished hood skin to the Fiero hood later on since it would be easy to get the sides of the hood skin to fit over the sides of the Fiero hood. As with all of the parts I am having to fix/fabricate with huge amounts of bondo the hood will be used as a plug to make a new mold and then use this new, bondo free part on the car.
------------------ Mera Style 308 Pats Available
[This message has been edited by EVM_Rob (edited 09-22-2011).]
Thanks! I dont think it would be an understatement to say it was un-buildable. Considering all the parts I had to fix then take molds off of and reproduce the parts. The originals would have had waaaay too much bondo in them to be of any use.
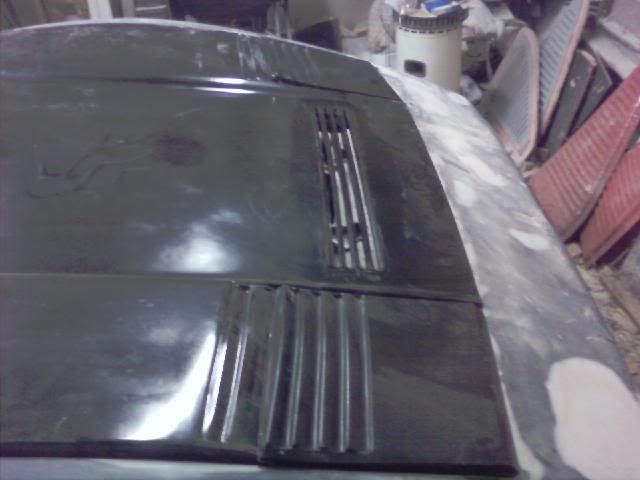
Next on the agenda was to attach the last rear louver piece to the hood (as it should have been to begin with in my opinion). This was pretty strait forward. I just lined them up and glued them in then. I had to do a bit of trimming to get them to fit halfway decent. Once they were in it was just a matter of some creative bondo work. I made some false seams around them where they meet the hood so it will appear like they are separate pieces though they will actually be part of the hood.
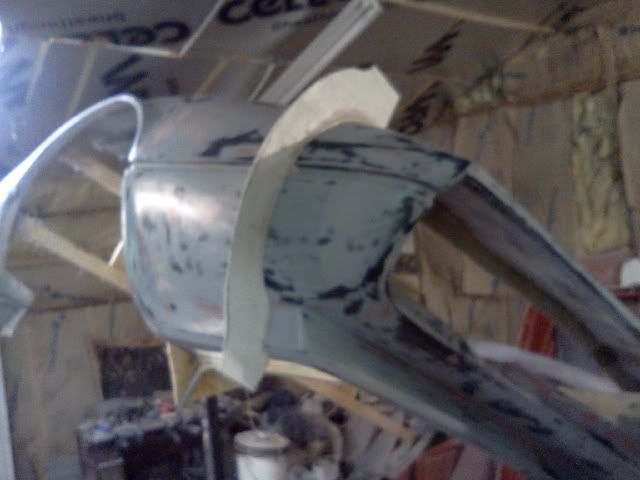
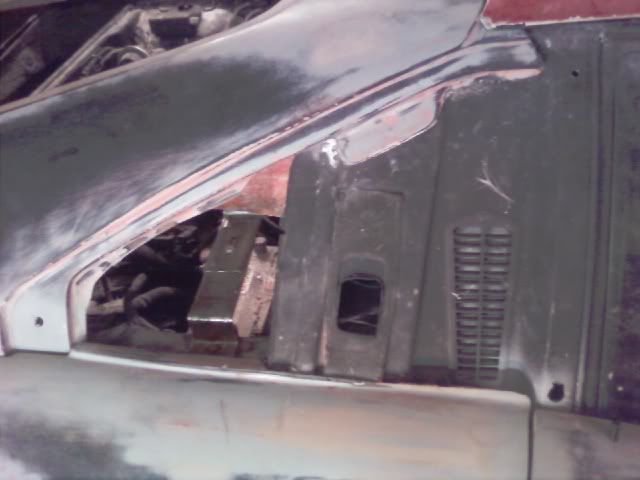
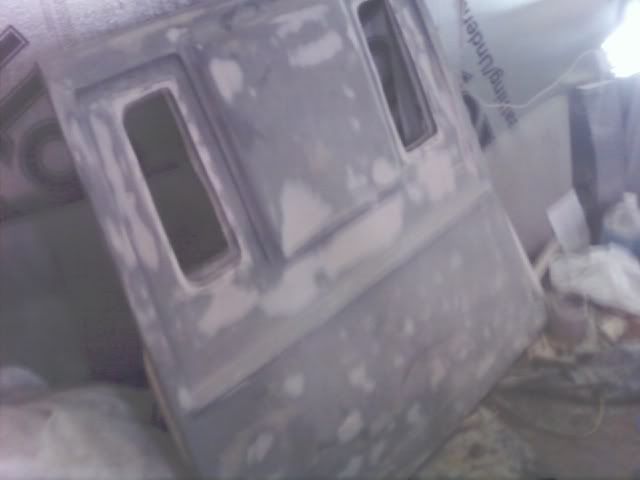
The trail fitting was pretty bad. The head light covers didn't fit right and the rear louver piece was a mess.
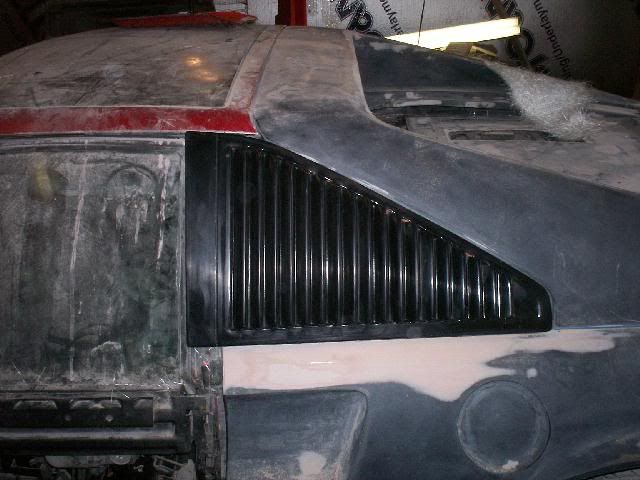
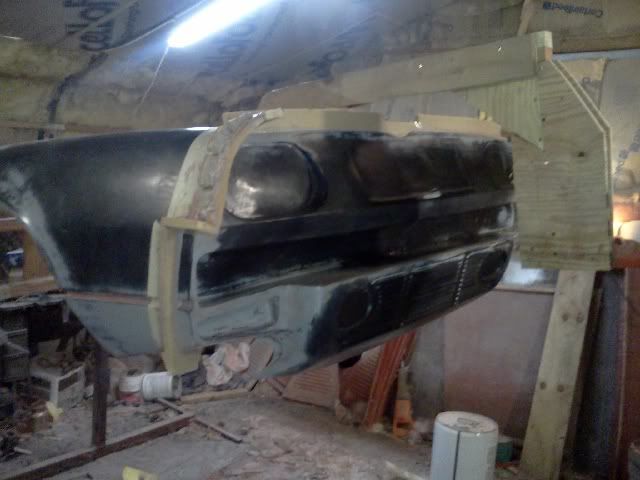
My next major task was to get the head light covers to fit properly. As you can see from the following pic they were about 3/8" too narrow and the front did not line up correctly with the front of the car. The angles were different.
I started building up the sides and the front with bondo (an obscene amount of bondo) and sanding to get the right width and the correct angle on the front.
After a ton of bondo and sanding I finally got them fitting nicely.
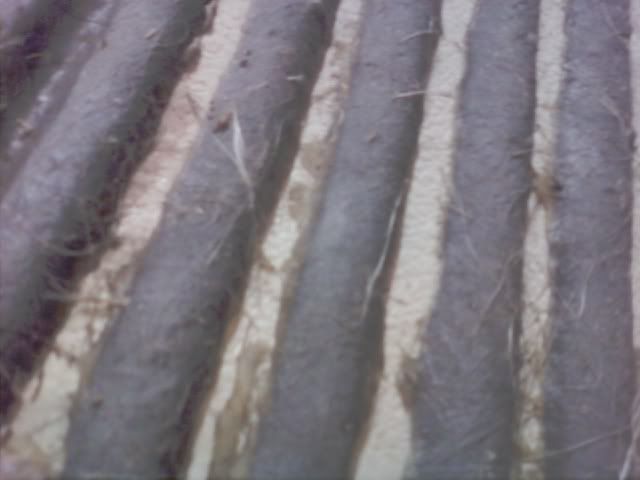
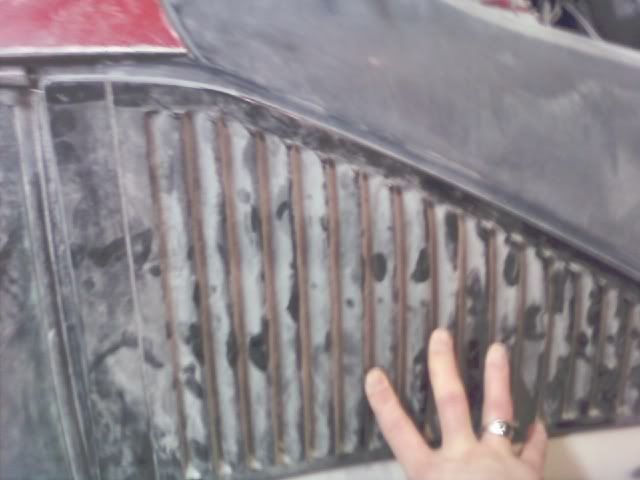
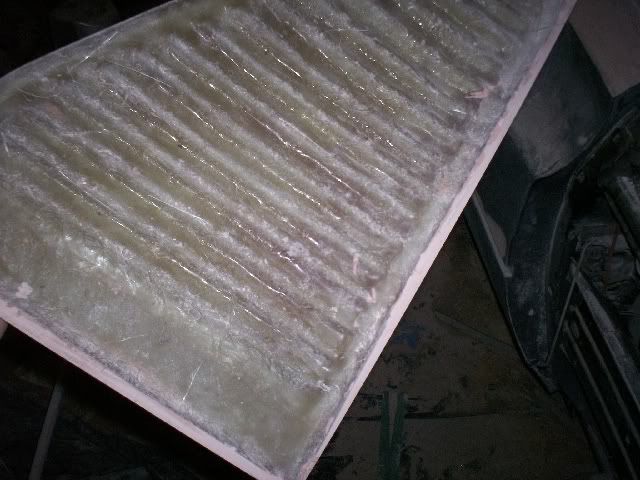
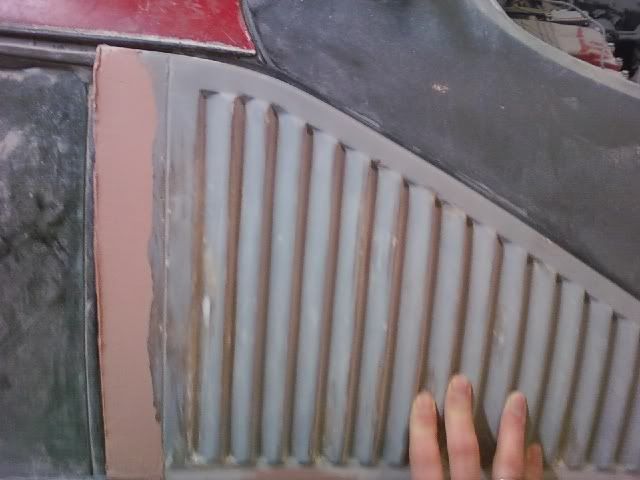
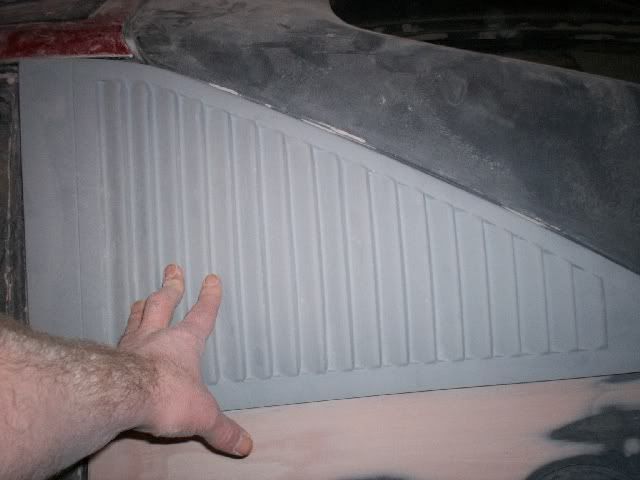
Like most every other part on this car the side window louvers didn’t fit right. They were about 1/2” too short in length and height. They also had a slight curve on the bottom edges. Bondo to the rescue again! I built them up on the front and the bottom and after several applications and sanding I got them fitting up pretty well
HERE IS WHERE I WAS WITH THE CAR AS OF MARCH OF THIS YEAR:
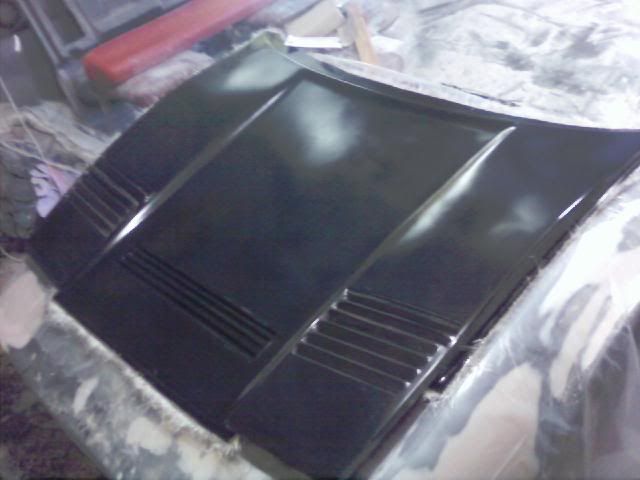
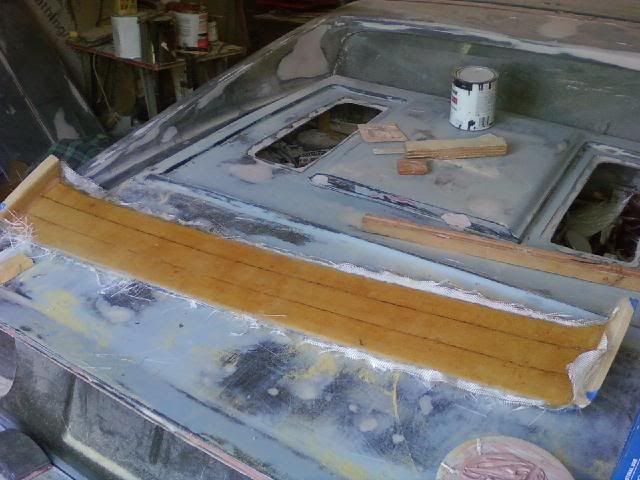
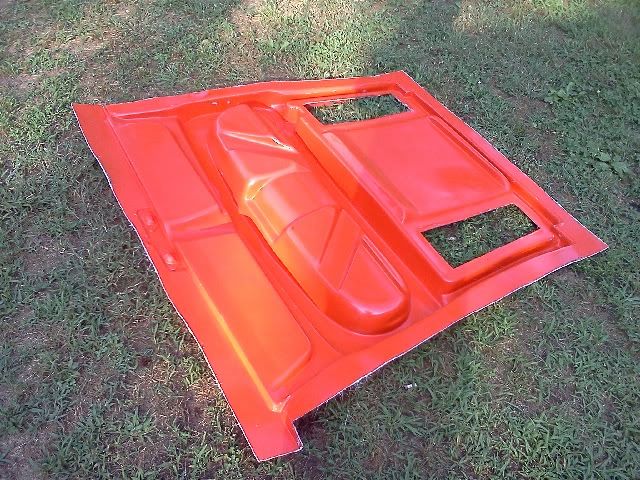
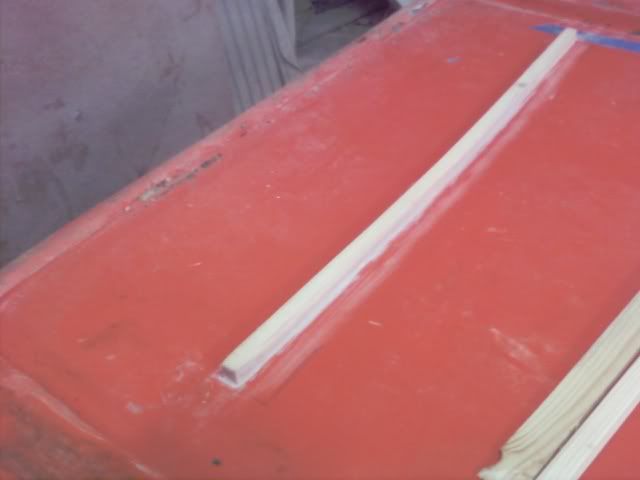
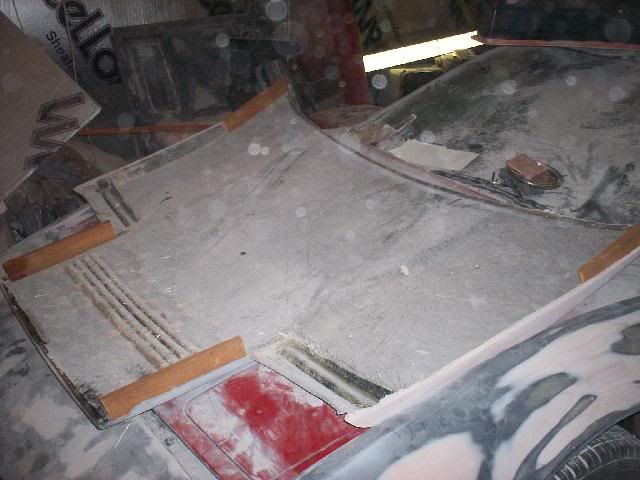
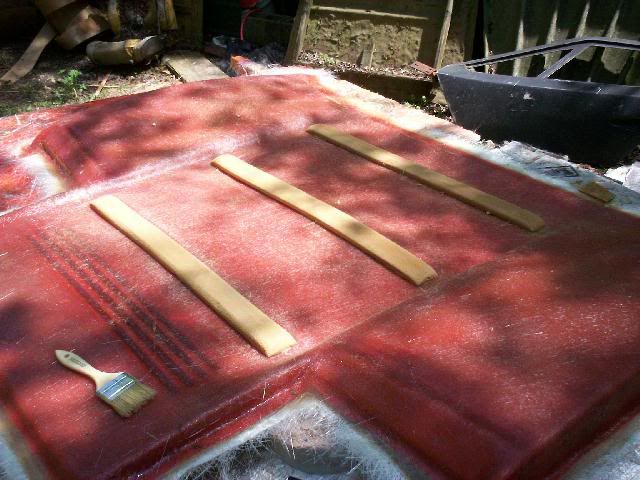
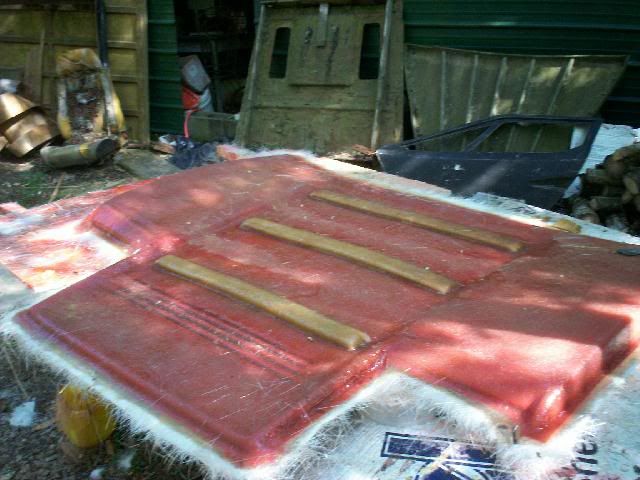
Next up was finishing the hood. The hood on the car was the plain hood with no vent in the middle between the lights. This was fine by me because I generally don't like the look of the hood vent on most 308 kits. To me most of them look like a cross between the 308QV hood vent and that of a 328. They seemed a little too narrow and a little too long front to back. I decided to make my own vent and build it into the hood just like the other 308 replicas but make it a bit more accurate to the original.
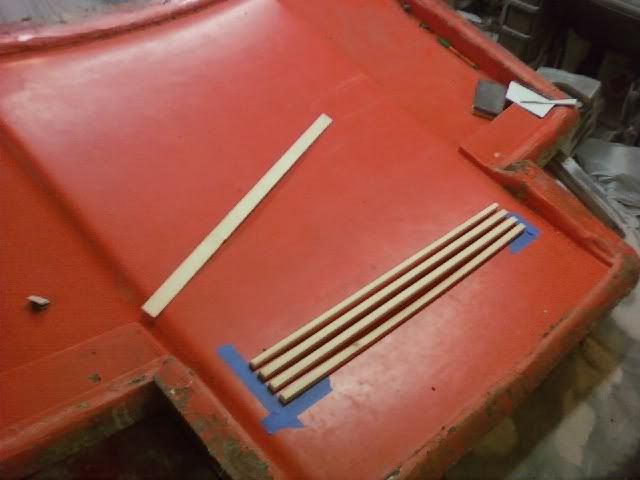
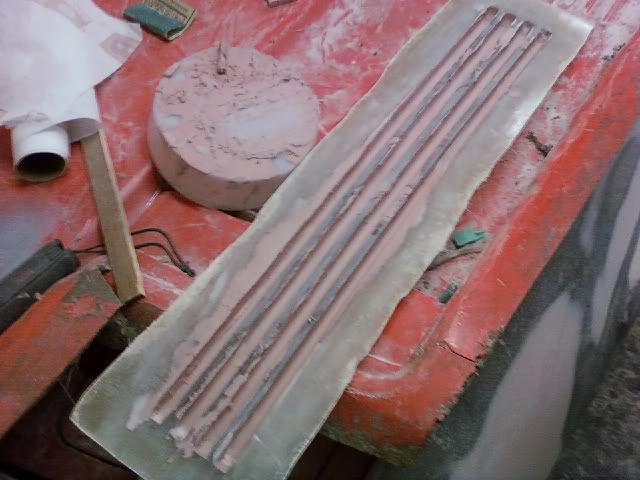
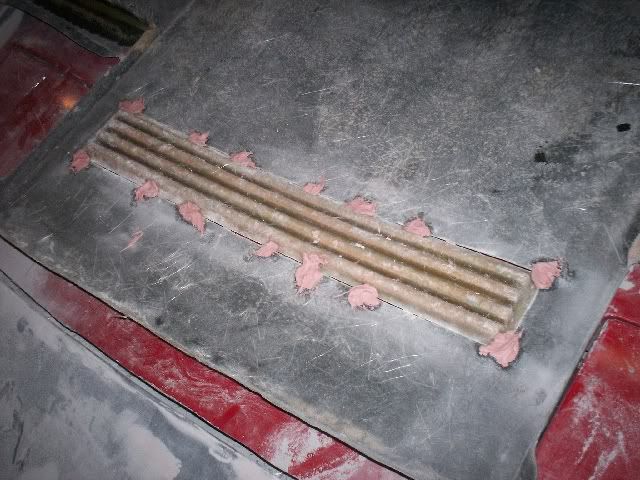
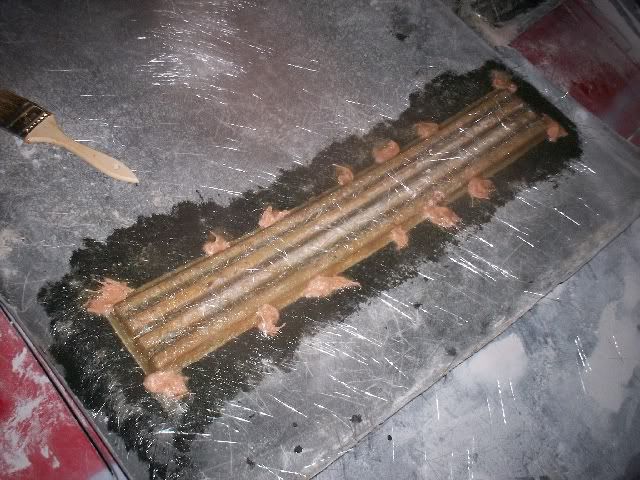
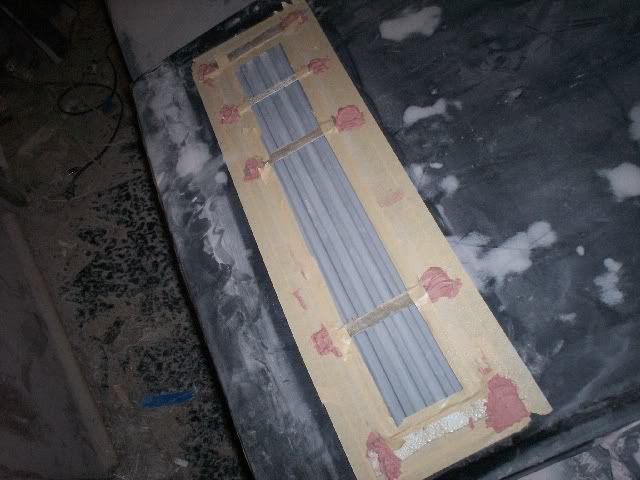
I cut 4 wooden strips approximately 3/8" x 3/8" then cut about a 70 degree angle on one side of each of them. Then I drug out the hood mold and began gluing the strips into place using 2 part expoxy and another wooden strip as a spacer in between the strips that would make the vent.
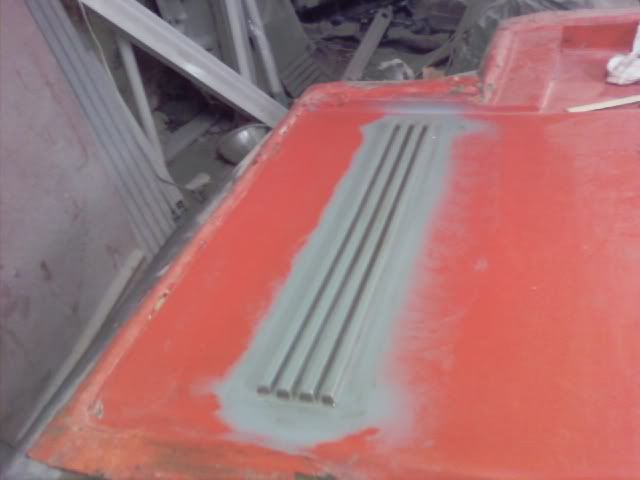
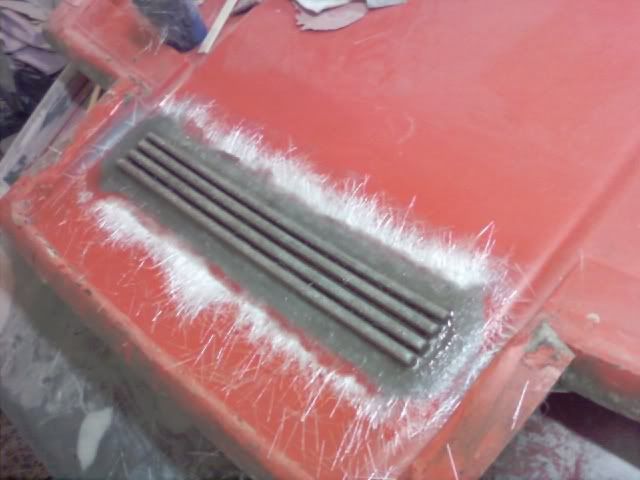
Once they were all glued into place I sanded everything smooth, primed, sanded again then sprayed the entire area with partal film. After that I laid up a couple layers of 1oz mat over the area.
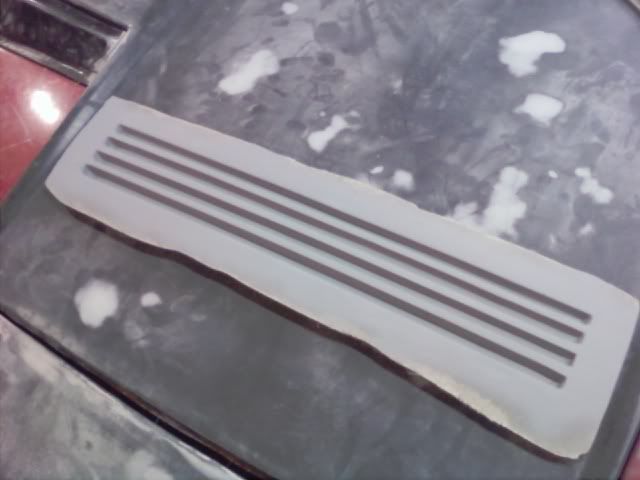
After drying over night I pulled the part off to see that it came out kinda rough but nothing the old faithful bondo couldn't take care of. After getting everything pretty smooth I primed, spot puttied and re-primed the part.
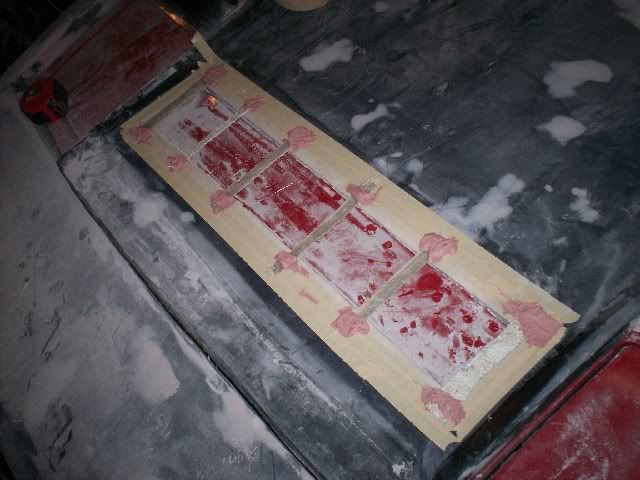
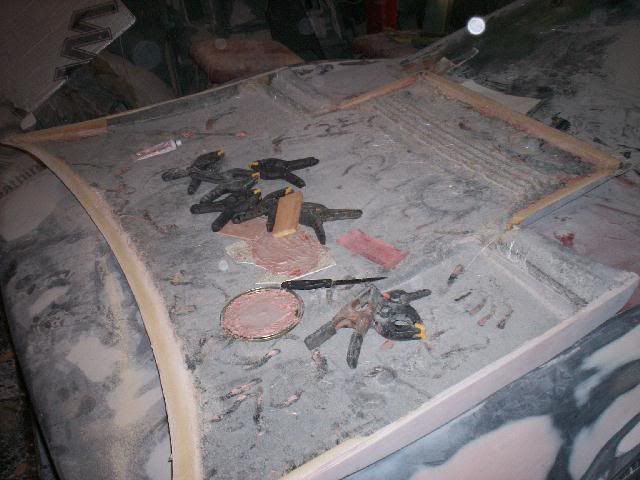
I trimmed the new part to get a uniform 1/4" flange all the way around it then marked the area on the hood and cut out the hole. I masked off the area around the hole and then using bondo attached some strips across the hole. This would keep the new grill peice flush with the hood surface while I glued it in from the back.
Once it was secured in place with the bondo I put a layer of fiberglass over the back to hold it in place permanently. After it had set up I was able to remove the masking tape and the strips I used to hold it flush to the hood.
Then I put a layer of bondo around the edges and sanded it smooth to remove any trace of the seam.
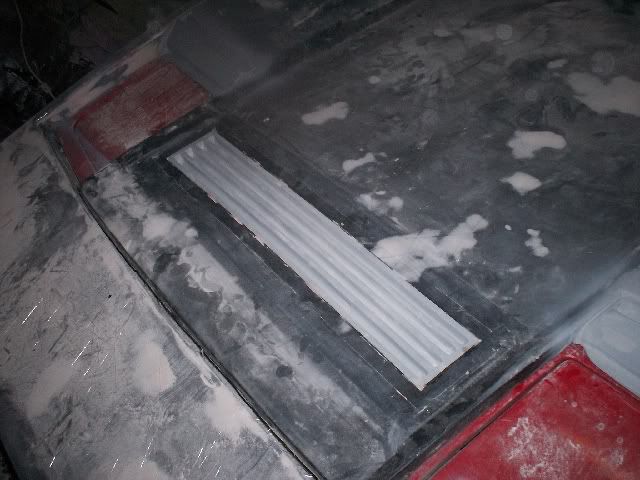
Installation complete
I cut a hole in the hood under the grill so the hood skin could sit flat on top of the Fiero hood again. I will also be making the hood grill functional by grinding the back sides of the grill pieces off and putting some steal mesh grill material behind it. The hole has to be cut in the hood regardless of making the grill functional or not though.
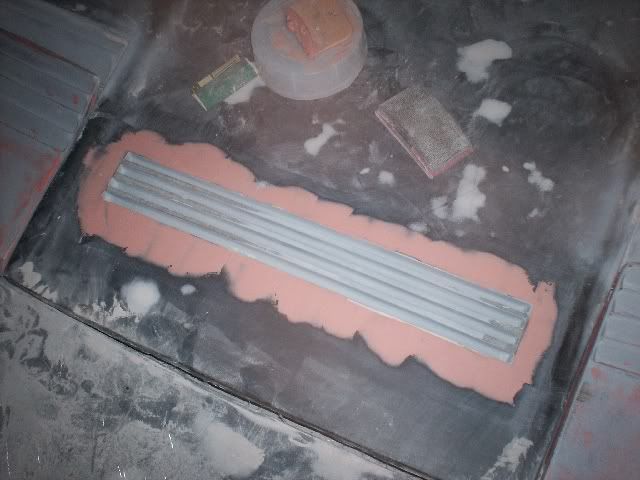
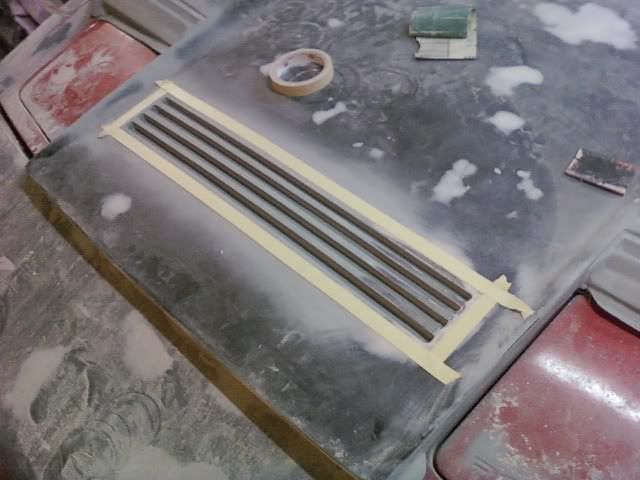
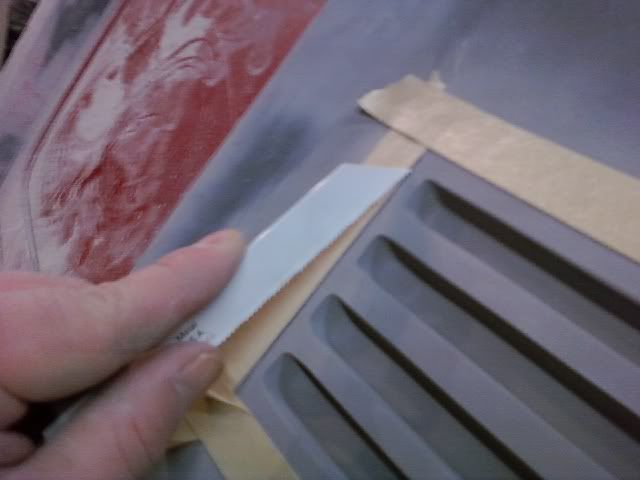
Next I decided to give the grill a more finished look. I measured I line all the way around the grill about 3/16" away from the grill and masked the line with about 3 layers of tape. I needed the tape to be thick to act as I guide for the next part of the procedure. Once the tape was in place I took a saws-all blade with a metal cutting edge on it and began scratching a line all the way around the grill using the tape as a guide. I then deepened the groove by making several passes over it letting the blade cut into the fiberglass a little deeper with each pass. I ended up with a "seam" line about 1/16" deep around the part. This gives the illusion that the grill is an installed separate piece and not part of the hood. The illusion would further be reinforced by painting the grill black. This small groove will transfer into my new mold so every hood made from the mold will already have this detail built in. I have to make a new hood anyway as this one has about 1 pound of bondo in it now.
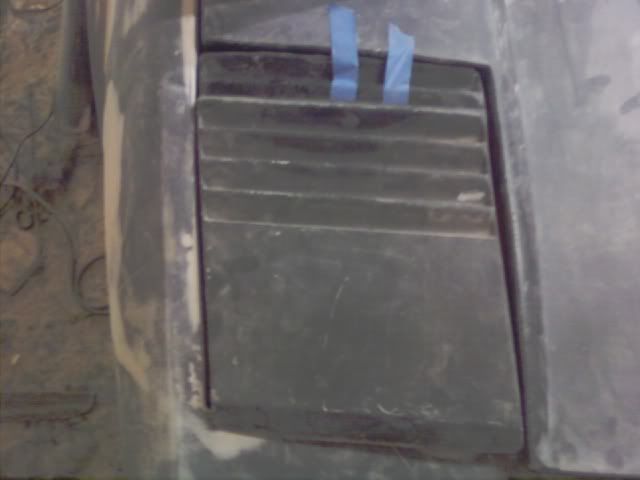
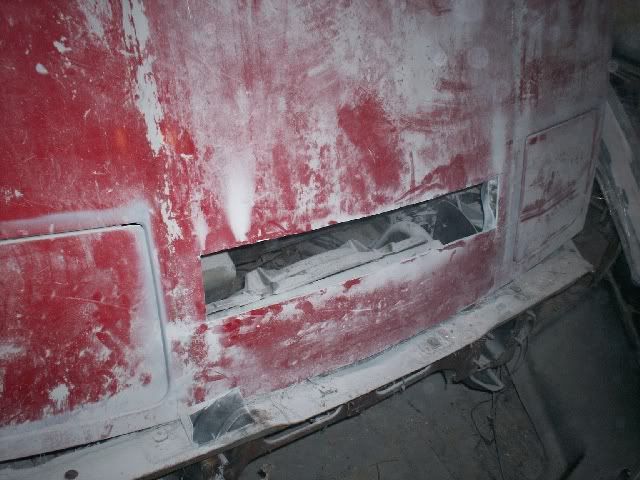
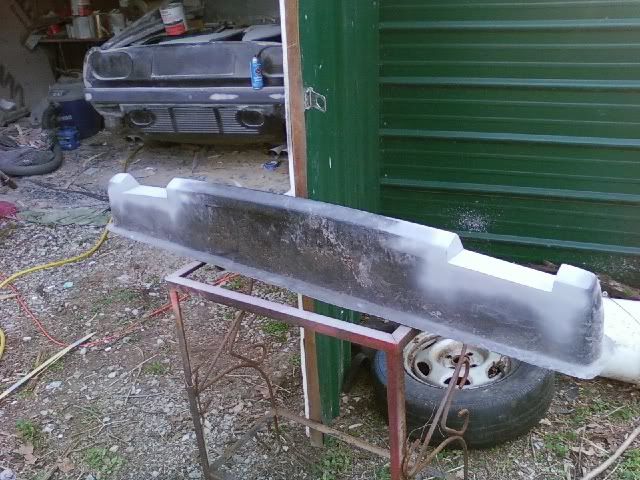
Next up was the front bumper. The car had the Mera style front bumper without recesses for the turn signals. I wanted to use 308 turn-lights so I needed to make the recesses for them. I took measurements off the 308 lenses then marked the area I was going to cut with masking tape then cut them out.
Once that was done I made some mock up pieces out of poster board then traced the mock ups onto fiberglass board and cut them out. I held the pieces in place with tape from the outside and fiberglassed them from the inside. I left the pieces a little big so that once they were permanently installed I could just sand away the excess and end up with a perfectly flush fit.
Since I left some excess sticking out then sanded it away I only ended up using about a tea spoon full of bondo to achieve a nice finish (one of the few times I can say that with this car). I left the flange on the bumper when I pulled it from the mold so now all that was left to do was some bondo work on the rough areas of the bumper (which there was no shortage of) and it would be ready to take molds off of. It saved me the step of having to add a flange back onto the bumper before taking a mold.
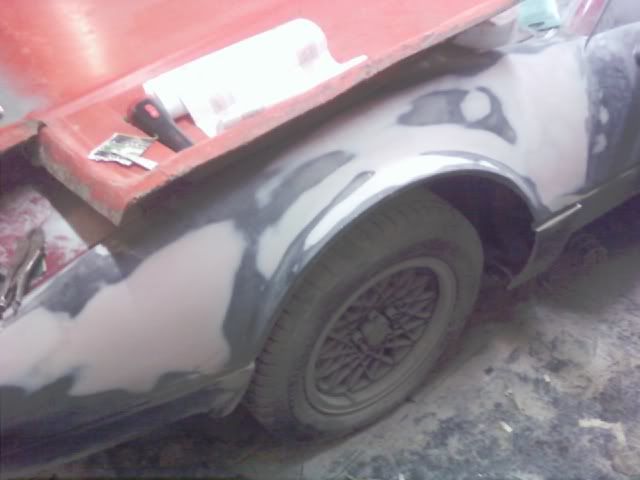
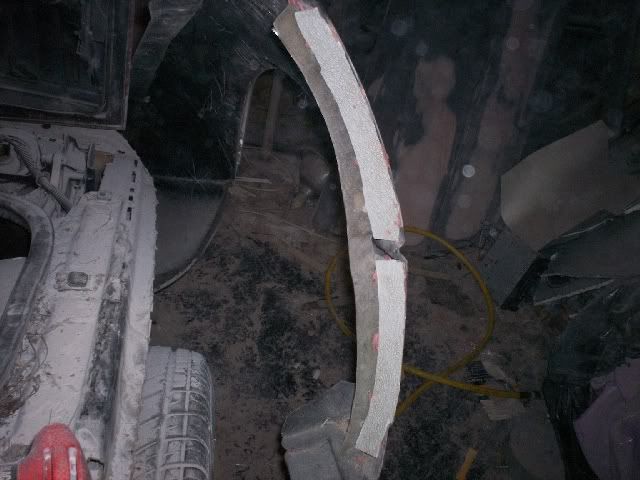
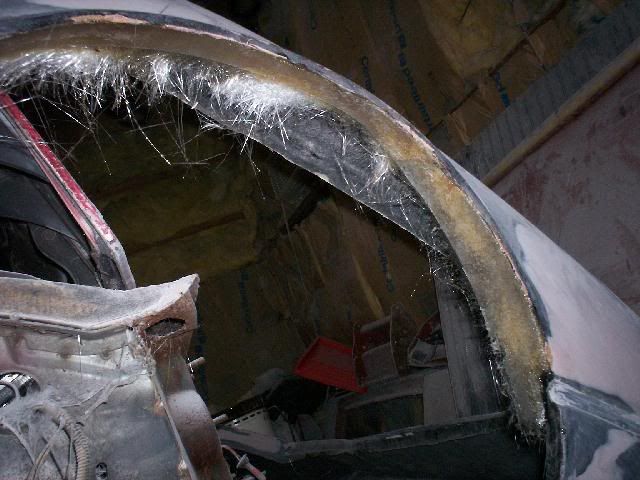
Now for the part I have been dreading from day one.. Fixing the wheel well liners and the rear edges of the fenders where they meet the doors. As I had mentioned before, I had to cut out the wheel well lips and rear edges of the fenders because the front clip was so miss-shaped and warped I needed some flexibility so that I could bend things back into shape. I started with the rear edge of the fenders. I knew this was going to be a pain because there is a very fine line (literally) between having a great door seam at the fender and a door that rubs, or worse yet, wont open at all and a door that opens fine but has a wide ugly seam that just screams "kit car".
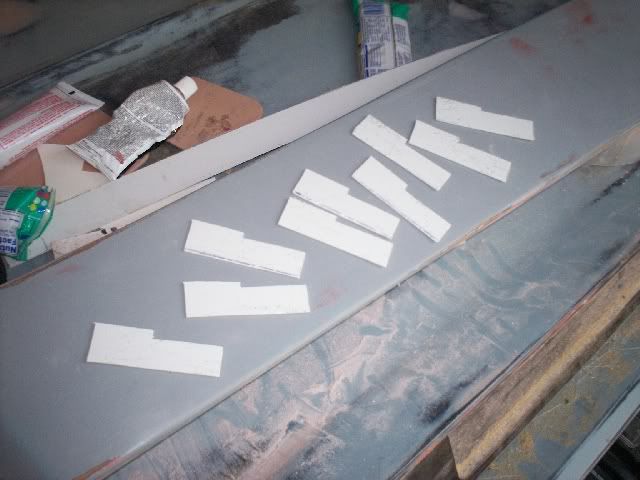
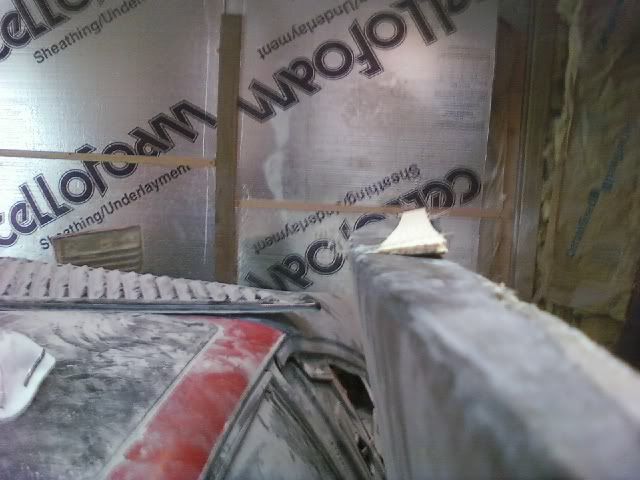
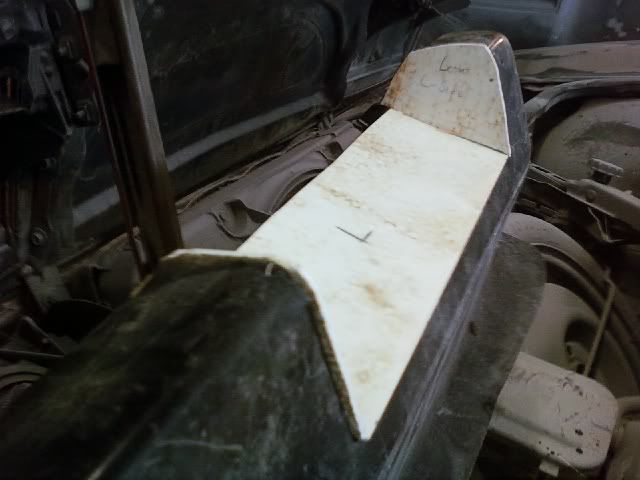
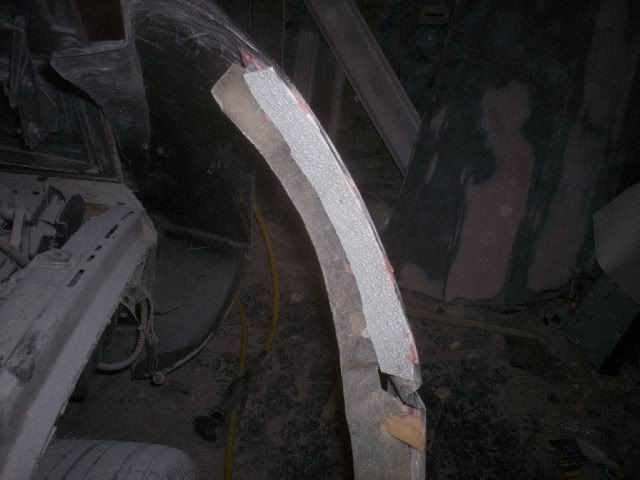
I laid up some fiberglass in the front edge part of the door molds and glued that piece into the inside of the fenders to make sure the rear fender edges matched up with the fronts of the doors. I glued it in a little recessed. Once it was in place I cut little pieces of foam and glued them onto the recessed piece and cut an angle onto them that matched the angle I wanted the fender edge to have. Its kinda hard to explain so lets move on to the pics
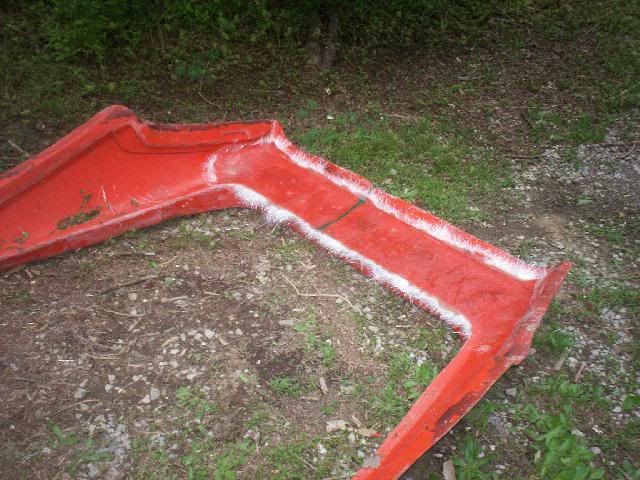
Here is the recessed piece with the foam angles attached
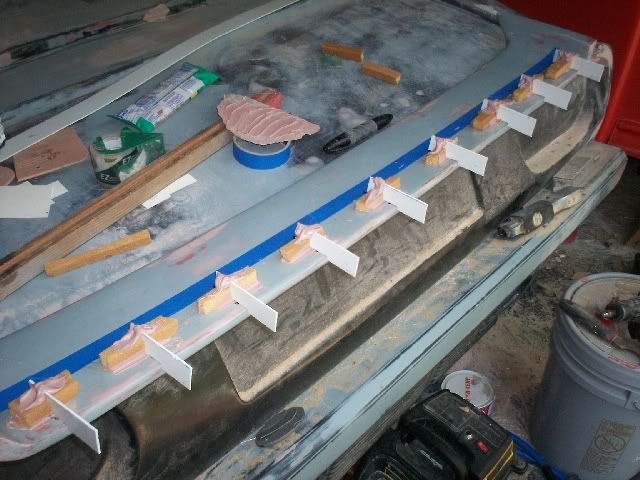
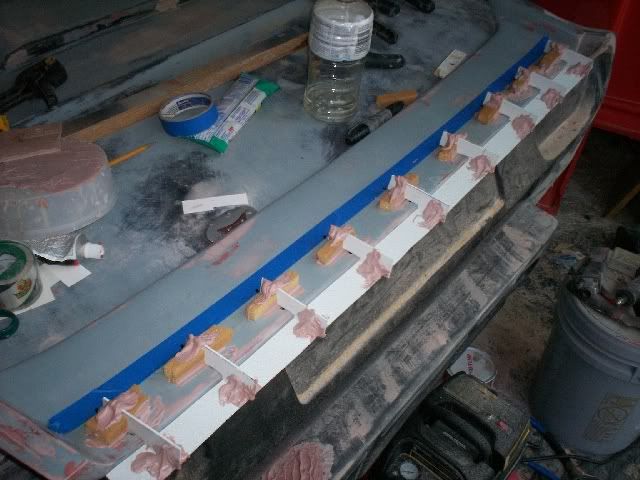
Next I cut strips of fiberglass board and glued them in. The foam pieces set the angle.
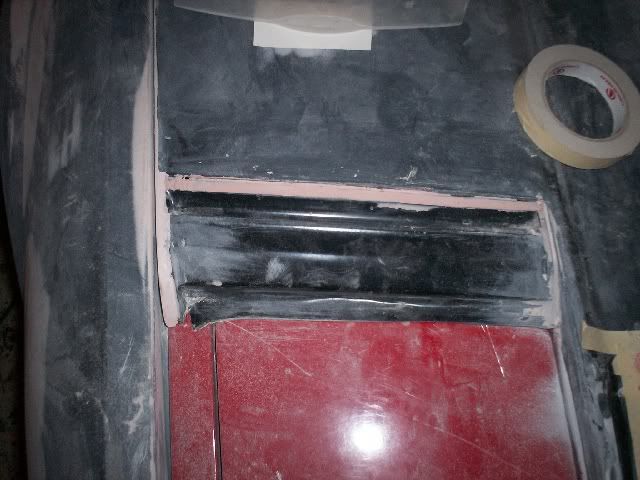
After that I laid one thin layer of fiberglass over the pieces and then followed with bondo and sanding.
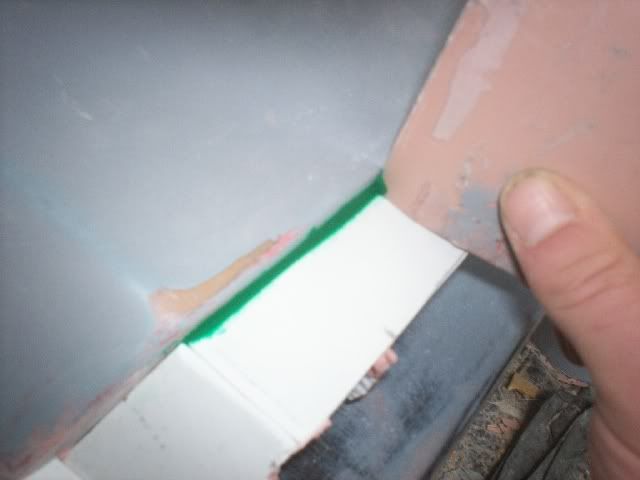
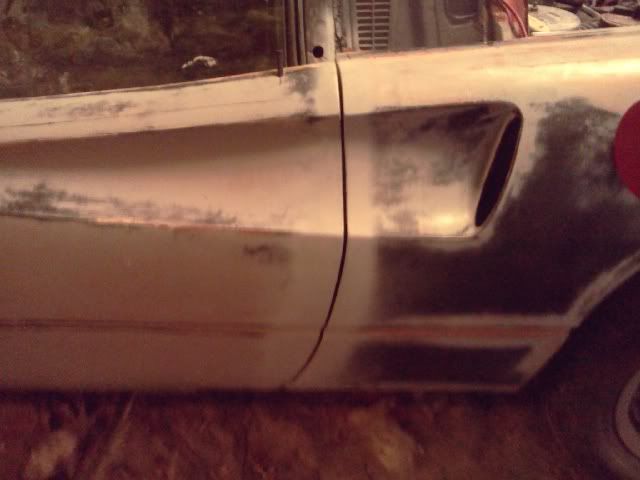
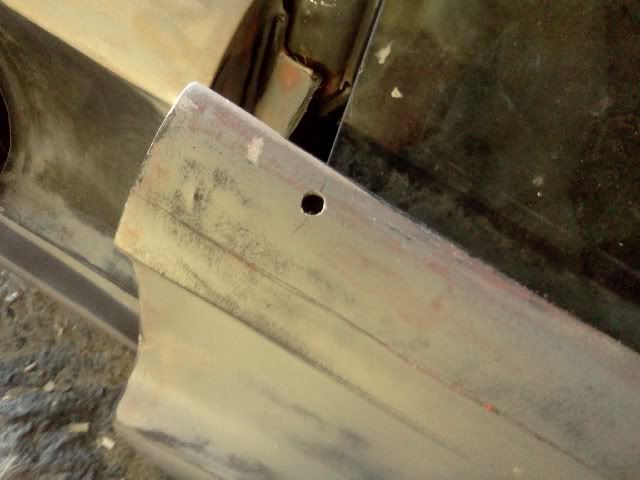
Here is one of the door seams so far.
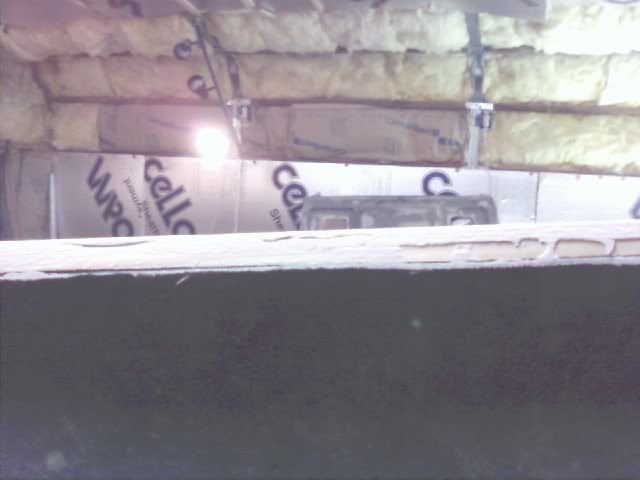
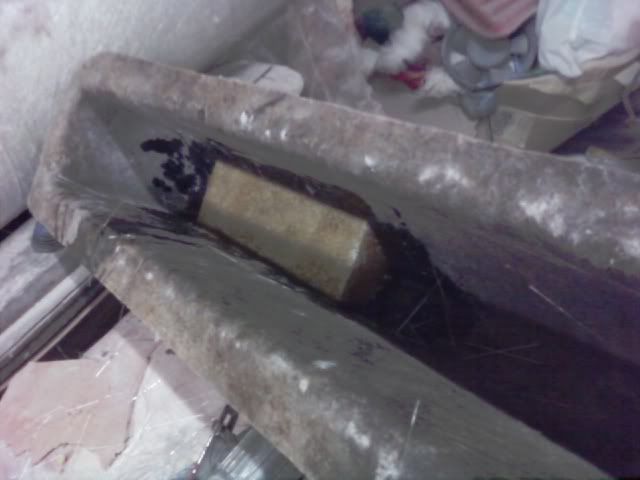
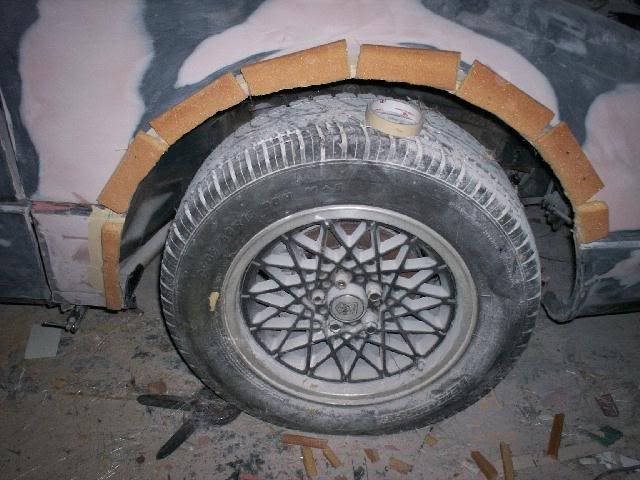
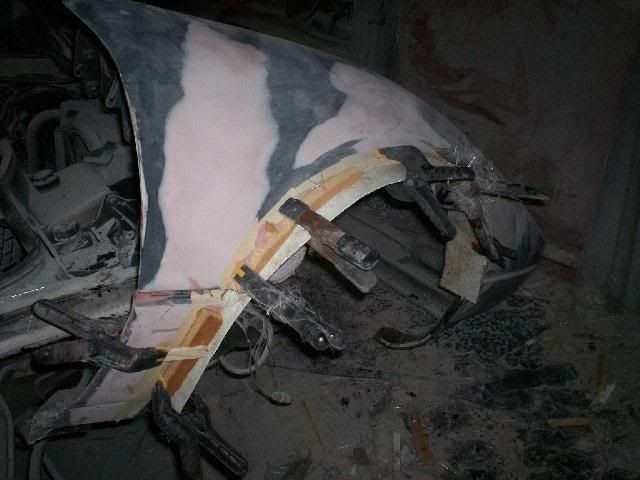
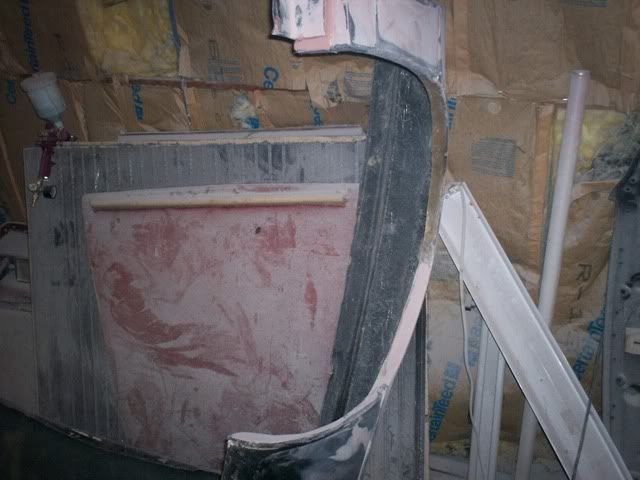
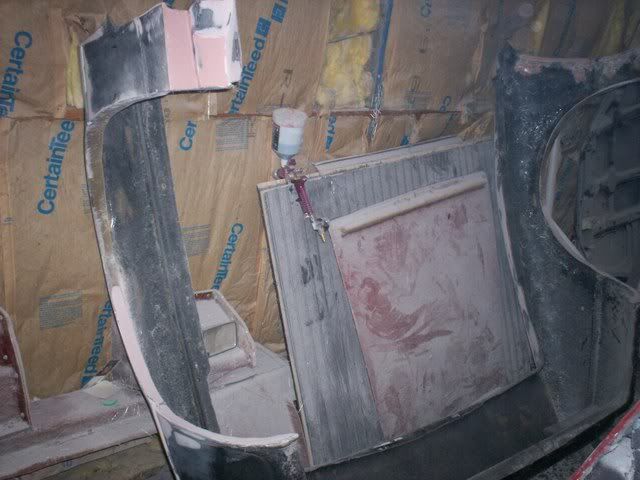
Next on the agenda was putting wheel well liners back into fenders. I put tape on the edges of the wheel wells then glued on pieces of foam. This would give me something to clamp fiberglass board to.
I trimmed off the excess foam and clamped the fiberglass board into place.
I put about 2 layers of glass on the inside of the fenders over the boards. I waxed the boards first.
Then I removed the boards and trimmed the fiberglass.
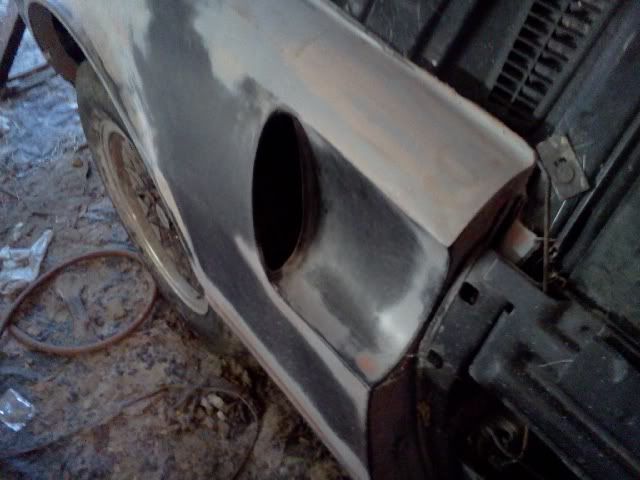
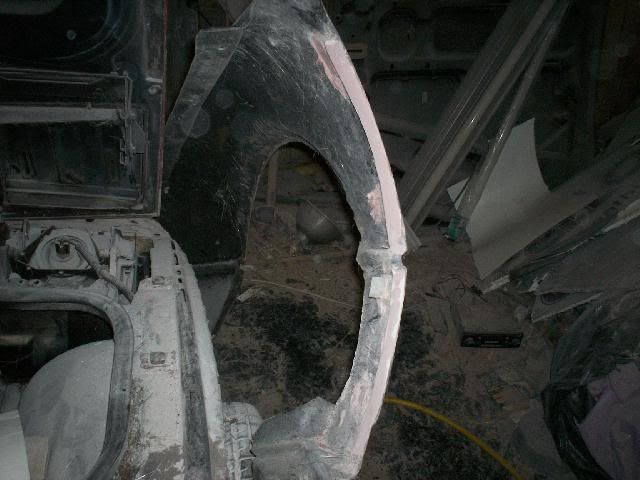
I took the front clip off the car to make the wheel well openings easier to work on. Once all the fiberglass was trimmed I started the body work on the wheel wells and other various parts of the underside of the front clip.
The rear edge of the fenders are almost done.
... popped open the FOURTH 1 gallon can of bondo now :-\
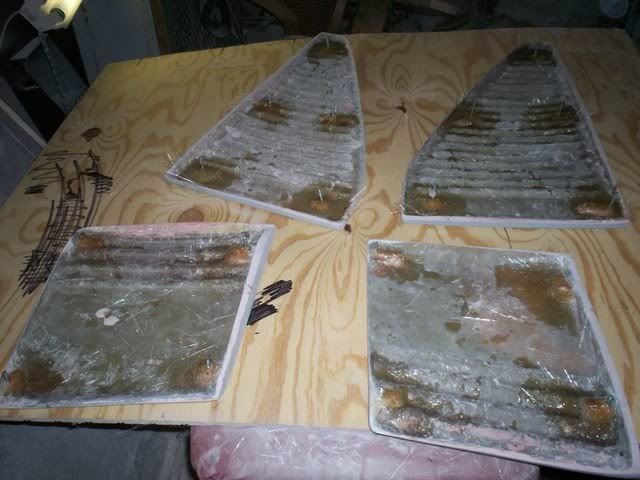
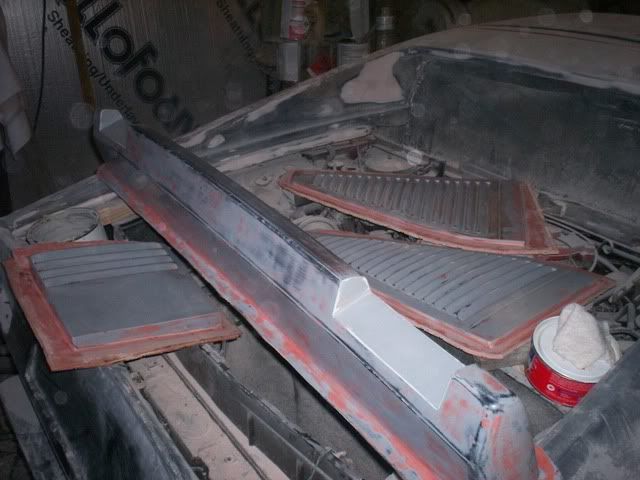
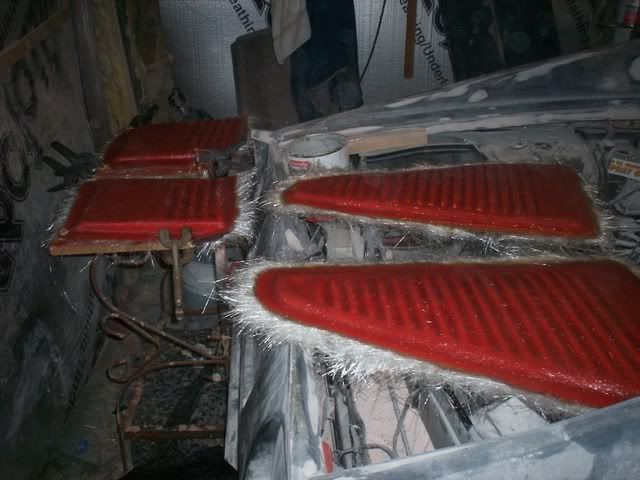
Taking a break from the front clip to work on molds. I will be finishing up the front and rear clips when they are off the car so I can flip them around and make things easier to work on. So for the past few days Ive been working on taking molds off of the front bumper, headlight covers, side window louvers, rear bumper and hood. Here is where I am at so far.
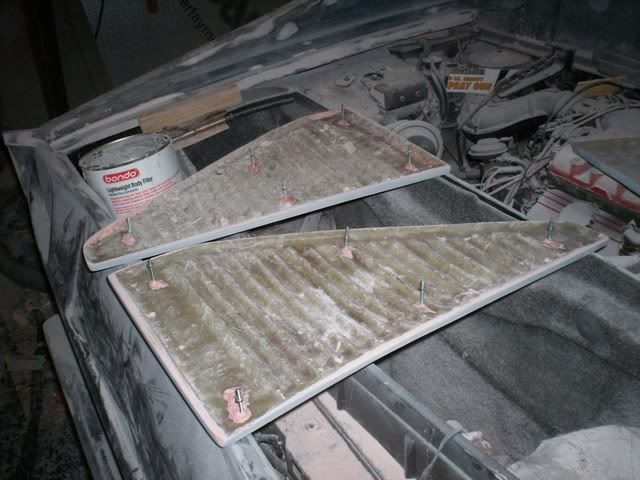
I used bondo to glue some small bolts to the bottoms of the headlight covers and side louvers and followed that up with some fiberglass to hold them in permanently so that the parts could be bolted down to pieces of wood. That way not only would they be held nice and flat for taking molds but the wood base could also serve as a flange for the mold.
I left about 3/4" of the plywood sticking out all the way around the parts to act as the flange. I used bondo on the seams, sanded, spot puttied and wet sanded everything. I also used bondo on the wooden flange area to endure a smooth and stick free surface. I left the flange on the front bumper so I didn't have to make a new one for it. I gave everything a good coat of wax then sprayed all the parts with partall film prior to gel coating. The wax is there as a little extra insurance.
Some of the parts just after spraying on a good coat of tooling gel.
I layed all the parts up with a skin coat of glass and let it dry completely before continuing. This helps to ensure there are no air bubbles on the surface. Once the skin coat had dried I used some sand paper on the surface to knock off any little stickers that might hold up the next layers of glass making air bubbles. I followed up the skin coat (1/2 oz mat) with 5 to 6 layers of 1oz mat.
I let everything dry over night before demolding. Once they were out of the molds I sanded the edges of the flanges smooth and got everything cleaned up. They all came out really nice and shiny.
That about catches things up to where I am now. This is what I had done as of the end of last week. Now I am working on make the molds for the hood and rear bumper. I'll post pics of that process this weekend when they should be done.
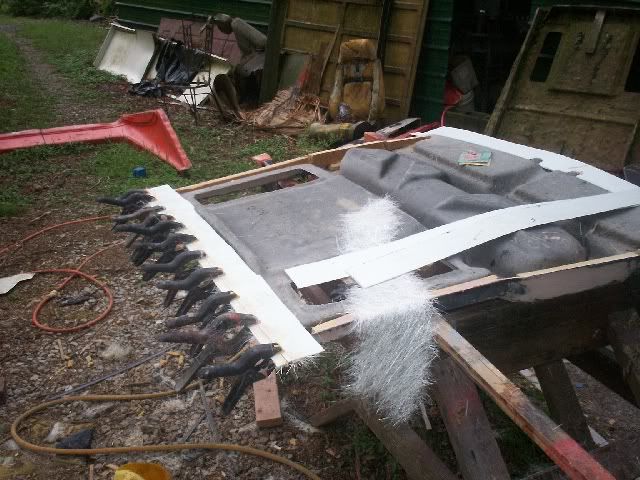
Here is the progress so far on the hood mold. First I took some foam a glued it to the inside edges of the hood to give me a wide surface to glue on the fiberglass board to make the flanges.
Then I trimmed off the excess sticking up and sanded the surface smooth and flush.
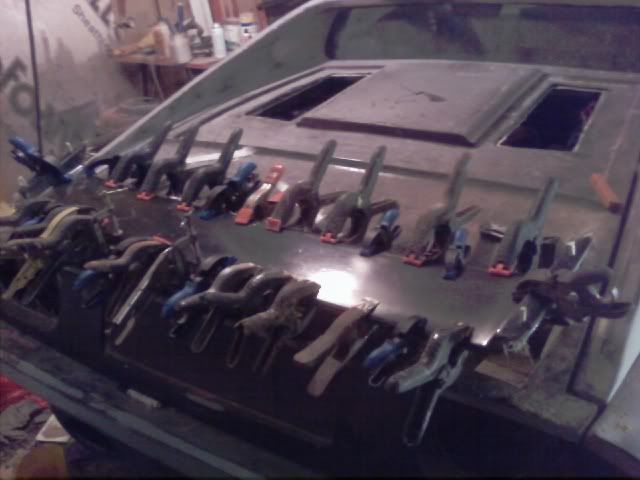
Once that was done I started gluing on the fiberglass board flanges. A man can NEVER have too many clamps
Once everything was glued on I backed up all the seams where the flanges meet with a little patch of fiberglass. After that I used body filler to make the transition from the hood to the flange seamless. Then it was just a matter of some spot putty here and there, some final sanding then a coat of wax, partal film and tooling gel.
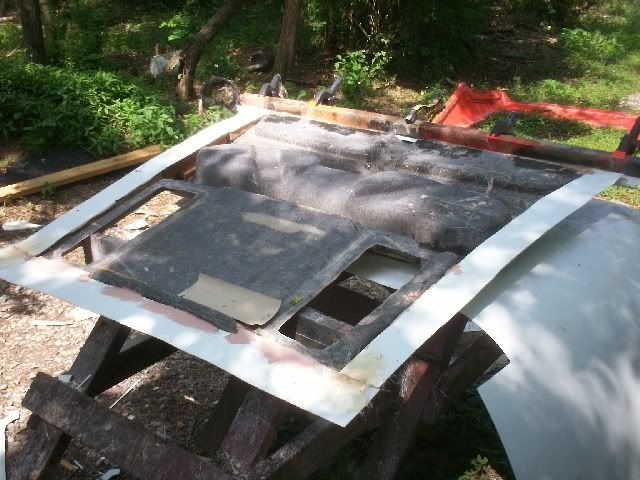
I started with a skin coat of 1/2oz mat to ensure a nice bubble free surface. I let that dry over night, sanded off the little stickers on the surface and began laying up the thickness. I ended up using 5 layers of 1oz mat. The finished mold is about 5/16" thick. After letting everything set up over night I began making some bracing on the large flat surface of the hood to help give it some rigidity. I took some of my trusty foam pieces and laid 3 of them out across the hood and glued them down.
After that I rounded off all the edges of the foam with some sand paper. This would make it easier to get the glass to lay flat across the foam.
Then I put on one layer of 1oz mat and let it dry completely then followed it up with a second layer.
I will post some pics of the finished product tomorrow or Monday. I de-molded the rear bumper today and it was a disaster. Most of the bondo on the bumper came out in the mold and was stuck to it. The bumper and the mold are a complete loss. I know why it happened though. I started work on the bumper shortly after I first made it which was about 3 1/2 years ago. The bondo sat exposed for so long it had lost most of its stability. It looked fine and sanded ok but could not hold up the mold making process. I will drag out the old crappy mold and pull another part out of it and fix it up to make another mold. Not that bad of a set back really. The rear bumper is pretty quick and easy to make as is the mold. This time around I will be leaving the flange attached to the part like I did on the front bumper. That will speed things along tremendously.
[This message has been edited by EVM_Rob (edited 09-24-2011).]
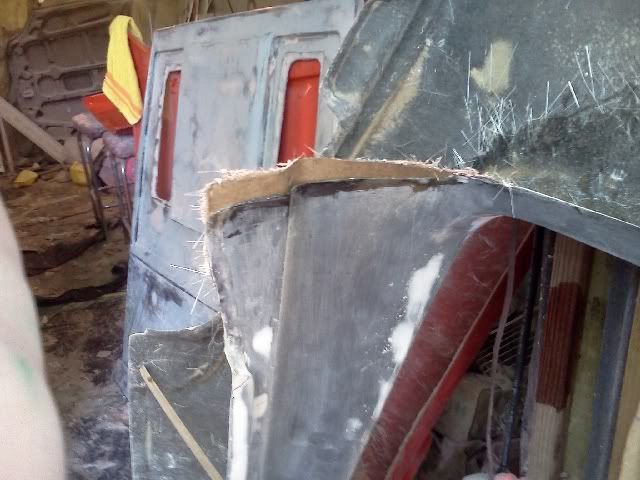
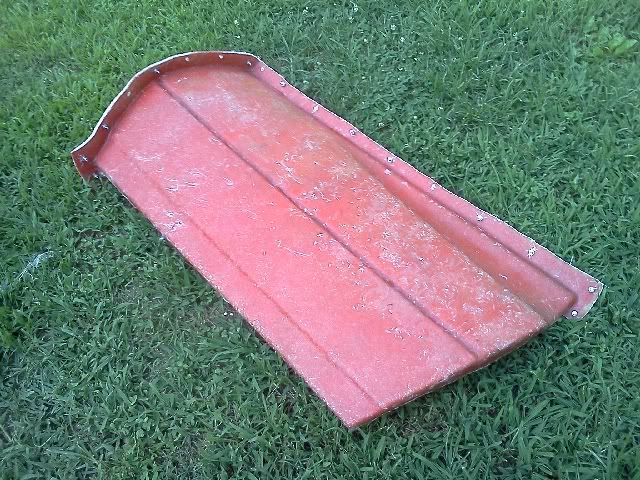
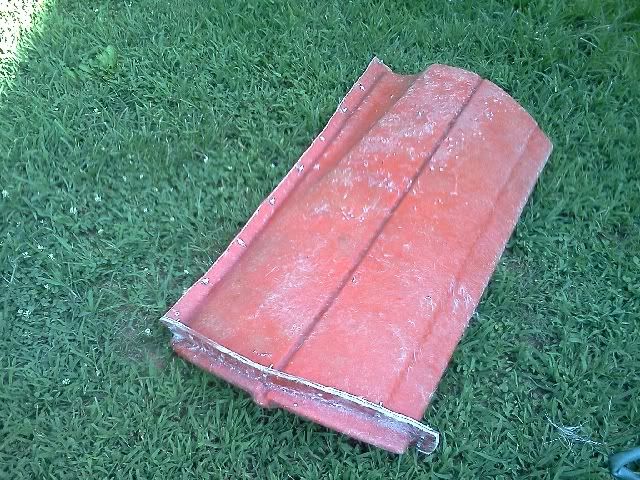
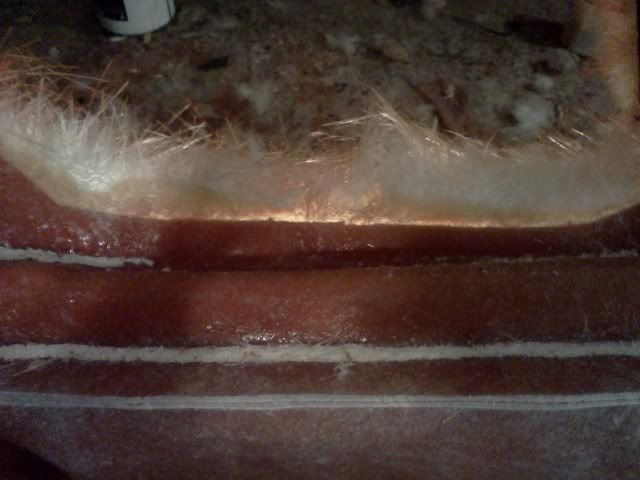
Time re-do the rear bumper mold since the last one was a total failure. I drug out the old original rear bumper mold and got it cleaned up and filled in the really bad spots of the mold (most of it) will mold repair body filler then finished up a few spots with modeling clay. Here are some pics of just how rough these original molds are
Just look at the size and quantity of those bubbles. All the molds for the entire car are like this. Its like these people that originally made these molds weren't even trying at all. They were certainly incompetent, that's for sure.
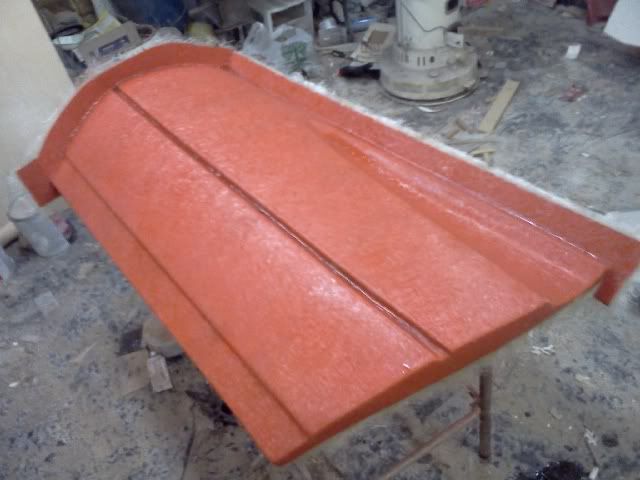
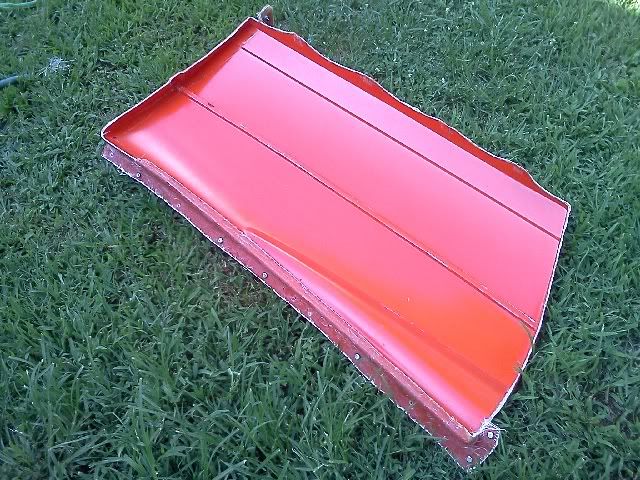
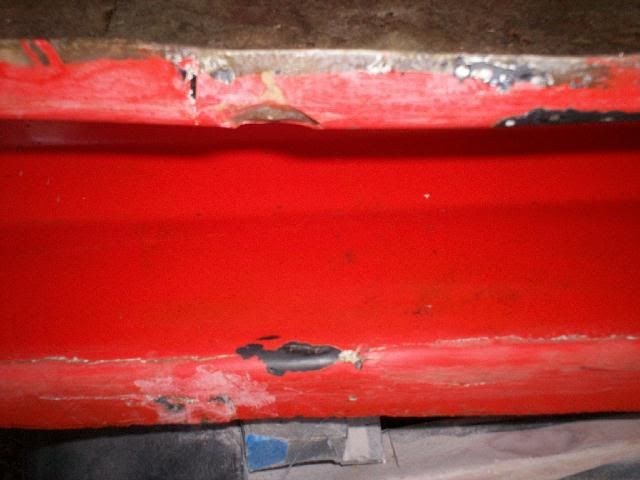
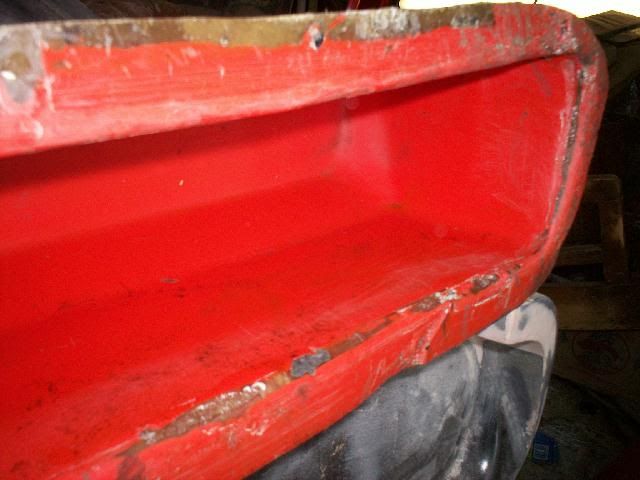
I laid up the rear bumper mold the other day and pulled out an expected lousy part. I got it pretty well straitened out with bondo and then got it primed, sanded, waxed and sprayed with partall and tooling gel. I also started on the outer deck lid to get it ready for taking the mold. One problem I noted with the rear deck lid is that the sides of it weren't even. It was almost 1/4" too narrow and had a really big gap. I glued on a piece of fiberglass board to make up the bulk of the difference then shaped it up the rest of the way with bondo.
The finished product. A narrower and more uniform seam.
After all that was done I glued on some flanges using the same process as I used for the hood. Then I got the remaining body work done and primed, sanded, waxed and gelcoated the part.
.
Both the rear bumper and deck lid have their skin coat of fiberglass on them now. I am just waiting for dry weather to finish them up. Just been watching it rain all day today. Chilly too.
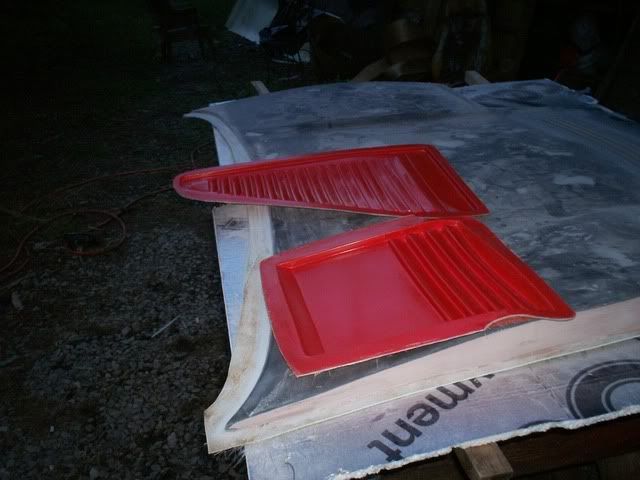
Since the side louvers and headlight covers had to be fixed with a ridiculous amount of bondo I knew I was going to have to make new ones out of the new molds to use on the car. I went ahead and made the new parts the other day,
Waxed and ready for gelcoat
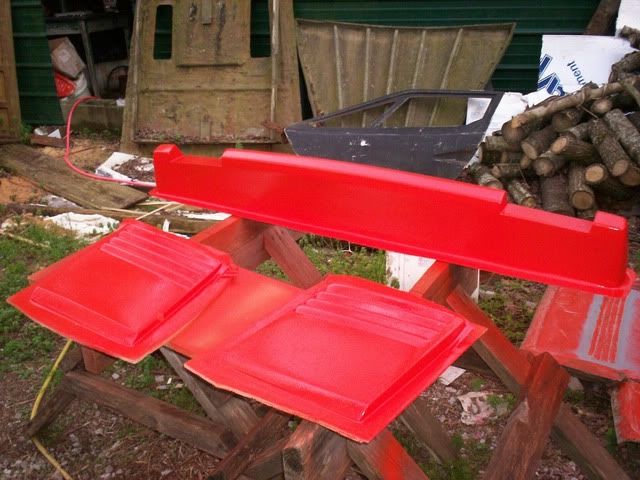
And here are the finished parts after being all trimmed up and ready to go
A perfect fit! And bondo free! ;D
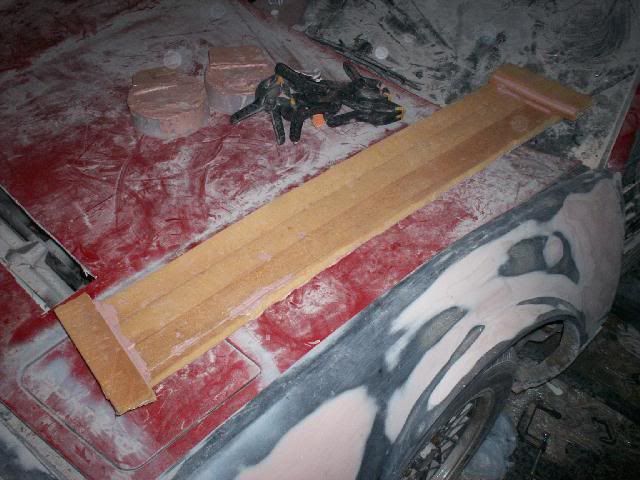
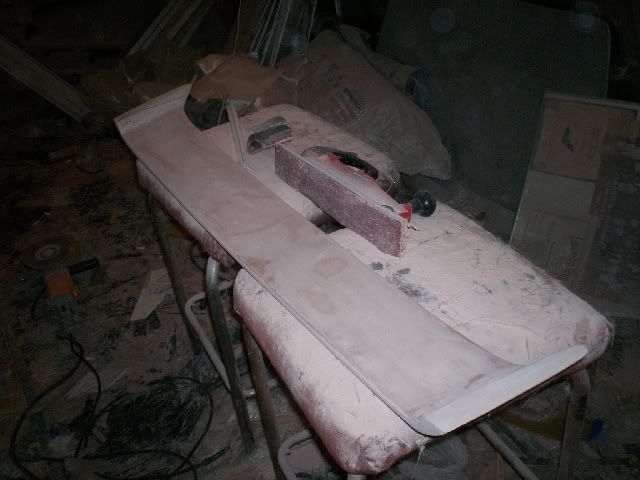
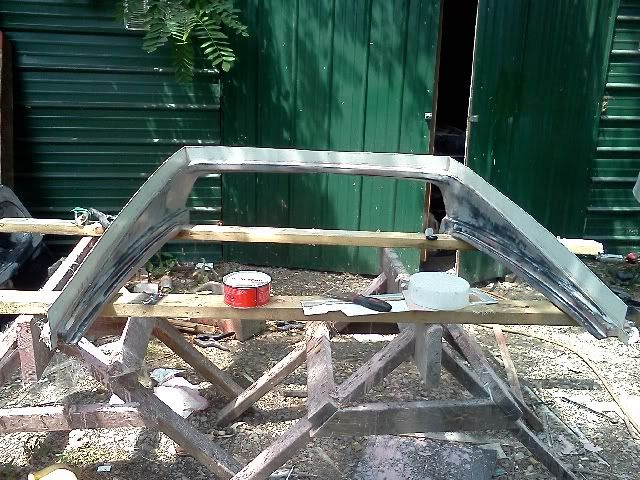
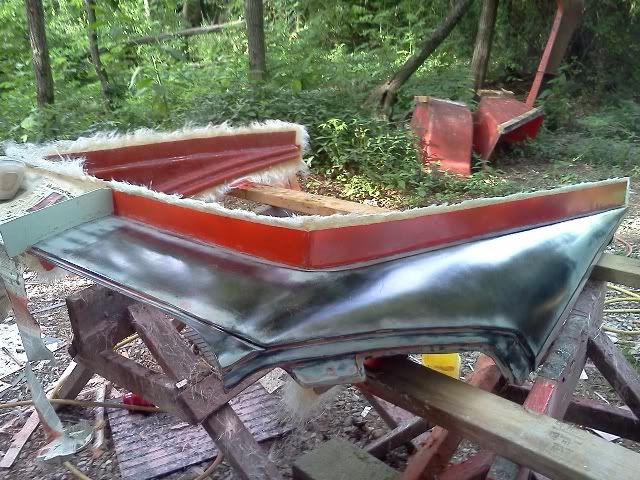
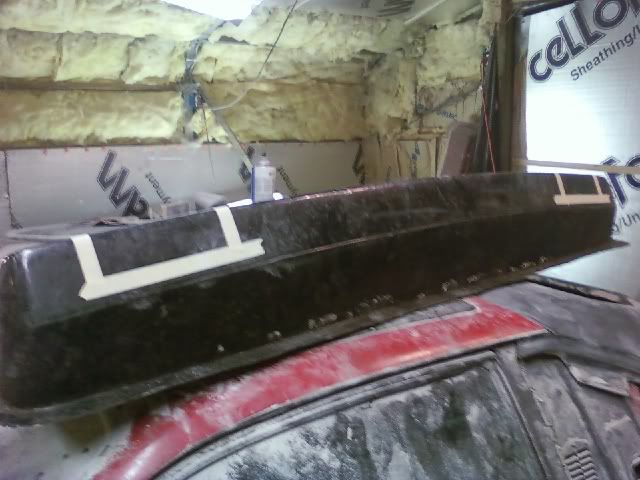
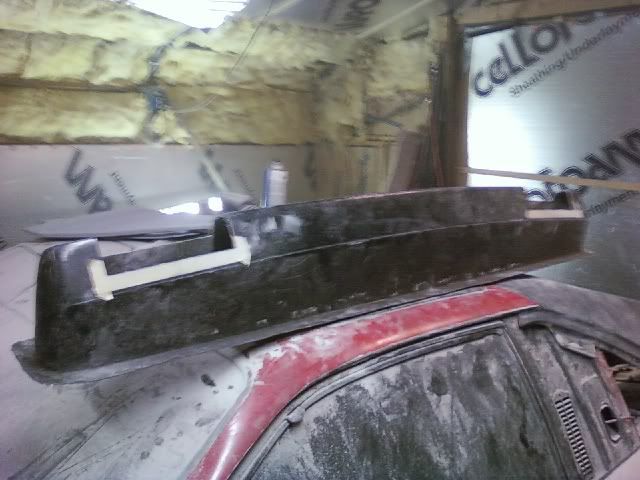
Here is another little project I have taken on. These molds did not come with a mold for the sail panel spoiler (or whatever you would call it). I really wanted one but they seam to be all but impossible to come by. So I decided to fabricate one from scratch. I laid up just the roof section of the sail panel mold to give me a good starting point to go by.
I glued on several pieces of foam to the bottom to create some thickness. Then I glued a couple extra pieces of foam on the outer ends to give me something to shape the pedestal parts of the spoiler out of.
Here it is after a rough shaping. Its got a long way to go and I have only been working on it here and there whenever I am waiting on something to dry and what not. I'll keep you posted from time to time on it as I make more progress.
I got the deck lid mold finished and it turned out really nice as did the new rear bumper mold
You can see in the pic the bracing I added to the deck lid to help keep it from warping and the flat center area over the engine has bracing to keep it from sagging in the middle. I Used the same method as I did on the hood. Its foam pieces with 2 layers of mat over top of it.
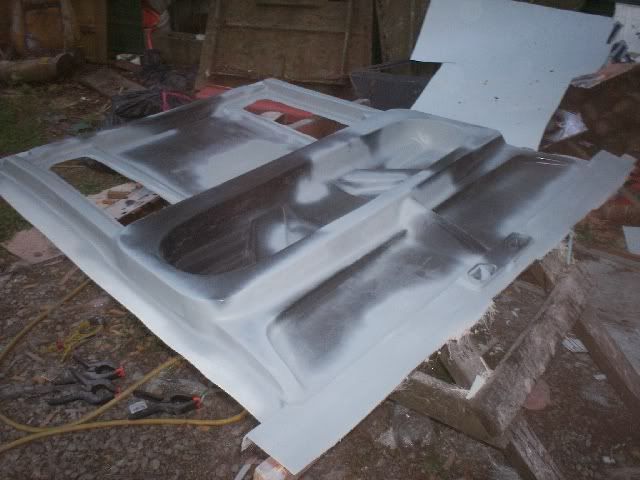
A pic of the completed hood mold.
I put a quick coat of wax on the hood mold and partall filmed, gel-coated it so that I could make a new hood for the car as the original is just loaded with bondo and unusable. All the new panels are bondo free! I didn't do a lot of prep work on the mold since I just needed this hood to complete the car. Once all of the molds are done I will wet sand and polish everything to get it super smooth and shiny.
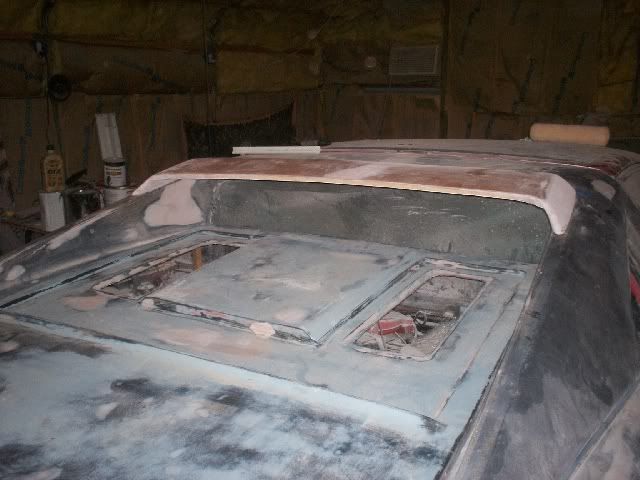
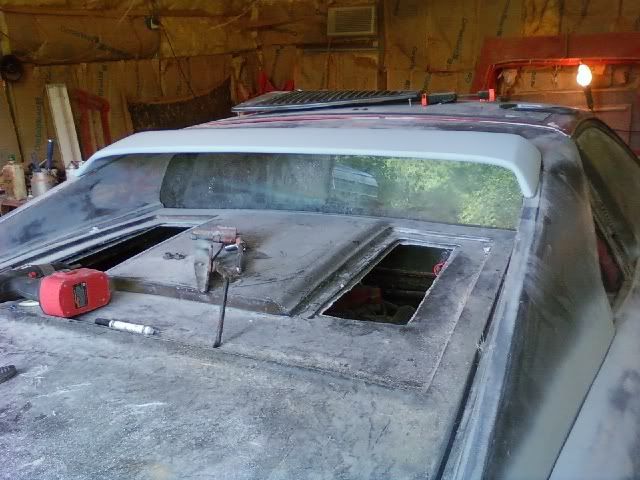
Here is a pic of the new hood just after it was pulled. I laid it on the car with the new headlight covers just to have a look. I hadn't even trimmed it out yet.
I went ahead and ground the back side of the hood vent to open up the holes so the vent will be functional. You can see its positioned almost directly over the radiator.
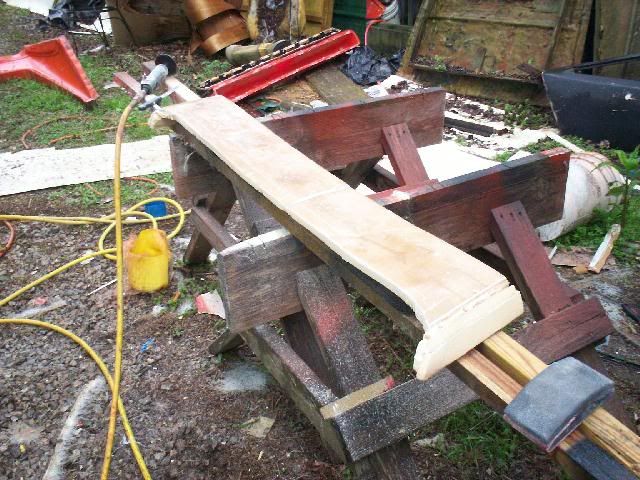
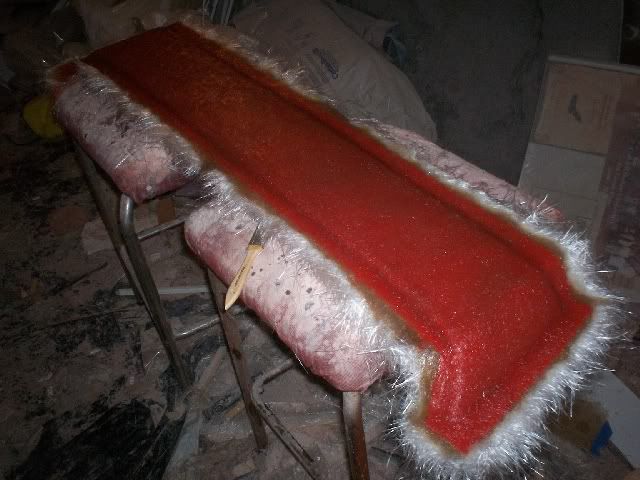
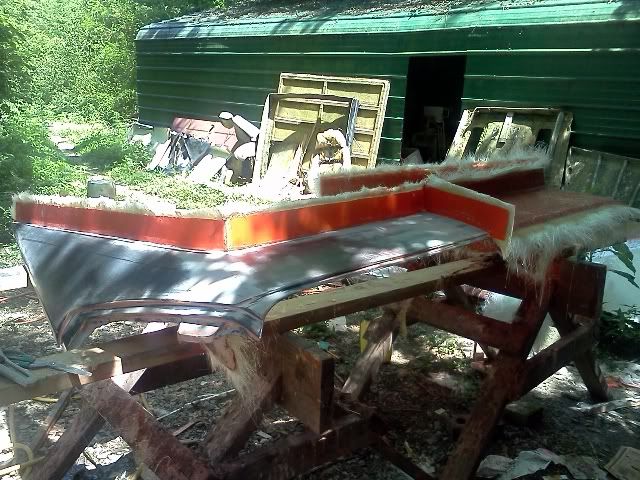
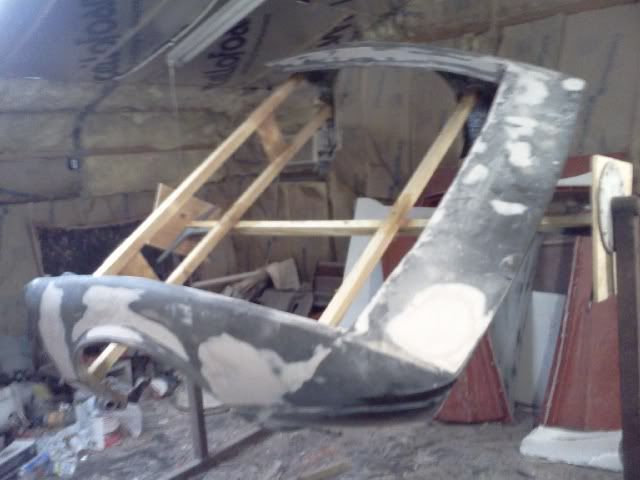
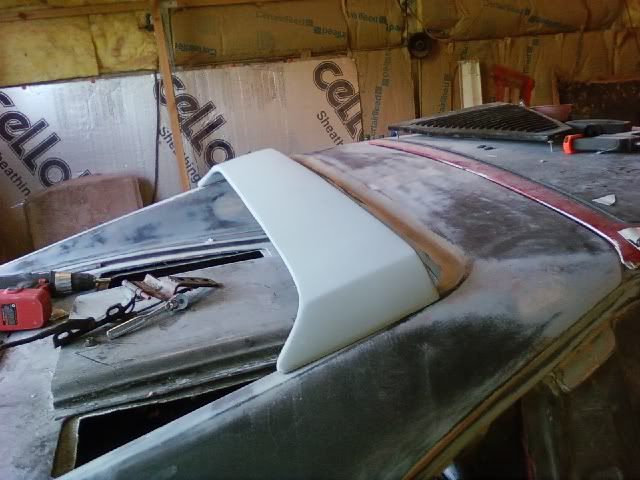
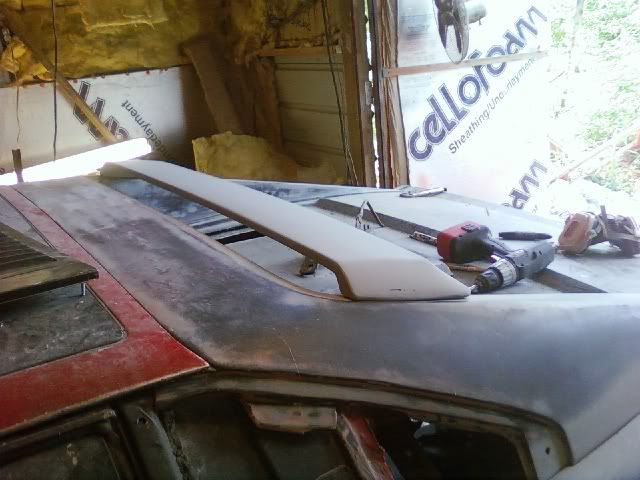
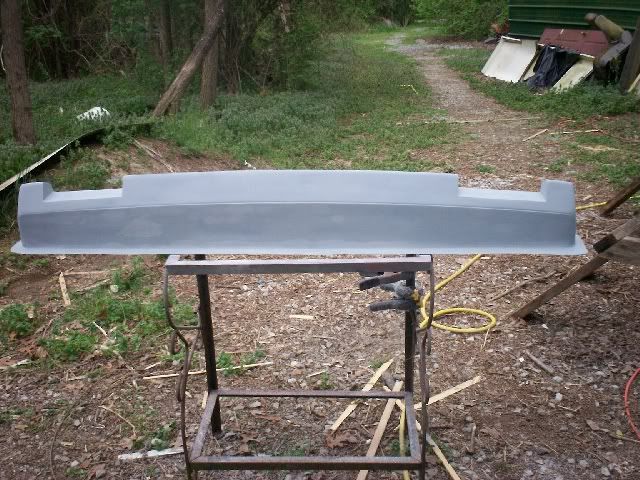
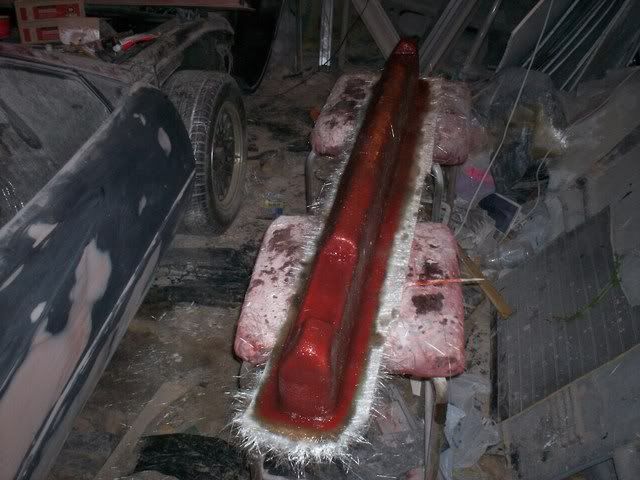
I also have been working on the scratch made sail panel spoiler. Here is a pic of it about 90% roughed out in shape.
It was starting to fit pretty nice on the car at this point. I have the can underneath the middle of it to keep it from sagging. Only the top outer surface is fiberglass and the rest is foam.
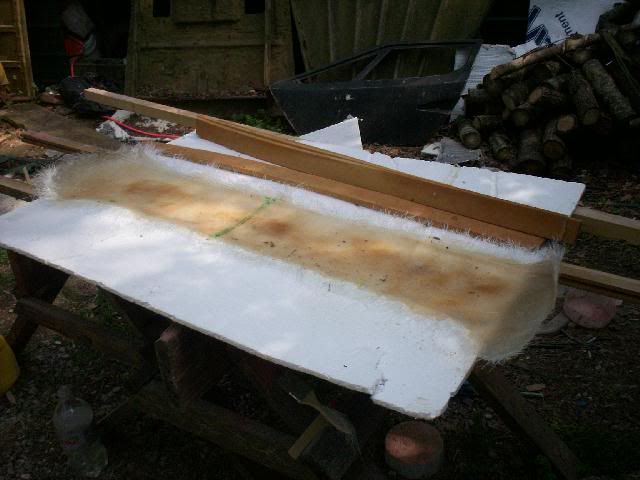
I covered the bottom foam area with a layer of mat followed by a layer of woven cloth to give it the strength it needs to hold its shape. I checked it on the car after it dried and it worked great. Didn't sag at all. That cloth kept it quite rigid. Its crucial that it holds its shape while I am taking the molds off of it once its completed.
I already had most of the body work done on the inner deck lid but I still needed to make flanges for it. It didn't fit right at all to begin with so I just cut off the old flanges completely and made some new ones. I used the same process as I did on the hood and outer deck lid (foam, fiberglass board and bondo on the seams)
And here it is primed and almost ready for wax, partall and gelcaot. Thats on tomorrows agenda.
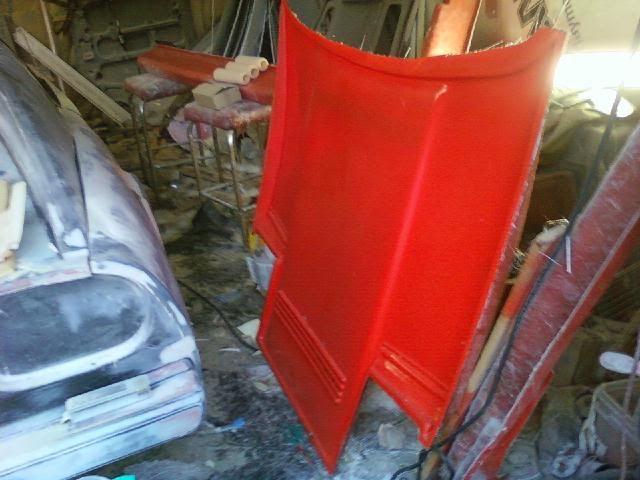
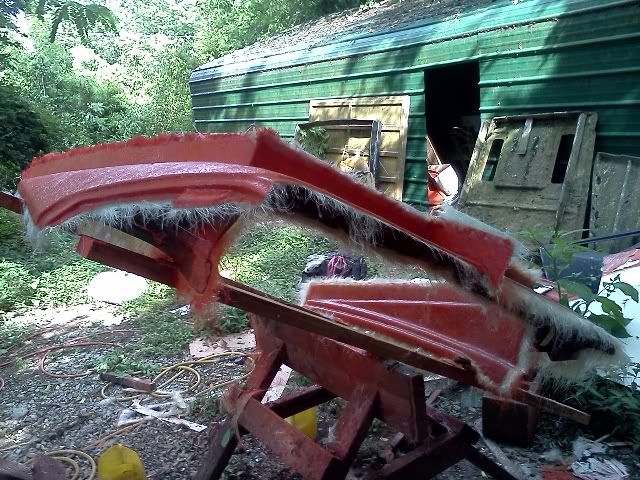
Tons of progress has been made on the rear spoiler. Once the fiberglass cloth had dried and made it rigid I went about applying all the bondo and sanding it smooth to get the final shape of the spoiler.
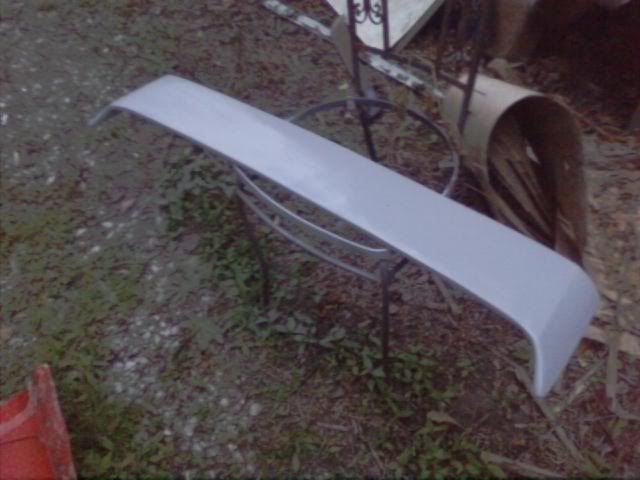
Here it is almost complete.
As you can see it holds its shape just fine now with the addition of the fiberglass cloth on the underside.
Once it was all smoothed out I primed it. I am quite happy with how it turned out.
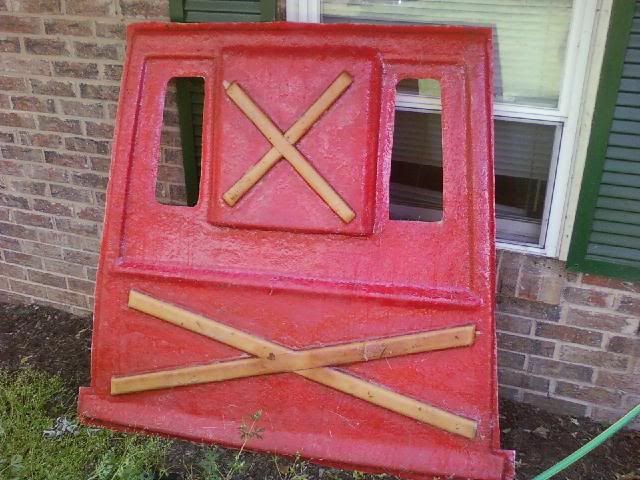
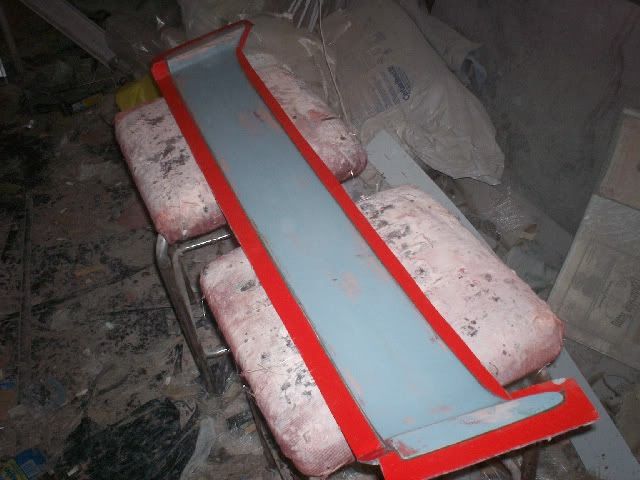
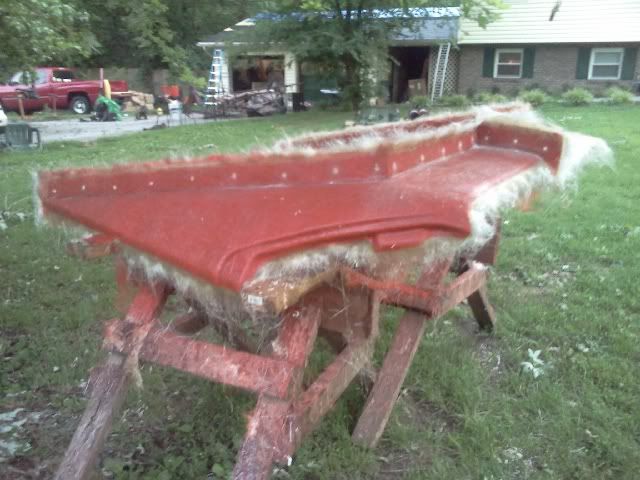
Now it was time to start making the flanges for the two piece mold. The parts that I make from the molds will be made in two separate pieces (top and bottom) then glued together. I started out by making some little braces out of fiberglass board that would hold the flange in the proper place all the way around the spoiler.
Next I put clear packing tape on the bottom of the spoiler so that I could glue the braces on without damaging the spoiler. I marked where the braces would attach then glued on little pieces of foam at each mark. Then I used the braces to saw into the foam and used bondo over them to glue them solidly into place.
Then I glued a strip of fiberglass board onto the braces. I had cut and sanded it to fit the shape of the spoiler. I completed this process all the way around the spoiler.
Once the flange was in place I used modeling clay to seal off the seam. I rolled the clay into really thin snakes and placed them in the seams then smoothed them out with my finger. I finished the seam off by scraping the excess clay and squaring the seam off by using the corner of a bondo spreader.
Then I waxed it, gave it a good coat of partall and a heavy coat of tooling gel. I laid on a 1oz mat skin coat, let it dry then followed that up with 3 layers of 1.5oz mat.
I pulled off my flanges and braces today and got the bottom half cleaned up, waxed and ready for partall and tooling gel tomorrow morning.
I hope to get it and the inner deck lid all laid up tomorrow and I will post pics of the finished products Monday or Tuesday. Hopefully they all turn out well.
Got the molds finished for the spoiler and inner deck lid. They all turned out great! Just have to get them all cleaned up. I will let them sit a few days to cure out then give them a few coats of wax and pull some parts. I'm looking forward to having a finished spoiler to see how well my little creation turned out. I have to make a new inner deck lid piece because the original is pretty much junk. Looks like by the end of this endeavor about 1/3 of the car will be brand new parts haha
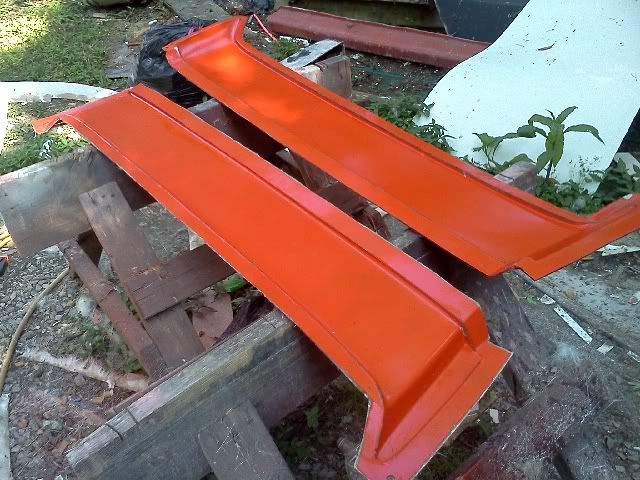
I made my first parts out of the new spoiler molds. I just have to get them trimmed up and glued together.
I'm starting on the sail panel getting it ready to make molds. I already had most of the body work done but I noticed that when it was pushed all the way forward into position on the car the inside edges did not come close to fitting flush against the rear window. So I cut out a piece of cardboard and glued it to the inside edge leaving about 1 1/2" sticking out. I then painted the cardboard with resin and laid a couple layers of glass on the back side for strength.
Once that was done I got everything flush and smooth with bondo then primed. I made the edges about an inch longer than they needed to be so I can just trim the parts down a little at a time till I get a perfect fit. You can always cut more off but its a real pain to put more back on.
After that was all taken care of I primed, spot puttied and wet sanded everything smooth.
Then I started making my flanges. It will be a 3 piece mold. I used the same process with the tape, foam and bondo to give me something the glue the flanges to. However, this time I put down the masking tape first and the packing tape over it. The packing tape tends to leave a residue once you remove it.
Instead of using modeling clay on the seams I tried something new. I put masking tape along the edge of the seam where the flange meets the part then used bondo like caulk along the seam. I applied it and smoothed it out with my finger then before it dried I took the corner of a bondo spreader and squared the seam off and scraped away all the excess. After it was all dried I took a razor blade and trimmed away the masking tape leaving only the filled in seam. I am hoping this will work better than the clay method. The clay works but you end up with a lot off clay to clean out of the mold later when it comes time to make the next section of the multi-piece mold. I hope to lay up the first section tomorrow then the next part on Tuesday and finish it up on Wednesday.
Got it in gel coat and finished up the first part of the 3 piece mold.
Once the first part had dried I peeled away the flange and made a flange for the top part so that I can start making the second of the three sections.
Here it is when I got finished laying up the second of the three sections.
Here is one just after finishing up the skin coat on the final section.
Once it was all laid up I drilled 1/4" holes about every 5 to 6" all the way around the flanges for bolting it together.
I got it trimmed out today and popped the molds off. They still need some cleaning up and some final grinding on the edges but over all they are done.
I used the fiberglass board as usual but on some parts I used my trusty foam strips instead of the fiberglass board. Unfortunately I forgot to take pics but basically what I did was the same process as using the fiberglass board for flanges but used the foam strips instead. I ran a strip of 2" wide packing tape along the surface of the foam to give me a nice, slick, nonporous surface. It worked really well and was easier to use than the fiberglass board for areas that have slightly swooping curves over a long distance. It would have taken forever to cut then sand to shape the fiberglass board to fit. I will be using the foam for flanges again in the next molds and I will remember to take pics next time. Its hard to explain without pics.
Here are the doors just after getting sprayed with tooling gel and ready for the first sections to get their fiberglass skin coats.
Skin coat done
Then after a the final layers where done I removed the flanges and repeated the tooling gel/skin coat/thickness layers of glass process on the second parts of the molds.
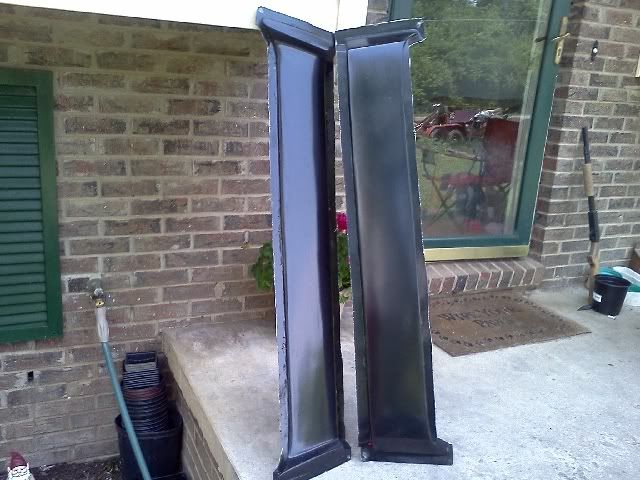
Here is the completed product
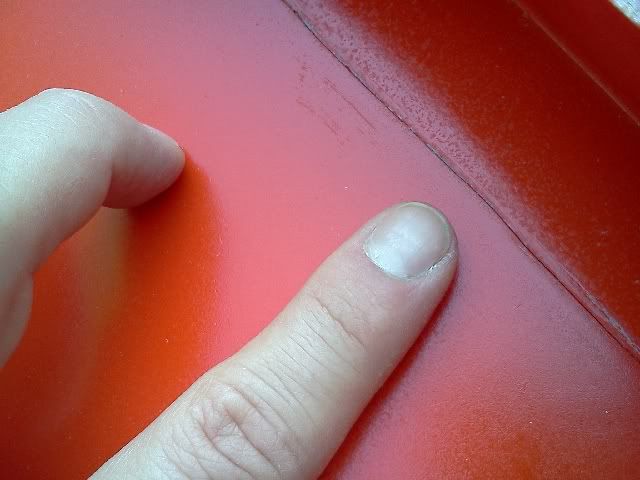
Both doors turned out really well! I have a few little spots here and there that will need some attention but no big deal. Just a few tiny chips along the seams and couple other minor details. The seams turned out very nice over all tough. The parts made from the these molds will only require a tiny bit of block sanding with 200 grit paper to make the flash marks caused by the seams disappear! I kept them away from the edges of the part to make it even easier to sand them out. No danger of rounding edges off accidentally that way. That was a big issue with the original p.o.s. molds I bought. The seams were so deep and wide you could have filled them with water and kayaked down them.
Here is a close up of the seams. With a finger in the shot for size comparison ;D
Now time for the front clip. This will be a pain I am sure. But there is finally light at the end of the tunnel!
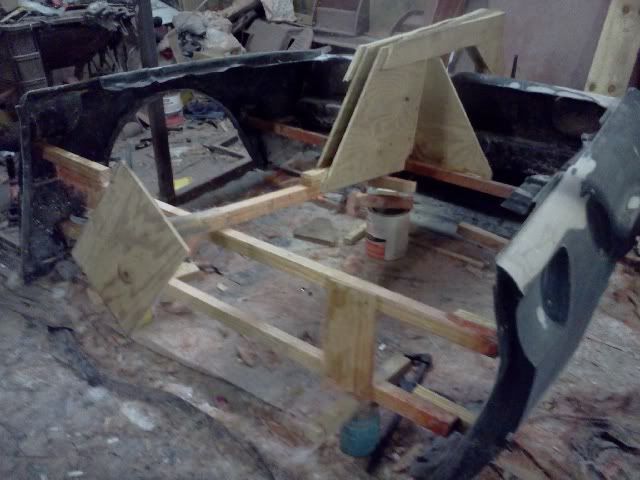
The first step in making a mold of the front clip is now complete!
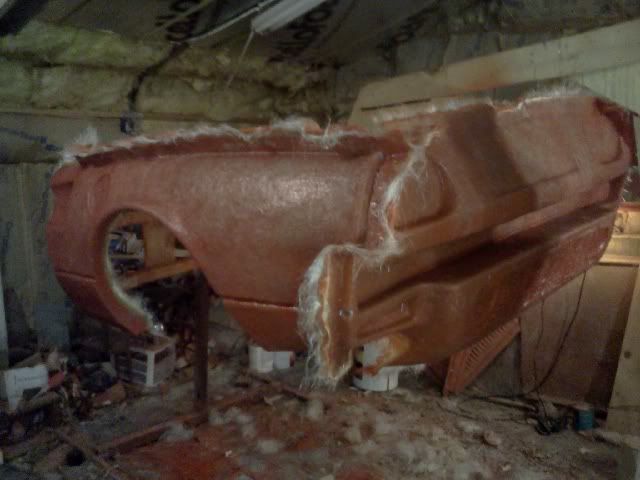
I made a wooden support system inside the front clip and mounted it on a rotisserie. I can rotate the front clip into any position I want now. This will make the whole process immensely easier. Next step will be to get all the body work finished up now that I have easy access to everything.
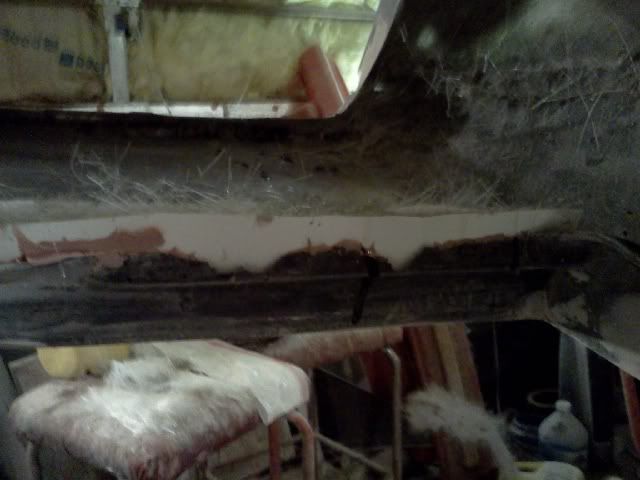
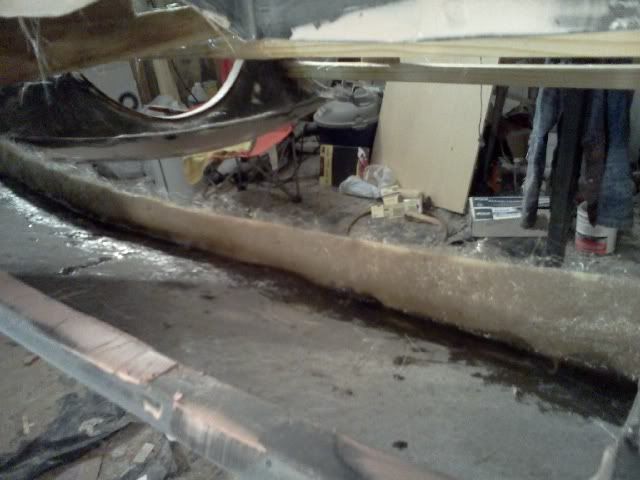
First off I had to fix a really bad part of the front clip. The part of the nose section that rests on the Fiero frame just in front of the radiator. The fiberglass was broken and all chewed up. I took some poster board and glued it to the back side of the section.
NOTE: The front clip is upside down on the rotisserie in this pic It was chewed up like this pretty much all the way across
After that I laid on two layers of 1.5oz mat on the back side and applied bondo to the front to get it all smooth and pretty.
Once that was taken care of I sanded the whole clip with 120 then primed, spot puttied and wet sanded with 320.
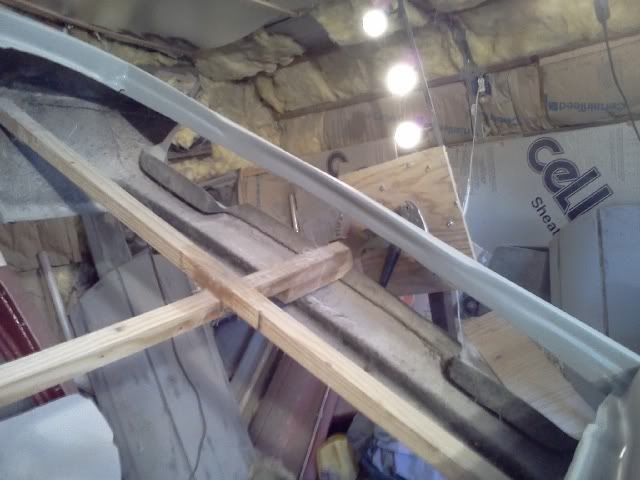
After everything was nice and smooth I waxed the whole thing and started making the flanges for the first part of the front clip mold. I decided to do the nose first. I was dreading having to make the flanges that would run down the sides of the nose section due to all the contours but after much brainstorming I came up with this nifty invention.
I took a wooden skewer and taped it to the side of a sharpie. I then had someone hold a piece of poster board up to the side of the nose section of the front clip. Then I held the marker up to the paper and touched the side of the nose section with the skewer. Starting at the top I worked my way down letting the skewer follow the contours of the body. I went really slow ensuring the wooden skewer never broke contact with the body and the marker never lifted from the paper
Worked like a charm!!
So then I just cut out the patten and traced it onto fiberglass board. After very little trimming it was fitting nicely and I got it attached. I repeated the process for the other side.
I used a strip of foam with the packing tape surface to do the piece along the top of the nose and got everything laid up with glass. I used foam for the flange along the top of the fenders and the same marker/skewer process to make the flanges on the back edges of the fenders.
I got finished with all the sections on Friday and spent all day Saturday trimming and drilling holes. So far I got the top section popped off as well as one fender and rear fender edge section. Still have one more fender and rear edge to pop off along with the nose piece. I will post more pics Monday when all the molds have been pulled.
Getting everything drilled, trimmed and ground is proving to be a very long (and itchy) process :P
WOW! I never knew all the work that went into making molds! Very nice job, I can't wait until the next installment -Jason
Thanks! And here is the next installment!
HERE IS WHERE I WAS BY THE END OF AUGUST:
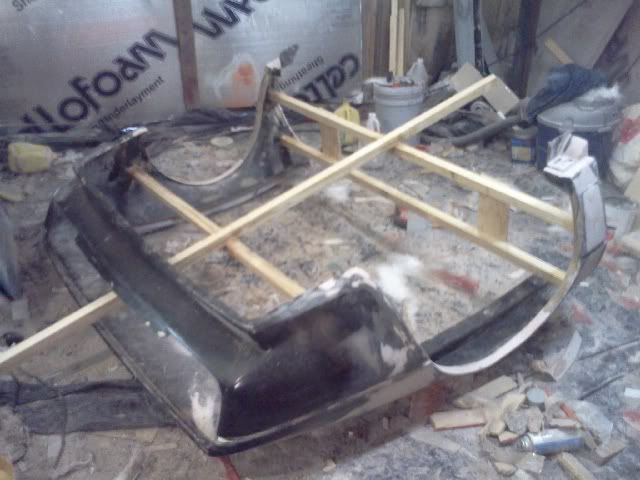
Now that the front clip is done its time to do the rear clip. I stuck the front clip back on the car along with the hood and headlight covers. Its all fitting really nicely considering none of it is actually attached. Its just sitting there.
I cut out the wooden frame from the front clip and recycled most of it to build the frame for the rear clip.
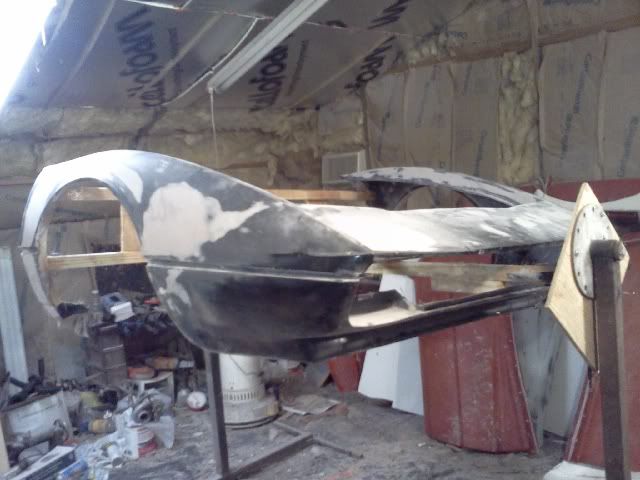
Here it is after I got it up on the rotisserie and finished up the body work.
Here it is after a final wet sanding and waxed. The first pic is when I was taping out where the flanges would go and the second is after the flanges were done.
Just got it in gel coat a little while ago. I will let it set up over night and start laying up the glass tomorrow evening.
I am finally entering the home stretch with mold making!!! Once the rear clip is done I will be making some molds off a set of SE stock Fiero rocker panels. I don't want to build any kits using the GT rocker panels as I feel they ruin the look of the car. It looks to weird to have this nice sleek body design and clunky squared off ground effects on it. I will be offering the fiberglass SE rockers with my kits for a small amount extra for anyone that's using a GT as a donor and doesn't want to use the GT rockers. I will also sell them individually to anyone wanting to get rid of the GT rockers they already have on their kit. I am anxious to finally move on from mold making and actually building this car! Its been a long time coming. But alas once the car is done I have to sell it :'( I am getting married in a year and need the cash to go toward the wedding and a new house. But I have the molds so I will eventually make one for myself ;D I also plan on offering a replica interior to go along with the kits. Mostly based on a Pisa kit but with some modifications. Namely the door panels and gauge pod. I want to make some new door panels that look more like a 308 and modify the gauge pod to accept refaced Fiero gauges. But that's in the future......
[This message has been edited by EVM_Rob (edited 09-29-2011).]
I got the rear mold section all finished up and moved on to the top mold section. Here is a pic of when I started making the flanges for it.
Here is one after the flanges where finished up and it had a final coat of tooling gel. Notice how much my wooden frame is bending in the middle do to the addition of even more weight. This thing is getting really heavy.
And here is where I am at in the process as of today. The top mold section has been finished and I got both sides gel-coated and the first skin coat of glass laid up. I will let it dry over night then finish up the layers tomorrow. I hope to start drilling the bolt holes in the flanges and getting it all trimmed out on Sunday.
Finished up the rear clip. Here is a pic of it after the final layer of glass.
It dried over night and I started trimming it out. If you take light and lay it behind the part your trimming it makes it much easier to see where to cut.
Here it is after getting it all trimmed out and the holes drilled. This was just before the process of popping the molds off...which was a pain.
And now for the fantastic news! I AM DONE WITH THE MOLDS!!!!!!!! It feels like it took FOEVER but I am finally done! Here are some more pics
I am not sure what the foam is or where to get it. I have been trying to source it myself. I bought some fiberglass supplies off a guy a few years ago that was getting out of it and he included the foam in the deal. I ended up with about 75 pieces of it. Its light tan in color and about 48" long, 2" wide and about 1/2" thick
Anybody have any idea why some of the pics in my last progress update aren't showing up? They are all hosted on the same sight and the code is copied exactly. I have tried several times to get them to show up but the just wont. I have no clue why. All the pics are done the same way but these wont show up
Yeah the photographs are too large in file size, so they appear as a click-able icon. When you click the icon they appear.
This is an amazing thread I just wanted to say. I'm very impressed with what you've done, considering what you originally had to work with. In particular, I really like the headlight area of the kit. Many 308 kits skimp out here and just use louvered headlight doors or they're really incorrect. The way you have it set up isn't perfect to the car obviously, but the detail with it extending to the edges of the hood and the additional louvers behind the headlight doors is really nice. Good job.
Thanks! The fully louvered head light covers has always been my pet peeve with these cars since it looks so cheesy but is so simple to correct. I wish I had a front clip like the one Don has created over on the madmechanics forum. He modified his front clip to have fenders that come all the way up and over the hood sides as one piece with the hood opening in between the humps just like the real 308 and has separate small head light buckets with real metal grills behind them. Looks awesome that way.
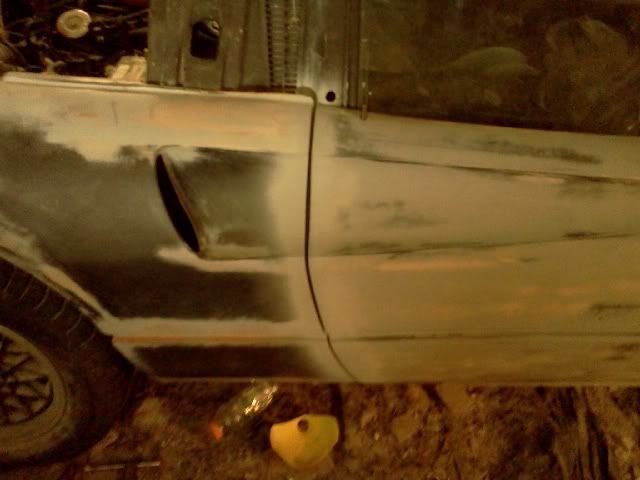
I got the rear clip and sail panel bolted on solid. Everything will need to be tweaked here and there I am sure but I wont bother with that till the doors and front clip are on so I can get everything all aligned at once then permanently secured. I also cut out the side vents, the exhaust openings and got the holes cut for the tail lights.
Progress is good. I finally got the drivers side of the car done as far as the front, rear clips and door shut lines go. It was a major pain but it looks great! I ended up having to rework the bottom of the front clip where it attached just in front of the door. I cut a little piece out that was hitting and preventing the clip from coming all the way back. Nothing you can see though. It gets covered up by the rocker panels. Then I made a bracket that holds everything in place and glassed it in. The next car I build will be out of my new molds so I will have to see if this is something that has to be done on that car too. If it is, I will make up more brackets and include them in the kits with instructions on how to use them.
The rear shut line looks as good as any factory seam Ive seen.
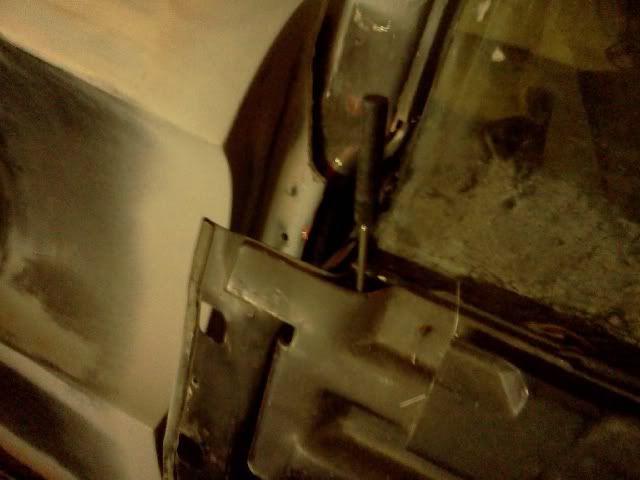
I got my side mirror attached. I was able to re-purpose another part of the old Fiero door skin to install the mirror. There are threaded metal brackets that clip into the door skin that have the torx head bolts. One of the brackets is a double bracket about 3 1/2" long with the threaded parts at either end. I looked at it and the factory mirror attach point on the door and the light bulb when on in my head. I turned the bracket around backward so the flush side was facing out and held it up to the door mirror mounting point. It was just a little bit too wide. So I drilled out the mirror mounting holes just ever so slightly and tried it again. Presto! It fit! And very snugly at that! So I just mixed up a bit of bondo and glued it in. I drilled the corresponding holes in the 308 door skin and bought bolts long enough to fit though. I worked perfectly. I will post detailed pics that can better explain everything when I do the same process today to the passenger door.
I never liked the idea of using the stock Fiero door handles and cutting the opening in the body line in door like on most 308 kits so I made push button openers that work great and are at least a little closer to being accurate since they are located in the same spot as the door handles on a real 308. They are super easy to install. If any one is interested in upgrading their car to these just let me know and I can sell you a set cheap.
I got the lock mounted in the door and functioning properly.
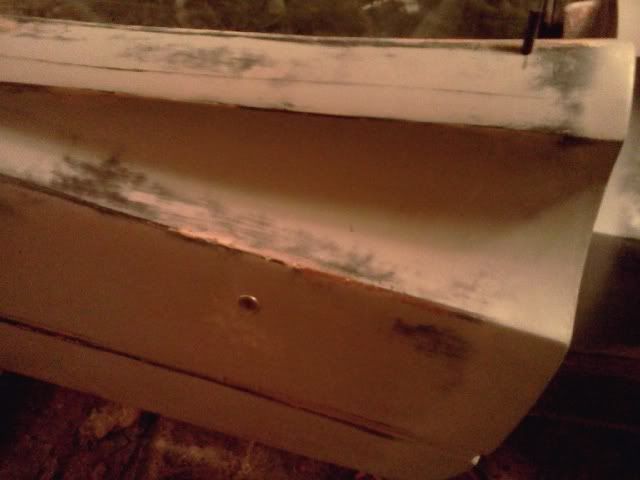
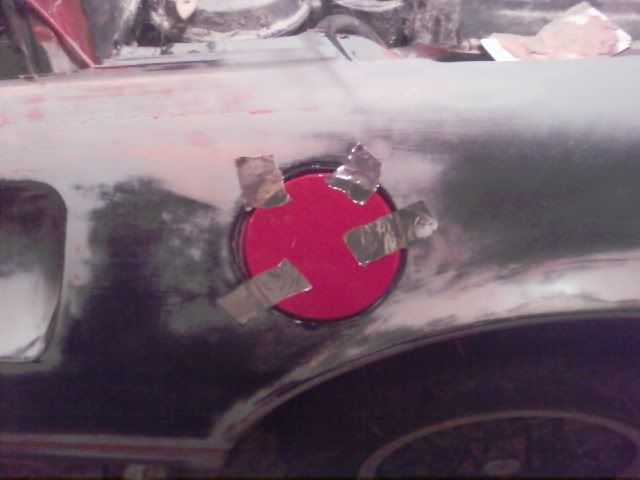
And the last thing I did last night was getting the gas filler trimmed down to size and glued in. The metal tape held it in place while the epoxy dried.
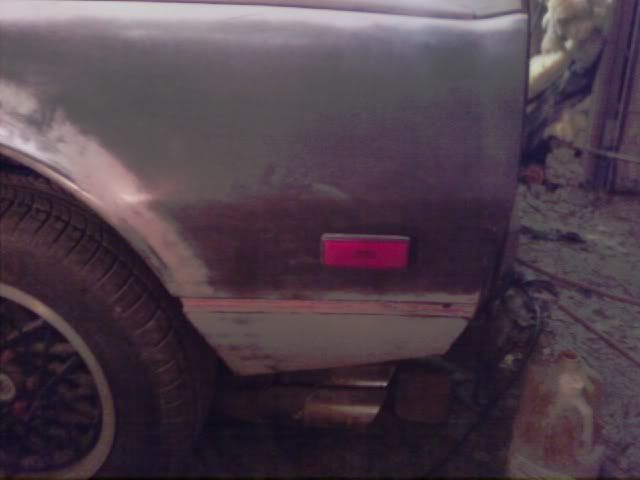
I got my holes cut for the side marker lights
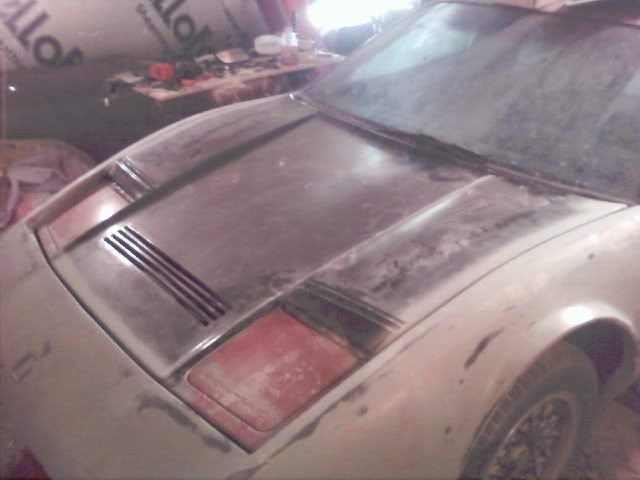
I got my hood skin mounted and just need to do some finish work to the underside
I made and installed some brackets for the sail panel to hold the inner edges out where the need to be
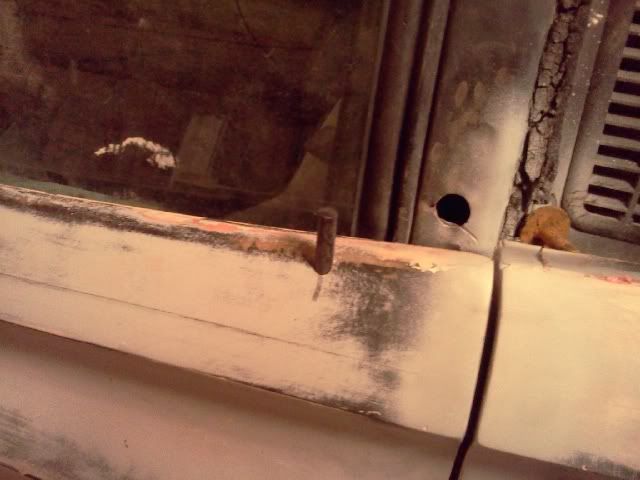
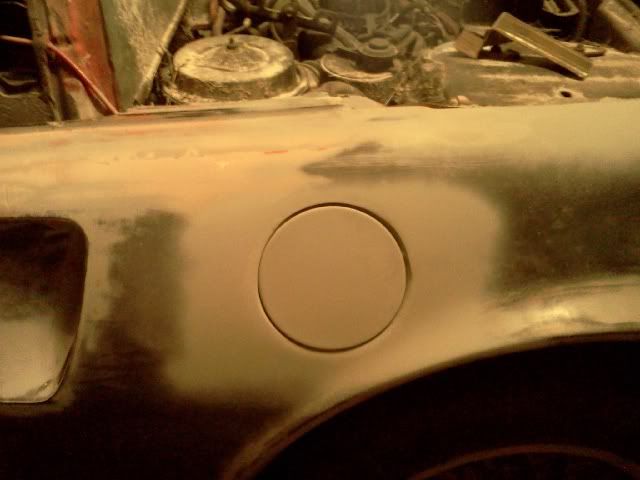
Here is a pic of the seam where the sail panel meets the rear clip. Its about 95% just the way I want it You can also see in the above pic that I am just about done with the gas filler cap as well
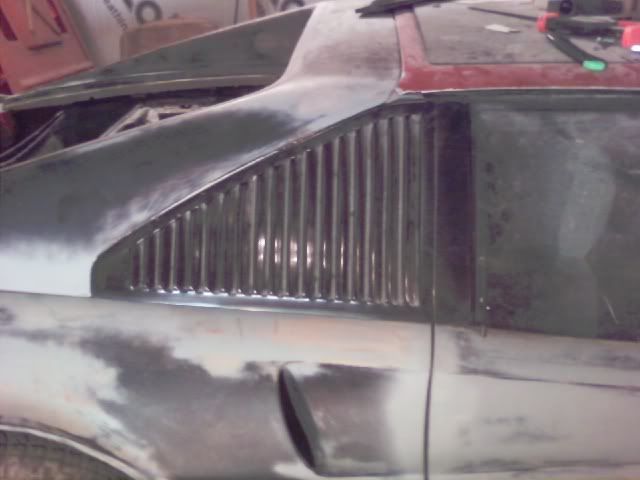
I started installing the side louvers yesterday. I used the existing hole in the bottom of the Fiero B pillar as a mounting point and driller another hole all the way through the B pillar at the top for a second mounting point. Its a 1/4" hole on the outside and I cut a corresponding 11/16" hole on the inside just big enough to accommodate a 3/8" socket to fit though to tighten the nut from the inside. The bottom factory hole is pretty big both inside and out and needs a big washer to give the 3/8" nut something to push up against. Otherwise it would just go straight through the hole. I also drilled a rear mounting point in the sail panel.
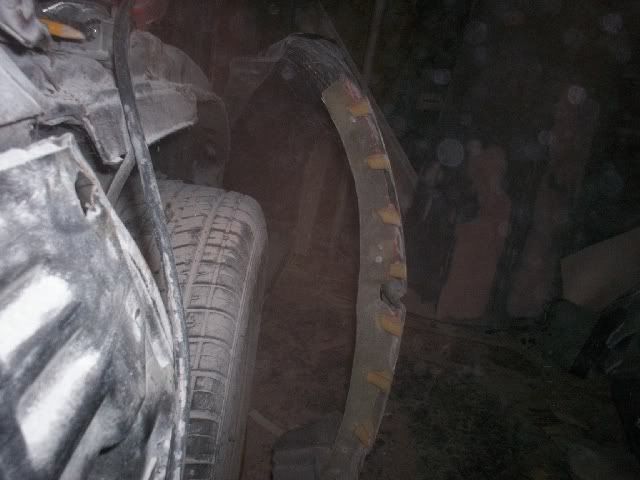
I used 3 bolts on the louvers. I think they were 10-24 X 1.5" machine bolts. I marked where they needed to go and first held them in place with bondo
Once the bondo dried I taped up the threads to keep resin off of them and fiberglassed around the bolt heads to hold them permanently in place
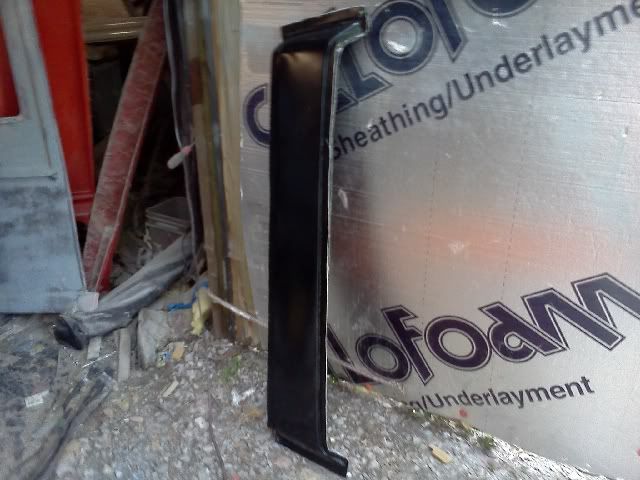
After the fiberglass dried I loosely mounted them so I could get an idea of any trimming I would need to do in order to get them to sit just about flush with the sail panel. Here is what they looked like
I also got the passenger side door installed with push button opener and the door lock. The door seams on both sides of the car are looking good now. Next up on the to do list: Make the under side of the hood look pretty where its bonded and mount the head light covers.
Here is a pic of the fuel door almost done
Here is a few of the installation of the passenger door push button openers.
I fist marked and cut the hole in the top of the door for the button to past through
Then I attached the rod to the door mechanism using a nut on top to adjust the height and one below to hold everything in place. Its a 1/8" metal rod threaded at both ends
This is where the rod exits the door. You just attach the opener and feed it up through the hole in the door when installing the door skin
Now here are some detailed photos of the mirror install using the re-purposed Fiero door skin bracket as promised a few days ago.
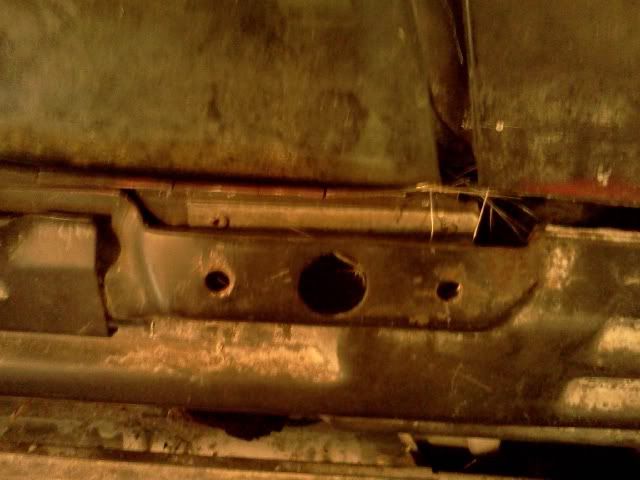
Here is a pic of the stock mounting point for the mirror. I drilled the holes out just slightly as they are a little to close together to begin with. Not much though, an 1/8" maybe
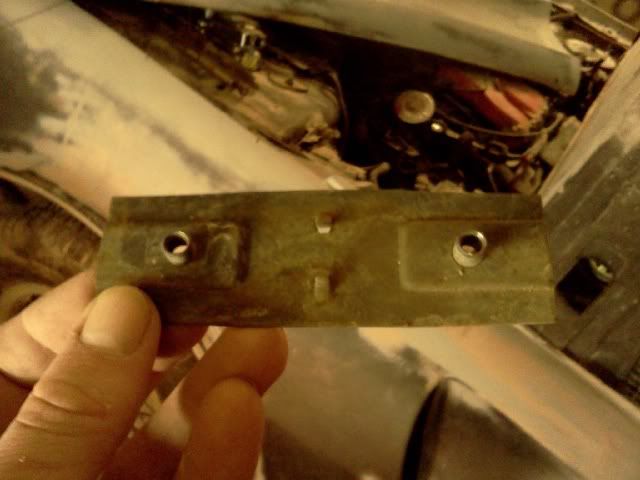
Here is a pic of the bracket removed from the Fiero door skin
You just flip it around backward and insert it into the holes. I used bondo to glue it in with
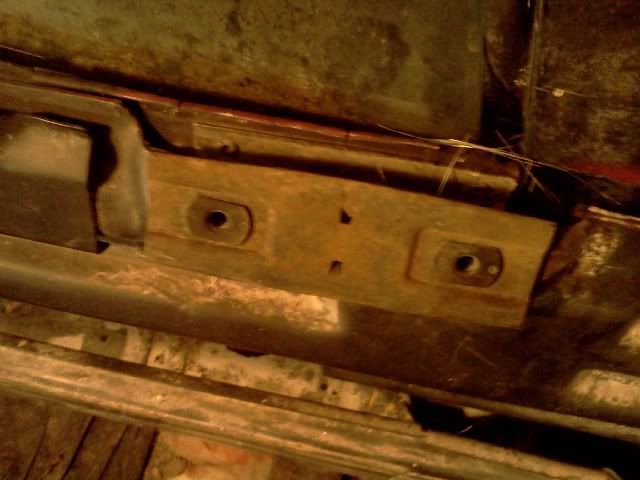
Once attached you just drill the corresponding holes in the door skin and install your mirror bracket using M6 metric bolts
Here are some pics of the passenger side door seams. I am pretty happy with how they turned out
I got the hood skin finished up. It turned out pretty nice.
I moved on to working on the headlight covers. I glassed in 4 bolts on the underside of the covers. You use nuts to adjust the height of the cover at the four corners. You just move the nut up or down the bolt depending on whether you need to raise or lower that corner of the cover. I drilled holes in the Fiero head light covers and once you have the height just right you tighten up another set of nuts on the inside of the cover. I got them fitting pretty good but couldn't finish them up because I needed to see how they worked with light going up and down but my battery is stone dead and wont hold a charge. It barely works even with the battery charger attached.
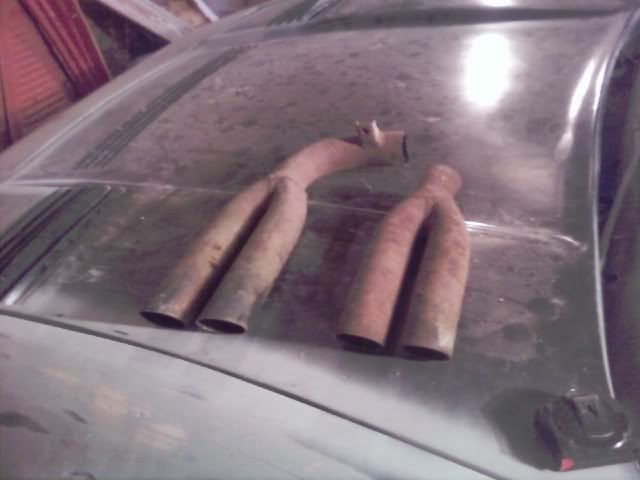
I have the exhaust tips I will be using. They are came off of a pair of 4 Cylinder Fiero parts cars.
I finally got the deck lid fitting right. I glassed in a strip of foam on the underside of the outer deck lid and put another layer off glass on top of that then clamped the inner and outer parts of the deck lid together. Then I sat the deck lid on the car and put clamps on either end of it to pull it down at the edges just slightly beyond where it needed to be. I left it to dry like that over night. I went out today and removed the clamps. It sprung back just a tiny bit but I expected that. That's why I clamped it down a little lower than it needed to be. I looks just right now
Next I will be making the brackets for the deck lid hinges so I can get it attached and I need to make some brackets to install the front bumper.
I got the rocker panels off my parts car Fiero SE to take molds off of. I filled in all the holes and anything else that would lock them in the molds. Here they are just after waxing. I will start laying them up tomorrow.
I start bonding together the sail panel spoiler. I fist drilled holes in the bottom half and glassed in the mounting bolts.
After that I glassed in two strips of foam running the length of the spoiler and then sanded them down to the right height. Just enough that they fill in the space between the 2 parts. After that I put a layer of fiberglass over them and then clamped to 2 pieces together sandwiching the foam and glass.
Clamps, clamps and more clamps!
I finished laying up the molds for the rocker panels. I will cut them out later on today
I have done so much fiberglass work in these shoes the ends of them feel like steel toe work boots. They are hard as rocks from all the resin that has dripped on them ;D
I got the brackets made for the front bumper and test fit it. I will do to a little minor adjusting on it as it is tilted a little bit to far downward as it is now
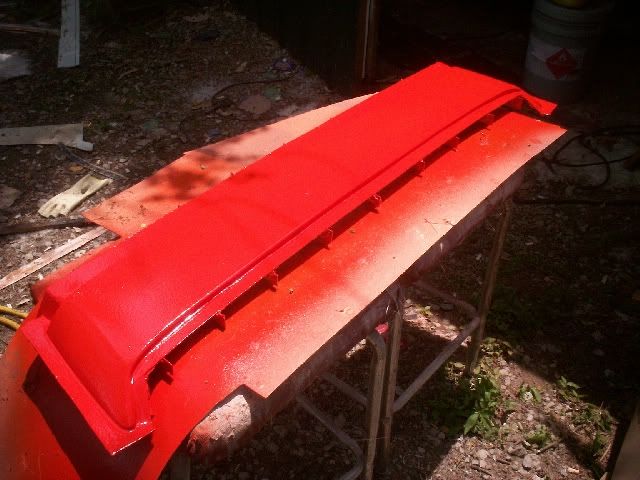
I got the sail panel spoiler almost done. Just needs a little finish work and painting
Now to get those rocker panel molds cut out and work on installing the trunk latch and key lock/release on the deck lid
I hope you got a great deal on the supplies you're using, if you had to pay full price for everything you've used thus far, that would be a very expensive project car!
You obviously know what you're doing with glass, you must have a couple hundred hours minimum in this so far, that's allot of work! Just out of curiosity, where did you get your fiberglass experience? You've covered just about every situation needed to produce molds for a complete body kit, that's not something most amatuers venture into, you are doing a bang up job.
You've also done a great job of documenting the work, thank you for that alone. Many people don't really know or appreciate what goes into making parts like you're doing, unless they've done it themselves. Your thread here will help those who wonder why the prices for this stuff are what they are, understand a little better why you get what you pay for.
Looking forward to seeing finished product, although there's little doubt that it will be very impressive, you've got "skills" man! (and PATIENCE!)
The molds you started with kinda put me in mind of some of what came from IRM. Most of those started out as good molds, but like you pointed out, proper proceedure was not followed and the molds got tore up. It's all about mold maintenance, right?
Keep up the great work, and please continue to post your progress. Am enjoying this thread very much.
HAGO!
Thanks a lot! I am glad you appreciate the effort that goes into making a proper mold.
I don't get any kind of discount in materials but I am lucky enough to have a very large fiberglass supplier just a few miles from my house. The resin is a about $800 a drum and a 80lb roll of mat runs about $175. If I had to order these items via the internet the prices would be at least double that or more.
I did the math and I actually have well over 1000 hours in the project thus far. Most of which was just getting the parts into a good enough condition to start molding. I learned everything I know from my father. He is a retired machinist (so he is very meticulous by trade) and he also used to work part time as a fiberglass boat maker. He is very skilled in body work and auto mechanic's as well. He taught me how to do fiberglass, auto body work, mechanical work and fabrication as well. I still have yet to learn how to weld though. Well, at least any good anyway Thats next on my to do list. He as only begun to show me the ins and outs of machine work. I learned how to do plastic molding and reproductions on my own. You will see later in this build that every light assembly, lens and emblem on this car will be made by myself. Except for the hood emblem (too hard and expensive to replicate, better to purchase).
Very few people do realize what goes into this. I heard someone say once that no fiberglass body should ever cost more than $4k. Ever. Maybe they should come work with me for about 30 days and see what they think That being said I will not be beating people up on prices. You will be able to buy everything needed to finish the car minus paint, emblems and your choice of tire and wheel set up for about $3995. Thats all fiberglass pieces, brackets, lights, grills, push button door openers and mirrors.
And yes, mold maintenance is very important. The cleaner, shinier and smoother you keep the molds the better they will produce and last. Wax build up can lead to a chip which leads to a crack which leads to a gouge etc etc... However, the original molds could have been maintained to the highest standard and it would have made little difference as they where badly made from poor, ill fitting parts and where pretty much garbage from day one I would imagine.
I cant wait to get this car finished but sad that I will have to sell it immediately after completion. I'm getting married next year and need money to go toward the wedding as well as funds to replenish my fiberglass supplies as I will be starting my next mold making project over the winter.
Well, that's enough rambling by me. I got a car to work on haha
You're right on about the price of materials. We get ours from Composite One in PA and pick them up ourselves and the drum is up to around $1400 now, and the ounce and a half matte is over $300 for the 80yd. bolt. When we started (about 10 years ago) it was around the prices you quoted.
A thousand hours, wow........that sounds about right for what you've done. You've basically made a silk purse from a sow's ear! I understand what you're saying about the molds not being right to begin with, that makes what you've done even more impressive.
You've got a great dad, and he taught you well, and obviously, you paid close attention! Can't wait to see your plastics projects, maybe you'll share some your techniques with us, many of us would like to know how to work with that stuff!
I spend more time cleaning-prepping molds than I do laying parts up, as you said, they can't be too clean or shiny. My teacher used to say, "A fly shouldn't be able to land on it!" Though some of the molds I use have a "class B" finish on them, that's how they were made in the first place. Sometimes no matter how much time/effort you put into them, eventually they start to break down a little at a time. That's why the guy I learned from always said when you get a really good part out of a mold, save it somewhere, cause sooner or later you are gonna need it for a plug!
You're pricing sounds very reasonable to me. Don't know how you can let it go that cheap! I hope you have more buyers than you can handle! Can't wait to see what you have on the drawing board.
Congratulations on your upcoming wedding and best of luck to you and your bride to be. You're life will never be the same again! (That CAN be a good thing though yaknow.)
Keep the updates coming.
About the shoes.........I've actually considered making glass covers that fit over the tops of my shoes, so I don't have to replace them every few months, and I have put plastic bags on them occasionally.


 .
.