I partially installed my T-tops today. I followed the other threads with good information on installing the tops, but did a couple things differently.
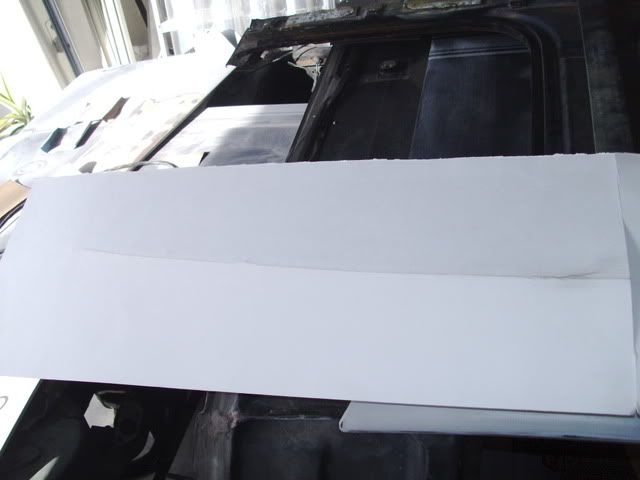
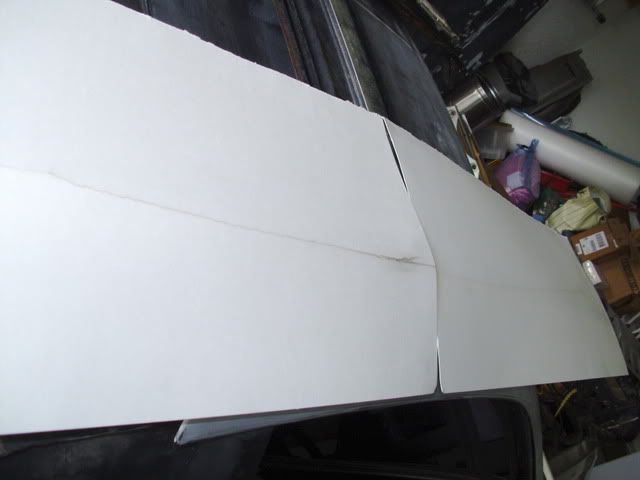
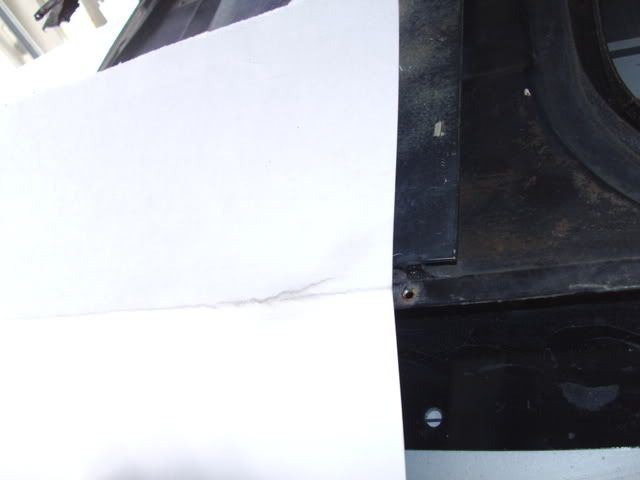
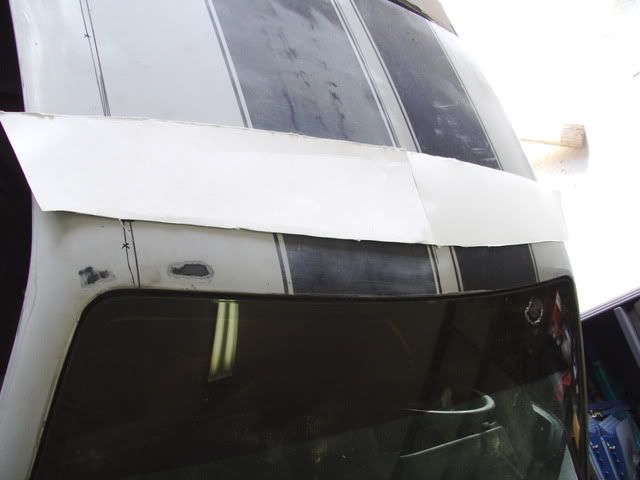
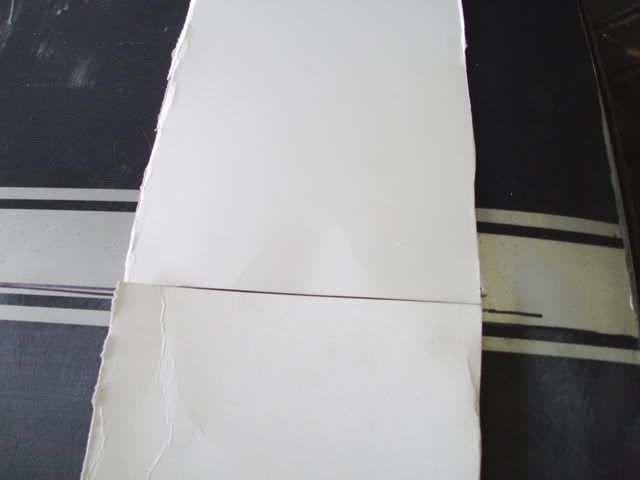
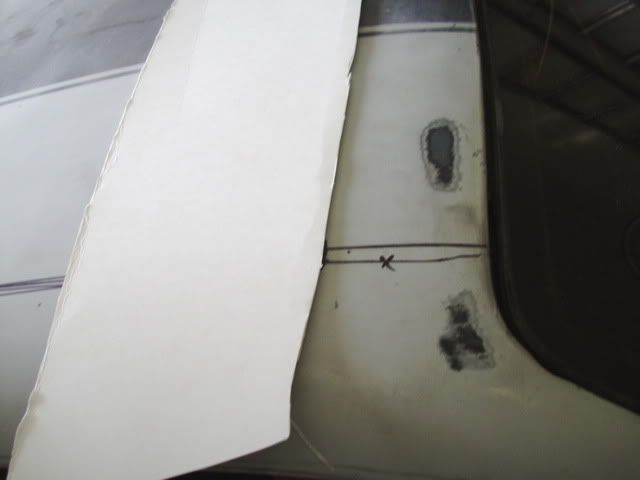
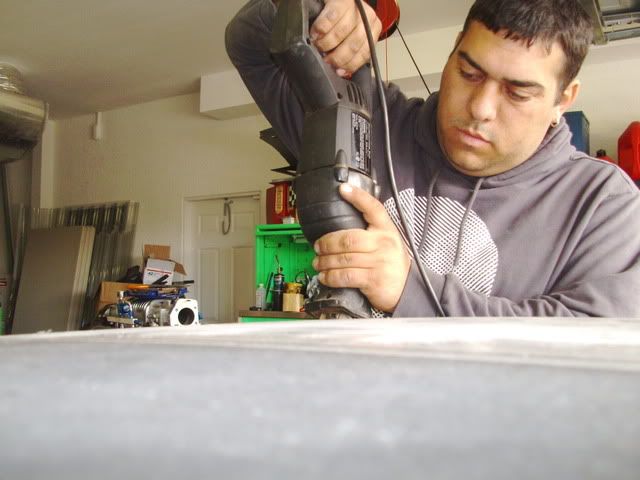
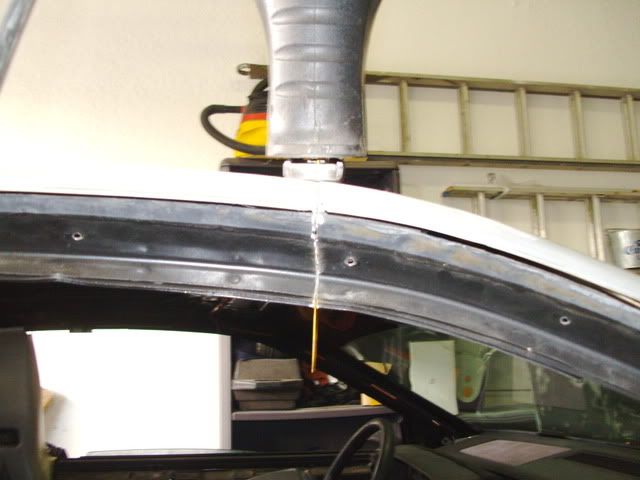
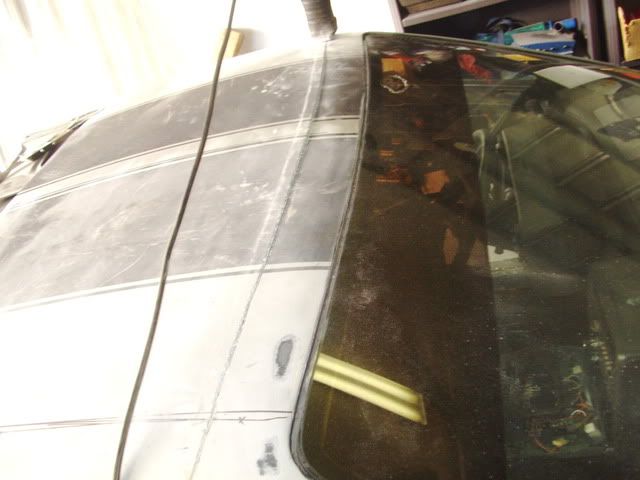
First off, I used the original installation manual found here. For the front cut, the instructions call for a template for the curvature. Since I dont have one I made one myself. First I took some construction paper, in two pieces and laid them over the T-top skeleton on the front where the curve is. Since I had two pieces I figured it would help to use the centerline to help line everything up. Once in place with the seam on the centerline, I used my greasy hand to crease the paper along the T-top frame, leaving a very distinguishable mark. Here you can see what the left half looks like on the frame. I simply cut the paper along the line until I had two halves with the correct curvature and laid them on the car. The lines you draw using the instructions are important to this working. Again, the seam of the papers went on the centerline and I used the two marks on the outer edges to ensure everything was square. Notice how far off the centerline of the car is from my racing stripes I just drew on the car where the paper line was and I was done with that! Since I had the roof section from the car I cut the T-tops out of I removed the front skin and laid it on my car to see how accurate my line was and it was dead on. Time to start cutting. Once all the way through, I removed the roof skin. Now you will notice that I dont have spreader bars installed on my car. I didnt feel like making any and they are somewhat unnecessary if you have two available jacks. Once the roof is cut the only structure holding the car in the middle is the floor and that flexes, hence the need for spreader bars, or you can put a jack right in the middle of the car on each side to support the center floor and act as a makeshift spreader bar. Jack the car up more to spread the roof or lower it to make the A and B pillars closer together. This worked perfectly for me because as I was cutting I was able to pump the jacks just enough to spread the roof so it didnt bind the saw and I could sit on my seats or stand on the sills.
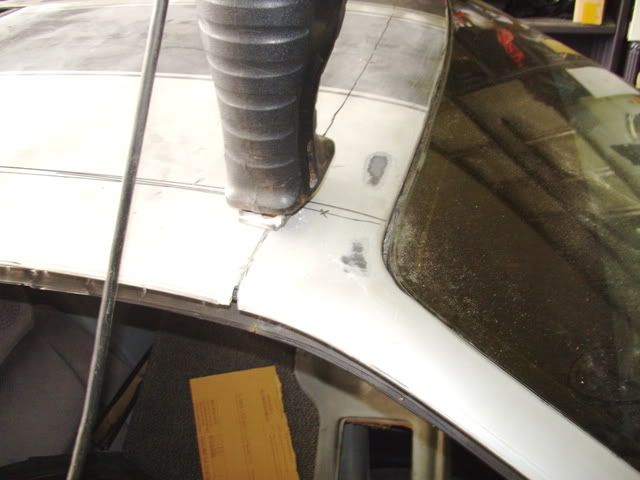
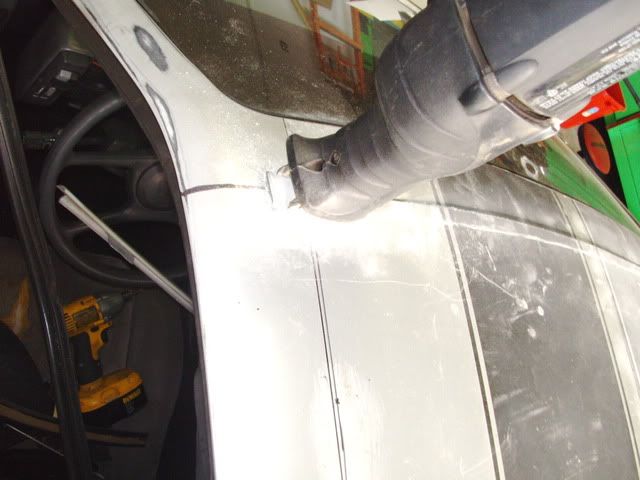
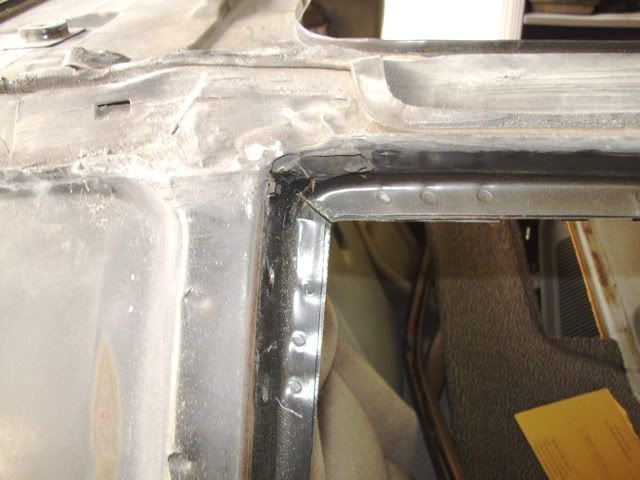
Now that the front is cut it is time to start on the rear. You cut up from the door seal pinch at a 45 degree angle like this and then starting at the rear of the sunroof cutout, cut toward your 45 degree cut until you have this Finally you have some really weird cuts to make at the B pillar, the instructions are vague but it you really study them all the info is there. I read it several times and referenced the pictures as well as the section of the donor roof I cut from the old car. It helped to have that there and I would recommend it for anyone attempting this. At the end you should be left with this
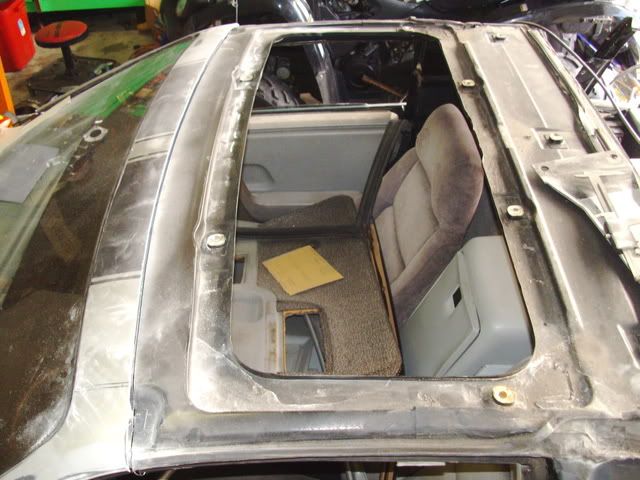
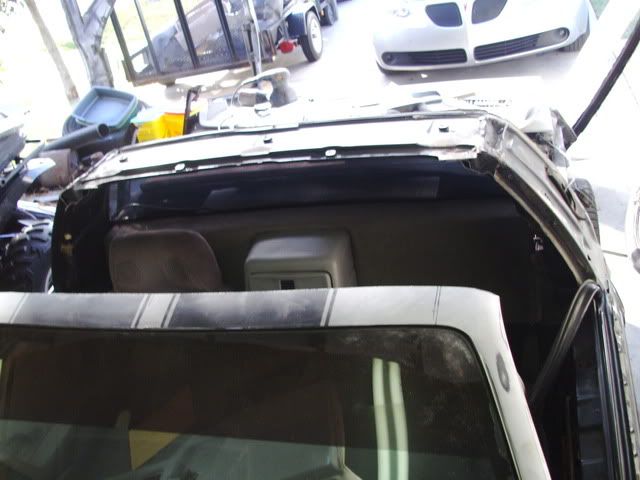
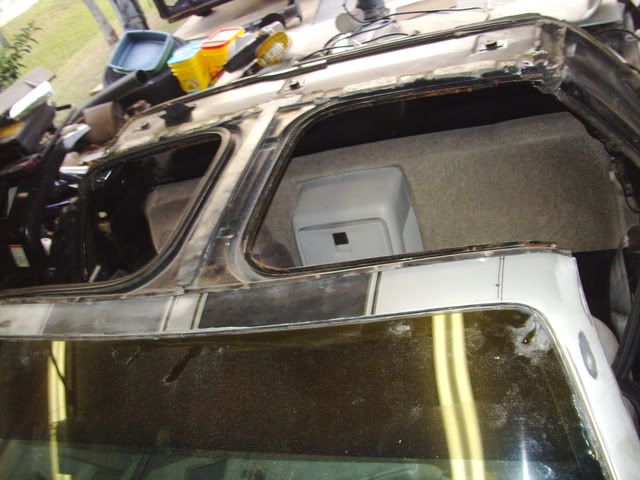
I didnt yet buy the butyl sealant so the roof is not fully installed, but I did test fit the T-top cartridge to make sure my cuts were good. At the end of a couple hours work I left off here. I am happy with the way the cuts turned out and how it looks now. The seals are going to be a different story, I have some but they were cut at the front so I think I am going to attempt butt joining the old door seals and the T-top seals and using a product to glue them together. The top and rear of the seals are in good shape, I think they will seals just fine.
More to come as I finish this off.
-Joe
IP: Logged
11:46 PM
PFF
System Bot
Dec 9th, 2010
fieroparts.com Member
Posts: 4831 From: Maine 207-934-1969 Registered: Jun 2000
Howdy, You didn't suport the frame when cutting the top off?? I thought you were supose to to keep the body alinement or keep from buckling correct?? Kinda like V8Archie does when he cuts off the roof for a chop top? Jay
IP: Logged
08:51 AM
Alex4mula Member
Posts: 7410 From: Canton, MI US Registered: Dec 1999
I replaced the seals on my 87. I bought new old stock C&C F82 Camaro seals, new Fiero store door seals, and IC2000 super glue w/rubber meant for gluing model tires. I cut the seals and glued them up so there is only one piece per side. I installed mine a year ago and they do not leak; see:
I replaced the seals on my 87. I bought new old stock C&C F82 Camaro seals, new Fiero store door seals, and IC2000 super glue w/rubber meant for gluing model tires. I cut the seals and glued them up so there is only one piece per side. I installed mine a year ago and they do not leak; see:
Actually I read through your thread quite a bit before doing this. The seals believe it or not were my main concern before I jumped in and cut the roof. I spoke with Will Hammond yesterday (infinitewill, the guy doing the GT trunk seals) on the phone and asked him about mating two seals together. He recommended the IC2000 product as well so I am going to try to find some of that today.
Thanks for the replys all. I am looking forward to getting this done but then it will be another few months before I can actually enjoy the T-tops because the whole car is under the knife.
On supporting the frame, I did write in there that I supported it with jacks on either side of the car. There is no need to "lock things in place" because you need to spread the roof gap to install the T-top cartridge anyway. All you are doing is supporting the middle of the car from collapsing which I accomplished a different way than spreader bars and it worked beautifully.
Howdy, You didn't suport the frame when cutting the top off?? I thought you were supose to to keep the body alinement or keep from buckling correct?? Kinda like V8Archie does when he cuts off the roof for a chop top? Jay
If you're doing a quick swap of the tops then you should be relatively fine when cutting the top in this way. The problem is if you were to cut the top and then move the car around or drive it. Then you'd likely start to see buckling of the frame. I'm pretty sure there's a few that have done homebrew chops in this manner also.
IP: Logged
11:18 AM
DLCLK87GT Member
Posts: 2717 From: South Jersey, USA Registered: Feb 2009
Pretty cool. You're making it look easy. Question, why not remove the fiberglass roof panel instead of cutting that too? I know they are a bugger to get off around the windshield but it'll have to come off eventually if you have a complete one that came with the T-Tops. Just curious, keep it up and the pictures coming, Dave.
IP: Logged
11:54 AM
joesfiero Member
Posts: 2181 From: North Port,FL,USA Registered: Jan 2008
Well mine wasnt a complete roof section, I cut the A and B pillars off of the donor car. I actually did remove the roof skin before I began, I know how much of a pain that sealant is to get off without cracking the roof and I figured it would be easier to get off with the roof panel as a whole. Once it was off I peeled all the sealant off and laid the roof skin back in place for cutting. It really needs to be on there anyway so you can measure and draw out your lines on it. There are certain points necessary as outlined in the manual to ensure you arent cutting too much off.
I searched all day for that stupid butyl sealant with no luck. I found some online I may just order so I dont have to keep driving around.
-Joe
[This message has been edited by joesfiero (edited 12-09-2010).]
IP: Logged
01:10 PM
infinitewill Member
Posts: 2350 From: Overland Park, KS U.S.A. Registered: Mar 2009
Or there are several dealers on Amazon as well but I would see if there is a local hobby dealer near you that has it so you can be assured it is fresh.
\/\/
IP: Logged
01:24 PM
PFF
System Bot
Dec 10th, 2010
joesfiero Member
Posts: 2181 From: North Port,FL,USA Registered: Jan 2008
Nothing new to report, there wont be for a while. I want to remove the roof skin and A pillars section for paint, but the T-top frame sits on top of the roof skin and the skin has studs that come down through the metal roof frame making it impossible to remove and reinstall the skin with the T-top section installed. I will have to wait until the roof skin is painted so I can reinstall it before final installation of the T-tops.
Give me a couple weeks, probably sometime after Christmas or maybe even early in the new year. Hoping to be ready for paint next week.
-Joe
IP: Logged
09:45 AM
Dec 11th, 2010
Back On Holiday Member
Posts: 6238 From: Downingtown, PA Registered: Jul 2001
Originally posted by joesfiero: I searched all day for that stupid butyl sealant with no luck. I found some online I may just order so I dont have to keep driving around.
3M Windshield sealant at autoparts place... pricy though.
IP: Logged
12:17 PM
Dec 16th, 2010
joesfiero Member
Posts: 2181 From: North Port,FL,USA Registered: Jan 2008
...so jealous, I would love to do this myself so much, but alas, t-top part cars seem to be beyond rare in my area – I would even pay a fair price if someone would send me a setup from the US, but so far no takers.
Anyways, thanks for posting and good luck with the install...
IP: Logged
10:36 AM
jscott1 Member
Posts: 21676 From: Houston, TX , USA Registered: Dec 2001
Pretty cool. You're making it look easy. Question, why not remove the fiberglass roof panel instead of cutting that too? I know they are a bugger to get off around the windshield but it'll have to come off eventually if you have a complete one that came with the T-Tops. Just curious, keep it up and the pictures coming, Dave.
That's the way it's done.
Removing the roof skin would add a lot of unnecessary work. Usually the donor roof doesn't have the full roof panel anyway and is cut midway up the A pillars. And even if it was complete, what's the chance of it being the same color and paint quality of your car? About zero, and your roof panel has to be cut anyway, so it's easiest to cut it in place.
@Alex, when I looked at the 88Gt T-top 5 speeds, they were out of my price range, so I started with an 88Gt 5 speed and added the T-tops. Really compared to engine swaps that people do around here all the time, the T-top is a walk in the park. It really is a weekend project that just about anyone can do.
IP: Logged
01:36 PM
82-T/A [At Work] Member
Posts: 25729 From: Florida USA Registered: Aug 2002
You're a better man than I am... my 87 Fiero SE / V6 was my first car, and there's no way I'd be taking a sawzall to it...
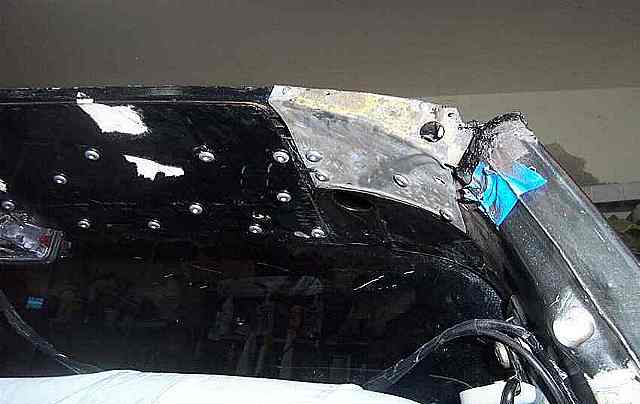
That said, I'm not afraid of a little cutting:
Quick question though. I think I asked this before in another thread... is there any reason why you don't want to weld these pieces together? I know a lot of people put back the normal rivets... it would make sense to me that a really good idea would be to weld the bracket (is it made of aluminum or steel?) to the chassis as WELL as using the rivets. Welding would probably help eliminate a lot of the flex.
I don't think there is any reason you can't weld, but it's more work, and not necessary. The installation procedure was designed to be accomplished as quickly as possible in the aftermarket. Welding would probably necessitate removing the interior to prevent damage or at least covering everything with thick welding blankets. The 50 or so 1/4" rivets are just as strong.
IP: Logged
01:53 PM
Xanth Member
Posts: 6886 From: Massachusetts Registered: May 2006
I don't think there is any reason you can't weld, but it's more work, and not necessary. The installation procedure was designed to be accomplished as quickly as possible in the aftermarket. Welding would probably necessitate removing the interior to prevent damage or at least covering everything with thick welding blankets. The 50 or so 1/4" rivets are just as strong.
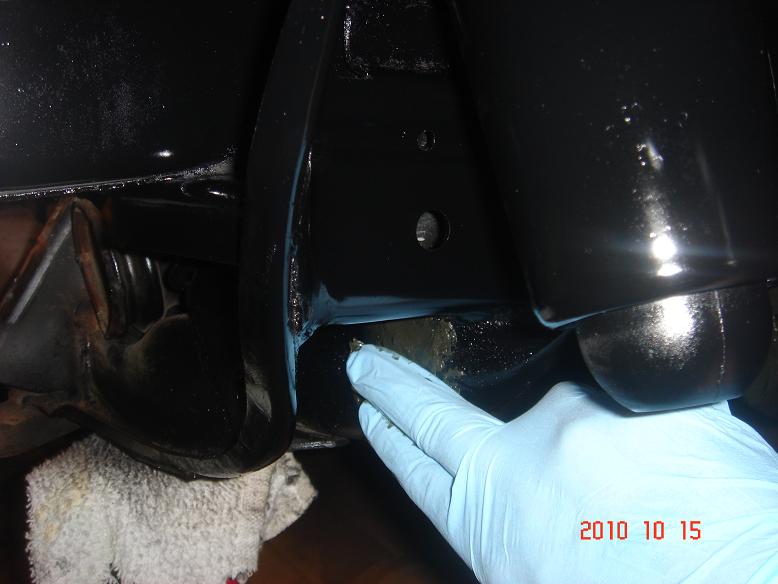
I guess... welding is something that's become very easy for me, and I usually turn to it whenever I see anything that can be improved. Like when I was re-doing my suspension, I noticed that the cross-member where the spring perch support plate was welded, it was left "open" in several spots, so I just welded it up (below).
I just figure, while I'm in there, I might as well do it if it's not going to hurt the originality and look of the car. The thing is, I would bet that after a certain amount of time, those rivets will eventually work themselves loose. Not that they'll break free, but with enough driving around, it would eventually elongate the holes that they reside in. At the very least, you can significantly re-enforce this simply by welding an entire bead along where it mounts to the chassis. A welding blanket the size of a sheet is like $10 bucks, and chances are you already have to remove the headliner and A-pillar and B-pillar brackets anyway for this installation.
I dunno, that's just me... looks good anyway though... I'd love to have TTOPs... but I could never bring myself to cut into my first car!!! hahah...
Not necessary.... the rivets will not loosen up, unless they were improperly installed. I have removed t-tops from a car with over 100K on the odo and the rivets were tight, no movement. I also owned a Formula with 200K on the odo with t-tops, nothing loosen up with that either.
quote
Originally posted by 82-T/A [At Work]: I guess... welding is something that's become very easy for me, and I usually turn to it whenever I see anything that can be improved. Like when I was re-doing my suspension, I noticed that the cross-member where the spring perch support plate was welded, it was left "open" in several spots, so I just welded it up (below).
I just figure, while I'm in there, I might as well do it if it's not going to hurt the originality and look of the car. The thing is, I would bet that after a certain amount of time, those rivets will eventually work themselves loose. Not that they'll break free, but with enough driving around, it would eventually elongate the holes that they reside in. At the very least, you can significantly re-enforce this simply by welding an entire bead along where it mounts to the chassis. A welding blanket the size of a sheet is like $10 bucks, and chances are you already have to remove the headliner and A-pillar and B-pillar brackets anyway for this installation.
I dunno, that's just me... looks good anyway though... I'd love to have TTOPs... but I could never bring myself to cut into my first car!!! hahah...
IP: Logged
02:27 PM
PFF
System Bot
jscott1 Member
Posts: 21676 From: Houston, TX , USA Registered: Dec 2001
Originally posted by 82-T/A [At Work]: I guess... welding is something that's become very easy for me, and I usually turn to it whenever I see anything that can be improved.
Nothing wrong with welding...but riveting is an acceptable manufacturing technique. Think of all the aircraft, buses and trains that are riveted together. And if you imagine several rows of rivets that is going to be stronger than a single bead of weld. In my opinion it just isn't needed.
IP: Logged
06:35 PM
joesfiero Member
Posts: 2181 From: North Port,FL,USA Registered: Jan 2008
Sure, if one wanted to weld a bead along the T-top cartridge to the roof frame one could. I probably wont on my build, I have a welder and could do it, I just think its unnecessary. If I ever feel like the rivets are working loose, or the car needs reinforcing then by all means I will weld it up.
Just a question for anyone who has done this before, Jscott et al., what did you use for the butyl sealant? Windshield sealant like BOH has suggested? I should be coming along on finishing the conversion in the next couple weeks (due to painting the car panel off) and should be purchasing some soon.
Thanks for the replies, I was confident going into this that I could make the cuts and install the frame as manufactured. My advice for anyone else doing this would be to do the same, be confident in yourself and your abilities. Once you start cutting into the car its too late to second guess yourself. I had a friend help me with measuring and marking the lines because you really need someone on each side of the car to be accurate. Once the lines were marked he left and I had the top in in a matter of a couple hours to where it sits now.
If needed it could be a weekend job. Mine isnt because the whole car is being worked over and Im waiting for certain steps to be finished before I can finish the tops.
One other suggestion, feel free to chime in others who have done it. When I put the top frame in towards the rear and then lifted up the front and slid it into place, it wouldnt quite fit all the way forward. I gave it a good shove and it went but took a small chunk out of the roof skin right behind the windshield. Nothing huge, but it took a paint chip, it was obviously not a big deal to me since it is being painted but I will have to be real careful once it is painted and I am sliding it into place for good. I will probably try to bend up the forward top flange of the T-top up for clearance since it is covered with trim anyway. I just know I would have been really pissed if I was trying this on a painted car.
-Joe
IP: Logged
08:42 PM
Feb 10th, 2011
joesfiero Member
Posts: 2181 From: North Port,FL,USA Registered: Jan 2008
Just to update this a little, I have the T-top installed for the final time. I finished the paint work on most of the body, the windshield trim being one so I could get that into place and finish the tops. I used a caulking made for roof repairs sold at the Home Depot. Its actually made by loctite, it is very thick and tacky and even after it dried it is still very flexible and sticky.
The rear of the cartridge is bothering me a little though. On the right side it sits fine but the left side seems to sit a little low, making the trim piece along the rear clip difficult to sit right without looking crooked. I will post some pics when I get home so you can see what I mean.
-Joe
IP: Logged
11:13 PM
Feb 11th, 2011
jscott1 Member
Posts: 21676 From: Houston, TX , USA Registered: Dec 2001
I used a caulking made for roof repairs sold at the Home Depot. Its actually made by loctite, it is very thick and tacky and even after it dried it is still very flexible and sticky.
-Joe
To answer your question I used the same stuff. At the time I couldn't find the Butyl stuff in a caulk gun sized tube so I went with the roof repair stuff. Just for good measure I sprayed the entire frame afterwards with rubberized sealer. That elliminatged any squeaks that might have been there.