The two main reasons I prefer the C5 setup, is for parts availability in 20+ years and its aftermarket support. [QUOTE]
Do you mean the C4? The C5 has not been around that long and has no common parts with the C4.
C5's are already plentiful today and will still be 20+ years from now. The other nice thing is the upper/lower a-arm setup uses common parts in the front and rear.
The C4's are quite common, but the rear setup uses a rigid halfshaft for the upper link and its length is critical to the suspension geometry. So adapting it to a fiero would be quite challanging.
IP: Logged
05:07 PM
Dec 25th, 2009
Eau_Rouge Member
Posts: 208 From: Ontario, Canada Registered: Jan 2007
Doesn't the C5 use a transverse leaf spring up front? Wouldn't this present a problem in adapting C5 spindles to a Fiero? Can you upgrade to coilovers in a C5?
IP: Logged
01:05 AM
fieroguru Member
Posts: 12134 From: Champaign, IL Registered: Aug 2003
Doesn't the C5 use a transverse leaf spring up front? Wouldn't this present a problem in adapting C5 spindles to a Fiero? Can you upgrade to coilovers in a C5?
Yes, but there are several coilover spring upgrades already available for them.
IP: Logged
09:00 AM
Dec 26th, 2009
Fiero2m8 Member
Posts: 1928 From: Niagara, Ontario, Canada Registered: Feb 2006
Forgot to say, Ryan thanks for the links - a lot of good info in there.
Hey Caesar, keep an eye on my build thread to see when the 88 front suspension goes into the Indy. You are welcome to come down and see it anytime you're in Niagara.
Sorry, a little off topic, but I was seriously looking at swapping/fabbing in a C4 IFS until I looked closely at this drawing:
The top A-arms are only 27" apart if I read this correctly. The Fiero is 36" apart. Unfortuneately, I think I would lose too much front space and tear into the brake booster to do this...Next?
Bob
IP: Logged
07:01 PM
Apr 4th, 2010
RCR Member
Posts: 4397 From: Shelby Twp Mi Registered: Sep 2002
Anyone know the scrub radius for the 88 suspension, using the stock wheels?
Based upon a model I did of the 84-87 front, the scrub radius is about 2.3". Anyone know if this is close?
Bob
Just to make sure I understand, the scrub radius is taken from where the kingpin line intersects with the road, to the center of the tire contact, correct?
------------------ ---------------------------------------------------- Currently in the middle of my 88 + 3800NA swap
IP: Logged
05:42 PM
Apr 5th, 2010
RCR Member
Posts: 4397 From: Shelby Twp Mi Registered: Sep 2002
Can the 88 uprights be adapted to the the 84-87 A-arms? What would it take? Why wouldn't it work?
Bob
No, you can't. The '88's have longer control arms and are designed to work with a shorter spindle height among other changes. The '84-'87's have shorter control arms that are mounted further apart at the chassis mounting points, and they would be closer together at the spindle ends and you'd have crazy suspension geometry going on if you tried using an '88 spindle.
The only way to use '88 spindles on your '84-'87 is to transplant the entire front suspension from an '88...
IP: Logged
07:00 PM
RCR Member
Posts: 4397 From: Shelby Twp Mi Registered: Sep 2002
To bring this topic up from the dead, I have now acquired an 88 front suspension that needs some TLC (thanks Dad). Hopefully it will make the trek across state back into my hands next weekend. Got a very nice gas tank, too.
Bob
IP: Logged
08:27 PM
Dec 11th, 2010
RCR Member
Posts: 4397 From: Shelby Twp Mi Registered: Sep 2002
I'm going to try to finish this thread as a build thread...I wanted to get and post some clearer pics of the work.
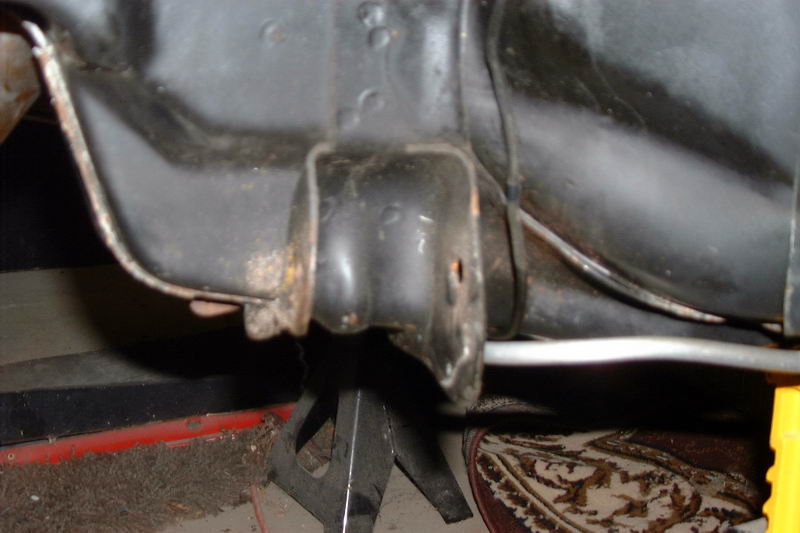
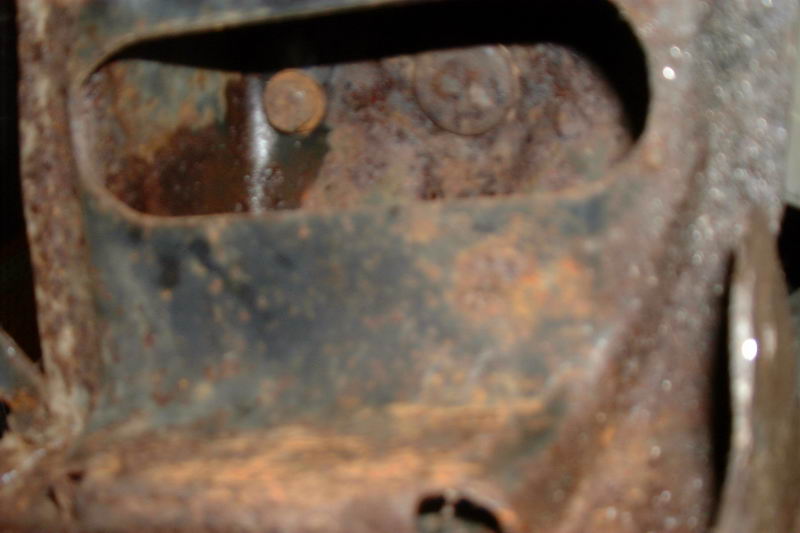
I have all of the '84 components out of the car, cooling, etc... I started today cutting the spotwelds out of the lower rear brackets. The cutter lasted for about 16 spot welds before I tore all the teeth off. Looks like 4 more to go Need to be a little more careful with the next one. Probably order 3 from HF (about $6 each).
The only shot of today...There'll be more. 7 of 10 spot welds visible in this shot. (The aluminum line is a trans line, the black wire is from the trans temp sender)
Bob
[This message has been edited by RCR (edited 12-11-2010).]
IP: Logged
02:38 PM
Dec 18th, 2010
Fiero2m8 Member
Posts: 1928 From: Niagara, Ontario, Canada Registered: Feb 2006
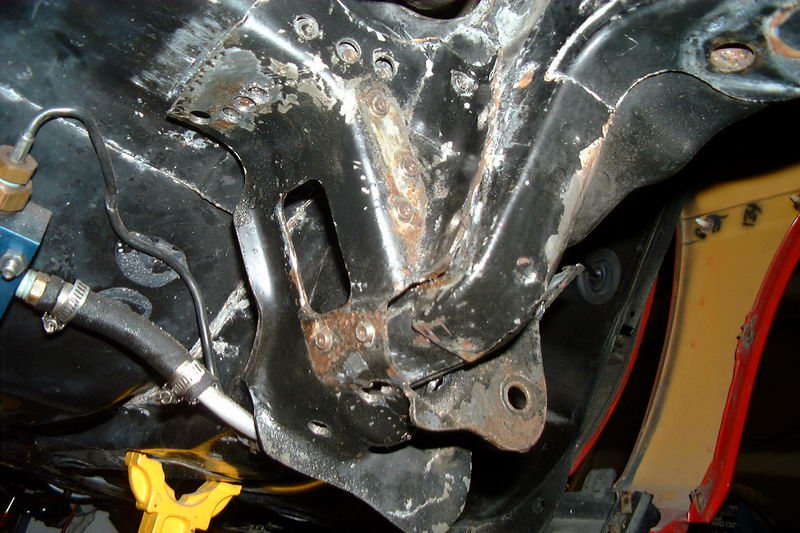
A few more pictures. Got a new spotweld remover. This one from Harborfreight (Drillmaster) cost half of my first one and I managed twice as many holes. Worth the 5 bucks...
Here is the bracket that holds the cross piece in front of the gas tank. 7 welds held that in.
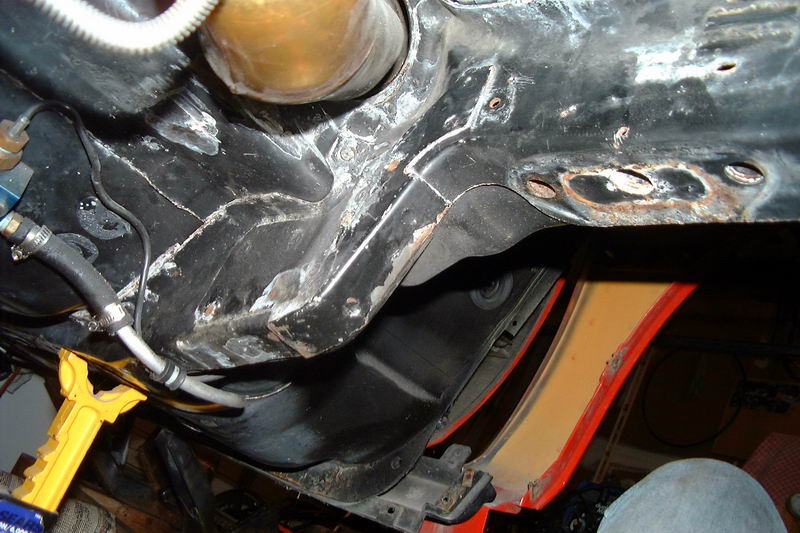
Here are a couple more of the a-arm bracket. lost count on the number of welds holding this bugger. The top of this bracket was a pain as there is a spot weld right in the corner that I could not get at with the cutter. Ended up doing a bit of damage to the underlying metal.
And here the bracket is removed and most of the left over spot welds ground flat.
Bob
IP: Logged
05:37 PM
Jan 2nd, 2011
RCR Member
Posts: 4397 From: Shelby Twp Mi Registered: Sep 2002
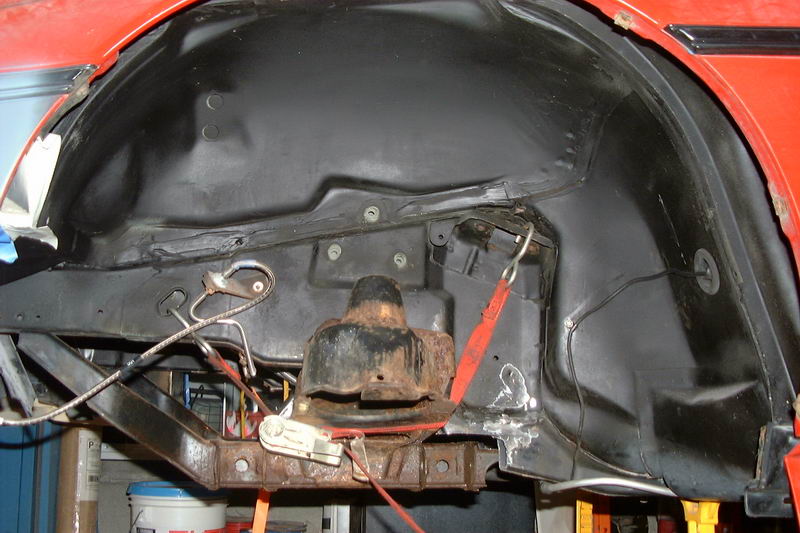
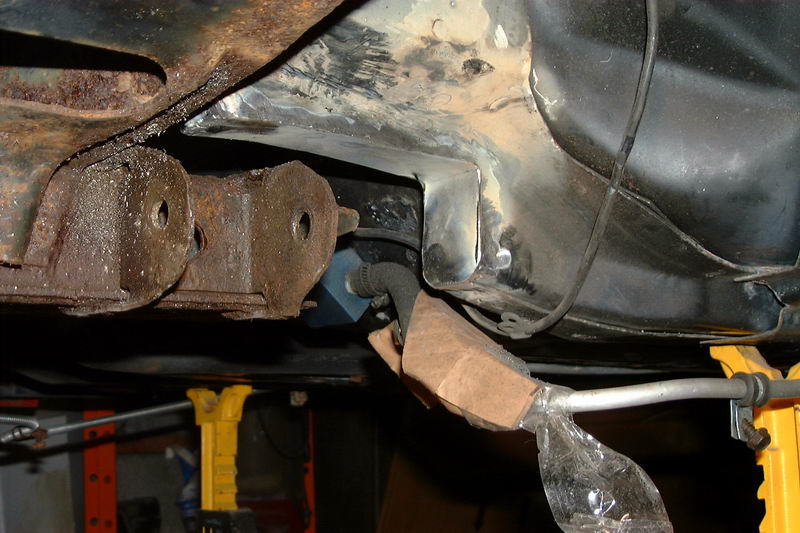
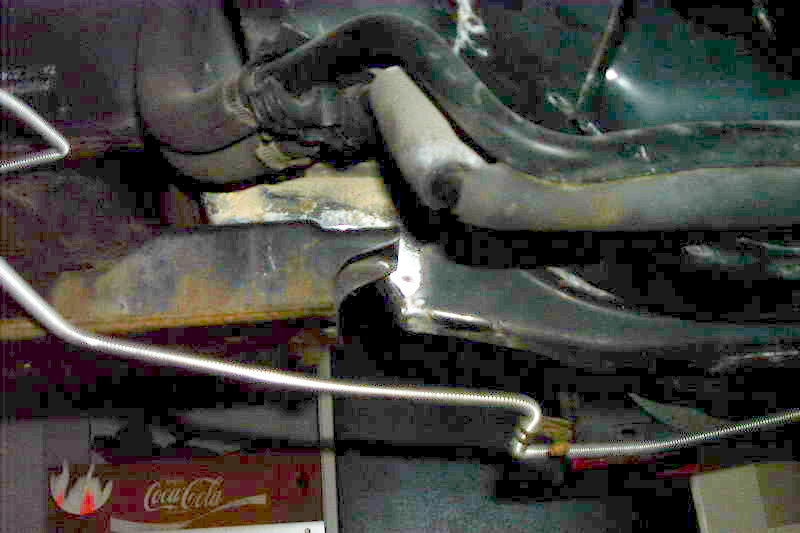
I removed the passenger side brackets then cut up the frame rails yesterday. I placed the 88 cross member into position using a couple of nylon straps.
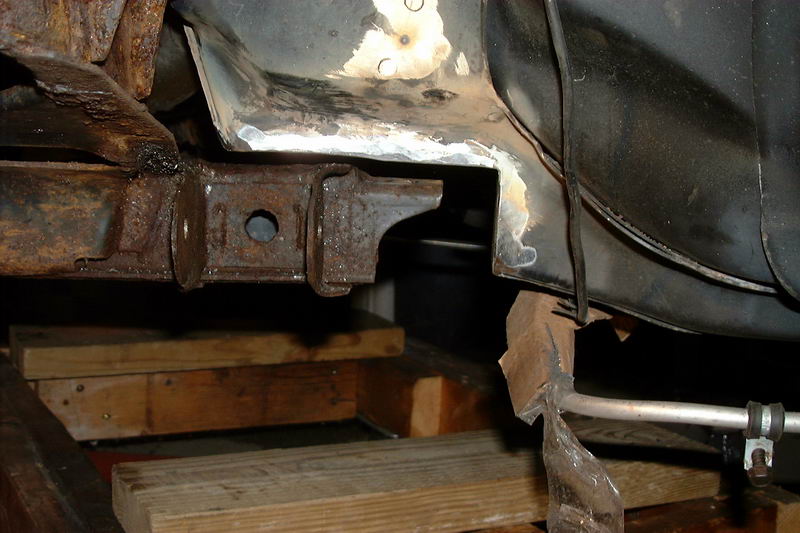
Here's a close-up shot of the driver's side frame rail, before the cut.
Here it is after the cut.
The one thing I'm unclear on and will have to verify before welding the frame back together is whether the coolant tube needs to run in the space behind the crossmember and the frame. If this is the case, I will need to trim the frame back a little more.
Bob
[This message has been edited by RCR (edited 01-02-2011).]
IP: Logged
09:57 AM
Isolde Member
Posts: 2504 From: North Logan, Utah, USA Registered: May 2008
Great thread. Before reading it, I had found and read all of a really old thread here going in depth on the geometry issues of the pre-'88 fronts, and was leaning toward an '88 swap for my '84. After this thread, I'm definitely going to try pivoting my front crossmember and raising the inner mounting points for the lower arms. Just doesn't solve the scrub radius issue.
IP: Logged
06:58 PM
Mar 6th, 2011
RCR Member
Posts: 4397 From: Shelby Twp Mi Registered: Sep 2002
I wanted to update the thread, but the pictures are not on the card. ???
Anyway, I had to recut the frame rails a bit to ensure I had clearance for the coolant tubes. I've also made the patch panels for the frame and welded them in.
This weekend, I drilled the new holes for the crossmember, using the dimensions Ryan provided in his thread. I measured and remeasured about 6 times and marked the holes with a punch. I wasn't to sure on my ability to slot the holes since the new holes are close to the old holes. So I decided to fill the existing holes first. (Looked better in the pictures, but I'll explain). I needed a 1/2" plug for the old holes, so I cut off the ends of 4 old press-in lugs. I tapered the ends to get good penetration and used a sawsall to cut them off. I drilled out the holes in the x-member using a step bit to ensure they were round. Then tapped the plugs in flush and welded them down. A little grinding and you couldn't tell they were there.
I used the punched markingings to drill new 1/2" holes.
After digging around for the original bolts (just to check fit), I re-tapped the chassis holes and used a die to clean the bolts.
I used my nylon straps to hold up the x-member and everything bolted into place with no issues.
Next step will be to fabricate the back mounts and drill the front holes to match the chassis.
I'll try to get pics that work...
Bob
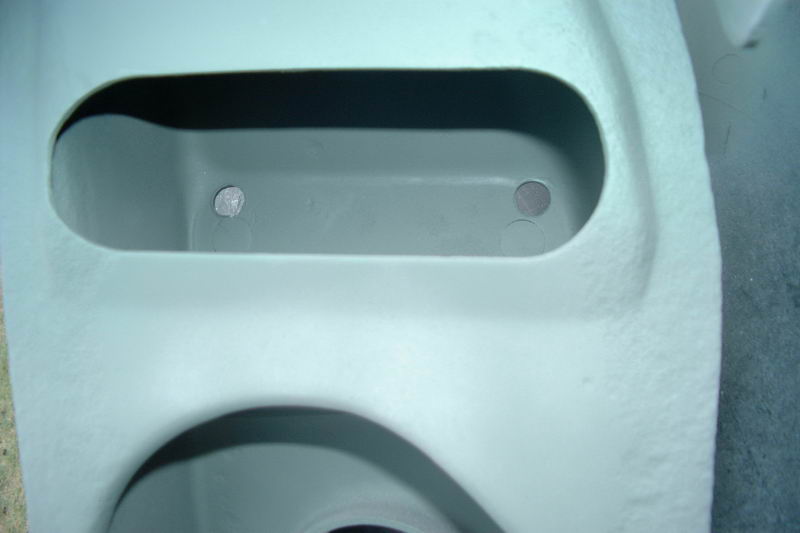
edit to add plug pics: bottom side. pretty easy to make out the two plugs.
top side. nothing visible
[This message has been edited by RCR (edited 04-05-2011).]
IP: Logged
04:54 PM
RCR Member
Posts: 4397 From: Shelby Twp Mi Registered: Sep 2002
Test fitting of the front cross member is going well. Some redrill the frame but I decided to use the existing space frame holes and redrill the cross member.
Here is the differences after measuring both:
1984 Space Frame – mounting holes measured centre to centre O < ---------------------------- 29-1/4” ------------------------------> O 4-1/2” O
1988 Suspension cross member – holes measured centre to centre O < ---------------------------- 30-1/4” -------------------------------> O 4-1/4” O
Using the locating pin to ensure the side to side and fore/aft position is correct takes the guess work out of it.
[This message has been edited by RCR (edited 03-06-2011).]
IP: Logged
04:57 PM
RCR Member
Posts: 4397 From: Shelby Twp Mi Registered: Sep 2002
This weekend, I drilled the new holes for the crossmember, using the dimensions Ryan provided in his thread. I used my nylon straps to hold up the x-member and everything bolted into place with no issues.
Bob
While I encourage you to vary the steps to suit your personal taste, I'm glad to hear the measurements worked out for you as well. It may inspire others to try knowing we've been there, done that and can support them.
Ryan aka Fiero2m8
IP: Logged
09:00 PM
Mar 15th, 2011
Fiero2m8 Member
Posts: 1928 From: Niagara, Ontario, Canada Registered: Feb 2006
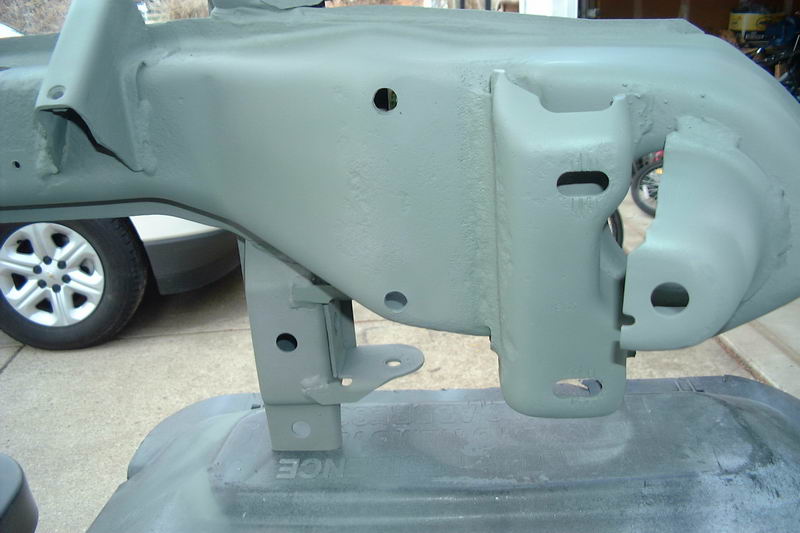
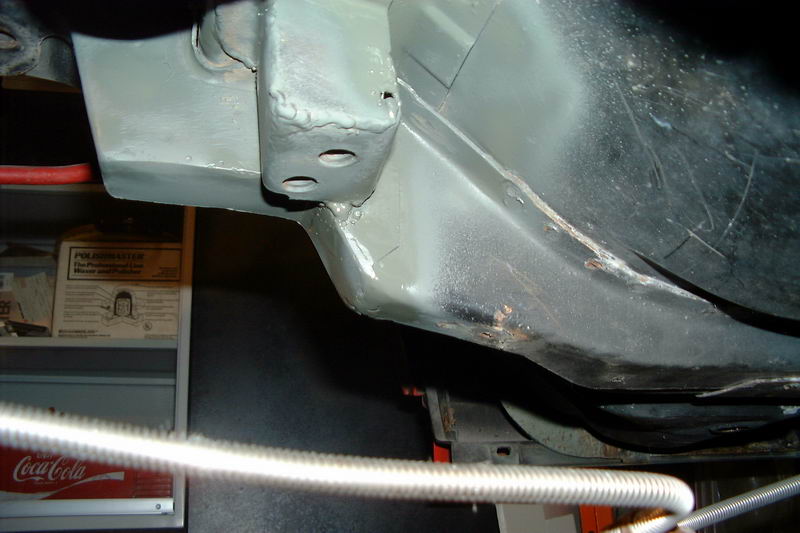
Finished melting in the back support brackets while the weather holds out. I used the original bracket, reshaped, bent, twisted and welded back together. Came out pretty good.
cleaned and primed
back bracket drivers side
back bracket passenger side
passenger frame rail
Next step is to tear everything down and have it blasted and either powder coated or painted.
Bob
IP: Logged
05:26 PM
Mar 20th, 2011
RCR Member
Posts: 4397 From: Shelby Twp Mi Registered: Sep 2002
Productive weekend. Bought a new standup sandblaster from Harbor Freight to replace my 12 year old HF tabletop unit. Cost was about $180 with 20% off coupon. I'm stoked about that.
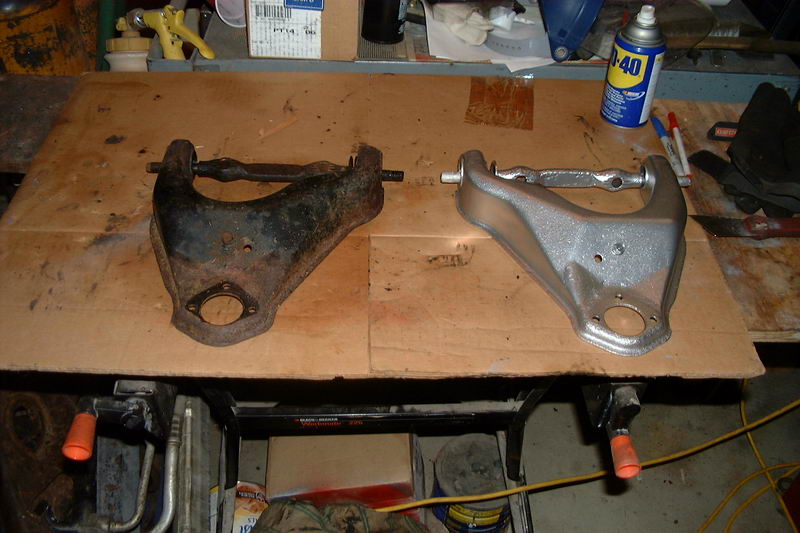
So after claeneing the garage a bit and reorganizing, I had to try it out. So, I burned out the bushings on all of the control arms, no mean feat on the uppers when the cross bolt is still in. I decided to clean up one of the uppers, and broke out some mirror silver powder cote for fun.
Here's the before after comparison using the right and left pieces.
I'm going to try and get the rest of the parts out to the local stripper (sandblaster you perverts) and have them done this week.
Bob
IP: Logged
07:53 PM
Mar 31st, 2011
RCR Member
Posts: 4397 From: Shelby Twp Mi Registered: Sep 2002
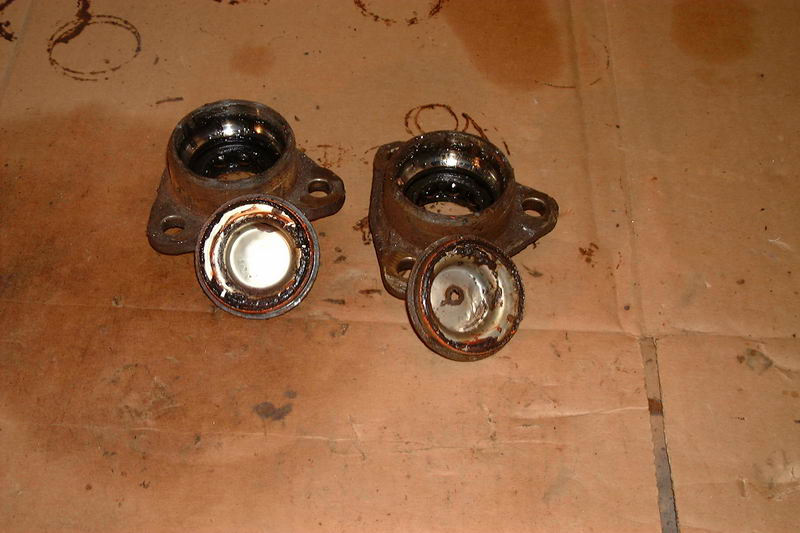
Both uppers are silver now. I've also disassembled the uprights/hubs/rotors. Not easy...The hubs look good, but the back caps are rotten. Gonna need to replace anyway.
The lowers, k-member, springs, sway bar and radiator support are at the blaster's. Should be done by tomorrow.
The uprights are cleaned and just about ready for powder.
moving along...
Bob
[This message has been edited by RCR (edited 03-31-2011).]
IP: Logged
05:58 PM
Apr 5th, 2011
RCR Member
Posts: 4397 From: Shelby Twp Mi Registered: Sep 2002
Back from the strippers. Cudos to S S stripping on Mound Road in Sterling Hts. Took a little longer than expected, but I've been working on this car for 7 years, what's a couple days. S S did a real nice job and the price was better than I could have done on my own.
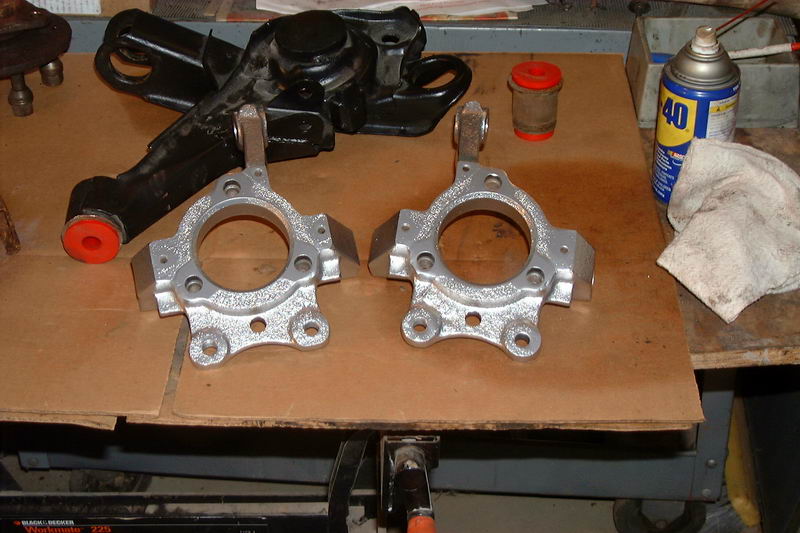
Anyway, pics... I blasted the uprights myself. A litlle smoothing and mirror silver powder coat later...
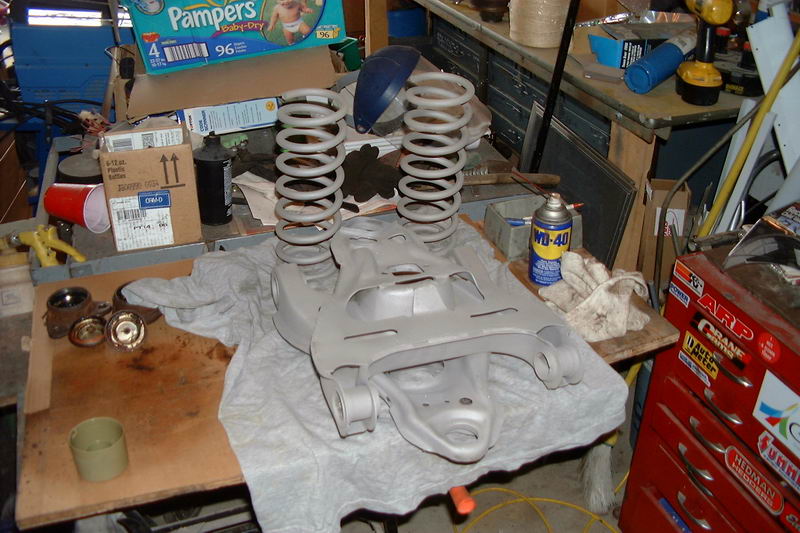
Control arms and springs ready for powder:
K-member and sway bar will be painted. I wanted to throw some self-etch primer on before the surface rust sets in:
Front hubs were a #&$&% to get off.
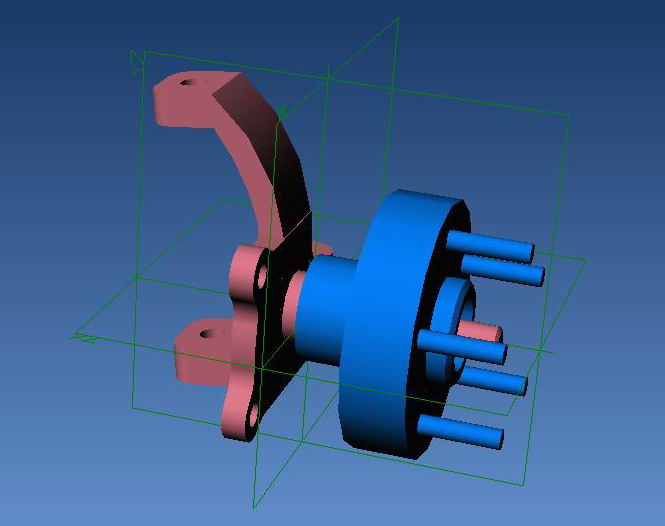
The hub mounting plate ready for Bubajoexxx's mods. Thought I'd give it a shot. Now i need to find Caddy hubs at the yard.
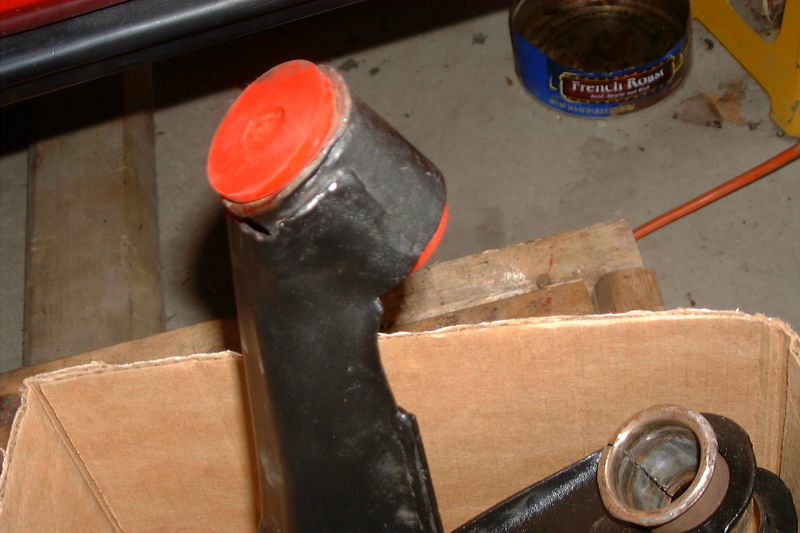
And one SOB urethane bushing I CAN NOT get out of the pre-88 control arm. I wanted to reuse them on the 88's, but it will not come out.
Anyone have a spare???
Bob
[This message has been edited by RCR (edited 04-09-2011).]
IP: Logged
04:20 PM
Apr 22nd, 2011
RCR Member
Posts: 4397 From: Shelby Twp Mi Registered: Sep 2002
New update...parts are being refurbed and parts are coming in.
LCA's coming out of the oven.
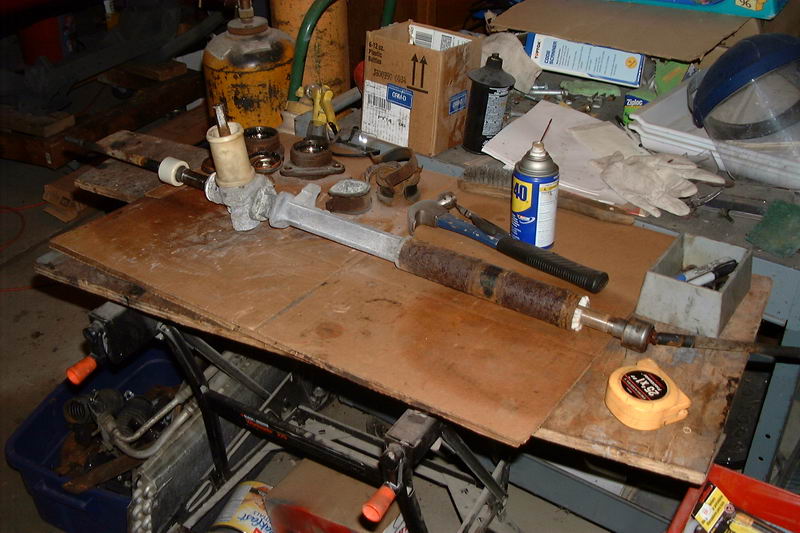
Old beat up steering rack.
Newly repainted steering rack.
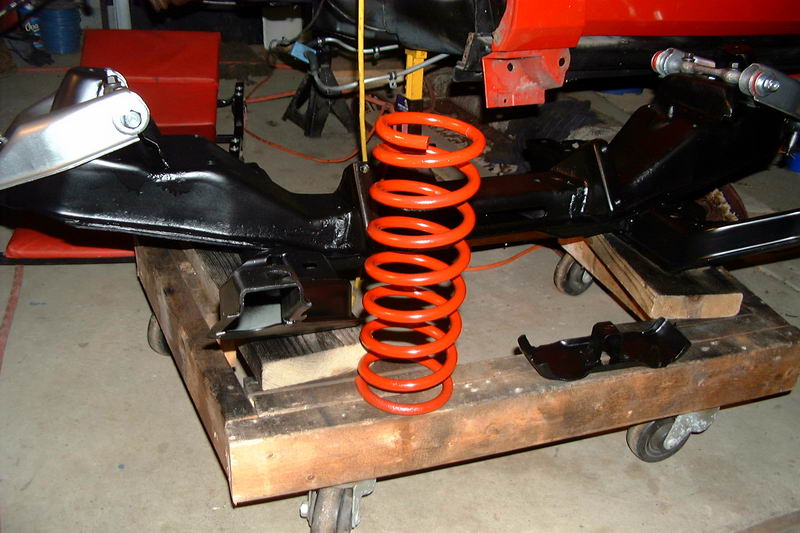
Springs are coated. Awaiting a coil to be hacked off. (They're more cherry red than orange)
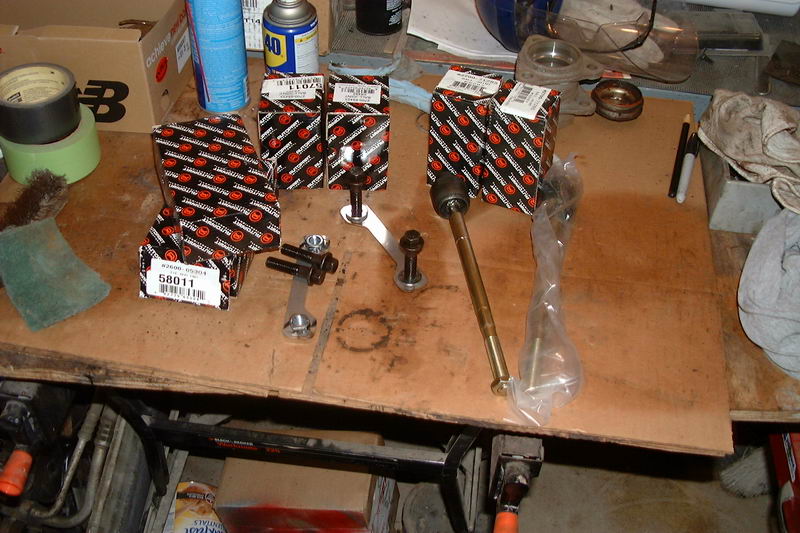
Box of replacement parts from the Fierostore, including all of the ball joints, steering ends, and paddle nuts and bolts. A quick run to the hardware store with my daughter Gen finished off all of the mounting hardware.
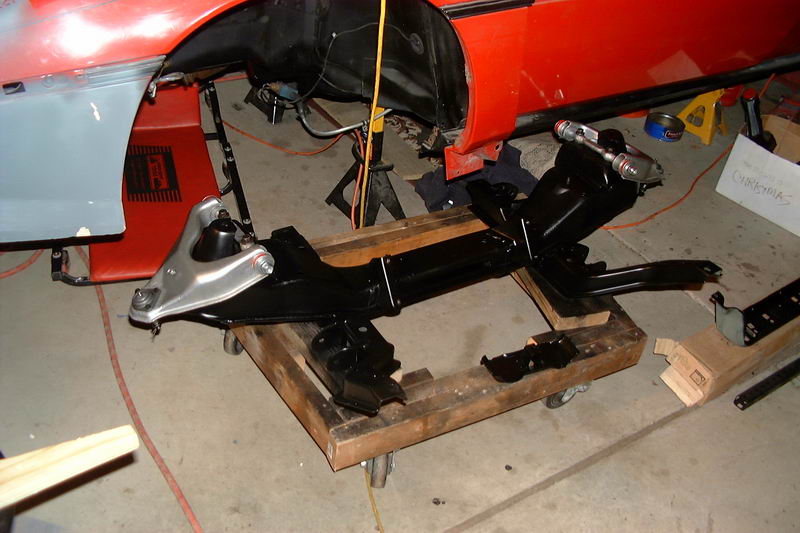
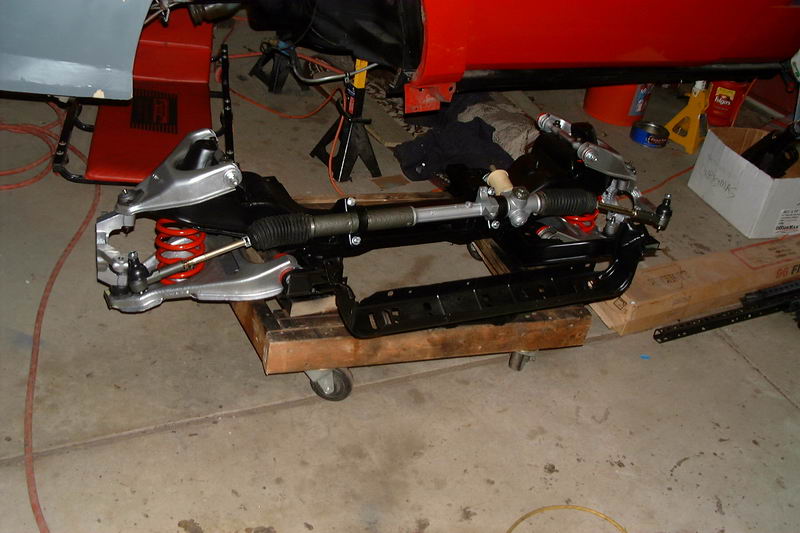
here, the UCAs are loosely mounted on the freshly painted cross member.
Bob
IP: Logged
06:43 PM
May 5th, 2011
RCR Member
Posts: 4397 From: Shelby Twp Mi Registered: Sep 2002
88 swaybar bushings are a pain. I took a different route as usual. A friend of mine gave me a pair of spare 1 1/8" bushings from his Mustang. I figured what the heck...
Unfortuneately, I did not get pics of the process, so words will have to do.
I had to trim about a 1/8" off each side edge of the bracket so that the bracket was narrow enough to fit in the raised edges of the bushing. Then I used a Dremel with a flapper wheel to cut a v-shaped grove around the middle of the bushing. Once the bushing would seat into the bracket, I needed to gring the flat into the bushing. (This is all obvious if you have the pieces in your hand.) Once the bushing seats all the way into the bracket, the bottom of the bushing will need to be trimmed off. I left about 1/16" overhang. A little sandblasting and paint and this is what you should have.
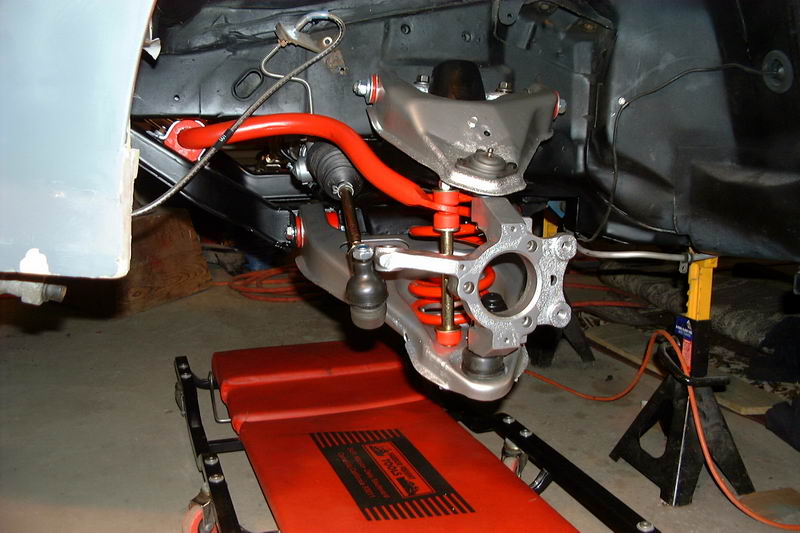
Fits perfect on the bar.
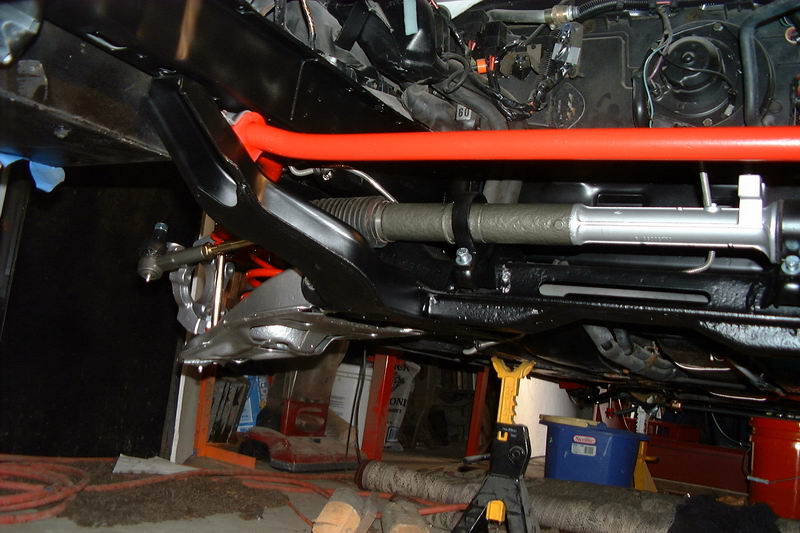
Here are a few more pics...
I still need to put in the coolant lines, get a bushing for the steering rack, and find some shocks, but with the completion of the bushings, all of the fabrication is complete.
As a note, all of the 84-87 brake lines fit with very minor tweeking. I had all new stainless, so I wasn't going to change.
So, unless there are specific questions, I'm calling this thread complete (yeah I finally finished one).
Bob
[This message has been edited by RCR (edited 05-05-2011).]
IP: Logged
07:33 PM
May 6th, 2011
Australian Member
Posts: 4701 From: Sydney Australia Registered: Sep 2004
As I am obsessed with handling and the consensus on this forum is that the 1988 fiero is far superior in handling than the previous models, I opted not to go with a bandaid solution and go right for the 88 rear cradle and suspension. As the seller offered me a deal too good to pass up, I ended up purchasing both the front and rear cradle/crossmember and all necessary suspension parts. I know that the 88 rear cradle fits into a non 88 easily as I've read about and have seen many photo's of the install. My question is regarding the front cross member and suspension. I know there is cutting and welding involved but how much? Do the 84 - 87 cars share any common mounting points for the front crossmember such that an 88 front crossmember can be bolted up making the necessary changes easier to measure.
Please chime in, if you have photo's of the differences in pre 88 and 88, please post. I figure I'm not alone in wanting to add 88 front suspension to my car however info on this swap is hard to come by. Hopefully we can pool all info on this swap here so those interested in this swap can get some answers.
In case anyone is wondering why I don't just get an 88 - sentimental value.
Why make it only handle as well as it did in 1988? you claim to be obsessed but your not going to make any major handling improvements. Adding sway bars stiffer shocks , newer springs and poly urethane all round will likely make an 84 out handle a stock 88. If you really want a good handling car and are truly obsessed and have about 6k to throw at your suspension alone and want too out handle and 88 with coil overs sway bars etc guaranteed in your 86. http://www.westshorefabrica...ero/KitCarSlalom.htm
IP: Logged
04:52 AM
May 27th, 2011
RCR Member
Posts: 4397 From: Shelby Twp Mi Registered: Sep 2002
I would like to know the pointers you said you had about doing the swap. Interested in going this route. Also wanted to ask what you did for coolant tubes. Did you use 88 tubes or no? I really would like to use the 84-87 coolant tubes if I can because I don't have any 88 tubes.
First off, yes, you will need 88 coolant tubes or do something custom. The coolant tubes turn in right behind the rear of the k-member then run up the middle. The tubes I got are damaged, so I'm not sure what I will do, yet.
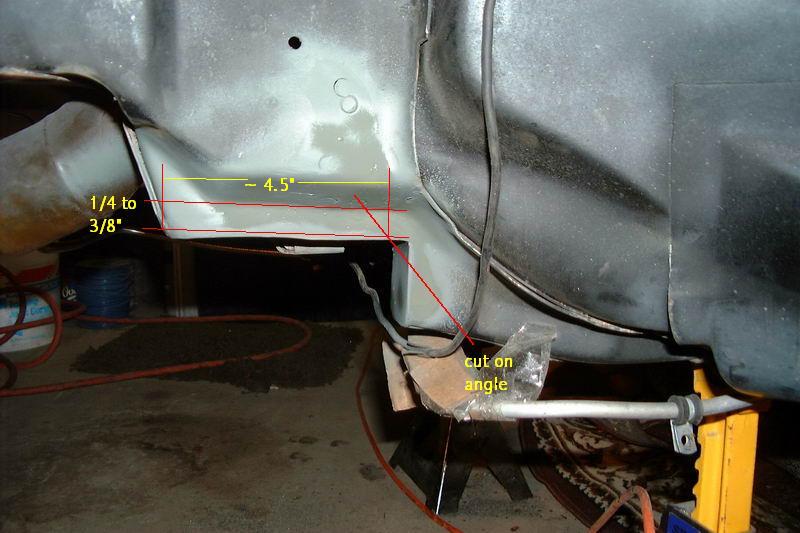
As for pointers, 1) read each of the build threads carefully and ask questions if anything is unclear. Fiero2m8 (Ryan) is a good resource, too. 2) Take your time with the spotweld cutter (Harborfreight). keep it straight as you're drilling, otherwise you'll knock the teeth off of it 3) I used the dolly I made for the rear cradle to move it around. That's huge if you're working by yourself. 4) Make the chassis cuts about 1/4 to 3/8" below the chassis lines and back far enough to clear the coolant lines
Bob
IP: Logged
07:46 AM
PFF
System Bot
RCR Member
Posts: 4397 From: Shelby Twp Mi Registered: Sep 2002


 Need to be a little more careful with the next one. Probably order 3 from HF (about $6 each).