I know, I know - just another 3800 swap thread. This one might be fun to follow. The owner really likes horse power so you never know what kind of goodies will end up in this swap. One of the El Paso Fiero Fanatics (Jeff) has decided to swap a 3800 SC into his 88 GT. The car already has a 4.9 in it but Jeff wants something he can tweak and get more performance.
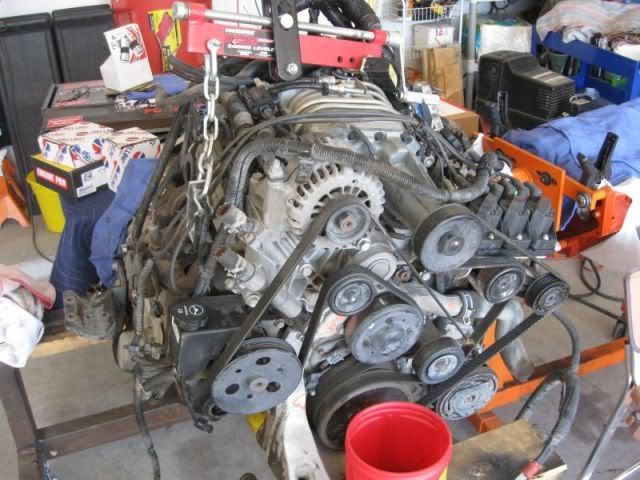
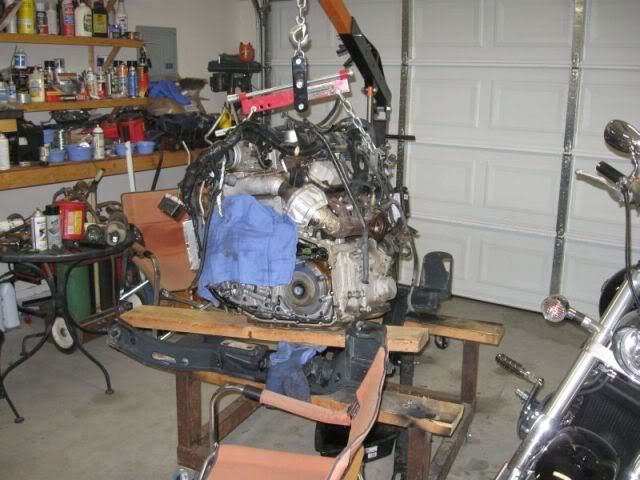
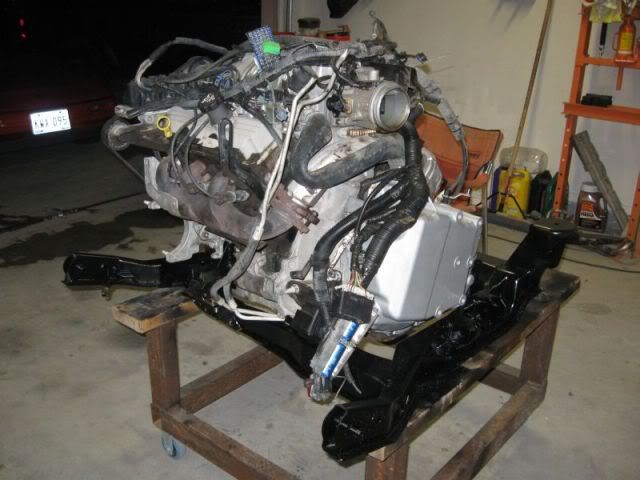
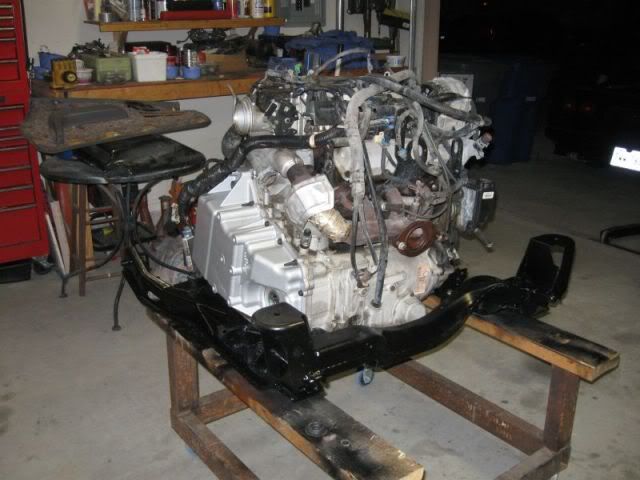
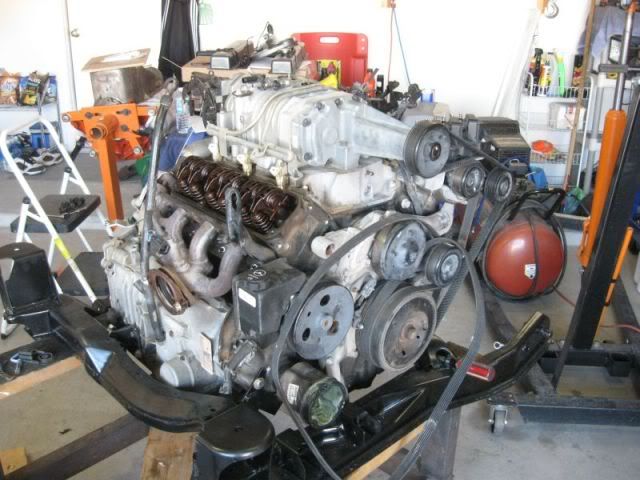
For the last few weeks, we have been looking for a good 3800 SC for the swap and Friday, he found a few to look at. After rummaging around a junk yard, he found a 2003 Bonny SSEI that had been serioulsy barrel rolled. The only damage to the engine compartment was the air box. Jeff bought the motor / trans complete with the PCM. Yesterday Frizlefrak, Jeff and I picked up the motor and brought it to my house. We will set it up on an 88 cradle and then take it to Jeff's for the swap. Jeff has a few decisions to make right off the bat.
Here's the list as of today:
Mounts - make our own or just buy them? Wiring Harness - attempt it ourselves or buy one made up? Stock or low mount Alternator which leads to Dog Bone mount decision? Coil pack location?
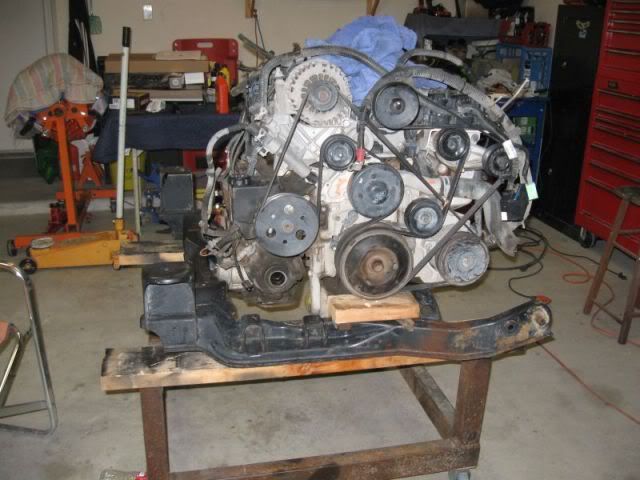
The lucky candidate:
More to come!
IP: Logged
01:31 PM
PFF
System Bot
Frizlefrak Member
Posts: 2921 From: El Paso, Texas Registered: Aug 2003
I recommend you do your own harness its actually not hard at all like people make it sound, the diagrams at www.gmtuners.com worked out perfectly for my swap and i didnt have to chase any wiring after it was a one key turn to run, well for the 2 seconds til the antitheft kicked on but that was another dirt cheap easy fix.
IP: Logged
08:03 PM
katatak Member
Posts: 7136 From: Omaha, NE USA Registered: Apr 2008
I was just getting ready to mention how cleaned up they look after they are mounted in Fieros. Congrats Jeff!
I agree Andy - I really like the ultra clean look some of the 3800 SC guys have achieved - all that modern electronic technology hidden away to give it that old school - bare bones - hot rod look. Not sure how far this one will go!
IP: Logged
10:15 PM
katatak Member
Posts: 7136 From: Omaha, NE USA Registered: Apr 2008
I recommend you do your own harness its actually not hard at all like people make it sound, the diagrams at www.gmtuners.com worked out perfectly for my swap and i didnt have to chase any wiring after it was a one key turn to run, well for the 2 seconds til the antitheft kicked on but that was another dirt cheap easy fix.
Thanks for the reply and the link. We are in the middle of the "research" mode right now so any info, ideas, comments and help is greatly appreciated.
Looks like it's starting to heat up out your way. It was 96 here today but the the direct sun was brutal - stay cool!
Pat
IP: Logged
10:18 PM
Carver1 Member
Posts: 2843 From: Edgewood, New Mexico Registered: Nov 2000
Mounts - make our own or just buy them?---From seeing the past work you guys do out that way I think you can make a set of mounts with no issues. If this is the route taken then make a 4 mount setup with 2 on trans/2 of the engine.
Wiring Harness - attempt it ourselves or buy one made up?--Again...yall can handle it.
Stock or low mount Alternator which leads to Dog Bone mount decision? Low mount the Alt..It is a cleaner look and will give you a 5th mounting point...
Coil pack location?...Mount where the battery sits as it gets then out of the way, hidden but easy to get to..>also you will need to change to a GTP style SC tensioner bracket mount.
Biggest thing is take your time so it is as clean as possible.......
IP: Logged
11:24 AM
Jun 1st, 2010
katatak Member
Posts: 7136 From: Omaha, NE USA Registered: Apr 2008
Mounts - make our own or just buy them?---From seeing the past work you guys do out that way I think you can make a set of mounts with no issues. If this is the route taken then make a 4 mount setup with 2 on trans/2 of the engine.
Wiring Harness - attempt it ourselves or buy one made up?--Again...yall can handle it.
Stock or low mount Alternator which leads to Dog Bone mount decision? Low mount the Alt..It is a cleaner look and will give you a 5th mounting point...
Coil pack location?...Mount where the battery sits as it gets then out of the way, hidden but easy to get to..>also you will need to change to a GTP style SC tensioner bracket mount.
Biggest thing is take your time so it is as clean as possible.......
Thanks for the reply. Today we kicked it around and we have decided to build the mounts ourselves and do the four point setup. Harness we will attempt it and rely on the kindness of others to help us out when we get buried. I think I have him talked into the low mount alt setup - I'll have to read into that a little more. He is talking about relocating the battery so moving the coil packs to the battery spot will be our choice. Not sure what the GTP style SC tensioner bracket mount is - any info/pics would be greatly appreciated. I am assuming that we need to remove the idler that is sticking out off the firewall side but had not looked into it yet.
I showed Jeff some pics of your car from San Antonio - mainly engine shots and he really likes how clean yours looks. We wil strive to follow your lead. He is full on reading and learning about performance mods and it's my job to get it mounted up and ready to stuff in the car. Any ideas, comments or help is greatly appreciated.
Pat
[This message has been edited by katatak (edited 06-01-2010).]
IP: Logged
12:09 AM
katatak Member
Posts: 7136 From: Omaha, NE USA Registered: Apr 2008
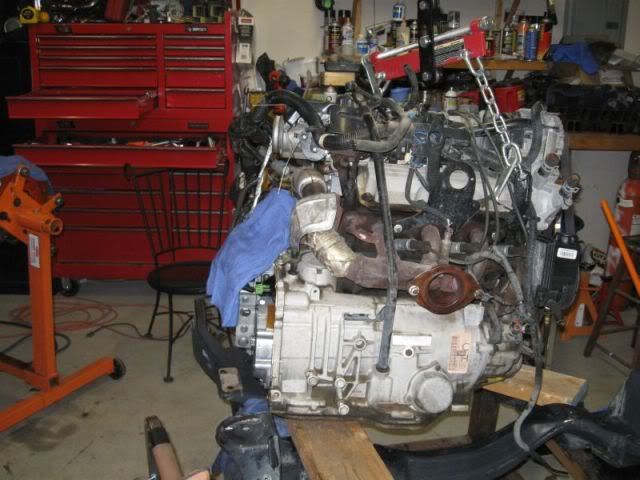
After closer inspection, we found that there was a crack in the side cover for the trans - through one of the mount bolt bosses. I think they did this when they removed it from the car as it looked fresh - no dirt/oil/grime in the crack but it could have happened when the car was wrecked? Either way, we have a new problen to deal with before we can mount the motor to the cradle.
Jeff has a friend that is a professional welder - does a lot of aluminum heli arc welding and Tig welding so he took the cover to him yesterday. After cleaning the cover real good, they found a couple other cracks coming out of the mount bosses on the face of the cover - where the trans mount bolts. After slotting the cracks for better weld penetration and then placing the cover in an oven, the welding began. Seems that the cover is some kind of alloy or something and it is very difficult to weld. As a weld was being made, the others would pop and run - the parent metal seemed to "boil" while welding and it appears that it was getting worse. Now we will just have to go to the yard and get another cover - it was an exercise worth doing but in the end, did not work out.
Today, we ran over to the junk yard where he bought the motor and much to our delight, they were open! We found that there were a few sensors that were damaged during the removal so we figured we could get those repalced and pick up the cover and search for some mount brackets. Just about every 3800 in the yard was missing the sensors we needed. We finally found another SSEI that the hood was jammed shut on. After some work, we were able to get the needed sensors. We also got the AC hose that was missing from the donor car. We found a couple covers and the brackets we were looking for but the guy running the yard wanted an arm and a leg for the parts. We will hit the Mega Pull at the end of the week and get everything we need there for 20.00 or less. He wanted 30.00 for each bracket and 100.00 for the cover - after they broke the cover removing it from the car! Some people......
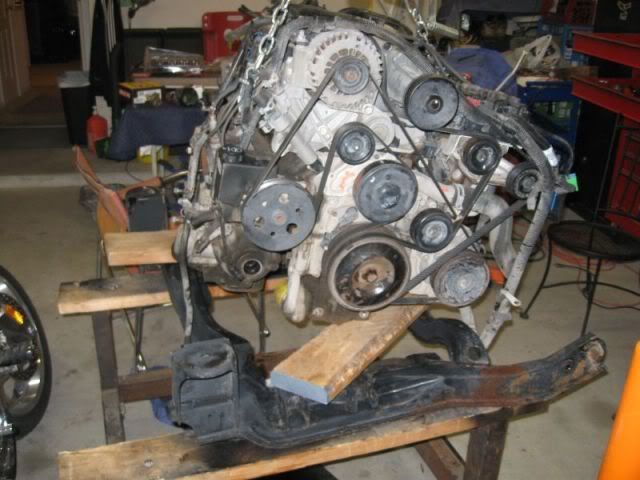
We took the 88 cradle to the car wash and degreased it. Brought it back and set the motor/trans up on it to eyeball it for awhile. Looks like we will have to do some trimming on the cradle - especially the rear trans mount for the Duke. Not sure if we have to trim it like we had to for the 4.9? I'm a little worried about the exhaust hump on the cradle cross member and the AC comp clearance but it's hard to see until I can get the trans mounted and level the motor.
Thanks for the reply. Today we kicked it around and we have decided to build the mounts ourselves and do the four point setup. Harness we will attempt it and rely on the kindness of others to help us out when we get buried. I think I have him talked into the low mount alt setup - I'll have to read into that a little more. He is talking about relocating the battery so moving the coil packs to the battery spot will be our choice. Not sure what the GTP style SC tensioner bracket mount is - any info/pics would be greatly appreciated. I am assuming that we need to remove the idler that is sticking out off the firewall side but had not looked into it yet.
I showed Jeff some pics of your car from San Antonio - mainly engine shots and he really likes how clean yours looks. We wil strive to follow your lead. He is full on reading and learning about performance mods and it's my job to get it mounted up and ready to stuff in the car. Any ideas, comments or help is greatly appreciated.
Pat
There are tons of performance routes that can be taken and most are fairly cheap and the gains are great. A four point mounting setup is ideal and adding in the low mount with an intergrated upper dogbone with make it soild for sure. The wiring is what can make or break the swap on how clean it looks as it can clutter up the engine if nto done right. Of course I can not take the credit on my wiring as FastFieros did it many years back. I will see if I have a picture of the correct tensioner to use.....
Originally posted by katatak: I showed Jeff some pics of your car from San Antonio - mainly engine shots and he really likes how clean yours looks. We wil strive to follow your lead.
hummm must have gotten MINE mixed up with Stephens
so FF did his wires and he tells ya'll can handle it Well believe a person that did all the wiring, and yes it is easy just time comsuming ...
IP: Logged
12:25 PM
Jun 4th, 2010
katatak Member
Posts: 7136 From: Omaha, NE USA Registered: Apr 2008
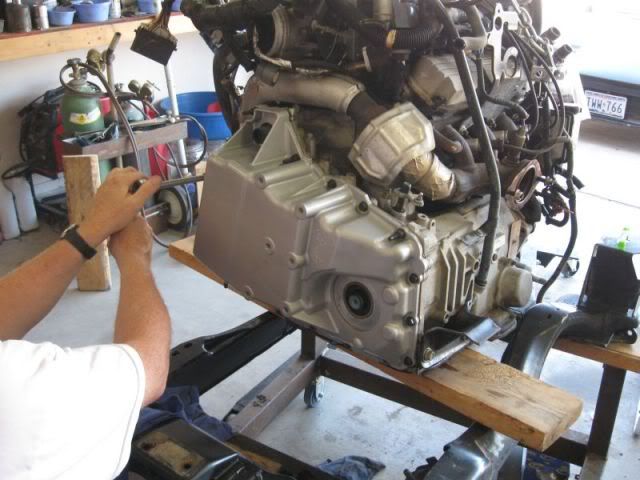
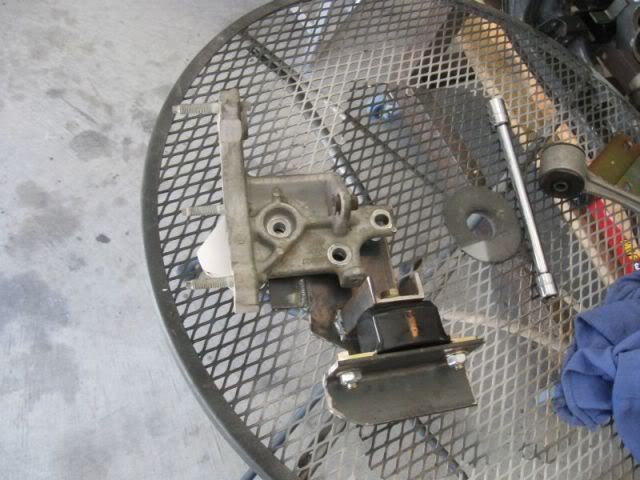
Thanks Stephen / Kevin for the replies. Still not sure which direction we will go - pretty sure we will give it a shot on our own. Got a few things accomplished today with the mounting. Spent the morning rummaging around the junk yards for brackets and a trans end cover. Found everything in the last yard we went to.
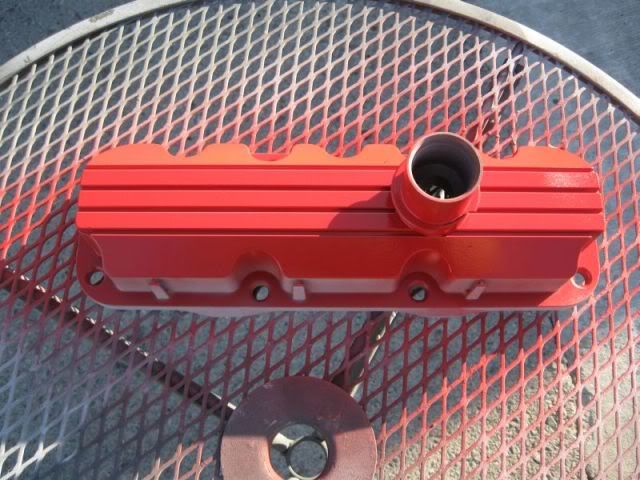
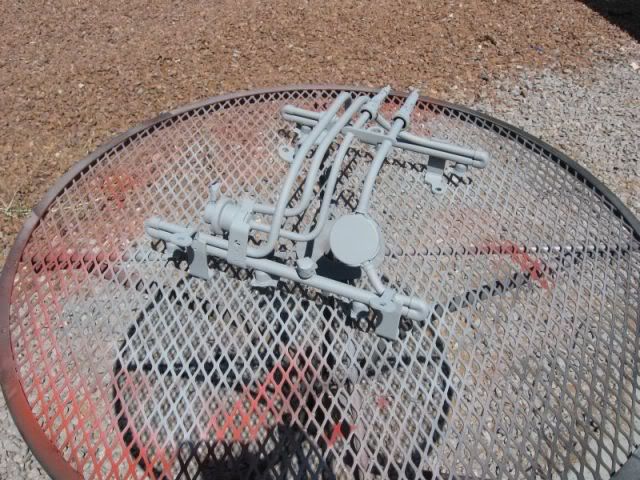
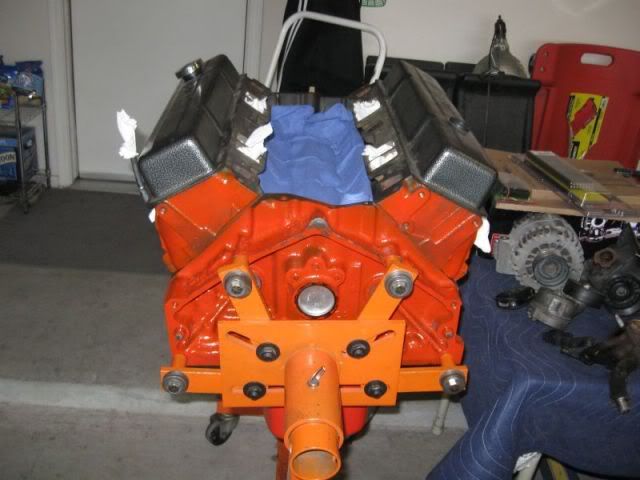
After cleaning up the cover and giving it some paint, we reinstalled it:
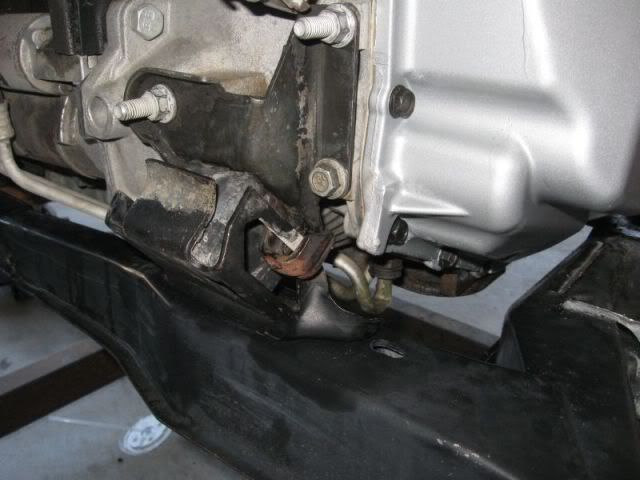
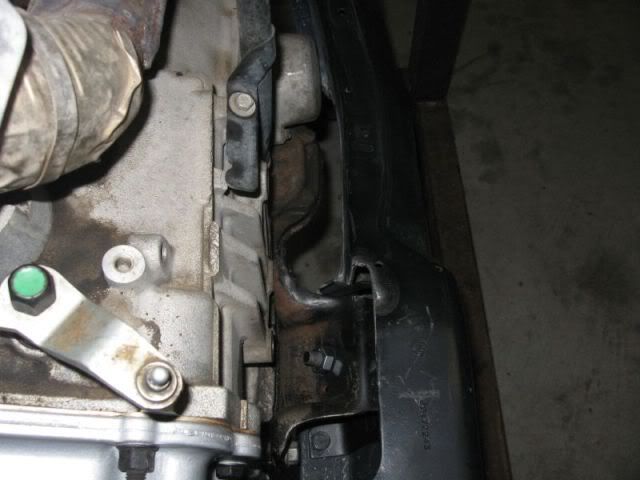
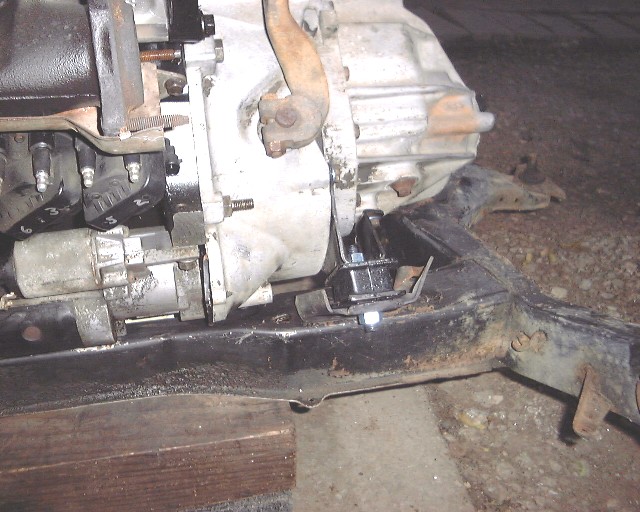
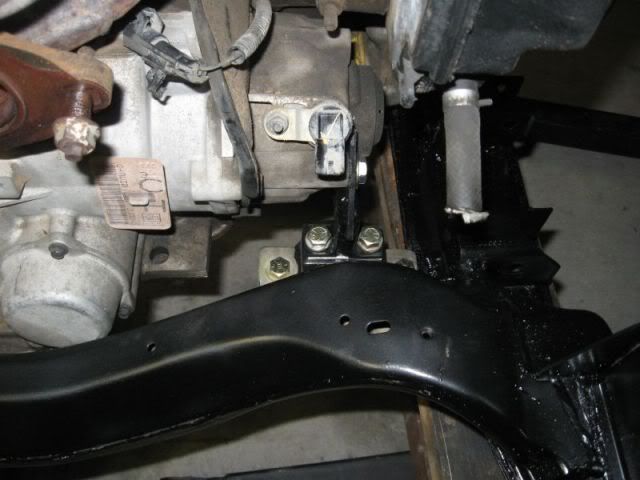
Got the trans mounts in place: Still not sure we have the right setup here - got a thread up over in Tech looking for some help.
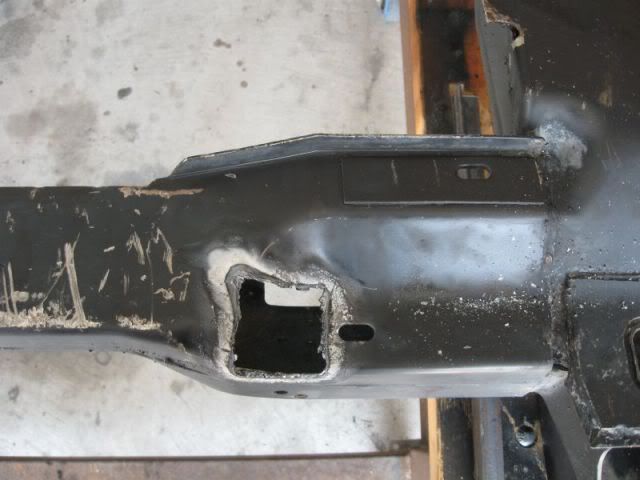
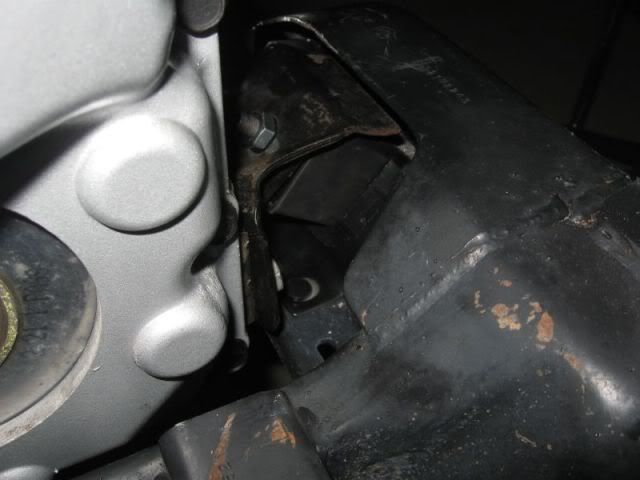
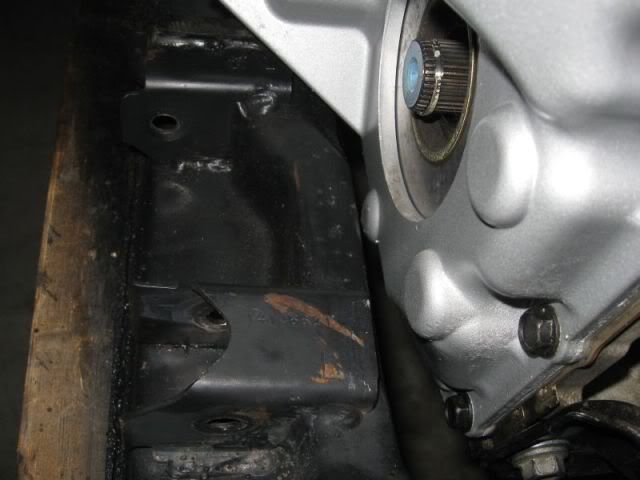
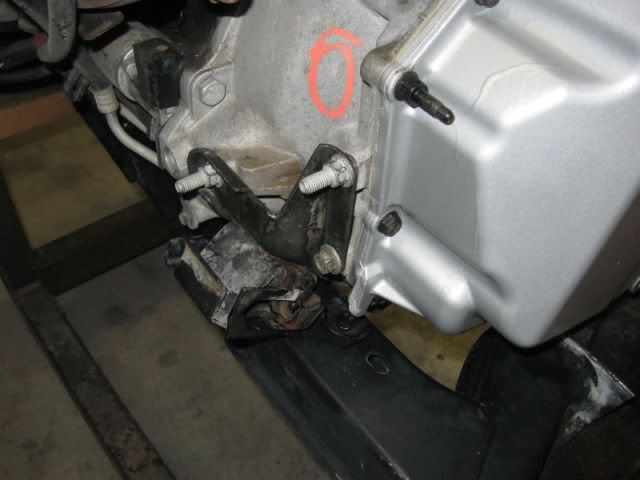
Looks like we will have to remove the stck front motor mount pad from the cradle:
That's it for now - more later!
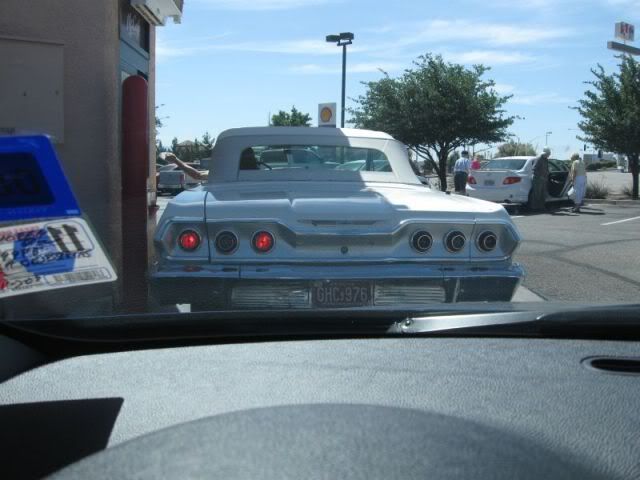
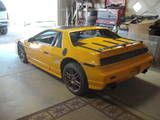
I thought I'd add this next pic just for your entertainment. Yesterday while I was going thru the drive thru fo an eggamuffing, I was right behind this car. Little old lady driving it. This was in Wilcox AZ. Once I got my eggamuffin, I pulled over into a parking spot to make a few calls and check my email. I was there for maybe 45 minutes. I jumped back on I-10 and headed for El Paso. I was driving a 2010 HHR - not a hot rod but I pushed it hard on the ay home. As I was approaching the AZ/NM border, I caught up with the little old lady in the convertable Impala - she was making tracks in this classic. Car was straight as a pin - looked to be in all original condition.
IP: Logged
11:52 PM
Jun 5th, 2010
katatak Member
Posts: 7136 From: Omaha, NE USA Registered: Apr 2008
A little more progress before the mercury hit the 100 mark - it's just too hot in the garage now to do anything - even witht he portable swamp cooler!
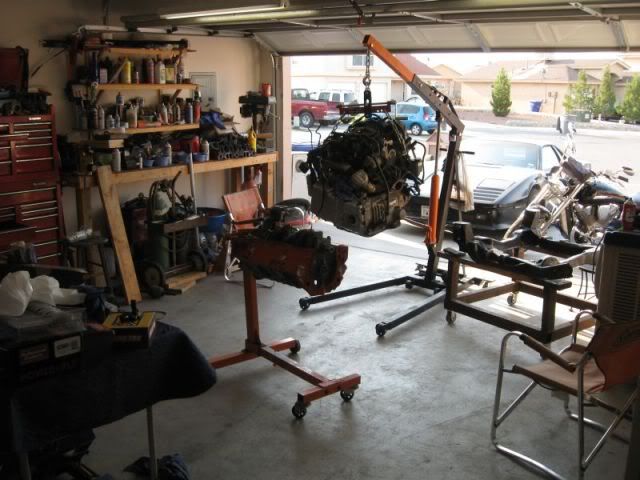
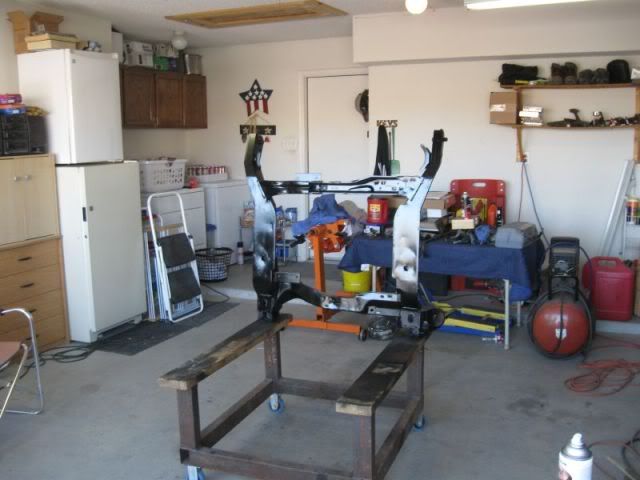
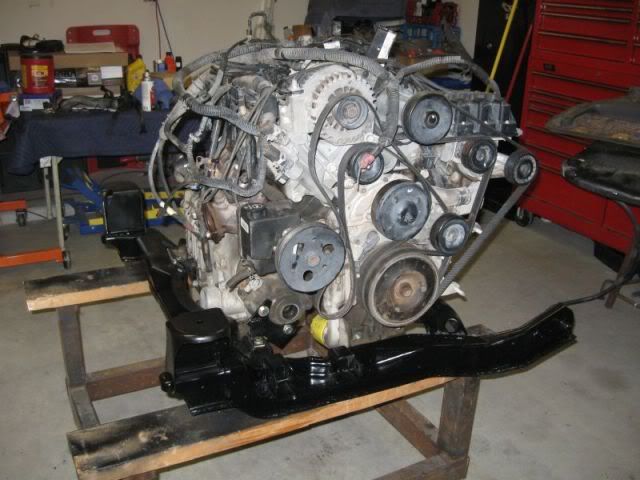
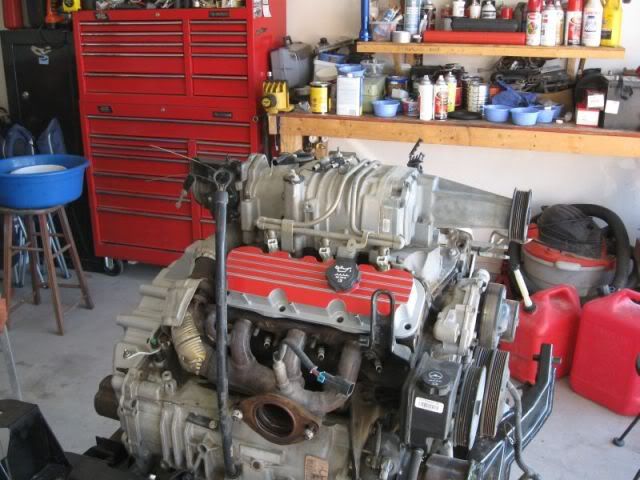
My garage is starting to look like an engine shop:
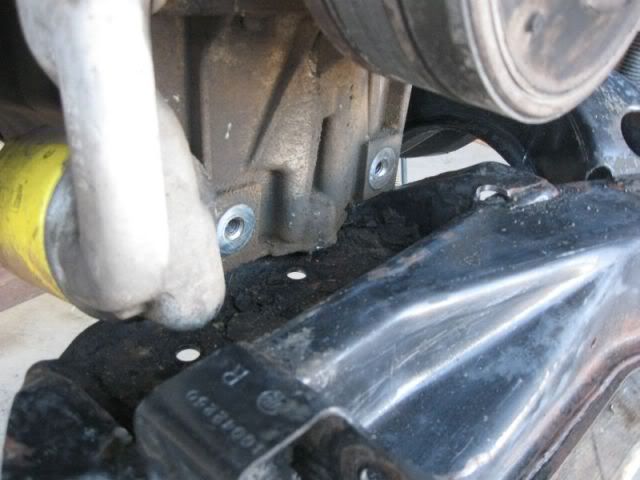
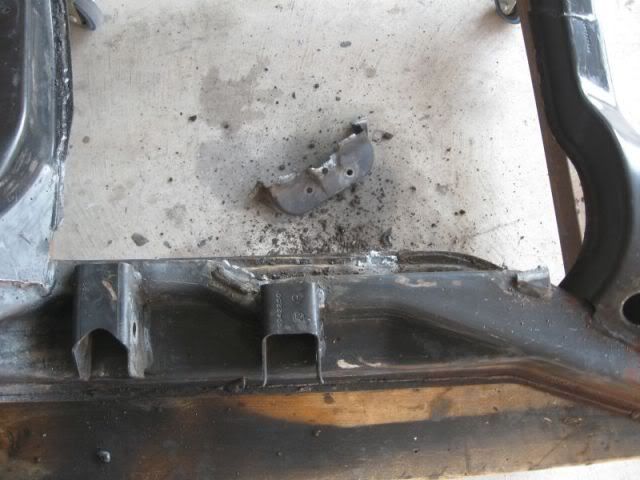
Cut the front mount pad off:
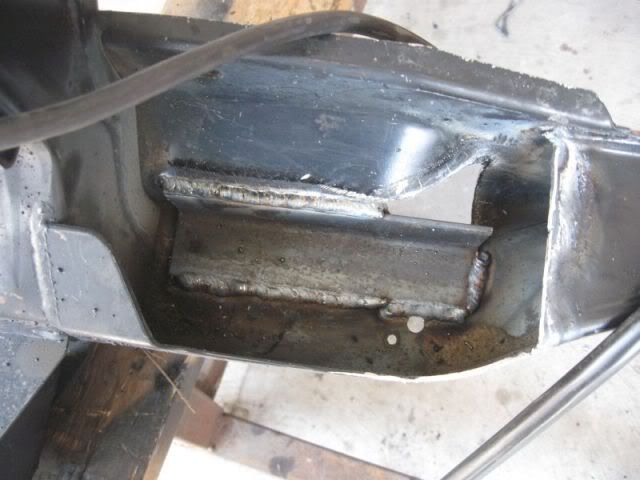
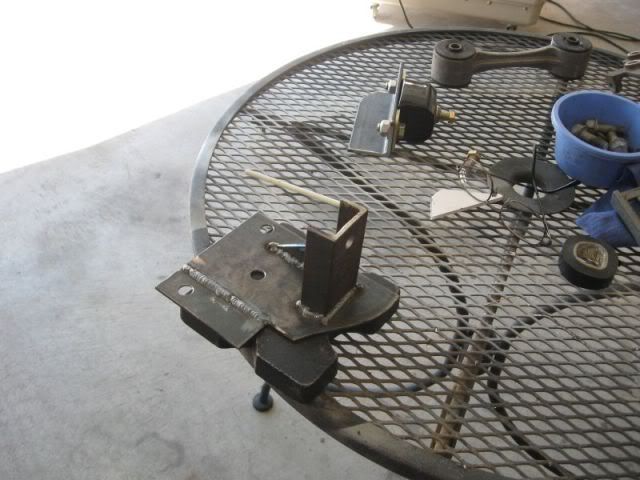
Notching for the trucnk side trans mount. I could just drill a new hole as far forward as possible but after doing a lot of measuring, I would not be able to get the motor square in the cradle. I decided to cut out a notch and add a piecs of angle iron, I will box in the rest of it and clean it up with the grinder before we stuff it in the car.
Welded angle iron
IP: Logged
06:08 PM
Jun 6th, 2010
katatak Member
Posts: 7136 From: Omaha, NE USA Registered: Apr 2008
Remember that when mounting the motor, your axle dynamics are the only things that "matter". The easiest way to do this is eyballing the location of the axle locations, and on a bare 88 cradle this is really quite easy. I would some blank axle ends in the trans (or the full axle if you want), then shim them off the cradle equally on both sides, then you can eyeball center them between the 2 toe links in the 88 cradle.
You are probably going to run into a problem with the supercharger tensioner assembly hitting the firewall, but it doesnt happen to everyone.
[This message has been edited by darkhorizon (edited 06-06-2010).]
IP: Logged
09:56 AM
darkhorizon Member
Posts: 12279 From: Flint Michigan Registered: Jan 2006
Thanks for the info DH - I think I need to work on moving it toward the trunk side anyway. What year Dodge Truck mount? Would I use this mount on both side of the trans? Thanks again.
Pat
IP: Logged
03:14 PM
darkhorizon Member
Posts: 12279 From: Flint Michigan Registered: Jan 2006
Thanks for the info DH - I think I need to work on moving it toward the trunk side anyway. What year Dodge Truck mount? Would I use this mount on both side of the trans? Thanks again.
Pat
late 70s or early 80s. You could use it wherever you want, they are pretty useful little things.
IP: Logged
03:42 PM
Jun 7th, 2010
katatak Member
Posts: 7136 From: Omaha, NE USA Registered: Apr 2008
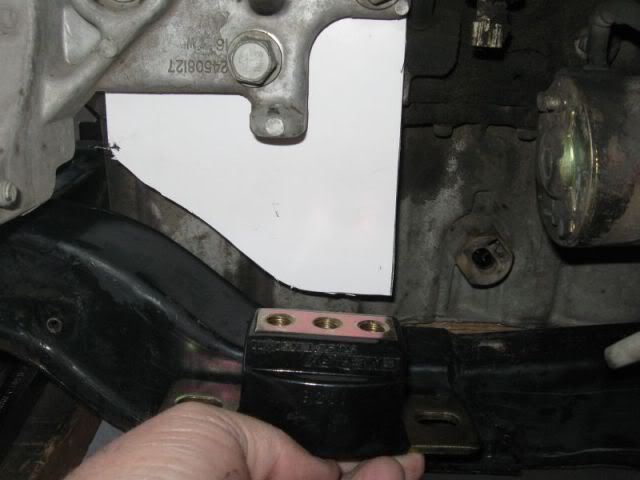
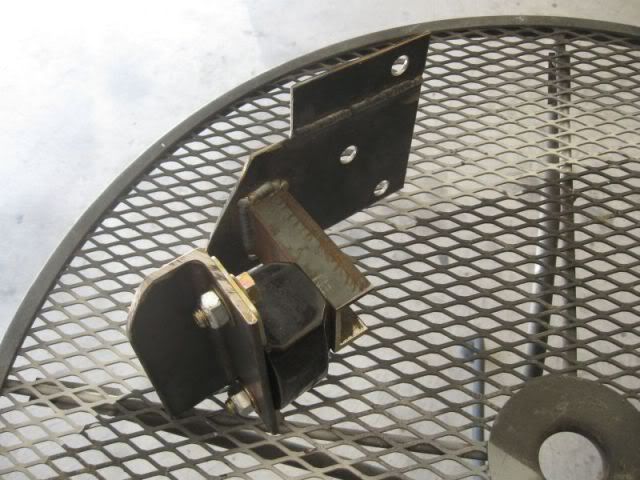
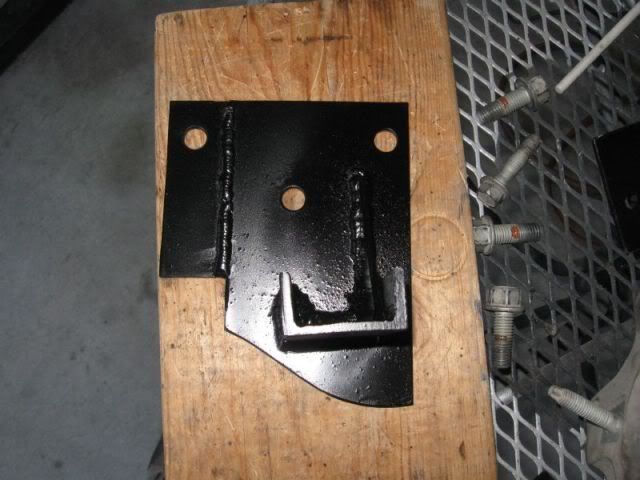
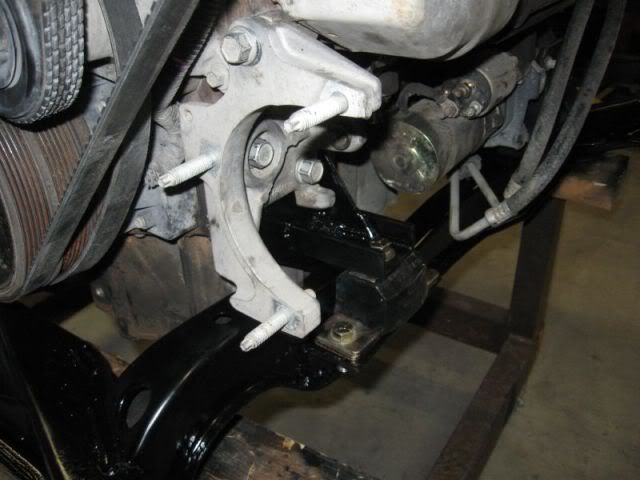
Some more progress on the front mounts - just tacking stuff for now - getting an idea of clearances, locations, etc. Nothing is final till it's in the car and running.
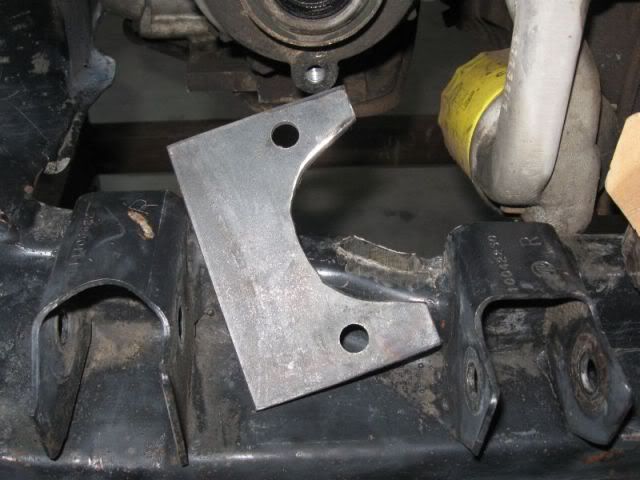
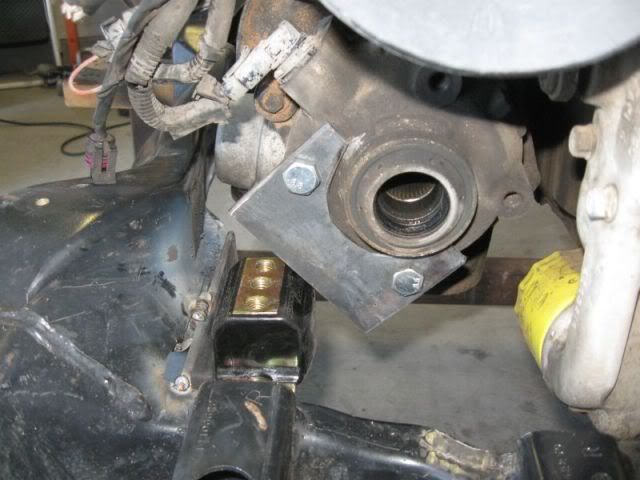
I looked through the yards for a Bracket off a Regal for the trans snout - no luck so I decided to fab one:
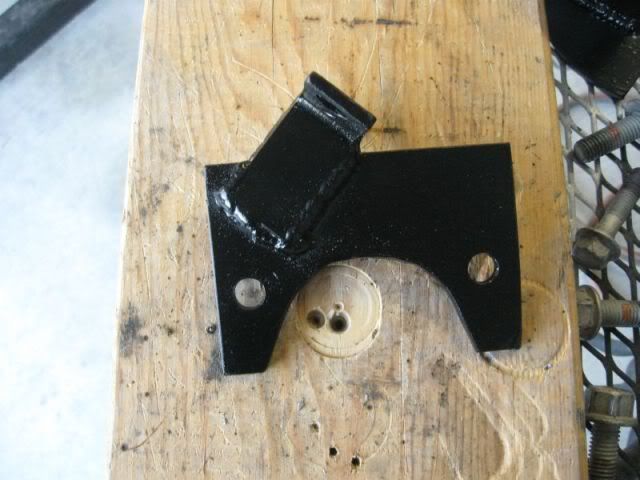
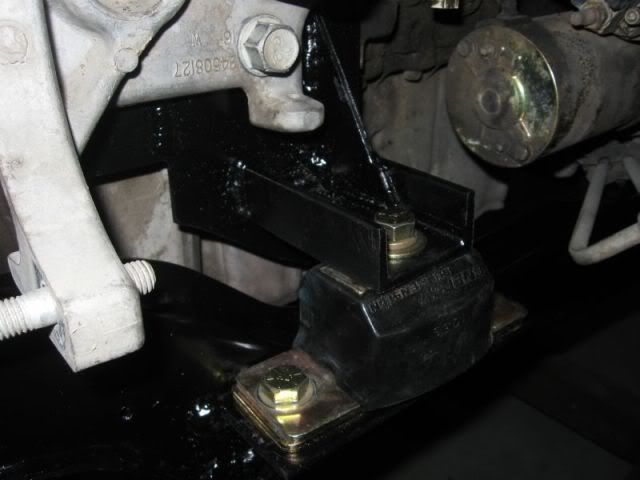
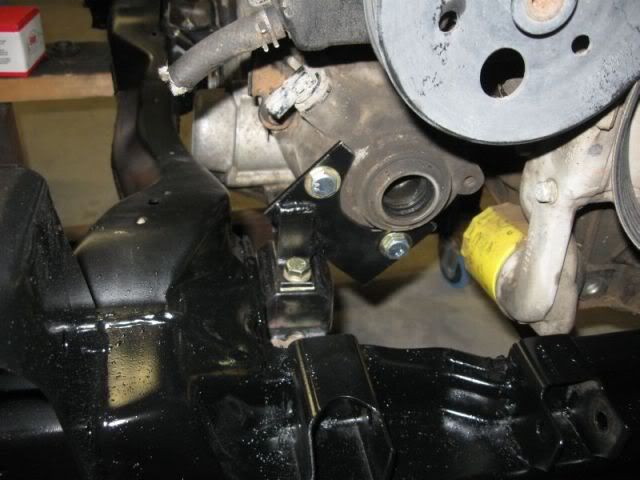
Then tacked in a piece of angle and set the poly mount in place: I have to fab some pieces to tie the snout bracket to the mount - will wait till I get the other side fabbed up so I can set the height and left to right - center the axles, etc.
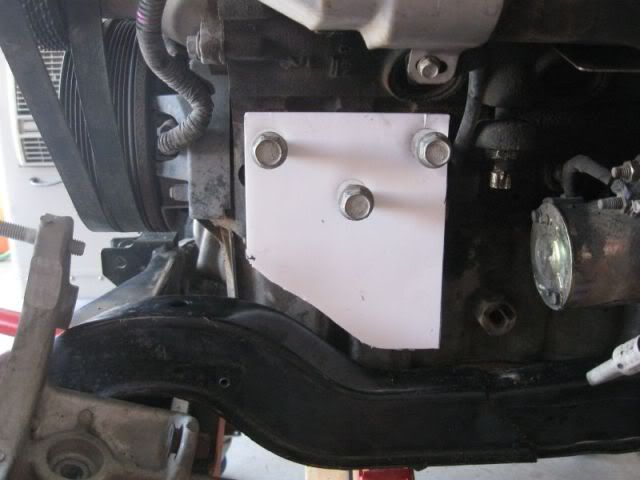
Not sure what to do on the AC side for the motor mount. I have looked for a "steel series 1" AC bracket as that would be easy but again, I did not find one in the yards - at least one I could get to without pulling the motor out of the car. That's not going to happen when it's 102 plus in the shade. So I am going to make my own. I mocked up a plate out of foam core to start with:
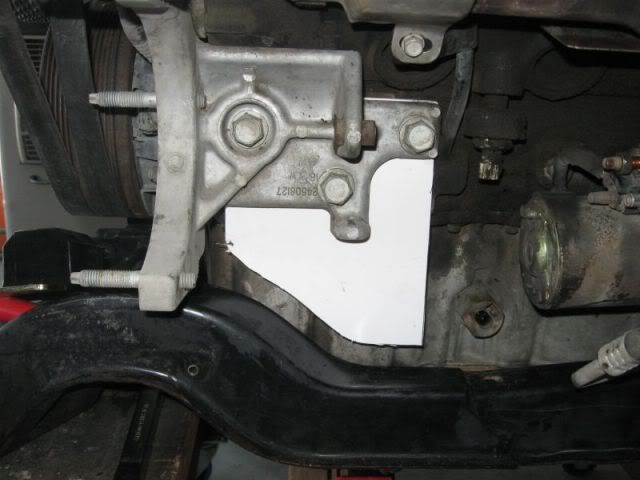
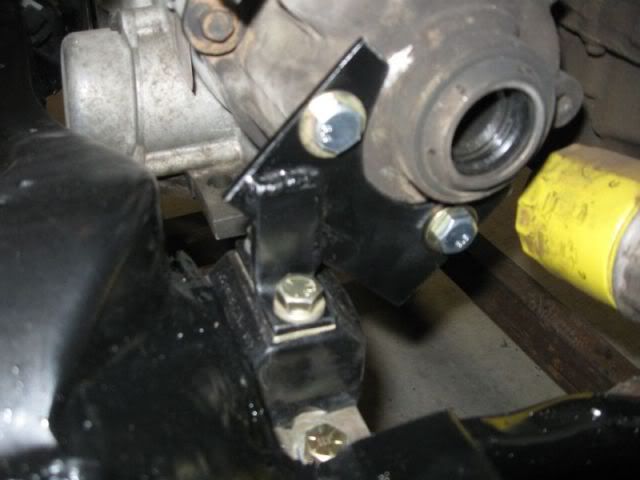
With the AC bracket in place:
The aluminum AC bracket has raised bosses on the back side. At first I though I would just have the bosses machined down - take off whatever the thickness of the plate use to make the mount.
After I made the mock up plate, iIdiscovered that if I use 1/8" or 3/16" plate, the bracket will bolt back on with no mods to the AC bracket. There is a bolt that comes through the front of the bracket that is "sloted". With the bracket bolted to the mock up plate and the AC comp Installed, I can still get the belt on with plenty of tensioner adjustment.
I will have to fab a "foot" to come off the AC side bracket so that I can bolt it to a poly mount. The poly mount will be bolted to a piece of angle I will weld to the cradle.
I know there are probably easier ways to do these brackets - maybe not!
More later!
Pat
[This message has been edited by katatak (edited 06-09-2010).]
IP: Logged
07:42 PM
Jun 13th, 2010
katatak Member
Posts: 7136 From: Omaha, NE USA Registered: Apr 2008
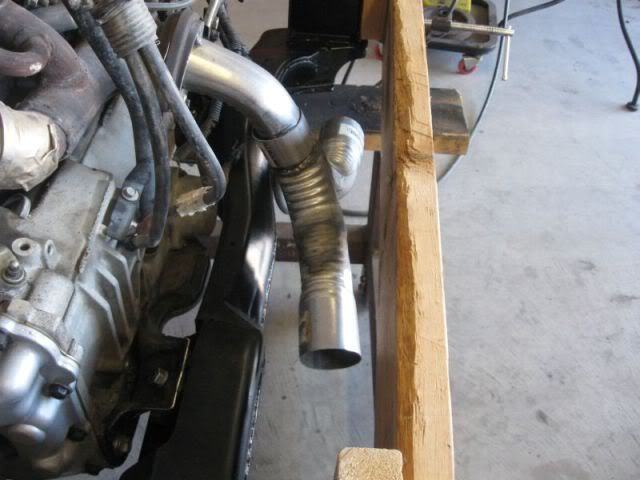
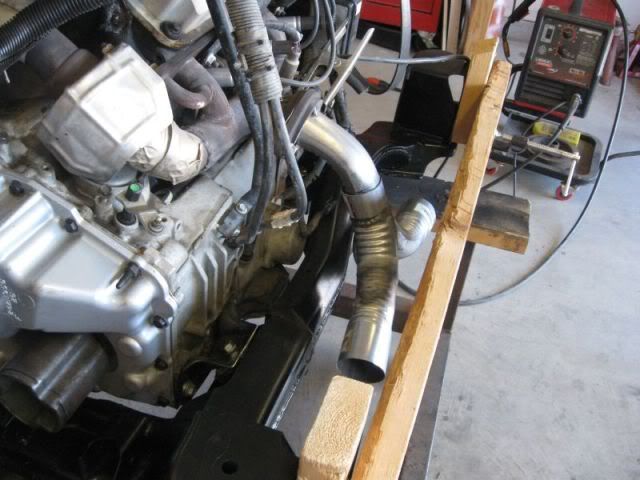
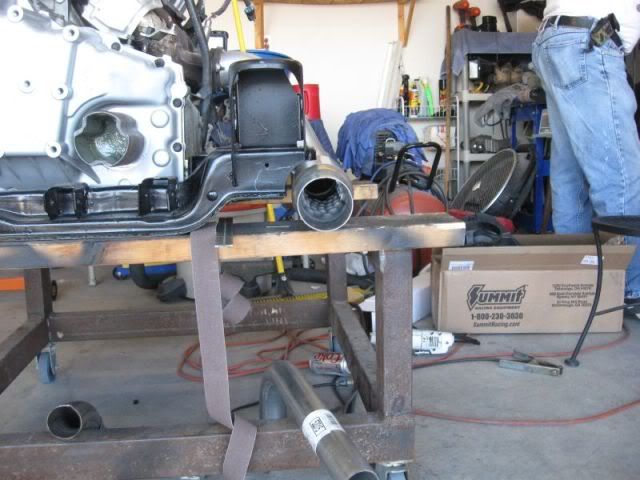
Did a little exhaust mock up this evening - still have not decided how it will be configured but we need to start somewhere.
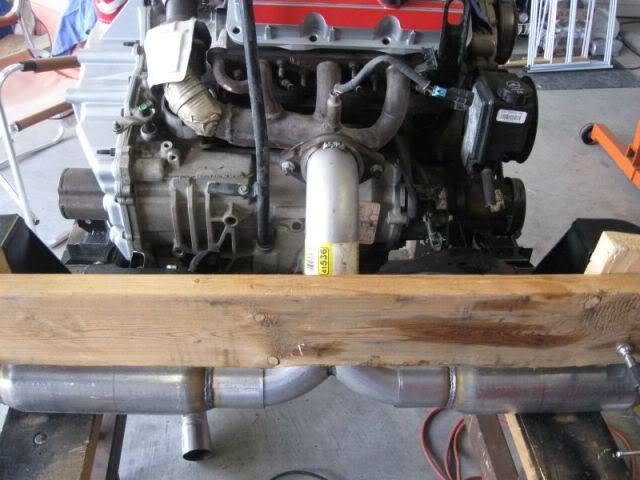
The first version is similar to the XTC exhaust:
The idea is to come out of the flange with a 3" 90 or 45 then build a "Y" out of 2 3" 90's. Right off the end of each Y there will be a spun steel Cat. I was able to use some of the scrap XTC pieces to mock up the down pipe and the Y pipe:
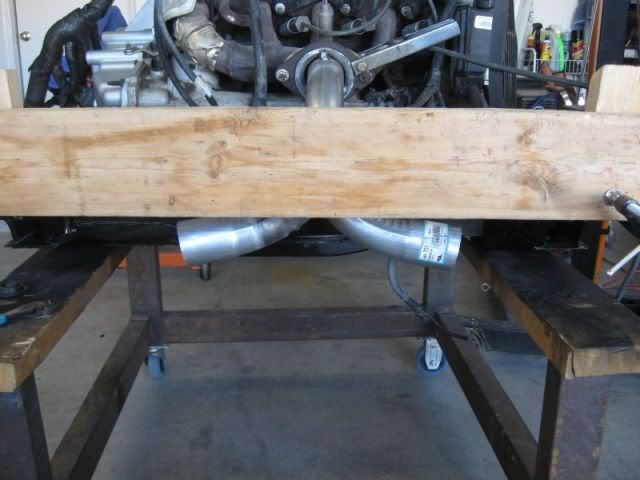
The 2 X 6 represents the trunk wall - it is about 1/2" closer to the cradle than the actual firewall but it gives us a good reference to work from. The mock up Y pipe is off in angle a little - again it is just to give us a visual of what is possible. Looking for some small spun steel cats now.
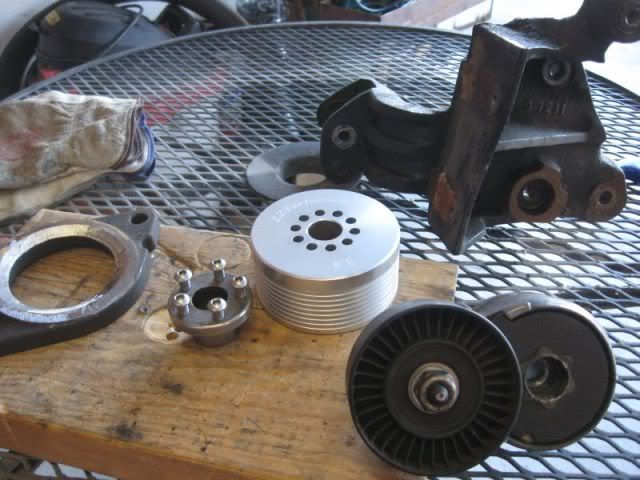
A few parts arrived yesterday:
More later!
Pat
[This message has been edited by katatak (edited 06-15-2010).]
IP: Logged
11:15 PM
Jun 20th, 2010
katatak Member
Posts: 7136 From: Omaha, NE USA Registered: Apr 2008
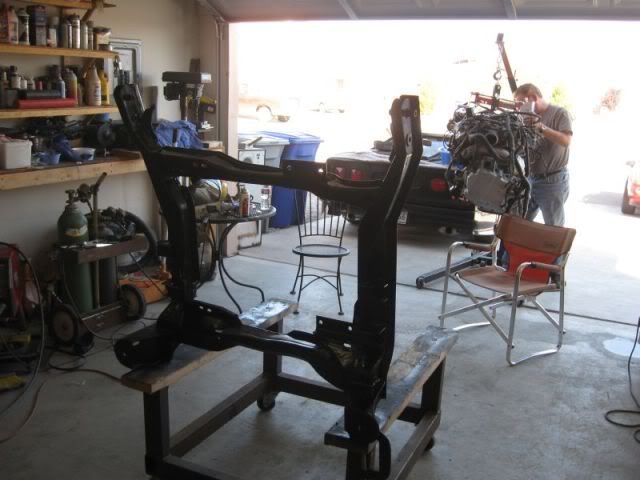
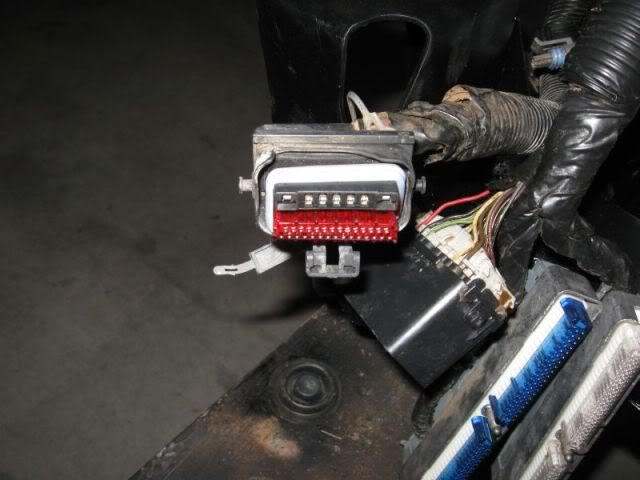
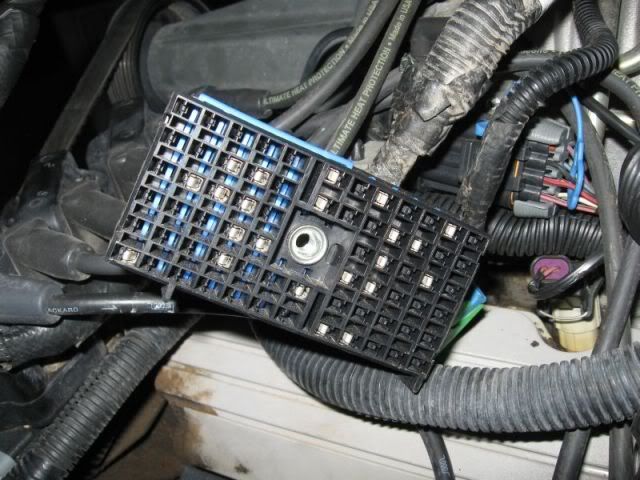
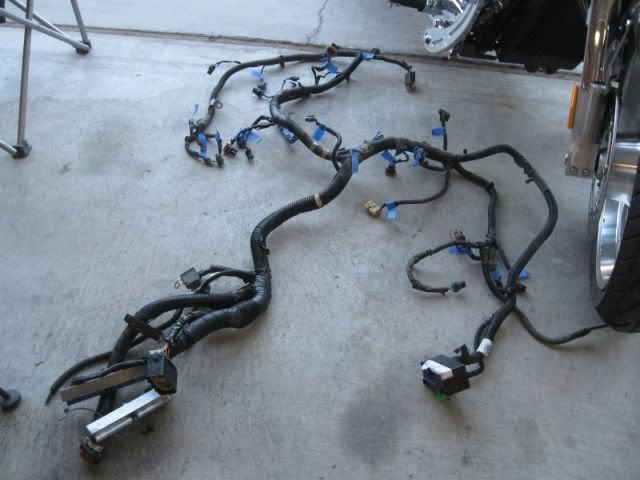
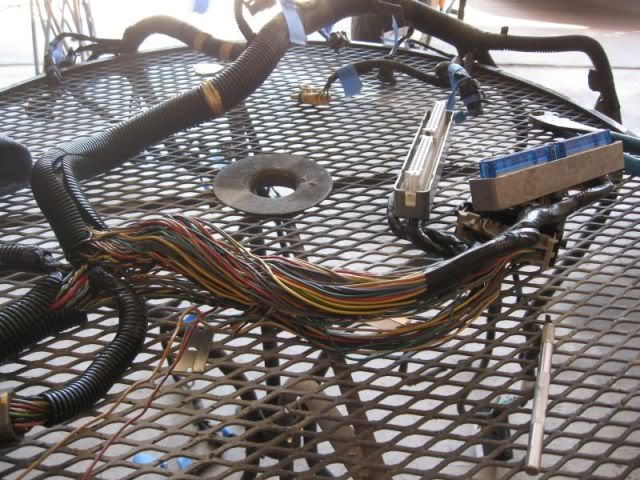
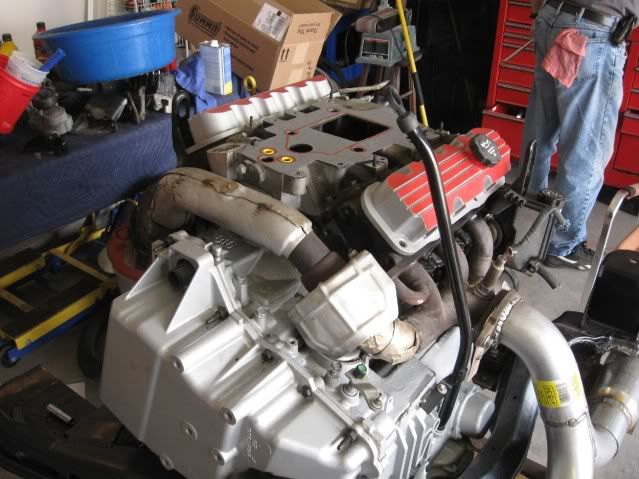
Jeff came over today so we could ge started on the wiring. After lunch, I had 3 Fiero nuts hanging out in my garage so the only thing that got done was a lot of story telling. It was a lot of fun though. A little later in the afternoon - around 4:00 we started getting serious. Went through and labled all the connectors on the harness and pulled it off the motor. What in the heck are we doing?
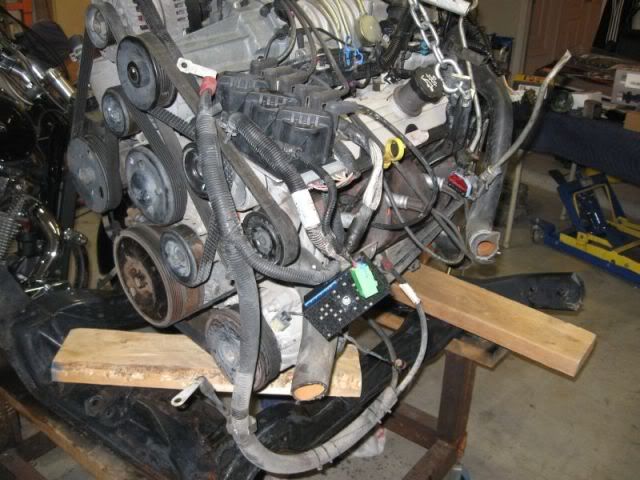
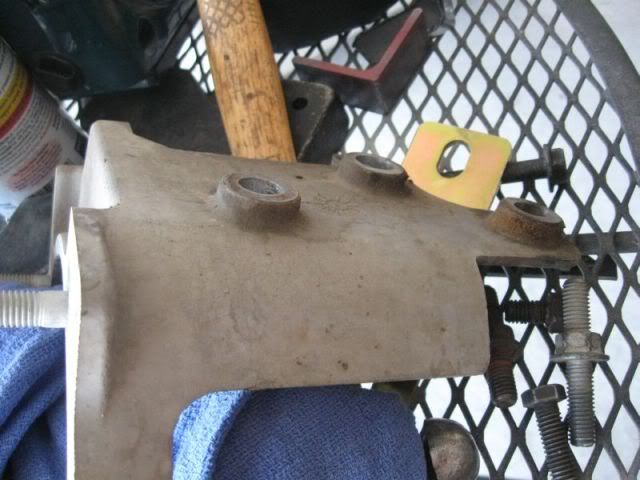
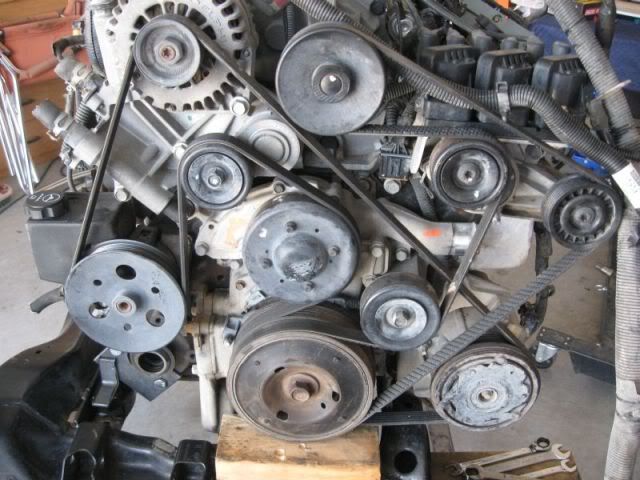
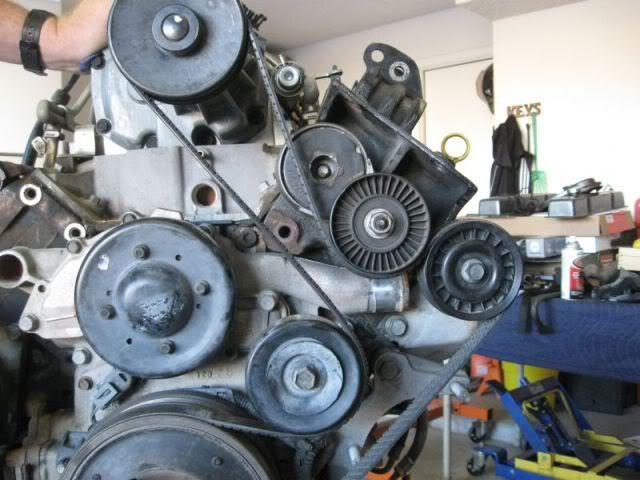
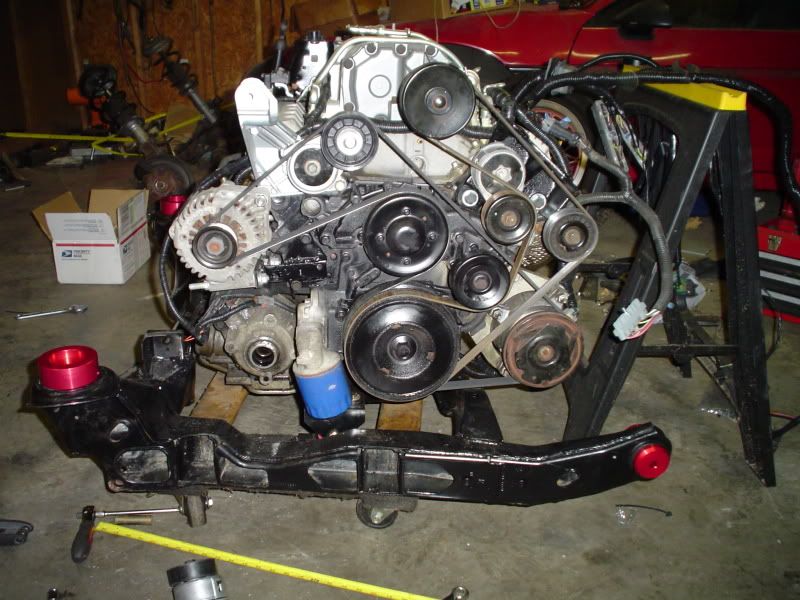
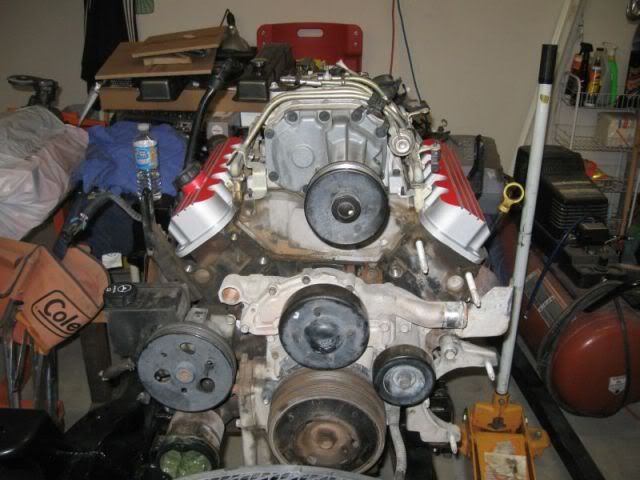
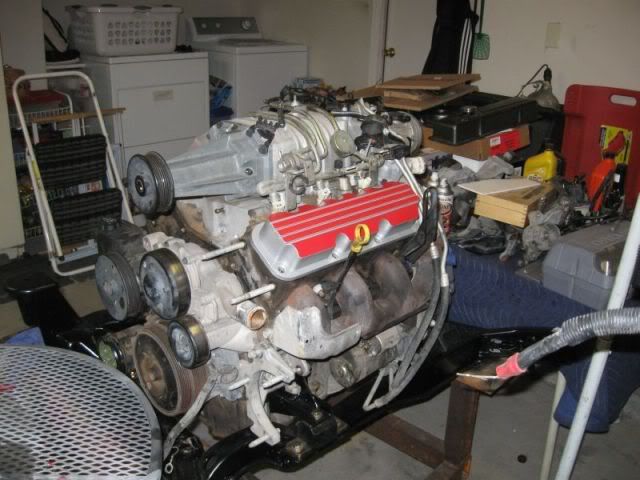
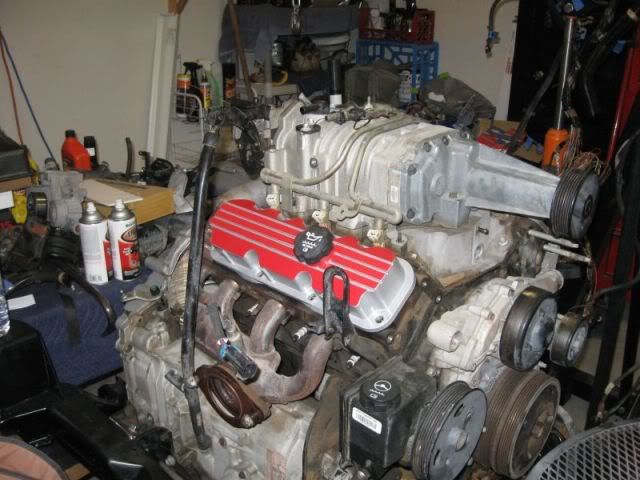
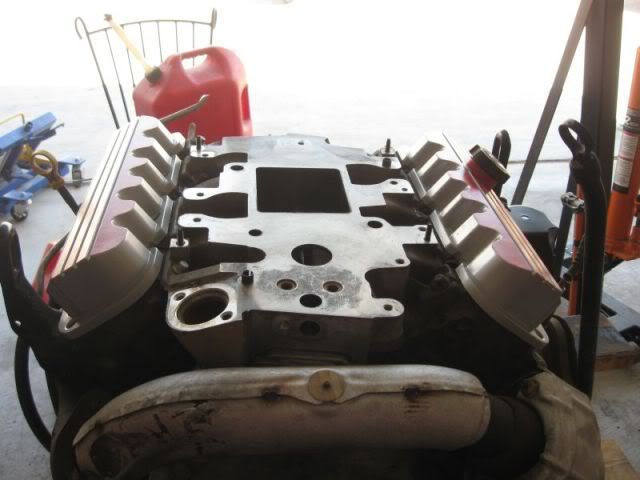
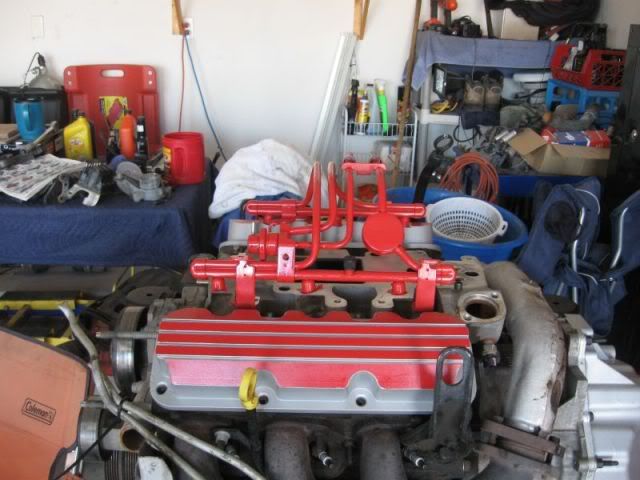
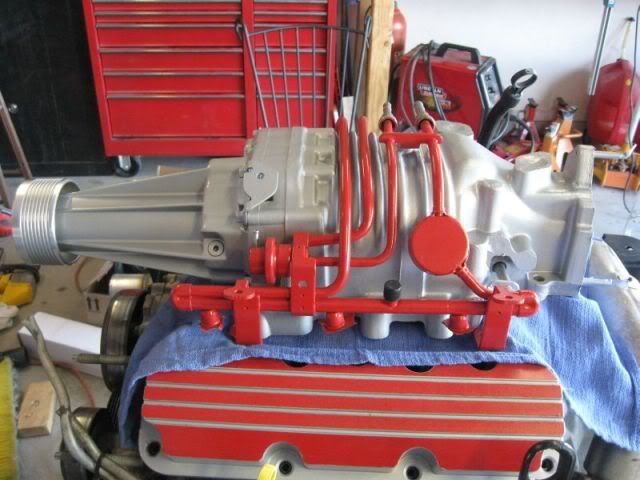
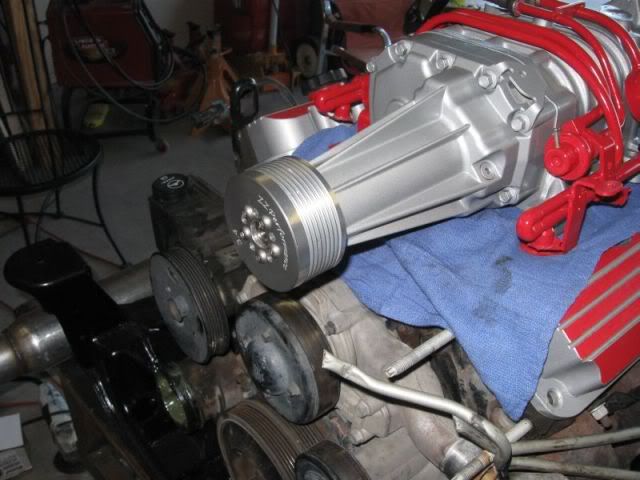
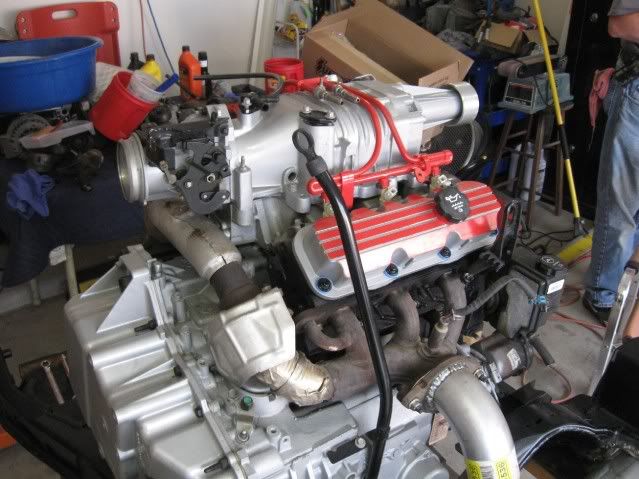
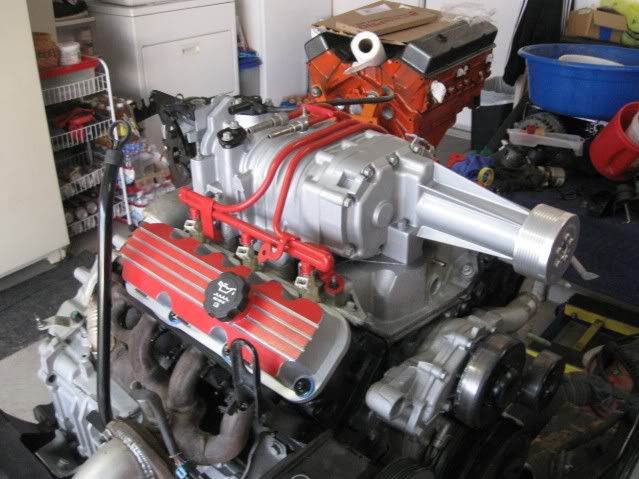
Then we started pulling parts to swap the valve covers, pull the blower for a clean up and check out the GXP tensioner braket setup.
Does this belt routing look right - the tensioner is just sitting there - no tension on the belt as this belt is too long:
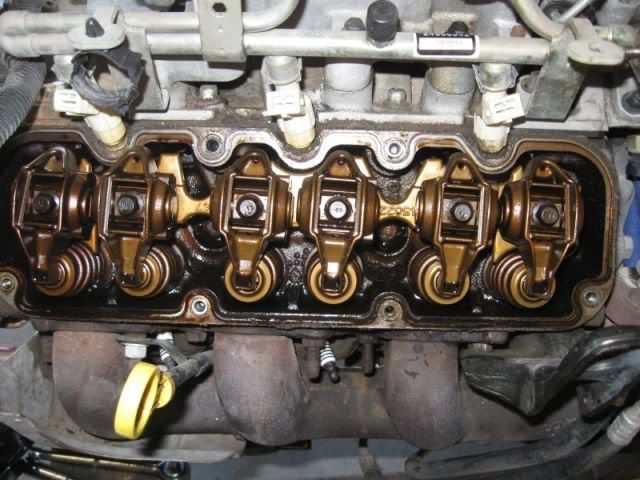
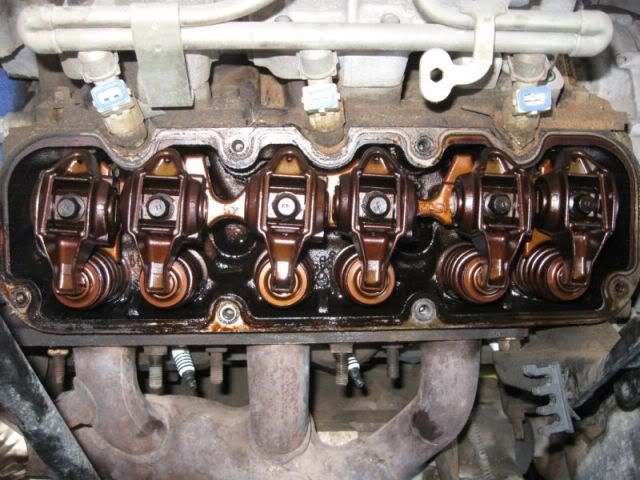
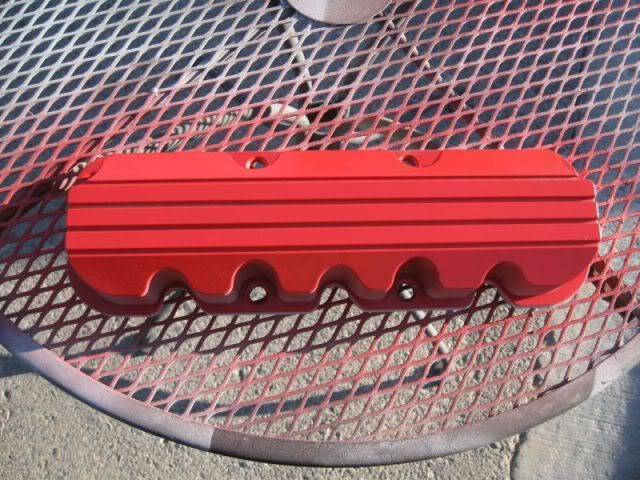
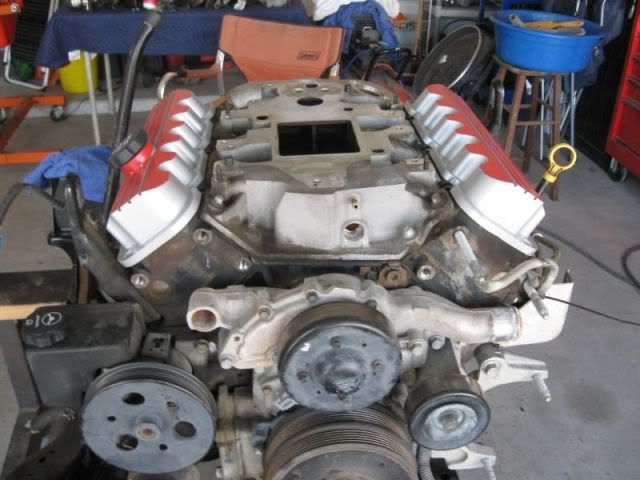
Valve covers off fo cleaning, painting and swapping: Looks pretty clean inside - no sludge but has that "hot oil" sheen.
Looks a lot better with out all that wiring on top of it.
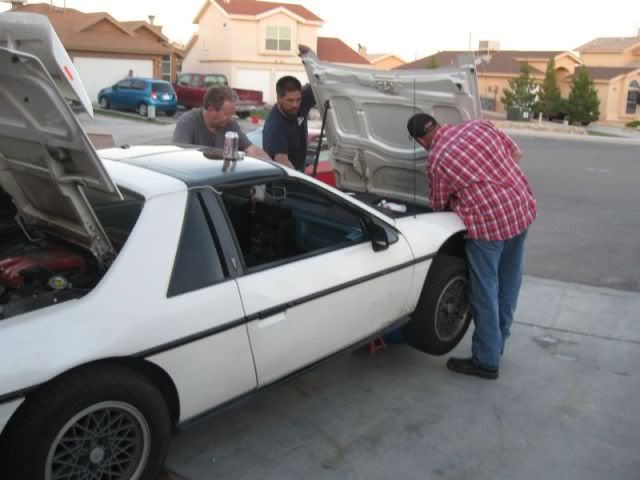
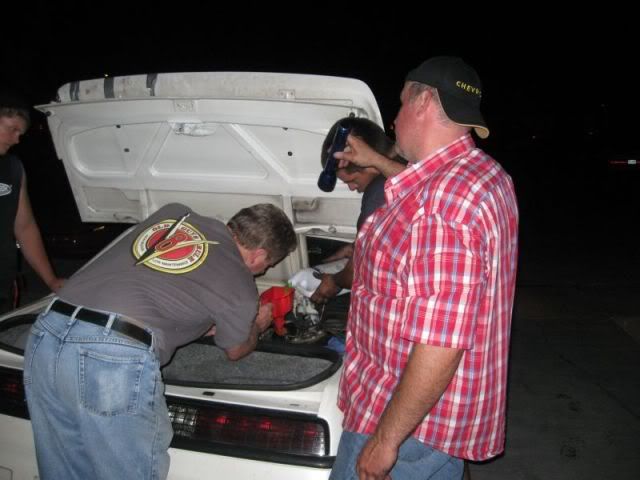
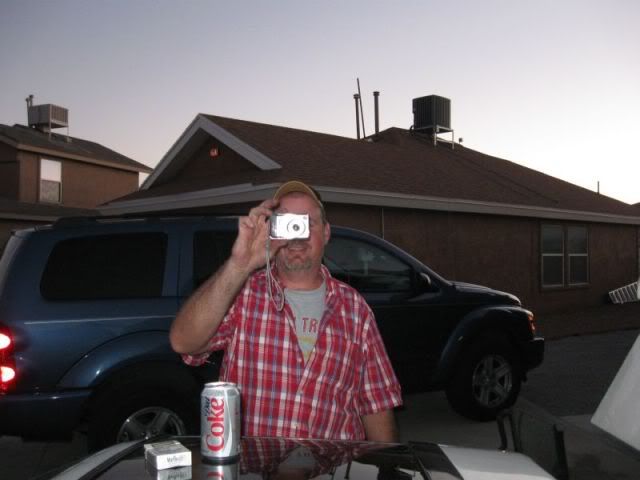
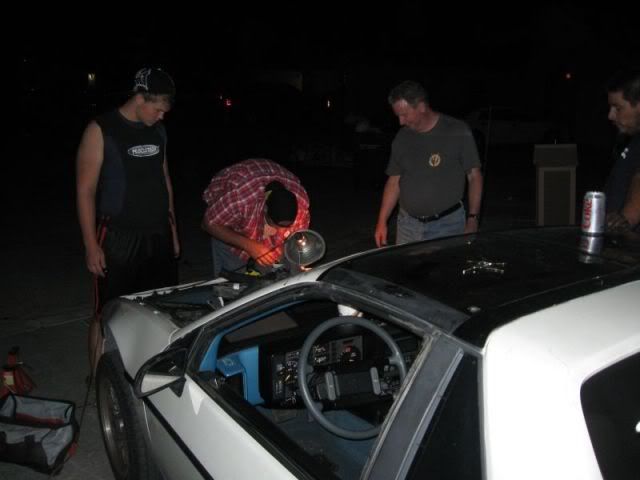
On a side note, I forgot that I took these pictures. Thursday night we had some NTFC folks show up at the door! We decided to do some surgery to a Formula: You will notice in all those pics, you will not find one with me in it working!
More later!
Pat
[This message has been edited by katatak (edited 06-20-2010).]
Originally posted by katatak: Then we started pulling parts to swap the valve covers, pull the blower for a clean up and check out the GXP tensioner braket setup.
Does this belt routing look right - the tensioner is just sitting there - no tension on the belt as this belt is too long:
Yeah that belt routing is not right....Should look like this for the SC with the GTP tensioner:
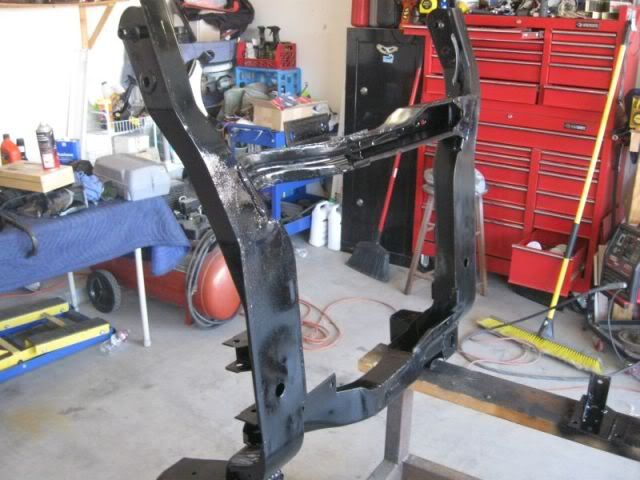
Mounting setup looks good and is the lowest mounted I have ever seen. If going with the full size IC then clearnance will not be an issue with the Dl..Thanks again for all the help the other night and let me know if I can help in any way with the swap.
IP: Logged
02:15 AM
AutoMark Member
Posts: 496 From: Somewhere between the Red and Rio Grande Registered: Jan 2005
Yall's work is lookin good! Great to see it in person. And... thats true bout you not helpin in those pics! Hmmm, guess that why you brought out lawn chair, you musta been tired from all that picture takin! hahahahaha I kid, I kid.... Thanks again for the help again, and lookin forward to seein yall again (just not in Little Bird Poop, thats the Fiero's given name) and seein that swap done! BTW, here is some more pics from that night, https://www.fiero.nl/forum/Forum1/HTML/081485.html
IP: Logged
04:19 AM
katatak Member
Posts: 7136 From: Omaha, NE USA Registered: Apr 2008
Yeah that belt routing is not right....Should look like this for the SC with the GTP tensioner:
Mounting setup looks good and is the lowest mounted I have ever seen. If going with the full size IC then clearnance will not be an issue with the Dl..Thanks again for all the help the other night and let me know if I can help in any way with the swap.
Thanks for the pic Stephen. A picture is worth a thousand words!
Pat
IP: Logged
01:16 PM
katatak Member
Posts: 7136 From: Omaha, NE USA Registered: Apr 2008
Yall's work is lookin good! Great to see it in person. And... thats true bout you not helpin in those pics! Hmmm, guess that why you brought out lawn chair, you musta been tired from all that picture takin! hahahahaha I kid, I kid.... Thanks again for the help again, and lookin forward to seein yall again (just not in Little Bird Poop, thats the Fiero's given name) and seein that swap done! BTW, here is some more pics from that night, https://www.fiero.nl/forum/Forum1/HTML/081485.html
It was all your story tellin that wore me out - I had to sit in the lawn chair! But I think I have a pic or 2 of you sitting in the lawn chair - and I think you were the first to find a seat....lol. Glad you guys could stop by! Even it was a "forced" stop.
Pat
IP: Logged
01:18 PM
katatak Member
Posts: 7136 From: Omaha, NE USA Registered: Apr 2008
A little more progress today but it was too damn hot to do much. I started stripping the harness. Once Jeff got a look at all the wires, he decided to have the harness built by someone else. I am really glad as this just scares the caca out of me. It only tkaes one goofy wire and I would not know where to look. Hope Fieroflye is feelin up to building a harness.
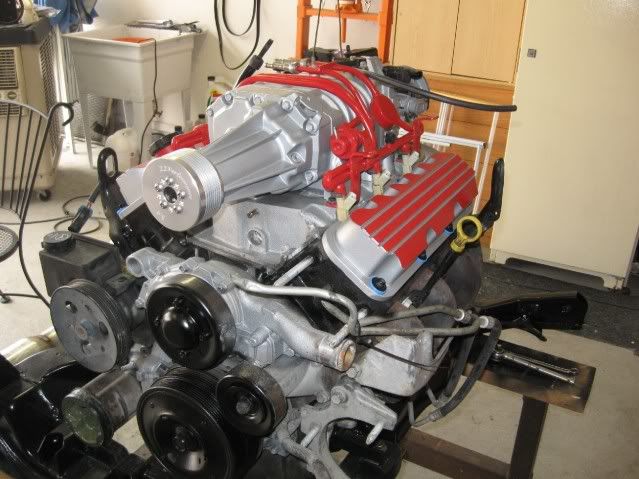
Cleaned up and painted the valve covers:
More later!
Pat
IP: Logged
11:33 PM
Carver1 Member
Posts: 2843 From: Edgewood, New Mexico Registered: Nov 2000
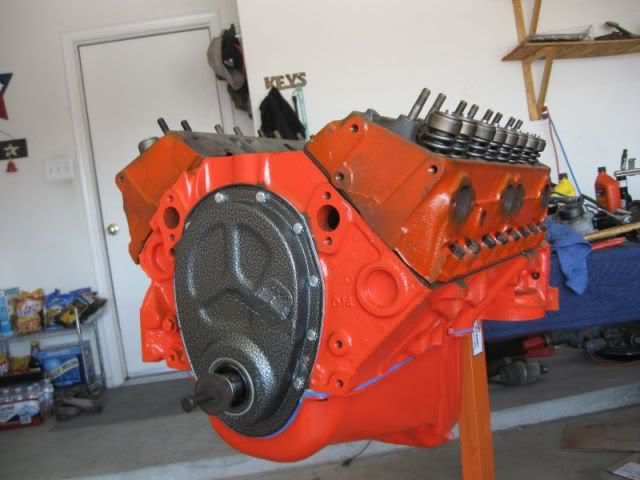
Pulled the SC today for clena up and paint. Got the fuellines cleaned up and painted. Shoudl get the SC done this coming week. Alos managed to get the EGR port plugs fabbed and ready for installation. While waiting for paint to dry, we got the heads installed on my Monte motor. Looks like everything we have going will be ready about the same time. Not sure how we are going to get it all done but we'll figure it out. We have a 3.4 going in an 88 Formula, this 3800 swapping out a 4.9 in an 88 GT, the motor pictured below going into tmy Monte, etc... etc.... Going to be a busy month.
Blower off - cleaning the old gasket off was a PITA around the EGR/ water ports!
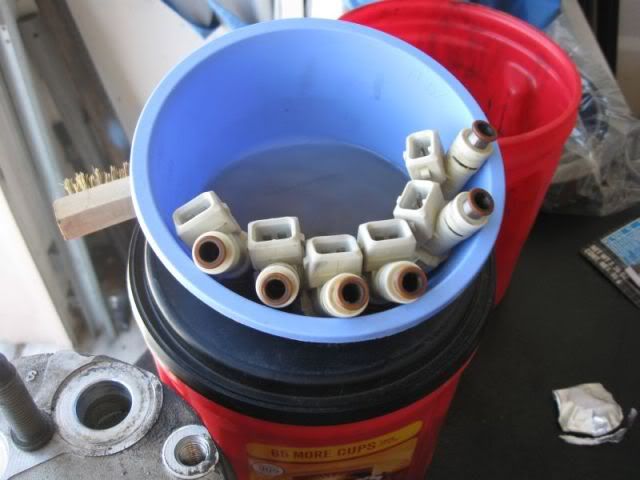
Cleaned the injectors:
Painted the Fuel Lines:
We filled in our down time waiting for paint to dry and injectors to soak installing heads on my Monte Motor: All that's left is the manifold and we will be ready to stuff this back in the car!
More later!
Pat
IP: Logged
12:36 AM
Jul 6th, 2010
katatak Member
Posts: 7136 From: Omaha, NE USA Registered: Apr 2008
Just got back from a marathon drive to S.E Idaho. Did not come home with any Fiero parts but I did get a lot of tools and a set of Factory GM Rally wheels for my Monte.
I had the injectors for Jeff's 3800 soaking in injector cleaner for over a week and when I got home, the rebuild kit I ordered from Mr. Injector had arrived. I decided to sit down and finish up the rehab on the injectors. After wiping them down and making sure they were clean, I installed the new filters, end caps and O Rings. Injectors are ready to go!
We will be building the Exhaust on Saturday. I hope it comes out good.
More later!
Pat
IP: Logged
06:39 PM
Frizlefrak Member
Posts: 2921 From: El Paso, Texas Registered: Aug 2003
And I'll be doing my marathon drive TO Idaho LOL. You guys have fun this weekend Pat.....keep the pics coming so I can participate vicariously from the road!
IP: Logged
06:46 PM
katatak Member
Posts: 7136 From: Omaha, NE USA Registered: Apr 2008
And I'll be doing my marathon drive TO Idaho LOL. You guys have fun this weekend Pat.....keep the pics coming so I can participate vicariously from the road!
I guess we are still on for Jan's swap? Be careful heading North. There is road construction everywhere! If you are going through Ship rock, it will take you 2.5 hours to go the 80 miles between Gallup and Shiprock. Lots of single lane road. I-25 has a lot of construction too! !-80 is not much better. I-15 through SLC is a mess and has some more North of SLC and on the other side of the Malad pass! Our stimulus money is hard at work on the Nations highways!
IP: Logged
11:32 PM
Jul 10th, 2010
katatak Member
Posts: 7136 From: Omaha, NE USA Registered: Apr 2008
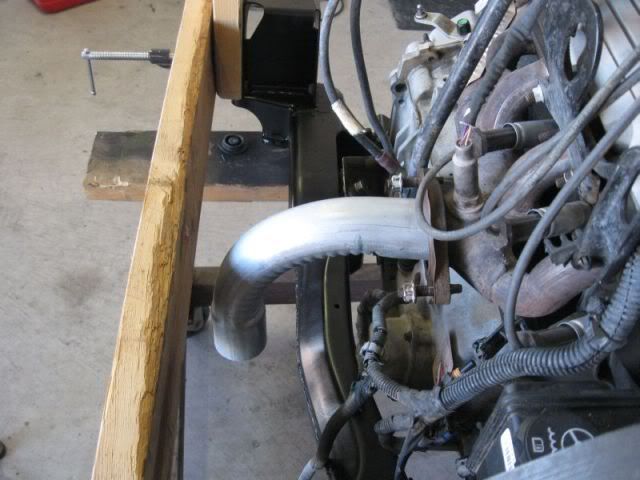
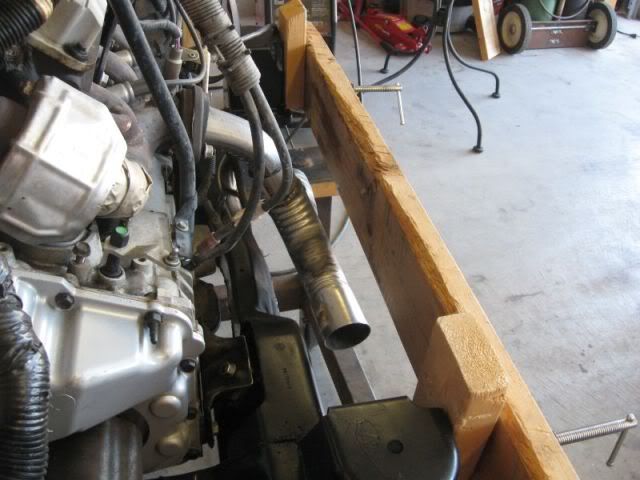
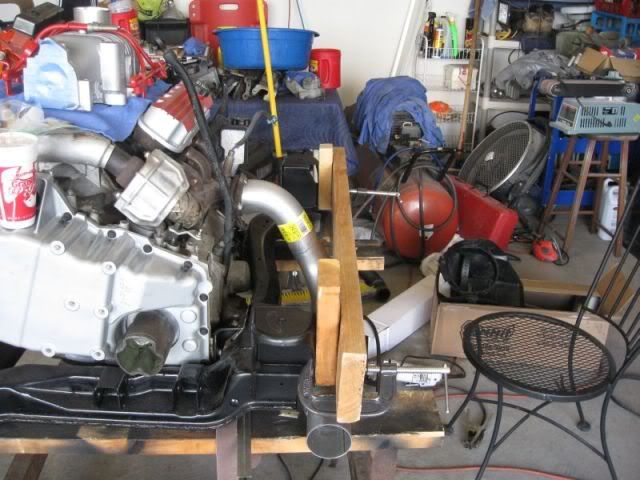
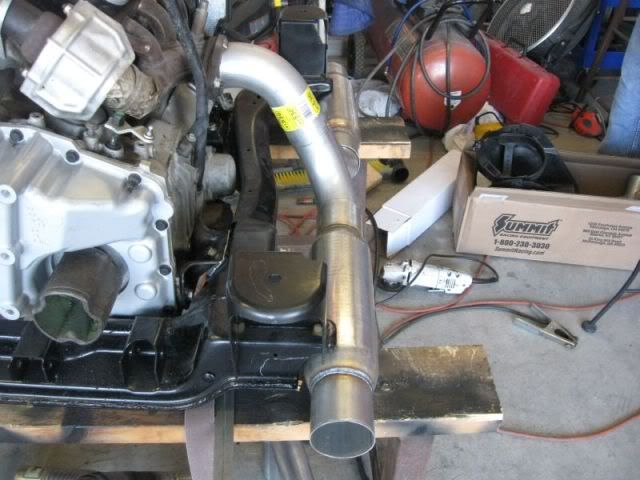
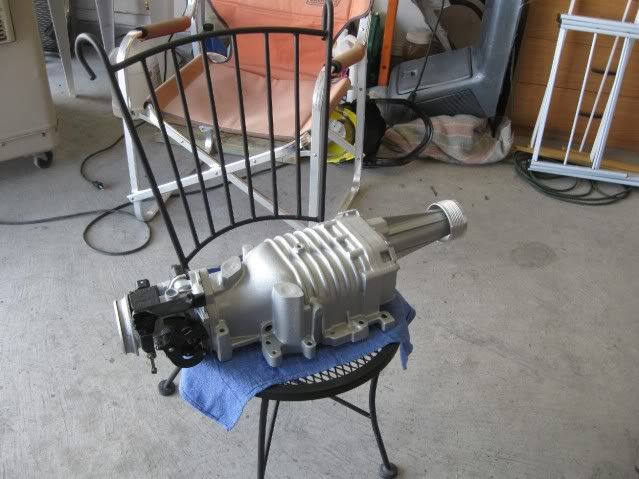
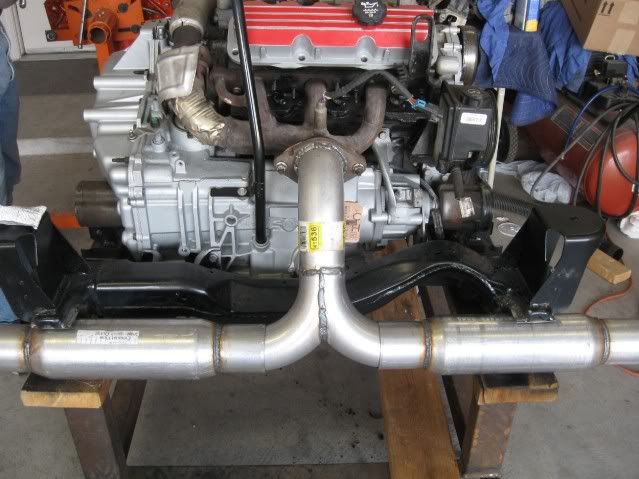
Started fabbing up the exhaust this afternoon. Jeff brought the mufflers and the rest of the pipe over along with a clean super charger. He got the super charger painted and the TB cleaned up and we mocked up the exhaust from the flange to the Y pipe and after some eye balling, we decided that it needed some tweaking so that we would have enough clearance with the trunk wall - our goal is to make the exhaust as free flowing as possible without having to cut the trunk. We ended up making some mods to the cradle to move the mufflers toward the motor about 1.5" which I think will give us plenty of trunk clearance. We will finish up the flange and Y pipe tomorrow and then finish the exhaust once it's in the car. We will have to do some creative trimming on the mufflers but it looks like it will all work great. Getting pretty close to swap time - once we get the harness back we will be ready.
Mocked up and it's too close to the trunk wall:
Can you say "big tube"?
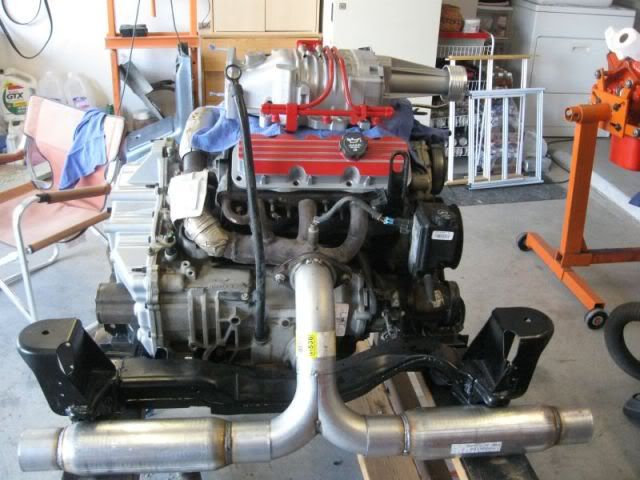
SC Painted and just sitting there:
Old pulley removed and ZZP 3.4 installed - Thank's Stephen!
We are talking "flow" here!
More tomorrow!
Pat
IP: Logged
12:27 AM
Jul 13th, 2010
katatak Member
Posts: 7136 From: Omaha, NE USA Registered: Apr 2008
We spent Saturday welding up the flange and the Y pipe for the exhaust. Also got the SC , Fule Lines/Rails and the Valve Covers installed. While we were taking out "union" break, my boy called to tel me that the XTC had died - he was able to start it but then it would die after a minute. We jumped in the Durango and went on a resuce run. Threw the Fuel Pressure gauge on it - had 10 psi? Hmmm..... I ask "did you put gas in it? He says "yep - 2 days ago! We pour 5 gallons in - start the car - 38psi..... Drove home. Kids these days?
SC gasket in place:
TB cleaned and painted - installed:
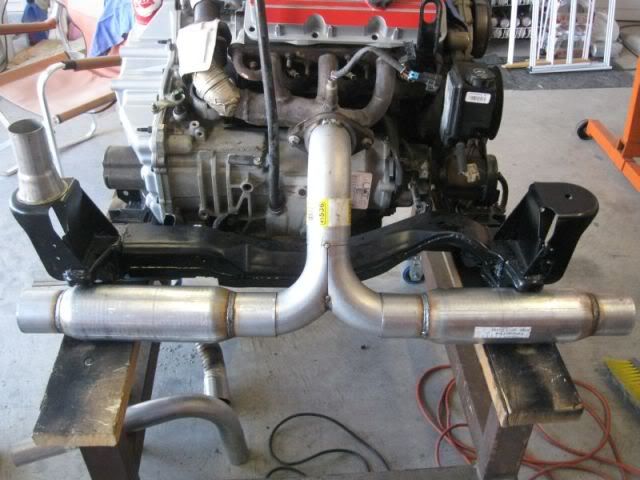
Wlede up the Y pipe:
Buttoning it up:
More later!
Pat
[This message has been edited by katatak (edited 07-13-2010).]
Looking good....Should really look into getting a good set of used aftermarker fuel rails for the setup... Will really clean it up and look better than it already does..You can just get the rails themself from Summit for pretty cheap. Or you can get fuel rail stock cheap off Ebay and drill your injector holes and tap the needed Ends....You going low mount or keeping it up high?