Pennock's Fiero Forum
  General Fiero Chat - Archive
  3800sc the krummy way (Page 1)

T H I S   I S   A N   A R C H I V E D   T O P I C
  

Email This Page to Someone! | Printable Version

This topic is 2 pages long:  1   2 
Previous Page | Next Page
3800sc the krummy way by ckrummy
Started on: 04-18-2010 02:40 AM
Replies: 46
Last post by: ckrummy on 08-08-2010 07:17 PM
ckrummy
Member
Posts: 517
From: Lexington, KY
Registered: Oct 2008


Feedback score: N/A
Leave feedback

Rate this member

Report this Post04-18-2010 02:40 AM Click Here to See the Profile for ckrummySend a Private Message to ckrummyDirect Link to This Post
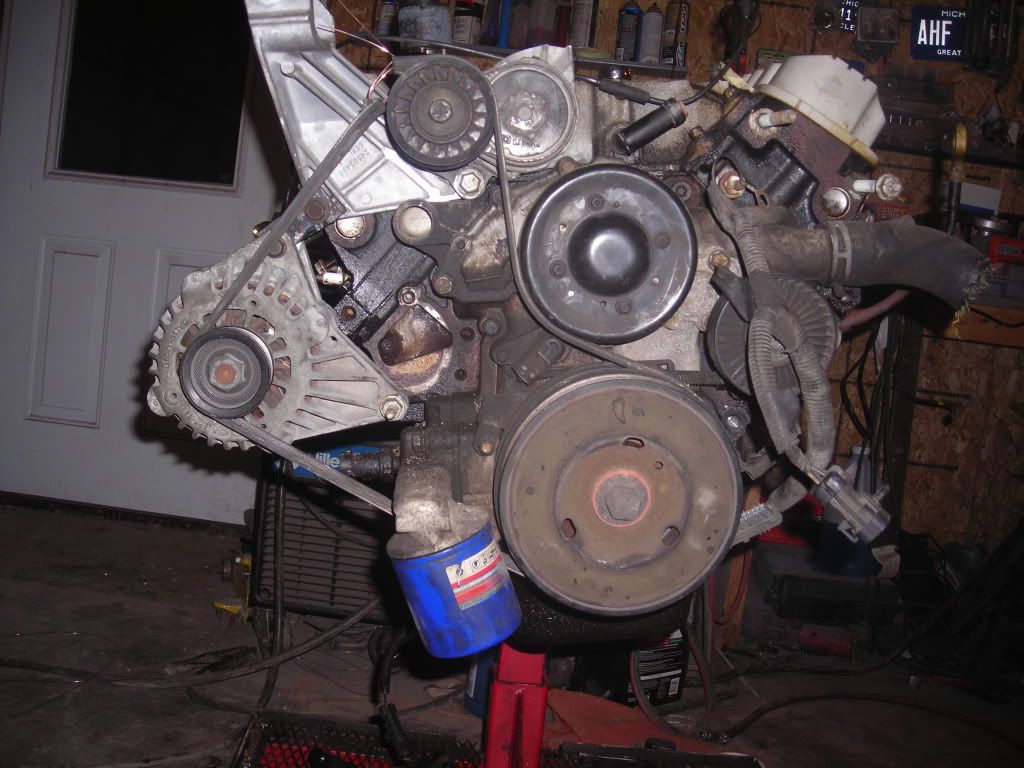
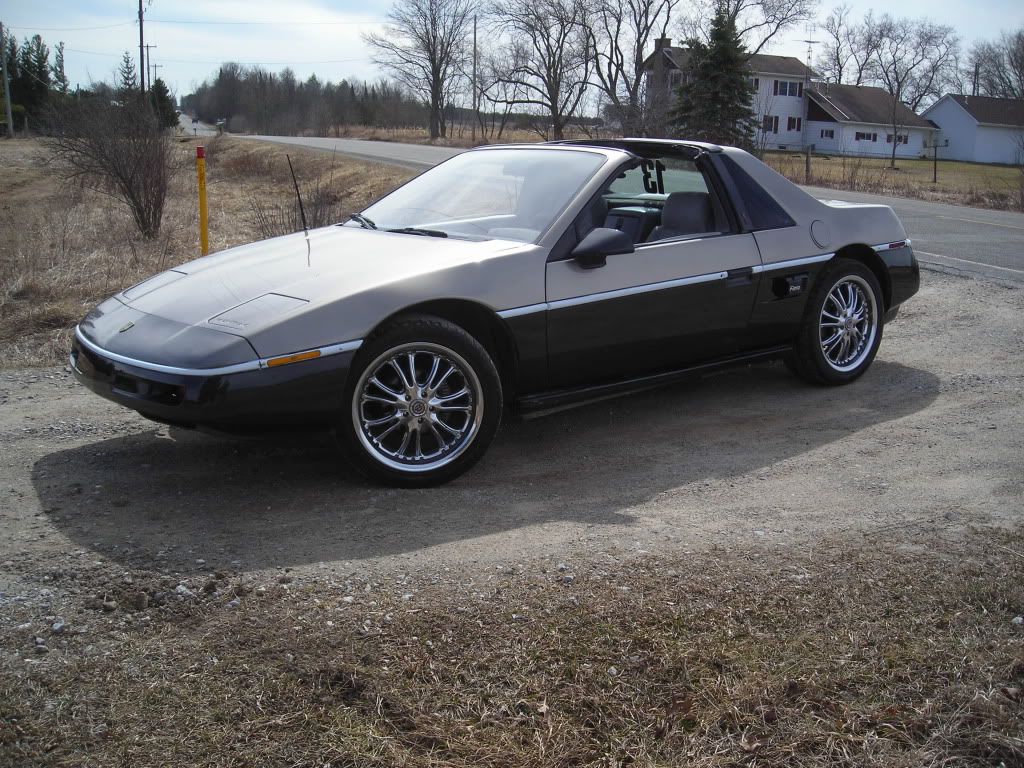
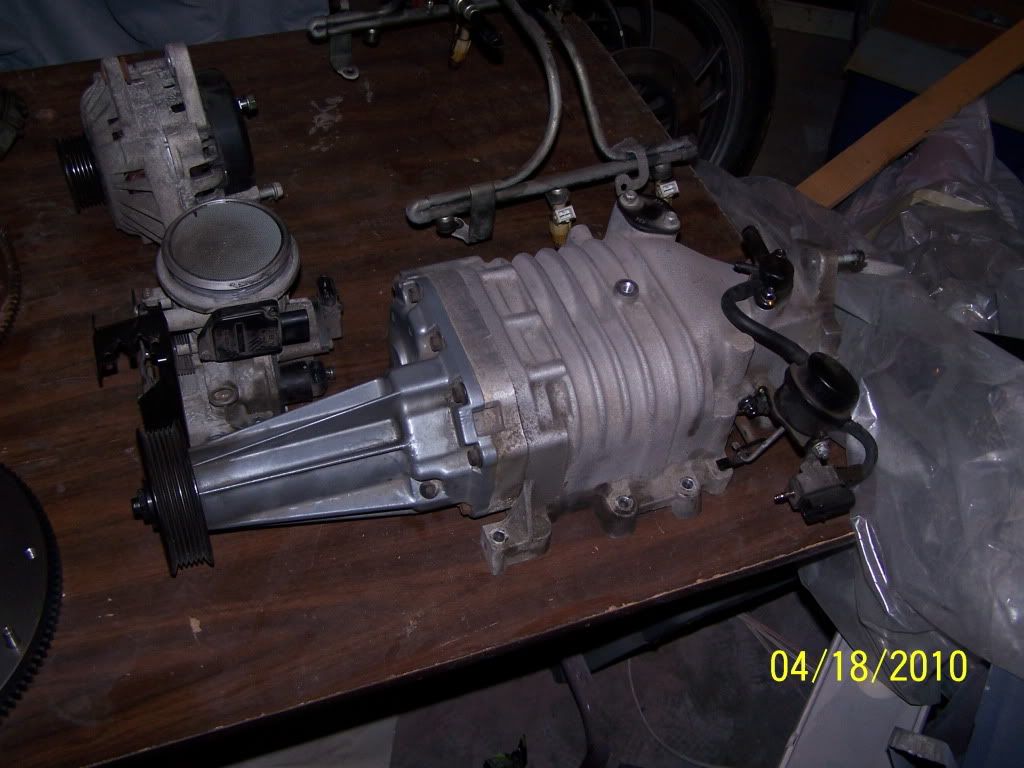
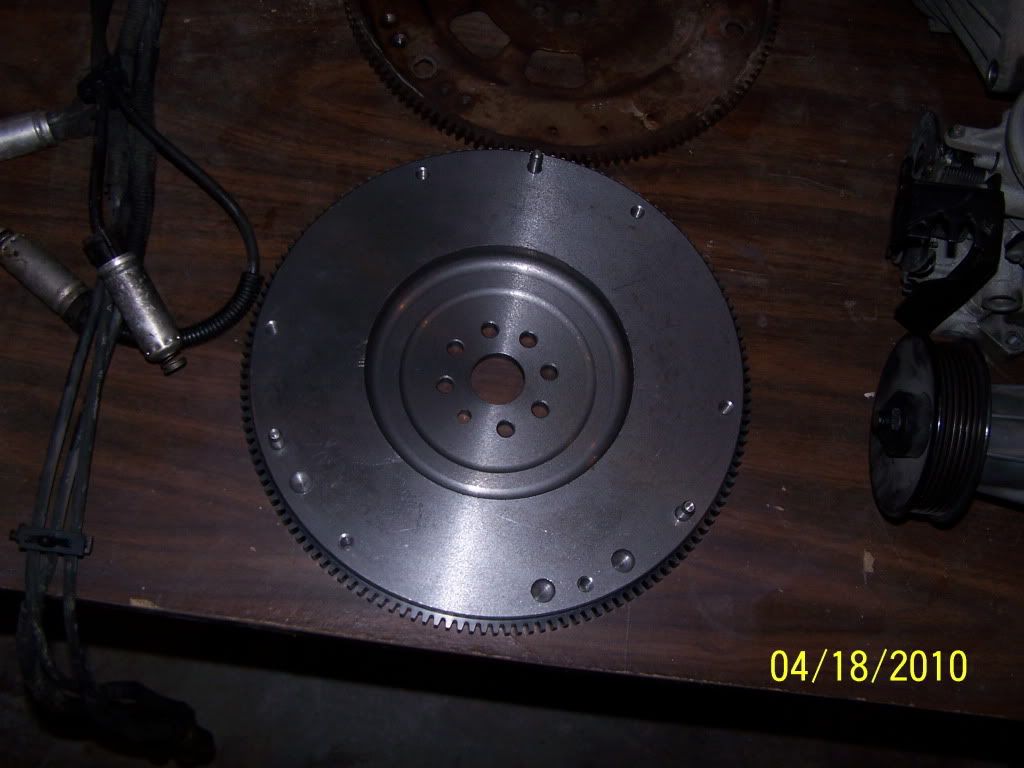
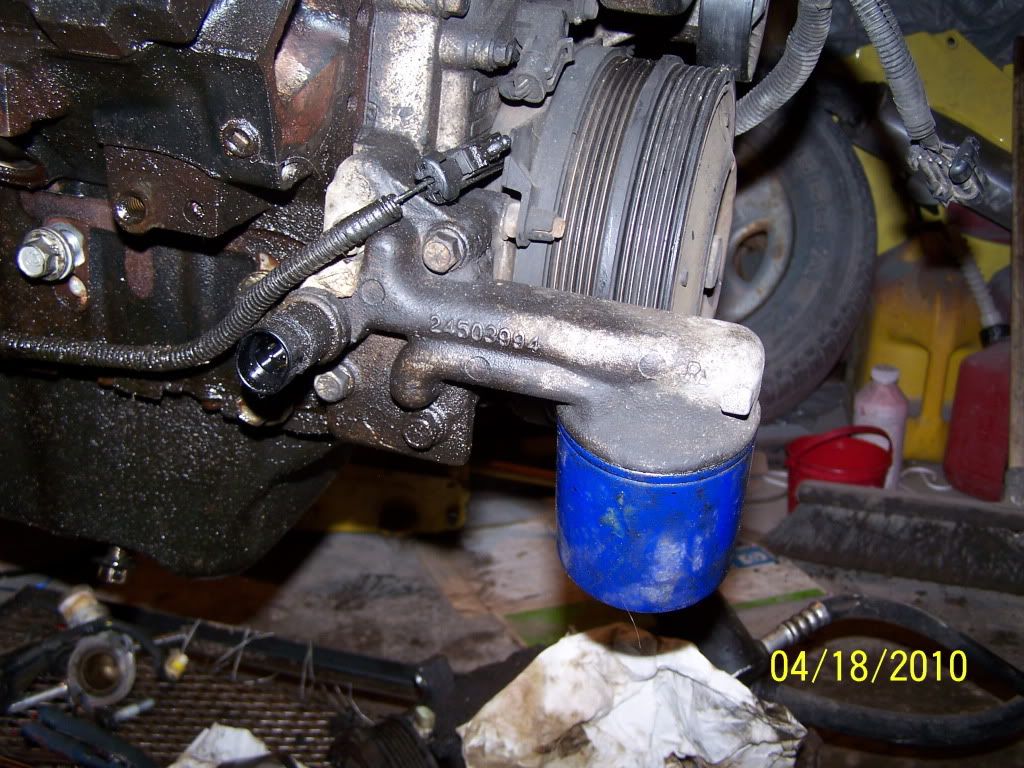
Sold my 86GT and now it's time to spend.
here is my car

Day 1
This is the engine from an 98 grand prix with 126k on it. I already did some tear down.
This images is larger than 153600 bytes. Click to view.
and the blower off and cleaned

here is the new flywheel still needs to be cut and balanced (un-balanced really)

This should be the correct oil filter adapter

and the dog bone mount

i also ordered exhaust parts to build from head to tips. should be here Wednesday. Keep watching.

[This message has been edited by ckrummy (edited 04-18-2010).]

IP: Logged
PFF
System Bot
Isolde
Member
Posts: 2504
From: North Logan, Utah, USA
Registered: May 2008


Feedback score: N/A
Leave feedback


Total ratings: 133
Rate this member

Report this Post04-18-2010 10:47 AM Click Here to See the Profile for IsoldeSend a Private Message to IsoldeDirect Link to This Post
dang, she's a great lookin car.
IP: Logged
Hockaday
Member
Posts: 2165
From: Clifton Park, New York, The States.
Registered: Sep 2009


Feedback score: (3)
Leave feedback

Rate this member

Report this Post04-18-2010 10:53 AM Click Here to See the Profile for HockadaySend a Private Message to HockadayDirect Link to This Post
please keep it a notchie!! -puppy eyes- Bumper Pads FTW!!!
IP: Logged
darkhorizon
Member
Posts: 12279
From: Flint Michigan
Registered: Jan 2006


Feedback score: (1)
Leave feedback


Total ratings: 451
Rate this member

Report this Post04-18-2010 11:14 AM Click Here to See the Profile for darkhorizonSend a Private Message to darkhorizonDirect Link to This Post
 
quote
Originally posted by Hockaday:

please keep it a notchie!! -puppy eyes- Bumper Pads FTW!!!


Pretty sure that is a coupe.
IP: Logged
Isolde
Member
Posts: 2504
From: North Logan, Utah, USA
Registered: May 2008


Feedback score: N/A
Leave feedback


Total ratings: 133
Rate this member

Report this Post04-18-2010 11:16 AM Click Here to See the Profile for IsoldeSend a Private Message to IsoldeDirect Link to This Post
What? All stock Fieros are coupes, whether fastback or notch-back
IP: Logged
FastFieros
Member
Posts: 2698
From: Dallas Texas USA
Registered: Nov 2000


Feedback score: (2)
Leave feedback


Total ratings: 265
Rate this member

Report this Post04-18-2010 11:30 AM Click Here to See the Profile for FastFierosClick Here to visit FastFieros's HomePageSend a Private Message to FastFierosDirect Link to This Post
A little degreaser and paint will shine that right up to match that fine looking Ttop car.

Good luck on the build !

http://www.fastfieros.com
IP: Logged
timcha
Member
Posts: 741
From: Edmond, Oklahoma, USA
Registered: Jun 2008


Feedback score:    (8)
Leave feedback

Rate this member

Report this Post04-18-2010 11:39 AM Click Here to See the Profile for timchaSend a Private Message to timchaDirect Link to This Post
Wow, that is one eye popping gorgeous notchie! As a hard core fastback lover, this gives me the warmies . Congrats on a great find!
IP: Logged
darkhorizon
Member
Posts: 12279
From: Flint Michigan
Registered: Jan 2006


Feedback score: (1)
Leave feedback


Total ratings: 451
Rate this member

Report this Post04-18-2010 11:41 AM Click Here to See the Profile for darkhorizonSend a Private Message to darkhorizonDirect Link to This Post
 
quote
Originally posted by Isolde:

What? All stock Fieros are coupes, whether fastback or notch-back


.............
IP: Logged
ckrummy
Member
Posts: 517
From: Lexington, KY
Registered: Oct 2008


Feedback score: N/A
Leave feedback

Rate this member

Report this Post04-18-2010 11:35 PM Click Here to See the Profile for ckrummySend a Private Message to ckrummyDirect Link to This Post
Day 2
I got a little work done on my low mount set up

This images is larger than 153600 bytes. Click to view.
It's simple but i think it will work.

[This message has been edited by ckrummy (edited 04-18-2010).]

IP: Logged
FastFieros
Member
Posts: 2698
From: Dallas Texas USA
Registered: Nov 2000


Feedback score: (2)
Leave feedback


Total ratings: 265
Rate this member

Report this Post04-18-2010 11:56 PM Click Here to See the Profile for FastFierosClick Here to visit FastFieros's HomePageSend a Private Message to FastFierosDirect Link to This Post
You better put that transmission on there and make sure it clears the axle and CV joint. Looks really low low mounted.

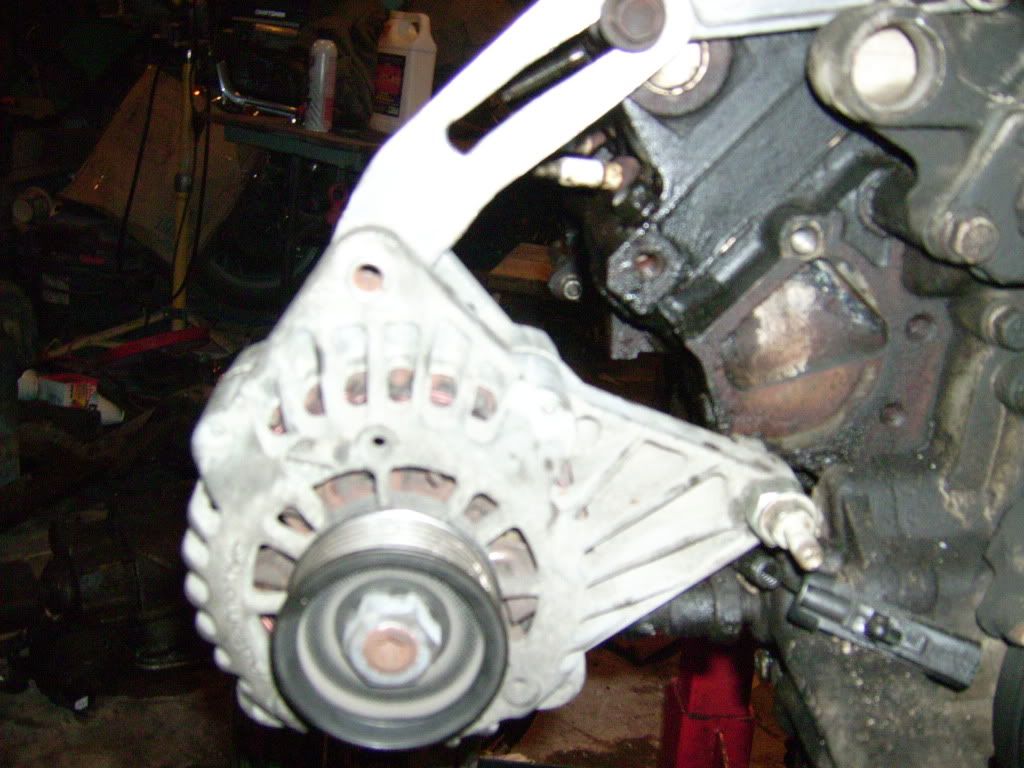
You will also have to brace the back of the alt. Just having it hang on those 2 pivot points will cause the alt to pull inward when you tighten the belt to proper tension.

http://www.fastfieros.com

[This message has been edited by FastFieros (edited 04-18-2010).]

IP: Logged
fierocarparts
Member
Posts: 2552
From: Dallas-Fort Worth TEXAS
Registered: Feb 2009


Feedback score:    (66)
Leave feedback

Rate this member

Report this Post04-19-2010 12:07 AM Click Here to See the Profile for fierocarpartsSend a Private Message to fierocarpartsDirect Link to This Post
Who's mounts are you using or making your own?
IP: Logged
PFF
System Bot
ckrummy
Member
Posts: 517
From: Lexington, KY
Registered: Oct 2008


Feedback score: N/A
Leave feedback

Rate this member

Report this Post04-19-2010 03:01 AM Click Here to See the Profile for ckrummySend a Private Message to ckrummyDirect Link to This Post
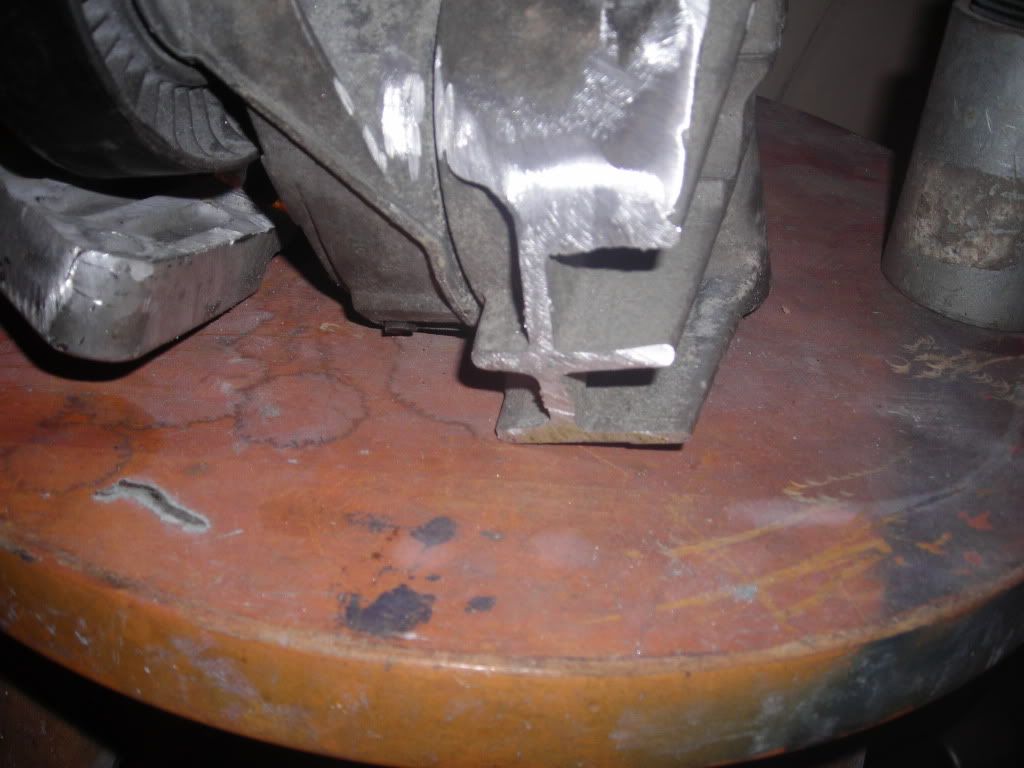
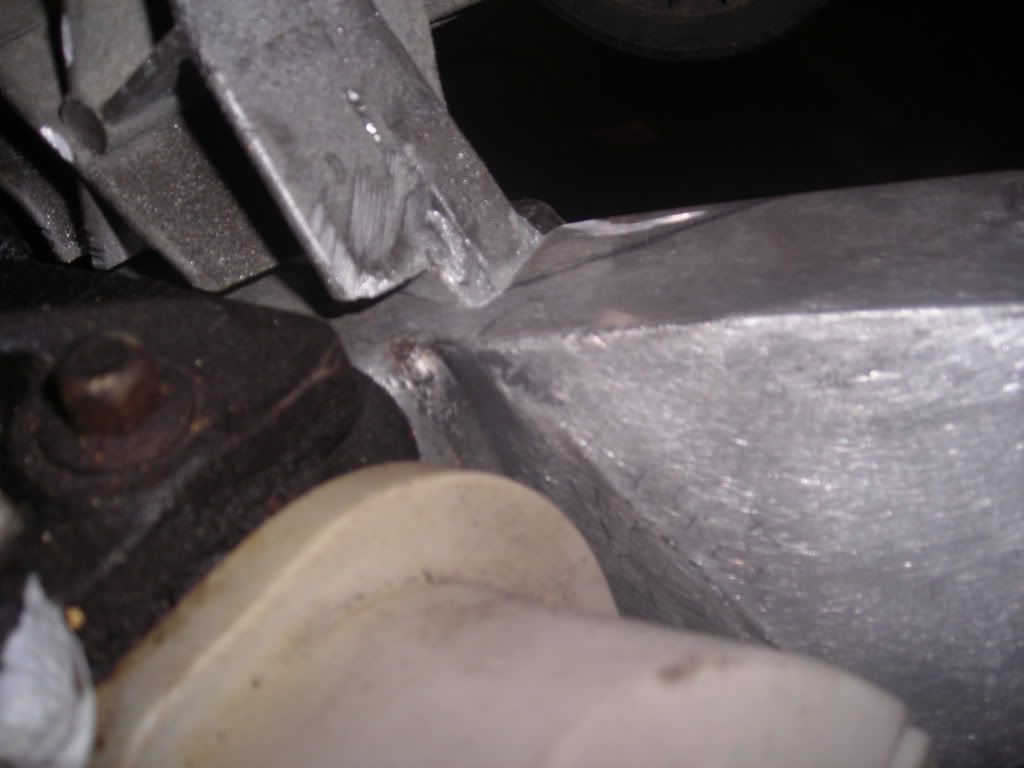
Day 3... ish
So I've decided to ditch my first attempt at building a low mount. On my first attempt i tried to build in adjust-ability to avoid running a tensioner but that wouldn't be strong enough. So... here is how you make a tensioner bracket.

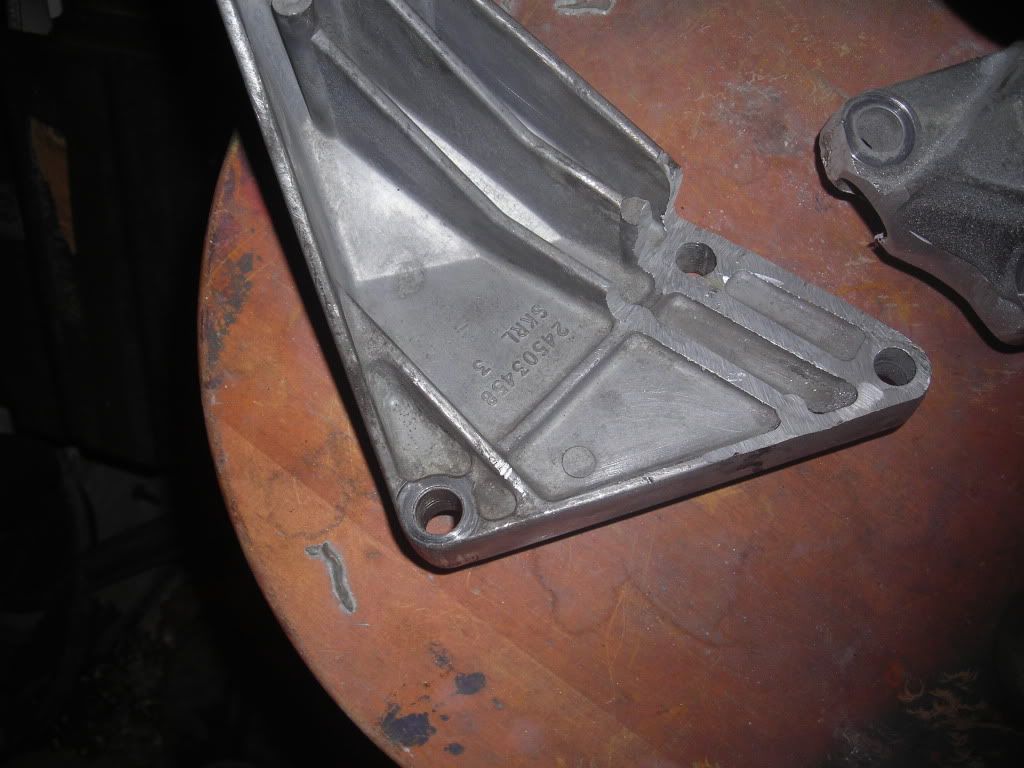
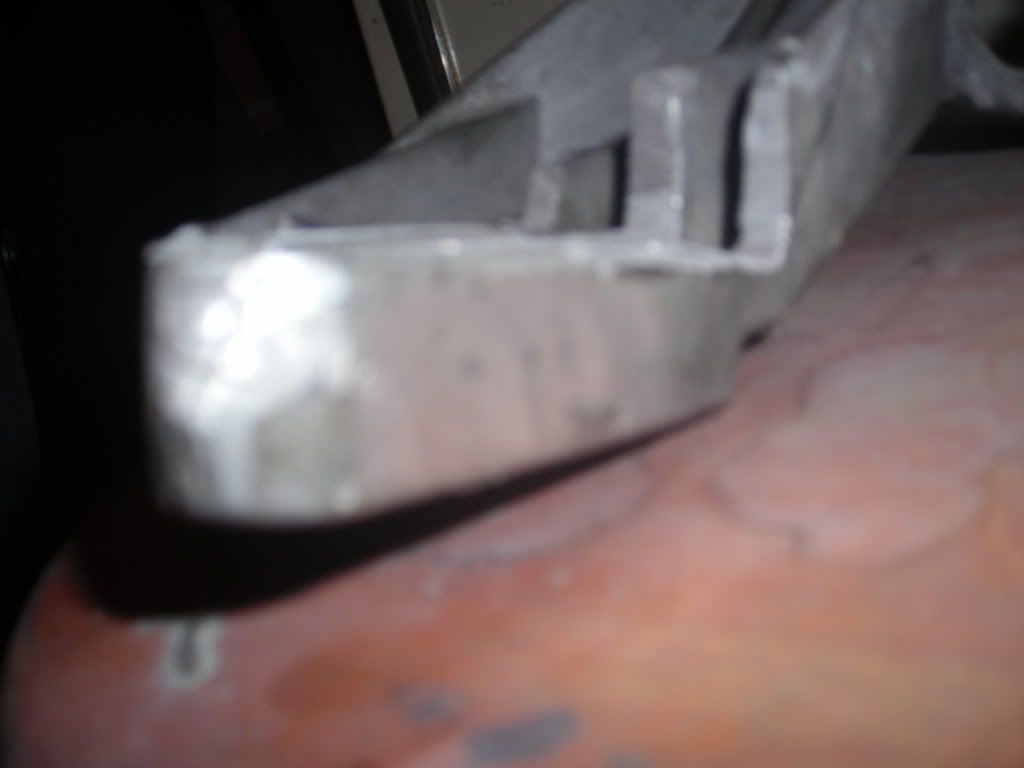
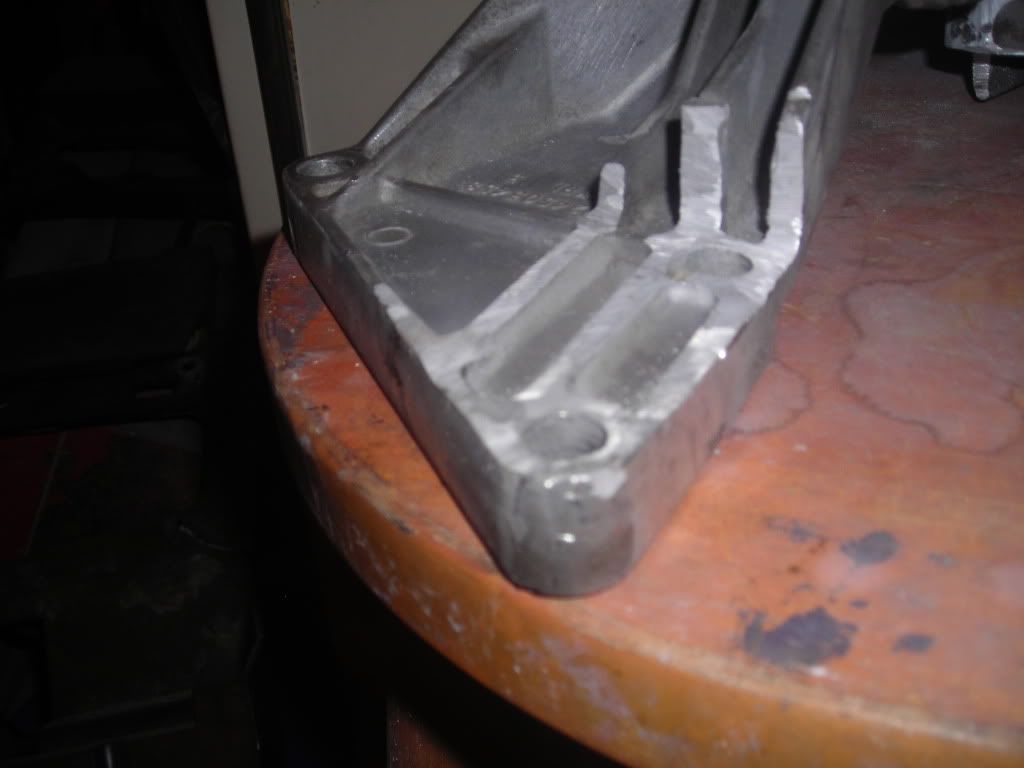
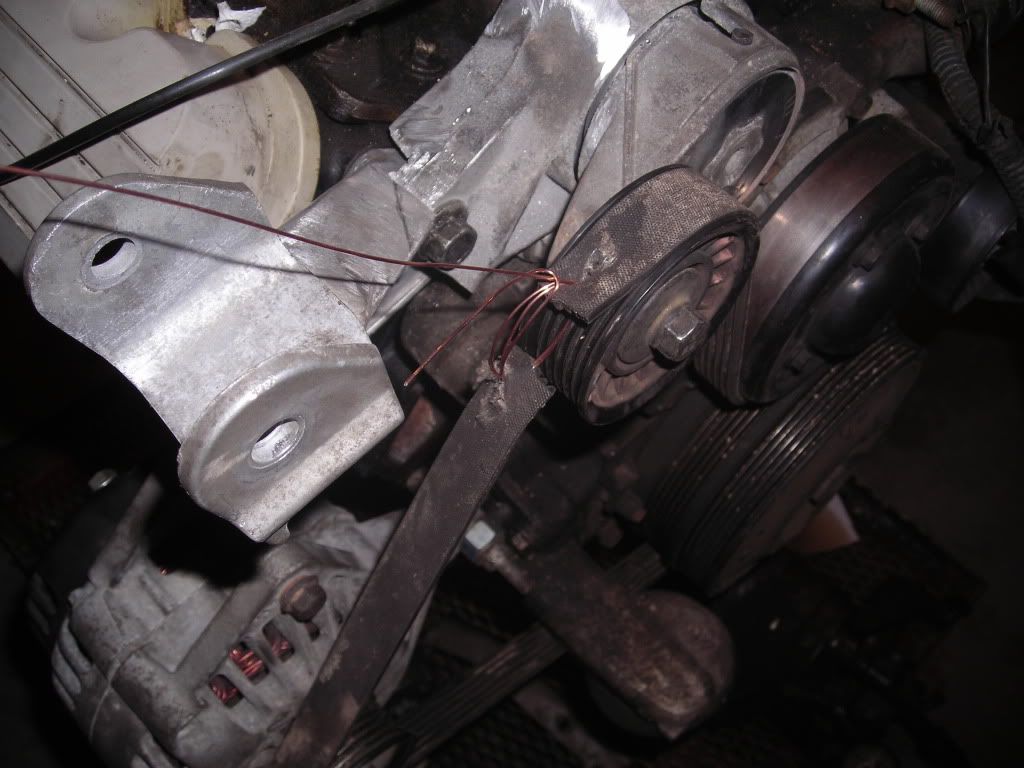
First you must notch out the Grand Prix dog bone mount so all the mounting holes are the same height, they should be around 20mm after the cut. The best tool for this job is a regular hack saw, a sawzall clogs quickly, and an angle grinder tends to kick a lot in aluminum.


Next is the standard alternator bracket. In Fiero applications the heater hose relocation built into this bracket is no longer necessary. Cut the bracket right before the 2 closest bolt holes to remove the coolant lines. now the next part is to remove 20mm behind the remaining 2 bolt holes and the area between.

you can remove the remaining alternator mounting location.

Now the 2 trimmed brackets should now fit together nicely using the same holes

some trimming may still be necessary.

The brackets fit on using all the same bolts that ore off of the dog bone mount.


Now the last step is to change the pulley on the tensioner, it has left handed threads, the ribbed one off of the coil pack bracket fits nicely.
Later today i will finish building solid mounts for my alternator.
\

[This message has been edited by ckrummy (edited 04-19-2010).]

IP: Logged
darkhorizon
Member
Posts: 12279
From: Flint Michigan
Registered: Jan 2006


Feedback score: (1)
Leave feedback


Total ratings: 451
Rate this member

Report this Post04-19-2010 02:43 PM Click Here to See the Profile for darkhorizonSend a Private Message to darkhorizonDirect Link to This Post
That dogbone will snap like a twig unless you weld it.
IP: Logged
deezil
Member
Posts: 779
From: St Louis Mo USA
Registered: Mar 2010


Feedback score: (1)
Leave feedback

Rate this member

Report this Post04-19-2010 03:12 PM Click Here to See the Profile for deezilSend a Private Message to deezilDirect Link to This Post
Weld it where?
IP: Logged
carbon
Member
Posts: 4767
From: Eagan, MN
Registered: Apr 2004


Feedback score: (2)
Leave feedback


Total ratings: 132
Rate this member

Report this Post04-19-2010 03:19 PM Click Here to See the Profile for carbonSend a Private Message to carbonDirect Link to This Post
I am really diggin' that color combination... what is the exact color of the belt trim? It looks like it could be silver, grey or white but with the lighting I cannot tell... very well done two tone.
IP: Logged
blackrams
Member
Posts: 31841
From: Hattiesburg, MS, USA
Registered: Feb 2003


Feedback score:    (9)
Leave feedback


Total ratings: 229
Rate this member

Report this Post04-19-2010 03:31 PM Click Here to See the Profile for blackramsSend a Private Message to blackramsDirect Link to This Post
 
quote
Originally posted by ckrummy:

and the dog bone mount


What's the dog bone mount from? Do you have a part number for it?

Ron
IP: Logged
Jncomutt
Member
Posts: 8899
From: Charlotte, NC
Registered: Apr 2001


Feedback score: (3)
Leave feedback


Total ratings: 221
Rate this member

Report this Post04-19-2010 03:34 PM Click Here to See the Profile for JncomuttSend a Private Message to JncomuttDirect Link to This Post
 
quote
Originally posted by deezil:

Weld it where?


To the tensioner assembly... I've seen 4 of these break in person already, read about countless broken ones, and broke mine twice.

Heres mine after it broke the 2nd time. I made a steel replacement.

They seem to hold up 'alright' for the auto guys, but they snap pretty easy with a manual.

EDIT, that's a typical GTP mount.

[This message has been edited by Jncomutt (edited 04-19-2010).]

IP: Logged
revin
Member
Posts: 8684
From: Pville, TX
Registered: Aug 2001


Feedback score:    (10)
Leave feedback


Total ratings: 234
Rate this member

Report this Post04-19-2010 03:55 PM Click Here to See the Profile for revinSend a Private Message to revinDirect Link to This Post
and isn't that the part # on the part........
yep had my 1st one break.
weld where you put them together.
IP: Logged
anthony_86gt
Member
Posts: 494
From: Monroe, MI
Registered: Feb 2001


Feedback score: (1)
Leave feedback

Rate this member

Report this Post04-19-2010 04:09 PM Click Here to See the Profile for anthony_86gtSend a Private Message to anthony_86gtDirect Link to This Post
I broke mine as well. I welded a plate to the flat side of it and it is fine now.
IP: Logged
darkhorizon
Member
Posts: 12279
From: Flint Michigan
Registered: Jan 2006


Feedback score: (1)
Leave feedback


Total ratings: 451
Rate this member

Report this Post04-19-2010 10:21 PM Click Here to See the Profile for darkhorizonSend a Private Message to darkhorizonDirect Link to This Post
I suggest putting the "dogbone" on the trans "snout" (diff housing) seeing how you have an auto.
IP: Logged
ckrummy
Member
Posts: 517
From: Lexington, KY
Registered: Oct 2008


Feedback score: N/A
Leave feedback

Rate this member

Report this Post04-20-2010 01:27 AM Click Here to See the Profile for ckrummySend a Private Message to ckrummyDirect Link to This Post
 
quote
Originally posted by darkhorizon:

I suggest putting the "dogbone" on the trans "snout" (diff housing) seeing how you have an auto.


Sorry i don't have an auto, the one you see is broke and i won't live with an auto anyway. i'll look into welding it but i think it's just a matter of time with these brackets. it should just be a standard grand prix dog bone mount so i can always get another one.
I'll finish my low mount tomorrow and post some pics and also show you how to make a mock up belt.
IP: Logged
PFF
System Bot
ckrummy
Member
Posts: 517
From: Lexington, KY
Registered: Oct 2008


Feedback score: N/A
Leave feedback

Rate this member

Report this Post04-21-2010 02:51 AM Click Here to See the Profile for ckrummySend a Private Message to ckrummyDirect Link to This Post
Day 5

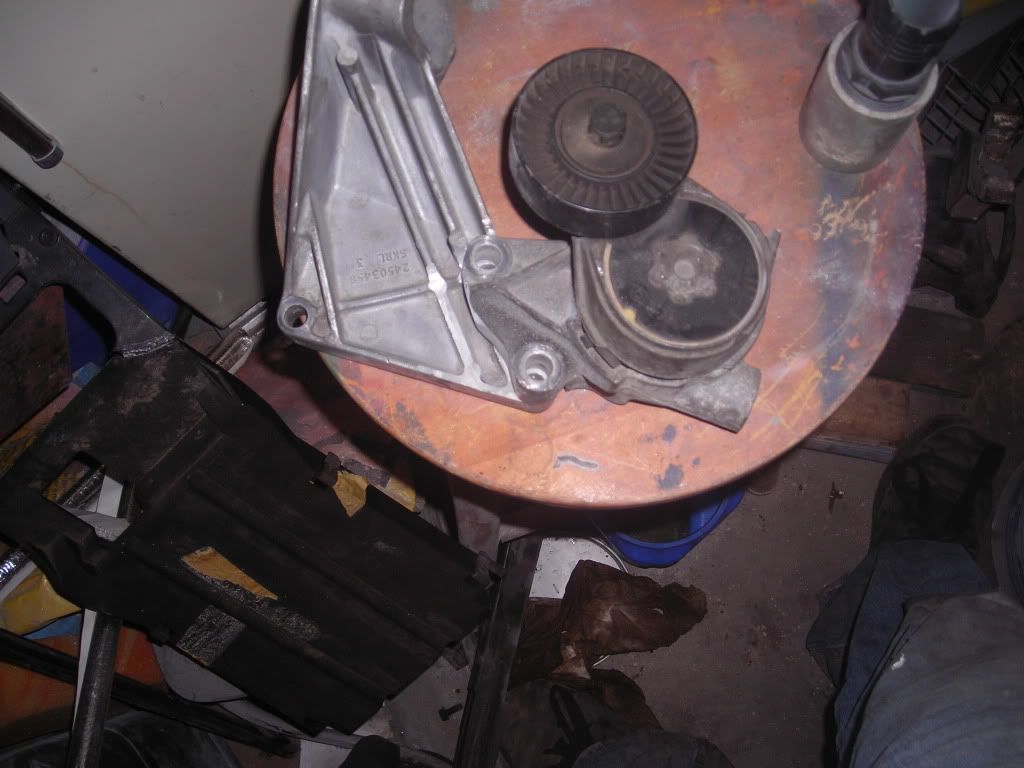
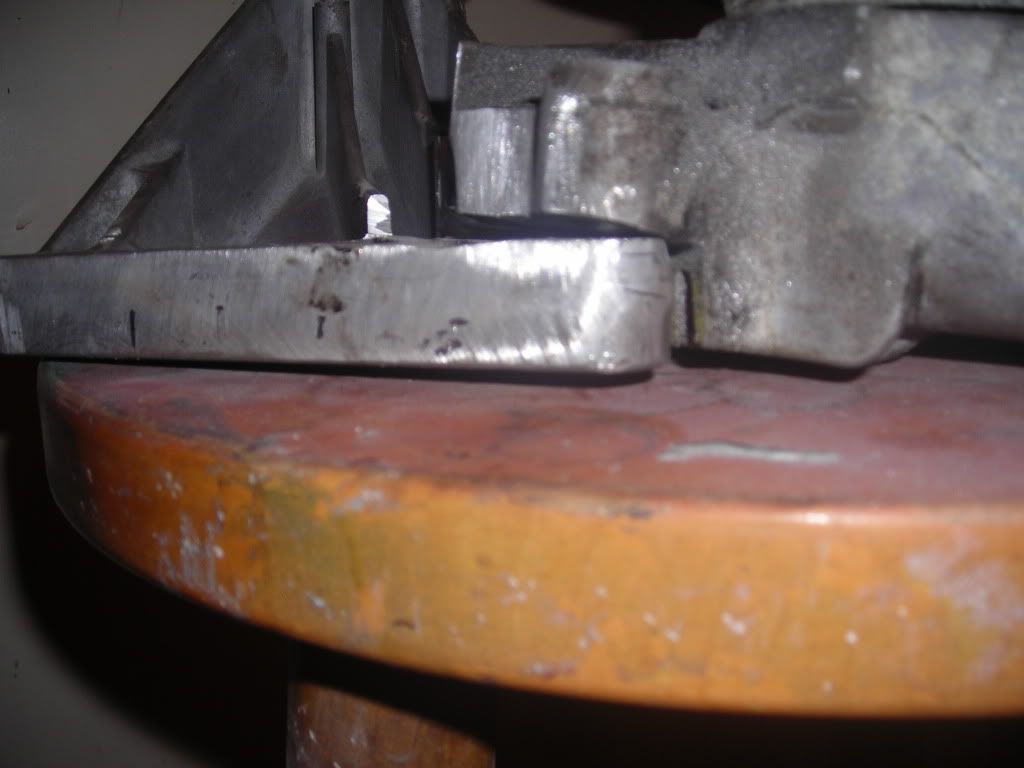
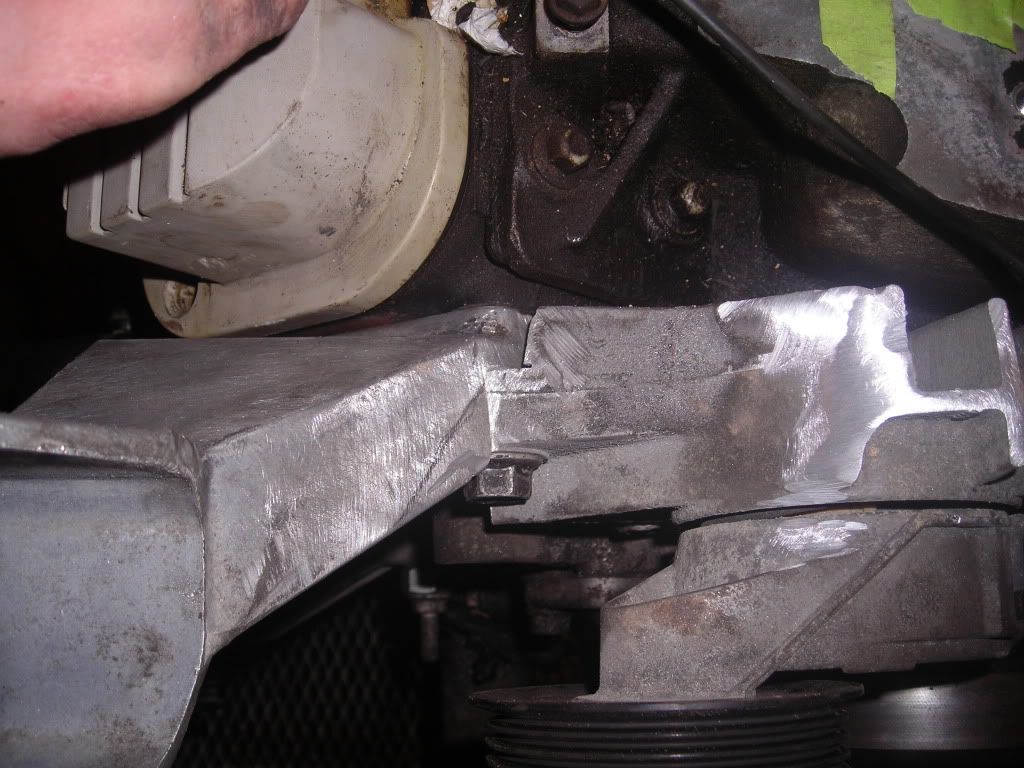
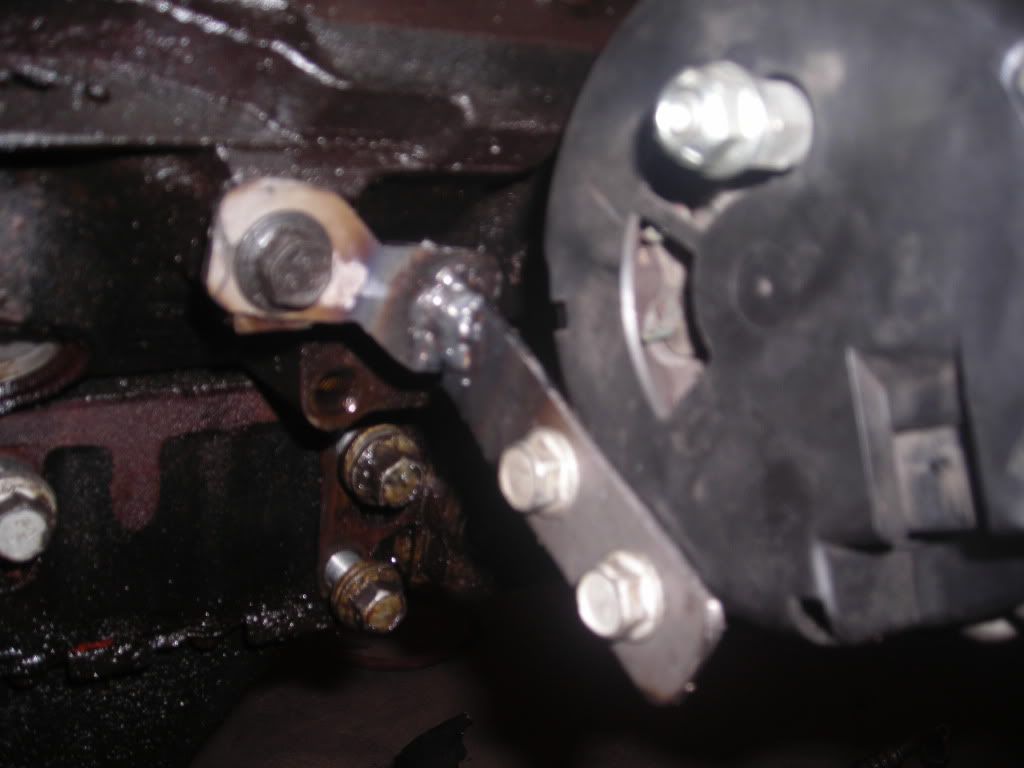
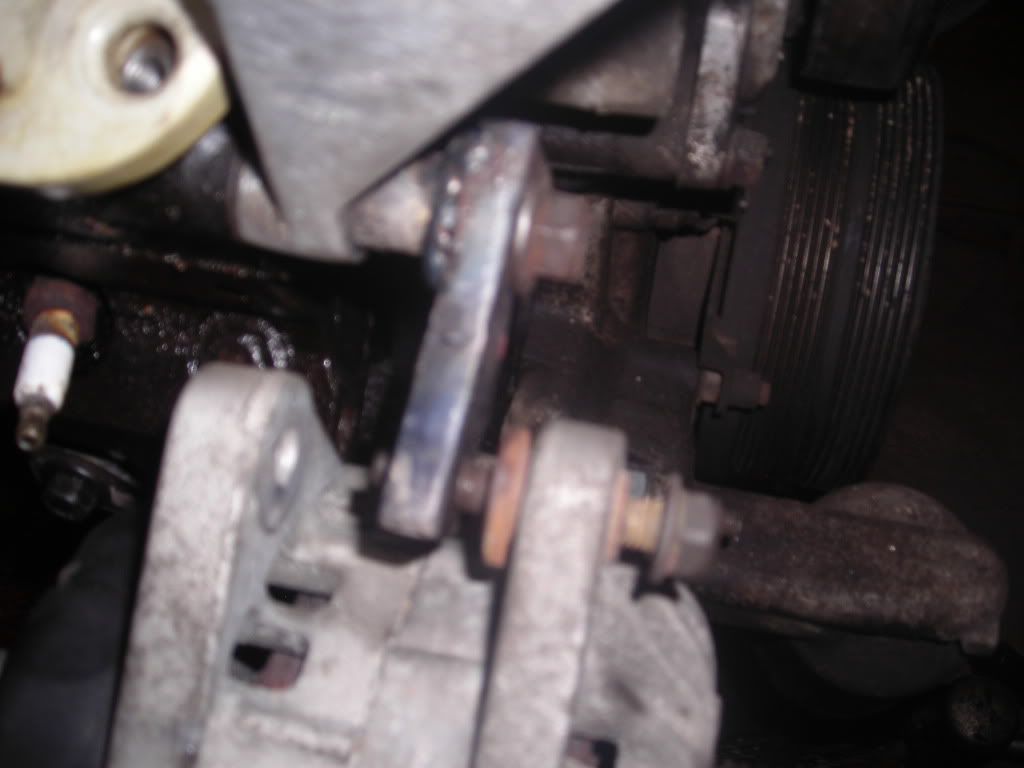
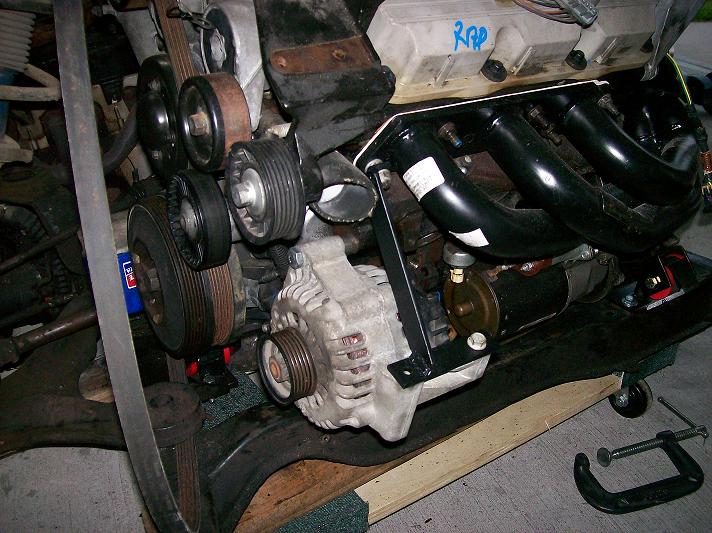
I finally got some work on my low mount, i was lazy yesterday.
Here is the back mount

And this is the top, it still needs a little tweaking and a new bolt

and the lower, just needs a bolt

Here is how i routed my belt

I know it looks like it hits but there is a small gap. I'll watch it and make sure it's not a problem when it's running.
This is my "mock up belt" it's just the original GP belt cut and wired together so now i just have to take it into my local parts store and find one that matches.

I had a little set back, ruined an idler pulley, not much to say but carb cleaner and welding, i feel stupid.

[This message has been edited by ckrummy (edited 04-21-2010).]

IP: Logged
carbon
Member
Posts: 4767
From: Eagan, MN
Registered: Apr 2004


Feedback score: (2)
Leave feedback


Total ratings: 132
Rate this member

Report this Post04-21-2010 07:05 AM Click Here to See the Profile for carbonSend a Private Message to carbonDirect Link to This Post
LOL... Focus FTMFW...

What colors are those on the car? I know I asked before, but I am curious...
IP: Logged
darkhorizon
Member
Posts: 12279
From: Flint Michigan
Registered: Jan 2006


Feedback score: (1)
Leave feedback


Total ratings: 451
Rate this member

Report this Post04-21-2010 08:27 AM Click Here to See the Profile for darkhorizonSend a Private Message to darkhorizonDirect Link to This Post
 
quote
I had a little set back, ruined an idler pulley, not much to say but carb cleaner and welding, i feel stupid.


Pretty sure you could have more than just a "setback"

http://www.brewracingframes.com/id75.htm
IP: Logged
ckrummy
Member
Posts: 517
From: Lexington, KY
Registered: Oct 2008


Feedback score: N/A
Leave feedback

Rate this member

Report this Post04-21-2010 10:56 AM Click Here to See the Profile for ckrummySend a Private Message to ckrummyDirect Link to This Post
 
quote
Originally posted by carbon:

LOL... Focus FTMFW...

What colors are those on the car? I know I asked before, but I am curious...


It's Graphite Grey Metalic on top and black diamond firemist on bottom, with Pure white for the beltline. Paints are available at www.tcpglobal.com
IP: Logged
Dracor
Member
Posts: 466
From: Houston, TX
Registered: Jan 2008


Feedback score: (1)
Leave feedback

Rate this member

Report this Post04-21-2010 02:06 PM Click Here to See the Profile for DracorSend a Private Message to DracorDirect Link to This Post
It looks like your going without A/C? If so, you should have put the alt in the place of the compressor. That way you can avoid cutting the alum dogbone mount, and the alt will be mounted even lower and closer to the front for better weight distribution.

The last reason is it will offer more belt wrap on the pullies. You are a bit thin in that area. This is how I did mine. I don't have a pic of the front of the engine off hand.

------------------
'84 3800SC, XP cam, 3.2 pully, HPTuners, N* TB, 4sp, SPEC 3+ clutch, Aluminium flywheel, pacesetter headers, F355 body kit, weight reduction

IP: Logged
Jncomutt
Member
Posts: 8899
From: Charlotte, NC
Registered: Apr 2001


Feedback score: (3)
Leave feedback


Total ratings: 221
Rate this member

Report this Post04-21-2010 02:09 PM Click Here to See the Profile for JncomuttSend a Private Message to JncomuttDirect Link to This Post
Hey guys, I just remounted a caddy 140amp alternator on my block where the AC was to replace my fiero alternator I had been using. What method are you guys using to be sure the pulleys line up exactly?

I wrapped a belt around the alt and crank and slid the belt around the pulleys, watching to see where the belt would approach the alt pulley. If it approached too high on the outside groove, I moved it out, etc. Is there an better/easier way than this?
IP: Logged
Dracor
Member
Posts: 466
From: Houston, TX
Registered: Jan 2008


Feedback score: (1)
Leave feedback

Rate this member

Report this Post04-21-2010 02:36 PM Click Here to See the Profile for DracorSend a Private Message to DracorDirect Link to This Post
 
quote
Originally posted by Jncomutt:

Hey guys, I just remounted a caddy 140amp alternator on my block where the AC was to replace my fiero alternator I had been using. What method are you guys using to be sure the pulleys line up exactly?

I wrapped a belt around the alt and crank and slid the belt around the pulleys, watching to see where the belt would approach the alt pulley. If it approached too high on the outside groove, I moved it out, etc. Is there an better/easier way than this?


The way I did it, which might not be accurate, was to put tension on the belt. You then looked down along the belt path like the barrel of a gun on the flat side of the belt. If you move it out of alignment it will curve out at the tip of the pulley. When it is perfectly flat and level on the pulley, it should be lined up. The longer the space between the pulleys, the easier this is.

In other words, I eyed it
IP: Logged
darkhorizon
Member
Posts: 12279
From: Flint Michigan
Registered: Jan 2006


Feedback score: (1)
Leave feedback


Total ratings: 451
Rate this member

Report this Post04-21-2010 04:31 PM Click Here to See the Profile for darkhorizonSend a Private Message to darkhorizonDirect Link to This Post
Straight-edge on the pulley surface is my method... I figure the pulleys are machined, so they have to be flat. I can sorta kill 2 birds with one stone with that method, I can align it with all right angles so the belt loads evenly, and I can also easily eyeball the alignment (I figure if I eyeball bodywork, a belt drive would be ok eyeballed as well).
IP: Logged
ckrummy
Member
Posts: 517
From: Lexington, KY
Registered: Oct 2008


Feedback score: N/A
Leave feedback

Rate this member

Report this Post04-22-2010 02:48 AM Click Here to See the Profile for ckrummySend a Private Message to ckrummyDirect Link to This Post
Day 6

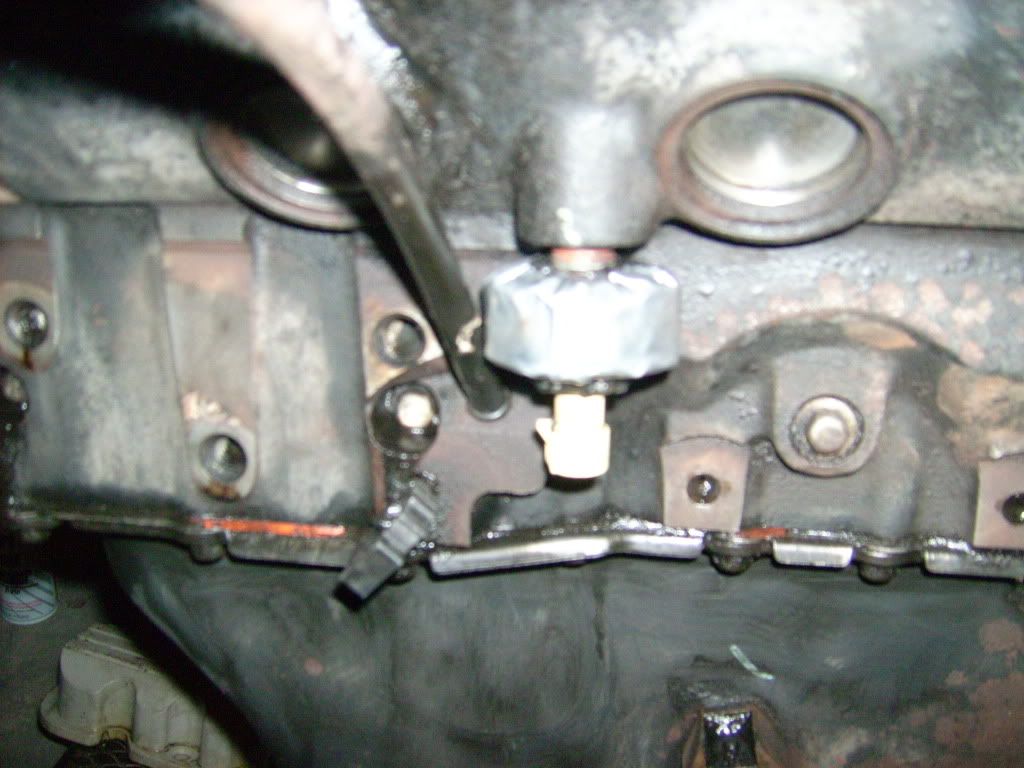
I think this is the knock sensor, so i covered it in dynamat to avoid false knocks caused by road noise


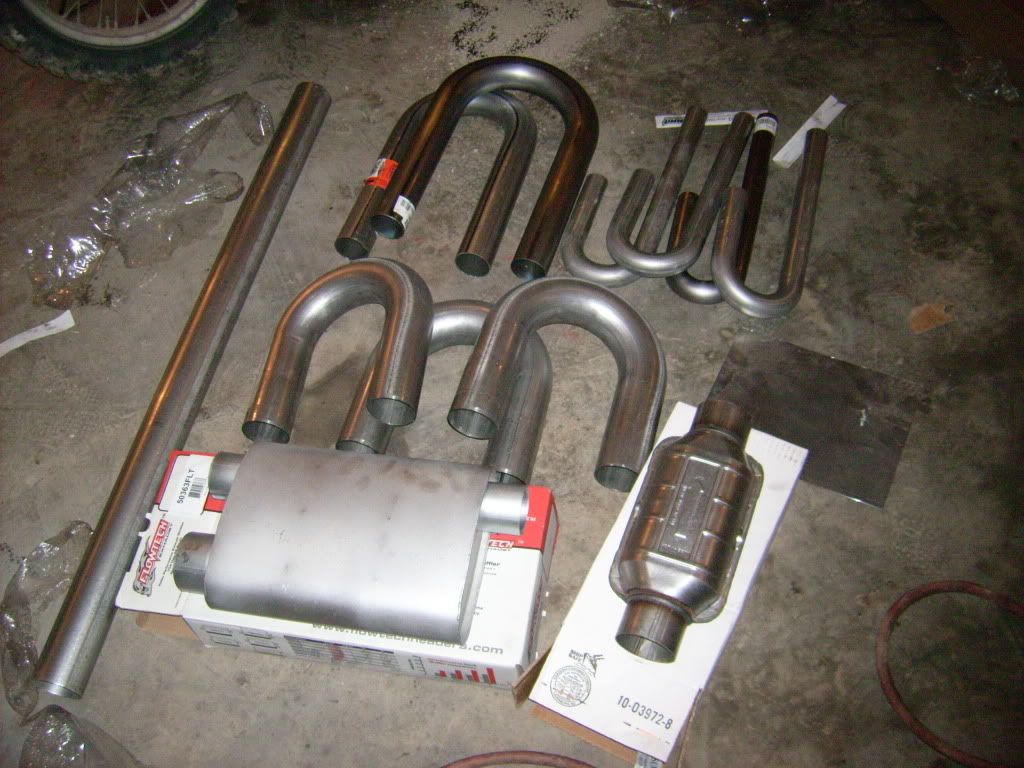
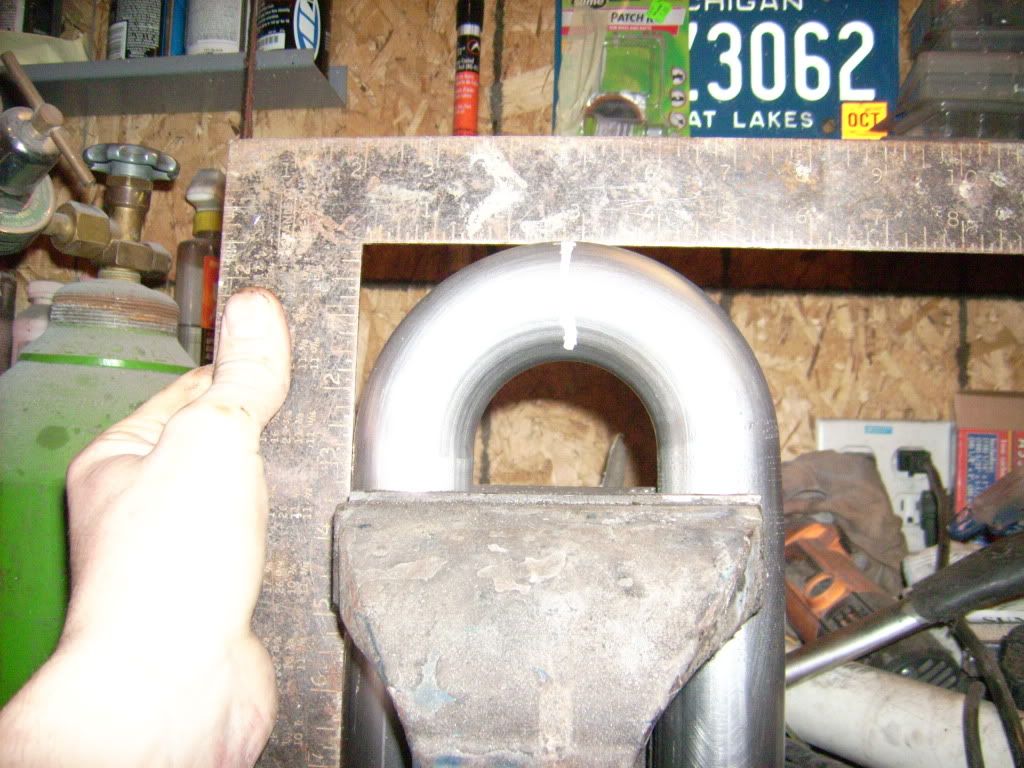
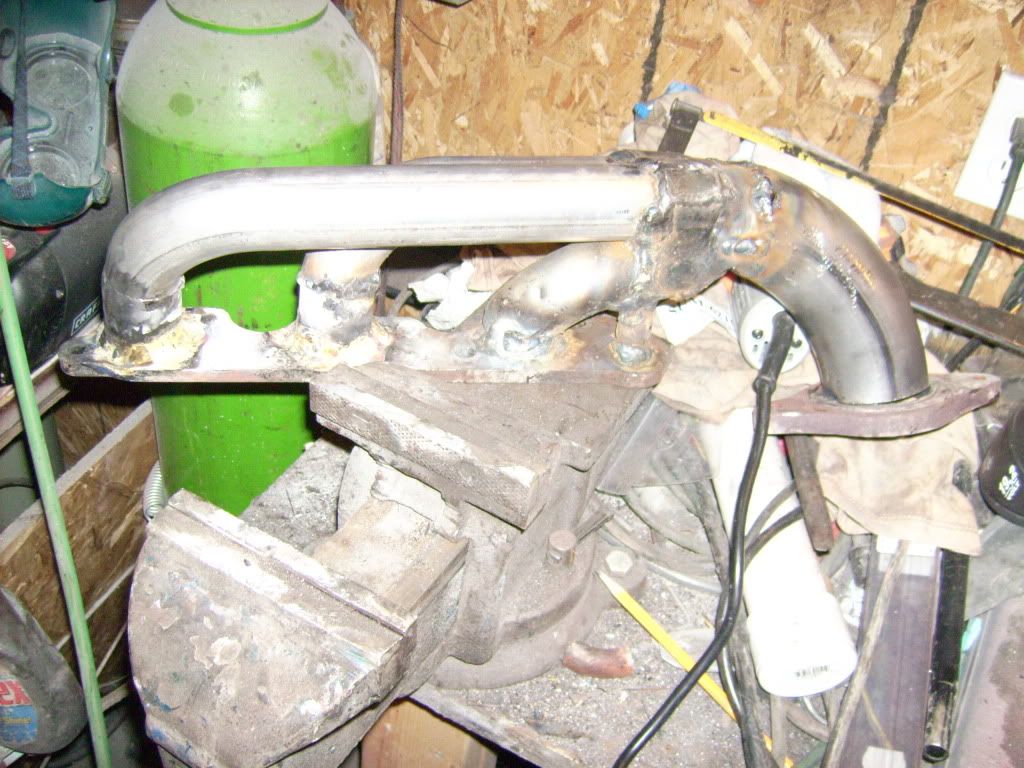
I got my exhaust parts from summit today, and yes i did shovel out $60 for a catalytic converter why kill the environment when you don't have to.

The muffler is a flowtech afterburner.
And after an hour


This images is larger than 153600 bytes. Click to view.
and here is a little tip for the people at home

put one side on the pipe and where the top touches will be your 90*

[This message has been edited by ckrummy (edited 04-22-2010).]

IP: Logged
ckrummy
Member
Posts: 517
From: Lexington, KY
Registered: Oct 2008


Feedback score: N/A
Leave feedback

Rate this member

Report this Post04-23-2010 02:56 AM Click Here to See the Profile for ckrummySend a Private Message to ckrummyDirect Link to This Post
Day 7

I don't have any pics right now but i built the collector and did a some finish welding. I have tomorrow off so i should be able to get some stuff done.
IP: Logged
PFF
System Bot
ckrummy
Member
Posts: 517
From: Lexington, KY
Registered: Oct 2008


Feedback score: N/A
Leave feedback

Rate this member

Report this Post04-25-2010 02:23 AM Click Here to See the Profile for ckrummySend a Private Message to ckrummyDirect Link to This Post
Day 9

Got the first header done for the most part, it will probably need some adjustment after i get the transmission on.

This images is larger than 153600 bytes. Click to view.

I also started porting on my blower.
This images is larger than 153600 bytes. Click to view.

Now i'm just waiting on parts. To start on the other header and start reassembly.
IP: Logged
ckrummy
Member
Posts: 517
From: Lexington, KY
Registered: Oct 2008


Feedback score: N/A
Leave feedback

Rate this member

Report this Post05-05-2010 09:52 PM Click Here to See the Profile for ckrummySend a Private Message to ckrummyDirect Link to This Post
Sorry i haven't been updating recently i've been working a lot and didn't feel up to it.

I got my parts i ordered from zzperformance.

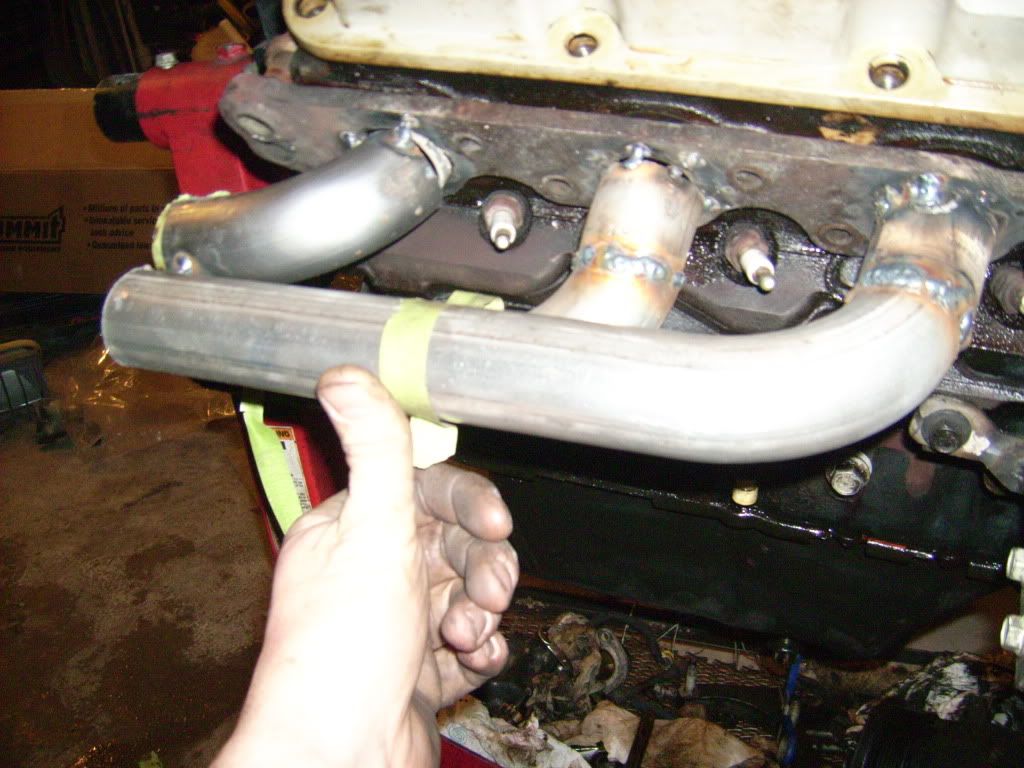
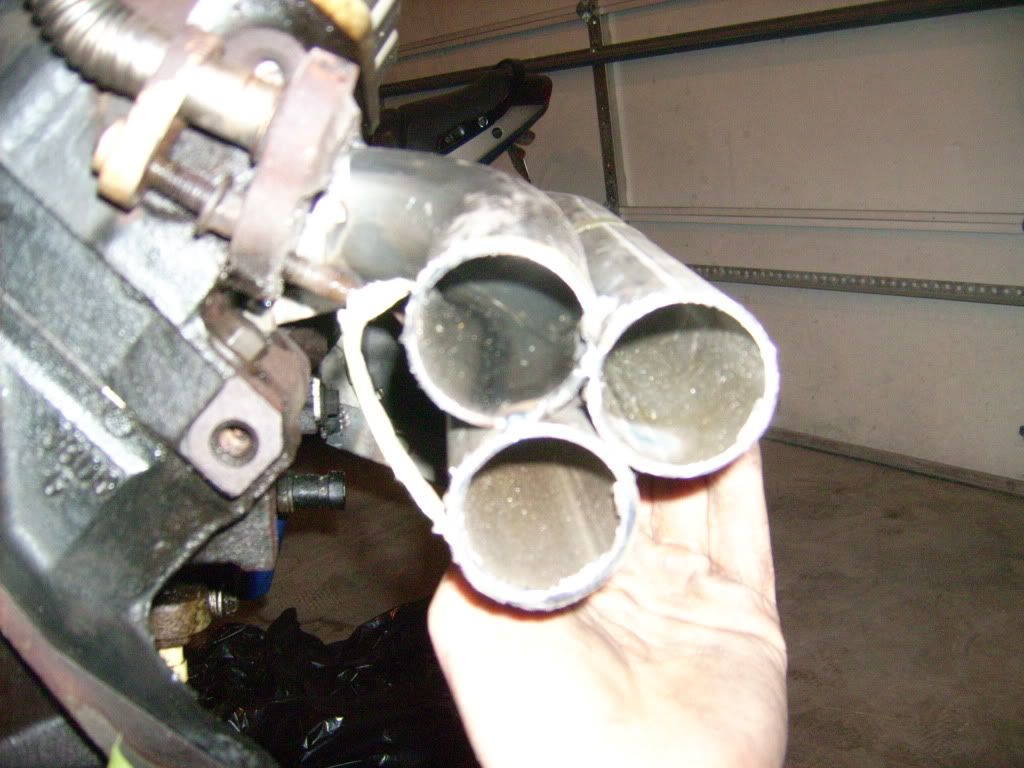
I've changed a bunch of gaskets, cleaned and ported my LIM, and reassembled my supercharger, including a 3.5 Modular pulley, and got my rear header built. I also changed my spark plugs to autolite 103's, to find that the old spark plugs had no electrode left, none,

but anyway here are some pics
This images is larger than 153600 bytes. Click to view.

Oh and i've been working on the wiring, i have 2 questions
#1 there was a massive connection of black wires i the middle of the GTP wiring harness, is this just ground or what
#2 where do all the pink wires go?
Thanks.
IP: Logged
darkhorizon
Member
Posts: 12279
From: Flint Michigan
Registered: Jan 2006


Feedback score: (1)
Leave feedback


Total ratings: 451
Rate this member

Report this Post05-05-2010 10:23 PM Click Here to See the Profile for darkhorizonSend a Private Message to darkhorizonDirect Link to This Post
 
quote
Originally posted by ckrummy:
I also started porting on my blower.
.


Did you start looking for a new one yet? that one is flat out ruined.
IP: Logged
ckrummy
Member
Posts: 517
From: Lexington, KY
Registered: Oct 2008


Feedback score: N/A
Leave feedback

Rate this member

Report this Post05-05-2010 10:34 PM Click Here to See the Profile for ckrummySend a Private Message to ckrummyDirect Link to This Post
Why is this one ruined?
IP: Logged
revin
Member
Posts: 8684
From: Pville, TX
Registered: Aug 2001


Feedback score:    (10)
Leave feedback


Total ratings: 234
Rate this member

Report this Post05-06-2010 09:12 AM Click Here to See the Profile for revinSend a Private Message to revinDirect Link to This Post
I think cause there is too much blood on it
IP: Logged
Dennis LaGrua
Member
Posts: 15145
From: Hillsborough, NJ U.S.A.
Registered: May 2000


Feedback score:    (13)
Leave feedback


Total ratings: 328
Rate this member

Report this Post05-06-2010 01:34 PM Click Here to See the Profile for Dennis LaGruaSend a Private Message to Dennis LaGruaDirect Link to This Post
 
quote
Originally posted by ckrummy:

Why is this one ruined?


The inside walls of the blower should be smooth and shiny not rough and "ridged". This amount of wear will give you little boost as there will be a leak of pressure around the rotors.

------------------
" THE BLACK PARALYZER" -87GT 3800SC Series III engine, 3.4" Pulley, N* TB, LS1 MAF, Flotech Exhaust Autolite 104's Custom CAI 4T65eHD w. custom axles, HP Tuners VCM Suite.
"THE COLUSSUS"
87GT - ALL OUT 3.4L Turbocharged engine, Garrett Hybrid Turbo, MSD ign., modified TH125H
" ON THE LOOSE WITHOUT THE JUICE "

IP: Logged
darkhorizon
Member
Posts: 12279
From: Flint Michigan
Registered: Jan 2006


Feedback score: (1)
Leave feedback


Total ratings: 451
Rate this member

Report this Post05-06-2010 05:41 PM Click Here to See the Profile for darkhorizonSend a Private Message to darkhorizonDirect Link to This Post
 
quote
Originally posted by Dennis LaGrua:


The inside walls of the blower should be smooth and shiny not rough and "ridged". This amount of wear will give you little boost as there will be a leak of pressure around the rotors.


Sorry, you are quite wrong here... The walls of the blower wear in and get those grooves.. that is because there is a nearly postiive tolerance between the size of the rotors and the case...

The reason it is ruined, is because the outlet port was made larger... this will prevent the sealing ability of the rotors, letting boost leave through the way it came in.
IP: Logged
ckrummy
Member
Posts: 517
From: Lexington, KY
Registered: Oct 2008


Feedback score: N/A
Leave feedback

Rate this member

Report this Post05-06-2010 11:21 PM Click Here to See the Profile for ckrummySend a Private Message to ckrummyDirect Link to This Post
It's not that much larger maybe 1/4" on each side, i hope i didn't ruin it that's what people said to do online (not really experts) and as for the scoring on the housing that's really just clean spots once i sprayed it with carb cleaner its not as bad as it looks. But hey if i have to upgrade to a gen V i won't complain too much.
How much boost should i get out of a 3.5" pulley in optimum running condition and what is the worst. I'll keep an eye on it.

But hey does anyone know about the pink wires, i need to know where to put them.
IP: Logged
Justinbart
Member
Posts: 3259
From: Flint, MI
Registered: Sep 2009


Feedback score: N/A
Leave feedback


Total ratings: 119
Rate this member

Report this Post05-06-2010 11:34 PM Click Here to See the Profile for JustinbartSend a Private Message to JustinbartDirect Link to This Post
Boost pressure is relative, it will go down the better your engine flows. ....maybe 8-10psi?

I had a 3.2 pulley on stock motor and it ran about 11psi. I put 1.9 modded rockers and it went down to 7-8psi

------------------
Turbo 3800 E85 5spd spec3
11.74@123

IP: Logged
Previous Page | Next Page

This topic is 2 pages long:  1   2 


All times are ET (US)

T H I S   I S   A N   A R C H I V E D   T O P I C
  

Contact Us | Back To Main Page

Advertizing on PFF | Fiero Parts Vendors
PFF Merchandise | Fiero Gallery | Ogre's Cave
Real-Time Chat | Fiero Related Auctions on eBay


Copyright (c) 1999, C. Pennock