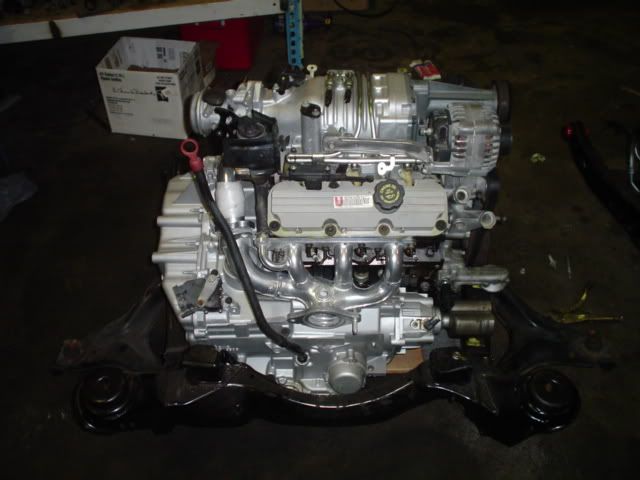
Well starting working on another 3800SC/65E swap this week that will be going into a 86GT(so far) that is a 5 speed car getting converted over to auto. The swap is going slower than expected being I am also working on another 3800 swap into another 86 GT at the same time. I did get time to start working on the swap last week and got some pictures taken. This swap will be bone stock down to having the cover put on the engine. Some of the parts going into the swap:
86 GT--(donor car as of now)--Looking for an 87 GT auto
Ceramic Coated Manifolds:
FieroAddiction Mounts w/new rubber mounts:
Motor/trans:
I have the cradle cleaned up/painted and the new rubber mounts on it and will be adding the motor/trans to the cradle this weekend. Will also be pulling the fuel rails off along with other parts on the SC to wire brush it to clean it up. More to come.........
IP: Logged
11:01 PM
PFF
System Bot
Mar 4th, 2009
Back On Holiday Member
Posts: 6238 From: Downingtown, PA Registered: Jul 2001
Is that a pre-'02 trans? It looks like the mounting is different that the one I have (02 trans requiring the boss hole being used for the front trans mount) (free bump )
Is that a pre-'02 trans? It looks like the mounting is different that the one I have (02 trans requiring the boss hole being used for the front trans mount) (free bump )
It is a 99 trans and it also has the boss mounting point. Many of the 99 up 65E have the mounting system that uses the boos mount.
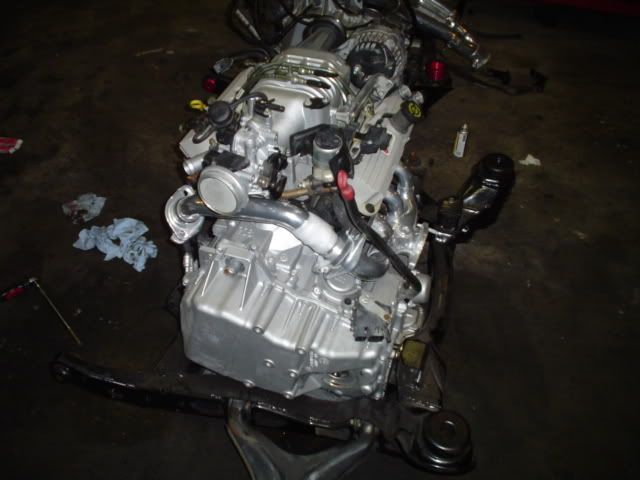
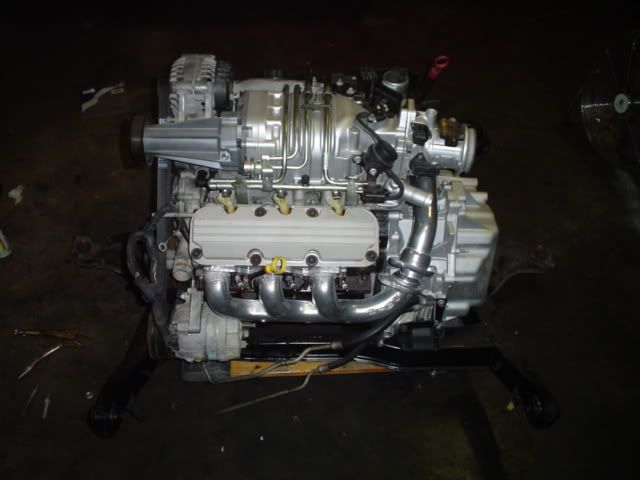
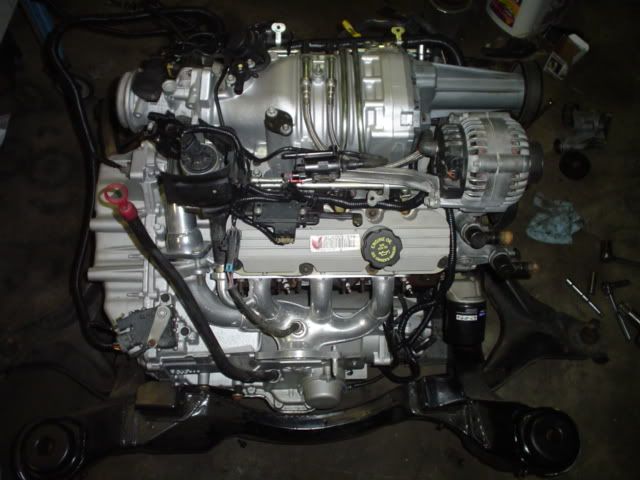
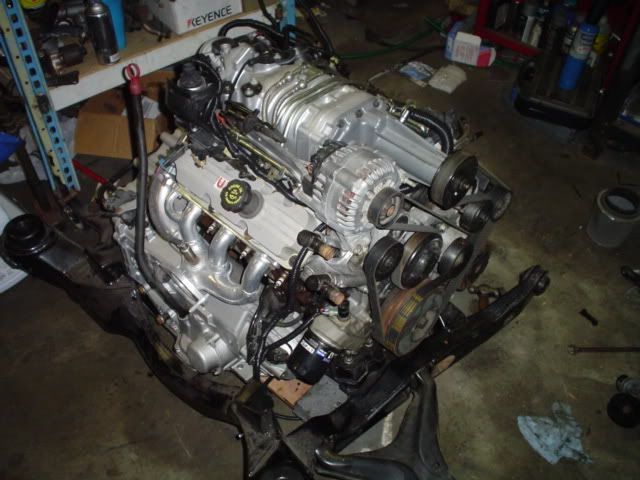
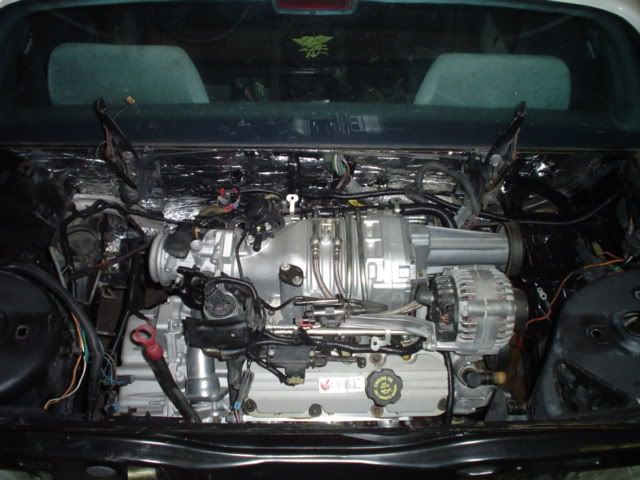
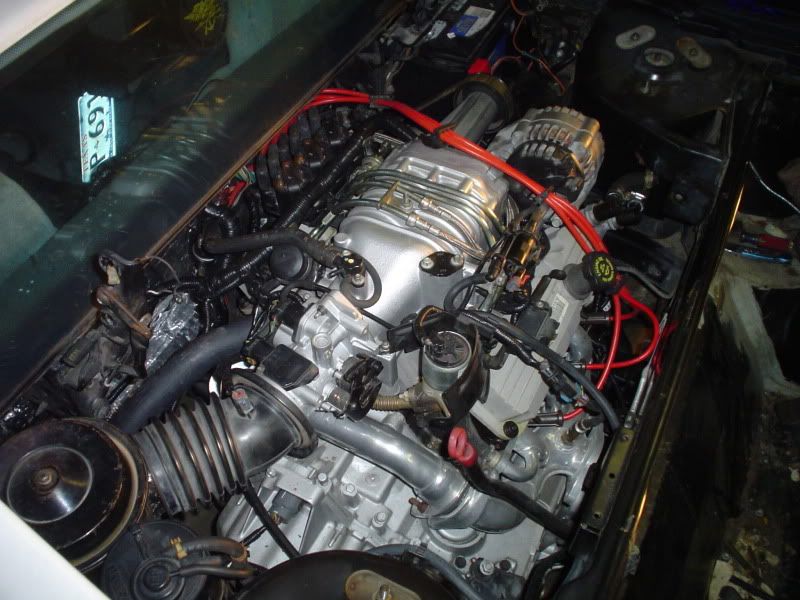
Well got some more work done on this swap but still have plenty left to do. The mounts didn't exaclty work like they should but I was able to get them worked out. Also did some cleaning/painting to make the swap look better and to give it that new look. The motor also got new gasket on the LIM/SC/TB and will be getting a new timing chain installed also. Here is an updated picture of what the swap looks like now.
IP: Logged
11:02 PM
Mar 31st, 2009
Dirty Harry Member
Posts: 347 From: Orlando, FL, USA Registered: Jun 2003
Nice detailing and engine mounting. . We've done a few engine swaps as well, but those with the auto always seem to take forever; 80 -100 hours of labor is not uncommon and the mounts always need massaging. Then there are the axles, the custom exhaust system, the fuel lines, the water lines, the air intake system, trans lines, harness rewiring, coil pack relocation, fuel pump, custom throttle bracket, trans shift cable bracket and lever, PCM reprogramming, custom dogbone, & low mount alternator, My own swap also has an LS1 MAF and a N* Throttle body and 3.4" pulley. You can even spend 20 hours just getting the tune right. Point is that its a bunch of work and most folks don't want to pay for it.
------------------ " THE BLACK PARALYZER" -87GT 3800SC Series III engine, 3.4" Pulley, N* TB, LS1 MAF, Flotech Exhaust Autolite 104's Custom CAI 4T65eHD w. custom axles, HP Tuners VCM Suite. "THE COLUSSUS" 87GT - ALL OUT 3.4L Turbocharged engine, Garrett Hybrid Turbo, MSD ign., modified TH125H " ON THE LOOSE WITHOUT THE JUICE "
IP: Logged
11:11 PM
doublec4 Member
Posts: 8289 From: Oakville, Ontario, Canada Registered: Jun 2003
Nice detailing and engine mounting. . We've done a few engine swaps as well, but those with the auto always seem to take forever; 80 -100 hours of labor is not uncommon and the mounts always need massaging. Then there are the axles, the custom exhaust system, the fuel lines, the water lines, the air intake system, trans lines, harness rewiring, coil pack relocation, fuel pump, custom throttle bracket, trans shift cable bracket and lever, PCM reprogramming, custom dogbone, & low mount alternator, My own swap also has an LS1 MAF and a N* Throttle body and 3.4" pulley. You can even spend 20 hours just getting the tune right. Point is that its a bunch of work and most folks don't want to pay for it.
I had my car converted to a manual transmission when my swap was done by Dan, Fieroflyer... sounds to me like I got a hell of a deal with all of the work involved
------------------
IP: Logged
11:17 PM
Apr 1st, 2009
darkhorizon Member
Posts: 12279 From: Flint Michigan Registered: Jan 2006
I think I need to have a 3800 build off day or something..
Wake up in the morning, look at a L67/65e combo, with 2 stock wiring harnesses, and my "custom" mount parts that still need to be fabricated and welded.. and see if I could do the entire wiring harness and the mounts in a day.
I am willing to bet I could do it if I really tried.
I must be pittifully slow as my average swap time from start to finish is about three weeks, but then again I believe in doing things properly, safely and cleanly when doing engine swaps and also tripple check all my work before the owner takes his car away. But that is just me and so far all my customers have been happy with both the work and the time I take for the swap. Any swap done in one day is a car I not only would not drive but is also a car I would not want to share the road with so take your time there Mustangebeware and ignore the crap from the peanut brains. Dan
IP: Logged
08:39 AM
nosrac Member
Posts: 3524 From: Euless, TX, US Registered: Jan 2005
What was the problem with the Addiction mounts? Was it 3/8" higher on one side like on my swap? I hope they work as advertised, where you don't have to notch the decklid.
Mounting the motor/trans takes the longest being ever vendor of mounts I have used have needed some work. Both set of Fiero Addiction mounts I used on these swap needed work in some way. On Norsacs setup the engine mount ndded re-drilled to lower the pulley side of the motor and on this setup the plate the motor mount sits on needed extended. Every time I run into an issue I look it over many times thinking I must have did something wrong but every time it is something to do with the mounts. I mounted up a setup Sunday with a set of FieroX mounts I got for a test set and let's just say that was a 4 hour event that took welding/drilling new holes. In the end the setup is on the cradle nice and straight but it is a pain and takes a lot of time.
I did the last swap in about 1.5 months but I was not working at the time and had plenty of time to work on it. I have since went back to work and with working 60 hours a week not alot of extra time. I can say when the swaps are done they will be very nice, reliable and the owner will be very happy.
IP: Logged
06:04 PM
PFF
System Bot
darkhorizon Member
Posts: 12279 From: Flint Michigan Registered: Jan 2006
I must be pittifully slow as my average swap time from start to finish is about three weeks, but then again I believe in doing things properly, safely and cleanly when doing engine swaps and also tripple check all my work before the owner takes his car away. But that is just me and so far all my customers have been happy with both the work and the time I take for the swap. Any swap done in one day is a car I not only would not drive but is also a car I would not want to share the road with so take your time there Mustangebeware and ignore the crap from the peanut brains. Dan
I never said swap, i was just saying wiring harness and mount.. I would still cry thinking about doing a full swap in 2 weeks... My usual time is around the 3weeks.. but I dont normally do a simple setup.. and I spend months working on custom one of a kind stuff.
the "one day" comment was related to the idea that the custom made mounts were similar in hassle to the store bought mounts, that as confirmed, took upwards of 4-6 hours to adjust properly.
[This message has been edited by darkhorizon (edited 04-01-2009).]
Originally posted by MstangsBware: I did the last swap in about 1.5 months but I was not working at the time and had plenty of time to work on it. I have since went back to work and with working 60 hours a week not alot of extra time. I can say when the swaps are done they will be very nice, reliable and the owner will be very happy.
I have this swap. It is very nice, very clean, very reliable. The owner will have a huge grin on his face every time he puts his foot down. Oh and Stephen, you have a PM.
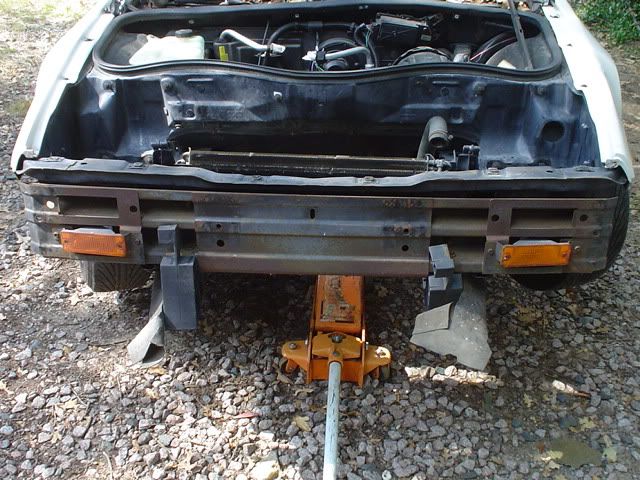
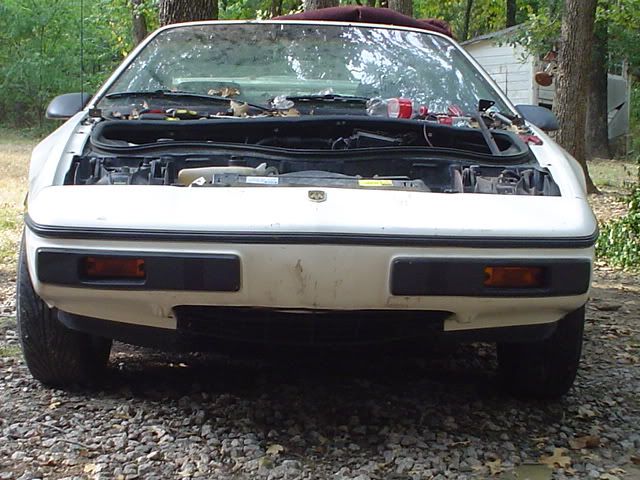
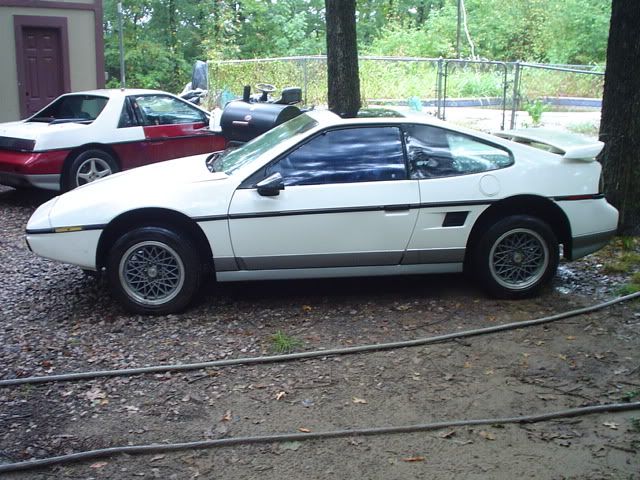
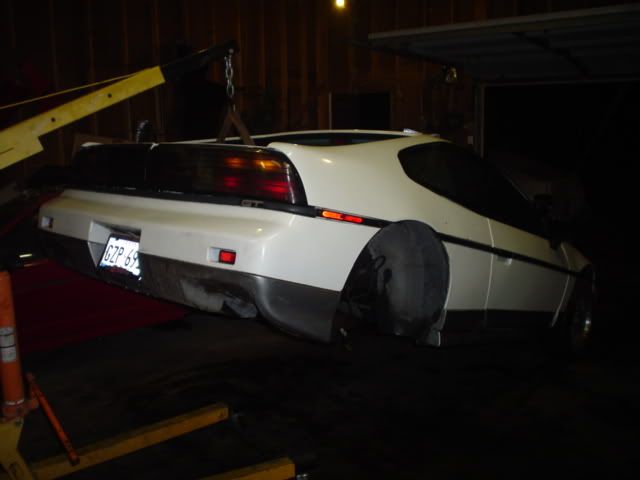
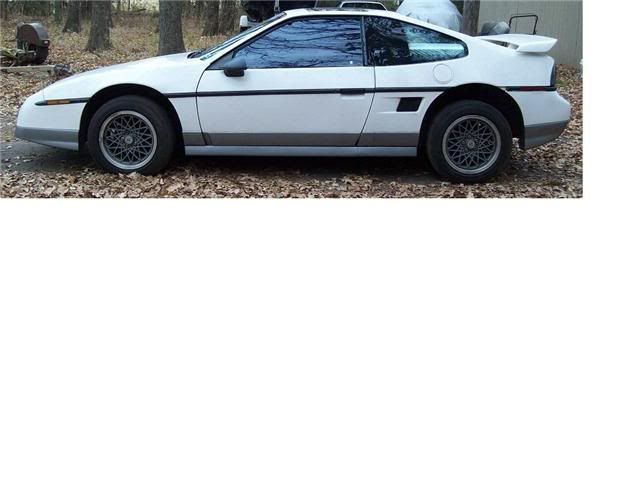
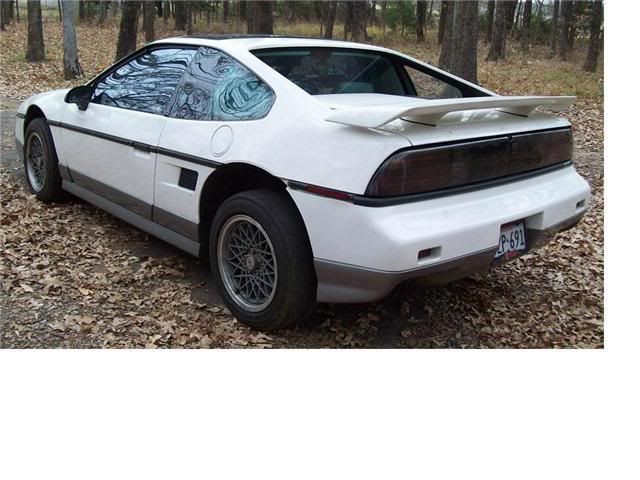
Well work has started again on this swap with the wrapping up of Norsac's swap. Since Norsac's swap was a no start on the first go around and still in the shop I started on swapping out non-engine swap parts on the car. The car is going from a 5 speed to a auto so things need to be changed along with it going from an Aero nose to bumperpad nose and getting Gen 2 light upgrade. Only one picture but it has started and more will follow once it is back together tomorrow evening.
Swapped headlights over to Gen 2 setup--Used a harness from an 85 SE that was used for a kit car so there was some work to be done to the harness to get it back correct. After about 2 hours of cutting, soldering and wrapping the harness was back to stock. Installed harness, headlight buckets and modules to wrap up that.
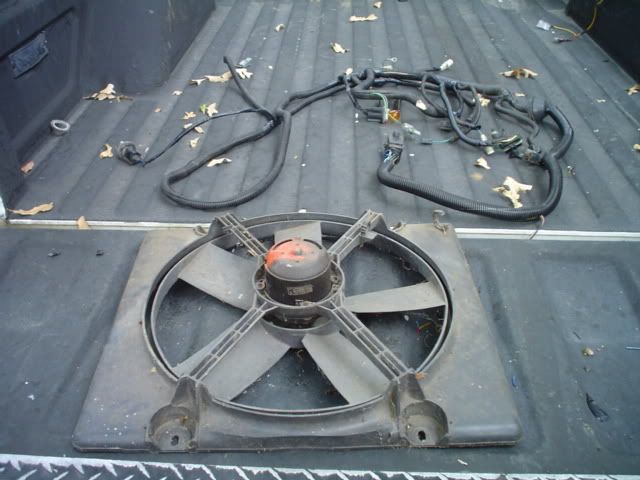
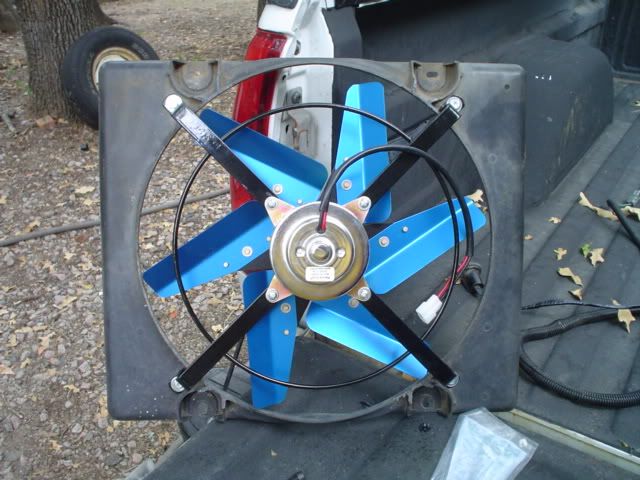
Next I worked on installing an aftermarket radiator fan into the stock shroud going off a Thread from PaulJK. The fan is a PermaKool from Summit that was supplied by the owner of the car. Was simple enought to make and went in pretty smooth. Only issue was moving up the coolant tank some to clear the fan blades. But overall the build/install of the setup was really easy.
Start with this:
Ended up with this:
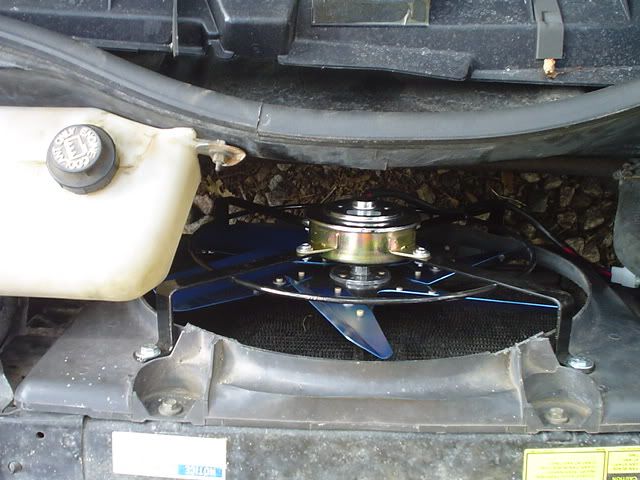
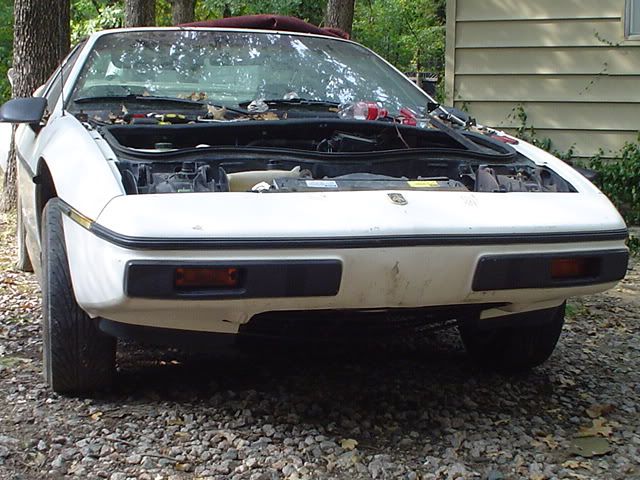
Fitted in like this: From there I swapped in the correct fender liners and added the bumperpad nose to the car.
Car know looks like this:
And This:
Engine as of now:
Next the fuel pump will get swapped into an 88 tank and I will be adding up the wiring harness and other parts to the engine.
IP: Logged
05:57 PM
PFF
System Bot
Tom Slick Member
Posts: 4342 From: Alvarado, TX Registered: May 2003
Little update--Pictures to follow once I find my camera cord.
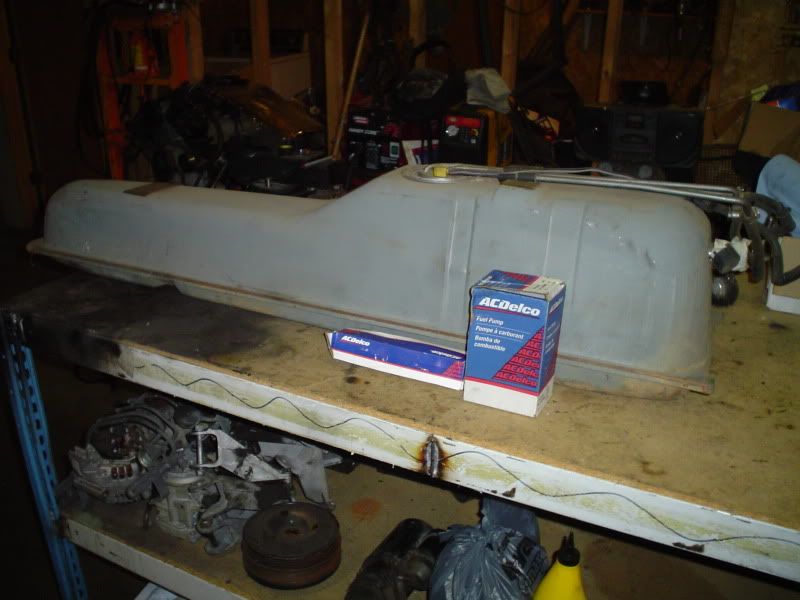
Got the new AC Delco pump installed into a larger 88 tank that will be going into the car. Still have to pull the 86 tank out(which is full of gas) and then install the 88 tank. Tank W/new pump
New pump installed:
Next step is to clean out the engine bay, add insulation and prep it for the motor/trans to be installed. This will happen as soon as Norsac's car is road ready and out of the way.
[This message has been edited by MstangsBware (edited 10-02-2009).]
IP: Logged
05:38 PM
fierocarparts Member
Posts: 2552 From: Dallas-Fort Worth TEXAS Registered: Feb 2009
Good luck on that Fuel tank swap. I would never do another one unless I had one there and did not have money to have the old one repaired. Looks like good work! Kick butt!
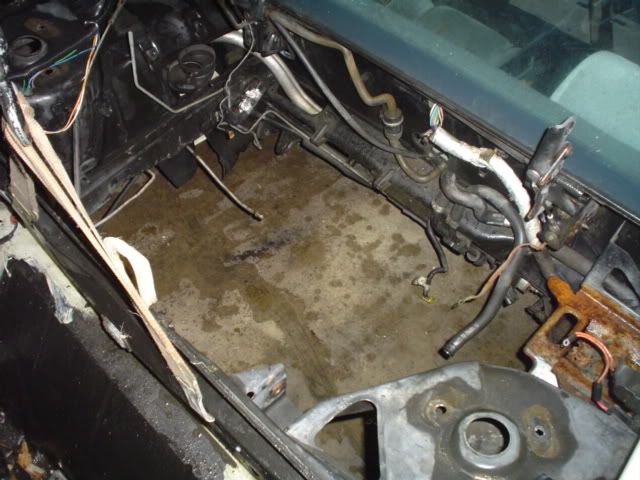
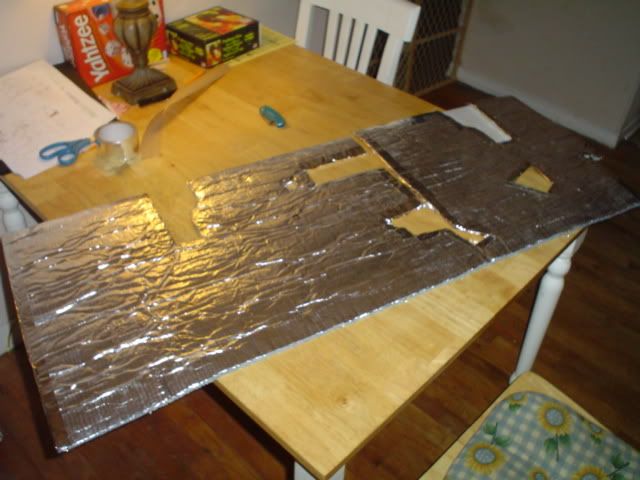
Engine bay is drying now and hope to install the new insulation tomorrow along with dropping the tank so I can install the 88 tank with new pump. Then will be time to install the motor/trans setup and start hooking everything up.
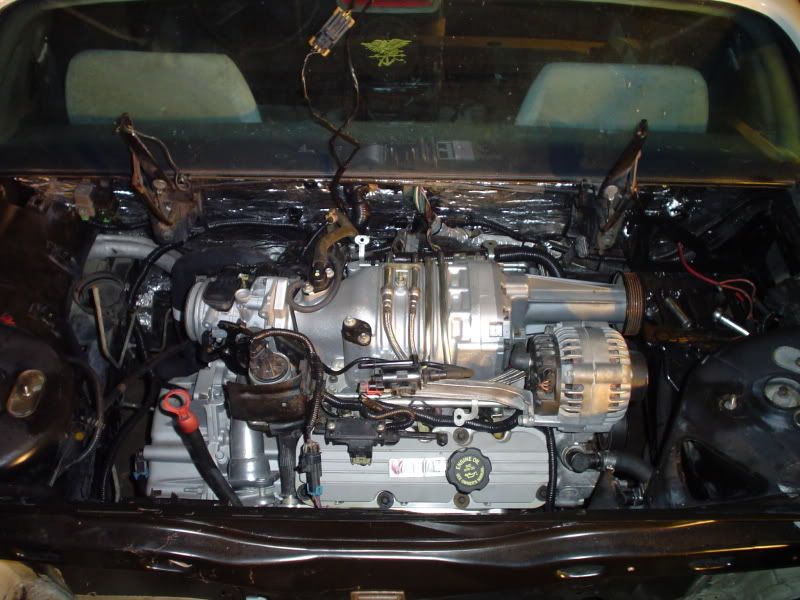
Update: Got the insulation installed along with the engine/trans bolted into the car. Still have to run the engine harness to all the proper spots on the car and ziptie them down. Tomorrow that will happen along with adding the rear suspension and building the axle for the Pass side.
Engine installed:
IP: Logged
12:22 AM
Rare87GT Member
Posts: 5088 From: Wichita, KS USA Registered: Oct 2001
Is there any advantage to using the stock Fiero fan shroud? I have an aftermarket fan on my upgraded aluminum radiator, but was thinking does it work better or more efficiently with the stock shroud to hold the aftermarket fan?
------------------ 1 of 2: Graphite Grey Pearl 87 GT 5 spd: 2.8L (Best 1/4 mile: 15.57@87mph, 2.0 60ft) 2 of 2: Ferrari Red 88 Formula/4T65EHD: 2000 L67 Motor (Best 1/4 mile: 12.0@118mph, 1.89 60ft w/True Street Radial Tires not Drag Radials!) New Engine on the Road again! FTW Motorsports style! 312rwhp/332rw/tq
Is there any advantage to using the stock Fiero fan shroud? I have an aftermarket fan on my upgraded aluminum radiator, but was thinking does it work better or more efficiently with the stock shroud to hold the aftermarket fan?
I would think that having the shroud around the fan would make it more efficient by control/directing the air. Seems like a read a long while back about a guy that did a test of the use of a shroud/not and using the shroud produced the better results. It was not done on a Fiero but I don't see what that would matter.
Got the suspension swapped on to the car today along with building the axle for the passenger side. Will be hooking up and adding the needed parts to the engine bay on my next day off and try to get this thing rolling. Shooting to have the car on the road by the end of January. Will add come pictures later.
Another update with a few new pictures. Will be posting some pictures of the car itself once I get it cleaned off. The car is now a roller with the suspension back under it with the built pass side axle complete. Tonight I ran all the coolant hoses, hooked up the fuel lines and worked on other minor things. Still have to run the battery cables, transmission lines and build a few of the custom parts for the swap. Going to try and knock out some of this tomorrow but the temps are only supposed to get to 26* all day so not for sure if that will happen.
Are you going to put the 3800 Supercharged engine cover on to complete the stock look? Also, do you plan on using NOS to get your car into the 11's? I think you made my car faster than yours.
Are you going to put the 3800 Supercharged engine cover on to complete the stock look? Also, do you plan on using NOS to get your car into the 11's? I think you made my car faster than yours.
The the owner mentioned putting the cover on to give it that bone stock look so with some work to the cover it should fit with not many issues.
I should be able to get into the 11s with my current setup with an updated tune. I found a very bad exhaust leak(header wrap ate up header) that has been killer the performance of the car. I finally got it replaced about 2 weeks ago and let me tell you, the car runs like a raped ape on roids. I guess I really never noticed the differance being it is a DD but I did after the header was replaced. The thought of using spray has crossed my mind and will see where that goes once I get back to the track.
IP: Logged
08:57 PM
nosrac Member
Posts: 3524 From: Euless, TX, US Registered: Jan 2005
The the owner mentioned putting the cover on to give it that bone stock look so with some work to the cover it should fit with not many issues.
I should be able to get into the 11s with my current setup with an updated tune. I found a very bad exhaust leak(header wrap ate up header) that has been killer the performance of the car. I finally got it replaced about 2 weeks ago and let me tell you, the car runs like a raped ape on roids. I guess I really never noticed the differance being it is a DD but I did after the header was replaced. The thought of using spray has crossed my mind and will see where that goes once I get back to the track.
I hope you are able to put on my last few mods so I can accompany you to the track. I want to see what my car can do but want to have the 3.1 on before I hit the track. I think you outdid yourself on my swap. That exhaust you made rocks because I have the best sounding 3.8 S/C. What do you think you will run at the track? I am shooting for a 11.9.
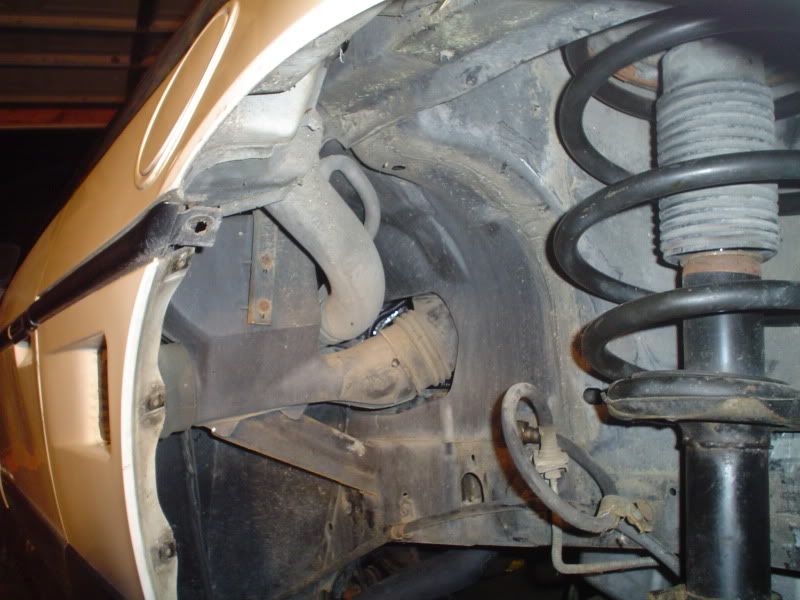
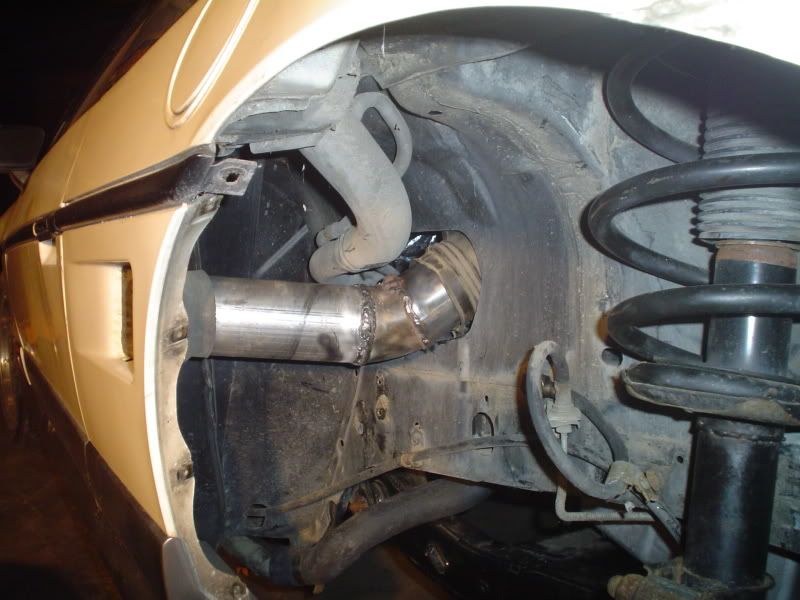
Update from the work done several days back and then today. The other day I got the battery cables ran, removed clutch line, added auto trans lines and cleaned out the front tub. Today I was able to work on hooking up the Evap system and reworking the stock Fiero air box so it can be used. For the air box I opened up the bottom side of the canister holder, then removed the stock box inside the fender well and replaced it with 3 inch pipe(basically what RD did for his CAI) and then topped it off with adding a 4 inch pipe from the canister for the intake tube from the TB. Still have to complete welding on the 4 inch piece and paint all the parts so they look nice. The complete air box will be a 3 inch setup that will run through a KN filter. Next the trunk will be cut to start the build on exhaust for the car along with wrapper up a few more odd/ends. Old Look:
3 inch replacement:
Air intake setup:
[This message has been edited by MstangsBware (edited 01-18-2010).]
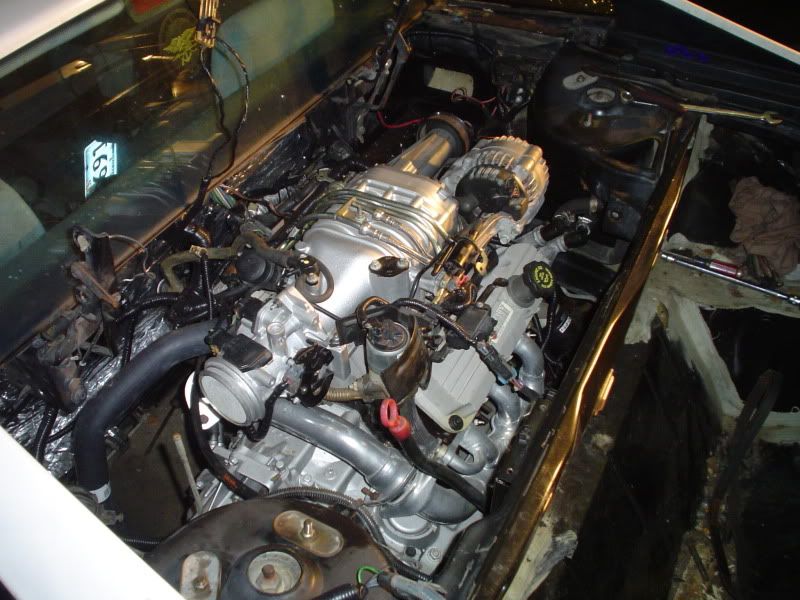
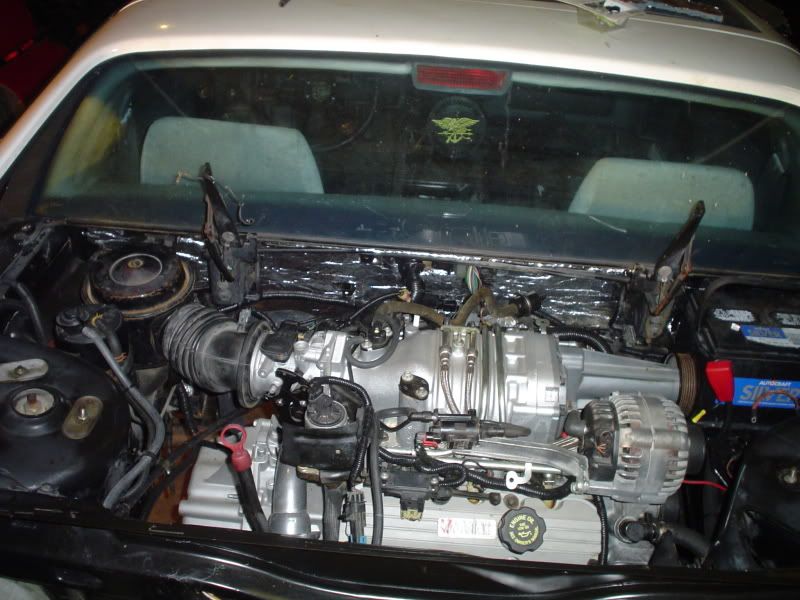
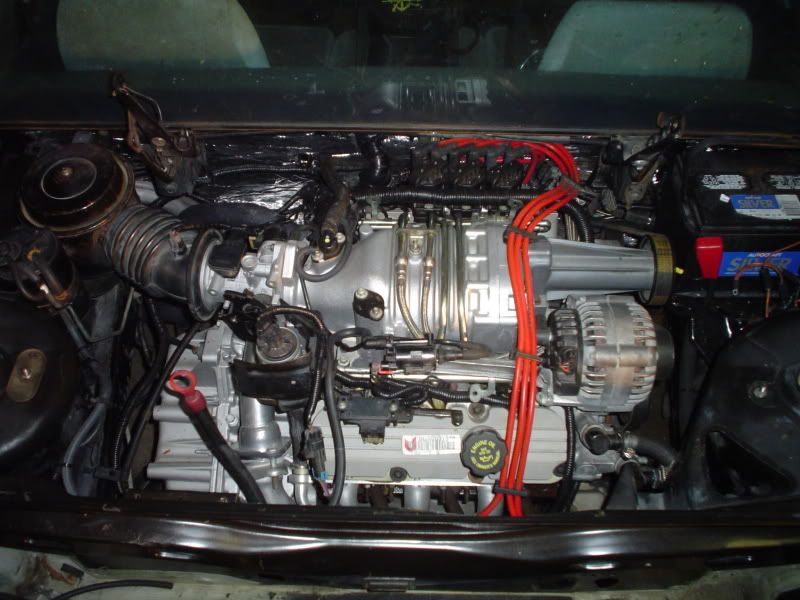
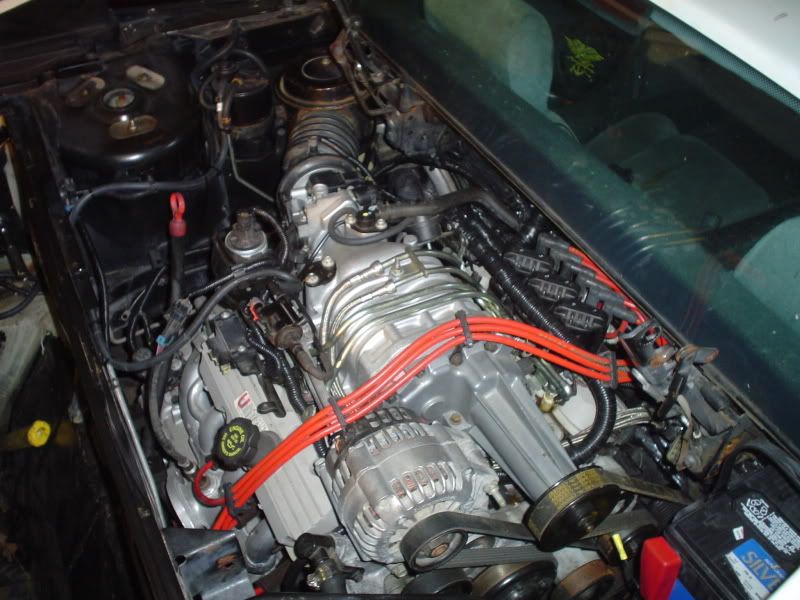
Time for a little update on the swap. The owner was wanting to use a 3.1 air box instead of the Fiero air box but the 3.1 box is to large to fit so.... Finished up modding the stock Fiero air box to a 3 inch setup from the intake area to air box then made it a 4 inch outlet to the TB so the stock TB hose would mate up. Still have to pull the air box back out once the weather warms up and paint it so it looks better. As you can see from the pictures the air box still looks as factory as it does in the Fiero. Next I made up some brackets to mount the coils/ICM so that stock aftermarket wires could be used. Added the wires, routed them the way they come stock then used wire seperators to keep them together and clean. Next I will be hooking up the trans lines, changing out the heater core, adding the rear rotors/calipers, bleed the system and several other things. Here are a few pictures of what the swap looks like so far.
Centered:
DRV Angled:
Pass Angled:
IP: Logged
10:02 AM
FFIEROFRED Member
Posts: 751 From: GULFPORT, MS Registered: May 2008


 )
)