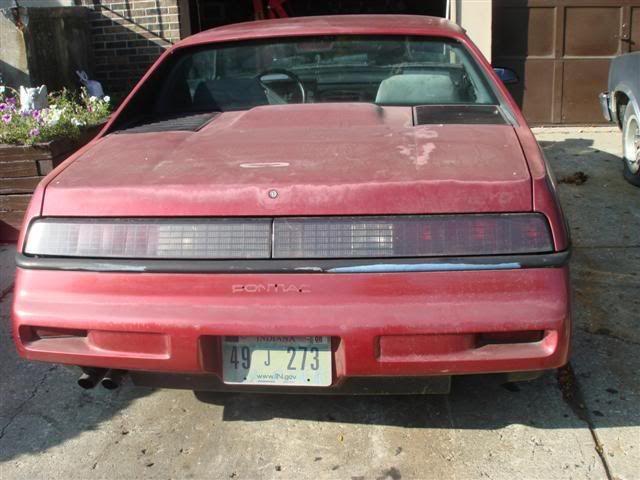
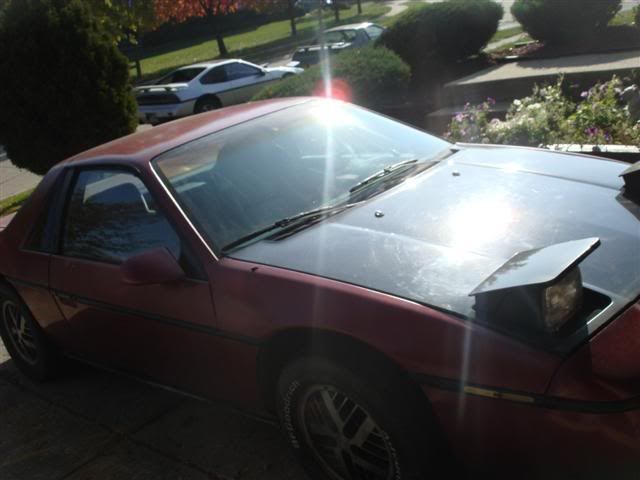
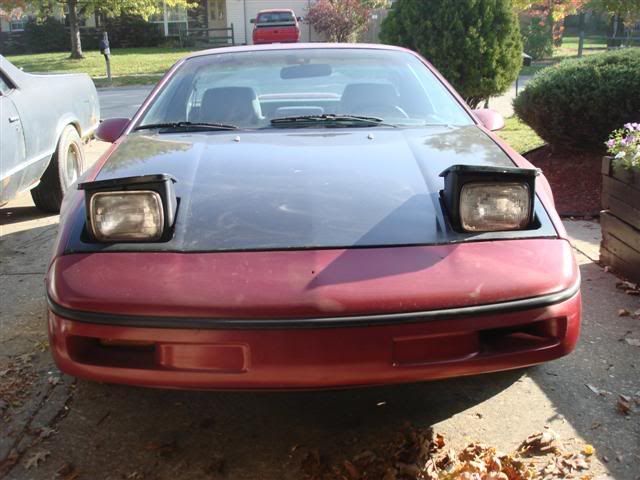
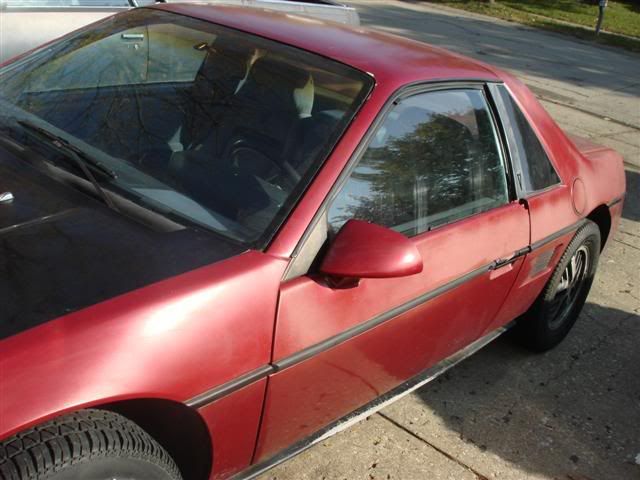
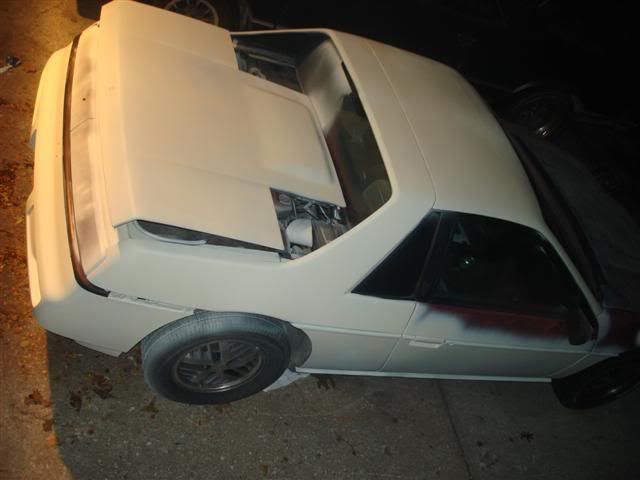
I recently purchased a 88 coupe that I'm going fix up and use as a daily driver while I finish my 87GT project. I'm not going for a show car on the 88, just want it to look good. My goal is not to spend over $400 in materials to paint the car. Also, I don't want to put a bunch of time into the car either. I see a lot of threads on here about painting Fieros so figured I would start this thread showing steps to a basic paint job. Heres some pics of the 88 before I start
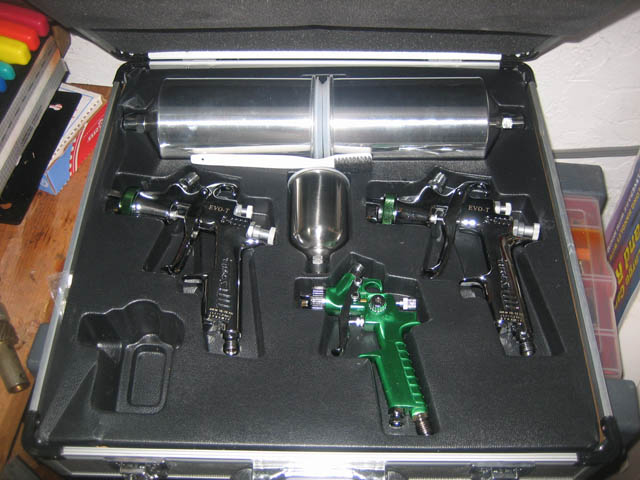
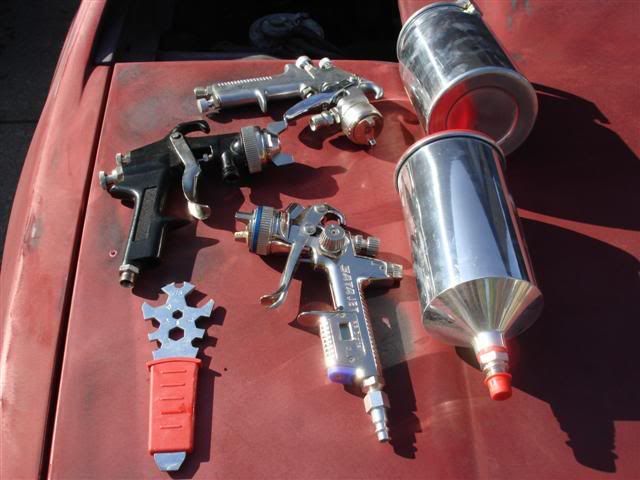
Heres the guns I'll be using Don't need a good primer gun, a cheap one will do just fine. Mostly because after I get the car in primer I'll be block sanding it to make sure the body work is straight. For the base and clear I'll be using a SATA RP gun. Best gun I've ever sprayed with IMO.
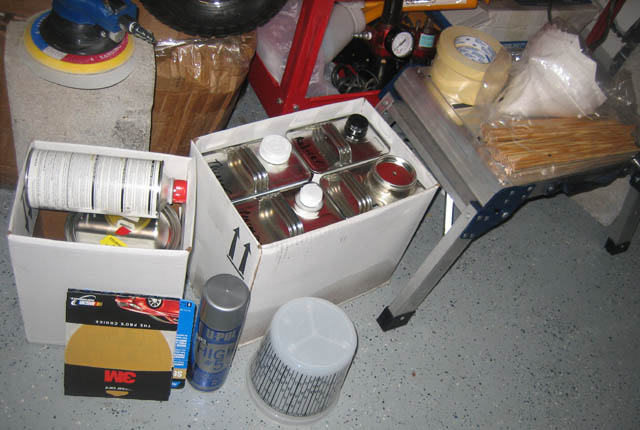
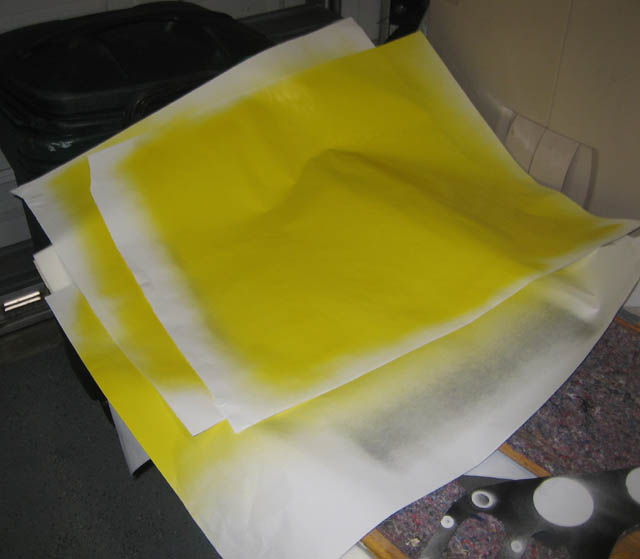
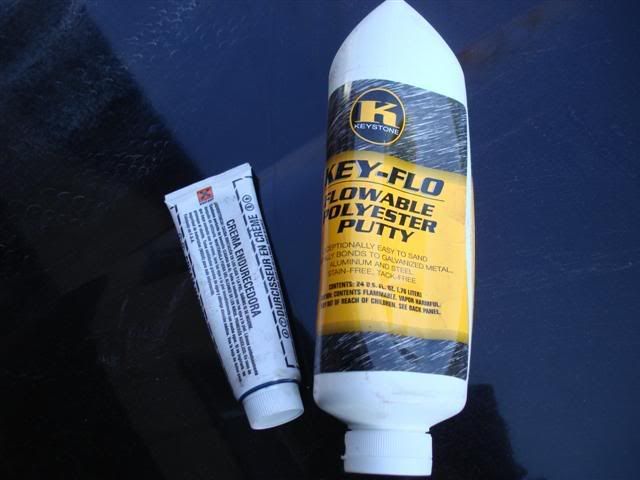
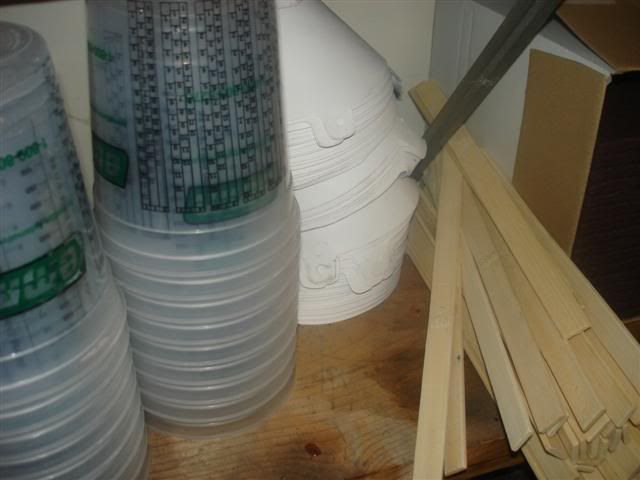
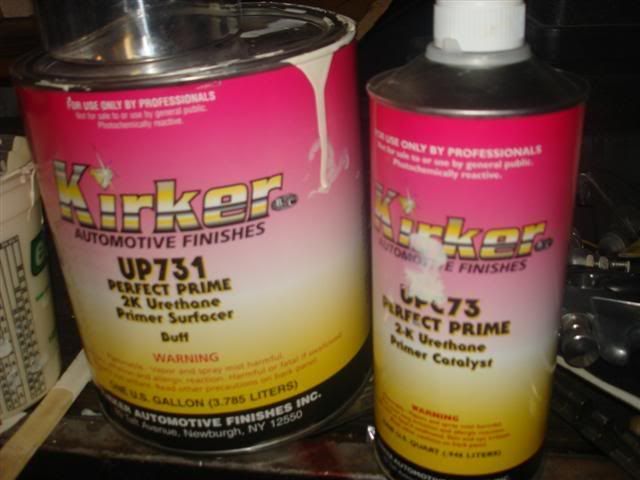
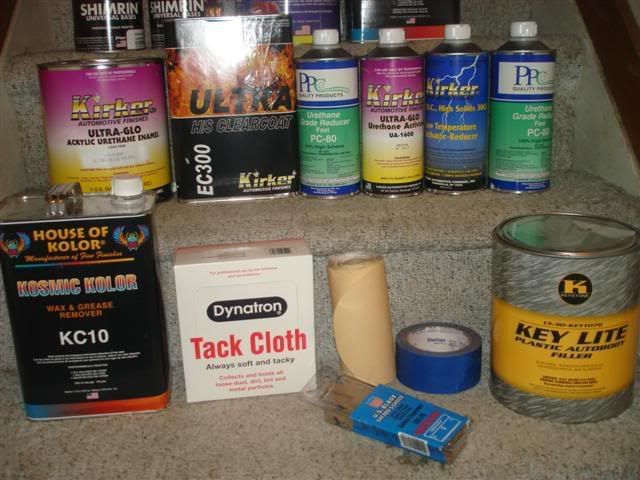
Heres the paint I'll be using, the brand name is Kirker. It's decent paint that only cost around $55 a GAL! I bought all low temp activators because I'll be spraying this out of my garage in the cold. For the base and clear I might take it to work and spray it in the booth if we're not too busy. Here a pic of the paint material I'll be using. Glaze to finish off the body work Paint cups, strainers, sticks, red pads to scuff the small areas Primer Base, clear, reducers, activators, wax and grease remover, tack rags, body filler, sand paper, tape, razor blades
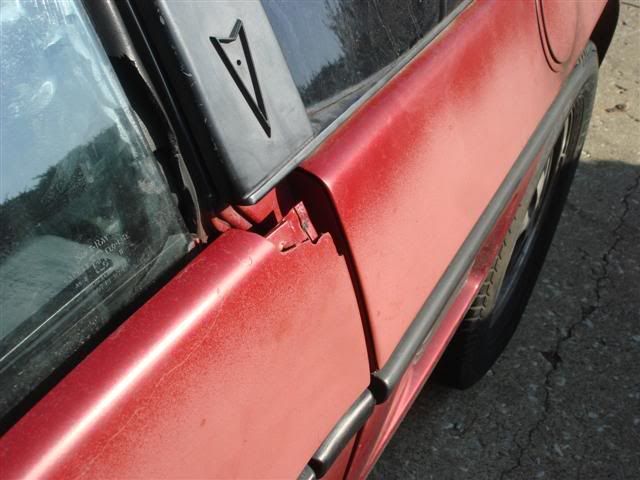
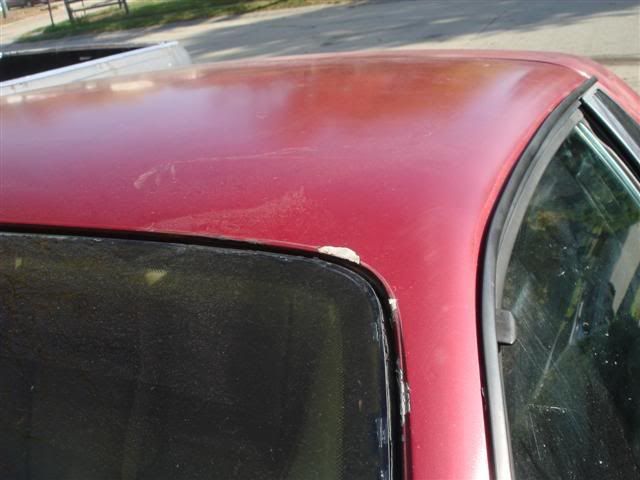
Theres is some body work that needs to be done. Mostly deep scratches and chips on the roof and decklid. Also, there is a piece that is broke on the door, and a hole in the fender where the antenna use to be. When you want a great looking paint job you would R&I (Remove an Install) all the molding, mirrors, bumpers, ect. But, like I said I don't want to spend much time on this paint job. On my 87GT I'm in the process of painting, I stripped the car down to the frame and doing a off panel paint job. On the 87 I'm going with House of Kolor Kandy Tangerine over silver metallic above the molding, and black diamond metallic on the bottom. Also shaved from the rear bumper to a under the hood. On the 88 I'm going with Blue Ultra Pearl.
More to come soon!
[This message has been edited by greengoblin0129 (edited 11-11-2007).]
IP: Logged
12:00 AM
PFF
System Bot
IMSA GT Member
Posts: 10696 From: California Registered: Aug 2007
At first I thought this was going to be another 48 can spray bomb job...but it's obvious you know what you are doing.
Having the knowledge and the right equipment is 99% of the effort. By the time I learned how to paint and bought the equipment, it would be cheaper to have a professional, (or at least experienced amatuer) paint my car.
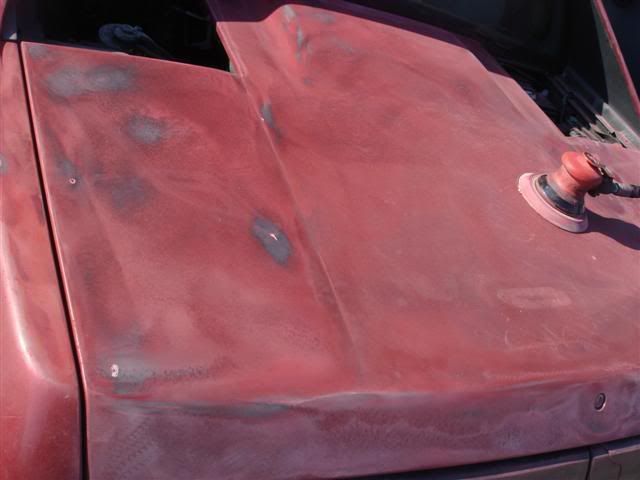
So far I have done most the body work, and finished the car off in 320 grit. For tight spots that I couldn't hit with the DA I use a red scuff pad. I went ahead and sprayed primer over my body work just in case it rains, I don't want water to hit the bondo. Pretty much the rear end of the car I sprayed so far. Can't put the car in the garage because my 87 is up on jacks lol. I sprayed the primer outside, not too worried about debris getting into the primer because I will be block sanding it out. Lucky, nothing got into the primer while drying outside. I know I said I didn't want to spend a bunch of time on the car, but should of took a little bit more time masking it. Nothing that a razor blade can't take off Tail lights are getting replaced either way so thats why I didn't mess with making them off.
IP: Logged
12:21 AM
jscott1 Member
Posts: 21676 From: Houston, TX , USA Registered: Dec 2001
What's the deal with the trim on the bumper? For some reason you didn't prime it.
There was still body work that needed to be done to it, plus it had tape still on it that I couldn't get off. At some point someone did a rattle can paint job on it and didn't take off all the tape lol... now it won't come off for nothing. Only reason why I got it in primer was to seal the body work because the up coming weather. Right now it's poring down rain
� 1gal. of 2k High build Urethane primer/sealer � 1qt. of the Activator for the Primer/Sealer � �Gal. of Urethane Color � 1qt. of the Activator for the Color � 1gal. of EC300 Clear Coat � 1qt. Activator for the clear � 2qts. Urethane reducer � 15 Paint sticks � 15 Strainers � 1 Spray Suit � 3 rolls of Masking Tape � 6 Tack rags � 10 1qt mixing cups � 50 sheets of 320 grit � 10 sheets of 180 grit � 5 sheets of 80 grit � Wax and grease remover � 15 Red scuff pads
Total so far: ~$340 After going threw a ton of websites I found the cheapest places for different things. For all my sandpaper I go threw tcpglobal on ebay. For my paint I've been using SmartShoppers.com. They have a whole Kirker paint kit on there starting at $200 that includes most the stuff you'll need. I believe theres 40 different colors you can choose from in that kit. Great place to deal with, they had it shipped to my house the next day. I'm also bought all my House of Kolor paint from there for when I paint my 87, also the cheapest on that as well after shipping. Heres a link to the kits http://www.smartshoppersinc.com/tarps/Kits.html
Thanks, Ryan
[This message has been edited by greengoblin0129 (edited 11-11-2007).]
------------------ "This car is so good looking its almost indecent. - AutoWeek on the new 1986 GT" Chilliwack Fieros MSN Messanger tylercaddick@hotmail.com
haha, hell no. I work for Hubler Express Collision. Just doing a quickie on this car, don't want to put a bunch of money or time into it. Only paid 150 for the whole car lol
[This message has been edited by greengoblin0129 (edited 11-11-2007).]
Damn thats a lotta stuff for one car. I painted my vette with a quart of white, hardner, quart of primer, quart of clear and reducer. I usually do a whole car with one (maybe 2 scotchbrites). They actually do better when there worn. Last time I used it, years ago, House of Color clear sucked big time. After a year it would still gum up sandpaper and tended to split open and crack. I stopped using it. Dont spray the paint if it isnt 60* at minimum or you will have drying problems anyway. Good luck with your job.
IP: Logged
06:28 PM
F-I-E-R-O Member
Posts: 8410 From: Endwell, NY Registered: Jan 2005
USE SOME MASKING! or at least cover the tires... there's got to be at least one old towel around the house? Should have labeled this "DIY Affordable Fiero Paint Job 94" If you mask even just a little bit then you can have your 101 back.
Thanks for sharing. I never get tired of seeing threads like this.
IP: Logged
06:48 PM
ALLTRBO Member
Posts: 2023 From: College Park, MD Registered: Mar 2006
masking is over rated Pretty much what I didn't mask is getting painted black, or getting replaced n e ways. I'm putting the GT 15's on there, and have over 4 sets of the SE rims so not to worried about those either lol. Paint came off the back windshild with a razor blade. Tonight I got the rest of the car in primer, I'll have pics up soon.
IP: Logged
09:32 PM
Wii Bird Member
Posts: 264 From: Dartmouth, Nova Scotia, Canada Registered: Oct 2007
This is great! Could you post more details on your prep, spraying, etc? Definitely you have experience on this so it would be great to share. After debating it for a long time I decided to tackle this job myself but I have no experience other than an art background if that helps. LOL! With body shop bills so big (especially where I live) I thought I could save some $$ and I can use the experience in more than one car. I'm not looking for a show winning result and my jobs are for same non-metallic colors so it shouldn't be that hard. My red car top is the one fading so that is the candidate. I have already spent near $600 in tools (guns, pneumatic sanders, etc.) and paint material for this job. I just started playing with a cheap gun and some leftover paint I had spraying on some flip-chart pads. There is so much to learn, I mean stupid thing like what are the knobs for at the gun and even what is the best way to clean it. I have no clue Then I have couple of panels to practice on the real thing. I'm not in a hurry but want to learn quickly
The knobs on the guns are different between manufacturers. You usually have one that controls how far back the trigger goes. This one controls the amount of paint that comes out with the given amount of air. Another one controls the air pressure coming out of the gun. The last one (usually) will spread the spraying paint from a small circle to a wide oval shaped fan. Read the instructions on YOUR gun then experiment. Too much air in a gun that dont need it can blow up in your face spraying paint on everything. Too much air pressure will also fill the air with paint instead of just your car (overspray).
As for masking, its still easier to take a few seconds to mask off something than go back later with laquer thinner or a razor blade and try and clean it. I keep a piece of old metal (old licence plate in my case) to keep from spraying anything on something when im priming just a spot. I just hold it over what I dont want painted. Garbage bags are good for throwing over tires and wheels in a pinch.
IP: Logged
01:14 PM
josef644 Member
Posts: 6939 From: Dickinson, Texas USA Registered: Nov 2006
I have been shooting the Kirker Acrylic Urethane, # U-61231, on the panels from my 86 that I am painting. About $50.00 for the paint and hardner. Its my first time to use their paint and I am very happy with it. It is very close to the factory silver on my car. I am shooting it at 25 PSI with a gravity feed gun. I got the gun from Harbor Freight for about $40.00. I will be doing the front fascia with it one day this week. I am going to throw my old paint gun away. This new one is wonderful. Over-spray is almost non exsistant.I dont need to make up near as much paint to be ready to shoot as with the old type of paint gun. If you have not tried the Kirker paint, I would reccommend you to give it a shot. PPG paints are in Houston,Texas but thats 90 miles each way from me. Thats a long way to drive for a gallon of paint. I am using laquier primer under the acrylic urethane. This is one step paint, that you can if you want to shoot a coat of clear on top. I always finish off with a light coat of clean thinner. It flows the top smooth. I never have any orange peel. I put it on pretty quick after the last color coat is put on. A wonderful shiney finish. Works for me.
Originally posted by greengoblin0129: On the 87 I'm going with House of Kolor Kandy Tangerine over silver metallic above the molding, and black diamond metallic on the bottom.
Hmm, I bet that will look good...
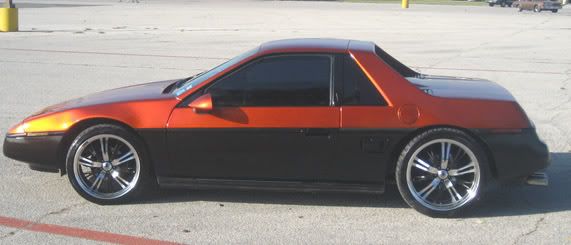
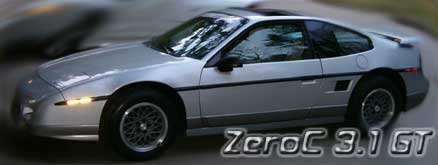
My 88 Coupe with HOK Tangerine Kandy over Orion Silver above the trim, PPG black w/ gold pearl clear under the trim
My 88 Coupe with HOK Tangerine Kandy over Orion Silver above the trim, PPG black w/ gold pearl clear under the trim
Man, guess I have to go with a different theme now lol! I didn't think any Fieros had that kind of paint job. Thats 100% what I was going to go with, except on a fastback. Is that real kandy or the base-coat version? I'm going with the base-coat kandy because knowing my luck I'll get a scrach on it, and real kandy is almost impossible to match. However, theres nothing that looks better then a true kandy paint job haha. One of those colors you have to see in person, pics just can't justify the paint.
IP: Logged
06:09 PM
Philphine Member
Posts: 6136 From: louisville,ky. usa Registered: Feb 2000
reading with interest too. smart shoppers is just about down the street from me and already has gotten quite a bit of cash from me for car stereo type stuff and a few other things. they advertise themselves as the ultimate guy store.
IP: Logged
06:19 PM
RandomTask Member
Posts: 4547 From: Alexandria, VA Registered: Apr 2005
This is great! Could you post more details on your prep, spraying, etc? Definitely you have experience on this so it would be great to share. After debating it for a long time I decided to tackle this job myself but I have no experience other than an art background if that helps. LOL! With body shop bills so big (especially where I live) I thought I could save some $$ and I can use the experience in more than one car. I'm not looking for a show winning result and my jobs are for same non-metallic colors so it shouldn't be that hard. My red car top is the one fading so that is the candidate. I have already spent near $600 in tools (guns, pneumatic sanders, etc.) and paint material for this job. I just started playing with a cheap gun and some leftover paint I had spraying on some flip-chart pads. There is so much to learn, I mean stupid thing like what are the knobs for at the gun and even what is the best way to clean it. I have no clue Then I have couple of panels to practice on the real thing. I'm not in a hurry but want to learn quickly
As far as prep work goes, I finish the car off in 320 grit, or red pad for the hard to get places. Before I spray I wipe the car down with wax and grease remover, then go over the car with a tack rag. This gets all contaminants off the car. When I spray the car, the first thing I do is set up my gun (air pressure, fan width, ect) When I spray the car (depending how YOUR gun is setup) I am about 6in above while moving the gun kinda quickly. If you go too slow you'll run the paint, to fast and it will be dry and not have good coverage. Takes awhile to get the right distance/speed. I always overlap my paint 50%. However, my house of kolor they say to go 75% overlap, so it just depends on the paint I guess. Mixing paint is pretty easy. Every brand is different, Martin Senior is 1:1 I belive, HOK is 2:1, and the kirker is 4:1. They all say how to mix them. Mixing cups come in handy for this. Hope this helps!
Ryan
IP: Logged
08:24 PM
Alex4mula Member
Posts: 7410 From: Canton, MI US Registered: Dec 1999
As far as prep work goes, I finish the car off in 320 grit, or red pad for the hard to get places. Before I spray I wipe the car down with wax and grease remover, then go over the car with a tack rag. This gets all contaminants off the car. When I spray the car, the first thing I do is set up my gun (air pressure, fan width, ect) When I spray the car (depending how YOUR gun is setup) I am about 6in above while moving the gun kinda quickly. If you go too slow you'll run the paint, to fast and it will be dry and not have good coverage. Takes awhile to get the right distance/speed. I always overlap my paint 50%. However, my house of kolor they say to go 75% overlap, so it just depends on the paint I guess. Mixing paint is pretty easy. Every brand is different, Martin Senior is 1:1 I belive, HOK is 2:1, and the kirker is 4:1. They all say how to mix them. Mixing cups come in handy for this. Hope this helps!
Ryan
It does help. What is the tack rag exactly? Thanks!
It does help. What is the tack rag exactly? Thanks!
A tack rag is basically a towel that collects dust really well. I don't know the science behind it but they work. Maybe someone can chime in with more info.
Ryan
IP: Logged
09:27 PM
TXGOOD Member
Posts: 5410 From: Austin, Texas Registered: Feb 2006
This seems to be the latest place to ask questions. I am going to paint my aero nose and I`m going to sand the factory paint with 400 grit. I have a bunch of small chips in the original that are tight and probably not more than an 1/8 of an inch in diameter. I am using a primer/surfacer by Evercoat, Slick Sand and I`m wondering if I need to feather those chips or just shoot the primer and block sand. I`m going to pime it because I have done some filler work on it plus I`m changing color. Thanks, Mike
IP: Logged
09:43 PM
IMSA GT Member
Posts: 10696 From: California Registered: Aug 2007
This seems to be the latest place to ask questions. I am going to paint my aero nose and I`m going to sand the factory paint with 400 grit. I have a bunch of small chips in the original that are tight and probably not more than an 1/8 of an inch in diameter. I am using a primer/surfacer by Evercoat, Slick Sand and I`m wondering if I need to feather those chips or just shoot the primer and block sand. I`m going to pime it because I have done some filler work on it plus I`m changing color. Thanks, Mike
If you can, feather the edges just to make it easier on yourself later. Also, there may be unseen dirt or wax hidden in the chip. That can ruin a paint job. One thing a lot of people seem to miss is that these are flexible parts. To do the job technically right, they should be clearcoated to help with the flexing of the parts or a flex additive should be put in the primer.....there is nothing worst than hitting a parking block and watching your paint crack........most of the time, clearcoat serves just as good.
[This message has been edited by IMSA GT (edited 11-12-2007).]
IP: Logged
10:03 PM
IMSA GT Member
Posts: 10696 From: California Registered: Aug 2007
A tack rag is basically a towel that collects dust really well. I don't know the science behind it but they work. Maybe someone can chime in with more info.
Ryan
Its a resin coated rag....about the size of a sheet of paper. If you hold on to it too long, the resin sticks to your hand and it is a pain to get off. When used on the car, the resin does not come off and stick to your car but the dust and debris sticks to the cloth and your almost guarantee a flawless paint job.
This seems to be the latest place to ask questions. I am going to paint my aero nose and I`m going to sand the factory paint with 400 grit. I have a bunch of small chips in the original that are tight and probably not more than an 1/8 of an inch in diameter. I am using a primer/surfacer by Evercoat, Slick Sand and I`m wondering if I need to feather those chips or just shoot the primer and block sand. I`m going to pime it because I have done some filler work on it plus I`m changing color. Thanks, Mike
They might now primer out. Feathering a chip too much will cause a low spot that you'll be able to see after the car is in cleared. Before I block sand, I spray a light coat (my light I mean mist) of black GUIDE COAT. Guide coat really does help a ton. It makes all your low and high spots very noticeable while block sanding.
IP: Logged
10:26 PM
jscott1 Member
Posts: 21676 From: Houston, TX , USA Registered: Dec 2001
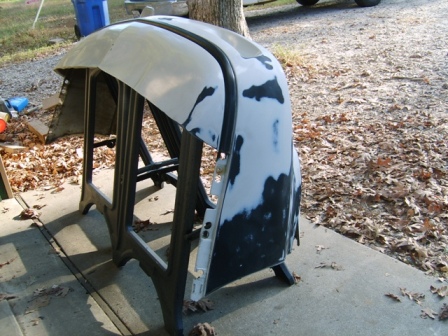
I was sanding spider webbing out of my fascia yesterday. There wasn't any primer under the topcoat that I could see. It appears to be the factory finish on the part. It is an 87-88 coupe style fascia. I plan on shooting three coats of primer today or tomorrow sometime.
IP: Logged
01:46 PM
TXGOOD Member
Posts: 5410 From: Austin, Texas Registered: Feb 2006
I probably will sand the whole thing down, and I am going to get some guide coat. It`s probably a lot easier than wetting the surface down and trying to tell against the light where the low spots are. What kind of flexible sanding board do you guys use? I have one of the smaller flexible ones that uses a third of a standard size sheet of sandpaper. I`m going to the paint store tomorrow and I want to pick up a slightly longer sanding board, maybe 16-18 inches.
IP: Logged
02:04 PM
josef644 Member
Posts: 6939 From: Dickinson, Texas USA Registered: Nov 2006
I just use my hand and my DA disk sander. I only scuff with my hand on the paper when sanding the primer. Here is a picture of my trunk/hatch I did about 10 day ago. I painted the little wing off of thte trunk, then mounted it back on after the paint dried. I also sit the pieces outside in the sun for two days to help the paint cure . Bugs or dust doesn't even stick to it after about 10 min's post shooting. I know that there many good paints ,and more expensive paints out there, but this Kirker is the best I have ever sprayed. Next time I will also get some clear and spray a coat of it on after the top color coat is appilied. This Kirker is one step paint, but the clear seems to add depth to a paint job.It is mixed 3 to one, or three parts paint to one part hardner. I has a can life of two hours after being mixed.
My front fascia's cleanup progress. See no factory primer. just one thin layer of topcoat.
Joe
[This message has been edited by josef644 (edited 11-13-2007).]
IP: Logged
02:53 PM
TXGOOD Member
Posts: 5410 From: Austin, Texas Registered: Feb 2006
I was sanding spider webbing out of my fascia yesterday. There wasn't any primer under the topcoat that I could see. It appears to be the factory finish on the part. It is an 87-88 coupe style fascia.
I sanded my fascia and there was black primer under the red top coat. I find it hard to believe that Pontiac would shoot paint directly onto a Urethane part.
Anyway this project is looking real good.
IP: Logged
05:29 PM
josef644 Member
Posts: 6939 From: Dickinson, Texas USA Registered: Nov 2006
Lookin good Joe. Are you painting any other parts of the car or just the decklid and the nose.
Well I am going work on the roof area and the drivers side windshield piller. The places where the paint always gets thin from getting in the car. Doors,hood, rear fascia and all fenders are pretty good shape for 21 years old. I had a good silver deck lid, but it had a luggage rack. I hated it . I traded the guy at the one and only wrecking yard in Huntsville for this plain one that was red.
I have everything loose to remove the cradle tomorrow. I am going to find out what is wrong with my clutch for once and for all. Then i will start back on the painting while I am waiting on what ever parts I need.
[This message has been edited by josef644 (edited 11-13-2007).]
IP: Logged
08:08 PM
josef644 Member
Posts: 6939 From: Dickinson, Texas USA Registered: Nov 2006


 Tail lights are getting replaced either way so thats why I didn't mess with making them off.


 I never get tired of seeing threads like this.
 Pretty much what I didn't mask is getting painted black, or getting replaced n e ways. I'm putting the GT 15's on there, and have over 4 sets of the SE rims so not to worried about those either lol. Paint came off the back windshild with a razor blade. Tonight I got the rest of the car in primer, I'll have pics up soon.
 Then I have couple of panels to practice on the real thing. I'm not in a hurry but want to learn quickly