I have herd that welding cable will work better for longer battory cables. Purer copper for lower voltage drop per. ft. and more abrasion resistanse insulation.
IP: Logged
05:54 PM
Alex4mula Member
Posts: 7410 From: Canton, MI US Registered: Dec 1999
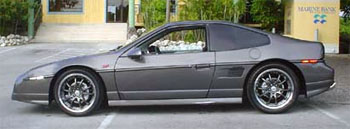
" Lookin Good " I have a TPI in my 85 Notchback almost stock. It make's enough power for me. I needed a throttle body on it so I got a BBK 52mm, also a Hypertech Super Chip,used a 91 or 92 Camero ECM. Get a Painless Harness it is a plug and play. The biggest problem was headers,custom made,dual's to a Dynomax 2-1/4 two in two out.It fits were the stock muffler was, even used the heat shield. Keep this going,it bring's back memories.......
Jim
IP: Logged
10:18 PM
Oct 11th, 2004
Alex4mula Member
Posts: 7410 From: Canton, MI US Registered: Dec 1999
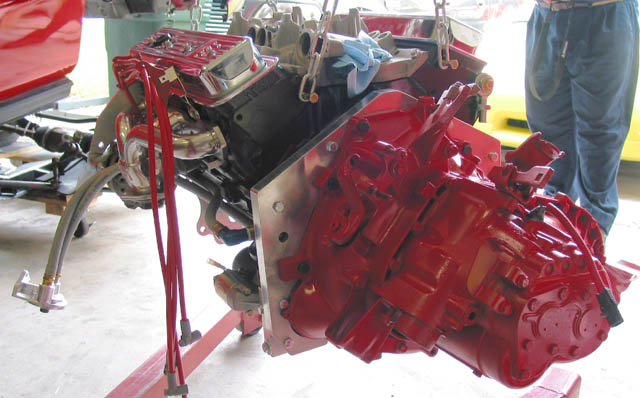
Ok. Let's continue. This is how the battery tray area ended up after some cutting;
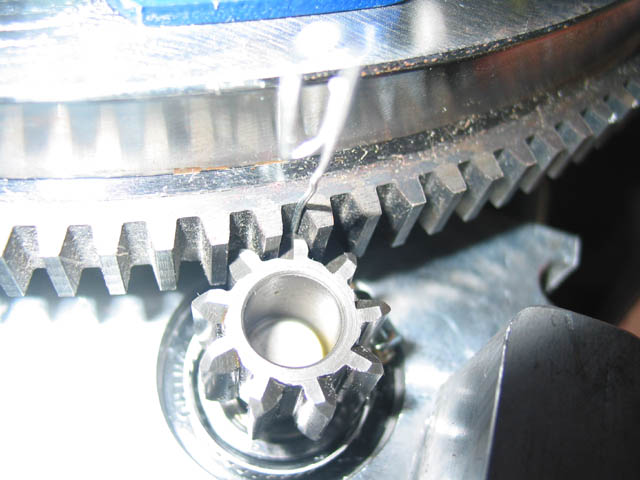
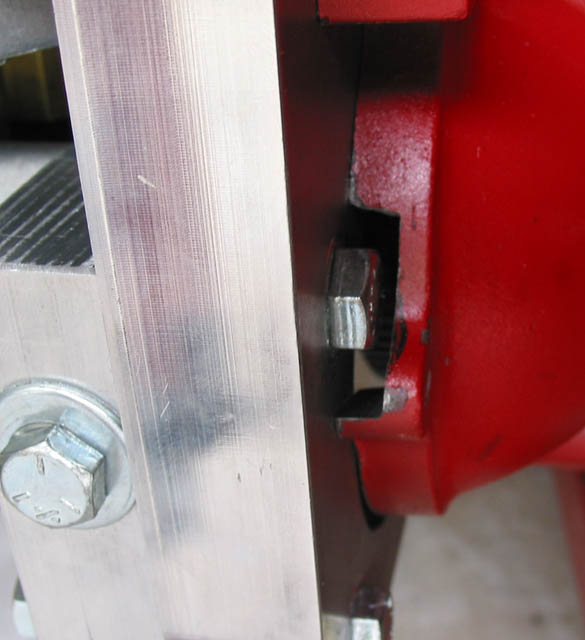
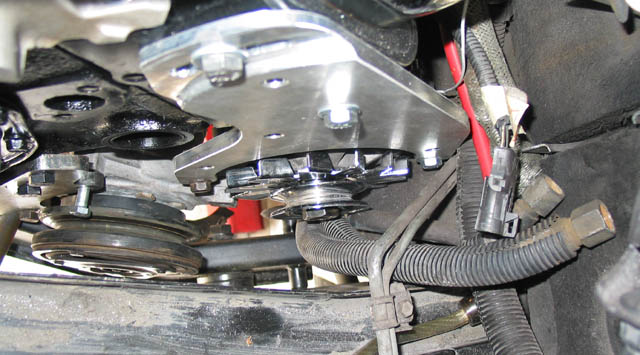
Now the starter. This area requires a lot of attention to get it right on 1st try. I spent like 2-3 hrs alone in this area. I tried that starter like 20 times and at the end I connected the battery and cranked it to make sure it worked properly. Fit on all this area items are supper tight so you don't want to go back and deal with it once the engine is on the car. This is what i used to measure the right clearance;
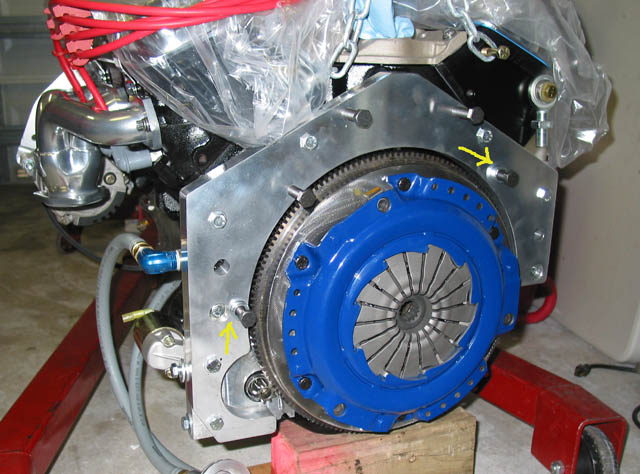
Now these are some pics of the adapter plate and clutch installed. The arrows shows the "new" tranny locating pins. I wished these $4 item could come with the kit as taking the old ones can sometimes be a little headache
IP: Logged
10:49 AM
Alex4mula Member
Posts: 7410 From: Canton, MI US Registered: Dec 1999
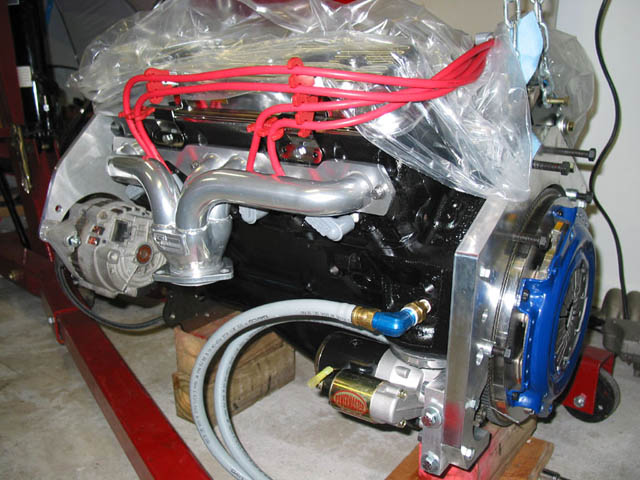
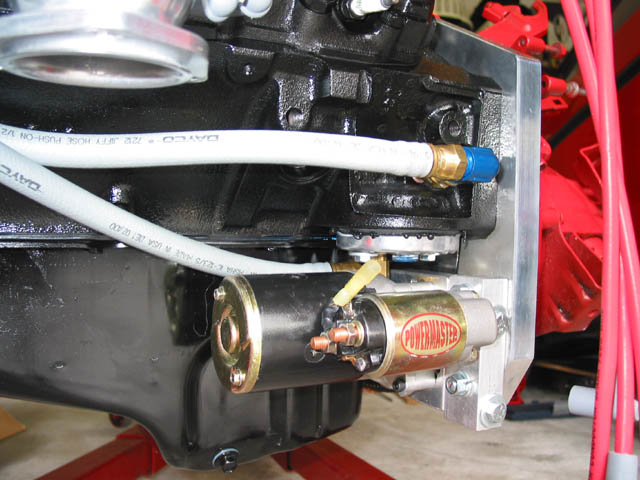
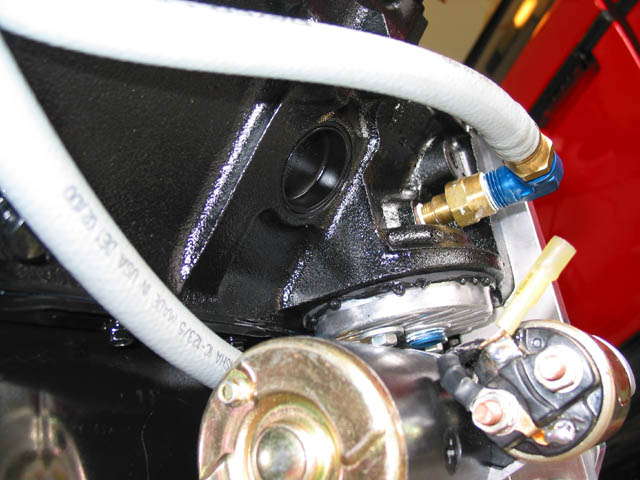
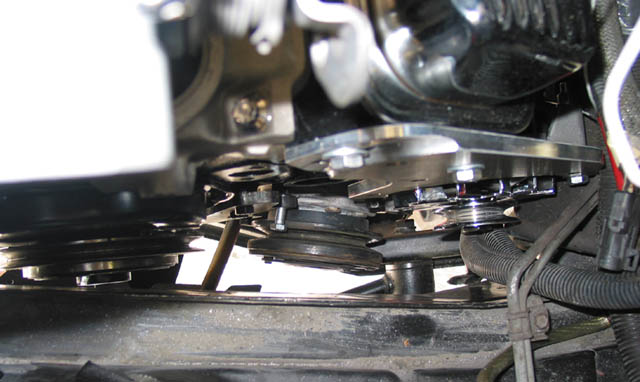
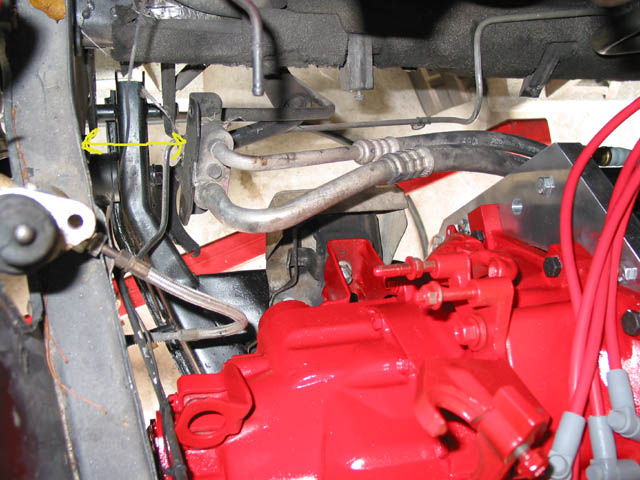
These pics shows the front mount, the tranny in place and the final starter area completed. As I said before the clearances are very tight. The transdapt hoses are shown and the special fitting to connect the 2nd oil hose to the block. I was able to find a single 1/4" to 1/2" NPT adapter at Home Depot for a clean install
IP: Logged
10:55 AM
Alex4mula Member
Posts: 7410 From: Canton, MI US Registered: Dec 1999
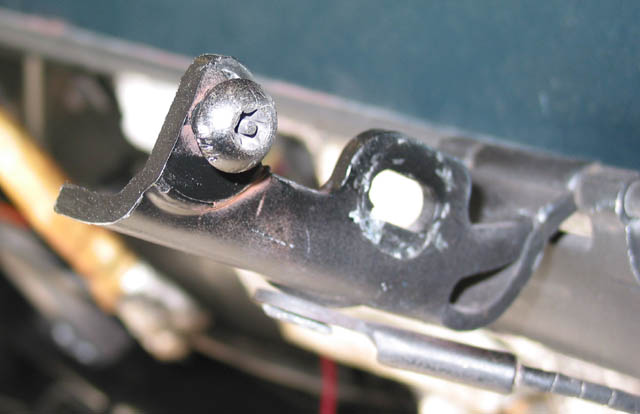
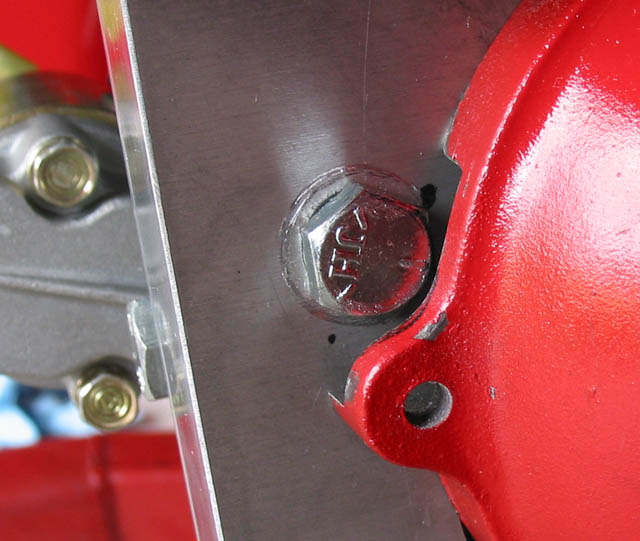
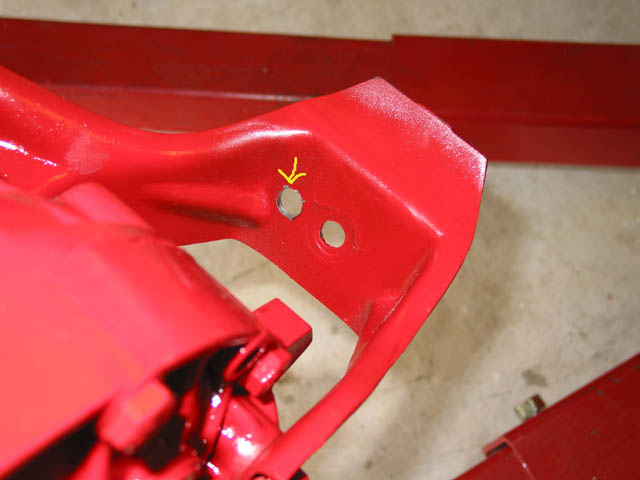
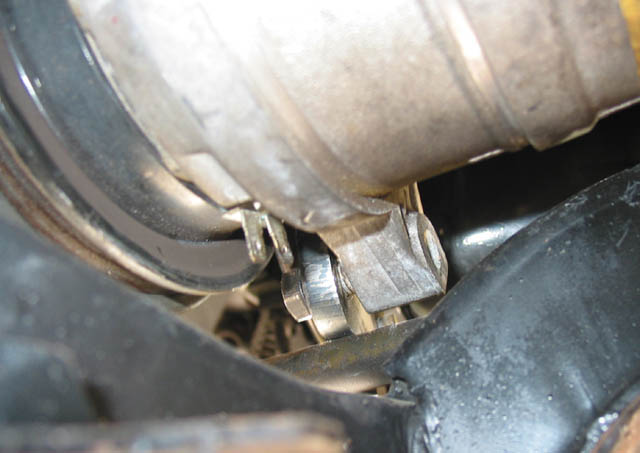
Now, when you install that tranny there is one of the adapter bolts that may interfere with the bellhousing and the area needs to be trimmed off. I think my firend did a great job on it. A wrench will fit in case I need to in the future.
IP: Logged
11:00 AM
Alex4mula Member
Posts: 7410 From: Canton, MI US Registered: Dec 1999
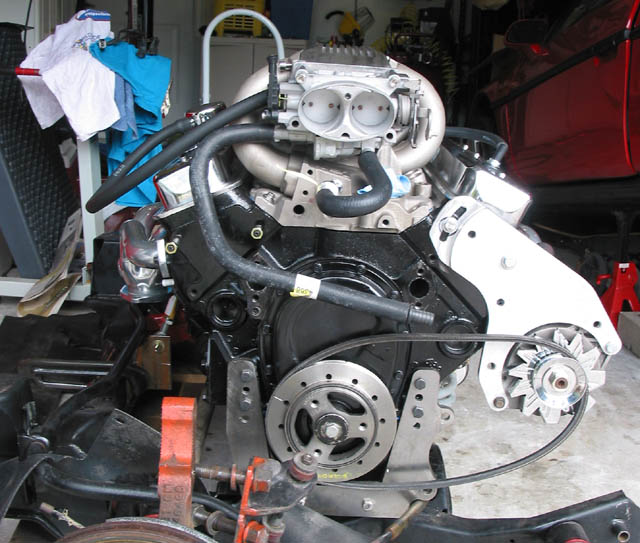
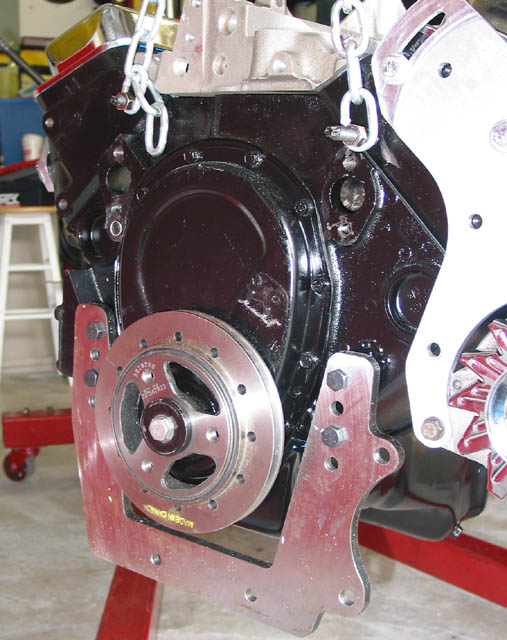
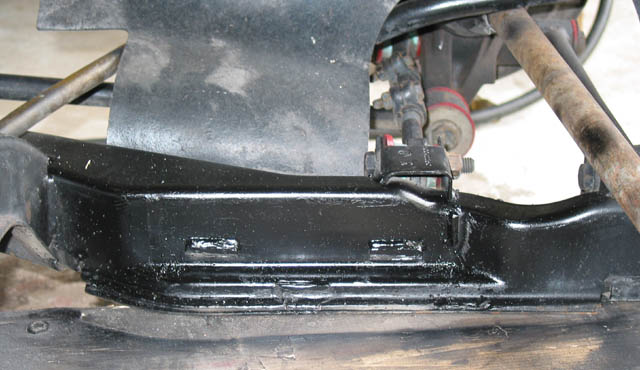
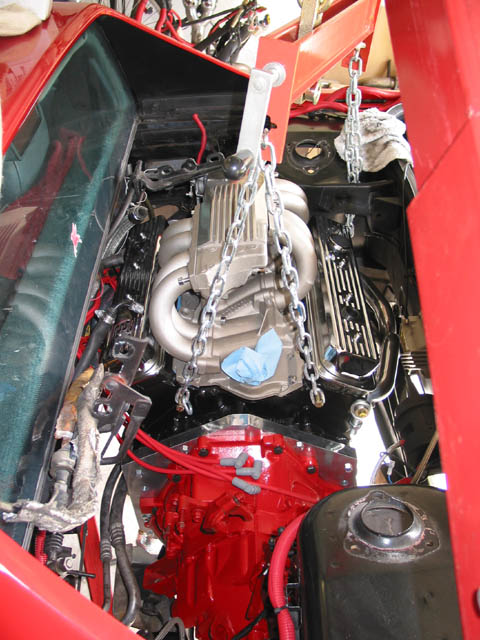
After all this the engine was ready to put in th craddle and that I did. No pics of that. There is a fornt L shaped bracket that bolts to the new front engine mount. This L bracket has a longer base on the bottom for 88 cars. If you get the wrong one (I did) half of it will be in the air when placed. After all is done you should have 16 3/8" from center of balancer to center of cradle front bolt. You will need to move and wiggle the engine until you get it right. Spent good time on it. Another area that I forgot is the new balancer that comes with the kit. In my case I needed a new balancer crank bolt (not included) as the stock one was too long. You need to check that because if it bottoms out either the balancer could end up too far out for proper belt alignment or worst case you cold damage the crank threads. Uuy! Rebuild time! So after all that the engine was ready for the 1st trial fit. And a lot of prroblems I found out as follows This is what you dream of seeing every day
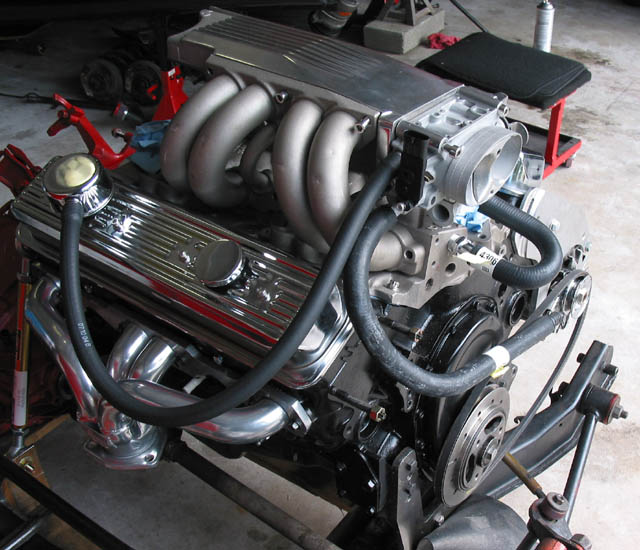
But then reality check. Like many I had clearance problems with the TPS area & shock tower even using the 4cyl unit. So that area was marked for trimming;
The Corvette fuel rail will not fit as you can see. Get a Camaro unit that will put lines in the middle.
The fuel lines touched a little the alternator. Those will need some attention too;
IP: Logged
11:21 AM
Alex4mula Member
Posts: 7410 From: Canton, MI US Registered: Dec 1999
Finally the A/C. Mounting this was a pain. The hoses length is short so you need to unmount the coupler bracket and pull the lines. This leaves a gap that will require a new bracket to hold them in place (will show later). The starter interferes with the hoses too. So you will need to slightly bend some of the A/C compressor pipes in the back to get it right or otherwise it will look tilted like mine in the pics below;
Here is another possible clearance problem area. See the distance between the header flange and A/C's little bottle?
And here is the gap that needs to be taken care later;
IP: Logged
11:30 AM
Alex4mula Member
Posts: 7410 From: Canton, MI US Registered: Dec 1999
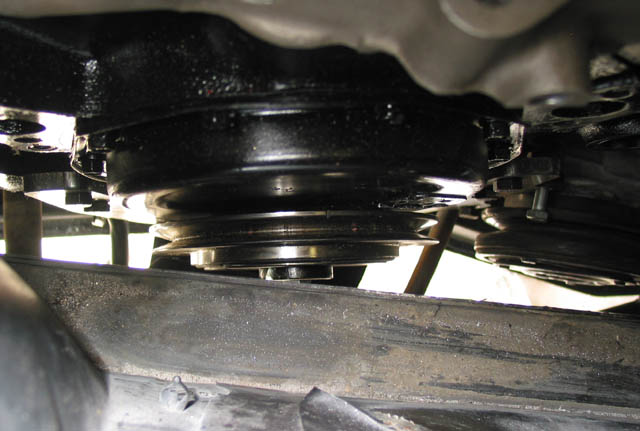
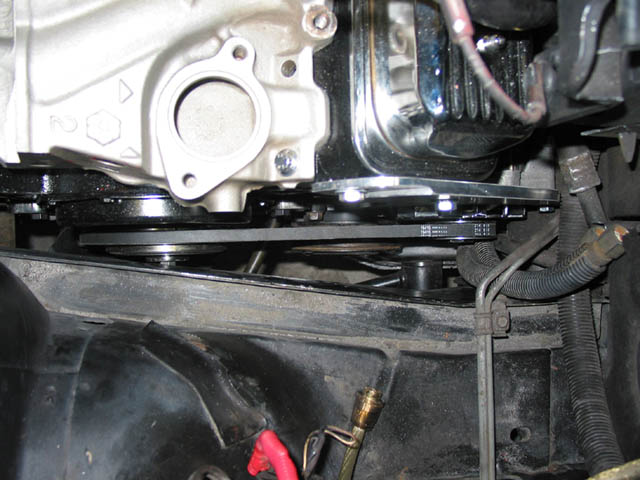
Finally for today below is the clearance I ended up with between balancer and frame rail. The belt will not slide between them More to come later Please tell me if you are getting bored with so many pictures
IP: Logged
11:33 AM
PFF
System Bot
KissMySSFiero Member
Posts: 5559 From: Tarpon Springs, FL USA Registered: Nov 2000
No, this is great! I'm glad you're showing pics of the problem areas. The fitting issues which Archie can likely do in his sleep are what would give the backyard mechanic the most headaches, I would think.
IP: Logged
01:12 PM
mrfixit58 Member
Posts: 3330 From: Seffner, Fl, USA Registered: Jul 99
Do you know any reason why a stock Fiero ECM can't be used?
I asked this question before. I was told that you really need an ECM from a V8 car. If I remember, it had something to do with the differences in the way the mmotors fire... V6 every 60 degrees, V8 every 45 degrees. You can get a V8 ECM prety cheap so it didn't seem to be worth questioning. Who knows.... maybe I was fed a line of crud.
You're really moving along on the swap. I'm loving all the detail pictures. They give me the itch .
Roy
[This message has been edited by mrfixit58 (edited 10-11-2004).]
IP: Logged
01:23 PM
Alex4mula Member
Posts: 7410 From: Canton, MI US Registered: Dec 1999
Mmm 60� vs 45�. It is just something we are looking into. Will see. Right now the plan is to use a MAF V8 ECM converted to MAP. The reason is because the MAF ECM uses the same wiring as the Fiero (MAP ECM has 3 connectors). Of course it needs to be programmed for MAP. We know someone who did it but we haven't been able to make contact with him to get who did the programming. Worst case I re-pin some wires and go with MAF.
I'm glad you like the problem areas because that is mainly what I didn't find in other V8 build threads. And like you said, that is what causes grief for us backyard mechanics. Will see some more
IP: Logged
02:10 PM
Black-Azz-GT Member
Posts: 2326 From: Florida Keys Registered: Oct 2003
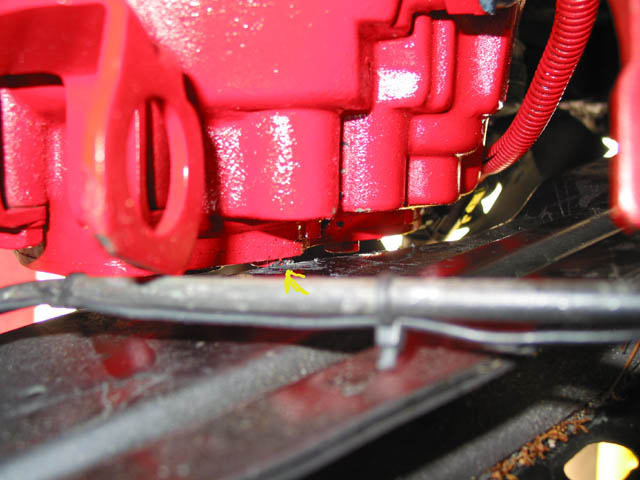
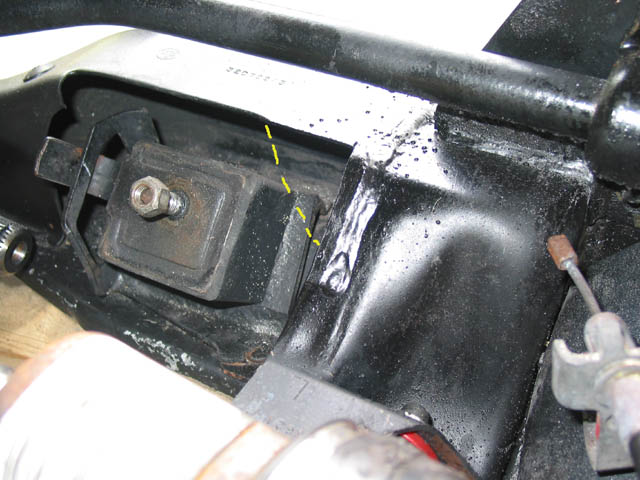
Ok. Here are more problem areas. The rear upper tranny bolt scrapes just a little the fram rail;
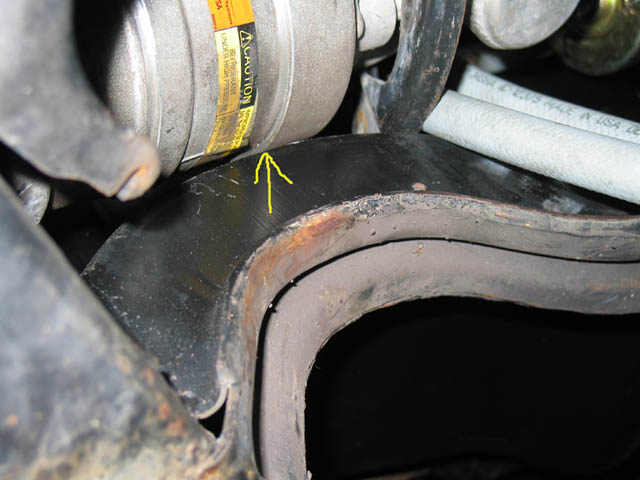
Here after finally aligning the A/C compressor it was touching the cradle at that point;
This is the top view after it was aligned. Notice that I didn't need the extra bracket to install it to the front mount, i.e. it is mounted directly to it and belt alignment was good.
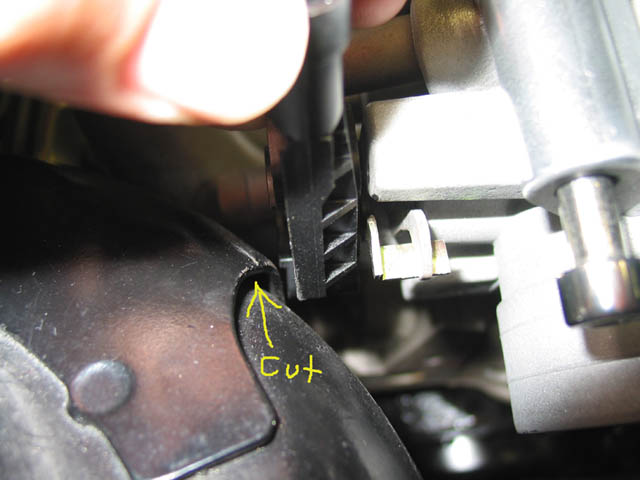
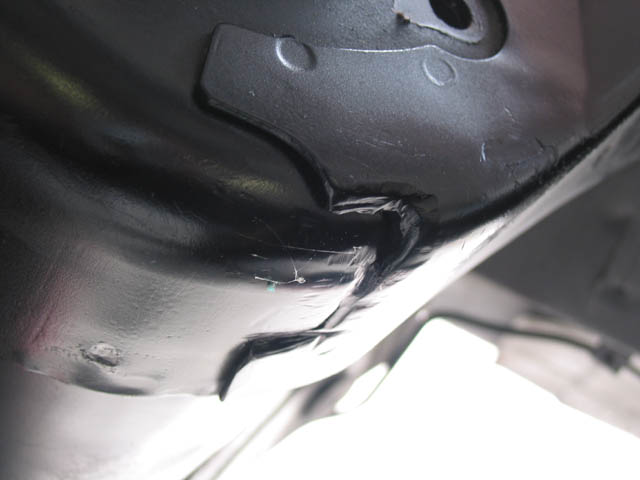
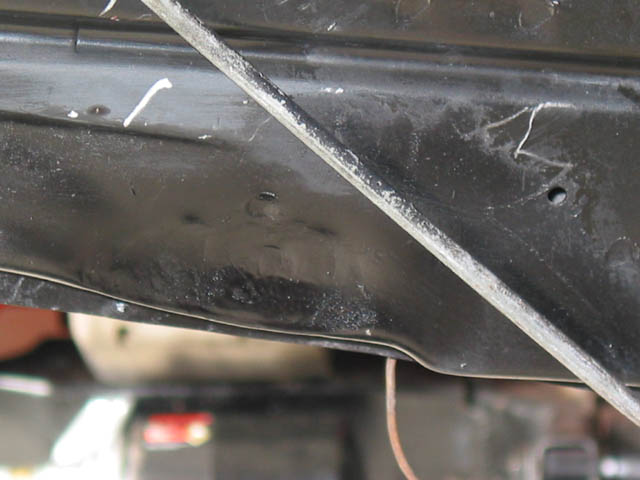
Also if you are using a TPI intake the trunk hinge will need to be cut and trunk rail trimmed.
IP: Logged
02:59 PM
Alex4mula Member
Posts: 7410 From: Canton, MI US Registered: Dec 1999
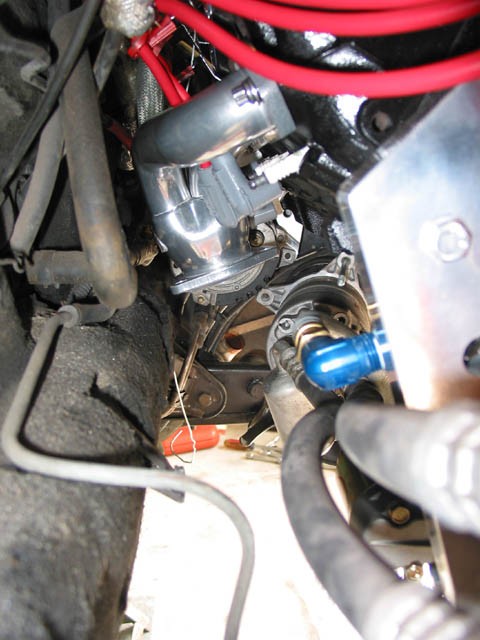
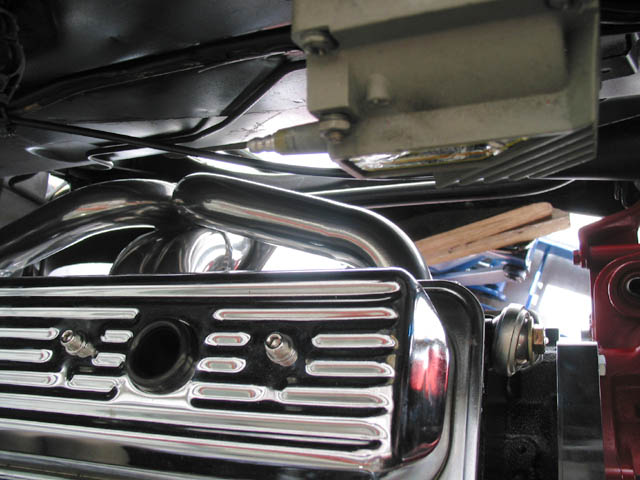
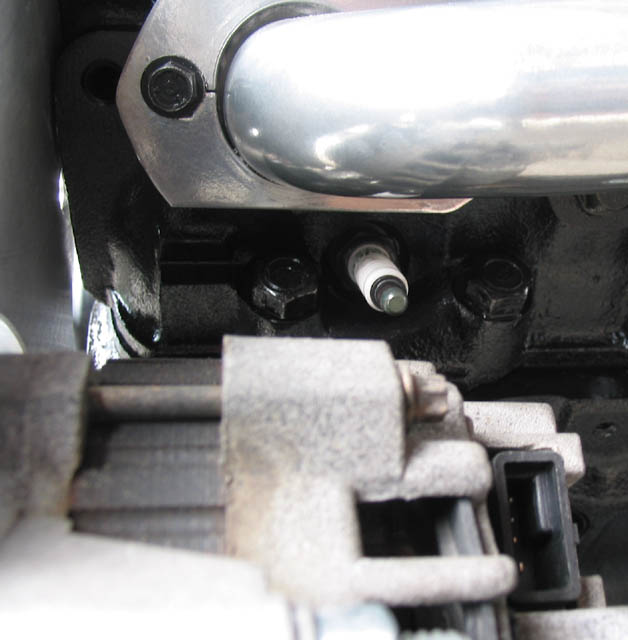
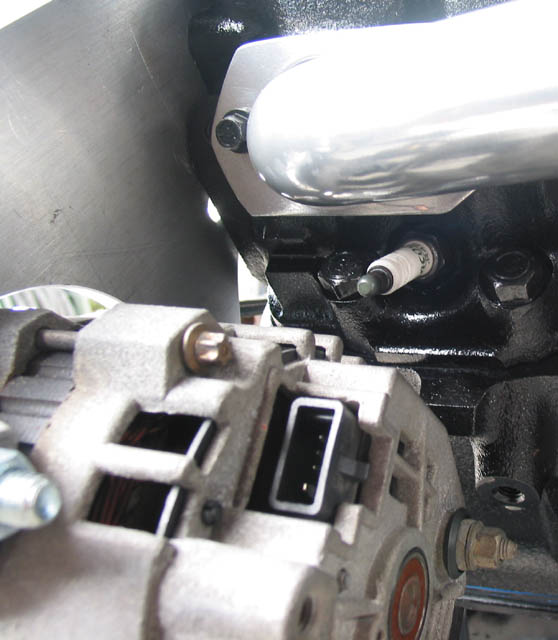
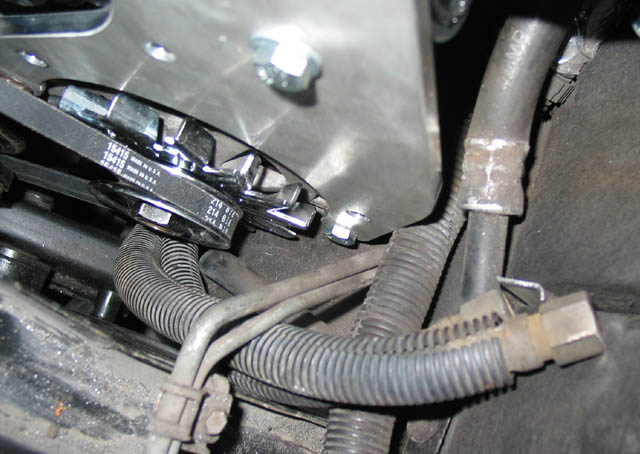
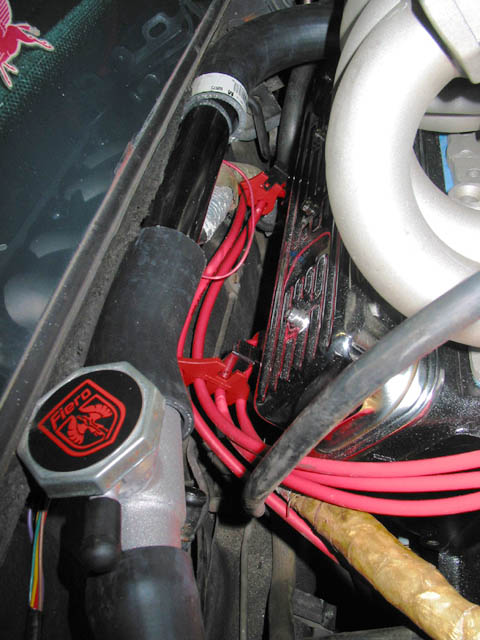
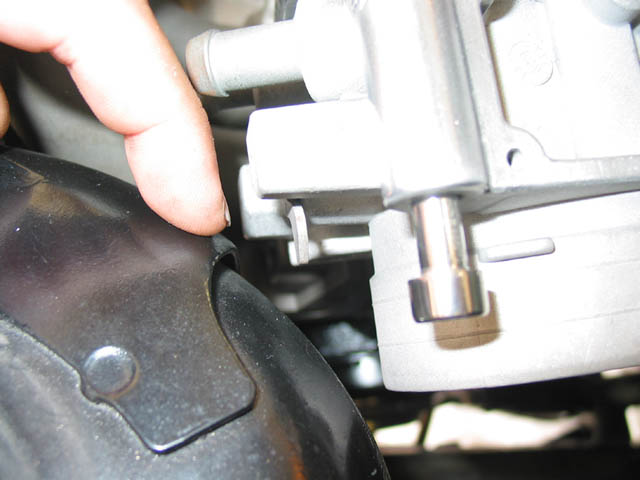
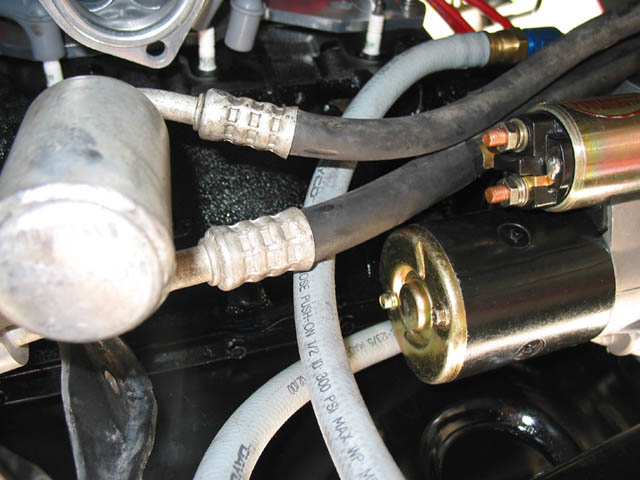
Another area of concern to me was the spark plugs change. All seem fine except this one below next to the alternator. I checked the clearance for a socket to go in with the alternator in the "belt-tight" position and it went tight but ok. I should be able to change it;
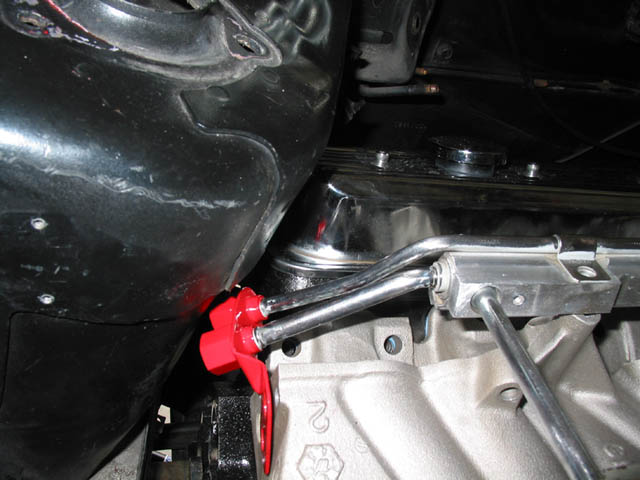
Here is another tight area but belt tightens ok with clearance in firewall. The fuel hoses need some attention;
IP: Logged
03:17 PM
Alex4mula Member
Posts: 7410 From: Canton, MI US Registered: Dec 1999
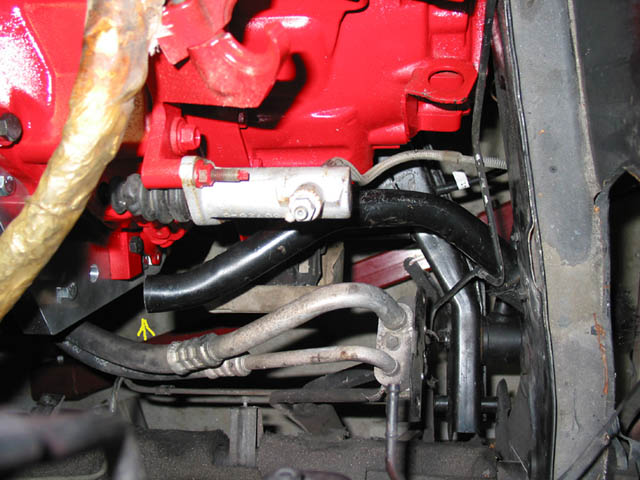
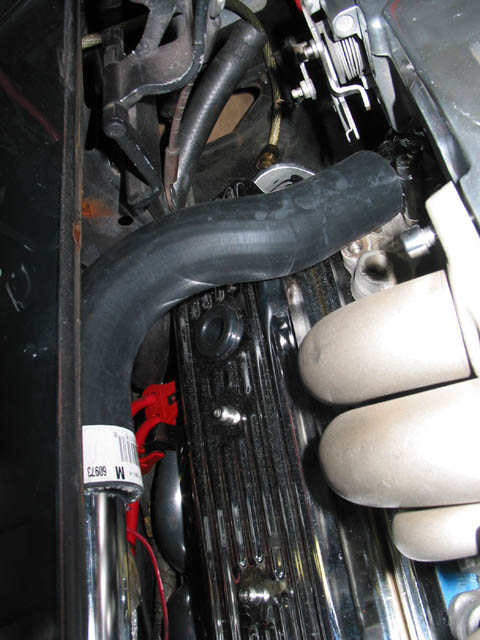
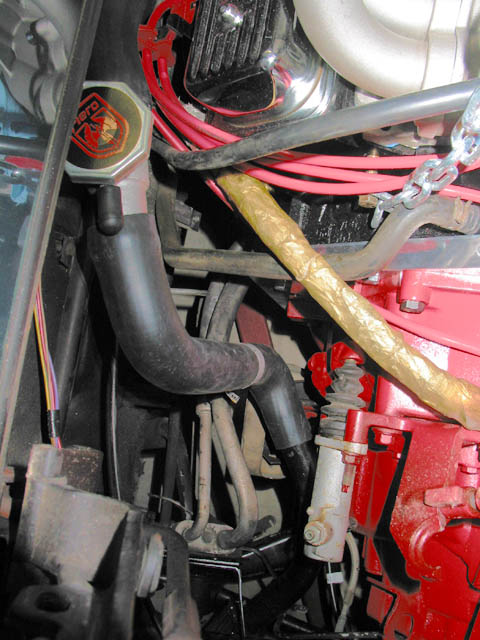
Other areas; Here I test fitted the stock radiator pipe. I'll use it in this manner and from there I have a hose coming up and then thru the firewall to the thermostat housing. More detail pics of this later;
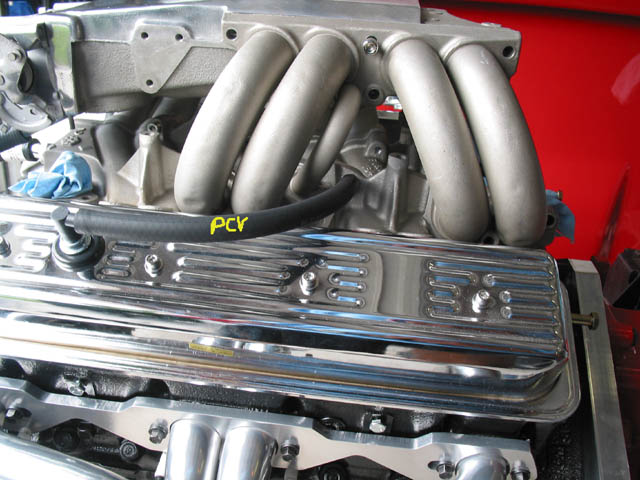
With the engine in car I checked all water hoses routing. Couple of trips to Autozone and got some nice hoses (who knows the app!) that fit the contour I needed to clear everything for the TB heater hoses. the top long one is the breather one. Don't like it too much but will do by now. Here is how they look outside the engine. I have PNs if anyone needs them;
Here is the PCV hose. i had to hunt down the info of how to hook up all these hoses. This is not on Archies video. thirdgen.org and chevythunder.com were invaluable for this;
IP: Logged
03:32 PM
PFF
System Bot
Alex4mula Member
Posts: 7410 From: Canton, MI US Registered: Dec 1999
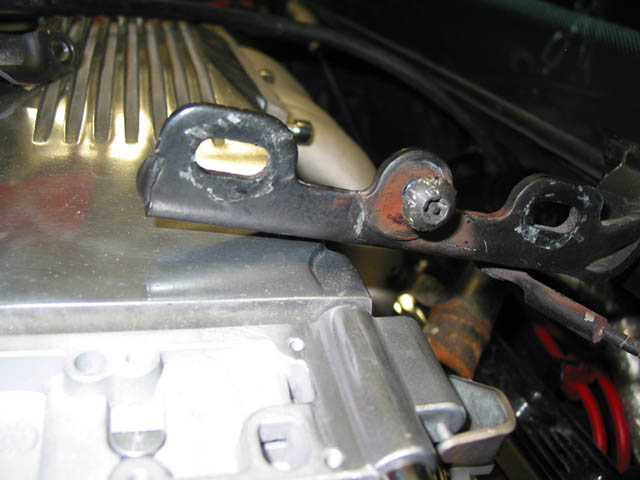
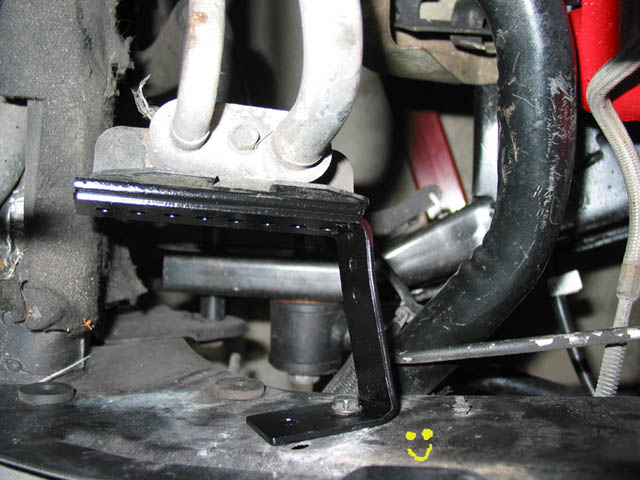
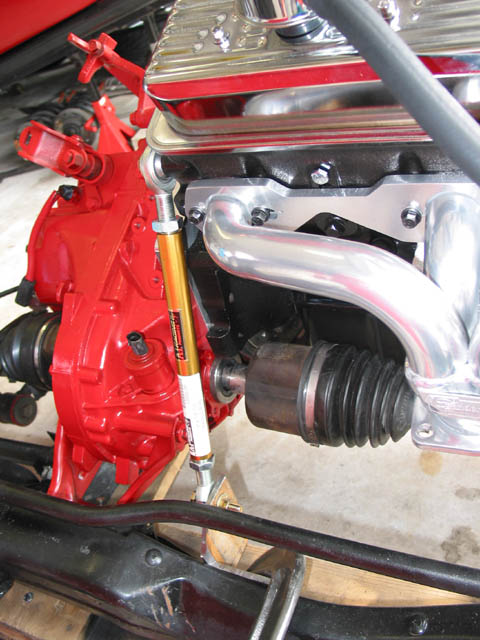
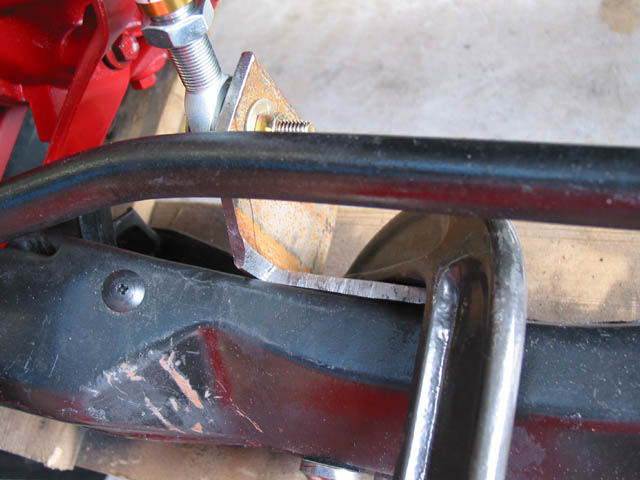
Finally for today; Here is how I'll mount the torque strut (still to be welded). Another little item I wished the kit had were the bushings for the rod ends Also you need to fabricate your own cradle bracket.
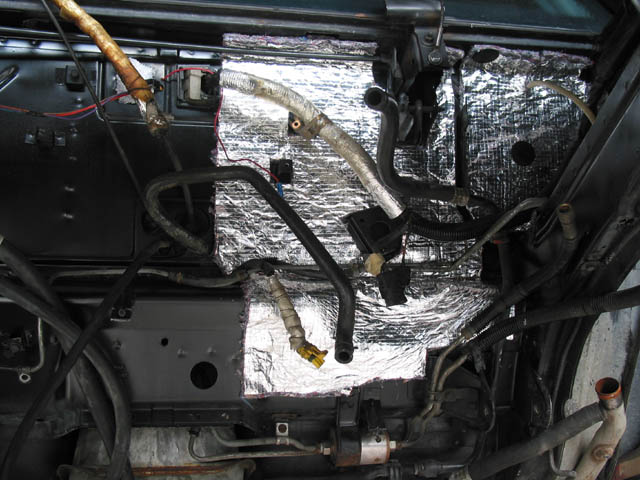
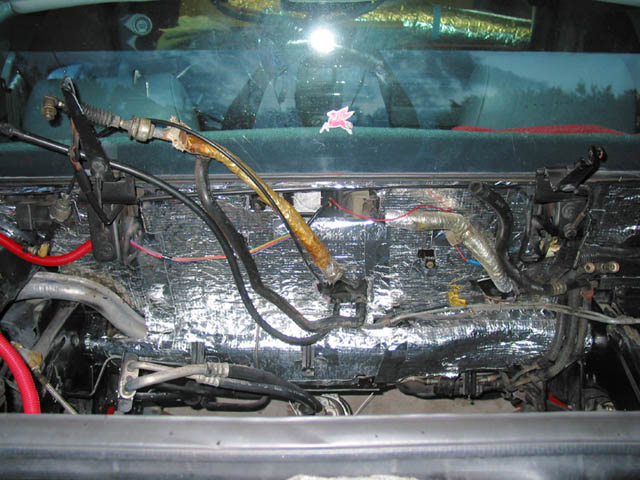
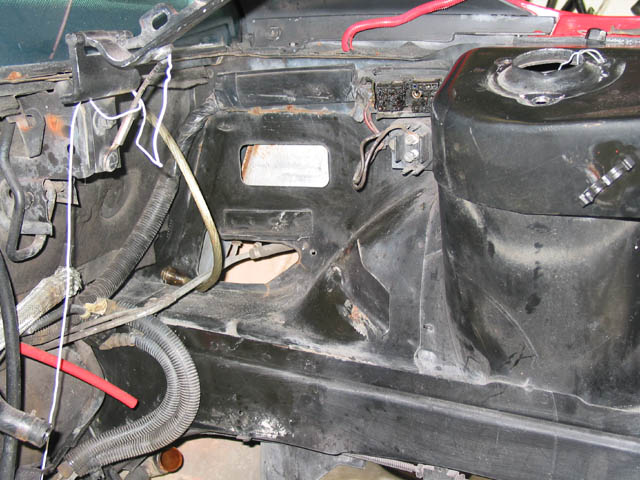
Like many others I removed the stock sound deadning material from the firewall because it was dirty as hell. But I didn't want to leave it like that because that WILL increase cabin noise no matter what anyone tells me. So I went to HomeDepot and with a fellow member recommendation bought a roll of water heater insulation blanket for $20 and aluminum tape. Used the stock one as a model to cut and installed it back. Here is the in-process and end result
C'ya!
IP: Logged
03:42 PM
Master Tuner Akimoto Member
Posts: 2267 From: South Florida,USA Registered: Jul 2003
where did you get the bushing for the torque strut, where its attached to the cyl. head? Or what did you use to make it?
How did you fix cradle where the ac compressor touches? I just hammered where mine hit.
I got some plastic ones at Lowes. They have a big drawer area with these type of parts. I attached the strut to the head. Also I grinded a little (+/- 1/8") the cradle area where the compressor was touching. It shouldn't move much because of the solid front mount.
IP: Logged
04:29 PM
mrfixit58 Member
Posts: 3330 From: Seffner, Fl, USA Registered: Jul 99
I needed to clear everything for the TB heater hoses.
Alex,
Why are you keeping the throttle body pre-heater? Living in south Florida, you shouldn't need it no more than you would on a stock Fiero. On the TPI that I put into my 68 Camaro, I completely elimitated it and it really cleaned up the motor.
Roy
IP: Logged
04:37 PM
Alex4mula Member
Posts: 7410 From: Canton, MI US Registered: Dec 1999
Alex, you are doing a very good job and doing an EXCELLENT job at documenting.
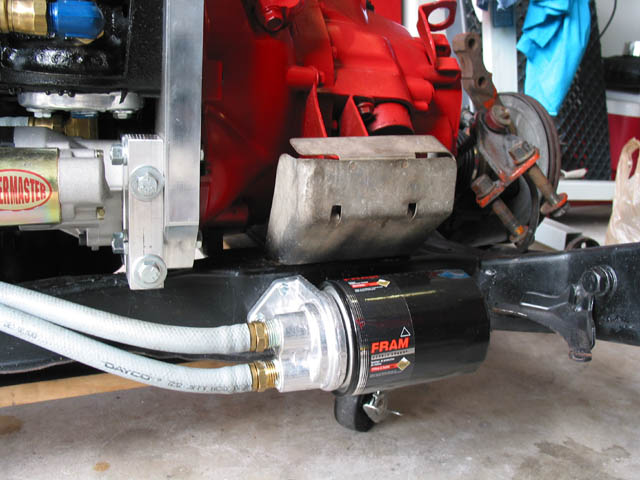
I too have a SBC (Carbed at this time) in my 88 and you have done a very good job addressing most of the "TIGHT" areas. There are varied ways to address them - like the lower tranny bolt - I clearnaced the bolt head to make room. Also, I went a completely different route with the oil filter to eliminate the hoses and to to keep them upright. Here is my buildup thread is you want to see some other alternative methods: https://www.fiero.nl/forum/Forum1/HTML/033900.html
I also went the electric WP route the first time... but remote mounted mine to keep from cutting the sheet metal in the wheel well. I have since gone to a mechanical belt driven waterpump that does not require any cutting and runs directly off the archie balancer with the same belt that drives everything else. This WP is a custom made prototype that might be offered late this year. This won't help you now, but maybe someday. Here are more details of the WP https://www.fiero.nl/forum/Forum2/HTML/055138.html
IP: Logged
08:38 PM
Alex4mula Member
Posts: 7410 From: Canton, MI US Registered: Dec 1999
Thanks Fieroguru. I'm very aware of your threads. The V8 one is in my HD and I referenced it many times. Also I'm aware of your pump. But I'm not sure it will fit. It is so narrow in the 88s. Anyway I'll have it remote. Thanks
IP: Logged
09:36 PM
Archie Member
Posts: 9436 From: Las Vegas, NV Registered: Dec 1999
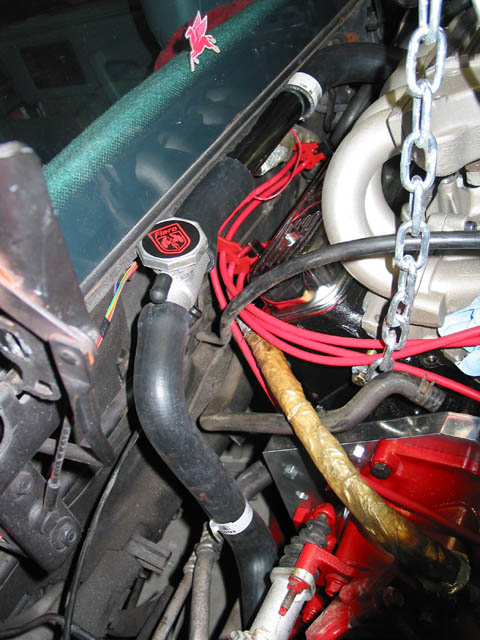
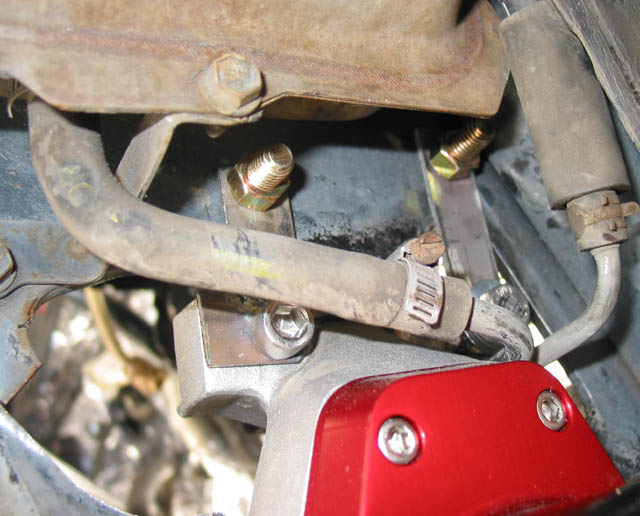
Let's continue. Here is my solution to the driver side water plumbing. I used part of the V6 coolant pipe and then bought couple of custom hoses to run a pipe thru the top of the firewall. Here is more or less how it will look; I'm using a Moroso adapter which conver from the big hose to the smaller one and provides a high point for filling the system;
The hose that connects to the thermostat housing is cut and the other end used at the Moroso adapter. A pipe then connects both ends;
Then I use this "S" shaped hose to connect to the stock Fiero coolant pipe that has been cut to fit;
IP: Logged
05:58 PM
seabee1678 Member
Posts: 116 From: killeen,texas usa Registered: Jul 2004
Use. the 90 to 92 Camero TPI computer as it is the best of the years .Dennis Saucedo [ Total Injection] 210-732-3898 in SanAntonio tex. makes the nicest looking TPI harness. He has been doing TPI sense they came out. You can run speed densidey or mass air flow. You can hear a lot of B S from people who have never run aTPI system. GM compurters are depenable and you can buy one in lower sobula USSR on sunday. I have been running a TPI in my 1984 Toyota pick sence 1995. Its a 383 stroker. Comp roller cam , roller lifters , roller rocker arms , H beam rods, Aris trickflow pistons,Trickflow heads,SLP sesme runners. ARP bolts .Headers .700R4 manual shift trans no TV valve no governer runs on 220 lbs of pressure. 9 inch ford rear end ,detroit locker 3:50 gears. Have driven it to 140 MPH when I passed 7 , 18 wheelers in a row. .........................seabee 1678
IP: Logged
11:09 PM
Oct 13th, 2004
Alex4mula Member
Posts: 7410 From: Canton, MI US Registered: Dec 1999
Sounds like a nice truck Wiring is a lot easier than that. Use Fiero harness, add 2 injectors, extend couple of them and repin the connector. Then use the 165 (MAF) computer (uses same connector) with MAP programming $5D (australian Holden). F-Bodies have been doing it for a long time now when they want to ditch the expensive MAF.
IP: Logged
08:43 AM
tesmith66 Member
Posts: 7355 From: Jerseyville, IL Registered: Sep 2001
Sounds like a nice truck Wiring is a lot easier than that. Use Fiero harness, add 2 injectors, extend couple of them and repin the connector. Then use the 165 (MAF) computer (uses same connector) with MAP programming $5D (australian Holden). F-Bodies have been doing it for a long time now when they want to ditch the expensive MAF.
Please, Please PLEASE give us more info on this...
------------------ 1986 SE 350 V8
IP: Logged
09:04 AM
mrfixit58 Member
Posts: 3330 From: Seffner, Fl, USA Registered: Jul 99
Please, Please PLEASE give us more info on this...
Ditto. I hope you go into as much detail on the wiring as you have on the motor install. I've got a spare V6 harness, complete TPI system, my $400 V8 Fiero, and a BAD itch .
One comment on your coolant hose filler... Isn't it going to be restricted by the deck lid? Meaning, when you onen the deck lid will you be able to get to the filler neck?
Roy
[This message has been edited by mrfixit58 (edited 10-13-2004).]
IP: Logged
10:08 AM
mrfixit58 Member
Posts: 3330 From: Seffner, Fl, USA Registered: Jul 99
Ditto. I hope you go into as much detail on the wiring as you have on the motor install. I've got a spare V6 harness, complete TPI system, my $400 V8 Fiero, and a BAD itch .
One comment on your coolant hose filler... Isn't it going to be restricted by the deck lid? Meaning, when you onen the deck lid will you be able to get to the filler neck?
Roy
It looks like but not. Cap will be at the level of the bottom of the hinge bracket. If you look at your engine compartment you will see there is a lot of space back there (not exactly with the V6). Also I'll be able to move the hose forward a little for fill ups. When I arrive to the wiring I'll give more details. I bought the equipment to burn my proms for the TPI and Fiero
IP: Logged
03:58 PM
Alex4mula Member
Posts: 7410 From: Canton, MI US Registered: Dec 1999
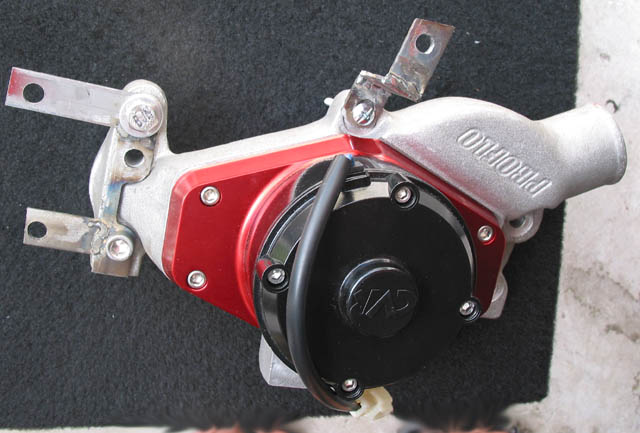
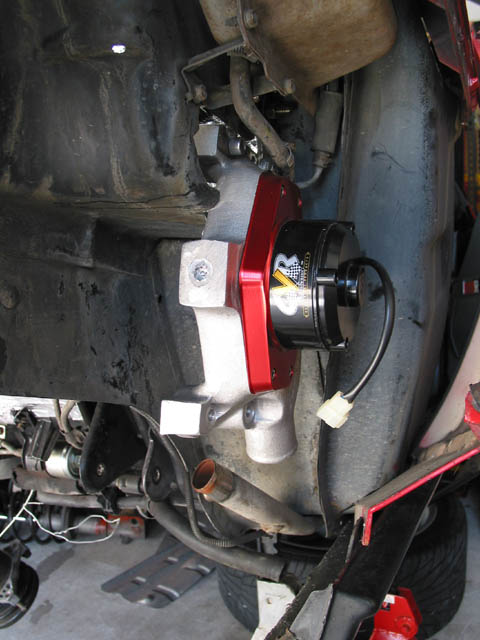
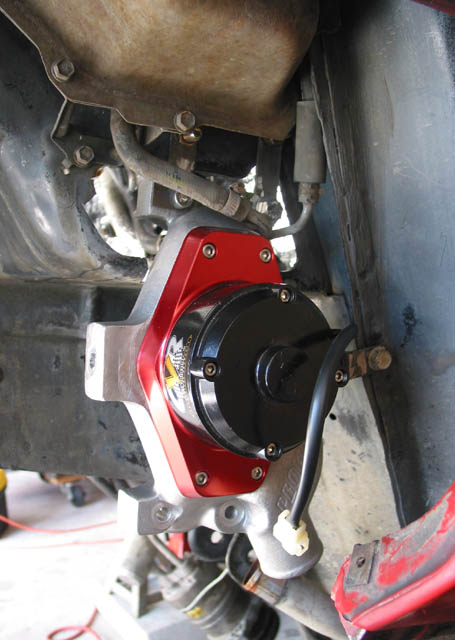
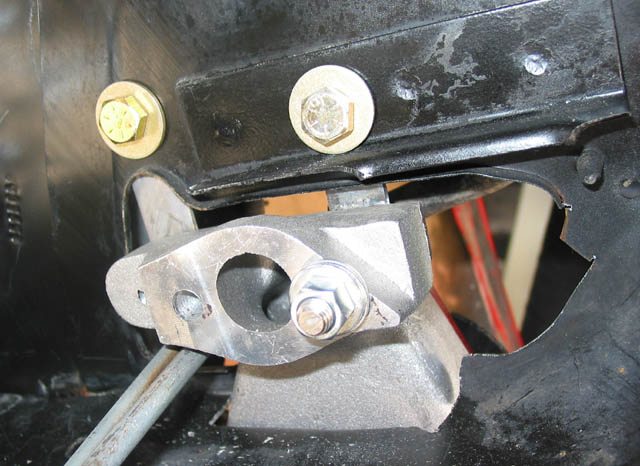
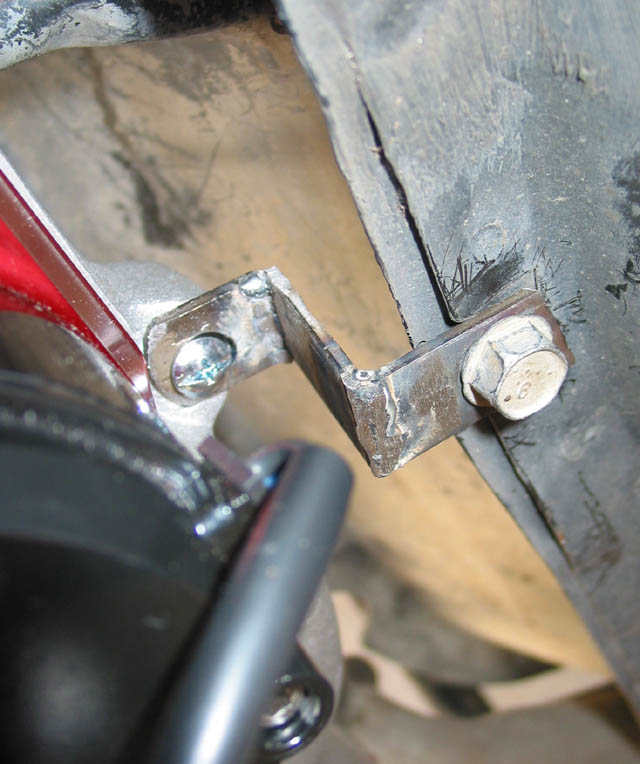
Ok. Let me show you what I did with the water pump. As I said before the space in front of the engine is super limited in the 88s. Even the CSI pump would not fit. So the pump will be located in the area in front of the wheel well. The top will go thru a hole that is there already and the other hose will go thru a hole that I will drill later. Here is the bracket that I fabricated to hold the pump solidly in place;
This is how it looks in place. All the area will be covered with the wheel well liner and 1/4 panel. If it ever needs service I can still easily remove the electric motor which will be the bad part
This is how it looks on the inside; PS: That opening will be trimmed better and all bolts will be replaced with nice new ones
[This message has been edited by Alex4mula (edited 10-13-2004).]
IP: Logged
04:07 PM
Alex4mula Member
Posts: 7410 From: Canton, MI US Registered: Dec 1999


 Please tell me if you are getting bored with so many pictures