Seems like projects changes almost daily with me these days. While the 3800 build progresses, I'm going to pop one of the spare t3/t4s I have sitting around on the GT's 2.8. I'm motivated more by the hole that developed in my muffler this week than anything else. Figured since I need to do exhaust on this car anyway, might as well turbo it! It will get the up-pipe and down-pipe this weekend along with oil feed/return and a fresh set of clevite bearings for the bottom end. While the pan is off for the bearing swap, I will weld in a hose barb.
I've got a spare IC laying around that will be suitable for this project and a set of LS1 injectors to use with it as well. Next week, I'll burn a chip for it and build the induction plumbing and mount the IC time/weather/energy permitting. I'll post up some pics on Monday for those interested.
IP: Logged
02:45 PM
PFF
System Bot
FastIndyFiero Member
Posts: 2546 From: Wichita, KS Registered: Aug 2002
lol. I'll break something don't worry My record for a turbo build was a grand prix from scratch during an overnighter. No tuning and nothing fancy but it was boosted in less than 24 hours straight work hehe. Called in sick the next day for work...
[This message has been edited by caddyrocket (edited 11-12-2004).]
IP: Logged
03:49 PM
trigger Member
Posts: 494 From: dubuque, ia 52003 Registered: Jul 2000
i'd love to see the pics. Someone did this a year or two ago. I dont remember hearing about him getting it tuned right... But he said it was a performance *boooost
Well I had the best intentions but ended up delivering parts I sold all weekend. I got far enough into it to pick up some clevite bearings and build the oil feed line. I cleaned the garage to make some room for the project on Sat but ended up driving to Joplin to meet a guy buying my 4T65EHD. That killed most of the afternoon/evening. Sunday, I drove to Memphis to meet a guy buying the Moser 9" from my turbo Camaro. By the time I got home, I had about enough energy to cap off the oil feed line, fix a rotted vacuum hose and go to sleep. The good thing is that I have a little extra money to put toward the 3800 buildup.
I snapped a couple pics of the oil feed line setup but it's a pretty simple Tee. I'll post them up tomorrow if I remember to bring the disc into work.
Oil feed line parts list 1 - 1/4in NPT tee 1 - 1/4in NPT to 1/4in hose barb 1 - 1/8th in NPT to 1/4in hose barb 1 - 1in x 1/4in nipple (I used the shortest one I could find to keep the sender lower 1 - roll teflon tape 1 - 4ft length of 1/4in fuel injection hose (must be rated for fuel injection as that is designed for the pressure and holds the heat just fine) 2 - hose clamps
Thanks I wish it were more budget focused but these just happened to be parts I already had. The decision to put it on the 2.8 was a bit impromptu! I think it was motivated more by the fact that my wife owns me on the highway in her Trailblazer! The TB is pretty quick and seems to do well on it's own but I can't have my wifes' SUV beating my Fiero from a roll. Not good, must be fixed NOW!!!
Besides, the exhaust noise is about to drive me nuts. I had to turn it off at the drive through to order lunch. ick
[This message has been edited by caddyrocket (edited 11-15-2004).]
IP: Logged
01:10 PM
avengador1 Member
Posts: 35468 From: Orlando, Florida Registered: Oct 2001
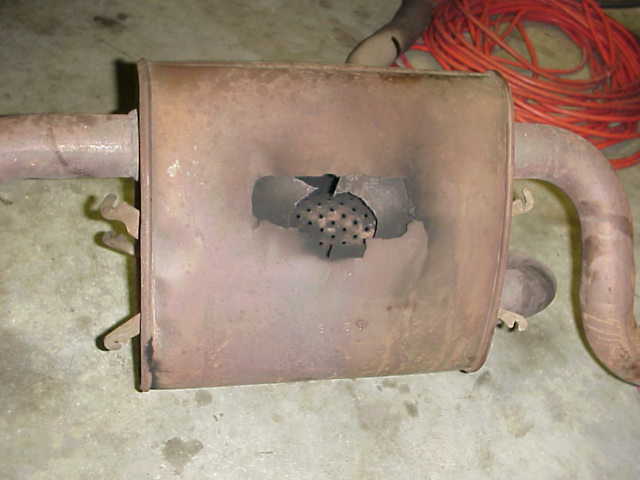
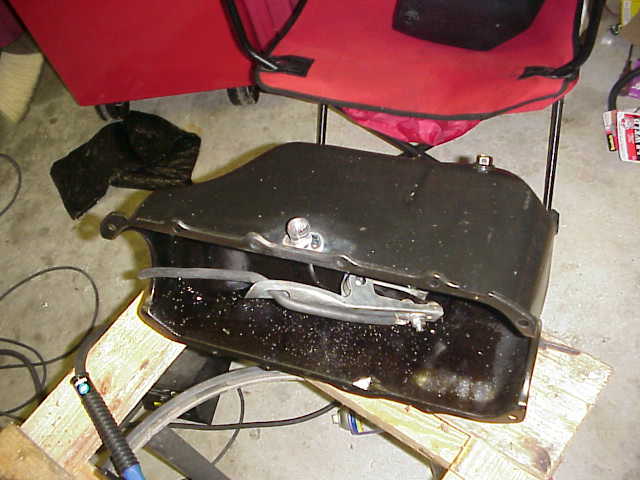
I got a little motivation last night and desided I can't take the noise anymore so I backed her into the garage and started tearing her down. First came the exhaust. When I finally got the exhaust down, I noticed the source my my headaches (litterally). The muffler had a nice 5inx3in hole in the middle of the trunk side. I guess I know what it feels like to be inside a subwoofer enclosure now. Since I had the exhaust off anyway, it looked like a good time to attack the bearing swap so I unbolted the motor mount, raised the engine, and removed the mount and bracket. Pulled all the oilpan bolts and dropped it down. By this time, I was getting a little tired so I decided to call it quits but I had to pull one of the rod caps. The bearings looks surprisingly good although there appeared to be some fatigue over time on the sides (where the halfs meet). While the pan is off, I will weld in the oil return barb.
In anycase, I will finish up the bearing swap tonight fresh with a new oil pump and button her up. I have a bunch of pics but left them at home in a rush to get out of the house this morning. I'll try to do better tomorrow.
FINALLY remembered to bring some pics in. The last couple evenings were spent replacing the main and rod bearings and the oil pump. Replacing the mains in the car is something of a PITA but the rods are quite easy. The rod bearings showed their age but were in pretty good shape over all. The main bearings were also in decent shape but there were groves in them a couple of them. Must have been a peice of debrish as I checked the crank and everything was fine. So I reassembled the bottom end and got the pan back on. Below are the pics of the turbo related modifications so far. I didn't take any of the bottom end replacement as it's already been pretty well documented on the board. If anyone has any questions relating to that, please feel free to post.
Here is the motivation for the whole project. This damn thing about drove me nuts listening to it!
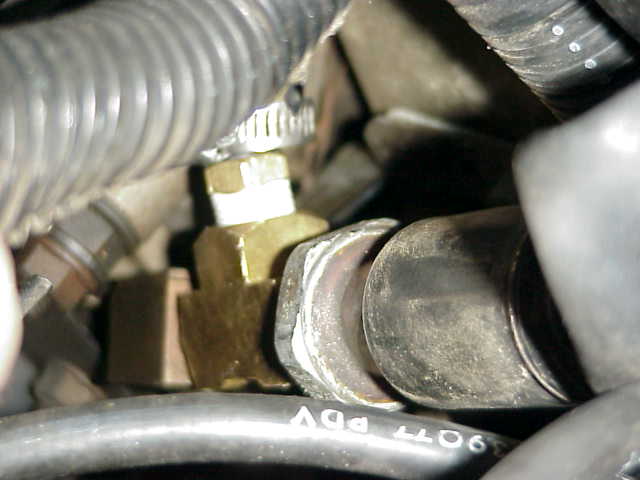
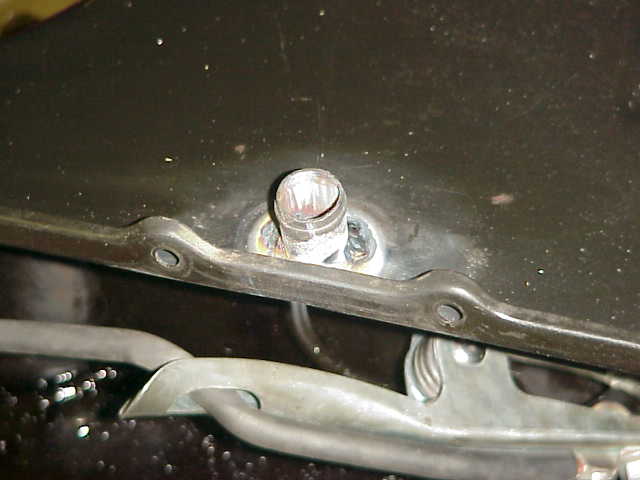
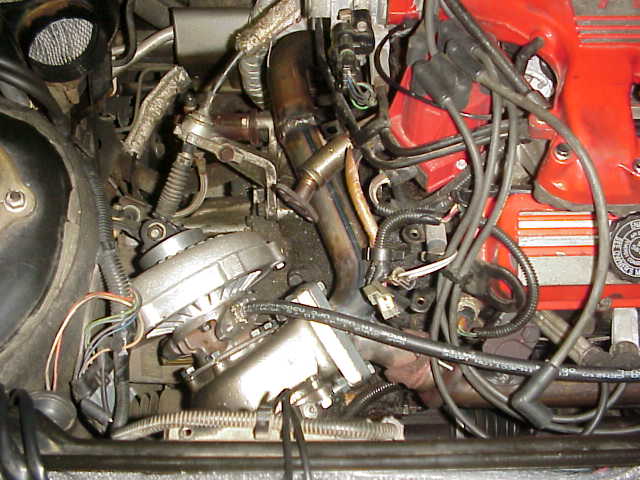
Here is a pic of the installed oil feed line. This part is pretty easy as I described above.
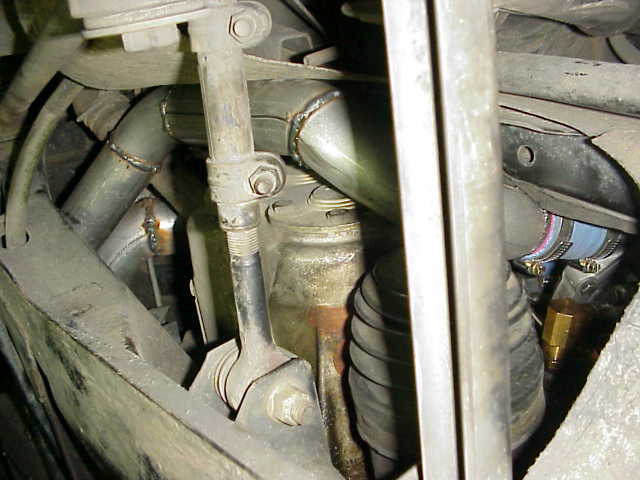
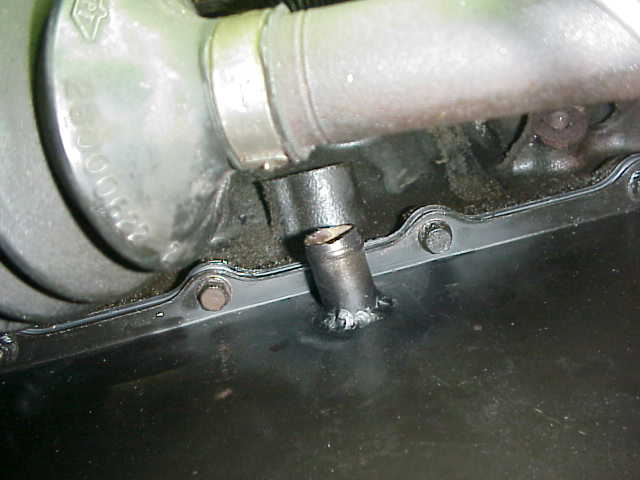
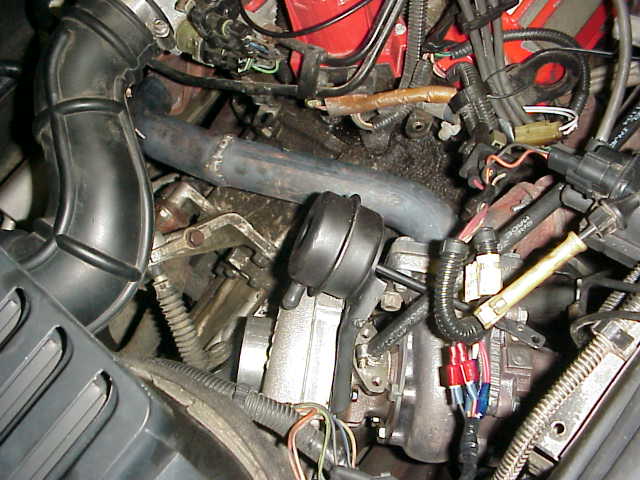
Here is are a few pics of the hose barb I welded in the pan. I put it on the rear side of the oil pan between the 3rd and 4th pan bolts (counted from the rear forward). As you can see it's slightly offset toward the 4th pan bolt.
I'll post up some more as the build progresses. I've only been working on this a couple hours a night and spent a lot of time cleaning the gunk off the bottom of the engine. A shower in Dawn is required everynight!
Finally got everything around under the car. Got the motor back down in the craddle and did some basic maintanence while under there as well. New fan belts, fuel filter and a call to Enzyte.. uhhh
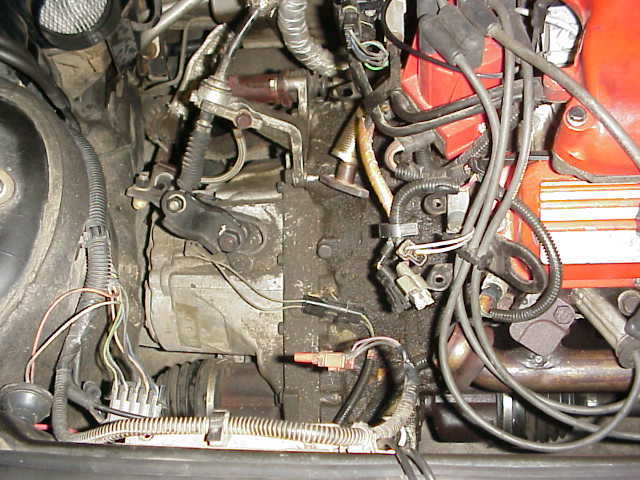
I didn't have much time to get started on the turbo kit but I did get the crossover pipe and some other stuff out of the way to start positioning the turbo.
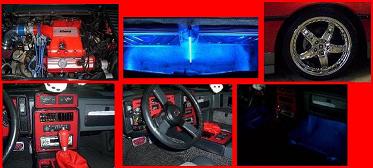
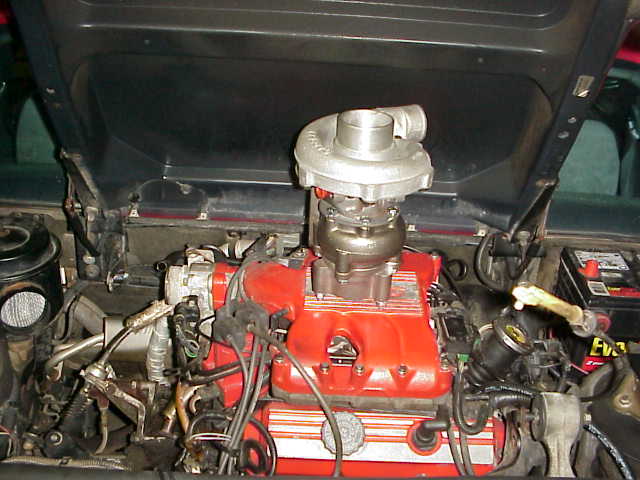
As you can see, there is still a ton of work to do but here is a little natural Fiero enhancement..
Finally got it installed. Unfortunately a good friends father passed away on Sat so we had to drive down to OKC to visit him and his family but this is the results of stairing at the engine bay all night friday and a good part of the day on Saturday. I can't tell you how many times I move the turbo around trying to find the orientation I was satisfied with. The pics don't do the jigsaw puzzle of an install justice but I'm happy with the placement as there is plenty of room around the turbo.
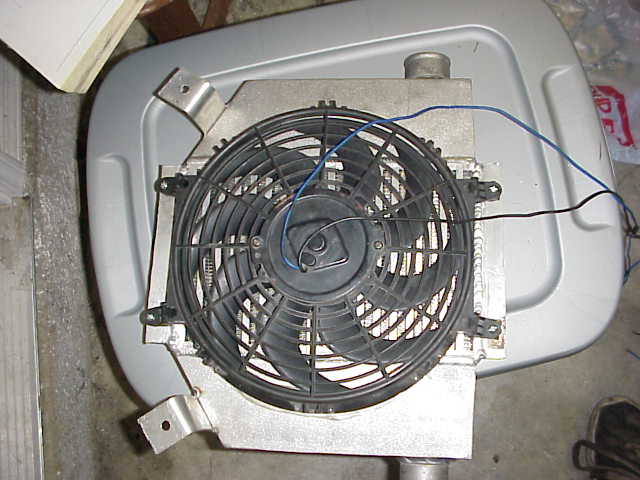
Left on the todo list is... Weld some brackets to mount a fan on the IC Weld some mounting tabs on the IC Figure out where the hell I'm going to put the IC (It's a little bigger than the Saab/Mitsu/Volvo ICs I've seen a lot of folks use) Build the snake of IC plumbing Write and burn the prom Hook up and mount the boost gauge and pyrometer Install the LS1 injectors Build the intake tubing (from filter to turbo) Pray it all works well
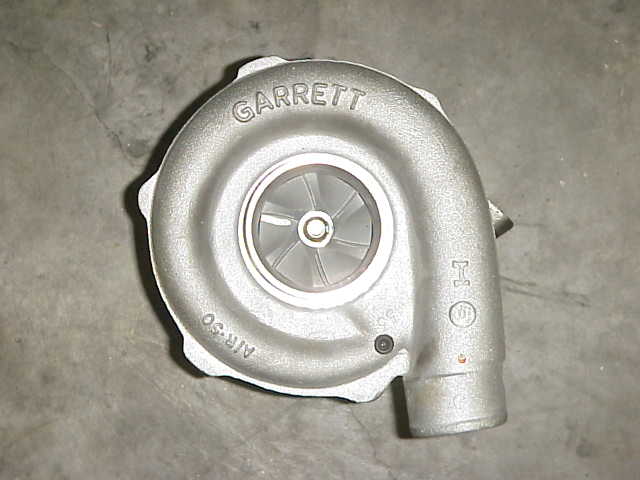
Actually one of them is quite a bit bigger and has been set aside for the 3800 build that I keep telling my self I'll get around to finishing some day.
IP: Logged
06:01 PM
Nov 23rd, 2004
Rhino88gt Member
Posts: 718 From: Maumelle, AR Registered: Jun 2003
interested in making another mounting bracket and crossover??
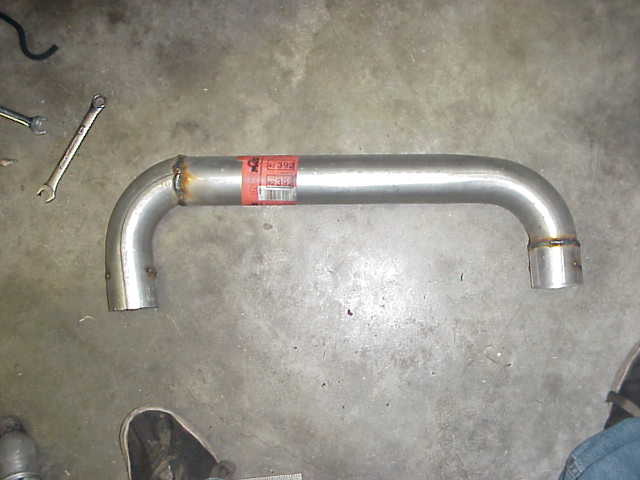
LOL, yeah maybe. I thought about making a kit out of this if it turns out well but I could probably reproduce the pipes It's hard to tell in this one but I just butchered my stock crossover and used the flares and replaced the rest with 1.75in pipe.
IP: Logged
11:37 AM
Nov 24th, 2004
fieromadman Member
Posts: 2217 From: Oconomowoc WI, USA Registered: Jan 2003
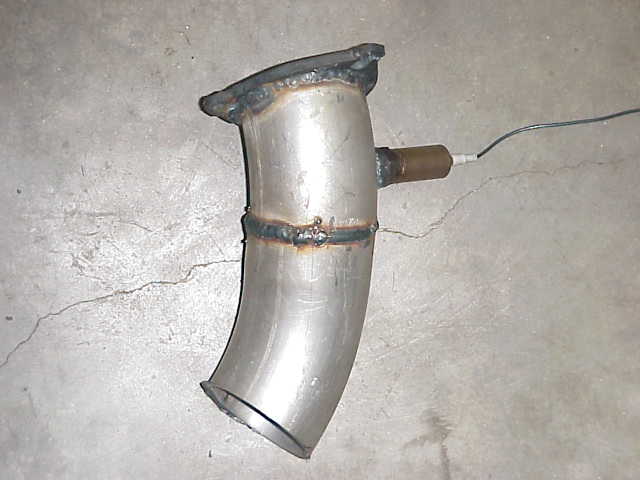
The only update I have today is that I finished building out the down pipe for now. I extended the down pipe out to the drivers side cavaty and used a single 3in chrome slash cut tip. I like the way it looks. Incedently, if anyone in Oklahoma wants my stock (cat removed) GT exhaust, lmk. You can swing by and pick it up. In anycase, it's a straight 3in downpipe that gives the car a nice rumble and you can really hear that turbine. I am going to put an electic butterfly in this DP and build a y into it so I can put a CAT back in the other side. You know, want to ensure I'm legal and all.....
In anycase, this way I can switch between street legal mode (quite) and race mode (not as quite). Last night I removed the stock 2732 chip from my Formula's ECM and soldered in the adapter for the 29C256 chip. I think I might build my own adapter later on so I can install more than one program in the chip and switch between them. For now, I burn 3 chips. One with the stock bin, one with the 2bar map enabled, and one with the injector constant adjusted for the larger LS1 injectors + previous changes. Anyway, this way I can test the ECM, then swap in the 2bar map, test that program, then swap in the larger injectors and test them.
Once I'm satisfied the new components work well in NA mode, I'm going to finish building the induction system and get some boost on this thing. If things go well, I'll head up to the dyno hopefully this weekend to complete the tuning portion.
[This message has been edited by caddyrocket (edited 12-03-2004).]
Well I didn't make as much progress over the weekend as I had hoped. This was due mostly to lack of motivation along with a Friday night company xmas party, a Saturday night Margarita fest with our neighbors, and a Sunday night 'I don't give a (*&_'.
In anycase, I got the computer and sensor modifications done. For those of you ordering adapters from Moates, Craig is an awesome guy and very helpful however be careful that the adapter is pinned out correctly. I ended up with both the .6 and the .45 dip spacing adaptors (didnt know which I needed) but it turns out the 28pin socket on the adaptor for the .6 (which the Fiero requires) was soldered on upside down. IIRC pins 20-24 are connected to make the 29C256 emulate a 2732. The .6 adaptor had pins 19-23 connected so it didnt' work. Of course I thought I was going to be cool and solder the adapter directly to the board to keep the skyscraper look down. but no. I had the fun of spending most of the day Saturday trying to remove all that solder to get the adaptor out. I ended up breaking a pin off the .6 adapter but when I examined it and compared it to the .45, I noticed the pinout differences. So I took a 28pin socket and soldered some desolder braid across the correct pins, stuck it in the burner with a 29C256 and it successfully read as a 2732. Awesome. So I took the two 12 pin risers I had, soldered them into the board (like I should have to begin with), stuck in the DIY adapter with the bin from the stock 2732 and it started and drove just fine. SUCCESS!!!
I put the 2bar map in with the 1bar map and it idled rough. Shut it down, swapped in the 2 bar map, worked like a champ. So I'm down to the injector swap. I changed the BPW from .153 (stock) to .10251 (to account for 33% larger injectors). The LS1 injectors at 3bar fuel pressure flow ~22.5lb/hr. Then came the injector swap. PITA. I pulled apart the upper intake and took it off. I still don't fully understand the engineer's logic in designing the vacuum hoses the way he/she did but it's what is there. When I got the fuel rail off I noticed the stock injectors are a little less than a 1/4in LONGER than the ls1 injectors. That isn't really that big of a deal normally. I've swapped in plenty of varying sized injectors over the years but this swap offered some unique problems. I guess that is par for the course with Fieros!
Problem 1 - The retainer clip grooves on the LS1 injectors did not encircle the injector as the stock clips require. It a groove on each side. I used my bandsaw to CAREFULLY extend the groove around the injector to use the stock clip.
Problem 2 - I reinstalled the LS1 injectors into the fuel rail. Using the stock clips this pushed the injector as far into the fuel rail as possible. It didn't require force to get the injector far enough into the rail to use the clips but it bottom it out. I was worried by this point that the injectors wouldn't seat in the manifold bosses. I was right. The o-rings just barely sat in the tops of the bosses. On other cars, I've been able to omit the clips just fine but that wasn't an option on the Fiero. I tried it and the fuel pressure pushed the injectors all the way down into the deep stock bosses on the intake and leaked around the side. Which leads up to the third and final problem.
Problem 3 - I had to cut new grooves about 1/8th inch above the original grooves on the LS1 injectors to ensure there was enough o-ring on each side of the injector to seal. A little more time on the band saw and holding a jigsaw blade in my hand to clean the grooves up and I was done.
Everything went back together well except for the IAC tube (?) that extends from the throttle body to the bottom of the middle intake. I could rant for an hour on forgetting that but no need. By the time I got to here, it looked like a good stopping point so I am still running on the stock induction system. It makes lots of turbo noise with no turbo go. Hopefully I get motivation to finish it before the weekend so I can build a proper exhaust system for it.
I just wanted to throw up a little side note observation having driven the car the last couple days with the new injectors and basic programming, the ass-o-meter likes the feel of the car. I wasn't expecting the car to wake up at all but it seems to like whatever I've done to it!
IP: Logged
09:17 AM
Scythe Member
Posts: 1055 From: Burke, Virginia Registered: Apr 2003
I can make you one if you want but i gotta finish mine first! It's funny that this thing has over 1000 views and only 26 replies! I guess I need to get something done to post about!
I have been one of the ones who keeps looking at this tread.... I think you are doing a great job and I whish I have some of your knowlege... keep up the good work and you know we like seeing pictures, please post some more
IP: Logged
12:30 AM
Scythe Member
Posts: 1055 From: Burke, Virginia Registered: Apr 2003
Actually one of them is quite a bit bigger and has been set aside for the 3800 build that I keep telling my self I'll get around to finishing some day.
how much $$$ you want for one that will fit a 2.8?
Is your turbo supported solely by the Ypipe, or do you have it mounted to the trans as well??
Yes it is currently. However I've ran a bead around the joints on the manifolds to reenforce them. They cracked on my formula so this was the one if it's first mods. I'll build a bracket that replaces coil mount as I finish up the kit but I'm confident the manifold will hold fine for this prototype.
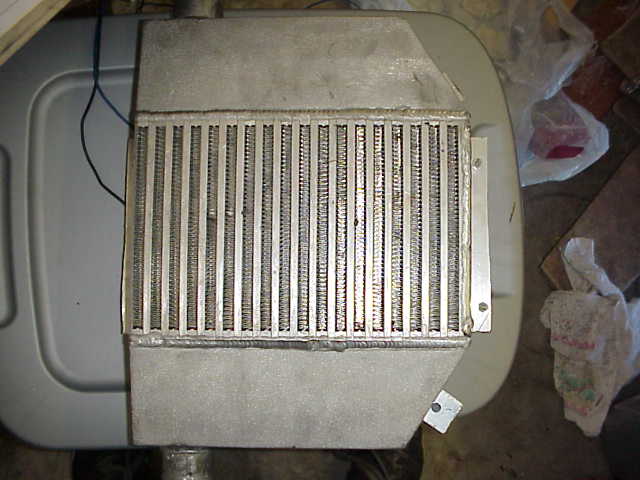
Here is yesterday's progress. I got the intercooler mounted in place and the tricky little ***** of an IC pipe routed from the turbo to the intercooler. Here is the intercooler. Had I built an intercooler specificly for this application, I would have done this a little differently. But it's what I had around. Most likely, I will modify the end tanks and inlet and outlet orientation or build a different IC but this will work for now....
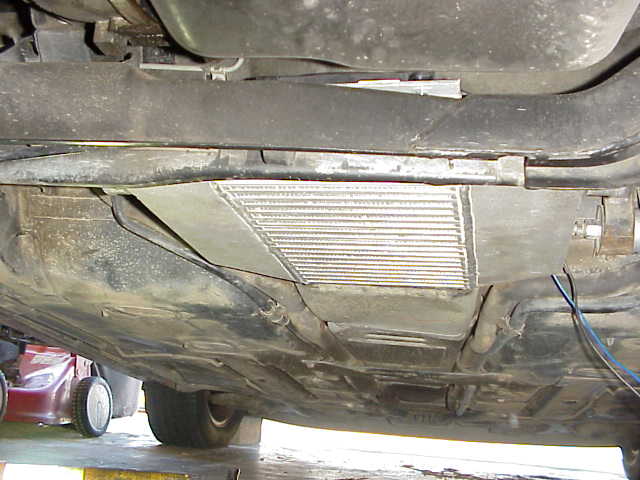
Here is a pic of it mounted in place. I will probably build a small spring loaded air dam for it. It did go in cleaner than expected...
And here is the snake that goes from the turbo, back and around the transmission, down and over the craddle, between the coolent tube and down and right to the IC. Each weld has a funky unique bend and pictures down to this justice but I'm happy with the way it turned out!
From here I just have to build the IC to TB pipe, put in the bov, and some misc work and I'm done with this phase! Next phase is to build an electric butterfly and mount it in the current open down pipe. Then Y off of it and install a cat or muffler. That way I can switch between an open down pipe and a normal exhaust system easily.
Did that hole cause you trunk carpet to melt. I have seen that before.
Sorry, which hole are you talking about? I guess I need to reread my posts. I don't seem to be having any heat problems at all. The trunk carpet is just fine. As tight as it looks, all the hotside parts have as much spacing as possible. The decklid is surprizingly cool. With the introduction of the intercooler and it's fan, there will be quite a bit more comparitively cool air into the engine bay. So far so good in the heat area. I heat shield for the turbine housing is on the list of todos but it's pretty low on that light right now. It was much higher until I noticed there didn't seem to be excessive heating of anything around the turbocharger.
IP: Logged
01:55 PM
Dec 14th, 2004
Scythe Member
Posts: 1055 From: Burke, Virginia Registered: Apr 2003
I finished up the final IC pipe last night. I built it into a two piece unit to make installation easier. At the joint between the two, I used and exhaust coupler so I could slide the u shaped peice into the end of the jshaped peice. I then used silicon tubing to seal it. when together, it is as stiff as if it were welded. This will prevent excess flex in the two peice pipe. Here are the pics...
I had already covered the flare union to take the 2in pipe to 2.5in pipe with the silicon coupler. I would have taken it back off for the pic but it was a ***** to get on so it stayed It connects the IC to the second peice
This one is all 2.5in pipe and connects the first pipe to the throttle body.
This is the turbo to intercooler IC pipe. You can see how it snakes it's way down out of the turbocharger, around the trans, and over to the IC. You might ask if it rubs on anything and the answer is no. It looks like everything is very tight, and it is to some degree, but it all came together well.
And here it the finished product! I'm going to chrome or paint the IC pipes and paint the down pipe black. It's already got a chrome slash cut tip that looks pretty cool but I want to hide the aluminized pipe leading to the tip.
As far as driving impressions, I'm running a 4psi actuator and the boost gauges is registering between 2-3psi. I need to ensure it's sealed well. 1st and 2nd pull really welll. The turbo instaspools but as yet doesn't seem to creep. In 5th on the highway, the turbo is online all the time and brings the part thottle boost without hesitation. From a roll at any speed, the boost is there by the time you get the thottle to the floor. From a dig with no prespool it still hits just off launch so you get a good set back in your seat. It climes to 100+ without thought of running out of steam and is happy to keep pulling through 5th gear. Max speed at this point has been 110 and it doesn't think twice about doing it. Overall, this is how I think this car should have felt from the factory. 1-3 will set you well into your seat and 4-5 still gives undieing acceleration.
I'm very impressed with this kit so far. The overall drivability of the car is 500% better than stock. The car reacts in an instant to changes in throttle position where stock, it's almost like asking it for a favor to get it's butt moving. I'm going to do some tuning on the car and get the boost up to around 6psi. It's not really all that fast especially compared to my 550hp Z28 but it's really fun to drive. Still do to is permanently mount the boost gauge, install and mount the pyrometer, dial in the tuning, increase the boost, finish the exhaust system, wire the IC fan, etc, etc, and make everything pretty. Then the limits experimentation starts. [evil] hehehehehe [/evil]
[This message has been edited by caddyrocket (edited 12-19-2004).]


 Hopefully I get motivation to finish it before the weekend so I can build a proper exhaust system for it.