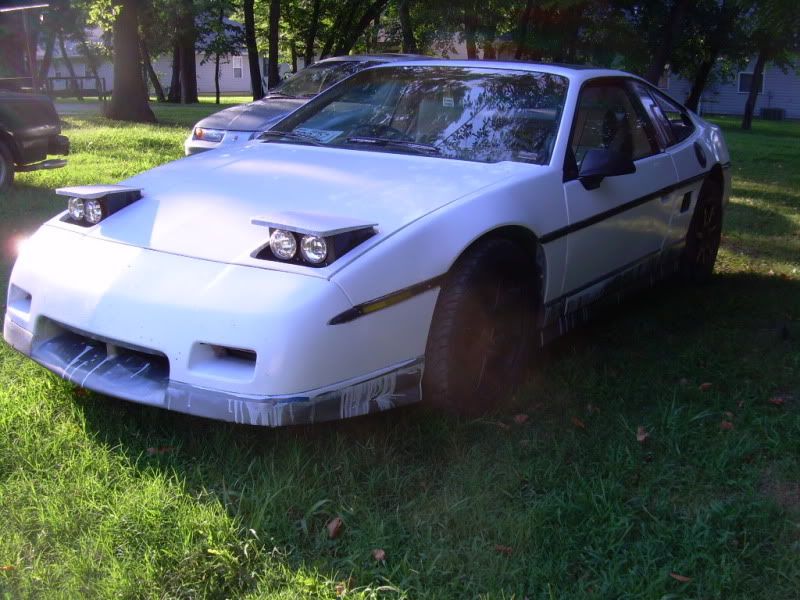
Some GT's had the luggage rack but it was a rare option (the notchback rack is different and wont fit right on a GT decklid either). Mine actually came with a wing but I like the look of the luggage rack more so I got the rack from a member out in California. I had to very carefully measure all my holes and drill, but otherwise it was easy to swap in. I'll have more pictures of it when I get around to painting it and installing it.
I actually bought mine from BackOnHoliday, the one shown in his pics with dimensions. The white car with the rack sorta what I'm aiming for with mine, except that instead of gray lower GT trim, its going to be black. Should be pretty spiffy when its done
[This message has been edited by Alibi (edited 06-19-2010).]
Man oh man. You aresure making a mess of your car. Who told you to use Rustoleum on it? It will dull out in a month or two and you will need to do it all overagain. 4 coats - 6 coats - 8 coats of paint?? If you used paint that was designed for a car you would be spraying down 2 coats and that's it. no wet sanding and all that crap.
It works. Trust me. I've read around 1000 pages of a couple hundred different people trying it with good results. So what if I put more work into than a spray job? I don't have the equipment to spray it and I've got the time so why not? And how the heck do you think paint was applied to cars back in the day before spray guns?
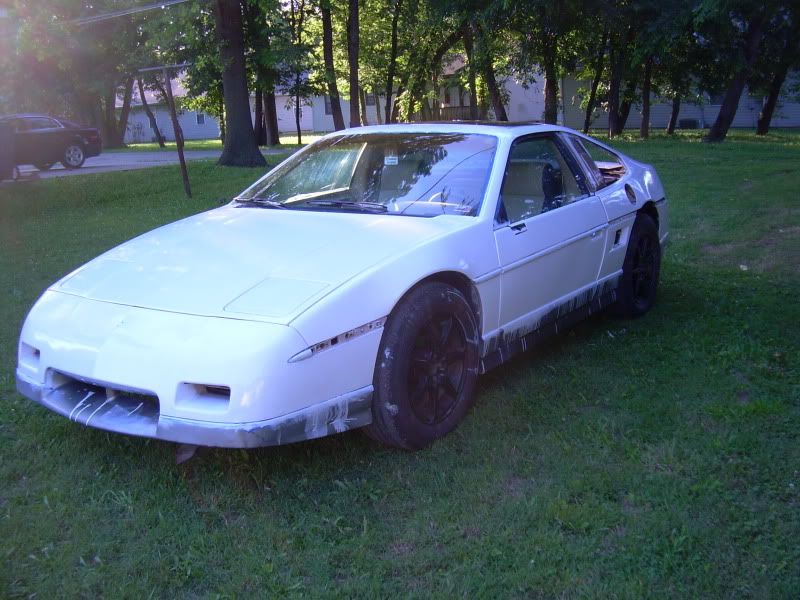
Got another layer of paint on. I think 3 more coats and it'll be done. Then I'll have to remove my masking, sand down the drips on the GT trim, paint my other trim bits and re-install, then mask off the GT trim and paint it.
So... by the time I get all that dome it'll probably be late next week.
LOL – Apparently you do not know your history my friend. Spray guns have been around as long as they were painting cars. It’s not so much the fact that you are painting your car with a dozen coats of paint using a roller and Rustolum from the hardware store. Hea, it’s your car after all, do what you want. It’s that you are making such a mess. What’s with all the runs and drips all over the lights, tires and trim. I wouldn’t do a job like that even in my teenage years. You must be a moron to post photos like that.
You're entitled to an opinion but theres no sense in calling me a moron. I have drips... so what? I'm still driving the car so its kinda hard to mask over everything that I need to stay legal (the lights and tires, namely). There are magical things known as "thinner" and "sandpaper" that do a pretty good job of making such things go away though so I'm not really worried about it. Most of the drips actually came from my girlfriend when she insisted that she "help" by putting some paint down... ugh
If you wish to provide me with constructive criticism, then go right ahead. Otherwise, GTFO.
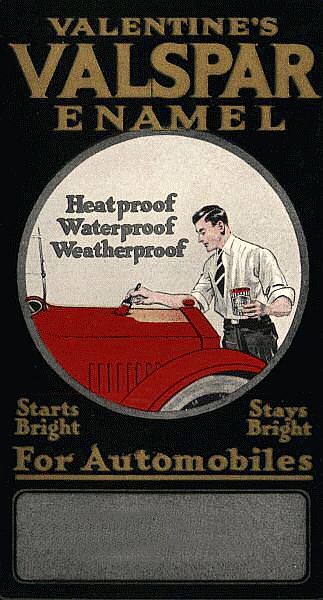
Note that the car on the brochure's cover is being painted by hand using a brush. This was how cars were painted in that era. The paint was carefully applied with a fine bristle brush, and then when dry, hand rubbed and polished to a high shine. Even though the Stanley Twins had invented the air brush (a form of atomizing sprayer for artistic paints) the technology to paint a car using a variation of the air brush we now call the spray gun in a special paint booth had not been perfected for mass production.
LOL – Apparently you do not know your history my friend. Spray guns have been around as long as they were painting cars. It’s not so much the fact that you are painting your car with a dozen coats of paint using a roller and Rustolum from the hardware store. Hea, it’s your car after all, do what you want. It’s that you are making such a mess. What’s with all the runs and drips all over the lights, tires and trim. I wouldn’t do a job like that even in my teenage years. You must be a moron to post photos like that.
Unwarranted. I, as I'm sure many others, happen to find it interesting. Helpful criticism is alright - calling someone a moron for no reason is not. So I agree with Alibi. Don't like it, gtfo.
Continue, good sir. What all did you use to sand it initially? I'm thinking of sanding, priming, and painting my roof panel as an experiment. The paint is horrible and damn near to the fiberglass.
The grit of sandpaper depends on how bad the paint is. Where mine was really oxidized I went down to 150. I think the 150 paper I was using wasn't actually wet/dry paper, but getting it wet didn't seem to hurt it any. Most everything else was done with 320 wet to get it smooth to the touch. Seemed to work pretty well and by the time I put down some more coats with sanding between every couple (440 and now I'm up to 600) the sanding marks are pretty much gone.
You don't have to use a primer, but doing so would probably help fill in sanding scratches better and would make getting a solid color coverage quicker. Rustoleum makes a primer in a can, but I imagine a couple of rattle cans would work just as well.
I noticed something interesting about the roof while I've been painting my car. I've been starting on one side of the car and then working my way around but a fproblem I ran into was that I would only paint half the roof and then by the time I got around the car to the other side, the half I had painted had already gotten tacky. When I painted the other half, seeing the overlap was pretty obvious. Now I'm working from the top of the car down by painting the whole roof at once, then down the A and B pillars, then the whole hood, whole decklid, then the rest of the panels. It works a lot better that way so that I'm not trying to roll fresh paint over some thats already started to set up.
[This message has been edited by Alibi (edited 06-19-2010).]
MacGyver before you start spouting off what's not going to work and how long it's going to last, I suggest you do some research. This method is well documented and an article was even done by a muscle car magazine.
Keep up the great documentation, Alibi. I will be doing what your doing sometime this summer. My clearcoat is peeling. brian
IP: Logged
07:19 AM
PFF
System Bot
Pete Matos Member
Posts: 2291 From: Port St. Lucie, Florida Registered: Jan 2010
ALibi, Hey man, now that you have some more coats on it, it is really starting to look good. I think once you have like six or sevel you will really start to level out and shine. It really is kinda amazing what you can do with a roller on the cars. I am using a nice spray gun but that really does not mean it is better, in fact using a roller and many layers may actually give it some strength as the paint is drying and then getting painted over building up some layers that may actually be stronger in resistance to chips and whatnot. That is just a guess of course but I would not be surprised. I had always heard that even spraying,, many light coats is better than a few heavy coats.... I guess the runs and drips are not a big deal really since you said you were gonna paint the lower areas last a different color. I would not be surprised that if you use some acetone on them before you sand and paint them that most if not all of that would come right off. I use it to clean my paint gun after I painted the red on and it was kinda drying on the little drips I got on the gun and it dissolved it pretty quick, just make sure you only get it on the side skirts. The wheels are no problem, it will come right off them with most cleaners, just try to find one that is kind to rubber..... perhaps try the acetone in a small area lightly to see if it hurts the rubber before you hit the whole tire.....
I know it will look smooth and shiny when you are done but I still say I would wetsand and buff it and I think you would be amazed at how great that is gonna look when you are done.... I like the white really and from what I have seen on the Rolled on forum and others it is the most forgiving of the available colors and buffs up VERY shiny and smooth.... Keep up the good work man, you're an inspiration.....
BTW, did your car have the chips and little cracks around the sunroof? Mine does and I am gonna hafta fix them before I paint the whole car. Kinda sucks and I am not terribly sure what the best stuff to fill it with is, I hate to use bondo altho I do have some here. It is fiberglass underneath that area and some of it has chipped up. I was just gonna break the little chips open, hit it with a rough wheel on my die grinder and then fill it with whatever is recommended. I could fiberglass it in too as I have some leftover from a recent project. Gotta see what I need to do there.... peace man and keep bringing the nice pics....
I've heard that spraying it works equally as well as rolling so if you've got the equipment, it should turn out just fine. Just experiment on a panel for now to see what works but I imagine that 2 or 3 sprayed on coats would be enough as long as you get good color coverage. With a roller, I've got about 7 coats on the body and about 3 on the bumpers so 2 or 3 more coats ought to do it. After the initial prep-work, there really isn't that much sanding. Wet sanding between coats only takes a few mintues as you're just knocking the peaks off the paint and to scuff it up a little to give the next coat something to grab onto.
I do plan on buffing it in the future, but I hear that its best to let it cure for a couple weeks before trying to really work it hard. I've been asking around my friends to see if any of them have buffers but none so far. So until it cure and/or I get a buffer I'm just going to leave the last coat alone. It should have some pretty decent gloss as-is, but as level as its laying out now it should buff up nicely.
As for the drips, I have masked the first inch down or so, which has caught probably 70% of the drips. Also, I haven't sanded the trim so I'm hoping the drips will more or less peel off the trim. We'll see here in a couple days I guess. On the tires, if I don't get it all off I'm not too worried because those tires are about used up anyway. I need to buy some new ones but I just haven't had the extra couple hundred dollars to do so.
On chips, the worst area is on my hood along the windshield and on my headlight doors. I also had a couple around the sunroof, but not too bad. I tried sanding to feather the edges and then filling with spot putty, but it only sorta worked. I'm not picky about stuff like that right now though as I need to replace some panels and re-paint in the future so I'll address any other issues like those to get the car closer to perfect when I have some better panels to do so. Until then, I'm just happy with having a fresh, solid color on the car.
Thanks for the comments guys, I'll keep this thread updated as I go. I'm going to try to get two more coats down today but we'll see... I gotta wet-sand out some bugs in the last coat first
[This message has been edited by Alibi (edited 06-20-2010).]
IP: Logged
01:45 PM
Khw Member
Posts: 11139 From: South Weber, UT. U.S.A. Registered: Jun 2008
Man oh man. You aresure making a mess of your car. Who told you to use Rustoleum on it? It will dull out in a month or two and you will need to do it all overagain. 4 coats - 6 coats - 8 coats of paint?? If you used paint that was designed for a car you would be spraying down 2 coats and that's it. no wet sanding and all that crap.
Really? Dull out in a month or two huh... While working at the machine shop the company bought a new International truck. We built a flat bed to go on it. The owners had me paint it with gloss black Rustoleum paint. It stayed shinny for the 3 years I worked there after I painted it and who knows how long after that. I didn't roll it on, I sprayed it using a siphon feed pot gun. I used Rustoleum rusty metal primer. Did a scuffing between it and the gloss black using maroon Scotch Brite pads. I painted a light coat, followed by a heavier second coat. Once the paint had dried I did a little touch up on the underside but the outer visible area didn't need any. No wet sand or buff, this was for industrial use after all. The paint does hold up well. As good as a automotive paint? Probably not, but it's not going to dull out in a month or two.
I've considered spraying mine with the Rustoleum, but you can pick up automotive paint for a few ducats more. But then I have a compressor and spray gun already.
Looking good Alibi, and I'm sure the runs on the lights and such could be cleaned up with a rag and some Mineral Spirits. I wouldn't use acetone on them as it tends to soften and cloud plastic, unless your planning to polish them.
[This message has been edited by Khw (edited 06-20-2010).]
If you've got all the proper equipment and a garage then I figure you might as well use modern auto-specific paint. I don't so I'm just going with the next best thing that I can do given the situation.
I've been using mineral spirits to thin the Rusto so I was planning on using that to clean up some of the drips but I'm not at that point yet. My drivers side tail light has a crack in it so I'll probably just replace the set with either new lenses from the FieroStore or a Corvette-style panel from KHines but I'm in no rush right now.
I didn't get any more paint on it the last couple of days since I've been busy with other projects (helping a friend look for a new car and sorting/unpacking boxes in my house so that my girlfriend can bring some stuff over from her place). I have to mow the yard tomorrow but I'm hoping to get a couple of more coats on afterwards. I think I'll be done in 2-4 more coats so I'm looking forward to that
So I haven't gotten any more paint on the car over the last couple of days. Been busy, but I'm about to put more on now. The trouble is that I'm almost out of my current can. Most people seem to need two cans to get good coverage.
I've been fiddling with the idea of maybe changing the color as white is kinda bland but I'm still on the fence. If I do change the color, I was thinking of going with blue but I'm not sure how well the blue would cover over the pre-existing white which is covering the old gold. I figure the white is pretty light at least so the blue wouldn't be trying to cover up the gold anymore at least.
Meh, we'll see. I'll probably just keep at it with the white and if I ever change my mind I can always repaint it.
IP: Logged
08:24 AM
SMTHGT Member
Posts: 1075 From: Seagoville , Tx. Registered: Mar 2010
LOL – Apparently you do not know your history my friend. Spray guns have been around as long as they were painting cars. It’s not so much the fact that you are painting your car with a dozen coats of paint using a roller and Rustolum from the hardware store. Hea, it’s your car after all, do what you want. It’s that you are making such a mess. What’s with all the runs and drips all over the lights, tires and trim. I wouldn’t do a job like that even in my teenage years. You must be a moron to post photos like that.
Wow, this is a great way to get negative ratings. I think this idea is very interesting and it is HIS car, let him paint it anyway he sees fit. Maybe you were offering to spray paint his car? If so, I missed that generous offer.
I don't know what was up with MacGuyver but he hasn't posted back so I assume he chose the "GTFO" option. Sure, this method may not be the most ideal, but for what it is it can produce a pretty decent paint job thats at least better than the damaged original factory paint.
Anyway, I went ahead and picked up another can of Gloss White from Wal-Mart so I suppose I'm going to stick with white for now. I got one coat on this morning, but I was parked a little further under a tree in my backyard than I have been and apparently it sheds these fine fibers all over. I got some in the paint, but I think most of it will wet-sand out. Then I need to rub the car down with a rag soaked in mineral spirits to get the wet-sanding debris out and keep on painting. I'm going to be out of town for a couple days so I might as well get as many coats on as I can before I leave.
2 more coats will probably get me full coverage but I'll probably put a couple more down on top of that just to have enough paint to buff and to help with scratches and whatnot. So I figure I'll use about half of the fresh can of Rusto and I should be good. I'll use the rest of the paint on my door jambs around my house I guess
IP: Logged
01:05 PM
thedrue Member
Posts: 1104 From: Vancouver, WA USA Registered: Feb 2009
i think you are doing a verry good job for doing it in your back yard. when i wet sand i put a couple drops of dish washing soap. help lube up the wet/dry sand paper. i have painted alot of wood with polyuathane and would rather paint in 40deg. weather than 80deg. weather. it just seem to flow better because it was cold and i never sanded between coats.mec kluskies marine varnish yellows thru the ages and still looks like the day i did it. i am lucky i did not blow up my mom&dads house from the fumes poly makes. my tru love is refinshing wood furniture and have worked in a body shop sanding cars [prep] befor paint. i love your project, lots of work and it will look good because you can say you did it.
IP: Logged
12:25 AM
LitebulbwithaFiero Member
Posts: 3381 From: LaSalle, Michigan Registered: Jun 2008
Wow, MacGuyver is really a jerk in those other threads too. Only takes 50 negs to get banned and I imagine he's well on his way already... I figure at least a couple people on this thread have probably rated accordingly already.
Anyway... yes, lots and lots of prep work but to some degree it can be fun to watch the nasty old paint slowly go away under fresh, shiny new paint. I don't mind the work since I'm not really doing much else right now anyway and it gets me out of the house.
I *finally* got another coat of paint on today! I was hoping to be able to put one down this morning, but it was just too hot out. I got one down just a little while ago though and I think I'm almost done. I can still see a few spots where the paint is thin where I've had to do some additional bodywork back around coat number 4, but they're starting to cover nicely now.
I really think I'm down to two more coats. That means I'll have about 10 coats on the car and about 6 or 7 on the bumpers. Then I'll be rattle-canning the black trim bits that I pulled off, re-installing and then working on painting the lower GT trim. That should just be a day project to sand down the drips, mask it off with some newspaper and hit it with some spray can gloss black.
This is pretty cool on a budget. Keep the pics coming!
I know you said your keeping your tail lights in as your still driving it, but I'd personally take the few minutes it takes to take out the (8? 4 on each?) bolts of the tail lights quickly and undo the harnesses just so the tail lights don't accidentally get damaged by paint.
Its true it would only take a few minutes to remove the lights, but I took a few minutes the other day to clean up the DS tail light and it didn't take much effort to do so. Also, I'm not too worried about them as they aren't in the best of shape anyway...
IP: Logged
02:23 AM
Stubby79 Member
Posts: 7064 From: GFY county, FY. Registered: Aug 2008
Keep it up Alibi. I posted my thoughts about this on that other highlighted thread so I will not do so here. I am on my 5th coat changing from red to sunburst yellow and let me tell you.. I am blown away by how good this looks. It's like any other paint job..However long you put into it will decide the results. Yours looks great. I started mine last week but had to make a few screw-ups along the learning curve. Once you get the technique down.. WOW!! Steve
Alibi....you're not doing anything you can't deal with in detailing. Get the body completed and THEN worry about the runs and whatnot. Like Stubby79 said: Have fun, make a mess, clean up later!
MacGuyver...Flaming fellow members for the simple joy of doing it WITHOUT offering any constructive comments will get you kicked off PFF faster than anything else. Trust me. I've seen it happen quite a bit here.
[This message has been edited by Doni Hagan (edited 07-05-2010).]
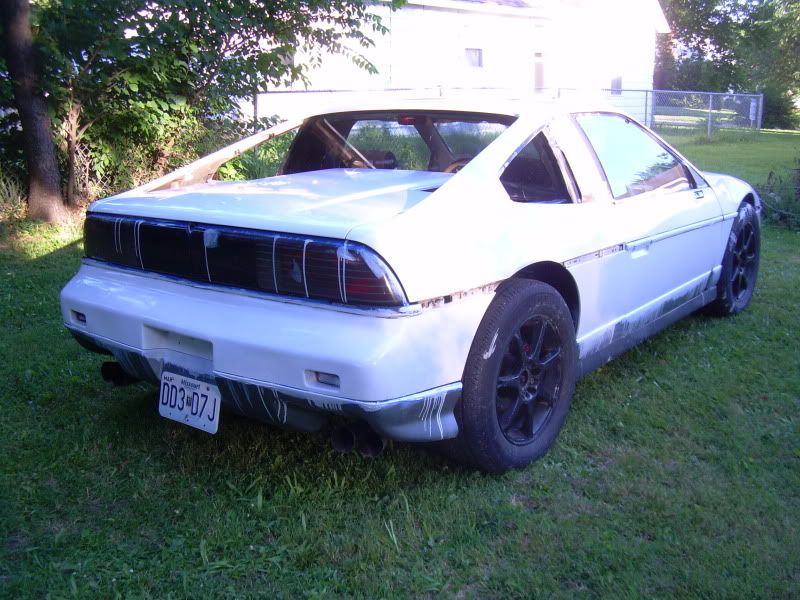
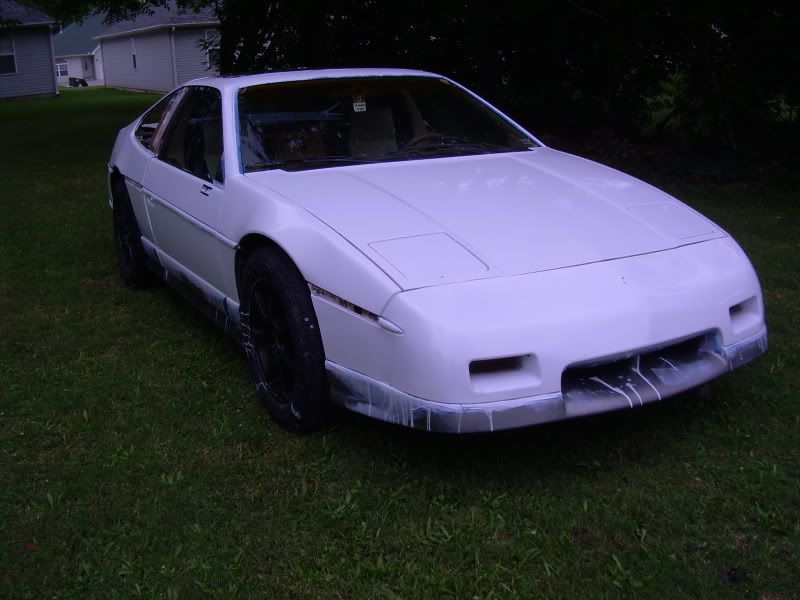
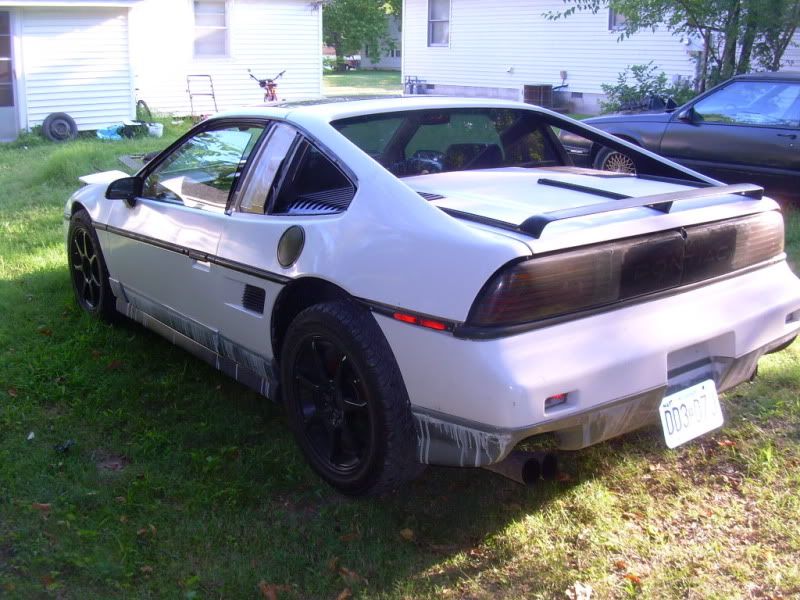
Here are some pictures of the coat I put on yesterday evening. I put it on a little thick than I have been, so I have a few spots where I need to concentrate my wet sanding before I do another coat. As-is, its pretty glossy. Its really hard to see much of a difference between coat 4ish and now by just these pictures, but up close and in person its easy to see how the paint is covering everything nicely.
Front of the car. You might be able to see the front bumper having nice coverage now:
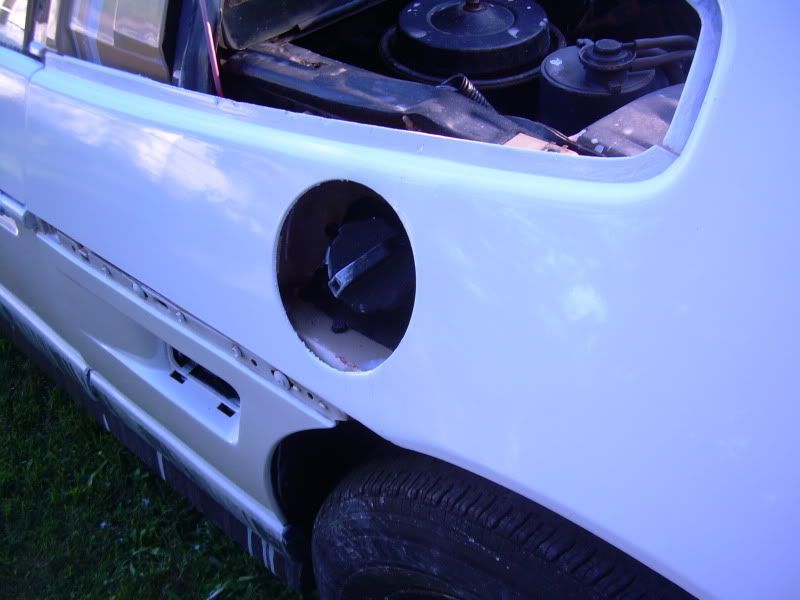
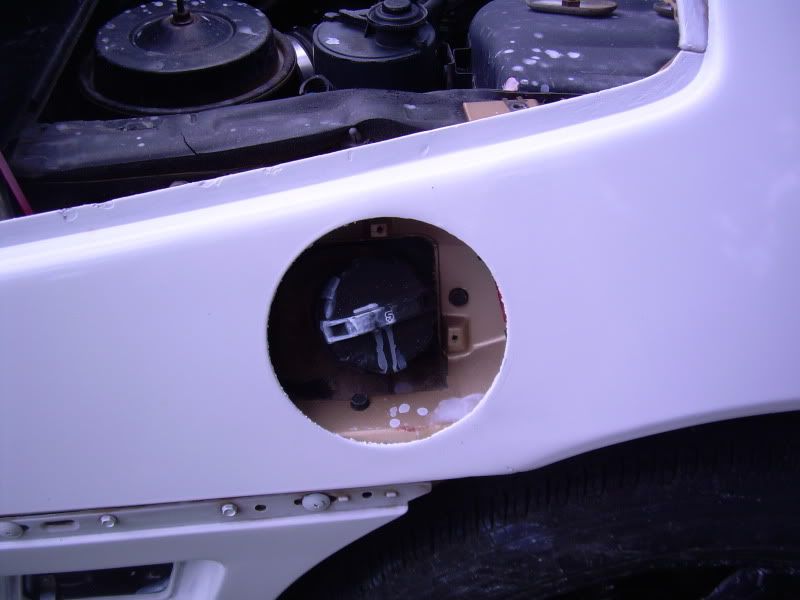
Repaired damage section. Theres still a bit of black gel coat showing through, but its very faint. A couple more coats and I think it'll be fine:
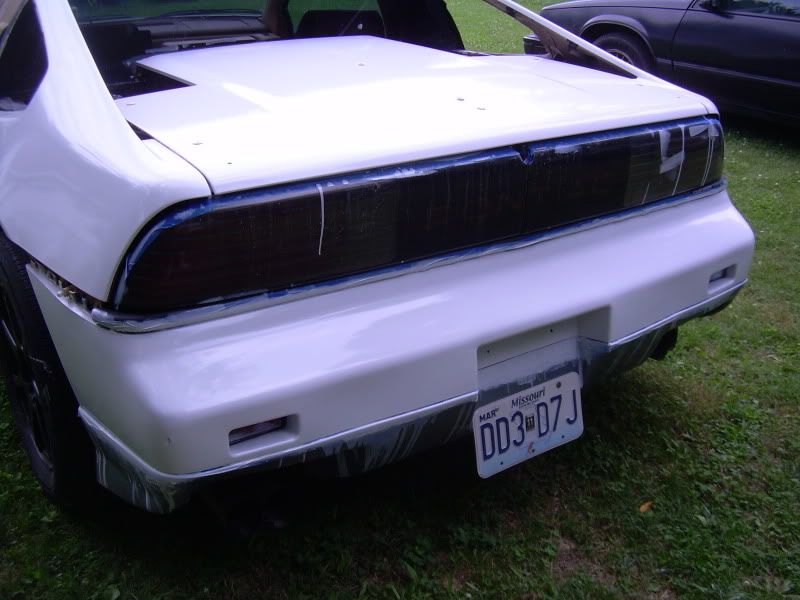
And the rear of the car. You can see where I cleaned up some of the runs on the lights, only to get another drip from this last coat. Oh well, I'll get everything after the last coat.
IP: Logged
05:40 PM
PFF
System Bot
jokerb90 Member
Posts: 366 From: Nederland, TX Registered: Nov 2008
Its really not technically complicated to do, but it does involve a lot of work. If you go with a silver-ish color, Rusto has an "aluminium" color that looks really nice. Be warned that it is one of the harder colors to apply though and make it look right to match all the rest of the panels. On that, I think you would almost have to use a primer to hide the old paint to keep it from showing through.
I just stopped into ACE Hardware and they have a line of oil based paints that look like the Rustoleum paints, but with a lot more color choices. Can someone say what makes this work so that maybe I can compare the products? Or maybe I just have to go for it... There is an "International Blue" that is the old International Harvester dark blue that looks pretty sharp. They also have a "School Bus Yellow" that could be fun if you like the Mac-N-Cheese color...
I've heard of people using other rust-stopping oil-based enamel paints other than just Rustoleum, so its probably fine to use. However, I would recommend you do a test panel first just to make sure. Practice on an old hood or door just to see how it turns out, let it sit out in the weather for a bit to see how it holds up, and then go from there.
Time for a bump. I'm done with rolling so now I'm working on getting all the trim bits painted and back on. Unfortunately, the paint bled under some of my tape on the trim so I'm having a hard time cleaning off all the belt line trim. I'm tempted to pull it off and rub it down with acetone, but I didn't pull it off in the first place for fear of breaking the clips. I may just leave it on, mask around it, and rattle can it when I rattle can the lower GT trim.
I've gotten nothing but complements on it so far, even though I'm not completely done with it. I have a couple of small spots to touch up on the white and I still need to paint the lower GT trim black, but otherwise its coming back together nicely.
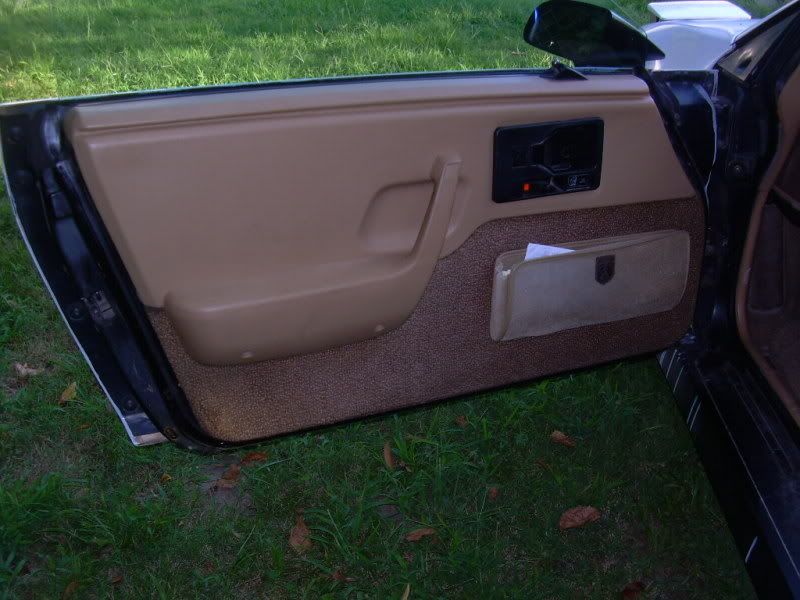
And while I had the door panels off to put in my dew wipes I cleaned all the dirt and grime off of them with some Mr. Clean Magic Erasers. Very nice
-about 9 coats on the body and 7 on the bumpers. Could use more or less depending on color change or whether you rolled on some primer or not (which is optional)
-I wet sanded with 400 grit, first coat of paint, 400 grit, second coat, third coat, 400 grit, fourth coat, fifth coat, 600 grit, sixth coat, seventh coat, 800 grit, 8th coat, 800 grit (would have used 1000 if I had some), then ninth coat and leave it alone. I could have done a few more coats just to build it up better, but I needed my car to be legal again so meh. I had to use so many coats because I was covering a relatively dark color (gold with black undercoat showing in spots) with a light color (white).
-use blue painters tape, it won't dry out and stick to the body like regular masking tape. Don't leave it on for weeks at a time either. Bear in mind that at every place you tear the tape the paint can seep under it so try to use one long peice of tape to mask off trim instead of several short pieces.
-remove ALL the trim you possibly can, you don't have to remove the bumpers like I did but I needed to make some repairs. Mask whatever isn't easy to remove.
-use more than just 1 line of 1 inch tape for masking, mask off other trim bits with plastic or newspaper if you don't have to drive the car while you're painting or just use more tape if you are driving it
-remove the inner door panels and outer dew wipes as they're hard to mask off. Now is a good time to order replacements from DIYstu
-do your work under a canopy or build one out of a tarp and some wood.... cleaning off and wetsanding out bird poo and bugs suck
-I used a 2 part rusto to 1 part mineral spirits combo. Use MINERAL SPIRITS, preferably the non-odorless kind if you can find it. Other thinners dry too fast.
-use two rollers to paint -- wet one with paint and slop it on thick but don't worry about full coverage of the panel. Use a second, dry roller to spread the paint out on the panel you are working on.
-work on one panel at a time as the paint will "flash" quite fast and will look funny if you try to re-work it after a few minutes
-work fast on each panel, but take your time between panels to get more paint
-work top to bottom -- decklid first, then roof and sail panel area, then hood, then front bumper, then the sides and rear bumper last. You don't want to lean against your freshly painted door to get at your roof in other words.
-if you're in Canada, Tremclad is the Canadian version of Rustoleum
-if you have extra money and want a *really* nice finish, order some boat paint called "Brightside", its relatively cheap off eBay. Only takes 2-3 coats for full coverage and is extra shiny. I'm poor and don't live near a body of water with marine stores so I stuck with the Rusto.
-if you get paint on glass, no worries! a razor blade will scrape it right off
-buffing should be done after the paint has had a chance to cure in the sunlight for at least a few days, up to a couple months. Just use plain old polishing compound either by hand or via random orbit machine. This should make the already impressive shine even better. Plain ol' turtle wax over it would be fine.
-to make repairs to scratches just wetsand the area (or the panel, depending on the size of the scratch) and use a rusto rattle can of the same color (yay for no need to custom color match!) to spray the area. Wet sand the area to feather in the fresh paint, then buff and polish. Should look identical to the rest of the paint after that
[This message has been edited by Alibi (edited 07-28-2010).]