If you're using an ECM with EECS control, just plumb the vacuum line to the EECS solenoid, then plumb the output of the solenoid to the control port on the Fiero vacuum canister. Plumb the flow line as stock for Fiero and Cadillac.
I think for the use on the Fiero canister system, it's nice to have the port enter about 1/4" in front of the throttle plate. Idle issues are a problem with most N* ECMs being used at the moment, so having the port a ways away will keep opening of the vapor canister delayed until well above idle. Russ544
Just so I am clear Russ...Your hole is entering the throttle bore in front(drivers) or behind(passenger) of the butterfly ?
If you're using an ECM with EECS control, just plumb the vacuum line to the EECS solenoid, then plumb the output of the solenoid to the control port on the Fiero vacuum canister. Plumb the flow line as stock for Fiero and Cadillac.
I am not sure if I have an EECS solenoid....Where do I find it ?
IP: Logged
11:17 AM
Russ544 Member
Posts: 2136 From: S.W. Oregon Registered: Jun 2003
Originally posted by buds: Just so I am clear Russ...Your hole is entering the throttle bore in front(drivers) or behind(passenger) of the butterfly ?
you want the port to be on the air filter side of the throttle plate. in a ported vaccum system there is no vaccum at the idle possition (throttle plate closed) then as the throttle plate opens it exposes more and more of the port which allows more and more vaccum. it's this signal that tells the vapor canister to dump more fuel vapors. you don't want the vapors entering the engine at idle or it would upset the idle quality.
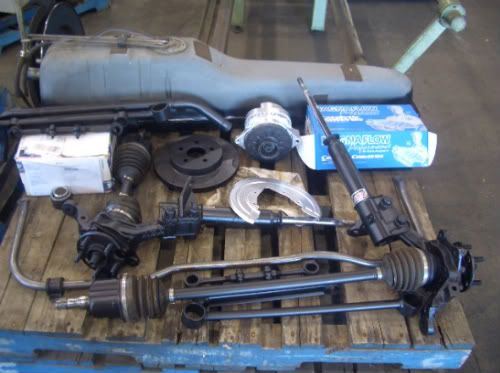
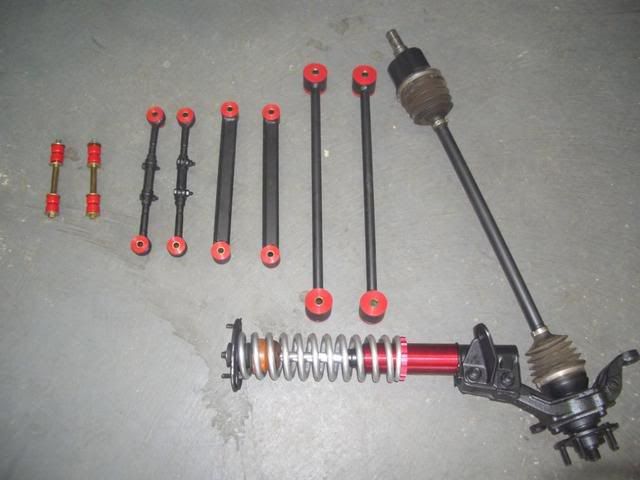
Still plugging away...I pulled all the suspension bushings out and ordered poly so I have been painting alot of parts. Also ground off my spring perches for coilovers.
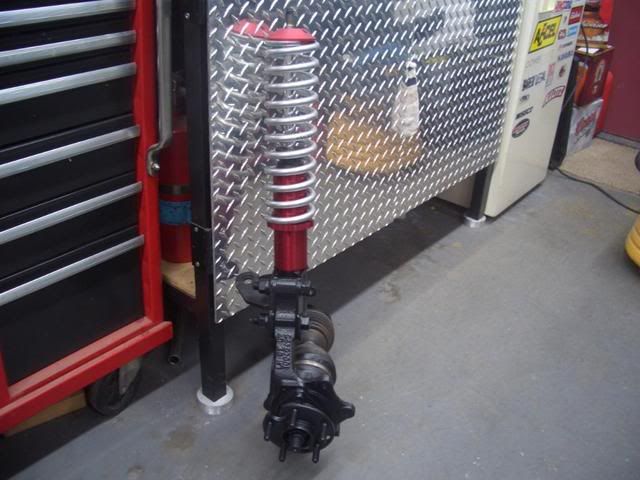
Picked up a coilover kit at a local race shop here today-----> www.grisdale.com Good guys and everything in stock plus dave the parts guy has a fiero. I went with 7" collars and 300# QA1 springs.
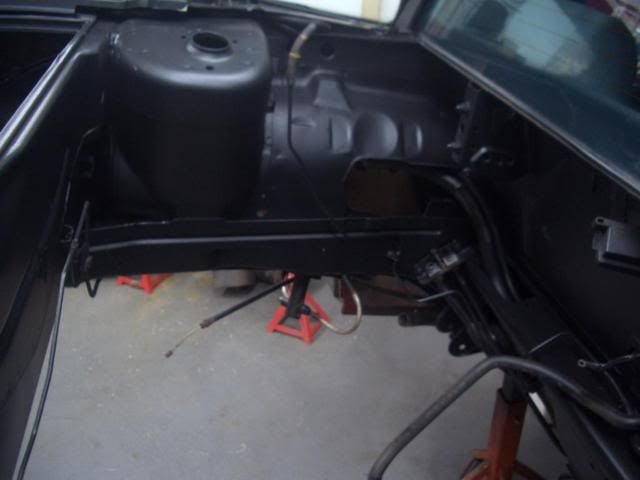
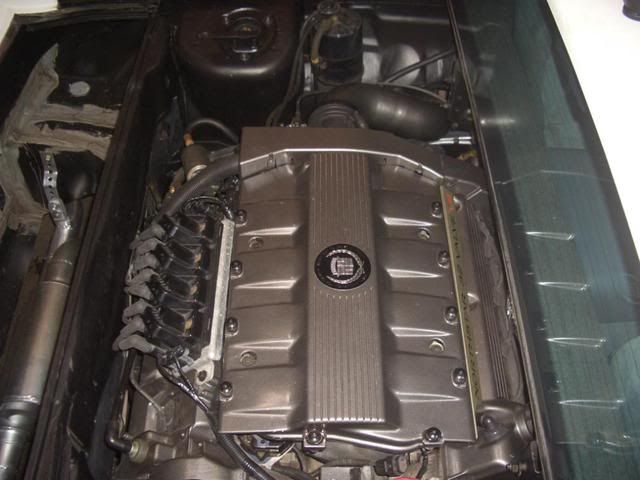
And just finished coating the engine bay and wheel wells with duplicolor truck bed coating...Very nice stuff. Ordered some Thermo tec heat barrier for the firewall and trunk area...So once I get that which hopefully will be tomorrow the motor goes back in.... for the last time
[This message has been edited by buds (edited 04-10-2008).]
IP: Logged
10:26 PM
Apr 11th, 2008
Will Member
Posts: 14305 From: Where you least expect me Registered: Jun 2000
Originally posted by buds: Picked up a coilover kit at a local race shop here today-----> www.grisdale.com Good guys and everything in stock plus dave the parts guy has a fiero. I went with 7" collars and 300# QA1 springs.
You'd be better off with your stock top plate on that spring. It'll go back together better and spread the force on your strut towers out more.
Nice toolboxes.
[This message has been edited by Will (edited 04-11-2008).]
I am not sure if I have an EECS solenoid....Where do I find it ?
The EECS solenoid is a little box about the size of a Fiero fuel pump relay. It has two vacuum connections and a two pin electrical connector. The stock Cadillac location for it is bolted with a single screw to the rear valve cover right next to the throttle body.
I'm running and running goooooooooooood. Had a some poppin first try but had two plug wires mixed up. Runs great and sounds awsome...No leaks...fires right up, good Idle even I'll get some pics when my wife comes home from Vacation.
IP: Logged
12:33 AM
Erik Member
Posts: 5628 From: Des Moines, Iowa Registered: Jul 2002
I'm running and running goooooooooooood. Had a some poppin first try but had two plug wires mixed up. Runs great and sounds awsome...No leaks...fires right up, good Idle even I'll get some pics when my wife comes home from Vacation.
Heres a much needed update...Its running and driving and sounds sweet.
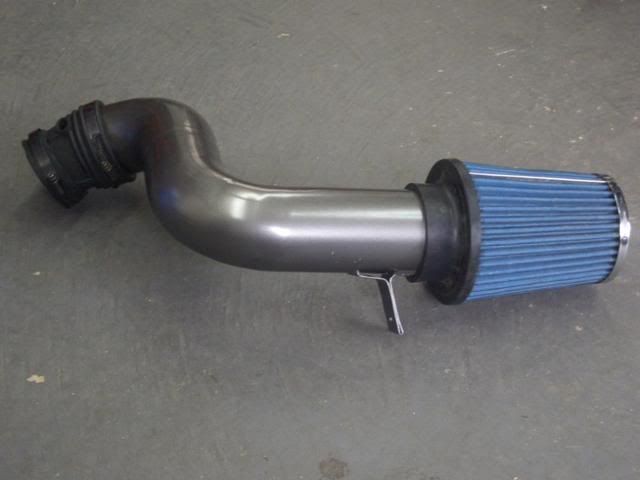
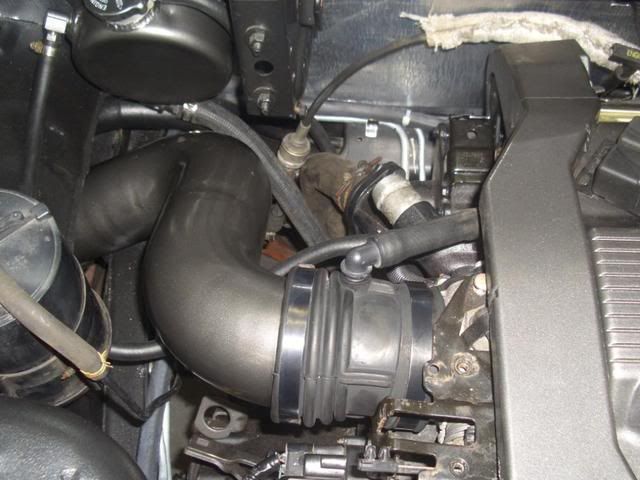
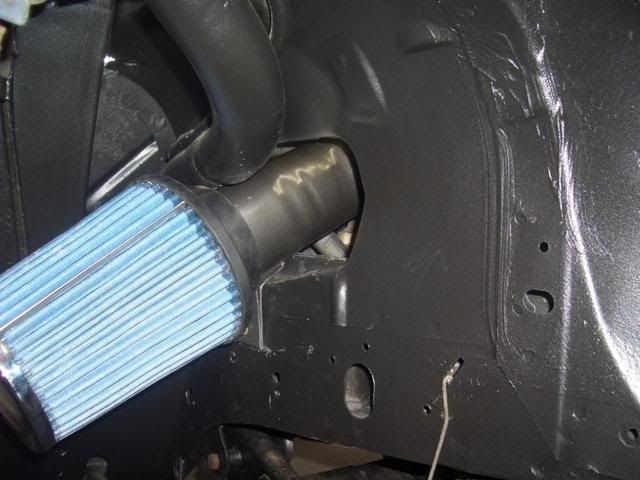
My Cold air intake...Still need to buy some scoops.
My Moroso remote fill jug....A little awkward to fill but it works.
Suspension with new poly.
And finally done with only a few issues I'll deal with after I paint.
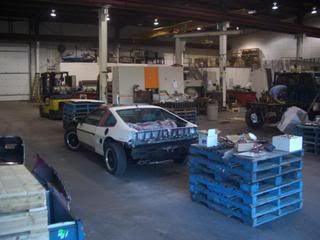
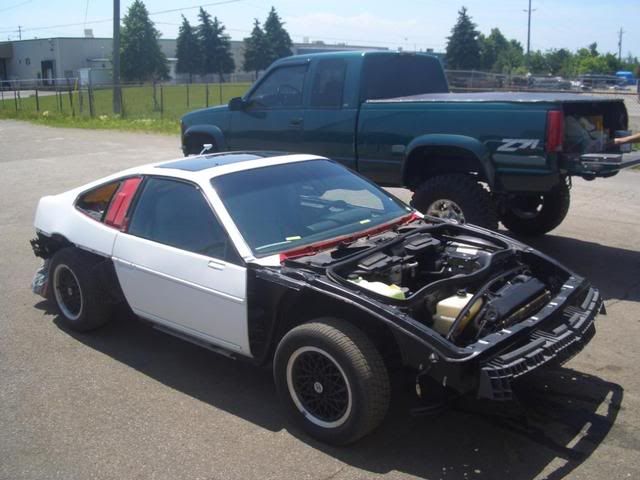
I trailered down to my shop tonight.....Needs a bit of work on the body but starting that sunday. It had a bad respray....was originally red but changed to white quite a few years ago.
Took a video but you tube no worky...Soon.
edit: Its Late
[This message has been edited by buds (edited 05-17-2008).]
that sounds evil ...Have you driven it yet? I just got back from the shop working on my swap and this really motivates me to get it done reeeal soon ...
IP: Logged
01:52 AM
cptsnoopy Member
Posts: 2587 From: phoenix, AZ, USA Registered: Jul 2003
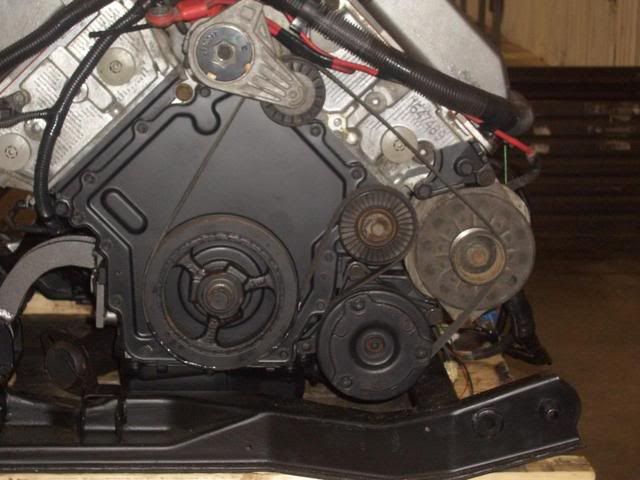
I was going through your thread again and noticed something with the serpentine belt. I figure if you ever hear your alternator squealing this may be why. On the other hand you may have it routed correctly and I might have it wrong...
yours:
Mine:
IP: Logged
03:06 AM
Zac88GT Member
Posts: 1026 From: Victoria BC Registered: Nov 2004
Nice swap, lots of great info, thanks for sharing!!
------------------ ~Michael Project IMSA Formula Coming Soon! '85 GT 4sp white - SOLD | | '85 2M6 Auto red - SOLD | | '84 2M4 bare chassis - SOLD Crap, I'm out of Fieros! Time to buy another!! - "Your mileage may vary."
IP: Logged
06:19 AM
RCR Member
Posts: 4454 From: Shelby Twp Mi Registered: Sep 2002
Originally posted by buds: My Moroso remote fill jug....A little awkward to fill but it works.
Vey nice work, and you have accomplished this in a fairly short time too. I envy you for that. Where did you buy your remote fill jug and where do you have it tied into? I tee'd into the thermostat hose connection, and have a 1.25" riser hose with a filler neck and cap but I like your setup better. Also, is your overflow hose run to an overflow bottle or just to the ground? Dave.
that sounds evil ...Have you driven it yet? I just got back from the shop working on my swap and this really motivates me to get it done reeeal soon ...
Drove it some more today....I have some clutch slipping issues.....Either I have way more power then a spec3 can hold or I screwed up...I'm thinking the later. I remember the guy I bought it off was having clutch issues and I think he put on a 4 speed slave...I'll have to look into it more.
quote
Originally posted by cptsnoopy:
Hi buds,
congrats on getting her driving!
I was going through your thread again and noticed something with the serpentine belt. I figure if you ever hear your alternator squealing this may be why. On the other hand you may have it routed correctly and I might have it wrong...
Thanks....I thought about going your way as well.....Its kind of a toss up...My way has more wrap on the crank pully and A/C and your has more on the altenator...Time will tell.
quote
Originally posted by Zac88GT:
Sounds great man!
Thanks to your headers
quote
Originally posted by TRiAD:
Oh, SWEET!
Nice swap, lots of great info, thanks for sharing!!
Thanks TRiAD....Haven't seen you on here in a while....I remember a few years ago you were very active here.
quote
Originally posted by RCR:
. More info, please???
Bob
Pretty easy to make.... I cut down the stock Caddie intake tube or you can just use a silicone coupler. Bought 2 - 3 1/2" mandrel bent 90's and an airfilter with a 3 1/2" inlet.
quote
Originally posted by Daviero: Vey nice work, and you have accomplished this in a fairly short time too. I envy you for that. Where did you buy your remote fill jug and where do you have it tied into? I tee'd into the thermostat hose connection, and have a 1.25" riser hose with a filler neck and cap but I like your setup better. Also, is your overflow hose run to an overflow bottle or just to the ground? Dave.
Thanks Dave...I started to hook up like you have done but thought it would be nice to use the empty space where mine now sits...I started with a VW tank but really didn't like the looks of it...Found this one on ebay. Overflow is to the ground and the overflow up front is still hooked up...I might change this up yet.
Oh man that made my day! ..SHWEEET!! about 52 seconds into the vid it sounds very turbo like ...You have a real beast there. Sorry to hear about your clutch issue ..It really pulls the front up for a slipping clutch, wish mine slipped like that ....if it was going to slip
Anyway, this is my fav vid and is very theraputic ..I see the light at the end of the tunnel
[This message has been edited by Erik (edited 05-18-2008).]
IP: Logged
02:40 AM
May 19th, 2008
cptsnoopy Member
Posts: 2587 From: phoenix, AZ, USA Registered: Jul 2003
One possibility that I can think of is there may be oil coming out of the flywheel bolts getting onto the clutch. A remote possibility but I did notice oil on my flywheel and flywheel bolts when I put the flywheel on with no sealer on the bolts to crank the motor over. The second time I installed the flywheel it has sealer but not the correct stuff so it may still leak over time. Given enough oil and time it would run right onto the flywheel clutch mating surface. I hope your issue is something else that is easy to fix.
One possibility that I can think of is there may be oil coming out of the flywheel bolts getting onto the clutch. A remote possibility but I did notice oil on my flywheel and flywheel bolts when I put the flywheel on with no sealer on the bolts to crank the motor over. The second time I installed the flywheel it has sealer but not the correct stuff so it may still leak over time. Given enough oil and time it would run right onto the flywheel clutch mating surface. I hope your issue is something else that is easy to fix.
Hmmm....Sealer eh ? I used loctite but didn't know I had to seal them. What sealer is recomended ?
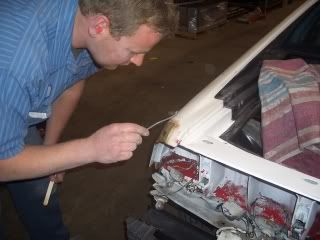
Yesterdays progress was good. Had my brother in law working on cab corners for his truck as well as a buddy helping me sand my hood and trunk. I am gona do a panel off paint job since I am changing colour.
Shop yesterday
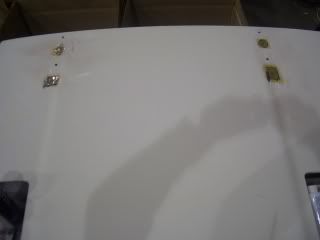
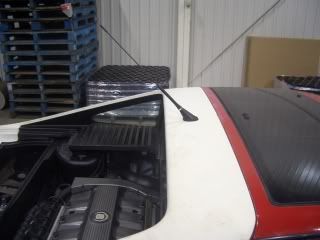
Had to glass over some holes in the trunk as I moved my wing back, fix a crack in the back drivers side corner as well as the stock antenna hole as I put on a roof mount.
I figure I have come this far I miswell clean and paint the under the hood as well. This is going to be one clean 88
[This message has been edited by buds (edited 05-19-2008).]
IP: Logged
02:24 PM
Eau_Rouge Member
Posts: 208 From: Ontario, Canada Registered: Jan 2007
If you have any details on how you mounted the roof antenna, including photo's please post as I am very interested in doing the same thing.
Also, where did you get your antenna and what kind of antenna is it?
Very nice job by the way, hopefully you'll bring it down to Mapleview or Applewood on a Wednesday night when it's complete!
Sorry I didn't take any pics of the install but basically I removed the third brake light and drilled a small pilot hole up through the roof. Then I stepped up to a 1" hole saw to cut through the metal above the light. Finally drilled down through the roof with a 1/2" bit.
I bought the antenna about 7 years ago (e-bay) to install on one of my fieros....4 fieros later finally got around to it.
I will get out to mapleview for sure this season.
Mike
IP: Logged
05:11 PM
May 24th, 2008
Daredevil05 Member
Posts: 2345 From: South Jersey 08077 Registered: Oct 2006
Hmmm....Sealer eh ? I used loctite but didn't know I had to seal them. What sealer is recomended ?
I took a quick look at my engine book and apparently the sealer is already on the new bolts (for the flexplate.) Will has mentioned some info before concerning the correct sealer. Hopefully he will chime in and let us know what to use.
IP: Logged
10:57 PM
May 30th, 2008
gunslinger Member
Posts: 352 From: southland pines,fl Registered: Mar 2008
I took a quick look at my engine book and apparently the sealer is already on the new bolts (for the flexplate.) Will has mentioned some info before concerning the correct sealer. Hopefully he will chime in and let us know what to use.
IIRC, I just used Permatex on the flywheel bolts. There's no pressure behind them, so it's not a tough sealing job like sealing the case halves is.
IP: Logged
12:20 PM
cptsnoopy Member
Posts: 2587 From: phoenix, AZ, USA Registered: Jul 2003
Thank you Will. That is a relief as I used the same.
My mistake buds, I was mixed up on the info. Please post when you find out what is going on with your clutch. Mine is the spec 3hk mated to the spec aluminum flywheel. I am still a ways off from driving it though.
IP: Logged
01:10 PM
Jun 9th, 2008
Daredevil05 Member
Posts: 2345 From: South Jersey 08077 Registered: Oct 2006
Hey Buds, I've been following your N* 88 GT project since the beginning. Its nice to start a project especially a rust free fiero. I gotta say, those rust-free fiero are hard to find in Canada. Sometimes a fiero project can last over a year or more, but once on the road it always brings back a grin.
Hope you enjoy it.
Plus a bump for a "in the works" Canadian rust-free fiero project.
Thank you Will. That is a relief as I used the same.
My mistake buds, I was mixed up on the info. Please post when you find out what is going on with your clutch. Mine is the spec 3hk mated to the spec aluminum flywheel. I am still a ways off from driving it though.
I should be driving it again in 2 weeks...Painting it this week-end then back to the N* trouble shooting.
quote
Originally posted by fierogt28:
Hey Buds, I've been following your N* 88 GT project since the beginning. Its nice to start a project especially a rust free fiero. I gotta say, those rust-free fiero are hard to find in Canada. Sometimes a fiero project can last over a year or more, but once on the road it always brings back a grin.
Hope you enjoy it.
Plus a bump for a "in the works" Canadian rust-free fiero project.
Yes they are hard to find...I gave up and drove 9 hours each way to Longisland Ny for this one.
Update: WOW.....sanding in 100 degree wheather sucks. It was rust free but the body needed quite a bit of work. I am doing a panel off paint job this week-end so I'll put up some pics of my progress this week-end.
Its getting closer...Spent a long hot week-end painting and for my first one it turned out very good. Friday night we set up the make shift booth and finished any prep work. My brother-in-law was also doing some paint work on his Z-71.
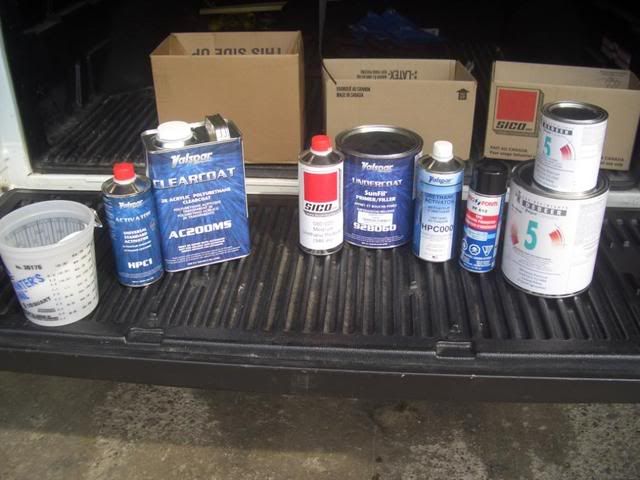
$460 of Supplies
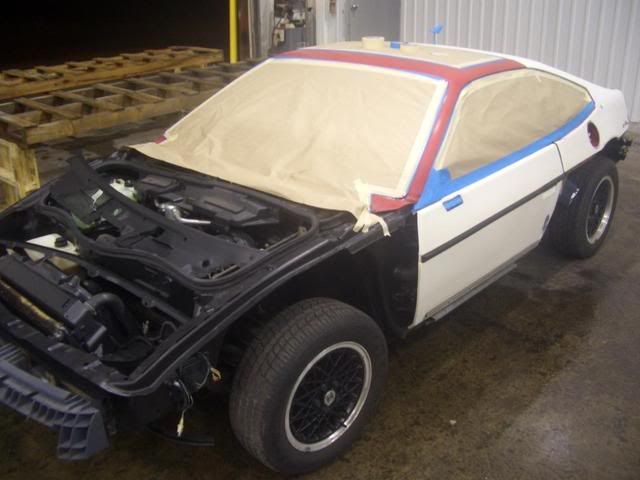
Starting to tape....This is the one area I spent alot of time at.
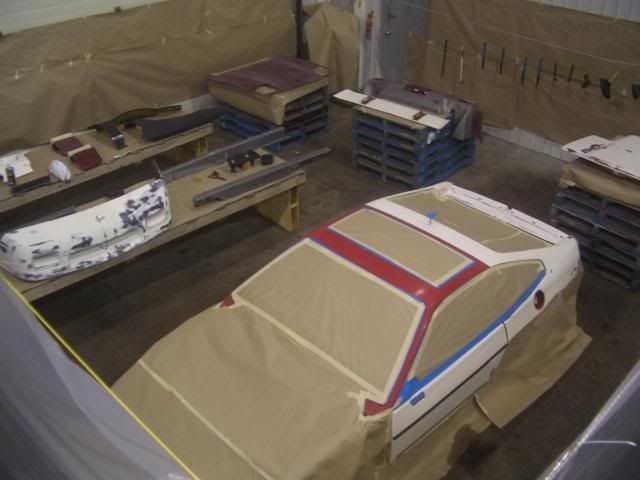
All ready for primer saturday morning.
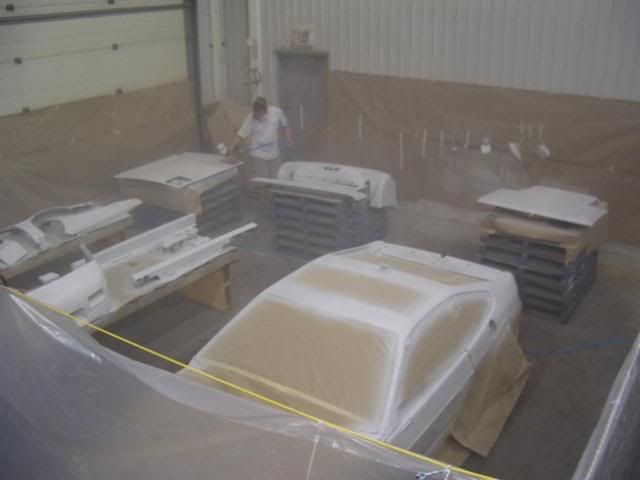
Laying on the primer
And the Oxford white basecoat then clear.
I have started to assemble it now....I need rims and tires and some time to fix a few swap problems then its done.


 I'll get some pics when my wife comes home from Vacation.


 . More info, please???