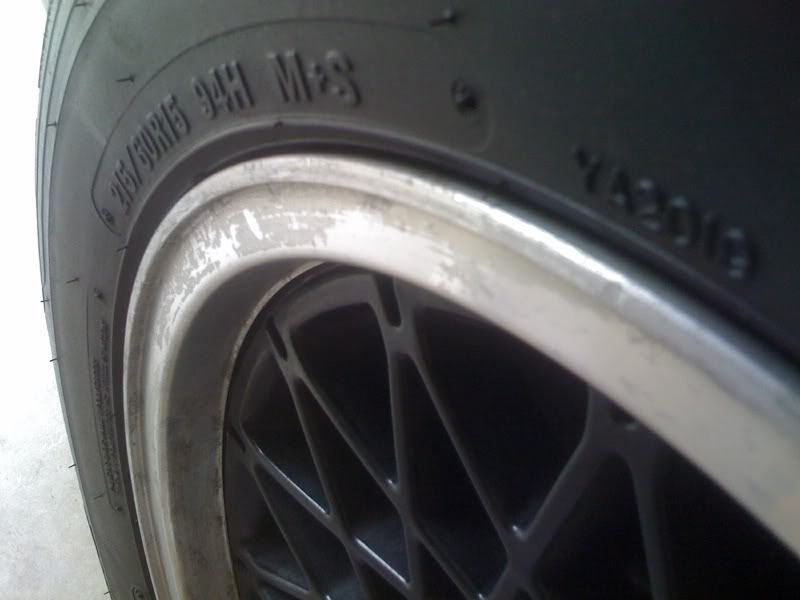
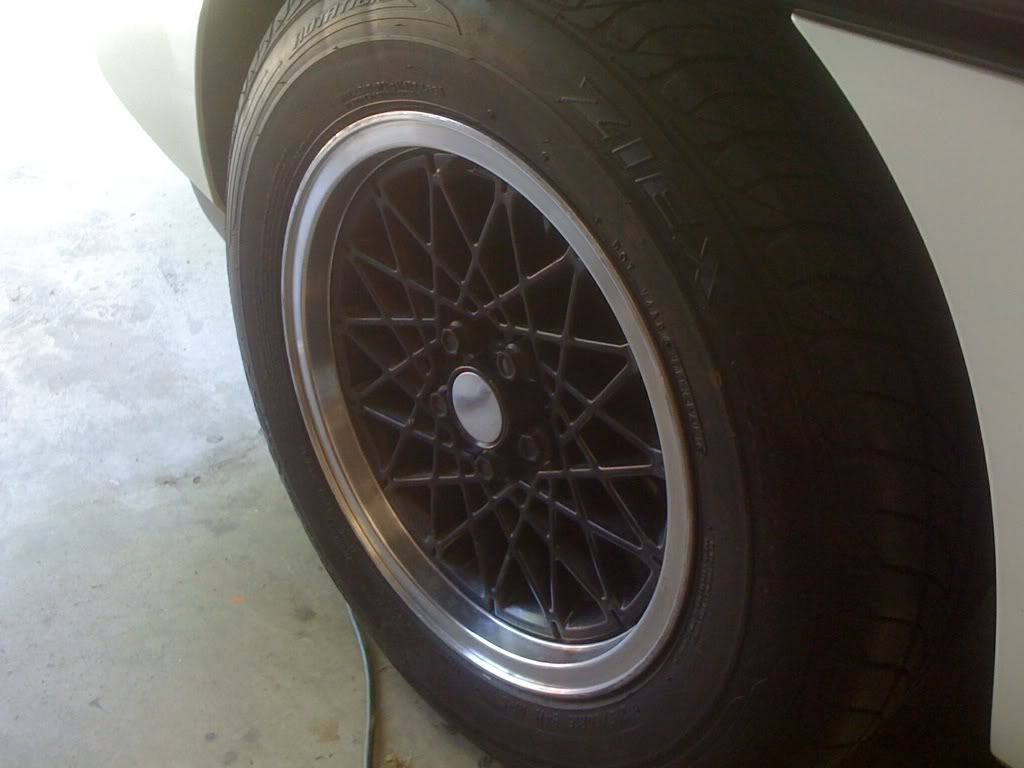
Check out the finish on my 88 wheels. Does anybody know the best way to remove, what I believe is the old clear coat, off the rim and then polish to nice shine without removing the wheels?
Any help would be great!
Thanks
IP: Logged
03:20 PM
PFF
System Bot
Tony Kania Member
Posts: 20794 From: The Inland Northwest Registered: Dec 2008
Hi there. The best thig is to remove the tire. But, if you just want to polish the lips, you may be able to do it with the tire on.
This is what I would do...
1. Jack the back of the car up, and secure it. 2. Don't fume yourself out. Start your Fiero, and put it into 2nd gear. 3. With the rim and tire spinning, carefully sand/polish the lip of the rim. With a bit muscle, and the right sanding/polishing, the lips will become mirrors. 4. You can either clear coat, or just polish the lips a few times a year. 5. Exchange backs for fronts, and repeat as necessary.
With mine I removed the wheel from the car and used paint stripper and a very small brush. After the clear coat softened I scrubbed it off with medium steel wool. Then wet sanded the bare aluminum with something like 600 - 800 grit sandpaper. Finished it off with Turtle wax rubbing compound and then Tripoli and small drill powered buffing wheel. It is time consuming but they look real nice when finished.
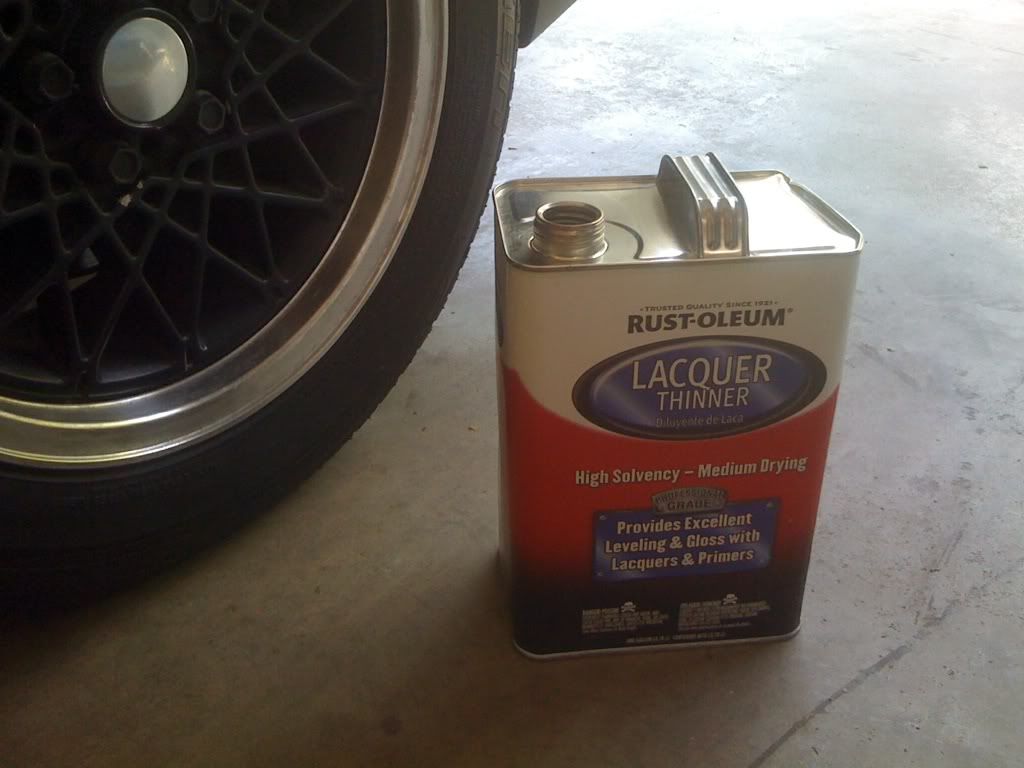
Been there, done that. Take a rag, saturate it with Laquer thinner, wipe down the wheel, keep doing that step(really wet) , it will ALL wash off leaving the wheel nice, shiney, not scratched, ready to be re-cleared.
The Michigan Fiero Club web site has full instructions on redoing the wheel rims. michiganfieroclub.com I did mine without removing the tires from the wheels. Just worked around the rim a quarter at a time with paint remover and green scotch brite, cleaned up and polished. Looks great!
IP: Logged
09:52 PM
Apr 18th, 2010
cjgable Member
Posts: 1198 From: Fort Worth, Tx, USA Registered: Dec 2001
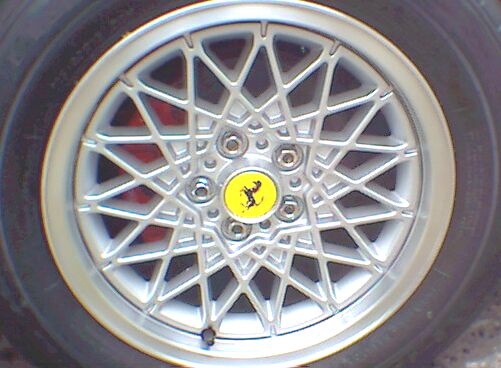
Mine were origionalley Dark Grey,for the honey comb area I used dish soap,ajax and an old tooth brush.I then sanded the outer aluminimum edge with wet and dry sand paper.I used a fine to medum grit paper,but befor starting I rubed the two pieces of sand paper together to get rid of some of the surface tension on the new sand paper.A then used a thin piece of card board,someing like from a cracker box or cerial box,so that I could seperate the honey comb area from the aluminimu auter edge and spray painted with aluminimum paint (shake aluminimum paint frequentley).Aluminim paint will oxidize or dull,so after fulley drying I clear coated the whole rim,incleding the aluminimum outer edge with clear coat.Both cans of spary paint were baught from autozone and are high temperature engine paint (aluminimum and clear) and no I didnt remove the tire,but I did use the cracker box again,when I applied the final clear coat,to seperate the ruber tire from the aluminimum outer edge.This is the final resutlt (Ferrari sticker,in the center) as for you,you can just use the wet and dry sand paper on the aluminimum outer edges..
[This message has been edited by James Bond 007 (edited 04-18-2010).]
While it's not 100% finished, I went out this morning and bought some thinner. I then spent the next few hours really cleaning / polishing the rear rims. I then sanded with 500 grit paper and then polished to high gloss shine. I think they turned out nice. I'll go back and really clean them when I have more time.
Much better
[This message has been edited by Sofa King (edited 04-18-2010).]
IP: Logged
05:10 PM
IMSA GT Member
Posts: 10732 From: California Registered: Aug 2007
While it's not 100% I went out this morning and bought some thinner. I then spent the next few hours really cleaning / polishing the rear rims. I then sanded with 500 grit paper and then polished to high gloss shine. I think they turned out nice. I'll go back and really clean them when I have more time.
If you really want them to shine, sand the edges until you cannot see the machining lines, Then sand with 1000 grit. Once done use some Mother's Aluminum Wheel Polish. The edges will come out looking like you had them chromed.
While it's not 100% I went out this morning and bought some thinner. I then spent the next few hours really cleaning / polishing the rear rims. I then sanded with 500 grit paper and then polished to high gloss shine. I think they turned out nice. I'll go back and really clean them when I have more time.
Yeah those do look nice! So lacquer thinner will strip the clear coat? Good info there. If you really want a shine the fine steel wool is a good idea. If you want an even shinier look buy a stick of Tripoli at a hardware store and a small buffing wheel for a drill. The aluminum will almost look like chrome. I guess it just depends on what you prefer, satin look or shiny. No matter, either is better than flaking clear coat and corroded aluminum. Good job!
Mike
IP: Logged
06:53 PM
Daredevil05 Member
Posts: 2345 From: South Jersey 08077 Registered: Oct 2006
Heres something else to try sometime. My Sebrings alloy wheels had some surface corrosion and nicks in the lip...the centers like Fiero are painted silver. I jacked up a drive wheel just off the ground and put it in 2nd gear to spin it. Then I sat on my stool and held a piece of #36 sandpaper against it. I cut the nicks out, took off the clearcoat. Then when the defects were all gone, i did the same thing with #80 sandpaper making the finish smoother. Finally went to #180 and #220. Finished it off with red scotchbrite and rubbing compound. They looked brand new and I didnt clearcoat them again. Any stains or marks can be fixed again in a few minutes with aluminum polish or steelwool. I just put each wheel on the drive axle at a time untill all 4 were done. Call it a hillbilly lathe
IP: Logged
11:43 AM
deezil Member
Posts: 781 From: St Louis Mo USA Registered: Mar 2010
It works great, just dont stick you fingers in too far and get it caught in the spokes. You be surprised how fast it works. I dont recall exactly where valve stem is on Fiero wheel, so you may only be able to do the outside lip. On my Sebring i did the whole lip even where it wrapped in,,,valve stem was in the painted part. You could always just leave it in low or reverse too. I chose second so it would work faster. Just let the motor idle in gear, dont rev it up.