Before you undertake this, understand that it takes a great deal of time.
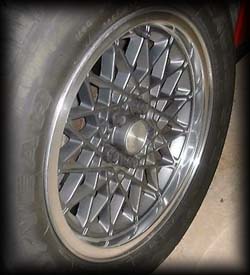
If you have the GT/Formula type "diamond spoke" wheels, and are stripping the paint,
you can count on eight hours per wheel. If you are leaving the paint, and just
polishing the rims, it will take considerably less time.
Note that I mention some "safety stuff" that may seem to border on paranoia.
This is not meant to discourage, only to make you aware. Please know and use
all of the appropriate safety precautions that are applicable to what you are
doing. It may only take an instant of inattention for something to happen that
can take many days (weeks? years? never?) to recover from.
First, remove the tires from the wheels. Remove all balancing weights.
Now would be a good time to clean all of the crud that accumulates on the backs
of the wheels. A trip to the "quarter car wash" would probably be in order.
Take your scrub brushes, maybe even a scraper (depending upon how nasty your
wheels are), and a big bottle of Simple Green (or similar).
Note: To do the strip and polish, you don't HAVE to do this step, but it will
sure make things easier, later on.
Stripping. To strip the paint, I used Klean Strip KS-3 stripper, from
Home Depot. You can probably use just about any "aircraft type" stripper.
The "gel" or "paste" type are probably best for this. Just be sure it is
safe for aluminum (read the can, it should say if it isn't). Follow the
directions on the container.
USE RUBBER GLOVES AND EYE PROTECTION!!!
You don't want this stuff to get on your skin. If that happens, wash it off
with soap and lots of water, immediately. You don't even want to THINK about
getting any in your eyes.
Do the stripping in a WELL VENTILATED area. Preferably outside. The fumes
are explosive. If you find that you are getting disoriented, you are breathing
too much of the vapor. Take a break. Get some air.
Apply the stripper with a cheap 1"-2" paint brush. If there is paint that you
want to remain, be careful not to get any stripper on it. You might try masking,
although I'm not sure how effective it will be.
Clearcoat will begin to "curdle" immediately. Paint will take a couple of
minutes. You can scrub the curdled paint with a small scrub brush to aid the
removal. Use a water hose to wash off big pieces of stripped paint, and to
neutralize the stripper. If you are stripping GT wheels, you will probably have
to repeat this 3-4 times, due to all the detail. Experiment with different
tools to remove the little pieces of paint that refuse to budge. Just don't
use anything that will gouge the metal.
Once the wheels are stripped, wash them thoroughly to remove any traces of stripper.
You also want to rinse them well, so that there is no soap residue to stop new paint
from adhering.
File smooth any nicks that you may find in the aluminum. Try not to remove any
more metal than you have to, but don't leave any sharp edges. If there is any
corrosion where the weights were mounted, sand it out using 220 grit, waterproof
sandpaper. If the corrosion is very minor, you can usually get it during step three.
Sanding. If you have an electric motor (brake lathe?) that you can use to
spin the wheel, that's great. If you are like the rest of us, mount the wheel on
the rear of car. The left side is preferred. (The car is on jackstands now. Right?)
Support the lower control arm so that the drive axle is at the same angle it would
be if the car were on its wheels. This will prevent unusual stresses on your CV
joints. You will need to find a method of stopping the opposite drive wheel from
spinning while you are doing the sanding/finishing. My car was actually on a
spare set of wheels/tires, and I just jacked up one corner, so this wasn't an
issue. Just be sure to block the wheels, if the car is on the ground. Be certain
of the condition of your transaxle. If the spider gears suddenly lock, and the
transaxle becomes "posi", things could get ugly.
Start the engine, and choose first or second gear. You will have to experiment a bit
to see which works best for you. You will need 220, 400, and 600 grit, waterproof
sandpaper, and a bucket of water, nearby.
As you do this, be aware of where all of your "body parts" are. If the car should fall,
you DON'T want to be in the way.
As the wheel spins, apply the 220 grit, wet sandpaper to the rim. Your goal is to
sand all the "machine marks" smooth. (The machine marks are the tiny ridges that
are cut into the rim by the manufacturing process.) As you remove metal, it will
build up on the paper. Dip the paper in the water every few seconds.
You want to keep the paper as wet as possible, to lubricate the cutting action.
Also, excessive metal build-up on the sandpaper will eventually scratch the wheel,
making more work for you.
Every few minutes, wet a shop towel and wipe off the grit that will accumulate
on the wheel.
Don't "fudge" on this first step. The more time you take, the better your job
will turn out. If you don't get all of the ridges, you WILL see them later.
It's especially difficult to get in the "corners" where the weights clip on,
and up next to the spokes. You can wrap the sandpaper around a popsicle stick,
or fold it double or triple, and force it into the corners.
Once you have removed all of the machine marks, you are ready to change to the
400 grit paper.
Change the water in your bucket. It's full of 220 grit and metal dust.
The 400 grit paper is used to remove all of the sanding marks made by the 220 grit
paper. As in the previous step, dip the paper every few seconds to remove the
buildup, and to lubricate the job. Wipe the wheel every few minutes with a wet shop
towel, to remove residue. Once you see that the finish is uniform, and that you
are no longer removing any more material with the 400 grit, you are ready to
proceed. (With enough practice, you'll actually be able to feel when the wheel
is getting uniformly smooth.
Change your water, again. Repeat the above step with the 600 grit paper. If you
see machine marks that you missed (don't be surprised), go back and get 'em.
It'll pay off later. When you are done, the rim should have a very smooth,
uniform "matte" finish. You should see NO ridges or sandpaper scratches.
Polishing. This step makes a big mess. Polishing compound will get on everything.
Wear old clothes.
If you have GT wheels, you should also mask off the spokes. (I used masking tape
and a shop towel.)
For this step you will need a high-speed electric drill, or an air driven
die-grinder, and the appropriate arbors to hold the buffing pads. You will need a
DICO #40 (4" preferred) spiral-sown buffing pad, and a tube of DICO SCR Stainless
compound for the initial buffing, and a DICO #60 (4" preferred), or equivalent
flannel buffing pad, and a tube of DICO JR-1 Jewelers Rouge for the final polishing.
Start with the #40 pad and the Stainless compound. To access the compound, you
will either push the compound up from the bottom of the tube, or peel the tube away.
You will be using the edge of the pad to do the buffing, not the flat face. Start
the buffer spinning, and hold the Stainless compound against the edge of the
pad to "load up" the pad. The compound will melt into the edge of the pad.
Start the pad spinning, and hold it steadily against the rotating (still first
or second gear) wheel. Move the buffer slowly across the surface that you are working.
Always try to hold the edge of the wheel flat against the surface that you are buffing.
Again, the most difficult parts to reach are the "corners" where the weights clip on
to the lip. Add compound frequently. If the pad seems to be getting clogged, you
can clean it by spinning it against the tip of a screwdriver. When you have a
uniform shine that doesn't seem to improve with more buffing, you are ready to
progress. At this point, you should see a decent shine, NO machine marks,
NO scratches, and NO swirl marks. You are probably good and tired of doing this,
and wondering if you should quit now, since it looks so good.
Keep going. You're almost there.
This is your final polishing step. Use the #60 pad and the Jeweler's Rouge. Follow
the procedure for the previous step. When you finish, you should have a finish
that almost (but not quite) resembles chrome plating. Any imperfections that you
neglected earlier will become very apparent, now.
Painting. I've had very good luck with Plasti-Kote paint, from the auto stores.
Powder coating might be worth investigating, if you've got the time and money.
Use a good quality car wax to protect the polished finish. Clearcoating
is not necessary, if you keep the finish clean.


 Before you undertake this, understand that it takes a great deal of time.
If you have the GT/Formula type "diamond spoke" wheels, and are stripping the paint,
you can count on eight hours per wheel. If you are leaving the paint, and just
polishing the rims, it will take considerably less time.
Note that I mention some "safety stuff" that may seem to border on paranoia.
This is not meant to discourage, only to make you aware. Please know and use
all of the appropriate safety precautions that are applicable to what you are
doing. It may only take an instant of inattention for something to happen that
can take many days (weeks? years? never?) to recover from.
Before you undertake this, understand that it takes a great deal of time.
If you have the GT/Formula type "diamond spoke" wheels, and are stripping the paint,
you can count on eight hours per wheel. If you are leaving the paint, and just
polishing the rims, it will take considerably less time.
Note that I mention some "safety stuff" that may seem to border on paranoia.
This is not meant to discourage, only to make you aware. Please know and use
all of the appropriate safety precautions that are applicable to what you are
doing. It may only take an instant of inattention for something to happen that
can take many days (weeks? years? never?) to recover from.