I have written this procedure for adjusting emergency brakes on Fiero's.
It seems to be a problem for a lot of owners, trying to get the emergency brakes to work correctly. Many in our club,
The JetCity Fieros in the northwest, have had this problem as well. I know I spent several days adjusting, testing,
adjusting, testing, etc., all the while cursing (under my breath) those !@#$%^ Pontiac Engineers that designed
the Emergency Brake system. Anyhow, once I finally fully understood the physics involved, with the help of my
brother-in-law with a doctorate in engineering, I became impressed with those great Pontiac Engineers and their
elegant/simple design! I was then able to get all 3 of my Fiero's emergency brakes adjusted and working properly,
I thought it might be a useful to document this information and put it out on the internet for all to read.
Let's start with a picture (used with permission) from The Fiero Store online catalog that pictorially shows the
Emergency Brake system components although the cables going to the brake calipers (shown coming forward) are
actually going the other direction.
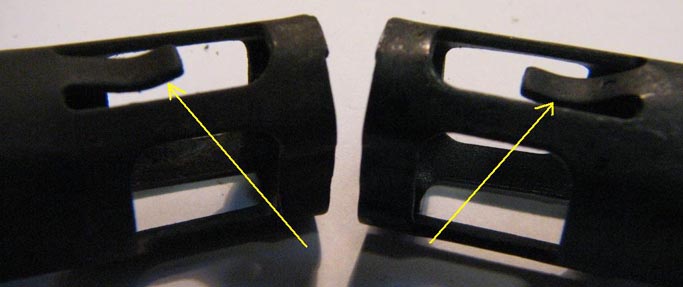
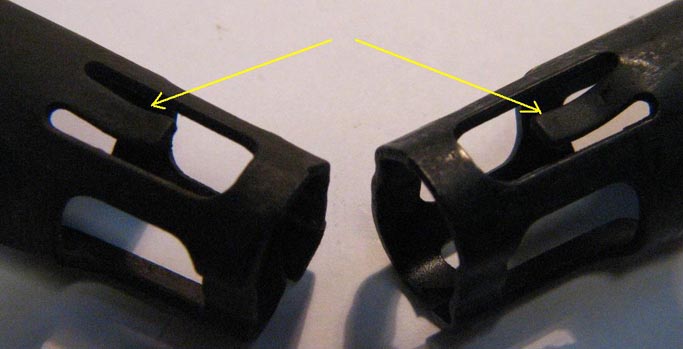
In addition here are three pictures of two equalizers, one used & old (on the left in the pictures) and one new on
the right. I have added some pointers to the pictures that are aimed at the "tang" that I consider the most important
part of the equalizer.
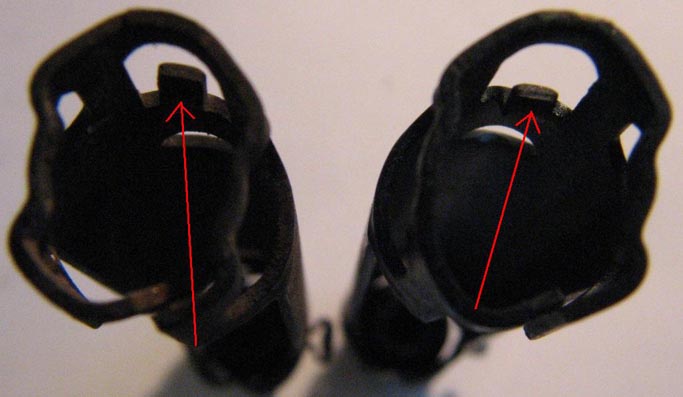
I have also added another picture that shows how the cable from the handle in the cabin is inserted into the equalizer –
with two arrows added, 1 pointing to the flange on the cable sheath and the 2nd points to the tang location on the
equalizer (although barely visible in the picture).
If you are using a new equalizer for the first time (available from The Fiero Store [84-88 E-BRAKE EQUALIZER (ADJUSTER)
Part #56097] then it should work with no problems and you can ignore the rest of this write-up. However even if it is
new, but you had to remove the cable for some reason, you will still need the following information. So follow along as
I explain what to do. If you look closely at the 3 pictures of the two equalizers, you will see that the tang in question
is where it belongs with the new equalizer and bent out on the used one; not much, just enough to remove the cable and
[this is the key point!] it will not work properly when installed without bending it back into place after inserting the cable.
It is difficult to get the cable out of the equalizer without bending that tang out of the way with a small screwdriver.
The issue is, when you put the whole thing back together - if you do not bend that little tang back into place - you will
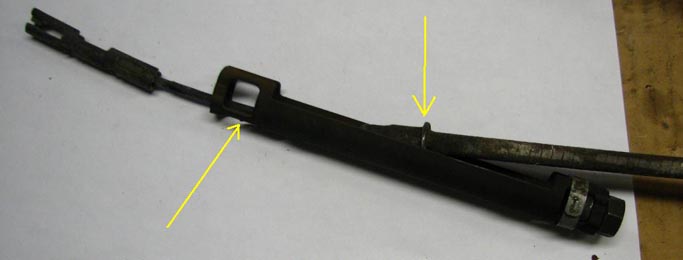
never get the emergency brakes to work as designed. Once you have installed the cable into the equalizer, I use a small
punch and hammer to bend that tang back where it belongs so that it will catch the flange (see the picture with the arrow
pointing to the flange) on the cable sheath so you cannot pull it back out of the equalizer. It is a matter of physics - that
little tang is what keeps that end of the emergency brake cable where it belongs, inside the equalizer.
Then you adjust the cable coming from the driver’s side rear caliper into the other end of the equalizer. Before you start to
remove the slack & adjust the tightness of the cable, the manual recommends that you step on the brakes with about 175 lbs
pressure at least 3 times, and pull on and off the emergency brake 3 times (not sure if you are supposed to step on the pedal
once, then use the emergency brake and repeat for 2 more cycles - that is not clear, but you get the idea). You will adjust
that cable tighter and tighter, constantly checking the two bell-cranks on each caliper to be sure they are not being pulled
off their stops. If either one begins to move off the stop, back off the adjustment until it is no longer off the stop.
Supposedly when you have adjusted the emergency brake properly, you will only hear 3 to 6 clicks as you pull up on the handle.
I find that after awhile and use, you may also find that you get more clicks on the handle - sort of like all the components
have finally "seated" into their operating places - so you may need to adjust that cable a bit more to get back to the 3 to 6
clicks if desired.