Surgery and recovery went well. However, I lost my camera in the thick of things.
The car is going slow now due to spring yard clean up, a bathroom in mid renovation (marble is my flooring of choice now) and work picking up a bit.
I did however get the firewall insulation material I ordered and cut out the pattern. It seems to fit pretty good. I also drilled out the broken sway bar bolts. I imagine my next step is to locate a decent steering shaft boot and then start reassembling the front end so I can mount the new sway bar.
I've sandblasted and painted almost all the bolts for the front and rear suspension. I've also removed the steering column boot and shaft (since it was rusty) I replaced them with the ones from my 1984. Looks much better now.
Everything should now be ready to put back together the front end.
IP: Logged
09:23 AM
May 5th, 2005
Soelasca Member
Posts: 455 From: Edmonton Alberta Canada Registered: Sep 2004
OK, got a new camera. Here's some new pictures. They're a little large. I'll have to turn down the camera resolution next time.
Here's a picture of the front suspension all in place. It would've been done today, but it turns out I got shipped the wrong calipers. I called up WCF and they handled the situation promptly. Hopefully I'll have the right calipers next week.
Here's a picture of the steering rack with the Rodney Dickman dual steering dampener installed. I have to get new clips for the brake lines too.
Here's another pic of the steering rack, you can see the nicely cleaned steering boot too, as well as the new brake lines (SS from the fiero store).
and a picture of the passenger side suspension in place. I guess I should get close ups of how I fixed the worn our LCA mounting hole. All I did was put a bolt through it with washers on either end and weld them in place.
[This message has been edited by Soelasca (edited 05-05-2005).]
I'm a skeptical person by nature. So overall, I have doubts about everything.
The one major gripe I have about the front end kit is the mount plates that sit on top of the shocks. I had to grind and grind and grind those things to make them fit. In the end I ended up cutting off most of the skirt on the plates. The only other thing that I'm kind of skeptical about is the adjustable lower control arm. To me it looks a little mickey mouse. However, I don't go around designing control arms everyday so I can't say if it's bad or good. Once it's on the road, I'll know for sure.
Oh yeah.... my second gripe is that the tool they gave me to adjust the coilover shocks doesn't work. It barely fits inside the hole on the nut. I'm going to have to drill out those holes for the tool to work. I don't know if that's RCC's fault directly. It may be the fault of the manufacturer of the shocks. Regardless, it should've been caught and now I'm having to fix this problem.
With all the griping about the grinding aside. I would buy the kit again. The installation is fairly easy and it does look very nice.
Once I road test it, I'll know for SURE if I'd buy the kit again.
I bought this kit from RCC because it has coilovers and the tubular design LOOKS better than the stock stamped steel. If you're just looking to lower your front end and add some stiffness, I'd be satisfied with going with the WCF shocks and springs setup.
IP: Logged
08:06 PM
Jun 9th, 2005
Soelasca Member
Posts: 455 From: Edmonton Alberta Canada Registered: Sep 2004
Well, I've finally gotten home and gotten around to doing more work on the fiero.
Of course I got a new camera, but my website is undergoing some changes and now ALL the picture links are broken (for now). So you can't see any pictures right now. I know, a picture is worth a thousand words.
So here is what I've gotten accomplished.
- Clear coated the headers and mounted them on the engine - welded a mount for the engine torque strut - installed a bushing inside the torque strut so the bolt going into the head fits properly - mounted the torque strut - finally went out and got a belt and installed it - bought the special accel spark plugs, but they didn't seem to make a difference on the spark plug wire fit - installed the shifter cables, wiring harnesses and reassembled the interior of the car
and last but not least
I installed the engine cradle into the car. Hopefully for the last time .
Tomorrow I will be purging all the extra wires from the harness and making the wiring hook ups. I may also be able to get the rear suspension all put together.
IP: Logged
01:27 AM
Soelasca Member
Posts: 455 From: Edmonton Alberta Canada Registered: Sep 2004
Well, on an off topic..... The spare tire compartment of my fiero has become the home for our cat midnight and her 4 new babies. Boy, you should hear my fiero purr now
Next up...
I went out and started to work on the wiring harness today. Decided it would be best to remove it completely and remove all the unneeded wires on the bench. So out ame the console (AGAIN!) and I pulled the harness out. Everything went smooth except when it came down to the alternator wiring. To make a long story short....
I have a CS alternator from an 87 fiero. It turns out that this alternator is no good for the v8 kit I'm using. I need either the old SI alternator or a CS alternator from an 88 fiero. Apparently the CS alternator is much better than the SI, but that would involve purchasing a new alternator. Using the SI alternator would involve butchering the stock wiring harness already set up for the CS. Since the engine is already mounted in the car it would probably be a bit of a pain to remove the alternator now and swap it out, but WTF! I'm gonna go buy a new 88 alternator anyways. It is literally the only thing I haven't replaced on this car yet, so what's another $400 - $500?
Since I read the post yesterday by Nitro I'm a little worried as to the quality of my RCC front suspension, but I'm still gonna go ahead with it and see how it works since it's all installed right now. It sounds like the only dilemma I'm going to be running into is the spherical bearings at the top of the mounts. I'll have to do some more research before they fail so I know what I'll be doing to take care of it.
Hopefully my pictures will be all up and running this weekend.
IP: Logged
04:36 PM
Jun 13th, 2005
Soelasca Member
Posts: 455 From: Edmonton Alberta Canada Registered: Sep 2004
Well, I got my website up and running again. All the picture links on this thread should be fixed. Hopefully within the next week I'll have some of the new photos up. I've got two to post tonight of the engine with the sanderson headers on them. I was trying to decide whether to paint them with the vht blue paint (like the engine was) or to clear coat it. When I went to Canadian tire to purchase a can of the blue paint the decision was made. They were out of stock on the blue, so clear coat it was.
Here's what they look like.
[This message has been edited by Soelasca (edited 06-13-2005).]
IP: Logged
08:52 PM
Sep 23rd, 2005
chachizz Member
Posts: 34 From: lima, ohio, united states Registered: Aug 2004
Yeah, so I've been tickin' away at the car. I have taken some pictures with the new camera, but really haven't had too much time to get the pictures up or document anything.
I must say I'm EXTREMELY disappointed with just about every vendor I've dealt with on this car with the exception of Rodney Dickman (He provided me with ample, accurate information and precise documentation and billing. Two thumbs up Rodney).
v8whiny's attitude when I wanted to buy the RIGHT flywheel ( You can guarantee I'll be finding another engine to put into my next fiero besides a SBC... at the very least it won't be with that kit). A little hint for ya whiny.... being sarcastic and condescending to they guy who's buying your product is NOT defined as "customer service". I think I'm still nicin' out from watching his instruction video ( I don't smoke).
WCF's constant forgetfulness. I'm still waiting for replies from WCF on my questions about the sway bar they provided as well as them to supply me brake pads for the front calipers ( Don't worry guys I figured out what pads I needed and bought the pads myself. If you ever want to satisfy a customer you could send me a check for $250 CDN. That's what I paid GM for the pads. Don't worry I won't hold my breath). I had patience with their first few screw ups, not anymore.
I'm still hesitant about how the RCC tubular control arms are gonna hold up. When I first ordered them I couldn't get any feedback on whether they were crap or not and ordered them. Since then I've heard some rumours about the spherical bearings being crap and the welds not holding up. I'll ensure to put everything to a thorough test on a closed course before actually trusting them. I'm sure if they are crap I'll get the same response out of them when I tried to get answers about the poor weld job on one of the control arms...... silence.
Let's see....... Oh yeah the clutch slave cylinder GM supplied me actually broke at the neck where the bleeder is and I'm having troubles getting warranty out of them so I had to spend another $200 CDN for another slave cylinder. Thanks Lakewood Chev olds (NOT!). Smyl motors in St. Paul has been more than great. Talk to Gary there, he's been known to perform a miracle or two.
The fuel system is complete. I mounted the battery box and battery. Ran the cables. The electrical is done except for the water pump connection and the electric choke connection.
I had a 4 core rad made and need to modify the mounting a little and the cooling system will be done.
I need to box in the hole I cut to fit the water pump. (I'll be using a remote water pump next time).
The brakes are all done and bled but the e brake isn't hooking up to the WCF calipers.
The new clutch slave needs to be bled.... AGAIN!
Oh yeah, I have to modify the engine hood due to the carb and air cleaner sitting too high. ( That was expected)
OH yeah and I have to hook up the throttle linkage. I'm still looking for ideas. Perhaps if anybody has pictures or explanations of what they've done. I'd be glad to read/listen/see them.
Troy at TR transmission in Red Deer has been more than helpful ( keep in mind he's been more than helpful and I haven't spent a penny in his shop). Randy at Pro stock performance in Edmonton has been a great help too. Thumbs up for both those guys.
i just sold my rcc front suspension parts for two reasons: 1: with the car sitting the way i wanted it ,there was almost no shock travel left and a good bump would break the shock 2:it appeared that i had two left rear lower arms and the suspension would bind badly. i bought a held kit and it looks like it will work better.smooth action and more travel.but i wont find out till spring,when my 86 gt goes back on the road after 6 years of on and off work. joe trentadue of race tech auto (416 747 5728 ) showed me a way to solve the travel problem. he cut a hole in the spring perch and extended the shock rod up to a higher mount.he says this works great and he does nt use drop spindles.his car is very low. he also fixed my headlights for a great price while we talked. i have to agree about some of the vendors.rodney dickman,the fiero store and lee at held have been great.i got no satisfaction from rcc.the others i have not dealt with. i really have enjoyed watching your build, hope you get back at it soon.
i just sold my rcc front suspension parts for two reasons: 1: with the car sitting the way i wanted it ,there was almost no shock travel left and a good bump would break the shock 2:it appeared that i had two left rear lower arms and the suspension would bind badly.
I agree... I got rid of my kit after the lower control arm broke on the road (Darrel was cooperative in refunding me an taking them back though I might add). I urge everyone running RCC components to take a good look at them. I'd really hate to keep my mouth shut and see somene lose their car or get injured cause they buy this joker's components.
Kit is the worse design ever, the adjustable link idea is designed wrong and seriously undersized, the spring/shock travel was about 1" on my car and it was caused by the stupid shock bottoming rather then coil bind or the wheel hitting the fender.
Well, I finally got around to working on the car again this weekend. I'm still too lazy to take pics.... sorry.
Let's see....
I got the coolant lines all hooked up and few pieces of metal welded back in the strut tower where I cut the hole to fit the water pump. Next time round I'll be using a remote water pump to avoid that fiasco.
Got the battery tray installed and ran the wires to motor and electrical harness. I'm pretty sure I screwed something up as nothing powers up until the car is in run position on the key. I'm pretty sure I missed a connection somewhere. It's been so long since I looked at this thing I can't remember what wires were supposed to go where LOL. I'll figure it out eventually. However I did test the started. It turns over the engine just fine.
I bought a K&N air filter to sit on the carb but it sits too low (even with the spacer) and it's too big onthe diameter to sit correctly on the engine. I'll have to do some research and figure out what I need.
Whatever air filter I decide to use I'm going to need to modify the hood. The air-gap manifold and the carb make things REALLY tall. I'll have to contact a body shop somewhere and see what they can do for me.
Got another slave cylinder for the clutch. Haven't bled it yet. A buddy of mine is comin for easter weekend. I'll probably do it with him on that weekend.
Fuel system is all hooked up and ready to go. Once again I think there's something wrong with the way I hooked up[ power as the fuel pump doesn't come on at all in any position of the key.
Still need to hook up the throttle cable. I've got a few ideas on how I'm going to do this. If you've got pictures of how you did yours I'd love to see 'em.
Got a 4 core radiator made. It's not quite a perfect bolt in but with a little modding it'll fit just fine.
Other than that I've got to get the alignment done and the exhaust done and it should be ready to roll.
Oh yeah, I finally found a guy who is willing to build me tubular suspension when this RCC stuff breaks/stresses me out/ticks me off. So that's a big weight off my shoulders. He's the head mechanic on a Cascar crew in Edmonton. I had a semi-short conversation with him 2 weeks ago and he seems very knowledgable. I think even if the RCC actually works (I'm not betting on it) I'll be having him build me a set and I may see what I can do to build a few sets and maybe sell them locally if they turn out to be hassle free.
IP: Logged
05:56 PM
Apr 4th, 2006
Soelasca Member
Posts: 455 From: Edmonton Alberta Canada Registered: Sep 2004
Nice to see another SBC build on here among a sea of 3800SC II builds. Don't get me wrong - I think they are sweet but a lot of the details are obviously different. Keep up the good work.
To be honest I doubt I'll do another SBC build. I vote with my dollar and I'm not overly impressed with the support/attitude I got from the SBC vendor. I'm probably looking toward doing a Northstar swap. There's a guy in Red Deer doing one and it looks more rewarding than this SBC. That will probably be my next fiero project.
IP: Logged
09:39 PM
Apr 16th, 2006
Soelasca Member
Posts: 455 From: Edmonton Alberta Canada Registered: Sep 2004
Well, got a lot of work done to the Fiero this weekend.
Got the radiator mounted. It turns out I made some errors in my design. The fan mount will have to be modified since I didn't take into account the recess of the rad core. I just have to make spacers and find longer bolts and all should be good. I also had to modify the top rad mount. Everything was going well until I ran out of wire on my welder (murphy's law). the bracket is in place and everything is holding fine. I'll just have to finish welding it when I get more wire. The filler neck I had mounted on the rad sits a little too high. This will create a problem for the hood when it gets mounted. I may have to pull the rad out and have the rad shop remove the neck. I'm think of just replacing it with a collar to install a pet **** for bleeding air.
Started filling the cooling system. No leaks! Wired up the electric water pump. I somehow thought the pump would be much louder. I can't really tell how much flow I'm getting out of it right now. I imagine I still have lots of air pockets to work out.
Got the wiring problem solved. Believe it or not, I forgot to add to my start up checklist a crucial item...... "ensure ECM harnesses are plugged in". The arm rest was just resting in place. I pull it out to access the aldl and discovered all the harnesses were still disconnected from the ECM. Everything works just fine now (so far).
Bled the clutch. It seems to be working well. The true test will be when it hits the road. I had a little trouble with air even though we were surgical in the way we bled it to avoid any air entrainment. We filled the resevoir with fluid left the bleed on the slave open and pressed petal to the floor. Tighetened breather and relsead pedal. Went through this process for about 5-10 cycles then proceeded to bleed out the slave.
bleeding the slave went like this. Took a 1/4" wrench and used the box end to fit over the slave shaft. Removed bleed screw. Pulledd back slave rod until I could visually see that there was no air in the fluid. Installed the bleed screw will the rod was still depressed. tightened bleed screw and then released the slave rod. I did this procedure about 5 times.
Inbetween all steps we ensured the resevoir didn't run out of fluid. I haven't measured the amount of travel yet, but it looks to be about 3/4". The transmission shifts into all gears when the cluth pedal is depressed and the clutch pedal actually has good feel to it.
Fuel system. Once I got power to the fuel pump I checked the fuel pressure at my regulator. According to the gauge I've got aout 3psi. This should be sufficient for the carb.
The engine was ready for fire and once I made a few last minute checks we were ready to give the engine it's first run in the car (this engine was previously ran up on a stand using natural gas on a stand). we seemed to be getting fuel into the carb after a few pumps. When the engine started to turn over we got a few fires and then some large back fires out of the headers causing a short fire (nothing detrimental). However we noticed that the carb was flooding. I checked the fuel pressure while the engine was turning over and it was at about 4psi. When we stopped cranking the pressure would go out to about 8 psi then stop. I adjusted the fuel regulator to minimum and was still getting 3psi on the gauge. Tried starting it up again. This time the carb REALLY flooded. There was gas pouring over the top of the carb and the engine actually hydraulically locked.
I disabled the fuel pump and ignition and started to crank the engine over. We got a LOT of fuel out of the front exhaust manifold. Will have to leave the engine over night to evap some of the fuel. Made a note on the checklist to replace the oil once we get everything started up.
So now I have to chase a flooding problem. I know very little about carbs. I know that too much pressure will flood the carb. I'm pretty sure the manual thaat came with the carb says not more than 5 psi. I'll have to isolate the regulator first and see what pressure it's building when it's truly deadheaded and go from there.
great project and your dedication is obvious; you'll have it running in no time. Carbs; I didn't go back thru all the pages and I am sure you know but carbs need (generally) a MAX of 7psi or less or they will flood constantly; I don' t know what you did re: new pump and/or fuel press reg; is either one a stock item? If so I would have to think they wouldn't be suitable for a carb. Is there any chance the 3 psi I saw in your note is a 'static' (ie residual) pressure? (ie after the leaking carb 'released' the overpressure?) The key is what is the pressure with it RUNNING (or trying to run).
The little needle and seat is the thing that made carbs go out of fashion; I have spent many long hours with Holleys and Rochesters (and Keihins and SU's etc etc etc) fiddling with exactly those parts. They have REAL limitations. I am just throwing out ideas that might trigger some other idea; again I am sure you have covered this but a second (or twentieth LOL) set of eyes sometimes help.
Keep up the great work and thread and looking fwd to the final results;
signed: just getting out to the garage in ottawa......
IP: Logged
01:18 PM
Apr 17th, 2006
Soelasca Member
Posts: 455 From: Edmonton Alberta Canada Registered: Sep 2004
Thanks for the insight 308. I posted another thread and it seems the general consensus is that the needle and seat are my problem. Yes, I do have a regulator on it but no I haven't gone the distance to set it up to my satisfaction. That will be the first step before I pull the carb apart.
If you read above. I finally found someone who can do the suspension work for me. I'm going tomorrow to check out their shop in Edmonton. They sound SUPER promising. However, the work probably won't be able to be done until after race season. Actually the guy I talked to said it's dependant on " how many times we run our cars into the wall". I thought that was fairly humourous.
On an off topic... I finally found an 88 GT....in SUPER good shape too. Just brought it home. Not sure if it'll be another mod or perhaps just a restoration job. It doesn't really need much right now except a sunroof seal and brakes.
My wife got a new camera so hopefully I'll have pictures posted sometime in the next month.
what kind of carb is it? I can look to see if I still have any of my stuff from the pre-fiero era........ Might be out in Edmonton in July; would be interesting to have a look-see!
GP
IP: Logged
08:47 AM
Apr 30th, 2006
Soelasca Member
Posts: 455 From: Edmonton Alberta Canada Registered: Sep 2004
The carb is an Edelbrock 1806. 650 CFM carb. As I posted on the other thread I created I pull the top off the carb and cleaned out the needles and seats. Everything fired right up after Idid that. I just purchased a set of metering rods for tuning the carb. No I've never done this before and (of course) it's vry hard to find a good "how to" guide on how to tune one.
*shrugs* like everything else I'll just read, listen and learn by my mistakes
IP: Logged
08:58 PM
Soelasca Member
Posts: 455 From: Edmonton Alberta Canada Registered: Sep 2004
I put the car on a trailer on Friday and took it down to the local tire shop to have them do the alignment and make/install the exhaust on it.
After that is done it's a matter of hooking up the throttle linkage and bleeding the clutch cylinder. After all the reading I did I STILL can't get the damned thing bled right. I actually think I may have screwed the slave cylinder as I was using a vacuum bleeder and everything was going well and then I heard a "pop" sound and it started sucking air. Not sure if I inverted the slave seal due to pressure or something worse. I'll figure it out when it gets back.
I also made a big booboo when I ad the 4-core rad made. I'll have to take it back to the shop and have them do a few touch ups. WHEN I get pictures I'll show you all what I did wrong and what I intend on doing to make it better. I also found the coolant system hard to bleed due to the routing of the inlet hose. I managed to get the pump bled but i'd like to switch it up somehow. Who knows I might end up going to a remote pump before I get this system debugged.
Other than that I'm read to go. I'm VERY VERY leary about the RCC suspension. The mechanic doing the alignment said the adjuster on the LCA looks SUPER flimsy which is what I kinda thought too. I guess I'll have to find a closed course to test it on before I really take it out on the road.
IP: Logged
09:07 PM
PFF
System Bot
Alex4mula Member
Posts: 7410 From: Canton, MI US Registered: Dec 1999
I read this and reminds me so much of my swap. So many little things here and there that go wrong and you have to figure out why. Still at the end it is very satisfying. Next time you may do a N* but you won't get anything close to the power this SBC you have should make. What cam are you running? Those 210cc AFR heads are huge.
IP: Logged
09:26 PM
May 1st, 2006
Soelasca Member
Posts: 455 From: Edmonton Alberta Canada Registered: Sep 2004
Heads are overkill I admit. I got a good deal on them and it gives me room to breathe if I go with a bigger cam. i'm only hoping for about 300-350hp out of the engine. I could be wrong, maybe I'll get more. Maybe I'll get less. I can't remember the spec of the cam off hand, but it's not anything stupid. It sounds a little rough at idle but it should keep an idle
The valve train is completely roller. I was trying to get as much of the HP to the flywheel rather than losing it to friction.
I honestly don't know much about the N* engines, but I'd like to go high tech. I've got a bunch of silly ideas I'd like to try out.
IP: Logged
12:31 AM
May 9th, 2006
Soelasca Member
Posts: 455 From: Edmonton Alberta Canada Registered: Sep 2004
The car is in the shop getting the exhaust and wheel alignment done.
There's only a few things left now.
1. Bleed clutch. This may involve buying a new slave since there was a lage popping sound when I tried to vacuum bleed it. 2. Pull the rad out and send it back to the rad shop for rework. I had them add a neck on the rad that really went wrong for me. Hopefully that won't take more than a week to get done. 3. Reinstall the interior. 4. Hook up the throttle cable. 5. Wrap the headers and install the heatshield I made for all the wiring. 6. Tune the carb/engine 7. Optional depending on break in...replace suspension.
Hopefully I can get all that done in the next couple of shifts off (approx 1 month).
Next stage will be finding a good body kit for it. Any suggestions??
IP: Logged
09:26 PM
Jun 9th, 2006
Soelasca Member
Posts: 455 From: Edmonton Alberta Canada Registered: Sep 2004
Ok here's some of the latest photos, Now If I can only remember how to add photos to this darned thing.
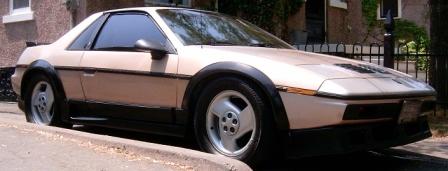
Here's the latest addition to the fleet. It's in pretty good condition. 240 000km, 80,000 km on the engine. Looks like it's got all the factory options other than leather (if leather was an option).
Here's a few pictures of how I modified the throttle connection.
As you can see the car is getting closer to being finished
A picture of how I butchered the trunk lid to accomodate
[This message has been edited by Soelasca (edited 06-09-2006).]
IP: Logged
02:45 PM
Jun 11th, 2006
Soelasca Member
Posts: 455 From: Edmonton Alberta Canada Registered: Sep 2004
here's a link to where I'm storing the new photos. You can see more (and bigger) images there.
-The radiator is back at the rad shop to have the neck removed and a 1/4" collar installed for an air breather. That will be picked up and installed when I get back. -The clutch is STILL not bled. Go a new idea on how to bleed it, hopefully that'll work. -I've got a line on a cheap piece of stainless steel tubing to replace the coolant hose that comes out of the engine ( I just think that having 3 pieces of rad hose pieced together looks so.... wrong). -I still have to clean the road tar off the wheel wells and install them. -The replacement steering wheel is installed but it seems crooked. It will need some adjustment. -Trunk needs to be welded up (yes, more pictures will be taken) and the trunk carpet will need to be refitted to the trunk. it'll be the first time I try to do any sort of upholstery/trim work. I won't promise anything. -Finally, the exhaust will need to be done. If I haven't already explained..... I want good flow, but I don't want to be getting speeding tickets (plus it'd be nice to have a sleeper)
Some items that can be handled AFTER the car is running on the road are.
- replace door, trunk and ignition keys - get some sort of hood scoop installed over the air breather to cover up the hole I butchered in it. - replace interior - replace body (currently researching a body and interior kit/upgrade)
IP: Logged
12:31 AM
Jul 1st, 2006
Soelasca Member
Posts: 455 From: Edmonton Alberta Canada Registered: Sep 2004


 . Have a good one and keep up the good work!