Pennock's Fiero Forum
  Technical Discussion & Questions - Archive
  Hey Sourmug... (also known as How to Re-cover the Center Storage Box with Leather)

T H I S   I S   A N   A R C H I V E D   T O P I C
  

Email This Page to Someone! | Printable Version


Hey Sourmug... (also known as How to Re-cover the Center Storage Box with Leather) by dguy
Started on: 03-25-2004 08:29 AM
Replies: 18
Last post by: dguy on 04-02-2004 09:27 AM
dguy
Member
Posts: 2416
From: Beckwith Township, ON, Canada
Registered: Jan 2003


Feedback score: N/A
Leave feedback


Total ratings: 97
Rate this member

Report this Post03-25-2004 08:29 AM Click Here to See the Profile for dguySend a Private Message to dguyDirect Link to This Post
After finding some inspiration in Sourmug's article on how to repair a shrinking/peeling center storage box, I decided to take it one step further. Why stop at vinyl when you can do leather?

Already impressed by the leather visors & console saddle provided by Mr. Mike's, and not wanting to end up with mismatched colors, I purchased a sheet of leather from them as well.

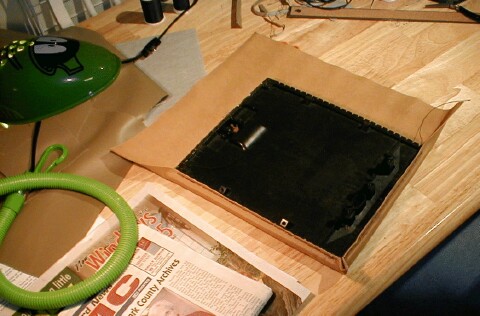
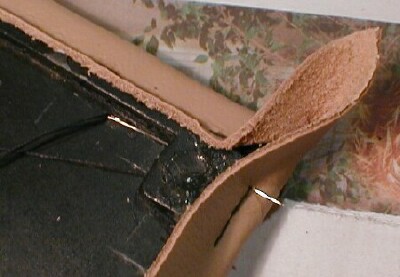
Sourmug's technique (see above link) was used to strip down, clean, and re-create the squishy layer which hides under the cover. We stopped short of re-attaching the vinyl however, keeping only the area which sits directly behind the latch handle. The same polyurethane adhesive was used to glue this one enduring piece of the vinyl to the door's skeleton. (the shiney stuff is some ¼" foam carpet undermatting that was lying about in the garage, and felt like dontaing itself to this project)


------------------

his: 1985 2M6 SE
mostly stock, but becoming more my creation than GM's with each passing day

hers: 1984 2M4
all stock... with plans for something bigger in the future

[This message has been edited by dguy (edited 03-25-2004).]

IP: Logged
PFF
System Bot
dguy
Member
Posts: 2416
From: Beckwith Township, ON, Canada
Registered: Jan 2003


Feedback score: N/A
Leave feedback


Total ratings: 97
Rate this member

Report this Post03-25-2004 08:33 AM Click Here to See the Profile for dguySend a Private Message to dguyDirect Link to This Post
The next part was simple--drill a series of 1/16" holes through the raised lip on the back of the door (on all four edges obviously).

IP: Logged
dguy
Member
Posts: 2416
From: Beckwith Township, ON, Canada
Registered: Jan 2003


Feedback score: N/A
Leave feedback


Total ratings: 97
Rate this member

Report this Post03-25-2004 08:38 AM Click Here to See the Profile for dguySend a Private Message to dguyDirect Link to This Post

dguy

2416 posts
Member since Jan 2003
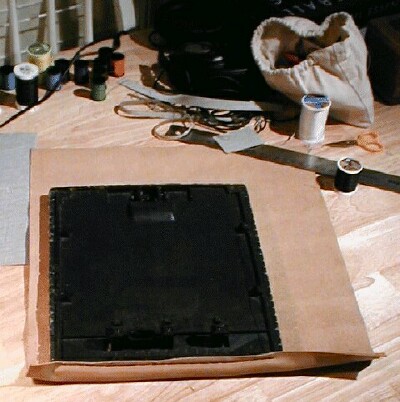
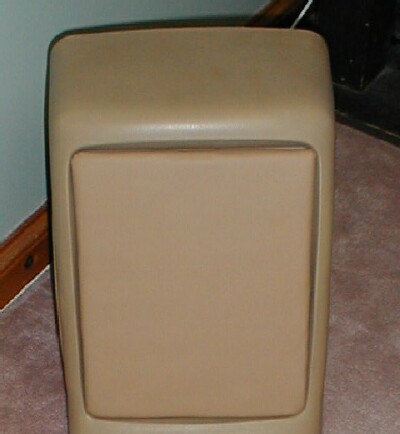
Now grab a needle, some heavy thread, and start sewing.

As you sew, pull the leather in tight against the raised lip. Once an edge is complete, trim the edge of the leather so that it is flush with the raised edge of the door.

[This message has been edited by dguy (edited 03-25-2004).]

IP: Logged
dguy
Member
Posts: 2416
From: Beckwith Township, ON, Canada
Registered: Jan 2003


Feedback score: N/A
Leave feedback


Total ratings: 97
Rate this member

Report this Post03-25-2004 08:41 AM Click Here to See the Profile for dguySend a Private Message to dguyDirect Link to This Post

dguy

2416 posts
Member since Jan 2003
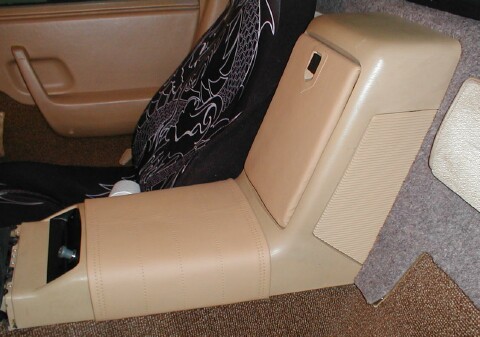
Once finished all four edges, you'll have a little "ear" at each corner. Trim away the excess material, leaving enough so that you can pull it in tight and stitch it down. More or less pinching & rounding the corner of the box cover.

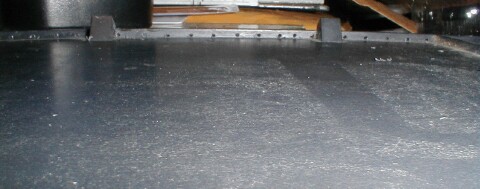
Here's a close-up of one of the corners in progress. It should be noted that when drilling the holes, the top two corners of the box's door require long holes to be carefully drilled through the mysterious plastic blocks which are only present at the top of the door.

[This message has been edited by dguy (edited 03-25-2004).]

IP: Logged
dguy
Member
Posts: 2416
From: Beckwith Township, ON, Canada
Registered: Jan 2003


Feedback score: N/A
Leave feedback


Total ratings: 97
Rate this member

Report this Post03-25-2004 08:42 AM Click Here to See the Profile for dguySend a Private Message to dguyDirect Link to This Post

dguy

2416 posts
Member since Jan 2003
Almost done. Give it a test fit to make sure that the corners were pulled in far enough, and that nothing else has gone awry.

IP: Logged
dguy
Member
Posts: 2416
From: Beckwith Township, ON, Canada
Registered: Jan 2003


Feedback score: N/A
Leave feedback


Total ratings: 97
Rate this member

Report this Post03-25-2004 08:45 AM Click Here to See the Profile for dguySend a Private Message to dguyDirect Link to This Post

dguy

2416 posts
Member since Jan 2003
Almost almost done.

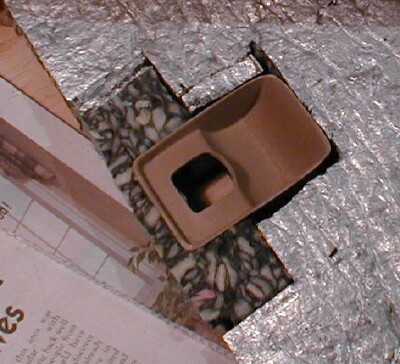
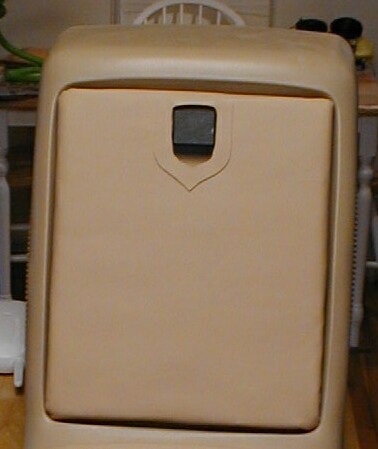
Using the sharpest knife you can find, trim away the leather which is hiding the latch hole, and re-install the latch. Use your imagination to finish off the seam between the leather & the vinyl "insert". We chose to use a piece of leftover leather, cut it to the same size & shape as the hood ornament, and glue it on with fabric cement.

[This message has been edited by dguy (edited 03-25-2004).]

IP: Logged
dguy
Member
Posts: 2416
From: Beckwith Township, ON, Canada
Registered: Jan 2003


Feedback score: N/A
Leave feedback


Total ratings: 97
Rate this member

Report this Post03-25-2004 08:47 AM Click Here to See the Profile for dguySend a Private Message to dguyDirect Link to This Post

dguy

2416 posts
Member since Jan 2003
One last brag photo of the completed console back in the car.

IP: Logged
USFiero
Member
Posts: 4870
From: Everywhere and Middle of Nowhere
Registered: Mar 2002


Feedback score: N/A
Leave feedback


Total ratings: 109
Rate this member

Report this Post03-25-2004 08:57 AM Click Here to See the Profile for USFieroSend a Private Message to USFieroDirect Link to This Post
I just kept refreshing my browser to watch you post this. Very nice, premium work!!!

------------------
John DuRette
Black 85 SE, undergoing work as we speak!
Battery re-located up front using a V8 Archie box
Remote Start/Window Rollup/Lock/Trunk Release/Alarm
White Gauge Faces w/120 MPH Speedometer Conversion
Hidden Antenna
Urethane Suspension Bushings
Sequential Tallights
Custom Painted Dash Panels
Oreif's painted door tabs and horn button
Shortened Automatic Shifter w/Beretta shiftknob
SpyHunter Intake Scoop
H4 Headlight Conversion - done right!
LED Third Brake Light/Custom Headliner
Thunderbird Turbo hood scoops
Braided Steel Brake Hoses
Lowered an inch

Still not on the road!

IP: Logged
dguy
Member
Posts: 2416
From: Beckwith Township, ON, Canada
Registered: Jan 2003


Feedback score: N/A
Leave feedback


Total ratings: 97
Rate this member

Report this Post03-25-2004 09:11 AM Click Here to See the Profile for dguySend a Private Message to dguyDirect Link to This Post
 
quote
Originally posted by USFiero:
I just kept refreshing my browser to watch you post this. Very nice, premium work!!!

Thanks! Though I can't take all the credit. Just in case she's watching , my wife did most of the sewing, and came up with the idea for the trim piece around the latch.

IP: Logged
Scott-Wa
Member
Posts: 5392
From: Tacoma, WA, USA
Registered: Mar 2002


Feedback score: N/A
Leave feedback


Total ratings: 147
Rate this member

Report this Post03-25-2004 11:07 AM Click Here to See the Profile for Scott-WaClick Here to visit Scott-Wa's HomePageSend a Private Message to Scott-WaDirect Link to This Post
Looks good!
IP: Logged
Sourmug
Member
Posts: 4538
From: Calgary, Alberta, Canada
Registered: Sep 2002


Feedback score:    (29)
Leave feedback


Total ratings: 144
Rate this member

Report this Post03-25-2004 11:24 AM Click Here to See the Profile for SourmugSend a Private Message to SourmugDirect Link to This Post
Hey! That looks great! Good job.

Sour

IP: Logged
PFF
System Bot
Stinkin_V8
Member
Posts: 821
From: SK, Canada
Registered: Aug 2003


Feedback score: N/A
Leave feedback

Rate this member

Report this Post03-25-2004 11:25 AM Click Here to See the Profile for Stinkin_V8Send a Private Message to Stinkin_V8Direct Link to This Post
 
quote
Originally posted by dguy:

That looks awesome, the color matched leather really makes this stand out as a high-quality job.

You've got me pumped up - I got three leather hides in the mail today, I can't wait to go home and mess with it now.

[This message has been edited by Stinkin_V8 (edited 03-25-2004).]

IP: Logged
Jake_Dragon
Member
Posts: 32846
From: USA
Registered: Jan 2001


Feedback score: (5)
Leave feedback


Total ratings: 403
Rate this member

Report this Post03-25-2004 11:49 AM Click Here to See the Profile for Jake_DragonSend a Private Message to Jake_DragonDirect Link to This Post
did you wet the leather and form it to the door or just do it dry?
IP: Logged
dguy
Member
Posts: 2416
From: Beckwith Township, ON, Canada
Registered: Jan 2003


Feedback score: N/A
Leave feedback


Total ratings: 97
Rate this member

Report this Post03-25-2004 12:01 PM Click Here to See the Profile for dguySend a Private Message to dguyDirect Link to This Post
 
quote
Originally posted by Jake_Dragon:
did you wet the leather and form it to the door or just do it dry?

Dry. The leather was very pliable, and easy to work with. No problem at all holding it snug across the door by hand while stitching up opposite sides.

I never would have thought of wetting it first. What advantages are there to getting it wet?

[This message has been edited by dguy (edited 03-25-2004).]

IP: Logged
Sourmug
Member
Posts: 4538
From: Calgary, Alberta, Canada
Registered: Sep 2002


Feedback score:    (29)
Leave feedback


Total ratings: 144
Rate this member

Report this Post03-25-2004 06:15 PM Click Here to See the Profile for SourmugSend a Private Message to SourmugDirect Link to This Post
As I understand it wetting the leather will allow it to streach. Once it dries it will shrink slightly making a tighter fit.

Once again, nice job it really looks great.

Sour

IP: Logged
dguy
Member
Posts: 2416
From: Beckwith Township, ON, Canada
Registered: Jan 2003


Feedback score: N/A
Leave feedback


Total ratings: 97
Rate this member

Report this Post03-28-2004 09:17 AM Click Here to See the Profile for dguySend a Private Message to dguyDirect Link to This Post
 
quote
Originally posted by Sourmug:

As I understand it wetting the leather will allow it to streach. Once it dries it will shrink slightly making a tighter fit.

That's what I suspected, but I wasn't sure. :insert memories of getting caught by one hell of a t-storm, while on my motorcycle, and about 30 minutes from home here:


quote
Once again, nice job it really looks great.

Thanks for sharing your reconstruction fix.


quote
Originally posted by dguy:

What advantages are there to getting it wet?

Well now I'm disappointed. I baited the dirty mind hook, but no one bit. I must be slipping.

IP: Logged
Jake_Dragon
Member
Posts: 32846
From: USA
Registered: Jan 2001


Feedback score: (5)
Leave feedback


Total ratings: 403
Rate this member

Report this Post03-28-2004 10:30 AM Click Here to See the Profile for Jake_DragonSend a Private Message to Jake_DragonDirect Link to This Post
Great job, wetting the leather will also alow it to mold to the part better.
My wife loves decorating shows, I don’t mind because I spend time on the computer. But every now and then she will find something that I might be able to use on the car and I will watch. It was such a show that I saw a mask covered in leather and some very intricate curves put into it. They wet the leather and molded it with their hands, when it dried it retained the shape.
IP: Logged
The_Ikon
Member
Posts: 629
From: Mississippi, USA
Registered: Mar 2004


Feedback score: N/A
Leave feedback

Rate this member

Report this Post04-01-2004 03:33 PM Click Here to See the Profile for The_IkonClick Here to visit The_Ikon's HomePageSend a Private Message to The_IkonDirect Link to This Post
very nice do it yourself upgrade, for very lil $$$!!! i guess you are going to do the visors and armrest now?! when you do it let us know! ha ha

------------------
65' Karmann Ghia
http://photos.yahoo.com/the_ikon1911

85' Fiero 5 spd
Jaguar XJ8 L
Audi A6 Quattro
Jeep CJ7
Lexus SC 400 *Best car ever RIP

IP: Logged
dguy
Member
Posts: 2416
From: Beckwith Township, ON, Canada
Registered: Jan 2003


Feedback score: N/A
Leave feedback


Total ratings: 97
Rate this member

Report this Post04-02-2004 09:27 AM Click Here to See the Profile for dguySend a Private Message to dguyDirect Link to This Post
 
quote
Originally posted by The_Ikon:

very nice do it yourself upgrade, for very lil $$$!!! i guess you are going to do the visors and armrest now?! when you do it let us know! ha ha

Actually the visors are already done, courtsey of Mr. Mike's. I really must put aside the money to get the seats done some day.

[This message has been edited by dguy (edited 04-02-2004).]

IP: Logged


All times are ET (US)

T H I S   I S   A N   A R C H I V E D   T O P I C
  

Contact Us | Back To Main Page

Advertizing on PFF | Fiero Parts Vendors
PFF Merchandise | Fiero Gallery | Ogre's Cave
Real-Time Chat | Fiero Related Auctions on eBay


Copyright (c) 1999, C. Pennock