|
| Bringing a 88 Fiero Back to Life with a LFX Swap (Page 4/15) |

|
MikesFirstFiero
|
AUG 07, 03:20 PM
|
|
|
Not having the 6T70 makes it a lot simpler. Good to see another LFX completed. Any problems with aft bank cam sensors hitting the shock tower? And is that a dogbone mount? [This message has been edited by MikesFirstFiero (edited 08-07-2021).]
|
|
|
|
MikesFirstFiero
|
SEP 23, 10:39 PM
|
|
Sorry for the long delay in posting progress. I've been at it most days and have lots to talk about.
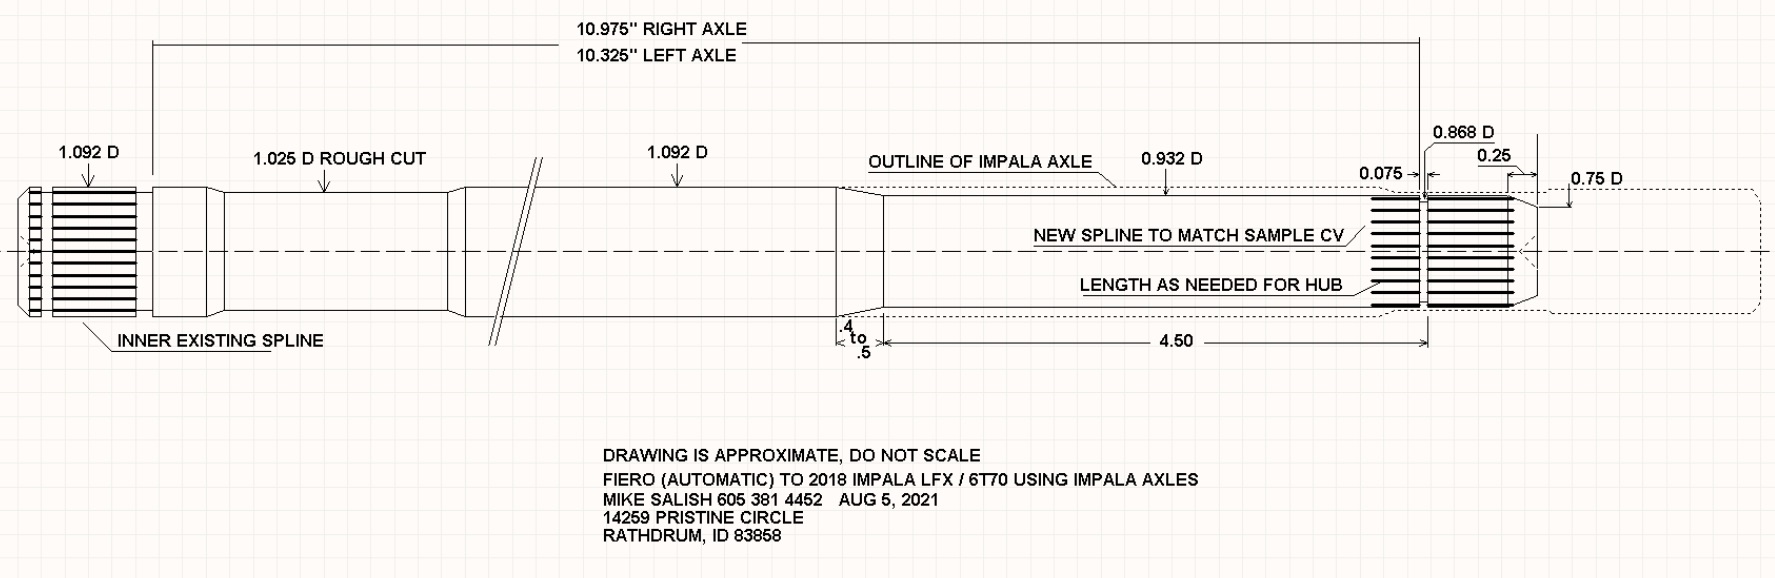
The axles were looking like a significant problem since the Fiero axles tripod ends won't work with the Impala parts. I looked at the Impala axles and found that they were long enough to work and the diameter was larger than the Fiero diameter. I spent a time over several days taking measurements of the axle positions in different points of suspension travel. I used a Fiero axle with the tripod fitting removed and replaced with the Impala part. The length position was determined by a plastic sleeve on the axle to position the tripod roller assembly. I made several independent measurements to insure that I was not making them too long or too short.
I found Dutchman Motorsports on the web in Boise, ID (https://dutchmanaxles.com) who said they could shorten, resize and respline the Impala axles for $75 each. Their big concern was that they would need to remove too much from the axles and get into the softer axle core. I sent them a drawing and they confirmed that the diameter reduction was good so I shipped the impala axles off along with a fiero axle and splined spider from a (new) Fiero outer CV as reference parts. Three weeks later they showed up and look great. For boots I went to (I'll find the name later) who specialize in CV joint parts. they had boots of the correct diameters in their catalog made fom a composite material, part rubber and plastic, for about $10 each with shipping. Since I was well into getting the engine in the car and connecting the liquid lines I set the axles aside for now.
Comparing the Impala and Fiero axles before modification
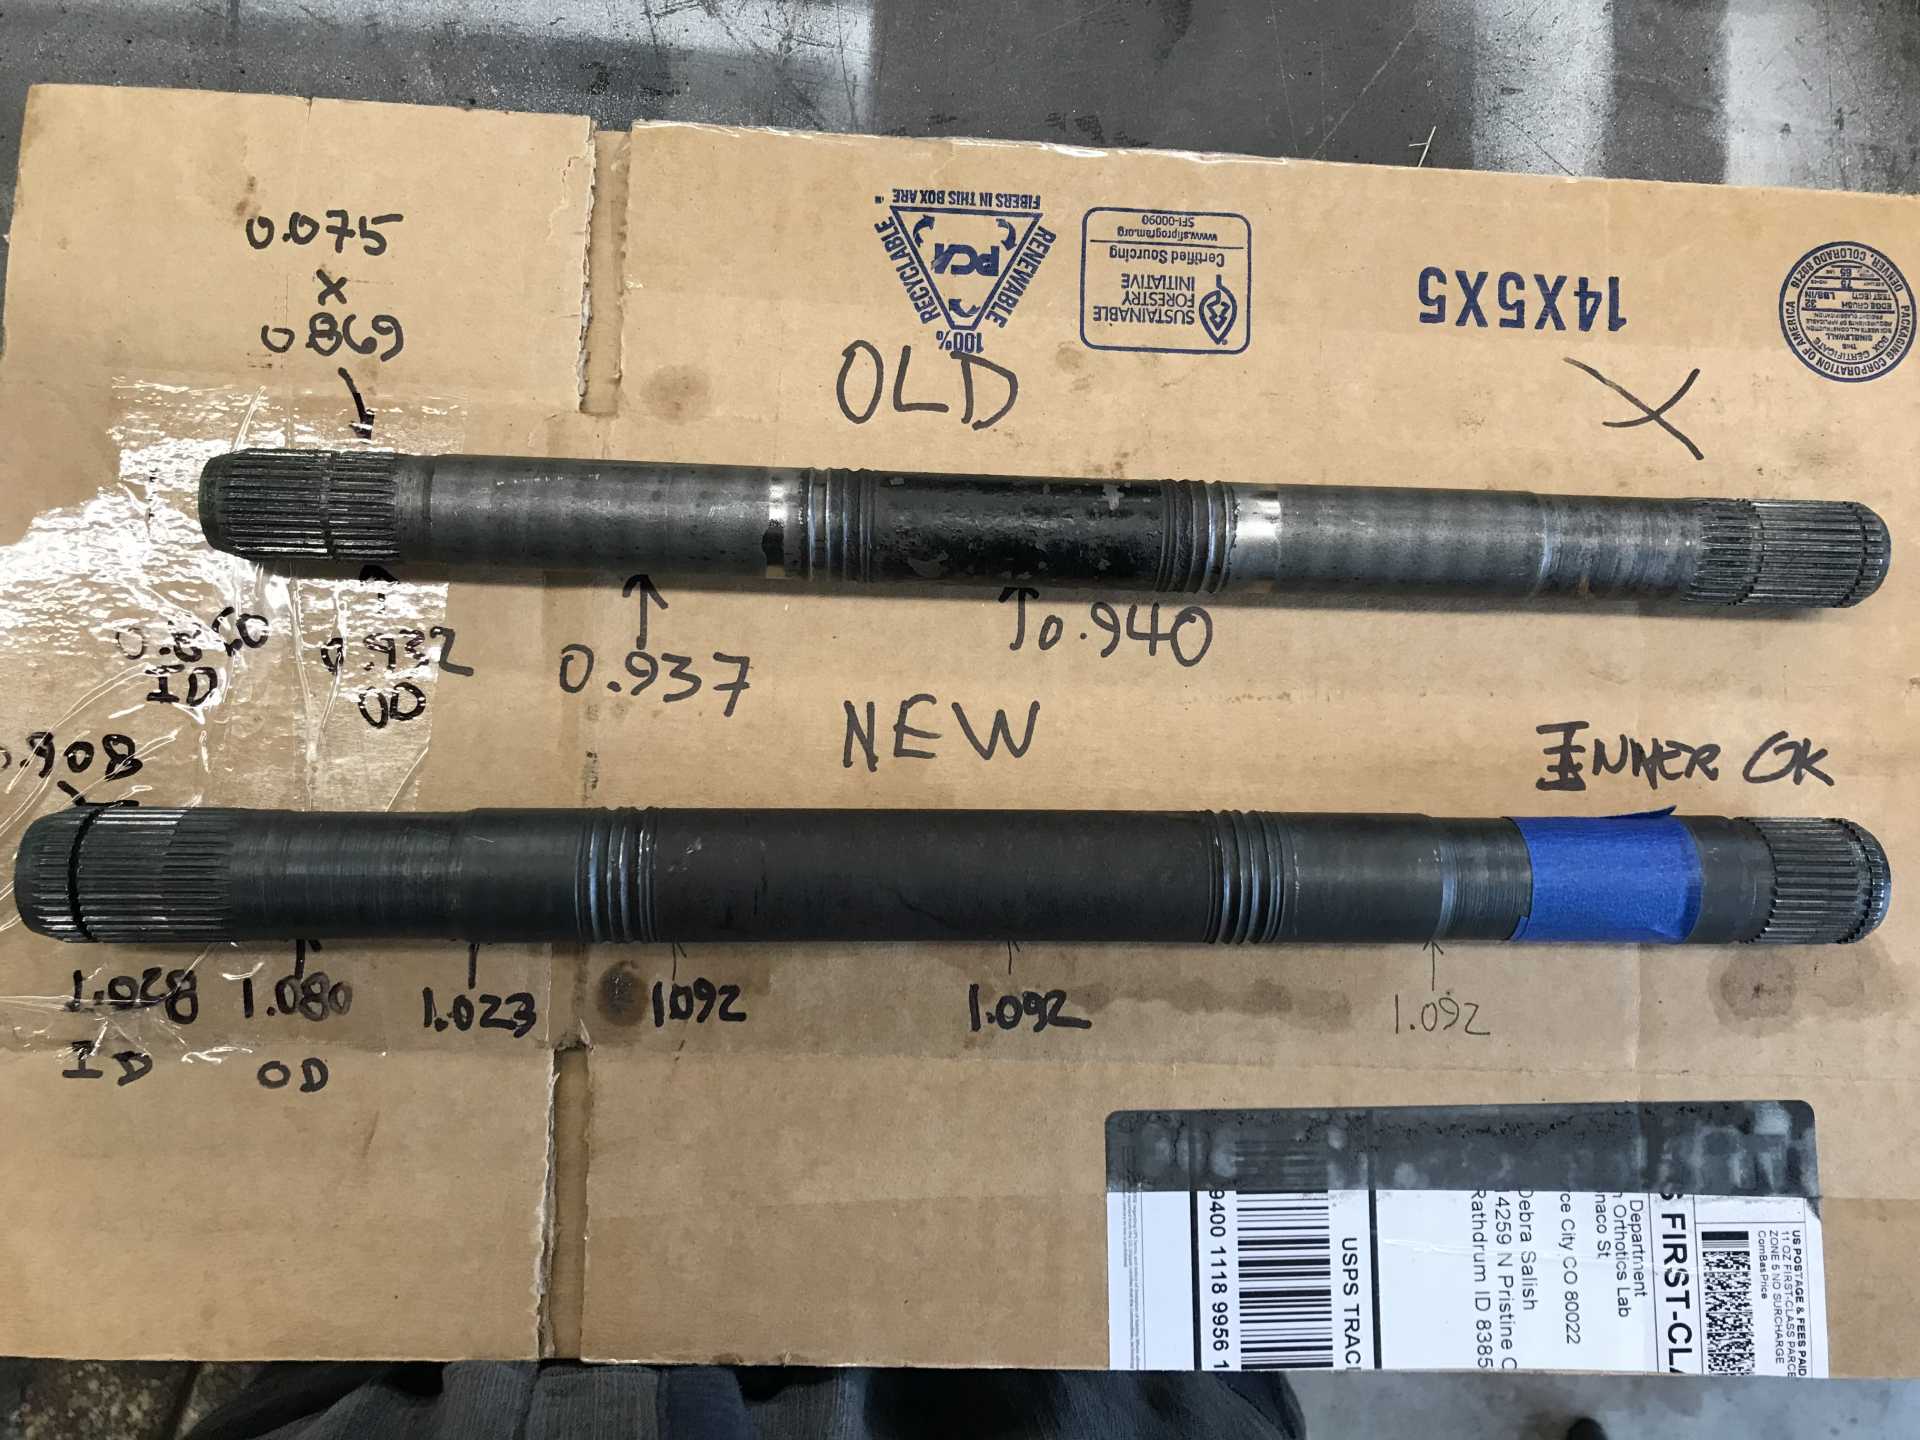

The shop drawing I sent to Dutchman
Impala, Fiero, New Axles

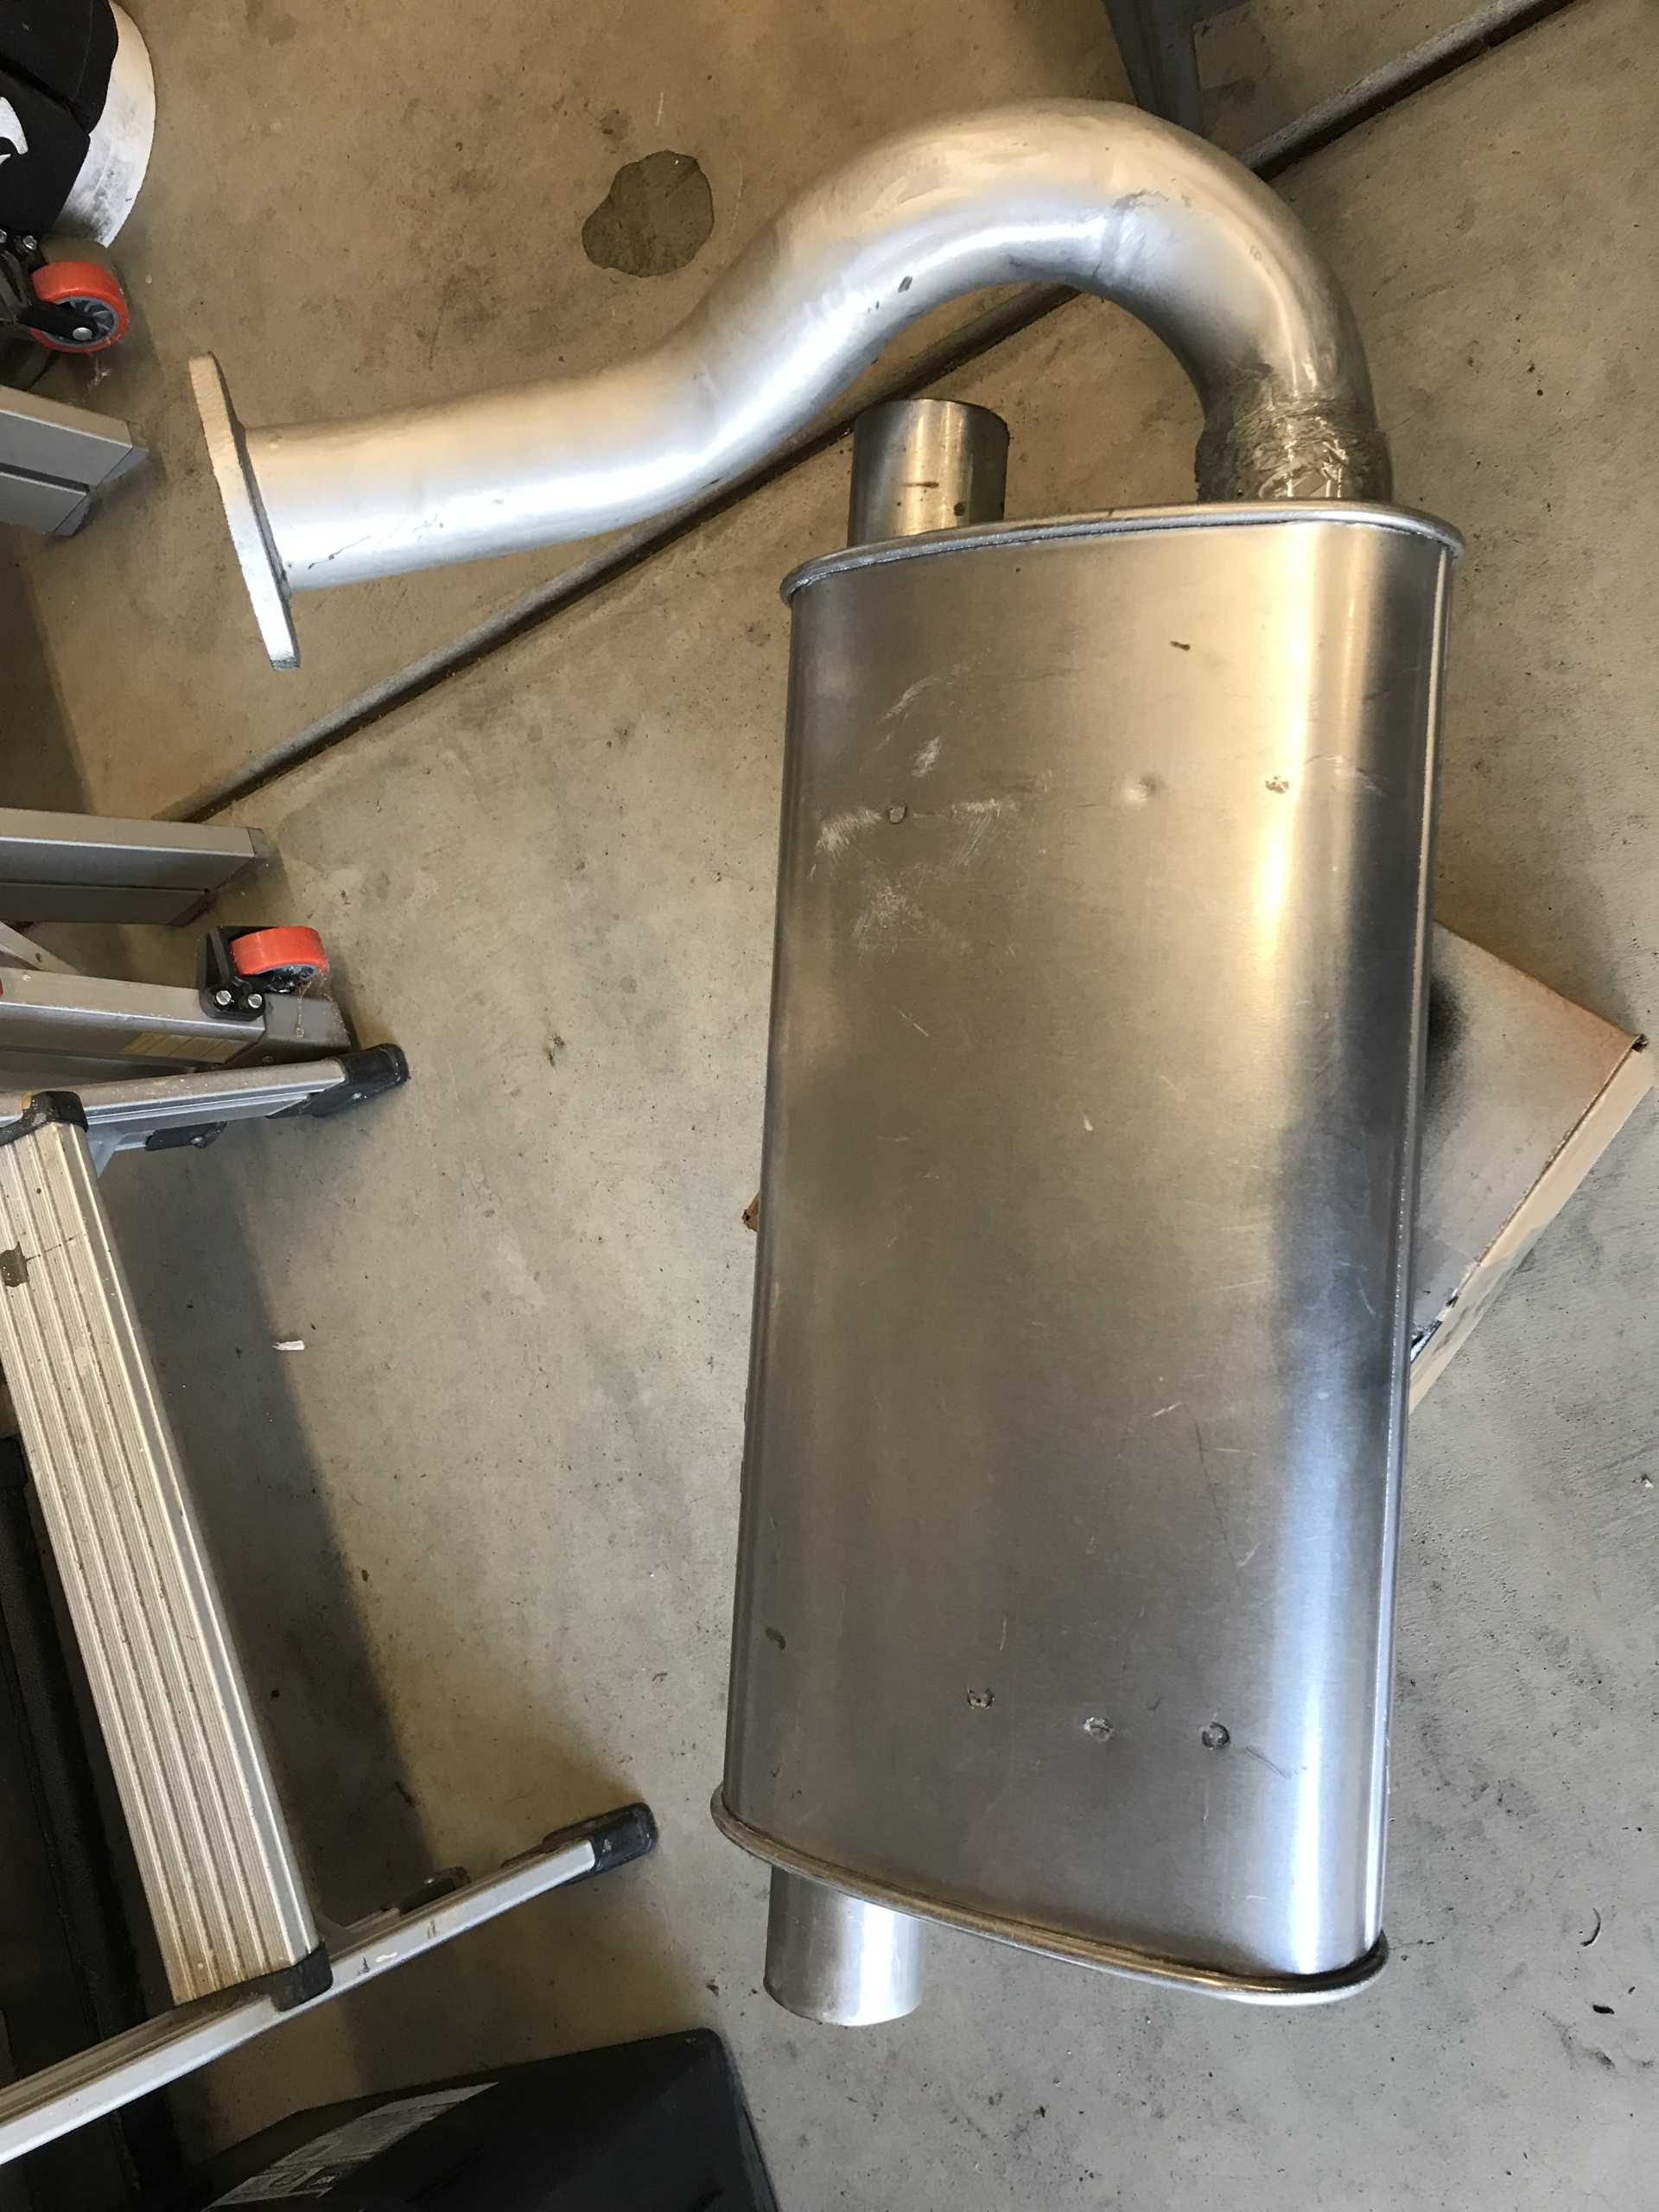
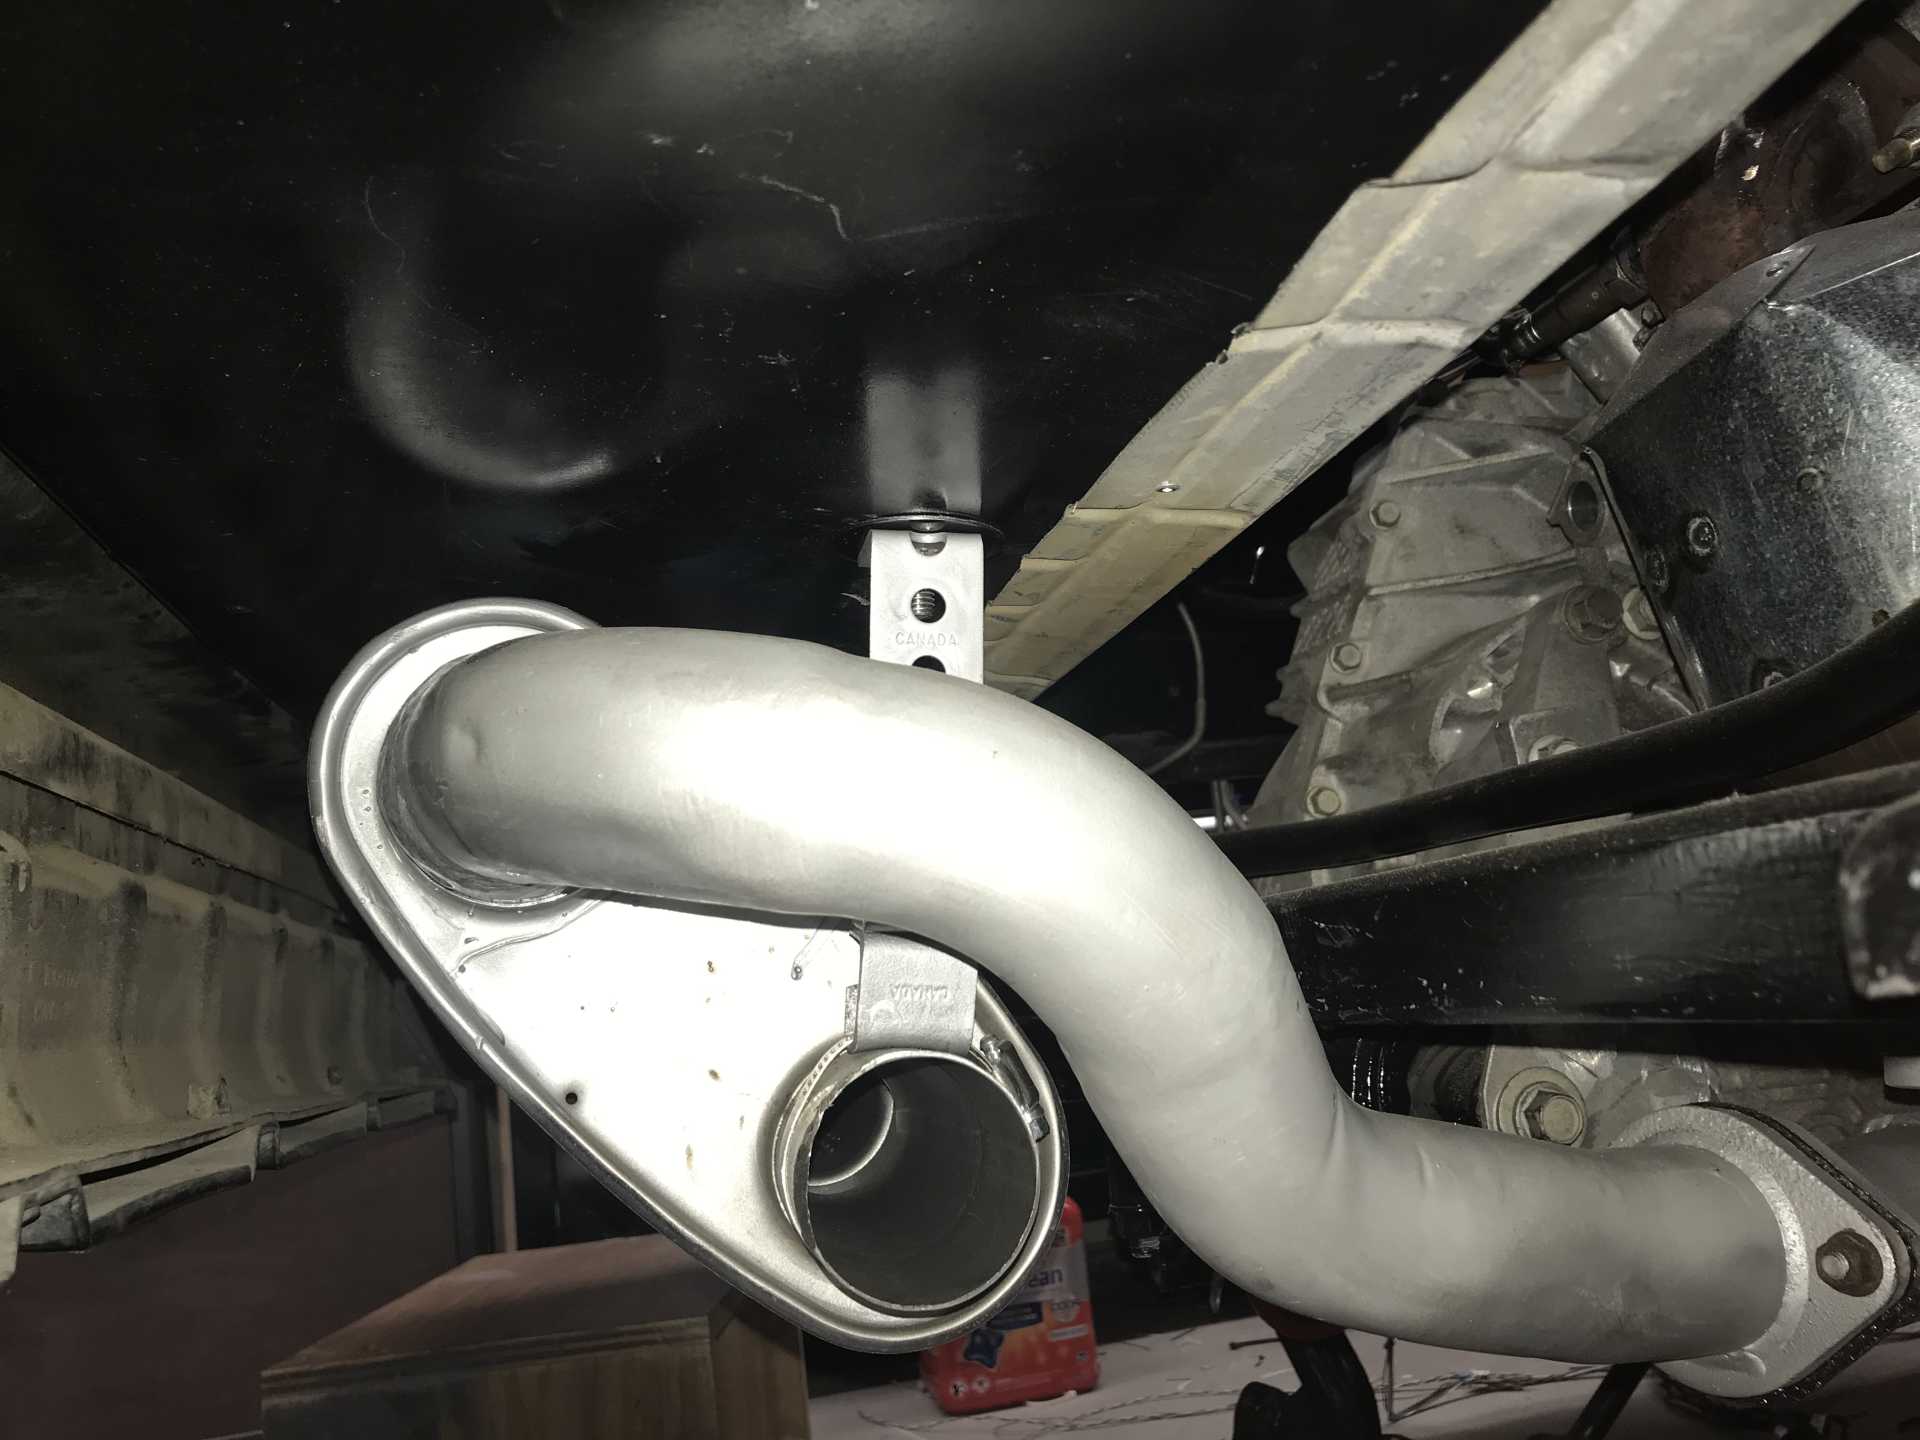
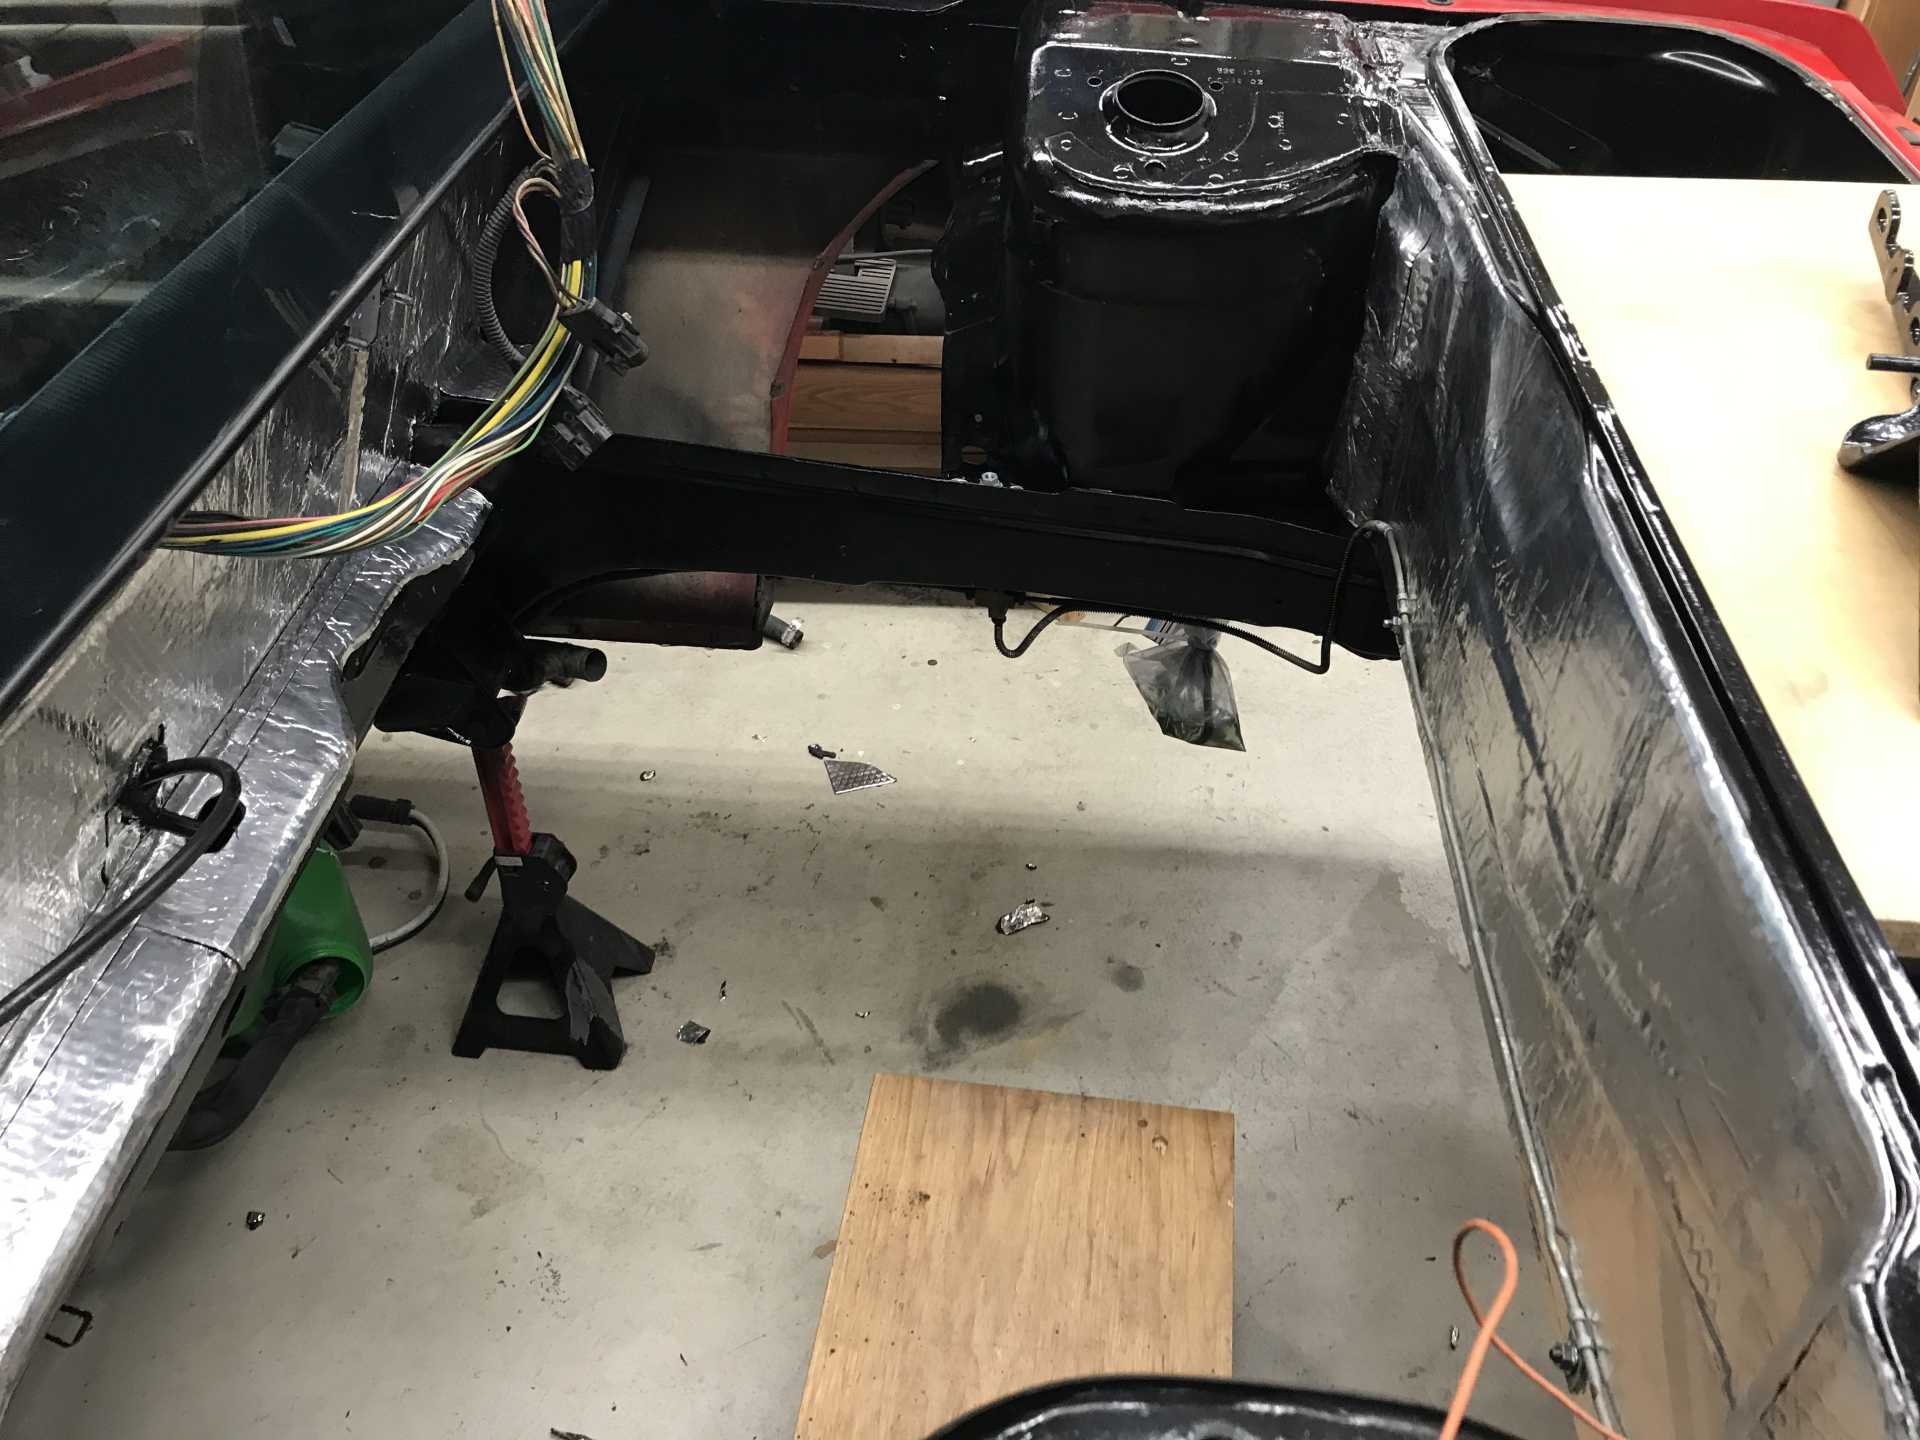
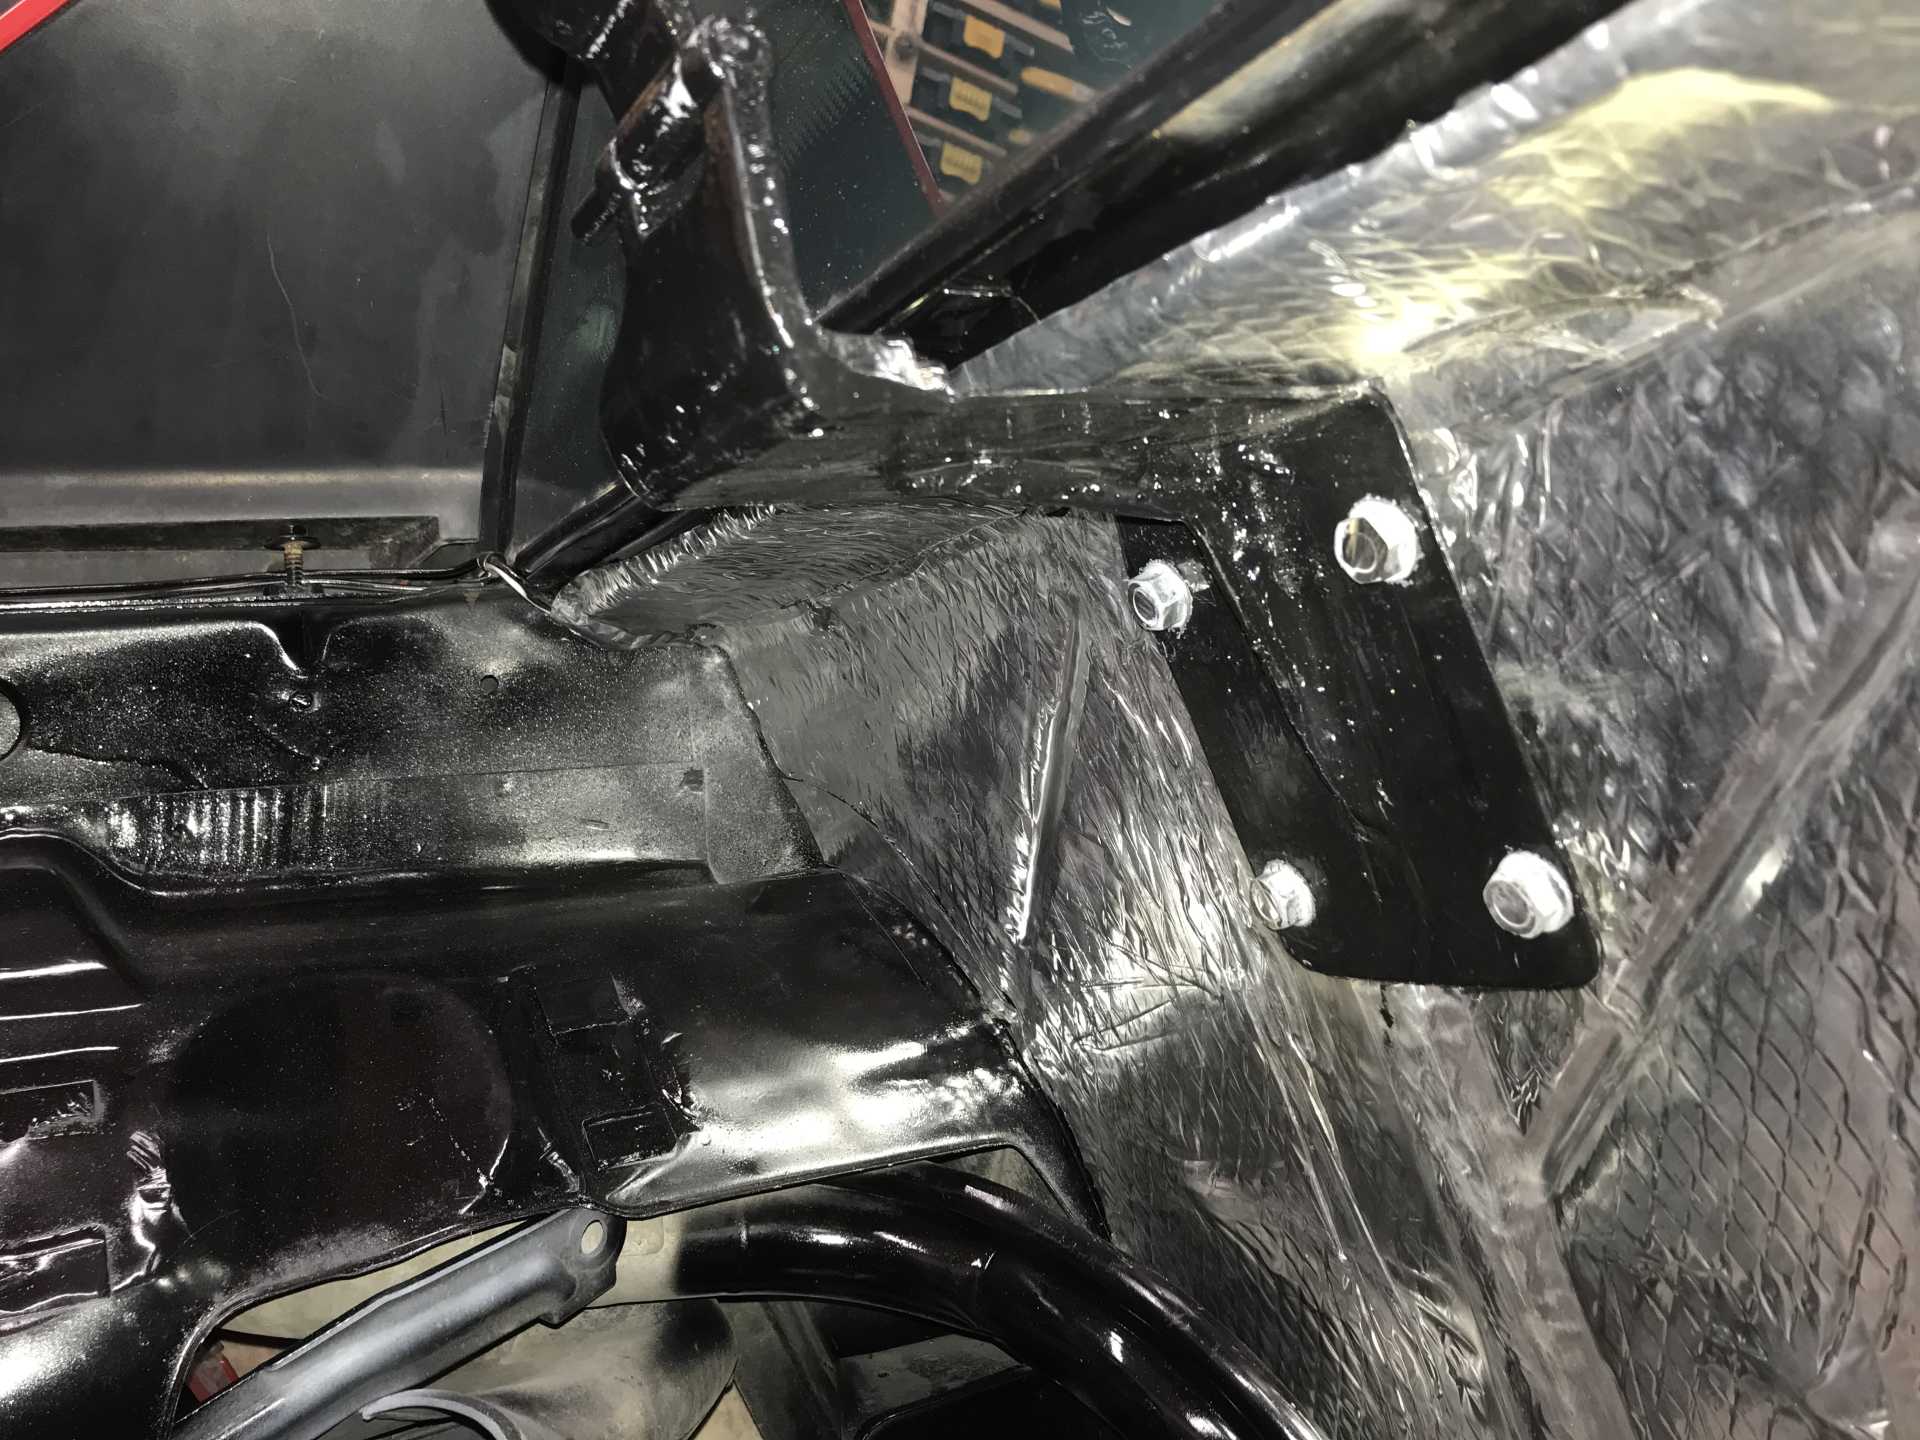
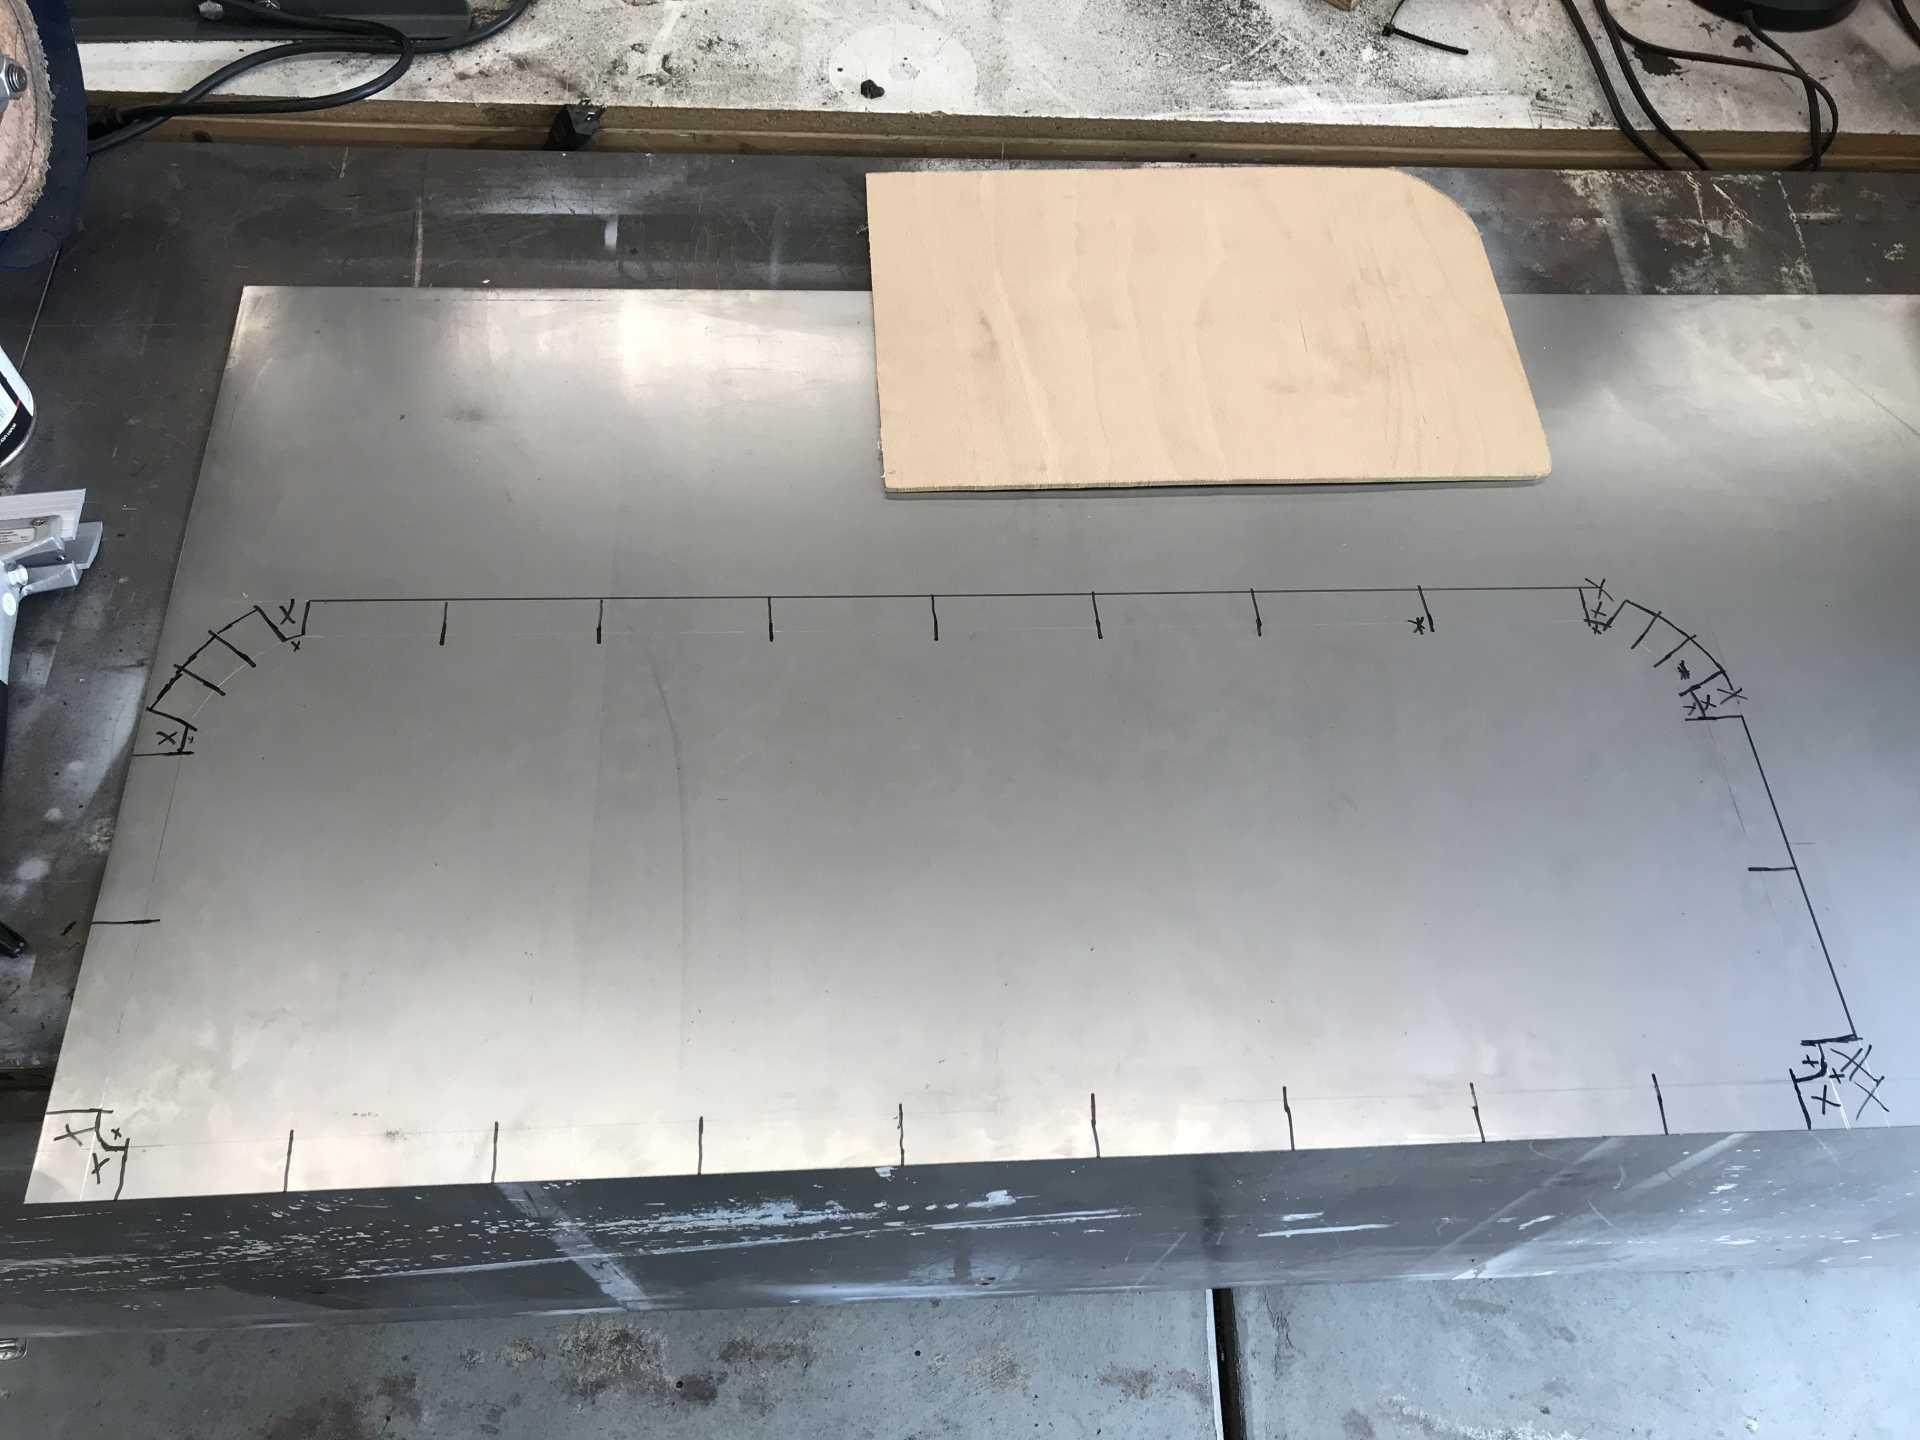
I spent a few days doing things cleaning up the engine bay, getting rid of unneeded old attachment points and fittings for the cruise control. Then I took a serious look at the new muffler installation. Cramming it between the engine and trunk meant that it would be impossible to work on that side of the engine and the trunk would always be hot. So I decided to copy the idea of chopping off the bottom of the trunk and putting the muffler below it. I found a muffler from a Camaro that was crossflow and acceptable dimensions. So off went the bottom of the trunk replaced by a new trunk bottom from 14 ga steel. I added a heat shield between the trunk and engine compartment where the cat converter is near. just cut up and relocated the original heat shield and I now have a big open space for the muffler. I'll worry about final placment of the muffler and exhaust later once the engine is in place.
Hinges
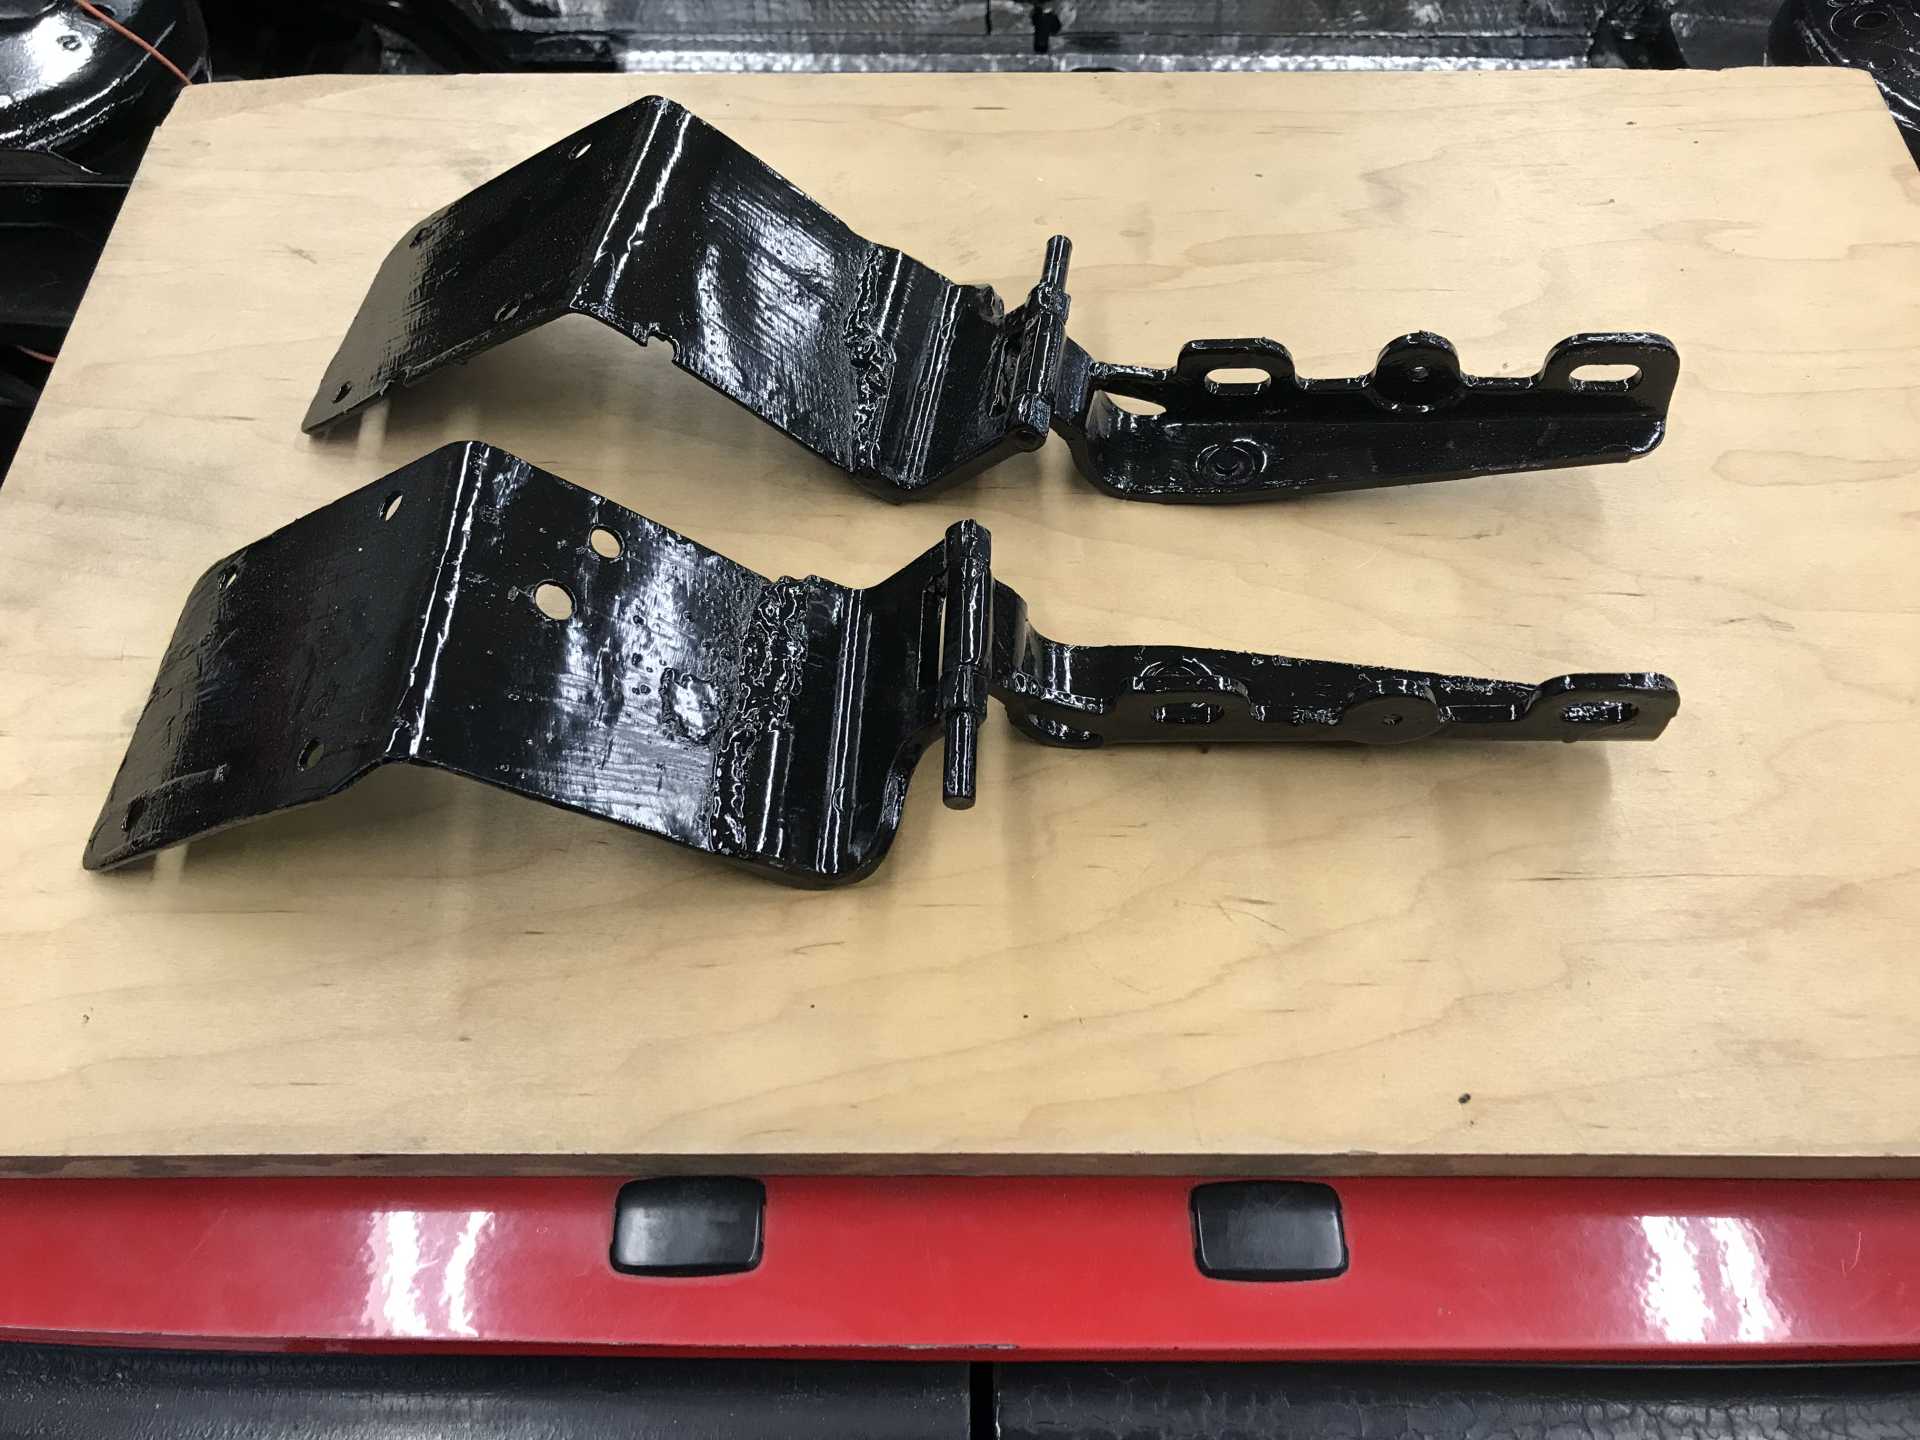
Cleaned up the bay
Hinges in the bay
Trunk Bottom marked on steel
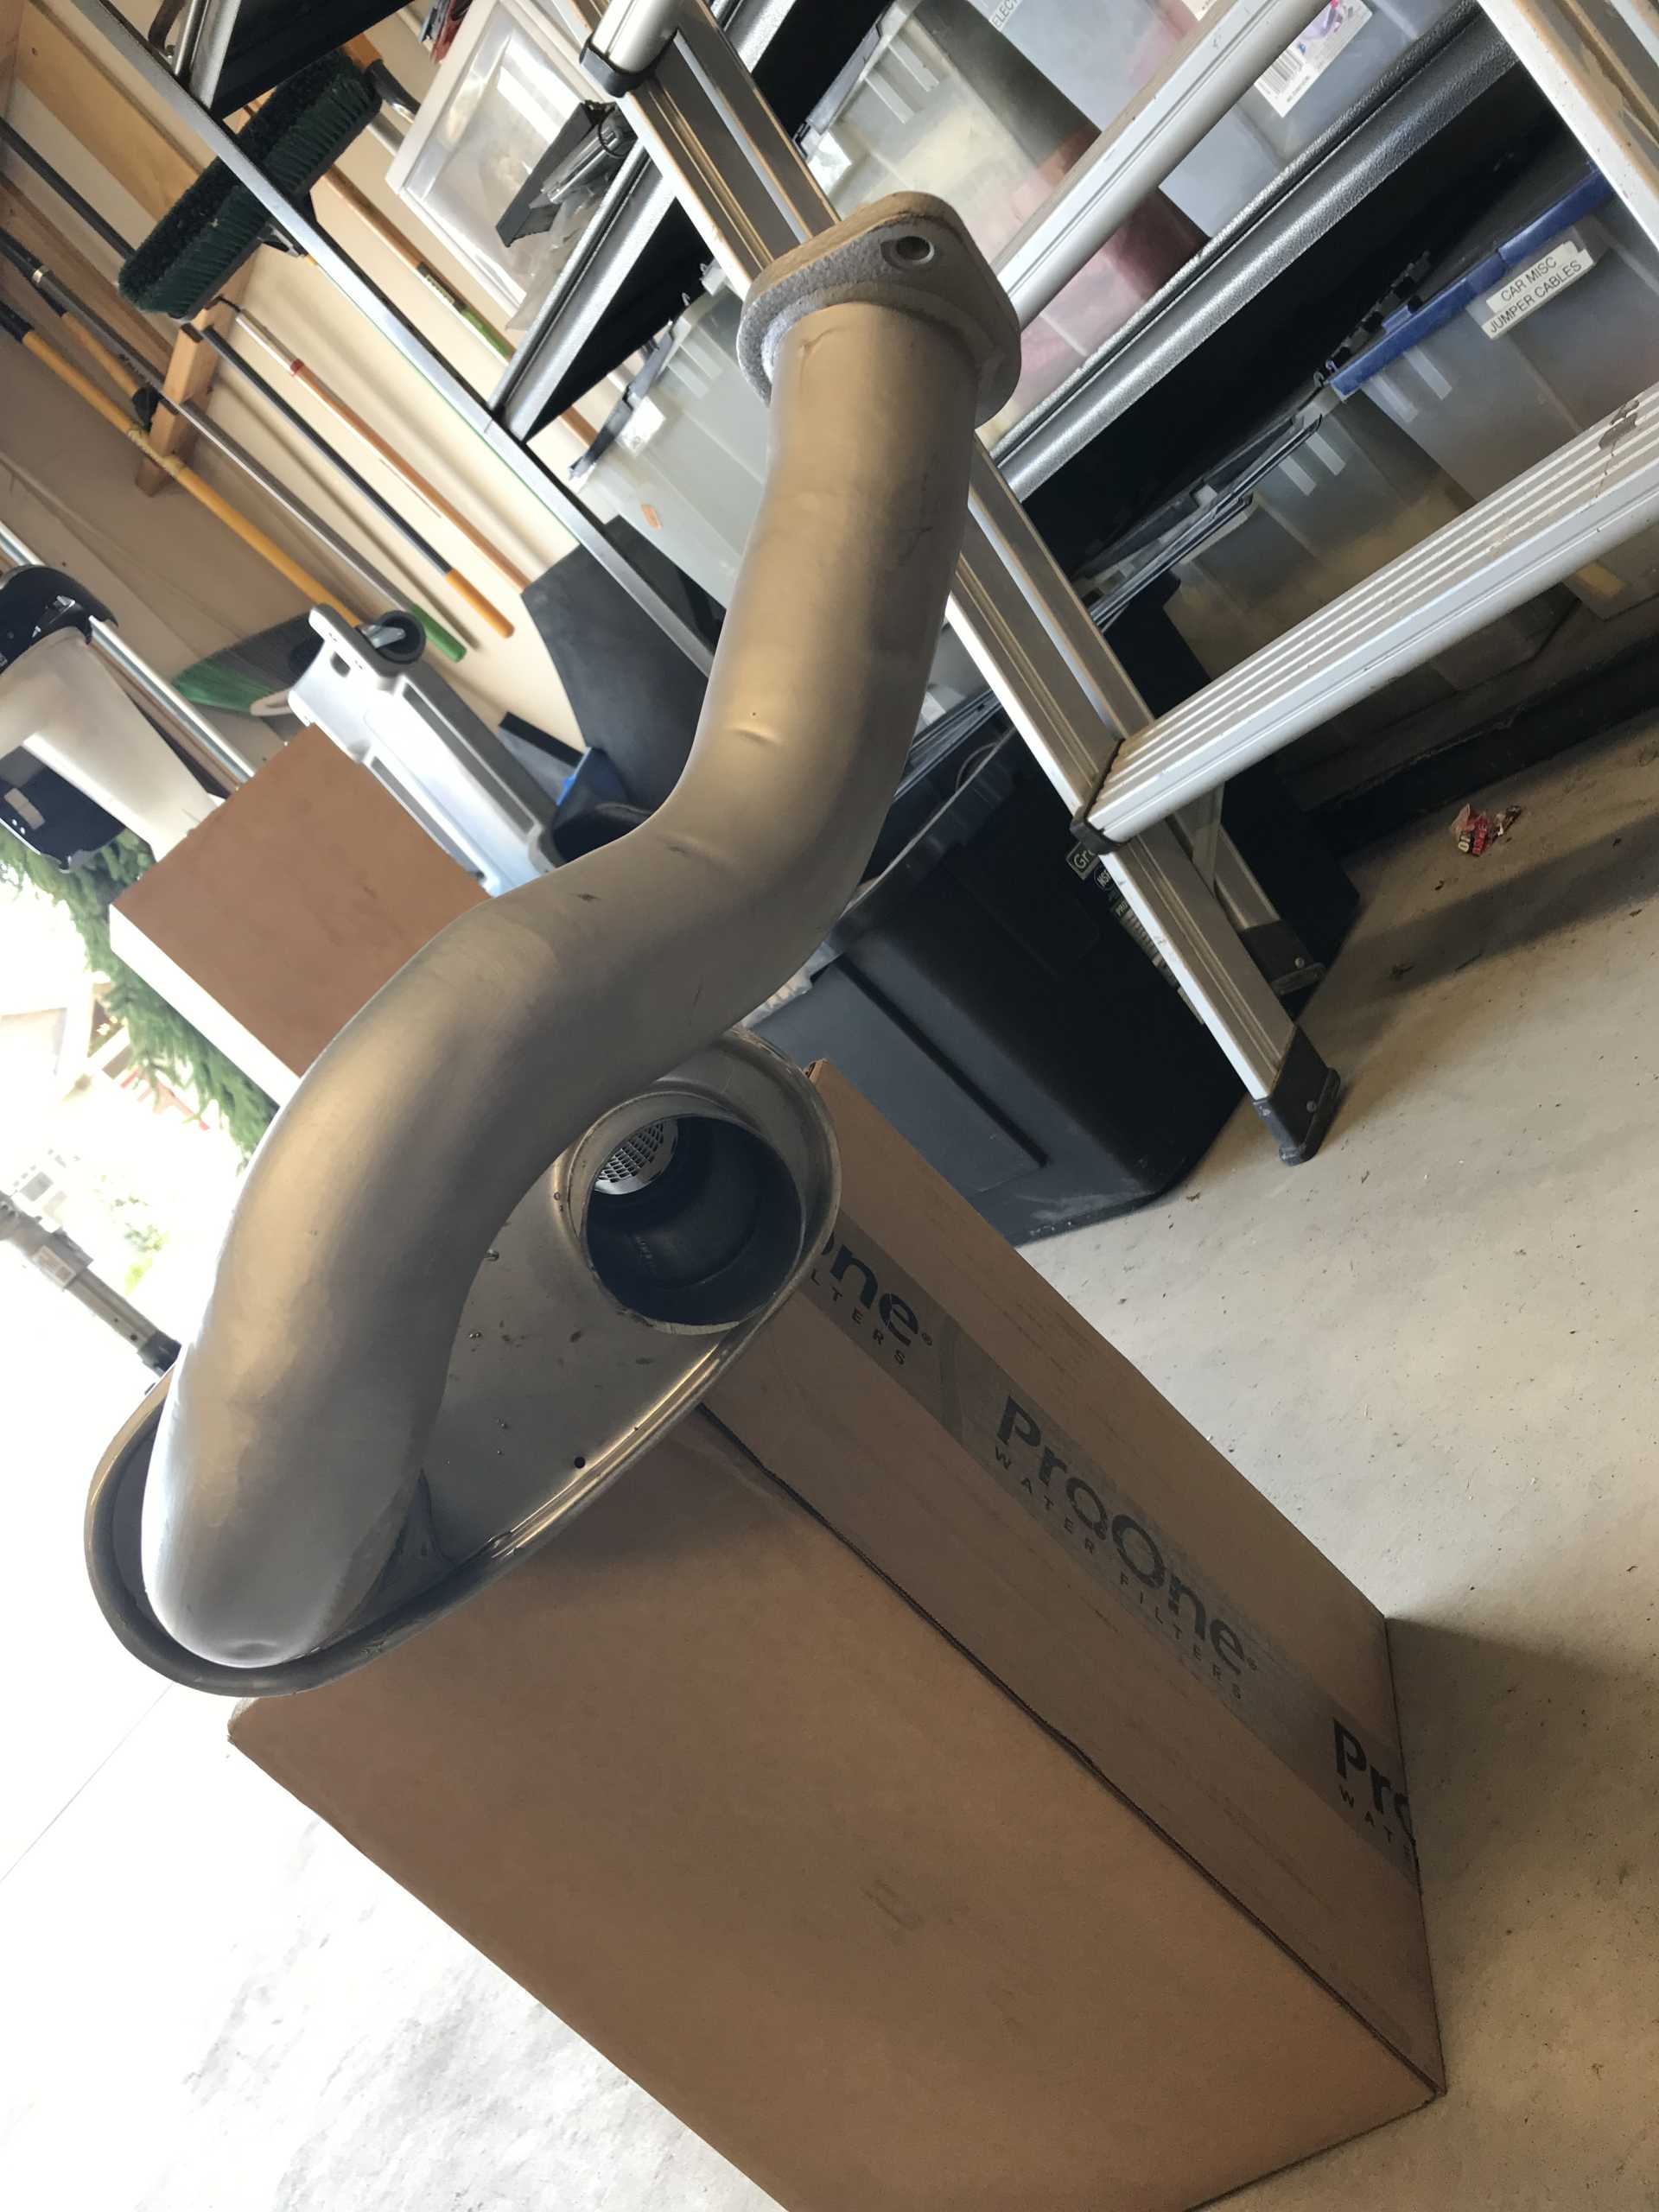
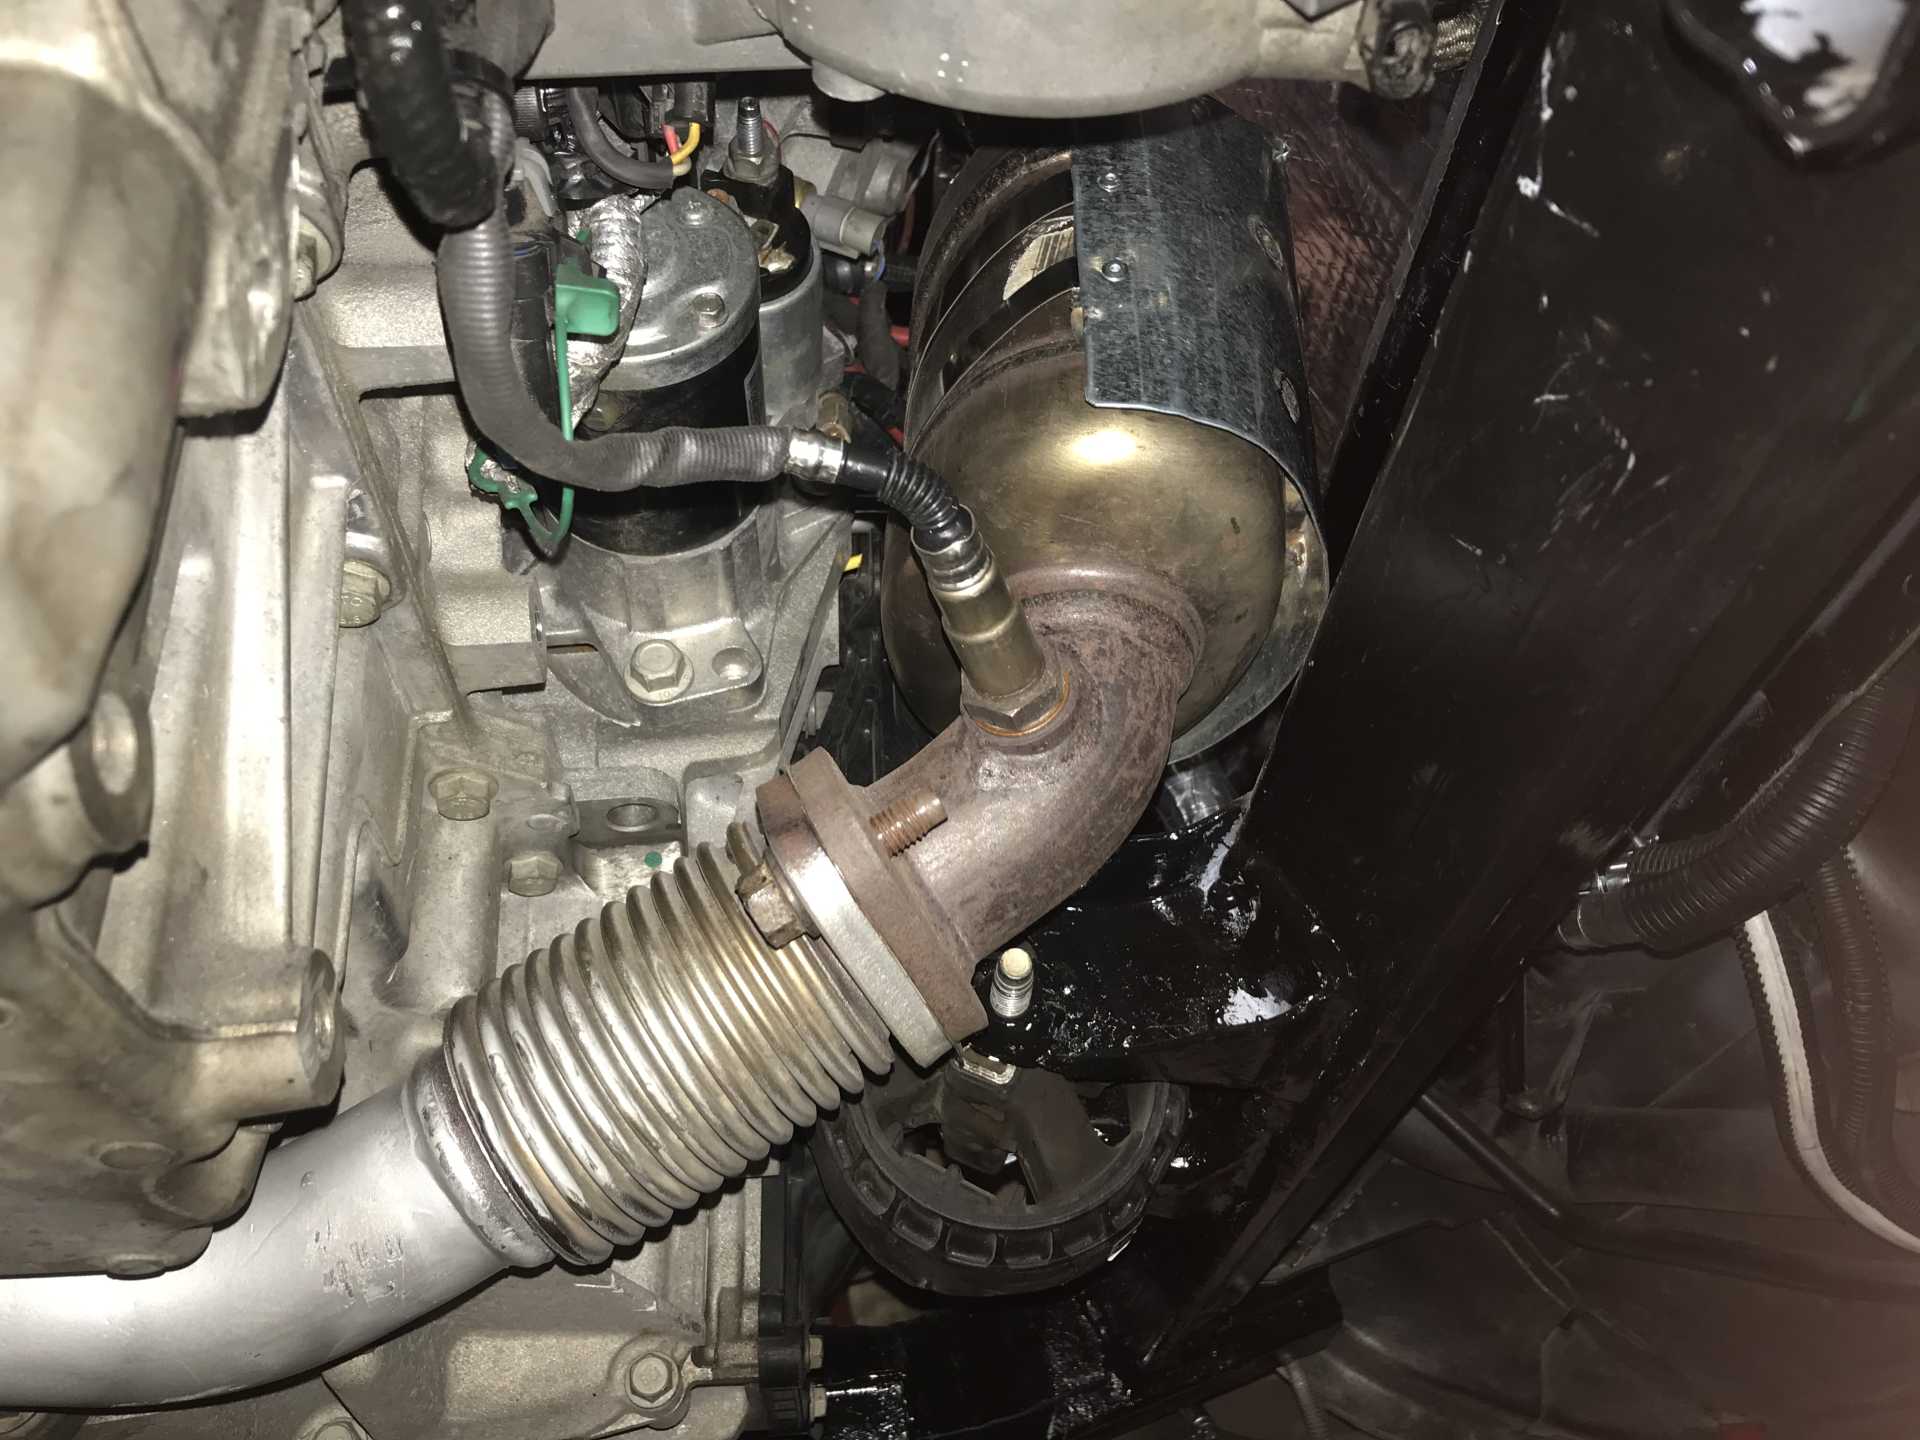
Then I spent a day or two doing things to the engine that would be more difficult after it was in place. I noticed what Daryl M did on his LFX swap and decided to provide some type of insulation for the outside of the cats. He used muffler tape but the cost of that stuff was more than I liked so I fabricated two heat shields out of 18ga steel and mounted them with modified hose clamps. I also cleaned up the engine harness and ran heavy duty cables for power and ground to the remote battery terminals. then it was time to install the engine and see if my planning paid off.
I lifted the body up and slid the cradle underneath.

Then lowered the car onto jack stands

Then raised the engine to meet the mounting locations on the car. About to hook up the hoist & lift it into place. Note my plumb bob to align the front bolt to the cradle sleeve, cradle is about 3” too far forward at this time. So My wife jacked it up until I got one bolt in, then some jiggling did the other front bolt.
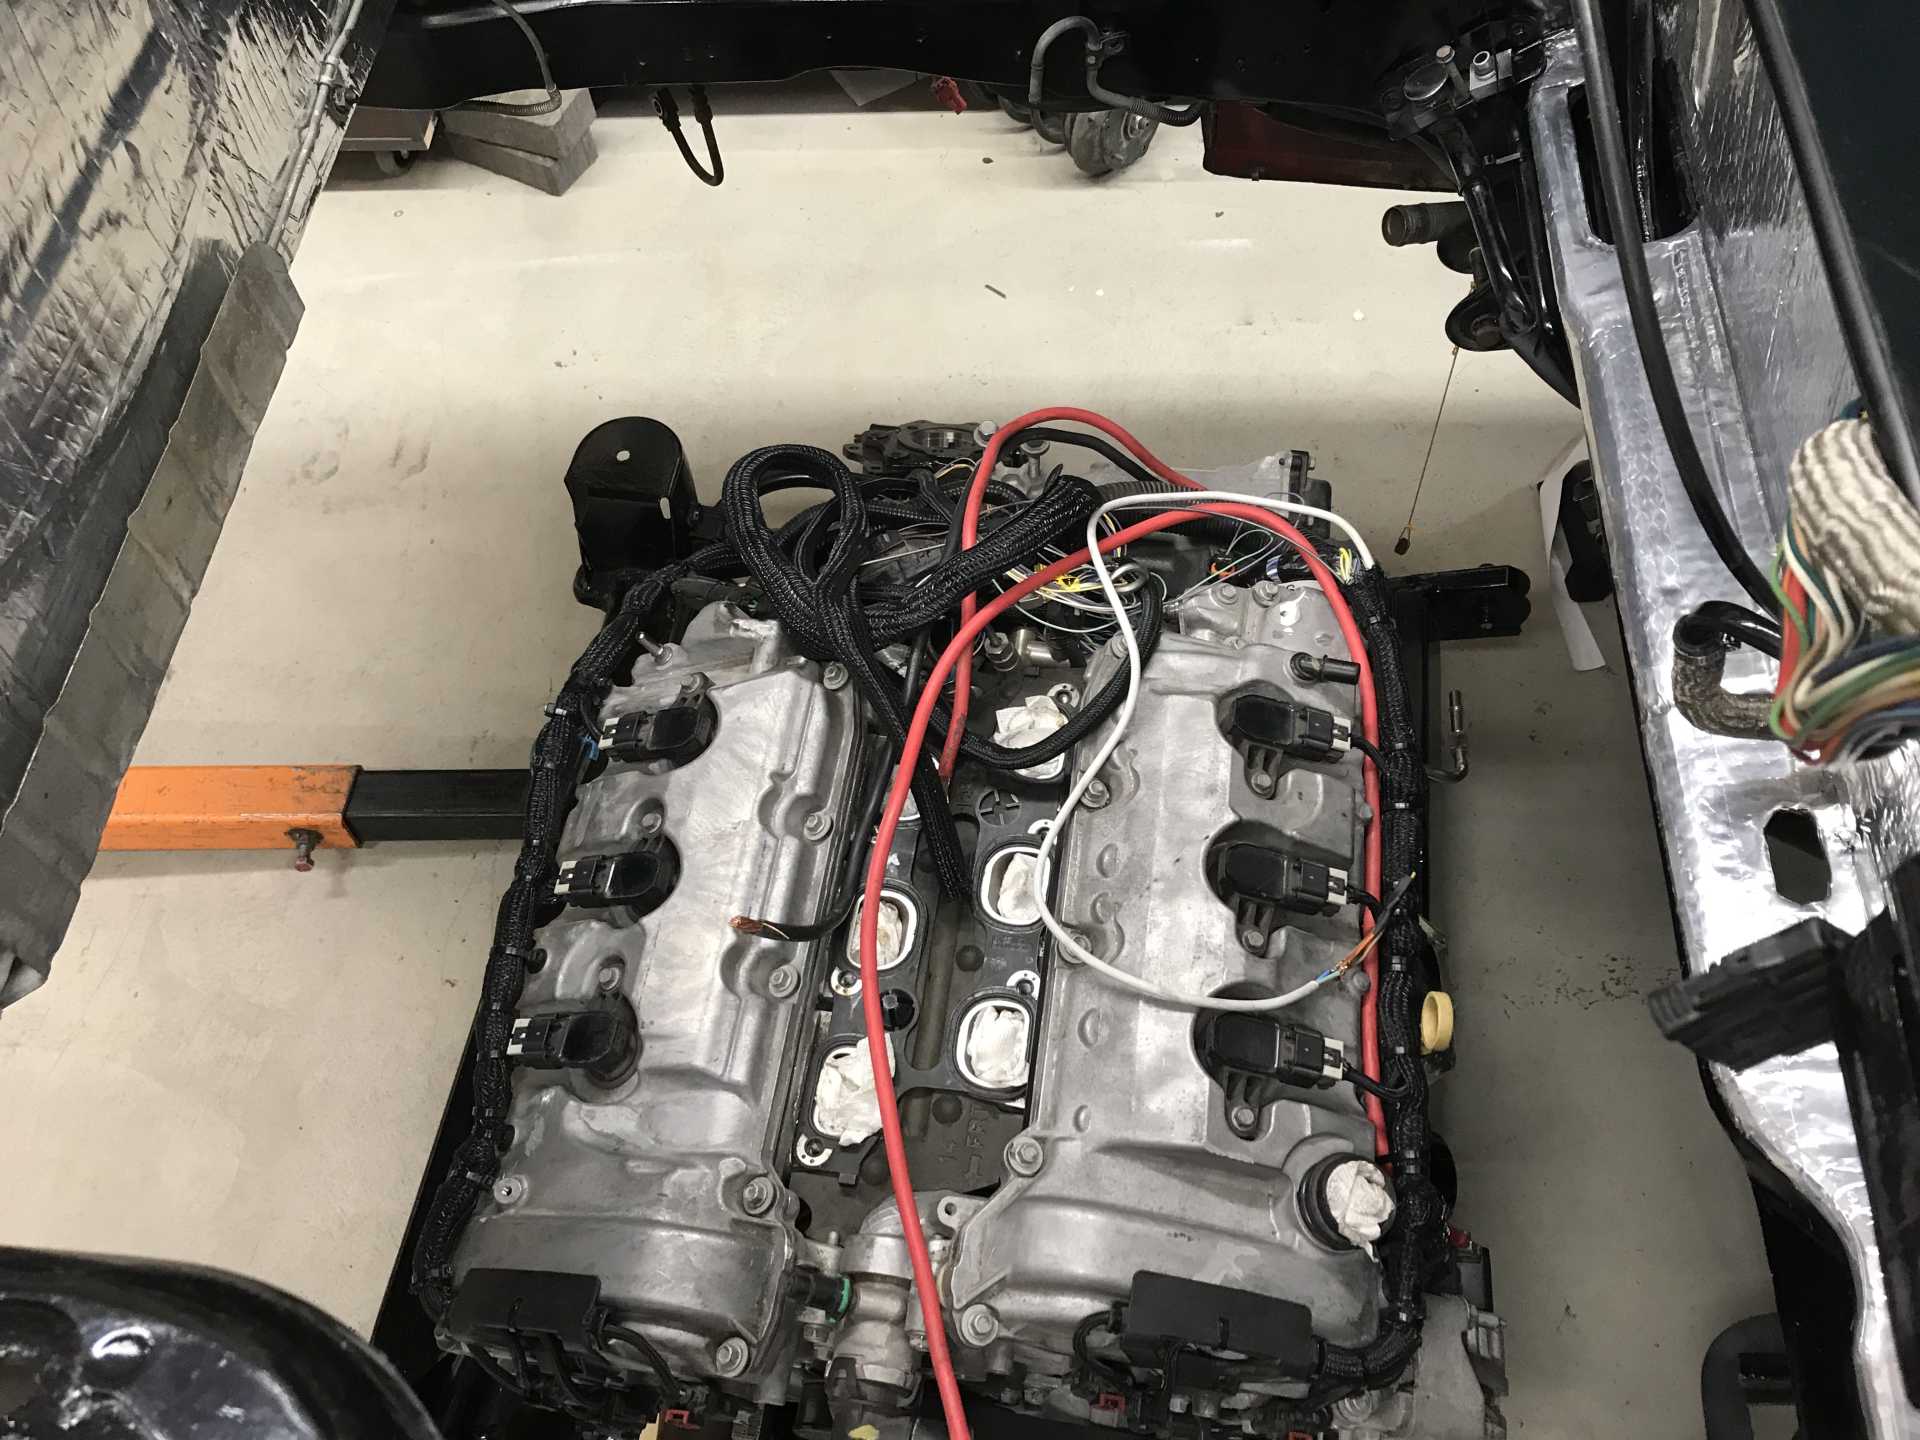
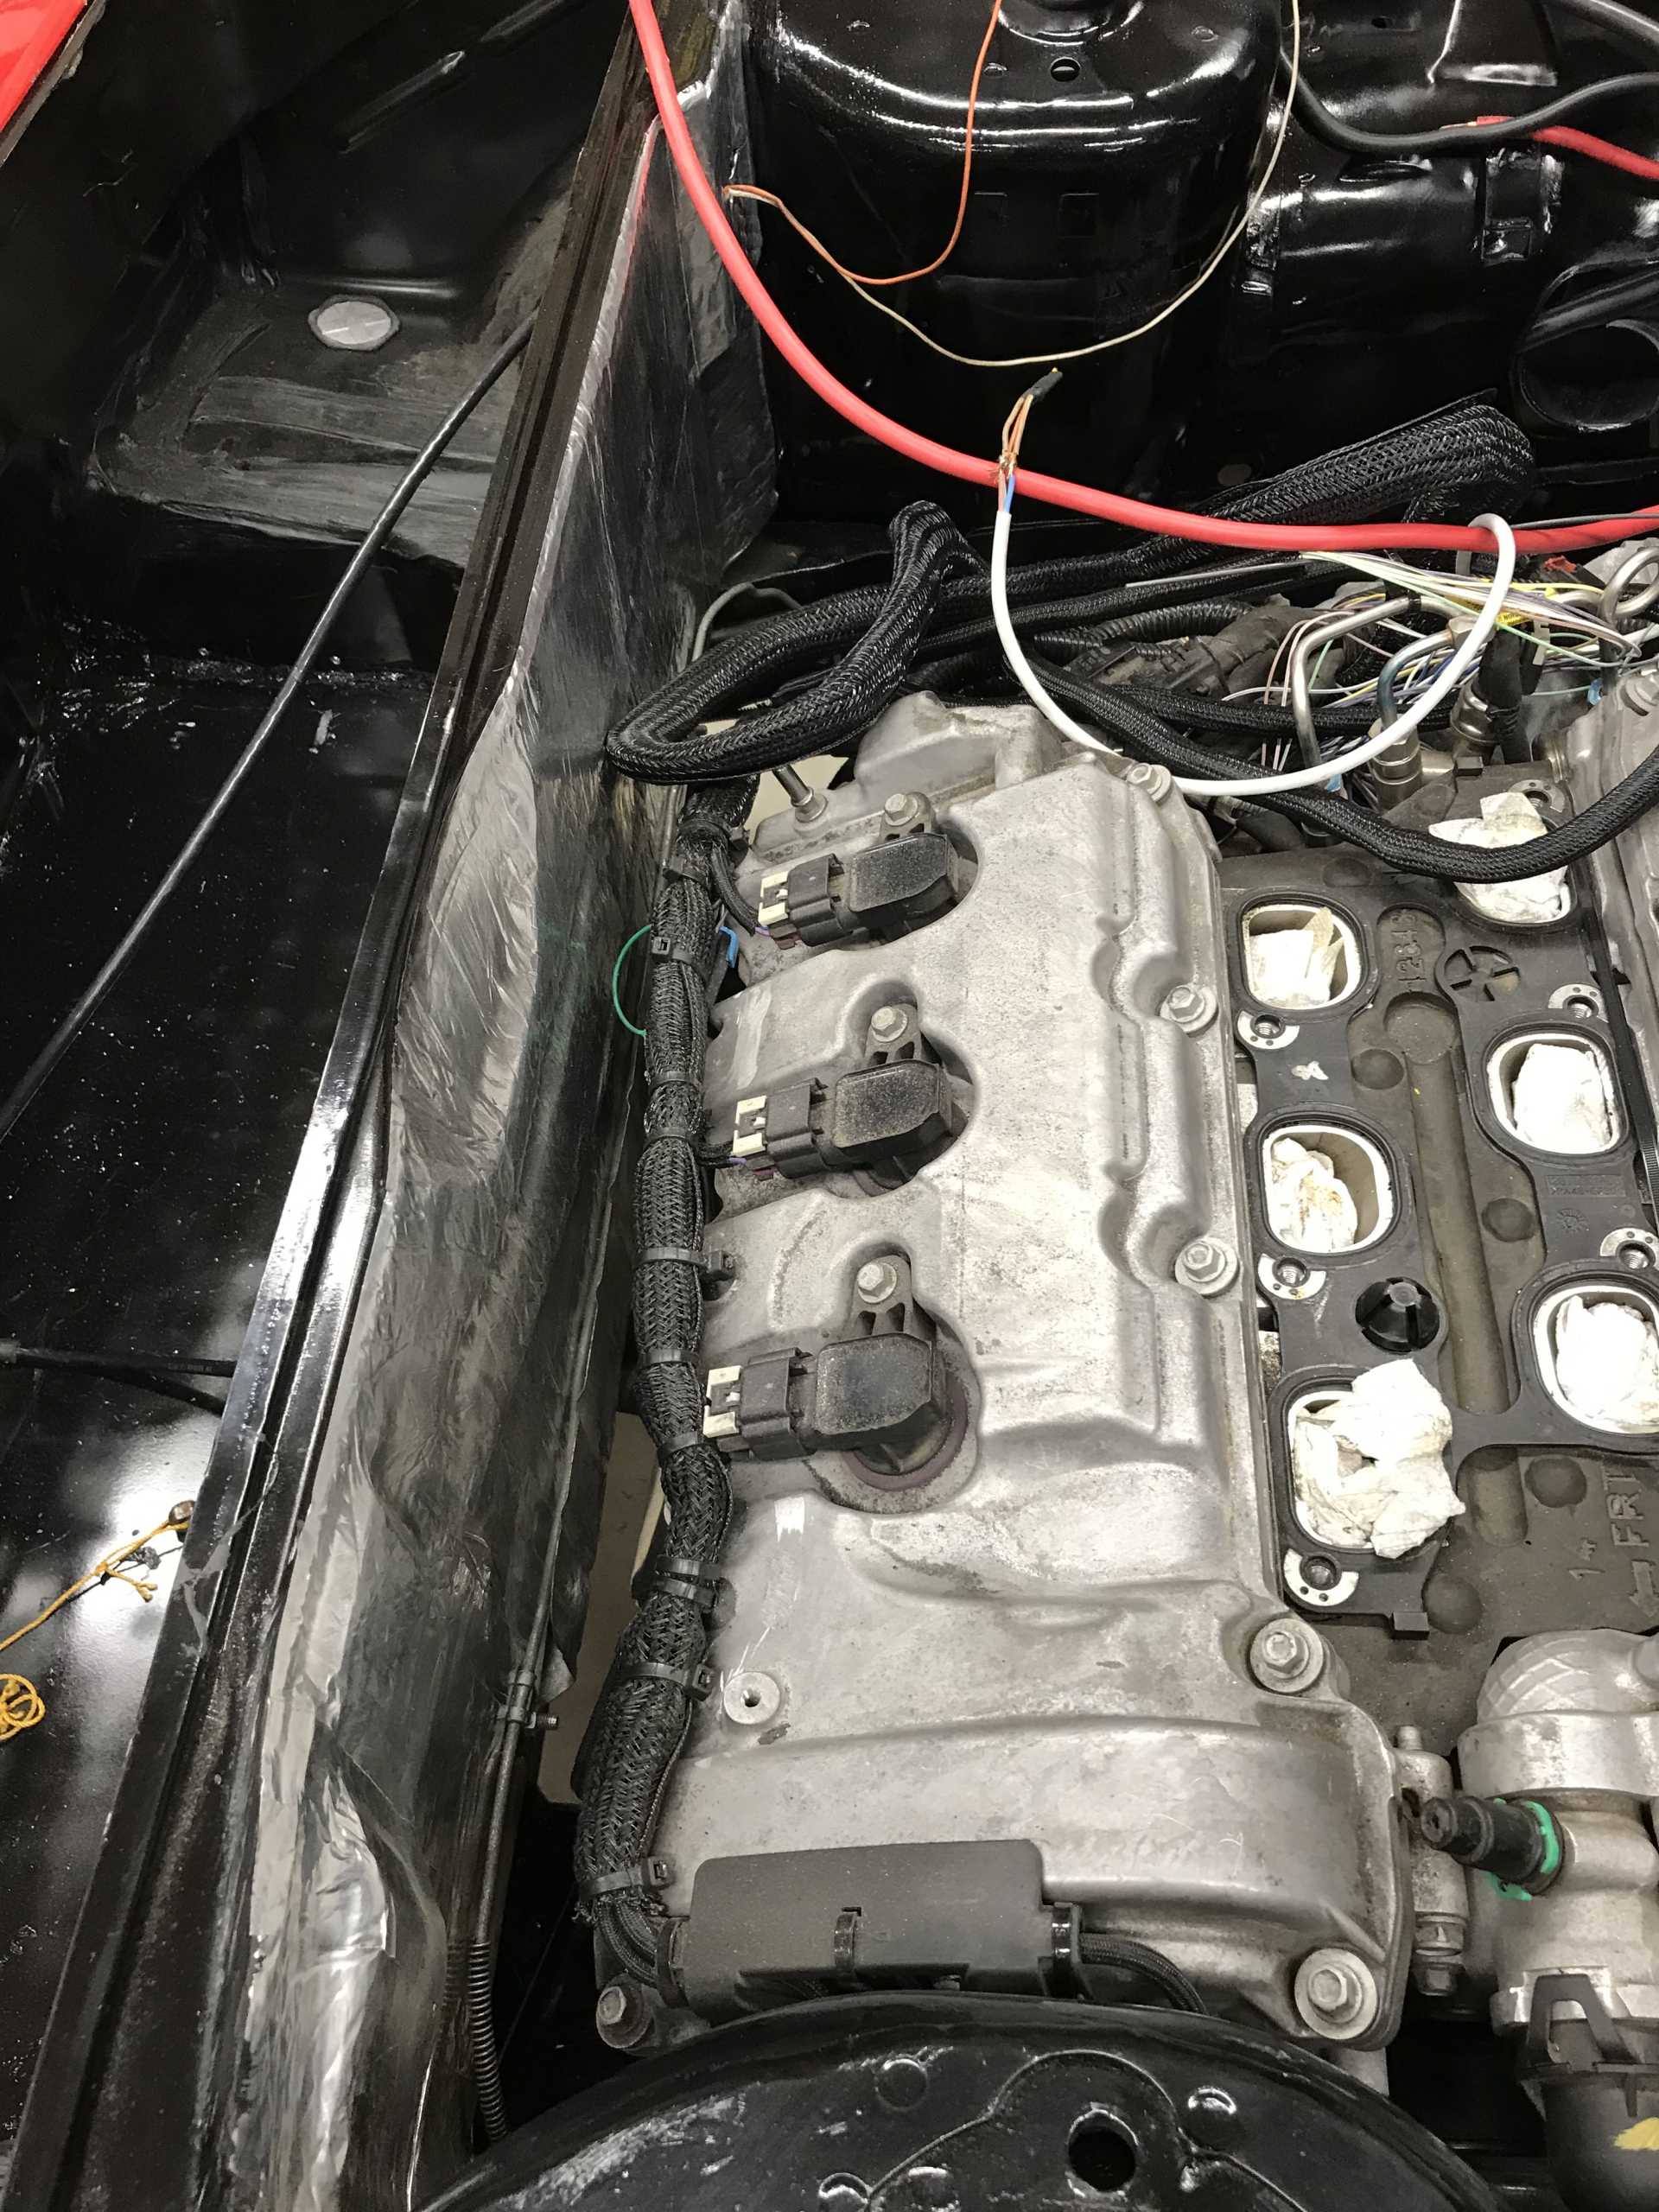
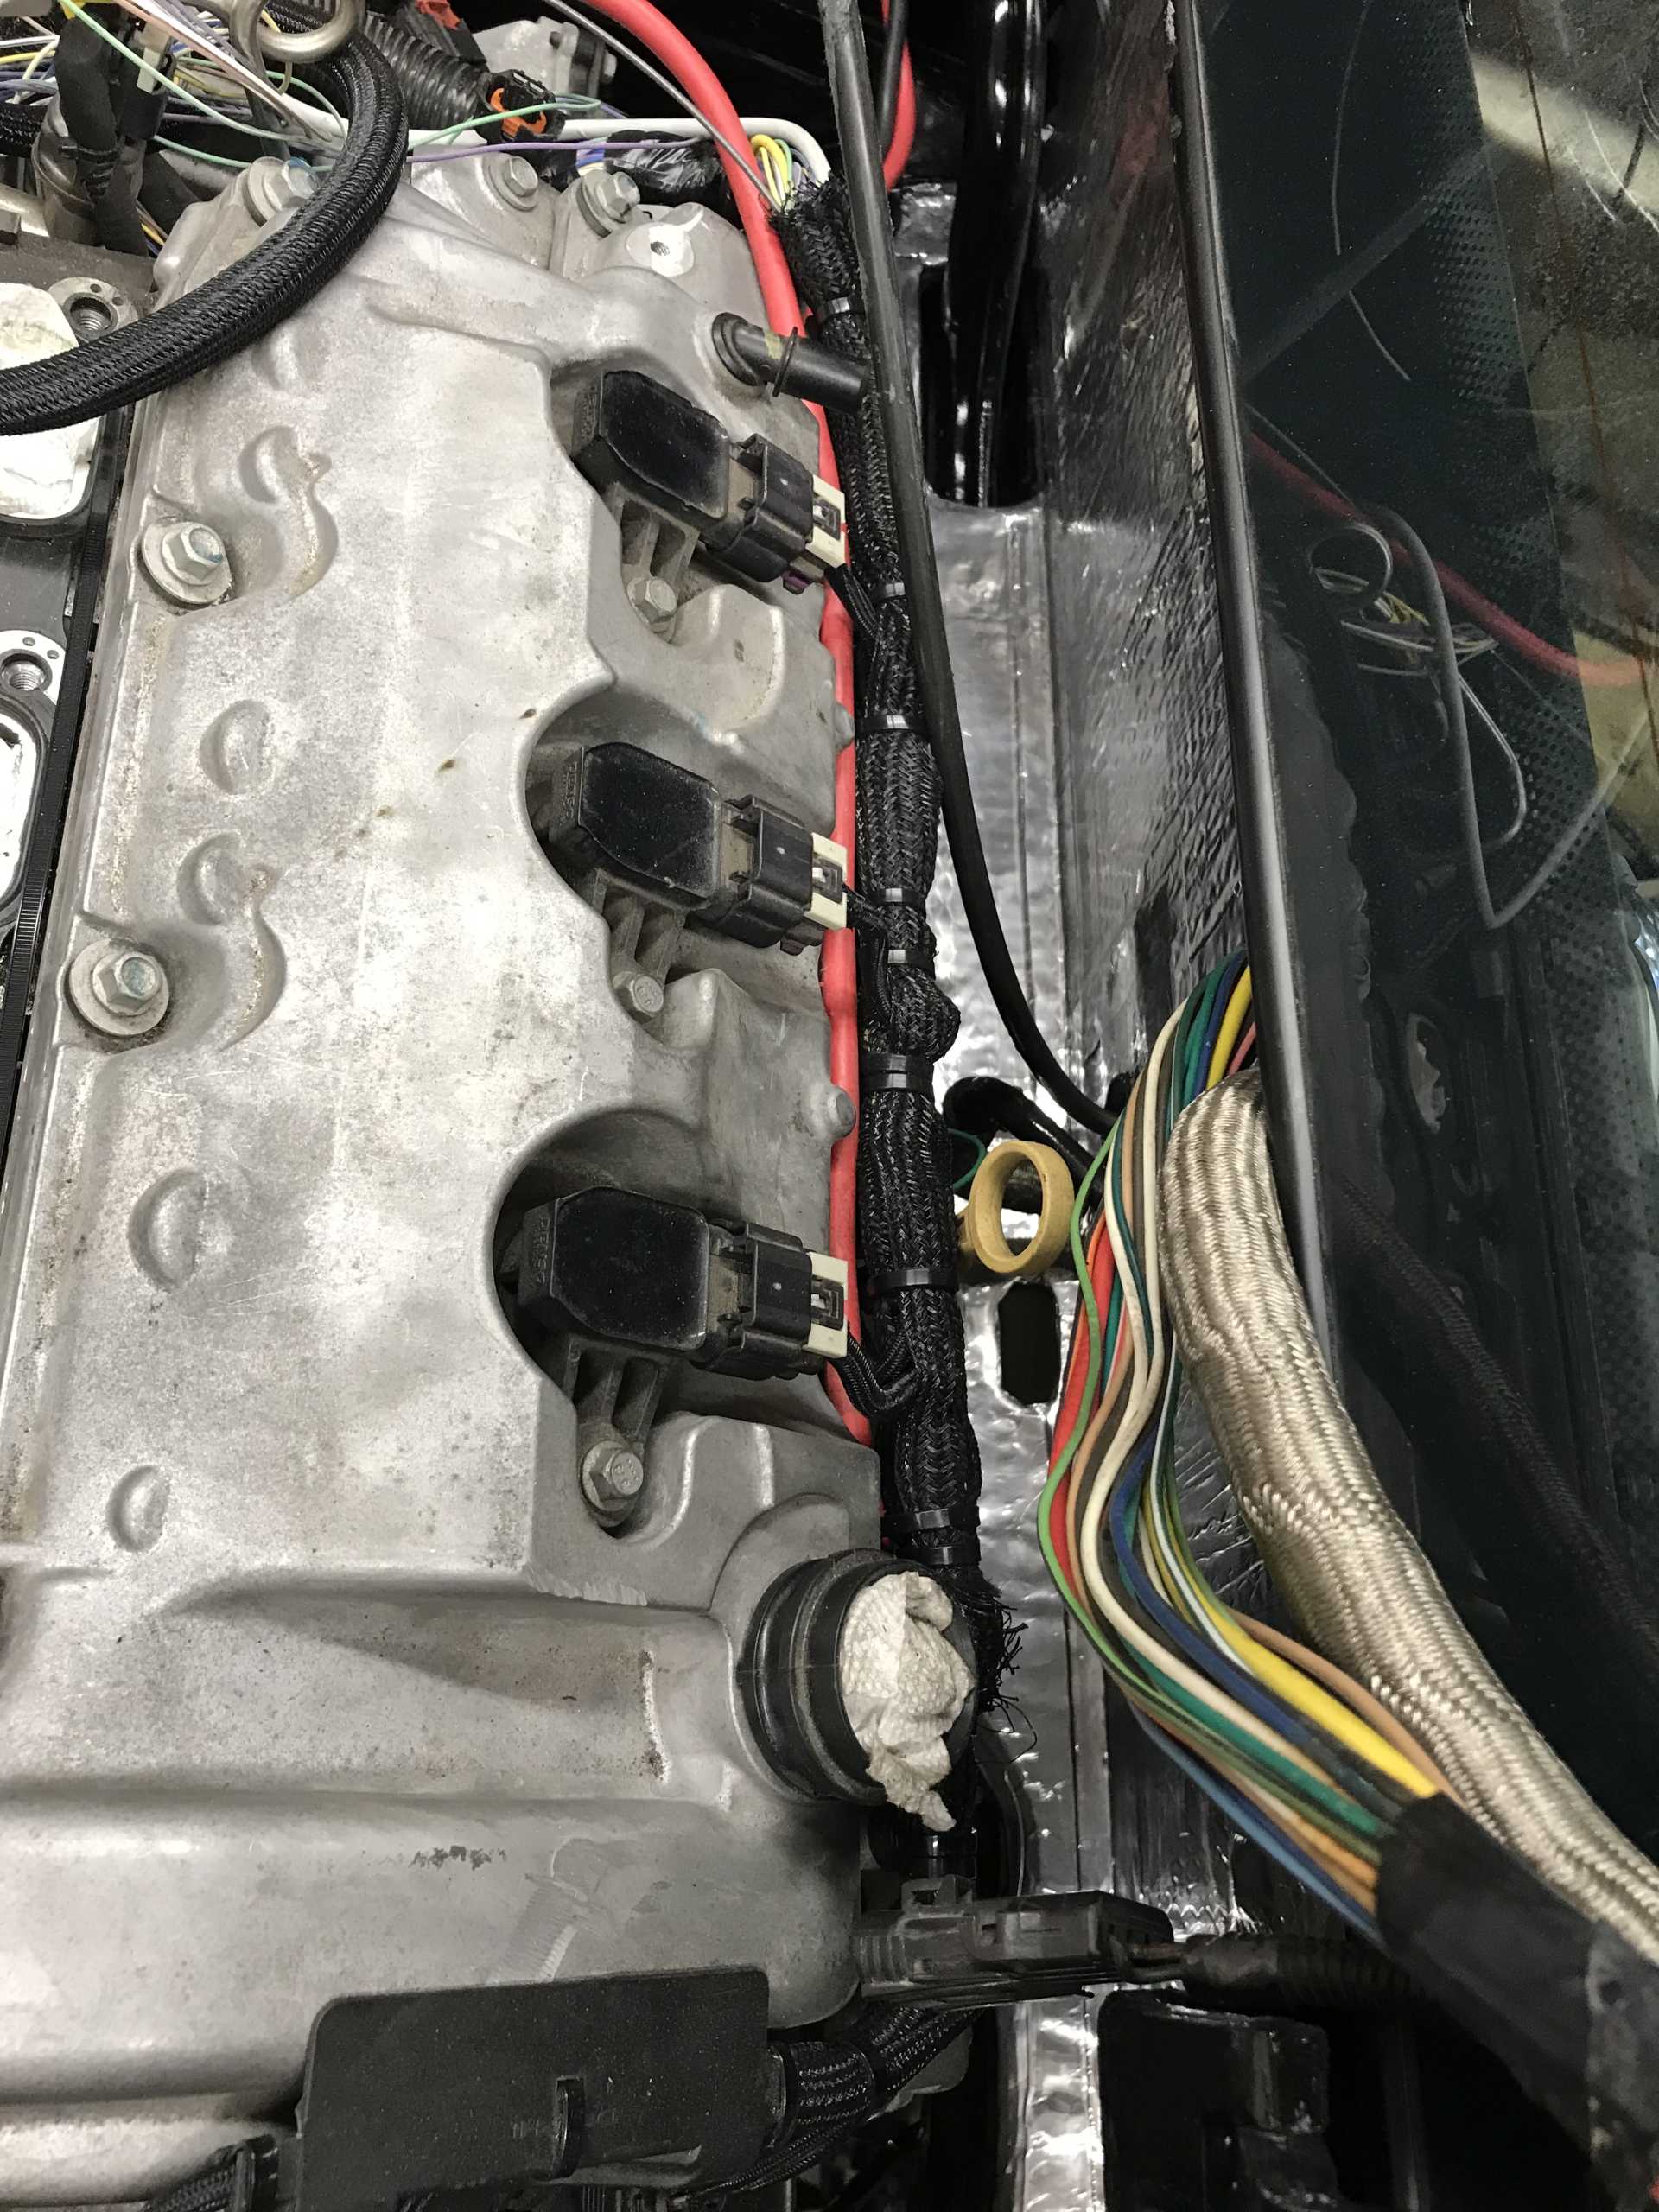
And except for one cam sensor it fits. I cut out a part of the right shock tower to clear this. Should have moved the engine left another 3/4”. Engine is 3” low and will hit the tower. Angle grinder to the rescue.

And checkout the clearances for working on it. Rear is about 1.5”. Nothing much down there, a couple of sensors only. Bottom access
Front access is great to Alt, A/C, oil filter, starter
Right Side is empty. Big hole is part of wheel well and will be covered.
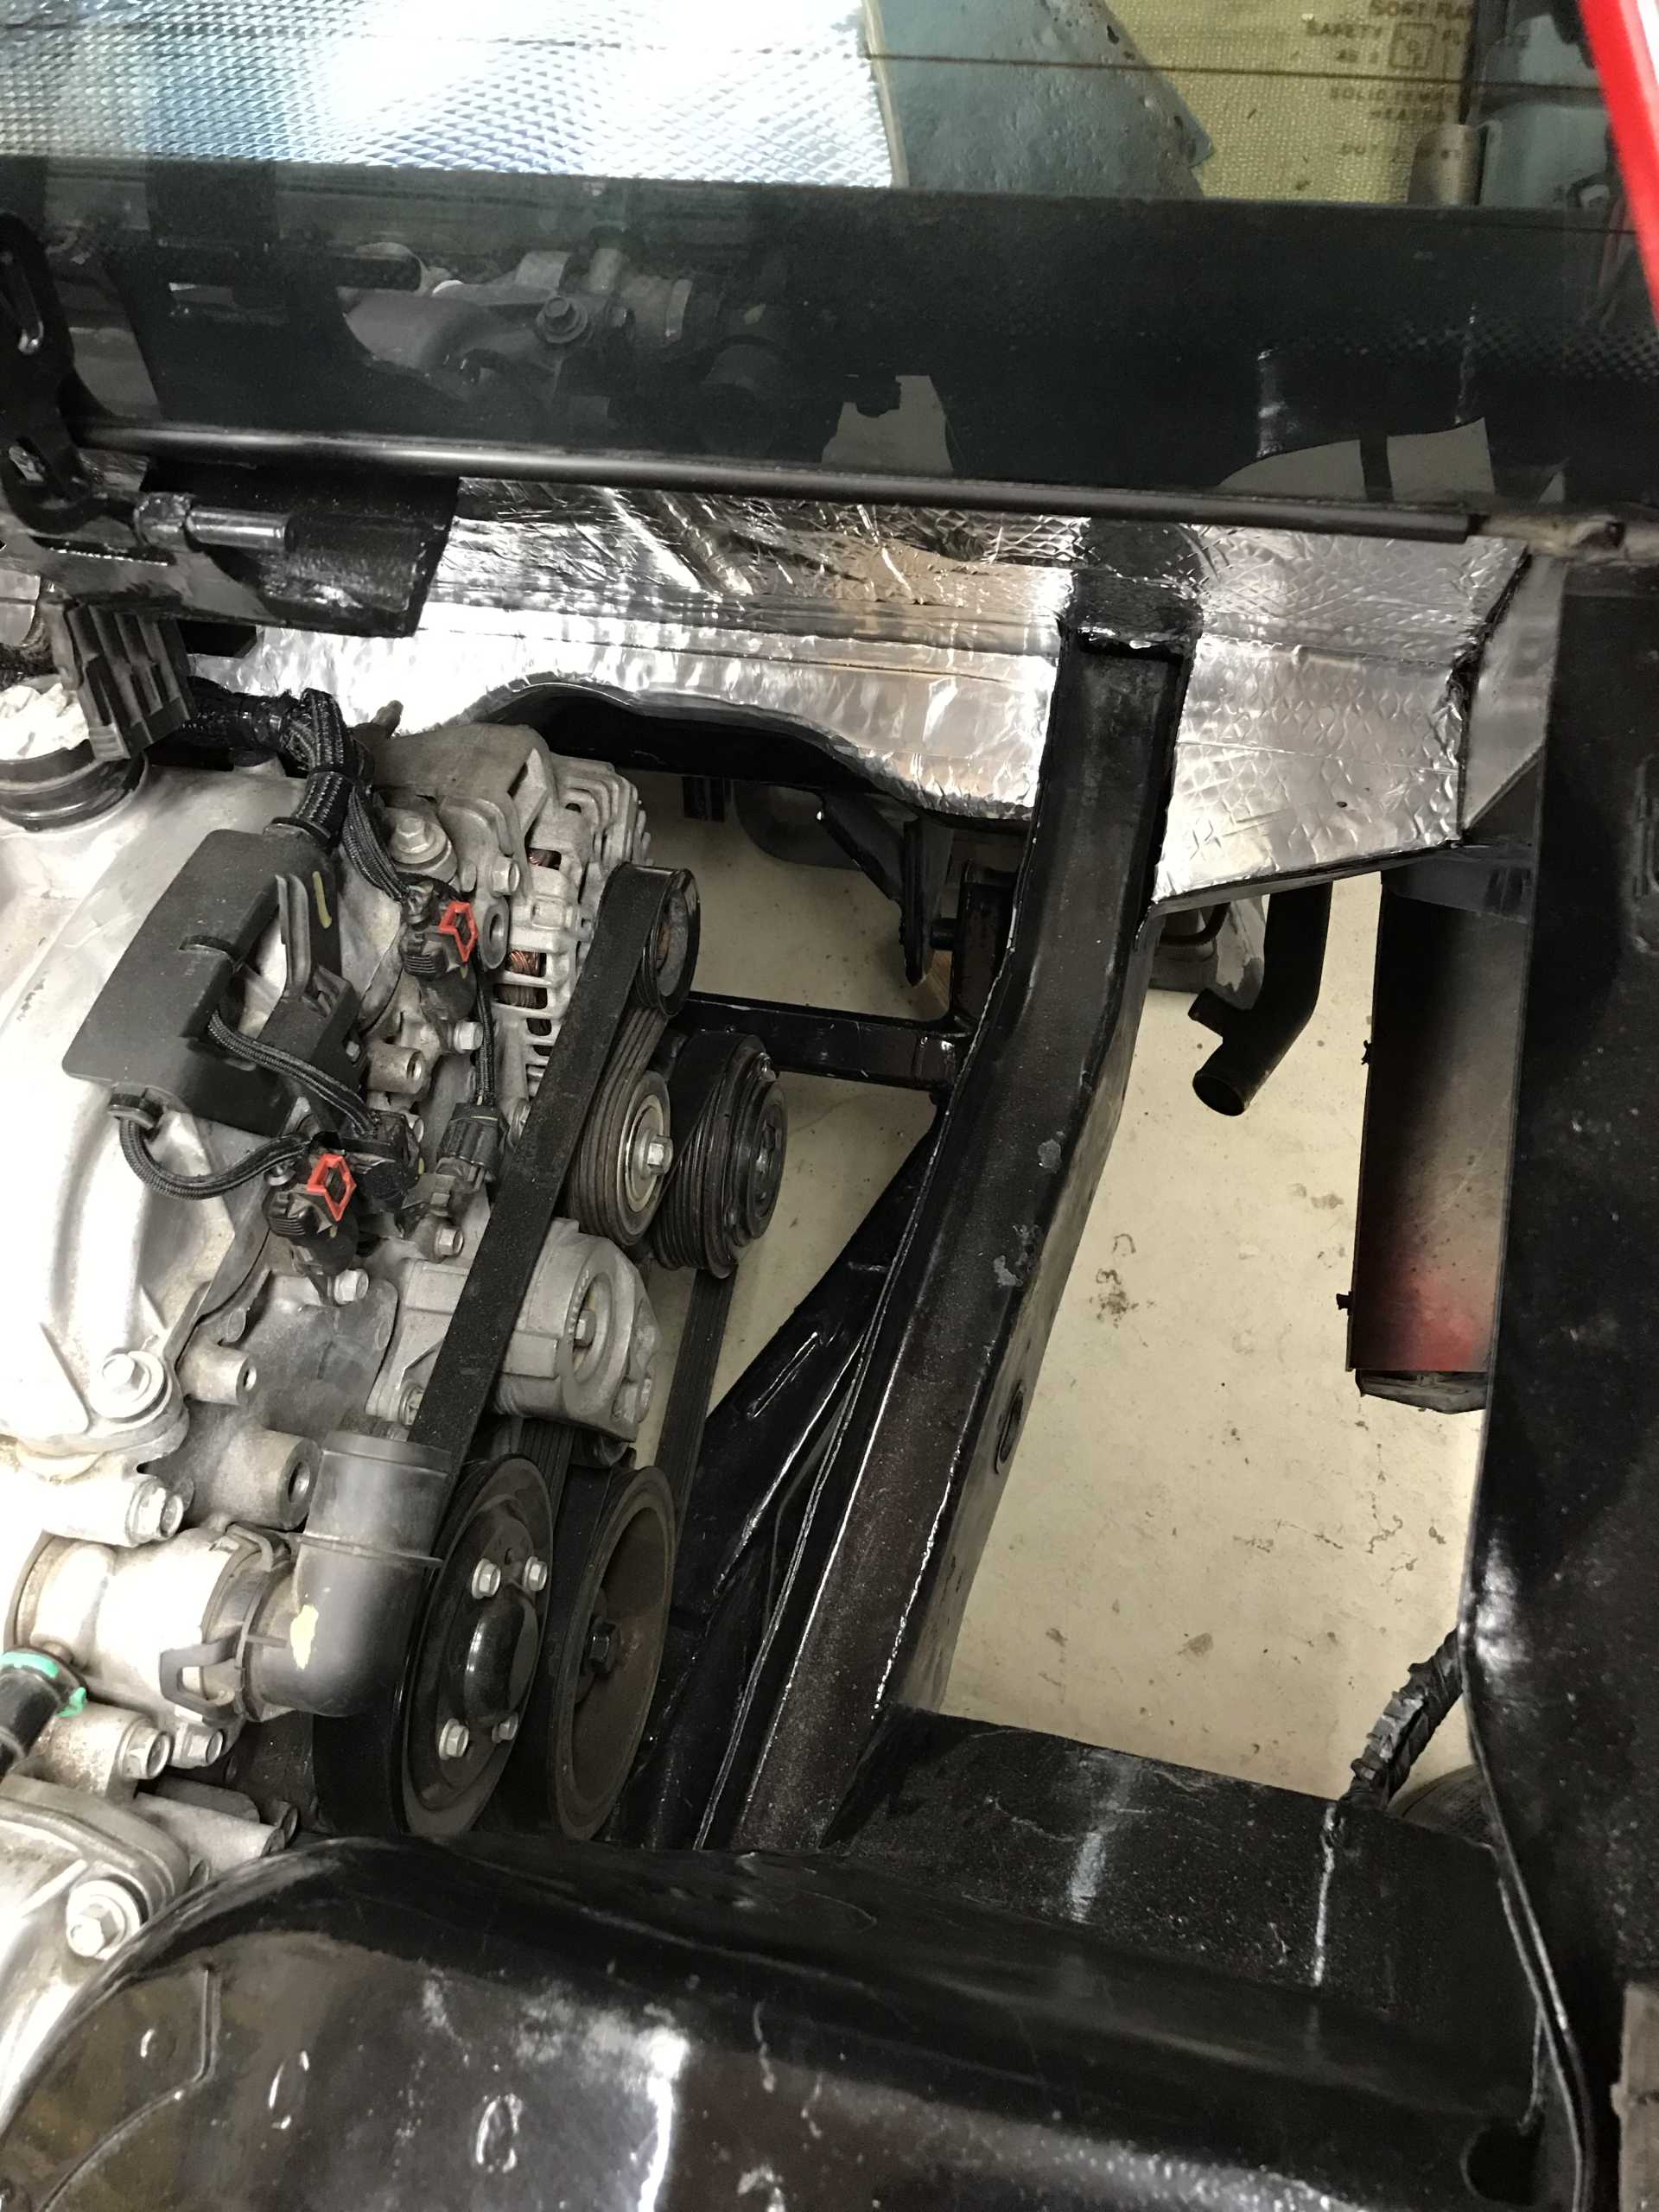
Left side even more. ECU & electrics will go over transmission. Should have moved the whole thing left 3/4" to avoid shock tower problem.
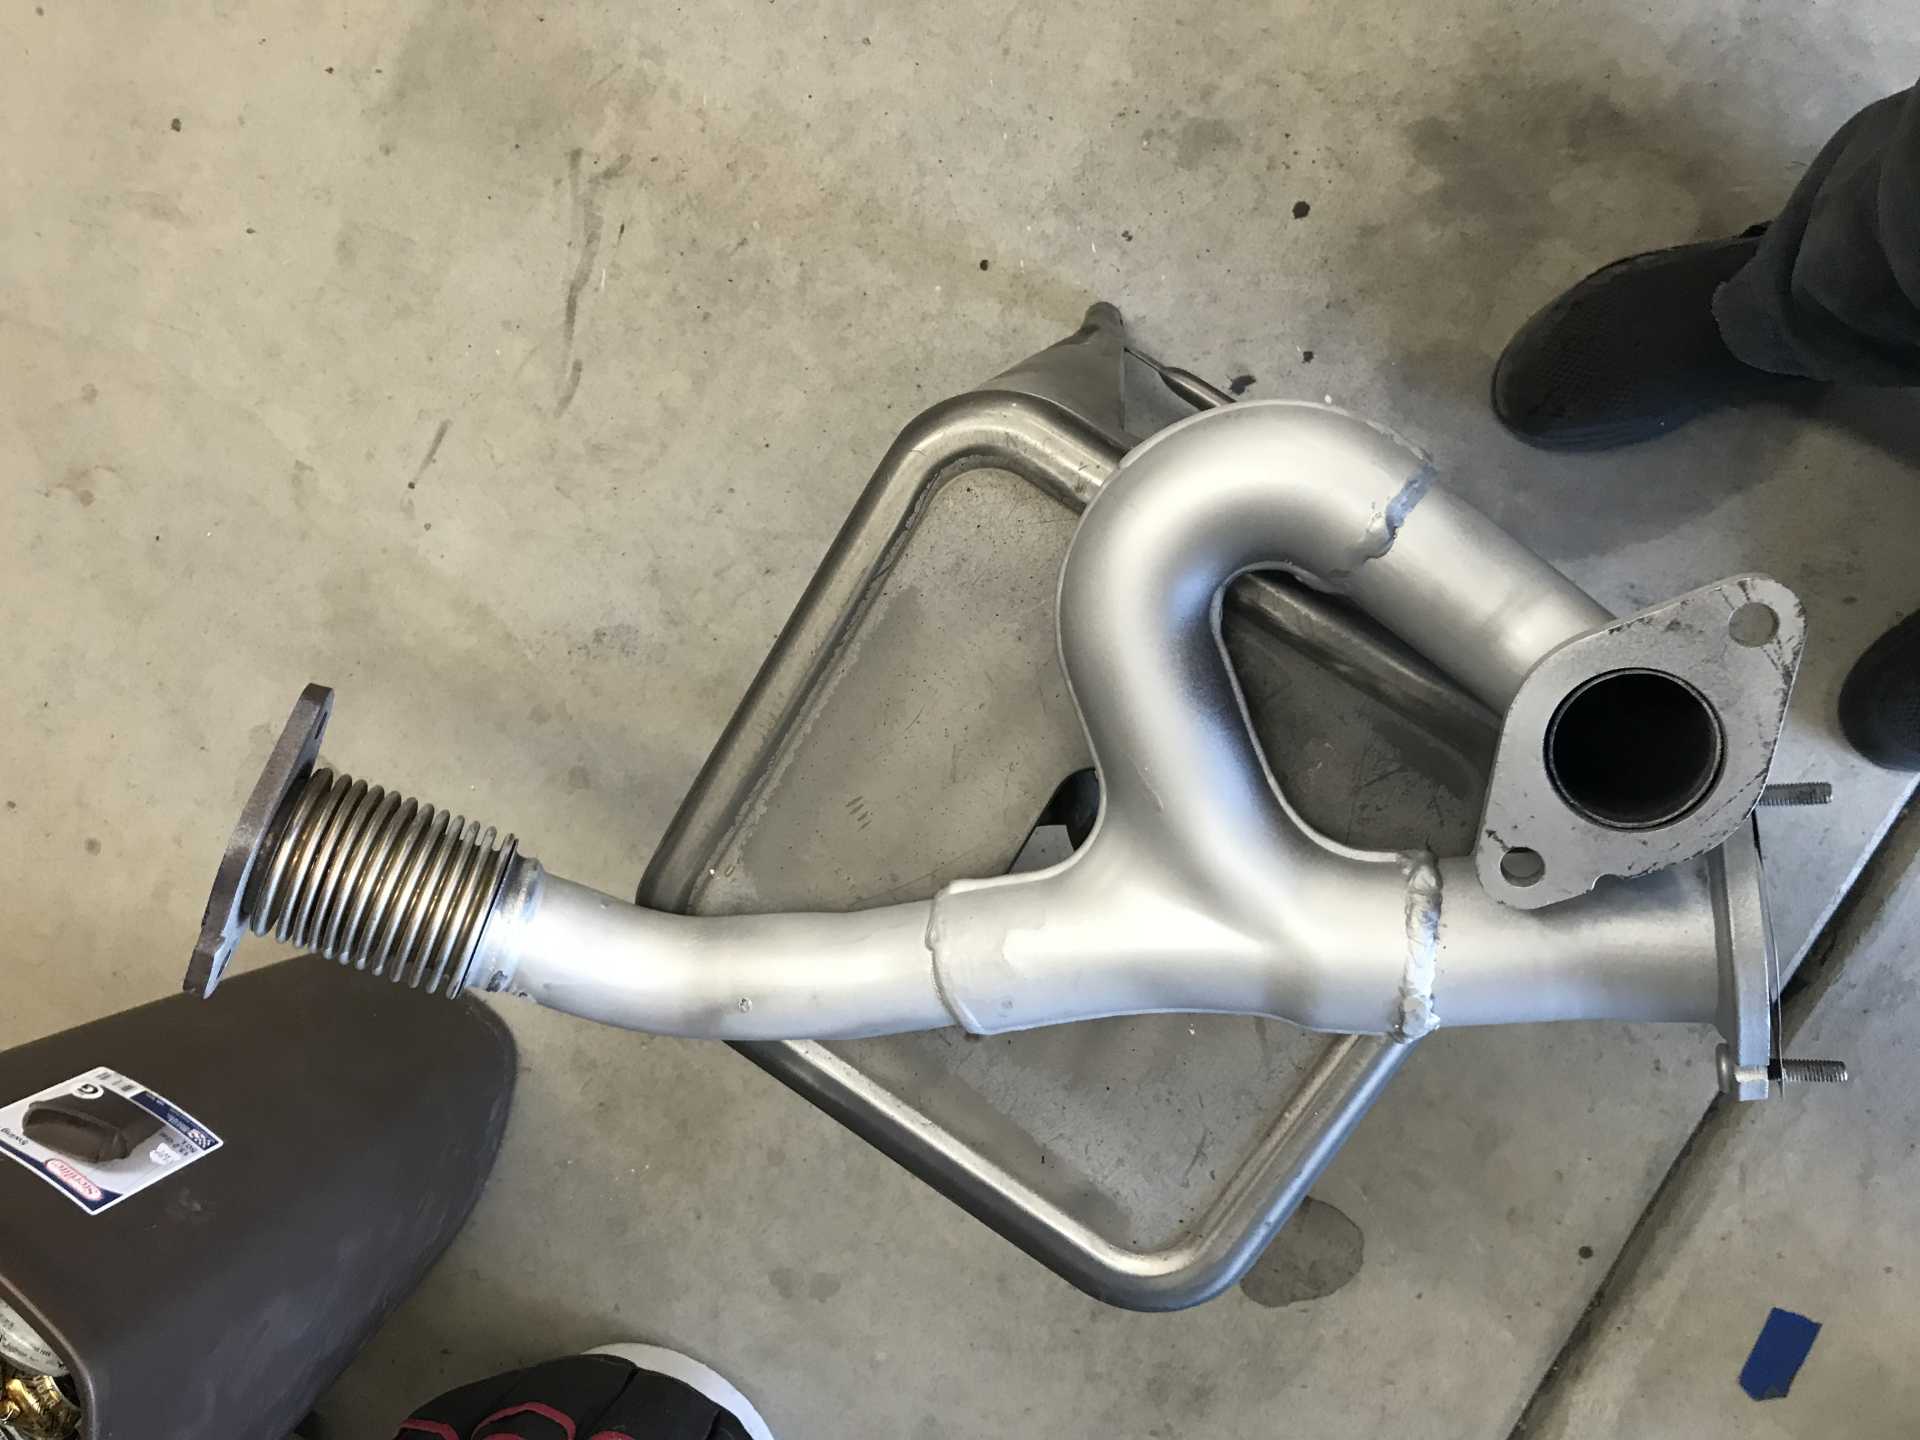
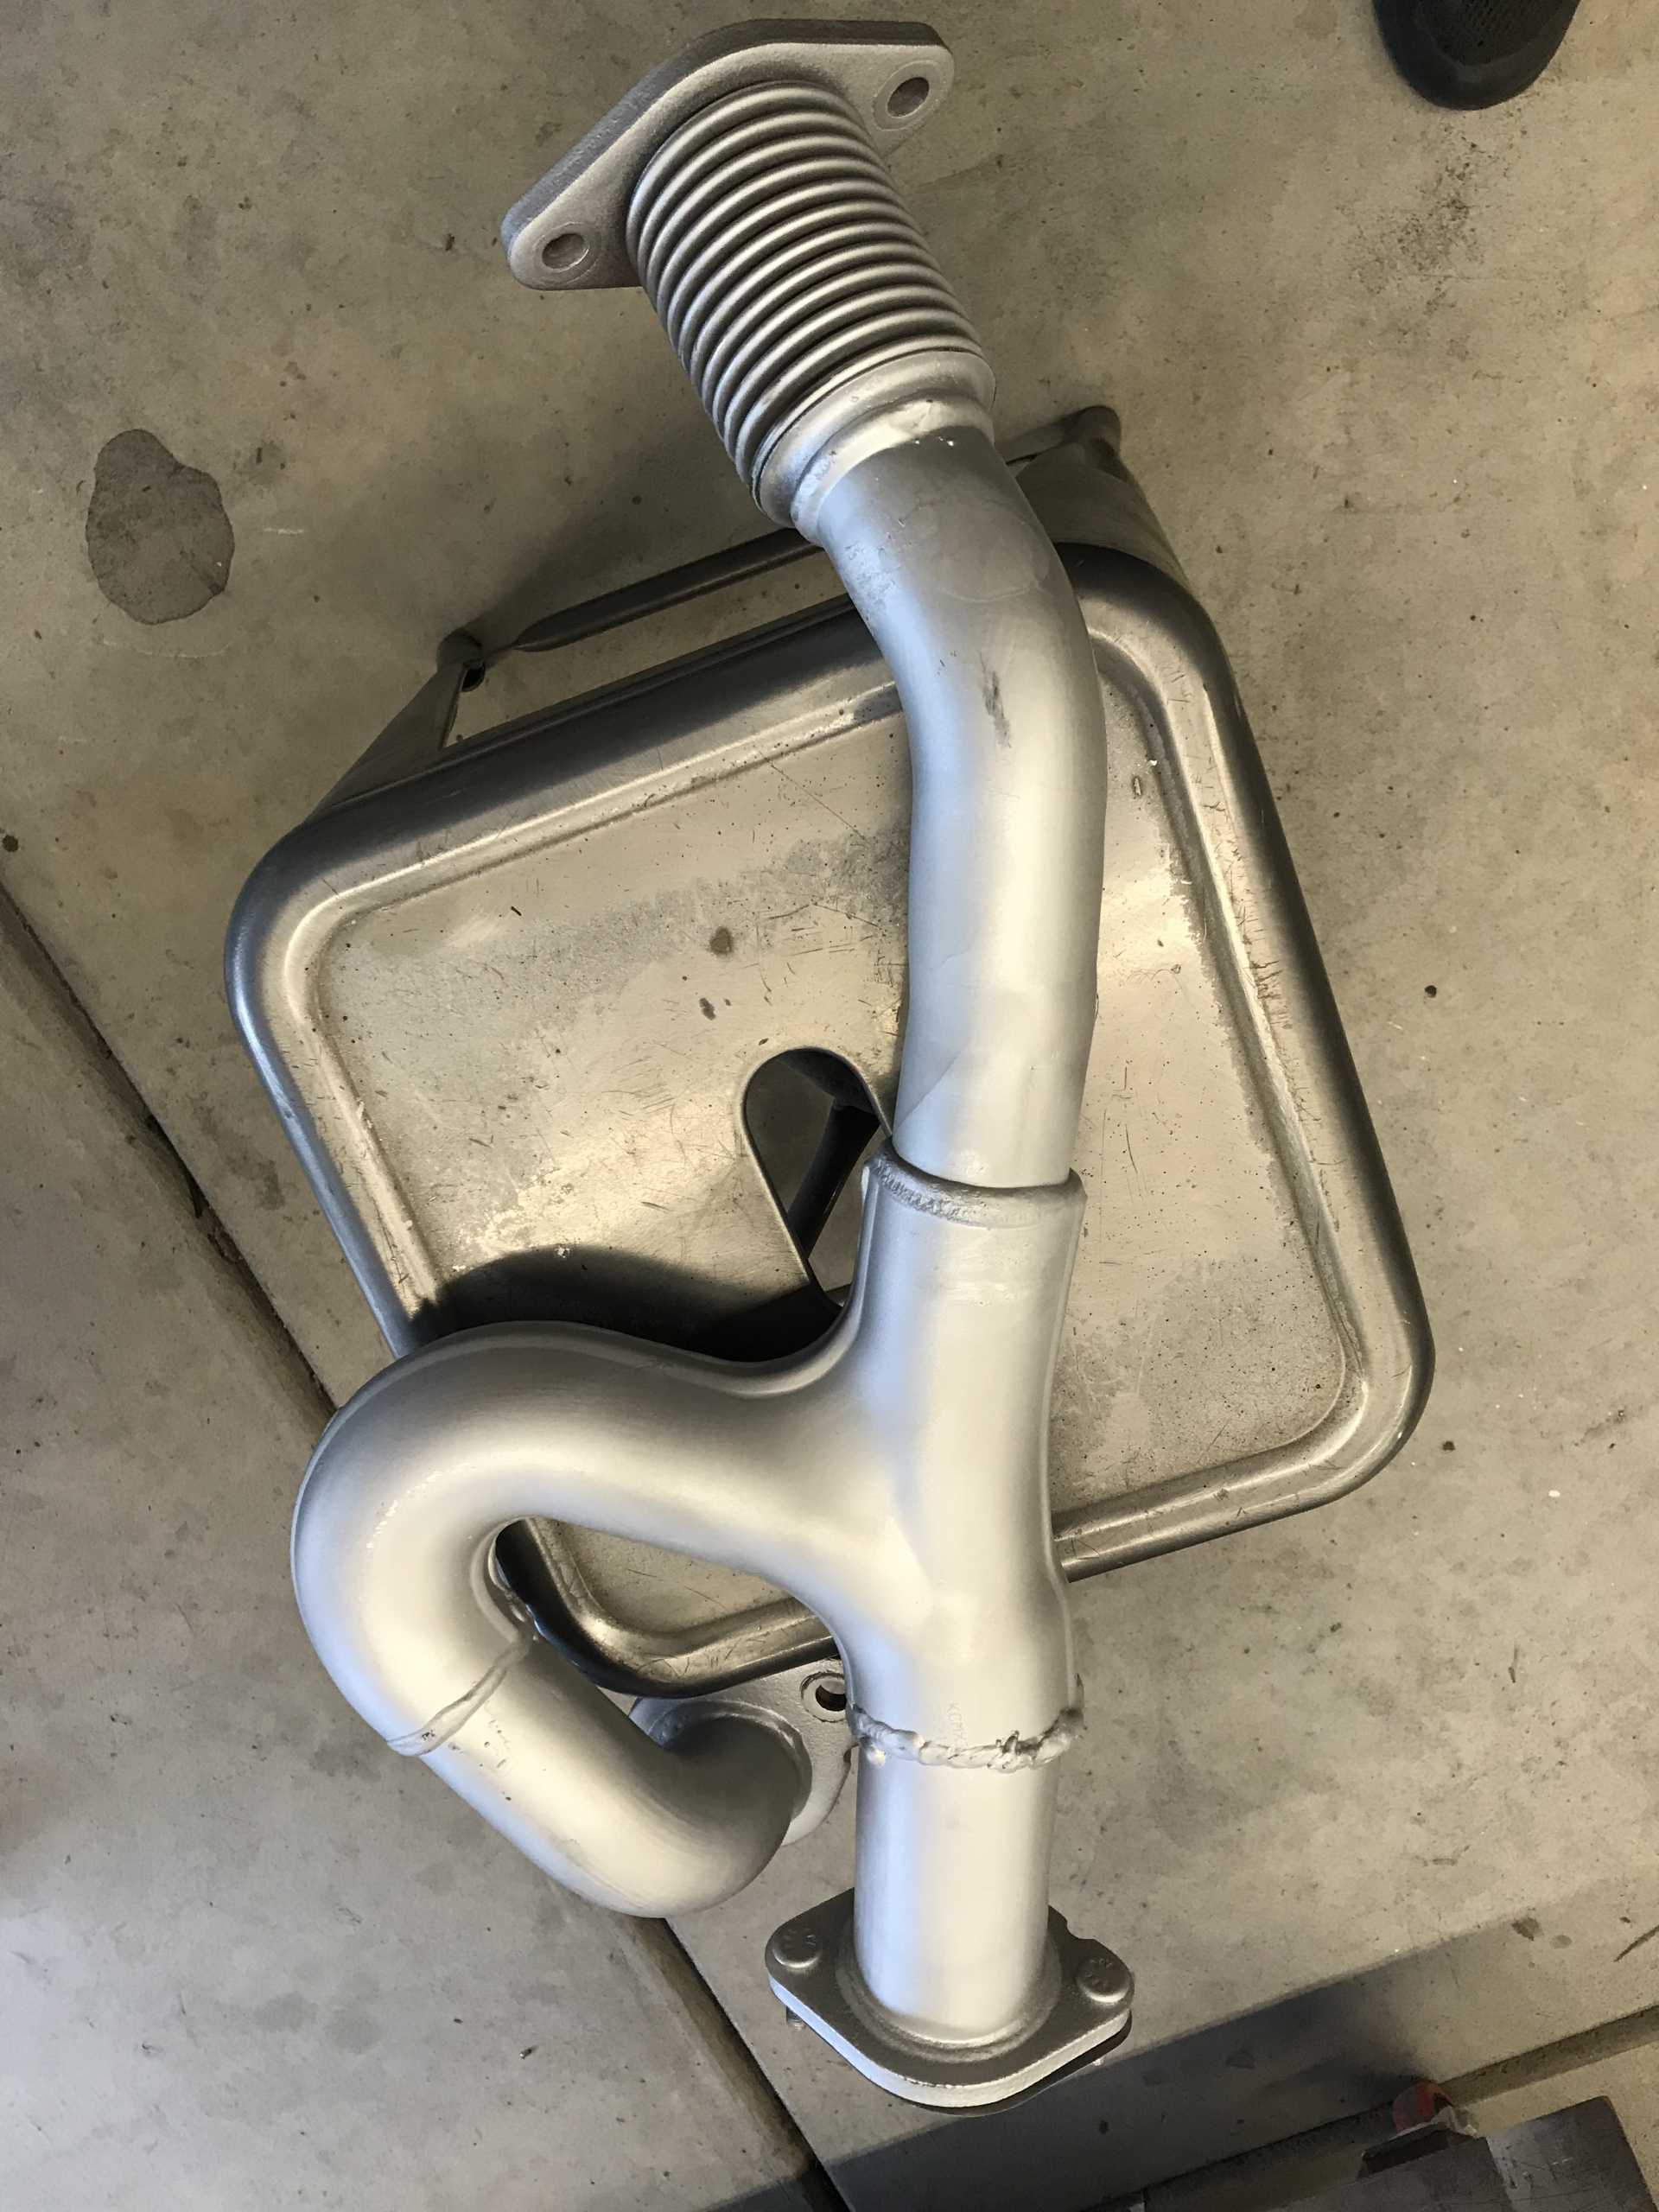
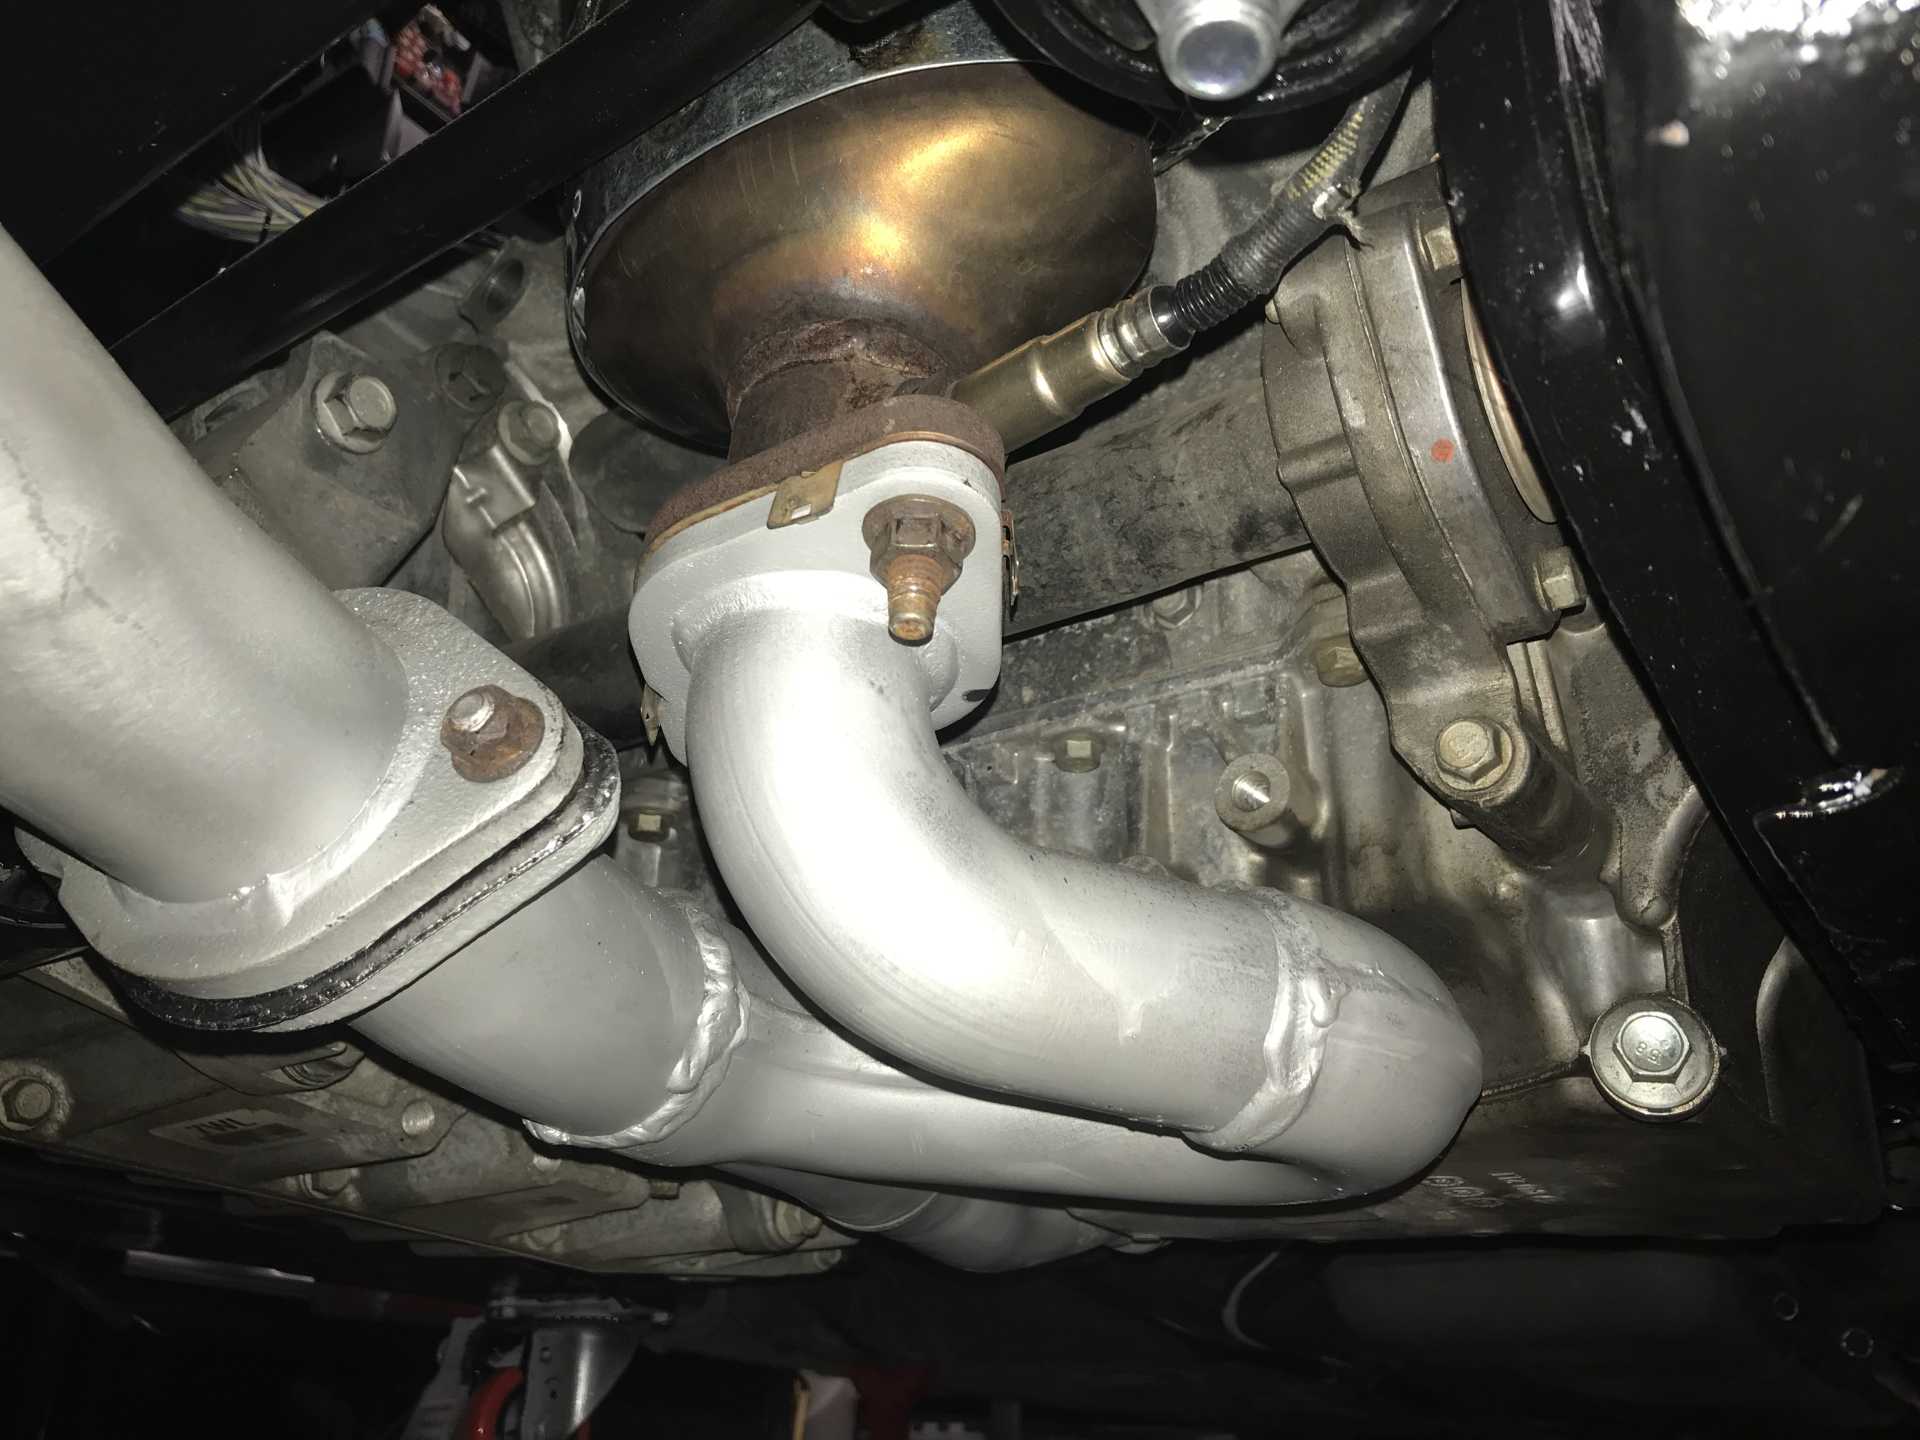
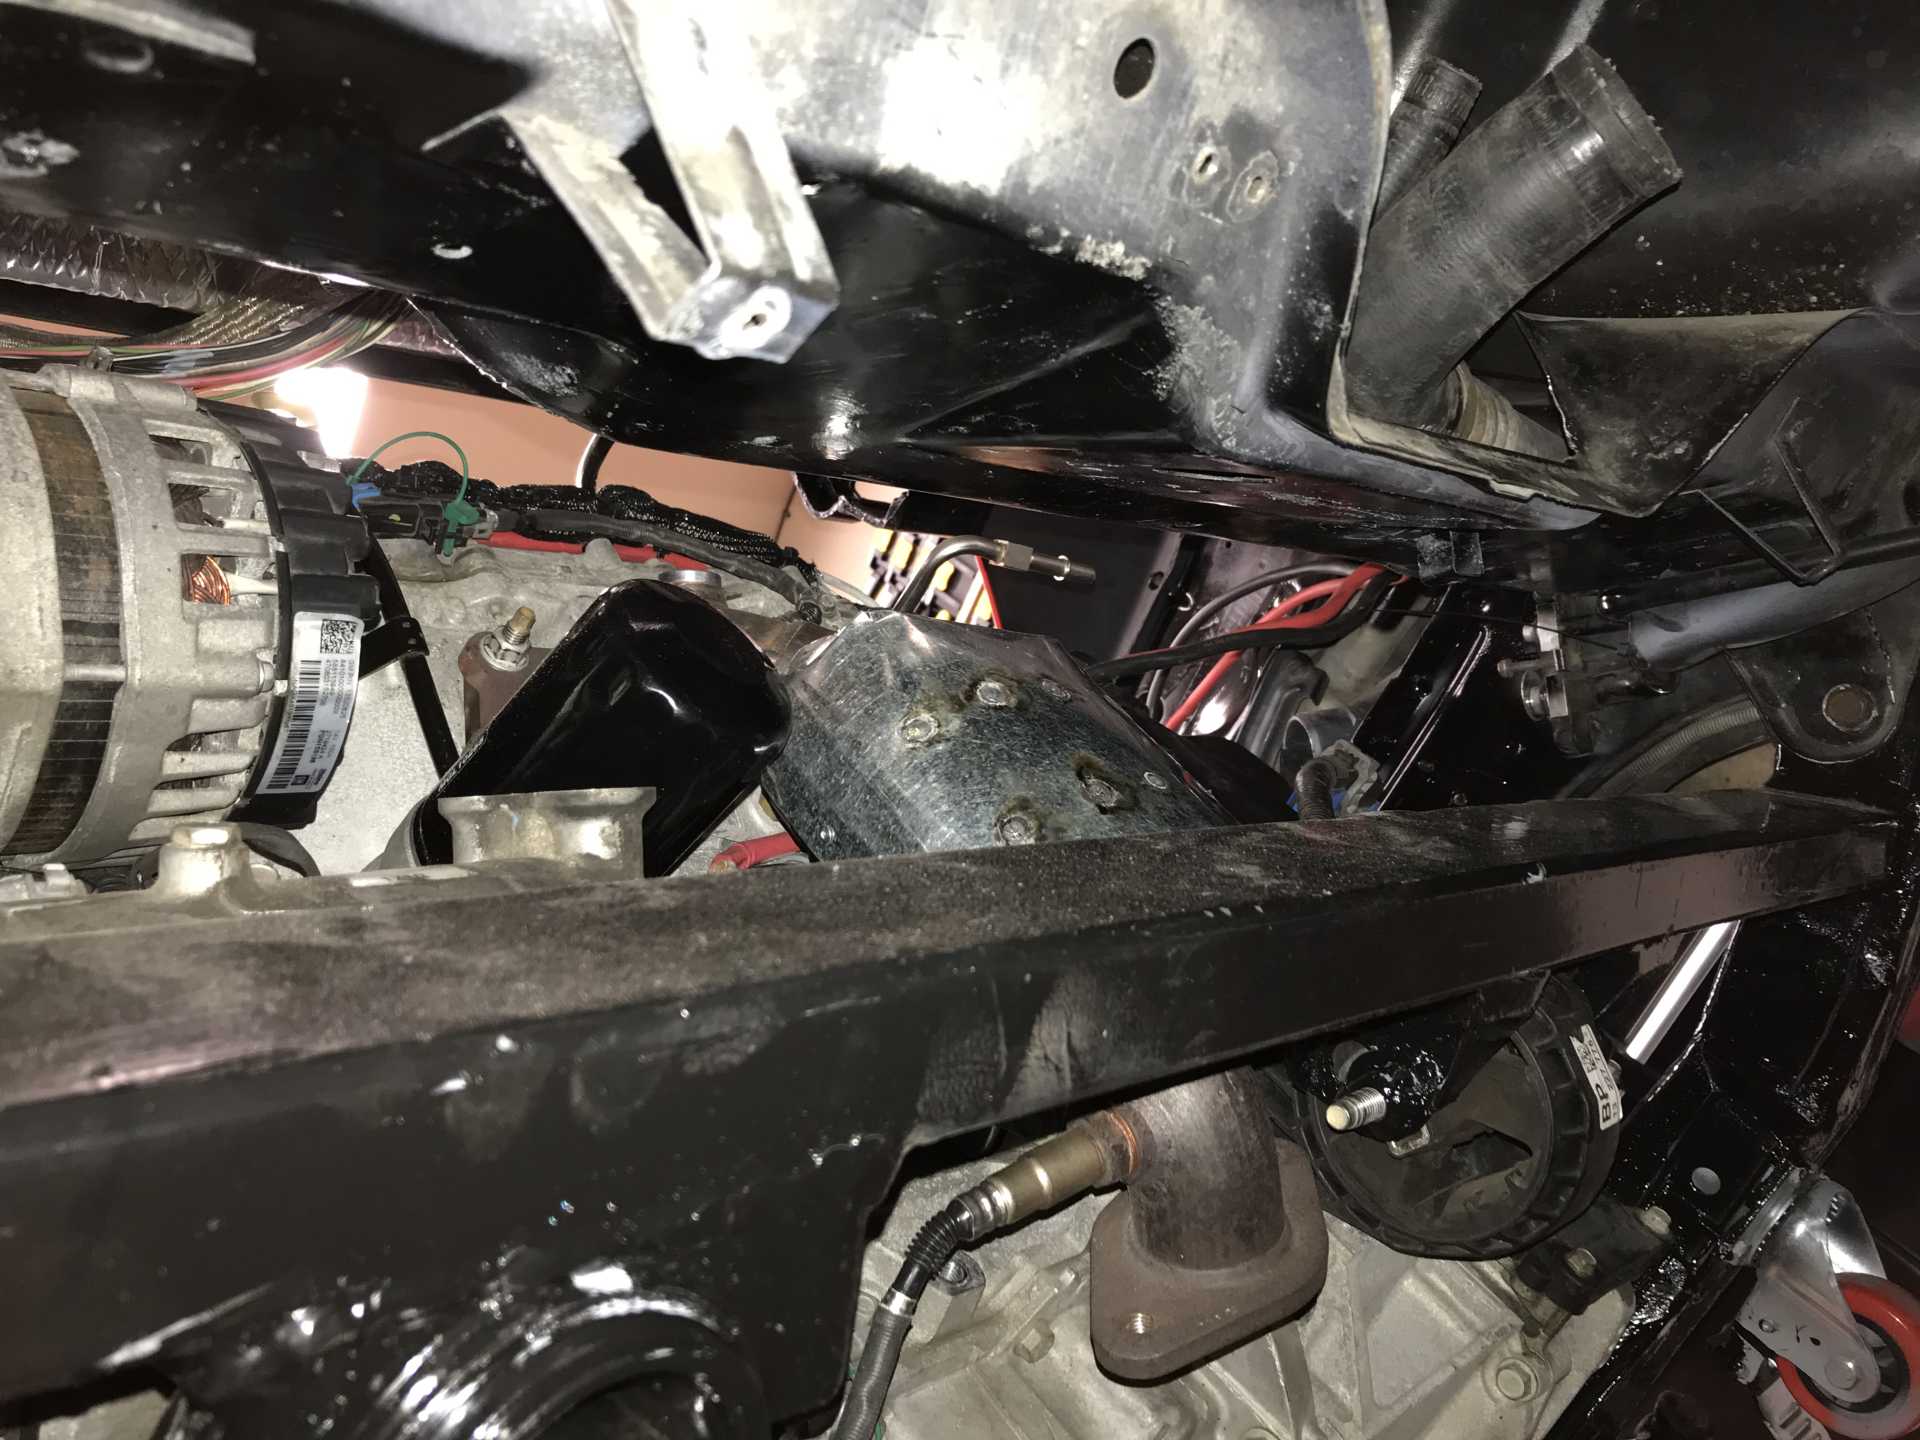
View of front of engine from the bottom, A/C is under Alt, I built heat shields for both cats. may not need the front one. Exhaust goes under the engine, has a notch in the oil pan. Those mounts are out of the Impala. There was a heat shield along all of the firewall since there were exhaust pipes, a crossover pipe and a Cat Converter. Now all gone. Cats and pipes are near nothing sensitive to heat.
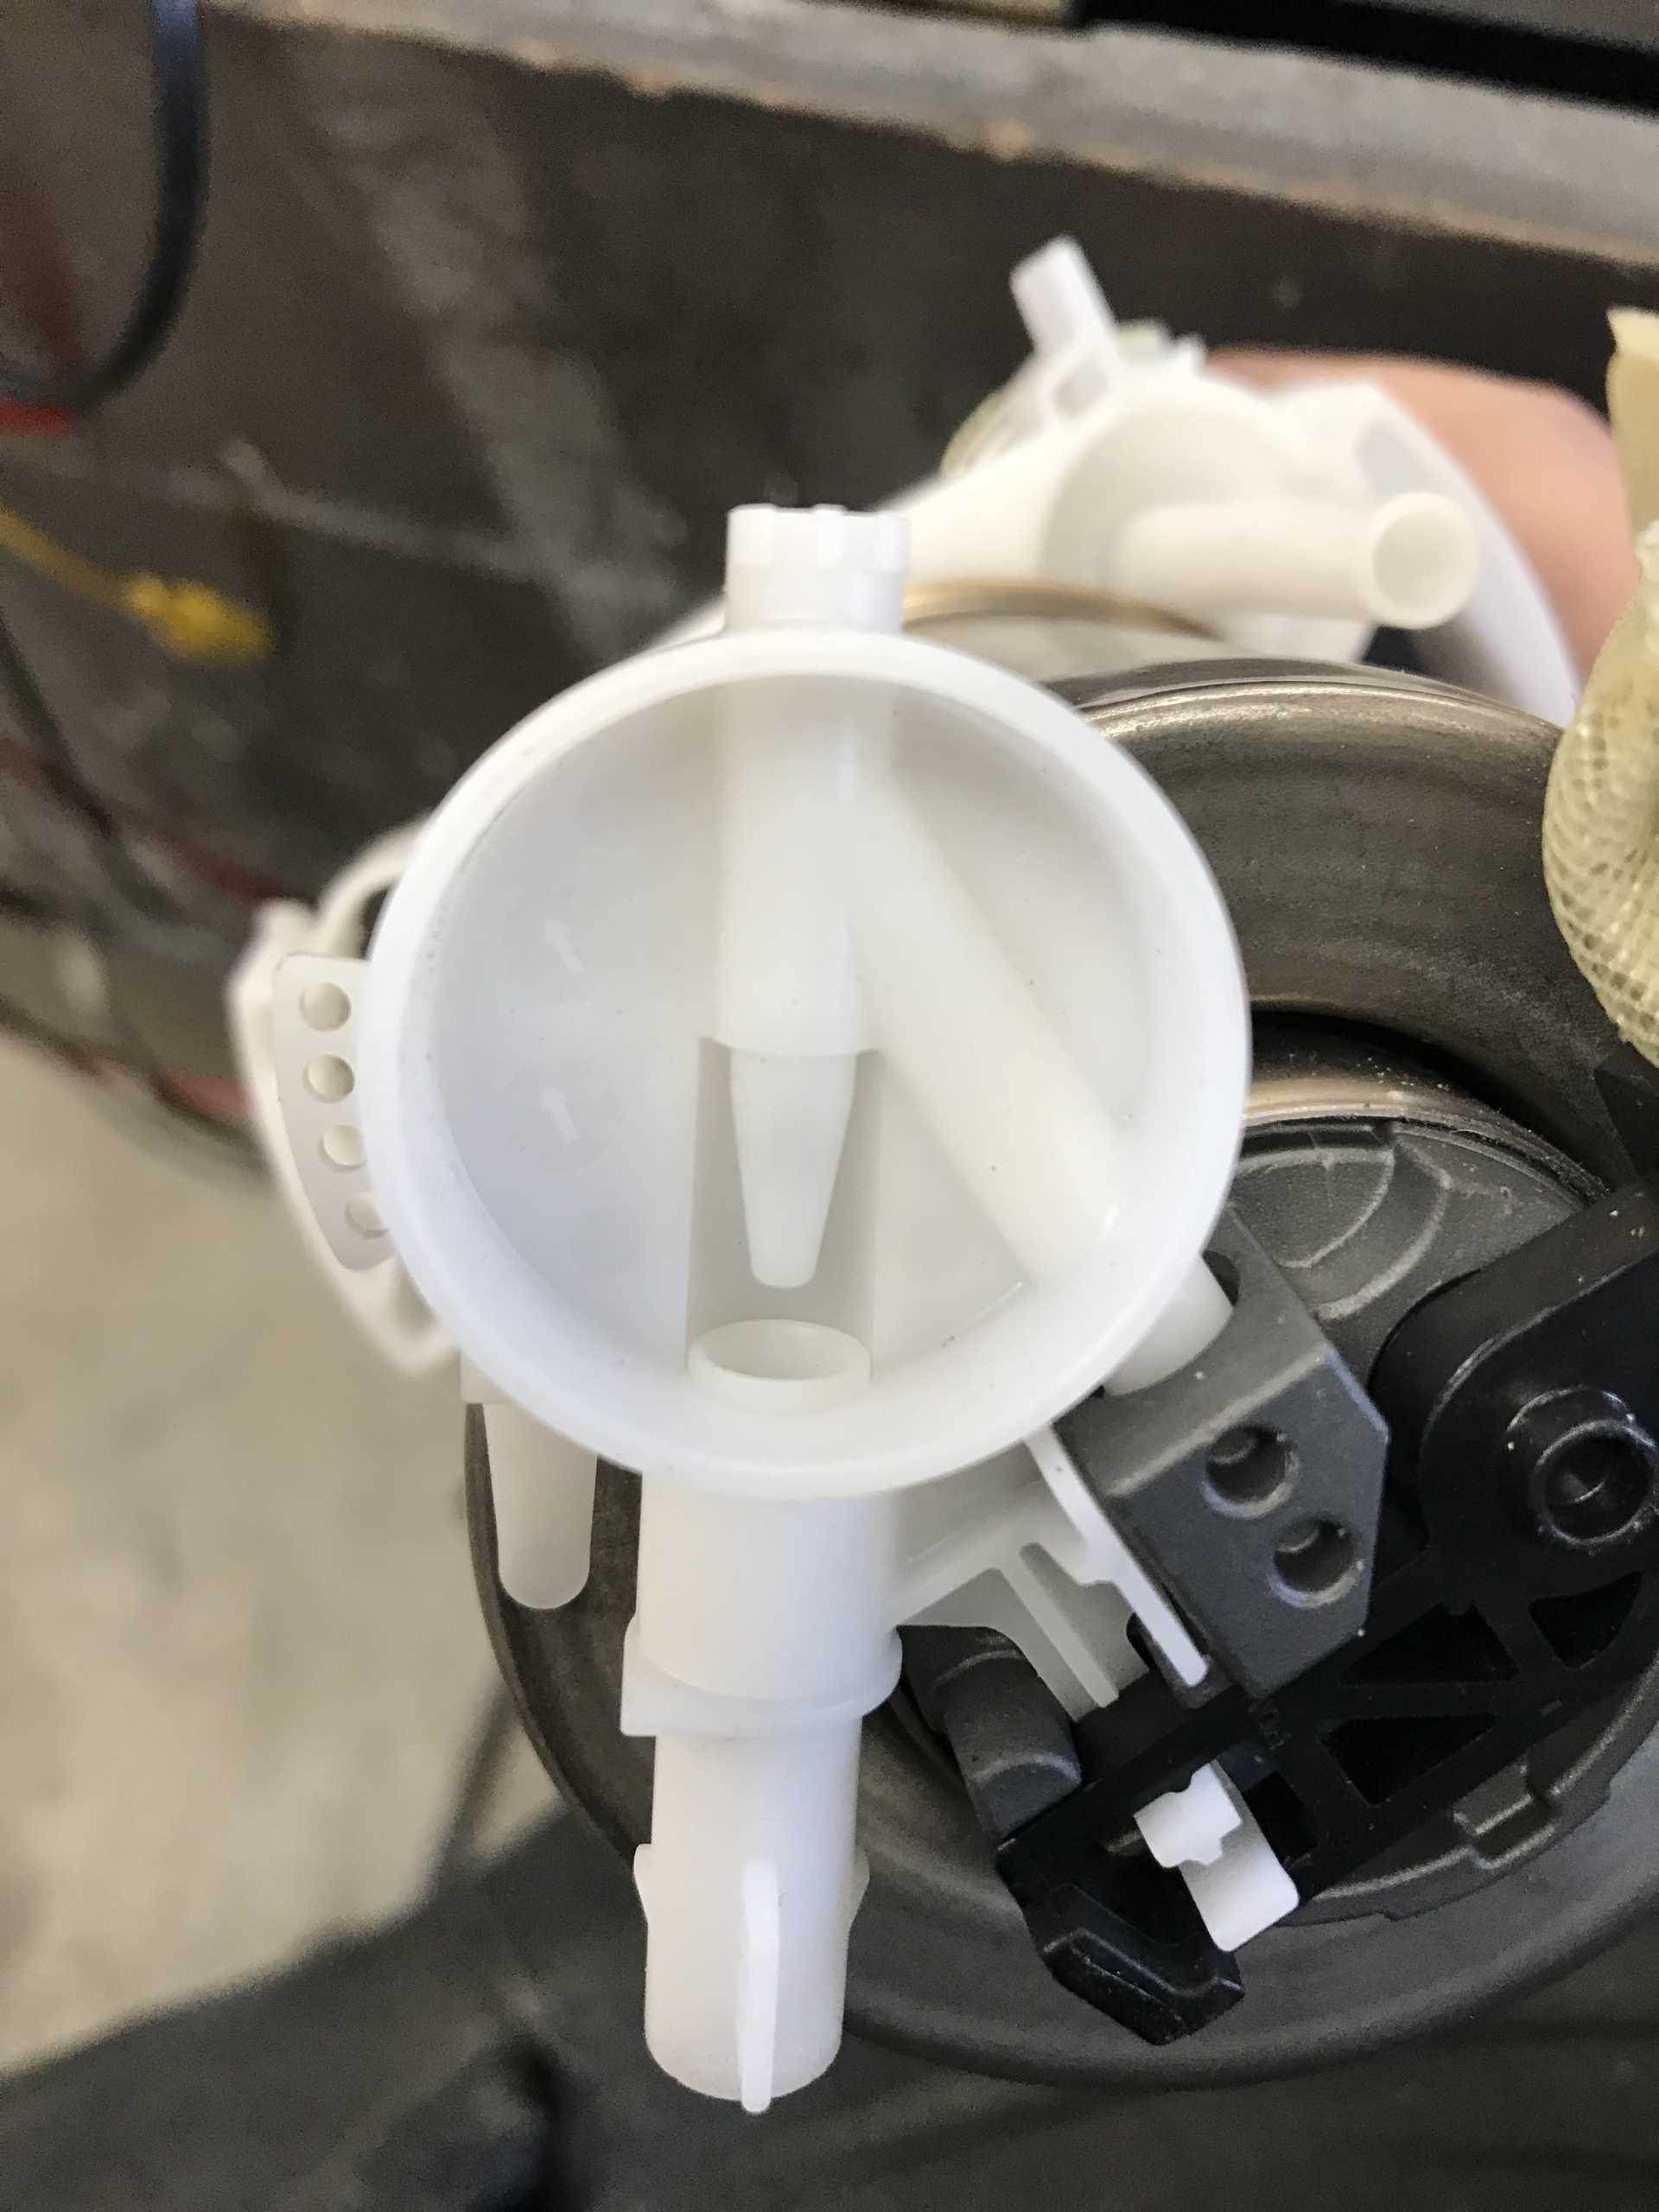
I had intended to use the Impala fuel pump with filter, pressure valve and level sender but it's huge and simply won't fit. Taking it apart was able to salvage the pump and the sender. The 55PSI pressure limiter will need to be external from a Corvette. Getting the pump to fit was simple except that it has a bottom opening to provide a siphon to suck fuel from the tank into the sump. That needed to stay and was cut down to fit. The senser was more of a problem. Different resistance from the fiero and needed to be fiddled with to arrive at a suitable position. Getting the float to work properly was difficult due to the internal baffling in the Fiero tank. But eventually it fit. The Impala uses 4 wires so the wiring fixture needed to be altered too.
The Impala it too big to be used as one part

The fuel filter is internal around the pump
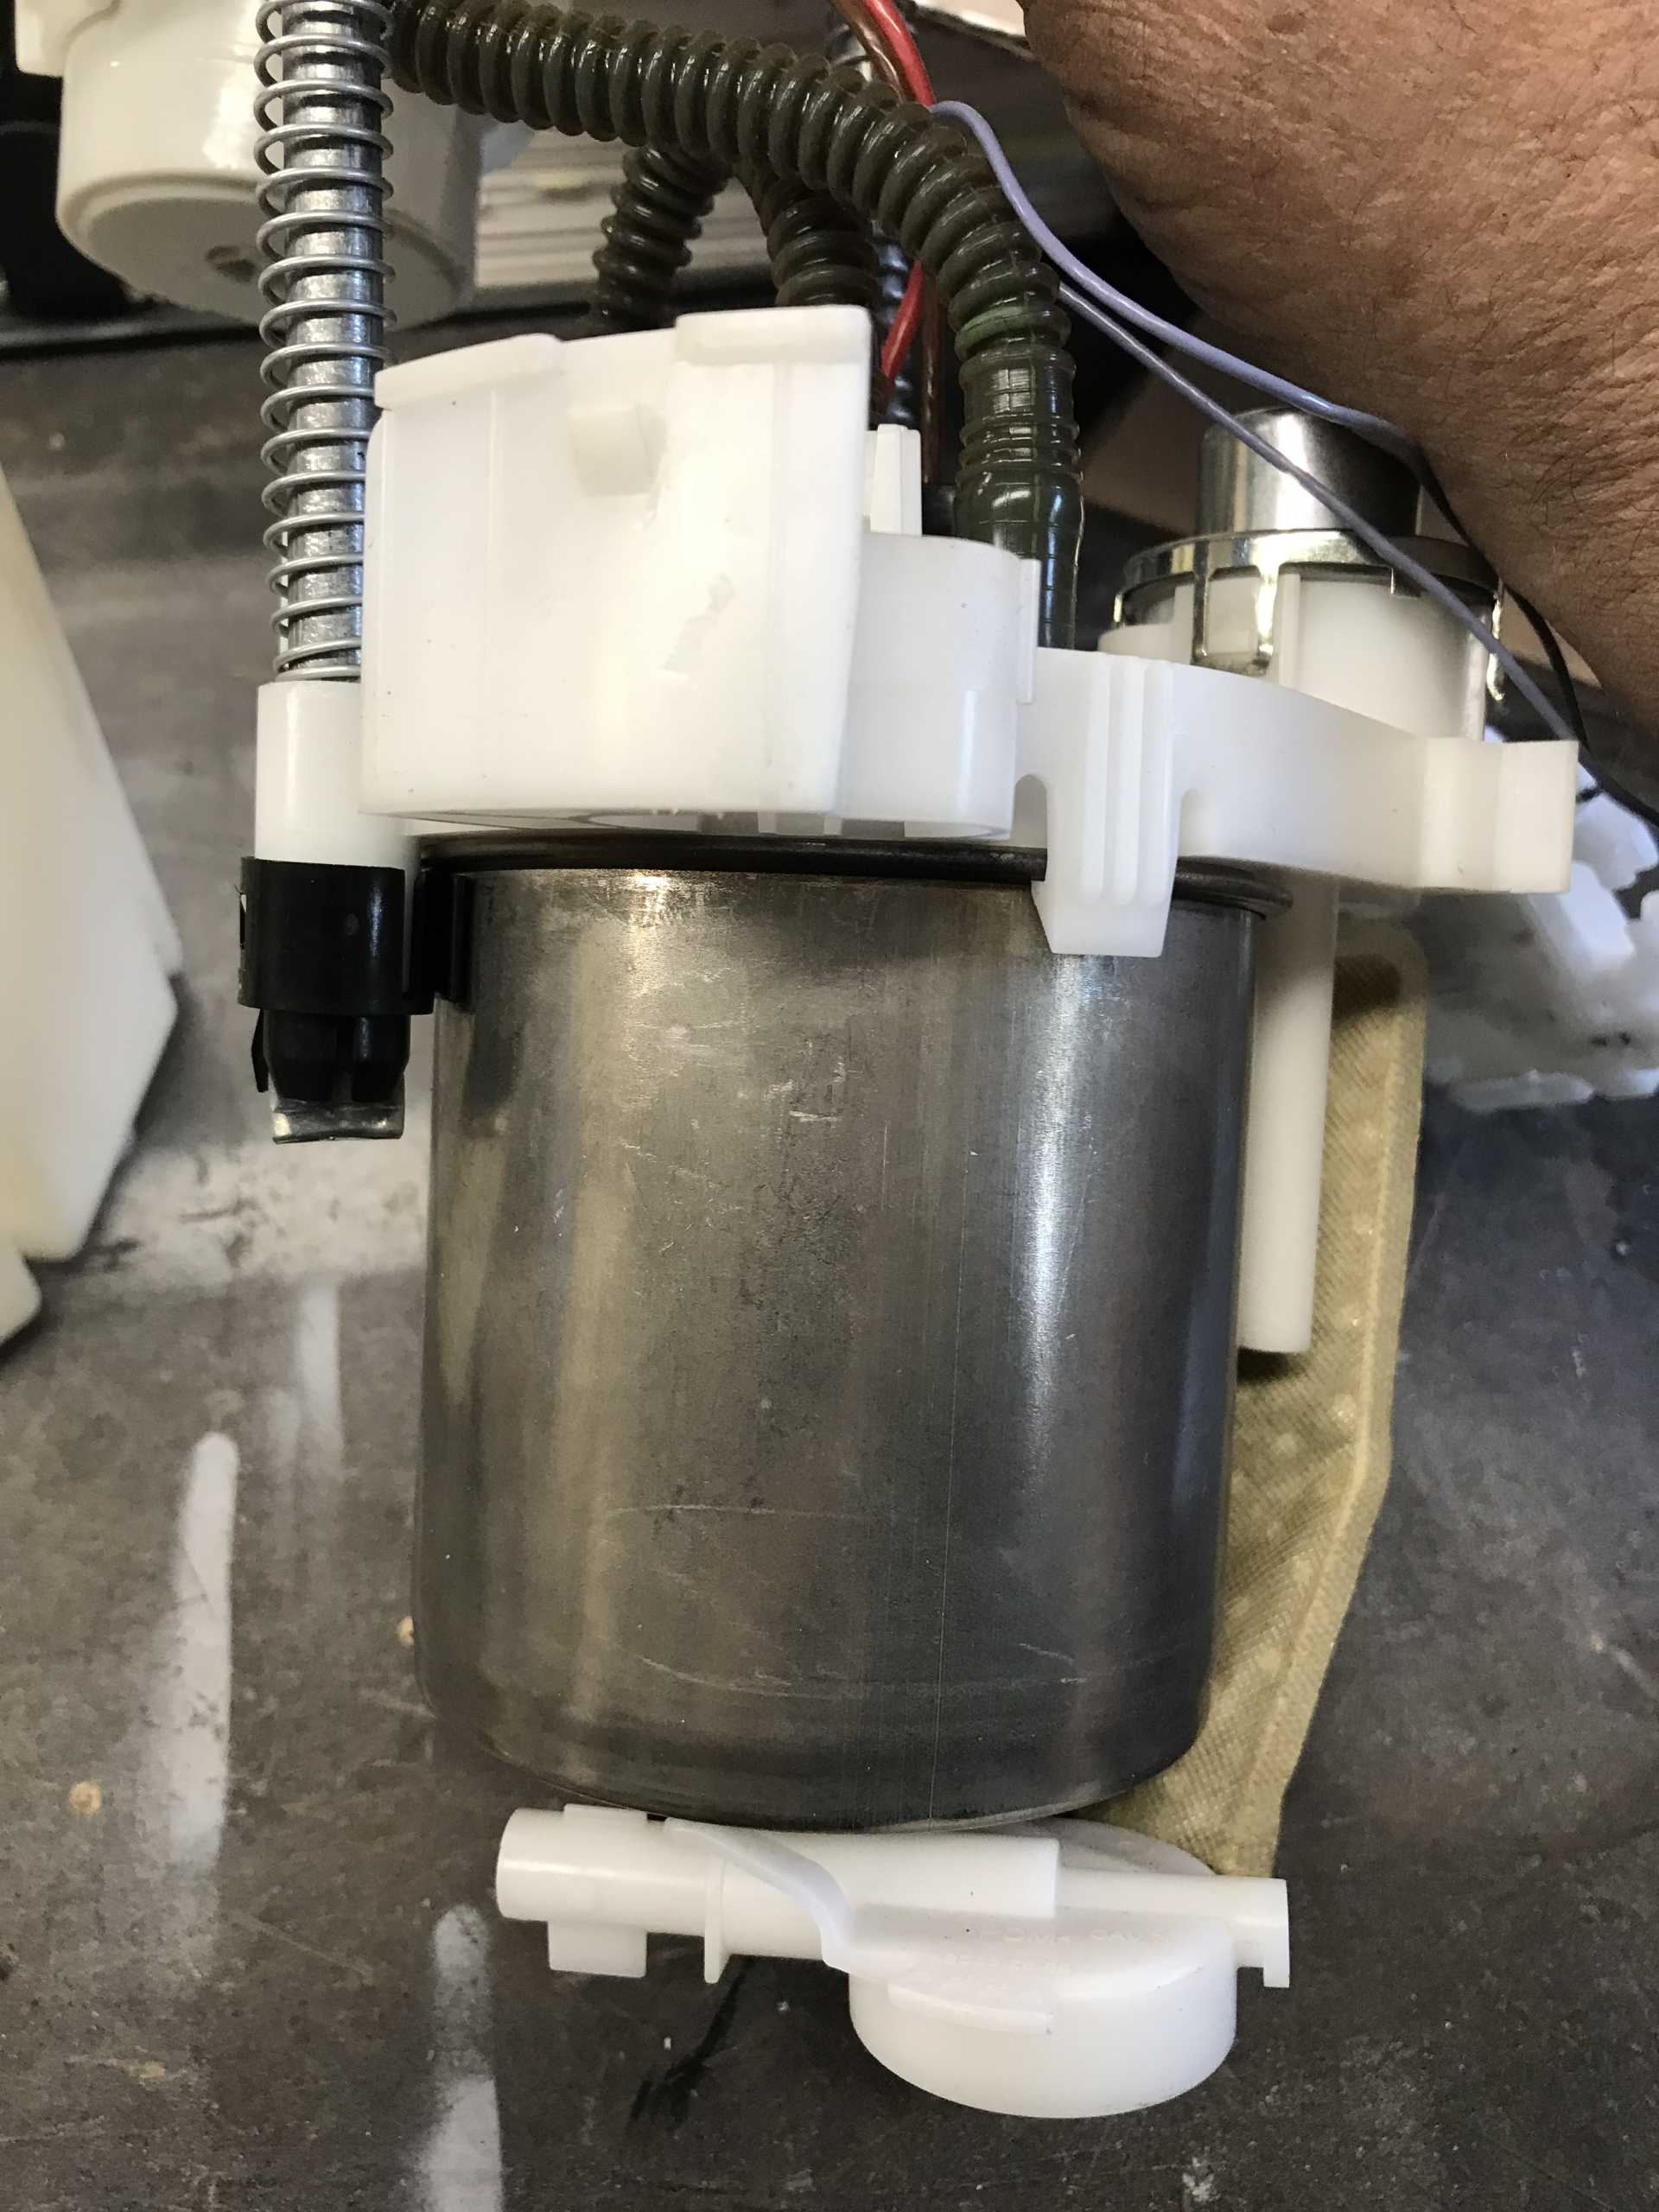
This is the jet pump to siphon fuel into the sump. The sump has an inlet valve below this from the tank. Clever idea.
The internal pressure releif valve which can't be easily used. So now an external filter/relief valve
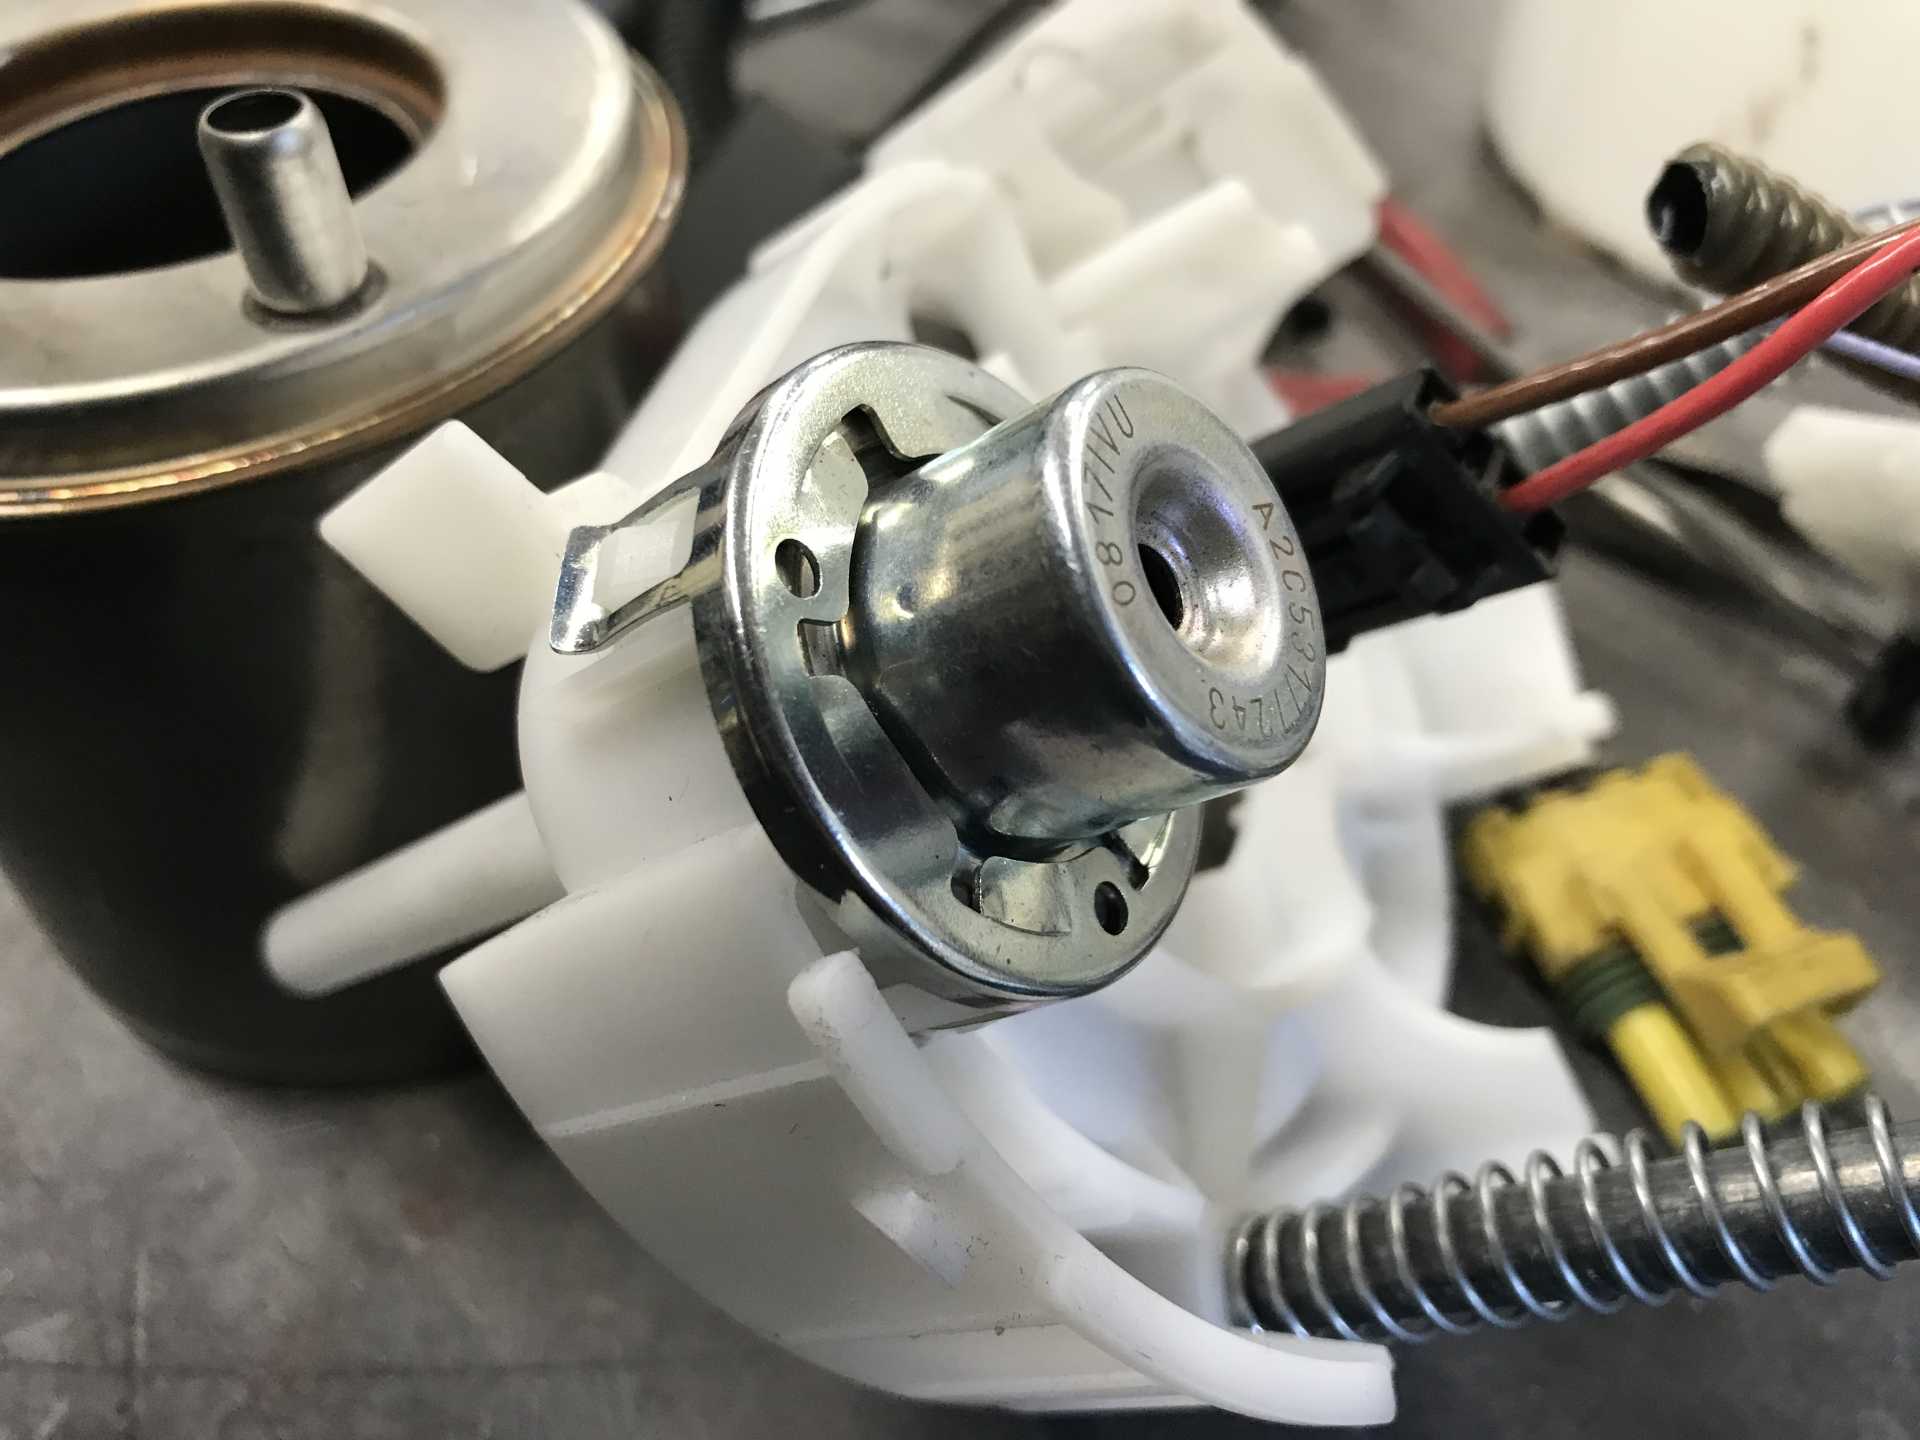
The sender is held in place by a bolt and a bent tab to prevent rotation. Note the lock nut.
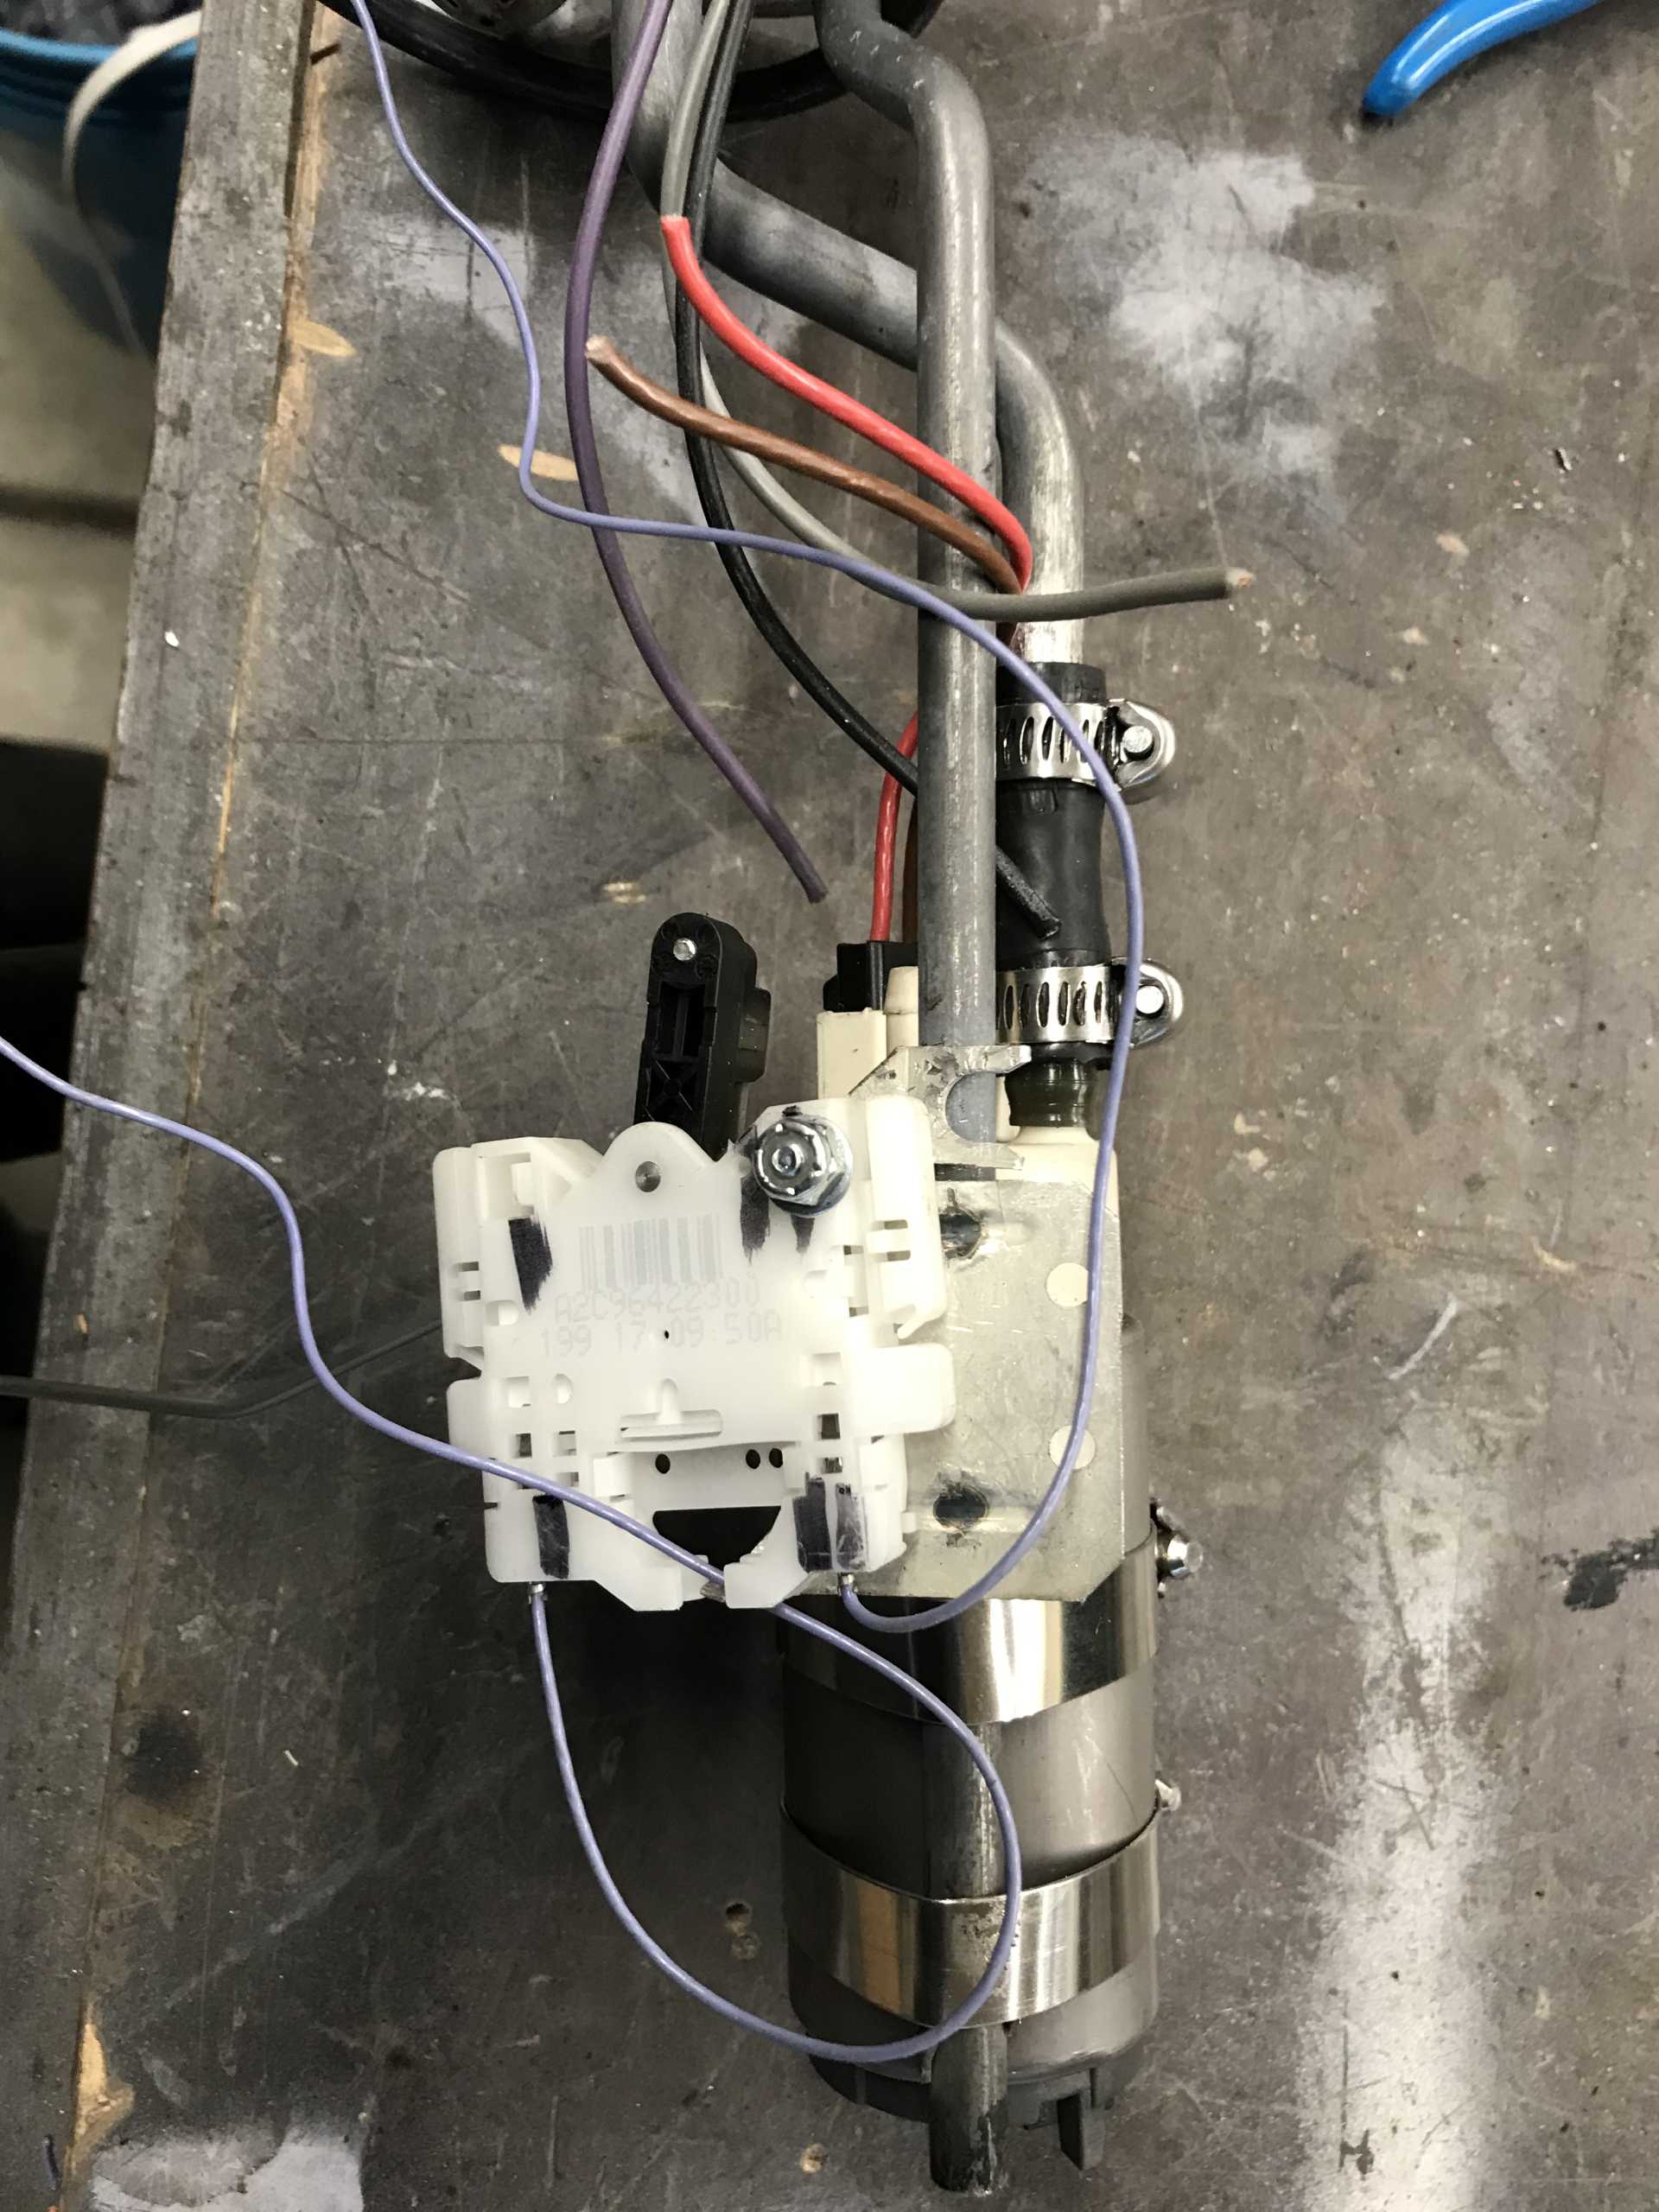
The altered wiring just barely fit.

Next comes fitting the muffler in place using as much of the Impala exhaust as possible.[This message has been edited by MikesFirstFiero (edited 09-24-2021).]
|
|
|
|
MikesFirstFiero
|
SEP 28, 12:08 PM
|
|
|
|
|
MikesFirstFiero
|
OCT 08, 01:22 PM
|
|
Progress is being made but the last few weeks were all about details. Everything seemed to need some time spent figuring out how to accomplish the task without breaking the bank. Buying the complete Impala did give me lots of parts to work with so things have worked out well so far. With the engine in the car and the muffler in place the next job was hooking up hoses & mechanical stuff.
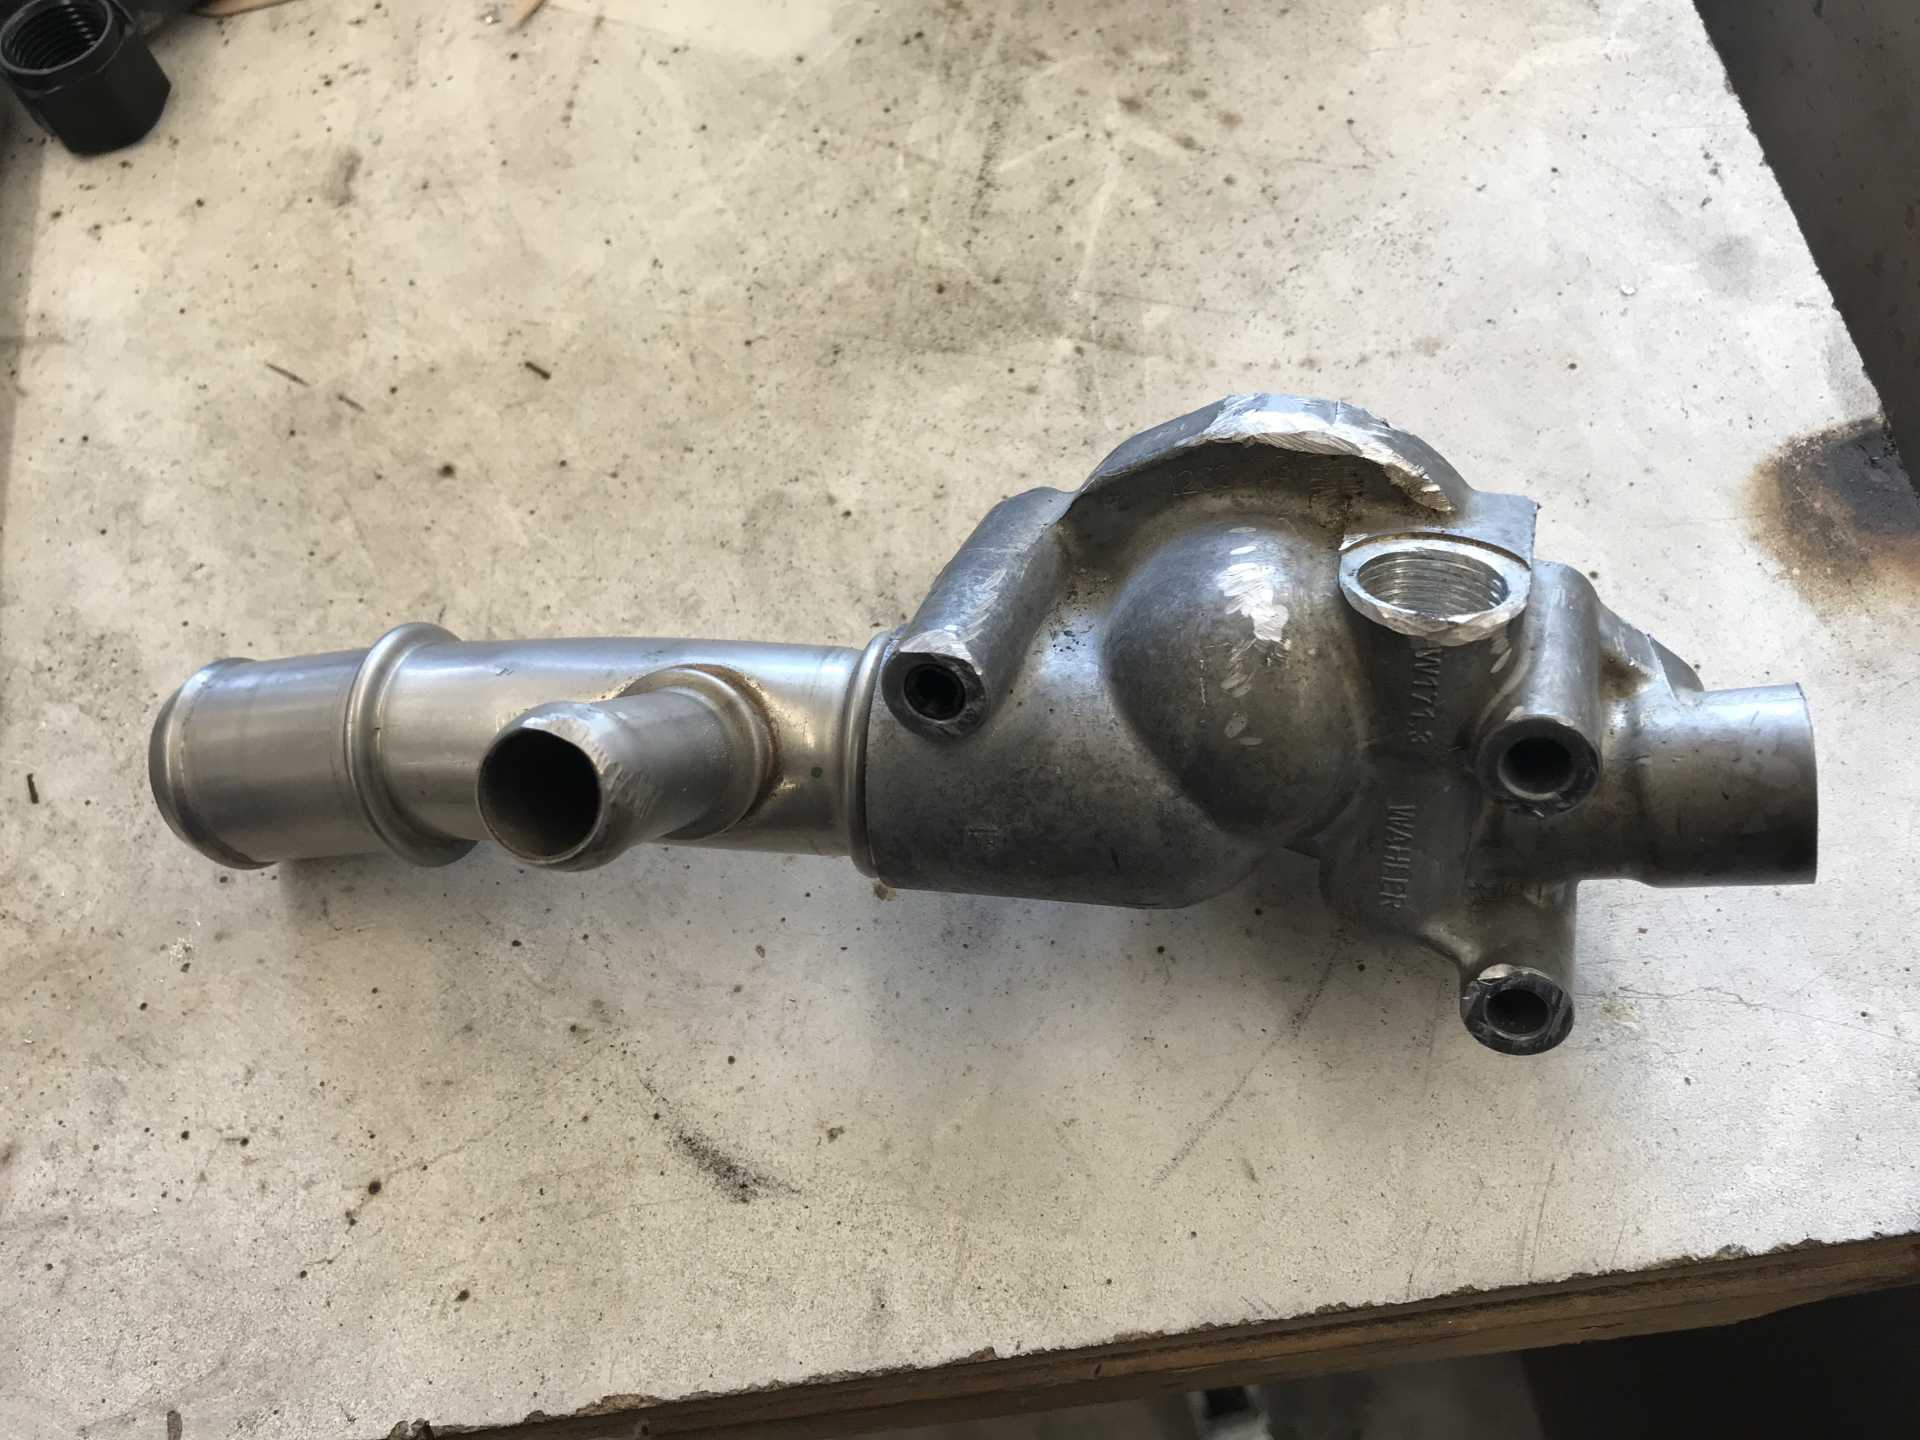
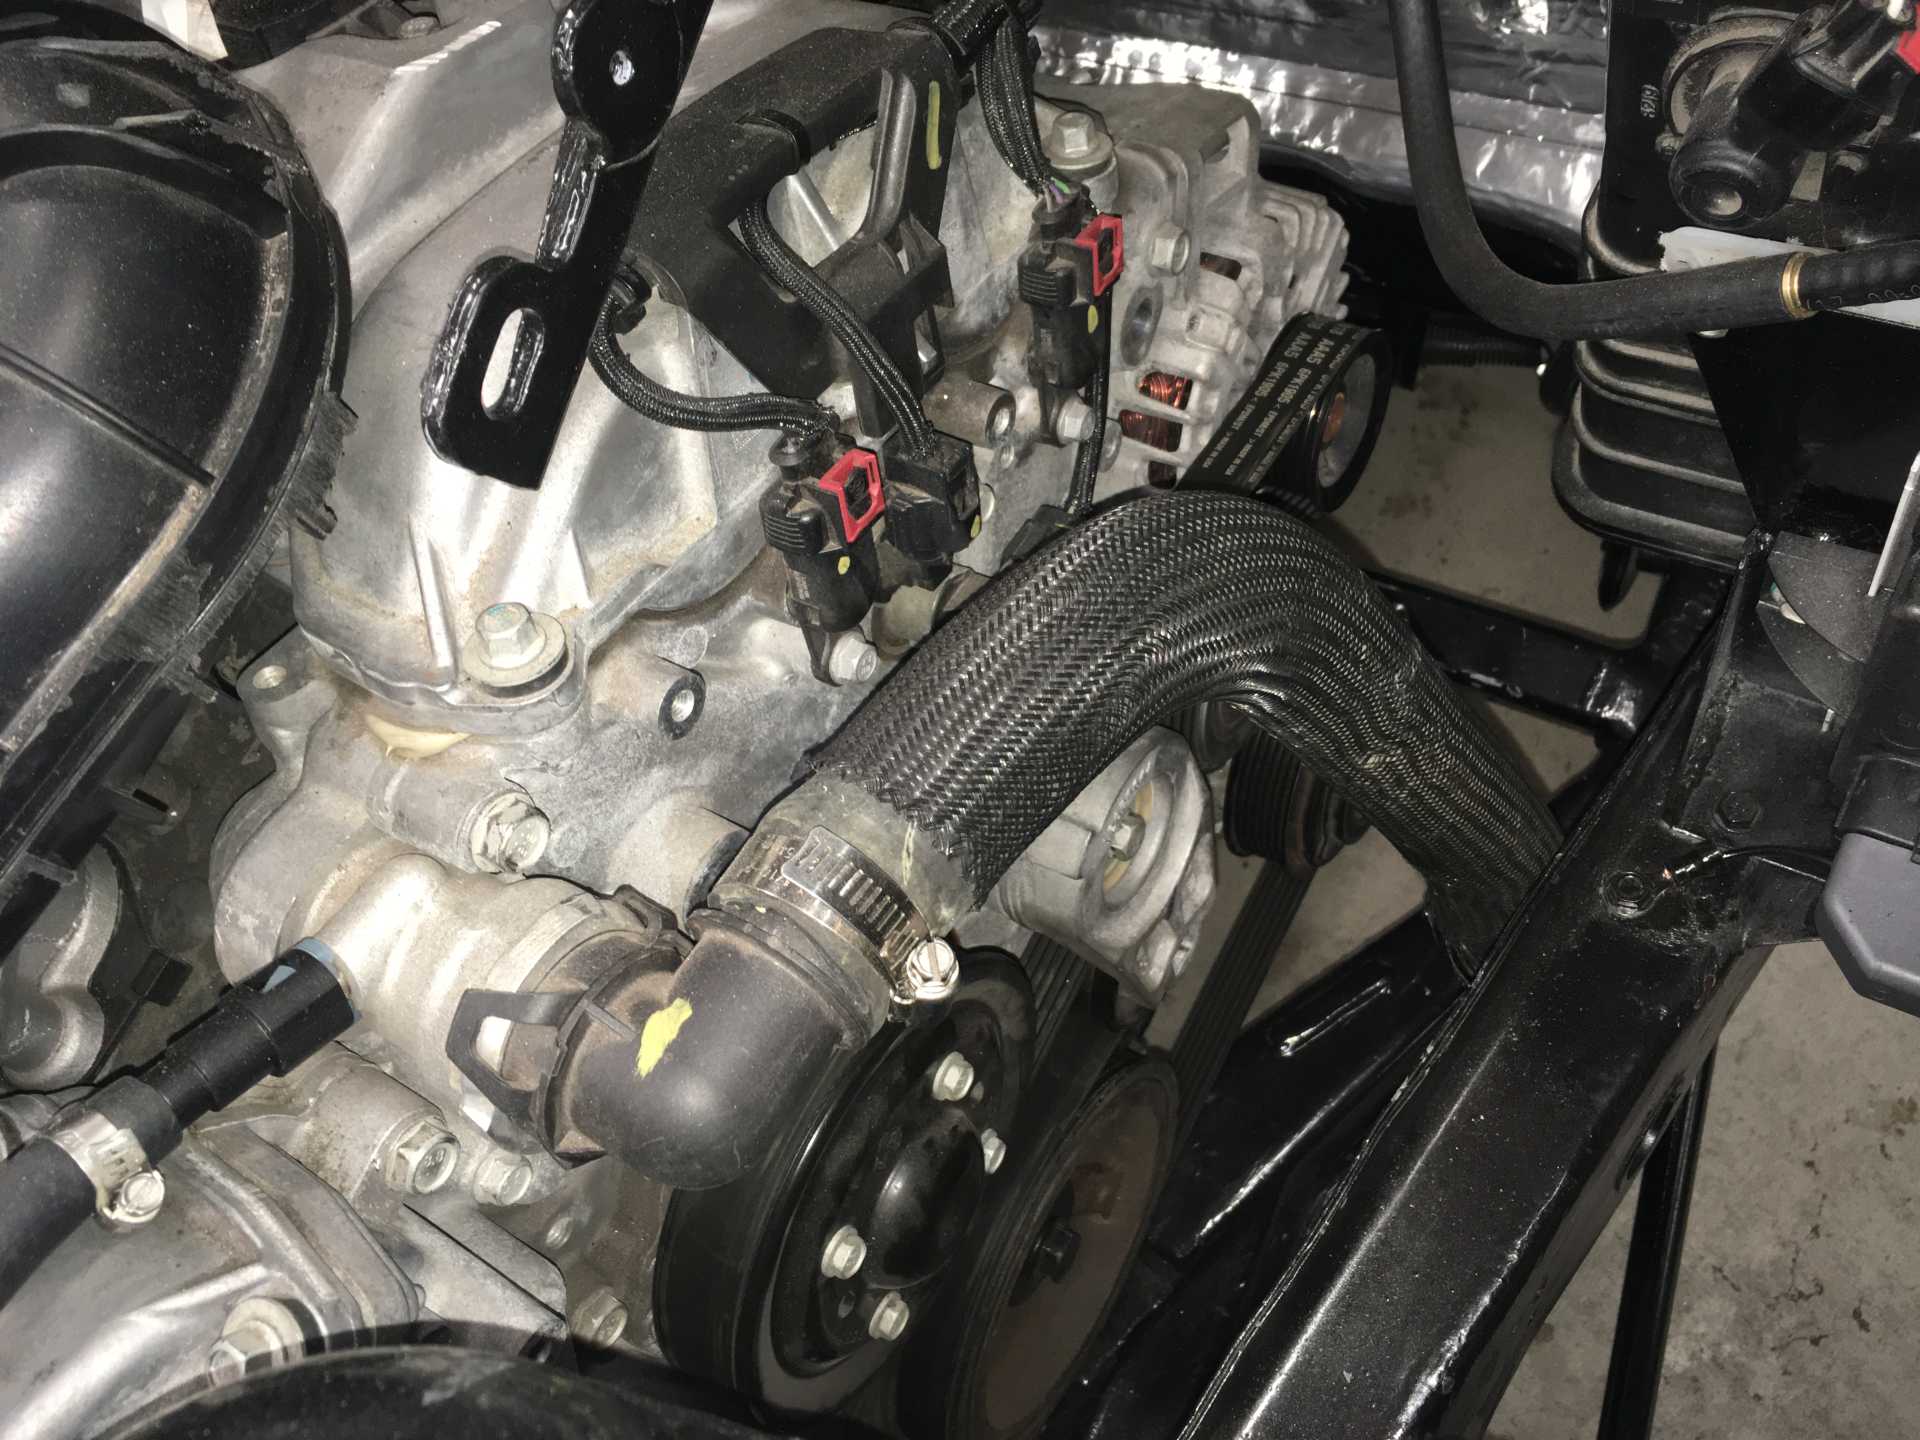
The transmission cooler piping from the radiator worked out well and I was able to modify and re-use the Impala pipes connecting to the Fiero hoses. The thermostat housing though was to be a problem. The inlet pipe (it's reverse flow) pointed in the right direction and there was a clear path to the side pipe. I cut up the Fiero coolant pipe from the front of the 2.8 and was able to use a combination of Fiero & Impala hoses to get the hoses between the two to fit. The heater connections on the thermostat housing were a problem though. One pointed to the rear of the Fiero and the other straight up and they were press-fit into the thermostat housing. I decided to solve this by removing and replacing them with AN fittings so I could use 180 and 90 degree swivel fittings to the hoses. I also allows me to cap them off easily until I get around to hooking up the Fiero heater pipes which also pointed in the wrong direction. I solved that by chopping them off before the bend and re-beading the pipes before the engine was in place. The thermostat housing was drilled and tapped for the AN-10 & AN-12 fittings but the threads were not too deep for me to feel comfortable. I ended up also JB Welding them in place along with the threads. Just in case. Turned out good in the end, no leaks.
The heater hose fittings are at the top and right of the photo. The large pipe goes to the radiator, the smaller branch goes to the expansion tank.
Added the AN fittings so swivel fittings can be used to point the hoses in the right direction

This is the right side hose to the engine inlet. the left is simliar.
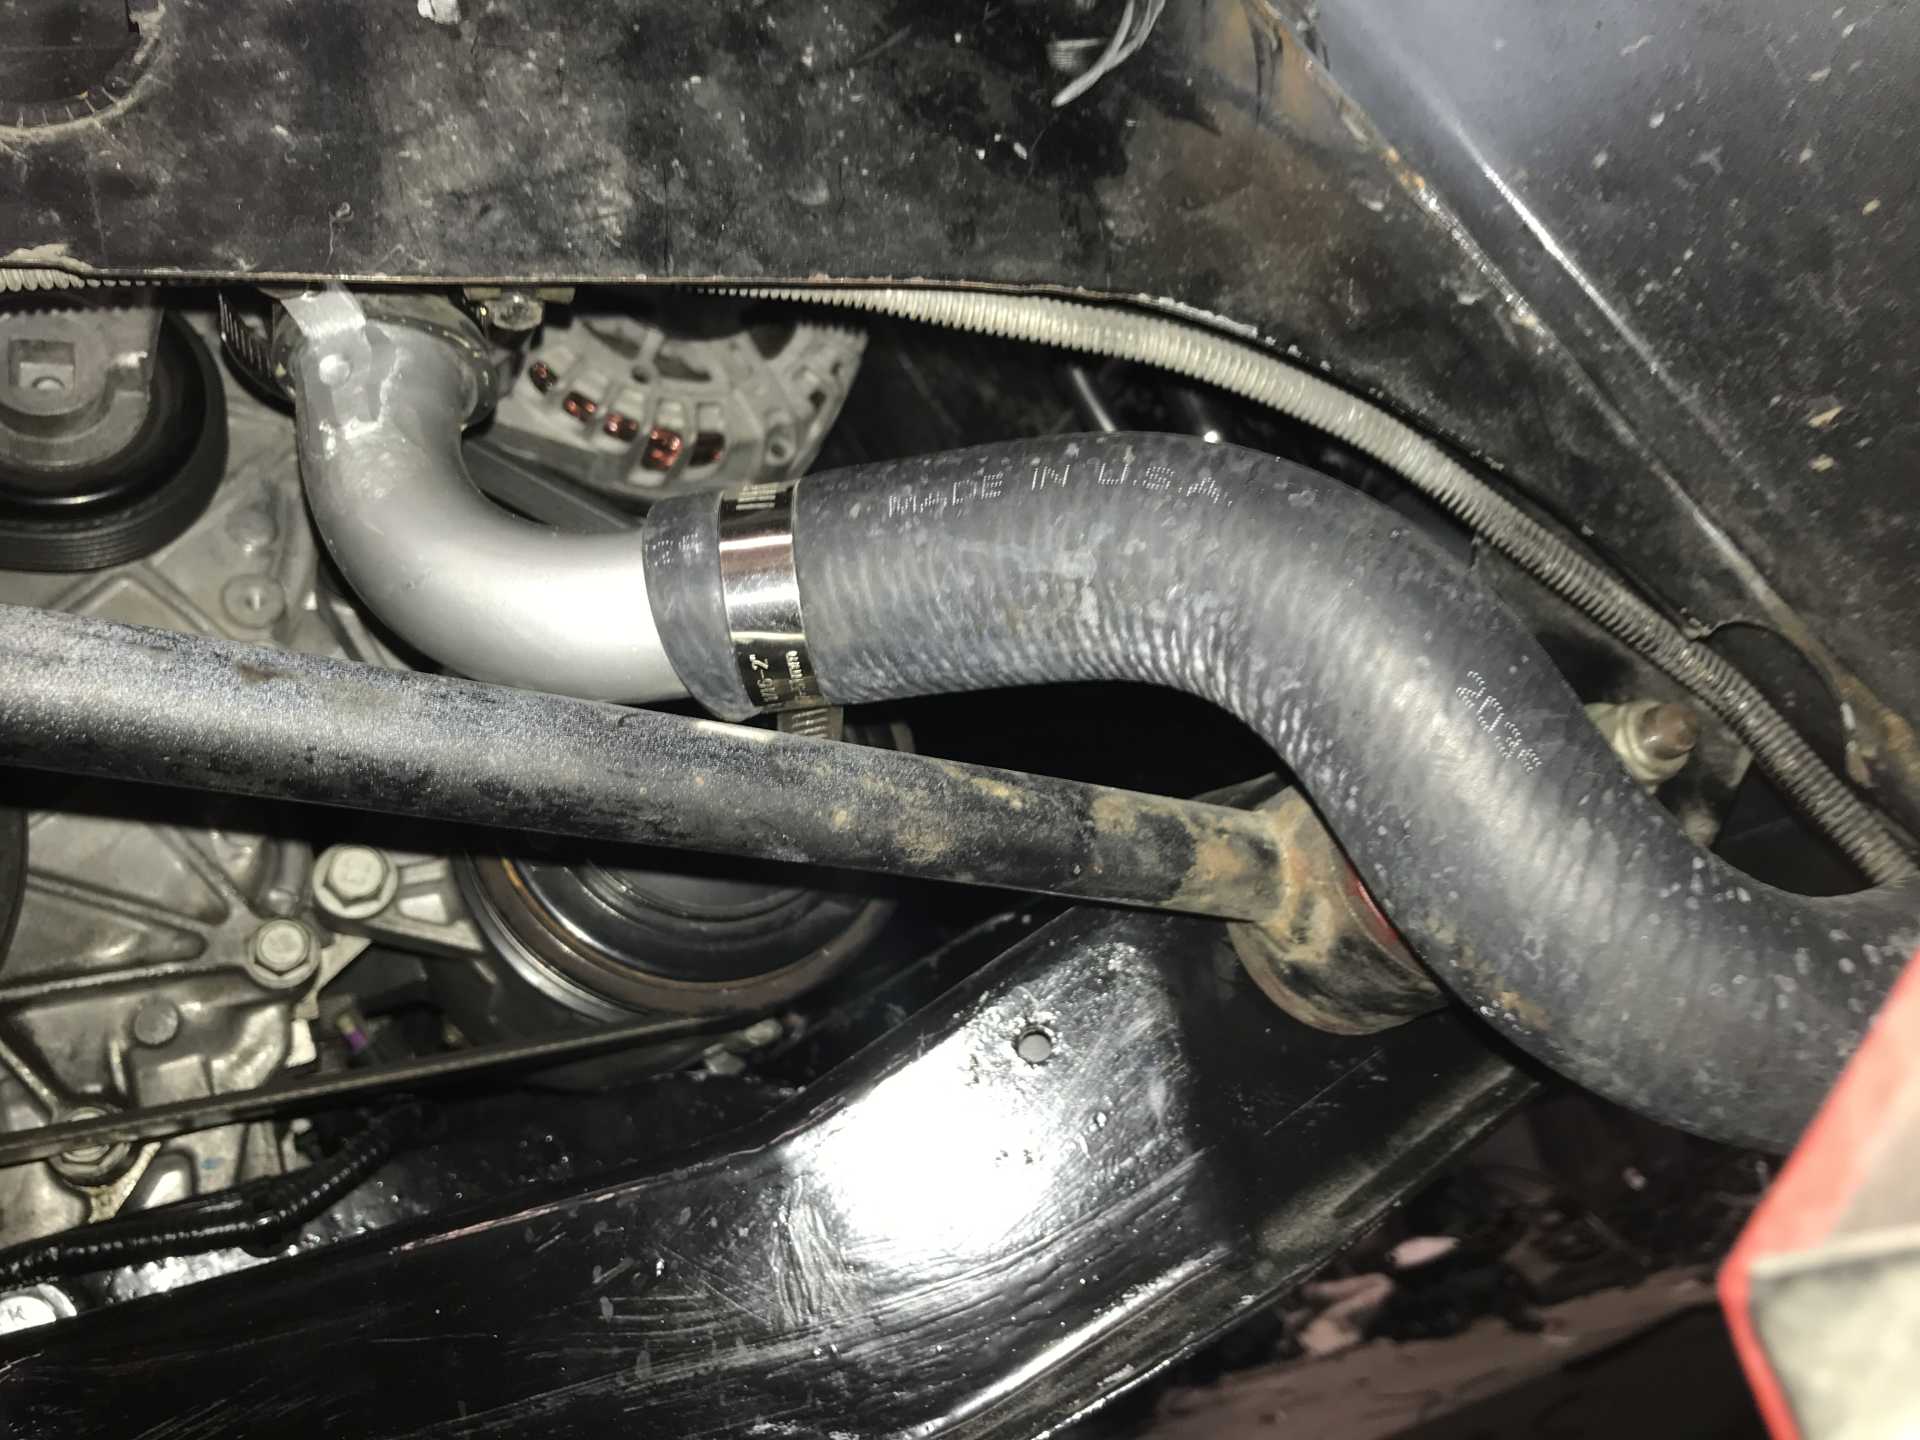
Top View of right side hose
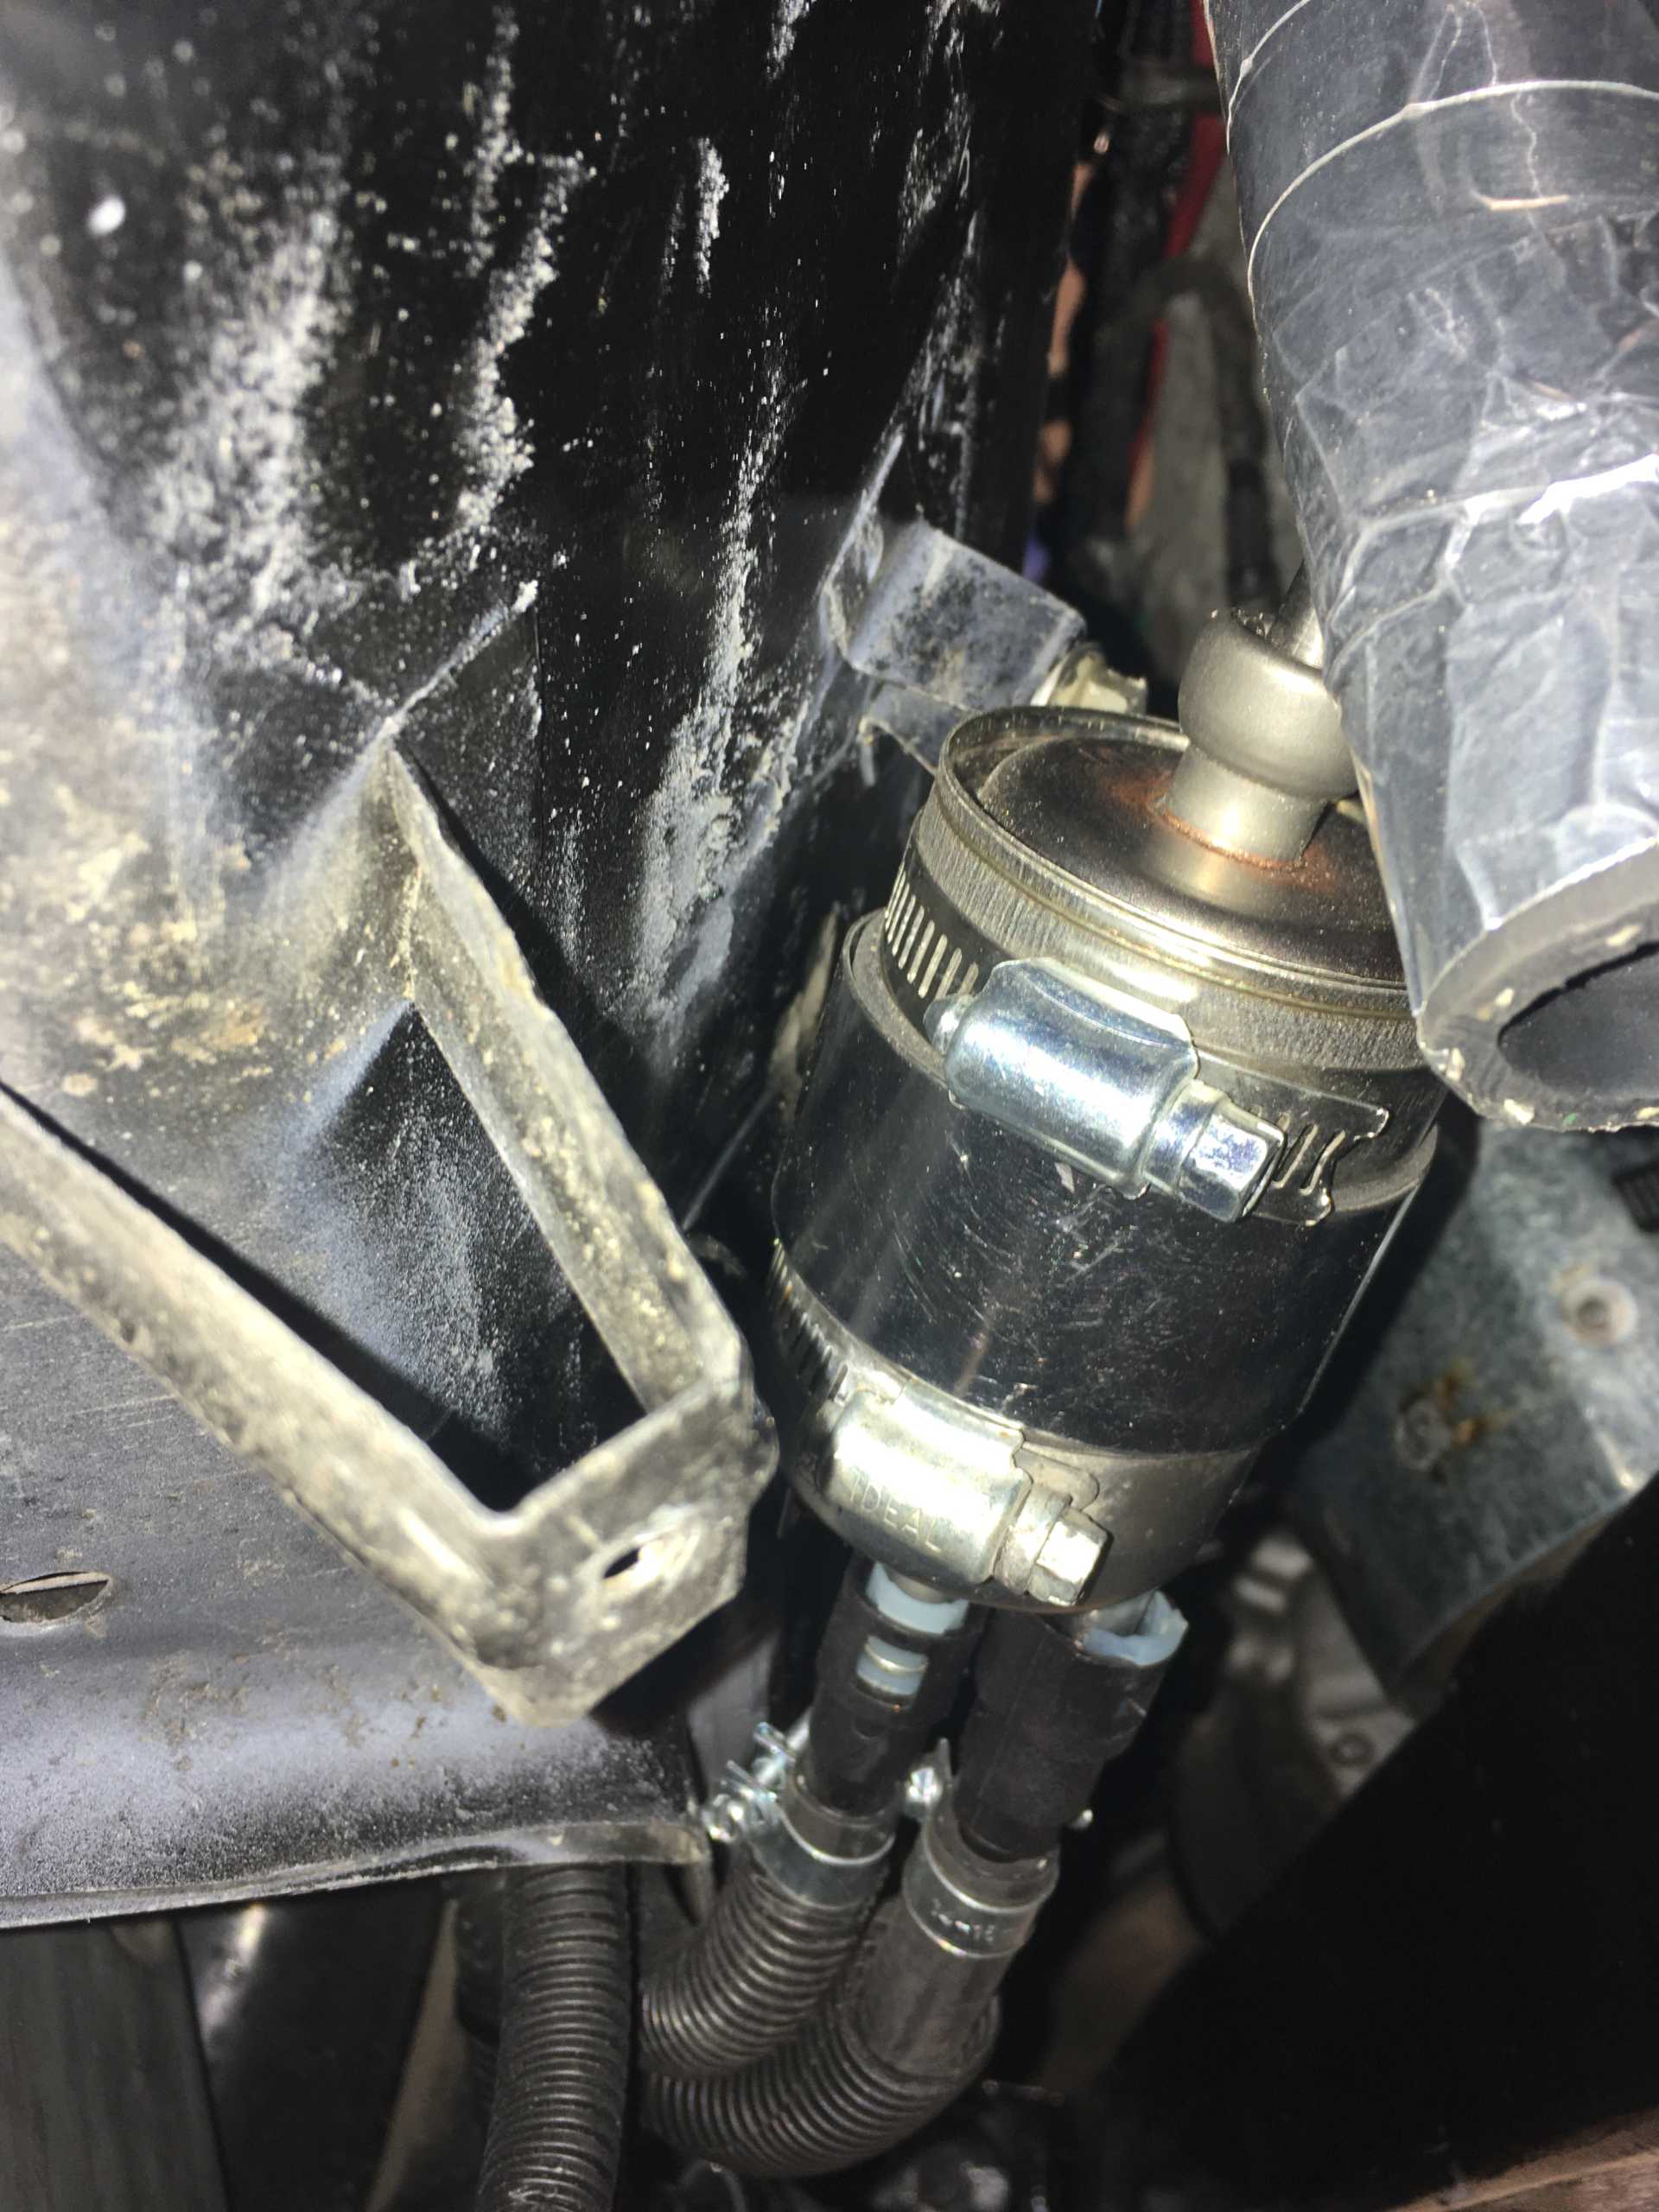
The fuel tank pipes also needed attention since the pipes for supply & return also pointed in the wrong direction. So those were also chopped off and re-beaded. The new hoses were routed well away from the cat converter and up to a Corvette fuel filter with internal regulator. The outlet then included the Impala fuel pressure sensor and ran up to the inlet of the high-pressure injector pump. That worried me since there were two hose clamps and a rubber hose in that section. If they leak or burst it could spray fuel on the cat. I ended up enclosing them all in a piece of 1" hose open on the bottom that lead down below the frame. I'll replace these with a custom metal pipe in the future.
Fuel filter outlet. Connector is fuel pressure sensor.
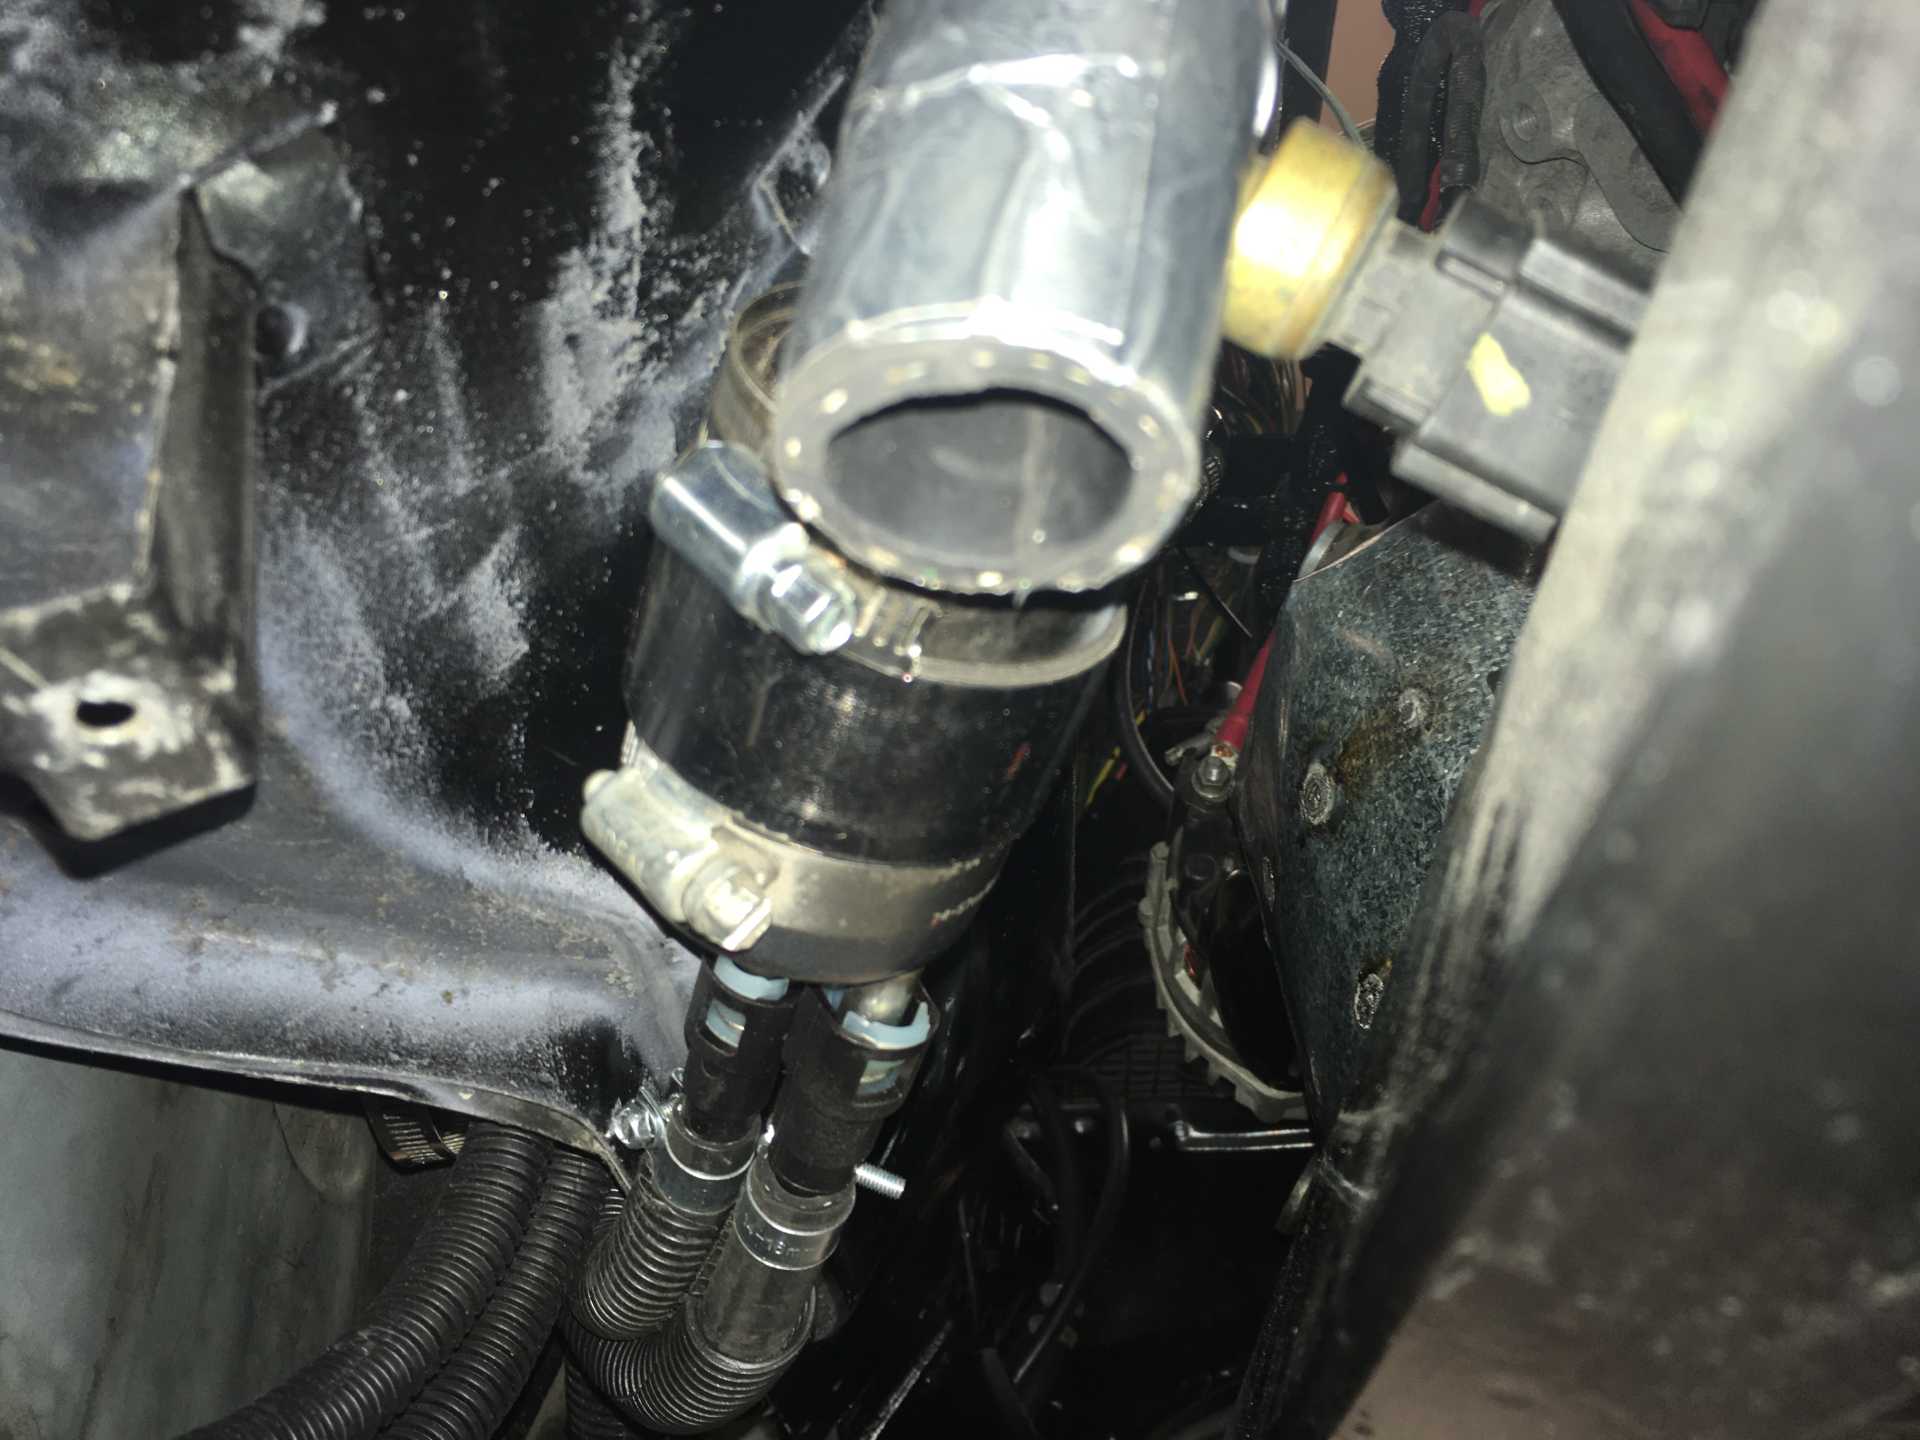
This view shows inlet from tank & return. Silver coated hose is protection against leaks due to the Cat being nearby
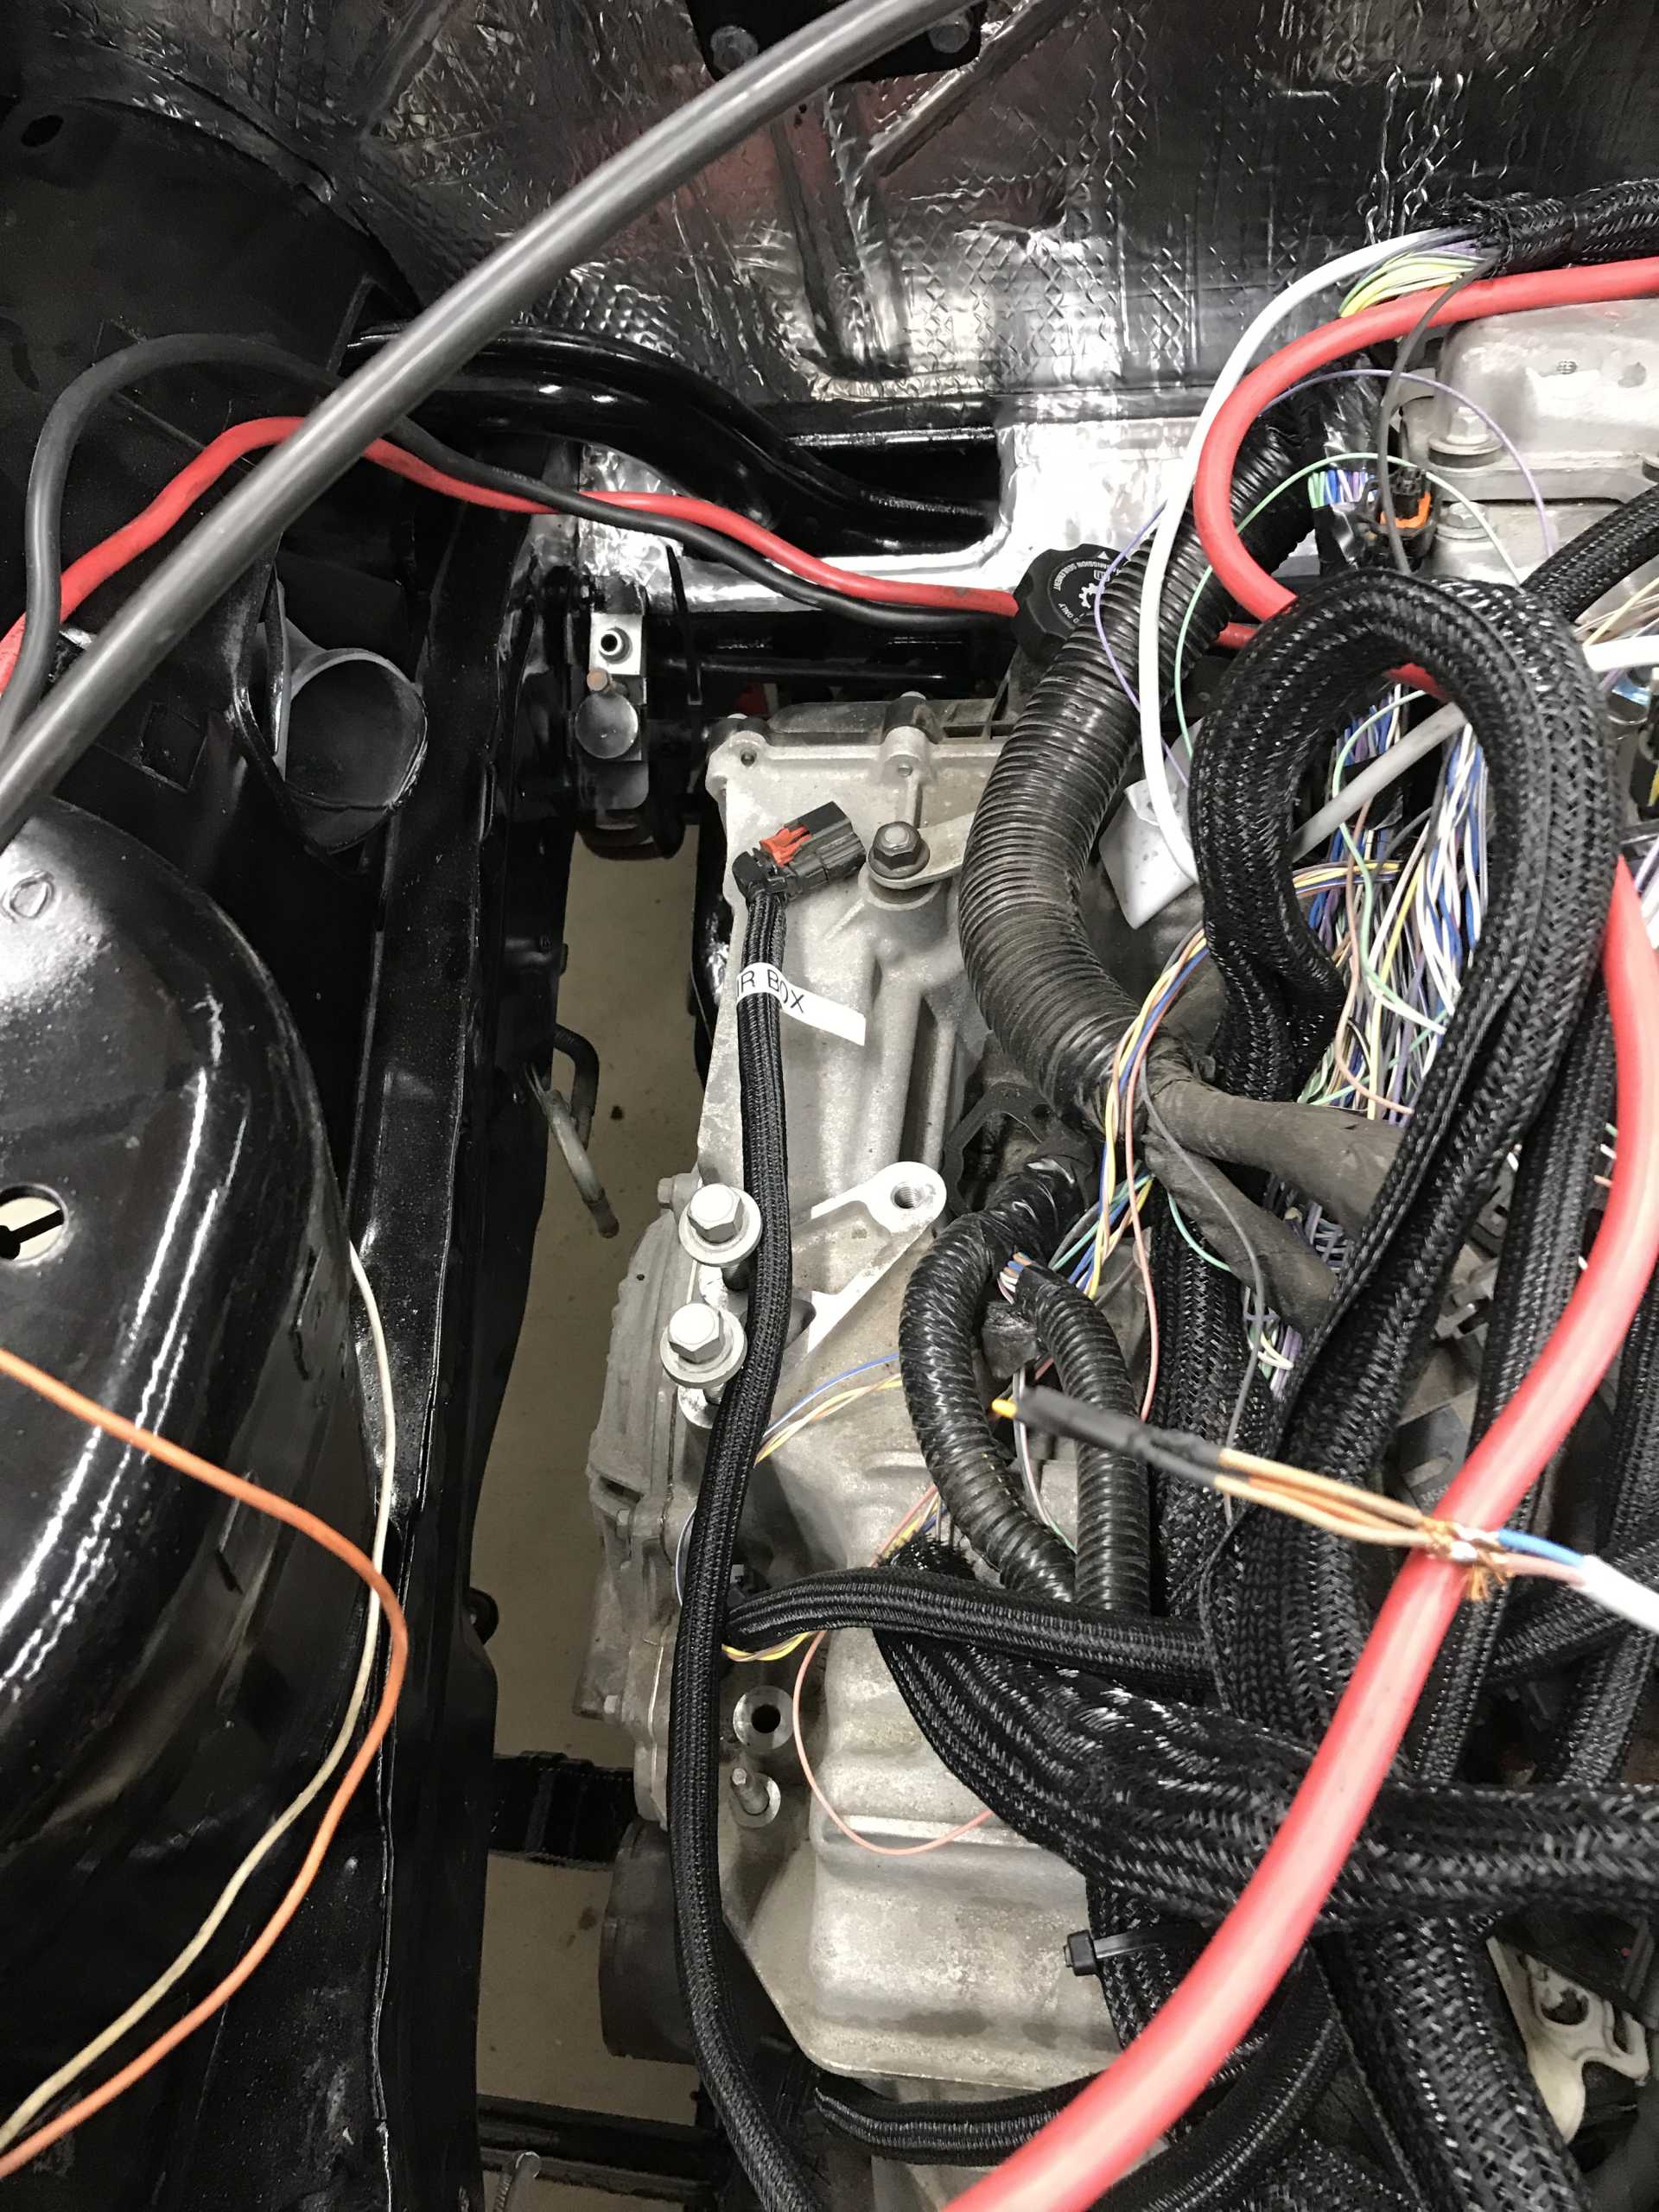
I kept the Impala evap assembly and Chassis Control Module (which controls the fuel pump too) by mounting them to a custom bracket where the battery used to live. The prior owner ripped out the sheet metal in that area so that needed to rebuilt also. But they did fit with no problems and the hoses worked out well to the fuel tank and engine.
Evap with CCM on the front Old C500 tucked away for now.
Then there is the intake manifold, throttle body, mass air flow and air filter. to deal with. This is mess that I'm not completely finished with. First the manifold needed to be swapped 180 to point to the left side. That's easy but some hoses will need to be shortened or lengthened. The real issue is the manifold outlet points up about 30 degrees and will interfere with the trunk lid. The MAF is a big pipe (3.5") and the Impala air filter box simply won't fit. So it's going to be a cone filter and some creative piping to make it sorta fit. I've considered cutting the intake manifold inlet off and extending it, not pointing up to avoid cutting the lid. Otherwise it will be adding a higher bump to the lid. On the good side the wiring will work out OK.
The intake tube. The cap on the side went to a resonance chamber to reduce noise. Needs to be lowered somehow.
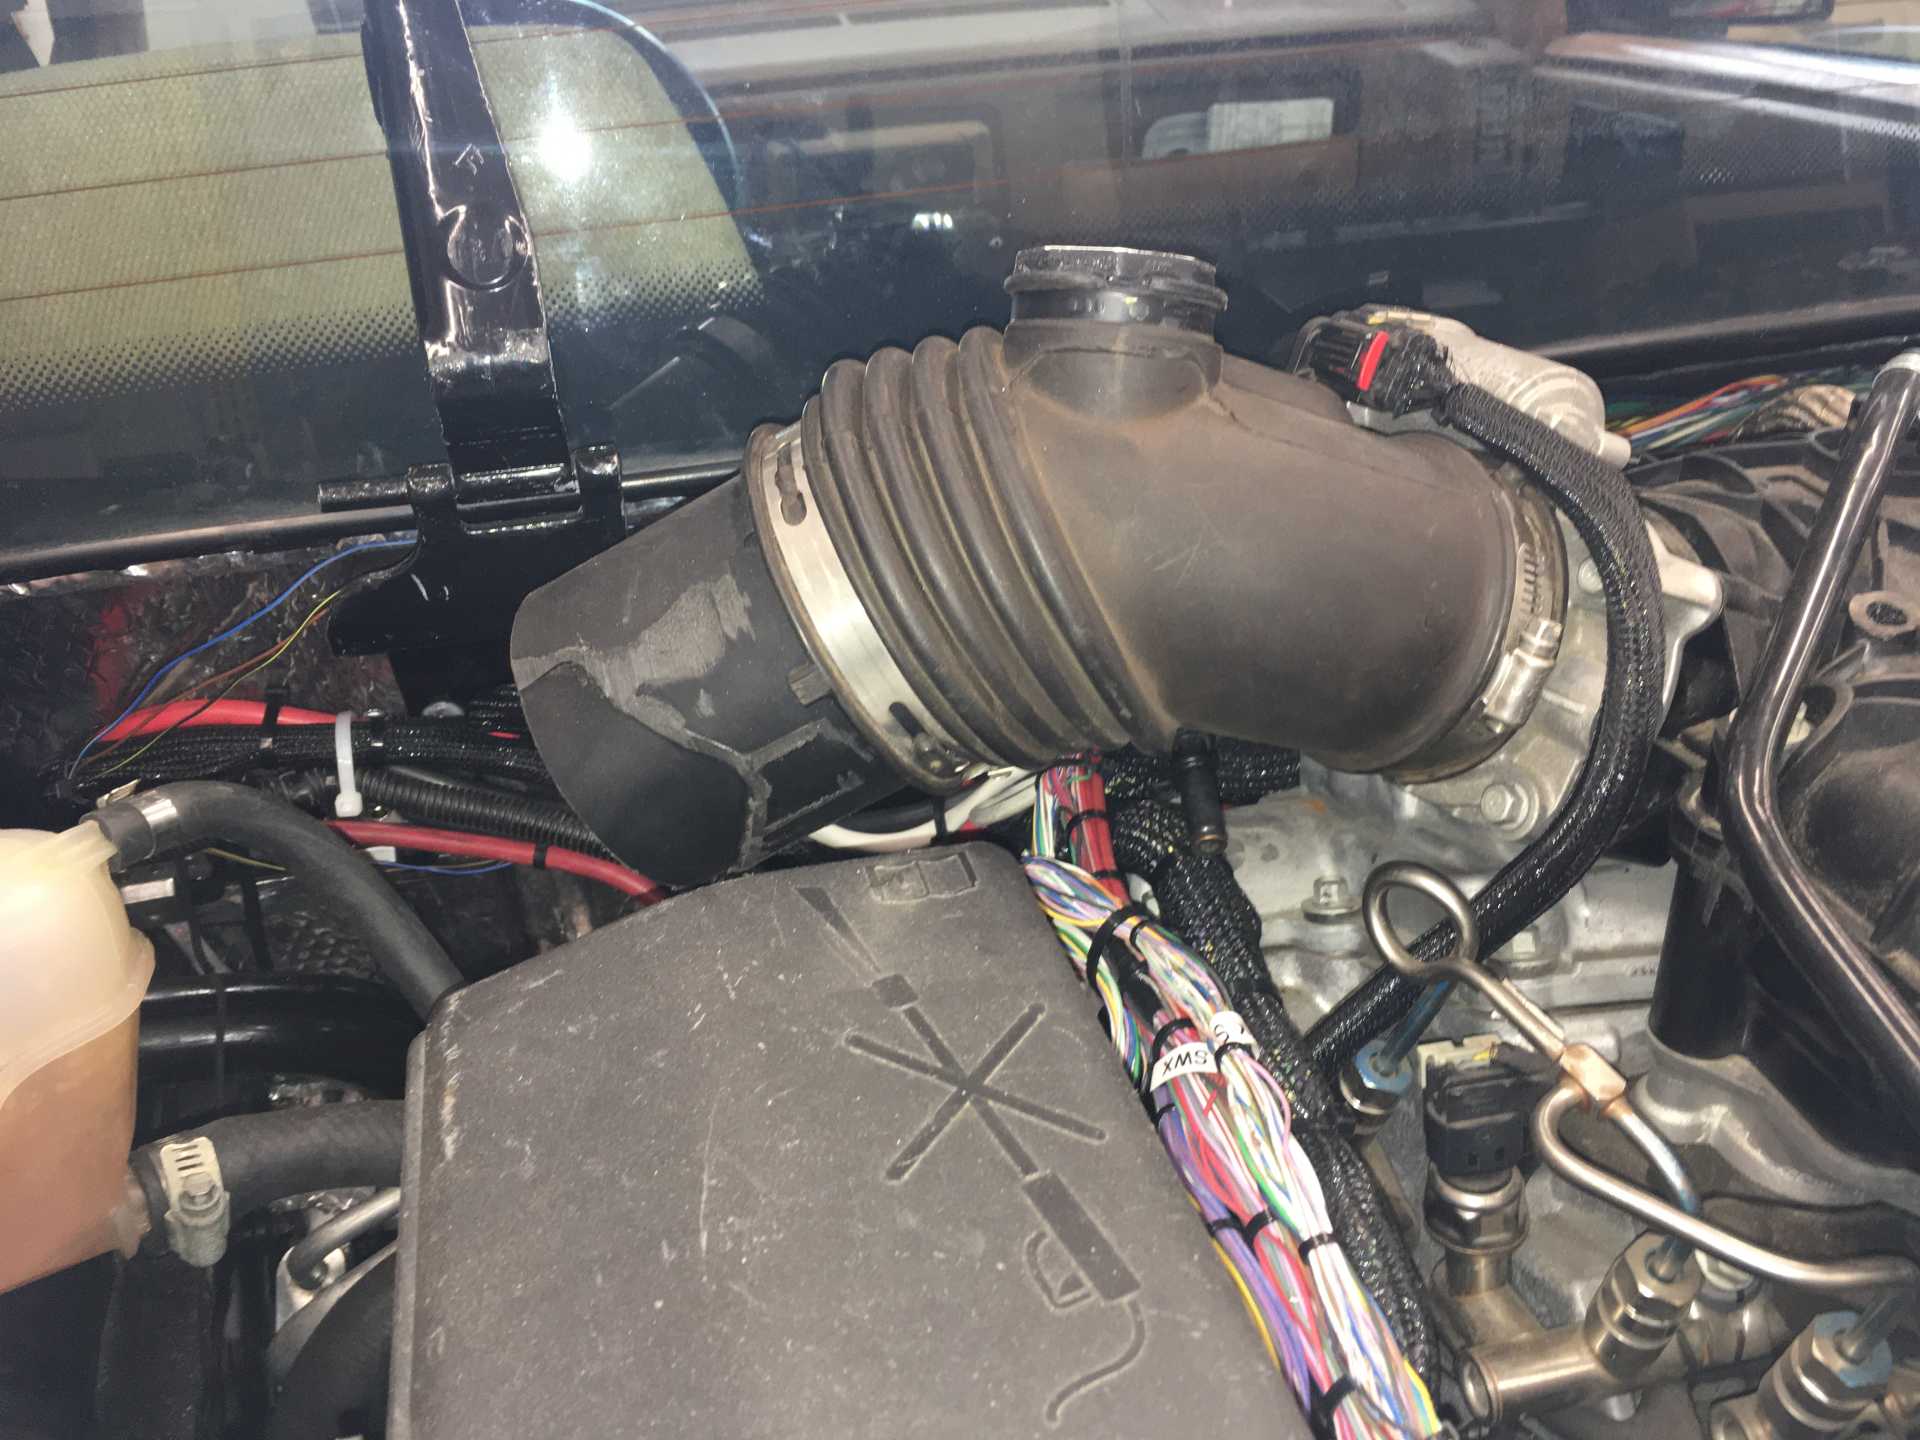
Before tacking the electrical stuff I removed the throttle cable and pedal since these are now electric. I fabbed a bracket for the pedal and in it went. The transmission cable worked out well. I re-used the Fiero cable and only needed to reverse the 6T70 gear selector arm and fab a simple bracket to hold the cable. The Impala shift knob will fit with a little work and that's good since it has the up/down shift switches for manual shifting. The shifter column will need to be shortened about 1.5" otherwise it sticks up in the air too high, but that's easy.
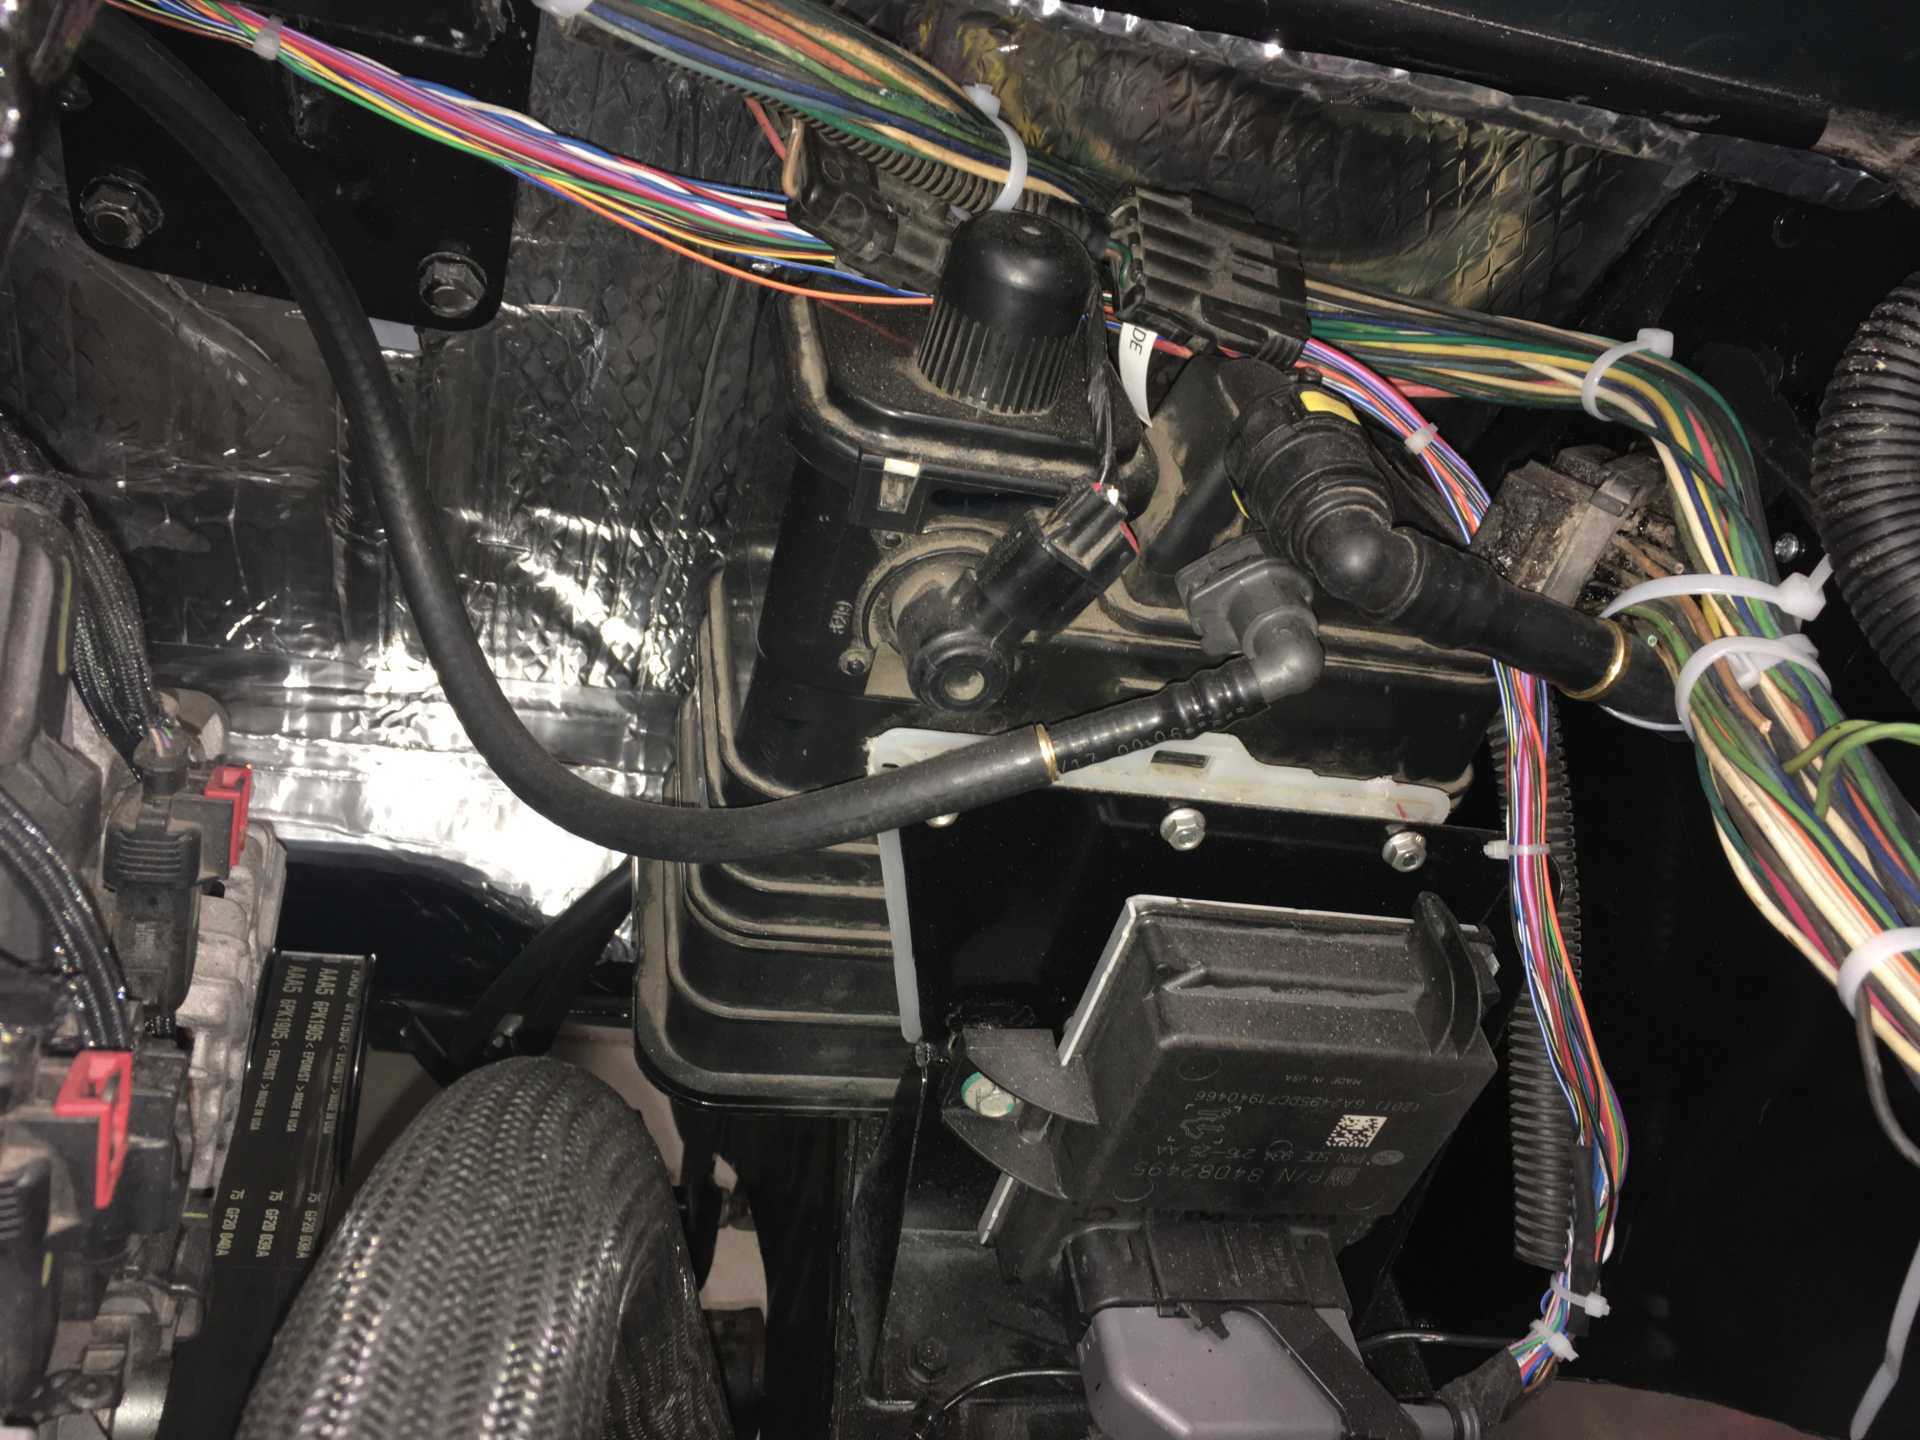
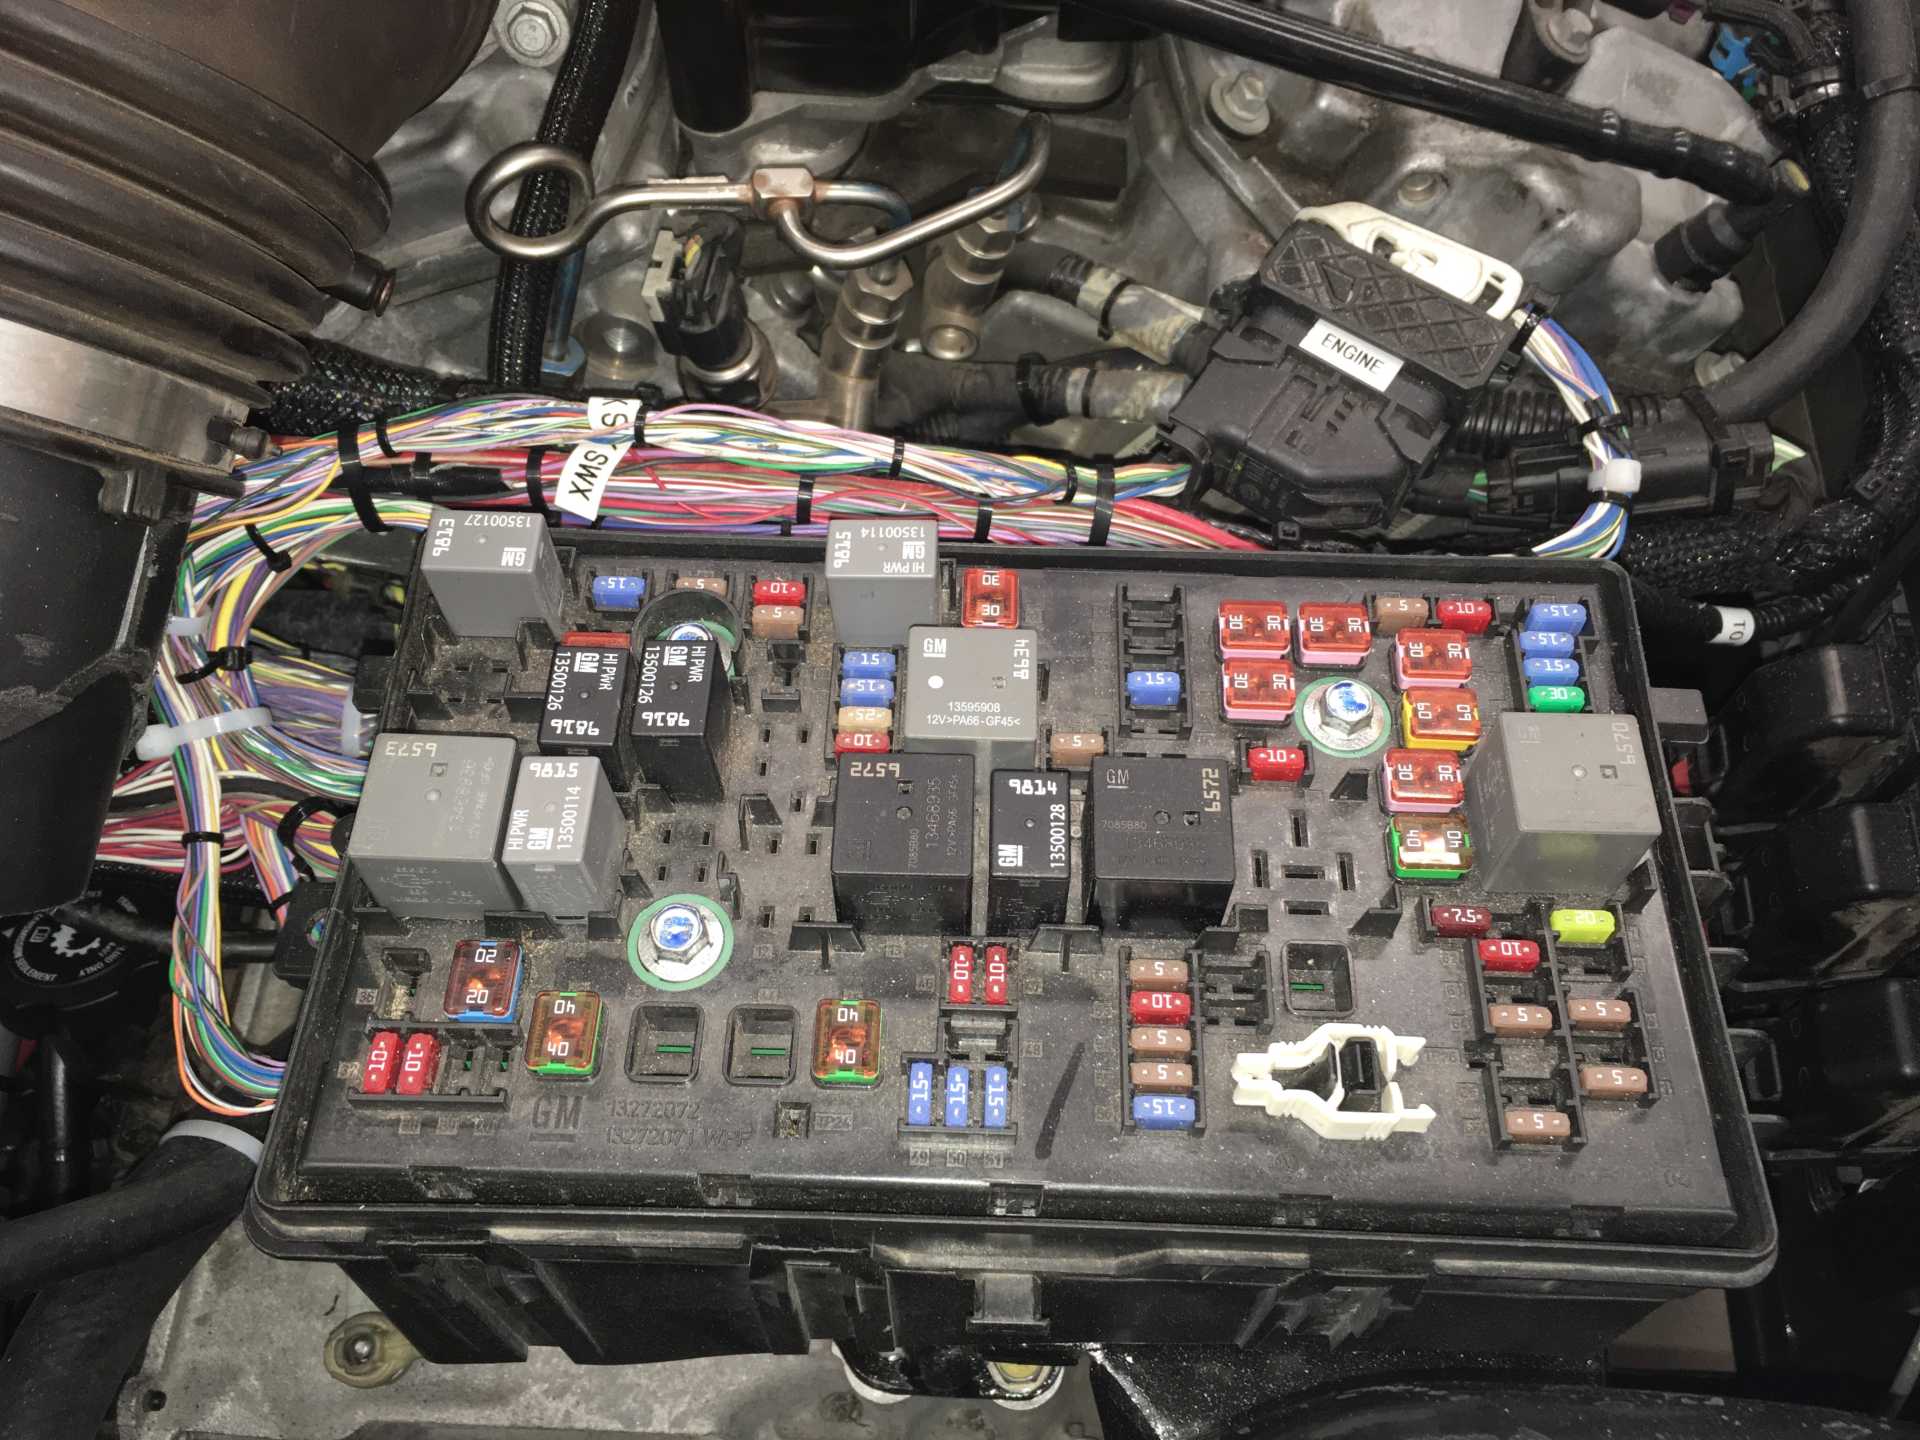
And then there is the wiring.So much wiring. I decided to toss the Impala harness in the trunk and figure out what to connect up to make it work and chop off stuff I didn't need. That turned out to be a long and difficult process that still isn't complete, I ended up unwrapping most of the harness to trace wires. The bottom line is to get the Mitchell1DIY access for your donor car for $30 for one year. You get complete schematic drawings, connector locations, pinouts and mechanical procedures that will save you weeks. Beats spending hundreds on the Helm books. Since my car is a 2018 I need certain modules that are VIN coded to make it work. I wanted the instruments and keyless entry to work so you need the following ECU (E39A), Body Control Module, Chassis Control Module, Serial Data Gateway, Keyless Entry Module, Brake switch, Press to start button and gas pedal; otherwise it won't work. I also wanted the instruments to work so include the IP. There is also battery current sensor and the fuse box (underhood) and keyless entry modules. There is also a special keyless entry coil in the center console. This talks to your "key" and lets the car start if the battery in the key is bad or the sensors are dead or disconnected. The fuse box also contains lots of relays for things you no longer have. I've re-purposed some of these to tie into the Fiero electrical system. This fuse box went over the top of the transmission. Also other minor but important stuff like the shift knob. The power to the fiero system now comes from the fuse box "Always Hot" through a fuse and ties into the wire from C500 (which is no longer in use) and the high speed fan relay (50 Amp) now is repurposed to provide the "Hot in Run" wire, also from C500. Under the dash the wires to the fuse box from the key are tied into the wires from the engine bay. The old transmission and steering interlocks are mo longer used. the key now does nothing.
So here is the semi-finished engine bay wiring. Cleaned up, not yet bundled and not fastened in place
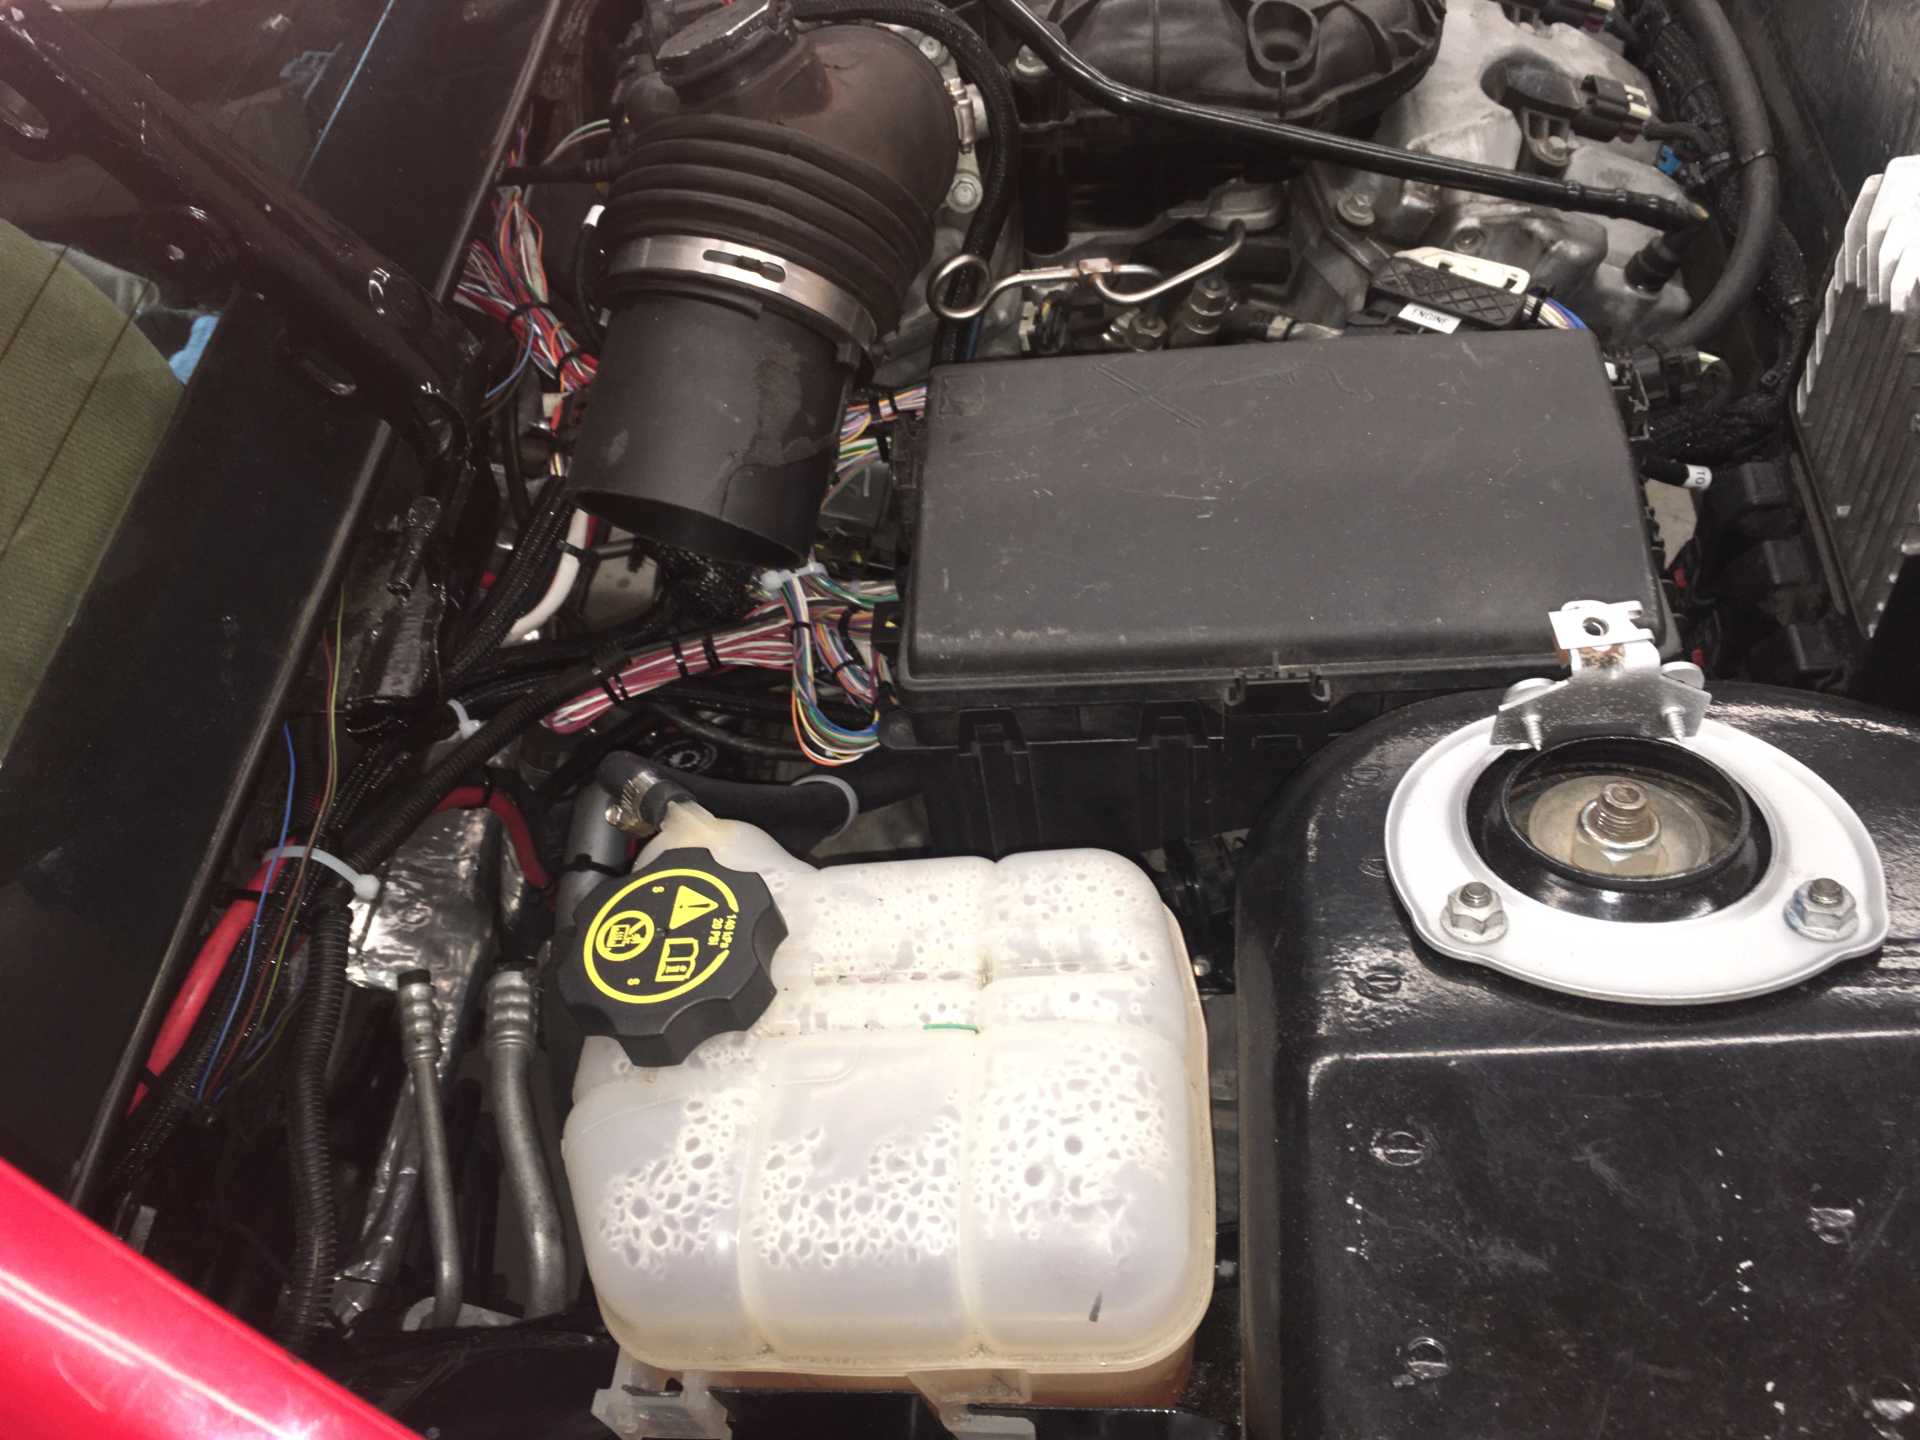
The fuse box has lots of goodies that can be re-purposed. Big relay on left now provides Hot-in-Run power to Fiero Fuses
Hid the ECU on the trunk wall

After all that I turned on the new battery switch and tried to start it. The instrument panel lit up and said "Theft Deterrent"?? Turned out to be a loose connector to the Body Control Module. Next it wanted the brake to be pressed. So I cable tied the brake switch on. Pushed the start button and damned if it didn't start and run. Guess I'd better put in some coolant (water until I find all the leaks). After filling it and tightrning two loose hose clamps I started it again and let it idle for about 15 minutes; blipped the electronic gas pedal and that works too. Even shifted gears into forward and reverse. It's Alive!
Now that that is done the next job was to assemble the axles and mount the suspension The axles fit together easily. I dry fitted one to the suspension to check the position of t he tripod rollers. No problems, my measurements were good. Putting the suspension together is nothing special. Then the calipers went on and the brakes were bled. I'd mounted the accelerator on a bracket ready for wiring
I spent almost 2 days sorting the wires that stay in the engine bay and those that were to be routed thru the firewall cable openings. Then a day cleaning up the engine bay wiring. The passenger side now looks like a wiring scrap yard. But everything is there. Now some wires needed to be extended for the accelerator, Brake switch and push to start. There may be more but that's all I'm doing for now.
Once all that was done I installed a seat and pushed the button. It started, so I didn't break anything moving wires from the trunk to the passenger side. The shifter worked so it was time to take a preliminary drive. Nothing bad happened. It runs and idles, the throttle is very sensitive and there is LOTS of torque. After driving around the neighborhood I went to a nearby road closed at one end for construction and drove up and down it several times checking the shifting, both auto and manual. Worked like a champ. I did only a couple 3/4 throttle runs and will take some numbers after I check over everything.
Today's checks revealed no leaks or broken stuff. Found one loose bolt that is not used anymore. So we are good for now. I'll add a video of my next outing after I've dealt with some irritations. The gas pedal position needs to be lowered, The brakes need to be re-bled and the instruments need to be in front of me, not laying on the passenger floor. To date I've got about 600 hours time in this project.[This message has been edited by MikesFirstFiero (edited 10-08-2021).]
|
|
|
|
Rickady88GT
|
OCT 08, 02:02 PM
|
|
|
Wow, thanks for all the information. You mentioned shifting the drive train to the left 3/4? The driver side is already ( if I remember correctly) the shorter of the two. Making it even shorter would concern me. Is it possible to just modify the strut tower and use a little longer shaft?
|
|
|
|
MikesFirstFiero
|
OCT 08, 05:48 PM
|
|
|
The shafts could probably be the same length if you cut the right shock tower. But that means coil-overs for sure. That's not in my budget for now. The axle difference from left to right came out to be 0.65". Shifting the engine over 0.325" would be easy. Remember I'm starting with Impala axles so those are longer and needed to be cut down. The Impala distance from tripod to tripod is longer than the Fiero distance so you need to work out whatever fits. You could take my numbers as a starting point and measure from there. I also replaced the hubs with Cavalier ones, that caused the axles to be shorter by .25" than if I had used the Fiero hubs. And all this is for the '88, It looks like the earlier cars would be a different game. You might want to look at the post again I just added more info and photos.
|
|
|
|
Will
|
OCT 08, 10:35 PM
|
|
|
Looked into a Camaro intake manifold?
|
|
|
|
MikesFirstFiero
|
OCT 09, 10:24 AM
|
|
|
I've looked at this and it would possibly work. It looks like it would hit the shock tower though and need some type of pipe to bend it forward. I'll work on making the Impala part work for now since it's paid for but if that fails then one of the other IMs might work better. Thanks.
|
|
|
|
Dennis LaGrua
|
OCT 09, 02:15 PM
|
|
|
Mike I doubt if anyone here could have done a better LFX swap. Your fab work is incredible. How did you handle the powertrain management? I see that you used the stock PCM but the programming must have been a chore. Also doesn't that PCM need to interface with the instruments? ------------------
" THE BLACK PARALYZER" -87GT 3800SC Series III engine, custom ZZP /Frozen Boost Intercooler setup, 3.4" Pulley, Northstar TB, LS1 MAF, 3" Spintech/Hedman Exhaust, P-log Manifold, Autolite 104's, MSD wires, Custom CAI, 4T65eHD w. custom axles, Champion Radiator, S10 Brake Booster, HP Tuners VCM Suite.
"THE COLUSSUS"
87GT - ALL OUT 3.4L Turbocharged engine, Garrett Hybrid Turbo, MSD ign., modified TH125H
" ON THE LOOSE WITHOUT THE JUICE "
|
|
|
|
Blacktree
|
OCT 09, 02:15 PM
|
|
|
This project is coming along nicely. I look forward to having more time for stuff like this, when I reach retirement age.
|
|
|
|