
 
     |
| Back in the Fiero Game after a few years (Page 4/5) |

|
86FieroCentPa
|
MAR 17, 12:03 PM
|
|
| quote | Originally posted by turbo86se:
PM sent regarding F40 |
|
Thank you for the information; you put me in touch with a good resource. For everyone else, there's a good thread on his build here
|
|
|
|
KillerFrogg
|
MAR 19, 06:02 PM
|
|
Being a bit cheap and up for a challenge, I plan on taking the original radiator and removing the plastic end tanks and fabbing up slimmer aluminum ones in place of the plastic ones and fitting it in front of the AC condenser for my inter-cooler heat exchanger. I plan on using the Champion fiero fit rad as well and that requires some trimming up front anyway.
Also, congrats on the lack of rust on your car. My first one car that got hit was nice but not that nice, the new one im working on right now is in bad shape. Big parts of the trunk and rear frame rails gone, as well as holes in the cabin floor. Not looking forward to dealing with all of that.[This message has been edited by KillerFrogg (edited 03-19-2020).]
|
|
|
|
KillerFrogg
|
MAR 24, 09:41 PM
|
|
I don't think you have mentioned what you plan on doing with your dash, but I just got my Haltech setup working to drive the factory speedo and posted the rough version in my thread.
It's ~$15 tops in parts a some basic soldering, and doesn't require any mods to the factory speedo board.
|
|
|
|
86FieroCentPa
|
APR 06, 10:20 AM
|
|
The weather finally dried out and warmed up a bit so I figured it was time to address some of my rust issues. Fortunately everything is intact, so I just needed to prevent things from progressing. I was thinking about sandblasting but without a cabinet it would be difficult, and the chassis-side work would be challenging. Based on all this, I started researching rust treatment products and ended up with Corroseal.
I started by knocking off as much rust as possible with a combination of sanding, wire wheeling, and grinding where necessary. Following that I started applying the product with a brush


It goes on with the consistency of buttermilk, then starts to turn purple-ish. The rust turns black. A coat or two later and you end up with....


Here's a good before/after of the suspension pick up points

After letting things cure for a day I then put a few coats of Rustolem Matte and ended up with a finished product

I also went through the same process with the rear wheel well, trunk corners, and a few spots in the engine bay. I have to say, I'm pretty impressed. Obviously it'll be few months/years until I can pass real judgement; a fresh coat of paint straight onto rust will look good for at least a day or two  .... the trick is for it to actually have converted the existing rust and holding new rust at bay. .... the trick is for it to actually have converted the existing rust and holding new rust at bay.
Outside of this sub-project I've been trying to get parts and everything in order to complete the swap. I think I have everything either in hand or on order, except for the coolant system. I'm thinking about trying out AutoPlumb. Does anybody have experience with their product? I think it should work much nicer than corrugated flex tubes or trying to piece together lines from cut up factory pieces.
Thanks for following along; stay safe and healthy out there.
|
|
|
|
KillerFrogg
|
APR 17, 08:21 PM
|
|
Cradle looks good. I did the same thing with mine a few years back with the rust converter and paint. Needs it again, I got some brake fluid on it bleeding the clutch and it ate the paint off where it was but thankfully no rust still.
Really I don't see any reason why those AN hose neck adapters wouldn't work. AN is AN and those adapters are the only part that I would be concerned about leaking.
I was going to comment about the water manifold neck being plastic, but looking at your thread, your's is aluminum! Thankfully you don't need much hose, $23/ft is not cheap but looking around that about going rate for -20an hose. I don't have much room to talk, just ordered everything I need for my fuel system and -6an teflon hose is ~$12/ft and I got 12 feet of it.
Apparently the Saab unit is different as well, one of the barbs for (i think) the heater core lines is in a different location.

|
|
|
|
86FieroCentPa
|
MAY 03, 05:44 PM
|
|
It’s been a couple weeks since I spent some meaningful time on the Fiero, but today I made some progress. I might come back in with pictures later, but for now I:
- Finished clearancing the passenger side hinge box. I ended up having to remove the lower stud, so I’ll have to come up with a method of adding a second bolt/stud.
-Got all 4 cradle bolts installed. The engine will come in and out a bunch more times I’m sure, but it’s good to know that even after all the cradle surgery that things line up
-Prepped the rear suspension parts and knuckles for paint. To start I burned out all the rubber bushings; it’s an easy if offensively pungent job. Then I wire wheeled the crap out of everything. Next time I get a few hours on a sunny day I’ll do the same rust converter base coat followed by a topcoat.
When I write it all out it doesn’t feel like much, but it’s all things that need done to get from here to driving again.
I hope that everyone out there is keeping safe and healthy. My wife and I are fortunate in that we’ve both been able to continue working, but the current state of affairs still wears on me. It’s probably been what’s slowed me down as of late.
|
|
|
|
86FieroCentPa
|
JUN 05, 09:20 AM
|
|
It's been a bit since I posted. I've been making progress, just not much of anything worth writing about. I'll try to do a catch up here
Cleaned up the rear suspension components


Finished adding an external oil filter. The location of the Ecotec oil filter isn't terribly convenient when there's a supercharger in the way and the engine is mounted on the wrong (right?) end of the car

Getting the Haltech wiring harness sorted out

I'm actually even a bit further along than when I took this image; I've got everything separated out into what will go into the engine bay, what will go somewhere in the cabin, etc. This weekend I'm hoping to start merging the Haltech harness with the Ecotec engine harness
Got the Autoplumb fittings installed


Overall, everything is starting to come together. I think driving the car this summer is within reach. 
|
|
|
|
KillerFrogg
|
JUN 05, 10:57 AM
|
|
Looking good. I have been working on my swap as much as i can, but haven't had much time to take photos. Rust repair on the frame rails on ended up taking the better part of a week and a half. The bottom of my strut towers were rusted out and just barely hanging on and the supports from the lower frame rails to the trunk were gone so the entire back of the car was just kind of flopping around.
I'm about the same spot with my wiring harness for my Haltech.
The remote oil filter is nice and clean. I have am running the supercharger manifold with a custom 90* adapter for an oval throttle body, and the piping clears the oil filter well enough. Even then the factory Ecotec setup is still easier to deal with than some of the other block mounted filters.
It might not be a bad idea to make a simple gravel shield for it tho. It should be relatively safe where it is but it never hurts. Something like a section of 4in thin wall pipe split and then mounted to the cradle with space to still get in to change the filter.
Those coolant fittings look real slick too! Should make it easier to get to the passenger side hard line. Thankfully I don't have a supercharger pulley in the way but the line still points straight into the AC pump but that won't be too big of a deal.
|
|
|
|
86FieroCentPa
|
JUN 15, 07:53 PM
|
|
KillerFrogg - That's a bummer with the rust. I'm fortunate in that regard; I found a car that the worst of the rust can be fixed with a wire wheel and some paint  . As far as the oil filter goes; that might not be a terrible idea with the gravel guard. Once I have the cradle in the car I'll have to eyeball how everything looks. Outside of just making oil filter changes easier this does net me the ability to run a much larger filter, which helps for filtration as well as nets me some additional oil capacity. When I switched from the LSJ pan to the 2.2L pan I lost about a quart; between the filter an the -12AN lines I hope to have gained most of that back. On top of all that, when v2.0 of this engine comes to be I'll have a nice easy place to grab plumb my oil feed from. . As far as the oil filter goes; that might not be a terrible idea with the gravel guard. Once I have the cradle in the car I'll have to eyeball how everything looks. Outside of just making oil filter changes easier this does net me the ability to run a much larger filter, which helps for filtration as well as nets me some additional oil capacity. When I switched from the LSJ pan to the 2.2L pan I lost about a quart; between the filter an the -12AN lines I hope to have gained most of that back. On top of all that, when v2.0 of this engine comes to be I'll have a nice easy place to grab plumb my oil feed from.
Outside of that, just a quick update. I realize that it's not the most glamorous part of the swap, but I'm really happy with how it turned out:

Made a 1/2" spacer out of some 1/2" box and tube. Then bolted on some cushion clamps to secure the intercooler hoses.

All tucked up out of the way

I'm not sure I lost any ground clearance. The rocker panels still might be the lowest thing on the car
At this point I'm really just trying to procrastinate on the wiring. I'm sure once I start it'll be a breeze; it's just a bit close to my day job and not usually what I want to do on my nights and weekends.
|
|
|
|
86FieroCentPa
|
JUL 20, 08:35 PM
|
|
Just a little bump....
3" downpipe into a Kooks catalytic converter
3" inlet dual 2.5" outlet Spintech muffler

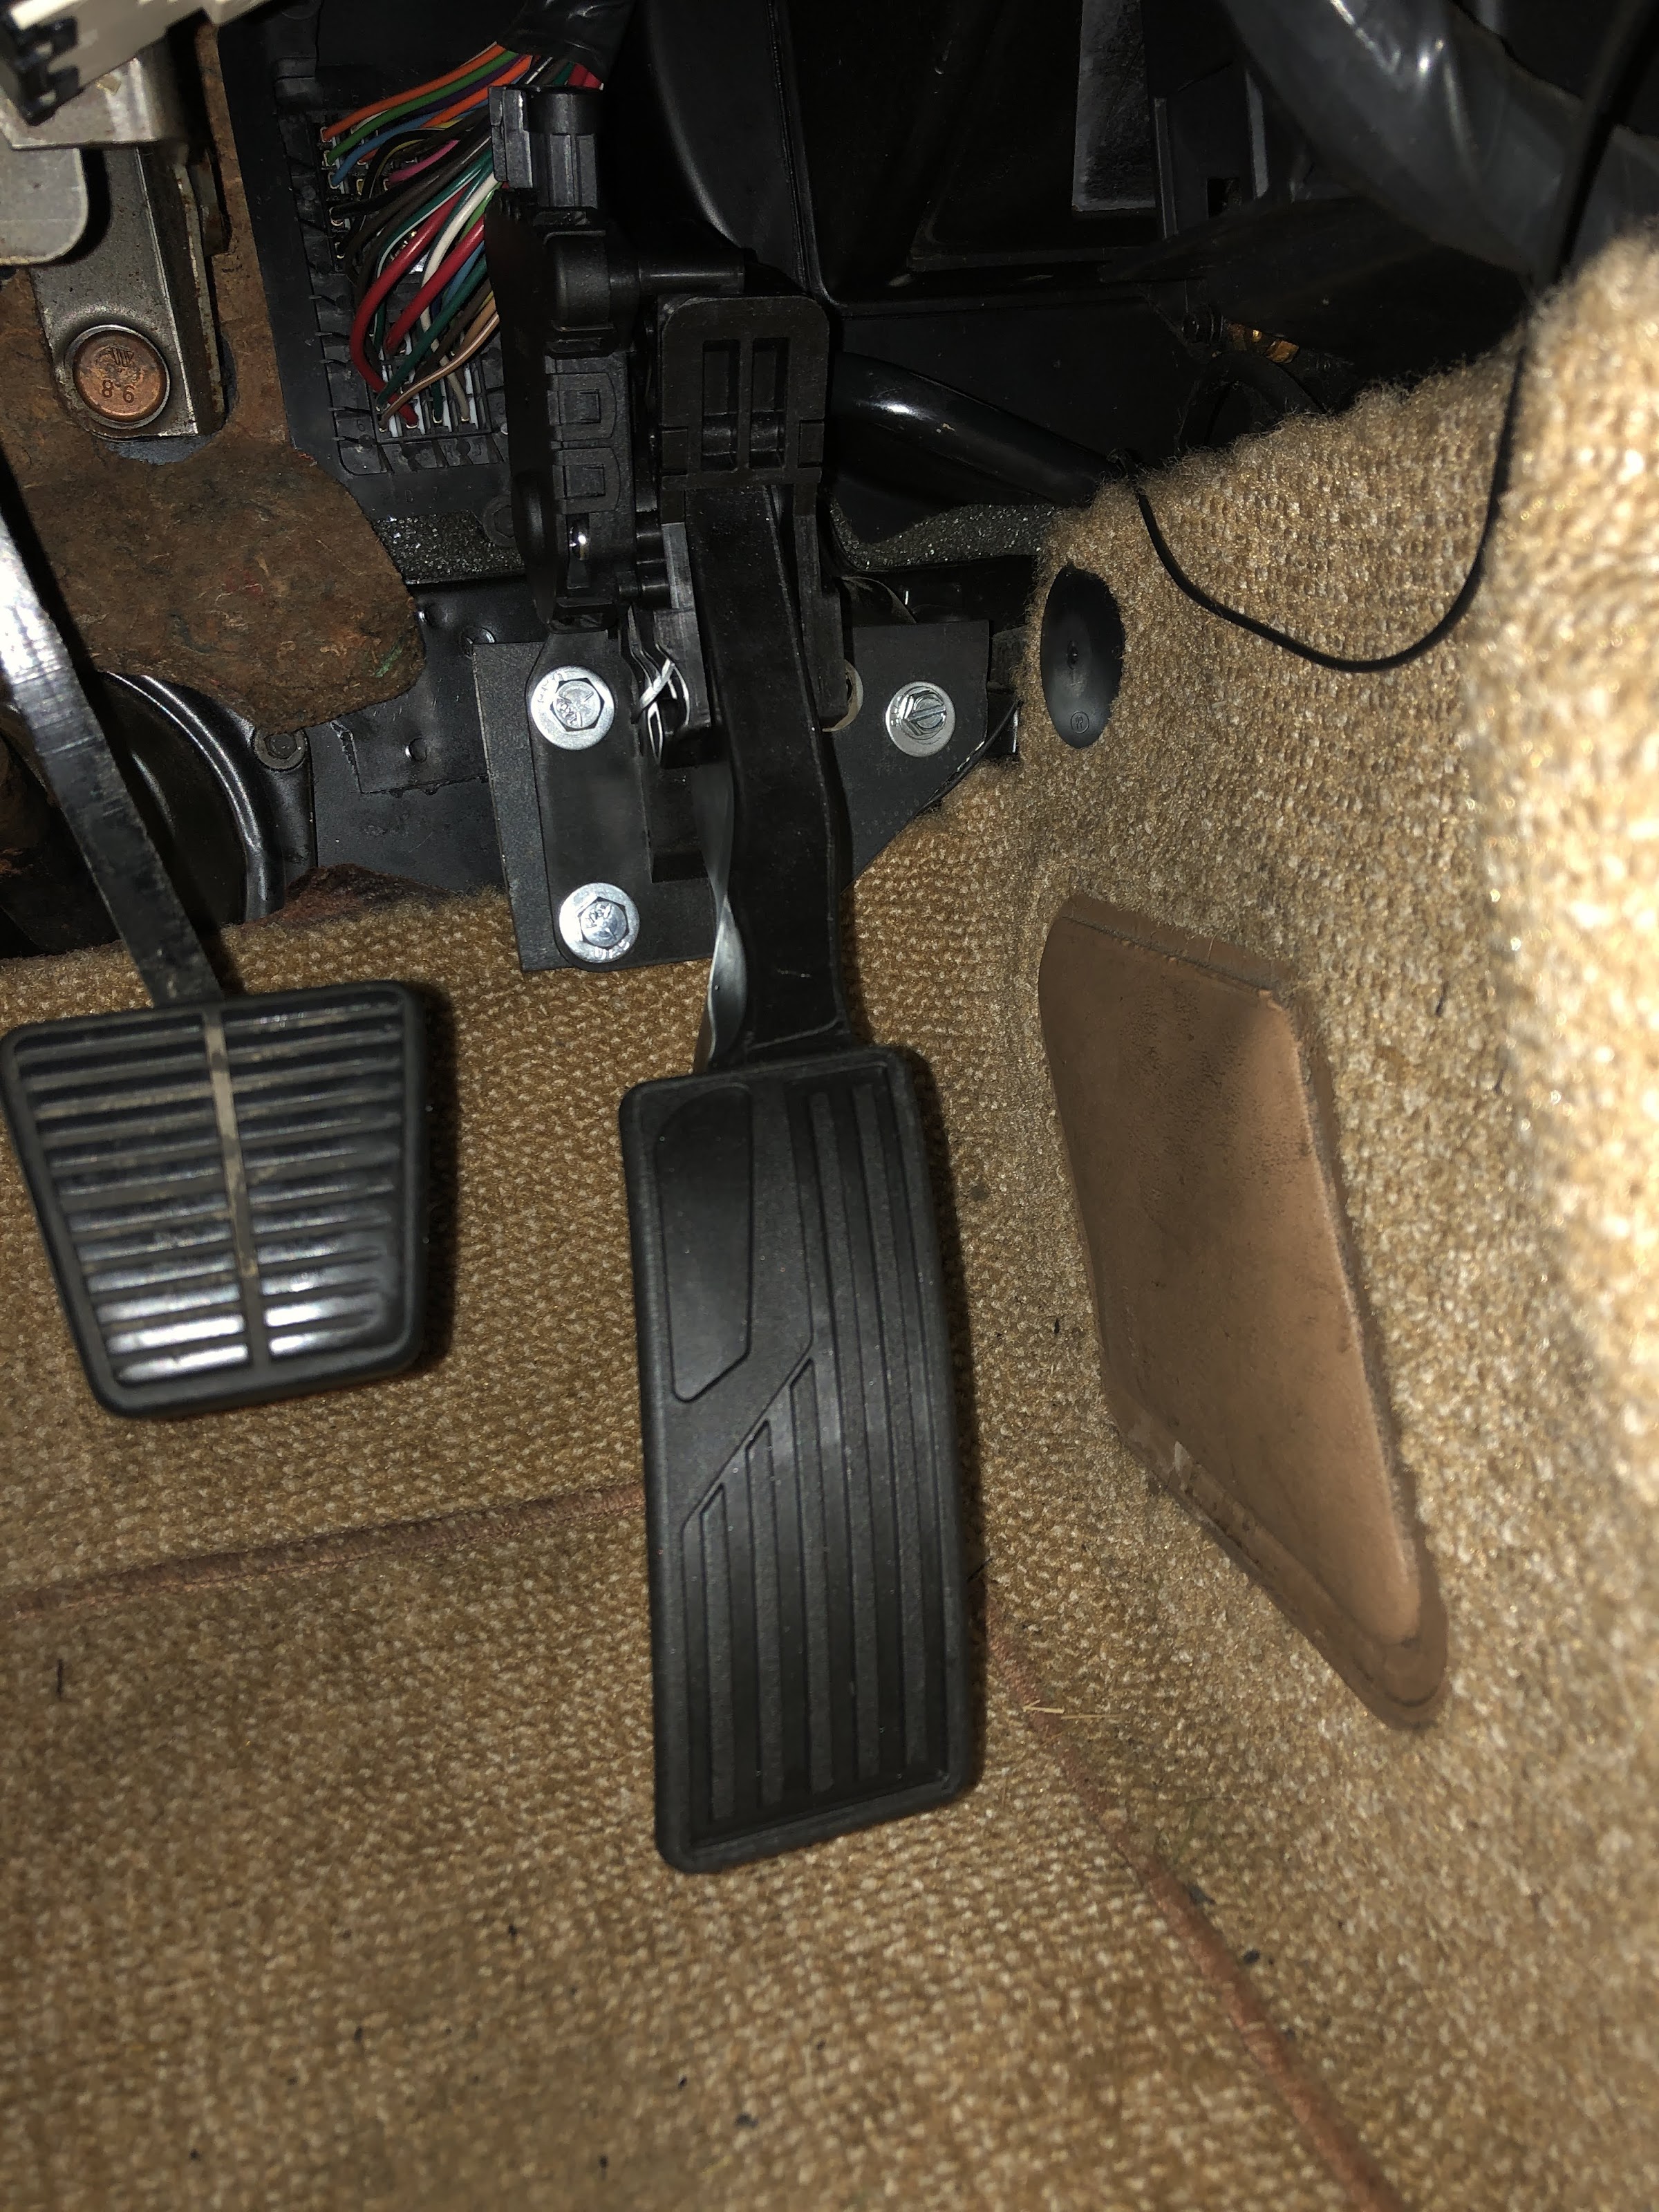
Test fitting the DBW pedal. Shout out to ericjon262 (thread here) for the inspiration
Did a bit of welding to the cut hinge so that it's still supported by two bolts. I may end up having to shim the new bolt depending on decklid adjustment, but it shouldn't be too bad.

Outside of that:
-I have the engine harness 99% complete and loomed, as well as pulled into the car and through the firewall for integration with the chassis harness
-Setup the Haltech TDC offset
-Tested the the Haltech's control of the throttle
The cradle will likely be going in for (hopefully) the last time soon. From there I can actually do a test firing, which will be a big motivational boost to get this thing up and running
|
|
|
|