
 
     |
| Building our Lemons/Chumpcar (Page 21/29) |

|
Patrick
|
OCT 13, 04:27 PM
|
|
| quote | Originally posted by DonP:
Just by looking, I can tell that this next photo was taken on the back straight/drag strip. Notice the headlight door open? It was a real shock the first time I got onto that straight with some speed. Bang! Up popped the headlights maybe 3/4 of the way down the straight away. We got used to it, but I'm sure it startled some other drivers. You could tell how well you were progressing by how soon the headlight doors popped up after entering the straight.

|
|
First off, I gotta say that this is the most informative and enjoyable thread ever at PFF (and I've been here almost from day one). It's well written and has lots of photos and links. Great stuff! 
Now my question in regards to the quoted photo and post above... To alleviate pent-up air pressure up front, you made various modifications as outlined HERE. Judging from the photo and description above, it doesn't seem to be fulfilling that objective. I'm really surprised you didn't simply put an extraction vent in the hood immediately behind the radiator. You must've had a reason for that. What was it?
|
|

|
DonP
|
OCT 13, 05:39 PM
|
|
|
|
|
DonP
|
OCT 13, 05:54 PM
|
|
Hi KurtAKX,
I cannot say for sure which bender Rich used. I think he used his air over hydraulic Mitler Bros bender with an appropriate shoe. http://www.fiero.nl/forum/F...L/090867-3.html#p103 But he also has a smaller manual bender that he may have used for this small tubing. He's out of town at the moment, but I'll follow up when he returns.
Don
|
|
|
|
Patrick
|
OCT 13, 06:30 PM
|
|
| quote | Originally posted by DonP:
First, thanks for the kind comments. I'm hoping someone finds it entertaining.
...Thanks again for the kind words.
|
|
Heck... thank you for this wonderful thread. It's allowing a lot of us here to do vicariously what we're not able to do with our Fieros (for a variety of reasons) in real life. I look very forward to all your updates. 
| quote | Originally posted by DonP:
We actually had the scoop installed at Buttonwillow where the headlight flaps came up on us.
With the engine temps reaching 235 at Buttonwillow, and the flaps indicated that we didn't have enough control over the air, we reworked a lot of shrouding before the next race. I'll share some pictures once I get through the suspension. But I think we would have been much worse off had we not run with his scoop.
|
|
Ah, I didn't realize you had installed that vent. You must've had to modify the front of the tub to get the air channeled that far back on the hood. I wonder if there's any possibility that the high pressure area in front of the windshield is interfering with the flow of air out of the vent where you have it currently positioned? Did you feel there was an advantage of some sort to have located it there instead of further forward in front of the tub (and behind the rad)?
|
|
|
|
DonP
|
OCT 13, 07:08 PM
|
|
| quote | Originally posted by Patrick:
Ah, I didn't realize you had installed that vent. You must've had to modify the front of the tub to get the air channeled that far back on the hood. I wonder if there's any possibility that the high pressure area in front of the windshield is interfering with the flow of air out of the vent where you have it currently positioned? Did you feel there was an advantage of some sort to have located it there instead of further forward in front of the tub (and behind the rad)? |
|
The photo above really doesn't show the air path to the radiator. Here's a photo, taken later after we added additional shrouding, that shows the direct path. There was no post radiator shroud during our Buttonwillow adventure.

We did, when we installed the vent, cut the front tub bulkhead. Our thought was to create as direct a path as possible, given that the natural airflow is down then up. Had we been closer, and saved the tub, I think we wold have lost some efficiency. I think.
Don
|
|

|
Patrick
|
OCT 13, 07:36 PM
|
|
| quote | Originally posted by DonP:
Here's a photo, taken later after we added additional shrouding, that shows the direct path.
|
|
Yeah, that looks like it should handle some air flow. 
Looking forward to future updates. Thanks Don. 
|
|
|
|
DonP
|
OCT 14, 02:13 PM
|
|
The upper control arm construction pretty much mimicked that of the lower arms. Two things were different. First, we widened the distance between the inner pivot points slightly as we anticipated wanting needing more room for the coil-overs to pass through. And we added a bit of tilt to the upper ball joint sleeves to compensate for increased angle in the arm.


With the swap out of the upper and lower ball joints for heavier duty units, we had to deal with making them fit the Fiero spindles. It turns out there are only a couple common tapers used on ball joints. But different vehicles fall at different points on that taper. Rich just happens to own the appropriate taper reamer, so it's just a matter of enlarging the hole until everything fits. Carefully.


So, at this point we had the major components built and it was time to start seeing how to make it all work together.
|
|
|
|
DonP
|
OCT 15, 12:25 PM
|
|
I have a question to ask. This last weekend an engine builder friend stated that if we converted to a dual exhaust on the Series II 3800 SC we are running, we should pick up 18 ft./lb. of torque. Anyone have experience with such a change and perhaps data on what the results were?
Thank, Don
|
|
|
|
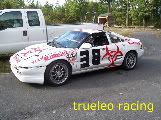
Francis T
|
OCT 15, 07:06 PM
|
|
It looks like you're going at the build the right way!
Looking at the car on that strait with headlight door up, I can't help but notice how high the car is ridding. My son also races in chump -east coast- and has the most wins -his MR2 team (Bio-hazard wins about 60% of their races) He uses a DIY -not on car in photo yet- plywood front air dam to help keep the front down; you may want to look into, remember it's about going fast, looking great don't help.
------------------
http://i16.photobucket.com/...ancis44/100_1147.jpg
 [IMG]http://i16.photobucket.com/albums/b50/francis4 [IMG]http://i16.photobucket.com/albums/b50/francis4
4/000_0451-1.jpg[/IMG]
trueleo.com[This message has been edited by Francis T (edited 10-15-2014).]
|
|
|
|
DonP
|
OCT 15, 11:46 PM
|
|
| quote | Originally posted by Francis T:
It looks like you're going at the build the right way!
Looking at the car on that strait with headlight door up, I can't help but notice how high the car is ridding. My son also races in chump -east coast- and has the most wins -his MR2 team (Bio-hazard wins about 60% of their races) He uses a DIY -not on car in photo yet- plywood front air dam to help keep the front down; you may want to look into, remember it's about going fast, looking great don't help.
|
|
Thanks for the comment.
You'll like what you see in a more current photo of the car. But I can't get that far ahead in the story. But plywood can be very useful.
Don
|
|
|
|


