Feel free to use any photo I have posted, they were posted to be helpful and provide potential benefit to others.
3/4 toe out is insane! With the driver in the car, the DS probably was dominant and the passenger side one was dragging, but if you turned to the left, the passenger side would shift to the dominant wheel and upset the chassis.
That toe panel is pretty slick! Mind sharing where it came from?
That toe panel is pretty slick! Mind sharing where it came from?
Oh yeah. I wasn't kidding when I said the car was evil. Our problem in the field was trying to decide what we should set the toe at. Just seat of the pants, we tried to relate the settings to what we remembered the front should be. And of course that's subject to opinion. But the 1/32" toe in seemed to work. Later we had time to reset everything.
The toe plates I showed were just a quick image off the internet. Now a search doesn't turn up the same image. I did not have a photo of Rich's toe plates, but needed something to demonstrate the concept. Rich's look a lot more like the Longacre plates, not quite as fancy as the image I used. But I know that someone made his. If I remember correctly, it was in exchange for either his "How to Build an IMCA Modified" or Building the Stock Stub Race-Car" videos. He always has them on the war wagon in the trailer The Coleman Racing units are nice as well. http://www.colemanracing.com/Toe-Plates-P4384.aspx
Thanks for the use of the illustrative photo.
Don
[This message has been edited by DonP (edited 01-13-2013).]
Easily my favorite thread at this moment! Please do not stop posting. This is like crack to me.
LOL Thank you. We have ( at this point in the narrative) made it to the track. But that just helped to point out new changes and improvements to be made.
We are on hold for a bit on the Fiero, so literally, just yesterday Rich started another non-Fiero project. He assembled his jig and started on a new IMCA modified for the season. He hasn't been happy with the last two "store-bought" frames.
Don't worry, we aren't going to document that here. Those are the only images we'll show here.
I have to correct yesterday's post. Robert pointed out that he actually did drive the car on Saturday. But he had a 45 minute or so stint before the heat induced sweat was blinding him in the car. As SCCAFiero said a few posts back, ” Racing is as much a mental challenge as a physical one." Paula points out that we certainly cannot quote Robert's on-track radio communications here on the forum.
Sunday started well. We did, however realize our mistake in leaving the car outside of the trailer overnight as the San Francisco Bay area fog had completely soaked everything. I think that's why they made me drive first, the wet driver's seat. Given the fact that we had a couple hours down-time on Saturday, it appeared our chances of an over-all win were slim.
One of our questions left over from Saturday was whether the rear sway bar should be re-attached. We had left it disconnected but hanging in place from before discovering the rear toe-in problem. We determined that we should do some testing on Sunday. I started out first thing, as-is. The bar was disconnected. Since it was cold, I ran about a 1/2 dozen laps with the bar off. Then I came in and we re-attached the bar and I went back out. On the first lap it felt as though the rear was too tight but I ran maybe another 1/2 dozen laps before coming in and having the bar disconnected again.
The car was definitely a bit more squirrelly with the rear bar. I was surprised at that conclusion. I have to give a couple qualifiers to that conclusion. The car was better given that the shocks and struts were completely shot, the spring rates were unknown, and the alignment was still slightly suspect. Changes in any of those things might have led us to a different conclusion.
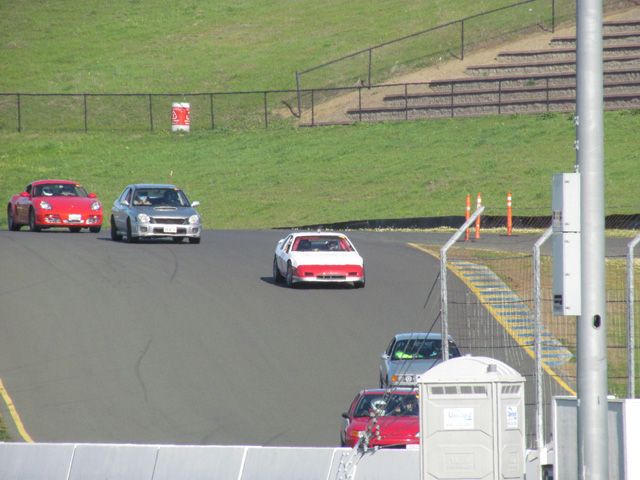
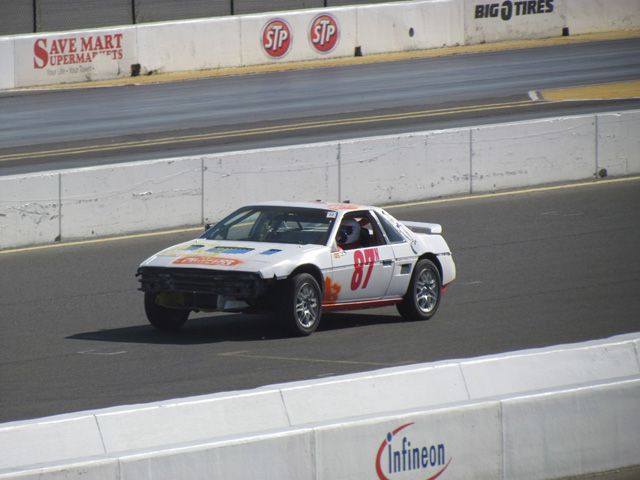
We did finally dig out our own Go-Pro cameras. I have uploaded a video of our car pre-swaybar. So this is the first few laps of the day. http://youtu.be/neaZjO3BbCg
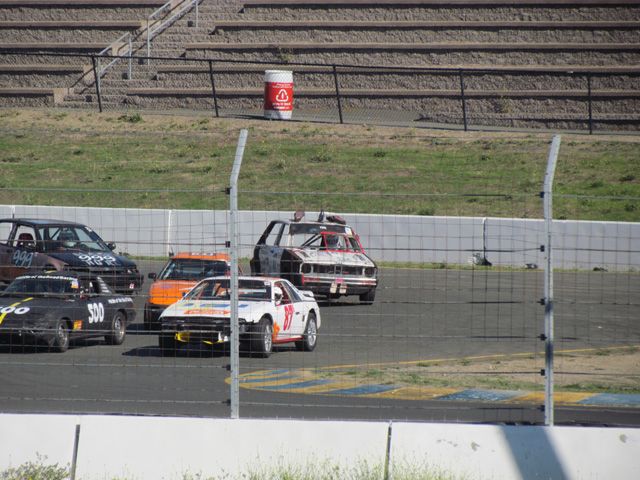
Yes, I was passed by a B-210 at about 1:35. He realized that the green flag was out before I did. Behind the B-210 you can see the Fiero Libre guys closing in. At about 8:48 I missed a shift going uphill into turn 2 and lost a lot of hard earned track position. If you watch, you can see that yellow flags were not all that rare. Feel free to laugh at my line. I blame it on traffic. In any case, as I said earlier, our stock brakes seemed to be a step above most of the brake systems you could see on other cars.
Robert got his turn on the track once I returned with the decision to disconnect the sway bar.
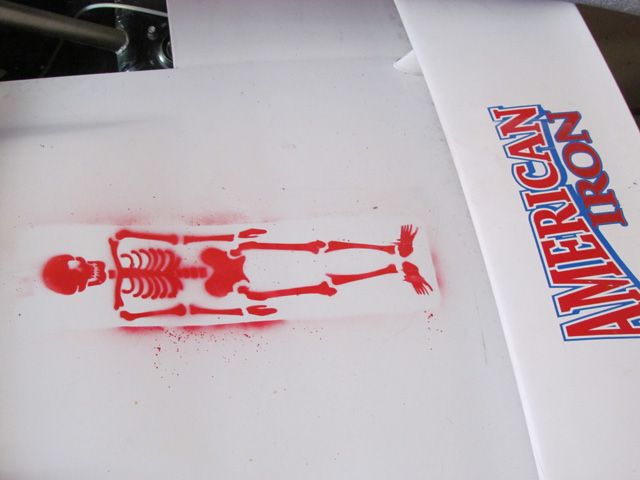
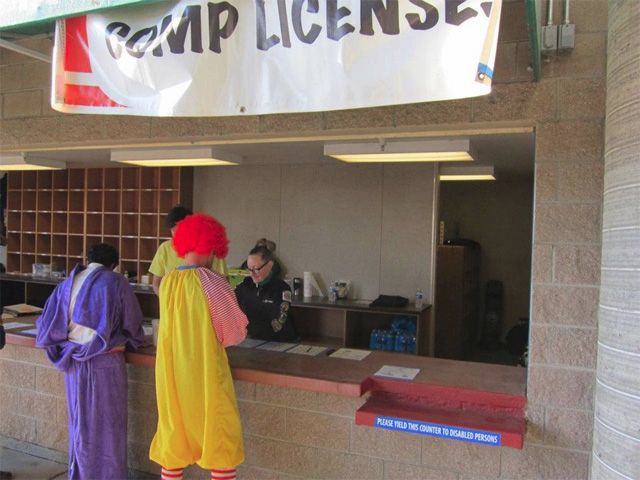
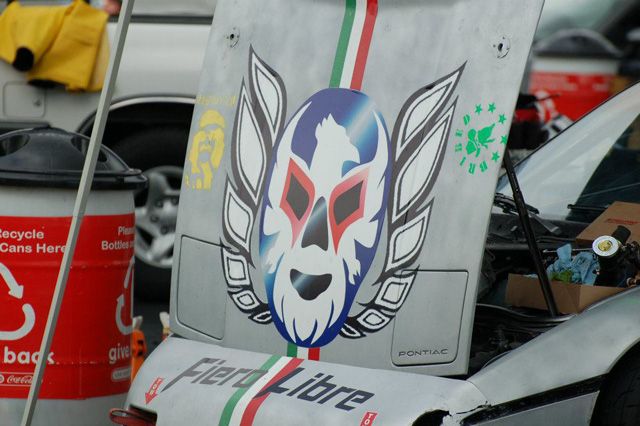
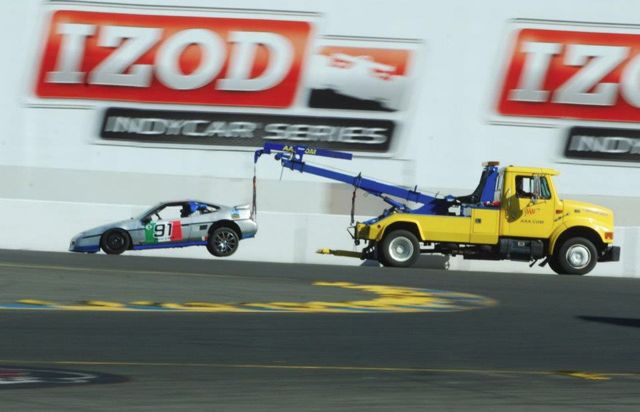
Okay, you may have noticed the change in the paint scheme in the last two photos. Robert was just driving along, minding his own business and keeping it clean when he was black flagged. These guys in black robes proceeded to vandalize his car. http://www.youtube.com/watch?v=7vvXJBQPlPY
Evidently, since Rich had failed to go to the penalty box during one of his "offs," there was an outstanding warrant out on the car. Robert got the opportunity to collect the penalty on the warrant. Because of the date of the race, the judges/vandals painted "Happy Halloween" stencils on the hood. A skeleton on the rear deck, flames coming out of the front wheel wells, "Save Ferris" on the right rear quarter, and a comment about pardoning LBJ on the hood. Rich and I were the only team members of an age to catch a reference to LBJ. Robert, who was the painter and who had plans for future paint, was not amused. Two laps later they black flagged him again because they forgot to check off that warrant. Luckily they just let him go, but he wasn't amused.
The Fiero Libre boys were hard at it as well They actually painted their hood during the race weekend.
Finally, Robert pulled in and commented that he thought the clutch wasn't working too well. We did the obvious thing and bled the hydraulic system, but saw no bubbles. And at the same time we found a leak that needed some attention. It took a bit, but we narrowed it down to the fact that the transmission was leaking at the little vent cap on top near the shifter. To be honest, our at-the-track cure was to just clean it with some brake cleaner and ignore it.
While we were looking at the clutch mechanism, the LeMons founder and chief Jay Lamm strolled by. We described the problem and the fact that we were trying to bleed the clutch. His comment was "Bummer. Do you have any more of those tamales?"
Eventually we arrived at the decision that the clutch MIGHT have a problem due to the fact that we had not adjusted the seat for Robert and he might not have released the clutch fully. We also recognized that shifting could not be hurried with the cable system. Adjusting the linkage was placed on our list of to-do projects back home.
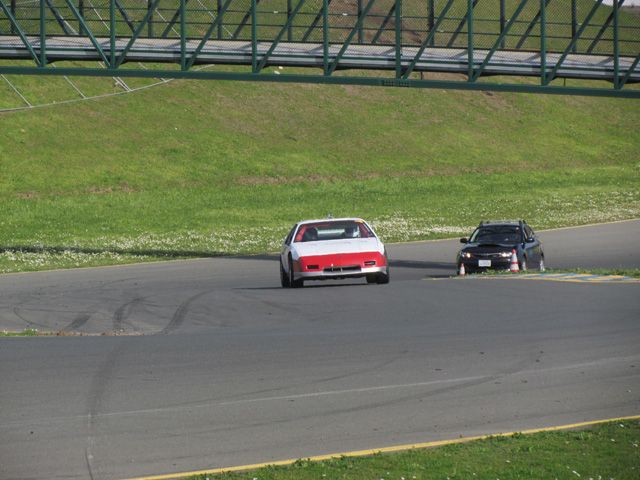
Our over-all goal was to be running at the end of the race. Our secondary goal was to turn more laps than either the Mustang or Fiero Libre boys did. When we noticed the other Fiero coming in, Rich hit the track.
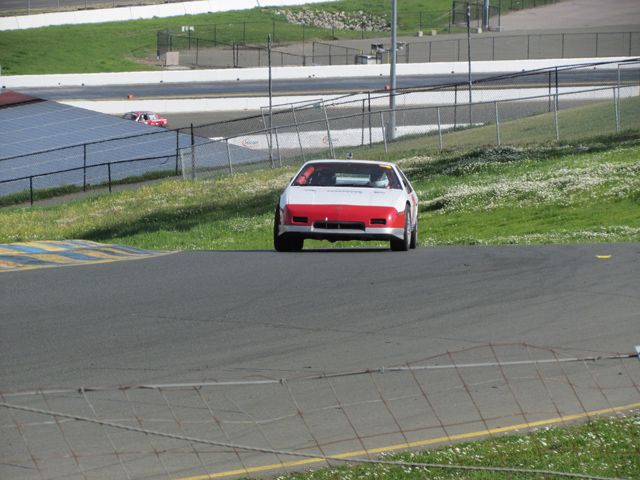
With an hour left to go, I took over. Our Fiero exhibited handling concerns coming through the abbreviated turn 11 that the Lemons race used. I do not have a picture of the car doing so, but through-out the weekend, when I was driving through 11, the inside (right) front tire would lift off the ground. The car would roll over on the suspension such that when I was fully on the throttle the front tire lifted. From the inside of the car, I had no indication that this was happening. The car was obviously too softly sprung, most seriously at the rear. We were using the old shocks and struts that came with the car as well as the stock springs.
We finished the race, on the track and moving. One of our goals was realized.
We had a couple of additional concerns moving forward. After the race, I told the guys that on the final stint on-track, I had the throttle stick fully open. I was at full throttle on the front straight and turning in through turn 1 and heading up the hill. So I was at pretty much maximum speed. This was the second time that this happened during the weekend. It's not like we had a carpet sticking in the throttle, so I have no explanation for what happened. In both instances, I could not just de-clutch as the engine would free-spin. I used the ignition kill switch to stop the engine, clutched and dropped the clutch to start again. All at speed. At that point all was well. It's never happened again but we still do not know what happened.
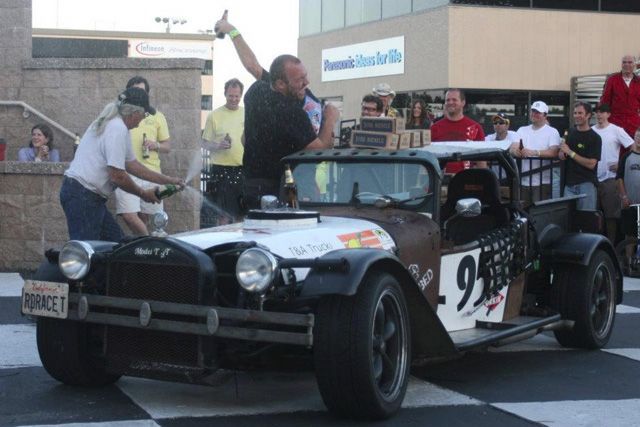
The winners were the Model T GT team.
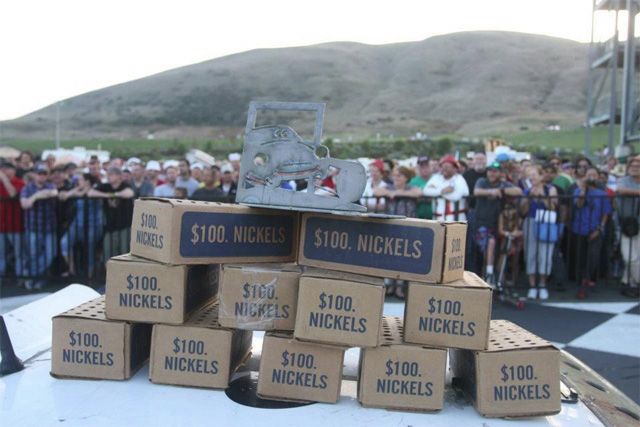
Their team had built a car based on a 1927 Ford Model T frame. Sort of. You can read about it here. http://www.hotrod.com/featu...model_t_gt_race_car/ Besides the braggibng rights, their prize was waiting for them in the winner's circle.
According to mylaps, the winning team had completed 378 laps on the 2.28 mile Infineon raceway. Their best lap time was 2:02.883. That was actually the sixth fastest lap of the day, but consistency won out as the second place car was 3 laps down. The absolutely fastest car was 89 laps down.
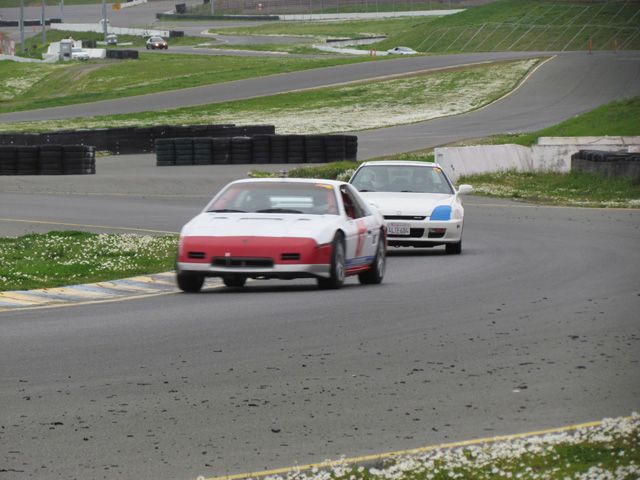
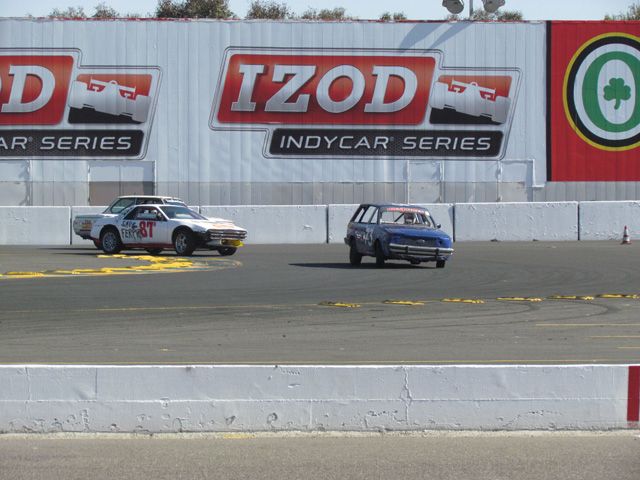
We, on the other hand, finished 121st out of 164 teams. We completed 141 laps, 237 down from the winner. The '78 mustang had trounced us with very consistent runs. They placed 65th, and completed 271 laps. But we made sure we passed them in front of the grand-stands!
The Fiero Libre guys were 6 places behind us at 127. They completed 117 laps.
The Mustang 's fastest lap was......2:21.308 at 58.086 mph Our fastest lap was......................2:16.087 at 60.314 mph Firo Libres fastest lap was.............2.30.755 at 54.446 mph
The full MyLaps results can be found at http://www.mylaps.com/resul...owrun.jsp?id=2122085 As a point of interest, in December 8-9, 2012 race at Chuckwalla Valley Speedway, the Fiero Libre guys finished first in class.
Our next race was scheduled for March of 2012 and we had some work to do.
Hi Jason, we haven't stopped. There's still a lot left to the story... in fact our next wreck, uh, race is in two months at Sears point/Infineon/Sonoma raceway.
We had a rough weekend. But nobody was too seriously overwhelmed by the experience. Obviously we had several tasks to complete in order to be ready for our next event. Speaking of next event, Rich and I decided that a little more instruction wouldn't hurt. So we joined NASA and signed up for a weekend back at Infineon. That was scheduled for February 11-12, 2012. Doing a HPDE (High Performance Driving Event) had a couple more requirements such as adding a passenger seat.
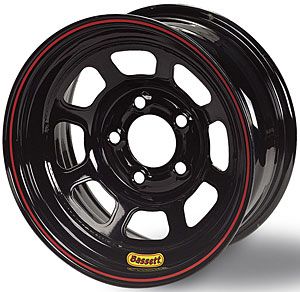
Our identified task list included: Replace the front bumper Replace the nose Repair the air box for the radiator Replace the front springs Replace the front shocks Check ball joints, tie rods and related hardware Check the front alignment Remove the paint job "enhancements" provided by the judges. Box the steering wheel bracket ( adrenalin does some strange stuff) Check the brake pads and rotors (basic maintenance) Add a passenger seat - can't just velcro in the instructor Add passenger harness Add roll bar padding for passenger Adjust shifter linkage Add transmission vent system Bleed clutch Replace rear struts Replace rear springs with a coil-over setup Replace wheel studs (Rant mode on) I cannot express strongly enough how much we hated the "tuner" lug nuts required by the wheels that we used. Add in the fact that the studs were JUST long enough but still inside the wells created by the wheels, and it just sucked. Wheel studs had to be replaced. We really wanted a set of steel wheels such as these by Bassett wheel. But bolt patterns versus offset... it got complicated and spendy. Still, they would have been our choice.
Okay, we had a start on our rebuild list.
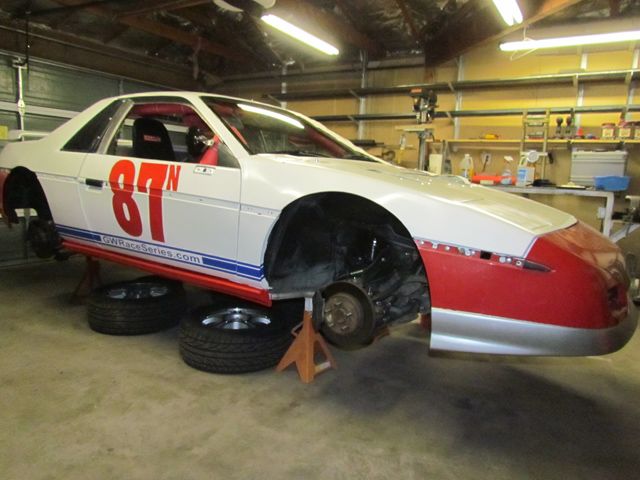
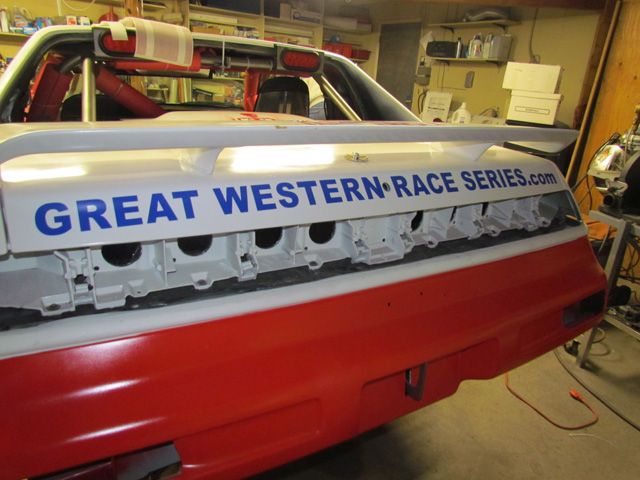
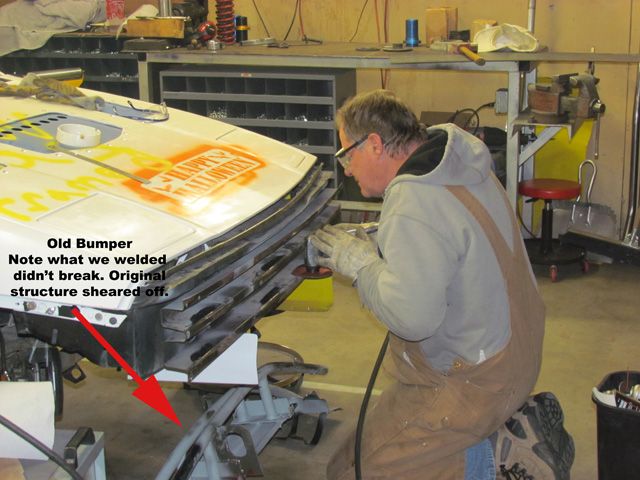
Rich started with the front bumper. Luckily, he had saved the conduit templates and notes, so it was pretty straight forward. What was interesting, and you can see it in the photo below, was that our welds didn't let loose. Rather the original steel separated from or was sheared off the supporting structure. We were hit hard enough to shear the original welds that held the pieces together. Rich was quick to make that point about the integrity of his welds. Rich did a little clean-up, bent up and welded a new bumper back onto the car.
You can also see some of the fine artwork applied at the track. Robert got after cleaning that all off. But he did leave a stenciled skeleton on the rear deck lid as a "conversation piece" for future talks with the judges. At our first race, several cars had stickers saying "Save Phil." Phil was the head judge who missed a race because of a serious illness. After our race with the paint modifications, Robert wanted to commission some "Kill Phil" decals. Naw, Robert doesn't take this stuff personally. As an added benefit, having a skeleton on your car changes the way SCCA and NASA type inspectors look at your car.
That was the second to last post on page 2. It happened on the second lap of the race. You can see the actual event on Youtube at these two links. Watch the complete first video......
I was tasked with changing out the wheel studs. We had gone to our first race with the stock wheel studs still at all four corners. Even before the race weekend, we had noticed that it was a real pain mounting the wheels on the car. The stud was recessed into a well, making it awkward to start the lug nuts onto the stud. The wheels may have looked good for the street, but were a problem for this application.
We knew that we would be getting more wheels as we went on, and might even jump to 16" wheels. But we needed a solution now that would carry us through to our expected updates. The simplest and cheapest solution was to change out the wheel studs. So I turned to the search function here on PFF.
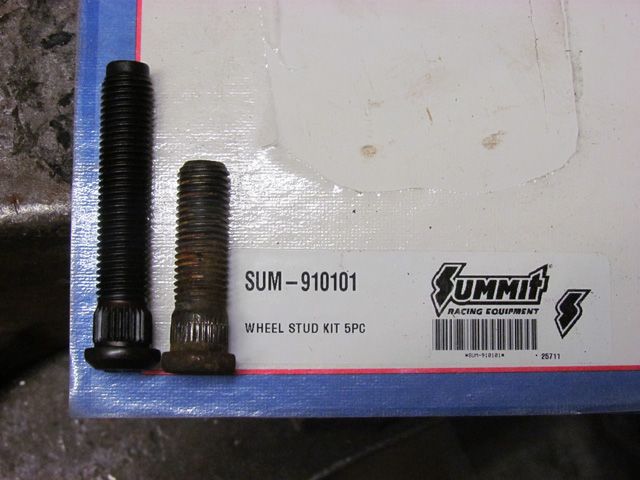
Okay, so here's the story. The stock wheel studs are M12x1.50 (pitch) and 41.5mm long according to Fieroguru at https://www.fiero.nl/forum/Forum2/HTML/122287.html. What, then, was available as a longer replacement? I found good information in these two threads.
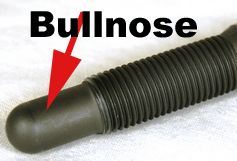
Archie was good in pointing to the Dorman 610-323 as a direct replacement, but 54mm in length, gaining at least 5mm over stock. I was also hoping to find bull-nose studs, but that was proving to be nearly impossible and out of our price range. And the reality was that we aren't going to be pulling off NASCAR pit stop times.
I found references to both ARP studs and Summit racing studs. Ultimately we settled on the Summit Racing Bolts http://www.summitracing.com/parts/sum-910101 The price was right at about $13 per wheel. And the length was really good. The Summit Racing bolts are 2.5" in length versus the Dorman 610-323 which are listed at 2.125" in length.. Compared to the stock studs, we were very happy with the additional reach.
We went with simple lug-nuts with a conical seat and open ends allowing the studs to pass through. I believe we used these. http://www.summitracing.com.../gor-40037/overview/ Our other hang-up was finding a thin walled 19mm socket able to hold up an impact wrench. Back to harbor freight.
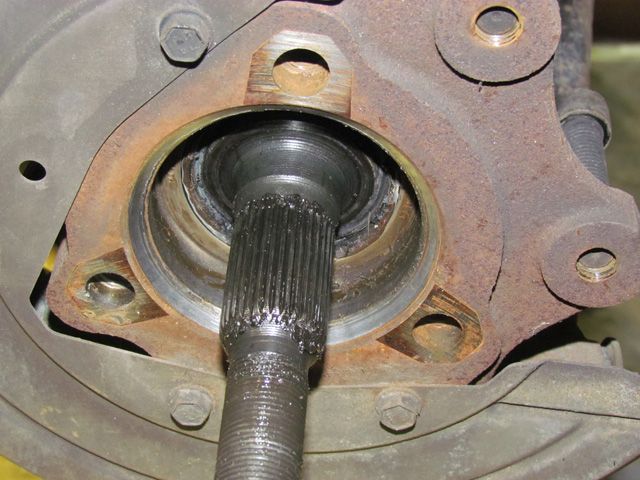
This was our first time to remove the rear hubs. Unfortunately, we did not have the 30mm socket required for the rear hub axle nut. Back to Harbor Freight for an impact worthy socket. Thanks to theogre for his comments that the rear nuts are considered to be a consumable. Use it once and replace when removed. According to what we found here, the torque spec when reinstalling is 200 ft./lb.
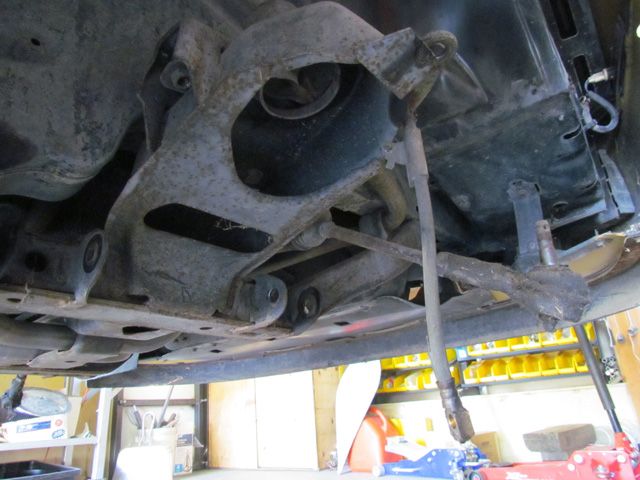
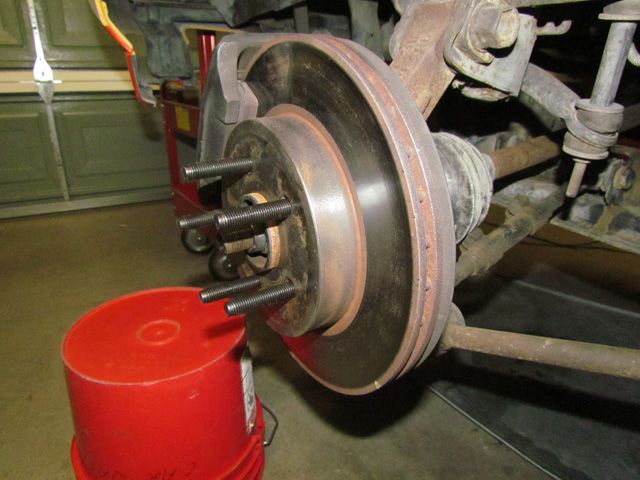
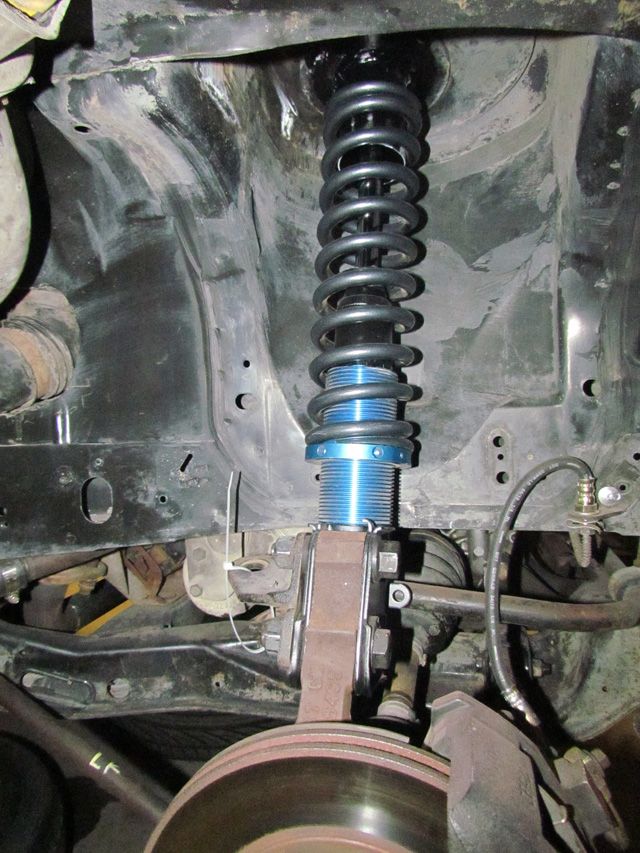
I read a couple posts that the wheel studs can be replaced without removing the hubs, but since Rich has a hydraulic press we found it easiest to remove everything. While we were doing all this, I bought an extra set of studs and lug nuts to throw into the track supply box. You can see in the photo below that we still had the rear sway bar in place. The other side was hanging free.
After the first race, we realized that the shocks and struts were totally shot. In addition it looked as though the springs could stand to be up-rated. On the back, the real solution seemed obvious. We would go with coil-overs. Our constraint would be that we would have to build our own. LeMons is somewhat okay with this type of upgrade, but there's no way they will go for some off-the-shelf trick racing setup. As if those exist for the Fiero.
We found some good DIY coil-over threads here on the forum. In particular, we looked at https://www.fiero.nl/forum/Forum2/HTML/046456.html That thread started in 2004 and, as I write this, the latest post was last year in 2012. It definitely has some staying power.
Rich and a couple fellow racers went to a racer oriented swap meet in Stockton CA. One of those deals where everyone tries to get rid of their extra sh...., uh, stuff in order to buy more stuff. Among all the artfully arranged stacks of stuff, he found a LARGE milk crate stuffed too overflowing with coil over components. The crate held 3 brand new coilover springs still in the box, 5 used coilover springs, 2 new threaded sleeves and adjuster nuts, 4 used threaded sleeves and adjuster nuts and a bunch of miscellaneous coilover parts. All for $90. He also found 2 additional springs from another exhibitor for another $15. Quite a haul of good stuff for $105. Hopefully some of it would work on this car.
Our base strut for the rear suspension was the Monroe sensa-tracs. Yes, we understand that the Koni or KYB struts have better cred in the racing world. But really, how far can you push the whole LeMons concept. The Monroes are supposed to be very similar to the stock struts and therefore shouldn't be pushing anything. The LeMons guys would have preferred that we found the best struts out of a wrecking yard and go for them. Konis would have set off so many red flags. Besides, the Monroe strut was a LOT cheaper. What can I say?
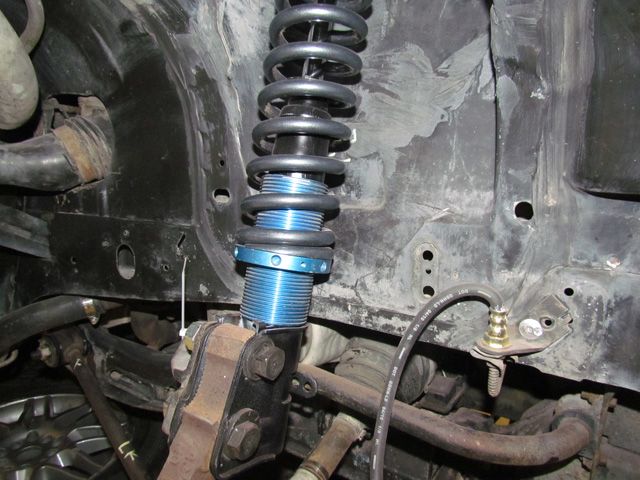
If you read the DIY coilover threads, you can see where some folks remove the extra shielding(?) and some do not. Check out the second photo in this thread. https://www.fiero.nl/forum/Forum1/HTML/084320.html We also found this instruction sheet on-line http://www.fieroaddiction.com/coil-over.html We elected to remove the shielding, partially in hopes of getting a squarer perch. I hit that job with a cut-off wheel. A couple of the threaded sleeves were just right for sliding over the outside of the struts. We did have to relieve the seam down the inside of the sleeves just a bit. But that really just took a few minutes with an air grinder and a paddle wheel sander. The sleeves rested securely on the perch created by the mounting brackets and we were happy with the results. Really, the whole thing was amazingly easy.
At the top of the spring, we kept it simple. We made a plate to fit over the top of the spring but inside the shock tower. I drilled some 1/4" holes to match the stock holes on the top of the tower. And we welded some 1/4" bolts to the underside of the plate. We found that an exhaust coupler (2 1/4" in diameter I believe) could be welded to the bottom of the upper plate, fit inside the spring and act as a retainer to keep it all centered. We didn't bother with insulators or pads or any of the niceties. Truly, we would never hear anything over the exhaust anyway.
We mounted everything up and found that, as mentioned in the DIY thread, we had an interference fit. 30 seconds with an air grinder applied to the upright and we were done.
We now had the ability to change the spring rates on the car from a variety of race suppliers. Given the fact that we had lifted the front inner tire in at least one turn on Infineon, we knew that we needed a bit more spring in the rear. But we still had to figure out what was going to be done up front. Our choice was to use some 300# springs from that $90 swap meet haul. Our only wish now was that it was all rusty and looking like it had been on the car forever. Tech. might be interesting. We also were half way towards making our suspension really adjustable. Coilovers (and weight jacks) are key components in making a car adjustable at the track. Now we had the ability to make changes at the back of the car.
We of course had new brake hoses for the car. But that shiny braided stuff was too attractive, So we used new rubber hoses. You can see yet another use for the tie-wraps. Holding up the disconnected rear sway bar. That anodizing is so out of place on a stealth install.
I have made a point of the fact that a coilover conversion might be a problem. But the Lemons guys have one of those loopholes that really helps everybody out. Yes, the car has a hypothetical $500 value. But once you have finished your race, you can petition of a "residual value" assignment to the car. The judges will look over your car, look at your race results, listen to your whining and declare that your car is worth $xxx. That gives you $500 less the $xxx residual value to spend on and repair your car. Judge Phil looked at the fact that we had finished solidly in the top 74% and might actually need to replace the clutch and hey, it's a Fiero.... Let me quote his reply
" OK, since it's a Fiero we'll say $100 residual. That means 400 bucks to squander on your car."
So, we did the math on the box of stuff Rich had purchased and figured we had $30 invested in the coil-over conversion. The Monroe struts cost $108 for the pair. So we could make a legitimate case that we were golden.
I watched your vid.. man your laps times would be much better if you used the brakes instead of relying on engine braking so much! Oh and defend the inside!!!! I cant wait to get back out on a track. I hope to hit Road Atlanta with the 3800t 88 this summer.
I watched your vid.. man your laps times would be much better if you used the brakes instead of relying on engine braking so much! Oh and defend the inside!!!! I cant wait to get back out on a track. I hope to hit Road Atlanta with the 3800t 88 this summer.
Cannot argue one bit with that assessment. I cannot do the heel and toe thing in this car to save my life so I stab the brakes jump on the clutch and use none of them well.
We did manage to get on track with a 3800SC in the car later in this story..................
Road Atlanta has to be one of the all time great tracks. Would love to try that track.
Rich and I decided that attending a NASA run training day/race weekend at Infineon would be a good idea. ( http://www.nasaproracing.com/ ) Their High Performance Driving Experience (HPDE) is affordable and offers the option of having an instructor ride along with you. So not only would we get some needed track time, but some direction. And chances are that NASA will never have 164 cars on the track at the same time! That means a less stressful learning experience.
It also means we had to install a new seat for the passenger. Most rules allowing for passengers such as SCCA and NASA training say that the passenger/instructor must be provided the same safety considerations as the driver. So using a stock Fiero seat and belt was out of the equation.
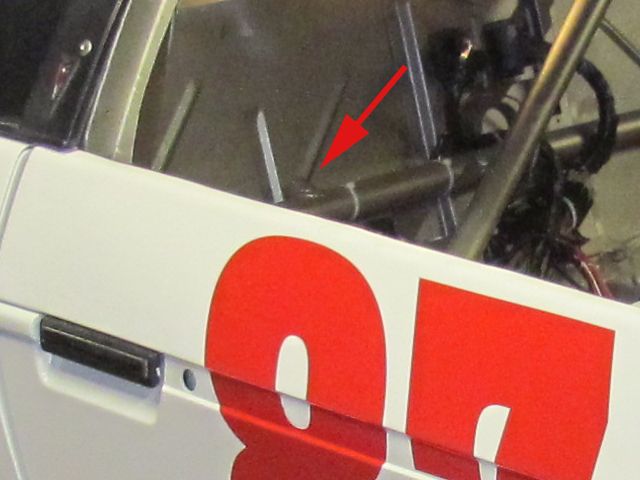
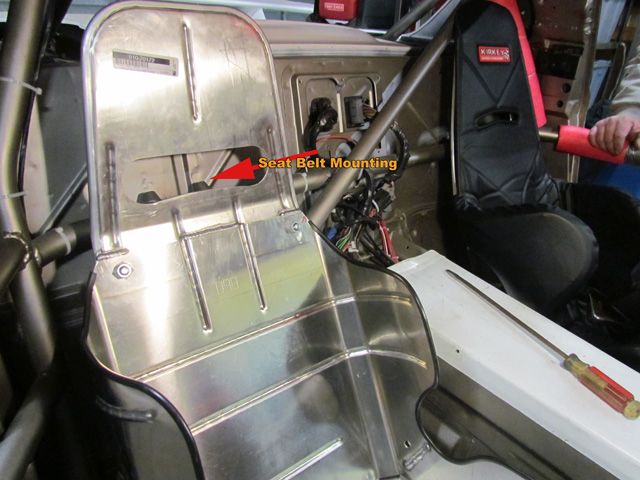
We actually planned on adding a passenger seat from the start. This detail from a photo taken from before our first race shows one of those UB Machine threaded stand-offs that we welded to the cross bar . If you recall, they are used to bolt in the shoulder harnesses.
We decided that this was the perfect opportunity to upgrade the driver's seat. Give the passenger the now used seat and get a better seat for the driver. It's not that we were really unhappy with the seat that we had, but the design meant that our legs were unsupported and were meant to be straight out and extended. For extended in-car periods, we could do better.
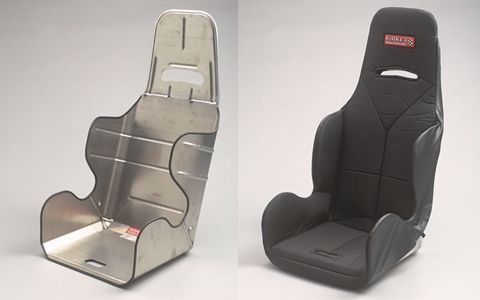
We had started with the Kirkey 09800 seat which cost us $115 at Summit Racing. Then we added the 09801 seat cover at $75. Not too expensive for a seat designed for racing use. This is what the seat looked like without a car wrapped around it. Pretty straightforward design.
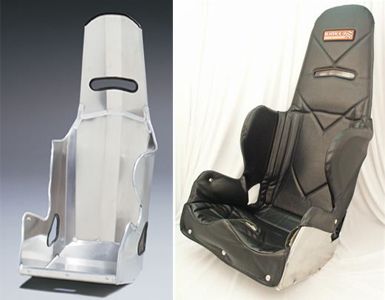
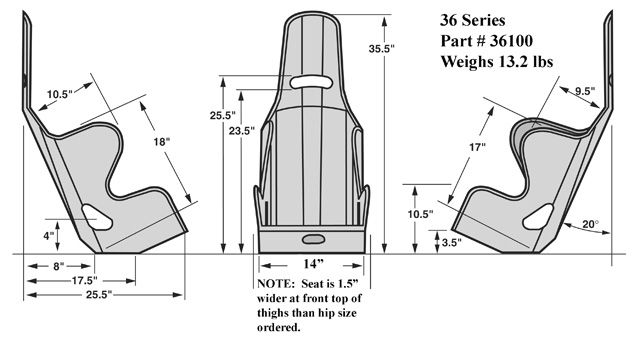
The seat we settled on to replace the first choice was the Kirkey 36700 which cost us $160 at Summit Racing. The seat cover/padding was the 36701 in black vinyl which was another $95.
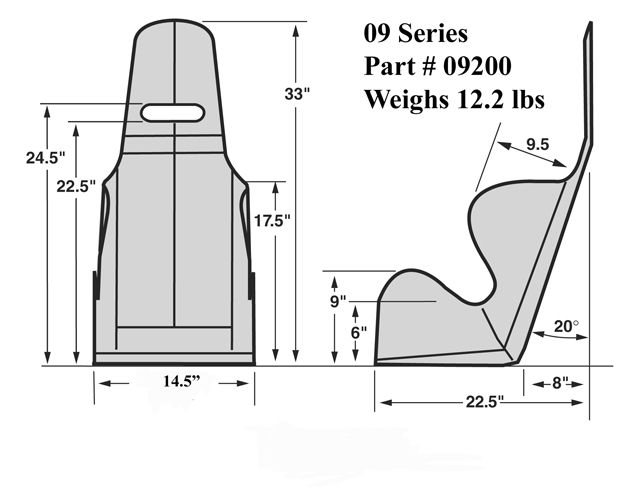
The biggest differences are in the seat bottom and where the harness engages the seat. The original seat has a very flat bottom where you place your butt. The new seat has kind of a well where your butt sits and a rise to accommodate the bend in your legs. The padding on the new seat is actually formed to support the back of your thighs. All together, a much more comfortable place to be. Compare Kirkey's technical drawings of the two seats.
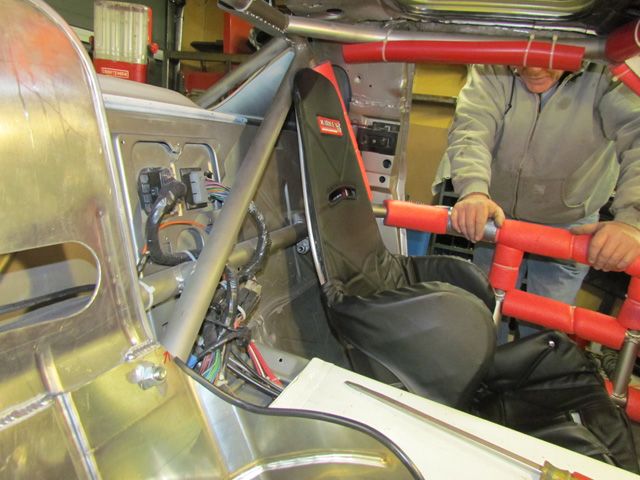
Mounting the seat would be similar, but different than our first seat. We basically tried to just shift the frame that we had made from the drivers' side to the passenger side. So both the original seat and frame were to be shifted. The good part was that we did not have to make the seat adjustable for different drivers. The seat was shoved as far back as possible (with the ECU mounted on the wall behind the seat, mustn't forget that) and bolted in place.
Okay, so much for the plans. The reality was that the new seat didn't fit. The original seat has an angle from the base transitioning to the sides. The new seat does not, it's a straight 90 degree bend. Check out the pictures of the bare seats. You can see the difference. That slight difference in construction is the difference between fitting and not in the Fiero cabin. Or at least it meant that we could not fit completely down between the rocker panel and the tunnel. If we raised it, head room went away. The only work around to that was to increase the amount the seat tipped back. And that destroyed the ability to make the seat adjustable. That could work for the passenger side since it is fixed, but not the drivers' side. Rich might have said a bad word.
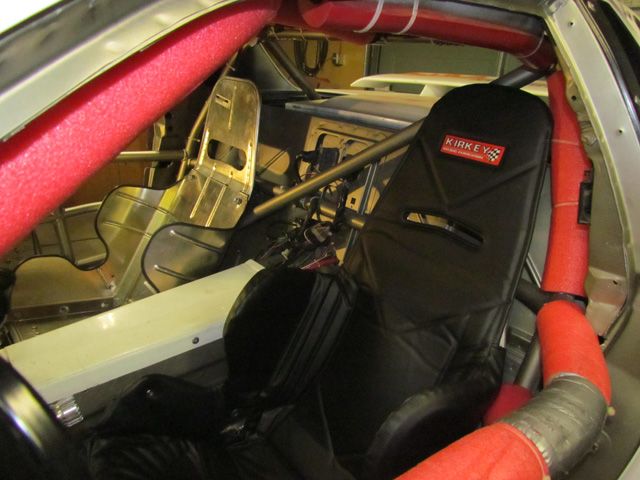
So ultimately, the passenger gets the high(er) dollar and more comfortable seat, and we were left with the original seat. For the harness, we did scrimp a bit. Instead of spending the extra bucks to with the same cam-lock system, they get to deal with the older, traditional over-center latch. They got the $70 G-force harness http://www.summitracing.com...gfr-6000bk/overview/
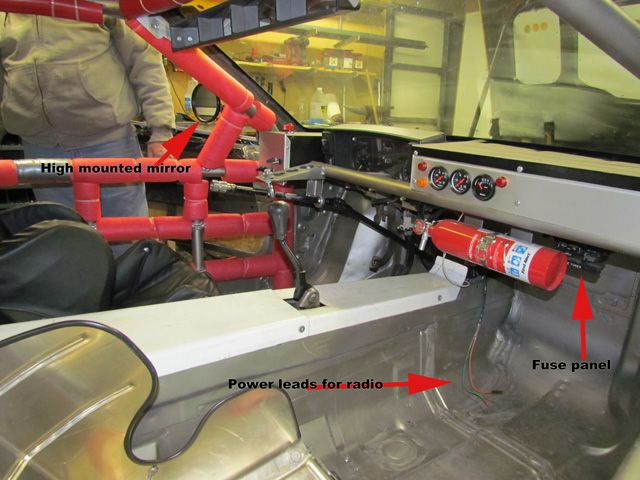
This photo just points out a bit more detail. We built a small box to hold our in-car radio. It mounted on the passenger side of the tunnel, just in front of the seat shown here. Rather than relying on batteries as we did in our first race, we purchased a 12 volt power pack and had some leads available to provide constant power. We added another switch to be able to turn the radio on-off independently of the rest of the car. At this point we were using the stock, but re-wired fuse panel. This location was very close to the battery mounted in the front compartment.
Working on the front suspension was more of a challenge than the rear. The rear coilovers were well documented here. The front was still a bit of a mystery. We couldn't put a complete aftermarket suspension in place. But it did need some attention.
These were all killer threads and inspired us to try making it work. The biggest hurdle appeared to be the packaging of the original suspension. The solutions that were most likely to succeed required moving the lower shock pick-up below the lower control arm. And we didn't see any way to use a stock looking shock as a starting point. Rich has actually taken a shock selection and rebuild class offered by QA-1. But we couldn't find a way to replace the heim joint ends with the stock type fasteners. The solution was just not coming to us using stock upper and lower control arms, time was running out and we had to make a move.
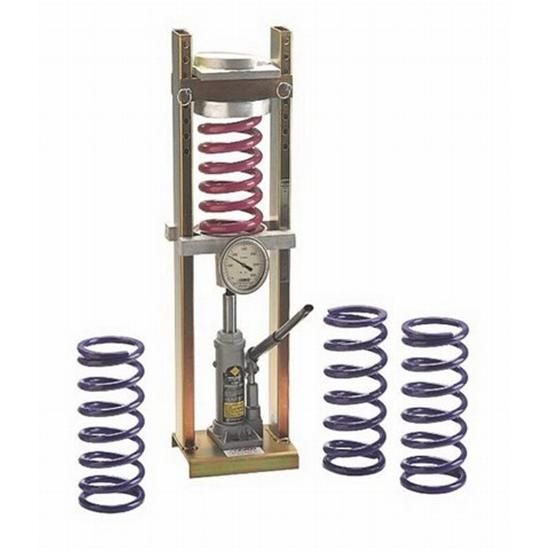
We abandoned front coilover idea and started looking for replacement, higher rated lowering spring. The stock Fiero springs are rated 205 # in the front and 142# in the rear. We threw the front springs into a spring checker. He has a Deco coil spring rater from Speedway motors. http://www.speedwaymotors.c...-2000-Lbs,32135.html
Basically, how these works is that you load a spring onto the perch as shown. Jack it up against the upper plate. Compress the spring on inch from the point that the spring comes into contact with the upper bar. Note the pressure reading on the large gauge on front. Measuring very carefully, you compress the spring exactly one more inch. Note the new pressure reading. Subtract the new reading from the first, and you have the amount of additional pressure needed to compress the spring one inch. That figure is the rating for the spring. For example, say that you have a spring that reads a pressure rating of 357# at the initial one inch of compression. If you compress it exactly one more inch and get a reading of 607# on the gauge, your spring is rated at 250#. (607-357=250) Our springs (with tag #ARD) measured out below the 205 listed in the books. We measured them at 185#.
Where we are headed with all this work is that we had to select a new spring for the front of the Fiero. We had no base-line or experience to make even a ballpark choice. There were several threads with opinions that a "performance" spring for the Fiero should be 300, 450, 350 or 500#. What we decided to do was try to maintain the front/rear ration that the Pontiac engineers had chosen for the car. We had replaced the 142# springs in the back with some 300# springs. If we used the same ratio, we should replace the 205# front springs with springs rated at approximately 436# springs.
West Coast Fiero had 400# springs designed to lower the front 1 1/2 inches. So we ordered a set. Or tried to. They were on back order and expected shortly. We waited a couple weeks, but ran out of time and had to look for other options. We spent a lot of time on-line looking for alternatives, but the diameter seemed to be a stumbling block. Our only option was to cut the stock front spring to lower the car and pretty much ignore the spring rate. Ugh. But we had always heard that cutting springs make for massive changes in the spring rate. We settled on cutting 1 1/2 coils off the stock springs. This lowered the car close to where we wanted it. And our gain on the spring rate measured out at 43 lbs. We didn't expect to get anywhere near the 400# WCF springs, but had hoped for a bit more.
Of course that created a new problem. Our shocks were now essentially useless. I do not know how folks contributing to several threads here can say they have no shock problems when lowering their cars. I cannot recall the final compression measurement on the shock once reinstalled, but it wasn't nearly enough. I think we would have bottomed out the shock travel at the first turtle we hit. The new KYB shocks we ordered were no better.
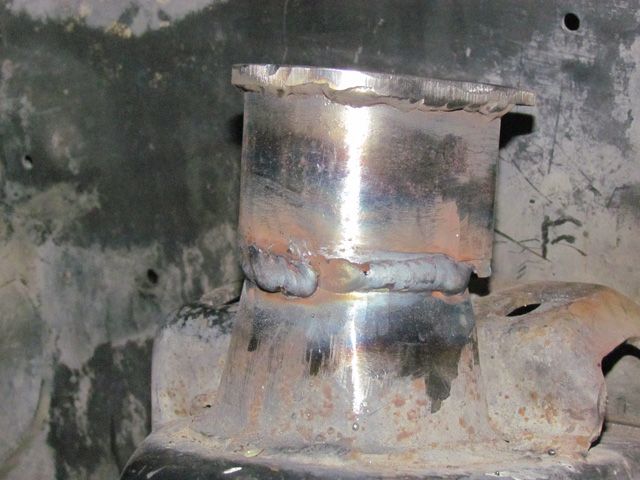
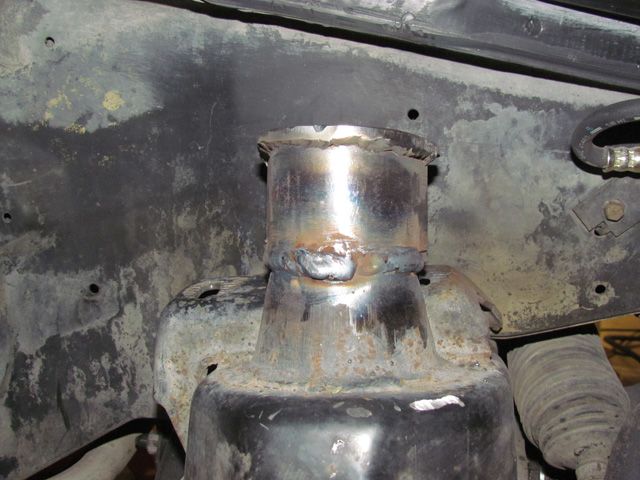
We needed to extend our shock mounts. Going down through the lower control arm was no option. So, up it was.
Early shot from the underside.
Didn't see that one coming, did you?
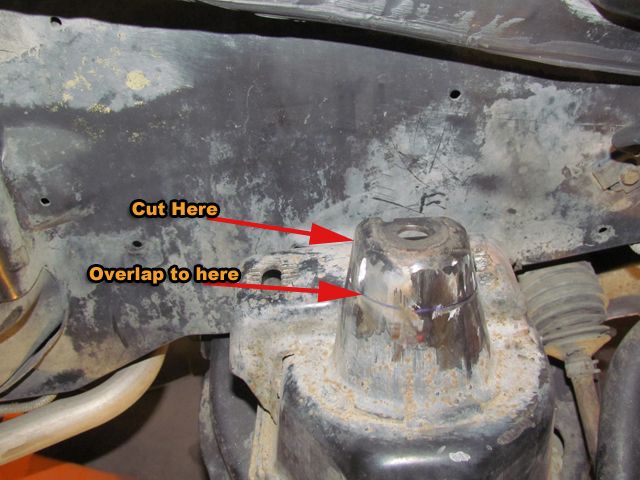
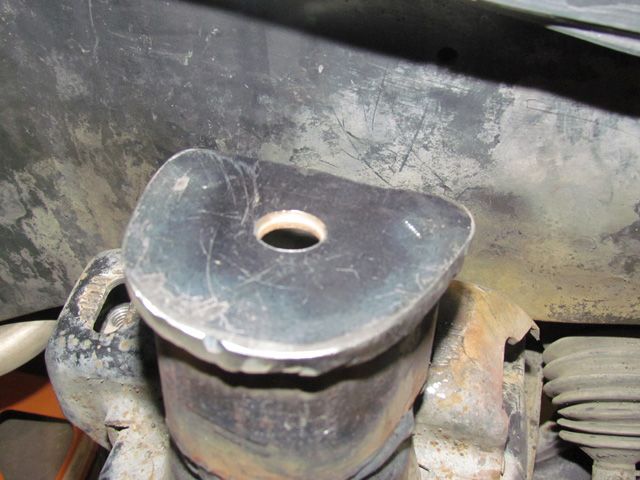
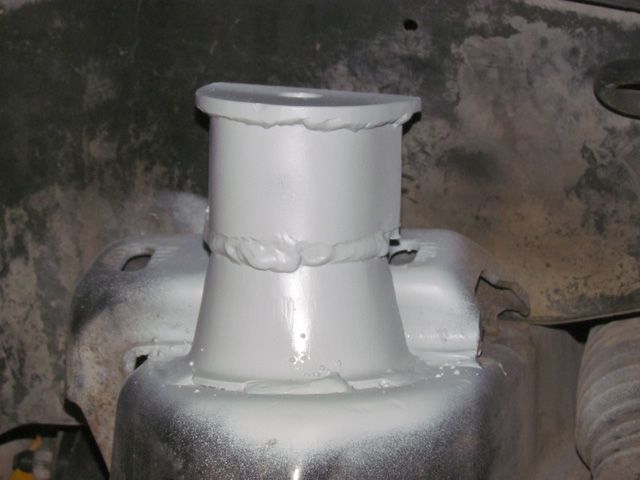
Using the plasma cutter, we were able to cut the top plate off of the stock tower, opening up the top of the shock tower. It was important to cut below the radius of the original top in order to create enough space for the shock to ride without fear of contact. We bent up a piece of steel into a "U" to follow the contour of the top of the shock tower. The "U" was measured to overlap the outside of the stock tower and extend upward. A plate was welded to the top, functionally replacing the original shock mounting plate. We were very careful to maintain the same angle and plane from the lower control arm mount to the upper mounting point as the original.
We observed the shock was free to function throughout the entire range of movement. And the suspension was at full droop before the shock was fully extended. Robert dropped the car, did a bit of relieving to the fender for tire clearance (read that as he took a sawz-all to them) and it looked as though we would be sailing.
*edit (After dropping the car down, we needed more fender-well clearance and Don was not happy about trimming the fender-well. Something about "it always looks like s***t when you do that. With the plastic fenders, we used a air driven sheet metal shear and trimmed them up. You can hardly tell they had been touched. - Rich ) end edit*
Our order with WCF stood, but we now had assurances that we wouldn't lose our track time. And we were reasonably confident they would work with our new shock mounts.
The wheel arch wasn't horribly bad after being reworked for tire clearance.
DonP, added this to my favs and "subscribed so I can keep up with your progress.
Great write up so far - really admire the work you guys are doing. I love the detail about the cage build. I'm getting ready to build another Fiero - Roadster Style and I will be building a cage/roll bar/ semi tube chassis - my vision is to have a Fiero with a road race "feel". Plan to use it at track days on occaision but will also be a "road" warrior that I'll run from car show to car show in. Maybe even a long distance rally or "Gumball" run? I've been a drag racer all my life but I'm really intirgued with "time trial" motorsports. This will be my year of transition from the straight line stuff to the twisty stuff. This thread has inspired me and given me a ton of ideas for my build.
I just moved to Omaha and I am about 10 miles from this course: http://www.motormagic.info/roadcourse.htm I hope to get to a few track days here and I am very interested to see if there is any interest in a LeMons race here. I'd love to build a car for that - appears to be a great experience.
Thanks Pat. Appreciate the comments. I had already noticed your thread on the newest project.......... but what got the most attention was the fact you had been working on someone's Mach I. I'm watching to see how the space-frame is dealt with when removing the top.
Prior to our first race, we didn't have time to swap out any of the rubber bushings in our '88 Formula. We had installed some energy suspension sway bar links. But we hadn't been able to get beyond that. Looking at several threads it looked as though many people liked the Prothane brand of poly bushings. LateFormula and Rick Vanderpool here on the forum were helpful in pointing me to the proper kit available from Summit Racing. http://www.summitracing.com/parts/PTP-7-305-BL/ It's so great to be about a mile away from Summit Racing's Sparks, NV store. Luckily, Prothane makes the kit in black as well as red. The red looks flashy for the street, but black is a bit stealthier.
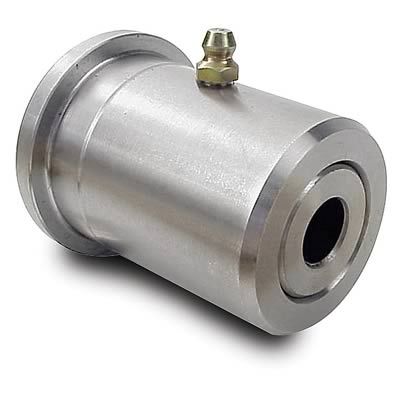
We were not unaware of the advantages of reducing suspension flex associated with bushings. For many years we routinely changed out steel on steel bushings for stock rubber bushings. But we were running really big slicks as opposed to the relatively stock tires we now had to run. As a matter of fact, just last weekend, Rich was installing new bushings onto his newest race car. They look similar to these.
In this case the whole thing is constructed in three pieces, counting the center bolt. The inner tube is free to rotate within the larger outer body and, as you can see, even has provisions for a grease zerk. Pretty much zero flex and zero provision for ride comfort. In our case, we were more than happy to go with the poly bushings.
I have seen mention of people considering using heim joints in their rear suspension arms. I suspect that these AFCO bushings, if one could be made to fit, might serve better to constrain movements along a single plane.
We had read all the horror stories about the problems encountered while swapping out the stock bushings. Most were true. But our biggest tool was the hydraulic press. In several cases, we could actually rip out the stock rubber bushings. Or push out enough that it we could deal with the remnants. In no case did we have to resort to burning out rubber bushings. Thank goodness.
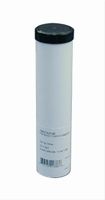
If you took the time to look at the link to the suspension kit above, you saw that puny little packet of grease that is supplied. Here's a really good tip. Did you know that Summit racing has the special silicon grease available in quantity. It's packaged in an 8 oz. re-sealable container as well as a 14 oz. container that looks like the tube you use in a caulk gun. Compared to the cost of buying those small packets, it's a great value!
So here's the best tip. Forget you every saw this! Those small packets are plenty. If you buy the large tube, you are tempted to use waaaay too much. That silicon gets everywhere and is a BEAR to remove. I cleaned for two days with acetone, lacquer thinner, various solvents and anything else I could find. We had to abandon part of the garage as uninhabitable. And I still have 97% of a tube left. I was sent back to using a broom for the rest of the week.
I really feel however, that the bushing swap was a huge move in the right direction for us.
Robert had real problems with the clutch during our race. And if you watched the video, you saw where I missed a shift as was left floundering in turn 2. The clutch disc was new, though just a stock street grade unit. We were sure (hopeful?) that the actual clutch was okay. So we tackled a couple of related issues.
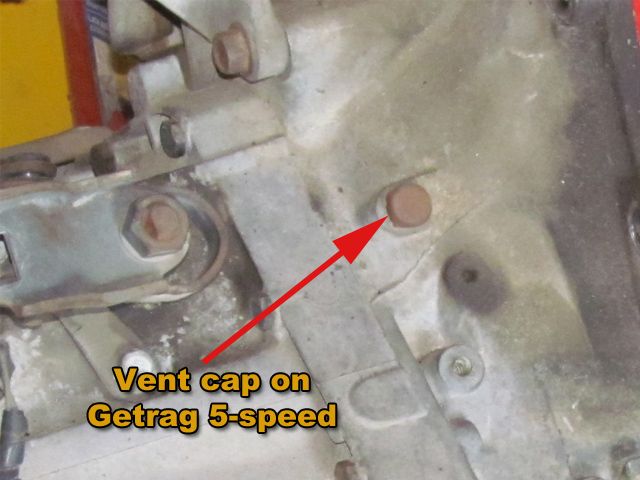
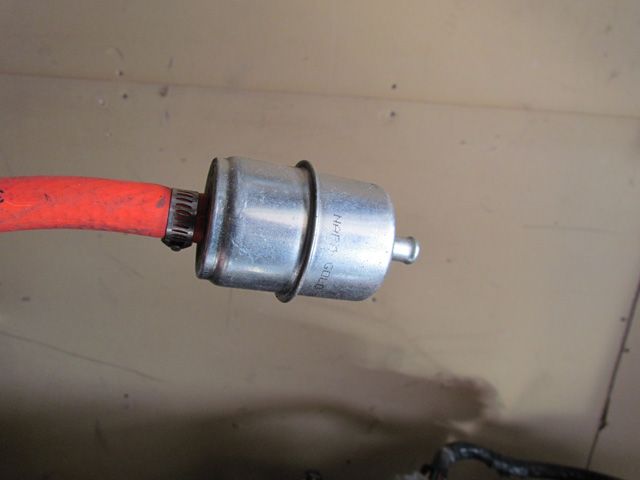
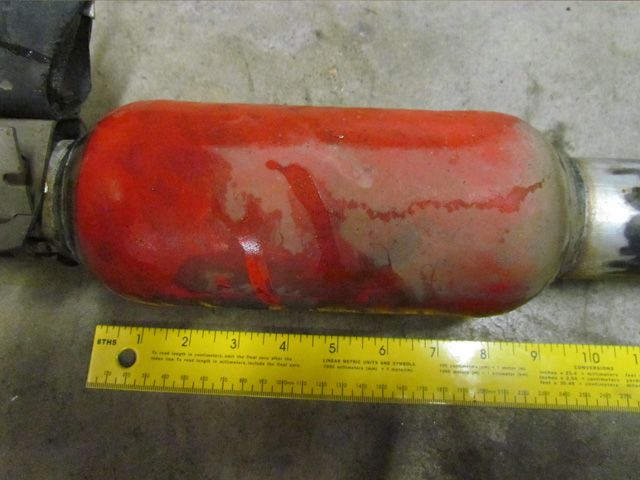
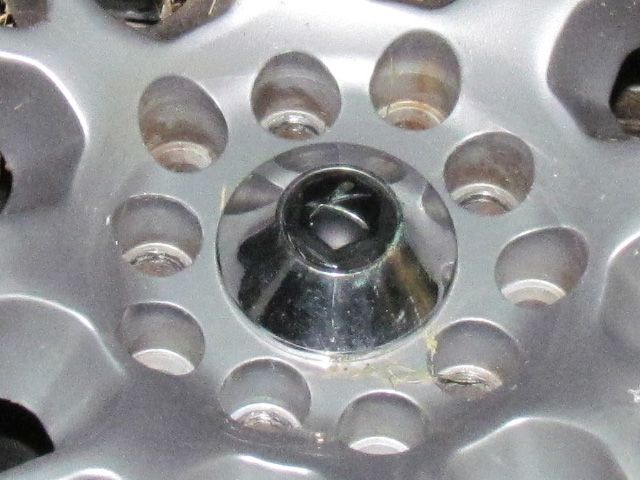
At the track we had problems with the Synchromesh leaving the case. It actually took awhile to figure this one out. We saw liquid, but could not figure out where it came from. Our first suspicion was that the distributor o-ring seal was bad and allowing oil to flow out across the transmission case. Or maybe a leaky valve cover. Ultimately we determined that the synchromesh was being pushed out the case vent. The Getrag has a small vent located close by the shifter arms.
Once we figured out the source of the leak (but maybe not the reason?) we looked for a solution. What you see in the picture is a small sheet metal cap kind of crimped over a small metal tube. The tube is pressed into an opening into the case. None of this description was known by us as we fought to figure it all out. We wedged the sheet metal cap off, exposing the tube. After some effort we removed the tube in hopes that it was threaded in. No luck, it is pressed in. So we replaced the tube and fit a hose over the end. We routed the hose up and around, terminating in an in-line fuel filter. We now had a filtered vent and really no way for fluid to be pushed high enough to be expelled. Every circle-tracker with a Ford 9" rear end does the same thing to properly vent the third member. Pesky leak, gone.
Not too high-tech here. Just functional.
We were getting close to finishing off our tasks to do checklist. We made the choice to use some KYB shocks up front. And they fit well with our new mounts.
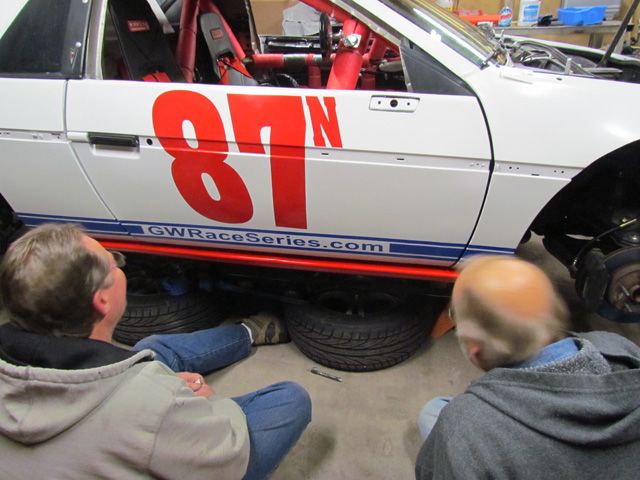
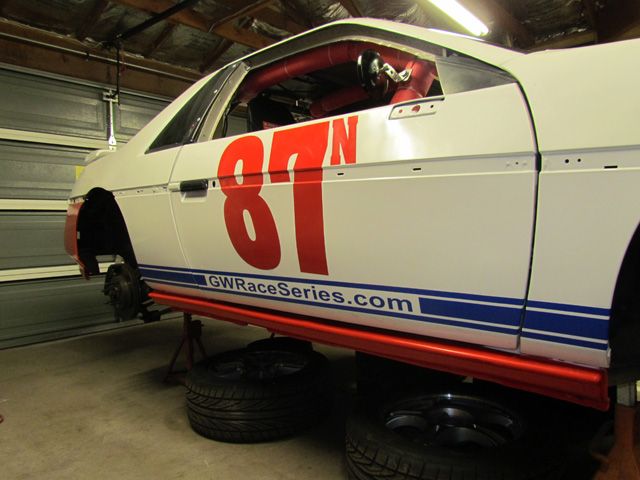
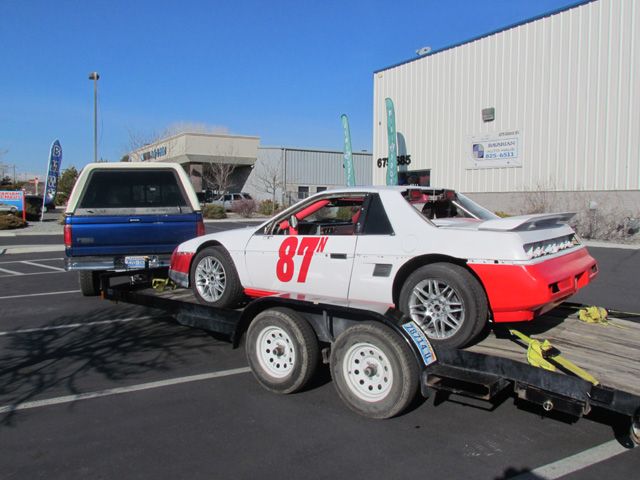
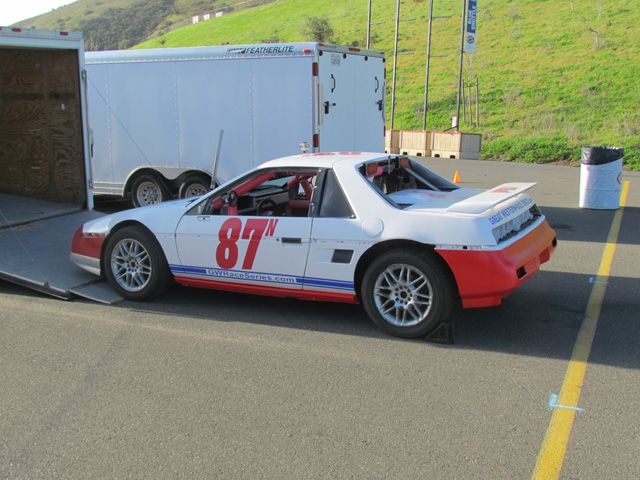
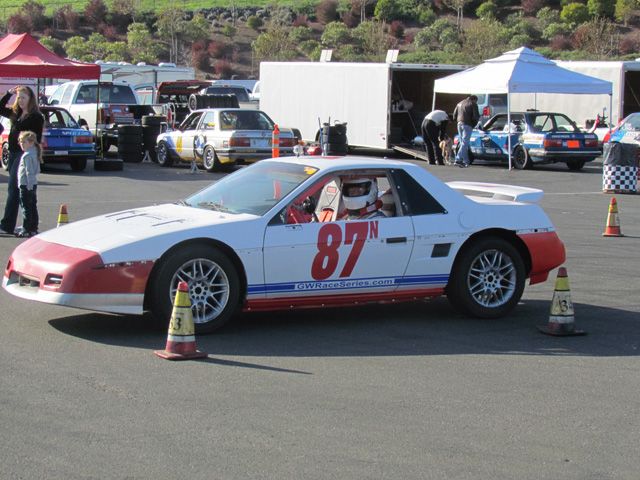
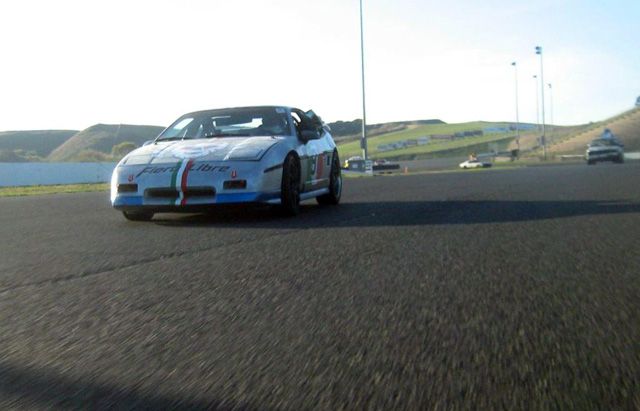
Rich and I decided to try our hands at running our own race series. Once the Lemons boys ran their early 2011 race at the Reno-Fernley road course, they left the state. We attempted to pick up where they left off with a similar type event back at Reno-Fernley. http://www.renofernleyracetrack.com/ Naturally we tried to promote our upcoming series at the NASA event. Time to add some decals to the car. Do not bother going to our gwraceseries.com site as shown on the decals. It's off-line since the venture was dropped. Even if the name is no longer meaningful, I think the graphics made the car look better. But then I'm prejudiced as we paid for them.
Notice the full cage now sports padding. And both seats are now completely installed, including harnesses and padding .
NASA has a local guy who is a certified tech inspector located here in Reno. So, though we were going to a HPDE event in California, we could have the car inspected and passed before the long haul over the hill. We loaded up on the flatbed and hauled off to get the car looked over.
It's always been a little gratifying to take our car through inspection. The inspector runs a BMW-centric performance shop. As in this case, the inspector first asked what class the car was for, assuming that we had built it to some particular NASA class spec. We told him that we had a LeMons car and were just going to participate at Infineon as a learning experience. His comment was "this is a LeMons car?" Rich told him "sure. It doesn't have to be ugly to be a LeMons car." We passed the inspection allowing us to by-pass the inspection process at the track. Cool.
A couple days prior to leaving for Infineon, I got an e-mail from a guy named Evan M. Evan was my assigned driving instructor. Rich got a similar introductory e-mail from his instructor, Mario. Neither seemed toooo concerned that they had drawn a LeMons car/driver. Actually, we were not the only Lemons team taking advantage of the training opportunity.
All told, it was a good learning experience and I would suggest that, given the chance everyone should participate in one of these on-track driving experiences, whether offered by NASA or SCCA. The group offers different run groups based upon experience. We chose to start at the novice level and requested ride-along instruction. For us, the day started in a class-room with a track map and a discussion the proper way around the track. The classroom instructor was good and had the memorable line that we stole. "There's nothing you can do on the track today that will make it more valuable." So take it easy. I was the student on Saturday with Evan in the passenger seat. Rich drove on Sunday.
The remnants of our run-in with the LeMons judges. It gives the tech inspectors pause as the wonder what our mindset is if we put this on the car...........
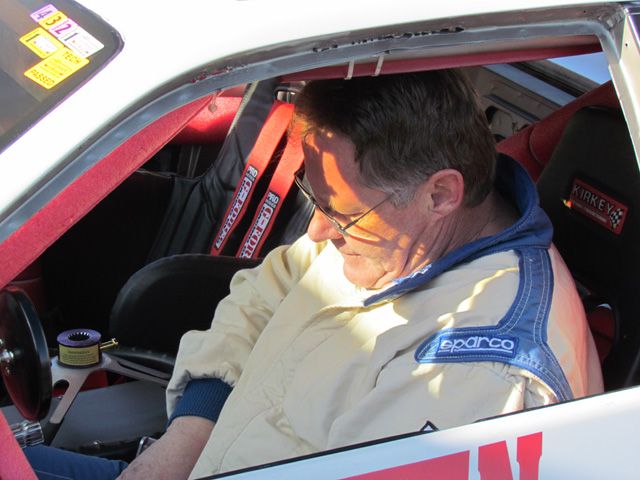
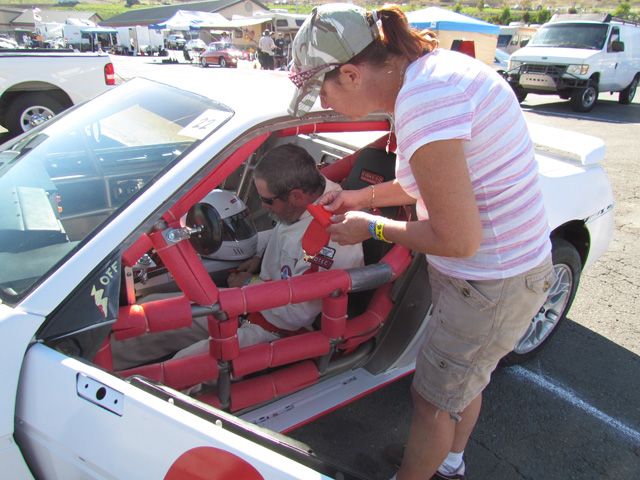
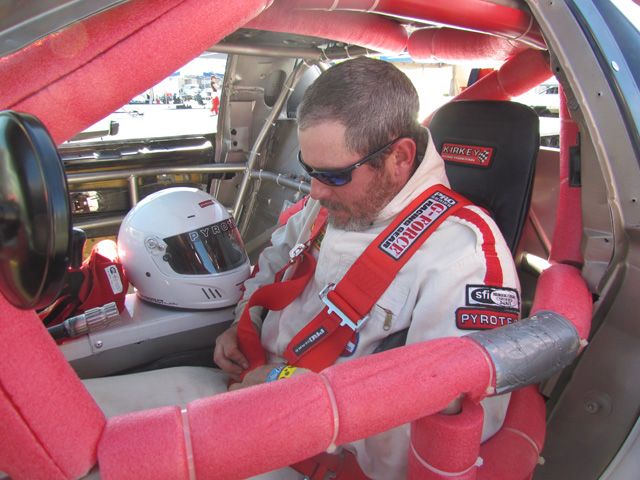
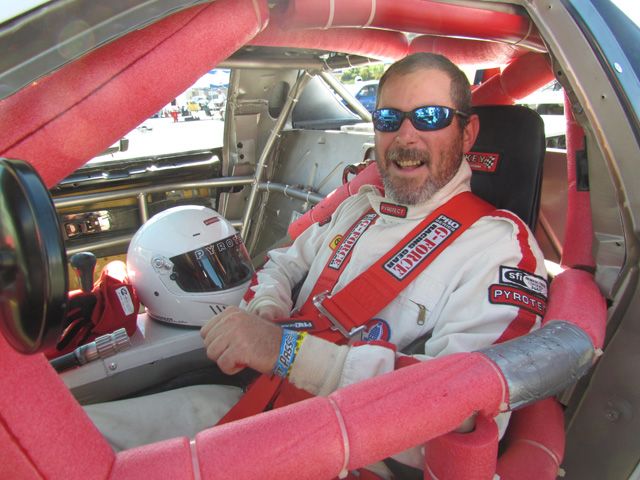
Rich getting ready
I asked Rich to give his perspective of the day:
On Sunday I had the opportunity to drive so my day started out with the same class-room track map discussion Don attended on Saturday. Infineon is a very technical track. The configuration with elevation changes that create blind corners and one corner followed immediately by another corner makes it imperative that the driver stay “ON LINE” at all times. The class-room instructor emphasized this by commenting that most road course tracks are turns connected by straight a ways. Infineon is turns connected by curves.
At the end of the class-room session I was paired up with my instructor Mario and we left the class-room and walked to the far end of the pit area where we were parked. Mario started our discussion by telling me he owned the Time Trial Record for Infineon. He was the 2009 and 2010 Time Trial Champion and had over 120 track days at Infineon. Mario also mentioned “all I need is a good ride and I could beat anyone at Infineon”. I heard this whole statement again at lunch, and again at the end of the day.
Having been around circle track racing since 1974, I have heard many drives make these same statements. It has been my experience that the more a driver toots his horn, the fewer driving skills he actually possesses. At the end of Sunday, I will have to agree, I believe Mario is a very talented driver and would do well in a good ride. His outgoing personality probably came partly from his nationality.
As we strapped in for our first on track session, Mario asked me what my goals were for the day. I said the only thing I wanted to concentrate on was learning the line. You can’t be fast if you are off line. Mario responded by telling me “that is good because I am a fanatic about staying on line.”
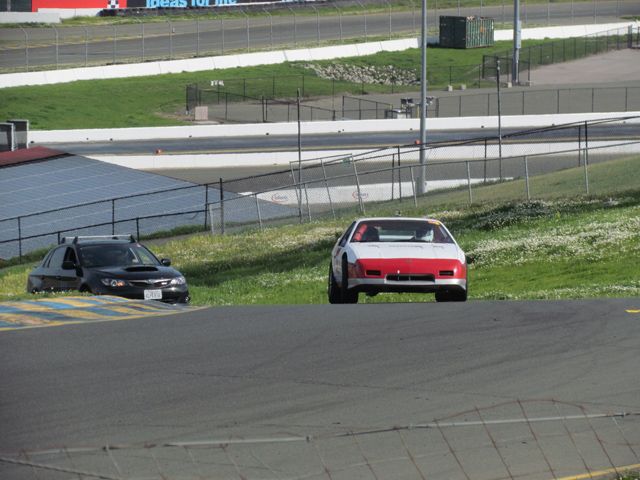
An early, off-line run.
We pulled out on track where we would do the first 3 laps under Yellow. Mario had his belts extremely loose and immediately reached over with his left hand and turned the steering wheel to get us on line. He explained that even under Yellow, I was to have the car on line. After the first 3 laps we picked up the pace and Mario continued to correct the car using his left hand on the steering wheel. The corrections we large at first and got smaller as I learned.
Between my first and second sessions Mario gave me a ride in his street car, a Honda S2000 with racing slicks. http://en.wikipedia.org/wiki/Honda_S2000 Mario was extremely smooth with his heel/toe shifting, braking, accelerating, and steering. The ride was very educational and gave me something to aspire to.
During the second session I had gotten smoother, was spending more time “on line”, and we had picked up more and more speed. Two laps from the end I crested the hill at 3a and the back end slid out. When I counter steered I got my hands tangled up with Mario’s. He had reached high up on the steering wheel to “help me correct”. With both of us steering we got too much steering input and started the Darrel Waltrip “Hospital Wobble.” I knocked Mario’s hand off the wheel and continued to fight for control. We got two wheels off before easing up and getting back on line.
When we did our debrief Mario asked how I thought the session went. My reply “great until we had 3 hands on the steering wheel”. Mario explained he didn’t know if I could save it and he was trying to help. We agreed he could continue to make minor adjustments with his left hand below my right hand, but I would do all the counter steering. Racing dirt, I get a lot of practice at that.
I continued to learn more and more during the 3rd and 4th sessions and was really glad we decided to do the NASA track day. Mario was very good as an instructor. He busted my chops all day about staying on line. Gave great tips about driving a mid engine car with a high rear weight percentage. “Trail brake entering the corner to get more weight on the front end, and never get totally off the throttle when turning.” Thanks Mario. You made my day very educational and the improvements I made were from your exceptional coaching. I hope you get that “good ride”.
I wasn't very happy when we decided that it was necessary to cut the front fenders for greater clearance. We had dropped the car a fair amount and it became necessary. But it didn't look as bad as I had feared.
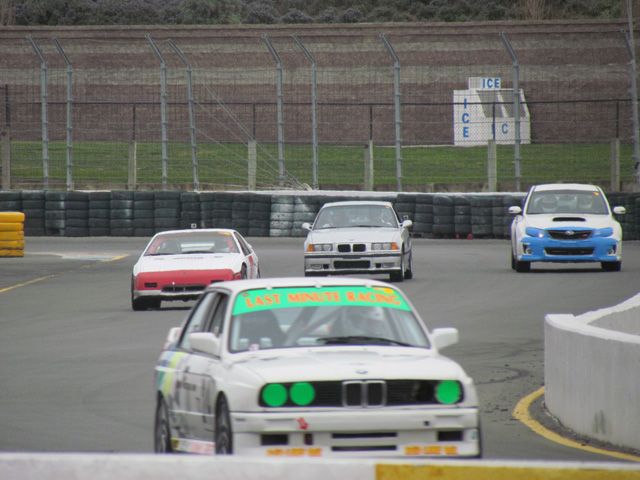
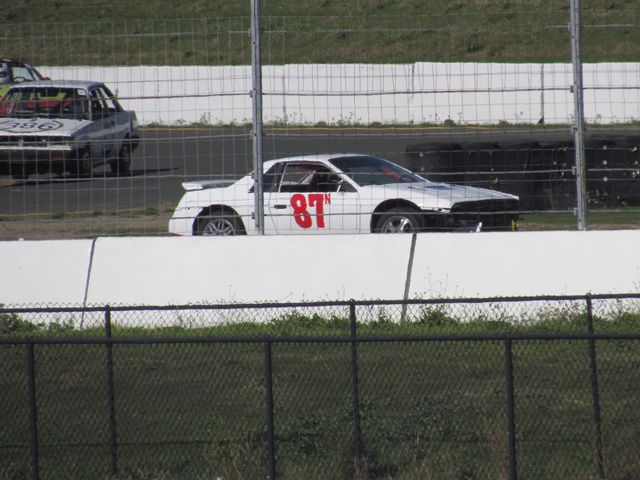
This is the photo that really brings home how small the Fiero really is. Those are not large cars surrounding Rich on the track! But we were dwarfed by them.
Our biggest concern at the start of the weekend was the exhaust system on the car. These NASA boys (and as we later learned, the SCCA boys) seem to have this phobia about loud cars. We were legal by all measures, but we were noticeable. Let me back up. The tech guys had concerns. We got plenty of comments from other participants that they loved the sound of a big V-6. Huh? It's the stock 2.8. But we were very distinctive, particularly when backing off the throttle at 6500+ rpm. Part of the reason of course was our choice of exhaust systems. We believe in a non-restrictive exhaust system. In the IMCA that Rich regularly races, he just clamp on a set of super-trap diffuser plates. So when we built our exhaust we kept it simple and minimal.
It was effective enough to keep us legal. But we sounded so different than anything else that we got a lot more scrutiny. I will say, that when I was up the hill at the top of turns 2-3, I could hear Rich entering and powering out of turn 11. That's quite a ways away if you consult the track map several posts back. They gave him a bit of flack on Sunday, but we survived it all.
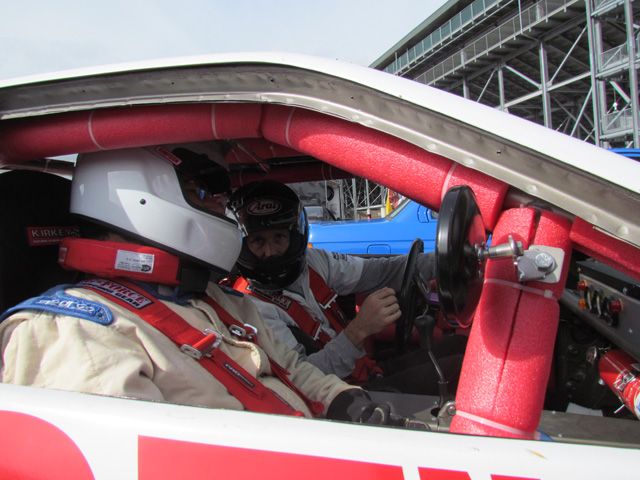
Mario had a go at driving our car. He's crazy enthusiastic. Look at these photos, he's too short to reach the pedals, so the harness is loose and he's sitting forward in the seat.
The main feed-back we got was that the car was controllable, but very soft. Those 400# WCF springs should have made a difference had they arrived. Oh well.
I hate passenger seat. On Saturday, I took the passenger seat while Evan, my instructor drove the track in his street car. Very smooth. Very fast. I hated passenger seat. On Sunday, Mario wanted Rich to follow him around the track, while Mario drove his little open-topped S2000. I didn't get away fast enough to miss the invitation to ride shotgun. Ugh. No roll bar or cage and Mario was crazy. Seriously. Did I mention that I had just watched a spec-BMW car roll at the end of the front straight? Up-hill. A long ways up-hill. Okay he was crazy, but you could definitely learn from the smoothness. Never even felt anything when he shifted. He had a non-stock replacement engine and a lot more power than we did. And he left Rich behind when he wanted to. Remember, we had that set of hard (300 rating) tires with a weekend of racing on them. Mario had some sticky tires far softer than we are even allowed. Yeah, I'm making excuses, he killed us. I hate passenger seat.
Probably the most fun of the weekend was playing mind games with the instructors. At the end of the day on Sunday, Mario was filling out Rich's log book, recording the experience. While Mario was filling out the logbook I mentioned that I had been passenger with my instructor, Evan as well as him. Mario asked for impressions. I mentioned that Evan was a bit more aggressive on turn in and under braking. "But who was quicker?" asked Mario. I told him he was very smooth on shifting. "BUT WHO WAS QUICKER?" You can see where this was going. What was amusing was that every time Mario asked for a comparison, he squeezed Rich's logbook a bit tighter. Rich was frantically signaling that I stop talking until after he got the logbook back. It took awhile before he got the book back.
Both Rich and I "passed" and were kicked up a run group. Rich even has a "slightly" crumpled logbook documenting the fact.
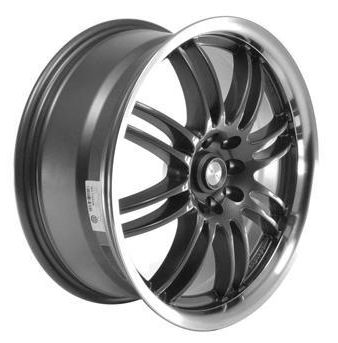
We knew that with most of the mechanical bugs worked out of the car, it was time to step up our tire selection. We wanted to upgrade to the popular Star Spec tires for our next LeMons race scheduled for March 25th. We would be returning to Infineon. In addition, we had signed up for the September 15-16 weekend at Thunderhill Raceway in Willows CA. http://www.thunderhill.com/ Shortly after our return from the NASA day, I ran across an E-bay list for some wheels. At $79 each, Summit had two Focal F-16 in 16x7 with a 42mm offset. Summit Racing was selling off the remaining stock of these wheels in a gunmetal finish. I figured that we could pick-up another pair and make an affordable set. Apparently, Focal was moving from gunmetal to matte black, so once again we have a mismatched set. But at least they are the same design.
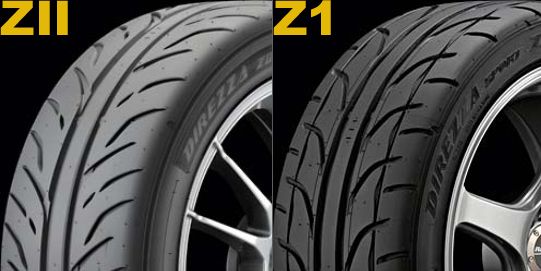
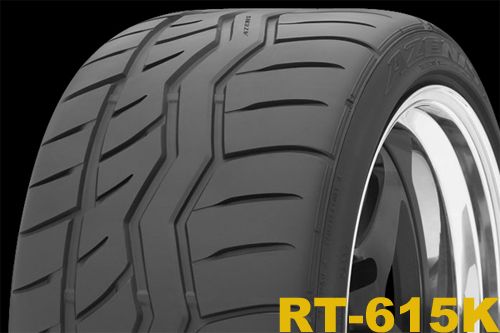
We elected to upsize our wheels to 16" based upon tire availability and sizing. The Dunlop Direzza Z1 Star Spec is limited to 195/50R in the 15" wheel size we were running. By going with the 16" wheels we could go to 225/50R16. That's the size we selected for front and back. The Star Spec is one of the most popular tires (along with the Falken Azenis RT-615K) in part because of the hardness rating of 200, our legal minimum. As of this time, the Star spec is being replaced with the Direzza II, so we will see where that goes in the future.
The Dunlops have an aggressive tread pattern - changed in the update.
The Falken tires are equally aggressive for street legal tires.
Remember, we are not allowed to run "racin' " tires. These are the two most popular tires without breaking the bank.
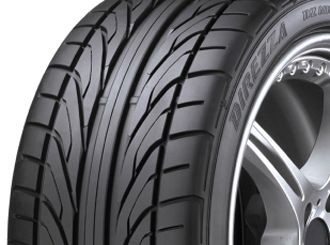
These are the Direzza 101 tires we had been running to this point. We were runnig them in 205/55r15. These have a wear or hardness of 300 versus the 200 of the others.
The Mustang boys had made the same switch from the 101 to the Star Specs and said it really transformed the car.
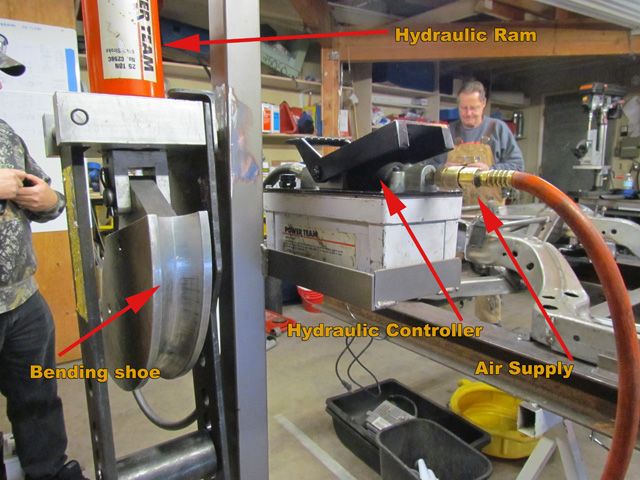
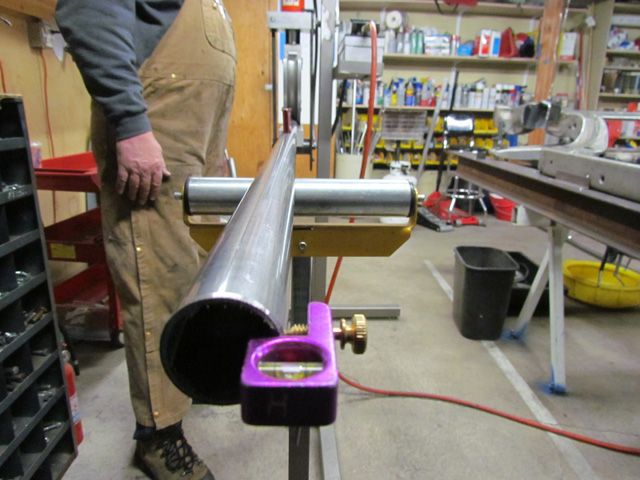
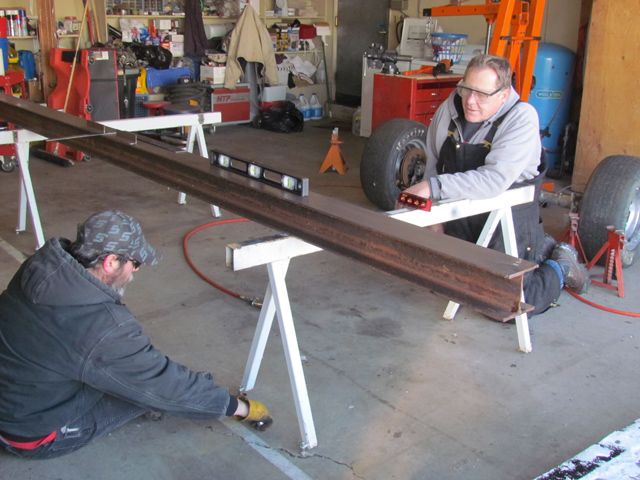
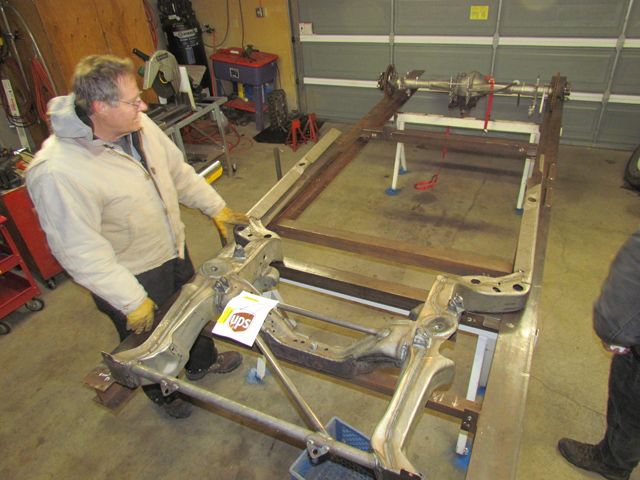
Way back on the first page of this thread, we talked about bending up the cage. But I really did not have any photos demonstrating the actual bending process. As I type this, Rich is building a new IMCA dirt modified for the upcoming season. He started with a jig built of I-beams, a stock front clip from a Chevelle, and a Ford 9" rear end based rear axle. He has to build everything in between. He's definitely bending tubes, so I took a few illustrative photos.
Rich has a Mitler Brothers air over hydraulic operated bender. What that means is that compressed air is used to control the hydraulics operating a ram.
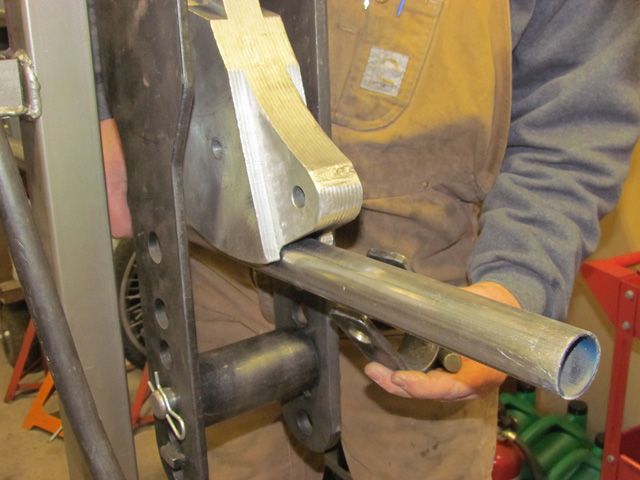
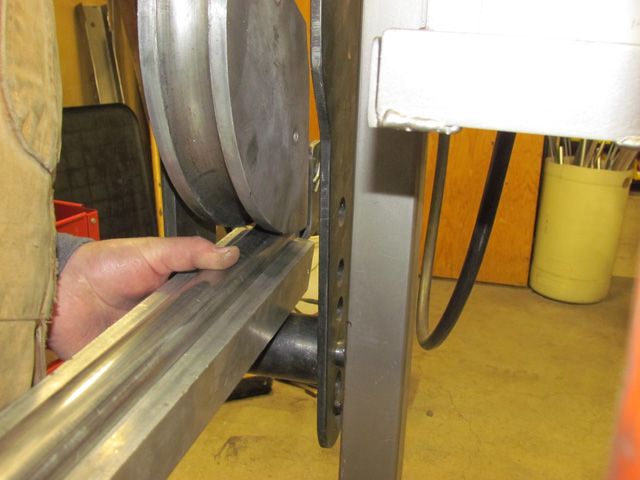
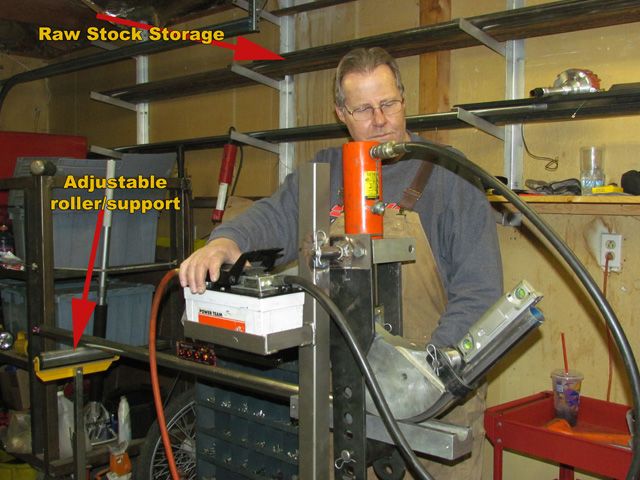
The roll cage tubing is then locked to the shoe with this simple clamp.
A follower is then sandwiched between the tube and the frame below the tube.
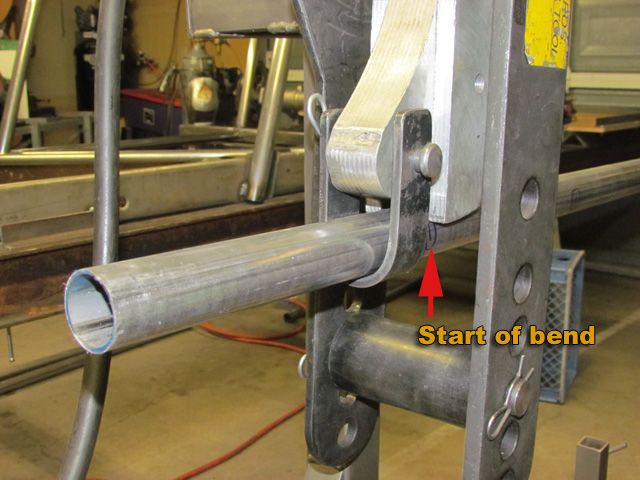
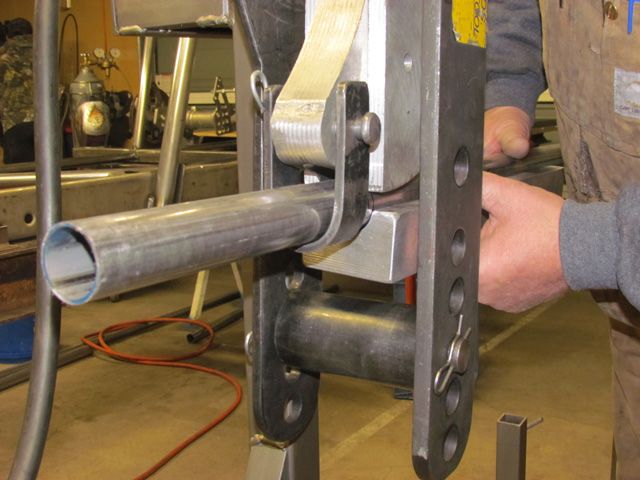
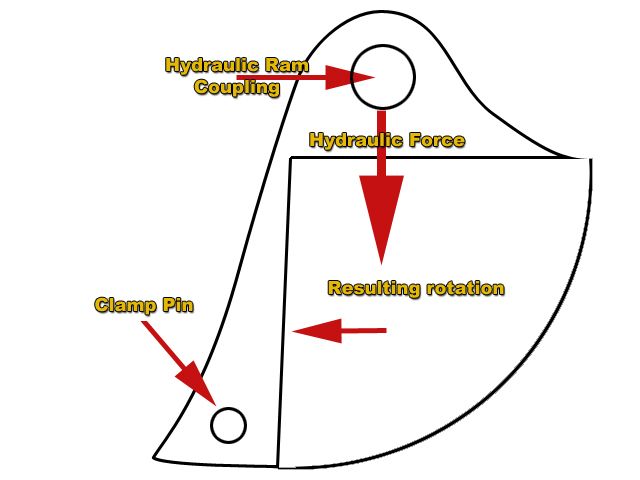
Once everything is locked in place, additional hydraulic pressure will start the bending process. Looking at a drawing of the shoe, you can see that the hydraulic ram is connected to the shoe to one side of the centerline of the shoes arc. It's the fact that its off-center that causes the shoe to rotate, In this image the rotation is to the left. The fact that the tube and shoe are in direct contact with the follow bar, and the tube is locked by the clamp causes the tube to be drawn along with the rotation. As the shoe rotates, the U clamp pulls up on the tube, causing it to bend. The real magic is that the combination of the shoe and follow bar keep the tubing from deforming and flattening on the outside of the radius.
The shoe/follow bar sets come in different sizes to accommodate different tubing as well as different radius bends. The more commonly used sets from Mittler Brothers to fit Rich's machine are over $400 per set. So you don't buy a lot of extra sets.
There are a few additional tools that help. First of all, Rich built the frame which allows him to work upright. Most small shops just use a clear spot on the shop floor. Rich comments that the floor is getting further away every year and built the frame.
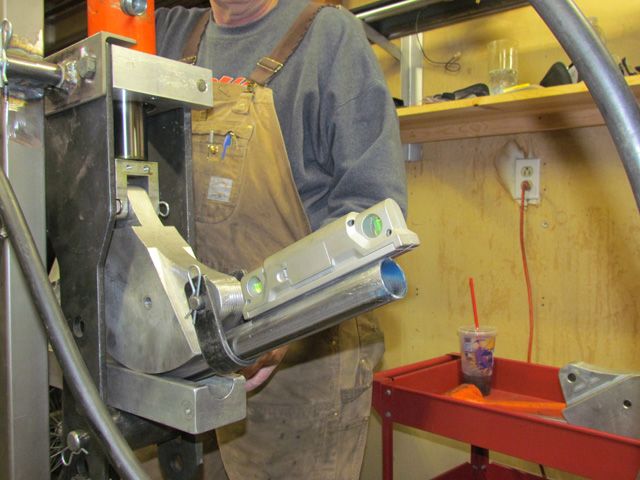
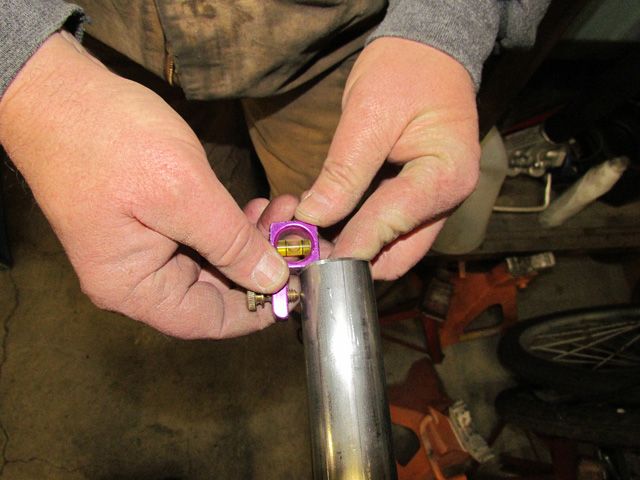
He uses a simple spirit level to make sure the tube extending out the back of the bender is level to give a known reference point.
This simple but invaluable tool helps when it's necessary to make more than one bend in a single length of tubing. For example, the simplest main hoop requires at least two bends. In order to keep all bends on the same plane, this little level keeps things oriented correctly.
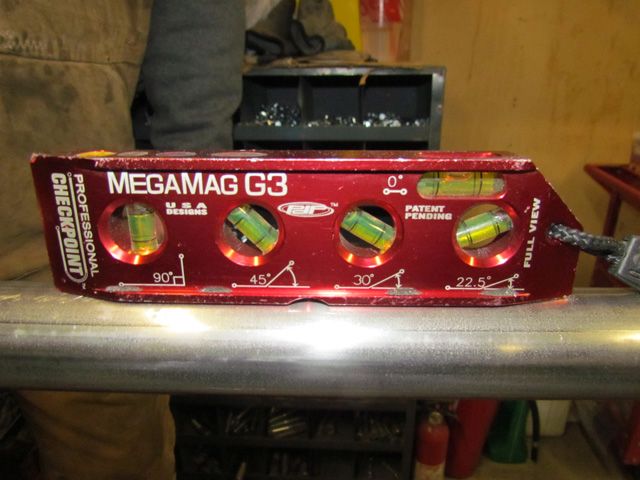
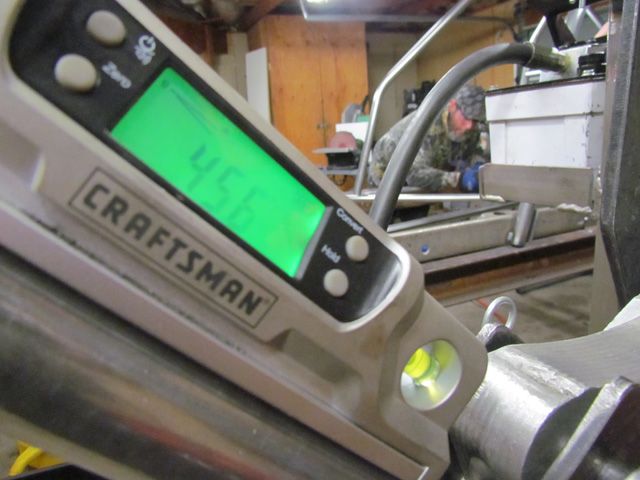
Years ago Rich saw the value of one of these digital levels. A bubble level is hard to use when you are trying to bend a tube at say 32 degrees. In this instance, the bending process is showing a 45.6 degree bend.
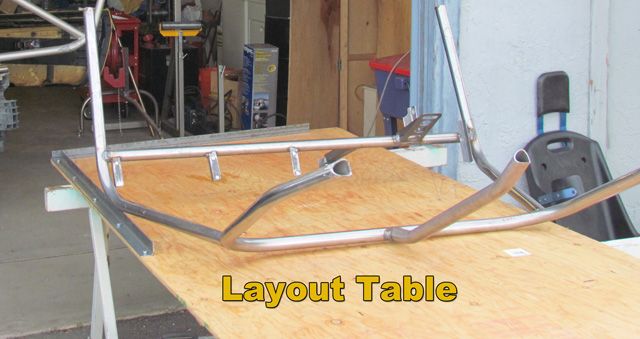
There's a lot of math involved in some of this. And you have additional considerations such as spring-back. But that's the basics of how Rich built the cage. Another trick was to build a "layout" table. Essentially that was a sheet of plywood with some angle iron pieces mounted at 90 degrees to each other. This allowed him to do layout and check the accuracy of 90 degree bends, offsets, and kicks.
We ran Star Specs on our Lemons Saab in '09, and not only did they survive the weekend we brought them back in '10. We holed a piston halfway through the second day (oops), and I have since put another ~1500 miles on them on the street. Great tire... really interested to see how the ZII compares.
One thing we caught onto real quick is how much pit time we saved by running good tires. We talked to teams that were going through two or three sets of lesser tires, having to pit in to swap and such. One good set of tires that you don't have to change over the course of the weekend saves a lot of time & effort. Especially since we were facing the same problem you were... lug nuts that were a PITA to get out of the wheels!
Any pictures? I tried a search on lemons, Saab, 2009.........
Rick's guys who drove the Mustang swore that the star specs totally transformed their car. When we drove the much harder DZ101 tires on Reno-Fernley, they lasted through the whole 24 hour race. But the track is so abrasive that at 8-9 hours in we did a full tire rotation and were very concerned about making the end. I know several teams with the softer Star Spec and RT-615Ks destroyed their tires that weekend. At the Track Formerly Known As Sears Point, the tires lasted much longer. I Believe the Mustang boys ran their set at Infineon in both LeMons and Chumpcar last year.
I actually don't have any pictures, but a quick search for "boxwrench garage saab lemons" turned up a number of hits, including our proud finishes - fourth at the Goin' For Broken Reno '09 and fifth at the Altamont '08 race. '10 at Infineon was our last race.... a holed motor & DNF made us sad, and then lives got in the way.
We took every ounce out the car we could and got down to about 2200lbs without the driver, so with 215-40-17s we were probably over-tired. We also put a lot of time into an aggressive alignment that I think really cut back on wear on the corners. My gut, though, is that the tire longevity was mostly a result of cutting weight... because we also did four races on one set of brake pads & rotors. :lol: Our car was pretty darned fast - on the front straight at Reno we'd crest 120mph pretty reliably. 16psi, some goofy cams, and an environment-be-damned approach to fueling (I mentioned our crap fuel economy earlier) does wonders... of course, you can now see through one of the pistons, but whatever. The 167,000 mile old engine did four races!
Prior to the Star Specs we were on BFG gforces and... something I don't remember... in 205/50-16 and 205/55-15. Count us in the "totally transformed" camp. I'm sure moving to 17s and wider tires helped, but the difference was stunning nonetheless. I will say that at no point have we ever changed tires mid-race, but only the Star Specs emerged out of Day 2 ready for more. The BFGs were done for hours before the race was over.
Holy cow! Look at all that room inside the Saab! Building a cage would have been a dream.
I did the search you recommended. I found a youtube video. That must have been a very early LeMons race. The car count looked as small as the track (by today's standards)
Fernley is a track where I can see you hitting 120 on that long front straight. You can enter the straight pretty darn fast once you learn how to take the last corner with the wide run-off. But getting the car down to 2200 lbs, everything works better when adding lightness. Changing the wheels to 17" is allowing us to up-size our tires as well. I'm confident that the size change and compound change will work very well.
So, the guys are selling that yellow '78 Mustang......... They have built a later, turbo 4 cylinder Mustang.
Re the cage: The second year we ran Lemons ('07) our car was pretty well destroyed. They didn't have rules back then like they do now. We got another car, and sawed the roof off of both of them and swapped the cage over. I was pretty impressed with our team mechanic / amateur welder guy. Really good with a wrench, but new to welding. He did a really great job!
I really enjoyed the Fernley race. Aside from being a pretty long haul from Sacramento it was by far and away the most interesting drive. It was cool to "race" at Infineon, just say to "Yeah, been there." but Fernley was downright fun.
I am not sure if I'll ever be able to get back in, but I hope so. You just can't beat the seat time:$$$ ratio. Not sure what car it would be, but I have my eyes on a friend's XR4Ti... I have lots of stock parts leftover from mine, so it could be a cheap build. If he doesn't do something with it soon (other than let it collect dust), I may just disappear it.
... but I have my eyes on a friend's XR4Ti... I have lots of stock parts leftover from mine, so it could be a cheap build. If he doesn't do something with it soon (other than let it collect dust), I may just disappear it.
I actually looked for an LeMony grade XR4Ti. My recollection from back in the day, they were considered a pretty hot car with an emphasis on handling. They have just enough character to be suitable for the task. But they only one I found was in So. Cal. and just too far away. And, as you alluded to, I saw a lot of less than encouraging reviews. If i recall, most were electrical problems. In any case, when they made the comment that Fieros never finish, that sounded like enough challenge to us.
We knew that we were pushing things by not having operating windshield wipers on the car. We had been to Infineon twice and not had any precipitation. But fog is always a serious consideration in the greater Bay area. Heck, we had to use wipers in the Reno desert while driving the Mustang in early 2011. We encountered both light rain and snow during that race. The closest we had come to a problem was when we left the car out overnight at the first race. A couple passes with a towel had taken care of that problem.
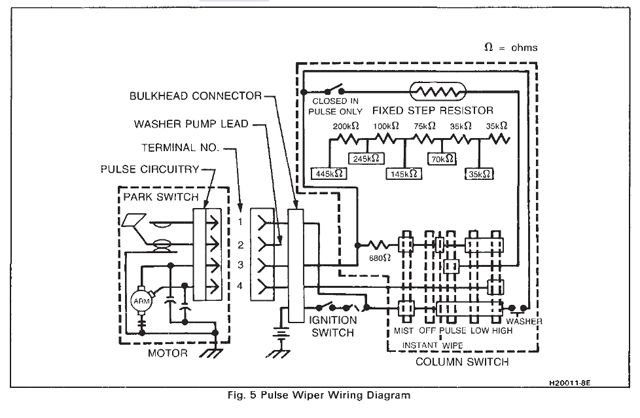
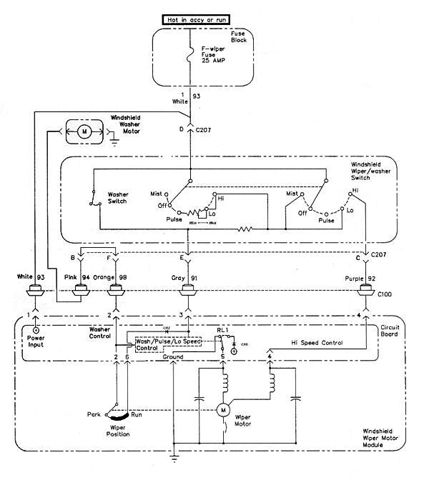
We had left the wiper motor and drives intact. We had removed the arms but had them in our supply boxes. And we had removed all the electrical circuits that ran the motor. The original thought was to just put a toggle switch in place to start the wiper motor. But just look at these diagrams. Where would you start?
As near as we could tell, if we try to use the delay function, we would be cutting out random fuel injectors. Or something. Nothing was straight-forward. We had the problem that we wanted to maintain the delay function as well as be able to run the washer's as needed.
In the Mustang, McSwiggen settled on just tie-wrapping the still functional wiper/cruise stalk to the dash bar.
Hmm? The plaid seat cover? Didn't I mention the official team uniform for our inaugural LeMons race?
That's right, we had kilts made up by a co-worker for the other team members. She did the work free, just to be able to take back the story of these macho fellow employees wearing skirts, uh, kilts. I was conveniently behind the camera. When we started our new team around the Fiero, Rich made me sign a statement that we would NOT be wearing kilts. I'm not sure where Robert came down on the issue.
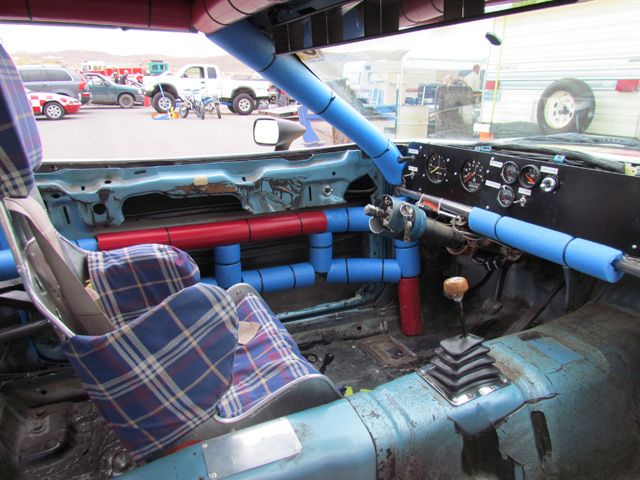
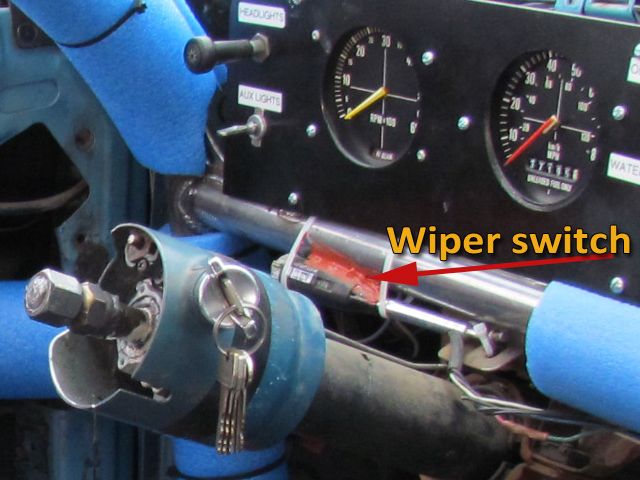
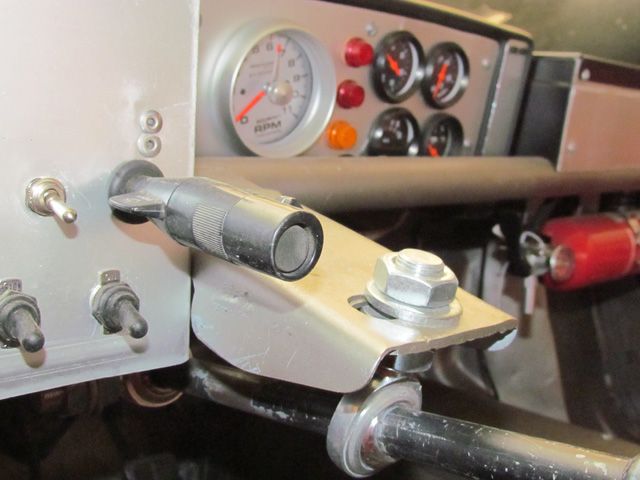
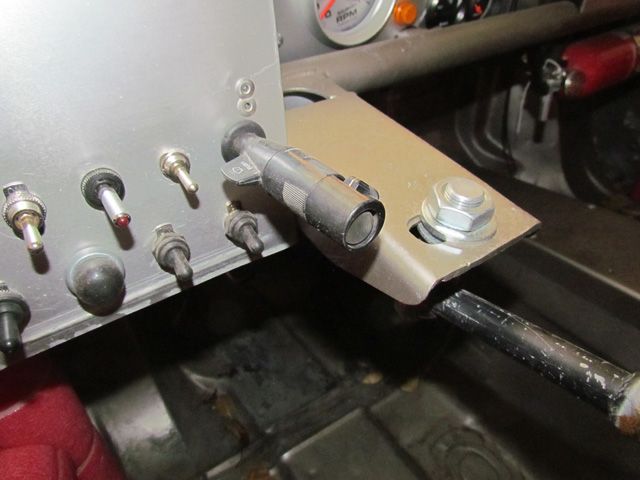
Anyway, back to the wiper controls. I think we spent a full evening trying to work out a schematic of various switches to get the functionality we wanted. It just wasn't that easy. So we considered using the stock stalk, as had the Mustang guys. But, besides being tacky, Robert would never be able to reach the controls. Finally, we settled on a compromise. We used the stalk, but mounted it in a way that it could be accessed.
We drilled a hole through the switch panel Rich had fabricated. The stalk was mounted through a rubber grommet on the inside of the hole and fastened to the back of the panel. Rich had earlier separated out the wiper/washer harness and integrated that into the harness we were now using. Robert could now reach the controls if needed. We also retained the ability to use the washer pump. Of course we didn't plan on actually using the wipers and used massive amounts of Rain-x at every event just to help deal with the normal debris
Thank you Pat. I hope there's some informative material. Done with the garage yet?
Don
Garage is nearly ready to accept the Fiero. I love the Uniforms! Did anyone actually "drive" in thier Kilt? The wiper solution is shear Genius! I must have missed it but I see that you have changed out the stock gauge's for some aftermarket unit's. Just keeps getting better!
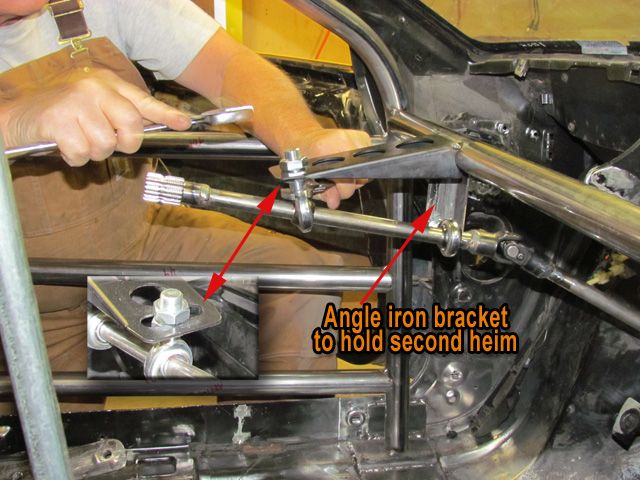
I have a few questions about the steering column. I beleive the stock colapsable part is the lower end that you used?
Did you use a bearing support at the fierwall? Something like this: or is it a straight shot from the second Heim to the rack?
Did you consider using one of these for the support? I'm thinking you went with the other bracket because it allowed you to set the wheel at the desired angle/distance for the driver(s). I'm thinking of using the one above with a Heim / u joint simialr to your setup. The support above is a little on the spendy side but I'm also going for a certain "look" as well. However, I really like the way you guys did yours - it's simple -functional and it looks good too!
I found this at Speedway too:
Did you consider using a "Quickener"? Something like this:
Thanks in advance!
Pat
[This message has been edited by katatak (edited 02-04-2013).]
It's not the kilts, it's all the extra stuff to make them work. Big bucks!
We did not use one of those bearing supports at the firewall. But we did use the stock plastic bellows piece to seal the hole around the shaft. That bearing is probably a good idea in that it allows for a greater distance between supports. That should minimize the leverage that the driver can exert on the whole assembly. We did tweak the brackets at our first race and subsequently boxed the support for strength.
Our choices were more driven by cost than aesthetics on this point. The brace and heim joint that we used cos $20. The nicer support that you show is $80 from Speedway. We are to cheap to go that route. And welding to the dash bar just seems right to us.
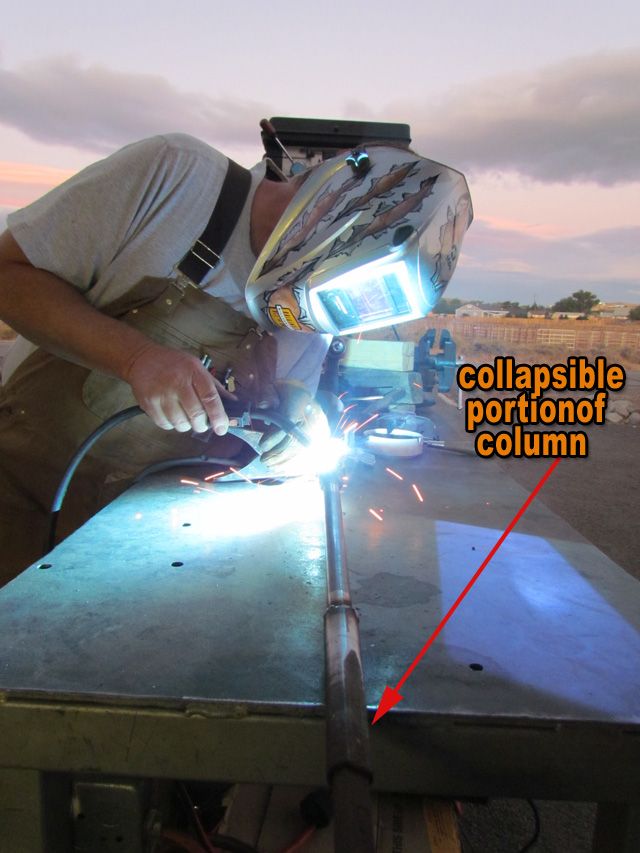
We just did a straight shot from the second heim, through the firewall and to the steering rack, We did weld in the collapsible portion of the column. This, combined with the angle from the rack to the first/lower heim should provide some safety in the case of a crash.
I would definitely like to use a steering quickener. Rich uses one on his IMCA and Doug and I have used them on our stock stub car. Loved it. The debate we have had is if one would work in this application without also adding a power steering rack. I know that a quickener would really be an asset when going through the chicane at Infineon. Rich is also concerned that the car may become too twitchy at speed on other parts of the track. I've driven at serious speeds with a quickener, and honestly it's presence just disappeared from thought when driving. We adapted very quickly and never thought of it again.
However I can tell you about a night that Rich was out of town several years (two decades?) ago. He let a friend drive his car during a race. It was enormously funny when the guy fishtailed down both straights trying to catch up with the steering quickener. Funny right until he backed into the concrete wall. But I chalk that up to a driver trying to prove something.
Your mileage may vary. But I like the steering quickeners.
The quickener is just a thought - I really would have no real use for it as this car may see a couple of trips around the local track at a "track day" event. I was just curious. Was not sure if it had to be used in conjunction with power steering or if it could be used with a manual rack (as in our Fiero's). I'm a newb at this twisty stuff!
I cannot state with any certainty that the quickener would require power steering in a Fiero. But I've read a couple threads here about needing power steering if you had a quicker rack. I do not know if the physical effort with a quickener is comparable to that using a faster rack. In our case, I would still like to add one to the car.


 Please do not stop posting. This is like crack to me.


 Oh and defend the inside!!!! I cant wait to get back out on a track. I hope to hit Road Atlanta with the 3800t 88 this summer.