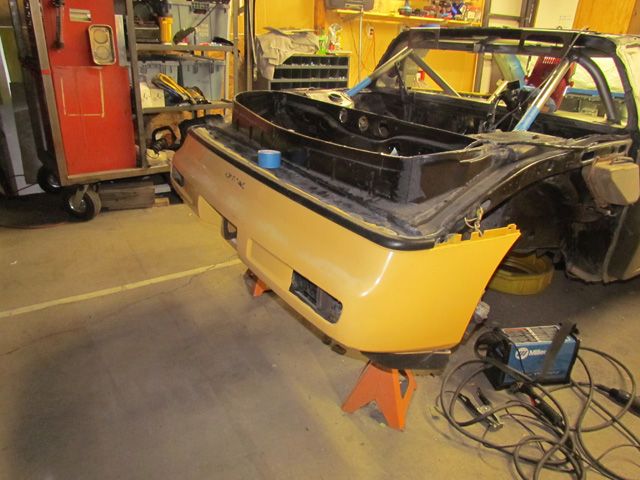
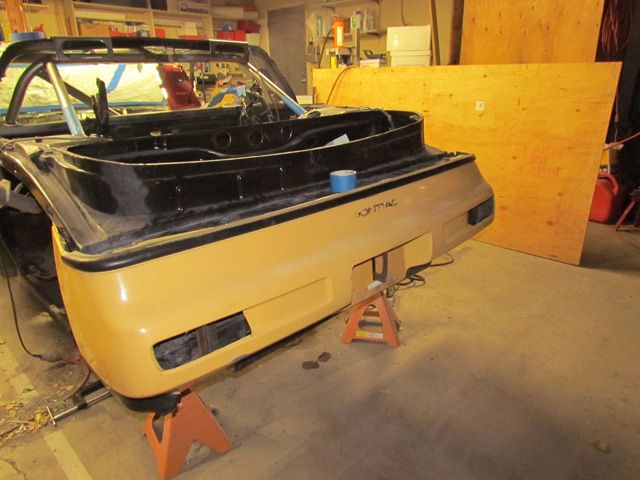
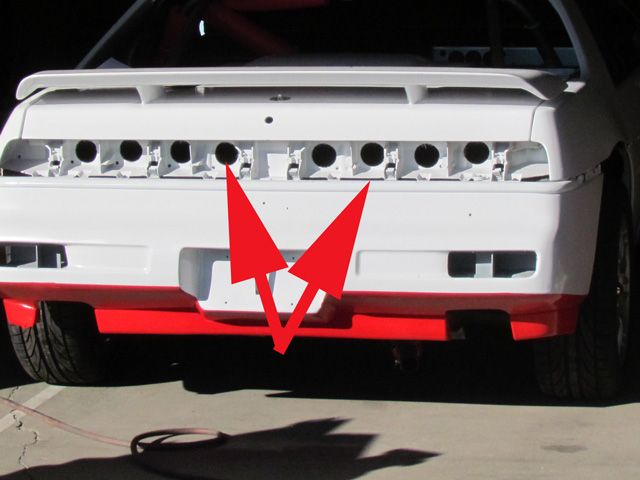
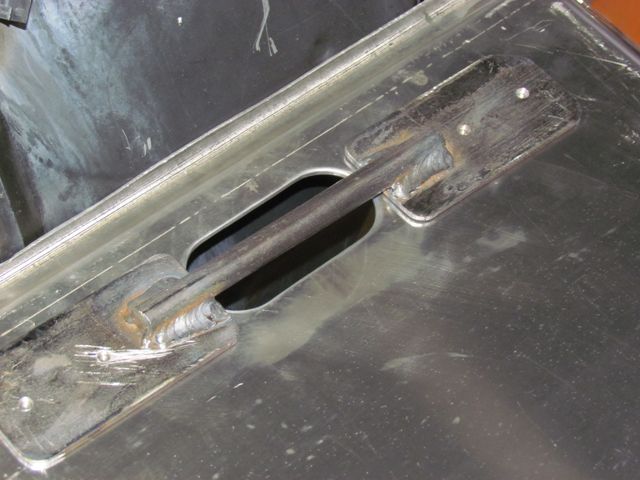
A little more detail on the rear bumper. The rules require a tow hook on both the front and back bumper. If you look at the picture below, you can see a hook coming through where the license plate would normally be mounted.
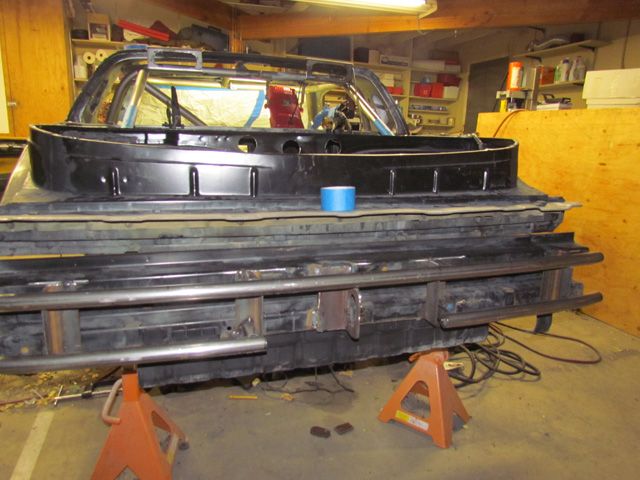
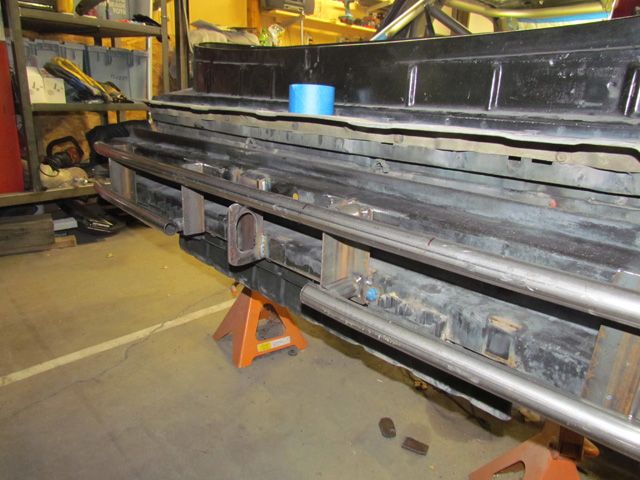
What we did was mount a large angle iron piece to the Fiero's original bumper back plate. That angle iron also tied into the upper bar that was our actual bumper. We used a plasma cutter to cut a large hole for a tow hook to engage. It was then pretty simple to cut a slot in the plastic bumper cover for the new hook to pass through.
We did a similar setup in the front with the plate being welded to the bumper bars and being exposed inside the aero nose air intake.
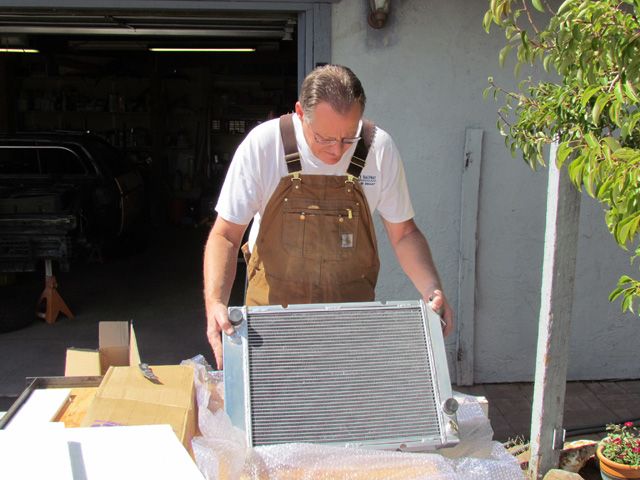
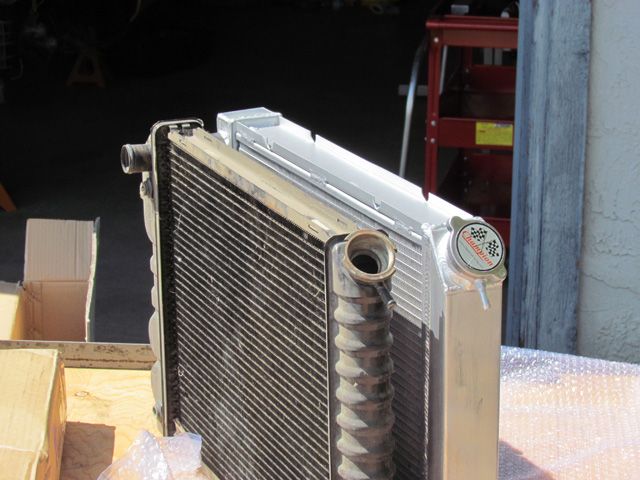
As with any track day car, cooling is a major concern. We followed a couple threads here concerning cooling issues. The Fiero system was totally new to us, but we searching on radiators yielded a few interesting threads.
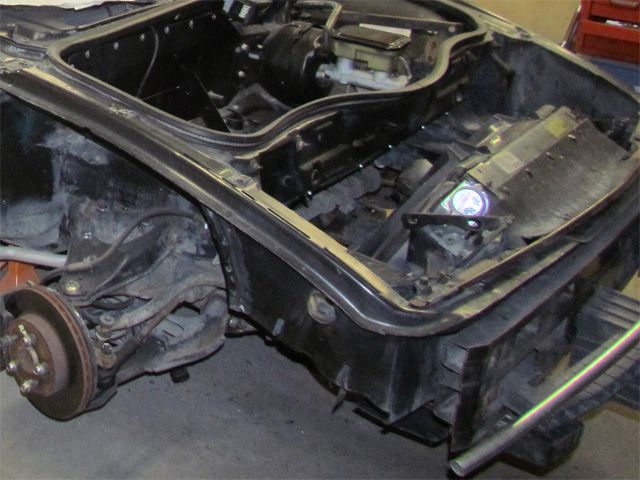
Piecing together many of the comments we have read here on the forum, it appears that cooling concerns go hand in hand with aero concerns. I read comments that the air rushing in through the radiator has nowhere to go. And looking at the area of the car, it appears the air flowing through the radiator is moving upward. It then hits the bulkhead and must change directions downwards under the car. The problem looks to be that the changing directions is hampered by more air flowing in through the radiator. I can guess that the airflow through the radiator fins is thus hampered by the build-up of pressure behind the radiator.
I read a couple comments here on the forum that there is enough pressure built up that by 90mph people were seeing the headlight covers lifting up. Our partial solution was to cut holes on each side of the front area into the wheel wells. Cannot say if this was a good move or not because of potential turbulence in the wheel wells, but we had hopes it would help with lift and cooling concerns.
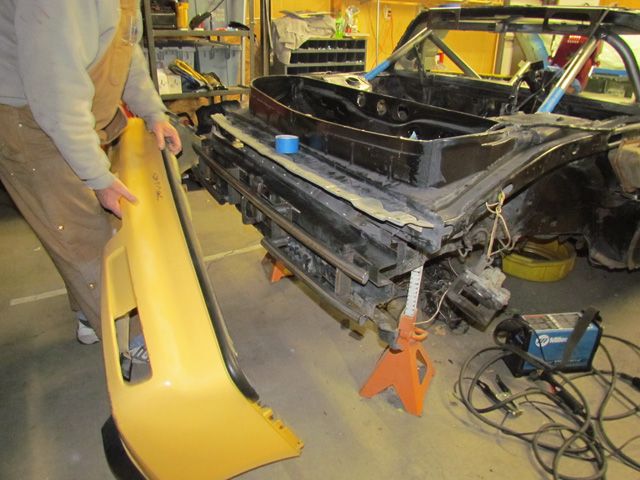
Our second level attempt to relieve air pressure build-up and promote cooling was to cut a couple holes through the bulkhead behind the radiator as well as the plastic tub. We hoped to relieve some air pressure into the spare tire compartment, promoting more air flow. From the spare tire compartment, we planned on venting through reliefs in the hood. Towards that end, we purchased a set of dies that would allow us to create louvers in sheet metal using Rich's bead roller. Rich has a bead roller manufactured by Lowbuck Tools. http://www.lowbucktools.com/beadroller.html Typically you use a bead roller to put those fancy ridges you see in sheet metal pieces. This creates significantly stronger and stiffer pieces.
So we cut out the three single layer portions of the hood, Made aluminum sheet metal pieces to fit, and rolled in some louvers. Cool! Or it would have been if it worked. They didn't cut cleanly and just didn't work. In large part because of the size of the sheet metal we were using.
I'm jumping ahead here, but we attempted to create the louvered pieces the day before we had to leave for our first race. We were left with only enough time to put flat pieces back in and drill several holes .
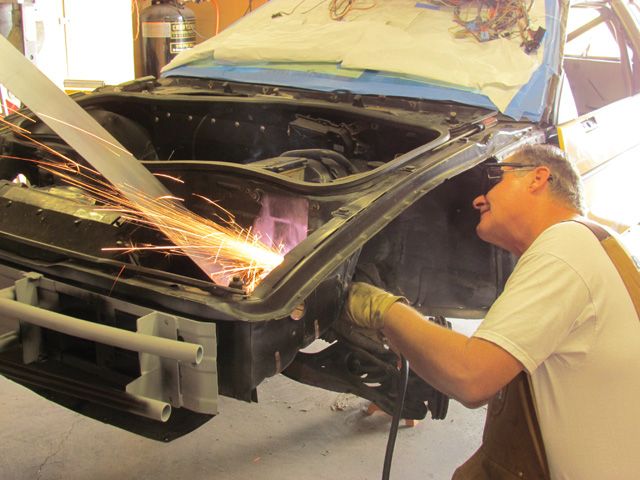
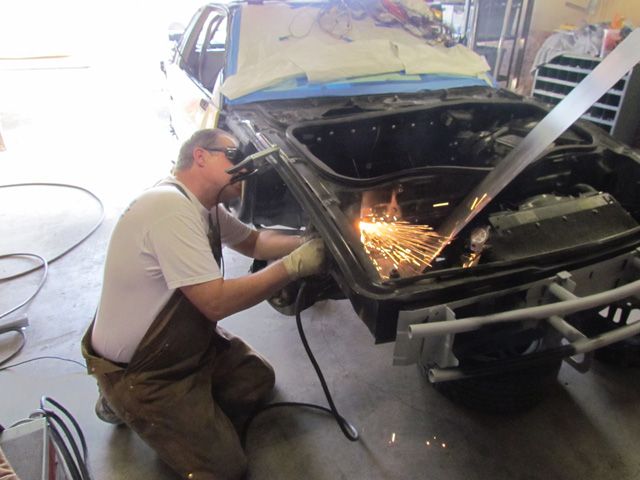
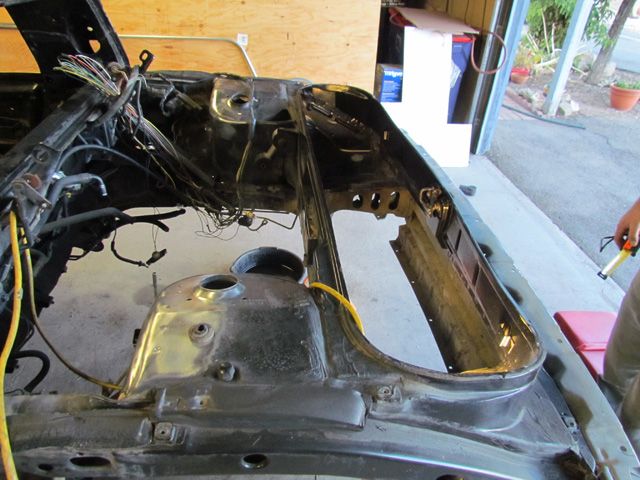
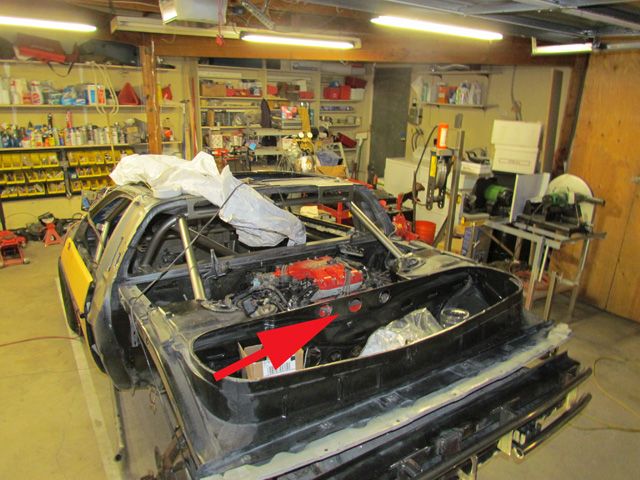
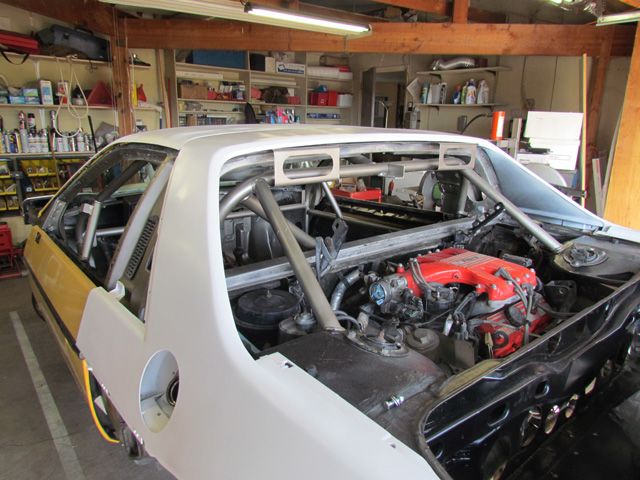
We also had some work to do at the back of the car. It was obvious that we would be modifying the exhaust. And it appeared that the trunk stopped the air flow through the engine bay. We hoped that removing the trunk would help keep things cool. So Robert cut out the trunk
I do not show it, but we placed a piece of aluminum over the opening left by removing the trunk. The sheet metal had a couple bead rolls put in it for strength and was riveted in place.
Most of the small screws used in building the car were replaced with rivets. For example, the small screws holding the engine bay heat shield on were replaced with rivets. Where possible, the small bolts holding body panels such as the front valence were attached with pop rivets. The reason being that pop rivets are far less likely to fail and fall out than screws. They can be drilled out but are less likely to fail.
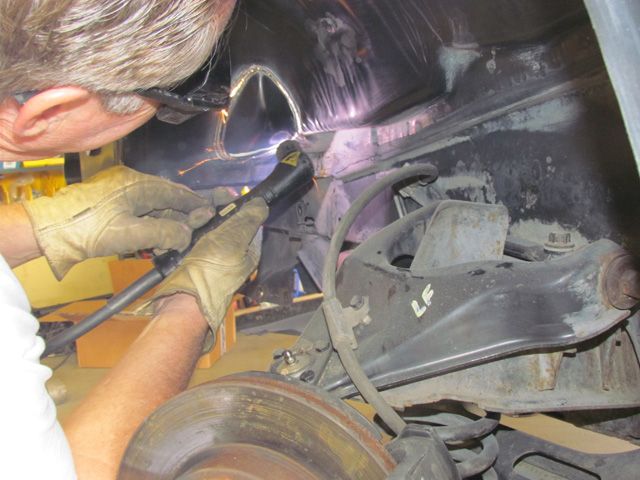
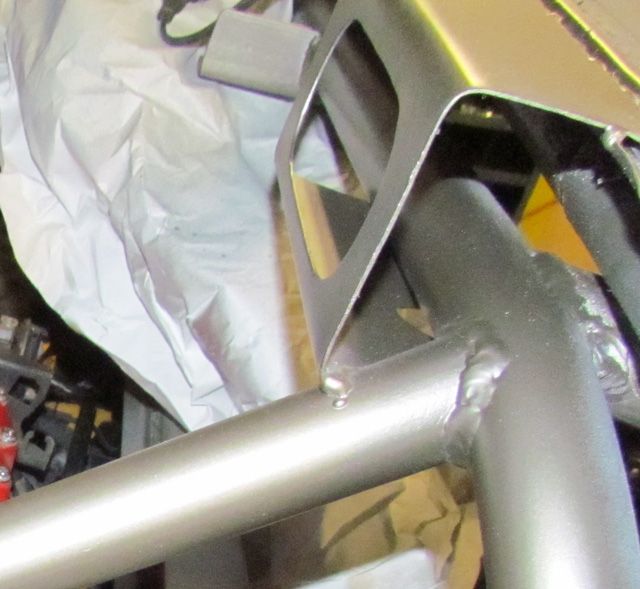
The next thing we did in the back was to add a brace to the stock dog-bone. We had observed quite a bit of movement using the regular dog-bone. So we welded in a small piece of tubing to brace the bulkhead near the dog-bone.
If you look at the following photo, you can see that we drilled a couple holes through the bulkhead into the trunk. This was followed up by drilling holes through the rearmost trunk bulkhead and the body panels. It's our hope that this will promote even more airflow through the engine compartment and aid in cooling Might work.
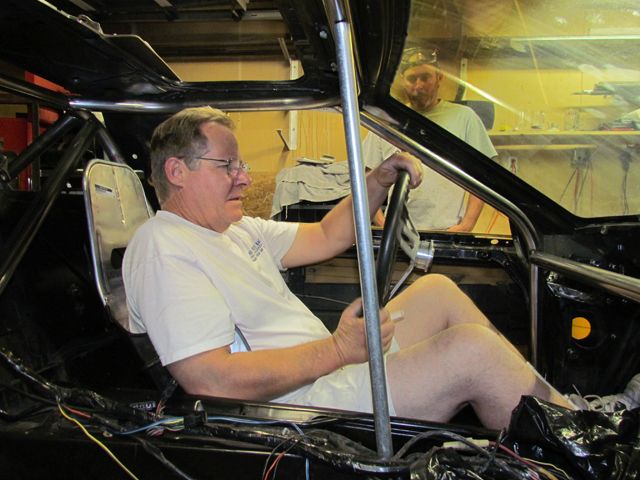
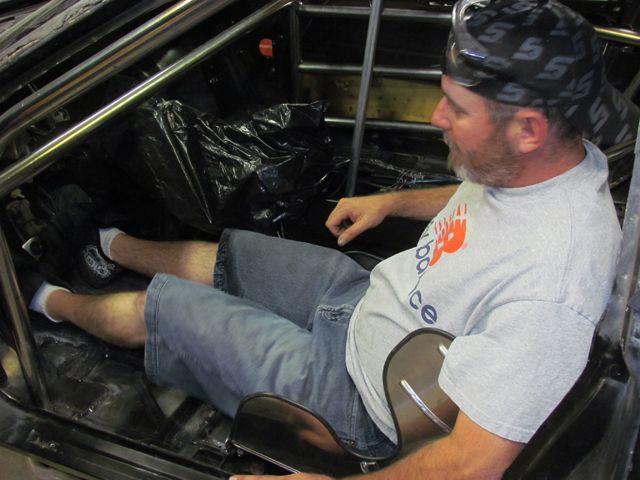
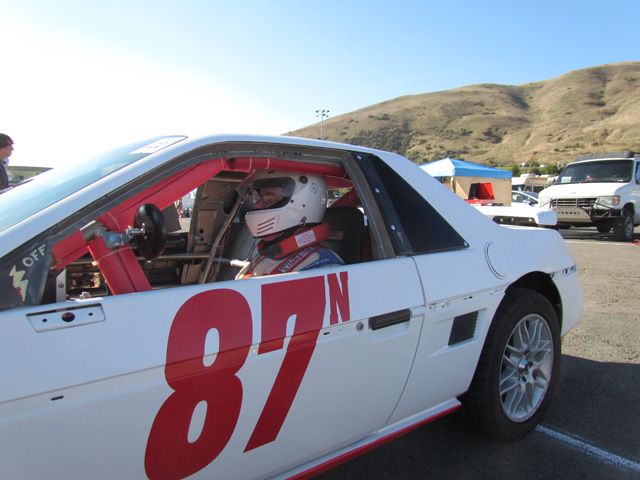
One of the more difficult things was making a seat mount. We had already settled on a specific Kirkey seat early on in the build. At $165 it wasn't the most expensive seat, but should serve us well. The problem came in designing how it would be mounted. In Rich's IMCA, it's easy to make the decision on how to mount the seat. It has to fit him and him alone. In this case, our tallest driver is 6'$'', I'm 6'2" and Robert is like 5'9" or 10" (sorry Robert, I'm just guessing.)
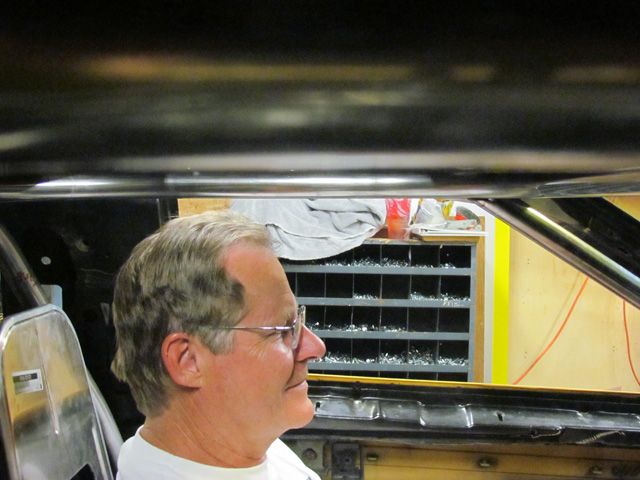
Remember Rich's headroom?
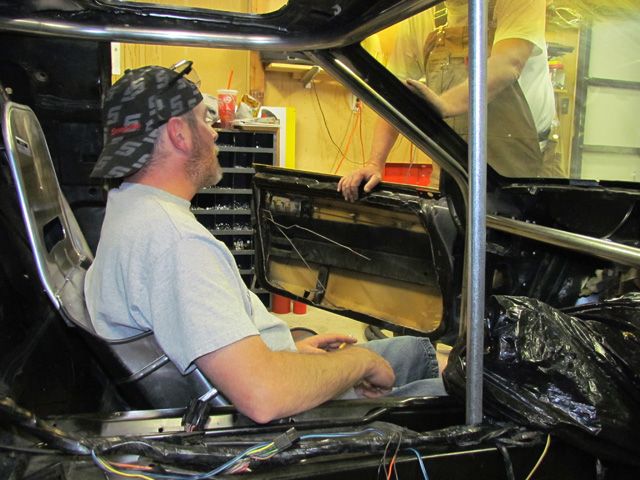
Robert's Headroom. Check out how high the seat back comes on each of them.
But more to the point, check out the leg room between the two.
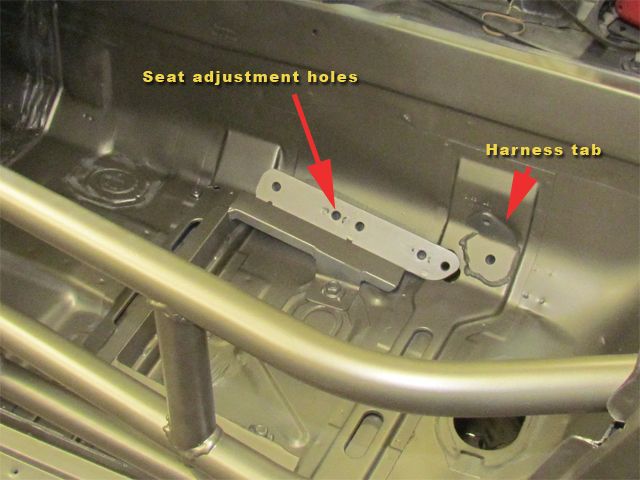
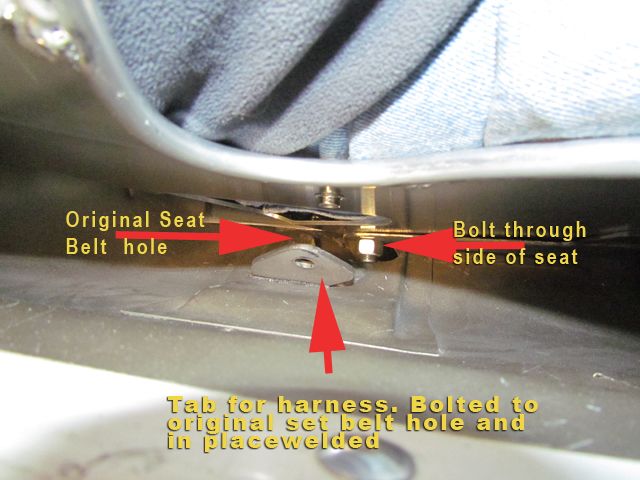
Obviously we needed to make the seat mount adjustable. Kirkey does make an adjustable seat mount, but using that mount would make Rich's head too high. We had to make our own. I failed to get a clear picture of the seat bracket on its' own. But I think you can see what we did in the following pictures. Basically, we have a couple 1/2" holes going through the side of the seat. These mate up with holes in the side of the bracket. When we have to move the seat for a shorter driver, we remove the bolts and select a pair of holes positioned for him. Yup, it's a pain but quickly done with air tools. We aren't talking Grand Am speed driver changes here. It also dictates the order for the drivers in order to minimize the number of changes in a given day. All bolts were grade 8 as required.
We used flanged nuts that could be welded to the outside of the mount. That kept the nuts locked in place instead of having to hold the nuts while moving the seat.
I point out the detail of where the safety harness is attached. For the submarine strap, we have a brace attached directly to the seat. So the strap moves with the seat when we adjust the mounting position. A submarine strap is essential in any racing application. When Rich hit a concrete wall two years ago inhis IMCA, he couldn't walk straight for two days, but he didn't slide under the lap belt and do far damage to himself. It's hard to credit the guys running without a sub strap.
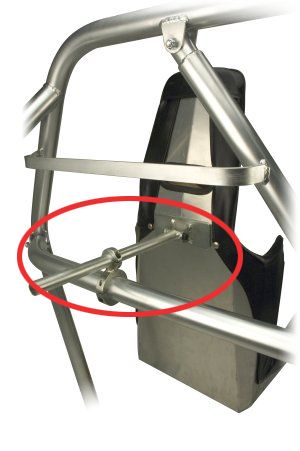
The next problem would not really be a problem in most other cars. he rules require a brace between the back of the seat and the cross bar of the cage. You can pick up an item similar to the image below. But with the bulkhead being literally an inch away from the cross bar, you can see the problem making an adjustable brace. we followed the same concept but made the pieces to fit the tight confines. An earlier picture with the main hoop out of the car showed 1/2 of the piece we made up.
We purchased a cam-lock style safety harness from Summit Racing. The cam lock is definitely the preferred mechanism because it's so much easier to use than the older over-center latch style. We looked at several and chose the G-Force harness http://www.summitracing.com...gfr-7100bk/overview/
You know they catch fire. I know that's a bit of a joke with some truth behind it. Reading several posts here on the forum, we see that the Fiero oiling system has received most of the blame for engine fires. Pontiac sent out a notice or something telling owners to add more oil than was originally specified. And we even saw some discussion the hard cornering can result in the oil pump pick-up tube being exposed sucking air instead of oil. Bad news.
Unfortunately, engine modifications are definitely covered in the $500 car value limitations for LeMons racing. Safety stuff like cages, safety harnesses, wheels and tires and the like are pretty much open. But "racing parts" are definitely limited. That means that we cannot convert our Fiero to a dry sump oiling system to fix the problem. That and the fact that we couldn't afford to do so even if it was allowed. And we could not follow the "chariot of Fire" builder's lead and use an accusump. It's just too expensive and looks too much like a go fast racing accessory.
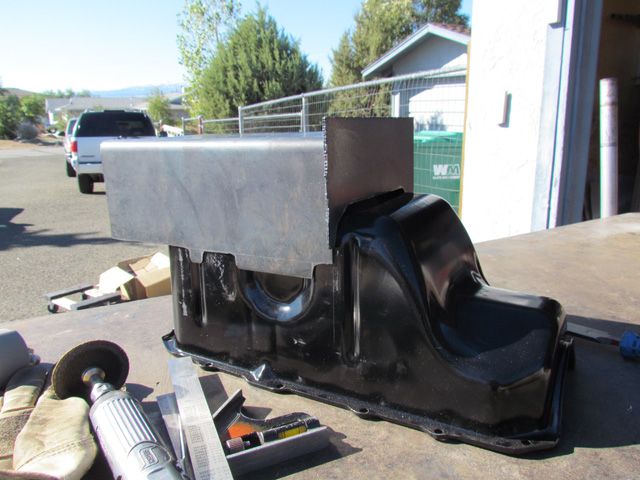
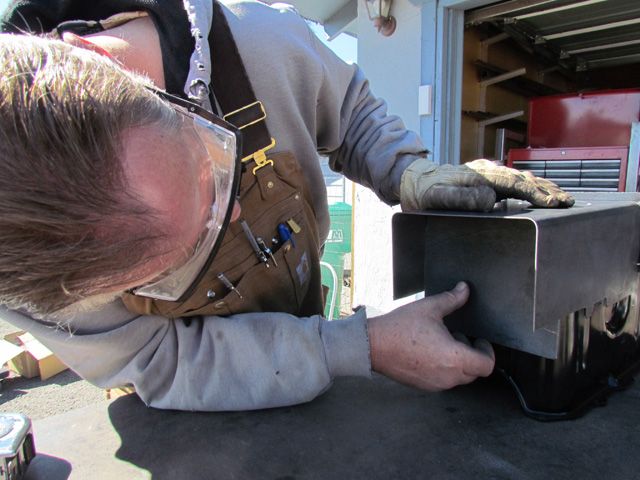
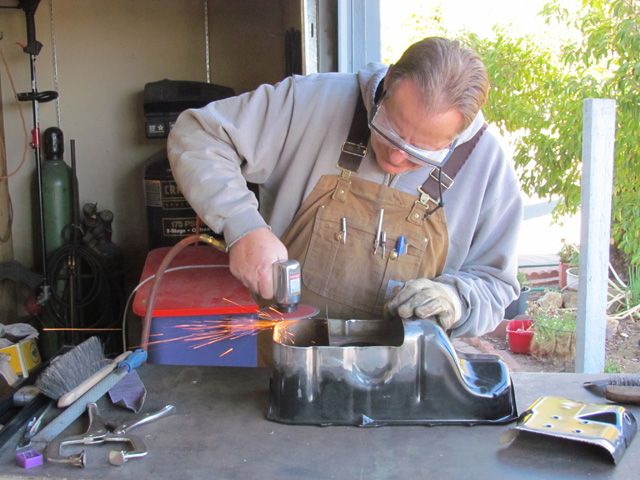
We have access to an accusump from a car we ran in the '90s, but there's no way to cheat and hide one of those things! We thought about getting an aftermarket oil pan with a deeper sump. But racing parts for the Fiero are a bit hard to find. And again, the budget thing kicks in. What we can do is make our own oil pan. That's in keeping with the spirit of the LeMons series. Home-built jury-rigged solutions are encouraged.
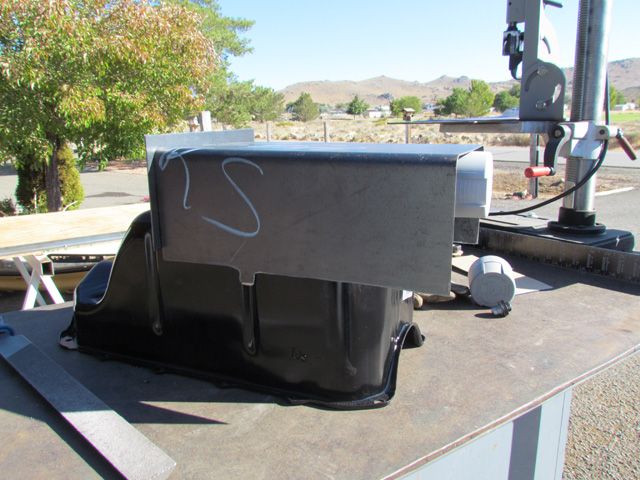
We started with the oil pan off the engine. Measurements indicated that we might be marginally safe with adding two inches of depth to the pan.
Our custom precision spacer, a paint can lid.
We picked up an oil pan baffle kit with a hinged gate for a couple bucks. I think it was from either Summit Racing or Speedway motors. Our intent was to not only have a deeper sump, but attempt to control the movement of oil to keep the pick-up covered.
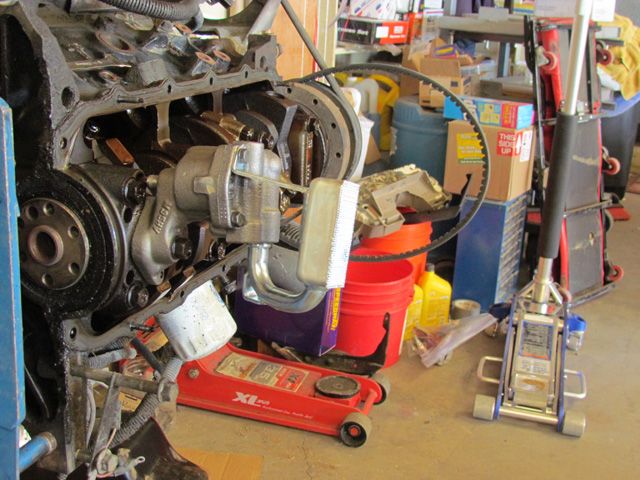
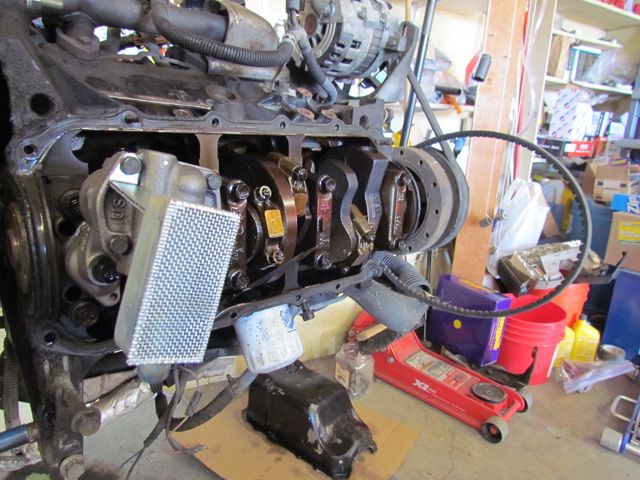
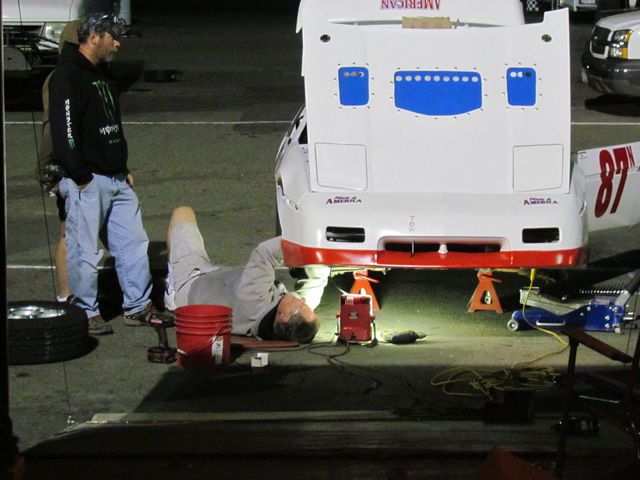
Our engine work consisted of changing the water pump, replacing belts and hoses, valve cover gaskets and oil pump. We elected to go with a Melling high volume pump. Rich spent a day looking at different pick-up tubes to fit not only the pump but the re-configured pan. We carefully averted our eyes as far as the condition of the rest of the engine.
A couple weeks prior to our first race, Pick-n-Pull had a 1/2 price weekend sale. We picked up a 2.8 and 5-speed for just over $200. since we had doubts about our original engine (remember no oil on the dipstick when we purchased it?) we decided it was smarter to use the new engine. Besides, Pick-n-Pull gave us a 90 day warranty, meaning that we would be running our first race on a warrantied engine. We could exchange the engine if it blew up!
Did you know that the '86 engine uses a different oil pan than the '88? Rich made another pan.
We really were running out of time, but, you know you have to look for an advantage. I know that the Mustang II suspension is used in a lot of different applications from street rods to track cars. Would it fit a Fiero? The driving reason we considered this type of change was the horror stories we had read concerning the '88 front spindles not holding up to the demands of a track car. The '88 hubs that are available reportedly give out after as little as a few hours on the track (The new Rodney Dickman hubs were not available and may only be available shortly after writing this.) Our concern was that we had one hub that didn't feel right.
We kicked the issue around a bit. And I found a post here on the forum from 2000 where member Will casually mentioned that he was working on a kit to change over to a Mustang II front suspension. The second post in this thread https://www.fiero.nl/forum/A...010706-2-006580.html I pm'd Will and found that he had stopped work on this change after encountering a few issues. I'm still of the opinion that we can engineer a way to add the Mustang II suspension in the future. But the geometry will have to be worked out in our suspension modeling program. Here on the forum, there's been a lot of discussion on creating accurate models of the '88 Fiero. I believe Bloozberry and FieroGuru have done a lot of this work and I'm hoping that they will allow us access to their technical drawings in the future. I think there's a lot of potential to change the front suspension for track day use.
In the short term, we found a couple of used '88 hubs out of a yard in Oregon. We replaced the suspect hub assembly and had a spare to take to the track.
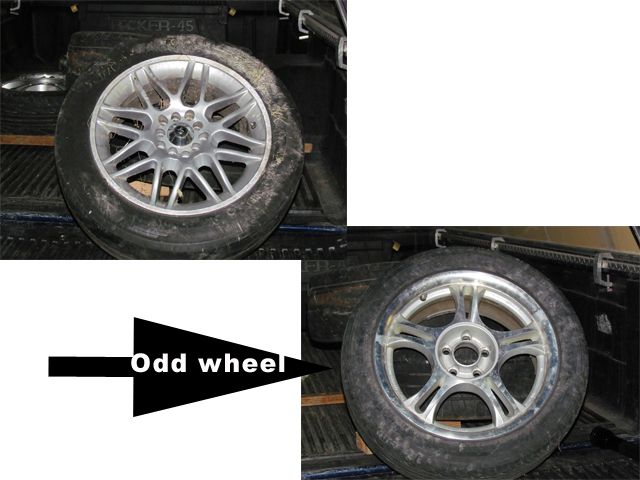
We also managed to round up a couple wheels. The car was purchased with a set of 14" wheels, and we located some 15" replacements. Unfortunately, under our budget, we had to settle for 3 wheels that matched and 1 that was totally different. But what can you say about a $55 purchase. We learned about "tuner" lug nuts. Not a desirable thing .
We purchased new upper ball joints from Rodney Dickman, as well as his shifter rebuild kit for the Getrag. If I remember correctly, we purchased the lower ball joints at Napa because Dickman was out of the lower ball joints. Ultimately that was a mistake that we didn't realize until the first race. More on that later. After a visual inspection, we decided to leave the tie-rod ends alone.
Luckily, the hubs that we purchased from the wrecking yard in Oregon had the uprights still attached. One of our original uprights needed to have the lower ball joint taper cleaned up. Rich had the proper tapered reamers to do this. Unfortunately I reamed out the hole to fit the wrong ball joint. Once it's reamed out too large, well you're out of luck. I was able to save some pride by doing the replacement correctly.
[This message has been edited by DonP (edited 01-03-2013).]
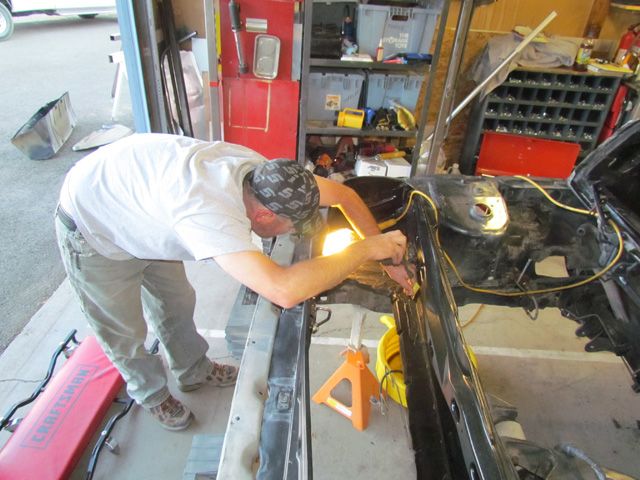
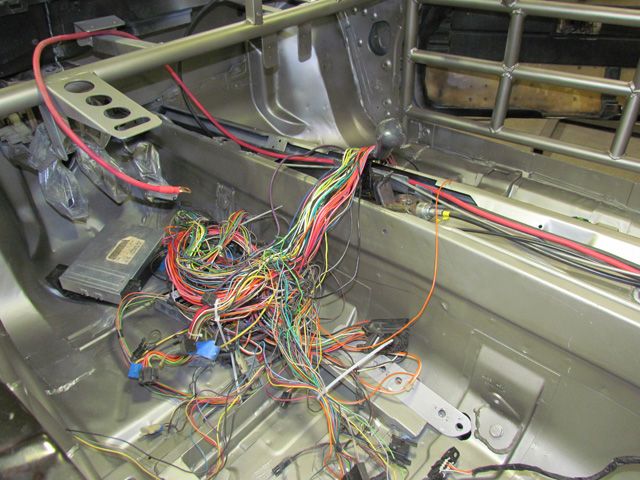
The race was fast approaching, and one of the most challenging job was still ahead of us. The wiring. We spent quite a bit of time researching wiring diagrams and direction. But how hard could it be once we bought a Chiltons manual?
We had put it off far too long, so Rich started work on the harness. We wanted to trim out any extra circuits and isolate all those we really needed.
Rich did make the choice early on to keep the original fuse panel. But that didn't mean he wouldn't be changing stuff around.
Thankfully we had marked as many of the connectors as possible when we were taking everything apart.
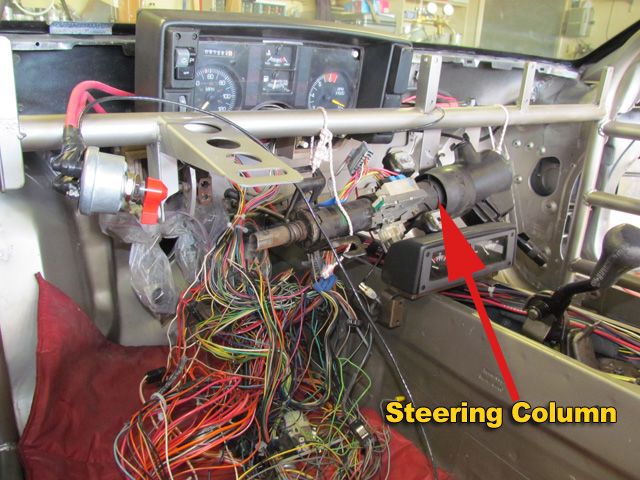
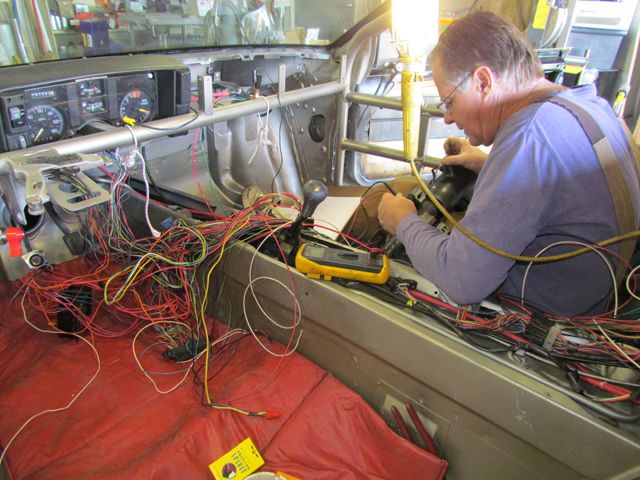
Here he's hooked back into the stock steering column trying to confirm what circuits would be necessary. Our plan of attack was to install the engine back into the car. Start the engine and make sure everything worked. And eliminate circuits that were no longer necessary while still having a working car. Hey, this wasn't our first wiring rodeo!
All I can say is I'm glad Rich is a certified electrician. The down side is that his work is too , ahem, immaculate. By actual count, we have 4,012 tie wraps holding the wiring harness together. And I'm positive we used at least half as many that were cut off and discarded as the harness was built. Once the actual wiring started, Rich opened a previously never opened drawer on his tool box and pulled out a set of dykes Robert and I had never seen. He tried to hide which drawer he opened, but we did peek. We were not allowed to touch them. Okay, I hope most of you are at least smiling, but I'm sure some of you electricians or even machinists know exactly what I'm talking about here. I'm sure Phonedawgs, FieroFlyer and Nosrac have their special tools.
Rich also sharpened the blades on his wire tie gun. Talk to any electrician and they will have a tie wrap gun. Most of us just pull the tie wrap tight (maybe too tight) and whack the end off with a pair of dykes. The reasons the electrician folks use a tie wrap gun is to get a consistent tension, save their fingers from pulling all those ties tight and to avoid leaving sharp ends. If you cut a tie with a pair of dykes, the end of the strap will be sharp and likely to scratch you when working with the harness. The gun leaves a duller end, not likely to scratch. Remember, we have 4,012 possible points trying to scratch us on our harness.
Tie wrap gun
[This message has been edited by DonP (edited 01-06-2013).]
Yeah, the boss isn't usually too open to leaving work because of blood loss caused by tie wraps. I picked up on the statement that you too have some tools hidden away. So you understand!
Rich saw the picture above of the tie wrap gun and decided he needs to upgrade his old one. I cannot believe how expensive the really good ones are.
[This message has been edited by DonP (edited 01-05-2013).]
Okay, lets get down to the really important stuff.
A roll cage may help prevent bodily injury and death.
A fire extinguisher, within reach of the driver, may be helpful in preventing 2nd and 3rd degree burns, long burn rehabilitation exercises and scars.
Brakes may be helpful in keeping us from answering the ages long question regarding immovable objects and irresistible forces.
And a proper helmet can help once again help prevent death and disfigurement.
But what's the really important question about a new race car? What is it going to look like, that's what!
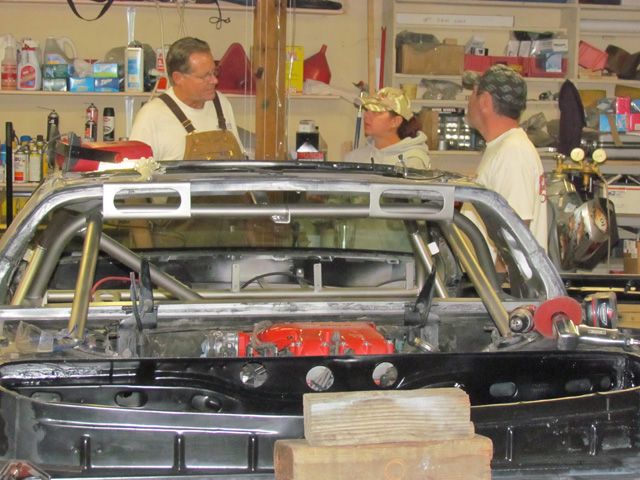
Because of the way the Fiero is constructed and can be disassembled it's easy enough to start the job of painting the car even before the mechanicals are done. So while Rich was busy with the wiring, and I had my hands full with sweeping the floor, Robert drew the task of painting the car.
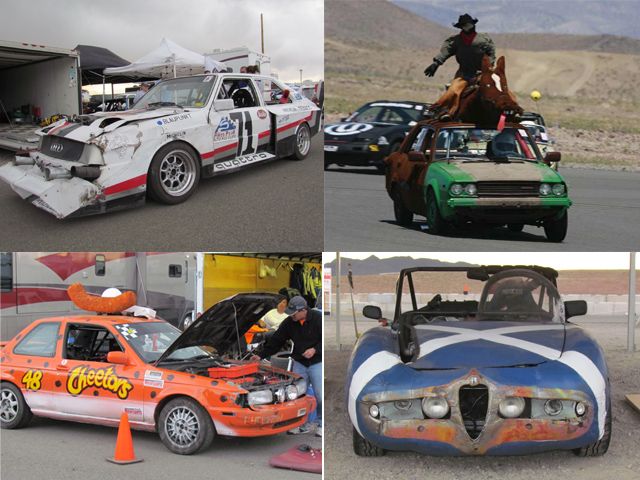
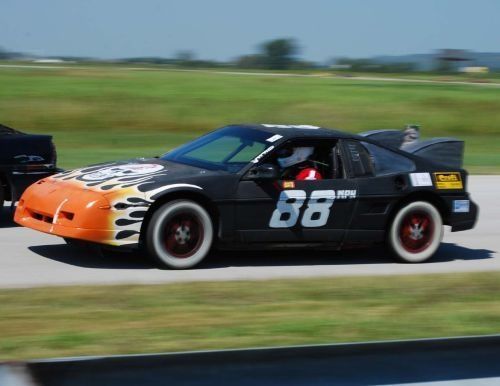
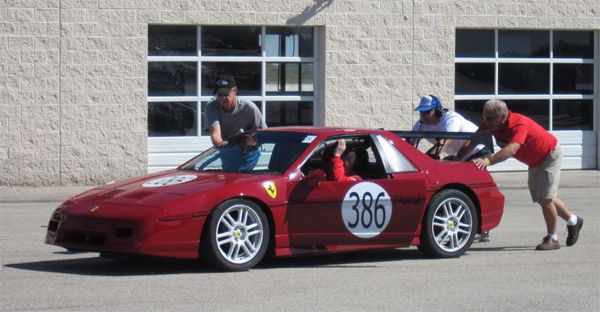
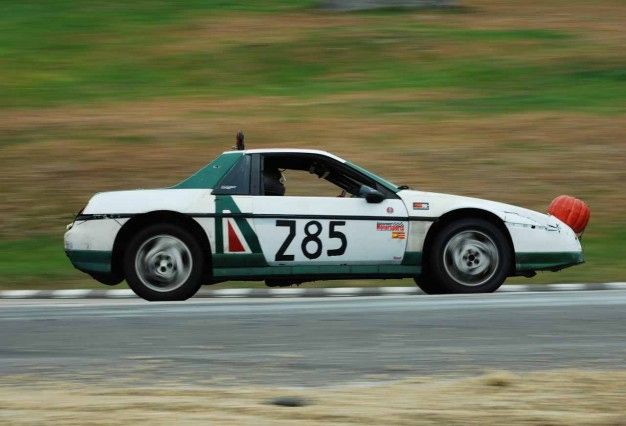
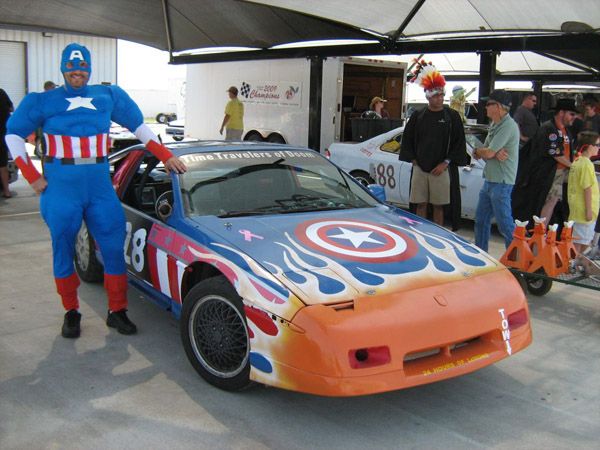
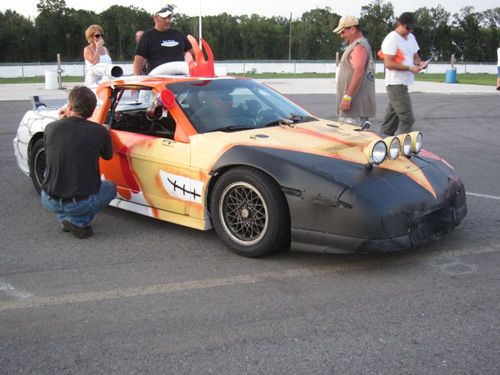
But where do you draw inspiration from. You gotta remember, this is the 24 hours of LeMons. That means the options are unending. Let me give you a few examples. Check closely in the upper right of the first picture. The 444 car has a star trek theme going. And the farther car has Wiley E. Coyote on a rocket.
And what I consider to be one of the most inspired LeMons car of the modern age.
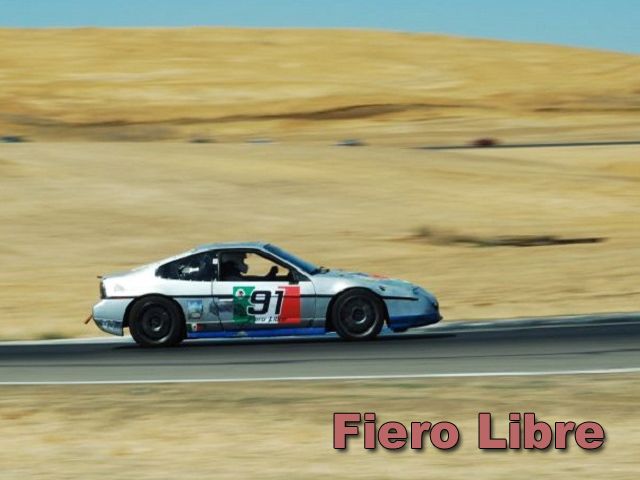
On the Fiero side, several have been entered in the Lemons and Chumpcar events. I've referenced the great looking Chariot of fire car out of Oregon who set the bar for looks and theme. https://www.fiero.nl/forum/Forum1/HTML/083726.html The Team is KissMyTaillightsRacing comes close https://www.fiero.nl/forum/Forum1/HTML/090000.html. As a side note, the third post on that thread (by me) shows the drivers of the FieroLibre car in the next photo.
Please excuse my taking a slight detour on the build, but I've collected images of a few other participants.
Do a Google search on Fiero 24 hours of LeMons and you'll find a bunch more.
I don't want to give the impression that the races are a joke. We all take them seriously. But the "themes" are a way to try to keep things in perspective. Be serious, be safe, have fun. You're probably not going to win anyway.
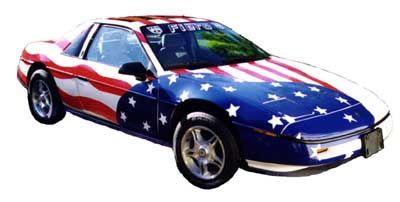
To be honest, we don't have enough imagination or balls to attempt some of the more imaginative stuff. But we did see a US flag motif on a Fiero that we could live with. Our LeMons theme would be "American Iron... uh, Plastic" I started a thread trying to find that original flag inspired theme and saw some really beautiful work https://www.fiero.nl/forum/Forum1/HTML/087054.html But we ultimately were referred to our original inspiration.
Robert had to get real busy with less than two weeks until the first race.
[This message has been edited by DonP (edited 01-05-2013).]
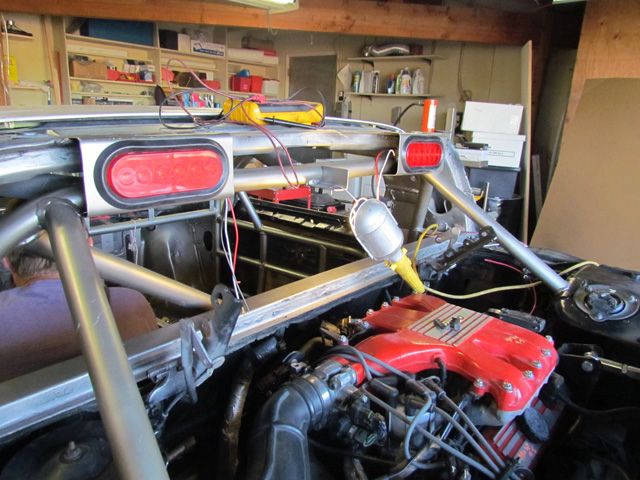
We wanted to make sure that we had good brake lights on the car. Using the stock lights didn't strike us as a great idea. They are just too exposed to contact damages. So we decided to adapt some LED lights. The mounting choice that appealed to us was high and at the top of cage. We bent up some sheet metal to fit the area between the top of the main hoop and the top of the passenger compartment. And we cut (and filed and filed and filed) the appropriate opening to accomodate a pair of rectangular LED brake/tail lights.
I can definitely report that the placement of the lights as well as the selection of LEDS was a great choice. In fact, we could pick out our brake lights the full length of Sears Point raceway. Very effective.
On the subject of brakes, we spent a lot of time following threads here on PFF concerning brakes. I believe in brakes, and am willing to spend money on them. Brakes are not calculated into the $500 value of the car. There's definitely a dearth of aftermarket brake components available for the Fiero. I spent time at Summit trying to find something to work with, and went away empty handed. The only thing we could find was a set of EBC brake pads, and they were advertised as street pads. Finally, with time running short, we followed the most common recommendation here on the PFF.
We purchased the Wagner Thermo-quiet MX-378 brake pads. Yes they are standard street brake pads. I can testify that they work great under race conditions. We could out-brake many other cars with no fears. Today, with 4 race weekends, a couple open track days and a couple auto-crosses in the bank, we are still running the same set and will just be taking a new set to the next race as back-ups.
We did remove the parking brake hardware off the rear disc setup. I was totally lost and thought I had ruined the calipers when I could not retract the pistons. Luckily, harbor freight is just down the street and they had the solution. http://www.harborfreight.co...ston-tool-68972.html
We did go with hi temp brake fluid as well. We purchased DOT 5.1 glycol based brake fluid (not DOT 5 Silicone based) with a 518 degree (dry) boiling point and 190 degree wet boiling point. It's expensive, but we flushed the whole system and it seems to work well. Obviously we replaced all the hoses as well. We elected to go with quality standard rubber hoses, not the braided stuff. The braided hoses scream "race-car" a little too loudly and promote a tighter scrutiny of the rest of the car.
As things progress, we may want to change our brake system. But only after problems start to manifest themselves. The stock brakes are great.
Holy smokes! I've been too darn busy to be on the forum much lately, but boy did I drop in at a great time. This thread is awesome! Takes me back to building our car. One of my favorite things about having these race car build threads on here is that everyone can pick and choose different little things they want from each build, and contribute a few ideas of their own. I'm glad our build was inspirational in ways. There's a couple things you've done that would improve our car... I might be making some improvements myself. Having read through everything up to this point, I have a few thoughts.
Your base plates and flat floor strategy look great. We built little platforms for flatten out the floor, and spread the load. We took the "Drop the cage" method, so we also had some holes to cover up. The way we built our cage meant there was no way we could have worked it in and out of the door openings like you did. That's pretty spectacular that you were able to do that.
We left the stock bumper bars, egg crate and everything inside the facias. I think the Chariot of Fire guys may have done what you referenced. We eventually modified the rear bumper guts, but not after a bit of on-track modification necessitated it. I like your rail-type bumper bars. If we ever get around to rethinking our bumpers, I will be inclined to do it that way.
Words cannot describe how difficult it is to get a racing seat mounted in a Fiero to accomodate tall vs. regular drivers, AND get the helmet height right. We've got a modified regular seat for the time being, but we're looking for a replacement. Using some measurements we've taken, I think we might have come to the same conclusion as you, and the Kirkey 17" width looks like a winner.
You oil pan is so trick. I like that a lot. Putting some trap doors in is a real smart idea. We've yet to find any oil starvation issues, but you can't be too cautious. The extra capacity looks good too. We always fill ours a tad more than "full" so maybe that's a benefit.
We have scored many a deal during the half-priced yard sales here. We built our 3.1L replacement motor using a low-miles shortblock sourced during one of those sales. Can't argue with a $94 shortblock in as good condition as we found. Some crafty work here and there netted us a strong running motor put together on the cheap. When we were there grabbing that engine, I saw a couple other crapcan teams from both ChumpCar and LeMons sourcing parts. It's an addiction alright.
I'm glad you kept count of your zip-ties. We may be over that number, but it's gotta be close. My mother made the team a "Certified Zip-tie Mechanics" banner we hang in our pit stall. Anything and everything can be somehow fixed with 'em. I'm really jealous of the tie wrap trimmer gun. I may have to invest in one of those. Snagging my skin or race suit on sharp ends is a PAIN.
I had not seen some of those Fiero crapcan racers prior to reading this thread. That's great to see the different ideas some folks have come up with.
If you have the chance to make it up to Portland for a race, you've got a huge group of loyal fans up here who would be willing to help. My team is based in the Portland area, and my buddy Damian (thedrue here on the forum) is in the middle of building his car for ChumpCar as well. He's in Vancouver, Washington. I've raced with another local team called "Team PontiHack" that has quite a well built car. Our plan is to race Both Portland ChumpCar events, and also The Ridge Motorsports Park this season. From the looks of it, there will be two Fieros in both the Ridge event in August, and two in the October Portland event. Convince your team a little harder and come race with us! It would be a blast to get a few Fiero teams together for once.
I've enjoyed reading it this far, and look forward to the rest of the story. Sharing your build is much appreciated... I'm having off-season withdrawls!
[This message has been edited by ManMadeChickens (edited 01-06-2013).]
there was no way we could have worked it in and out of the door openings like you did. That's pretty spectacular that you were able to do that.
That came as a real surprise to us as well. We were resigned to welding the cage in the traditional "in the car" method. As you saw in the photos, Rich had enough experience to have a plan of attack and was moving the cage within the shell in such a way as to get the most exposure. About an hour in, I commented that we had most of the cage jacked out of the car. Might it just be possible.... Sooo much easier. In a way it's too bad Damian's prebuilt cage is already welded. Cutting the top off is likely to be difficult and getting the base metal clean enough to weld back together will be a chore.
quote
If we ever get around to rethinking our bumpers, I will be inclined to do it that way.
I tried finding the photo of the bumper build here on the forum. But I just couldn't locate it again. I thought it was your build. But we've trimmed down a lot of the build files we had amassed. We are happy with the Kirkey seat. It fits well enough. I would change how we made the adjustable back brace. But it does work.
Overall, the oil pan was a success. But we do still see some oil starvation issues. The light has come on in turn 6 at Sears Point/Infineon/Sonoma raceway. That a long left turn. But I guess we might see the same light in the Portland Raceway turn 12, though thats a rigt hander. Your PIR turn 6 isn't as severe and sustained at Sonoma turn 6. The wrap tie gun is a real winner. Yet another one of those specialty "tools of the trade" the rest of us never hear about. As an electrician since... well for awhile, Rich had a bunch of tools. They were stolen a few years back and he still laments the loss of a ton of tools that he'll never replace at this point.
I started racing on the Eugene asphalt oval in the mid '80s. But we made several trips to PIR, usually in conjunction with the Shelby American club. So PIR is my home road race course. I have great feelings for the track. I'm of mixed feelings about the chicane, but have memories of going way too fast without it. Excuse the memory here. Rich and I took an SCCA class there in the early '90s. We showed up with our full tube-frame chassis car that had been modified for road racing. Got a lot of attitude from the instructors for showing up with what (they thought) was strictly a roundy-round car. Pulled in from a run and they were giving us some good natured ribbing when my instructor asked if the realized I had lapped at 1.5 seconds off the trans-am race speeds. We were clocked at 162 mph on the front straight. Rich, unfortunately was limited to a Mustang we rented from Enterprise. A six cylinder Mustang. Oh well.
So yes, we like PIR. It's hard to drive that far with for an April or October race that is so likely to be a rain event. But, one of our drivers is out of Eugene. Good luck this year.
Rich continued working on the Fiero wiring harness. We were aided enormously by the resources found via the PFF. Darth Fiero had some very useful files that he made available on the net. http://www.gmtuners.com/files/index.htm The Ogre's Cave had good solid information on his site http://home.comcast.net/~fierocave/ as well.
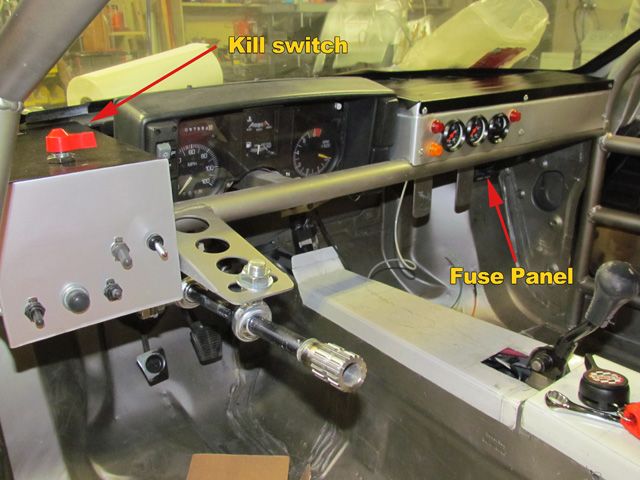
For safety reasons the rules require a master kill switch that could be reached from the outside of the car. The kill switch is required to kill the engine and all electrical devices when disengaged. We purchased a 4-pole master kill switch from Longacre Racing Products. http://www.longacreracing.c....asp?id=477&catid=14 We started the wiring by running a battery cable from the positive side of the battery to the upstream side of the kill switch. We ran an additional battery cable from the downstream side of the kill switch to the starter. For the grounding, we ran a battery cable from the negative side of the battery to a 3/8” stud welded to the chassis close to the battery box. From the 3/8” stud we ran a battery cable to the back of the car to another stud welded to the chassis and then a battery cable from the rear stud to a clean area on the engine block. In addition we welded several 1/4” studs to the dash bar behind the instrument cluster so the gauges, dash lights, and relays could be properly grounded. Many electrical problems can be traced back to poor grounding so we took special care with this aspect of the wiring.
To keep the car from running off the alternator when the master kill switch is disengaged, we ran the charging wire from the alternator to the pigtail of the battery cable clamp that ties directly to the positive post of the battery. This put the alternator charging wire upstream of the kill switch.
From the downstream side of the kill switch we fed all of the “hot at all times” fuses in the fuse block. These are the fuses that are hot even when the main ignition switch is turned off. We wanted to be able to turn on the interior light, head lights, run the cooling fan, use the two way radio, and bump the engine over without turning on the ignition switch.
From the downstream side of the kill switch we also fed the main ignition switch. This switch controlled a relay that provides power to all the “hot in run” fuses. These are the fuses that feed the ECU, coil, and dash lights.
When we gutted the car, we removed all unessacary items like the turn signals, radio, air conditioning, heater, and OEM dash lights. With these items and their wiring removed, we only used about one half of the fuses in the original fuse block.
With the steering column and original keyed ignition switch removed, we made a new pod for switches on the left side of the steering shaft and original instrument cluster. The switch pod contained the master kill switch on top. On the front is a toggle switch for the main ignition providing power to all the “hot in run” fuses. The starter button is a push button momentary contact switch that engages the starter when pushed. The other 3 switches control the cooling fan, interior light, and headlights that will be add later if we decide to enter a 24 hour race. We did wire the headlight switch to the tail lights, so that is already done.
The master kill switch, and indeed all the switches must be within reach of the driver when belted in with a full 5 point harness and you can appreciate that the switches were JUST within reach for Robert. The master kill switch MUST be reachable from the outside of the car in case safety workers have to kill the engine after an accident. Placing it as shown in the photo meets that requirement.
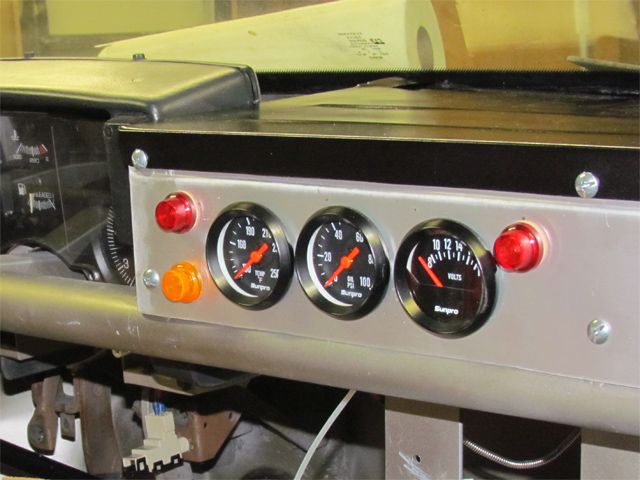
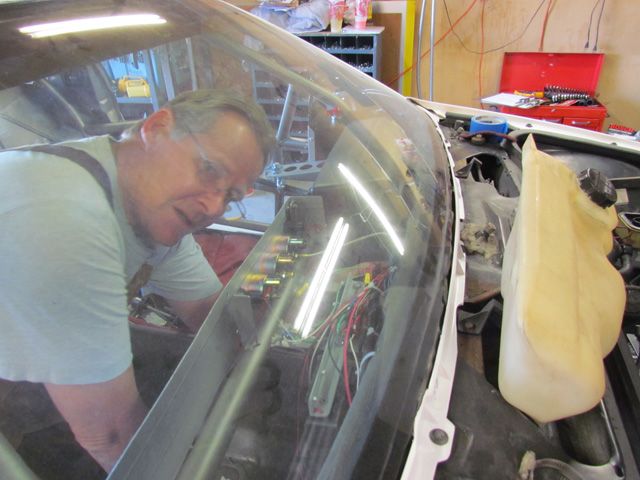
Gauges were next on the list. We wanted to use the original instrument cluster, but it did not have the oil pressure and the water temp gauges was suspect. These gauges were originally located in the dash above the console, and that dash was long gone. We started with a fairly inexpensive set of gauges that we picked up at Summit Racing. http://www.summitracing.com...un-cp8218/overview/. We decided to create a new dash to mount the oil pressure, water temp, and volt meter gauges. If you look, you can see the beads that were rolled into the top of the dash. This added quite a bit of structural rigidity. You can also see that we used a step die in the bead roller where the top and face meet. We tried to make sure it was clean with less of an exposed lip at the overlap.
The top of the new dash is removable to allow access. If you define access as almost impossible to work on.
We elected to add a mechanical oil pressure gauge. The oil pressure system in a Fiero is also tied to the fuel pump for safety reasons. We wanted to keep this feature so we put a tee in the oil pressure line coming out of the block. From the tee we ran an oil pressure line to the mechanical oil gauge located in our new gauge panel. We also put an additional tee in and added a low pressure switch and red indicator warning light to the oil pressure system. We used a kit from speedway motors http://www.speedwaymotors.c...earch-604-50604.html If the oil pressure drops below 20 psi, the red light on the upper left side of gauge panel comes on alerting the driver.
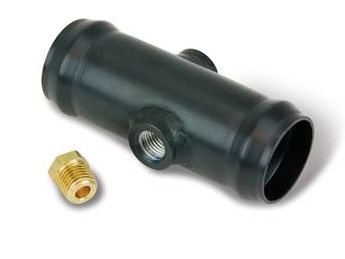
We also chose to go with a mechanical water temp gauge and warning light system. The probe for a mechanical water temp gauge is only 60” long and would not reach the rear of the car. To solve this problem we took two 1/2” pipe couplings and welded them into a piece of 1 ¼” tubing that was 6” long. We made sure to weld a ridge on the ends of the tubing so the hose would not come off under pressure. We put the tubing with the couplings in the radiator hose just before it went into the intake of the radiator. The two couplings allowed us a place to put the temp probe for the water temp gauge as well as a place for the sensor for an indicator light. We had to ground the 6” piece of tubing for the sensor to work. If the water temp goes above 230 degrees, the sensor turns on the red light on the upper right side of the gauge panel alerting the driver. After chasing down the couplings, drilling, cutting, welding, and painting our piece, we found that Summit Racing, just down the street sells what we needed. Can’t beat that internet!
The voltage meter gauge is wired to a “hot in run” fuse. This allows the gauge to be off when the ignition switch is in the off position.
As mentioned earlier, we eliminated the thermostat switch for the cooling fan and replaced it with a toggle switch so we could manually control the cooling fan. We also needed a reminder to turn the switch on after the car was up to temperature so we used a two pole single throw switch and a couple of relays for the fan control. When the ignition switch is on and the cooling fan switch is off, the yellow warning light in the lower left of the gauge panel comes on to alert the driver. When the ignition switch is on and the cooling fan switch is on the yellow warning light is off. To wire the cooling fan switch we fed the switch pole for the light from a “hot in run” fuse through a relay and the switch pole for the fan from a “hot at all times” fuse through a relay. This wiring configuration allows us to run the cooling fan with the ignition switch off and have the light off when the ignition switch is off.
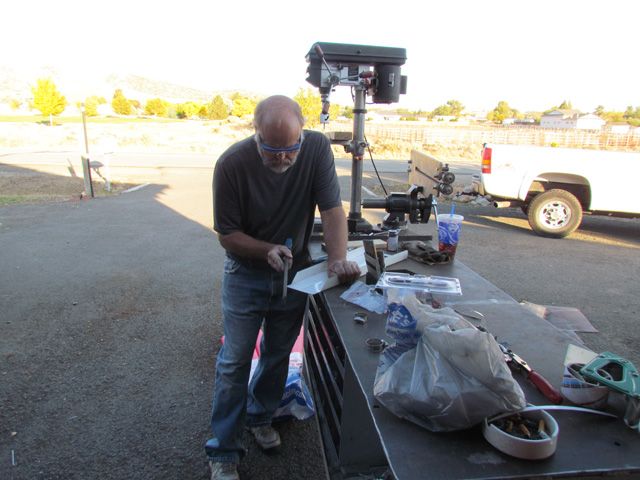
Because Rich was busy trying to finish up on the wiring and Robert was busy with trying to paint body panels, and we had less than a week until the first race, I was allowed to stop sweeping the floors and actually work on the car.
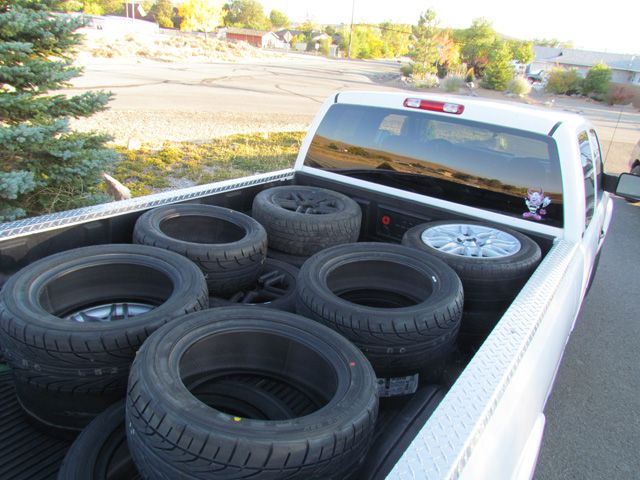
I drove over to Tirerack and picked up new tires. The Lemons and Chumpcar series both allow us to run any tire we want. Almost. Two requirements are that they be DOT approved tires with a hardness rating on 200 or higher. In essence, real street tires. Researching the LeMons and Chumpcar forums led us to the conclusion that two tires were the preferred choice. The Dunlop Direzza Sport Z1 Star Spec and the Falken Azenis 615K. Each of these has a hardness rating of 200 and have excellent reviews from other drivers. You really couldn't go wrong with either tire.
We chose neither one of those. Instead we went with the Dunlop Direzza DZ 101. The Direzza has a hardness rating of 300. By way of comparison, those ultra sticky Hoosiers have hardness ratings of 40 but are illegal. TheDirezza were cheaper, and we were fearful that it would require two sets of the softer tires for the weekend and we couldn't afford that. I picked up 4 tires for the 16" wheels we planned on running. In addition, we picked up two 15" star specs to be our spares. Rich has a tire machine, so he burned precious time changing out tires.
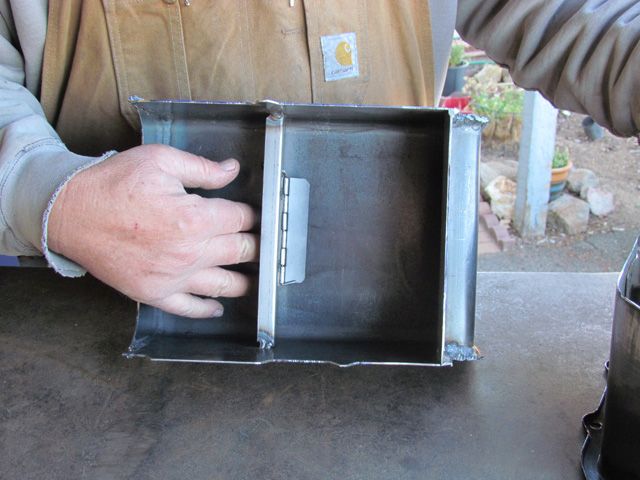
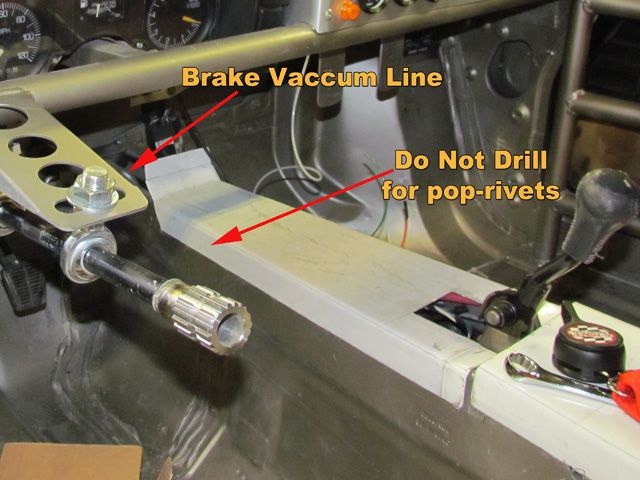
While Rich mounted tires, I jumped on the interior a bit. We needed a cover for the center console. There are just too many sharp edges to leave the console open. I laid out a template in cardboard and then started bending sheet metal. We made a break at the back of the shifter.
Just a word of caution. Inside the center console is a metal tube that supplies vacuum from the engine to the brake booster. Should you decide, as we did, to pop rivet the console cover to the spine, take care to avoid drilling through the tube. Call this the voice of experience. We actually did not notice that I had done this until removing the cover well after the first race weekend and hearing a loud hiss.
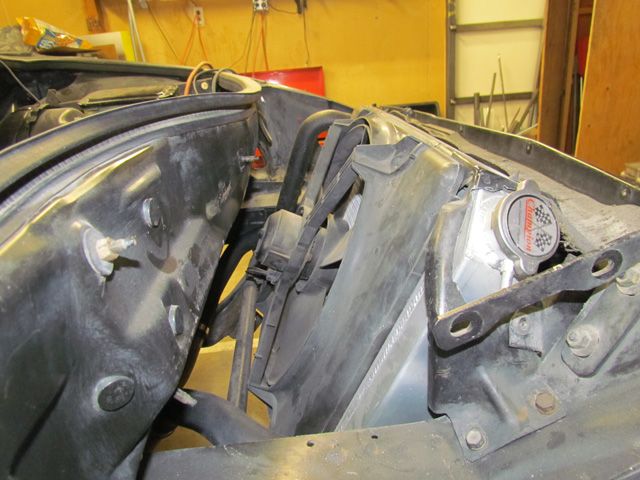
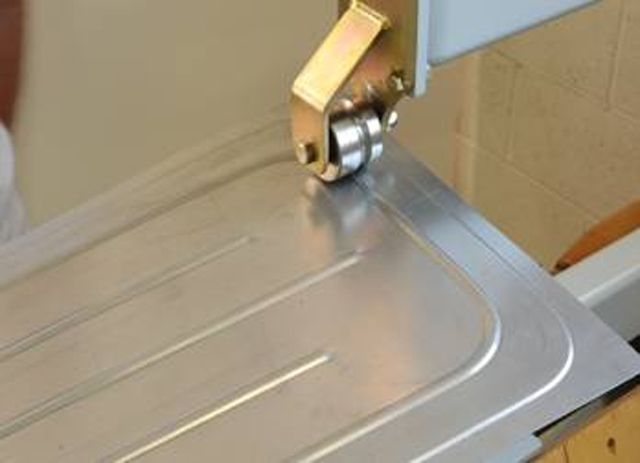
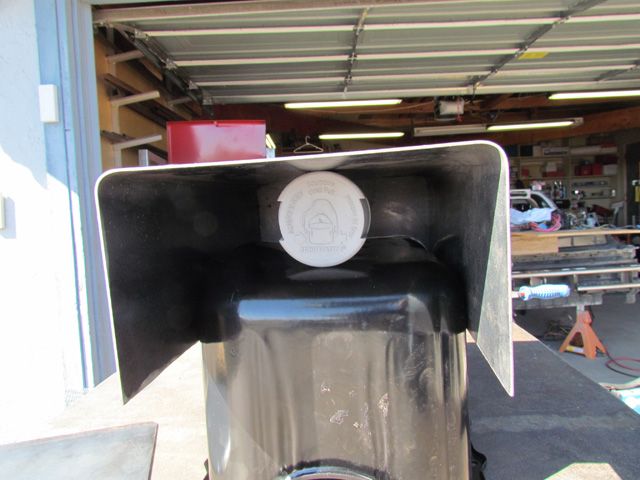
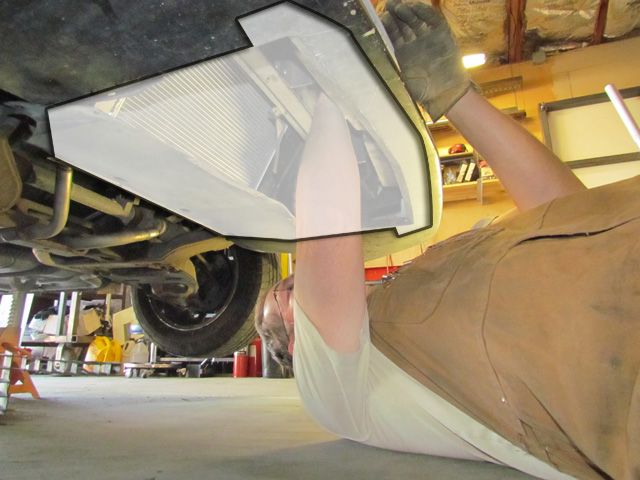
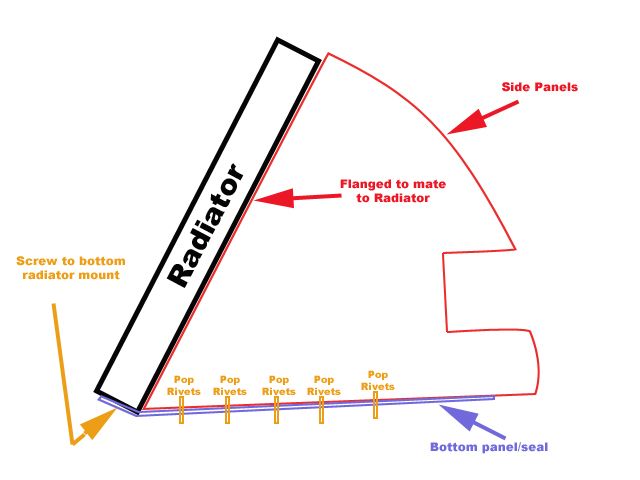
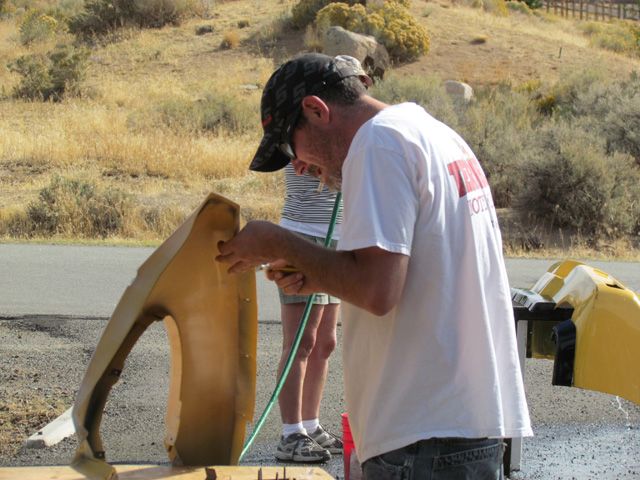
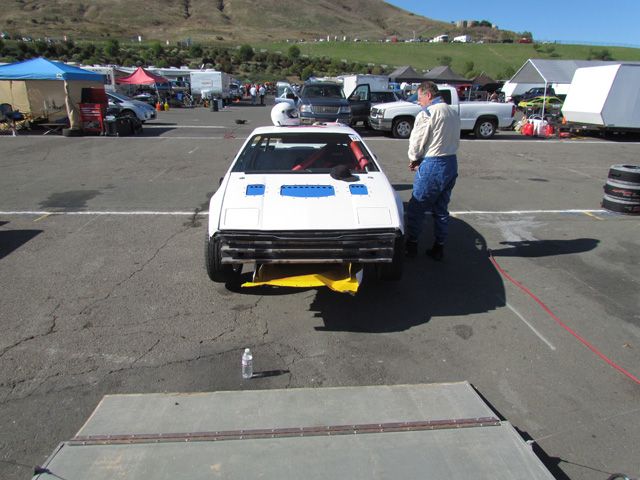
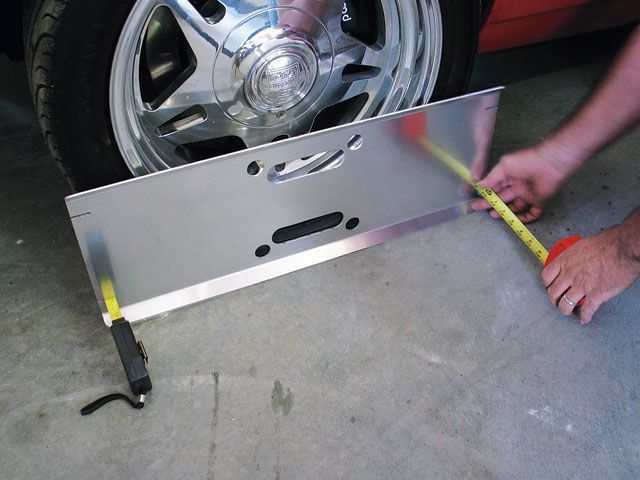
Another project that I was allowed to work on was creating an air dam for the front of the radiator. We wanted to create a high pressure area directly in front of the radiator and force air through the fins. I started by making a floor to the structure. I cut a piece of aluminum to fit the contour of the aero plastic nose. The nose has a cutaway that's a bit wider than the actual radiator that starts a couple inches behind the nose. I cut the aluminum about 3/4 of an inch wider (on each side) than this void. I bent the extra material up on a brake so that it fit the void. I could then pop-rivet the 3/4 lip to a mating lip that exists on the stock nose. Putting the bends in as opposed to just overlapping the material and riveting this area created a stiffer structure. And it looked smoother and more finished. Finally, on the trailing edge which extended an inch or so past the front edge of the radiator, I placed a bend that matched the angle of the radiator. There are 5-6 small bolts going through the radiator support under the radiator itself. Here I used those bolts to secure and seal the back of the plate. In addition, I placed a couple bead rolls in the aluminum sheet metal to again add rigidity and strength to the structure. No picture but it looked something like this.
I have no drawing skills whatsoever, but the next image should give you an idea of what the next pieces looked like. Inside the front structure behind the nose, we fabricated a couple side pieces to the air dam. We did our best to create side panels that would seal enough to direct the airflow through the radiator. What is not show is the bumper structure behind the nose. But we conformed the front of the side panels to that structure and riveted it all together. All in all, riveting each of these panels together created a remarkably solid structure suitable for the job.
What we learned, besides the fact this would be expensive, was that UHF radios deals with obstructions like buildings, better. VHF has longer line of sight range. About the same time that we were trying to figure all this radio stuff out, a whole thread was building on the LeMons forum. http://forums.24hoursoflemo...iewtopic.php?id=8326 Of a couple threads going, this seemed to be the most informative. A lot of people were looking for the cheapest yet effective way to talk with the driver. Eventually we jumped in and talked with Troy Hogan out of Texas. Troy is the first poster on this page. http://forums.24hoursoflemo...opic.php?id=8326&p=3 And he was starting to build cheaper mic and earbud systems to work at the LeMons price point.
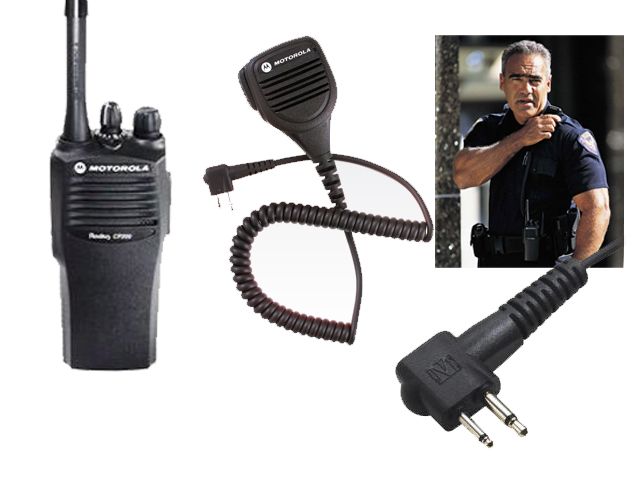
There are several choices when it comes to the radio itself. And several price points. Because of our initial experience was with the borrowed Motorola CP200 radios, we had some confidence in them and we elected to go that route. Ebay, here we go. We picked up two 16 channel, 5 watt VHF radios on e-bay for about $100 each.
The downside, and what we experienced while driving the Mustang, is that the normal speaker/mic combo clips onto the safety harness. And it's sometimes difficult to find the mic button because it's out of sight and you are wearing gloves which hamper the tactile feel. The up-side is that when you use this type of setup, your arms automatically look like the cop's in the picture. But you are wearing a long sleeve driving suit, so nobody sees.
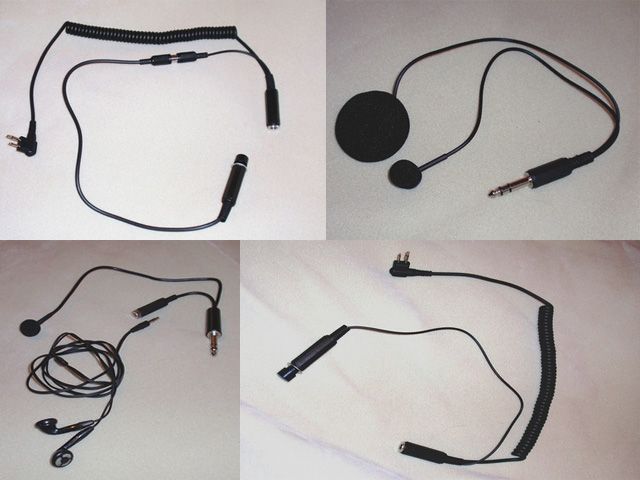
Ideally, you want both the microphone and the ear buds inside the helmet. Unfortunately, the Motorola comes with a funky two-jack connector that you can see in the image above. We needed an adaptor, and that's where Troy came in. Troy was building a couple different adapters to fit different radios. I pulled a couple pictures that he had posted, combined them into a single image and placed an order with Troy.
I ordered one of the harness labeled "A" This is the main harness that plugged into the radio. Coming from the top two-prong Motorola plug, it drops down to a T. Off the side of the T, just above the A is a Push-To-Talk (PTT) button. Past the T is another PTT followed by a 1/4" jack. The jack then interfaces with other options. So this is the main harness.
I ordered two parts labeled "B." You can see a small microphone which is velcroed to the inside of the helmet, near the driver's mouth. And another small jack to connect to in the ear buds. Two of us have molded earpieces which I'll talk about shortly.
For the other drivers who do not have personalized ear buds, I ordered two "C" harnesses. The same microphone as the B harness, but also a larger speaker that can be shoved inside the helmet in the ear socket.
And finally I ordered one "D" assembly. This is a larger PTT that can replace the PTT button on the main harness and then be attached to the steering wheel. Never really used this because of fears it would be ripped out with the removable steering wheel.
I won't say what Troy charged, but he was way too cheap! He helped to keep the costs to a LeMons scale.
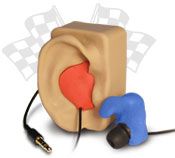
What we elected to use was the kit from Fuze custom Earphones. http://www.earfuze.com/index.html Their direct price right now is $45 with some adequate ear buds.
Since that time, we found an article on-line for what might be a cheaper alternative. http://www.howtogeek.com/57...our-in-ear-monitors/ and It's likely our other drivers will build their own molded in the ear buds.
We ran out of time for our first race weekend, but we intended to build a box out of aluminum to hold the radio in place. Just too much to do.
On the subject of brakes, we spent a lot of time following threads here on PFF concerning brakes. I believe in brakes, and am willing to spend money on them. Brakes are not calculated into the $500 value of the car. There's definitely a dearth of aftermarket brake components available for the Fiero. I spent time at Summit trying to find something to work with, and went away empty handed. The only thing we could find was a set of EBC brake pads, and they were advertised as street pads. Finally, with time running short, we followed the most common recommendation here on the PFF.
We purchased the Wagner Thermo-quiet MX-378 brake pads. Yes they are standard street brake pads. I can testify that they work great under race conditions. We could out-brake many other cars with no fears. Today, with 4 race weekends, a couple open track days and a couple auto-crosses in the bank, we are still running the same set and will just be taking a new set to the next race as back-ups.
WOW. I am really surprised your brakes lasted that long. I guess sticky tires make a huge difference in brake wear since I typically only got about 300 miles before the pads were less than 1/16" remaining on my car. The best brake pads I ever ran were KFP purple pads. KFP Golds are pretty good as well. Summit does not sell them. The EBC green pads were decent for stopping power but I only got about 60% of the pad life since they started to break apart after that and lose chunks of material.
Unless of course, you were not going fast enough to get the brakes hot enough to wear out. Kidding. Car looks good.
Going too slow is always a possibility. But typically we could pull many of the cars off the corner (once we were straight) and still brake later and harder than most of these admittedly street cars. But we've been thrilled with the brake performance and longevity with the Wagner brakes.
KFP purple pads. I tried doing a Google search but could not find an application page. I did see several BMW, Corvette and Porsche inquiries. Are you running stock calipers brakes on your car? I guess I could go back and check your build thread. I'm interested as we are doing an engine swap for this coming March and might be gaining speed. Oh, and yes, sticky tires change everything.
Don
[This message has been edited by DonP (edited 01-08-2013).]
I have not purchased them for a couple years now, so you will have to make a phone call to check availability. They were around $135 per axle. I ran stock front calipers on all 4 corners of my 88. Stock, over the counter rotors. Wagner 5.1 brake fluid and stainless flex lines. I used 1/4 bolts with steel lock nuts to hold the pads in for quick pad changes. I never had any brake fade issues even during enduros.
2005 - Black Color * Average coefficient of friction .650. Stable friction at all temperatures up to 1200 degrees F. Designed for open wheel or cars with good ducting. Requires less pedal effort. Use with new or reconditioned rotors.
2003 - Purple Color * Average coefficient of friction .500. Good stable friction at all temperatures up to 1200 degrees F. Use with new or reconditioned rotors.
P1101 - Red Color Average coefficient of friction .530. High torque with moderate wear, for use in applications where thermal saturation is low. For use when under 600 degrees F operating and under 1200 degrees F spiking. Popular for formula cars with large and/or vented brakes. Not for use on aluminum.
P4211 - Blue Color Average coefficient of friction .490. Moderate torque with low wear rate. For use in applications where thermal saturation is low to moderate. For use when under 800 degrees F operating and under 1500 degrees F spiking. Common uses are rear applications for OEM based road race vehicles, small caliper formula fords.
P42A - Gold Color Average coefficient of friction .470. Moderate torque with low wear rate. For use in applications where thermal saturation is moderate to high. For use when constantly over 450 degrees F operating temperature. Has the broadest thermal zone of these materials. Commonly used as a front pad material choice on larger vehicles and custom relining brake shoes, such as on the popular road racing vehicle, Formula Vee.Formula Vee Champion KFP lined racing brake shoes
Thank you Michael. The initial build is coming to a close, maybe by tomorrow. But we had some adventures that required additional work as well as stuff we just didn't have time for. And the work on a track car nevr really stops.
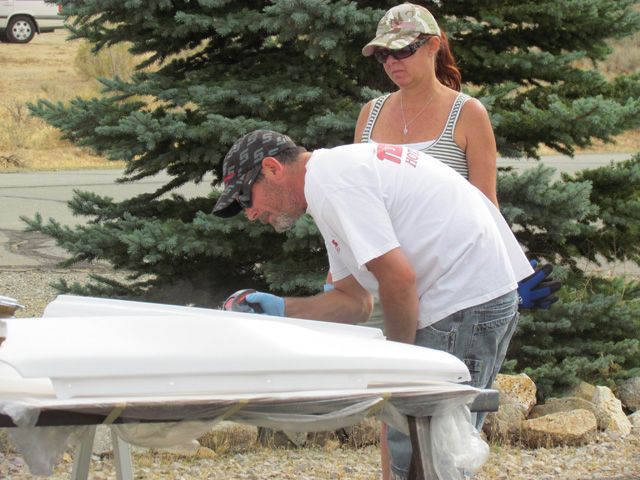
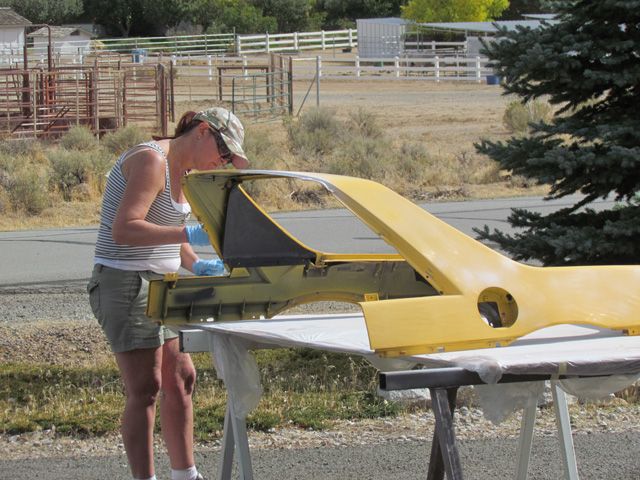
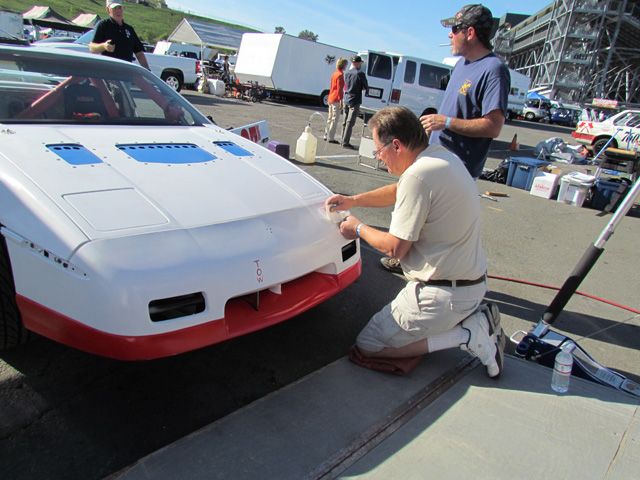
With time running out, Robert pulled out the big guns and called in Paula to assist in the paint efforts. Rich doesn't do paint. He was too busy in any case. I had more sweeping to attend to. So Robert and Paula jumped on it.
Yes, we did it with rattle cans. And working outside meant that we had to work around the Northern Nevada winds. That means we had a window of opportunity of about an hour a day. The base paint for our theme was white, so that's where we started.
With less than 40 hours until we needed to load up and go, we had a white car.
It was about this time that we installed the hood vents you saw earlier. Robert , whose job requires him to get up at 4:30 a.m. did a big final push and started adding some color to the car. We couldn't make it to our hoped for paint scheme, but needed to do something.
Obviously we needed to make the seat mount adjustable. Kirkey does make an adjustable seat mount, but using that mount would make Rich's head too high. We had to make our own. I failed to get a clear picture of the seat bracket on its' own. But I think you can see what we did in the following pictures. Basically, we have a couple 1/2" holes going through the side of the seat. These mate up with holes in the side of the bracket. When we have to move the seat for a shorter driver, we remove the bolts and select a pair of holes positioned for him. Yup, it's a pain but quickly done with air tools. We aren't talking Grand Am speed driver changes here. It also dictates the order for the drivers in order to minimize the number of changes in a given day.
We purchased a cam-lock style safety harness from Summit Racing. The cam lock is definitely the preferred mechanism because it's so much easier to use than the older over-center latch style. We looked at several and chose the G-Force harness.
We ran into the same seat adjustment "considerations" on our Lemons car using a similar Kirkey seat. Our drivers compromised a little on seating position to minimize the number of seat changes - we only had to change it once per rotation. In the early Lemons days moving the seat around wasn't a big deal, as we would get our driver strapped in while tires and fluids were checked and we refueled, but when they changed the rules to require the driver out of the car while gas was being poured, protracted seat adjustment periods had to go!
We also switched from a latch-type to a camlock belt, and that dramatically improved our pit times. It was really pretty stunning to see how pit stops could ruin a good race... we spent lots of time in several races in the top 5, and a slow pit would blow us out to the teens! Anything you can do to reduce time in the pits is critical... and that brings me to:
What are you doing about a fuel tank? We actually swapped from a 16 gallon to 20 gallon tank off a later car to save pit-ins. 20 gallons would last us perhaps 3-4 hours, so we would refuel at every two hour-ish driver change to ensure enough gas if we kept a driver in longer. The Fiero has a tiny, tiny tank and isn't particularly fuel efficient... You might find your race time limited by gas and not fatigue.
Yeah, changing the seat position is a real pain. The thing is, you cannot take chances and do it half-way. It has to be secure. We have found some high density pads and may attempt to just trow some in the seat when changing drivers. But that's second best and we will have to wait for feedback from Robert.
We started with an '88 Formula. This year had the larger fuel tank. The races that we have participated in to date have not had a proper hot pit. So we always have to drift back to our pit for any service. We found out quickly that the fuel intake was restrictive and have removed some of the obstructions found in the filler. We have run 1-1/2+ hours at a time and just fill the tank each time. If memory serves I think it has rarely taken more than 5-gallons. That may change in the future. as we are changing power plant. But we've never had a lot of confidence in the stock fuel gauge which we left intact. Cannot say definitively why, but we don't feel good about it.
LOL, you could always make the short legged drivers wear platform shoes......
Have a set of quick release blocks for pedals.
Actually in a more serious rather than joking note, when I wear my "office shoes" vs. my Worksite steel toe boots, I do notice a huge difference in legroom, it does not sound like much, but it really is. It does not take much thicker of a sole on a shoe to make up that 1 inch of seat travel.
Unless you are strictly dealing with seat height...... Uhm a pillow under his butt to get him into the right position for the belts.
I love this thread, you guys are amazing and I so wish I was out there. I have spoke to the Clackamas guys a fair bit and I am going to at least try to come and watch them when I am in the area at some point.
------------------ 857GT Part 85GT Part 87GT Part Caddy, 93 Eldorado 4.9, 5spd Dual O2 Custom Chip, Custom Exhaust. MSD Everything Now with Nitrous. Capt Fiero --- My Over View Cadero Pics Yellow 88GT 5spd Full Poly Suspension, Lowered 1/2" in front, Corner Carver.
We have found some high density pads and may attempt to just trow some in the seat when changing drivers. But that's second best and we will have to wait for feedback from Robert.
Don
That's what I always did and it worked great. Biggest thing is to make sure the sub belt is still usable with both/all drivers. I had foam pads that I stuck under the vinyl cover for me so that when I pitted, I would take them with me since my co driver didn't need them. Depends how big a difference you are talking about.
Robert is at full extension to have full throttle. That's with the seat back for Rich and me. We are both left with bend in our knees. Our adjustment is set for about 3 1/2 inches. I think the padding we have found will move him up and forward almost as much as moving the seat. There's just no way to drive the car for any length of time if you are fully extended like that. Comfort is huge. Also, his arms are extended without the adjustment or padding.
LOL, you could always make the short legged drivers wear platform shoes...... Worksite steel toe boots, I do notice a huge difference in legroom, it does not sound like much, but it really is. It does not take much thicker of a sole on a shoe to make up that 1 inch of seat travel.
Shoes aren't a real option. Driving shoes, meaning fire resistant are required safety equipment. And most are thin soles like sneakers. But trust me, we thought of platforms. The Fiero pedals aren't really designed to add blocks in a manner that would inspire confidence.
I would love to drive Portland with the other guys. But rain is always a threat. It's hard to take a chance with that much travel involved.
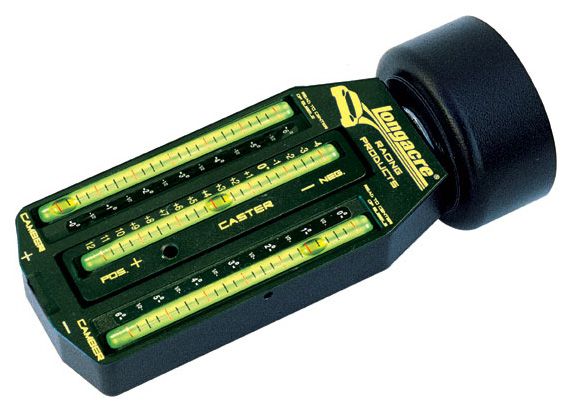
One of the last jobs that HAD to be accomplished before we could think of leaving was to do an alignment on the car. We had changed out ball joints and one hub but nothing had really been changed. But still, it's too important to simply ignore the job. Rich has a Longacre caster camber gauge to adjust the alignment. It has a magnetic base that snaps onto the wheel hub. From there you calibrate the gauge using the bubble levels incorporated into the gauge. Turn the wheels left and right 20 degrees both directions, and read the changes in caster. And of course you can find the camber setting. We opted to dial in as much static camber as possible. We also took care of the toe-in at this point.
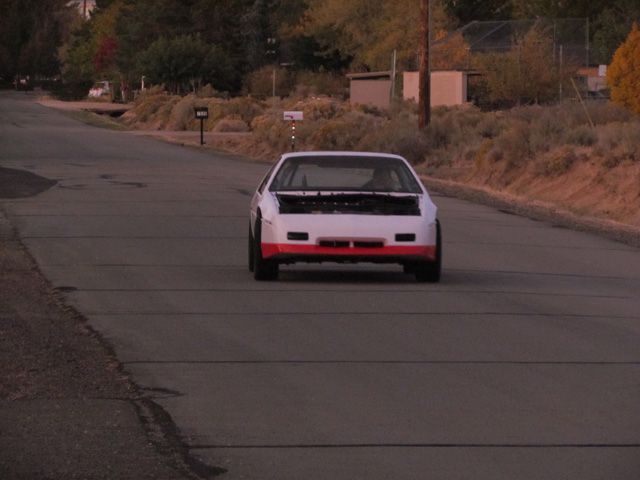
Less than 20 hours from the point we needed to load up and head to the track, We managed to do a test drive. Once again we praised the fact that the car was being built out of town and we had understanding neighbors.
The LED Brake lights worked well.
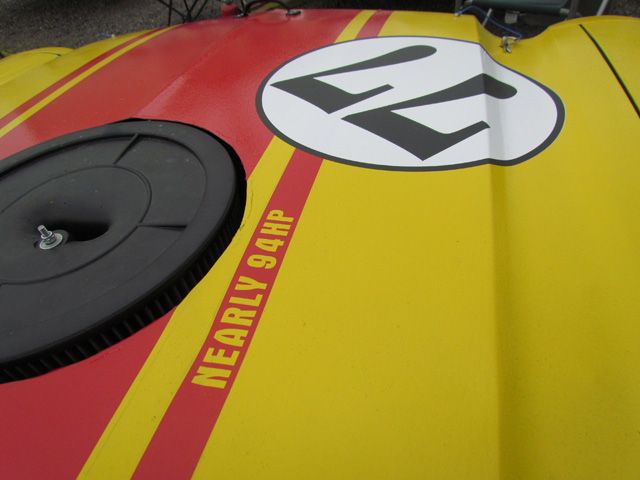
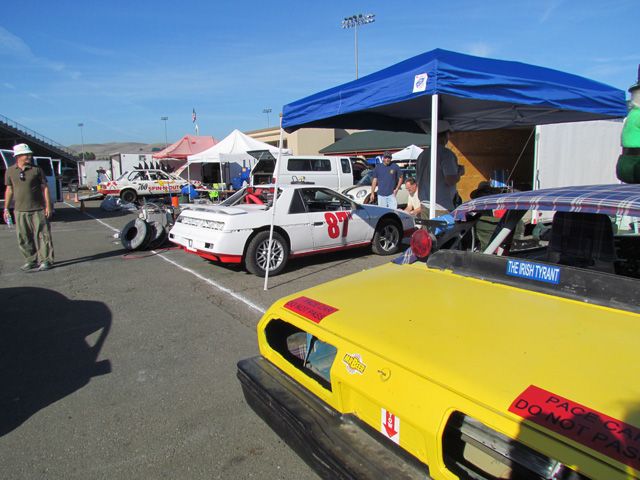
The obvious problem is that we had a plain car with none of the required stuff such as numbers. On the Mustang, the earlier team had purchased "Meatballs" and stripes as a tribute to the much earlier (and more race-worthy) mustangs of the trans-am era. We bought the graphics off of E-bay from user "lindarembowski72" It's amazing what you can find on e-bay.
The Chumpcar rules require that you use "meatball" backgrounds that must be purchased from them. The Lemons rules just require a contrasting color. Both series require something in the neighborhood of 12" tall number.
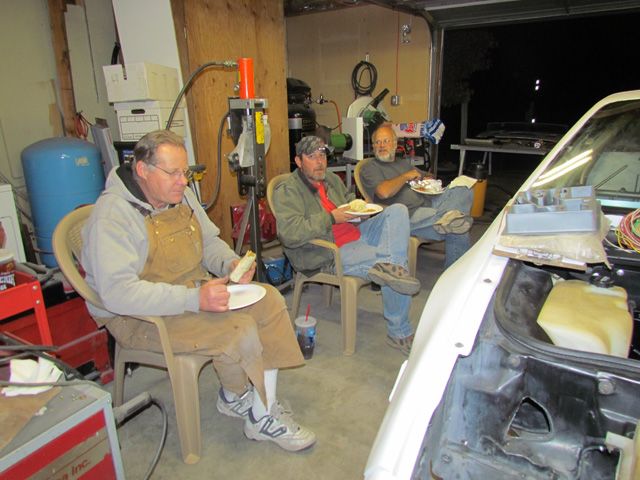
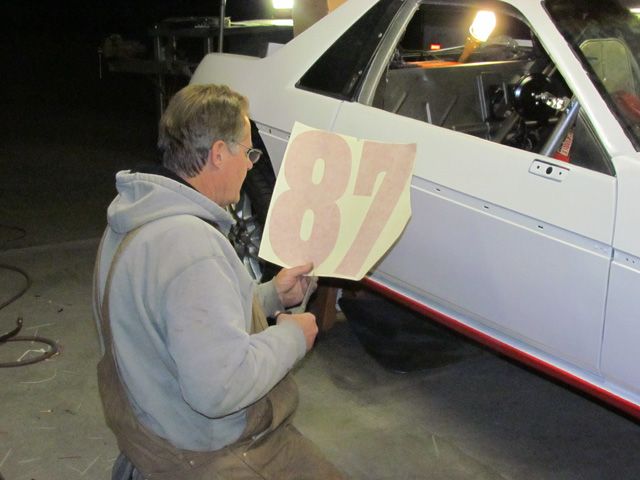
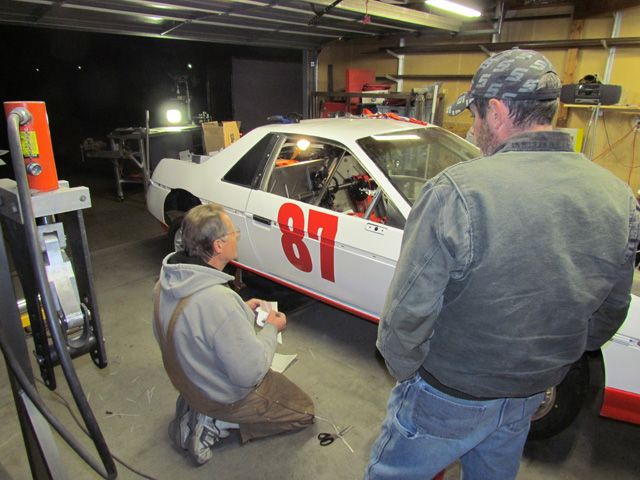
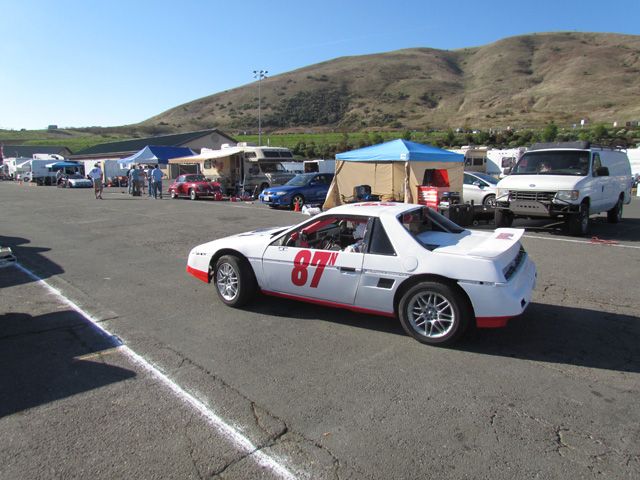
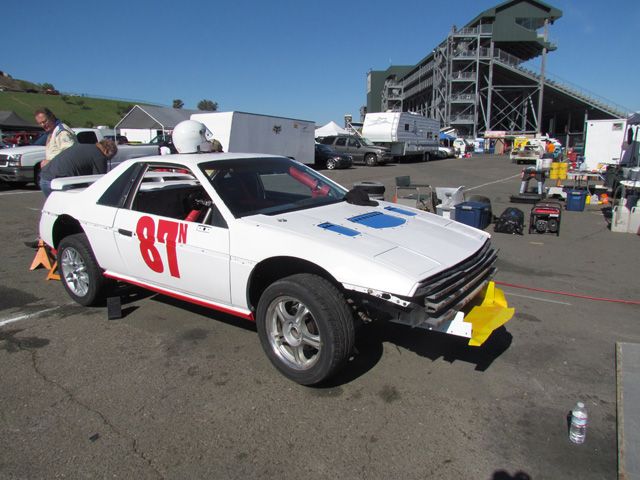
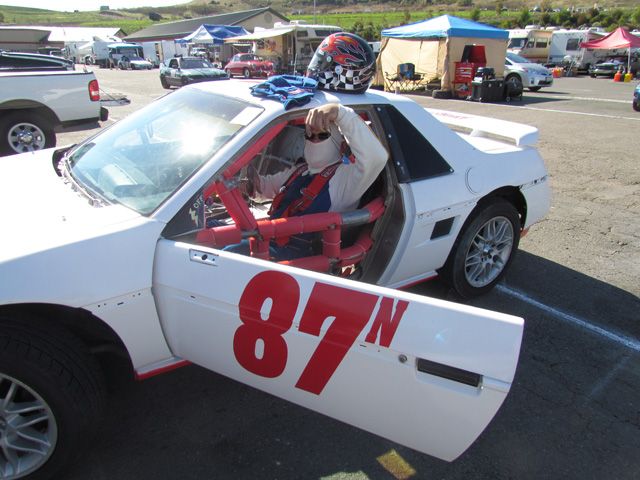
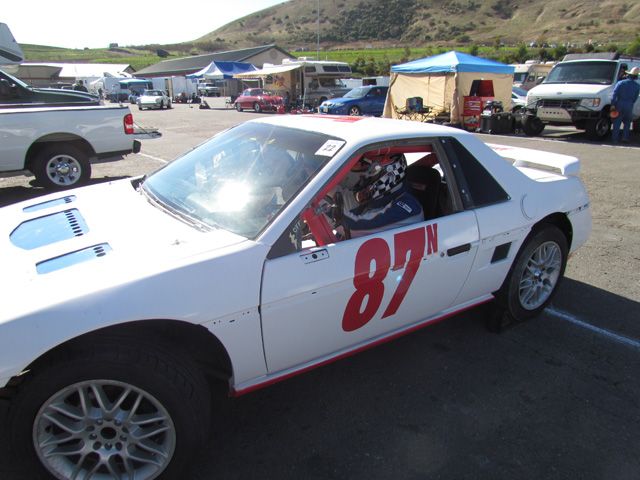
The meatballs didn't really fit the look of the Fiero, so we went a little different. Rich had used Harris Decals http://www.harrisdecals.com/ on his last IMCA and they had reasonable pricing. So that's where we went for decals. Our car number was 87 but we had decals made up reading 87 with a smaller superscript N in case there was a conflict at a later race. With everyone a bit bleary-eyed, we took a short break and tackled the job. You can see we failed to fully execute our paint scheme that had been agreed upon.
You can see how the side mirrors were placed on the cage upright. This moved them up and in such that they are less likely to be damaged. You never have enough in the way of mirrors, but they do give you some hint of what's happening around you. Inside we used a Wink mirror that we picked up from the local parts store.
We placed the numbers on both doors and roof as required. But with no sleep and our departure deadline only a few hours off we chose to go as is and deal with extra decals as we had time at the track. I still needed to install all the roll bar padding for the last time, adding to the number of tie wraps we had used on the project.
My first 1.5 hour enduro I ran with my Fiero. Car was not running 100% as I later learned I had a bad fuel injector. First turn of the first lap there is a multi car wreck about 4 rows in front of me, I get slowed down, guy behind me tries to pass on my left and side swipes me pretty good, both of us are still probably going 70 slowing for the turn, but we both keep going. My mind is on high alert now wondering if I have a cut tire or anything. I get about 2-3 turns away and start hearing something rolling around on the floor in front of me. I immediately start thinking I left a water bottle in the car and start wondering what else I forgot to remove or check. I made about 1 more lap when the shifter goes limp in my hand and I coast to a stop on the back stretch and wait for a tow. As I am sitting there, mentally steaming, I figure, well, at least I can have a drink. I reach for what I thought was the water bottle only to grab the other guys outside mirror. As he passed me, my mirror sheared it off his car and it made it through the gap at the forward edge of the window net.
Once I got towed back to the pits, I got out of the car, told my co driver, "If you can fix it, you can finish it (the race), because I am done", and walked away for a while. He fixed the shifter in about 2 laps and ran the rest of the enduro.
Racing is as much a mental challenge as a physical one.
Racing is as much a mental challenge as a physical one.
Absolutely no doubt about that. And until you've done it, you cannot understand how exhausting it can be. And that's probably 80% because of the mental strain and getting keyed up. Once you get mentally rattled (say by contact with another car and acquiring a mirror) it's probably best to just take a break. These enduro races are killers. Having said that, I'm still trying to talk my current team into a 24 hour race.
I believe it was 8:30 am before we actually hit the road headed to our first race as a LeMons team. Our trip originated in Reno, NV and ended at what was then the Infineon Raceway in Sonoma CA. 199 miles away. I don't think we've ever left for a race so tired. Returned, yes. Headed out, no.
That first race was officially titled " THE SKANKAWAY ANTI-TOE-FUNGAL 500, SPONSORED BY CRUSKIN-SKANKAWAY INC., THE OFFICIAL FUNGICIDAL TOE CREME OF LEMONS" and was held October 22-23, 2011. The Lemons schedule is pretty tight. All tech inspection had to be completed on Friday the 21st between 10:00 am and 5:00 pm. No exceptions. Without passing tech, you didn't race.
Sorry, I failed to get photos of that first tech session. But we were happy when the tech inspector declared that we "had one of the 5 best prepared cars" he had ever seen when teching cars. It was clean, prepared and looked ready to go. His comment was only slightly tempered when he said under his breath "good luck finishing in a Fiero."
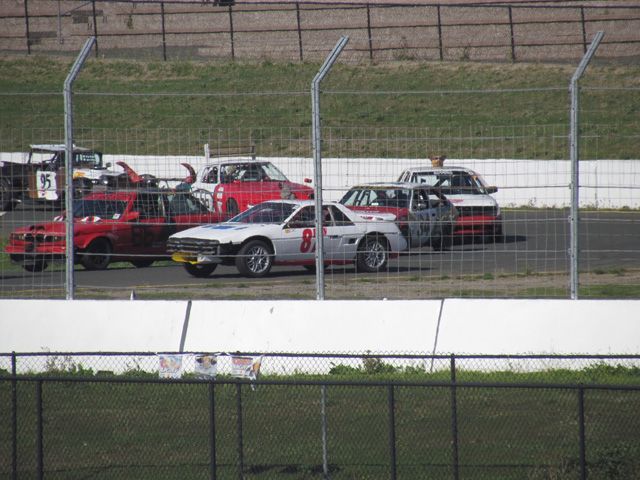
There were 164 cars that started the race on Saturday the 22nd. I say started because I heard that at least one car actually broke down pulling off the trailer. If you want to see what a LeMons race looks like, the official photo gallery for that race can be found at http://www.facebook.com/med...1.36766739494&type=1 There's a lot of pictures.
But before we could race, we had some work to finish up. Luckily, our old team mates held a spot for us.
We still had some work to do. Can't go on track without the stickers. Rich is applying "Made in America" stickers to the nose. On the top of the rear spoiler, we had stickers saying "American Iron." Remember, our intended paint scheme was a US Flag. BTW, the name of our race team is NAFM Racing. Not Another Freaking Miata Racing.
After the tech session was closed we had the option of paying for a chalkboard discussion of the Infineon Track. Hooked on Driving http://www.hookedondriving....ut-hooked-on-driving held a discussion/class in a meeting room at the track. It was a terrific opportunity to see what "the line" was at Infineon. I had been on the track in the early to mid '80s with the Shelby Club. Rich had seen the track on Speed. It was worth spending a couple bucks for some instruction.
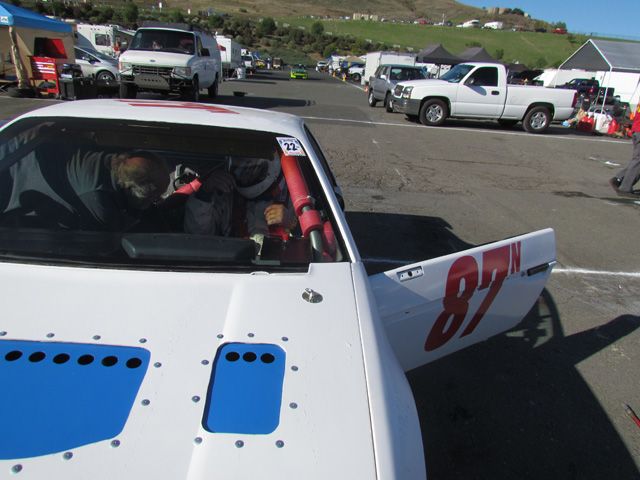
Rich is checking on our transponder mount here. And you can see the decals in place. I left the "tow" stickers at home, but you can see what a little red marker can do when necessary. We left for the hotel shortly after this picture. So we didn't participate in the pre-race partying that goes on in the pits. Can't say I felt too bad about that.
Sure wish those louver dies had worked out for the hood. But I'm sure this relieved a lot of under-hood pressure.
The next day was a beautiful. The mandatory drivers meeting went well at 9:30 as scheduled. We were fueled up and ready to start our first race. Obviously Rich would be our first driver, so he lined up with 163 other cars and got ready to start our first race. He claims that he was "forced" to be the first driver. But since he was the only experienced driver, having driven around the block at home, he was the man.
With so many cars, the LeMons crew has figured out a way to make the start work All the cars are put out onto the track about 10 minutes prior to the start of this seven hour race with just the briefest of pauses between cars. So if everyone is smart, they hold a reasonable speed and warm up the vehicles. Right. Anyway, when everyone is spread out on the track and looking good, they throw the green flag.
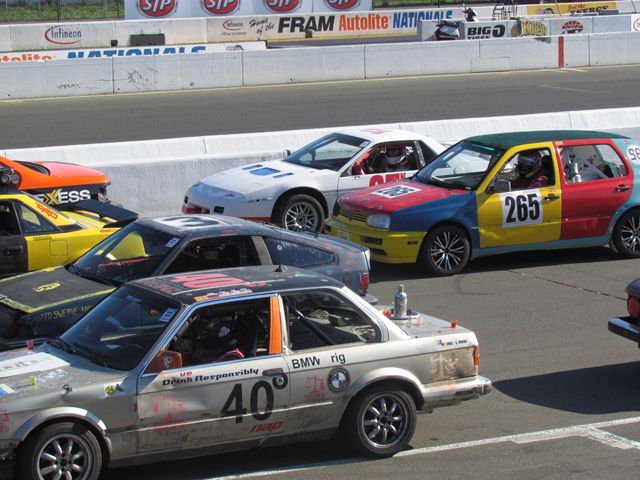
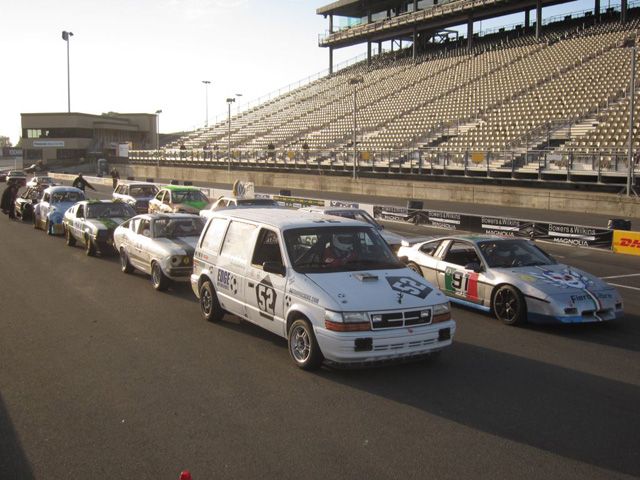
Our Fiero competition for this event. Peter's guys were working hard to get their car finished for the race. And yes, that "car" next to him was serious competition.
The race didn't actually start as planned. Robert, Paula and I were standing in the pits waiting for the start of the race. the 10:30 start time had passed and we were not racing. We could hear the PA system but Rich could not. As it turned out, the track had a call come in from the Novato police department. It seems that the police department was picking up some radio traffic, and that the conversation was between a race team. And it was on a reserved emergency only police channel. The conversation between the police station and the track officials started out with some tension and went down-hill from there. The track PA was busy with the LeMons folks trying to identify the team using a police band radio. Nobody 'fessed up and the officials had to make the hard decision of pulling everyone off the track and check car by car for the offending team. The police were on the way and would be here in about ten minutes. The offending team was identified, the radio magically disappeared, the Novato police turned around and we started the races a little late. The offending team had a couple members who borrowed the radios from the police department.
The offending team bought beer for all 164 teams that evening.
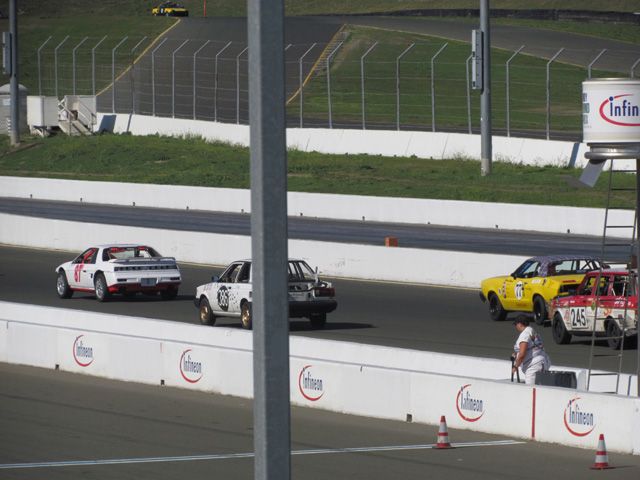
Rich cruising before the race.
Rich on the second lap after the start of the race. I do not believe that he reported this on the radio.
Those damn Go-Pros are everywhere. So I was up at turn 11 watching for Rich to come around. And I see a car leaving the track and entering the pit lane. Something looked odd and it took a moment until I realized that a car had the nose of our Fiero sticking straight out of his rear wheel well. That's a bit unusual. Rich drove in a few minutes later.
Thankfully this car was on fire while in it's pits, so we didn't get the full attention we deserved.
Not to worry. It's just a flesh wound. Nothing to be worried about. After checking out that Rich was okay, we got to work evaluating where we were. Obviously our theme had changed as we now looked a lot like a DeLorean. I was most concerned that my air box feeding into the radiator had been damaged. Forget the rest, that's what I had worked on! We jacked up the car, checked the suspension, checked the radiator and checked that the car was basically sound and could continue. After all, when Rich pulled in, it was at the end of his third lap.
Rich's report was that as the second lap was starting and he was charging up the hill through turn 1 and towards turn 2 he moved from the outside, left to the inside in preparation for the entry into turn 2. As the car started to transition from turning left to turning right he was massively and suddenly loose and spun into the grass. That led to the picture above where he's parked in the grass.
On the same lap, after navigating through the rest of the track through turn 7 and entering the "S"es at turn 8-8A the car again had sudden and dramatic change to being loose. You can see in the video that the cars' rear stepped out and Rich was on a ride trying to catch it.
Everything looked good, or at least okay, so it was time to get to work. The first step was to trim the panels forming our radiator air box. As it was, it made a great ankle slicing machine. Once trimmed to safer lengths, we pulled it back up and riveted to the structure as well as possible. The box would still take a huge pressure load and we needed it to stay intact.
We obviously spent some time trying to decipher what was causing our problem. The first thought was that the suspension was binding somewhere causing the sudden shift to being loose. Nothing really jumped out at us. The original shocks had not been swapped out, but that didn't seem to adequately explain the severity of the change. Rich drives a dirt car and is used to dealing with having the rear end work around. But this was extremely sudden.
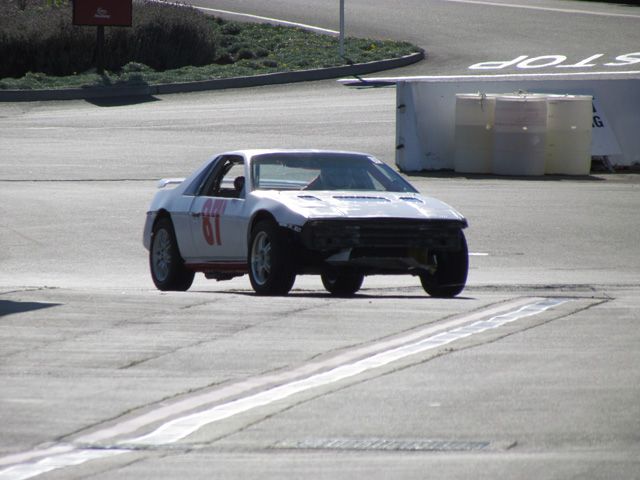
But if you cannot find any safety or mechanical problems, and the car looks safe, you go back out. So Rich gave it another try. That '31 model T at the back of the next photo is blindingly fast with a 5.0 mustang engine.
Rich ran off another couple laps and finally spun off the crest at turn 3A . He was a bit frustrated and came in. Rather than trying to explain what was happening, he handed the car off to me, saying "it's very unpredictable." And I took a shot at it. My mantra was "don't spin, don't spin, don't spin."
I think that I did maybe 5-6 laps. And I clearly remember thinking that perhaps we had made a mistake in trying to race a Fiero. This was no fun. Maybe they would let me back in that '77 Mustang. Was I really too old for this stuff? I pulled in. My comment on getting out of the car was that "this car is EVIL." Rich recalls it as "this car is f*****g EVIL" and I don't cuss as a rule. We discussed what was happening with the car. I had read all the stuff about snap over-steer, but this was ridiculous. Finally we thought considered the effects of running a rear sway bar. Could this be making the car too loose in the rear? So we disconnected the links and I headed back out. There was a noticeable improvement. But to put it in perspective, removing the bar gave us 1" of improvement where we needed a full yard of improvement.
I want to be clear on this. I did not officially spin. Yes, I was at what felt like more than 90 degrees to the track in turn two, but never stopped. And yes, technically speaking I was off the track, in the grass, facing backwards and stopped after cresting the hill on turn 3a. But the LeMons organization had instituted a new program just prior to that race. The rules state that if you have a third spin in a given day, you're out for a specified penalty time. If you noted, Rich had already been off three times ( more on that later.) Had I been found guilty of being off, our day would have been effectively over. But, if you pay $100 fine to the Speedway Children's Charities, the offense could be made to disappear from the records. I do not know how much the Speedway Children's Charities made that weekend, but they got my $100 and were welcome to it.
We continued to brainstorm solutions. Finally, Rich asked from underneath the car, "do you suppose that this rear suspension is adjustable? It looks as though you have actual alignment stuff back here." We had never run anything with an independent rear suspension. Robert dragged out the toe plates and we started by checking what we might actually be able to adjust, the toe-in of the rear wheels.
What we found was that the rear wheels were toed out 3/4 of an inch. What that means is that the front of the wheels were pointing away from each other by 3/4" over the diameter of the tire. EVIL, EVIL I say. Now the problem became how to fix this? We were in the field and nothing would be easy. Or obvious.
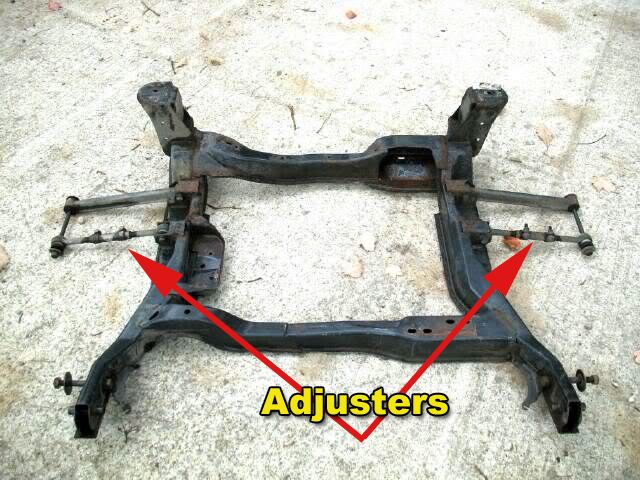
The toe in on the '88 can be adjusted with what are essentially two turnbuckles incorporated in one of the rear arms. I borrowed this photo from a posting by Fieroguru here https://www.fiero.nl/forum/Forum2/HTML/095283.html. I hope that's okay. But it illustrates where the toe adjustment can be made.
But knowing how the adjustment will be accomplished is a far step from knowing how it should be done. Was the whole 3/4" all on one side, split evenly between the two or randomly split between the two. The solution, as we saw it was to not only adjust the overall toe setting but make sure each rear tire was adjusted in relation to the center-line of the car. When we build a race car from a pile of tubes, on a jig, we place lots of convenient marks on the chassis for future repairs and alignments. I have no idea if Pontiac has a line or dimple or point designated as the center-line of the car. What we determined, in the lack of better information, was to use the rear cradle mounting pick up points. We assumed that the cradle was symmetrical with regards to the attachment points. So our goal was to make the rear tires parallel (actually our goal was for 1/32" of toe in) as well as making them the same in relation to the center-line of the car.
Concentrating our efforts on the front end of this horse, we had never touched the rear suspension. It looked to have run well on the street. Our first task was to loosen the adjusters., clean the components and reassemble everything with a dose of anti-seize. That's what we did at the front. That was a chore. We didn't even look at the camber, toe was a big enough job. It was close to 4:00 when we got the rear adjusted as well as possible. Robert, made what was probably the smartest move of the day when he declined to take a turn behind the wheel. A nap seemed far more desirable. So Robert passed up his chance to experience the evil car.
Rich had the opportunity to drive the car next and it was a totally different beast. I finished out the last hour of the day and crawled out of the car. We had not given up and the car was totally different. Over-steer was still there, but only if you got a bit exuberant and didn't pay attention.. Though we were tired, we were still happy with our progress.
We were not the only ones having problems at the track. Check out this video taken from that '77 Mustang II. http://www.youtube.com/watch?v=vcCCBG0iOjs Check out the action up ahead.
Back in the pits, Paula had dragged out Robert to set up a stove and start with our contribution to the community party that a Lemons race usually degenerates into. Team Caffeine had three or four industrial coffee makers and supplied coffee to all comers all weekend. The police-radio offenders supplied beer for all. Many other teams supplied different items for the asking. Because of our "American Iron" theme, we brought 12 dozen tamales and handed them out to anybody walking by. I would like to say that we were pretty popular that night.