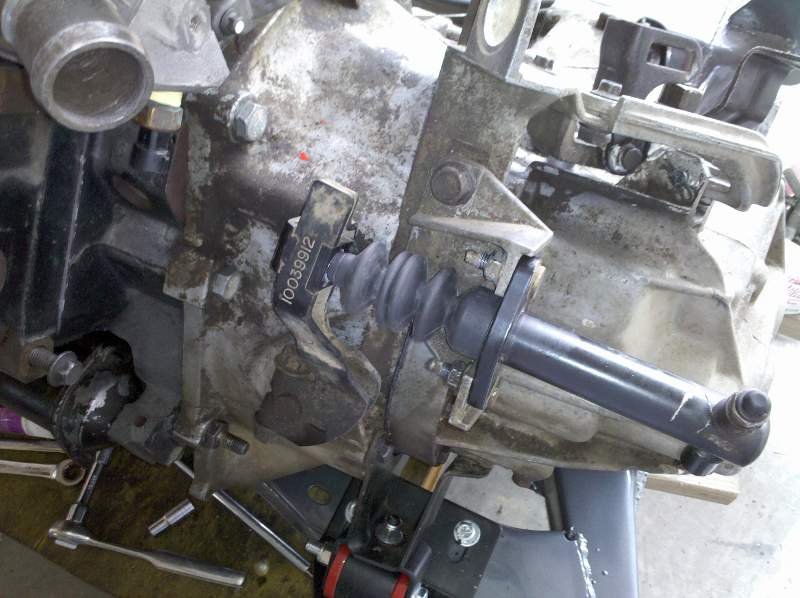
I tore down my Muncie from the parts car, and the only reason the shifter wasn't working was the bolt thru the shift pin had come loose. So, I lock-tite'd it and re-assembled the 4-spd with some permatex for sealant around the lip, and presto!
Shifts like a dream.. This will save me a ton of money on cables, mounting brackets, slave cylinder, and rodney's fwd getrag adapter kit. I'll probably hang on to my fwd getrag in case this 4-spd grenades, but it looked really clean inside, and there's no galling on the gears or bearings.
I ordered my fierostore HD clutch kit for the 4-spd, (Joe aka Fieroking has used them with great success behind his 4.9), had my f-body flywheel resurfaced to .840" from crank hub to friction surface, and ordered poly engine/tranny mounts from West Coast Fieros (they shipped today, Woohoo!).
I should have the motor/transmission on the cradle by Monday or Tuesday. Just have to get flywheel bolts.. The consensus is to use the ARP SBC cam bolts, and lock-tite them in at recommended torque for the bolts, but 20 ft/lbs makes me a bit nervous.. I might just get some 5/16-18 x 1" bolts in grade 8 and torque 'em down to 35 ft/lbs or so.. Anybody have feedback on these?
Yeah, well, there're these weird things called "families" and "budgets", and both seem more important than the car..
Luckily, spring is here, and I'm feeling motivated, and the wife's taking the kids to CA for spring break, so I have some guilt-free car time coming up..
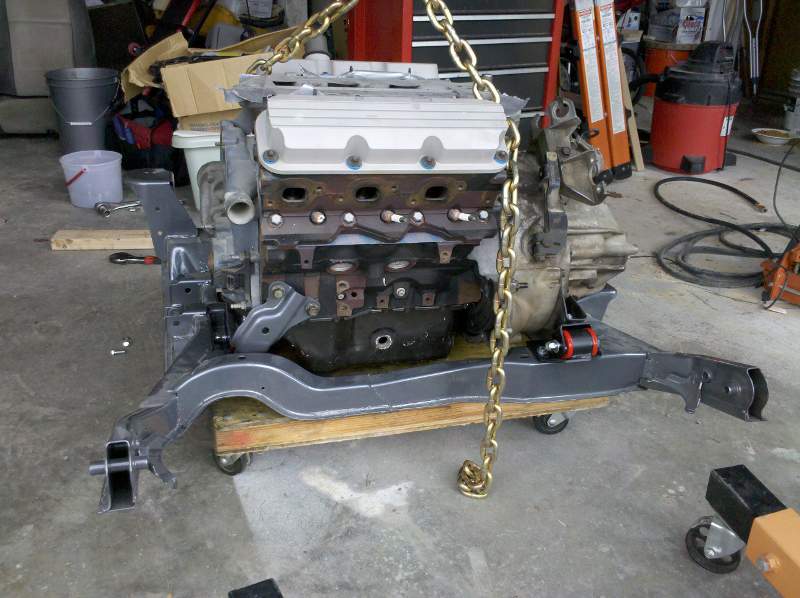
West coast fiero poly mounts all showed up today (Thanks Chris!), and I went to NAPA and got some 5/16 18 x 1" grade 8 bolts to bolt the flywheel to the engine, so all my excuses for not working on the car are gone.. That, and the wife and kids are in CA for the rest of the week, so I'm off to do some damage. With any luck, I'll have the engine and tranny on the cradle by tonight!
[This message has been edited by aaronkoch (edited 03-31-2010).]
Well, I didn't get the engine and tranny on the cradle tonight, but I did get the flywheel, clutch, and pressure plate on, and got the tranny mounted to the engine.
I'm thinking I may have to do a true dual exhaust, as the 4 speed's tranny cables are going to be really really close to the exhaust crossover, if not touching, and that's not ok with me..
Instead of using the ARP bolts for the flywheel, I used 5/16" 18tpi 1" bolts and some grade 8 washers, and locktite. Without the washers, the bolts would bottom out about a fingernail's width away from the flywheel. No clearance issues between the bolts and the clutch plate, there looks to be a bit more than 1/8" inch of room or so b/t the bolt heads and the springs on the clutch plate. I'm using the fiero store's HD clutch kit, and the clutch is quite a bit bigger than the stock clutch..
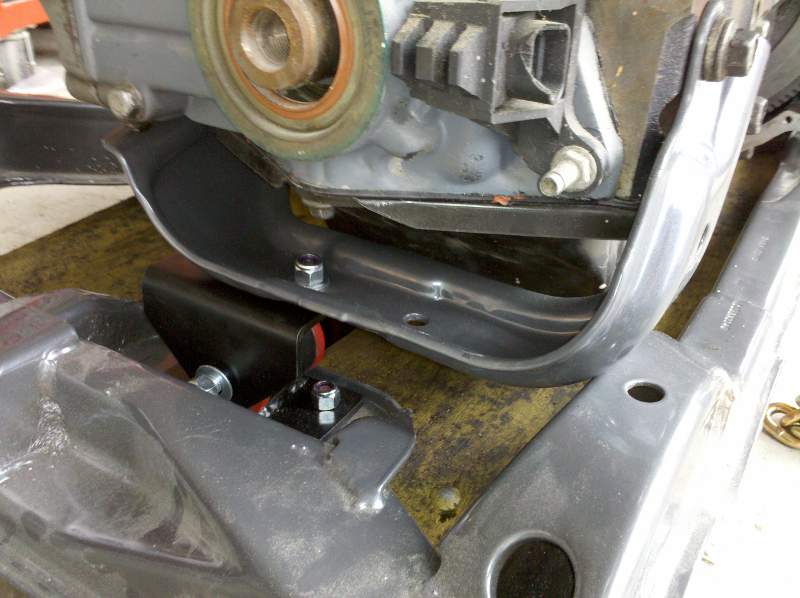
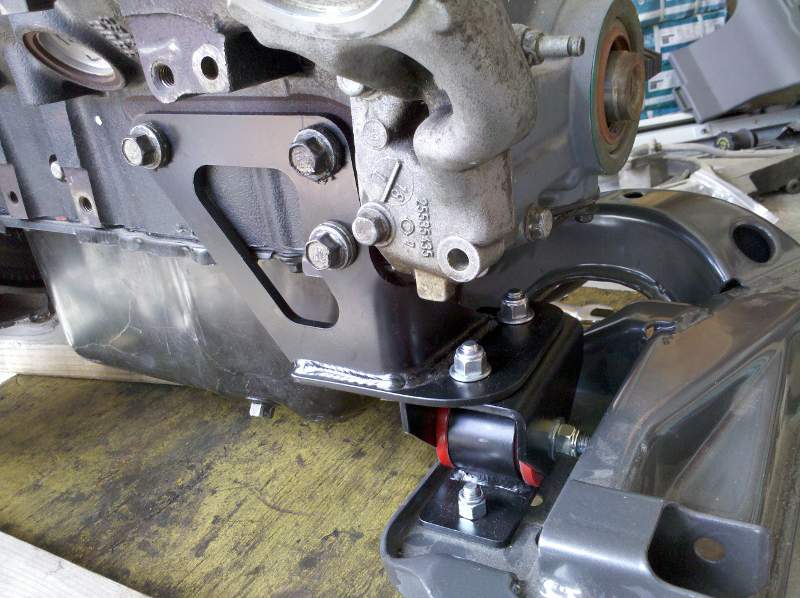
Well, it looks like my fancy U mount won't work.. Sigh.. I guess I'll give Chris at WCF a call back and order his 3800 mount.
It does feel good to have it ALMOST on the cradle though.. Right now the mount bolts are just finger tight to check for fit. I'm hoping that once I get the correct mount for the engine and snug the bolts down, that the 4-speed will no longer rest on the auto trans mount on the drivers side of the cradle. For any of you guys that have done this, how close is your trans to that mount?
Mine is really close. I actually made new mounts to insure that no rubbing or foul play will harm the set up. Too much work to have to gamble a mount. Getting it safe and sound the first time is the best way.
Finally got WCF to answer their phone.. (ok, ok, so it's only been a day...) and ordered:
Hopefully it makes it by this weekend, I'd love to be able to get my motor bolted down.
Paul, if you're still reading this, I know you used a 4-speed, what did you do around the shift cables? it looks like it's going to be TOO close for comfort. I've actually thought about getting some f-body manifolds and running true duals, using stock cat location for one muffler, and stock muffler for the other..
My motor mount came in, and I finally got the engine and tranny bolted down tight.
Engine mount:
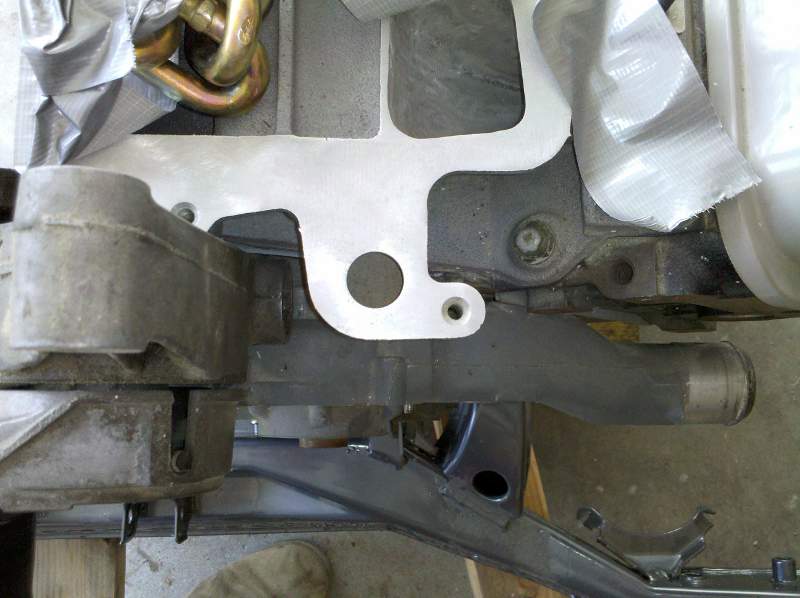
Back trans mount:
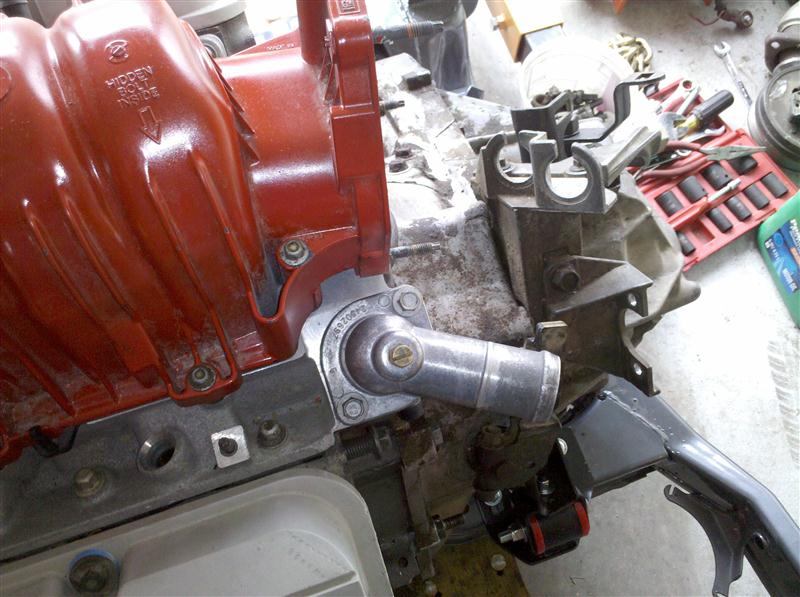
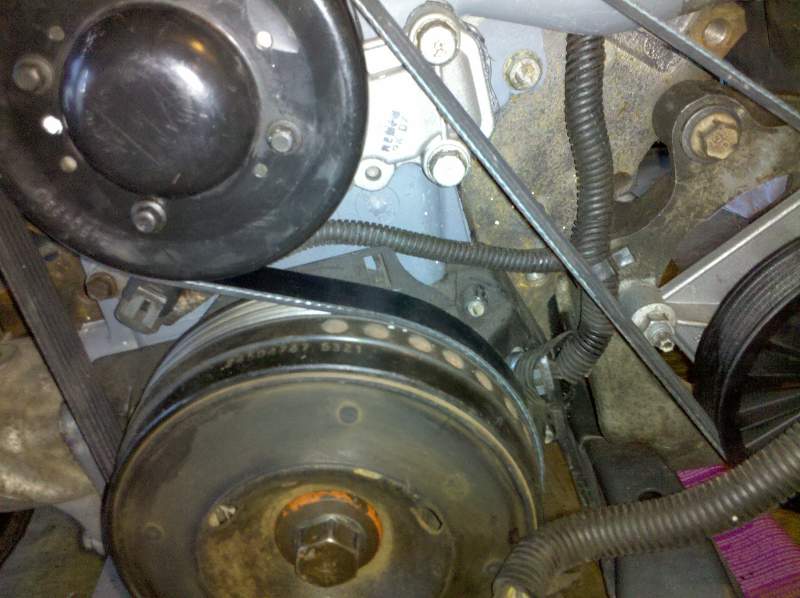
Front trans mount: Forgot to post pics of the inside of the 4 speed, You can see the bolt that had fallen out, it goes through the select arms into the shift shaft..
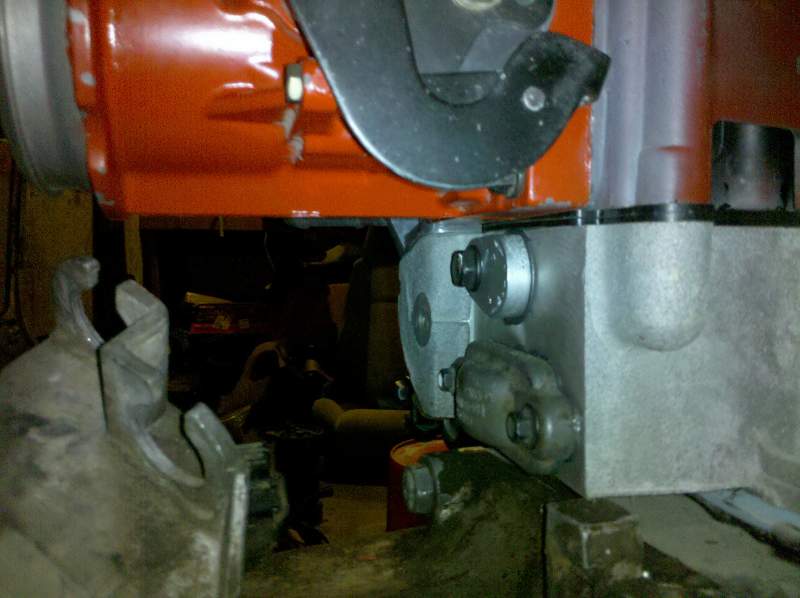
Here's a shot showing the rather limited clearance between the 4 speed's case and the '88 cradle's auto trans mount. It's about 3/16", but with poly mounts, I'm not going to worry about it.
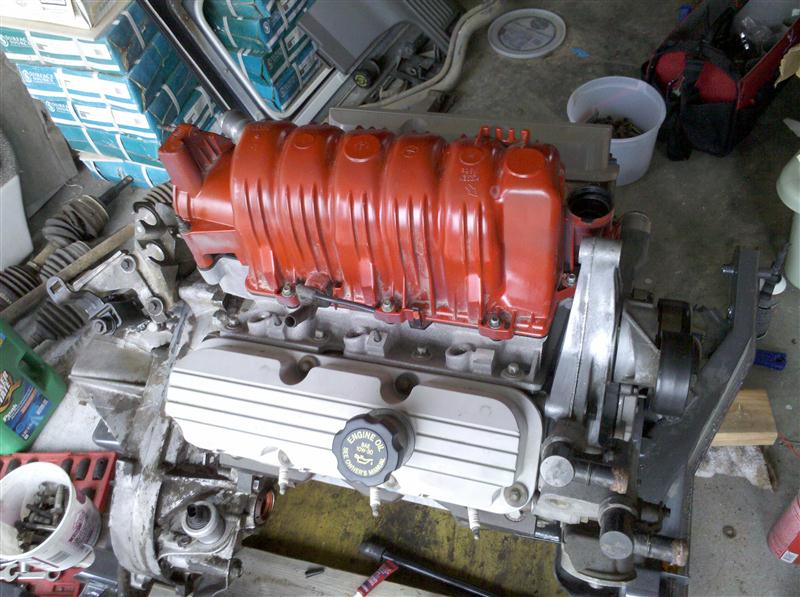
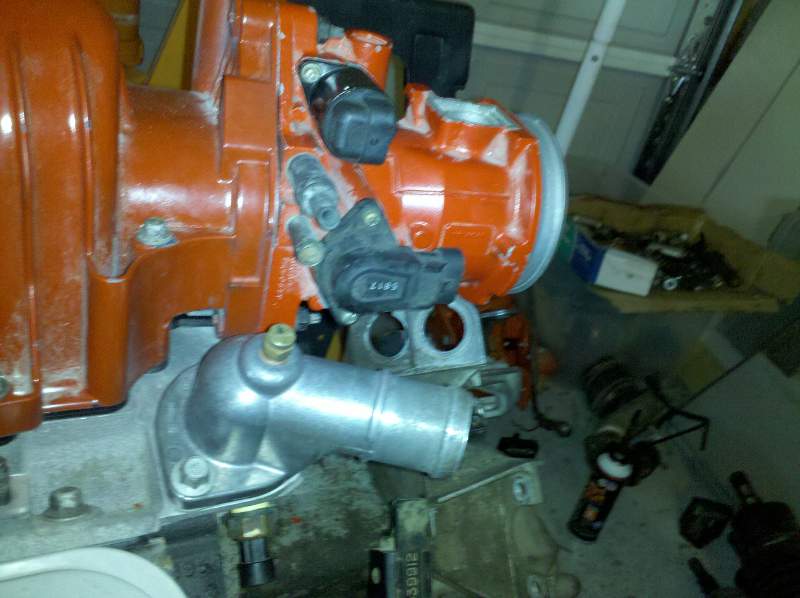
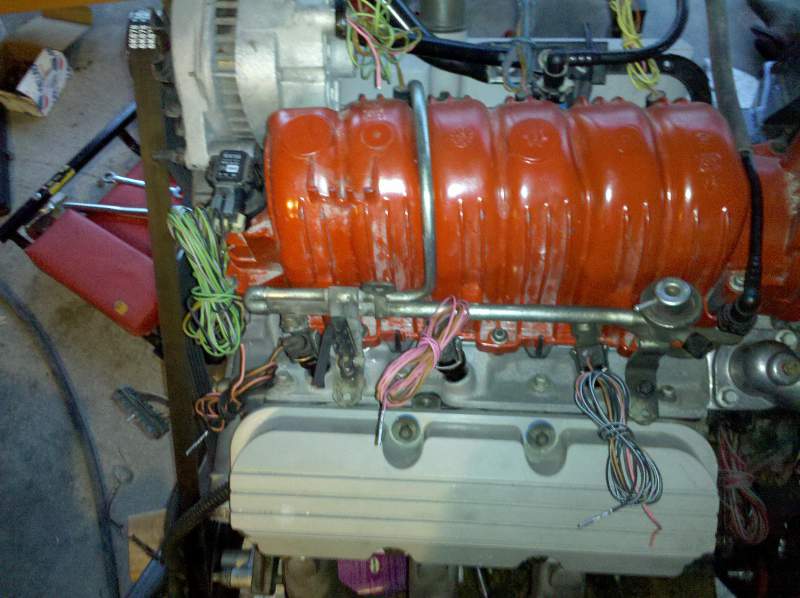
I silicone'd and attached that weird little coolant passthru cover on the LIM, not sure why they made it a separate piece, maybe something to do with casting it.. So, what mounts here? This is the LIM, on the pulley side of the engine. I'm referring to the open port on the bottom right of the LIM..
I went and looked at the plastic intake, and sure enough, looks like a built in valve there.. Does that mean I don't need valve cover breathers since mine's NA?
Back from the dead Second LP, here we go Coming back, from the R-O-M-E-O! Pistol packed, with the 4 or 5 slimmies Hat turned back, and some airwalk jimmies!
(Just like your thread, I pulled this one from way back!)
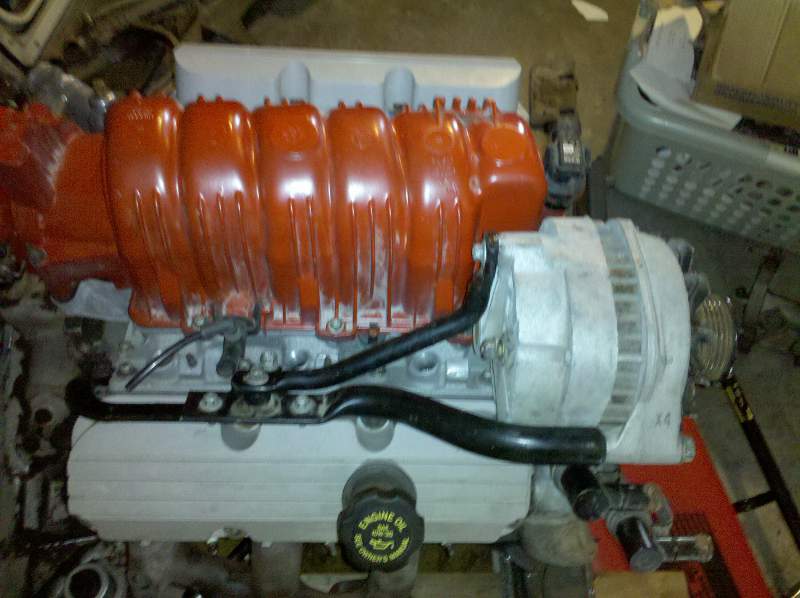
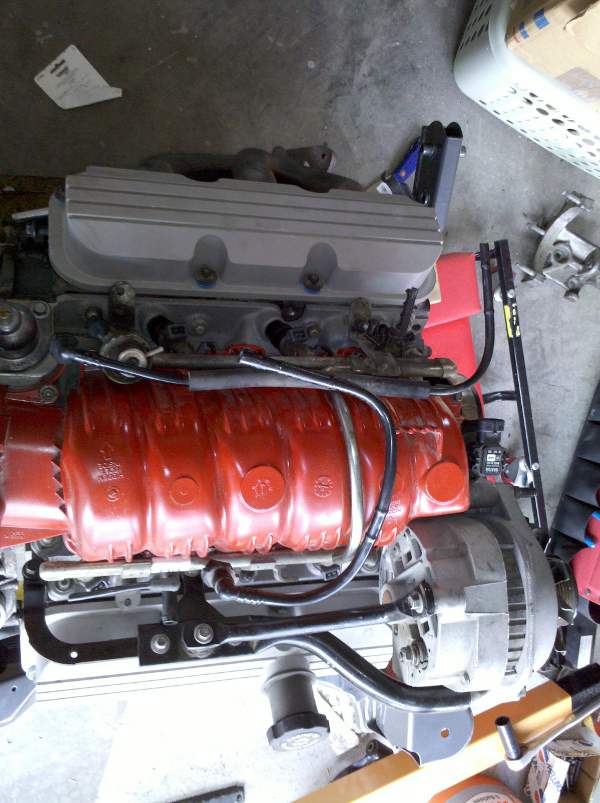
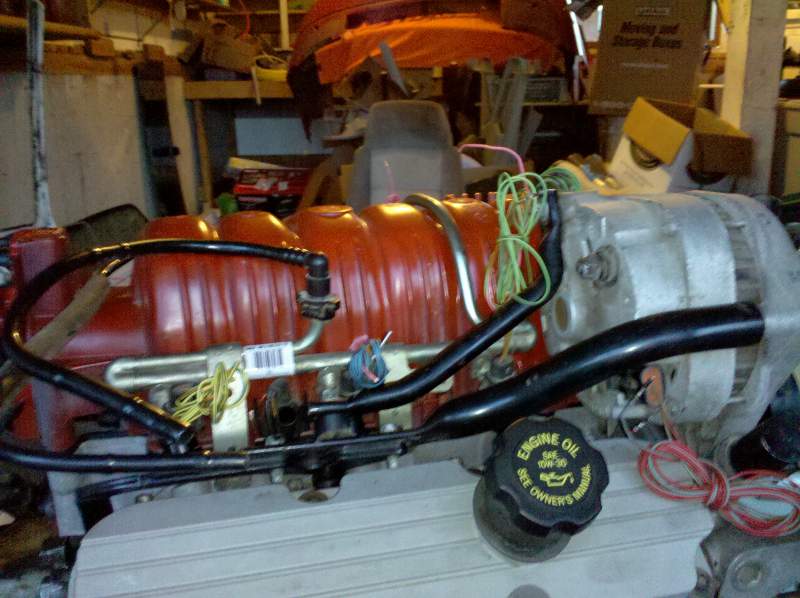
Got the thermostat housing on, and the upper intake manifold.
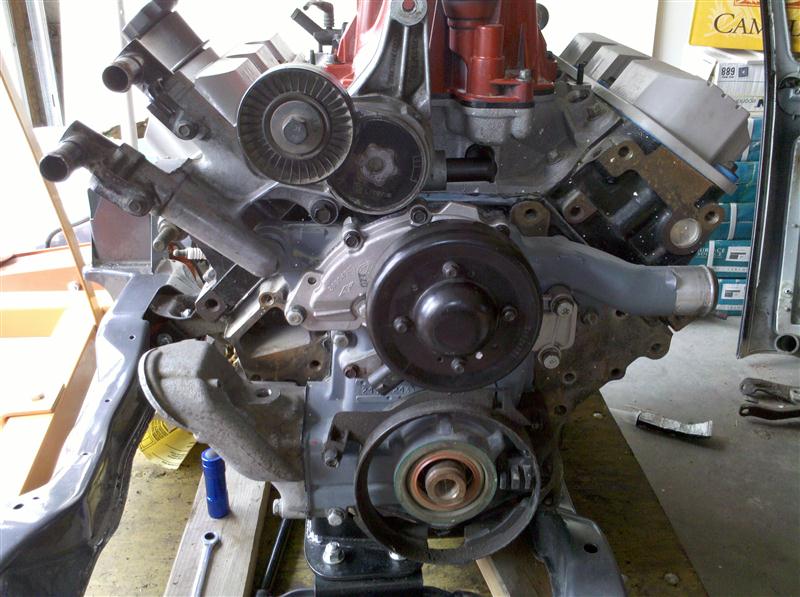
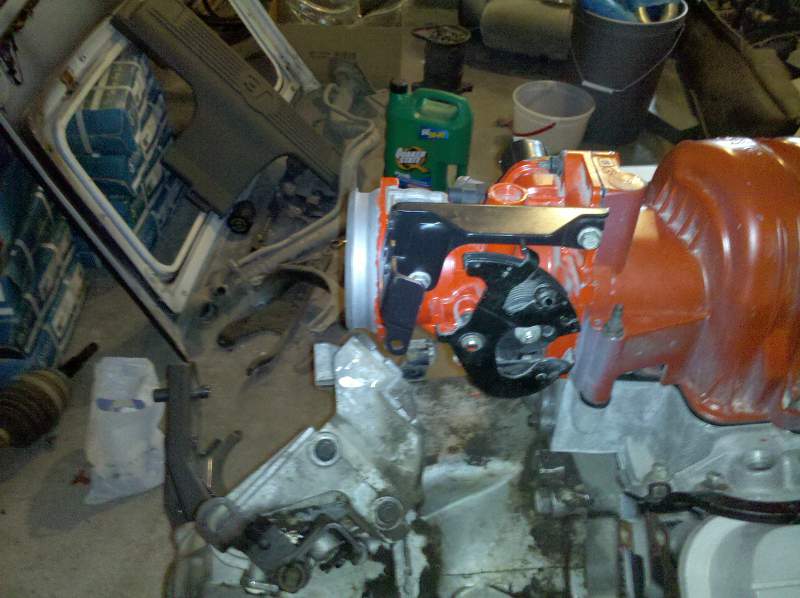
Then, went and got a new water pump, love how the 3800's come with a metal impeller, and put the water pump on as well as the alternator bracket and weird little plastic coolant elbow (new as well).
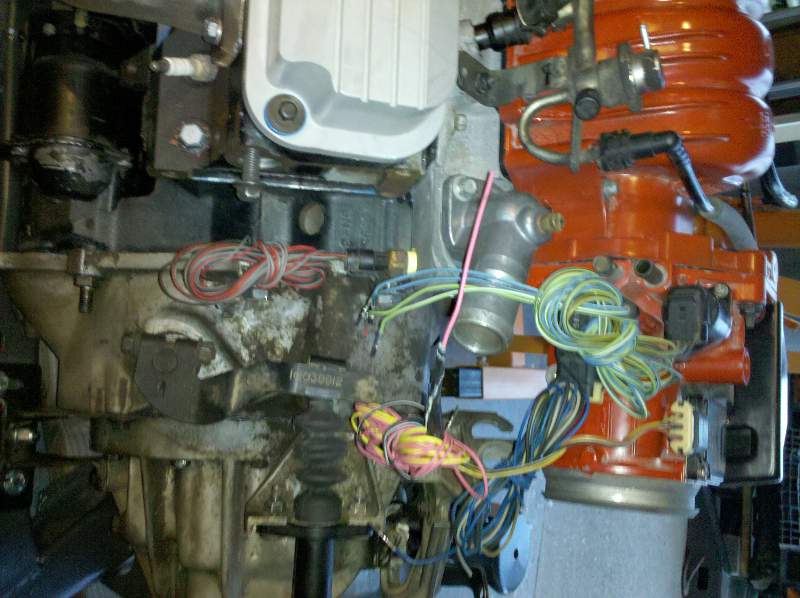
Next up is the alternator, I've got the wrong one apparently, it looks nothing like the mounts say it should..
Well, I made it to the Pull & Save yesterday, and grabbed an alternator, $9, can't beat that. Also grabbed a digital cruise module off a '98 L36. Hope it's the right one..
I lubed up the harmonic balancer and seal, then slid it on, and bolted it down. My inspection plate is still off, so I wedged a screwdriver between the teeth of the flywheel, so I could really snug 'er down, but I will fire up the air compressor after my 2 year old wakes up from his much needed nap and I'll really get 'er tight with an impact gun..
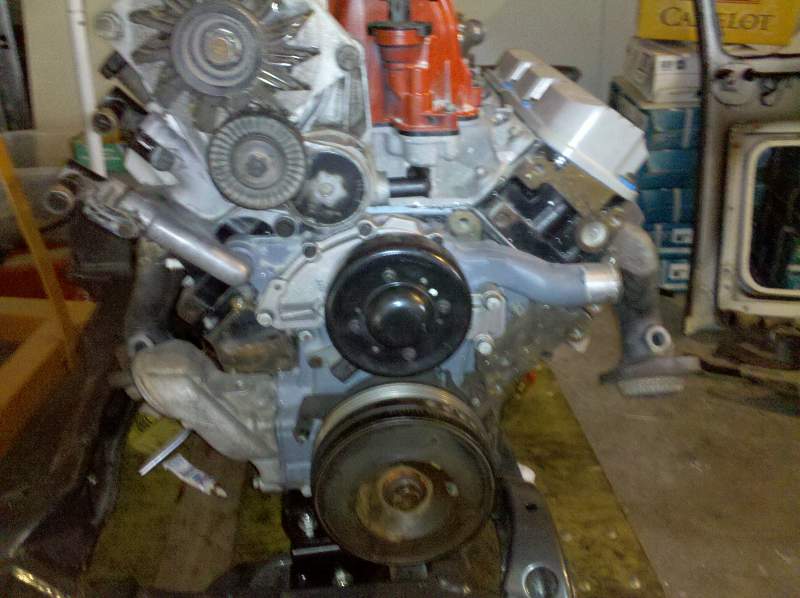
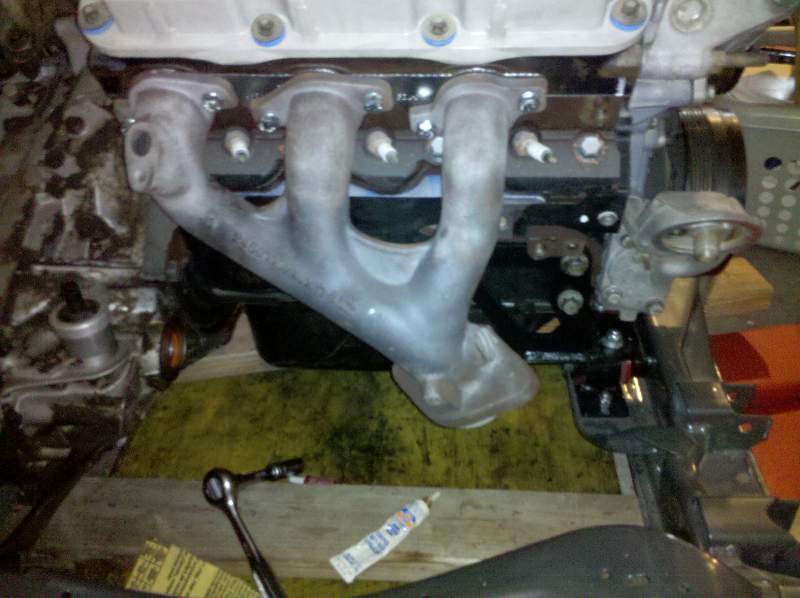
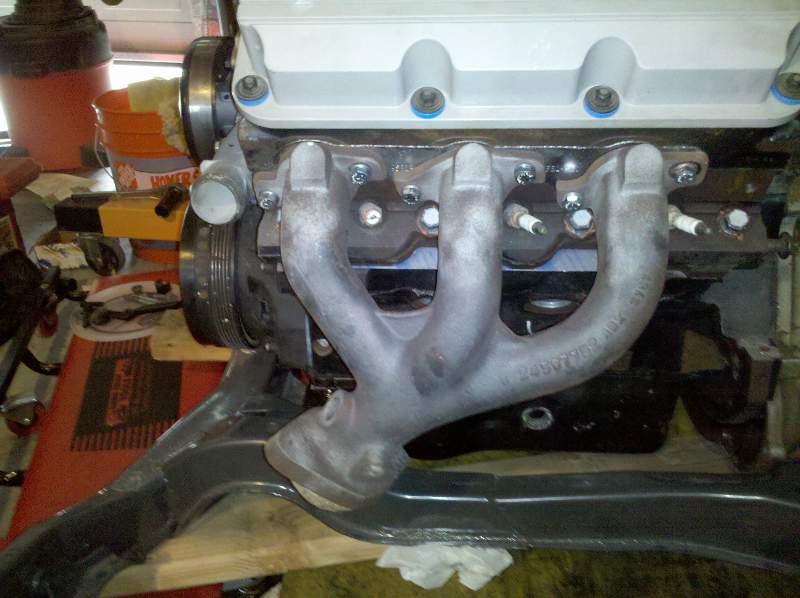
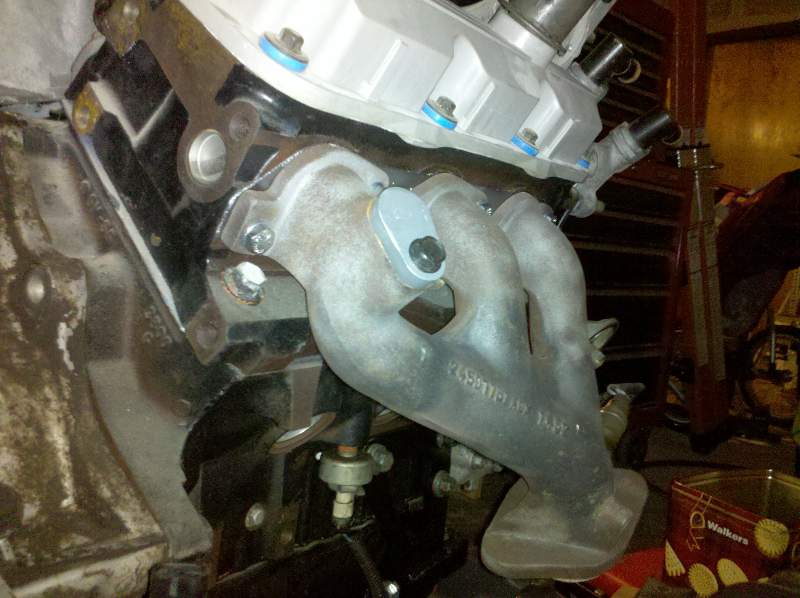
Also picked up the F-body exhaust manifolds from a junkyard, and thanks to Joe (Fieroking)'s kindness (he let me sandblast them at his place last week), I got them all pretty and scale free and mounted them up. These are going to work perfectly. One thing for those of you who want to try this: I'm mounting the manifolds on the opposite side of the engine from how they originally came, so the front bank dumps out right where the air compressor would have gone should I have wanted to keep it. Just something to know.. The front bank will feed right down where the original exhause came under the cradle and oil pan, and meetup with the rear bank, then come up into a muffler, and out to the tips like stock.
Finally, got the correct alternator mounted up, and put on the throttle body and throttle cable bracket. For those of you wondering what my obsession is with the F-body manifolds, check out where the 4-speed cables are going to sneak through, and where the 3800's original crossover would go, and you'll immediately know why I'm doing it this way..
All for now, more to come soon, as soon as I get the fuel rail and injectors on.
Ok, so I had a second wind, and a sudden burst of motivation. Doesn't happen often, so I took advantage of it..
I pulled the o-rings off the injectors, and replaced them with new ones, and slapped the fuel rail on. Man these are easy compared to the devil-inspired 2.8 rails..
Then, I pulled the slave from the white '85 parts car out of the box, cleaned it up, and disassembled to check for wear. Looked beautiful, so I cleaned it all out, and pre-lubed it with a bit of brake fluid, then greased the pit with a bit of lithium grease, and the release armpit with some lithium grease, and installed.
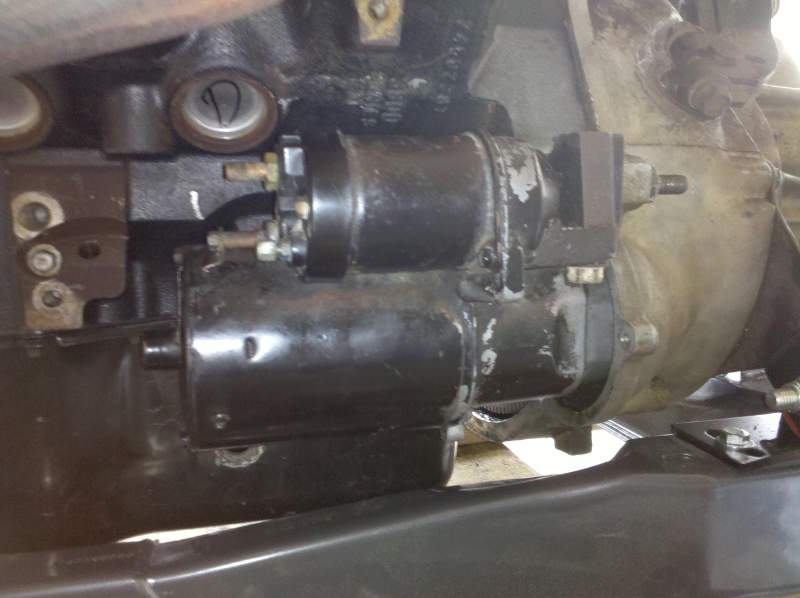
Following that, I dug the starter out of the parts box, found the bolts for it, and cleaned it up. Looks like the donor car leaked a bit.. It was caked in 1/4" of oily goo, but came out nice & clean (still ugly, but it's hidden...). Then, bolted it up. Man, these things are retarded heavy..
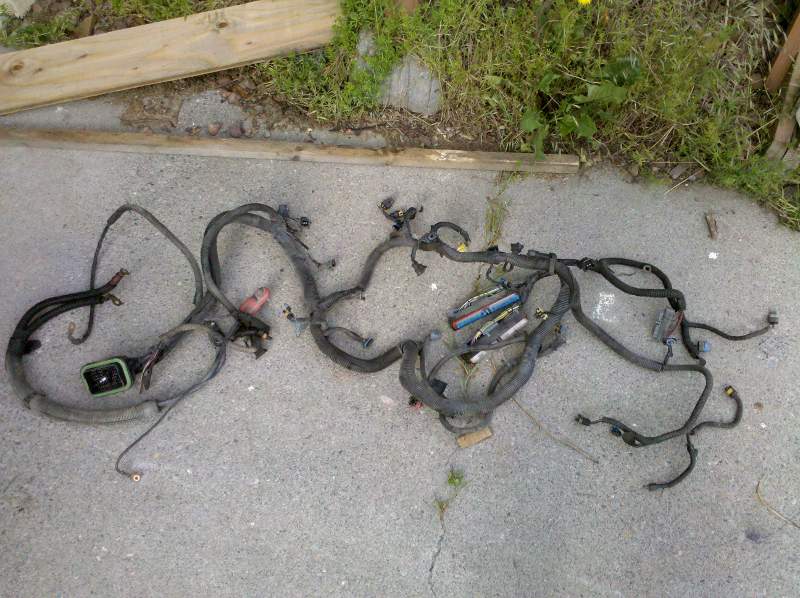
So, that concludes todays sporadic burst of activity, I also dug the wiring harness out and cried a little. I know most of it's going away, but still, it's a bit daunting. I'll start liberating one piece at a time soon..
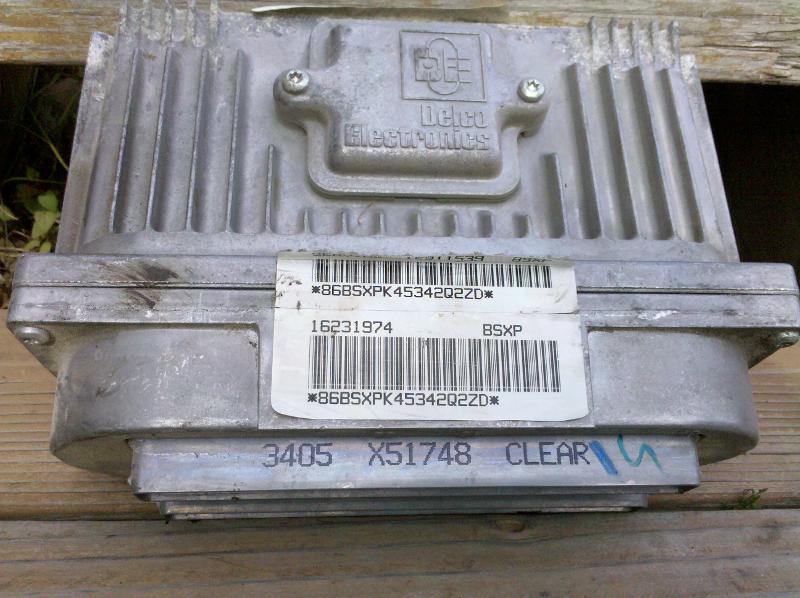
Lastly, I pulled the PCM out and brushed off the cobwebs. Been a while since this has seen service.. I think it's out of a '97, can't remember, but I've got it written down somewhere. Fieroking has access to GMtuners here in town, so once the car is all wired up and I can start it for 2 seconds, I'll get the laptop and pull out VATS, tranny codes, evap, egr, post cat O2 sensor, and see if there's some way to incorporate the dual bank O2 sensors with this computer.
why are you gonna run dual banks? I am going to just block off the 02 bung and run a ypipe. are you still going for true duals?
I think I am going to end up with a Y right before the exhaust passes under the rear of the cradle, then up to the stock fiero location through a big 'ole flowmaster that Fieroking gave me because he hates the sound.
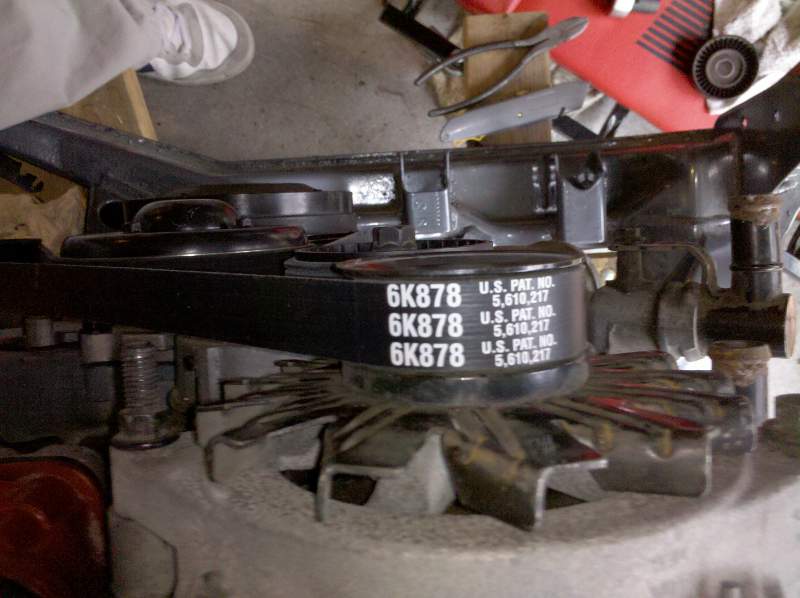
After about 3 ideas that DIDN'T work, and 3 belts that were too short, I think I've finally got it!
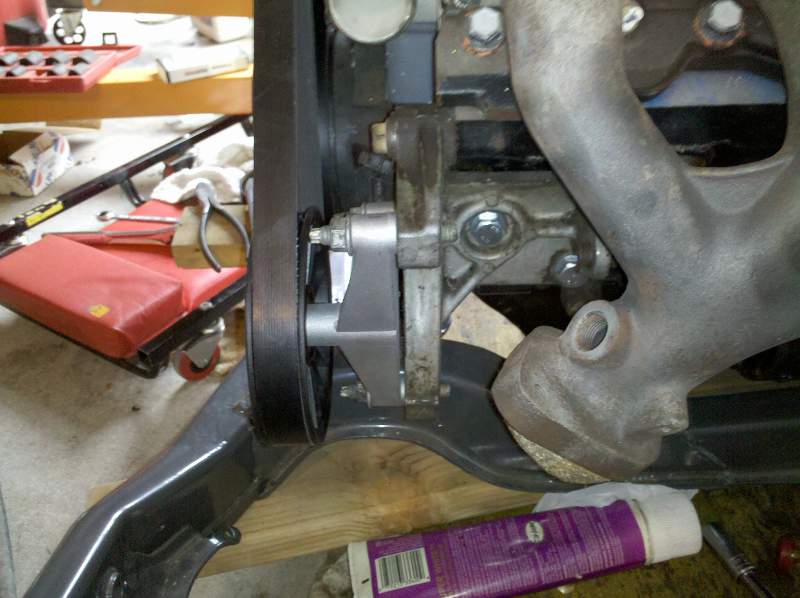
First up, the AC Bypass pulley from NAPA, $36. This was too easy vs. trying to make one.
It literally just bolts to the AC bracket, and lined up perfectly, first try.
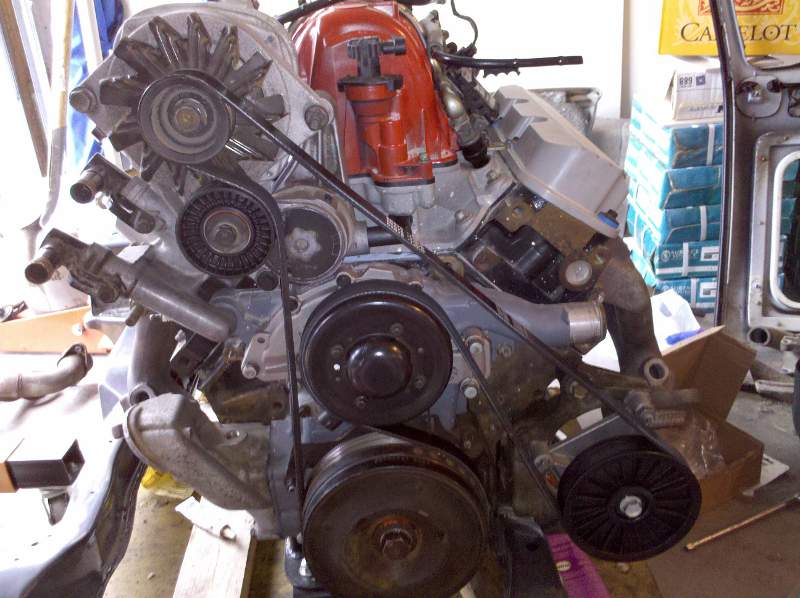
Next, front view. Notice, at least 180 degrees of wrap on all major pulleys, and it uses the factory tensioner.
Then, finally, the belt's part number, for those of you trying the same idea:
I did have to cut a bit of the crank pully plastic shroud off with some wire cutters, right where it mounts on the post stud, but it's still snug on there. I'm a little concerned about what happens as it stretches, as in will the 2 parts of the belt rub when the tensioner is at full pull, but I think it's ok. It will be VERY easy to change the belt in the car, so worst case scenario, I replace the belt every year. It's pretty snug on there, but not as tight as factory, but I think that since I don't need to run the AC compressor or PS pump, it's more than fine. Also, for those of you doing this too, The tensioner is at the "end" of it's factory marked range, but there's still another 1" of pull or so left in the spring. I'll update when I have it running to confirm that it will be ok, but I think I'm fine..
[This message has been edited by aaronkoch (edited 06-17-2010).]
Aaron I am planning on running a similar belt setup. Jncomutt did something similar on his sisters car. https://www.fiero.nl/forum/Forum2/HTML/102326.html I found a pulley you may be interested in. On the tensioner I replaced the pulley with a ribbed one. the part number is 49106 made by Goodyear. Pulley was a whopping 15 bucks. Just remember the bolt on the pulley is left hand threads. I ran a ribbed to keep things from slipping side to side. Nice to see someone thinks like I do.
[This message has been edited by Tstang429 (edited 06-17-2010).]
I did end up replacing the pulley with a brand new one, since it's so easy to do when the motor's out. I need the smooth one, however, as the way I've run it the backside of the belt is on the tensioner pulley, just like stock. Also, I like how John did his belt routing, but this way gets like 3 times the wrap on the crank pulley, and I'm pretty sure since the alternator, crank pulley, and fake ac pulley are all ribbed it will stay put ok.
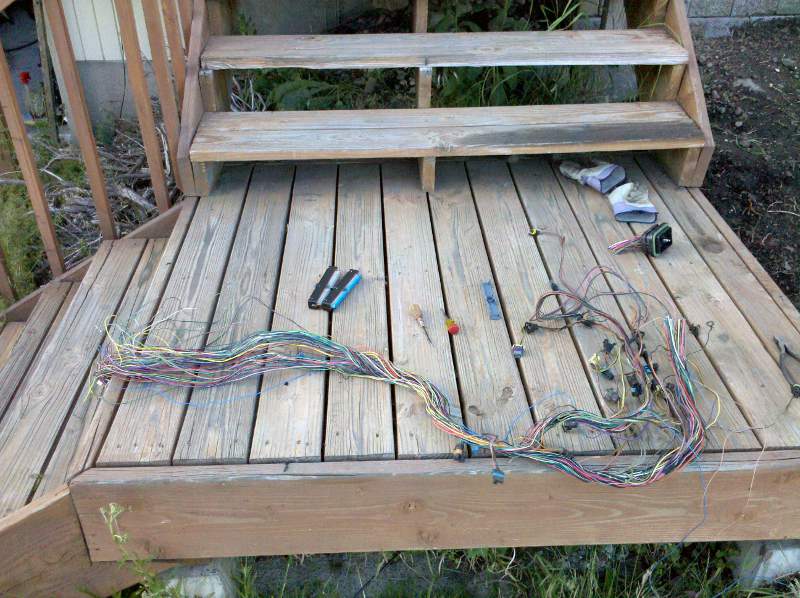
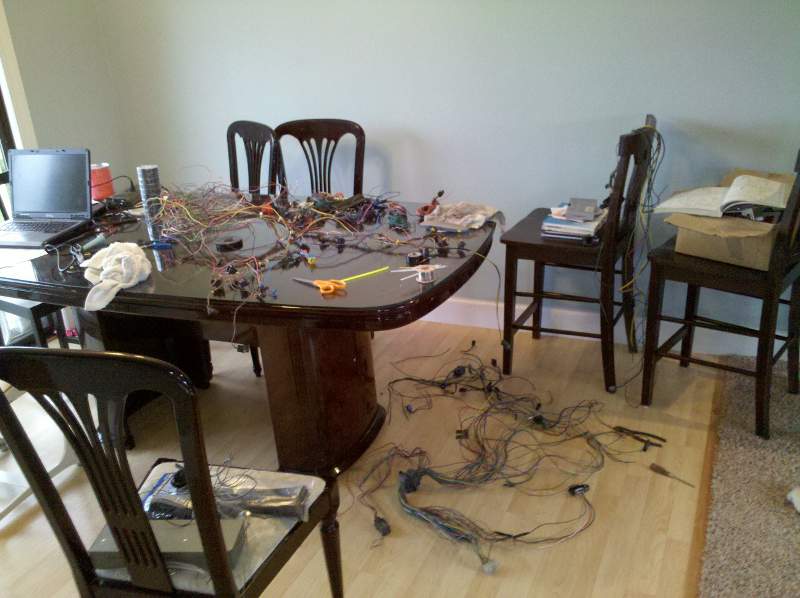
Ok, finally started the wiring. What tremendous fun THAT is..
Got all of that nasty tape, loom, and junk off the harness, then slid the pins out of the connector:
Then, started the de-tangle process:
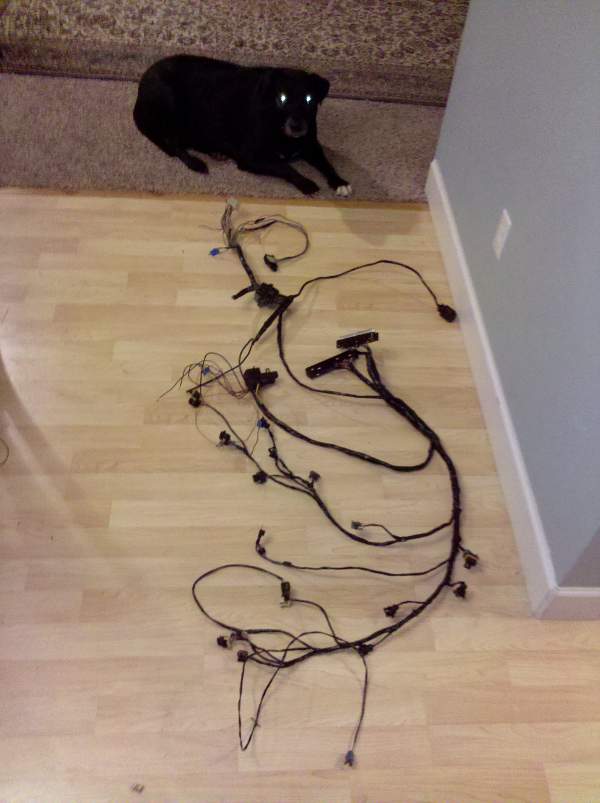
Once they were all seperated, I went around and found where they all plugged in. This was much easier than I anticipated.
Tomorrow's task: Run to pull & save, as it seems I don't have an air temp sensor.. That's ok, because I'm going to look for another O2 sensor as well. There are a lot of L36's in the junkyard at the moment with those Cash for Clunker stickers on them, and that just chaps my ass.. some of these are like '02 buicks loaded with leather, and they look brand new. Ugh, it makes me ill that somebody would intentionally granade a motor like that..
Then, I'll run the wires where I like them, and begin the re-loom. I still need to get the VSS plug off the '85 harness too, and run that in with the rest of them. There were a LOT of left-over wires, I know some of them will go to the cabin, but most were for the EGR, EVAP, AC, and all the fluid level sensors. I'd guess more than half of the original harness won't be used.
Very nice way to lay out the wires! That thing is going to scream. With all of the great swaps going around the neighborhood, maybe my 3.1 needs to throw a rod or something.
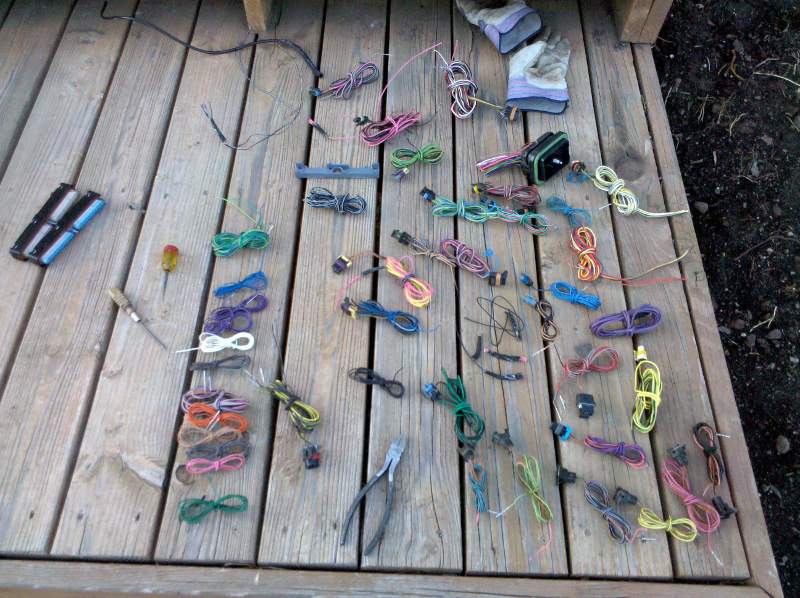
So after laying the wires on the engine how I wanted them, I zip-tied them temporarily in place, then grabbed the whole mess and spread it out on the kitchen table. The wife and kids are in CA for the week, or else I'd get beaten to death for this mess.. I also grabbed the original harness, and hacked off the c500 and c203 connectors.
Next, I soldered up the grounds, the injector +12v feeds, and walked each sensor to the appropriate spot on the PCM connectors. I must have spent about 10 hours doing this, I know there are people WAY faster than I am at it, but hey, it's my first time, and I didn't want to have to tear into it again later to fix stuff. I did run into a slight snag, all of the instructions talk about using c203's J and/or K pins for the injector feed, but that isn't possible in an '88 duke, as those pins aren't there. I used c500 E3, which is also used to power the ICM, and is IGN fed.
After getting the whole mess pinned, I had a few extras. The green wire (of the black, tan, and green) off the coolant temp sensor didn't have a spot, so I fed it to c500 C2, which according to the charts is the temp gauge feed. I hope that's right.. Also, the oil pressure sensor apparently never talks to the PCM, so I ran the tan lead to C203 pin E, and hope it's the same values as the fiero one (mine is the 3800 oil press. sender) and the black to ground. We'll see soon enough.
Other oddities: Since my car was an auto, and will now be a stick, I ran the yellow wire coming from C500 A4 to the start solenoid, and will have to wire in the safety at the pedal assembly side (or not, can be usefull for moving the car when it won't run). Also, I noticed that the original fiero v6 intake air temp sensor had the same plug as the 3800, so I used the original fiero v6 one as it sits in that can so well. We'll find out if the ohm range is the same when I get power to the PCM..
Not sure if this is how it's supposed to be, but I ran the PCM's fuel pump feed to the fiero FP relay pin A. This will mean that I no longer have the oil-pressure backup driver for the FP, so I guess I'd better keep a spare relay in the car..
After all that, I taped it up. I will get some new high-temp loom for it tomorrow, just can't bring myself to put the old stuff on it.
Of course, my dog Bailey was constantly there begging, er, I mean "helping". Since I was sitting at the table, she thought that meant I must be eating..
Forgot to post this earlier: I went to hang out with Jeff, Joe (FieroKing) and dratts on Saturday, and Joe whipped me up some block-offs for the EGR passages. I noticed that on the original EGR tubes, the hold-downs were nice and thick, and I cut the egr tube, slid off the hold-downs, and ran over to Joe's, where he put a scrap bolt thru the hole, welded them in, and cut the bolt about 1/4" long to keep the block-off's centered. He then grinded down the tops smooth, and I hit 'em with some high temp paint. I used some copper high-temp exhaust gasket maker on the one on the exhaust manifold, and some Right-Stuff for the one on the intake manifold.
I've gotta do the fuel pump, filter, and a little plumbing, and i'm almost ready to mount up the suspension and get the motor in the car. It's getting exciting now...
Ok, bedtime. I was actually sick today, and ended up just staring off into space for a lot of the day.. I checked the pins end to end with a meter just to make sure I didn't space out too badly..
Wish me luck, I'm getting there..
[This message has been edited by aaronkoch (edited 06-23-2010).]
Oh yeah, and by the way, to those of you who ENJOY wiring like this (yeah, I'm talkin' to you Joey), you are SICK, SICK, TWISTED people. This was by far the most obnoxious job of the swap to date, and that includes wrestling with the rear cradle bolts. I see now why people are happy to plunk down $500+ for a completed harness.. That is some TEDIOUS work..
Great job on the harness! It really does look great. I have done so much wiring on robots, cars, and homes, that I do not shed a tear for you. It is a pain, but just look at what you get out of it. The engine is looking good too.
Tedious work indeed but deffinently not worth plunking down serious loot for, if you get ahold of new PCM pins its even easier and comes out about as clean as it gets.
Going well, Stacey and the boys are headed out for the weekend in the morning, and I'm going to drop the tank to change the fuel pump, do a little cleanup in the bay, and hopefully get the engine in this weekend.. I'm straight running out of time for the fierofest, and right now it's looking like 50% chance of making it.. IF, and it's a big if, everything works as it should, I should be ready to rock. Any major setback (and there almost always are with swaps) and I'll be down there for moral support..
Great minds think alike. I'm doing a 3800SC and did exaclty the same thing to block off the EGR ports. I used a Carriage bolt - cut the head off and welded it in the hole. Then I trimmed the EGR tube ends leaving about 1/8" of the tube on either side of the "seal" ring and bolted them back in place.
Motor is looking good - wish I had the stones to dive into the wiring harness - every time I look at it, my head starts hurting.
Nice to see you yesterday at Fieroking's. Even if you were driving a Ford. (Hey, I love my Ford.) Cool to see the Gulliford boys too. There are so many Fiero projects going on in the Inland Northwest right now.
Just chiming in to see how much you have accomplished on your beast? I know, only so many hours in the day. Keep your head down, and your eyes up. That 88 will be smokin' when you are done.


 So, I lock-tite'd it and re-assembled the 4-spd with some permatex for sealant around the lip, and presto!


 That thing is going to scream. With all of the great swaps going around the neighborhood, maybe my 3.1 needs to throw a rod or something.
 It really does look great. I have done so much wiring on robots, cars, and homes, that I do not shed a tear for you.
 Keep your head down, and your eyes up. That 88 will be smokin' when you are done.


