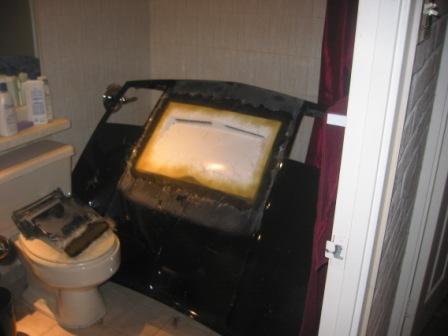
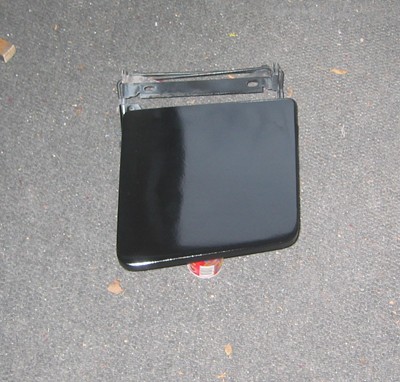
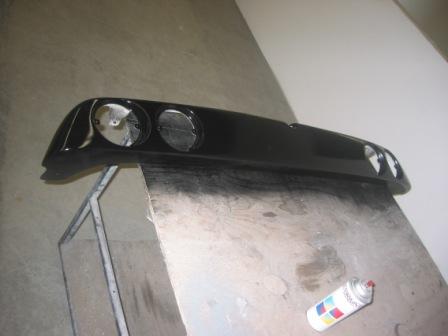
The final job I wanted to do was to install Ken Hines �Euro Tail Light Assembly�. I ordered it pre-cut for �78-�82 Corvette tail lights. I�d found some used tail lights at a wrecker in Oklahoma City � via the intranet and had them shipped earlier directly to Archie�s. Ken shipped the panel to Archie�s as well. I guess Archie knew I was up to no good.. with packages coming to him with my name on them� tee hee hee
Anyway, the first thing I did when I unpacked the panel was check it over. Great craftsmanship on Ken�s part. Norm, Rob, Kris and Archie said it was the best fibreglass part they�d ever seen. All mounting holes are drilled and have clips in them. This panel has a tongue of fiberglass in each bottom corner, with a hole pre-drilled. There are two holes on each bottom inside corner of the rear bumper. Once fastened, the bottom of the bumper is secure. You tighten these inside mount points by wrenchin' through the turn light opening before you put the lenses on. These extra mounting points (8 in all) make the part 100% secure. No loose bottom.
Being impatient, I get the old lenses off and put the part on �without doing the wiring. Perfect fit first time.
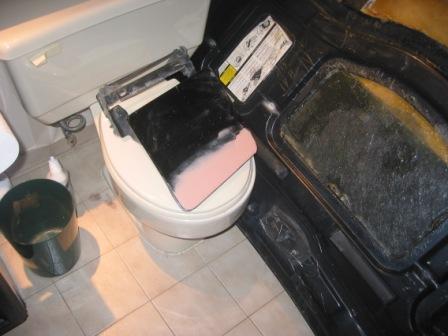
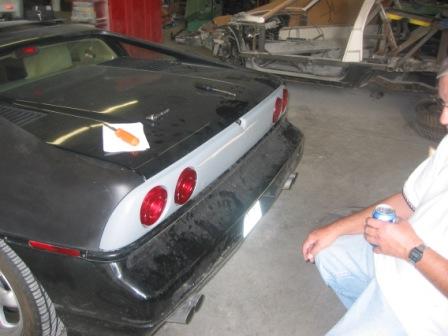
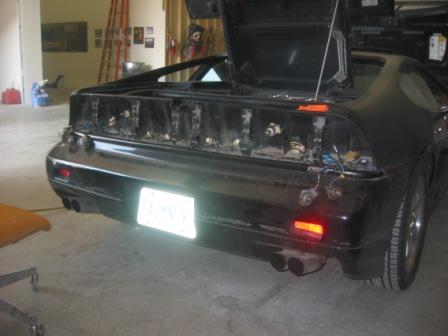
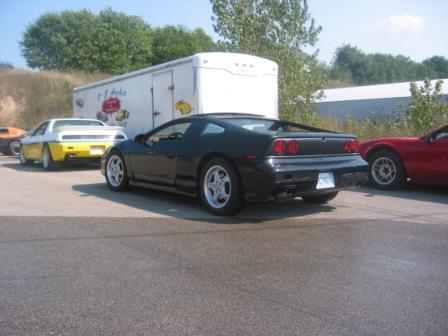
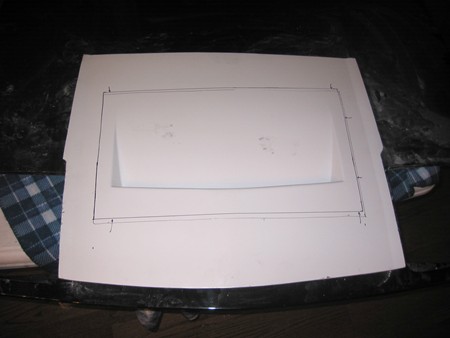
I get Archie to help me out with the wiring instructions and go to his wrecked cars to pilfer two turning element housings. I thought they�d come with the panel but were not included. I get the wiring put together and tested and then install the unfinished part. That�s enough for day one. I drive back to the hotel and take on last picture before it gets prepped and painted�
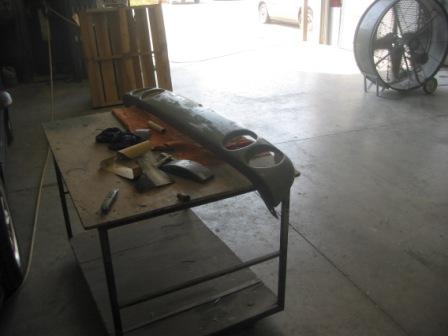
Next, I rough up the gelcoat and sand down a very small seam line of gelcoat at the top. I then prime it and paint it semi-gloss black.
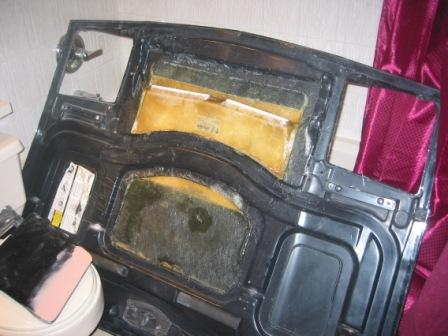
Next I remove all the unused bulbs and get Kris to replace my flasher with a digital version. This way it will turn on the 4 ways and turn signals without having to have all the bulbs in. I then tidy up the harness and zip tie the loose unused wires and bulb harnesses. I Velcro the backup lights so they will show a tiny amount.
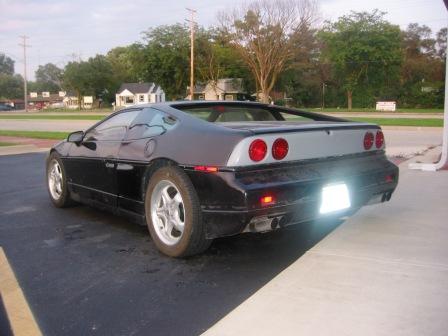
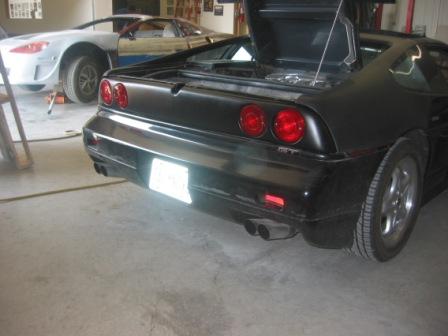
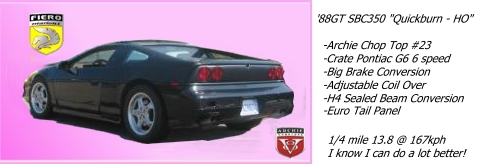
Install the panel and put on the Corvette lenses�. Ahhhh all done.
I guess it�s a personal preference thing � but I really light the tail light assembly. Only reference to �Pontiac� is on the driver side head light cover�. Not a bad thing � but now when I get asked what kind of car it is I�ll use Archie�s line and say �It�s a �prototype� Ferrari being test marketed for North America only!��. hahhhaaaa
With the finished product....
My next job � after this one � to be done sometime later this winter is to install permanent BU lights where the reflectors currently reside�
One last thing� I need to update my Signature Graphics�.
I really have to thank Archie, Kris and Rob. They were great and at the end of the two days felt like I was part of their crew. I can�t recommend them highly enough. I know some on PFF my think I�m blowing smoke � but I could not have been treated better�
------------------
[This message has been edited by DrCPU (edited 09-14-2006).]
I already have project four five and six in line....
Project four was to install a Rodney Dickman strut for the rear lid. Installed it at Fierorame in a minute.... Cool works great - even if it was expensive. I'll edit this post to add a pick in the next days..
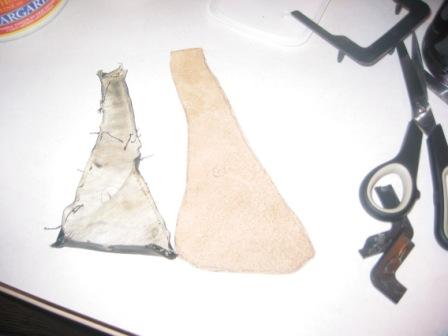
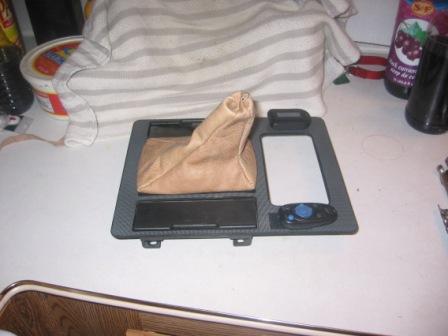
Project five is to replace the shifter boot. I bought the metal plate from Rodney as well and picked up some leather from Tandy. Will take the old boot off - use it as a pattern, and sewn my own leather boot replacement this weekend.
Project six is to install a security device in the same spot that my rear defroster switch was located. I picked up a replacement part with a blank face where the reaer defrost plug is - at a swap table at Fierorama - for $5 bucks. Need to buy a few parts from an electronics componet shop first - but hope to get things complete on this project in the next month.
I still have to get a paint job, and was planning to do it this winter. Will probably wait until late winter as with my new found glassing skills will likely add the inverted scoop to the hood this winter. I also need to glass the supporting member of the read deck lid - that had to be cut to make clearance for the intake - on the right side.... I guess that's projects seven and eight!
I know there are more things to do. Mr. Mike leathers would be nice - and a new custom dash with new guages is also on the wish list...
Coming together really well. Best of Show next year in London?
Arn
Being best of show would mean I'd have to really clean everything - every little crak. I live in a trailer park during the summer (it has dirt roads). I'm probably too lazy to spend the time doing all this work... =8^)
Heck my Harley gets washed all the time - when it rains!!
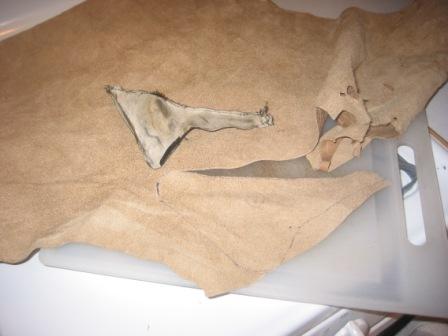
I stopped by Tandy Leather on my way home and picked up a scrap bit of leather. Close in colour to what I wanted - but a bit lighter. After I rub the leather down with light MinWax it should darken up just enough to be a perfect match. Here's the add on of the shifter boot.
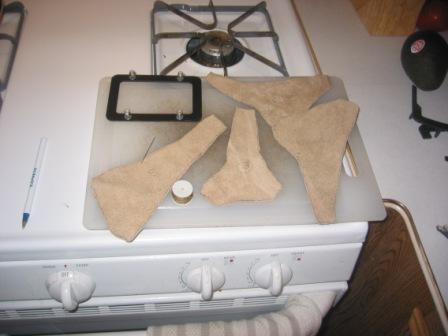
Take the boot shifter and assembly appart. Squish out part and trace the outline - give a little extra - on the leather. Make sure I number the parts so they go back in the same order as shape for each part is slightly different...
Lay everything out for a clean shot...
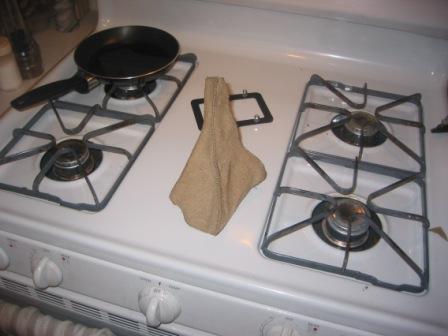
I don't have a sewing machine, so hand sew the seams (inside out) by hand with wax thread. It lasts a lot longer than regular thread and because of the wax will be moisture proof. About an hour and a half later ... tada!
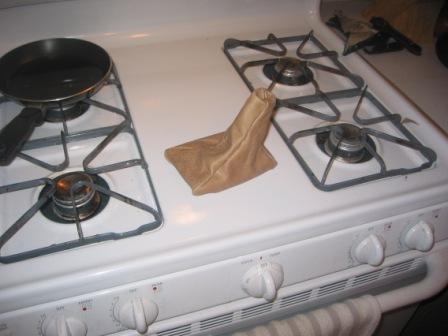
Now turn it inside out (good side out), but keep the top of the neck doubled - don't turn it all the way right side. Put the base plate into the bottom of the new boot (I bought this from Rodney Dickman ($12)) and use a knife to score the locations for the four posts after moving the leather around to get the best fit...
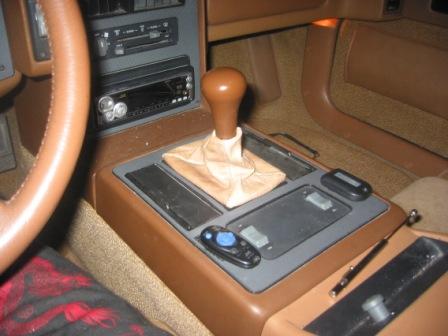
Attach the new shifter boot to the top of the center console...
Then put the centre part of the console back in the car...
I did not have the MinWax - so will rub the shifter down this weekend. It's much nicer than the old half rotted "pleather". I did not glue the leather to the steel base. With the metal base and the four screws, there is full contact all the way around. No need for glue.
If you're pattern is a little bigger than stock, you can run up a second bigger seam inside, taking up some material to tighten the look up.
Dave ------------------
[This message has been edited by DrCPU (edited 09-15-2006).]
I like burl walnut - or bird's eye maple - but wood only works for me in older cars - (1940-1950) or Jaguars or high end luxo barges. Wood doesn't seem as fast (aka Flinstonemobiles) as say - carbon - or swirled aluminium.
I guess it�s a personal preference thing � but I really light the tail light assembly. Only reference to �Pontiac� is on the driver side head light cover�. Not a bad thing � but now when I get asked what kind of car it is I�ll use Archie�s line and say �It�s a �prototype� Ferrari being test marketed for North America only!��. hahhhaaaa
I'm debating this taillight mod. My painter wants to remove all evidence of the "Pontiac" name as well. But I kind of like the stock lights, and the light up "pontiac" is kind of cool. But since it's a bolt-on mod I can do it at anytime.
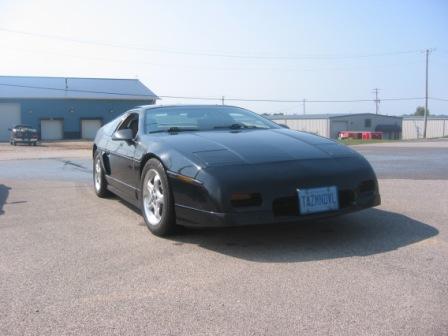
Since I made the tail lense swap, the only Pontiac badging left is on the driver side head light cover. Now more than ever I get everyone looking at the car - walking around it - and then asking what kind of car it is. After I've finished toying with them a little I tell them it's a Fiero. Many will thell their spouses - both male and female - "See I told you so!" They are not sure at all and then they say "How come it looks nice and long?" Then I add in the chop factor and each and everyone then asks - "How old is the car?" When I say close to twenty years old they can't beleive it.....
Heck, I'm a lonely guy - it gets me the attention I need! =8^)
I didn't know about the lense cover in carbon. If you give me an url - I'll most certainly check it out.
I drove to Port Huron - got in at about midnight. Stayed in my regular "Knights Inn". Coasted through customs - no problems. Ginger makes it easier for me - not that I had anything to hide....
The car ran very well. No more speedo problem. I get close to 25mpg on the highway. Got home at about noon the next day.
I put in my second stage car alarm on Friday night.... did not take any pictures of it as it minimises the security I'm taking.
I'll send you a PM with pics in it. I'm sure you'll smile!!!
I trust you flight back was OK. How did things work out ar Archie's the next two days?
The last few weeks have been pretty slow. After getting back from Fierorama I took care of a couple of mods - as posted.
I'm planning to add the minor inverted scoop from Archie. He's been busy and has not been able to tell me what shipping charges will be to get the fiberglass part to me in Canada.
If I remember - I'll call him again and just get him to get me a price to send it via UPS.
I've moved back into my appartment - and have brought the tools I'll need to take off the hood and do the work on my dining room table.
I also want to change out the spring in my RCC coil overs. Archie said I had 350lbs springs and I need more spring rate - so want to buy 400lbs springs. I've been trying to find a source for the RCC coil over in Canada without any luck. If anyone has a number in the US I can call I'll order them from the US.
I'm still targetting Mr. Mike's leathers for the interior - will get the new visors as well - but will have to wait till a bonus cheque comes in before I can order that.
One good thing about garaging the TAZ for four or five months - means I've got time to do some work.
I've got my Harley up for sale at a local shop - and if I can sell it will have the funds to do everything above.
I'm going to get the car painted in March 07.
Demon asked why I picked the TPI - Well it's what Archie suggested. I really like the look and it's the only one around that I've seen with the version of the intake I have. I opted for the 330hp 350 to keep things in the tamer category. I have to be honest - I did not research it much. After all is said and done - I'm very satisfied with the set-up I have.
Now that it's getting colder up in Canuckland it's time to start the new projects....
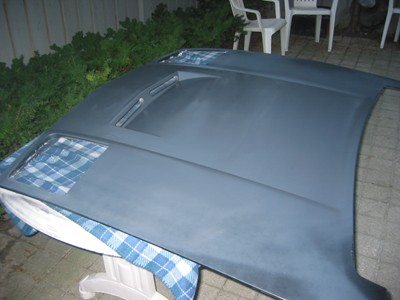
I received the Warber hood scoop from Archie and will take off the hood this weekend. Great quality on the part with lots of pics and instructions. This will be my first "real all by myself" fiberglass project so will take it slow.
I've got a price for my paint job (basecoat/clearcoat) and will probably get it painted next month - after I've finished the scoop - and maybe hidden the "Pontiac" logo on the left (driver) headlight cover. My Fiero badge fell off - so will make the front end nice and clean as well.
I wanted to post a pic of the scoop - but cannot get PIP working on any of my XP systems.
Edited for the pic of the Warber hood
Will post a pic tomorrow, from work.
------------------
[This message has been edited by DrCPU (edited 11-16-2006).]
I like my stock light allot, they delaminated, so I took some vht night shade, masked off the two clear parts and sprayed away. No sign of Pontiac on my Fiero until the ignition is on.
[This message has been edited by jmbishop (edited 01-08-2007).]
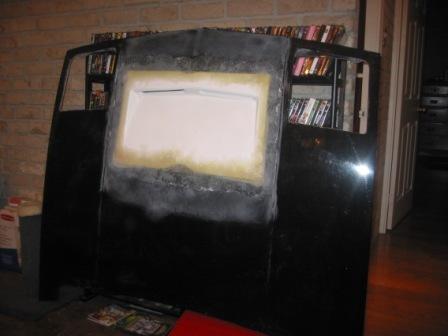
As mentioned I started the scoop project. Got a friend to come over and help me take the hood of the TAZ. It's not heavy, just easier having someone hold the hood when you take the last bolt out! I'll be fiberglassing the word "Pontiac" out of the driver side headlight cover at the same time.
I'm doing the work in my appartment, and am trying to make as little a mess as possible. Well, as a bachelor - you know that's pretty much a lie!!
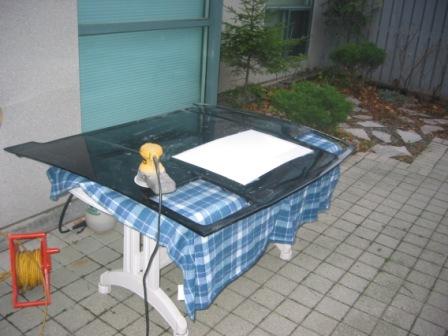
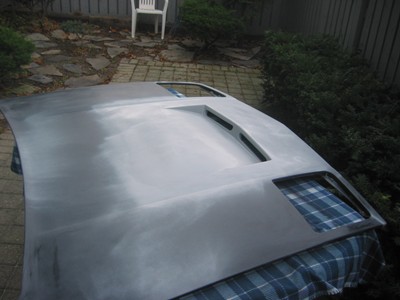
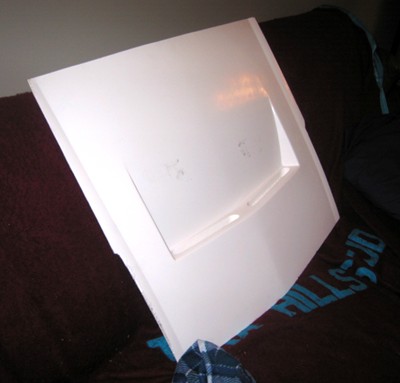
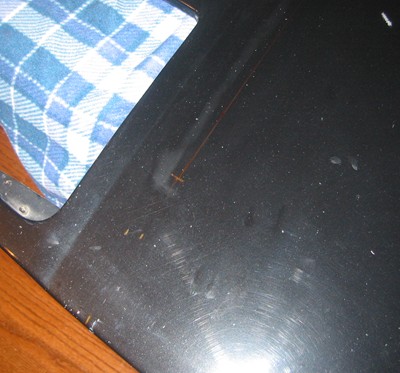
First thing is get the ABS picnic table in from outside - my working surface.
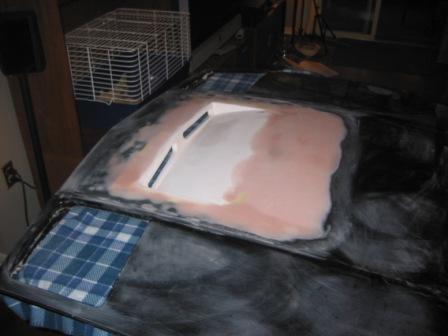
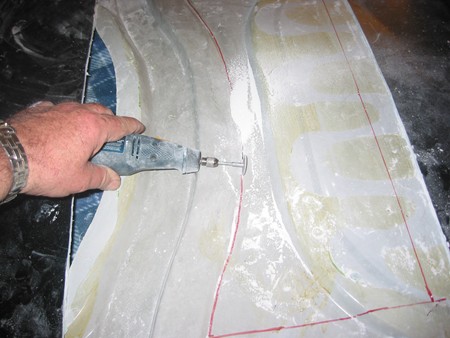
I've read the instructions over about a hundred times, and checked all the photos that are referenced on the instruction page. One last moment of "should I be doing this?", then it's let's start marking up the hood! First is to measure out the bottom corner...3"in from headlight, 6" from nose of hood (bottom).
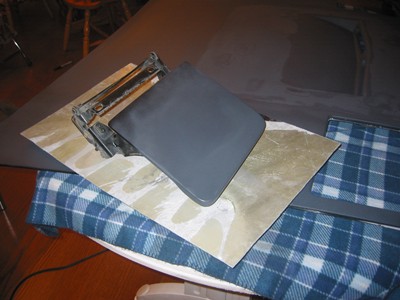
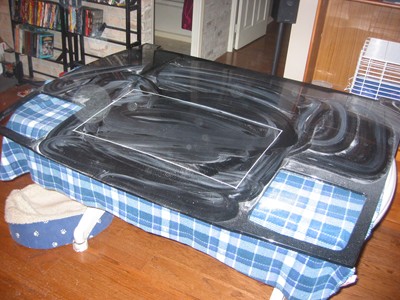
I marked up the other points and then used my dremmel with dual discs (2 thin pads together), scored the opening.
Next keep going with the dremmel - to cut through the single layer. Went through about ten discs - when I twisted a little, as the discs are very thin and probably not designed for the job at hand. I have a 4" angle grinder with a thin cutter - but figured better slow and safe rather than too fast and sorry. The instructions did not really explain how to seperate the cut out piece (as it's still bonded to the ribs). Took lots of time, turning the hood over and checking to see if I was cutting too deep etc.
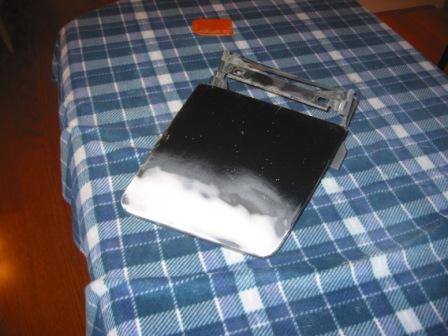
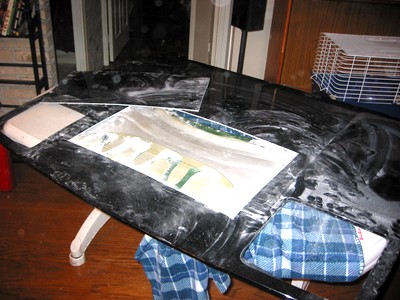
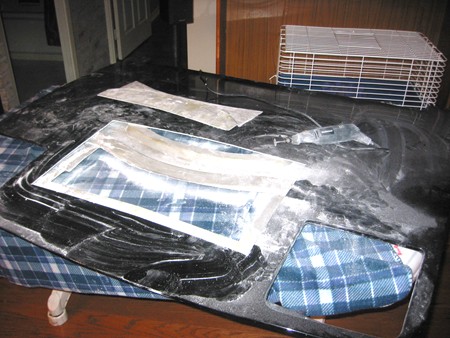
I have two very large knifes (for cutting wedding cakes), that my ex gave me when we parted ways and figured this was a perfect us for the largest one!. What the hay - looks perfect to insert in the cut and slip along the inside edge. Turned the hood over and did the same thing at the rib/top layer bond points. The panel seperated pretty easilly. Took me about 15 minutes as I took lots of time. Next is the pic of the cut out - removed from the top. The final picture was different than those in the instruction as I only cut through the first layer at the front end. This is a good thing as there were some pictures in the set from Archie that showed an inner lip.
Next is remove the bonding agent from the ribs - for a clean surface to bond in the new scoop panel....
Next, back to the dremmel to remove the interior portion on the second layer....
I have a full 1 1/4" edge for the scoop to bond around (sit on) - should make for a real solid insert...
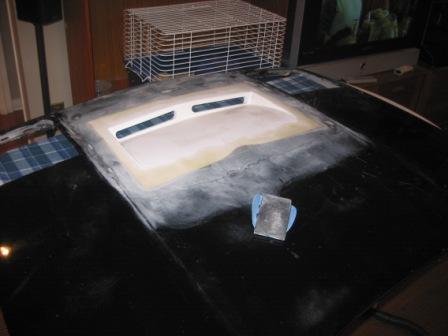
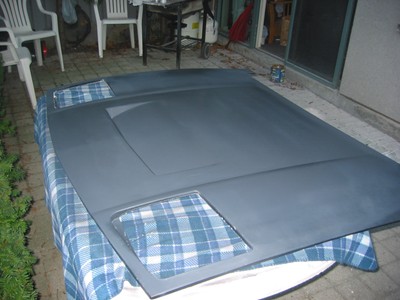
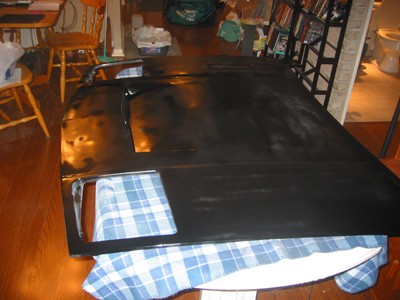
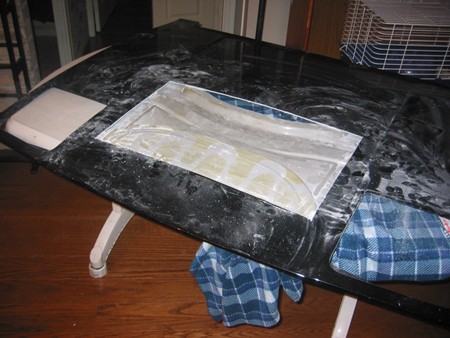
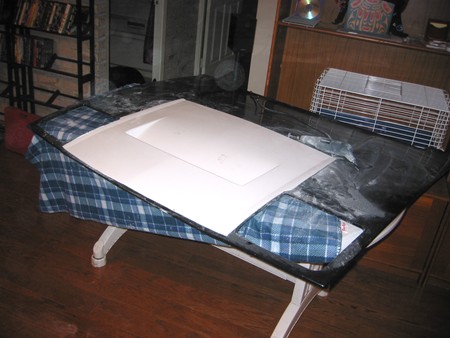
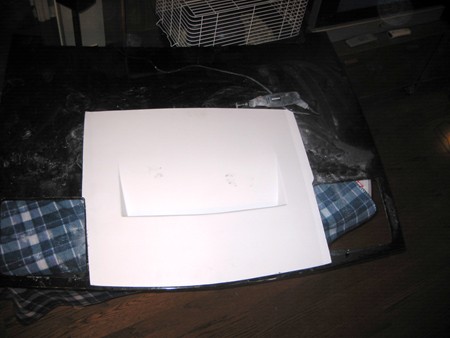
Next is drop in the scoop - to see how things will look.
Next it's time to use the part that I cut from the hood as a general template to cut out the portion from the scoop part. Lots of measuring here. Clamping and remeasuring.
Part is marked out - time for more dremmel work.....
I stopped here for the day. Will get the scoop cut and bonded this weekend. Will post more picks next week!
Dave your car is sweet . Not to put the blame on you but it was your car that got me all excited about having a chop...lol.
Ya! I can remember both you and your wife spent a lot of time around my car at Fierorama. At least this time I can be blamed for something that turned out great!
Made lots of progress today! Got the scoop cut last night and bonded in. Boy did that filler ever set fast. I was ahead of it by about four minutes and wanted to make a final tiny adjustement (left/right by about 1/32nd inch) in alignment - but it was set solid. The scoop is centred and aligned great. This morning I started on the fiberglass.
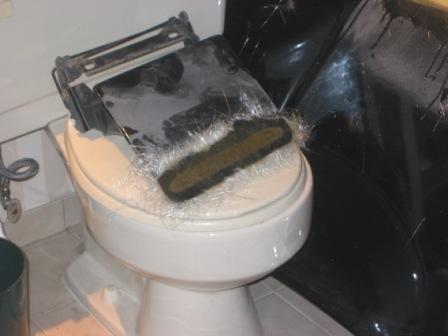
It's cold up here - but dry. Decided to do the fiber work outside. I used a mediun set with the hardener - and was a little worried after things seemed to taking forever to set. Once finished I brought the peice inside - and things started gelling great! I'm letting the hood and left side headlight cover "cure" in the second bathroom - door is closed - with vent fan on! It's working fabulous! My appartment doesn't smell like a fibergalss factory - I can work in colder temps giving me lots of time before the resin sets-up and then bring the peice into the warmth - were it sets up great!
I'll post lots of pics on Monday - with more to update - PIP not working from my home systems...
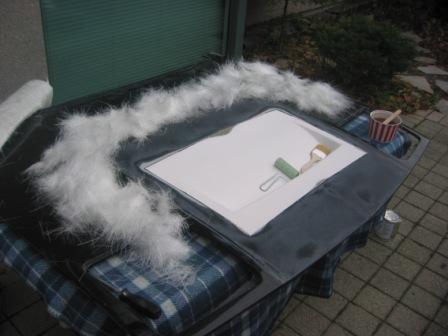
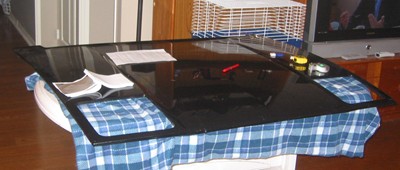
Colder day - but nice outside. Moved everything out to cut down surface for glass.. I decided to pull the matt so I'd be ready during the glass laying process..
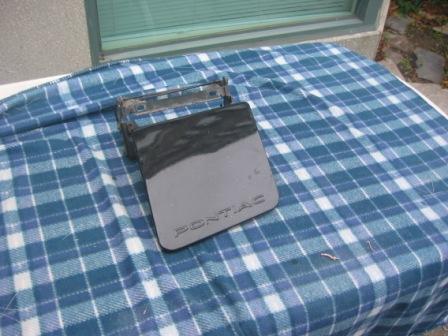
Might as well grind out the last "Pontiac" name badge...
Move the peices inside so things can set up good - too cold outside for the resin to set in a reasonable period of time.. Had time to shave off the headlight surface - of extra glass and get the first coat of filler down..
It's Sunday and time to start shaving the set glass (edges) etc.
Time to sand the headlight cover.. and take down the top layer of glass to prep for filler...
I used 40 grid on a 4" grinder pad to take down the glass - it worked amazingly well and gave me lots of control. I was quite surprised and very happy with the results.
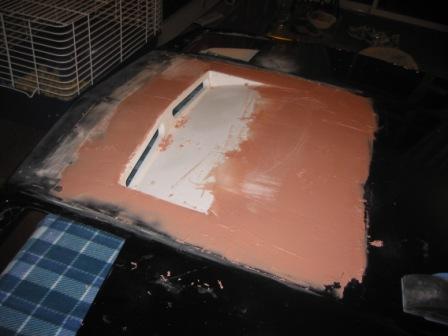
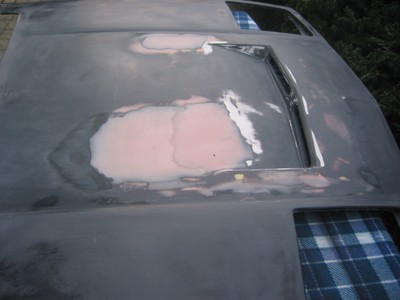
Late Sunday I laid down the first layer of filler for the hood. This is the most crucial part for me as I have not had a lot of experience with body work. I'm going to go at this one edge at a time, rather than the whole hood.
More pics and progress to come later during the week. We are down to 30F - so working outside isn't as fun anymore. Weather is supposed to go up to 40F on Wednesday - and is supposed to be a sunny day. Will probably wait until then to do any more work.
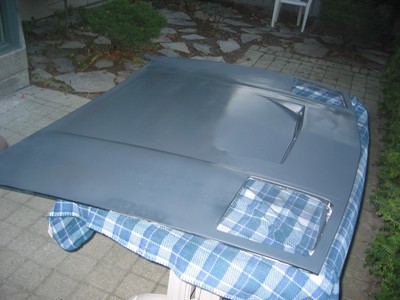
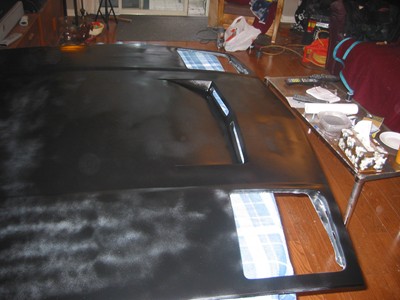
Finished laying the first layer of filler and letting it dry for a couple of days...
Next step - I'm flying from the seat of my pants here - is take it down to have the smoothest surface (no waves) as possible.
I then started the wet sanding with 220 then 320 grit.... I then touched up uneven areas with more filler (very light application) and after letting it set up for an hours wet sanded it down with 320 grit. The filler line at the top of the scoop is now even and I'm happy with the surface - all around. I should have taken another pic of the scoop at this stage - but forgot.
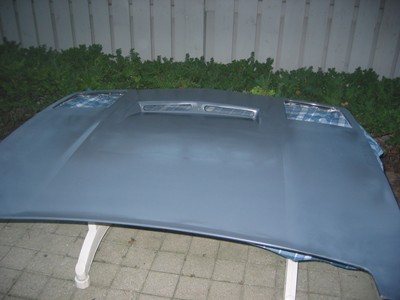
Next step is to prime it - very lightly - and check for any irregularities. Will post at the end of the week - or early next week!
Question for all you glass gurus. I recently saw several cars that had this or similair mods done to the hood and 80% of them had some bubbling around the bonding edge area, once it hit the florida sun.
What causes this and can it be avoided by something done in the prep and bonding process ??
Originally posted by exoticse: Great job CPU, and a first timer at that !
We never know what we can do until we try.
Question for all you glass gurus. I recently saw several cars that had this or similair mods done to the hood and 80% of them had some bubbling around the bonding edge area, once it hit the florida sun.
What causes this and can it be avoided by something done in the prep and bonding process ??
Thanks for the kudos. There were several points in this project when I wondered if I'd bitten off more than I can chew. I hope I stripped the scoop panel down low enough to get the best bond possible with the glass. Time will tell. If I find I didn't do this right and it bubbles or cracks then I can just grind it all down, redo it and then repaint the hood.
Your question is a good one. Maybe you might post it in the tech section. I'd be interested in reading the feedback. I don't think too many PFF readers are following this thread - may a hundred or so. Your post in the other section might get a better response.
You have to be careful with what you use to bond the scoop on with. If it doesn�t cure all of the way before you put your filler and paint on it will out gas when the sun heats it up and cause problems.
You have to be careful with what you use to bond the scoop on with. If it doesn�t cure all of the way before you put your filler and paint on it will out gas when the sun heats it up and cause problems.
Cool! Thanks for the caution. I have not painted it yet - primer to come this weekend. I used standard filler - and will drill two holes in the underside spars - to make sure there is room for the air (and materials and gases) to expand and contract without trying to break out of the top. I did let the filler sit for a week or so before I did the fiberglass work - and didn't use as much filler as was implied in the pictures Archie sent me. There was a solid bond but I did have gaps on the left and right sides down near the lower part of the scoop funnel and the underside ribbing. Hope this makes sense to those reading this thread.
Did you just use fiberglass to bond it on? Or did you use some type of glue? When I was in the Navy we didnt fiberglass anything if the temp was under 70 but that wasnt a big problem for our shop in Charlston SC. There are sometimes issues where the glass wont cure all the way went its cold out and then can cause strinkage. But if you put it in the house and let it sit for a few days you should be ok. Put a heat lamp on it for a couple hours if youre worried about it. Good luck.
Did you just use fiberglass to bond it on? Or did you use some type of glue? When I was in the Navy we didnt fiberglass anything if the temp was under 70 but that wasnt a big problem for our shop in Charlston SC. There are sometimes issues where the glass wont cure all the way went its cold out and then can cause strinkage. But if you put it in the house and let it sit for a few days you should be ok. Put a heat lamp on it for a couple hours if youre worried about it. Good luck.
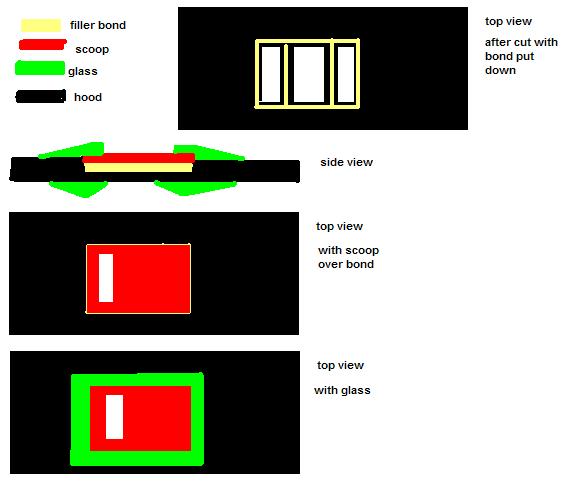
The scoop was bonded (downside) with filler to the underside spars. The top and underside were then glassed. Kinda like a sandwich where the middle layer was the hood like swiss cheese (with big holes) and used penut butter to stick a slice of processed cheese to the swiss cheese - then used a sliced doughnut to sandwich the outer edge of the swiss and process cheese parts together. Man, I must be getting hungry!
Here is a crappy graphic to illustrate.
I let everthing cure in my apartment (in the bathroom with the door closed and the exhaust vent turned on) at a comfortable 78deg. The fiberglass had about a week to fully cure - so I should be fine.
How much is the Warber hood from Archie? I don't see it on his site. I must be blind.
Best to ask Archie.
I think it's $125 - but I haven't reveiced my bill yet. Archie shipped it to me before I paid - I have a good track record of paying him anyway and spent a ton of money on my car this past year with him. He might have given me a discount - so please don't quote me on the price.
Also I spent at least 40hrs on this project. It was my first. Archie's charge of $450 for a completed project looks like a deal. He does the work on a hood and takes yours as a core.
Ater I paid for shipping and the materials (resin, glass, bond filler, sand paper etc) his price seems like a deal.
I wanted to try my hand at some "honest" work - so decided to do this myself. This is really my first time doing glass and body work. I'm getting my car painted in a month and I'm sure the paint shop will add an hour to my paint job to cover off any time they might need to scuff the hood now that it isn't stock.
I've finisehd the scoop and the hood is back on the TAZ. Fixing the clearance of the rear trunk (over the TPI) and will post a bunch of picks late Monday or Tuesday!


 . Not to put the blame on you but it was your car that got me all excited about having a chop...lol.