What application did your rear cam cover come from? The close corner looks different than the ones I've seen.
Good to know about the hose!
I thought about doing it on the left side too. I think you’re right and it could fit good, I suppose it depends how the air filter goes.
The rear one is off of a ‘93 Northstar. You can’t see in the picture but it has the “stripes” on it. I found it cool because I was able to make them silver, and the red and silver reminds me of the Fiero intake. The later year valve covers don’t seem to be produced with the grooves for the stripes.
Here is the old sending unit. The unit itself is actually not really rusty, but the fuel pump itself is awful looking. The strainer was filled of rust.
I took the gas tank to a radiator shop and they cleaned it out for $100. They said it should’ve been more because there was a lot of rust in the tank! It must’ve all been hidden by the plastic baffle. There must’ve been a lot of water in the tank from the open gas cap, because the outside actually looks good.
New sending unit, nee fuel pump and new gasket. Fuel pump is an AC Delhi EP376 out of 90s Corvettes, Impalas and other V8s. It was plug and play.
Original, unpainted straps and gas tank. I thought it was too cool to paint over, so I cleaned it up and sprayed some clear over this stuff to keep it looking ‘factory’.
We ran out of time yesterday to finish the gas tank installation. I hope today we can get it all strapped in.
Gas tank is installed! There is a small leak at the one fitting that comes out of the filter. Will probably have to weld a new one on.
The car was finally ready to start! Except it didn’t. I appreciate 2 Seat Garage helping us out with some ideas on what it could be, especially on things we didn’t know since this was our first swap.
The car had fuel and spark, but still sounded like it was missing something. We decided to check the fuel injectors the easiest but most unsafe way we knew how. We started a small fire, but it was easy enough to blow out(fire extinguisher on standby, what’s a Fiero without a fire). Only 3 fuel injectors sprayed. Time to order brand new ones and hope this was the only issue.
On Friday I did some messing around with the radiator. I was just gonna leave it, but we’ve gone this far and why not redo this too. According to the Pennocks thread on this car, it was a Oldsmobile radiator installed in the ‘90s, and they did not install it the best... I could only hope they were not gonna leave it how it was and fix it but who knows.
Instead of undoing 4 bolts, they hacked the lower radiator support off, and the radiator was not bolts to anything and just dangling and wiggly. PO also cut the fan shroud by an inch which looked bad for whatever reason, and left a stock fan.
There was a lot of white sludge in the radiator. Ignore the oil it was just leftover from the pan.
On Saturday I went to a scrap yard in Mason that had just gotten two near Fieros. Both notchback, both complete, but nothing exceptionally rare. I took a lot of interior pieces, rear wheel wells, a radiator shroud, upper radiator bracket, and little things.
I then swung by 2 Seat Garage’s place to get the lower radiator bracket, and check out their beechwood interior parts. I ended up coming home with almost all of it, as my car was missing just about everything and there’s was in great shape. Thank you guys again for the interior parts, I’m excited to install them.
[This message has been edited by copperhens (edited 12-21-2020).]
Yesterday I started on the interior. This was all that was left of the headliner that was in there.
I had to do some modifications. The headliner was from my friend’s ‘84. I had to cut out a 3rd brake light, and the clothes hanger things. I also saw that those old headliners had clips to hold up the rear. My ‘88 still had them tab in the roof it fit into so I left it. They should’ve kept those tabs on all years, as it’s no fun fighting with the headliner trying to hold it up and install stuff. The clip(single clip other was missing) held it up. This board was floppy in many places, I tried hot glue to stiffen it up, but it still wasn’t great. Once in the car and held up you can’t tell it’s a bit broken.
Here is a ‘new’ headliner installed. I have had it for a while actually, but never had the trim pieces I needed to hold it up.
I started dew wipes yesterday and finished them today. I haven’t done them in a few years and was dreading it. Taking the window tracks out made the job much easier! I also painted and regreased them too. I only stripped one screw thank goodness. I then went to the local hardware place and bought brand new screws that were the same size. Since this car hasn’t ran in decades, the windows were unscratched since they were never used.
I ordered fuel injectors two weeks ago. There were zero tracking updates and Amazon admitted they could be lost. So I ordered a new set last week. The new set came a few days early, today, and guess what? The old set randomly showed up today too. Grr, I hope they’ll refund me for this set when I send it back.
Anyway, I installed the fuel injectors, believing it was the last thing before the car could start...
And it was! After verifying fuel pressure, the car started right up! I’m so excited, this was such a huge milestone. Watch the video: https://youtu.be/HwY2lLXPkkM
You going to add the engine oil cooler setup? Finally found one at our local yard and was surprised to see the stock setup runs through the radiator in an addition to an external oil cooler. Someone said something about there being a 2 bolt filter housing and a 3 bolt one.
You going to add the engine oil cooler setup? Finally found one at our local yard and was surprised to see the stock setup runs through the radiator in an addition to an external oil cooler. Someone said something about there being a 2 bolt filter housing and a 3 bolt one.
Thanks!
I had an oil cooler hooked up that had come with the engine. I was going to mount it under the passenger side quarter, but there’s not a scoop there and it’s already tight so I will have to think on that. I have read about Will’s oil cooler and that ones pretty cool. I just ran a hose to ‘delete’ the cooler, so it could go back on. Currently I don’t have plans for one.
I am missing the moisture barrier. I don’t believe I mentioned it either but PO cut both lock buttons on so I had to wire new ones on which is why they have heat shrink around them.
$8 placemat material from Ace cut to shape and attached with double sided tape.
This arm rest doesn’t line up at all with the two bottom bolts in. So I just put in the top bolt and the right bolt and it’s good enough for now. I need a new armrest as this one is beaten up, but am not in a huge rush for it right now.
Door panel is installed just to have somewhere to put it. I don’t have enough clips to even just secure one panel so this one sticks up on the bottom. Driver side will have to wait.
Old carpet.
It’s not very rusty but still a lot of mice droppings. I’ve had the carpet out before but didn’t do a good job cleaning as it was done outside when it was cold.
If this car could tell stories... PO obviously ran something over. I’ve known about this for a while but now it’s time to fix it. Also a random hole drilled through the passenger side floorboard towards the from.
It’s hard to see unless you look for it, but the driver side has 3 random holes drilled through that need to be patched as well,
The driver side is in better shape than the passenger side.
There’s a mouse nest at the very front of the center console tunnel, and under hvac stuff. Using a grabber tool was taking far too long.
There is one 7mm bolt that holds on the bottom part of the hvac, and it slid out and allowed me to reach my hand it. It still was tight but I got the nest out. I did my best to wipe down in there too.
The mice must’ve been in there a while as per had drilled down the sides of the console from a seam. This was a gross job.
Here is a picture while everything was drying. I used a lot of degreaser to get it nice. I need to now prep all of the holes to be welded, and scuff some paint so I can just hit it with another coat. Then the carpets can go back in. That’s all I did tonight.
I wonder why the passenger arm rest doesn't line up? They are all the same.
Even bending it hard it still was hard to line up, and I didn’t want to force it and break it. Even with the two bolts in I can’t really tell anyway as it’s not even wiggly. The car is already looking loads better.
Try starting the two screws along the bottom of the armrest first?
I had the first two bottom in first, and then the top doesn’t line up even when I try bending it. If I just do a top and a bottom, the third hole doesn’t line up either.
I spent a lot of time cleaning the floor. There was actually a puddle of crystallized mouse pee. After prepping them with a degreaser, I hit them with some paint. Luckily there really wasn’t rust to deal with, but the couple spots of it I scuffed off.
I bought 36sqft of Siless sound deadener. It should be enough I hope.
The stuff was pretty easy to work with. The hardest spot was the B-pillar just because there was so many little things in the way.
I bought a set of pretty flawless in original carpets from 2 Seat Garage. Here is the driver side.
I had a tough time with the seatbelts. They kept wanting to go in sideways and strip. After cleaning up all threads and using antiseize, they all went in straight. I also bought these seat belts from 2 Seat Garage. I’m so happy with them, they are in great shape and I’ve never even seen real beechwood seat belts for sale ever.
[This message has been edited by copperhens (edited 12-28-2020).]
Once again, 2 Seat Garage supplying me parts. I got the lower radiator support bracket for an ‘88 from them. As I showed earlier, mine was hacked off for some reason. I bead blasted this one and then painted it.
Here’s the dirty, but intact fan shroud I pulled off of a Fiero in a scrap yard.
The PO had no lower radiator bracket on the radiator that was installed. Mine looks much better now.
My dad and I kinda forgot the hood is connected to the top radiator bracket. The POs only had two bolts on their custom bracket, and since we were not thinking about it, the hood fell off and trashed the lift lever bracket. Oh well, at least that was the only damage. With the hood off, I could access the front well. Only minor surface rust, but might as well prep the area for a light spray of paint for now.
Looks good! Today was the first time I’ve ever turned on the headlights. I rebuilt them a couple of years ago when I got the car, and never tested them since the car had no power. The driver side wouldn’t go up, turns out I forgot to tighten the one pivot bolt. Oops.
I bought a 3 core Champion radiator. There were much cheaper ones that seemed to look the same, so I really hope this one lives up to the price.
The center of the fan shroud was cut out, and this fan from Amazon was installed.
All installed! My dad and I worked on this all day and got a lot done. The old radiator had a different outlet for the lower tube, so I need to buy a new lower hose then it can be filled with coolant. Also, the fan plug doesn’t match the Fiero one so I ordered a new pair of water proof connectors.
I picked up a project the other day. I hope I didn’t just get in over my head, but gotta start somewhere... I have always been interested in an engine swap, and this one was already started at least. Yes, I’ve heard about 3800sc are easier, why would you go for the Northstar?! Isn’t that the hardest and most expensive swap? We’ll figure this out.
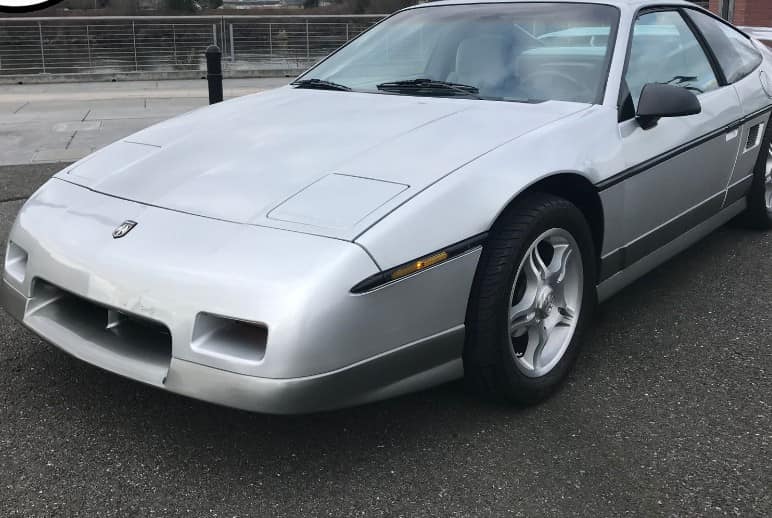
Anyway, the car is a 1988 GT 5spd. I thought my California fiero was clean... this thing is soooo rust free you can lick it(ps, don’t lick it)! The Northstar is already in car. The coolant lines have been started. Looks like there is a new fan in the car. AC was deleted. The trunk has been chopped for the exhaust. Looks like wiring is almost done and it comes with a computer.
Now, the big issue is that the motor is seized and the clutch is shot. I found a new running motor for $300. Hopefully I’ll be able to pick that up and start there.
I’m on my phone so I’ll have to post pictures later.
Heres My 87 I picked up day before Christmas eve lol FESTIVUS i guess. I was gonna sell it because I have other cars..but I just cant bare myself to do it. Lol its staying here with me. Im lucky its a Chris Moore built car with just under 41000 miles..to be show worthy it needs a lil but not a whole lot. Im gonna do it up starting mid summer I hope .Congrats to you ! HEY ? Any body here ever mounted a rach dash unit in their gauge bezel. Prices are reasonable for them now on the ones abroad.. Its an easy way to have tricket dash in the land.
I picked up a project the other day. I hope I didn’t just get in over my head, but gotta start somewhere... I have always been interested in an engine swap, and this one was already started at least. Yes, I’ve heard about 3800sc are easier, why would you go for the Northstar?! Isn’t that the hardest and most expensive swap? We’ll figure this out.
Anyway, the car is a 1988 GT 5spd. I thought my California fiero was clean... this thing is soooo rust free you can lick it(ps, don’t lick it)! The Northstar is already in car. The coolant lines have been started. Looks like there is a new fan in the car. AC was deleted. The trunk has been chopped for the exhaust. Looks like wiring is almost done and it comes with a computer.
Now, the big issue is that the motor is seized and the clutch is shot. I found a new running motor for $300. Hopefully I’ll be able to pick that up and start there.
I’m on my phone so I’ll have to post pictures later.
Heres My 87 I picked up day before Christmas eve lol FESTIVUS i guess. I was gonna sell it because I have other cars..but I just cant bare myself to do it. Lol its staying here with me. Im lucky its a Chris Moore built car with just under 41000 miles..to be show worthy it needs a lil but not a whole lot. Im gonna do it up starting mid summer I hope .Congrats to you ! HEY ? Any body here ever mounted a race dash unit in their gauge bezel. Prices are reasonable for them now on the ones abroad.. Its an easy way to have trickest dash in the land.
Heres My 87 I picked up day before Christmas eve lol FESTIVUS i guess. I was gonna sell it because I have other cars..but I just cant bare myself to do it. Lol its staying here with me. Im lucky its a Chris Moore built car with just under 41000 miles..to be show worthy it needs a lil but not a whole lot. Im gonna do it up starting mid summer I hope .Congrats to you ! HEY ? Any body here ever mounted a race dash unit in their gauge bezel. Prices are reasonable for them now on the ones abroad.. Its an easy way to have trickest dash in the land.
I saw that car for sale, and I’m glad you decided to keep it. You’ll never come across another Fiero like that for cheap. Yours looks really clean, hopefully I’ll catch you at some shows as I think you’re pretty close to me.
My dad and I were gonna fill the coolant system, but I then remembered that everything in this system was new or at least clean, so I decided it would be best to drop these pipes to make sure they were clean. The driver side had a bit of green coolant, and the passenger side was dry and full of cobwebs. We flushed them out with distilled water, and then I worked on cleaning them up.
After using a wire wheel on both and some aluminum polish, they cleaned up pretty nice.
I’m glad we dropped the pipes as they were pretty dingy looking, and I was able to clean underneath them when they were down.
The front bracket that holds up the pipes was in good shape aside from surface rust. Bead blasted it then repainted it.
We mixed up some Preston’s yellow coolant, and found the first, and seemingly only leak. The bottom hose clamp on this bracket must’ve not been seated right. After cutting the tube back and tightening the clamps more, it doesn’t leak.
With the expansion tank out of the way, I got some pictures of behind it. I never got pictures of how the electrical was run over here back when I installed it, so now is the chance.
I plan on using better clamps to secure the cables down, but for now they are wedged behind this bracket(I’m assuming from the old battery tray) the PO cut up. There’s one ground from the block that goes to one bolt from the expansion tank bracket, and the main ground from the front goes to the other bolt.
The main positive runs behind the expansion tank to the junction block. The closer red cable is from the alternator to the junction block.
I think this side came out pretty nice.
This completely dry system is kinda a pain to burp, I am probably going to need to buy a vacuum to do this.
-Front radiator fill cap -Upper heater hose at the heater core connection -Whatever you have at the back for a fill cap.
Fill coolant until the level gets up to the front radiator fill cap Install front fill cap Continue to fill until coolant shows up at the heater core side of the upper heater core connection (yes, it'll dribble out the tube a little bit) Re-connect the heater hose Fill to full at rear fill point Fill front overflow tank to factory full mark (if applicable)
Run up to temperature and allow to cool completely. You'll need to watch the level in your expansion tank while it's cooling Top off coolant at rear fill Done
We tried this and it worked for a bit. Eventually we would let the coolant sit over night and it would drain from the overflow. However, there are 4 gallons in the system and I’m not sure where it’s all at as the radiator is dry. No coolant in oil... I suppose the system is just much bigger but I was still a bit concerned.
Most people seem to run the battery lines along the gas tank. Unless they are uncovered, I didn’t see a way to do that nicely. So, we ran them under the carpet. I’ve seen people run it through the center console, but not the carpet. So maybe there’s a reason people don’t go under the carpet, but it seems to work for me so far.
We tried this and it worked for a bit. Eventually we would let the coolant sit over night and it would drain from the overflow. However, there are 4 gallons in the system and I’m not sure where it’s all at as the radiator is dry. No coolant in oil... I suppose the system is just much bigger but I was still a bit concerned.
Thanks for the info!
You take cap off the radiator and fill the system until coolant comes up to the lever of the radiator cap and then after some run time and thermal cycles the radiator is dry?
Do you have the original Fiero overflow bottle connected to the overflow port on the radiator?
You take cap off the radiator and fill the system until coolant comes up to the lever of the radiator cap and then after some run time and thermal cycles the radiator is dry?
Do you have the original Fiero overflow bottle connected to the overflow port on the radiator?
I am hopefully gonna refill the system again today. The other day though after running the car, the radiator was dry even though I had seen it full before starting it.
I do not have an overflow bottle up front yet. My car was missing one and I’ve been meaning to get one from the scrap yard.
I am hopefully gonna refill the system again today. The other day though after running the car, the radiator was dry even though I had seen it full before starting it.
Stock type radiator? Possible you blew coolant out the overflow port as the system warmed up?
quote
Originally posted by copperhens: I do not have an overflow bottle up front yet. My car was missing one and I’ve been meaning to get one from the scrap yard.
The PO had run over something at some point. There is also a puncture through the main floorboard that’s not as structural as this one that’ll get fixed eventually.
Here is the patch. I painted it after it cooled.
After that, I ran the car for some friends, and found a puddle under the car. Coolant must’ve finally made it to the heater core, and as it was coming down the cool line it showed us this leak. Presumably, water was in the tube and froze, where it burst. It was hidden under the foam. The cool line ended up having several pin hole leaks, as well as a crushed spot, so we cut out the bad section, and replaced it with rubber hose. The metal sections that were kept were inspected, cleaned, and painted. The hot tube was inspected, and because it was covered in insulation it was in great shape with no corrosion.
We then decided to run the heater lines different than what they were. Both lines came out on the passenger side, but since they needed to come out on the driver side it made more sense to cut them shorter and run them directly towards driver side. I’m not sure why I didn’t think to do this before.
Both heater lines now run with each other. I am not a fan of so many clamps, so I hope this all holds. If not I’ll run a solid line.
The PO also didn’t have shocks. So I ordered some new ones. The passenger side had the lower mounting hardware, the driver did not. Took some digging to find the bolts online.


 The later year valve covers don’t seem to be produced with the grooves for the stripes.