It’s a 2000 Deville. Runs great with lowish miles for the year ... 130,000. That engine is a rocket in the big car and it would be amazing in the light GT.
Thanks for the tips on more swap information. Looking forward to seeing your version.
Nice! I've never driven a northstar, so it'll be interesting for me. Those 2000s Cadillacs are pretty sharp for how old they are.
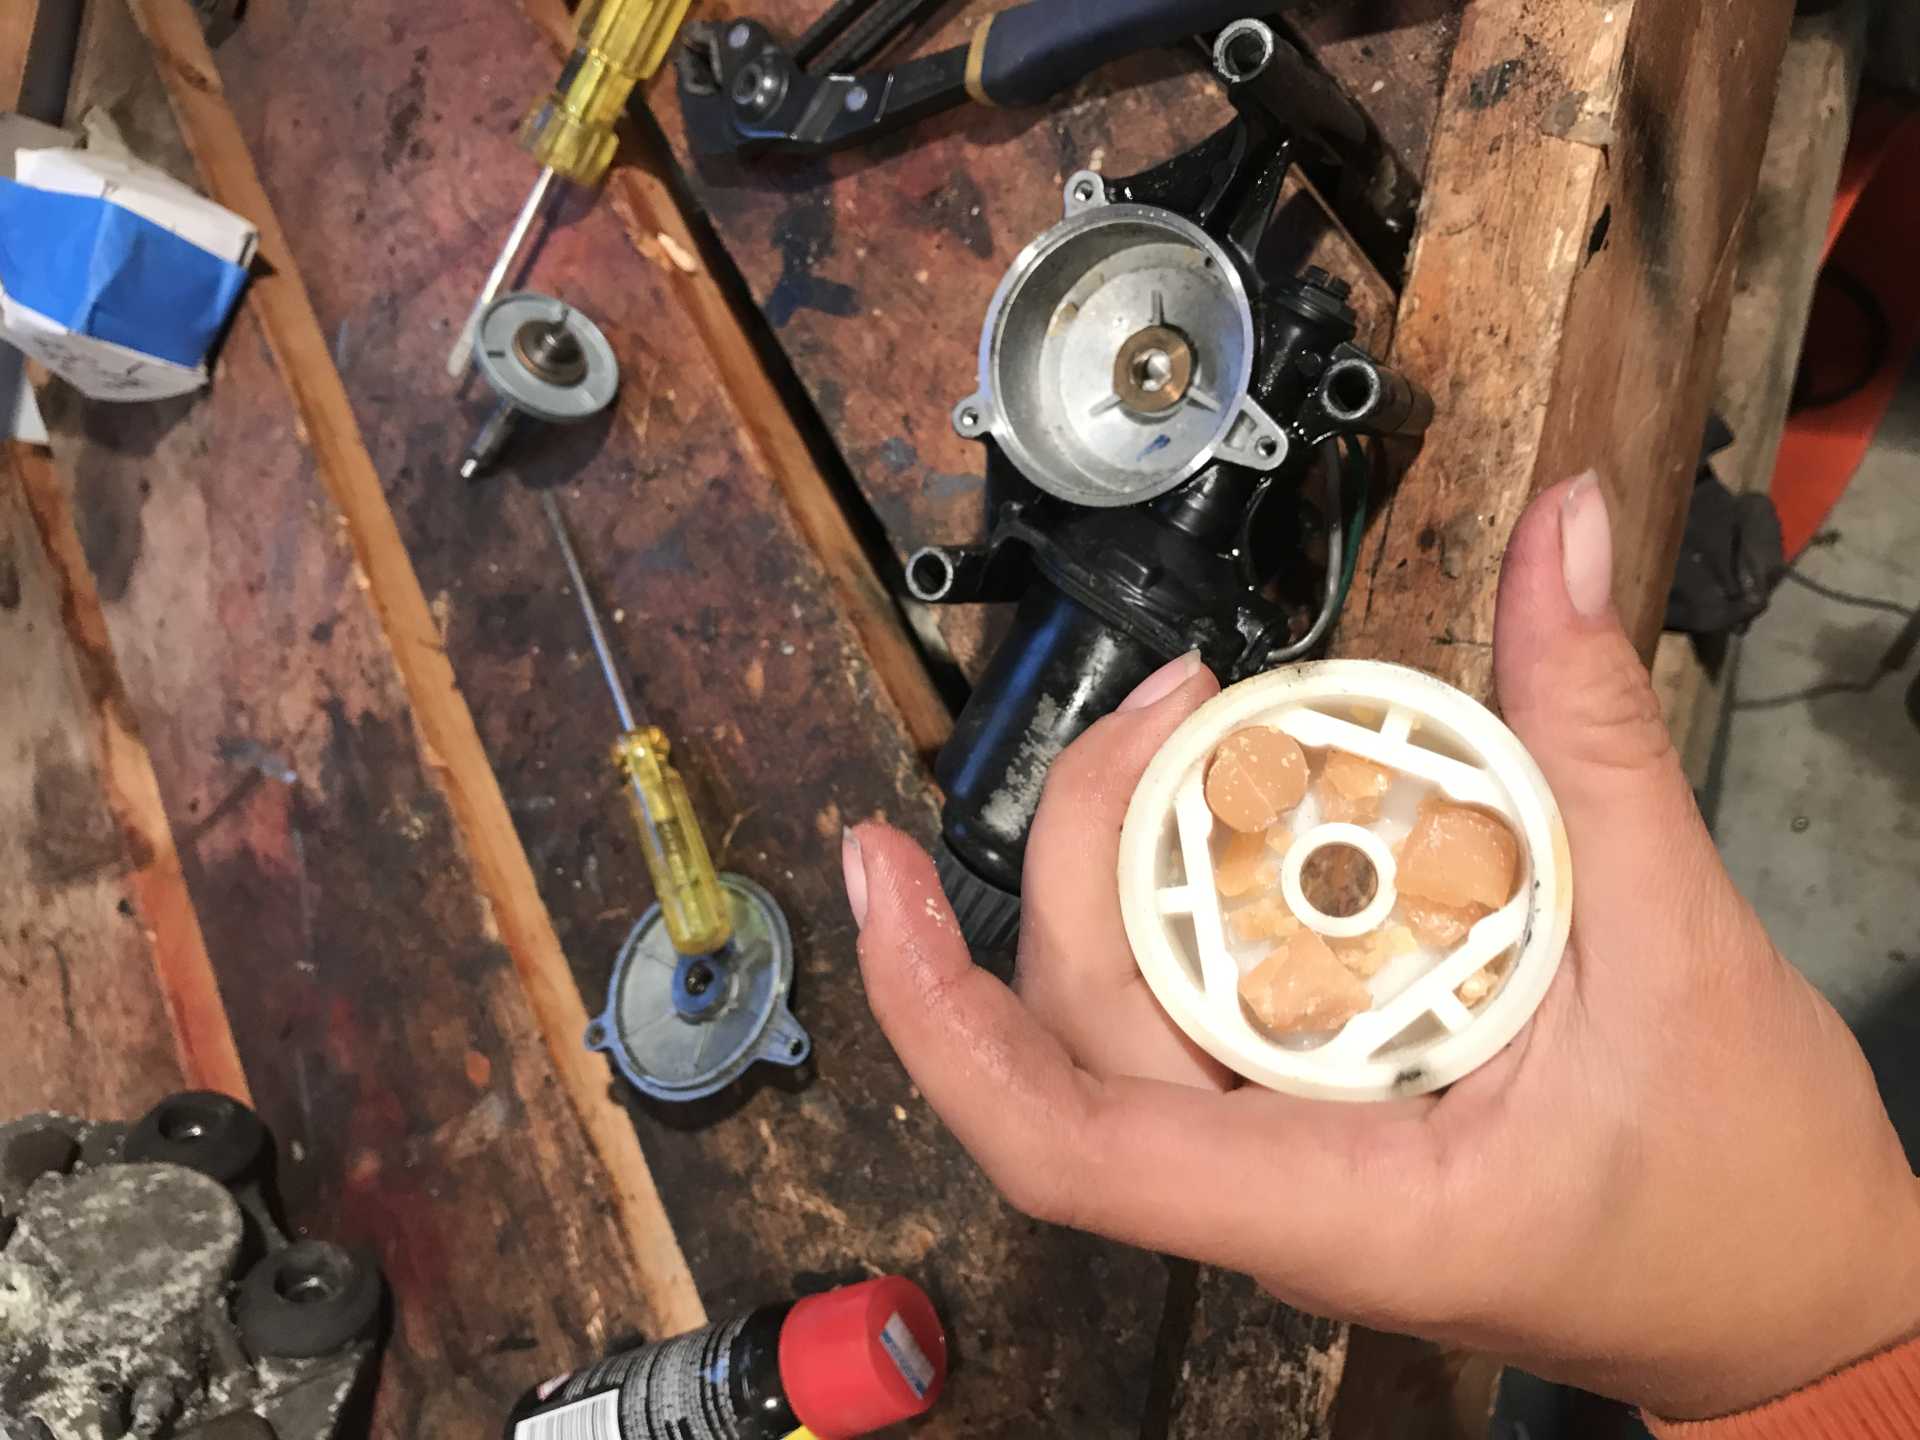
The oil distribution manifold came today. Nothing really wrong with my old one, but it's recommended to get a new one since the seals are melded into it. I bought it from eBay for $45.99.
Looking good man looking good! Never buy anything from HF without that 20% off coupon. I got the same cherry picker for pulling my jetski motors, its a handy sumbitch and nice it folds up!
Looking good man looking good! Never buy anything from HF without that 20% off coupon. I got the same cherry picker for pulling my jetski motors, its a handy sumbitch and nice it folds up!
shem
Thanks! Yup, this 20% coupon is pretty great. I’ve necer been to harbor freight before this year, I like it a lot now.
Nice! I've never driven a northstar, so it'll be interesting for me. Those 2000s Cadillacs are pretty sharp for how old they are.
Thank you. Yes they seem to have that classy look even today. You will not be disappointed with your northstar in the Fiero. The sounds are intoxicating under the hood and the exhaust notes will make you giggle. The engine launches this tuba lard off the line and can embarrass a stock mustang but the 45-70 mph launches are the best.... I can pass pretty much anything without breaking a sweat.
Keep it up!! Good work ------------------ Aaron H 1986 Fiero GT 2.8- A dream car of mine since childhood- Stock now, but looking for creative options to upgrade this wonderful car 2000 Caddy Deville- Has the Northstar- possible donor engine
[This message has been edited by Phlebmaster (edited 11-30-2018).]
Thank you. Yes they seem to have that classy look even today. You will not be disappointed with your northstar in the Fiero. The sounds are intoxicating under the hood and the exhaust notes will make you giggle. The engine launches this tuba lard off the line and can embarrass a stock mustang but the 45-70 mph launches are the best.... I can pass pretty much anything without breaking a sweat.
Keep it up!! Good work
That’s good to hear. I’m excited for the his swap.
Another boring post. I haven't had time to work on the motor aside from some cleaning. This Saturday I hope to make some progress.
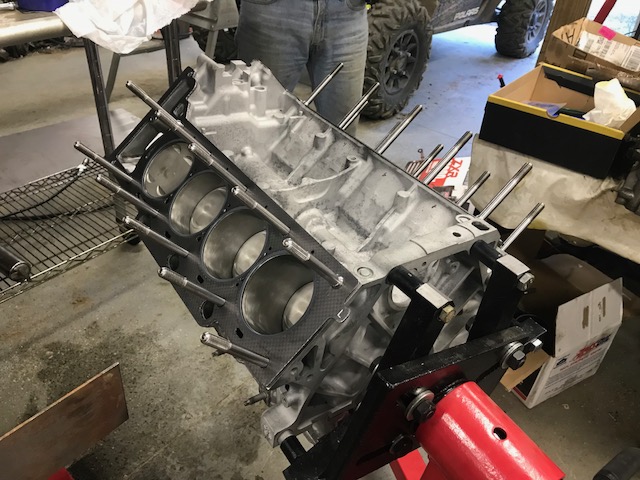
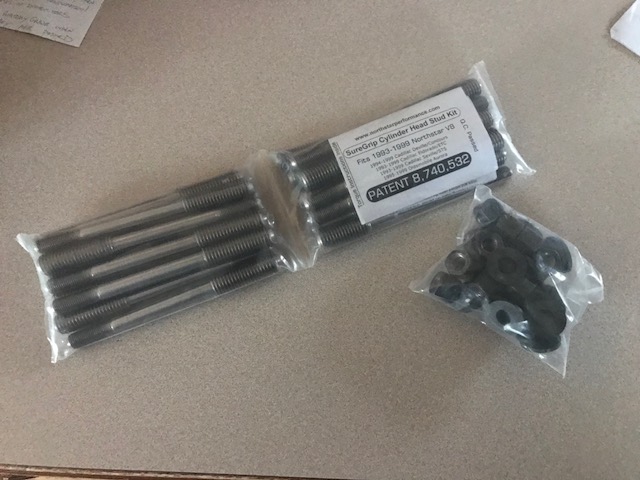
The last of the goodies came. Here are the Northstar Performance head studs. They're heavier than they look(8lbs!).
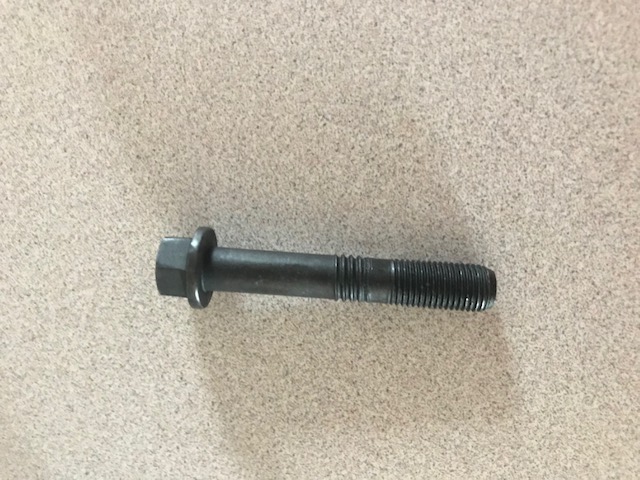
I also had to get 16 new rod bolts(part #12552947) , because they are TTY. I got these from GM Parts Direct for $5.04/bolt. Don't use this company! They would not ship the bolts until I sent them a heated email. Took two weeks to get these bolts. I should've checked the reviews, because they were all bad. Oh well, at least I got my stuff. I've heard good stuff about "Cheapest GM Parts", and their rod bolts would've been cheaper by $3. The more ya know lol.
I have made sporadic progress. Been waiting on my friend to help me drill for the head studs. He just picked up the bit today, so hopefully this weekend we'll drill the block.
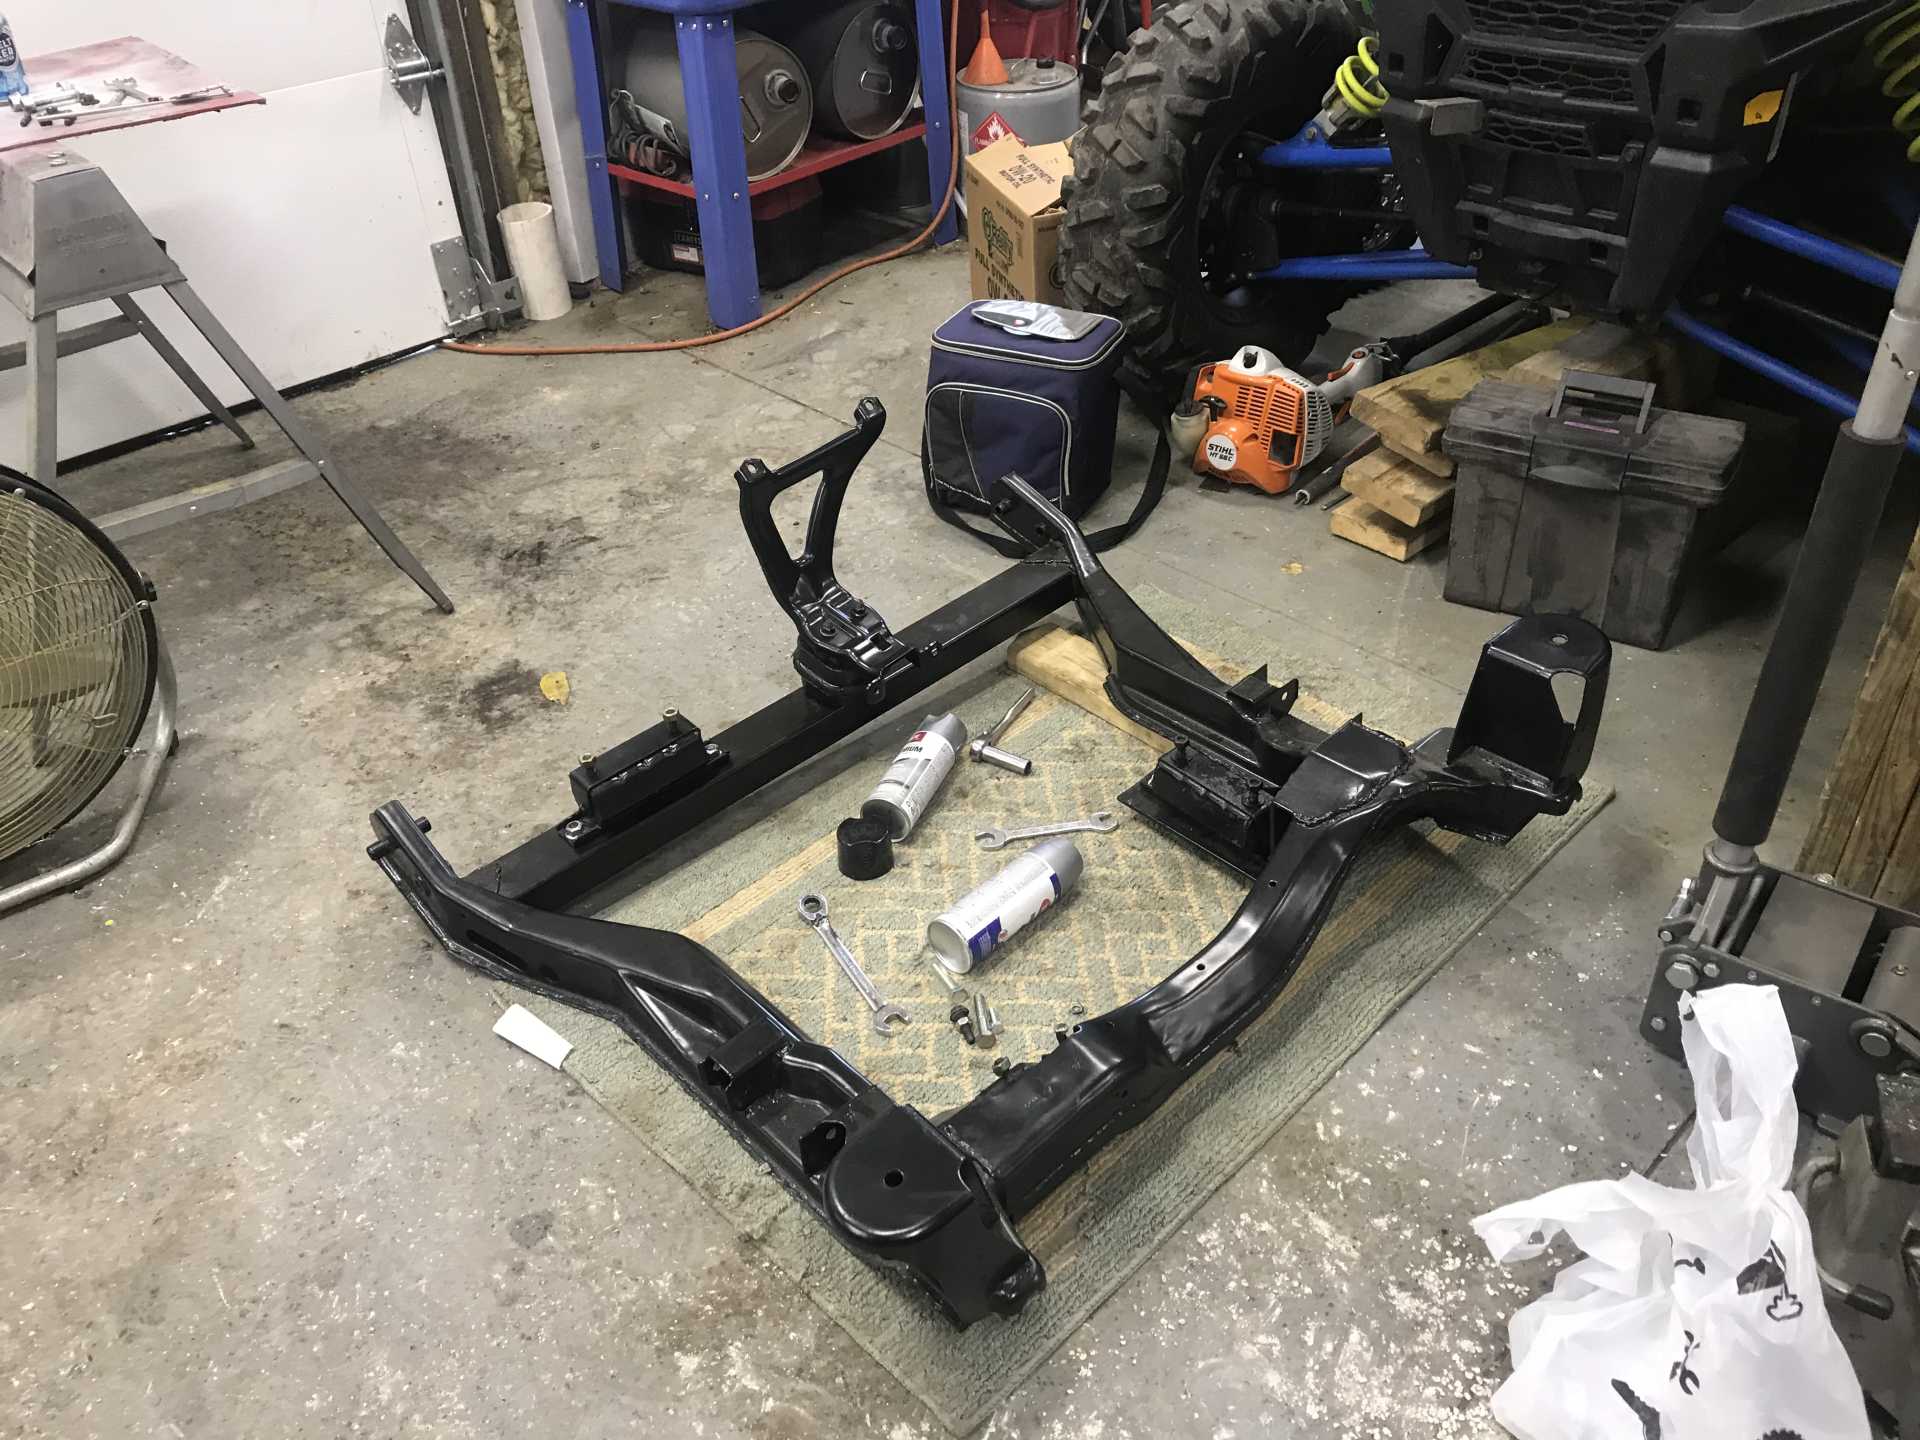
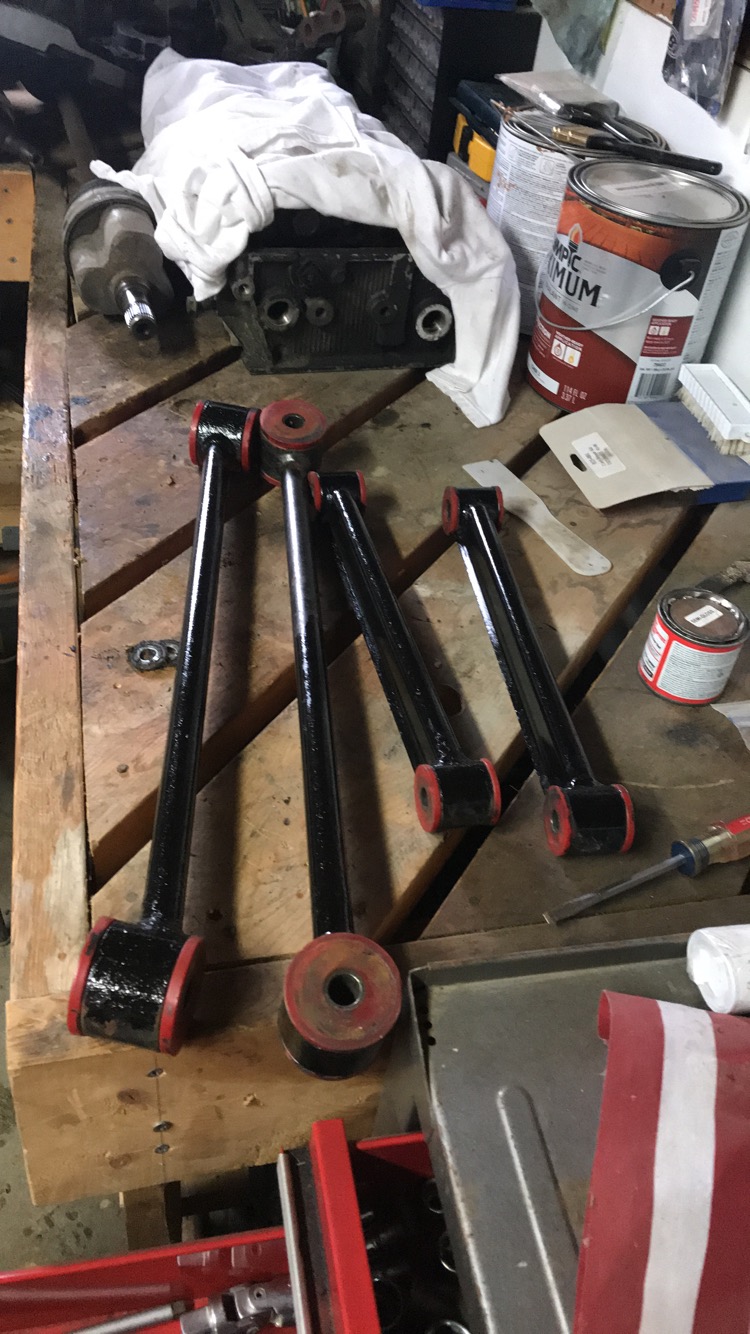
I took al of the mounts off the cradle. I POR-15ed(partially) the control arms. The poly on them looks good.
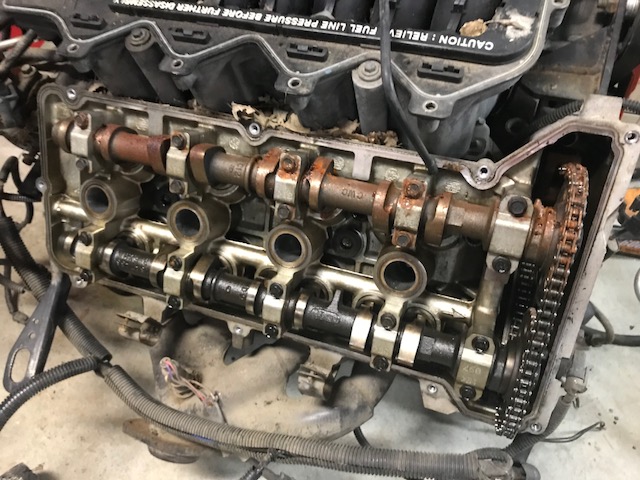
Turns out, my old valve cover had a crack. We only noticed after my poor dad cleaned the thing all nicely. Good thing for spare motors, because I just took the cover off the siezed engine. Look at that poor cam, yuck!
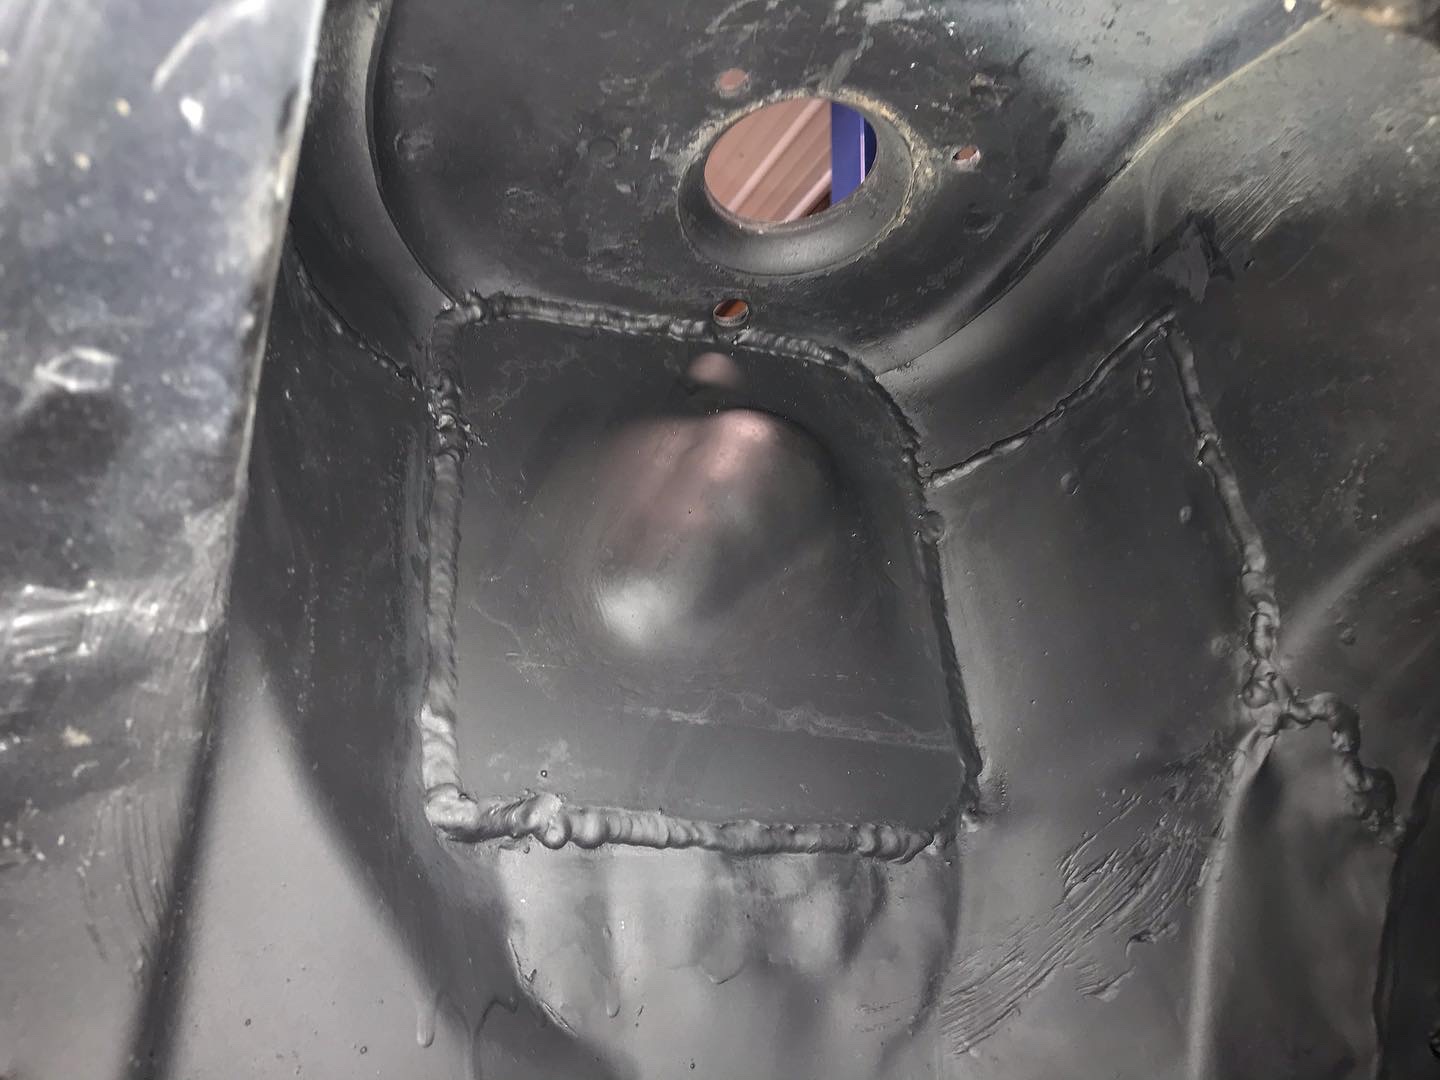
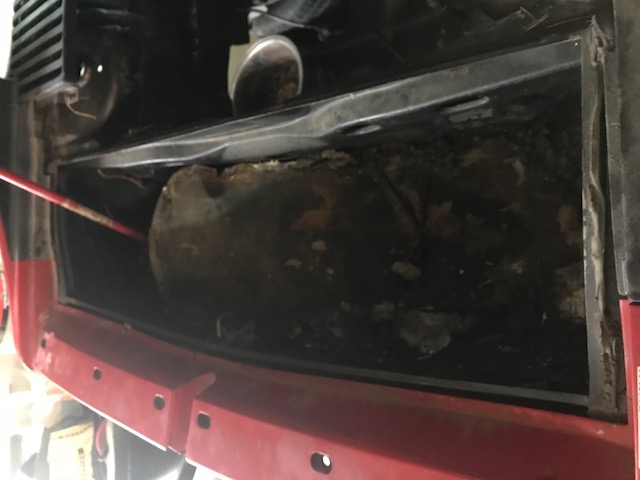
Today I also worked on trying to get the sheet out of the trunk. It busted up when the car fell, and it may be easier to do the exhaust without it in the way. Will probably cut out a new sheet and weld it in later; this one was just held in with screws and foam.
Took the cradle, and some mounts to get powder coated. Also need to drop off the rear knuckles and the other valve cover off to be done.
[This message has been edited by copperhens (edited 12-20-2018).]
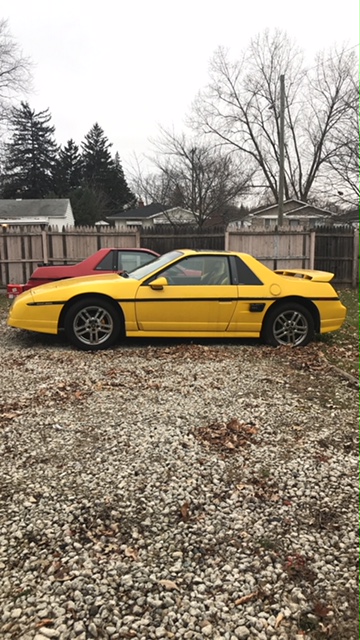
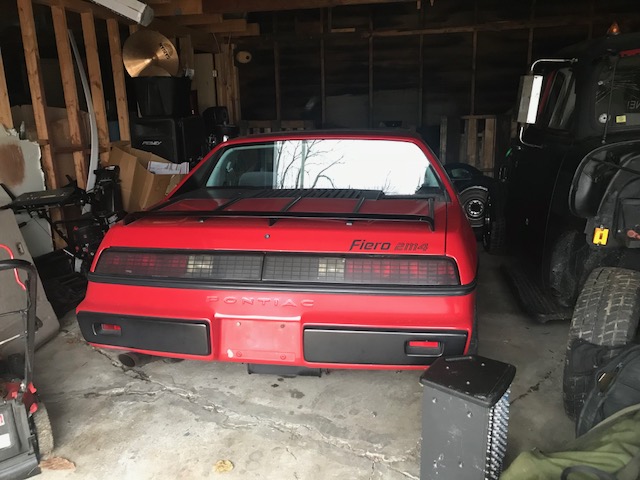
I went over to Charlie's today, and picked up some stuff. He has four cool Fieros.
This one is a super duty.
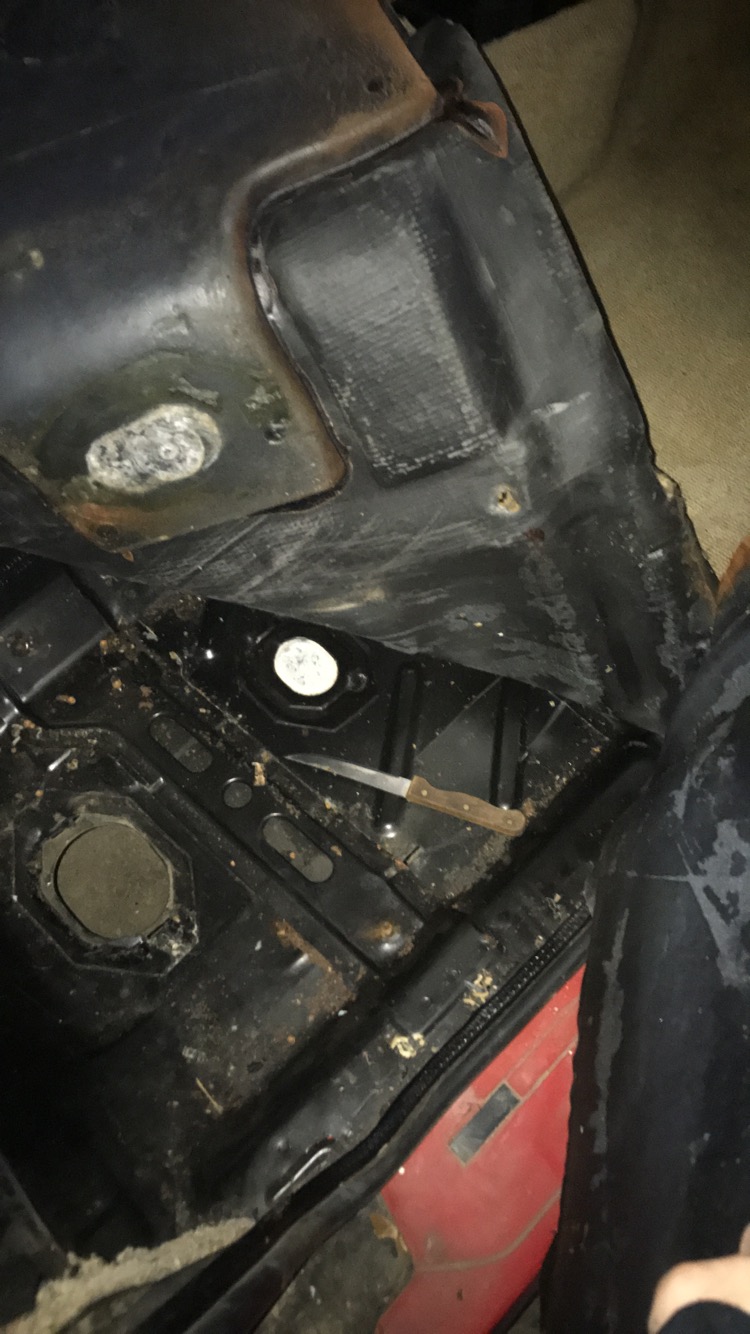
I'm debating what to do about the carpet. The car smells yucky, and according to Charlie(he's the one I bought the northstar Fiero from), it was filled of mouse poop when he got it. New carpeting is around $150, although the carpet is in pretty good shape. The foam just looks yucky. Oh well, not really an immediate concern. When I was peeling the carpet back I found something really strange.
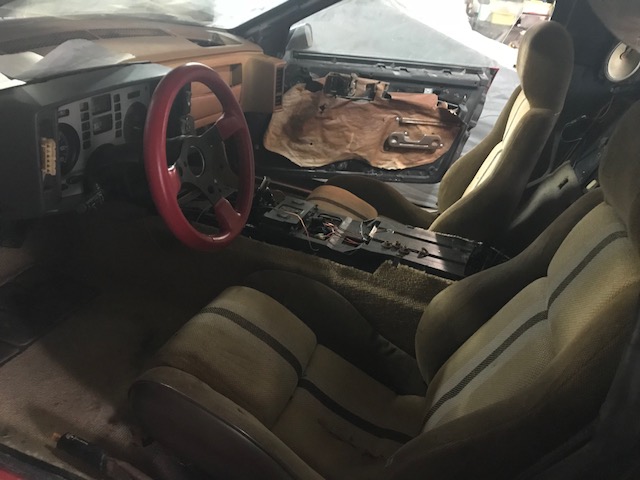
I also got some seats! I swore I had a better picture of them, but this is all I got. I just put them inside the car so my dad wouldn't have a heart attack from the garage being more messy. These seats are from an '84, so they have that stripe, and speakers! I'll need to figure out to wire those in though. The passenger seat is flawless. The driver side has two rips. but they're not worn.
Originally posted by copperhens: I'm debating what to do about the carpet. The car smells yucky, and according to Charlie(he's the one I bought the northstar Fiero from), it was filled of mouse poop when he got it.
Take the carpet out and to the car wash. Clip up with the floor mat clamps and spray it down until the water coming off of it is clean. I do this to every new to me fiero.
Take the carpet out and to the car wash. Clip up with the floor mat clamps and spray it down until the water coming off of it is clean. I do this to every new to me fiero.
Messing with my carpet seems like a spring project... I'll try to save it, as it looks pretty good on top, just stinky. Thanks.
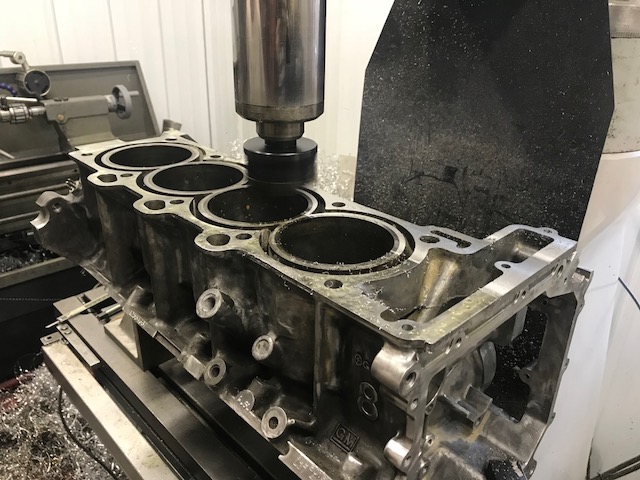
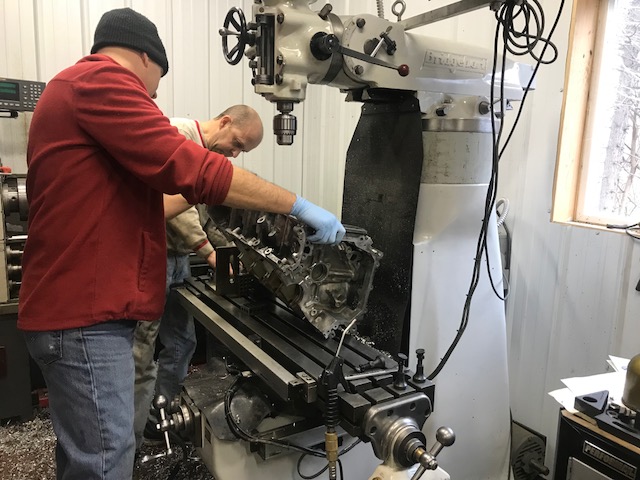
My dad and Mr. Eric are pictured here trying to align the block on the Bridgeport. This took an hour or so.
I worked on getting the cam bolts(10mm) off. They were coming off at first, and then they kept stripping, no matter which 10mm I used. I had to pound a 3/8in on to get quite a few off.
Turns out both 10mm had split.
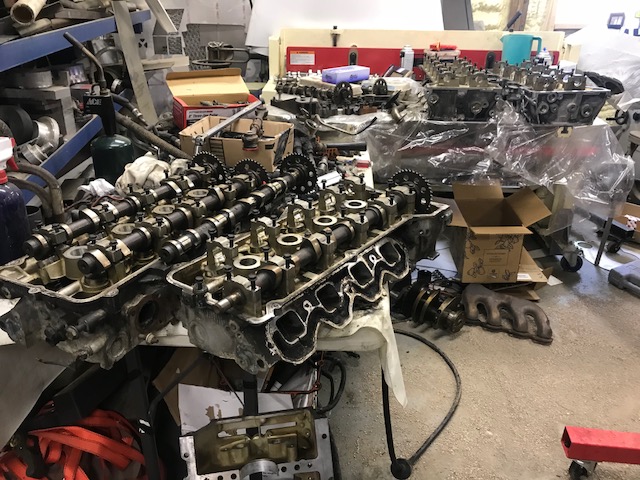
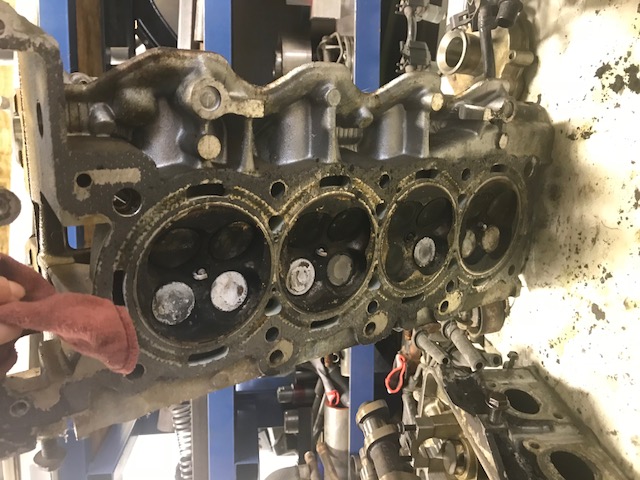
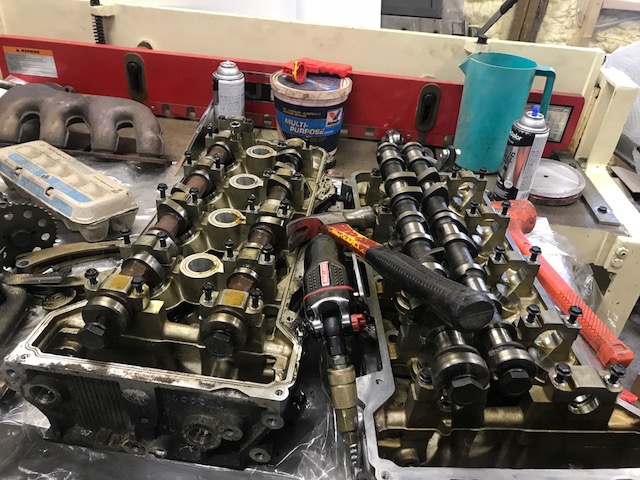
The exhaust lifters and cams on my heads were pretty awful. Luckily I not only have a spare set of lifters, but a spare set of heads too.
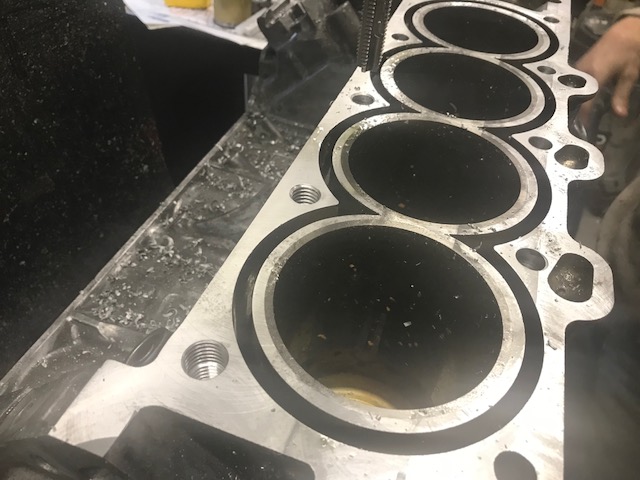
The surface was pretty rough, so we shaved off two thousandths of an inch.
The first two holes are tapped in this picture. The Bridgeport was having some alignment issues and needs a new scale, but we still got it done. Just took a while since we had to do a lot of the math the scale couldn't. We started the taps with the Bridgeport, and finished the, by hand. We were able to get this half of the block done.
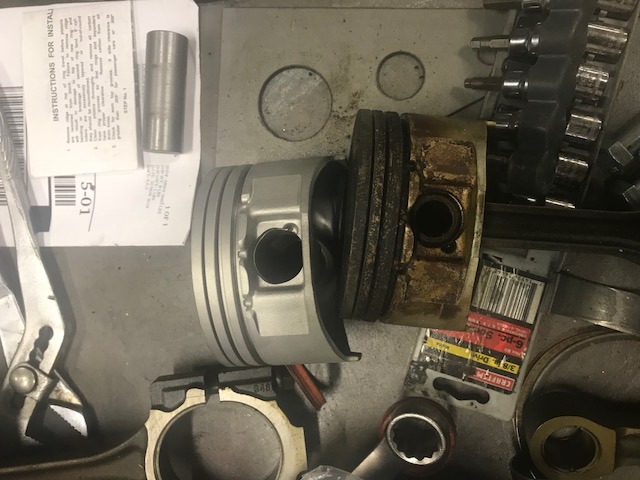
Made a temporary dowel pin for the piston so it could be bead blasted.
Nice work! I bet it feels good to get this far... The assembly will be the fun part, but then are you ready to start the swap? Thanks for the good pictures and descriptions
[This message has been edited by Phlebmaster (edited 12-24-2018).]
Nice work! I bet it feels good to get this far... The assembly will be the fun part, but then are you ready to start the swap? Thanks for the good pictures and descriptions
I've been lucky so far that a lot of the custom work has already been done. My Christmas break goes until January 6th. What're the chances I'll crack down and get the engine together by then? I have all of the parts, so in theory it's possible. The transmission situation is going to get difficult because the engine came with a stock Fiero 5spd trans, and I have an F23... So I will have to make a new trans mount for that at least. As well as the guts of the trans may differ.
I'm going to dump some information in this reply as it's Northstar/F23 related. If you think it's too much, let me know and I'll remove it.
I've decided to add some information to those interested in mating the Northstar to a F23 transaxle.
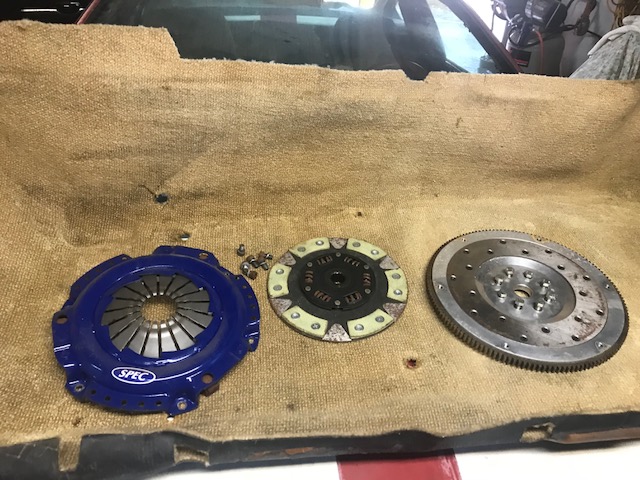
Notes; 1a) The Northstar has one mounting flange hole (on the bellhousing) offset to clear the 4T80-E transaxle. Therefore we will need to clearance the block for a bracket. 1b) The Getrag F23 will physically bolt to the Northstar. Although the F23 is secured to the block with six bolts while attached to the 2200 SFI or 3800 engines, on the Northstar we will use four for sure. There is a possibility to use the 5th hole. 2) Stock Fiero axles fit right in, no modifications are necessary. 3) The Northstar is neutrally balanced. Therefore we need a flywheel that is also neutrally balanced. With some minor machining, you can use the one that came from the 2000-02 Sunfire or Cavalier. The part number for this flywheel is: 14018712. If you Google that number, you'll see it was used in many applications. 4) Fiero clutch and pressure plate can be used. 5) Transaxle mounts. You'll have to fab up some mounts as the F23 doesn't really line up with anything on the Fiero cradle. 6) Flywheel bolts. The Northstar flexplate bolts are too short to use on the manual flywheel. You'll need to find something suitable. Whatever you end up using, use Loctite and torque to the manufacture's specification. FYI: Make sure the bolts used aren't too long or they'll hit the rear bearing and either damage it, or cause the crank not to turn. The maximum length they should protrude from the flywheel is .530" The holes in the crankshaft flange are M8x1.25 7) Despite what others think, you can use the stock Fiero clutch master cylinder. But there is a catch; you'll have to make sure to measure the concentric slave cylinder travel and see if you need a spacer or not.
I'll be using a Gen 1 (93-99) Northstar block and F23 from a 2000-02 Cavalier or Sunfire with the 2200 SFI engine for this tutorial.
Here's the dirty F23 and Northstar somewhat bolted together.
In this photo, we can use the bottom left and top left bolt holes. The middle one is not tapped and there isn't enough material to do so safely. We'll leave it alone. You can also see there is ample clearance on the left side for the water log.
On the right side, this is the hole that doesn't line up. We'll take care of that later on.
That bolt hole isn't used, although it can be. I'll show that later on as well. You can see the F23 has a casting that interferes with the water log and must get removed.
Using a hack saw, remove the offending area. It only takes a minute.
Then I chose to use a sanding disk and clean up the area a little.
The water log on the right now clears.
Now we have the filler cap to deal with. It hits the water log! This means you'll have to remove the water log to fill the trans, or fill the trans then install it onto the engine. This is nowhere near ideal.
Two simple 45° elbows (not shown) will remedy this by offsetting the filler away from the water log.
Another tight spot is the right tripod. The boss on the block is in close proximity to the axle. While it does turn, I don't have the CV boot on. The boot may foul if in place. Grinding the boss looks like it'll have enough room to clear the boot. Doing it this way should work and avoid having to use a jack shaft.
Starter clearance: As we know, the Northstar has its starter in the "V" under the intake manifold. We must clearance the inside of the F23 for the starter. Using my technique with a grinder and used (therefore smaller diameter) abrasive wheel, one can make a nice looking cut.
You'll need to go in at least 1 5/8".
Your cut should like this.
The camera gives the illusion that the left side of my cut isn't enough; it is.
If your cut looked like mine, then your starter will fit.
Now the flywheel, which needs some machining. This is the one from the 2200. It has the right ring gear diameter to work with the Northstar starter. The seven holes will need to be plugged. Either machine some pins and press them in or tap and thread in some set screws. Use high strength Locktite if tapping. After the holes are filled, one must drill new holes to match the flange of the Northstar. The pattern is 8 on 78mm. The holes should clear the 8mm bolts and be around 8.2mm; a 21/64" drill bit should be good. After that, machine off the rear flange of the flywheel. It's around 0.060" thick and needs to be removed. This is because the Northstar crankshaft is larger in diameter and needs a larger base. After the material has been removed, use the spacer that came on top of the Northstar flexplate and place it between the flywheel and crankshaft. This plate is around the same thickness as the material that has been removed. Now we need a bushing made to center the flywheel onto the crankshaft. Make it a press fit into the flywheel and the inner diameter should match that of the Northstar crank.
Here's the bushing that's needed to center the flywheel onto the Northstar crank. Note: I say "my application" below. Measure "your" Northstar crank lip and flywheel ID to get the proper measurements. Dimensions: The inner diameter (in my application) was: 1.102" The outer diameter (in my application) was: 1.263" The overall length (in my application) was: .356"
Here's a metric layout of the bolt circle, for the flywheel, that's needed when using a mill with a DRO (digital read out).
If one had access to CNC equipment, making a flywheel would be easy. Here's a few quick drawings of what it would look like.
Oh yeah, the ring gear!
If designing your own flywheel, you can pick up an aftermarket ring gear as seen below. Using the flywheel shown, it'll work with your existing starter. These are fairly inexpensive at around $40. This ring gear is installed as a "shrink fit". Meaning one will heat the ring gear to expand it, then quickly install it onto the flywheel. As it cools, it shrinks into place. If I was going this route, I'd machine the mating surface on the flywheel around .020" bigger than the inner diameter of the ring gear. I'd say 0.002" per every 1 inch of ring gear would be an interference fit. Therefore a 10" ring gear should have 0.020" of interference. Steel expands when heated. So, for every 100° in temperature rise, you gain 0.006" of ring gear expansion. Therefore at 400°, you should be around 0.024" of expansion. I'd also place the flywheel in the freezer for a day too. Some specs: -Pioneer part number: FRG 142W -Outer diameter: 11.910" -Inner diameter: 11.088" -Pitch 12 -Width: .453"
Addressing the mount that doesn't line up. As seen in this photo, one can see the mount that doesn't line up. Note: The centerline of these bolt holes is 1.0625" apart or 1 1/16".
That's okay, this is an easy fix. I used a piece of 1" round stock. Coincidentally, it had the perfect inner diameter of 1/2", which is what we need. Note: The length of my tube was .970" (thickness of the flange) + .240" (thickness of the material) = 1.210" long.
I chose to slip a bolt through the tube that I just cut and used that to scribe a line.
As seen here, this is what you need to remove from the block.
Take your time here with the die grinder and you can make it look factory.
I also added a fillet to clear the weld.
Checking the fitment.Looks nice and like it belongs.
Oh yeah, here's the mounting lug adapter that we're making.
Here's the piece that was laser cut out of 1/4" mild steel.
Here's what it'll look like after I attach it to the tube that I cut earlier.
After TIG welding the two components, I now have this mounting lug assembly.
And lets install it.
Now for the fastener lengths. These are M12 x 1.75 Hole A = 45 mm Hole B = Not used Hole C = 45 mm Hole D = 45 mm Hole E = Not used Hole F Upper = 30 mm Hole F Lower = 55 mm
I'm going to dump some information in this reply as it's Northstar/F23 related. If you think it's too much, let me know and I'll remove it.
I've decided to add some information to those interested in mating the Northstar to a F23 transaxle.
Thanks for the info. Leaving it up is fine, in case another member has questions.
I believe I have the same trans that’s shown in that tutorial? If that’s the same one I got from you a couple months ago. The starter area is already cut, as well as the the other protruding pieces.
In the words of Mr. Eric, "we have some good news and bad news. The block is drilled, but its also cracked." I thought he was joking about it being cracked, by alas, it is.
It goes through the block heater, that we took out. It's not that bad, and I think it may have started when the block was cut by a PO. That curve there isn't factory. We're gonna v the crack, and weld it together.
Mr. Eric bought a sand blaster, so we tested it out on the block. It looks great.
I can't find the pictures, but two days ago when it was 50F out, I worked on the car's interior. I changed the guage cluster surrond back to tan, since PO tried to change to gray. Also took out driver side carpet, and cleaned the crap out of it. The foam was in pretty good shape.
Still haven't worked on the block. This week hopefully.
I did take all of the transmission stuff off the seized motor today though. Apparently something in here was supposed to be broken(according to PO), but it looks fine to me.
I know I have not been updating, but don;t worry because I've still been at it!
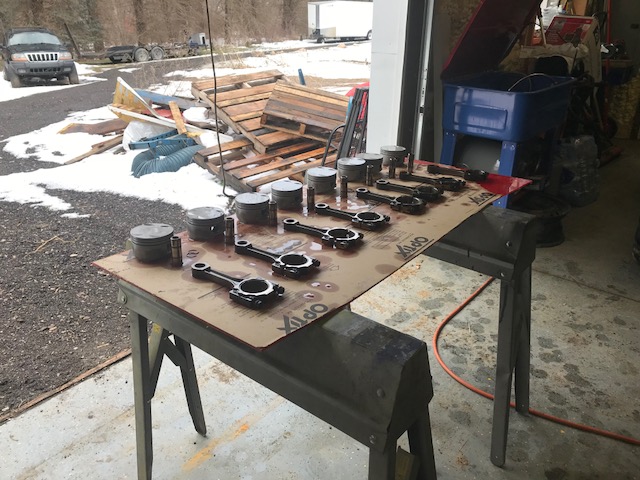
Back on the 24th of February the pistons got cleaned up.
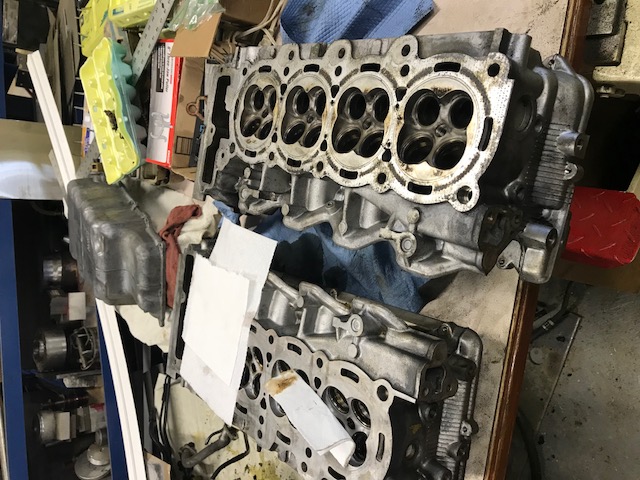
Rebuilt the heads late March. New valves, and cleaned everything else up.
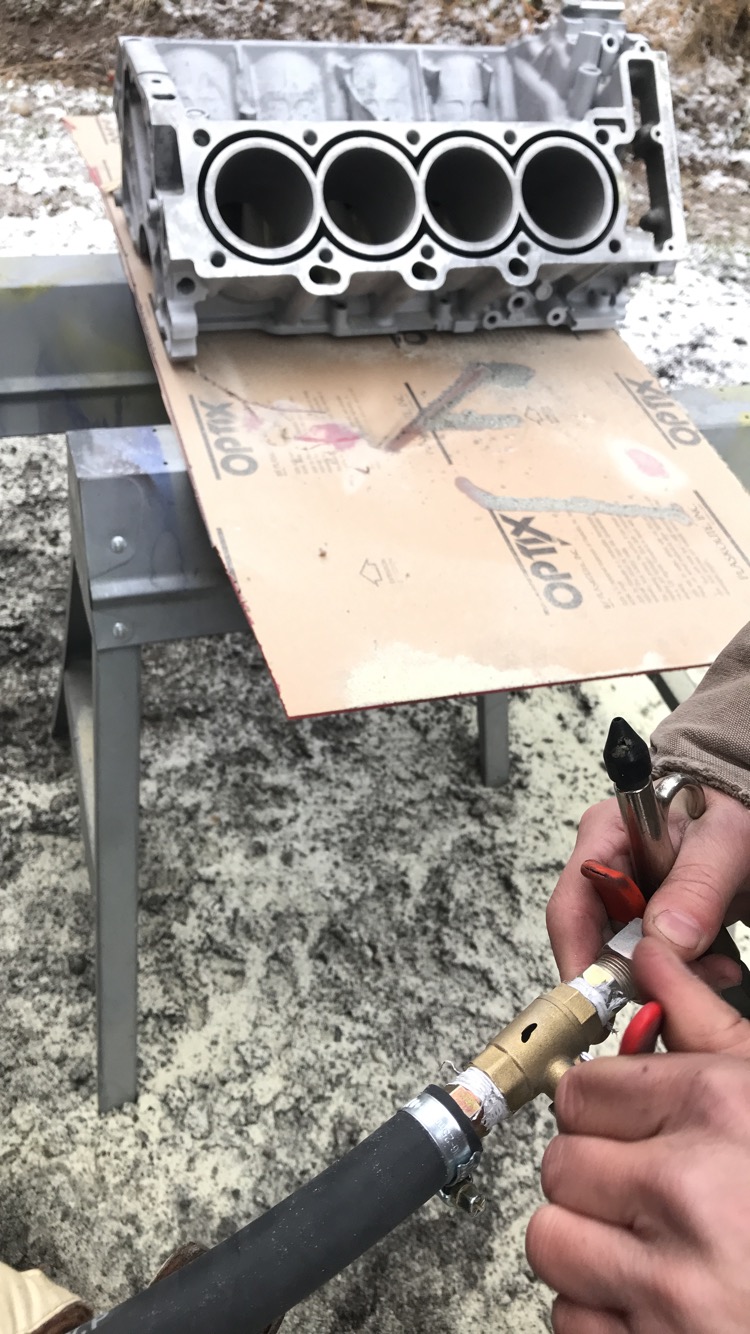
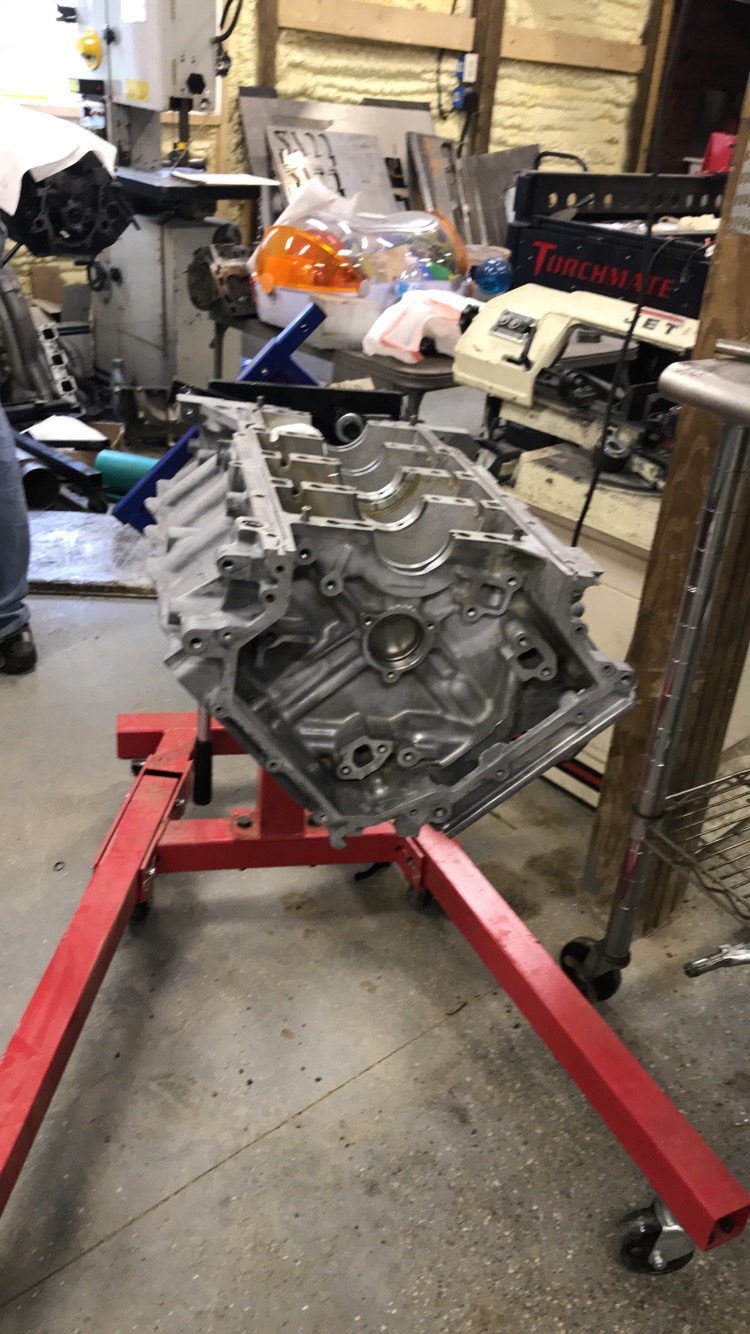
Sand blasted the block in below freezing weather.
Pistons in in May.
Headstuds in on the 21st,
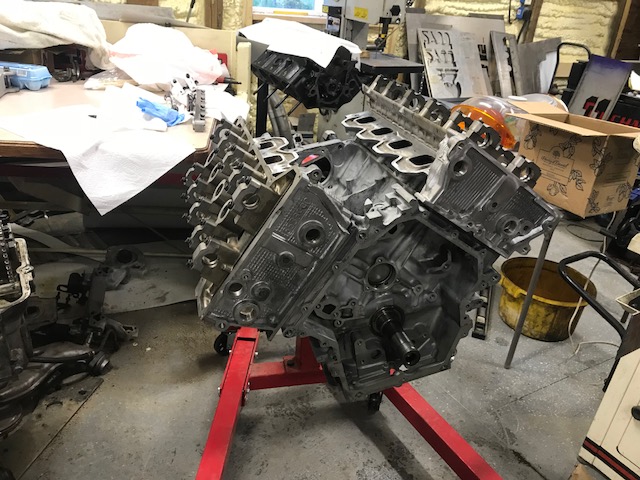
Heads on.
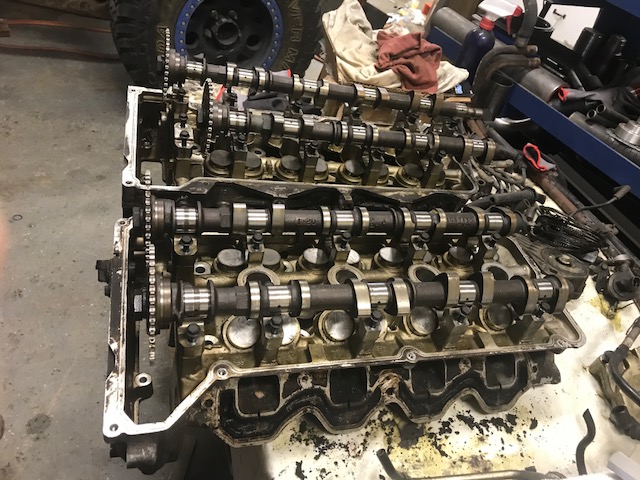
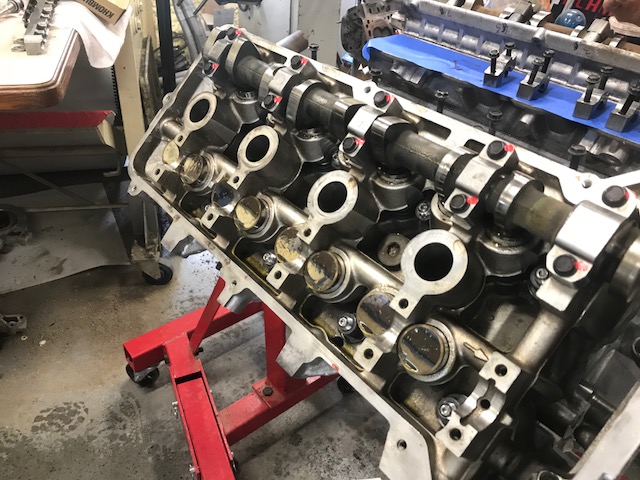
Cams on and the followers on today. The exhaust ones all came from the spare heads I have because the ones that were on this engine were pretty beat up.
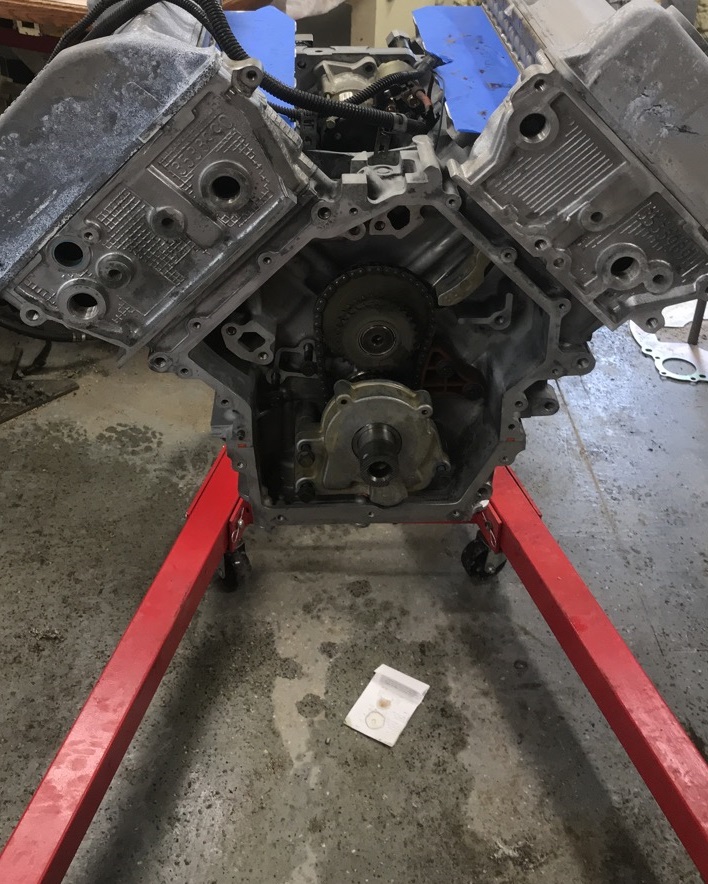
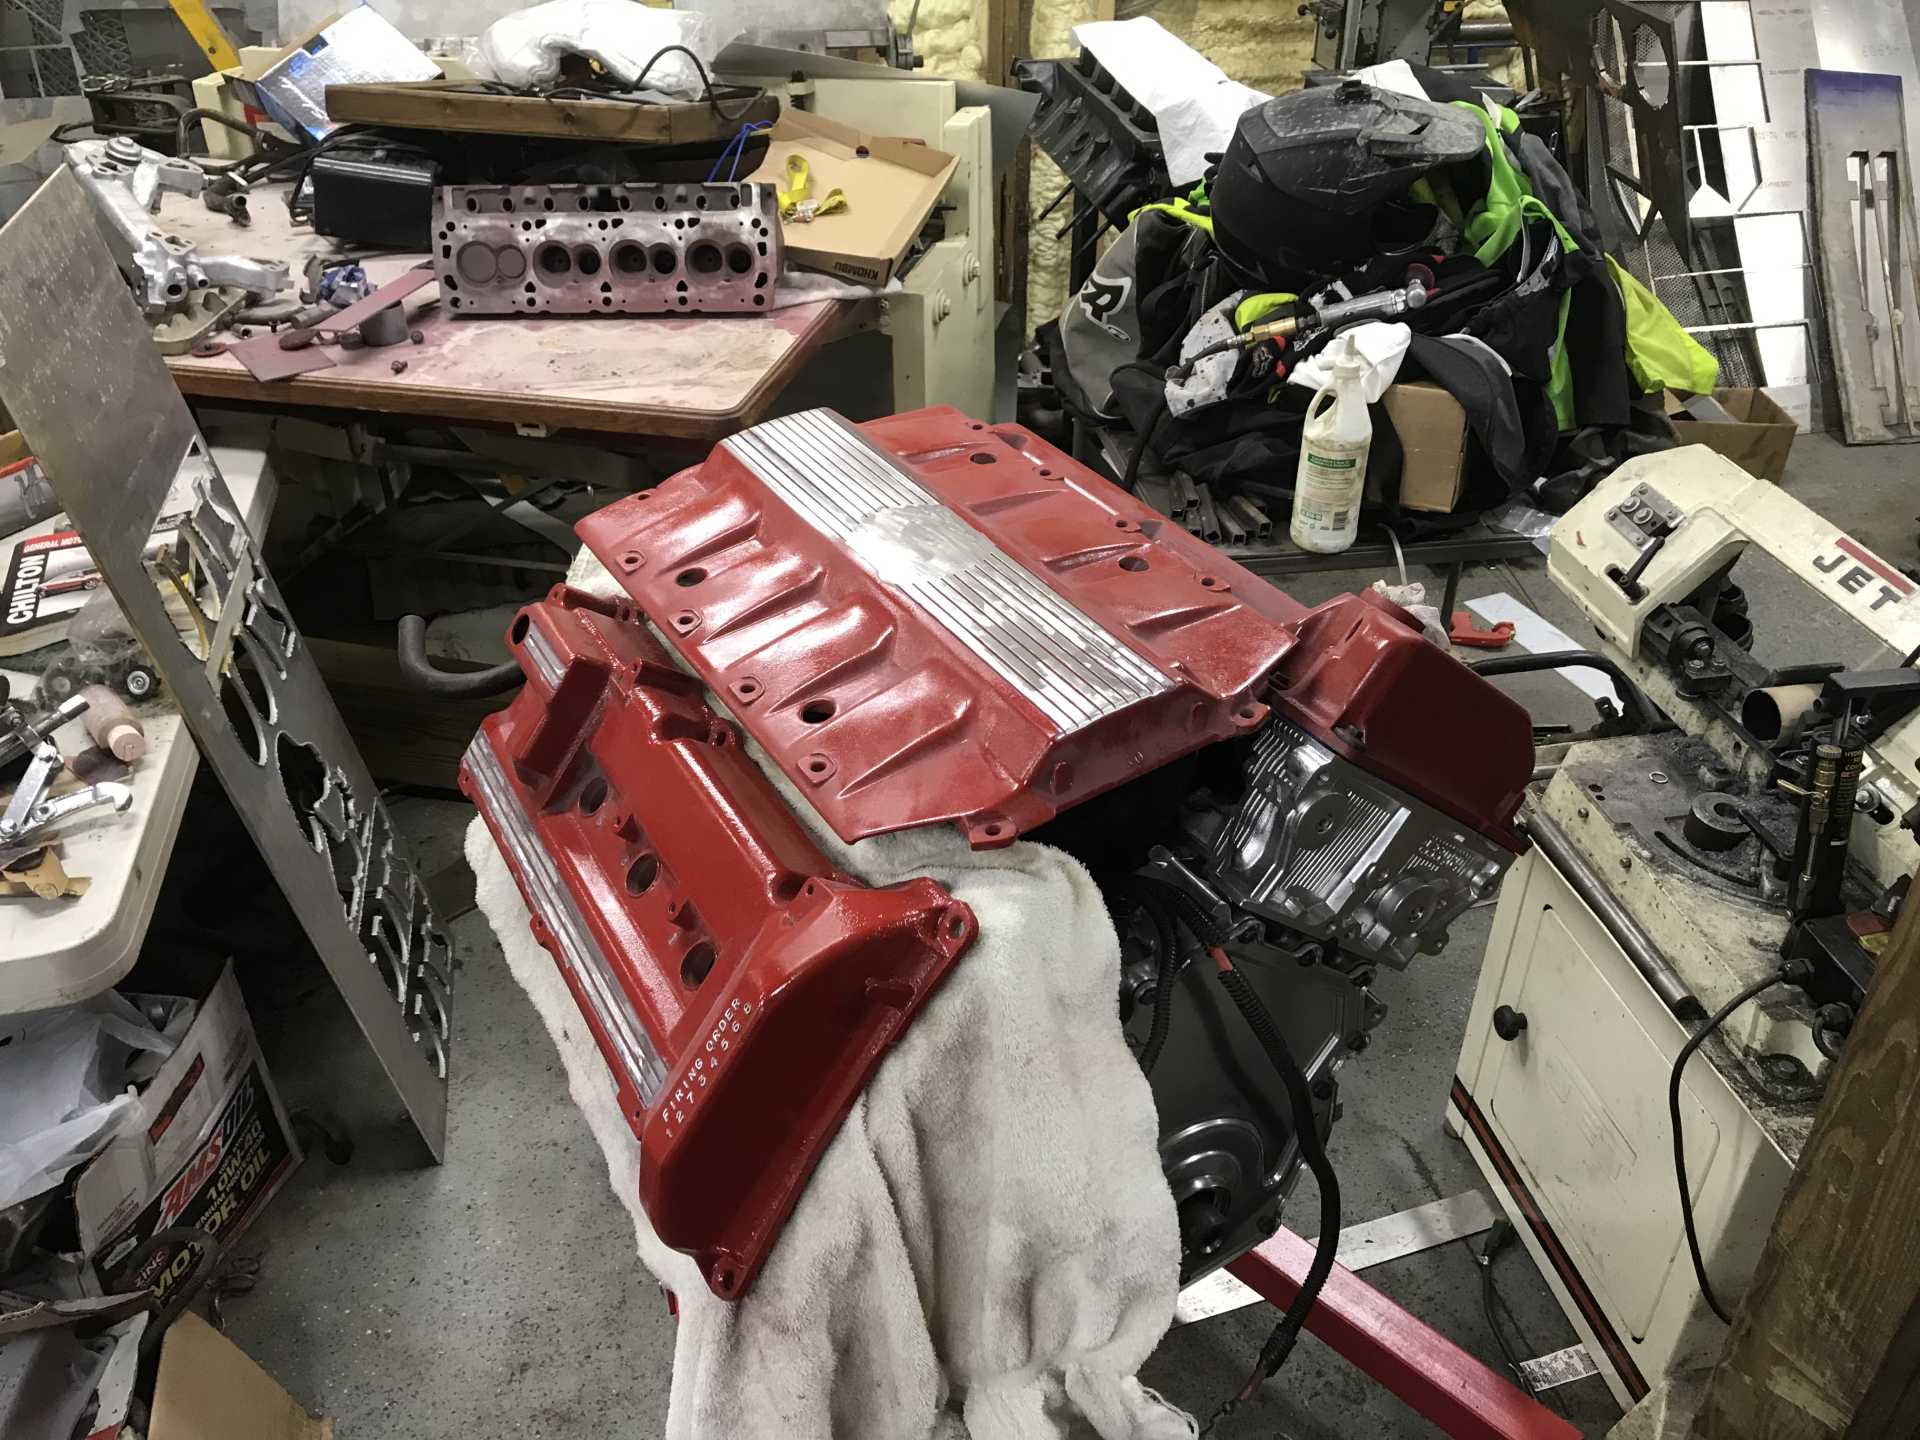
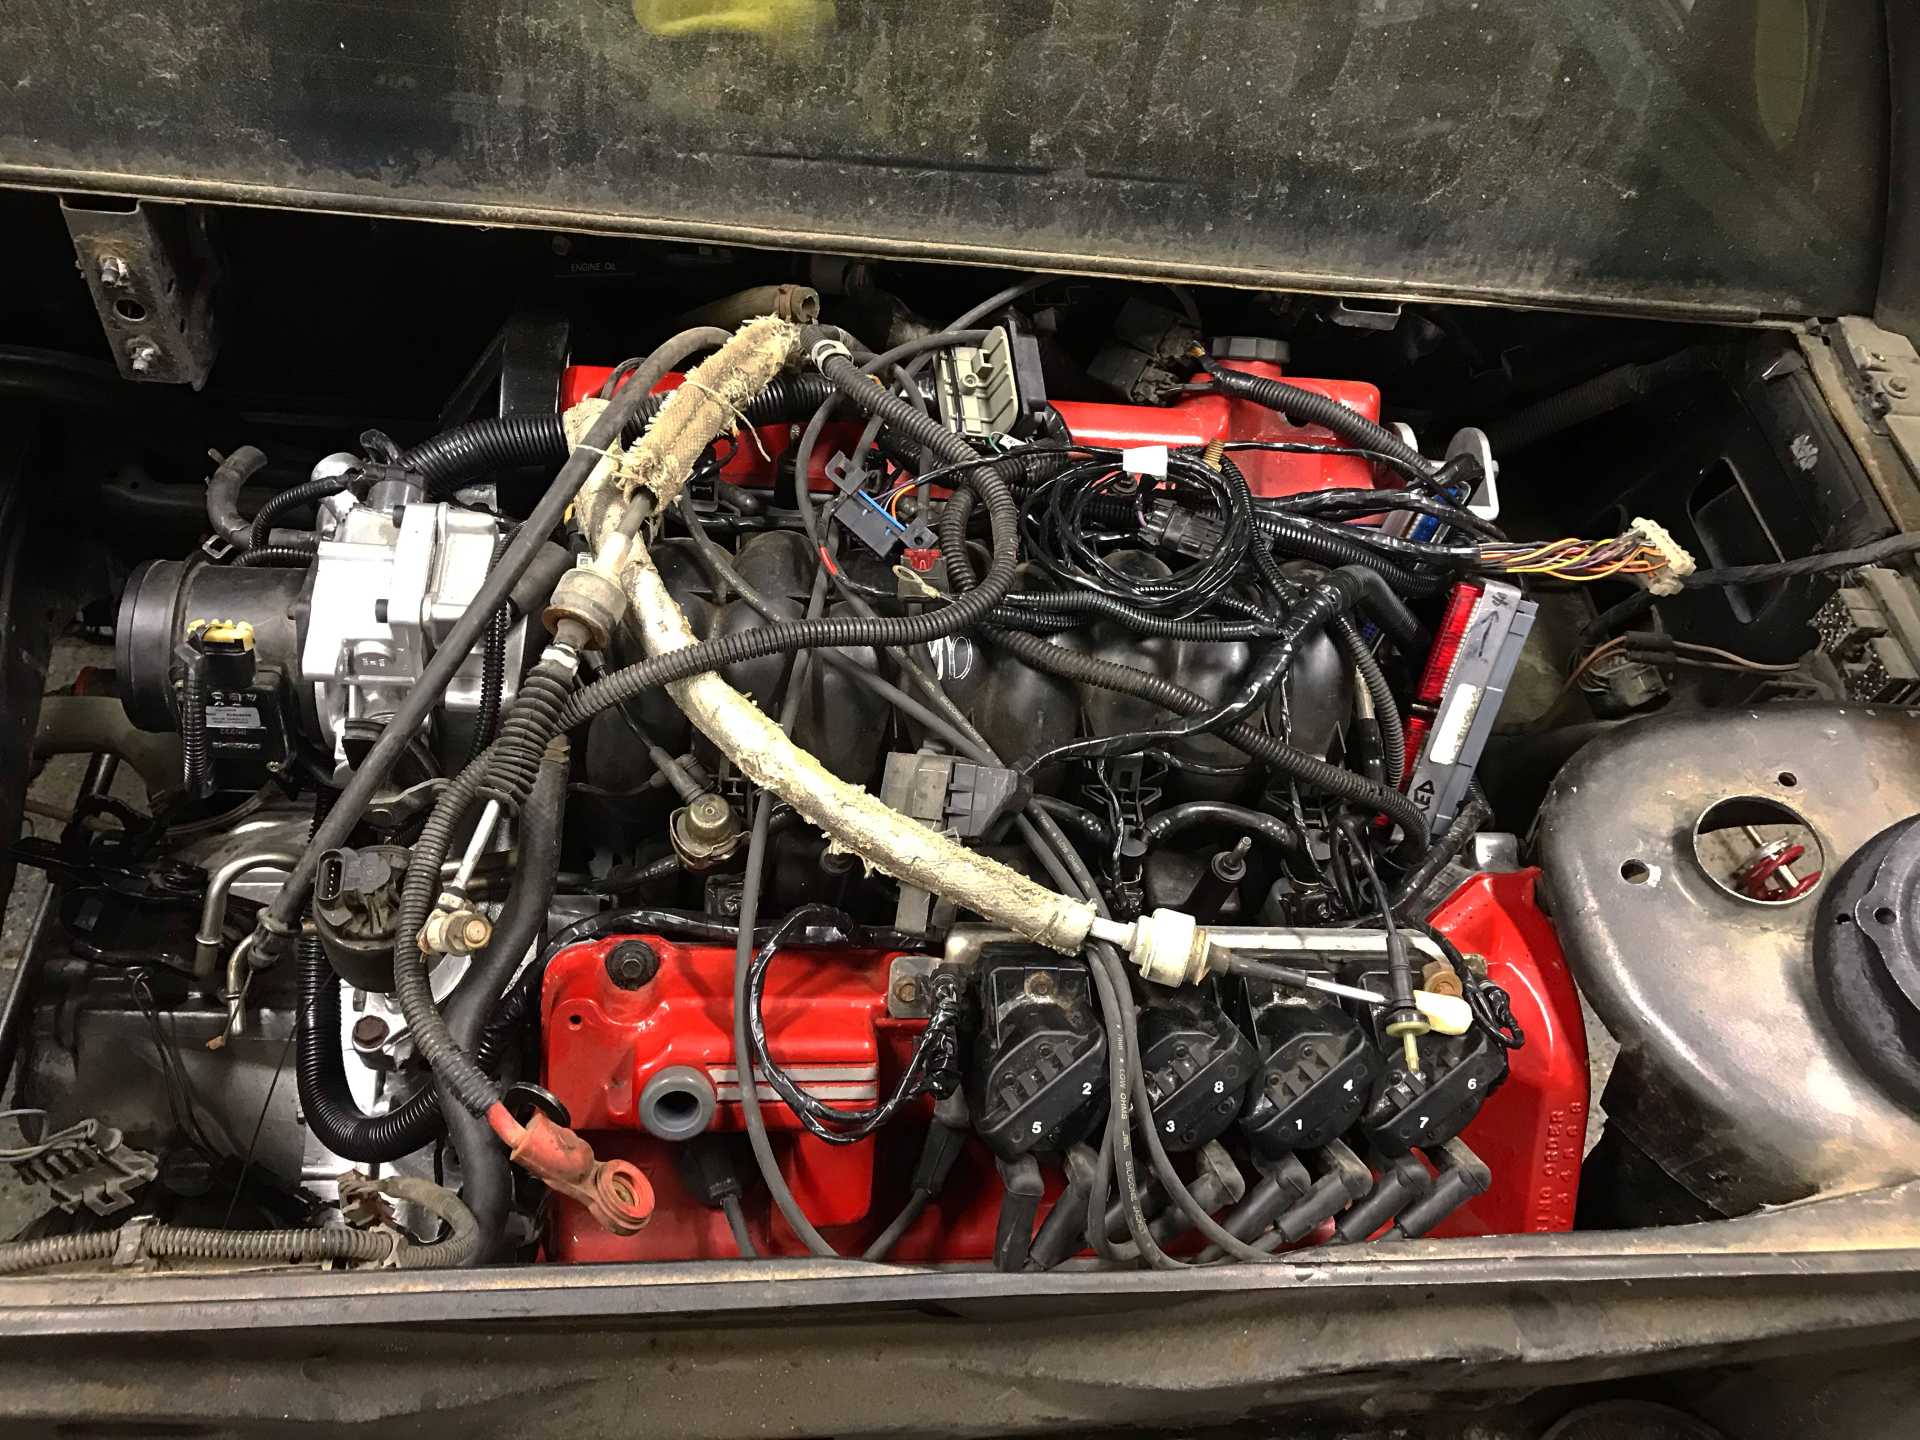
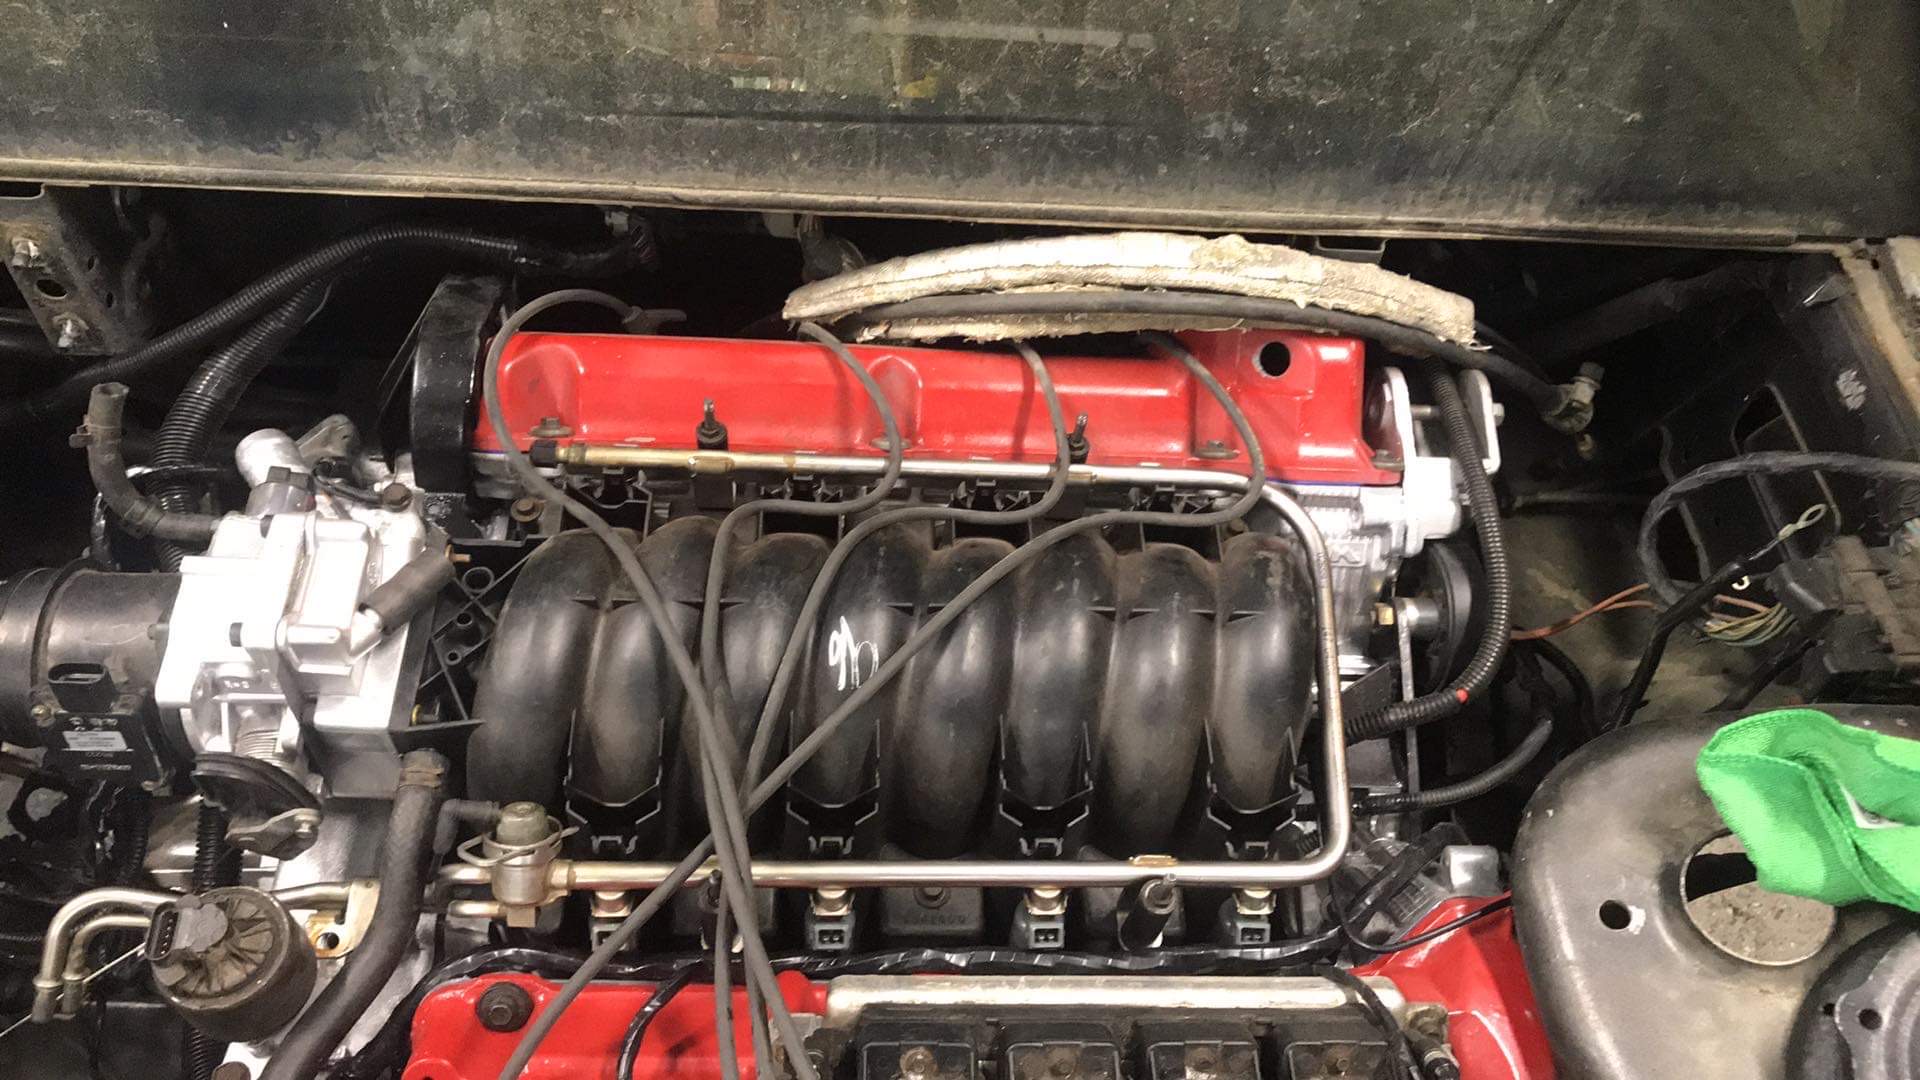
I had to order new timing stuff because the stuff was pretty worn. Also had to pull new valve covers since the ones pictured are all pitted. I'm wondering if anyone has relocated the oil fill. Currently it is on the front of the engine, and that just looks awkward in a Fiero hmm...
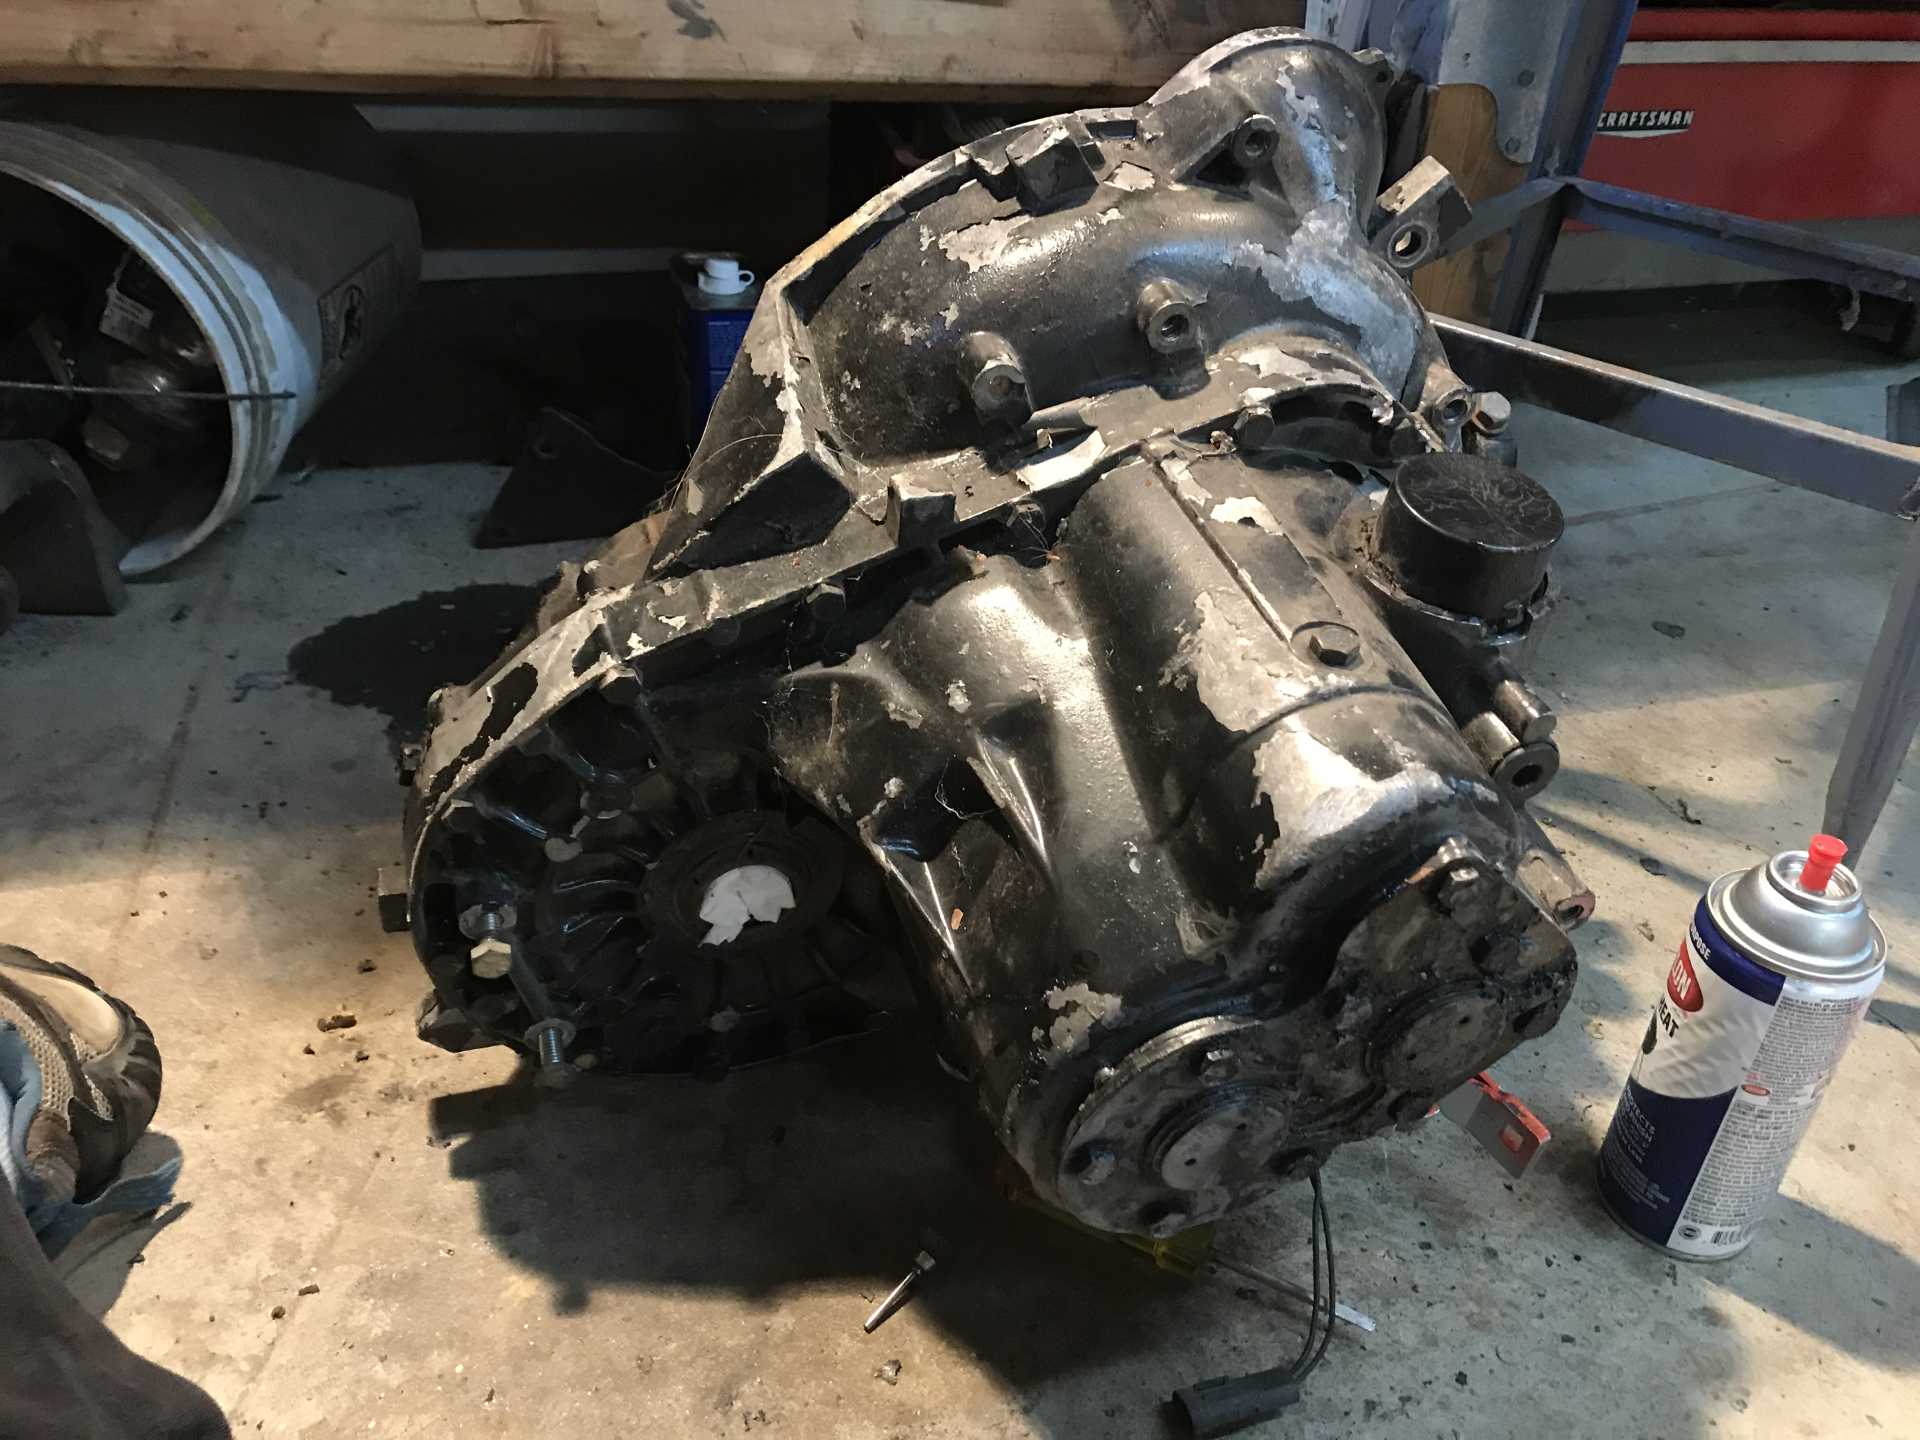
Transmission fitment. In order to fit the transmissions on the northstar if you go manual, you have to cut a notch out to accommodate the starter. I did not have to worry about this because the transmissions I have were both going to be used on a Northstar so it had already been done. The transmission in the picture is an F23. I later end up using the 5spd getrag because it is already set up in the car, and I saw someone trying to get an F23 into reverse once and it wasn’t pretty.
9-1-19 My Fiero’s headlight motors needed rebuilding.
9-20-19 The PO cut the brake lines for whatever reason, so I replaced all of them too with stainless steel. Also have the front brakes with new pads and rotors. Don’t kill me for saying it’s all stock... These upgrades I have to save up for as I can’t afford all of this stuff at once. And also let’s make sure my engine even runs!
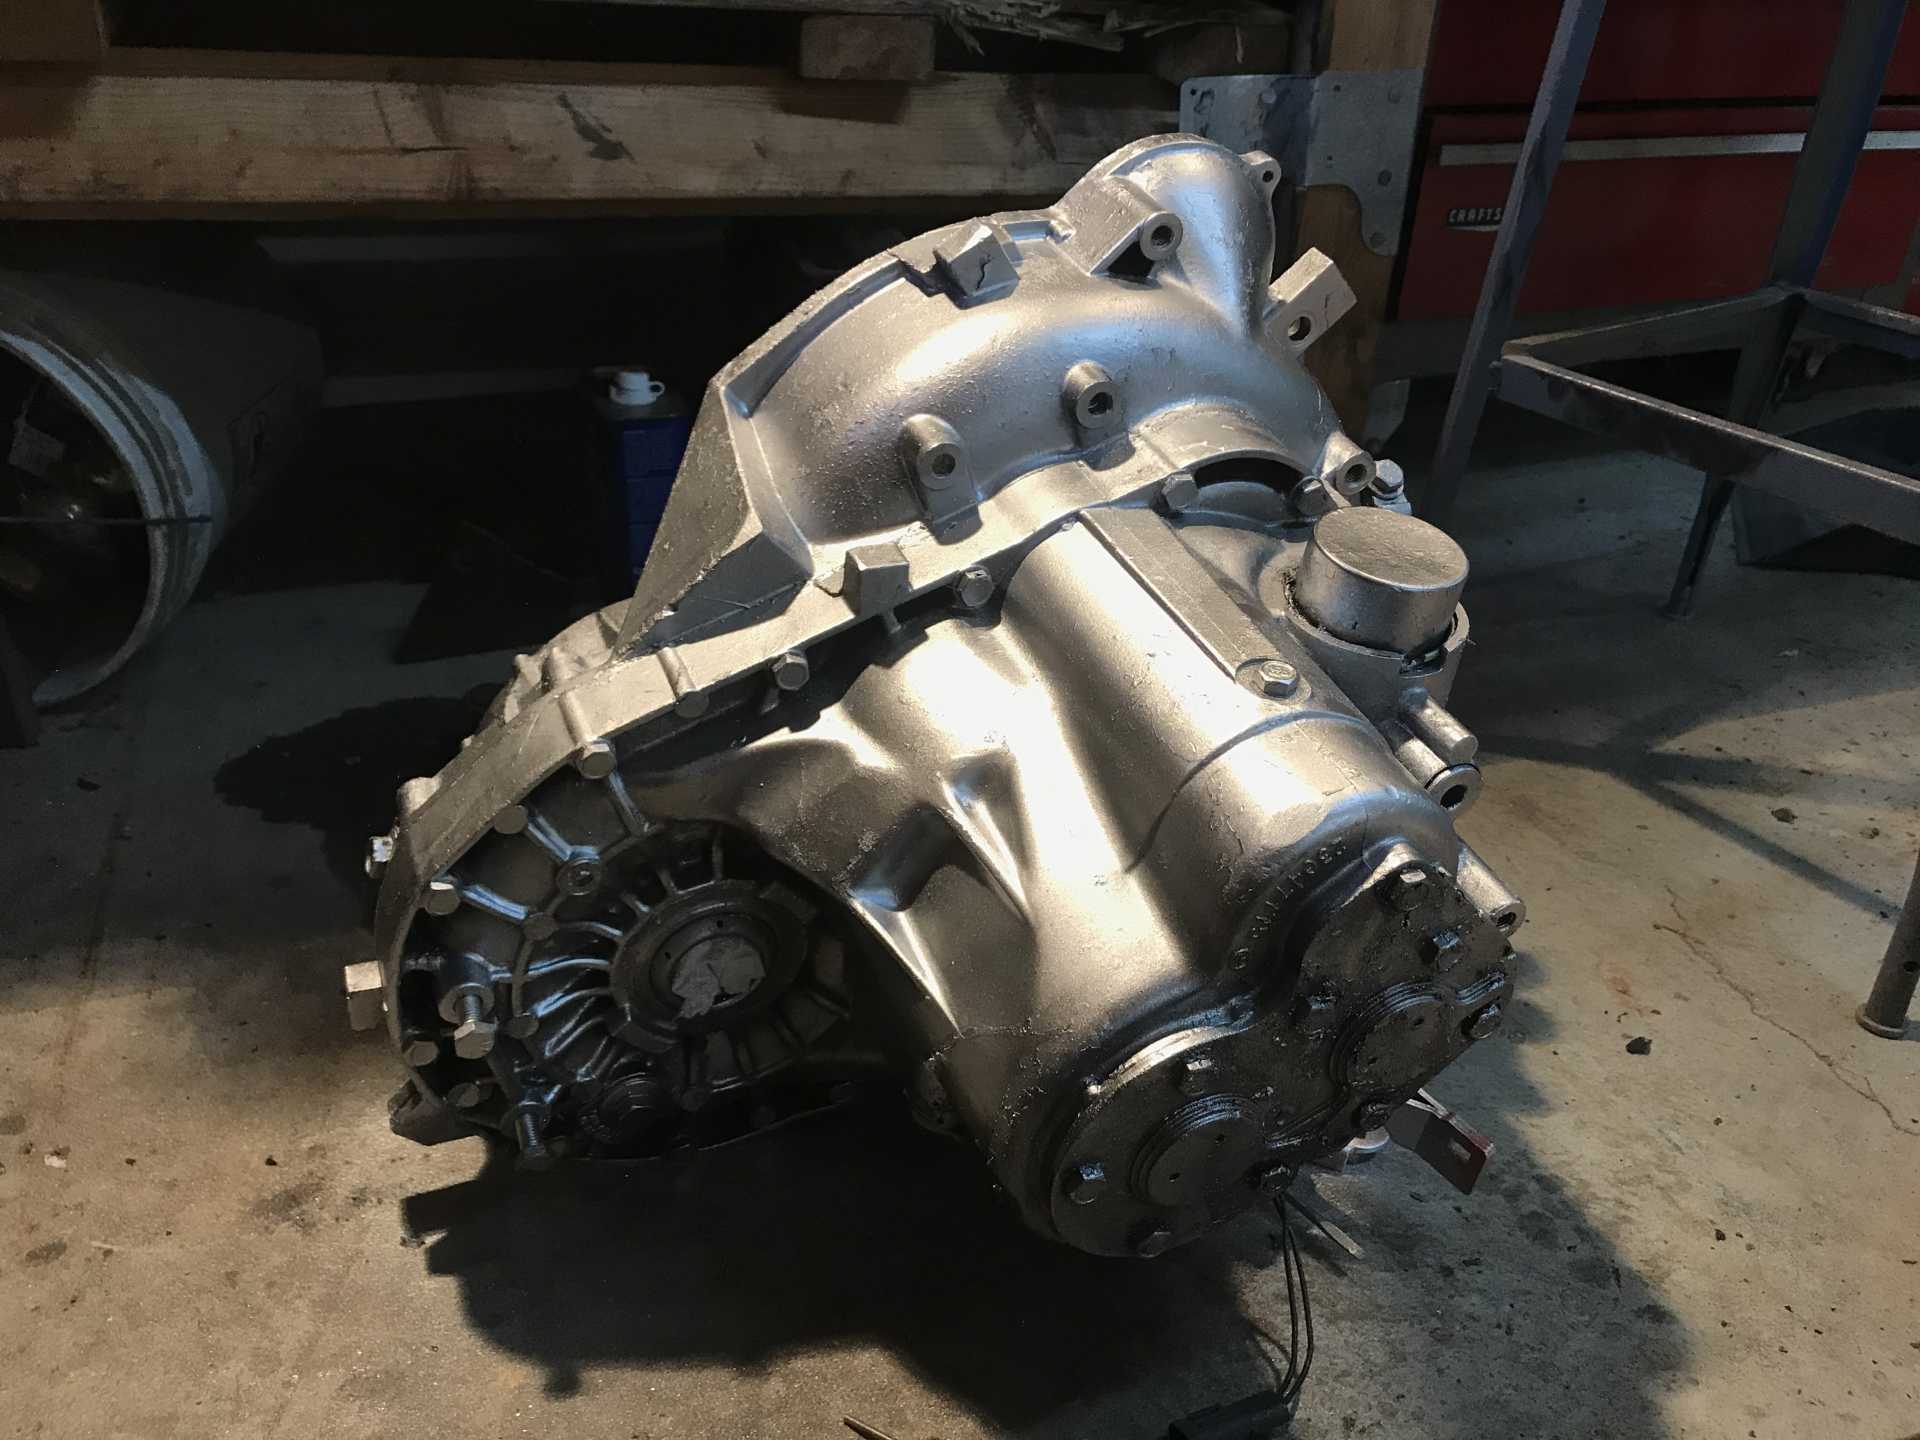
The POs painted the 5spd getrag black. I stripped it all off, cleaned it up and used some metallic spray paint.
10-27-19
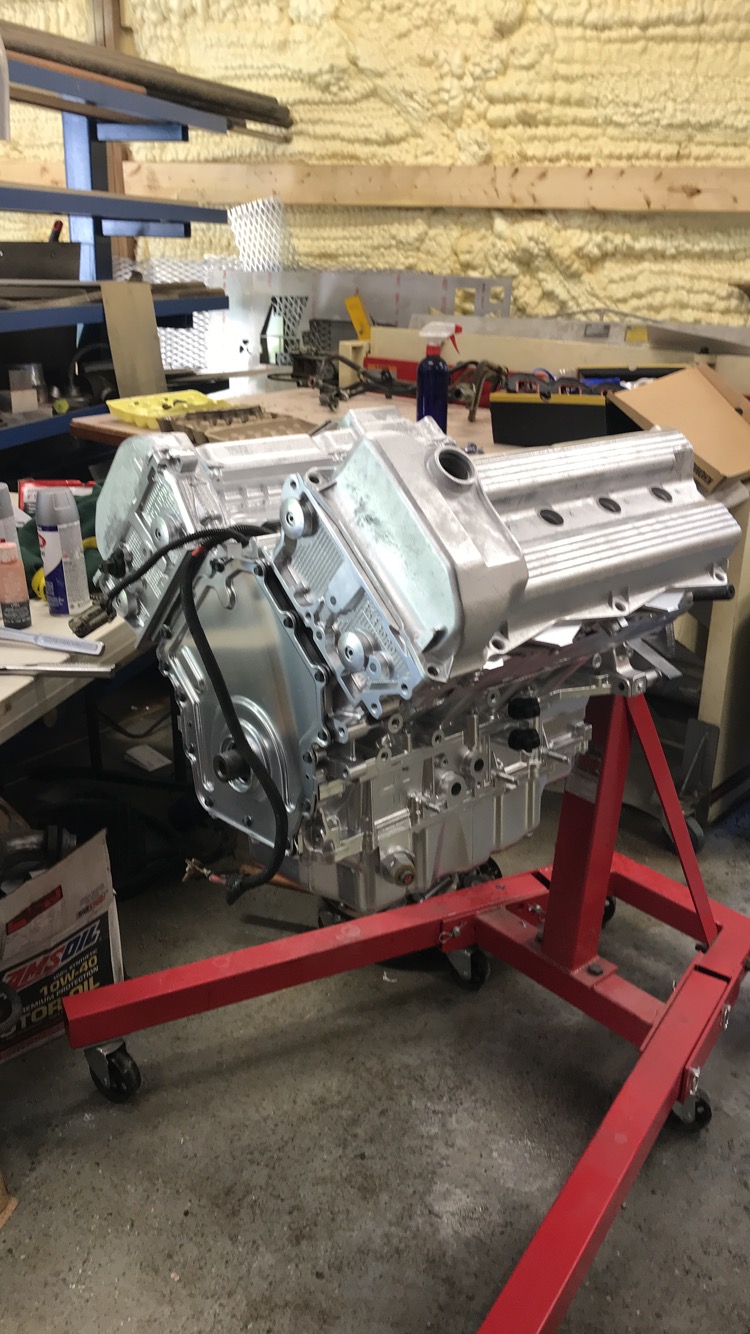
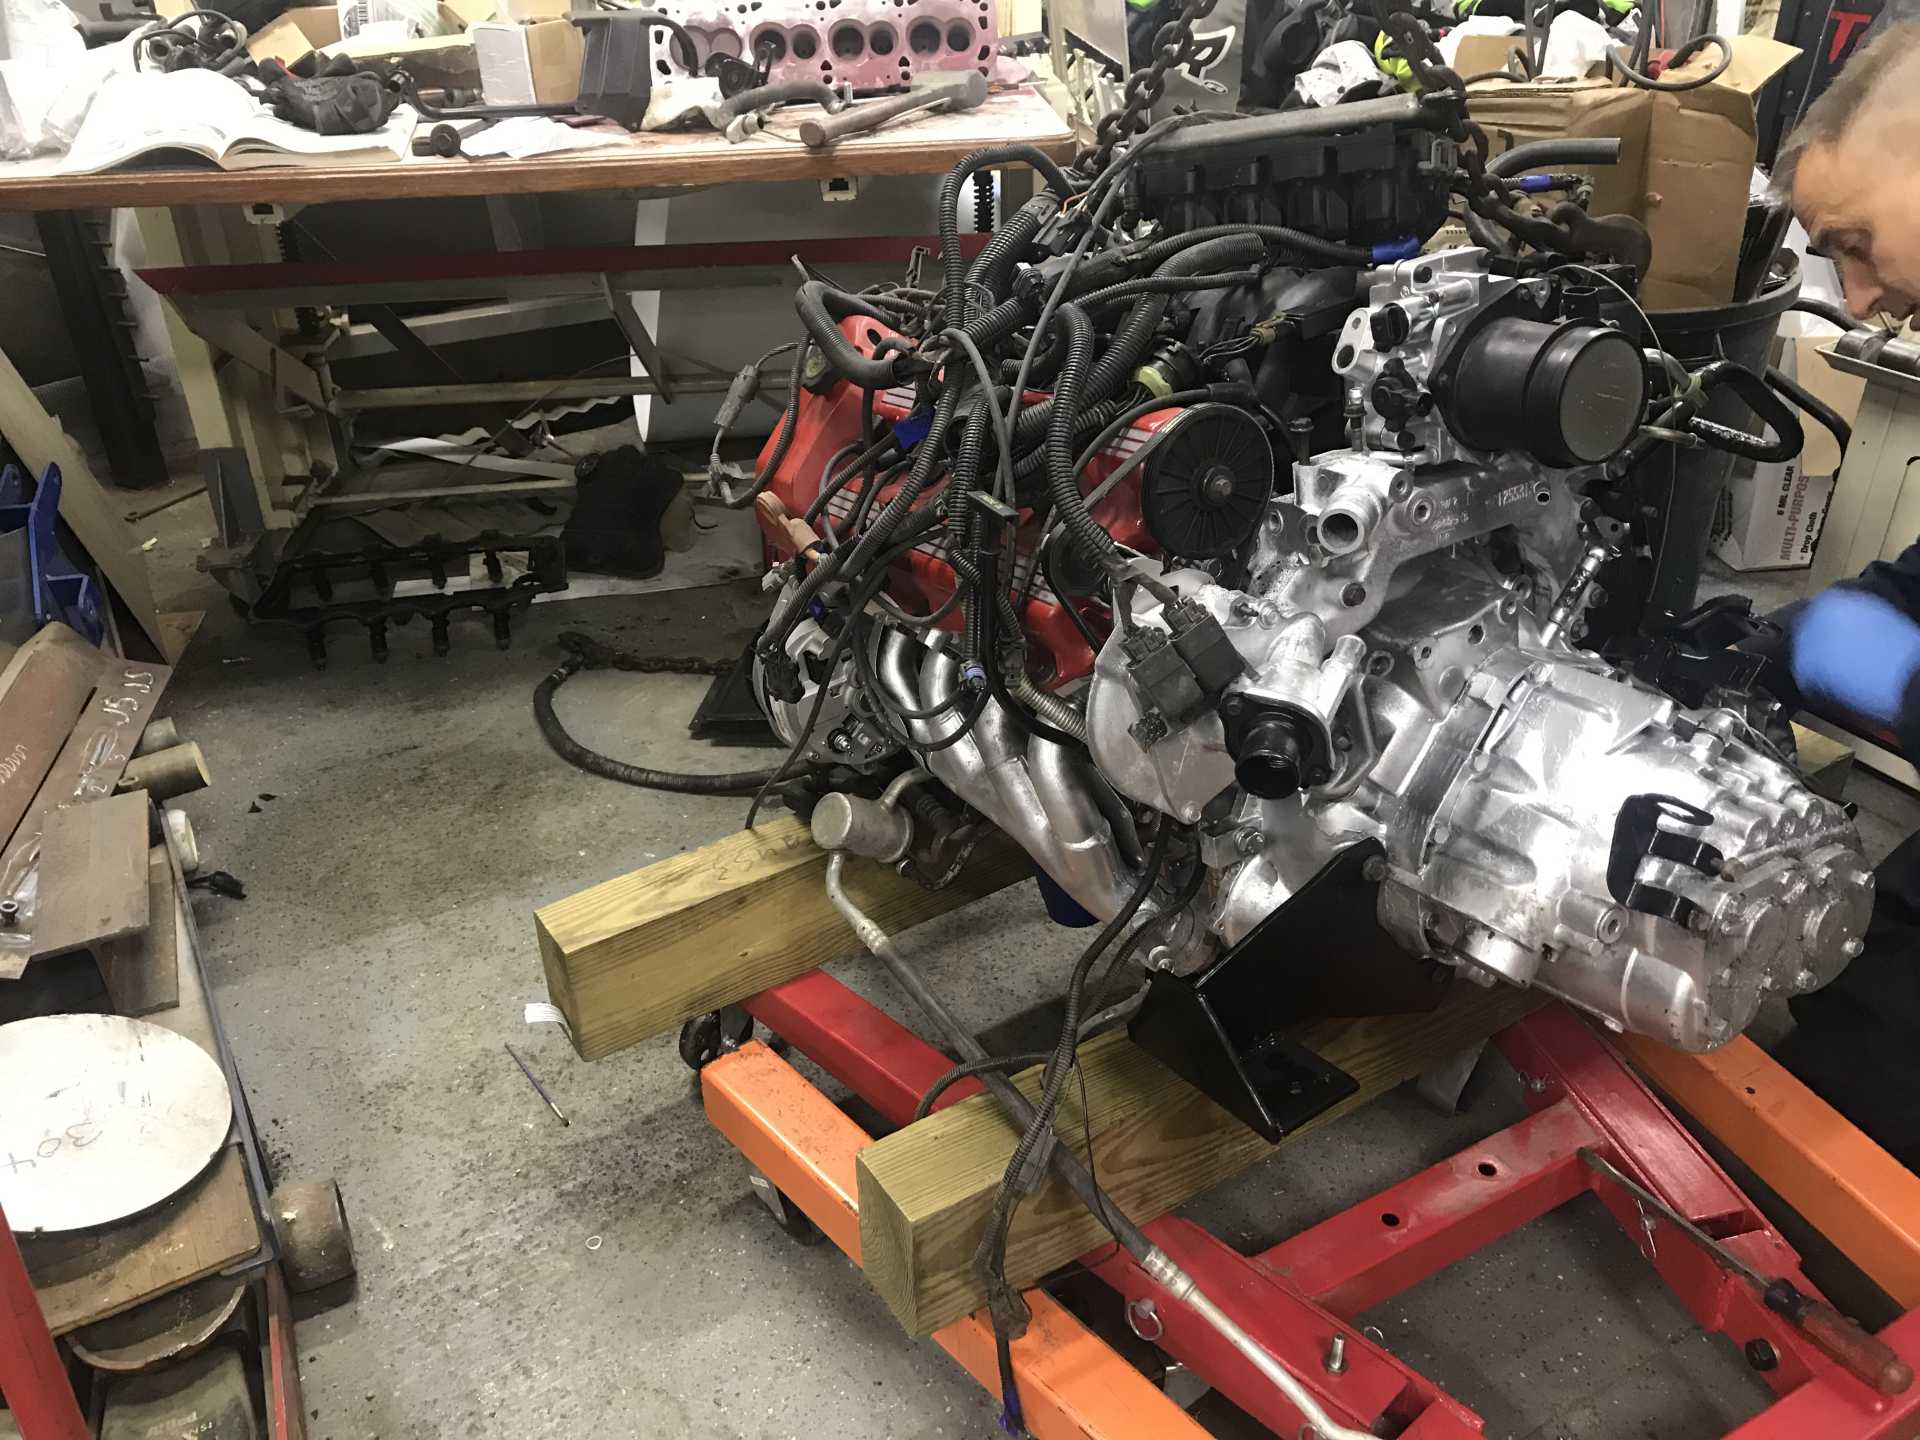
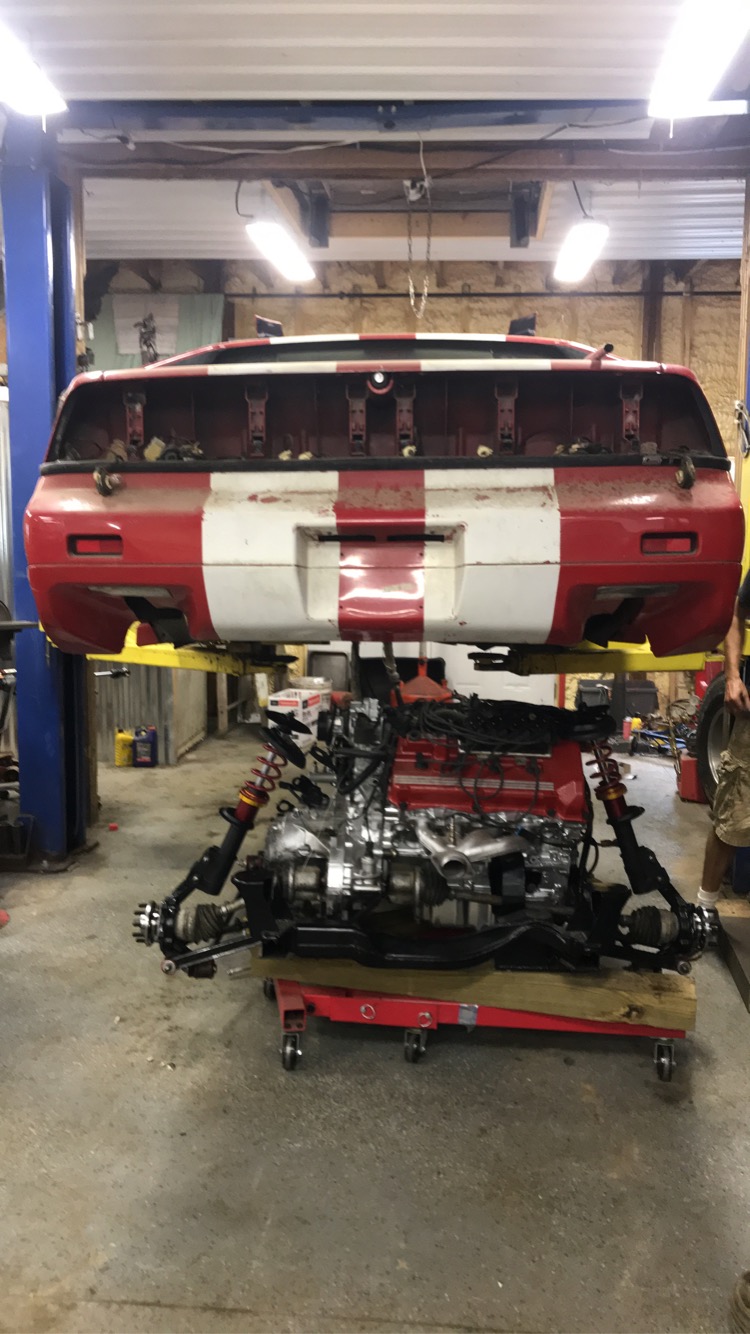
Huge step. Dragged my cradle and the components from under my dad’s Jeep because it was finally time to mount the engine. When I bought my Fiero, the PO has the engine mounted, so these are custom to him. There are two chevy 4x4 mounts, a Caddy mount(rear bank), and a Fiero mount(transmission).
Trying to figure out how to dangle the engine so it would fit on the cradle yet still be on the engine stand so we could roll it was tricky.
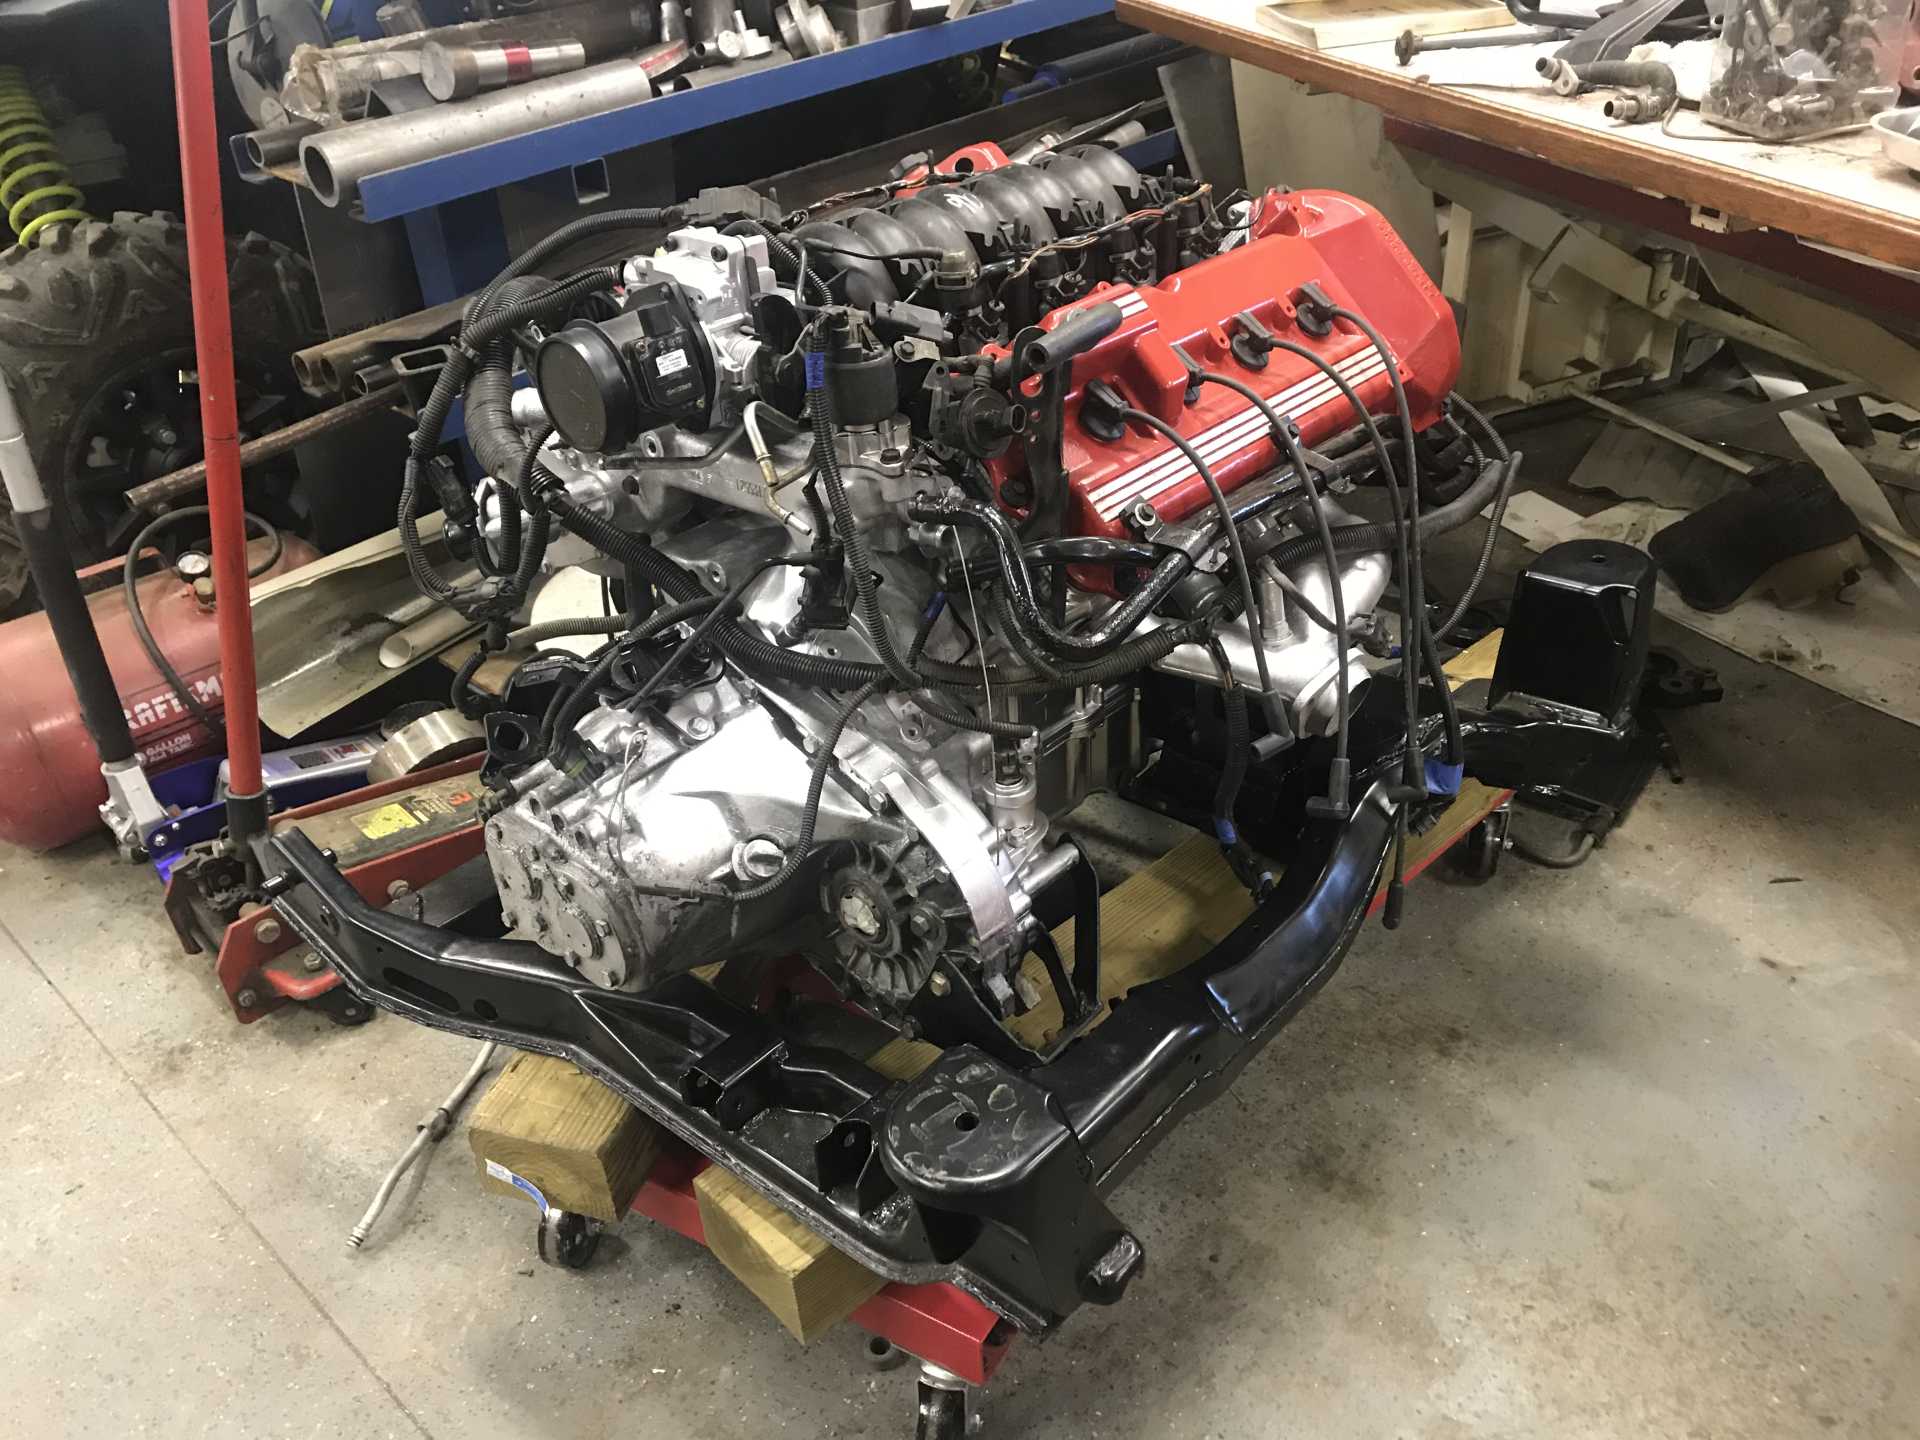
And this is how the engine sits today. The wiring is on it but had since been removed. I am taking it to oljoedad to redo. I wanted to figure it out myself, but it is beyond me and my dad’s knowledge. The harness if for a ‘93 Northstar Fiero and I have a ‘96, so it’s just not going to work. After the wiring is done, it could go in the car!
Thank you Cliff for letting us be able to post images from our phones! It’s a huge step and makes updating these threads so much easier. I used Facebook over the forum more because it was easier to post pictures there, but now that we can do it here I will be around more often.
I've always been a fan of swaps with a nod to the Fiero V6 colour scheme Particularly when there's this level of attention to detail, which makes the V8 appear like it could've been a genuine factory option
Motivation must have been at an all-time high if you were sandblasting in sub-zero temps! Your hard work and dedication is absolutely going to pay off in the long run Good luck with the wiring and please keep us up-to-date on the progress!
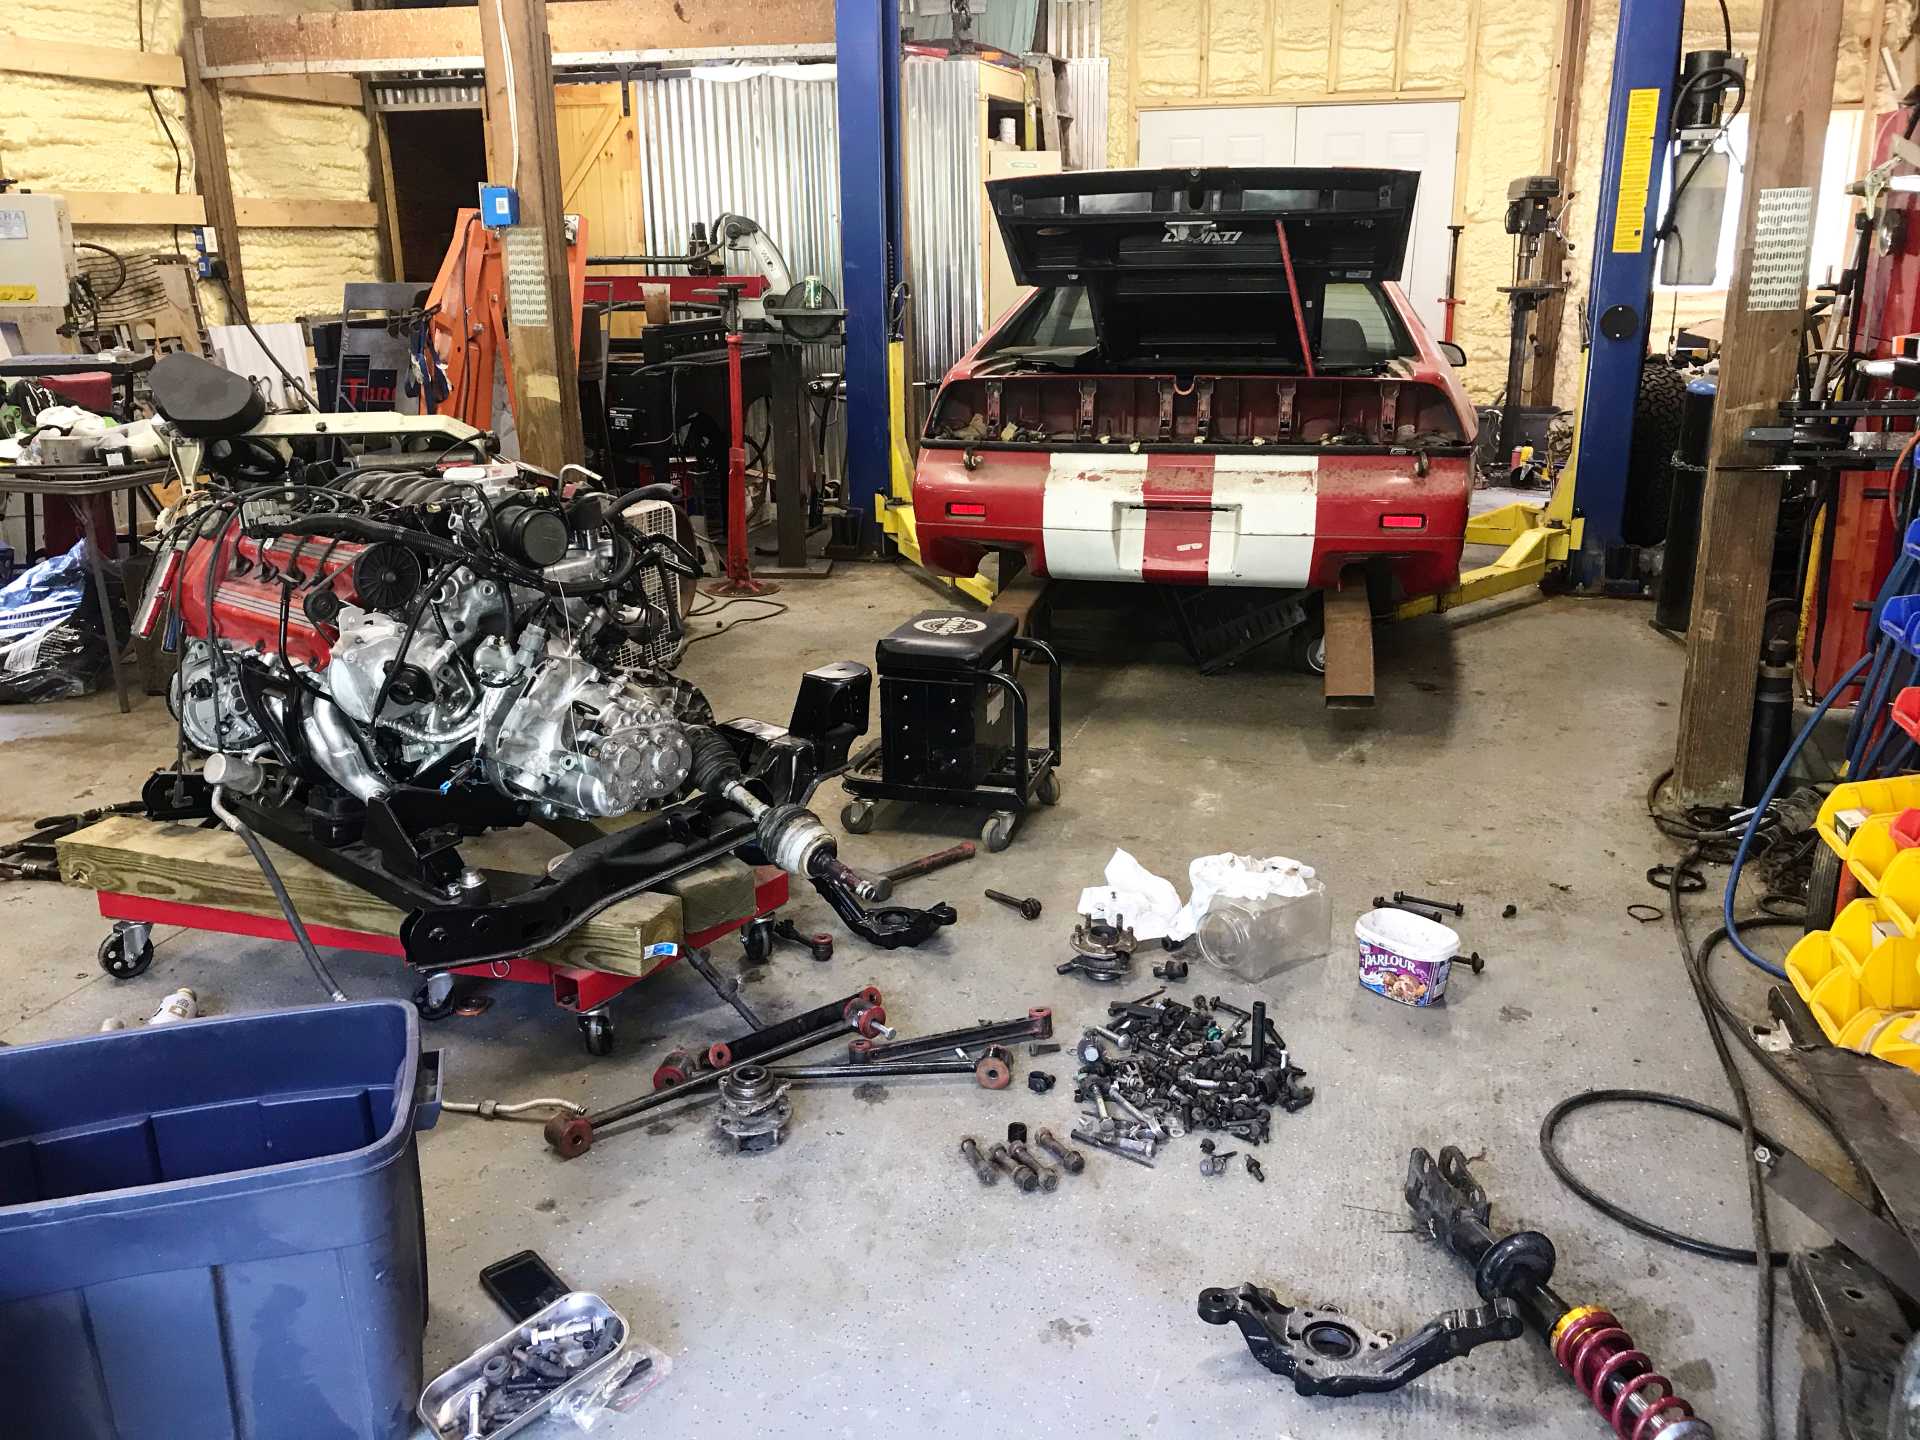
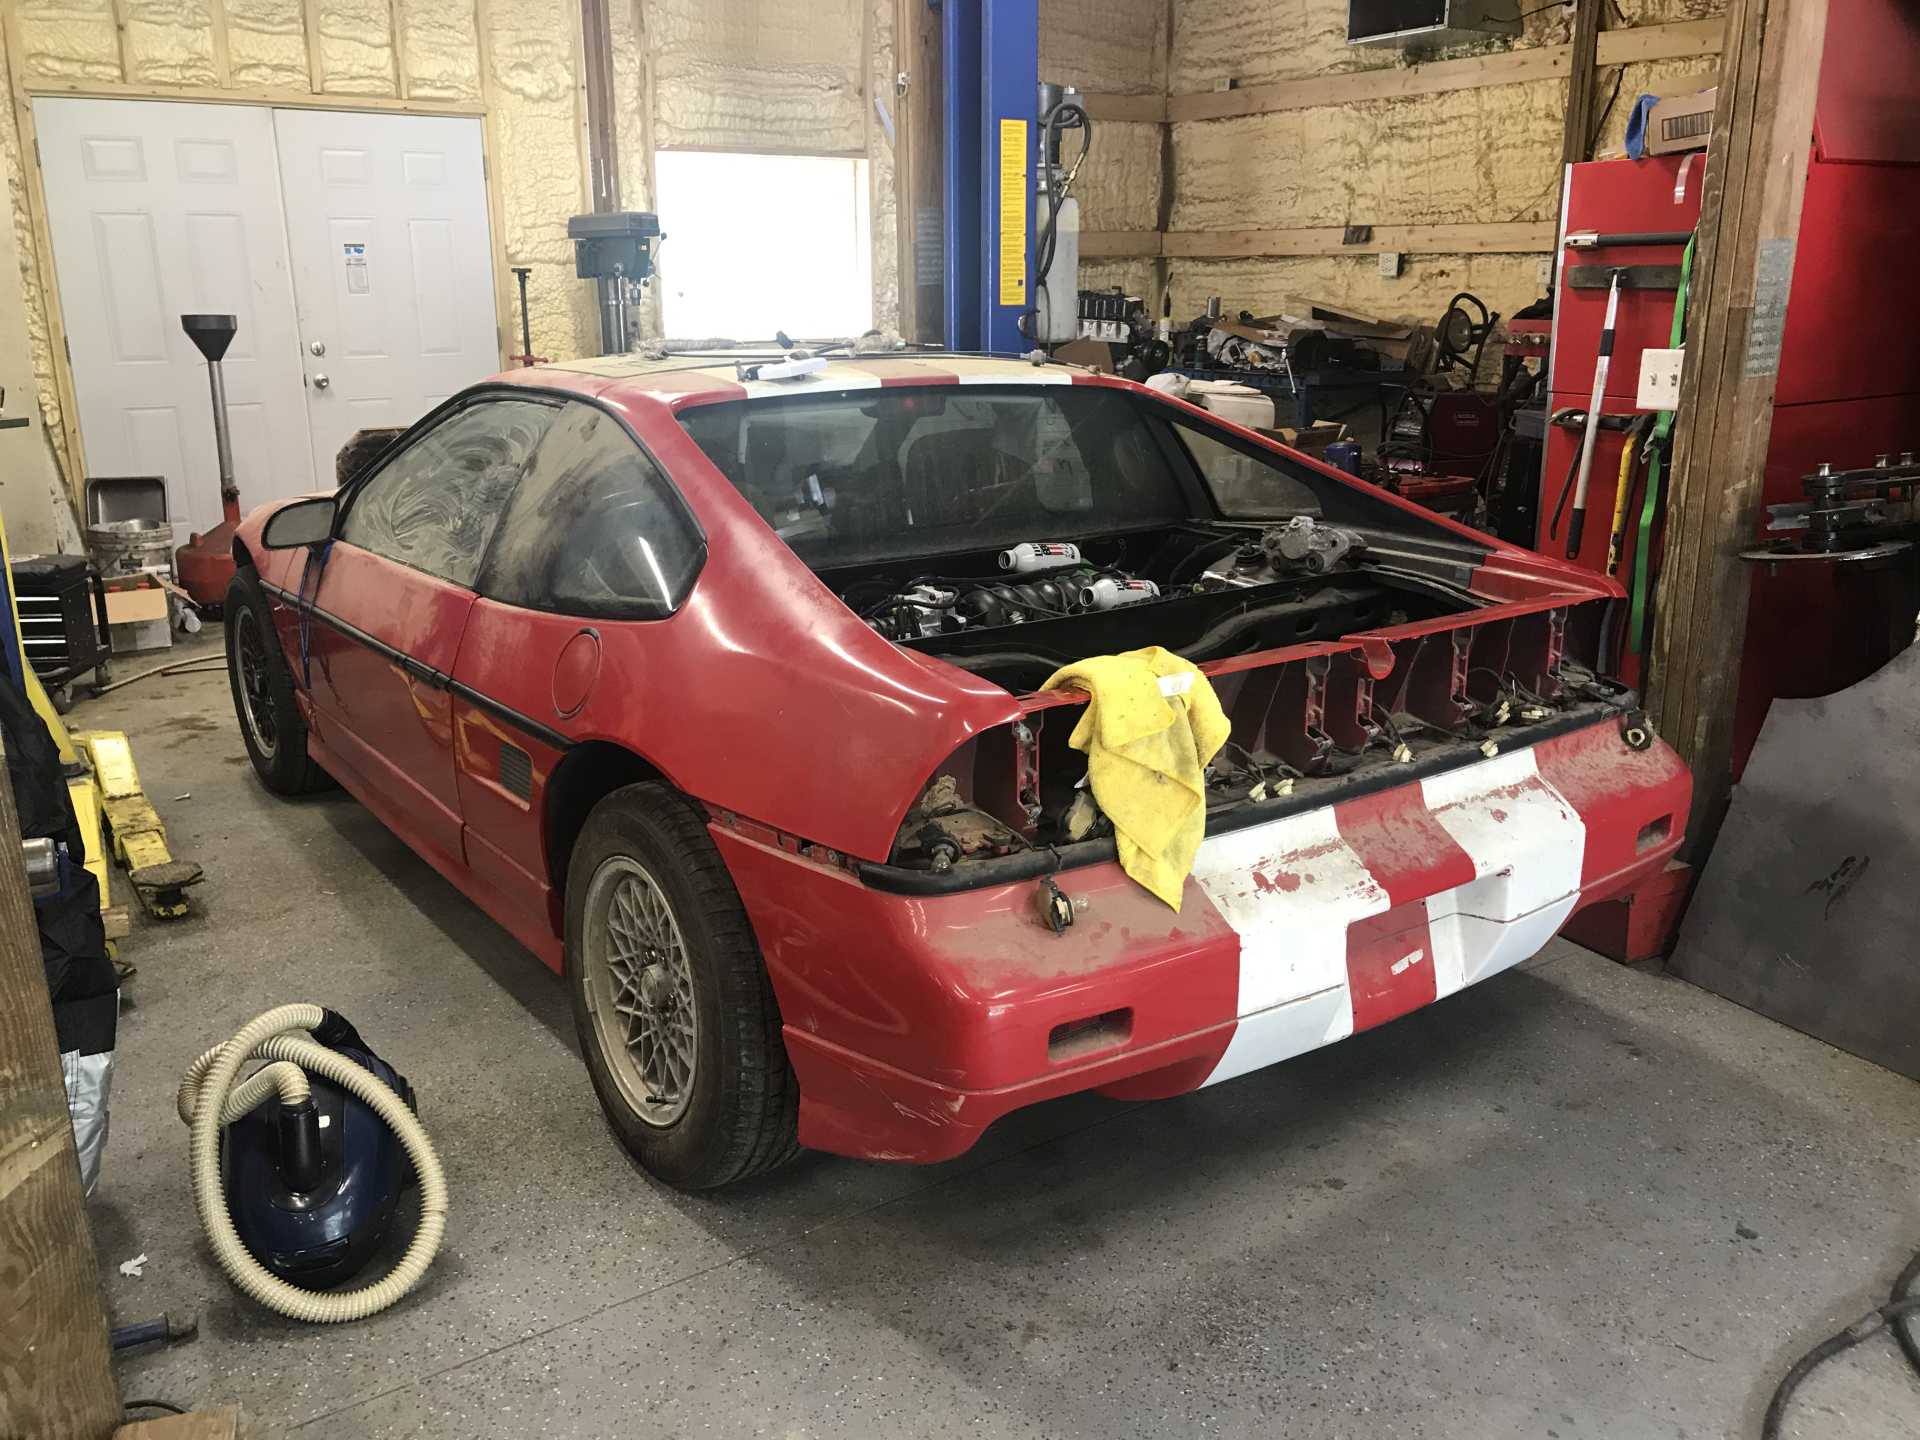
July 5th we got the car to my friends and it saw it’s new engine for the first time.
We didn’t get the engine in until July 19th
We had several clearance issues. We had to raise the front mount slightly because the oil pan was a 1/4 inch from the cradle and we didn’t think that was ideal. By raising the mount, it raised the front of the engine. So then it did not clear the passenger side hinge for the decklid. The PO already cut off the bottom decklid bolt. We ended up having to cut off the top bolt too because it did not clear. We have an idea for how to resolve this that I will write about later when we do it.
The passenger side balance cover also went through the strut tower. The PO had already cut out the middle of the tower to make it clear, but did nothing to reinforce it. So my friend being the master welder he is, fixed up the hacked tower.
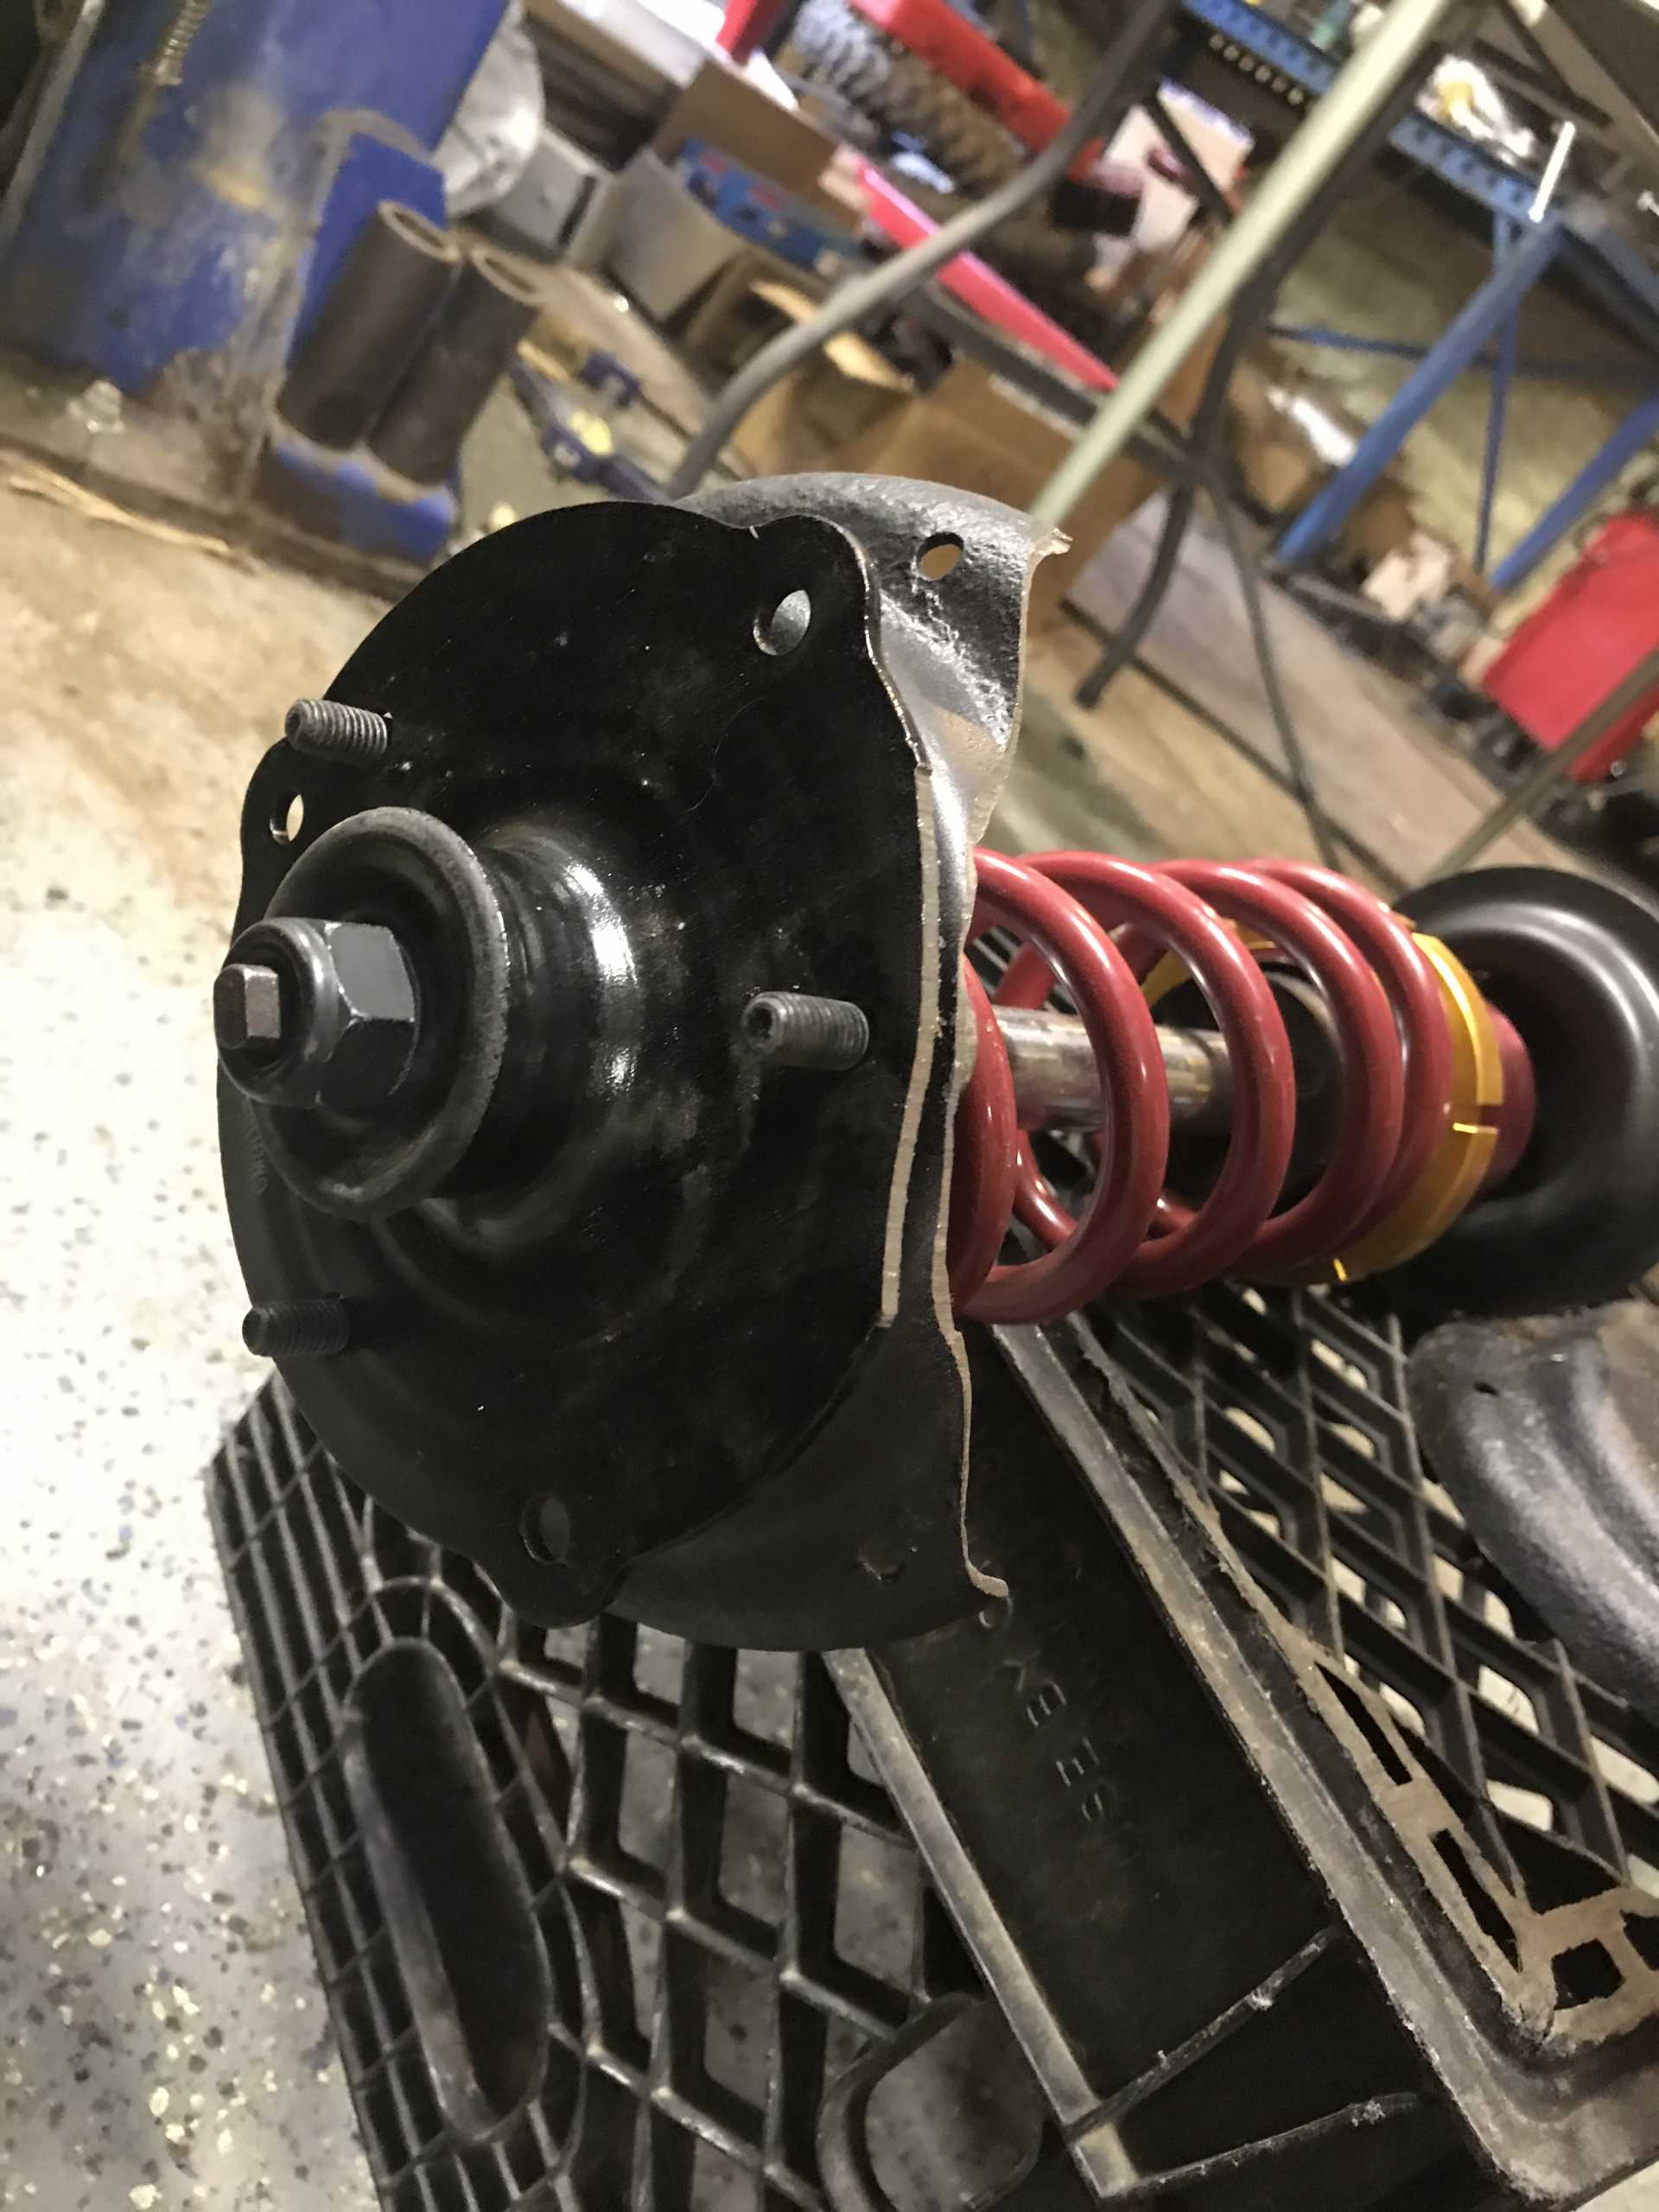
The coil overs barely clear. When I look into upgraded suspension it will be tricky. These coil overs are temporary.
I was at the scrap yard, and they only had one Northstar of the year I needed. It was also not picked over at all go figure. The plastic rail was recalled, and replacing mine was on the back burner. I got this rail for $10 and installed it in 20 minutes so I call that a score.
[This message has been edited by copperhens (edited 08-16-2020).]
What fuel pump will you be using? I have a 1988 Mera with N* motor and auto trans, but when I accelerate it hesitates like starving for fuel. Previous owner replaced fuel pump, but believes it was stock Fiero which doesn't have enough pressure for the V8 motor. My PS rack is leaking bad and its been too hot in Florida to work in the garage, so waiting for better weather to check it out, then work on fuel pressure and AC line replacement.
Bummer! I think the thread got moved to a different category now. I have not abandoned the project, I just have been slacking with keeping updates... I got to post more as a lot has happened.
What fuel pump will you be using? I have a 1988 Mera with N* motor and auto trans, but when I accelerate it hesitates like starving for fuel. Previous owner replaced fuel pump, but believes it was stock Fiero which doesn't have enough pressure for the V8 motor. My PS rack is leaking bad and its been too hot in Florida to work in the garage, so waiting for better weather to check it out, then work on fuel pressure and AC line replacement.
Dr Xtreme
I am going to be using the EP376. It is a '90s pump used on Corvettes, Impalas, and ther v8 GM cars. I have never used this pump before, but it is supposed to be plug and play.
My phone took a crap and I had to upload all of my photos to the PC which cannot read .HEIC format photos. So most of my project pictures from the last couple months are unreadable unless I go through them one by one, but I managed to find a few. Because of not having a phone, I have not been taking as many pictures, grrr.
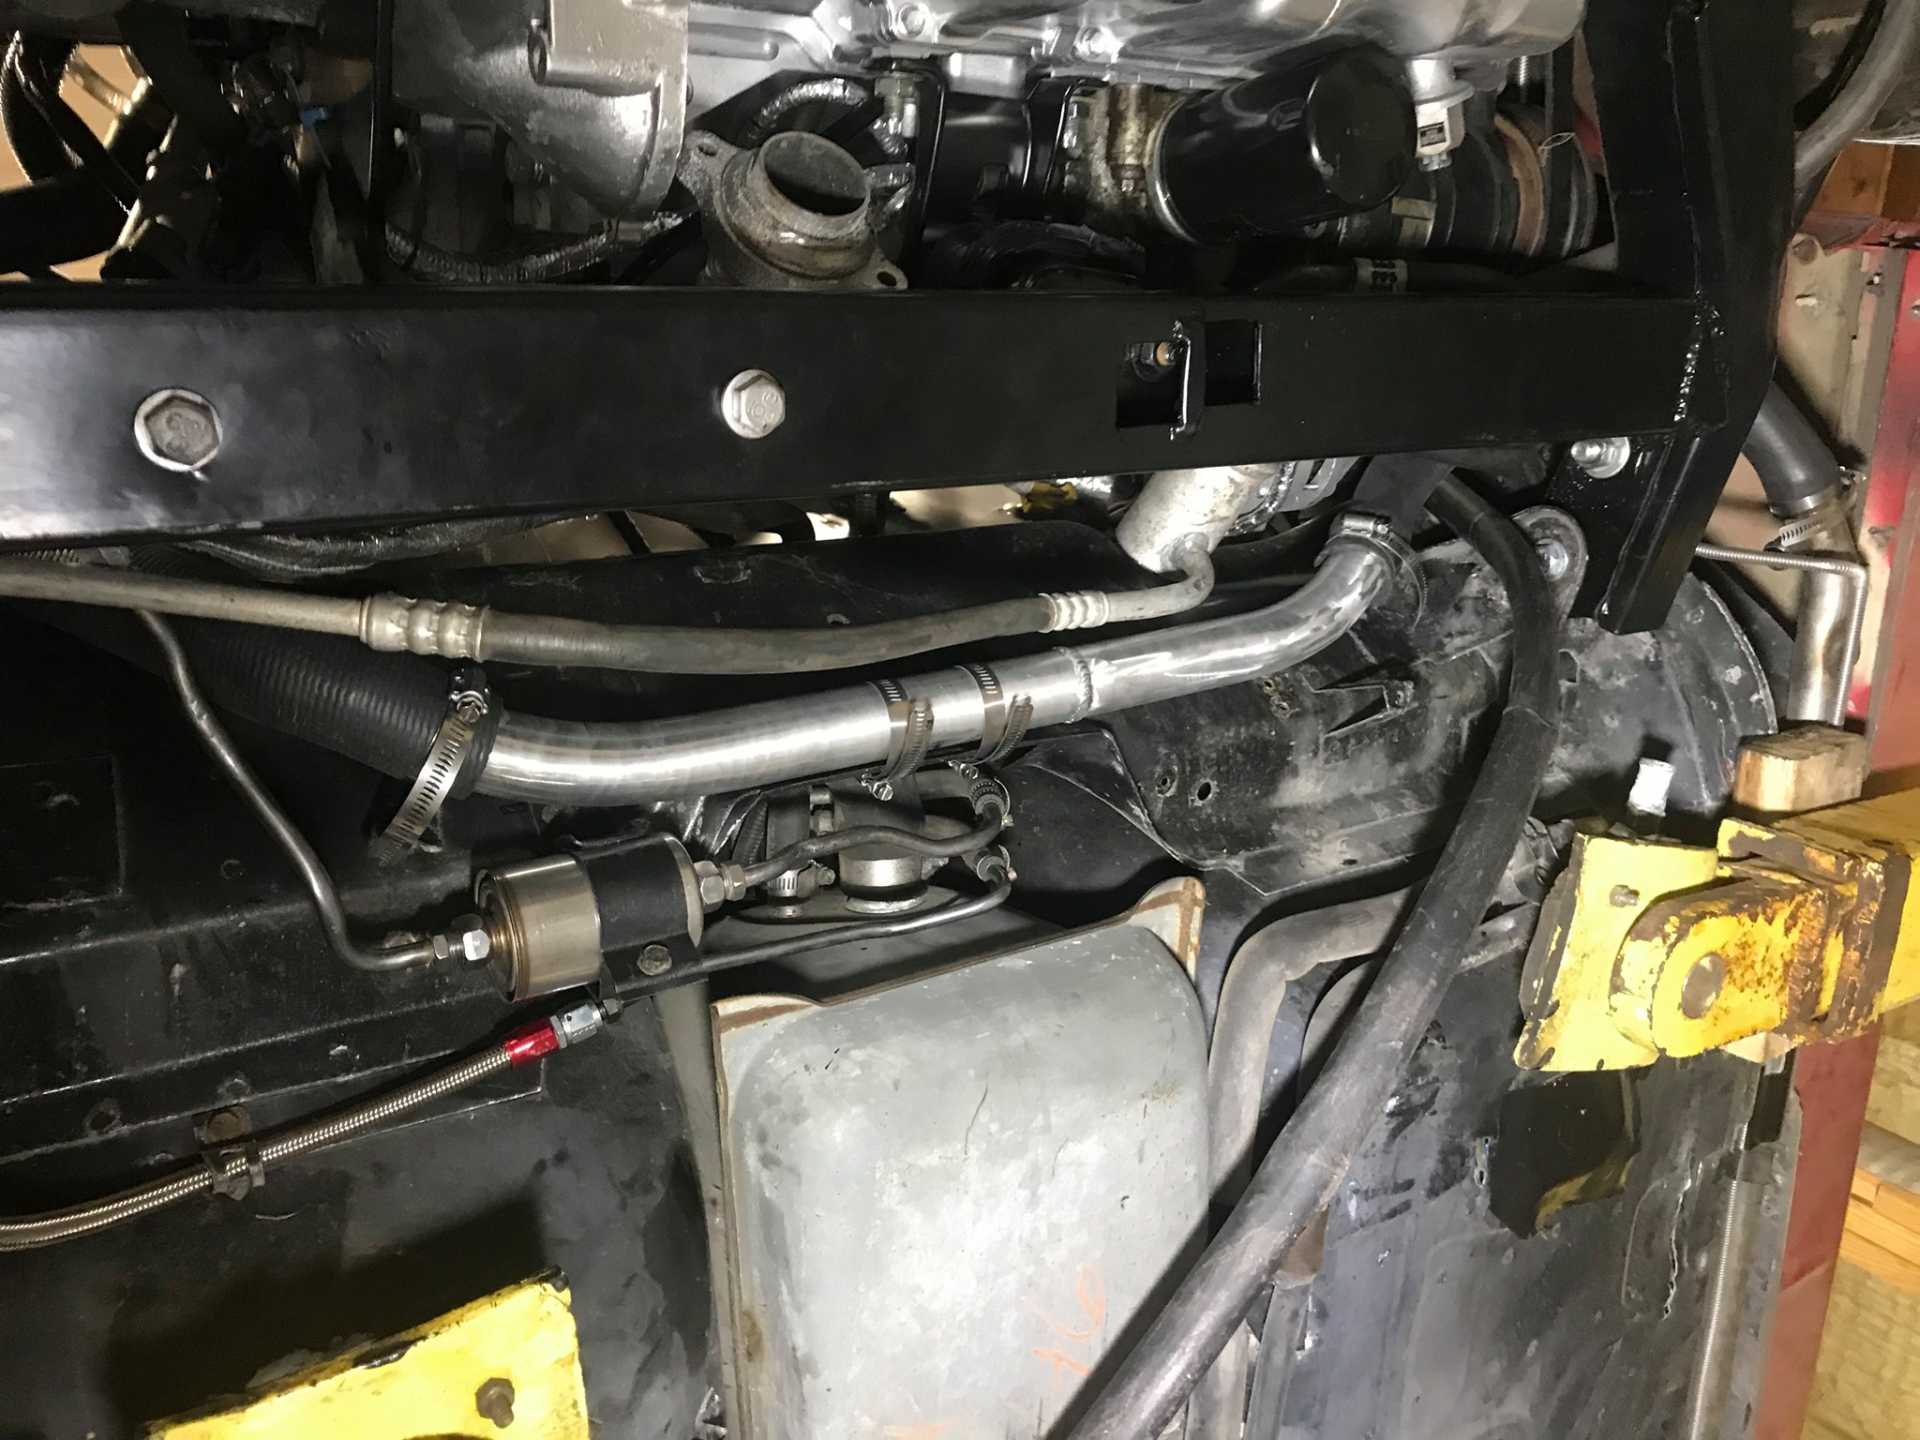
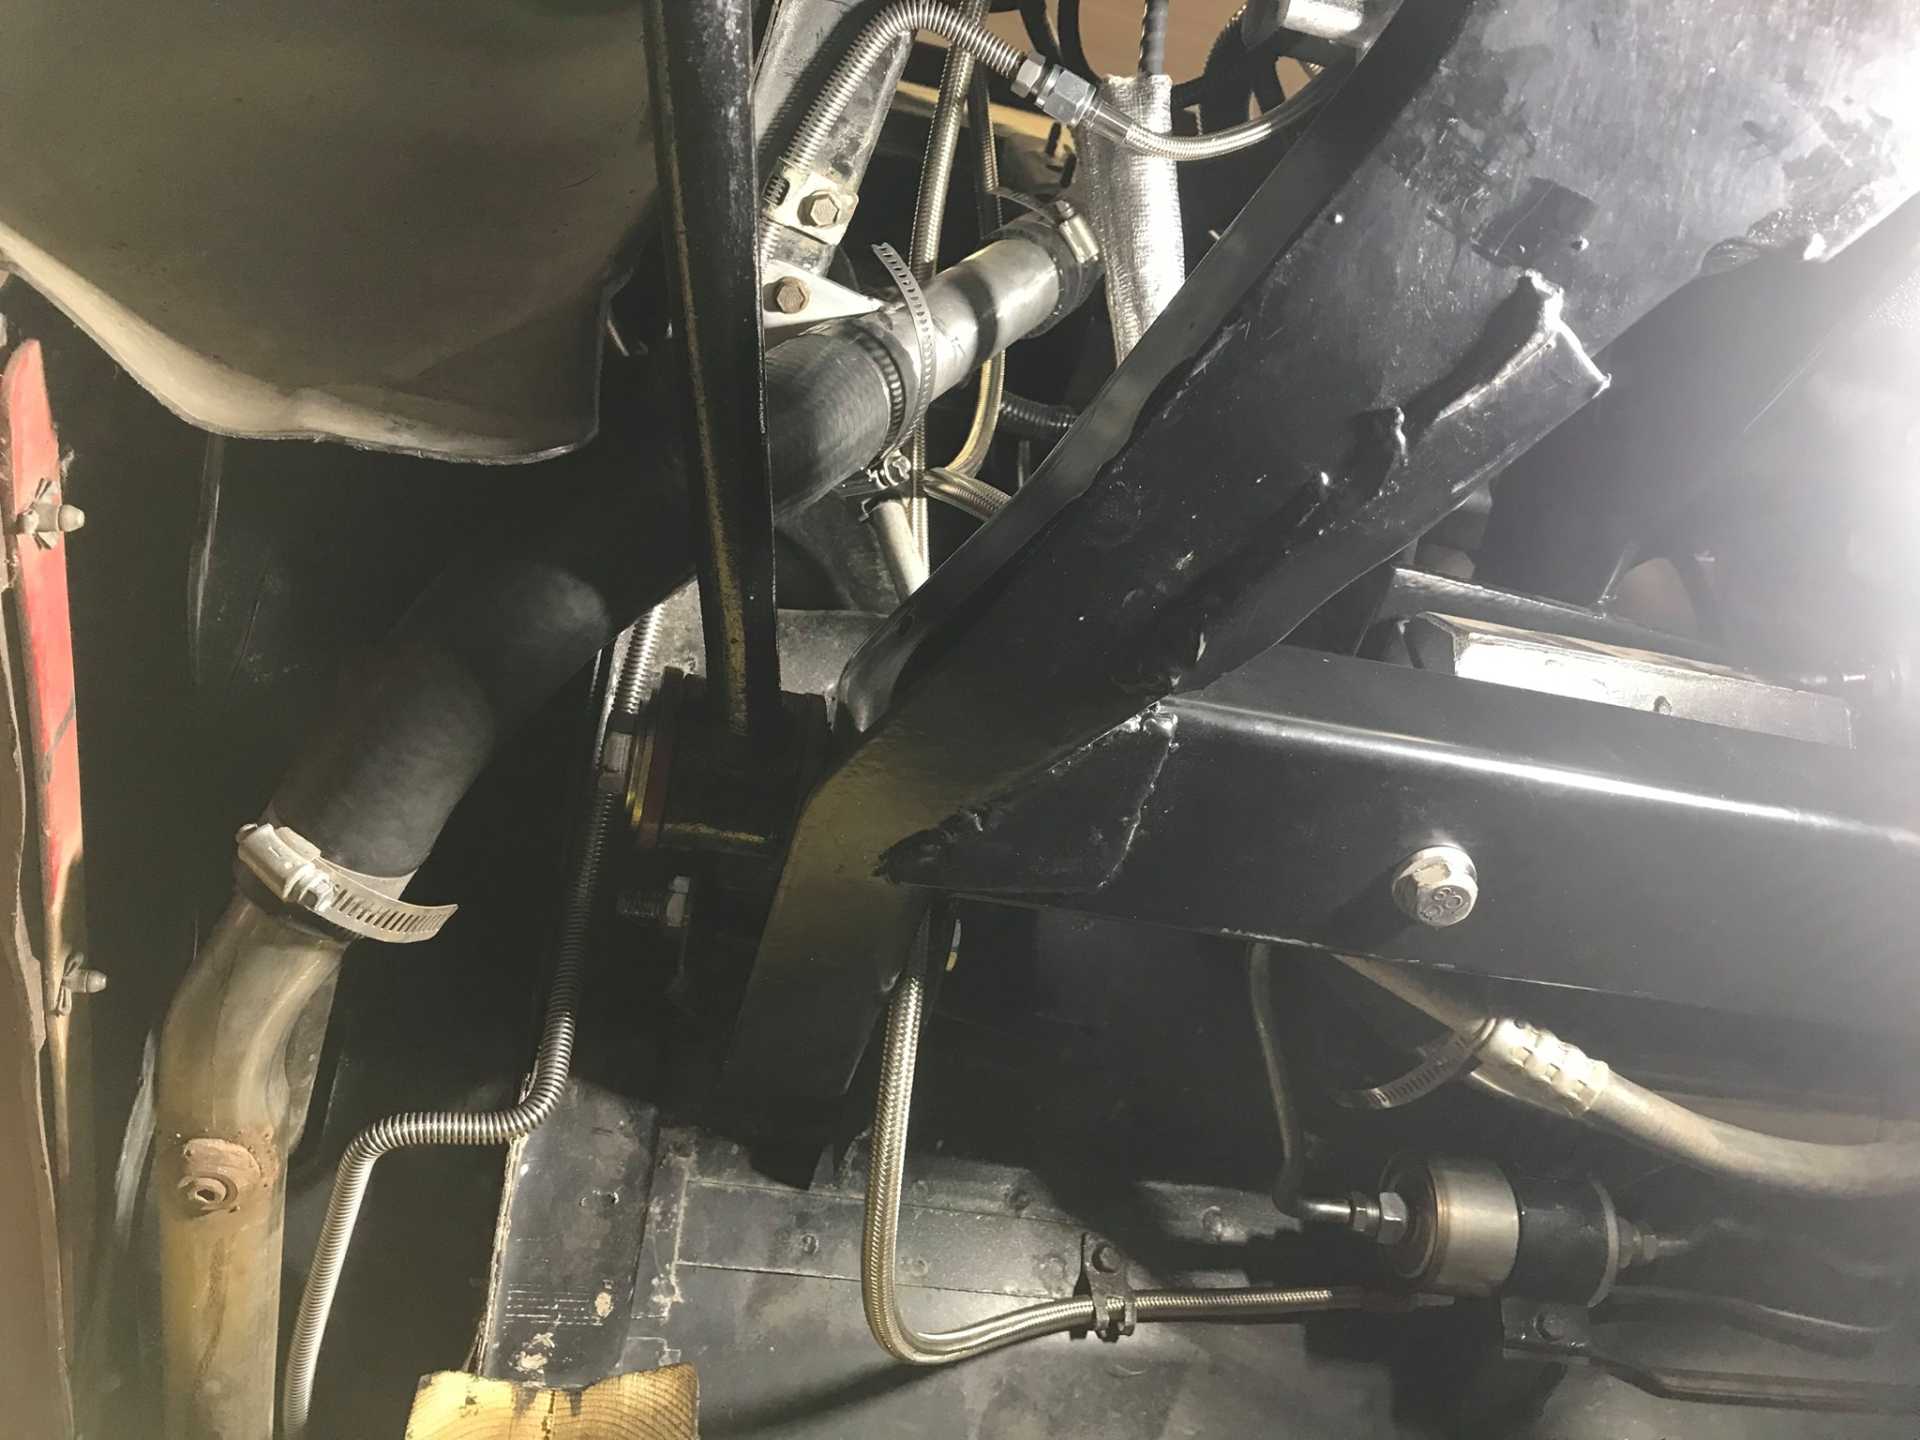
In October, we mocked up the cooling hoses and got them done. I had part numbers for the rubber hoses that are lost in my pictures. My friend had Jeep cooling hoses layimg around that actually were close to what I was looking for. I took them to Oreilly's and told them the idea I had for hoses. The nice guys at Oreilly's searched their inventories and found hoses that worked perfect. From there we used scrap aluminum pipe to connect the rubber hoses.
At some point the brakes got bled, the clutch got bled... It was nice to finally have brakes for a change. I also changed out the ignition and door locks. The door locks were much harder than the ignition to my surprise. It is great having keys for the car!
Within the past couple weeks a lot of major stuff has gotten done.
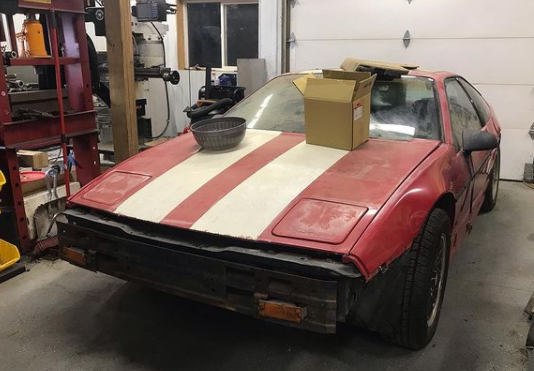
Here is the car.
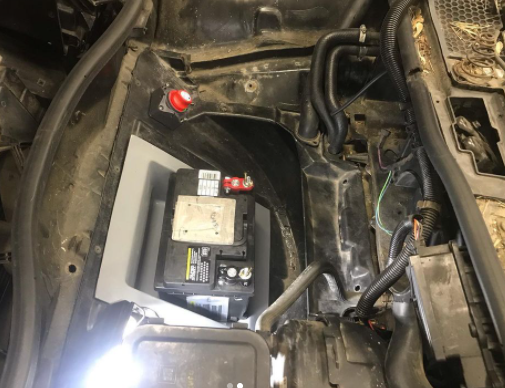
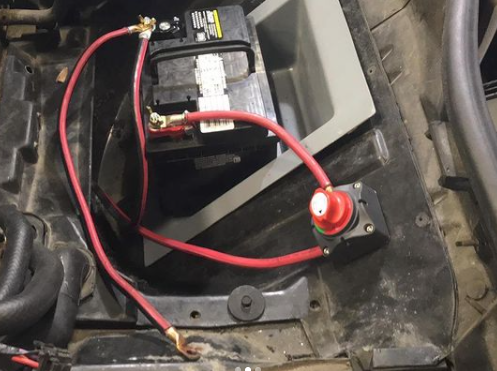
Here is the battery tray mockup. The tray is from V8 Archie. The on/off switch is some $20 off of Amazon that seems really well done.
Here are some wiring mockups. The wires run along side the bottom of the car.
Here is the bracket for the expansion tank. I did a lot of research on which sort of tank was best. I have seen some Northstar tanks up from, I have seen some mounted in multiple spots in the rear. A Grand Prix tank seemed popular, as did an expensive Corvette tank. Ultimately I bought Dorman 603050. Its pressurized, you can see the fluid levels, and mounting it did not seem crazy since it was a nice shape. However, there had to be an adapter made to jump down from 1in at the tank nipple, to the 5/8 hose of the Fiero. I will have to get pictures of it.
I failed to get pictures of a lot of the rear wiring and progress from the weekend.
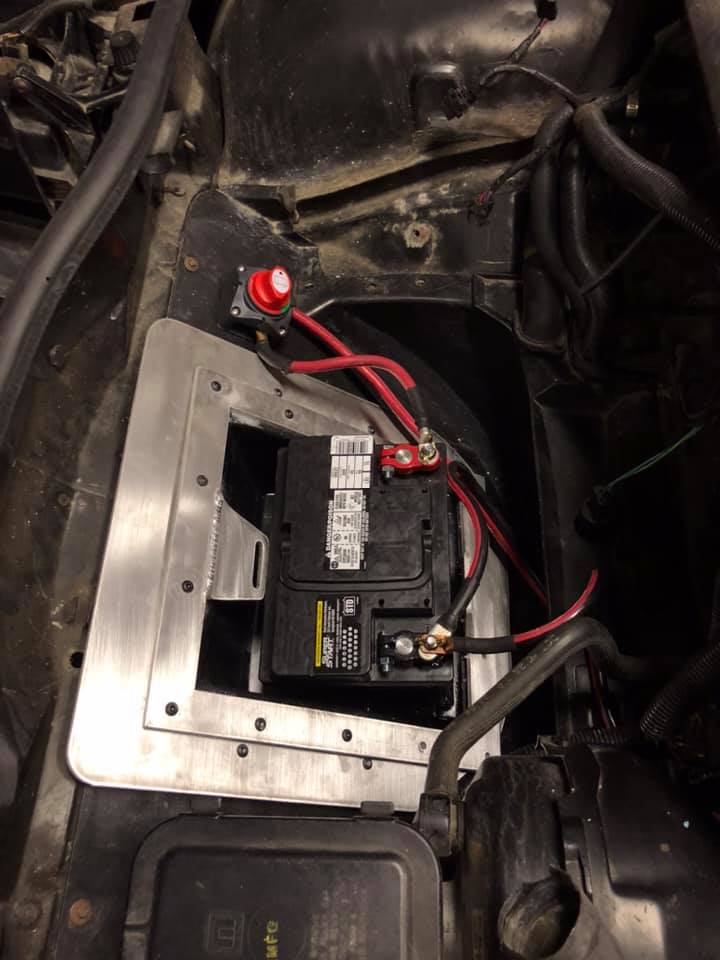
Here is the car as-is. It is kind of a bad picture, but you can see the tank mounted in the corner. The main ground is mounted at the bottom of the bracket of the tank. The engine ground is mounted on the other bolt of the same mount. There is a positive battery junction on the strut tower as well that I wired in yesterday.
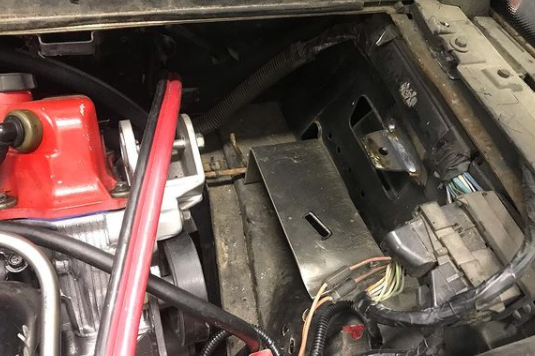
Here is the front tray that is pretty much done. The aluminum was cut with CNC, and is just for added support up front, as well as having a battery tie down location.
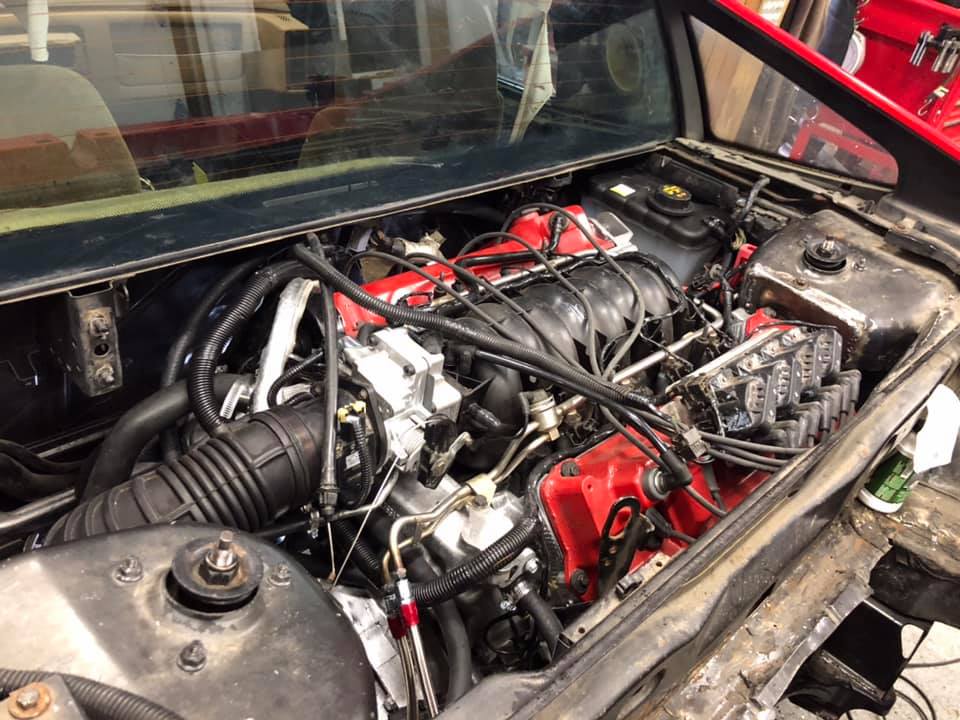
We got a lot of cooling system accessory lines run too. We worked from 11am to 5pm yesterday and it flew by! But we got the car to the point where it could be started.
Alas, the fuel pump thought otherwise, and now the tank needs to be dropped. I am ashamed to admit I was all ready to drop the tank months ago, but my dad told me not to get into it. We should have known better that the fuel pump was probably dead after sitting. Oh well, it has caught up to us. Also, my fuel and starter relays were both rusted solid. I have never seen a relay in such bad shape, so time to buy new ones. I am also biting the bullet and buying a sending unit. I am assuming it is rusty, and might as well just replace it.
To go from the waterpump outlet (upper connection) to the left coolant pipe, check out this combo: CarQuest 20898 + Moroso inline filler neck + 1.25” straight hose coupler ~2” long
quote
Originally posted by copperhens:
Here is the bracket for the expansion tank. I did a lot of research on which sort of tank was best. I have seen some Northstar tanks up from, I have seen some mounted in multiple spots in the rear. A Grand Prix tank seemed popular, as did an expensive Corvette tank. Ultimately I bought Dorman 603050. Its pressurized, you can see the fluid levels, and mounting it did not seem crazy since it was a nice shape. However, there had to be an adapter made to jump down from 1in at the tank nipple, to the 5/8 hose of the Fiero. I will have to get pictures of it.
I've wanted to try the Corvette tank on the left side of the engine bay... I believe the Corvette tank has a concave spherical surface meant to fit over the Corvette's wheel house, so it may work with with the Fiero wheel house on the left side of the engine bay.
quote
Originally posted by copperhens:
Here is the car as-is. It is kind of a bad picture, but you can see the tank mounted in the corner. The main ground is mounted at the bottom of the bracket of the tank. The engine ground is mounted on the other bolt of the same mount. There is a positive battery junction on the strut tower as well that I wired in yesterday.
What application did your rear cam cover come from? The close corner looks different than the ones I've seen.


 That doesn't sound too lady-like.


.jpg)