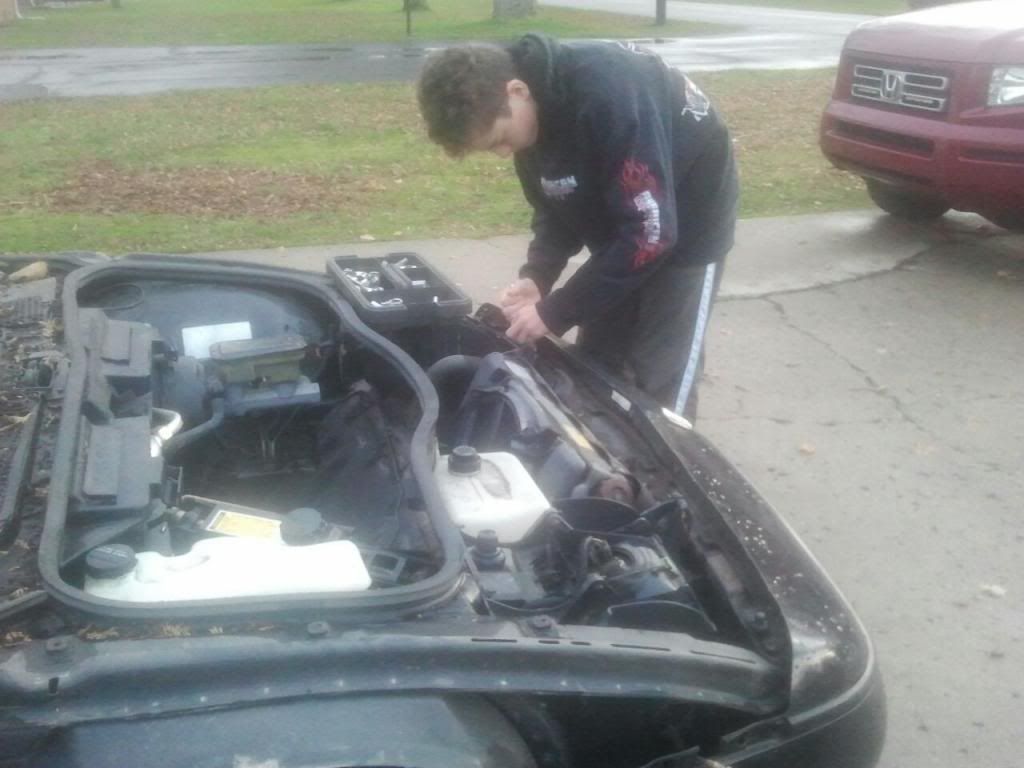
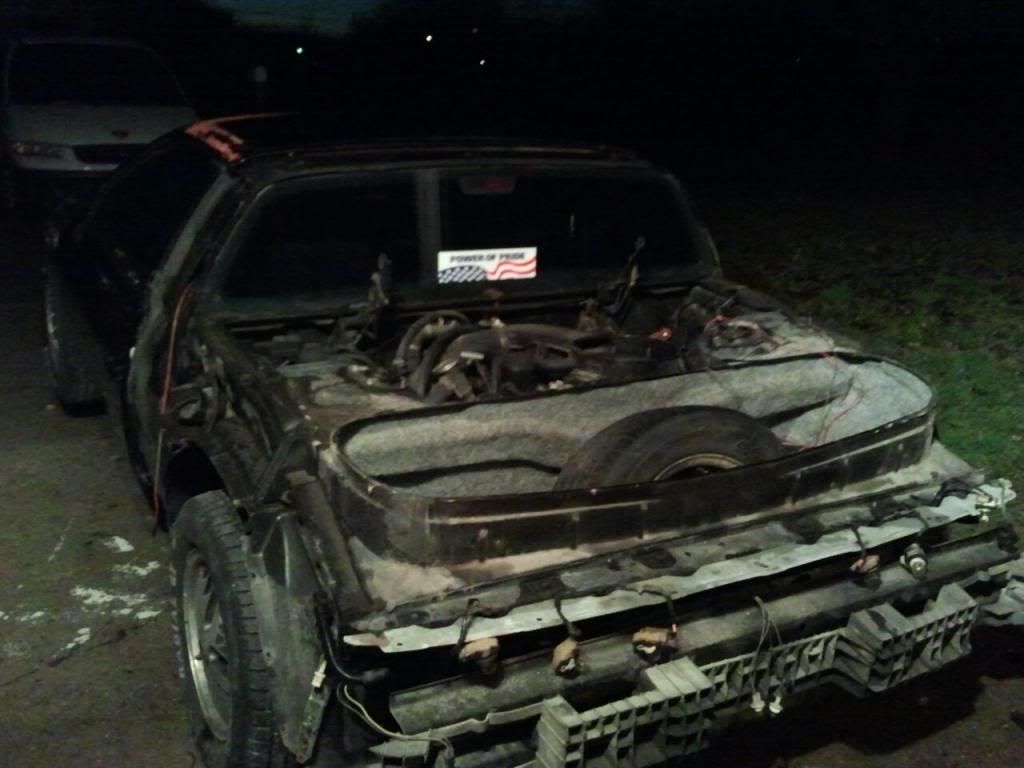
After work today, the boys were once again waiting for me, asking if we could work on the Fiero.
I put them to work removing the front facia, while I labeled the different compartments of our makeshift hardware/fastener box.
I finally had to take over removing the facia because 2 of the 4 bolts in the center underneath, that attach it to the rubber thingy that shrouds the radiator and makes like a tunnel to the radiator which I obviously don't know what it's proper name is, were rusted. I managed to get one out with pliers, as they were too rusted for the 7mm socket to bite into. Unfortunately, in my attempt to get the other bolt out, I ended up tearing the rubber thingy. Totally had my arse kicked by those nuts. **hangs head in shame**
With the help of the outside garage light, I did manage to remove the deck lid though.
Probably won't get to work on it tomorrow, as I have a Fire Department meeting. But here is hoping that Thursday is more productive.
After work, before my Fire Dept meeting, I did manage to remove that waffle-looking thing behind the front facia. I think its some kind of bumper impact cushion. I also removed the headlight assemblies and the headlight motors.
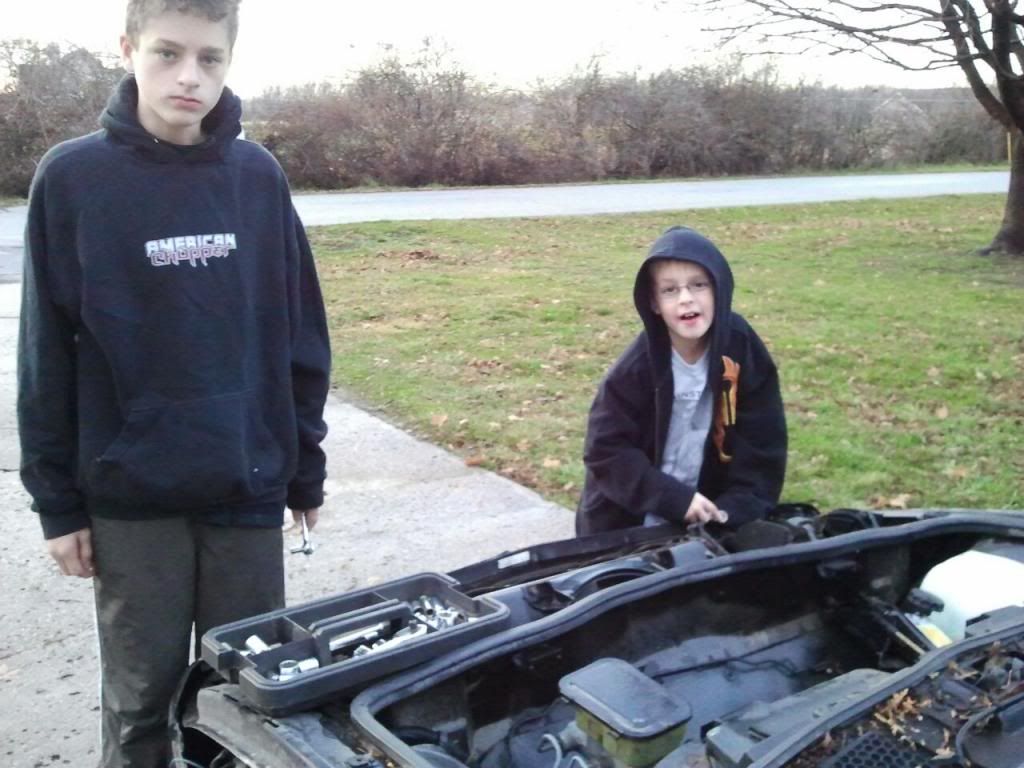
The boys weren't much interested in helping tonight. Well, the 8 year old (Sam) was, but I think the 13 year old (Max) is losing interest already.
The sad part is this was supposed to be a project to teach Max more about cars, but Sam seems more interested. And honestly, he seems a little better at it.
I think Max will come around again once the tear down is finished and we start the build.
After work, before my Fire Dept meeting, I did manage to remove that waffle-looking thing behind the front facia. I think its some kind of bumper impact cushion. I also removed the headlight assemblies and the headlight motors.
The boys weren't much interested in helping tonight. Well, the 8 year old (Sam) was, but I think the 13 year old (Max) is losing interest already.
The sad part is this was supposed to be a project to teach Max more about cars, but Sam seems more interested. And honestly, he seems a little better at it.
I think Max will come around again once the tear down is finished and we start the build.
Kinda the same way my younger brother and I were, some people just dig it, others don't. just make sure they're getting their hands dirty, they'll thank you one day!
What do you plan to do for a powerplant?
------------------ there's a Group on 60degreeV6.com for us 660 Fiero owners!
I am doing my best to get them dirty. Even if it does require every ounce of patience I have.
As for powerplant, originally I was thinking 3800 sc series 2. Seems like it is one of the easier ones, with lots of power and decent fuel mileage. I want to stay V6, because this car will be a daily driver and gas is expensive. I would love to do one of the new 3.6L V6 like in the new caddies and buicks, but seems like people say that is impossible.
Nice to see you taking on this project with the kids. I just started our project this year with my 13 and 15 boys now that they are showing an interest. Hang in there as their interest flucuates. I'm seeing the same thing at times but overall they are hanging in there and learning alot as we go. Your project is looking great and before you know it, a couple years will fly by and you'll have your project finished and on the road.
I am doing my best to get them dirty. Even if it does require every ounce of patience I have.
As for powerplant, originally I was thinking 3800 sc series 2. Seems like it is one of the easier ones, with lots of power and decent fuel mileage. I want to stay V6, because this car will be a daily driver and gas is expensive. I would love to do one of the new 3.6L V6 like in the new caddies and buicks, but seems like people say that is impossible.
Any suggestions?
just because it hasn't been done doesn't mean it's impossible! it would be difficult, as there is not as large of a variety of controllers available that can handle 4 cam VVT, direct injection and DBW throttle. AFAIK, there's only the stock PCM, which also looks for inputs from other modules of the donor car. of coarse, that doesn't mean you can't lock out the VVT use one of the eariler non- DI motors and run a '7730.
after looking at your plans for the car, I'd love to see it get a N* or High Feature engine, and not one of the plain jane 3800sc swaps, but that's just me.
------------------ there's a Group on 60degreeV6.com for us 660 Fiero owners!
Thanks for th encouragement with the kids and your link. I will definitely check out your build.
ericjon262,
Thanks for the positive feedback. I am still figuring all this stuff out, but I did toy with the v8 idea. Nothing is set in stone yet. Who knows, maybe I'll drop a 426 Hemi in it. LMAO
I have done a lambo build replica. It was 2200 hrs to complete. That was with the body already molded. Your design is going to require an extensive expertise in making molds and then molding fiberglass panels that have to be assembled together. If you dont have the expertise now i suggest you consult with someone who has done one of a kind fab work.. This has been done by some few who have their creations published in kit car mag. I had to make many of the interior panels and made my own rear end from abs sheet plastic guled together to make the mold. Practice makes perfect. Good luck to your project. i dont mean to be skeptical and want to leave without that. Use as much already defined curved objects to make your curved surfaces. abs cannot be heated to mold shapes so it has to be done with no radius surfaces. A simple thing like a curved refuse can surface is a start.
We are a LONG way from doing any body mods, but I get what you are saying and I appreciate the heads up. I am using the time of tear down and suspension and powertrain build up to learn as much about glassing and molding as I can. Probably be next year before we start that, if not the year after.
I am thinking of creating the original body mods out of a combination of pourable urethane foam, corrogated cardboard, preformed plastic panels (like the original body panels), etc. Then we'll probably pull some splash molds from that.
This is definitely a learning experience. I spent about an hour today reading up on how to form and mold your own taillights. LOL
Thanks for th encouragement with the kids and your link. I will definitely check out your build.
ericjon262,
Thanks for the positive feedback. I am still figuring all this stuff out, but I did toy with the v8 idea. Nothing is set in stone yet. Who knows, maybe I'll drop a 426 Hemi in it. LMAO
put a modern engine in it, the 426 does make alot of power, but it's a dinosaur. but definitely do something different.
------------------ there's a Group on 60degreeV6.com for us 660 Fiero owners!
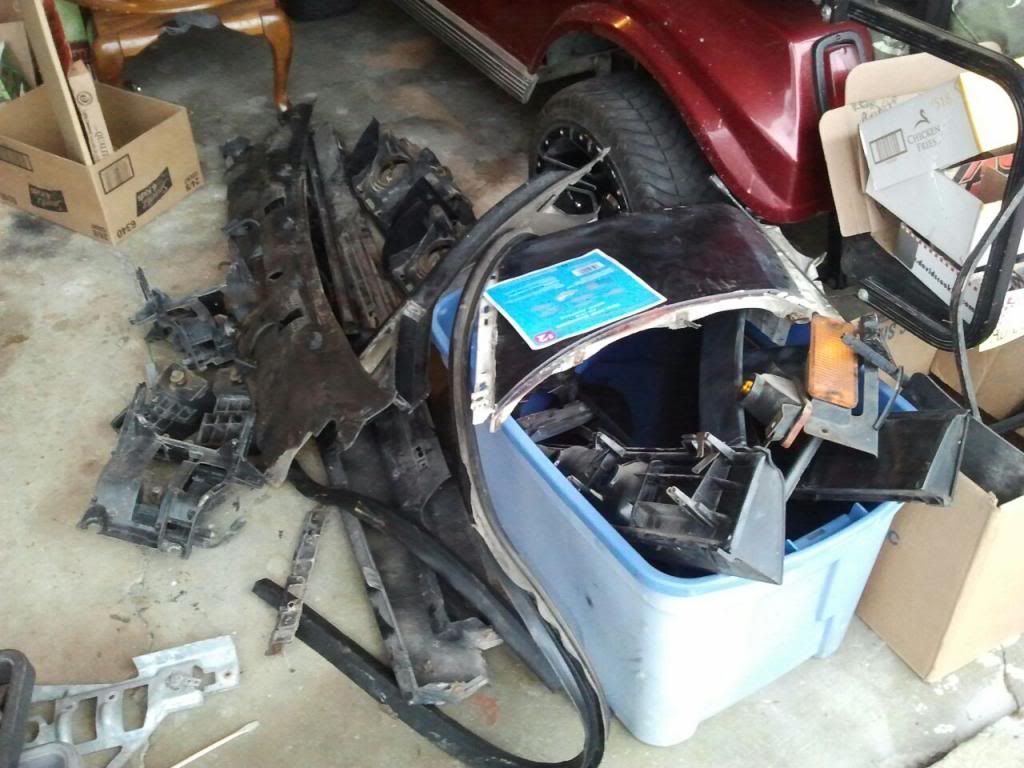
Between the rain and other commitments, it has been slow going on the fiero. I mentioned before that I removed the headlight assemblies.
SEE
I also made some more hardware/fastener dividers.
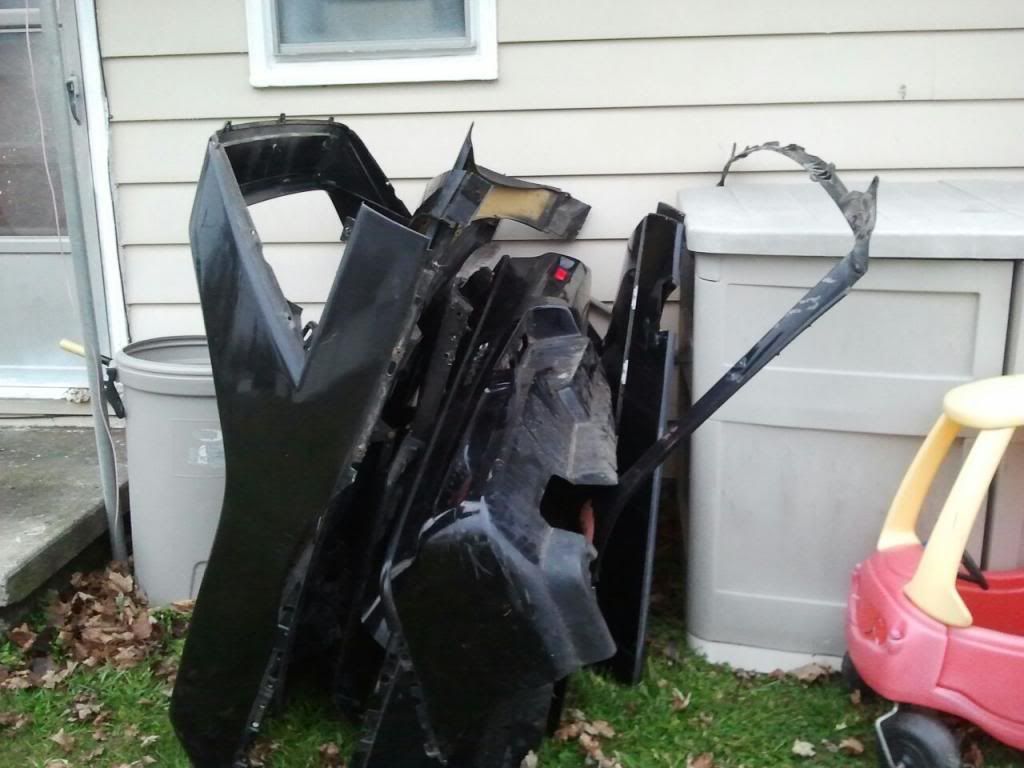
Here is some shots of our parts pile getting bigger
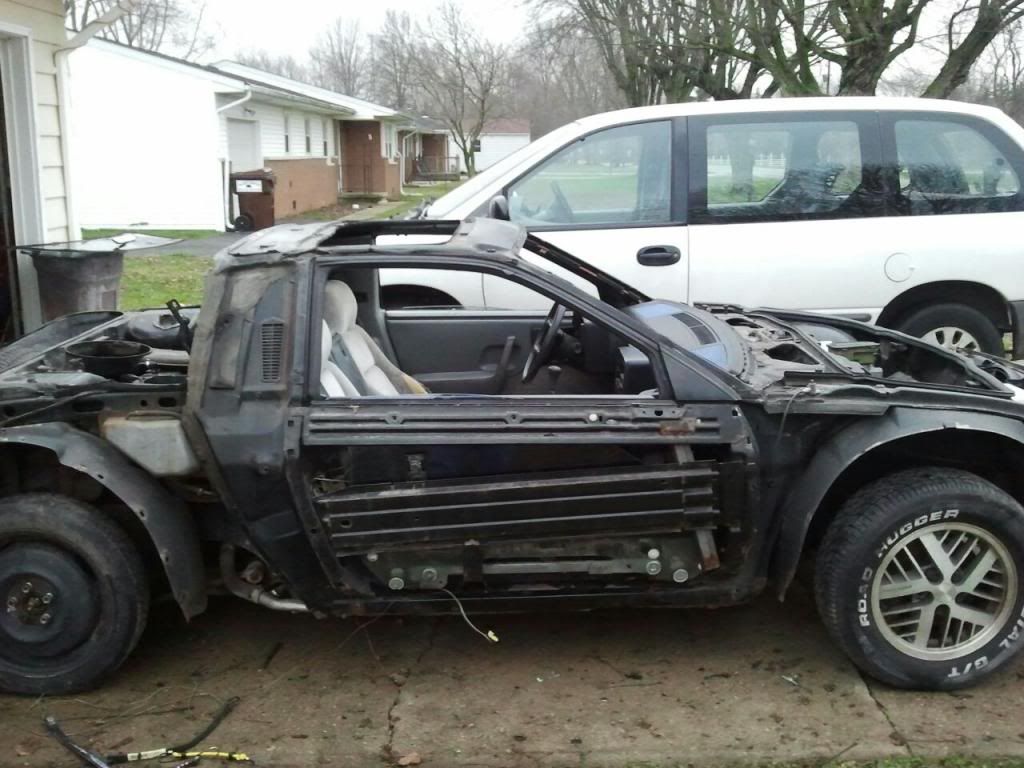
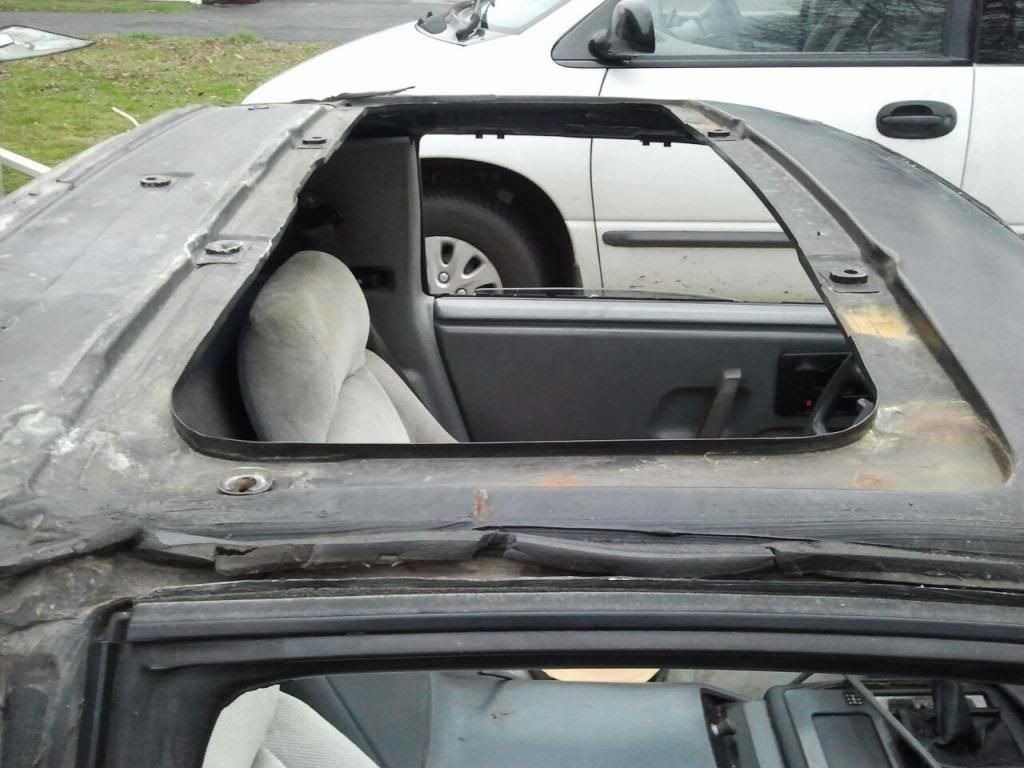
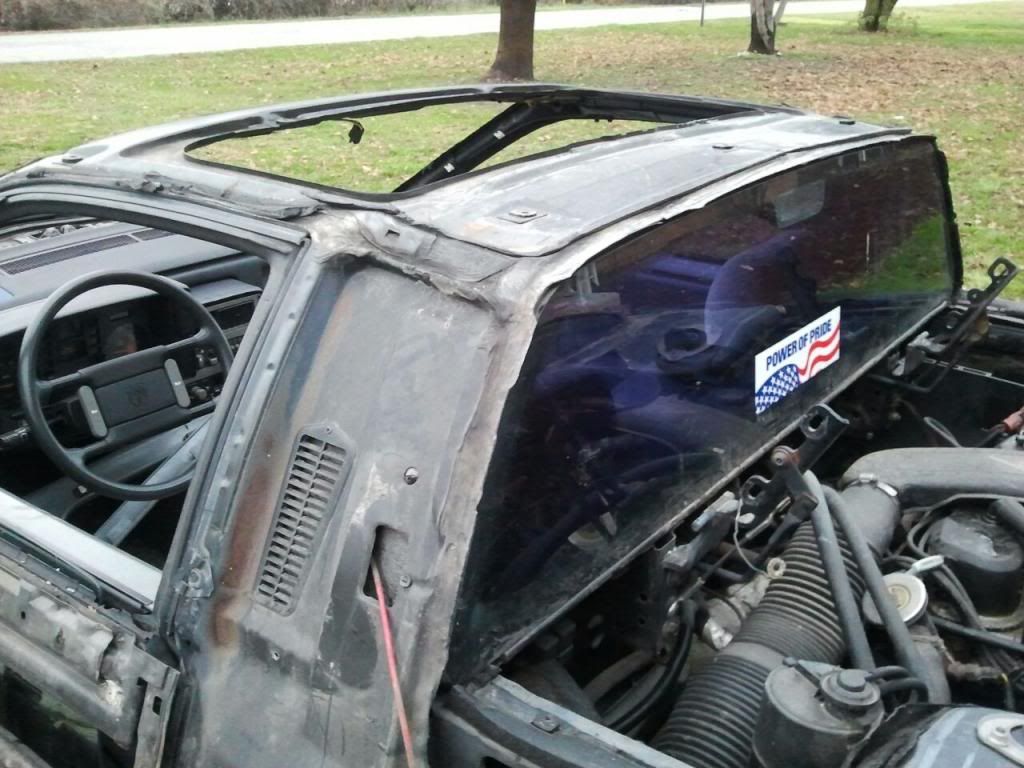
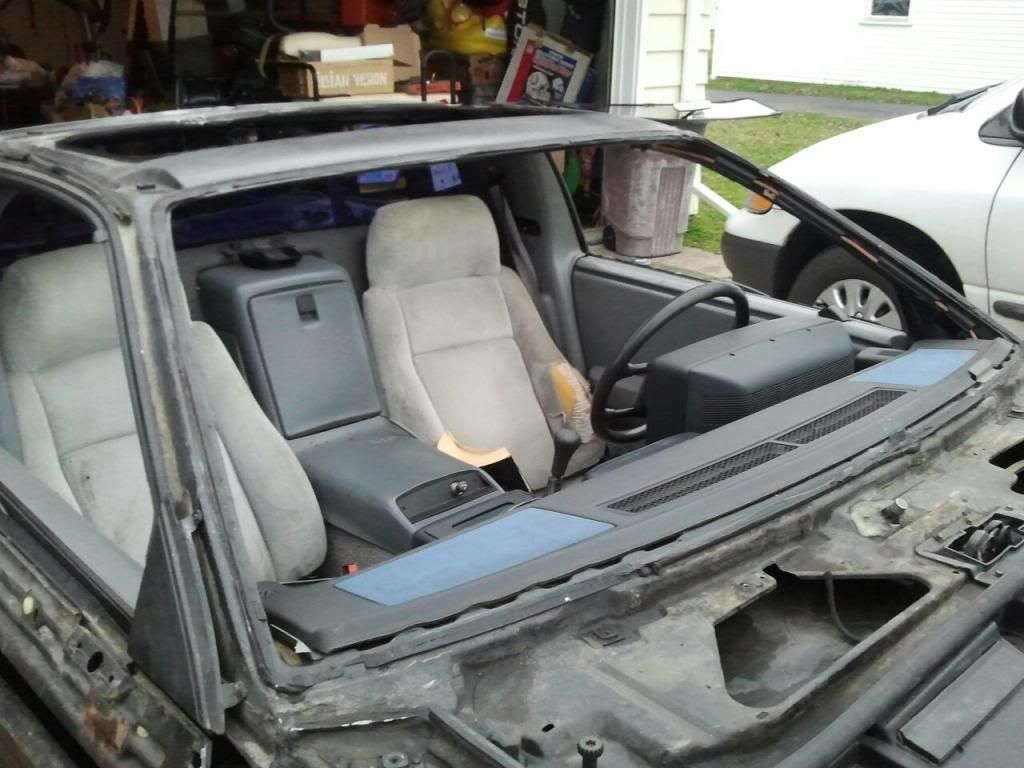
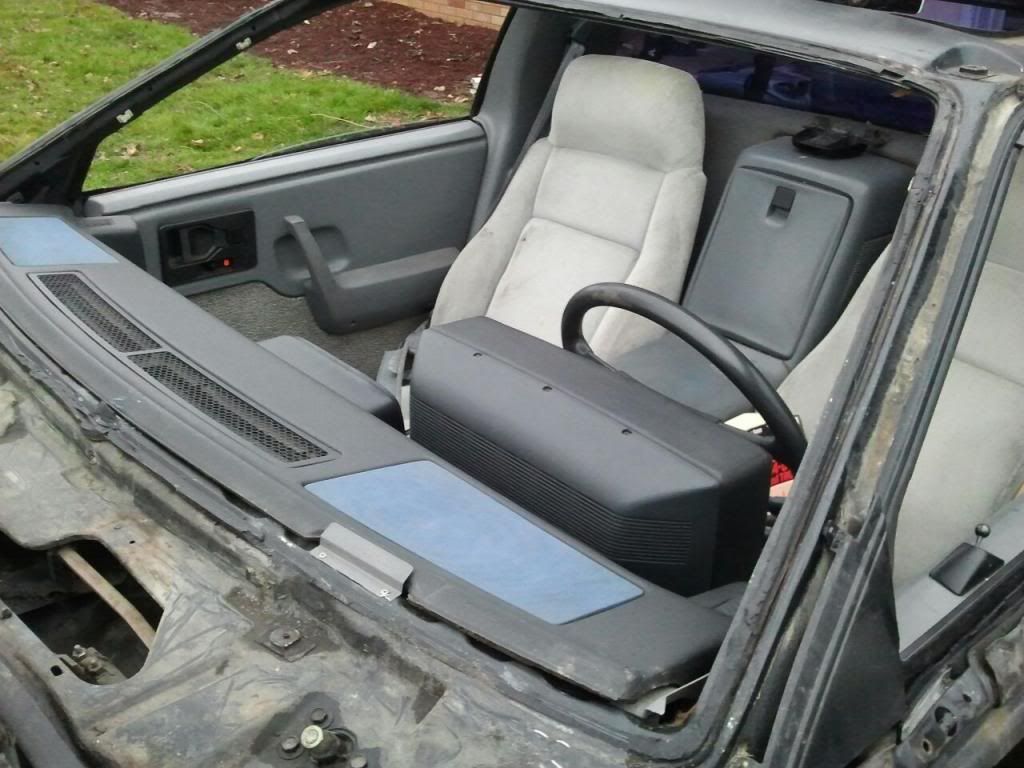
Today, I removed the rest of the roof and door skins.
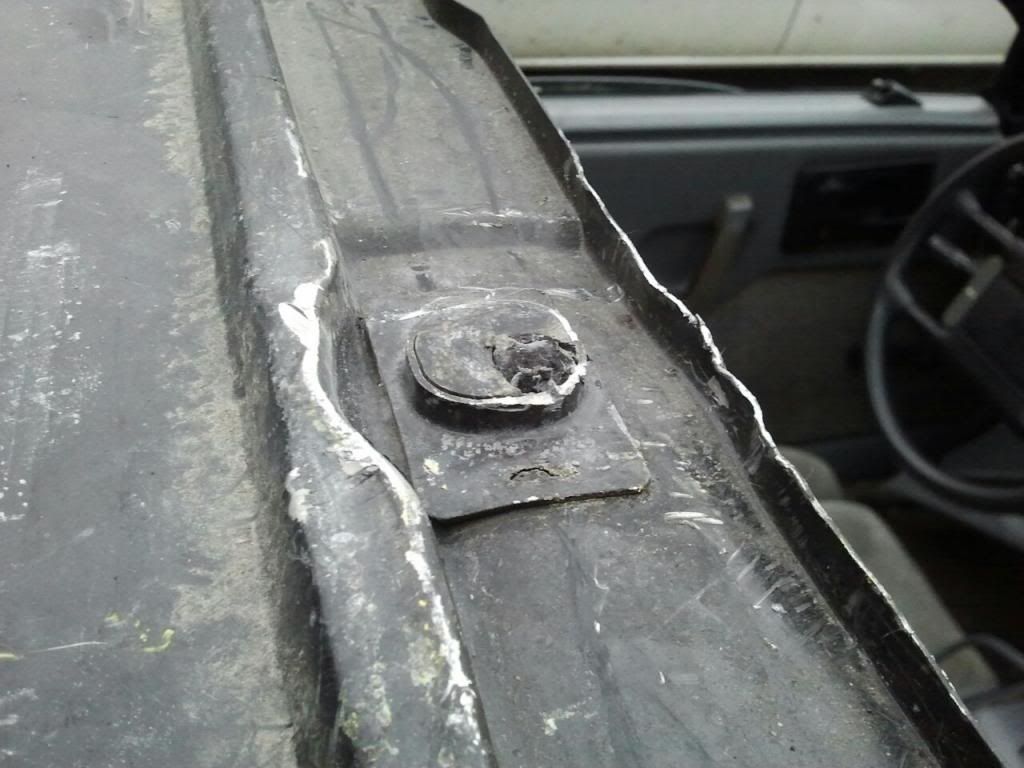
One of the roof bolts stripped and caused me all kinds of grief. Here's a shot of where it was
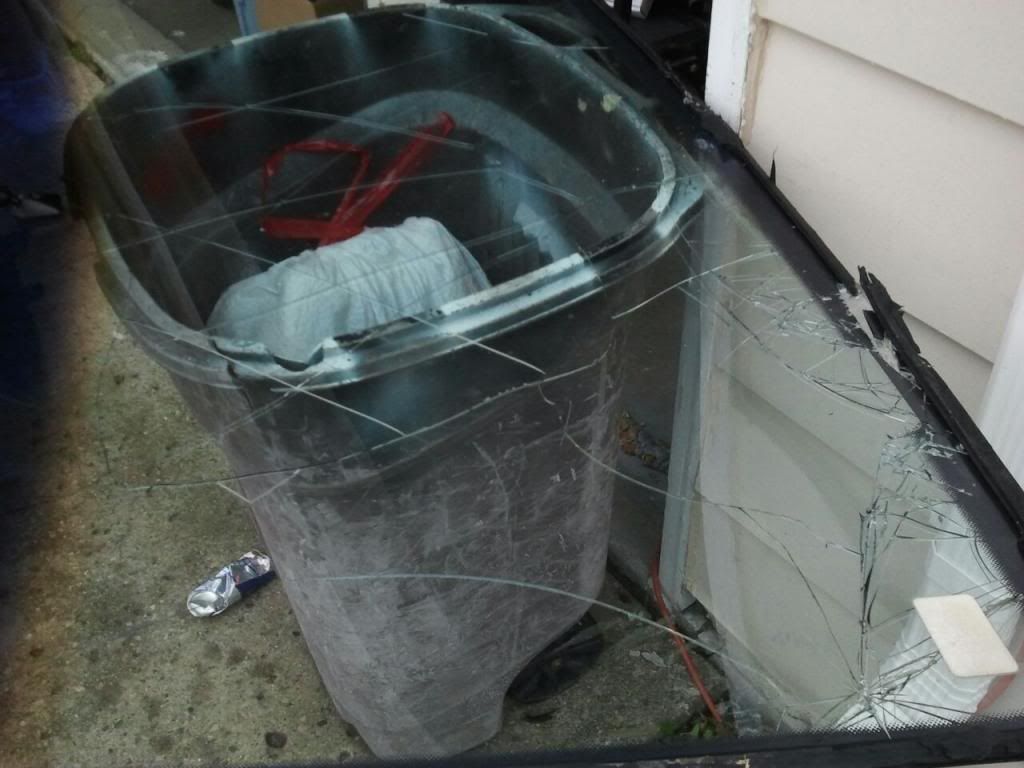
I also removed the broken windshield. I had never removed a windshield before, and can honestly say, it sucked. I'm just glad it was already broken, cause if it hadn't been, it would have been by the time I finished.
That's about all I'm going to be able to get done until I move it into the garage after Christmas. The wife currently has the garage full of presents and stuff.
Although Sam (the 9 yr old) had been very excited about helping, even going so far as to ask me yesterday "when can we EDIT the fiero again?", they weren't much help today because the neighbor boys came over to play "with them". Instead, the neighbor boys spent most of their time watching me work and asking questions incessantly.
Turned out, my 4 yr old daughter was quite the help. She was very eager to hand me tools and tell me how I was doing things wrong (just like her mom, lol).
Don't let it get to you. I have two boys and a girl, also. My youngest, the daughter, is more help than the other two combined.
I've got this one bookmarked. Eager to see what you have in store for us. Keep up the good work.
Originally posted by Corpsmen Ed: Turned out, my 4 yr old daughter was quite the help. She was very eager to hand me tools and tell me how I was doing things wrong (just like her mom, lol).
This made my day. They're so independent at 4 & of course know everything (better take her advice - LOL). Need a photo of your cutest helper... I use baggies for hardware - bolts don't spill out if you drop them. Label them with a marker for each part you take off. ~ Paul aka "Tha Driver"
This weekend, I'm going to try and get the car in the garage so I can start tearing apart the suspension.
First, I gotta get the wife to get her Christmas crafts out of the way.
I also put up the Prothane 84-87 Fiero poly suspension kit, which I bought before I purchased my 88 project car, in the Mall. If you need one, check it out.
Awesome! This sounds like a pretty awesome project! And to do it with your kids is even more awesome! I know they will thank you for it in the future! I have ALWAYS been a total car NUT, to the point where I drove my family INSANE with my incessant talk about different cars and random facts about them. Unfortunately, nobody in my family is into cars, nor has any interest in working on or even looking at them. So if your 13-year old is as much a car fanatic as I am, he won't lose interest in the long run. I wish somebody would have worked on something like this with me.
Now, the rest of your plans sound awesome! I love the matte black and yellow theme you're thinking of. As for the body, custom will be pretty freakin' sweet, but a TON of work! Nonetheless, I'm definitely eager to follow your progress!!! Seeing how quickly you progressed with the deconstruction of the body panels has me definitely considering removing all of mine and having paintwork done off-car rather than taking the whole car in to get sprayed when I get to that point. Best of luck!!!
Thanks for your kind words. Teaching the boys about cars was definitely my main purpose in starting this project. My dad was always working on cars and all I ever got to do was hand him tools and "hold the light". And although I learned a lot by watching him all those years, I want more for my boys.
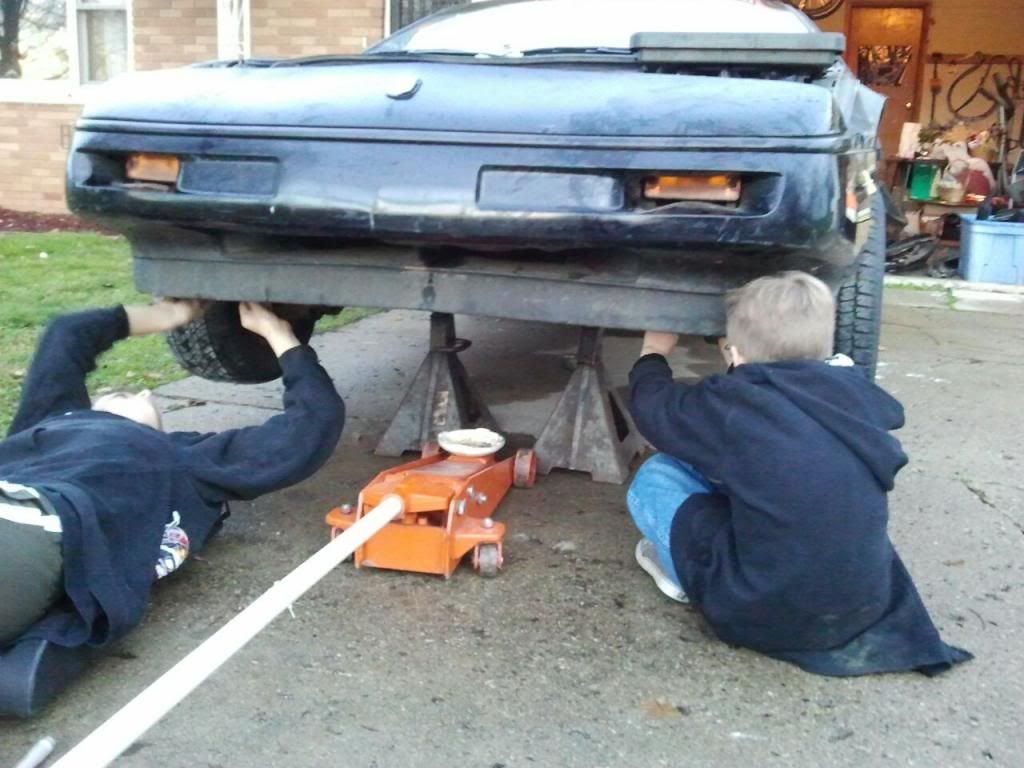
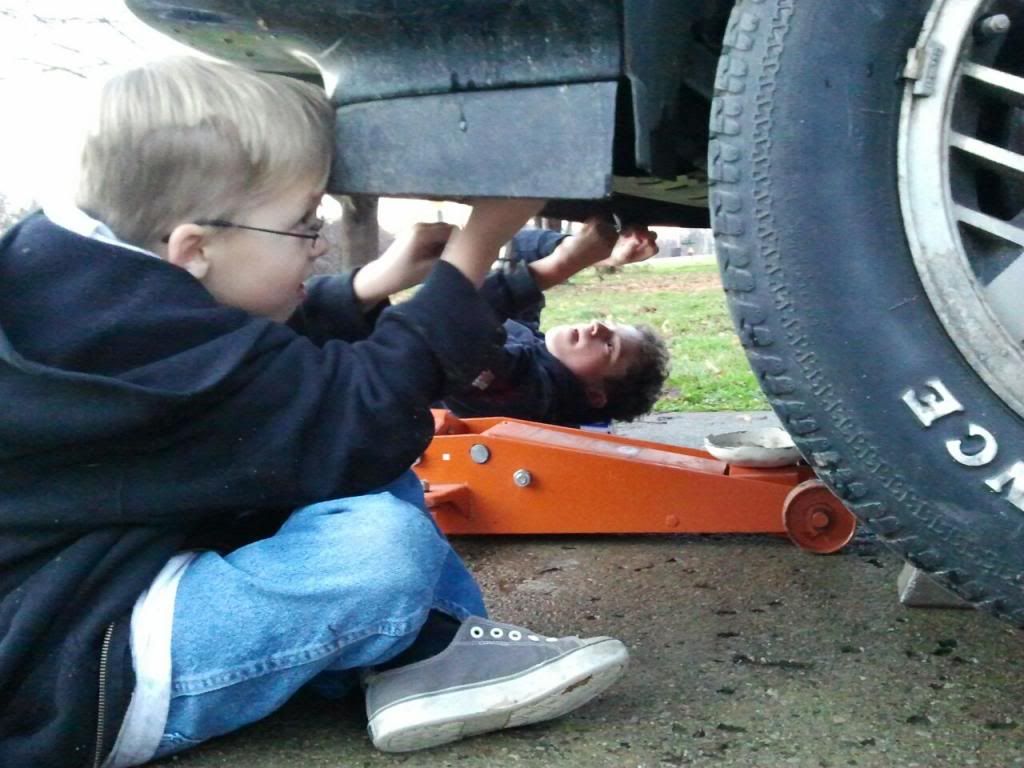
In fact, me and the boys FINALLY got the Fiero moved into the garage this morning
And they are chomping at the bit to get started on the suspension.
Well, the 88 is in the garage, up on jack stands, and barefoot.
Let's see what we have to work with:
Right Rear (passenger side)
Right Front
Left Front (driver side) Looks like someone replaced the swaybar connection on this side with poly. However, the missed the shock which is completely gone on this side. Here's another angle, showing the shock completely rusted in half:
And finally, the Left Rear (driver side)
About what I would expect on a 25 year old car.
Anybody notice anything in these pics I missed? Any tips on where to start?
You don't need the hub puller or the balljoint fork. A solid rap (or few) on the spindle with a big hammer where the balljoint goes through will drop the balljoint. The same big hammer will drive out the axles, just use a 2x4 so you don't mess up the axle threads. Now get to work. ~ Paul aka "Tha Driver"
Well, I hope everyone is having a wonderful holidays.
It's been slow going with the 88, mainly because I couldn't find anyone with a #55 Torx socket for the brake calipers. I asked EVERYBODY, and finally resigned myself to picking one up on payday.
Then my father-in-law went and purchased a whole set just so he could loan me the #55! What a GREAT guy!
After 4 Christmas parties in the last 24 hours, I was struggling to find time to work on the car. But I spent about an hour in the garage tonight and managed to tear apart the passenger side front suspension. The Torx bit worked great. Everything came off fairly easy.
Except the top retaining bolt of the shock absorber, it liked to spin. Even with a pipe wrench on the stem and a wrench on the nut, it wouldn't budge.
I finally broke out the Matabo and cut the nut and stem off. Which dropped the knuckle off the upper balljoint. Then I had to "tap" the lower one to get the knuckle off. "Tap" is being nice.
Anyway, its off. Not sure how I'll get the hub off the knuckle without the hub puller, but I'll worry about that later. Still need to get the control arms off and ready for sandblasting and powder coat and new bushings. On a side note, I am thinking of these for the headlights: Only mounted lower on the front facia of the new custom frontend like this: The are for a Cobalt.
I agree with wrap around lines comment, they don't fit the fiero, fieros don't really have that wrap around body. Though its good to think about what you want while working it keeps you motivated. Besides your plans could always change mid project.
That bolt on the left, that holds the Upper Control Arm to the front cross member refused to budge. I tried penetrating oil, tried tightening a little before loosening, tried a breaker bar, tried a wrench and hammer. Nothing.
The one on the right came out easily.
Eventually, after the head of the bolt had started to become stripped, I brought out the matabo again. I cut/ground off the head of the bolt. Unfortunately, I also ended up brazing the bolt to the part. DOH!
I figured that out after trying a BFH and pry bar to get it to release, of which I only succeeded in having the pry bar slip and hit myself in the face.
About this time, my dad showed up. He was curious as to why my face was bleeding and decided he better show me how it was done. For the next 2 hours, it was just like old times, with him under the car yelling at me to "Hold the light" and "hand me that wrench".
Finally, he came to the same conclusion that I had already. I would have to get my Brother-in-law over here with his torches.
He also took this opportunity to let me have it for starting a project without the proper tools (even though he assured me that he would have any tool that I would need). Ugh! He was all, "Where's your punch? Where's your chisel? Don't you have a sledge hammer? Where's your smaller breaker bar? Blah,blah,blah"
Made some major progress on the Fiero the last two nights. I'll get some more fresh pics up soon. I need to get a better camera, cause the phone pics are kind of crummy.
Anyway, the passenger side front suspension is completely torn down. I didn't even need the torches. LOL. I even got both ball-joints out. Still need to tear apart the calipers and remove the rotor from the hub and from the knuckle. I'm probably going to have to break down and buy or rent a hub puller.
Next, the drivers side. It should go much quicker now that I have a better idea what I am doing. LOL Not to much, the shock absorber is already busted on that side.
After a quick trip to Lowes to pick up some new toys, I got down to work on the 88 tonight.
I spent about an hour cleaning off all the rust off the passenger side crossmember and sub-frame around the wheel-well. Started out with the 4 1/2 inch wire wheel on the matabo. Then switched to the wire wheel on the rotary tool for more fine point cleaning. And finely went with the wire brush for more concentrated cleaning. Then I washed the whole area down with soap and water and waited for it to dry while I watched a movie with the kids (Princess Bride - CLASSIC!),
Then I coated the whole area with Industrial Grade Rust-O-Leum Primer.
I'll hit it tomorrow with some Industrial Grade Rust-O-Leum Flat Black Enamel. It will get a couple coats before I am done.
Then I went to work tearing down the Drivers Side.
I still have a little more to do, but MAN does it make a big difference once you know what the heck you are doing. LOL
I got the same amount done tonight in about an hour and a half as it took me 4 evenings on the passenger side.
**Sorry you guys didn't care for my choice of headlights. It may change before I get around to that, but don't be surprised if the car ends up with some form of wrap around lights. It is supposed to be an concept of an updated Fiero if they were still building them today, and almost all the new GM cars have some form of wrap around headlight. Plus, I think that style will look better with the nose I have envisioned. But, like I said, that is still a long way off and could change.**
Originally posted by Corpsmen Ed: **Sorry you guys didn't care for my choice of headlights. It may change before I get around to that, but don't be surprised if the car ends up with some form of wrap around lights. It is supposed to be an concept of an updated Fiero if they were still building them today, and almost all the new GM cars have some form of wrap around headlight. Plus, I think that style will look better with the nose I have envisioned. But, like I said, that is still a long way off and could change.**
Happy New Year Everyone!!!
no need to be sorry, it's your car, I was just giving an opinion.
I appreciate your opinion and the fact that you follow my measly build. Thanks again.
Today, I got 2 coats of Industrial Grade Rust-O-Leum Black on the Passenger side that I primered yesterday. I also finished tearing apart the Drivers side. It was a PAIN IN THE A**, because the bushing bolts on the lower control arm REFUSED to come out. The nuts came off with a little PB Blaster and a breaker bar on the deepwell 18mm, but the long bolts were rusted to the inner sleeve of the bushings. I tried a sledge, pry bar, punch, etc. Not luck. I ended up cutting off both ends of the forward bolt with the matabo. That allowed enough wiggle room to get the back bolt to turn out with a ratchet on the head and a pry bar pressing against the threaded end.
WAY more rust on the drivers side. I spent probably an hour and a half cleaning off all the rust with the various wire wheels and brushes.
Finally got the 13 yr old (Max) to come out to the garage to help, but he only stayed about 5 mins when he realized it was too cold for his shorts and sweatshirt. (Which might explain my current case of bronchitis.) Plus, as he said, "All the fun stuff is done now."
I then washed the drivers side down with soap and water to get it ready to prime tomorrow.
**As a side note, someone following the build sent me a PM asking for various pictures of the roof and stuff. I would be happy to oblige, but I accidentally deleted the PM before I could respond and can't remember who asked for what. I also apologize for not checking my PM's lately. I kind of forgot about that feature and noticed tonight that I had 5. Oops.**
Yeah Ed, that was me. I can forward the PM if you want. Thanks for the help.
------------------ fierogt28
88 GT, Loaded, 5-speed. 88 GT, 5-speed. All original.
Originally planned on a 3800 SC series 2 or 3, but it is so hard to find a decent low mileage one without breaking the bank. I have no desire to completely rebuild an engine. Nor do I have the know-how.
Plus, after reading your build, I might try something different. I would love to do the elusive 3.6 out of one of the newer caddies. Maybe mated to an F40. But that if a HUGE undertaking and expense. Plus, it doesn't look like anyone has successfully completed that swap.
Glad I could be inspiring! My main concern with the the 3.6 is the size, I haven't measured, but I imagine they are a large engine, which could make packaging tougher.
go to harbor freight & get a "Ball jount / bushing press" they are relatively cheap on sale. (Or, maybe you could rent one) that way it only takes 2 minutes to remove one & replace it. I think I paid $20 for it.
go to harbor freight & get a "Ball jount / bushing press" they are relatively cheap on sale. (Or, maybe you could rent one) that way it only takes 2 minutes to remove one & replace it. I think I paid $20 for it.
Remember though its an '88 and has that shaft through the bushings in the upper control arms. It complicates things.
Best thread on here that I've seen was where the guy made C-shaped spacers to keep from distorting the flanges on the control arm while still allowing them (the spacers) to be removed and installed around the shaft.
Thanks guys. I got them out. It wasn't pretty, but with a drill, ballpeen hammer, chisel, matabo, and lots of PB Blaster, they came out. Needless to say, I have some straightening, grinding, and threading to do before they go to powder coat.
Balljoint/bushing press would have been easier. Definitely picking one up before the new ones go back in.
After looking around for a local shop to do the sandblasting and powdercoating of my upper and lower control arms, the nearest I could find wanted several hundred dollars and several weeks lead time. Since I'm on a budget and would rather use that kind of extra cash towards my swap, I am going to just clean and paint them myself.
I was able to straighten the bends and dents out tonight. I also wire wheel and ground off the old coating and what little rust there was. After a little parts cleaner, and some soap and water, they don't look half bad.
When I get around to painting them, I'll post some more pics. I keep forgetting to take my phone out in the garage with me, and then don't want to get it with greesy hands. LOL
Right now, I am fixing to order the new ball joints from Rodney and some new bushings from either Rock or TFS.


.jpg)
.jpg)


.jpg)


.jpg)
.jpg)

.jpg)
.jpg)


