Finally got it dialed in and ready for the Dyno....when I get a chance. Had to replace the O2 sensor and reclocked the MAF sensor. Seems to run great now and no longer stalls....forgot to mention that one earlier. Although I've had the car out earlier this year, this is the first time to drive it without any obvious side affects. Idle is definatly smoother but I don't know if it was cam timming settings or the cams out of sync with the crank. Rt bank was 360* out from the crank or 180* out at the cams. I can definatly feel the difference. Still miss the uper RPM "suck you back in the seat till rev limiter stutters" power.
And ofcoarse I get challenged on the highway by a Mustang. Poor little horsee got left behind...... This is just one of the things that makes this much work worth it. Especially when people notice you car even before they can see it. Exhaust is a little loud but smooth and deep. Kind of like Barry White doing a tabetin chant. Anyway I LOVE IT! Now off to the Corvette club to see how many more I can run with on the Autocross coarse. Maybe now I can catch up with the modified vettes. Still love the vette but everyone knows those can run which looses the OMG factor from the competition.
Anyway, If anyone has any questions I'll be more than happy to help if I can. Judging from the information I got here there are plenty of experts here to help.
Allright, that makes it official. I am going to find a '86-88GT, stuff one of the 3.4's in it, make it really nice, and ship it to New Zealand with me.
Without another dyno test I couldn't really say but If I had to guess I would say 25 to 35 Hp at 7K rpms. I just dont feel the pull like it had before after 5500 rpms. Although the rt bank was out of sync and -6-16 timming was used the idle was very harsh and created alot of vibration. I like the way it runs now. The torque is better through mid range. That is more usable than the gain used before in the last 2k rpm range.
HAHA!!! I started this thread, but PAUL, emc209i CREATED IT!!! Great job on the front page, I haven't checked this thread out in awhile and wanted some inspiration, OH, the layout is extra nice to, for your first post I mean......When I can do this swap I hope I learn half as much as you do know Paul!!!
------------------ Me, I sell engines, the cars are for free, I need something to crate the engines in.... Enzo Ferrari....
Today they are called garage's, yesterday, they were stable's! Eric Jacobsen....
Dont you think that the 2.8 t-body is a little small compared to the 3.4 DOHC? You might want to consider upgrading that. All the same, impressive ammount of work!
Hey guys just need a couple questions answer so I can move on to mounting my motor to the cradle. I set the cam timing, pulled out the paper clip for the tensioner. But when I turn the motor over so that it lines up with the crank pulley mark on the timing cover, one bank has the flats facing up and the other has them facing down, they are not perfectley down but off to one side a bit, is that ok or? Also does someone have a diagram on where all the coolant lines run on the motor, and also one more question for ya guys how do you fill this motor with all the stock coolant lines and such, would it make sense to use the 2.8 thermostat housing or do you guys have a trick to filling it with all the stock cooling system?
Before I attach the last hose to the eninge (which is always the drivers side main line) i fill it up with as much coolent as possible. Then I fill the radiator and the overflow, start it up and open the stock bleeder and when the t-stat starts to get warm I shut it off and then repeat a few times, topping off the overflow each time and allowing the engine to cool in between. I know several people that do it this way and have no problems. The cam timing sounds completely wrong btw. One is supposed to be up completely the other is supposed to be down completely.
Heres a coolent diagram. Its quite easy BTW:
For the heater core you want the output side of the engine's lines going to the insulated line.
------------------ --180* t-stat, cams, 96-97 intake swap, FFP pulley, A/C Idler, flowmaster exhaust, EGR delete, K&N filter, chip-- --Check out the Fiero Kingdom!-- Beater: Flat black 90 CRX with a JDM D15 VTEC <--ballin'!
yep, cam timming is one bank up and other down. Did you turn the tensioner pully counter clock wise after you pulled the wire from the tenstioner? I rotated the crank 360* before i tighten the first cam. Make sure whatever you use as a lockdown does not bend from tightening the cam cogg bolt being torqued. As far as cooling fill goes I've had the best sucessdoing doing it this way....it may not be the best way but it saves alot of time.
1. take radiator cap off. 2. Jack car up in the rear (just 6 incheas or so.) 3. take thermostat out of the motor and start filling from there. 4. once you hear the water flow from the radiator, install the cap. 5. Massage hoses at the motor (moves the air pockets out that includes the heater hoses going to the intake.) 6. keep adding fluid...once the fluid reaches the thermostat opening install thermostat and bolt housing back on 7. Take the brass screw off of the thermostat housing and add more fluid through that hole (I used a hard plastic line and screwed it into the threads and clamped a small funnel to it) 8. top off the funnel and massage the hose on the thermostat side. once the water dropps to it's lowest point re-install the brass bleader screw. 9. Top off overflow tank.
I know this may sound like alot of work but it seems to work for me every time. The best part about doing it this was is, you dont have to worry about air pockets in the motor. Since the thermostat housing is the highest point in the system you can be sure you have all the air out when the top off is done. I've tried to do the run/cool/run/cool process and it seems to take longer and constantly worry if it was completely burped. The above method lets gravity work for you and ventalation to let the air out.
The 2.8L Throttle Body is smaller...But I wanted to produce velocity at lower RPMs. The intake system for this motor is all wrong from factory. I know they were trying to produce smooth acceleration and torque with their intake system, BUT there was way too much volume in the intake to allow the air to flow quickly at low speed. I also plan to add a Turbo next and reducing the intake volume will reduce lag time caused by filling up more space with pressurized air. I might go with a larger pipe and throttle body later if I don't do the turbo.
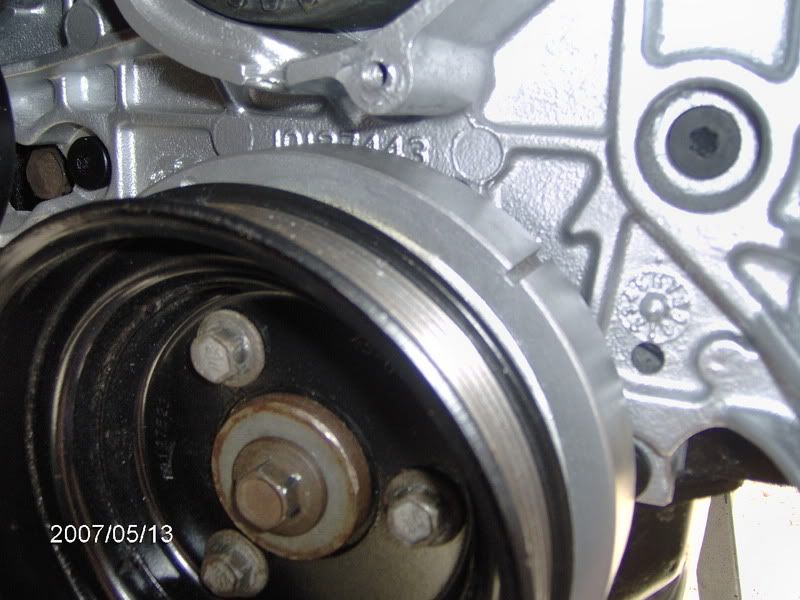
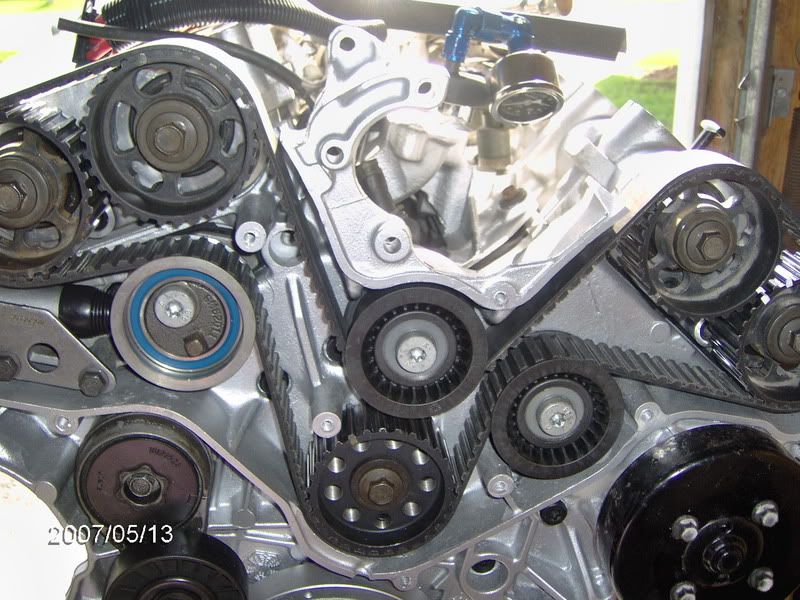
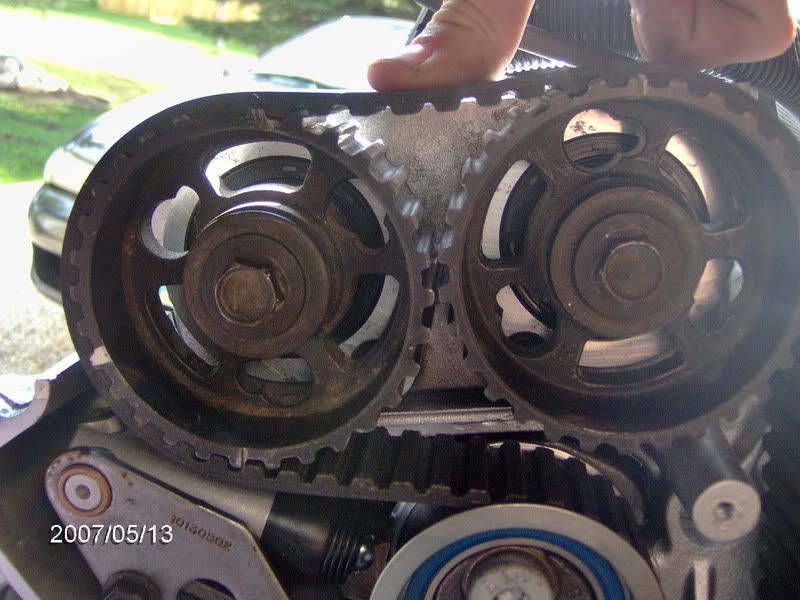
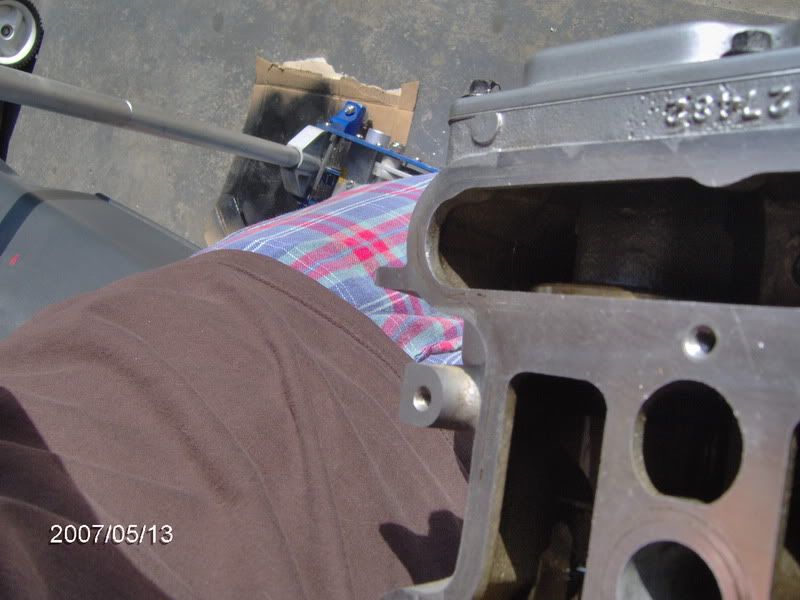
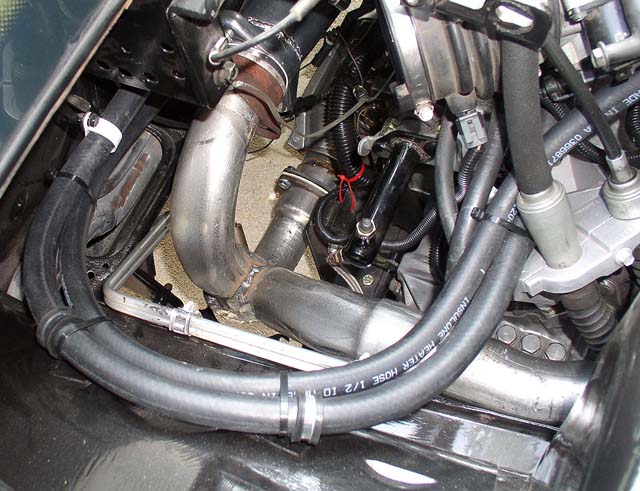
K guys here is some pics of my cam timing adventure lol just need to know if this all looks right to you guys. Motor at TDC Flats up after putting the timing belt and everything all back together, this is the right bank from the pulley side of the engine.
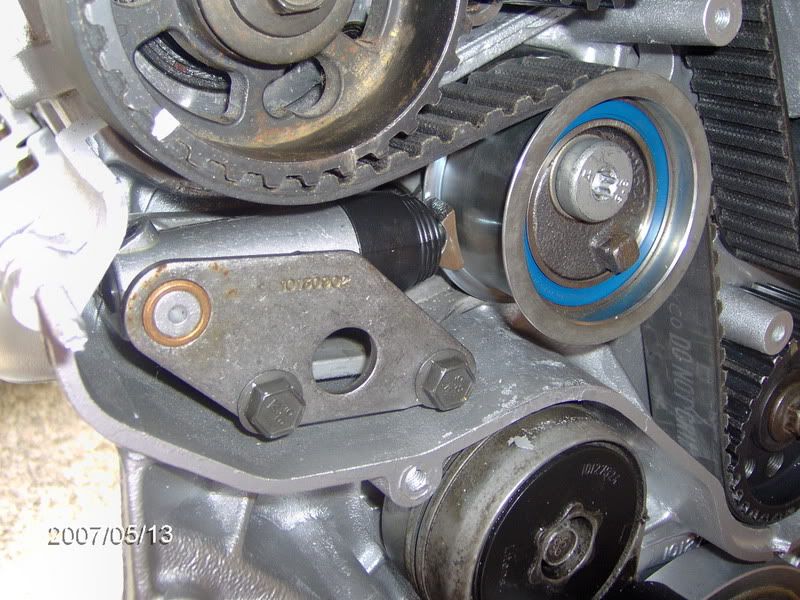
Flats down on left side bank, notice how they are not facing 100% down but they still face down, everytime I do the timing it ends up like that, also the last image is that correct belt tension?
[This message has been edited by olaf_fiero27 (edited 05-13-2007).]
Are you loosening the cam cog bolts so the cam cogs can rotate independently of the cams when you set the cam timing?
First, Install the belt and release the tensioner. The belt needs to be tensioned when you do the timing.
You should start off with the bolts slackened off so if you rotate the engine, the cams will rotate but NOT the cams. Basically the cogs should be free wheeling on the end of the cams. Then you put the engine to tdc. position and lock the 1st bank then tighten that banks cam cog bolts.
Now you rotate the crank 360 degrees, lock the other bank (1st lot are now pointing down) then lock up the cam cog bolts. If you do it that way the cams will be exactly 180 degrees apart.
From what you are saying it sounds like you are installing the belt without releasing the cam cogs. If you do that you'll never get it to be exact.
I find this post interesting. No doubt the 3.4 DOHC engine is capable of some good things. However, the main drawback to doing this swap is that the engine was never very popular and was dropped by GM for some very good reasons. This would seem to indicate that parts availability and the cost of maintamnace in the coming years might be very high. Performance modifcations are also bound to be very expensive and the engine weighs in at 492.5 lbs. I also understand that the engine fits so tightly in the engine compartment that you can't change the plugs without dropping the engine. For the creative engine builder the 3.4 DOHC might be the ticket, but if wider choices are desired, then it may end up being a very costly swap. For instance on the top end the valvetrain is multiplied by two. However,I still enjoy seeing these engine swaps in Fieros.
------------------ 87GT 3.4 Turbo- 0-60 5.2 seconds 2006 3800SC Series III swap in progress Engine Controls, PCM goodies, re-programming & odd electronics stuff "I'm on the loose without the juice"
Please lemme know what the reasons were that GM quit on this engine? Though not to start a flame war, you also kinda have to wonder why GM dropped the 3800 too...........
------------------ Me, I sell engines, the cars are for free, I need something to crate the engines in.... Enzo Ferrari....
Today they are called garage's, yesterday, they were stable's! Eric Jacobsen....
The main fit issue is as you say, the plugs, although I believe others on here have mounted it a tad lower and say that with some creative fiddling involving swivel socket drives etc you can get he plugs out without dropping the motor.
The other fit issues are the oil filler location is under the rear window so it's tight to get at but that's pretty easy to relocate to the other head if you want although I never bothered. Funnel and some tube worked fine for me.
Dipstick is a bit of a bugger (same location as oil filler) but I made a 'cable' one up that slid down the tube no problem. Alternative is to relocate the dipstick to the other side but I didn't fancy drilling my block !!
You gotta cut the pass side deck hinge mount to clear the cam cover and the springs don't really fit after that, well maybe one, so you need to use one or more struts for the deck lid.
Yes, there's not much in the tuning area so unless you want to go into largely uncharted waters you are pretty much stuck with it as it comes but for me that was fine. It made the Fiero the car it should aways have been.
Unfortunately I never got to the point of facing maintenance issues but my motor was dead on reliable all the time, never missed a beat and it had 80k on it when I wrecked it and I didn't do anything to it when I installed it other than replace the cam timing belt, just dropped it straight in from the donor.
[This message has been edited by ltlfrari (edited 05-14-2007).]
what flywheel do you use for this swap either than a fiero flywheel cause there kinda hard to come by, and also can i just grind the weight off the back of my stock 86 flywheel?
what flywheel do you use for this swap either than a fiero flywheel cause there kinda hard to come by, and also can i just grind the weight off the back of my stock 86 flywheel?
You could grind it off but I would have it checked by a machine shop..you can use a beretta, cavalier 2.8 flywheel ..most autoparts stores can get you a 88 neutral balance 2.8 flywheel
Does anyone have any exhaust pictures behind a 4spd setup? I need some ideas on what to do with my exhaust I have stock manifolds and a stock 3.4 y-pipe but from what I understand it does not clear the clutch arm.. O and by the way what kind of numbers will my semi stock 3.4 with 4:10 4 spd roughly put down?
Rising parts costs dont matter, just go custom performance! And there are plenty of spare engines out there.
As far as the flywheel goes, your better off getting one off a cavalier or beretta. Just make sure its neutrally balanced. Their way cheaper from the cav or beretta too BTW.
Does anyone have any exhaust pictures behind a 4spd setup? I need some ideas on what to do with my exhaust I have stock manifolds and a stock 3.4 y-pipe but from what I understand it does not clear the clutch arm.. O and by the way what kind of numbers will my semi stock 3.4 with 4:10 4 spd roughly put down?
the clutch arm will clear. The problem is the shift select cable and the end of the shift bracket interfering with the crossover. What I did was take the crossover, drill out the rivets, remove the heat shield, cut the flanges off each end remove about an 1" or 2" off each end, reweld the flanges back on each end. That will bring the crossover closer to the back of the engine/transmission so there will be the necessary clearence. You also have to cut the ends off the heatshield cut a bit of it for clearance in the area of the shift bracket as shown in the pictures.
Also you will have to mod the clutch slave bracket as shown in the pictures
Mine can beat a C5,LS1 Camaro, SLP LS1 Firehawk in a short race ...I estimate mine in the low 13s possibly high twelves with the 4.10 4 speed
Ok, nearing the end of my swap, and saw a couple of questions in this thread. 1st, I don't have to modify the t-stat housing, I am guessing this is only done for ease of adding coolant. 2nd, looking at the plumbing diagram above, it shows all but where the coolant tube along the trunk wall would attach (2.5 originally), again I am guessing it attaches to the coolant nipple on the plenum.
Ok, nearing the end of my swap, and saw a couple of questions in this thread. 1st, I don't have to modify the t-stat housing, I am guessing this is only done for ease of adding coolant. 2nd, looking at the plumbing diagram above, it shows all but where the coolant tube along the trunk wall would attach (2.5 originally), again I am guessing it attaches to the coolant nipple on the plenum.
dan
Correct..you don't have to mod the t stat housing if you use an inline filler cap that can be bought at autoparts stores or you could just remove the hose from the hosuing to fill I just welded a coolant temp bung to the housing and remoe it to fill
Erik thanks for the write up but I dont really follow on how to mod that crossover, could someone explain it to me lol either im stupid or somethings up cause I dont quite follow. also did you one stock front and one stock rear manifold, what did you do with the rest of the exhaust, is your motor stock putting down those numbers cause that sounds very impressive
[This message has been edited by olaf_fiero27 (edited 05-15-2007).]
I had to cut off one of the slave bracket flange that goes to the transmission bellhousing bolt and bend it as shown in the picture and drill a hole to line up with one of the shift bracket bolt holes
Erik thanks for the write up but I dont really follow on how to mod that crossover, could someone explain it to me lol either im stupid or somethings up cause I dont quite follow. also did you one stock front and one stock rear manifold, what did you do with the rest of the exhaust, is your motor stock putting down those numbers cause that sounds very impressive
what you are doing is temporarily removing the heat shield to get unobstructed access to the exhaust crossver pipe itself. Then you can take a hack saw or cutoff wheel and squarely cut each end about an inch behind where the flare is on the ends of the crossover and remove the flares. Then squarely cut about 1 or 2 inches off of each end of the crossover ( measure to make sure how much) and then weld the flares back on. That way it will bring the crossover closer to the bellhousing towards the back of the engine which will gain clearance for the shift cable bracket and select shift cable
I just use the stock exhaust manifolds
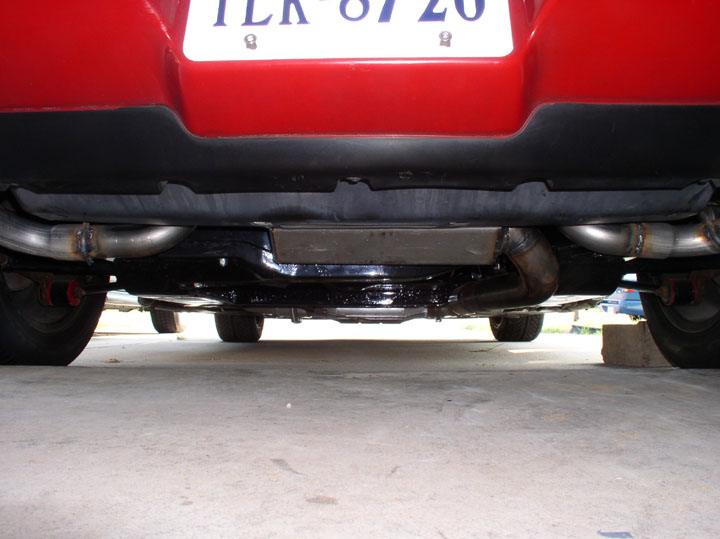
I use the stock down pipe and weld a Y to it and then weld 2 turbo mufflers to the Y and then 2 90 degree mandrel bent pipes off each muffler
here is a pic of the old exhaust using 2 cherry bombs and ansa resonator tips config and the new config before final fabrication
I have a cam retard and freeflow exahaust with a Darth Fiero Chip
[This message has been edited by Erik (edited 05-16-2007).]
so you just dump the exhaust through the front bank, ( rear of the car bank) that looks like it would be the most simple exhaust setup in my books, that means i gotta switch my manfolds to the other sides then. also how does the manifold that has the second dump in it clear the trunk? must be tight squeeze hey? but yeah that looks like an easy setup ill probably end up doing that too.
[This message has been edited by olaf_fiero27 (edited 05-16-2007).]
so you just dump the exhaust through the front bank, ( rear of the car bank) that looks like it would be the most simple exhaust setup in my books, that means i gotta switch my manfolds to the other sides then. also how does the manifold that has the second dump in it clear the trunk? must be tight squeeze hey? but yeah that looks like an easy setup ill probably end up doing that too.
The exhaust manifold arrangement is completely stock with the single dump exhaust on the front bank ( closest to the front firewall in Fiero engine bay) and the dual dump manifold in the back. It realy is the simplest easiest way to go for a config and it will have the freest flowing being so short. The dual dump manifold does clear the trunk wall but, you may have to slightly tweak the wall in the area of the oxygen sensor for clearance.
Round 2 of stupid questions. I was looking at the pictures of my engine b4 I took it apart (been 2.5 years now), and can't determine from the pictures on which side the fuel injection harness enters under the plenem. pulley side or throttle side? plus i see what looks to be 2 vacuum lines running under there also?. Next question, please bear with me, the junction box next to the battery (stock location) I remember a battery feed coming off of there (maybe to alternator) so this leads me to belive that a positive lead needs to go there? Thanks for any help, I realize these are probably stupid questions, but I would rather be safe than sorry after so many years of waithing on this swap to be completed too just rely on my memory, it's like a colender up there.
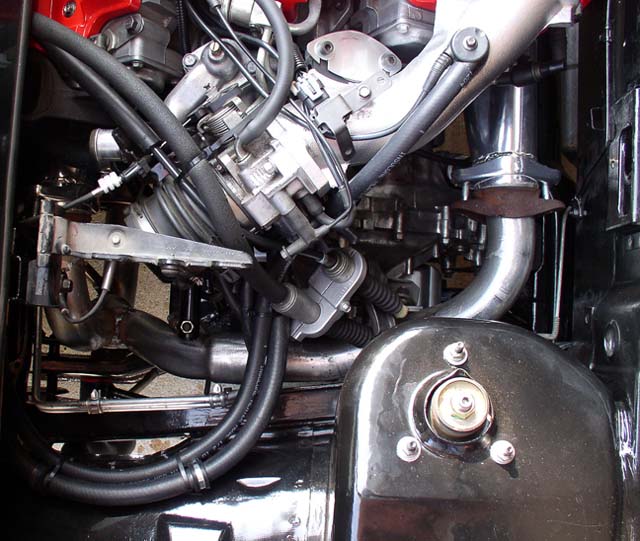
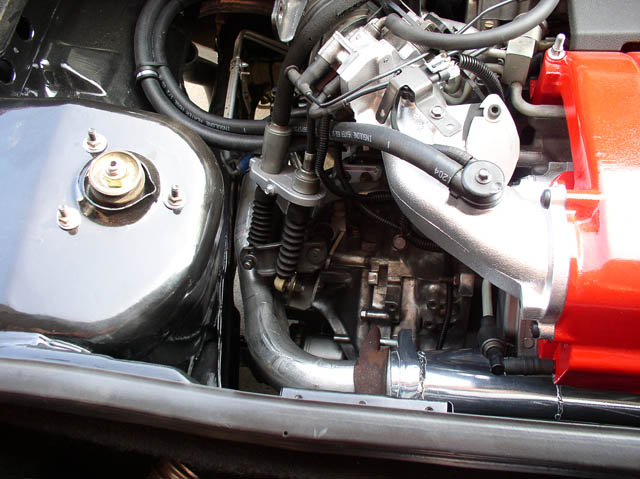
Pully side. At least it is on my 92 motor. Yes, there is a battery feed to that juction block. I just ran mine off of the starter solenoid because I'm moving the battery up front. I actually made some real progress today....got the motor in the car and started hooking stuff up. Here's a progress pic from the end of the day...
For some reason the engine seems tilted forward more then the last time I put it in for a fit-up. I may have to loosen engine mounts and move things around a little. The converter seems to clear everything pretty well and the muffler hangs about a half inch below the bottom of the trunk . Now I have to fabricate tail pipes and get the rest of the car put back together.
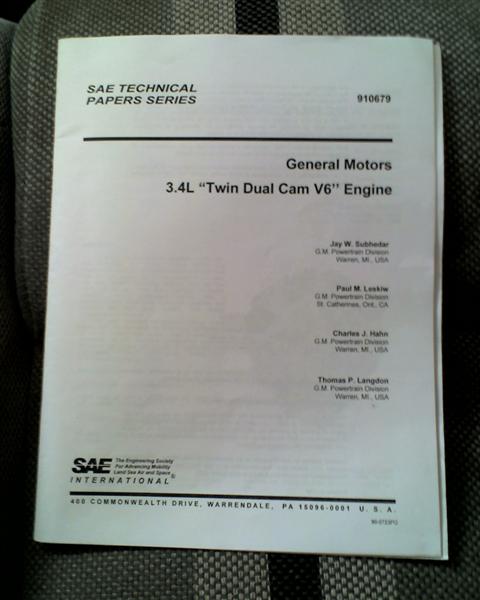
Heres some new info. I recently purchased a technical report on the development of the TDC, from SAE (I'm a student member.) It goes pretty well in to depth to understand the system, but no major specs are released.
here's a pic of the cover, IDK all the rules about the copy writes and whatnot, i did get a nice note reminding me it is copy write protected, i dont think i will upload any scans and post them here.
so guys Im totally stumped on the wiring harness and am about to give up and pay someone to do it, the dohcfiero.com guide doesn't help to much its way to complicated and all over the place anyone have any ideas or links that would help me out ?
lol the whole harness I dont know where to start, we kinda got going on connecting the Clear Fiero connector under the center console to the harness but the colors for wires are different on other sites so we dont exactly know which wire is which you know?
This is what I did, I have a set of homemade headers. I wanted the exaust to be routed like the stock one, and after I got the headers the stock crossover location would not work. This was what we came up with. This is an shot after I got the car home from the exhasut shop. I will be "jethot" coating the rest of the system and I have already installed some insolation around the clutch and fuel lines. but this is what I did.
Rob
------------------ 88 TTop coupe (96 3.4DOHC/5 speed in progress) 03 Vibe GT. 6spd 05 GTO, LS2, 6spd 01 Sonoma SLS, 5spd, ZQ8 sport suspension
I have been thinking alot just lately about a ferrari 355 kit, and am curious about this engine with the 355's decklid vents..... What have you all done to keep the wet out from the sparkey plugs on the front side, or nearest the passenger cabin? What could I do to cover both sets of sparky plugs from getting wet?
------------------ Me, I sell engines, the cars are for free, I need something to crate the engines in.... Enzo Ferrari....
Today they are called garage's, yesterday, they were stable's! Eric Jacobsen....


 Poor little horsee got left behind...... This is just one of the things that makes this much work worth it. Especially when people notice you car even before they can see it. Exhaust is a little loud but smooth and deep. Kind of like Barry White doing a tabetin chant. Anyway I LOVE IT! Now off to the Corvette club to see how many more I can run with on the Autocross coarse. Maybe now I can catch up with the modified vettes. Still love the vette but everyone knows those can run which looses the OMG factor from the competition.


 I haven't checked this thread out in awhile and wanted some inspiration,
  OH, the layout is extra nice to, for your first post I mean......When I can do this swap I hope I learn half as much as you do know Paul!!!