I can't remember using the reverse polarity. Try it the other way around. Also check your fuses (doesn't one run to the speedo ??)
As for coolent. The most absolute method I have found thus far, is to disconnect the outlet hose from the block (the one coming out of the left side of the block * will be up high) and remove the radiator cap, then fill the system at the disconnected hose in the back. When solution begins to come out of the the radiator fill neck in the front, replace the cap and then continue to fill until coolent spills out of the waterneck on the block. You have to do the last part slowely so that air will escape. Reclamp the hose and you're ready to go. Make sure the overflow bottle is at least half full.
It sounds like you worked it out, but just for future reference or someone who is soon to need it.
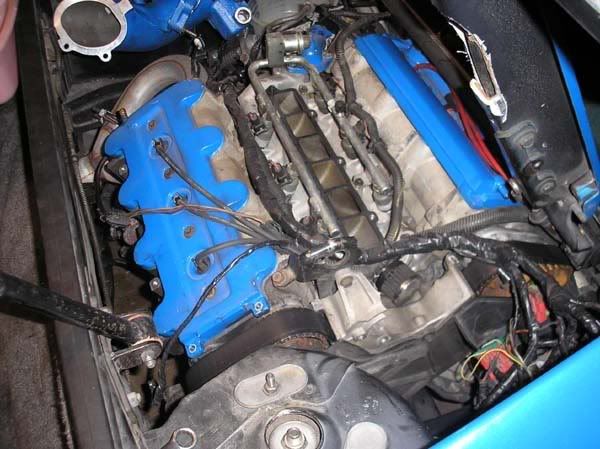
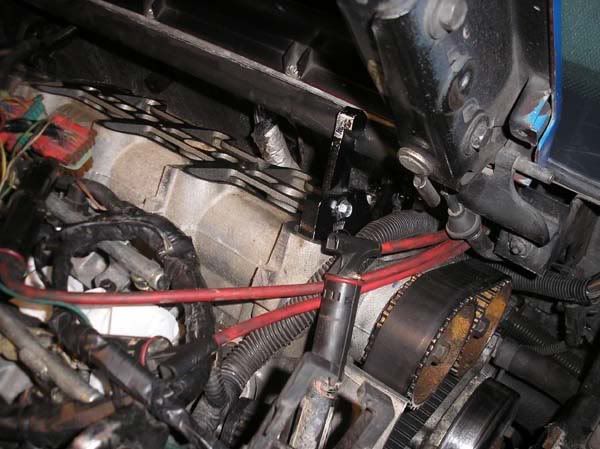
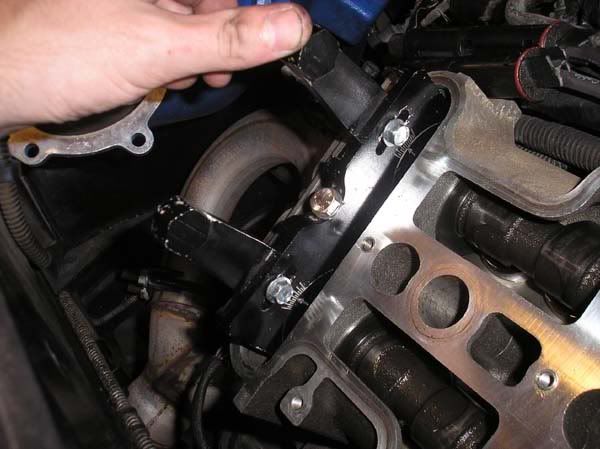
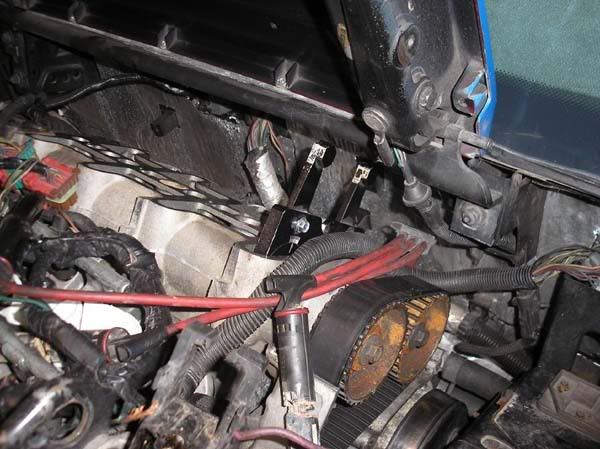
I modified a thermostat housing from a 4 cyl. by cutting the flange off and brazing a hose nipple on the bottom, then attached it to the outlet side (see pics). It was moved a little since I took the pictures to make it more accessible. Filling it worked excellent using the same method that you would use to fill a stock Fiero .... jack the back up as high as you can get it and fill from the back. The only difference is that the thermostat is in place so it's hard to get the last half gallon or so into the engine. It helps to have a thermostat with a bleed hole.... I drilled a tiny hole in the flange of the thermostat before It was installed to help vent the trapped air. I may have to burp it a couple more times once it's been run it a little.
My first trip out on the road will be directly to the gas station and top off the tank with fresh gas. It didn't have that "varnish" smell but might cause some performance problems until I can run a couple of tanks of gas through it. The filter will be changed after a tank or two also.
I'll try to post a sound clip or video soon if I can figure out how.
fairly getting on it from about 10 mph to 120mph and then letting off ..The phone cam video doesn't do the sound coming from the exhaust justice ..couldnt shift very well due to having to hold the camera and drive at the same time but I was impressed that I held the cam as steady as I did http://youtube.com/watch?v=m_ySzZSGYAU
[This message has been edited by Erik (edited 06-30-2007).]
Took the first ride around the block in my DOHC 88 GT today. Aside from the speedometer not working and the tach reading about twice what the engine sounded like, everything went great and the exhaust sounds awesome even though it's a little louder than my neighbors would like. I don't understand the speedo problem because all I did was tap into the VSS wiring for the ECM signal. I reversed the polarity of the two wires running to the ECM (yellow to purple and purple to yellow) as instructed by Ryan (DarthFiero) and had him burn the chip. Maybe I hosed something up in the wiring. It was tough getting all the air out of the cooling system but after burping it several times and using almost 2 3/4 gallons of coolant it seemed to work as planned. It ran surprisingly well on 2 1/2 year old gas. Cudos to fuel stabilizer.
Let me know if anyone has any ideas about the speedo..
That's what I did exactly. I will try reversing the wires from the ECM and if that doesn't work I'll try just disconnecting them and see what happens. Why does the ECM need a VSS signal?
[This message has been edited by SKIDMARK (edited 06-30-2007).]
That's what I did exactly. I will try reversing the wires from the ECM and if that doesn't work I'll try just disconnecting them and see what happens. Why does the ECM need a VSS signal?
So that it knows if you are moving or not..otherwise it may stall or idle high.Also, be sure to connect pin D22on the 9396 ECM to your clutch switch or it may stall
Check to make sure pin M on the C203 is grounded to the engine and chassis if so then reverse the wires and it should work
It took a while to come up with this one, but it looks real good I used An 88 4 Cyl hose and thermostat housing. It also took two 91-95 3.4 DOHC water outlet pipes. Some cutting and welding....
I cut one of the 3.4 DOHC water outlets short, and used the 90 degree from the other, then put the top half of the thermostat housing from the 4 cyl Fiero on the end of the 90, welded it all together, and added a piece of metal to brace the thermostat housing to the throttlebody where the old heater pipe connected.
been working on a cad drawing of a sort of "weber' manifold for the dohc, its just a idea, I didn't use any measurements and it can use some more work.
been working on a cad drawing of a sort of "weber' manifold for the dohc, its just a idea, I didn't use any measurements and it can use some more work.
do a distributor to match ..it would have to be offset due to the head interference ..or perhaps one running off the cam... the webers would sound sweet
I had thought that the dis was capable of running without the computer even? of course it would perform the best then. It would be quite a challenge to do a distributer, would much rather just buy a aftermarket spark contorller.
I had thought that the dis was capable of running without the computer even? of course it would perform the best then. It would be quite a challenge to do a distributer, would much rather just buy a aftermarket spark contorller.
it would be nostalgic and with a HEI you could totally eliminate a computer
i guess i would need to find the smallest six cylinder distributer, and then one could manufacture a cam pulley that drives it and billet timing cover to mount it.
[This message has been edited by FieroWannaBe (edited 09-03-2007).]
Does anyone know the correct size of the two bolts in the center of the lower intake? Per Darth's archived thread they do not remain in the intake they just help ti align it.
Does anyone know the correct size of the two bolts in the center of the lower intake? Per Darth's archived thread they do not remain in the intake they just help ti align it.
Thanks RUNDLC
What bolts are you talking about? I sent you the bolts that fasten/align the lower intake. They have a rubbertype of sleeve on them
I have never used them when installing a lower intake ..all I did was push down on the intake a bit and the intake bolts line up with the holes. I suppose if you have difficulty getting the lower intake bolt holes to line up with corresponding holes in the heads then use them. They are 8M 1.2500 pitch thread and of course 2 inches long
[This message has been edited by Erik (edited 10-10-2007).]
Thanks for the info. Just know she'll be taken care of and I promise I won't abuse her either!! LOL, LOL, LOL
I'll let ya know when the early xmas present arrives.
Good night to all!
10/10/07 Does anyone know if the ford injectors will work for the 94-95? I have posted in the mall that I need some but no response. Which one can be used, I have a stock motor. Has anyone used the spark plug wires from summit, they are called "taylor" and have OEM style boots? Retail at $73.99
RUNDLC
[This message has been edited by RUNDLC (edited 10-10-2007).]
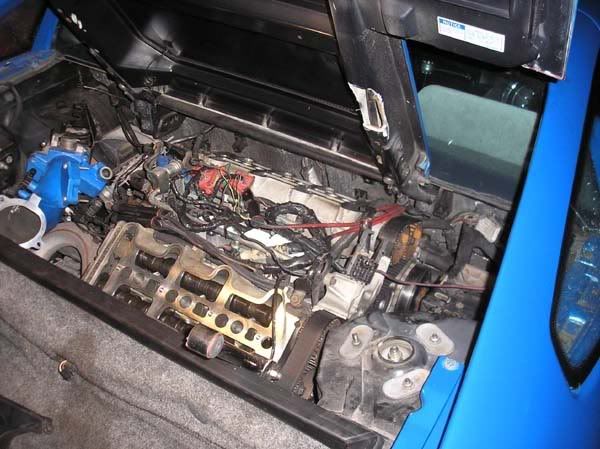
I just thought that I would post up photographic proof that cam timing while the engine is in the engine bay of a fiero is not that hard, even with the adjustable tool.
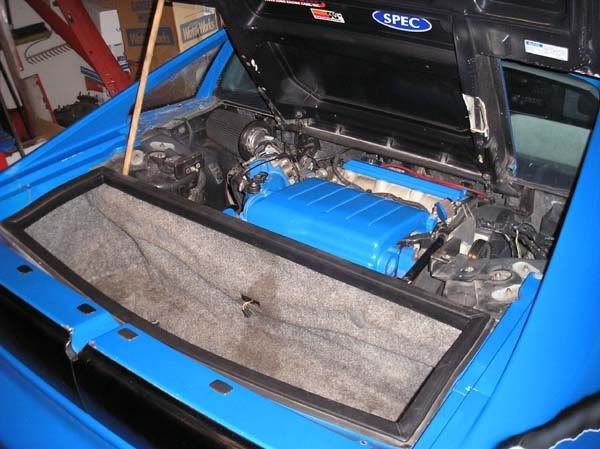
Before I started:
Removed the dogbone and the inspection covers:
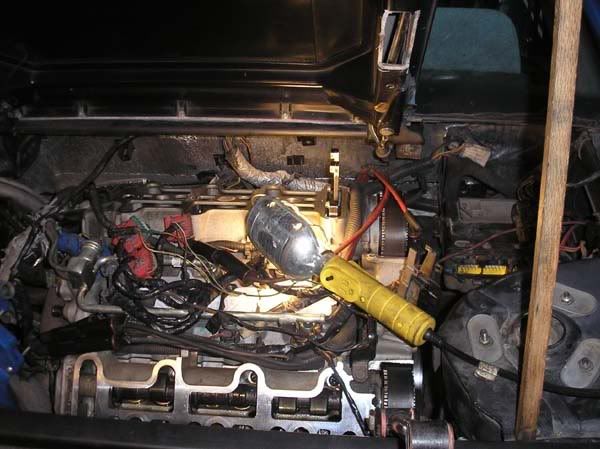
Adios power steering delete pulley and upper intake:
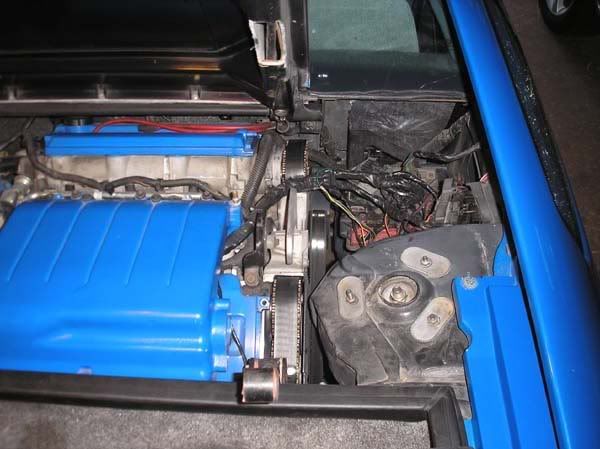
Valve covers timing belt covers and a few more things removed, wiring moved off to the side:
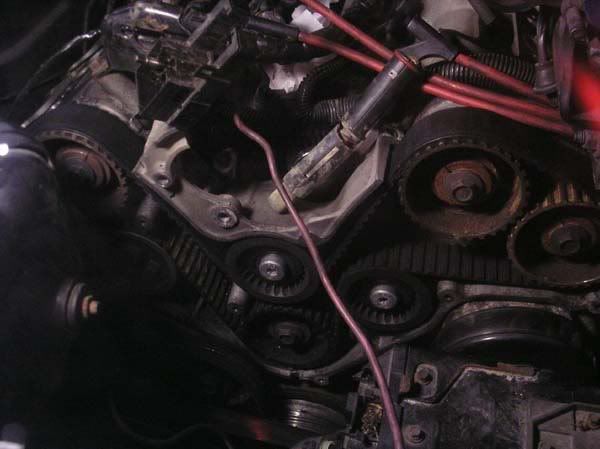
Side view:
Another perspective (Note getting a torque wrench or any sort of a wrench on the rear cogs at this point is really impossible)
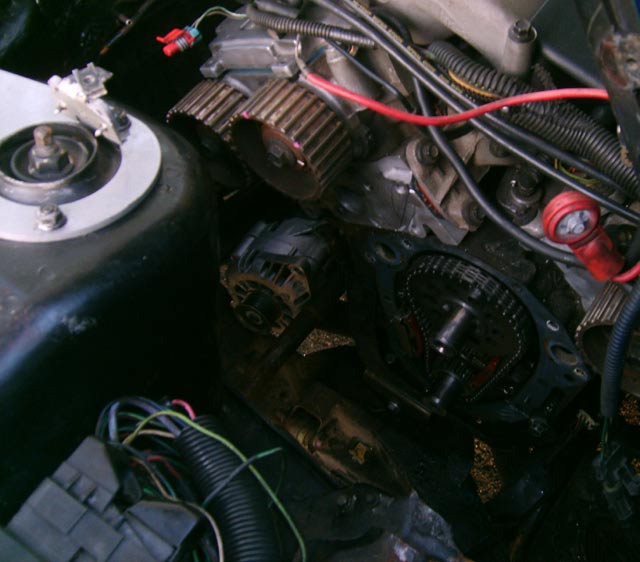
With the engine in this position it is damn near impossible to adjust the front bank as well:
The rear bank is good to go though, with plenty of room to spare!
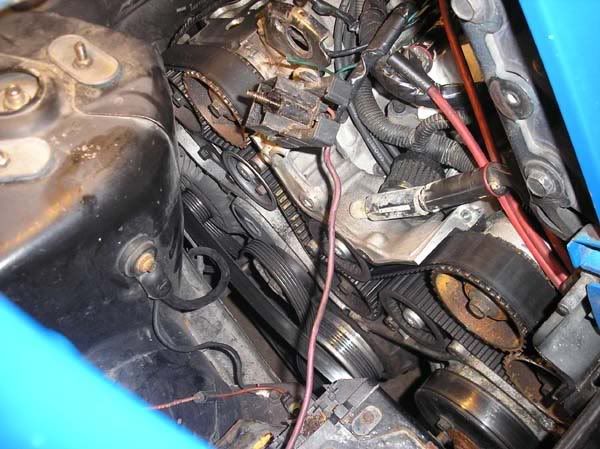
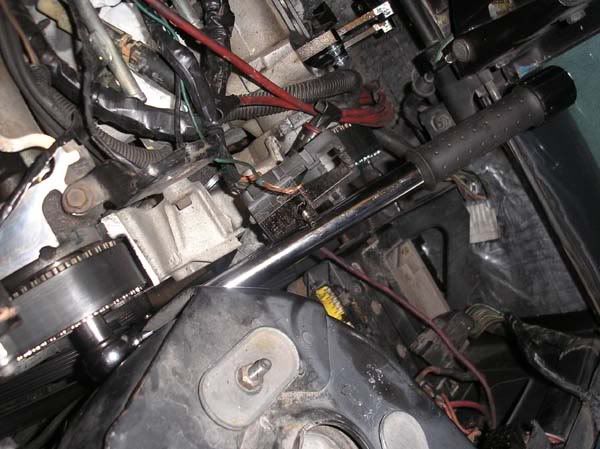
So lets take the rear bolts out of the cradle making sure that all the hoses have enough flex to accomidate for the tilt (this was no where near a problem for me) *My biggest reccomendation that I failed to do was put a jack in the lowest position under the cradle BEFORE I took the bolts out of the rear of the cradle. This made jacking the cradle back up a PITA!
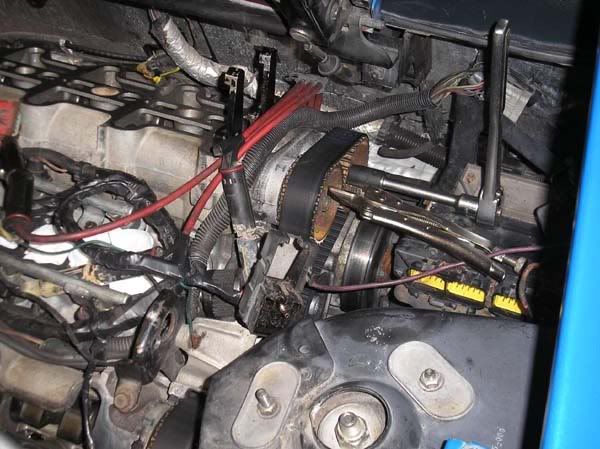
With the cradle sagging as low as it wants to, the tool still fits on the rear bank fairly well (by the way it looks like the timing tool is resting against the trunk wall because it is, but that is because I didnt have it bolted to the carriers yet and when it is properly positioned this is not a problem):
And the front bank is good enough to see and adjust it:
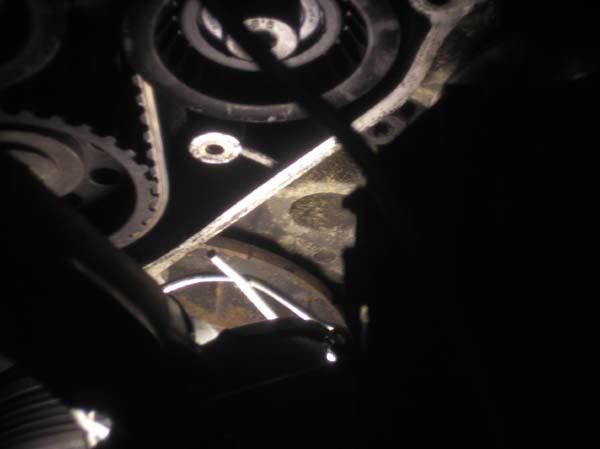
And the torque wrench fits on the rear cogs very well!
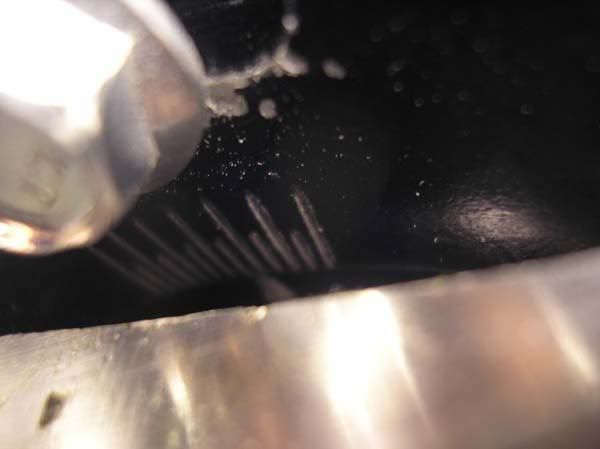
And here is how I looked at the timing mark (this is hard to see in this picture, but it was easy in real life)
While timing the front bank:
To be continued... (edited to add a few details)
[This message has been edited by fieromadman (edited 10-12-2007).]
hmmmm... 2 cam degrees off! Too bad my car STILL doesnt idle right.
Tightening the Cogs:
After that it was a matter of re-assembly. It wouldnt be hard to change the belt in the car either by the way. I just didnt need to and the engine will be out again soon Im sure. This whole process only took my two nights to do working at a blind mans pace, so it was pretty time efficient.
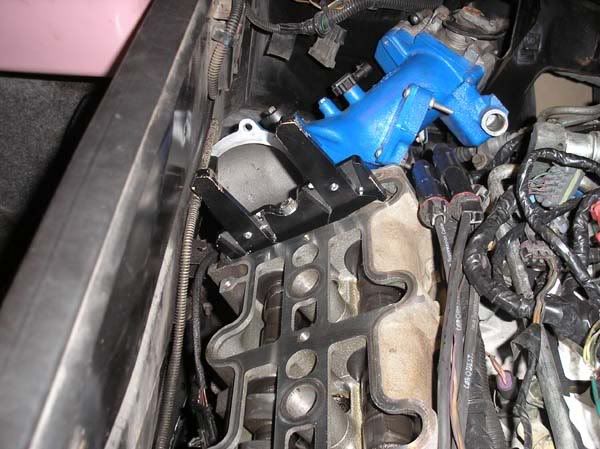
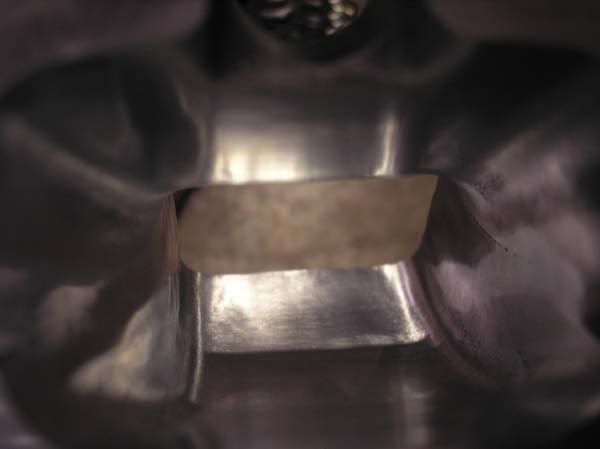
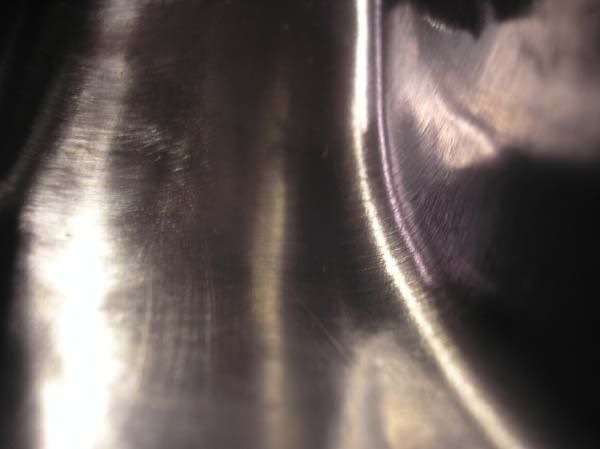
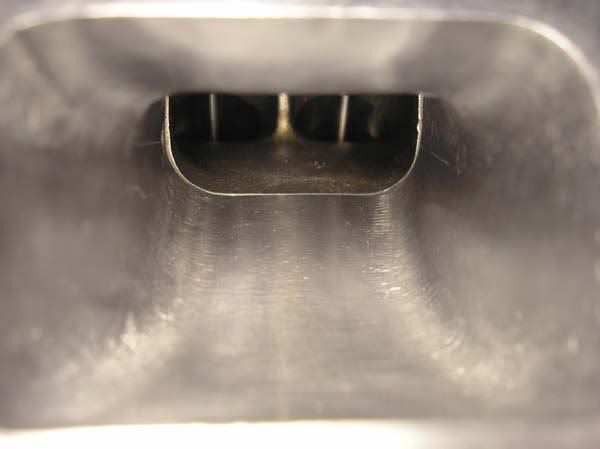
While I had the engine apart I took off the lower intake and ported (really just gasket matched) and polished the lower intake. Now I just need to finish my ported heads...
So purdy!
Smooth and shiney:
Even though its got the wide ports and 24 valves going for it, those heads need some work!
Anyhow, hopefully I enlightened some people!
------------------ --180* t-stat, cams, 96-97 intake swap, FFP pulley, A/C Idler, P/S idler, Ported exhaust mani's, flowmaster exhaust, EGR delete, K&N filter, chip-- --13.8 @ 99 (before cams full street trim)-- --Check out the Fiero Kingdom!-- Beater: Flat black 90 CRX with a JDM D15 VTEC <--ballin'!
Thats what I was hinting at. I really want to get those on before next season starts. I'll probably have an update around christmas time. I'm too busy with school right now.
P.S. Is it bad that I broke a CV joint and a wheel bearing in the same week? I think I may have been too harsh on the car?
The rear bank is good to go though, with plenty of room to spare!
So lets take the rear bolts out of the cradle making sure that all the hoses have enough flex to accomidate for the tilt (this was no where near a problem for me) *My biggest reccomendation that I failed to do was put a jack in the lowest position under the cradle BEFORE I took the bolts out of the rear of the cradle. This made jacking the cradle back up a PITA!
With the cradle sagging as low as it wants to, the tool still fits on the rear bank fairly well (by the way it looks like the timing tool is resting against the trunk wall because it is, but that is because I didnt have it bolted to the carriers yet and when it is properly positioned this is not a problem):
And the front bank is good enough to see and adjust it:
And the torque wrench fits on the rear cogs very well!
And here is how I looked at the timing mark (this is hard to see in this picture, but it was easy in real life)
While timing the front bank:
To be continued... (edited to add a few details)
Ya just gotta experience this first hand to understand the madness ..hardcore 3.4 DOHC Fiero enthusiasts , unite!!
Smashed = please disreguard. We did drink to Fiero's twice though... All 5 of us...
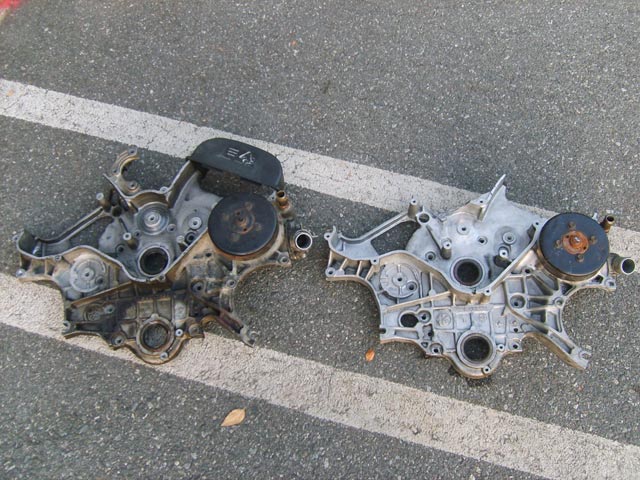
Impressive ..without dropping the cradle even Is that a pre 88? I couldn't do that with my 88 without dropping the back part of the cradle mostly due to those 91 -93 cogs ..Looks like your dogbone got the better of the powersteering mount You should make a steel timing cover that also covers the powerstering mount to spread the load. Someone on the forum did that
No it's an 88. I laugh at people who complain about changing the belt on the W body cars now. Realize that the cover on the left came from a GTP. Both were taken out of cars with the cradle still in, and required about 7 hours each. There was no dogbone... that's the reason it broke. I'll be implementing a Michael Smith mount setup once I get it home from school.
The timing cover you are refering to was made out of Aluminum. He built underdrive pulleys also if I remember correctly. Anyway.


 I used An 88 4 Cyl hose and thermostat housing. It also took two 91-95 3.4 DOHC water outlet pipes. Some cutting and welding....
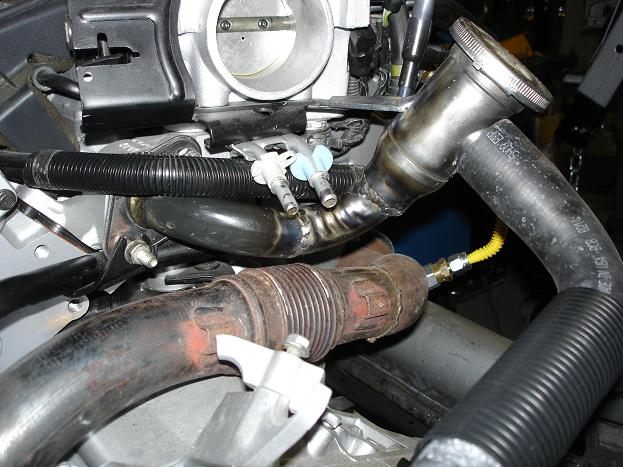

.JPG)


 We did drink to Fiero's twice though... All 5 of us...


