Well, time has come for me to introduce my 3800sc project that I have been working on. It has been coming along steadily since last June when I bought the motor and is almost completed. Since I am almost done, I can only provide pics that I have taken along the way, I wish I would have documented everything a little better but maybe next time.
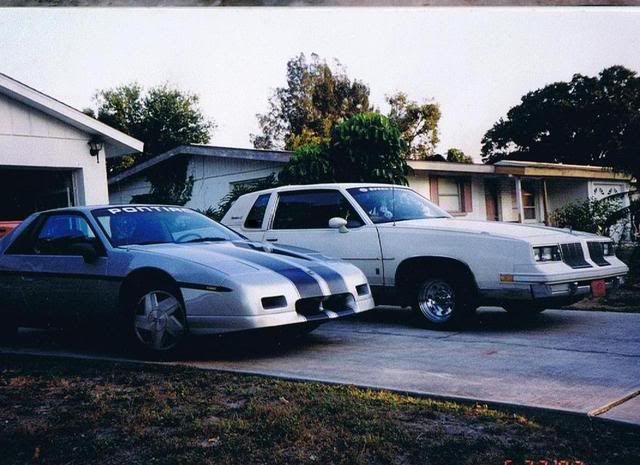
Introduction: the car is a 1985 coupe, originally a 4 cylinder 4 speed car swapped by the PO to a 5 speed Isuzu. Not sure why he did it but it saves me a little time since I am going with the Getrag. I bought the car when I was 17 and in high school because my 85 Cutlass was undergoing a swap and I needed cheap transportation. My teacher for automotive technology is the PO, and he was also an engineer for GM for a while, as well as a GM instructor, back when they still did that kind of thing. The funny thing is the 1984 Fiero was the first car line he had to train on so he has a bit of history with Fieros.
Anyway, late in 2008 I swapped in an 88 duke because the engine had been blown for a few years and I wanted to get the car running again, I missed driving it. All was good for a while, I drove it and it was fun, but I knew I wanted a 3800sc one day, after driving JimmyS's car at Daytona last year, I was determined.
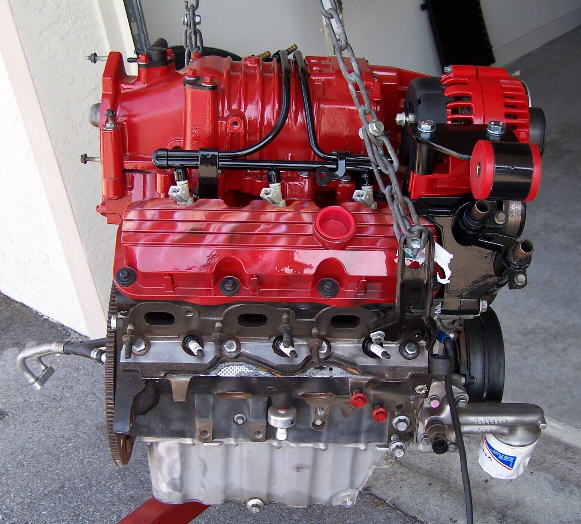
I found the engine on Craigslist from a guy that was parting his 60k mile Riviera. Went and picked it up, brought it home and began buying up parts for it. I must say the most time consuming part of this whole swap has been finding parts and buying them as I went. Then, I found out I needed more parts and had to wait some more.
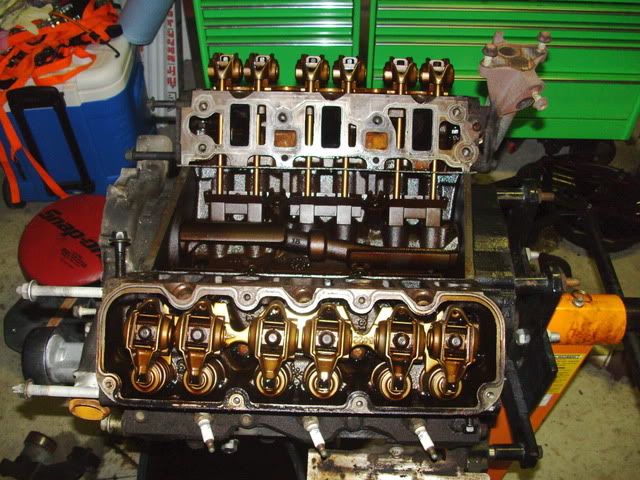
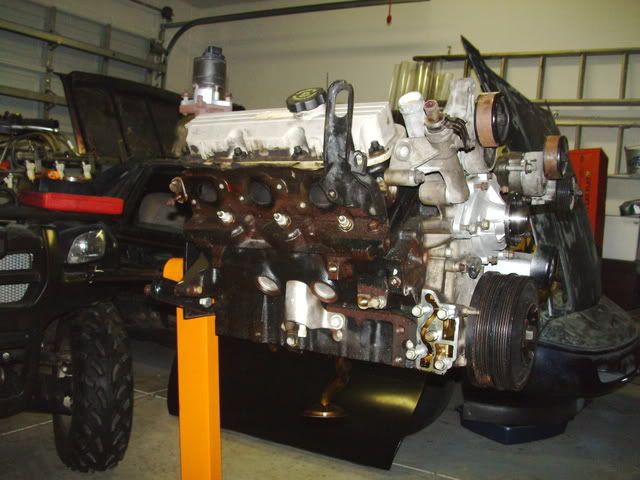
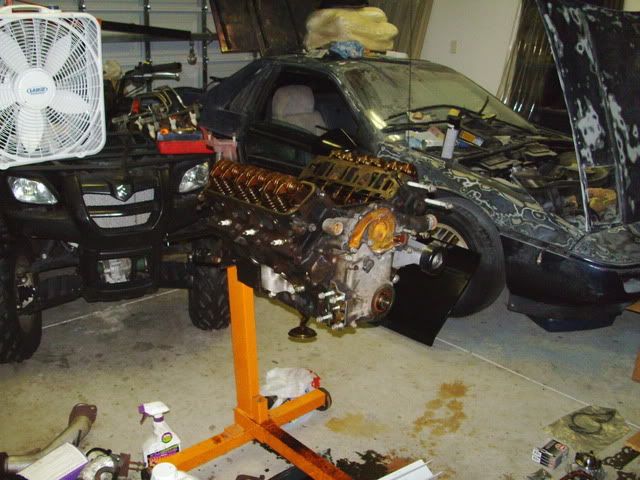
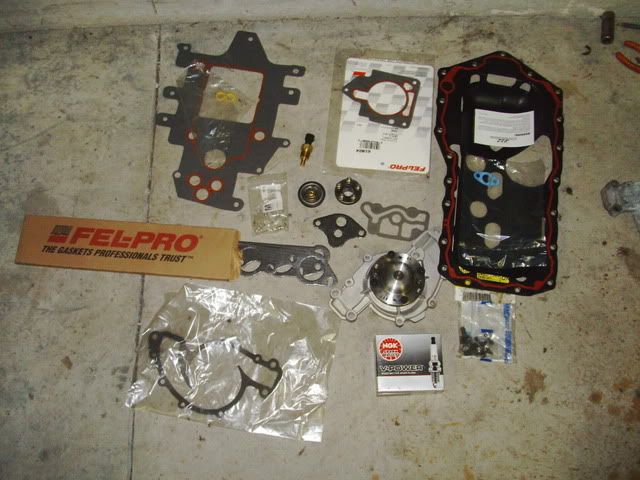
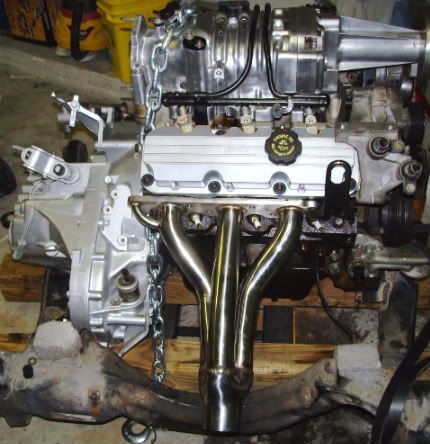
The engine all stripped down:
Some of the new gaskets, water pump, plugs, etc. that went into the "rebuild" of the motor. I really just resealed it as I had no reason to tear into the bottom end or anything.
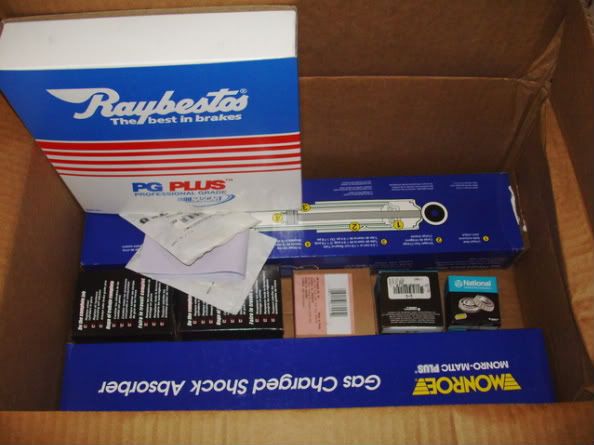
some of the other new parts that went into it, new shocks and struts (only shocks pictured) caliper rebuild kits, wheel bearings, e-brake cables:
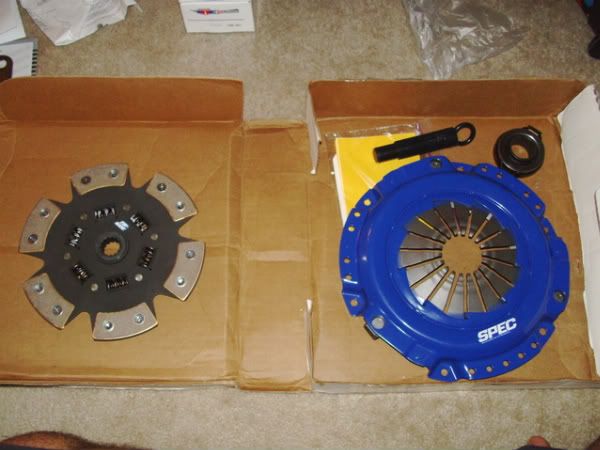
A Spec stage 3+ clutch:
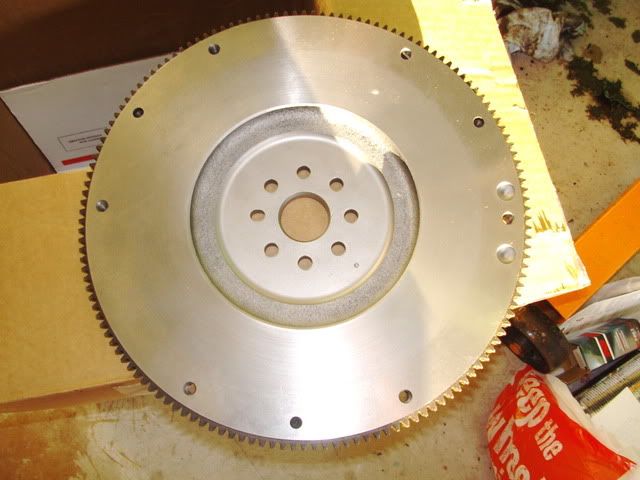
Camaro flywheel turned down and balanced:
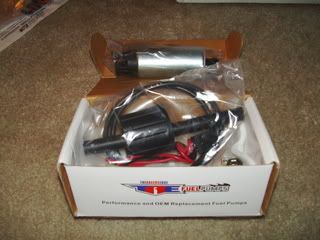
TRE racing fuel pump:
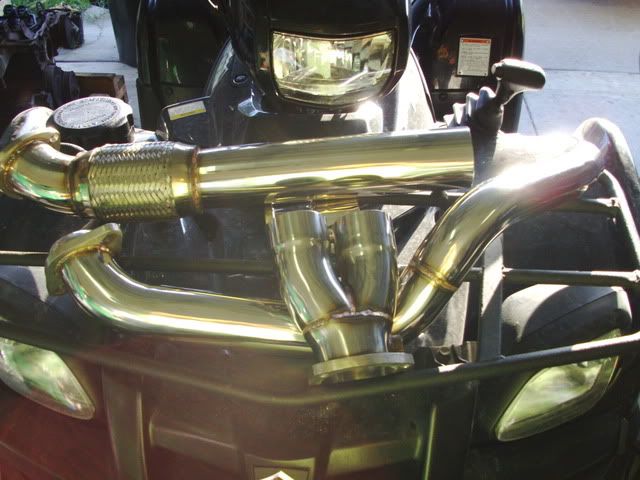
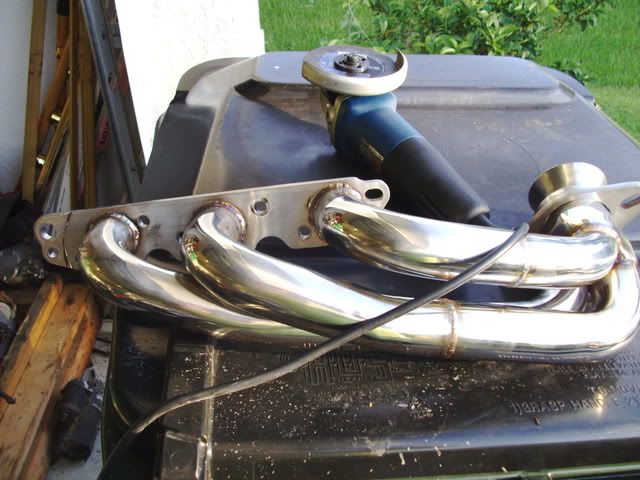
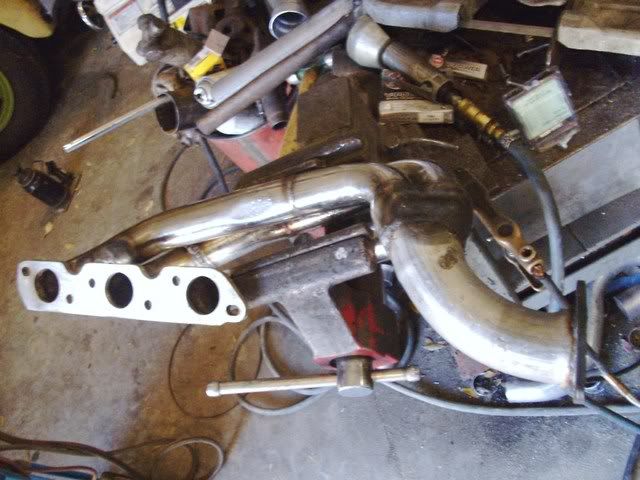
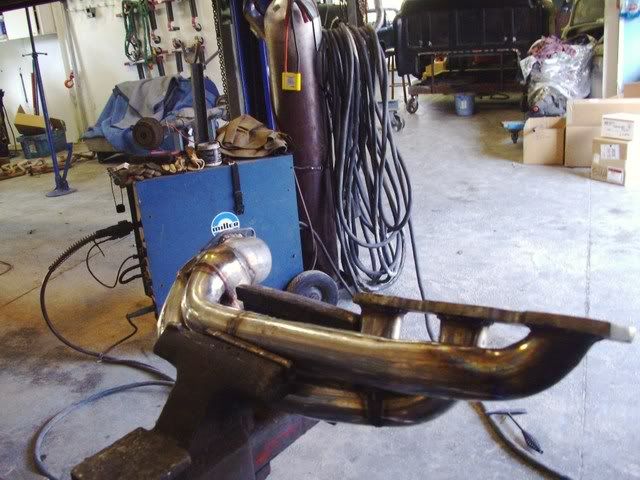
I also bought a set of Ebay OBX racing headers that didnt even begin to fit. I will splain later.
-Joe
Edit to add: the Fiero thats in the garage in the engine shots is not the same car, that is a whole nuther build thread coming, should be titled something like "my Northstar build thread".
[This message has been edited by joesfiero (edited 02-08-2010).]
IP: Logged
11:08 PM
PFF
System Bot
joesfiero Member
Posts: 2181 From: North Port,FL,USA Registered: Jan 2008
For the second part of the build, I wanted to renew the suspension.
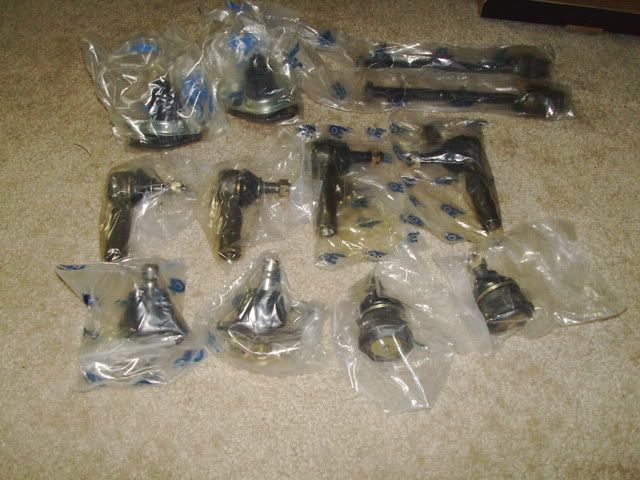
I bought all new ball joints, tie rod ends:
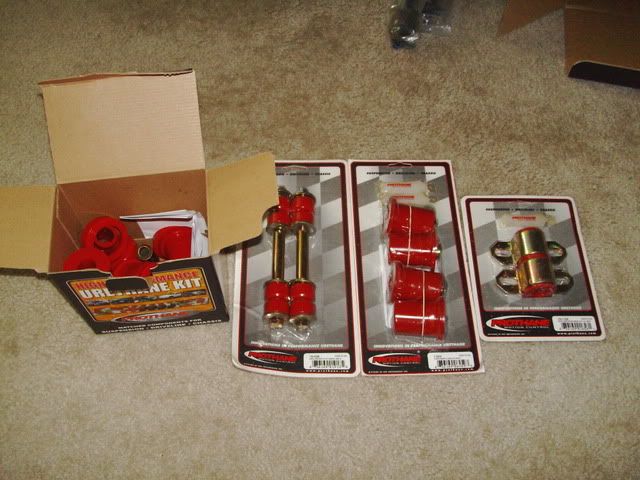
All poly bushings:
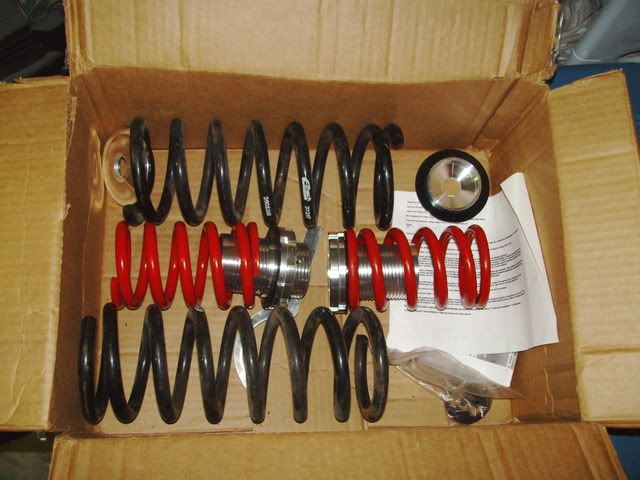
Rear coilovers and front Eibach lowering springs:
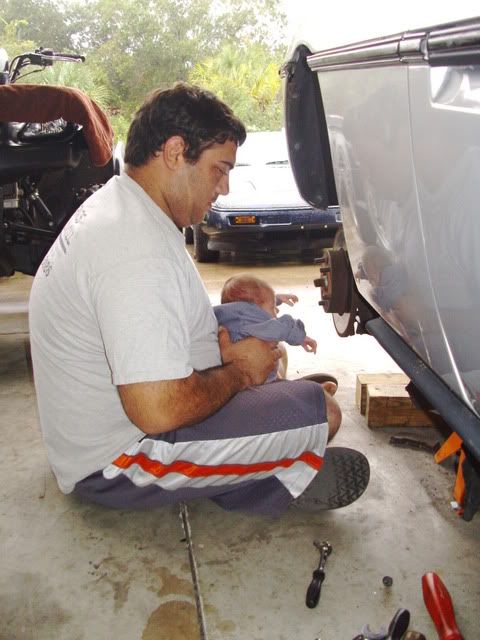
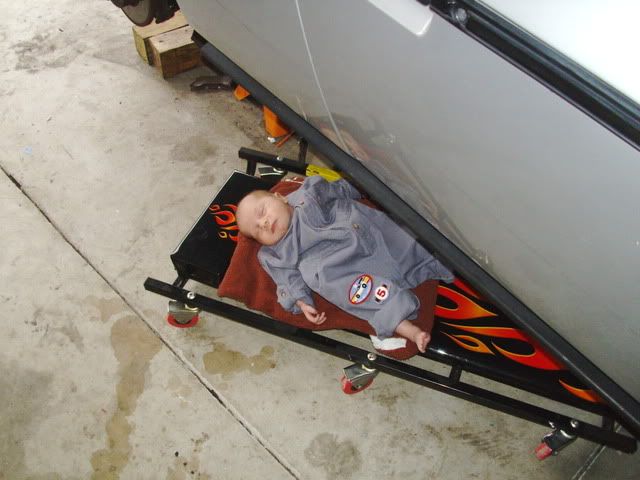
I posted these pics a while back when my girl was brand new, but here is my daughter helping me with the rear control arms:
taking the fuel tank out for me so I could install the TRE unit:
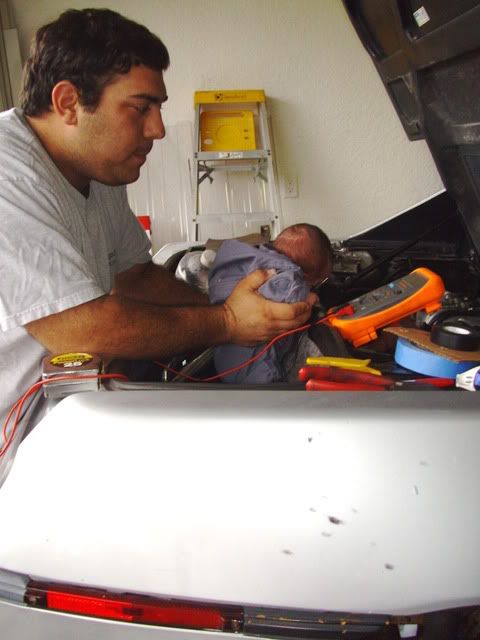
And helping me finish up the wiring:
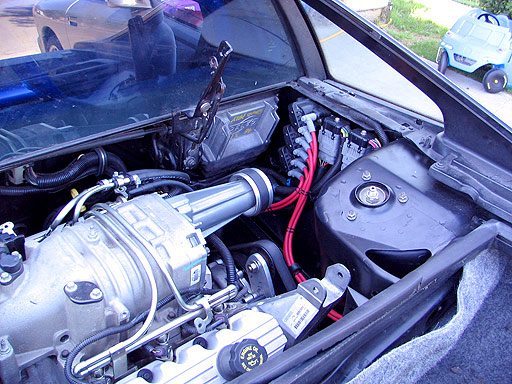
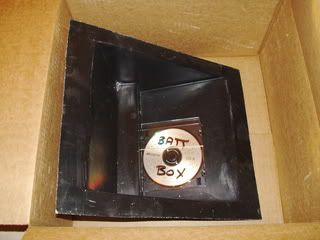
Back to the motor, I made my wiring harness from the Riviera harness, which is 2 pieces as the PCM is inside the car and a donor Fiero harness. I opted to mount the PCM and coil pack where the battery was much like Mcaanda did here:
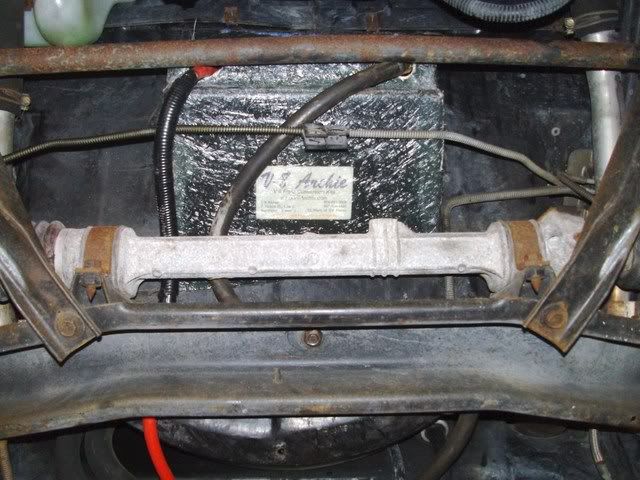
To do so I bought a battery relocation box from Archie shown here
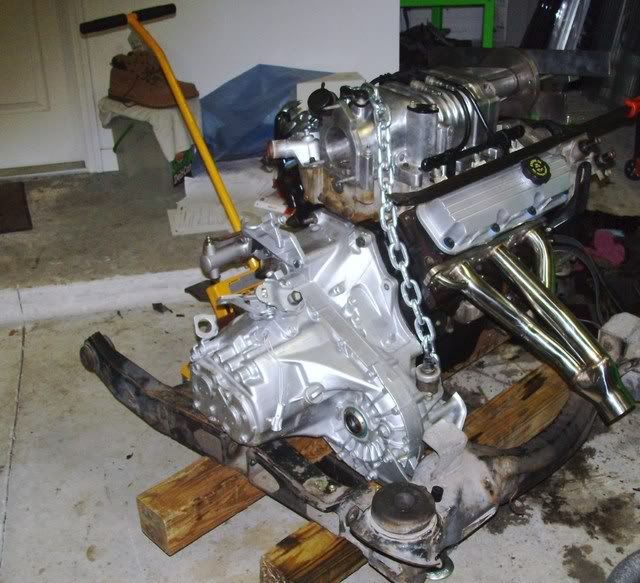
After that was done and the engine was back together, and clutch/trans installed I used a spare cradle to figure up my mounts. I used the stock trans mounts as well as the stock Fiero front engine mount with a bracket from a Trans sport minivan. I cut off the old perch on the cradle and welded some 1/4" steel angle to use as the new perch.
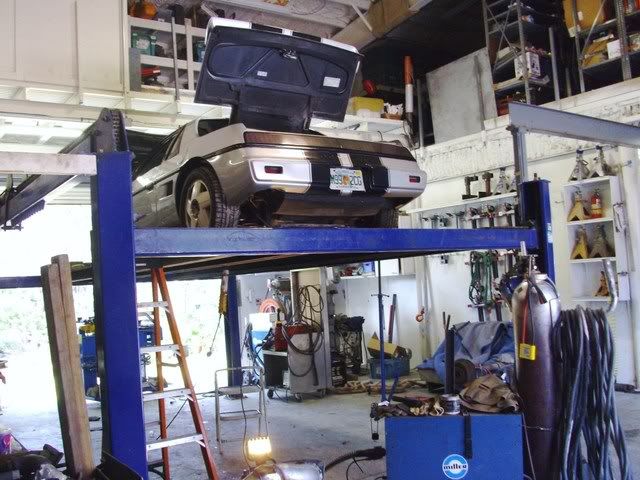
Here is the whole package as it sat semi ready to install on my ATV jack.
Thats it for now, I will have to finish this up after I take more pics of the engine installed. It is sitting in a warehouse right now awaiting some help from a friend who does exhaust work.
-Joe
IP: Logged
11:26 PM
Feb 9th, 2010
joesfiero Member
Posts: 2181 From: North Port,FL,USA Registered: Jan 2008
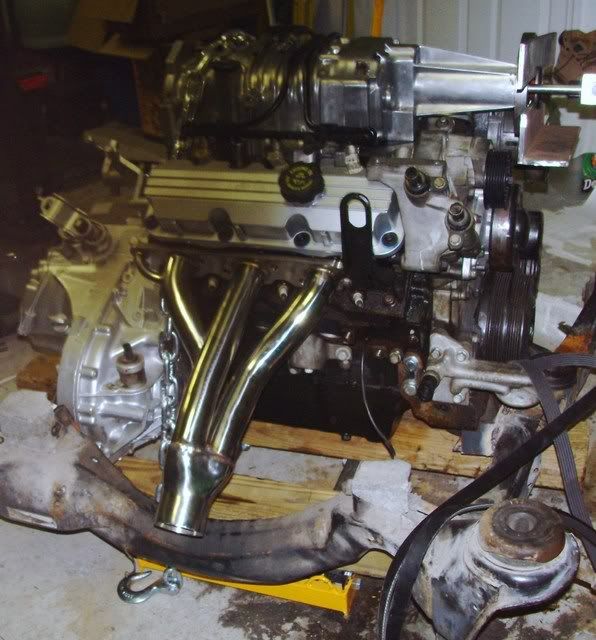
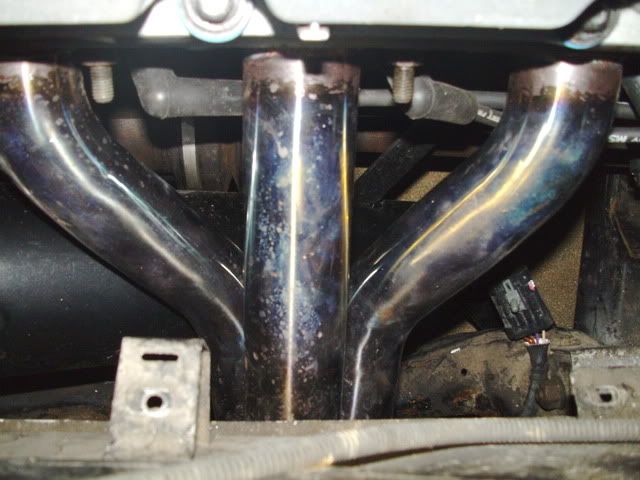
As for the headers, the first thing I noticed is that the cross over tube didnt bend anywhere near right to meet with the other header, I should have expected this. The way these are designed the crossover is SUPPOSED to end up right next to the rear header where a two way collecter ties them together. Since I have to modify the cross over anyway, I am really going to try making it a true dual exhaust. I will post pics as I get it to the shop and we work on the exhaust.
OBX also used the same mounting flange on both sides, so there was a spare EGR tube hole on the front side that got in the way of my SC tensioner bracket. You can see in this pic where I marked it ready to cut it off. You may also notice on my other pictures that I deleted the EGR so I will probably be cutting the other flange the same way.
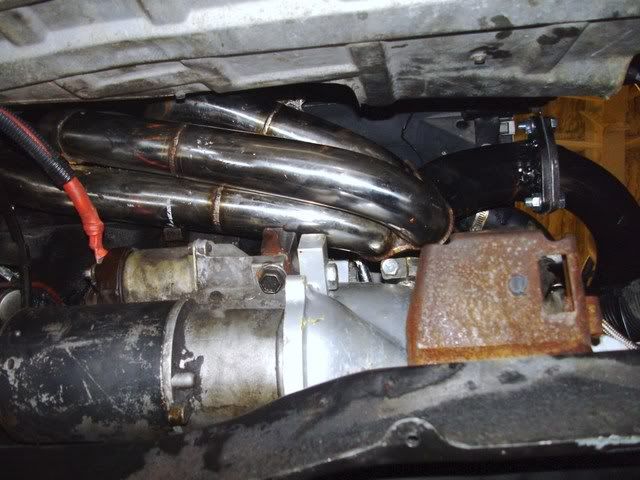
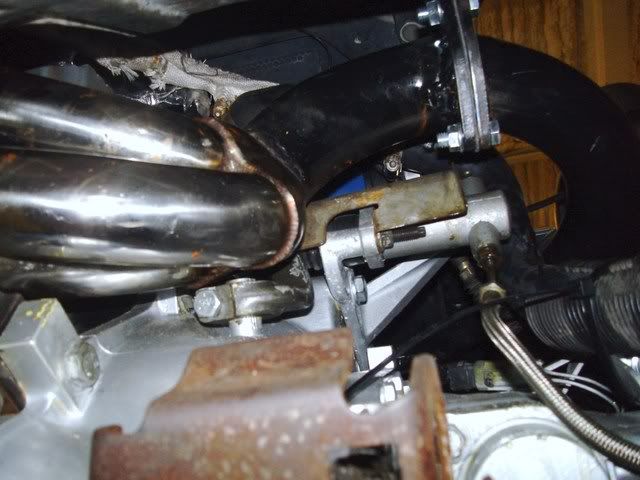
The other problem I have is the traditional slave cylinder in the way. To avoid repositioning the slave, I am going to try to modify the front header so the crossover can come out right above it and clear all the moving parts there. I bought one of Rodney Dickmans new aluminum slaves which looks very high quality, as well as a shifter cable and decklid strut for this swap.
The engine also has a 3.4 pulley on it right now with the MPS and I have a 3.25 to go on later once I get this setup tuned right and I am ready for it. I also bought a N* throttle body and 85mm MAF, colder plugs, 180 degree Tstat and MSD make-em-yourself 8mm plug wires. I feel that with the right tune, these mods will support the 3.25 but we shall see.
Anyone want to venture a guess what kind of HP I might be looking at with this setup? I think I can get well over 300 with the 3.4 but others who have actually dynoed their car please chime in.
-Joe
[This message has been edited by joesfiero (edited 02-09-2010).]
Looking good Please keep on posting, I am in the process of getting parts for my swap.
What bolts did you use to bolt the flywheel ? Can you tell me a little about the TRE fuel pump ? I never heard about it How much did you pay to have your flywheel balanced ? where did you get your rear coilovers from ? How are you going to be mounting the alt ? any pics ?
Are you coming to Daytona
Thanks for any info
PS are you the one who's wife is very cute with long dark hair ? she took some pics by Troys chop top. If you are I think I met you in Daytona.
Looking good Please keep on posting, I am in the process of getting parts for my swap.
What bolts did you use to bolt the flywheel ? I used flywheel bolts from a 3800 Camaro. I bought them new because it is recommended not to reuse them.
Can you tell me a little about the TRE fuel pump ? I never heard about it Its another option for a 255LPH fuel pump. Most people complain about the loud whine of the Walbro units and this was cheaper and supposed to be whisper quiet. For the few times I heard it when I primed the pump it sounds like the stock Fiero one. I bought this on Ebay.
How much did you pay to have your flywheel balanced ? I obtained the flywheel already cut and balanced. I know that a machine shop should charge no more than $50-75 to do the work.
where did you get your rear coilovers from ? Again, Ebay. I bought the MK1 coilover kit for the Fiero and it seems to be working out. Ride height is just where I want it and I can adjust a few inches lower.
How are you going to be mounting the alt ? any pics ? I have the alt. mounted in the stock high location. I had my reasons that some may not agree with. I had to cut the decklid a bit to clear it but I am happy with the outcome. I will have pics soon.
Are you coming to Daytona Short answer is yes. I have submitted my vehicle registration and booked the hotel for Friday and Saturday nights. Of course like anything else I dont like to fully commit in case something catastrophic happens. With any luck the car should be running well enough for the show. I dont know if I could bear showing up if the car wasnt able to make it. I know I would miss alot but I would be heartbroken not being able to show all the hard work I have put in the past 6 or 7 months.
PS are you the one who's wife is very cute with long dark hair ? she took some pics by Troys chop top. If you are I think I met you in Daytona.
Boy that is awkward, I am pretty sure its not me but I think I know who you are talking about.
You arent talking about last years show are you? That is the first and only show I have attended and I dont recall seeing Troys chop top. You arent confusing Randye's car are you?
Randy, thanks! It has been a long time coming and I will post pics soon of the almost completed swap. It is in the car and almost everything is hooked up, just awaiting exhaust and a first startup. I should be able to snap a few shots tomorrow.
-Joe
[This message has been edited by joesfiero (edited 02-09-2010).]
IP: Logged
04:20 PM
joesfiero Member
Posts: 2181 From: North Port,FL,USA Registered: Jan 2008
I wanted to start a post to document all the parts I bought and vendors I used for future searchers. Theres no way I can remember all the prices so I will leave those out, plus if I had them all here on one page I would be tempted to add up the cost and then I would be crying for a day or so. I will keep all the information in this post so I will edit it regularly as I remember stuff, and continue to buy new crap that I dont need.
Engine swap parts: OBX racing headers bought on Ebay for GTP. They arent showing them on the website, but like I said I wouldnt recommend anyone buying them unless you want to do extensive work. I also bought an Accsy belt tensioner bracket/heater hose debacle because mine was shot and my flywheel from ebay.
From Rodney Dickman I bought my decklid strut kit (not necessary for the swap but mine wouldn't stay up without a prop stick) as well as his new aluminum getrag slave and select cable.
From ZZP I got several of my engine gaskets, my spark plugs, tsat, 85mm MAF connector, SC snout bearings, seal, and oil, and a new balancer bolt.
Auto zone or Carquest supplied coolant, small misc. bolts here and there, some solder and electrical tape, intake pieces, plug wires, and coolant hoses.
I also sourced many parts from PFF members here in the mall: A new shift knob, transmission cable bracketry, shift cable, I got my ported and polished supercharger from a member here, 88 2.8l oil pressure sender to feed the gauge, C6 exhaust tips, a couple connectors that were missing from my harness, and a couple small odds and ends.
Thank you very much for all the info and + for being helpful I will be following your build closely.
How many mounting points will you be using on the eng ? What mounts are you using ? If you can would you please post some pics. Are you going to be using a dog bone on top ? I asked because you stated that you will be mounting the alt in the stock location.
PS I did not mean any disrespect about your wife What I said I meant it as a complement
IP: Logged
09:55 PM
Richy Junior Member
Posts: 5 From: Bakersfield, Ca, usa Registered: Jan 2010
Dude thank you sooooo much for your build info. Last week I purchased a 3800 sc off of craigslist that i'm going to run behind an 85 Fiero 4-speed in my sandrail. Got the motor for a steal. $500.00 with about 60k on it. The complete engine harness and all the sensors are there. The casting numbers tell me it is a 1993. I have no other info to go on other than that. I still need an ECM but not sure where to get on. Your ZZP link is where I may start. Does anyone know of someone who offers custom ECM's because I don't need half of the crap on the motor. Thanks..
IP: Logged
10:43 PM
Feb 10th, 2010
joesfiero Member
Posts: 2181 From: North Port,FL,USA Registered: Jan 2008
Thank you very much for all the info and + for being helpful I will be following your build closely.
How many mounting points will you be using on the eng ? What mounts are you using ? If you can would you please post some pics. Are you going to be using a dog bone on top ? I asked because you stated that you will be mounting the alt in the stock location.
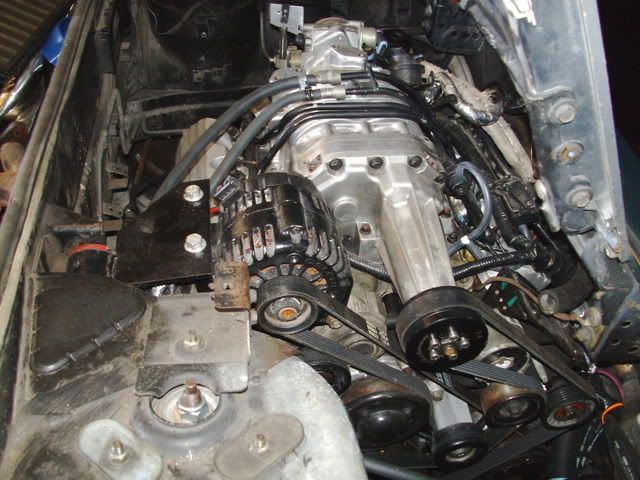
No problem, on the engine itself I will only be using two mounting points plus the two on the trans for a total of 4. The engine has the bottom center mount very similar to the original Fiero one, even uses the Fiero rubber mount and then I have made a custom mount up top to act as a stabilizer/torque mount that uses the dogbone mount point on the trunk. I "borrowed" the design from JimmyS's car shown here: Thats Jimmy's motor and you can see the Steel plate uses the alt. mounting bolts to attach to. I will snap some pics of mine soon, I am heading over there in a half hour or so.
quote
PS I did not mean any disrespect about your wife What I said I meant it as a complement
LOL, I know what you meant. I didnt say my wife isnt cute, just that it wasnt her in the picture.
quote
Originally posted by Richy:
Dude thank you sooooo much for your build info. Last week I purchased a 3800 sc off of craigslist that i'm going to run behind an 85 Fiero 4-speed in my sandrail. Got the motor for a steal. $500.00 with about 60k on it. The complete engine harness and all the sensors are there. The casting numbers tell me it is a 1993. I have no other info to go on other than that. I still need an ECM but not sure where to get on. Your ZZP link is where I may start. Does anyone know of someone who offers custom ECM's because I don't need half of the crap on the motor. Thanks..
A 1993 motor is going to be a series one with a different SC, it is easily identifiable with the shorter snout. DarthFiero may be the one to contact for help as he tunes those I believe. He has helped me out with my build and is very knowledgeable.
More pics to come soon...........
-Joe
IP: Logged
02:36 PM
joesfiero Member
Posts: 2181 From: North Port,FL,USA Registered: Jan 2008
I stopped by the warehouse where the car is today and snapped some new pics.
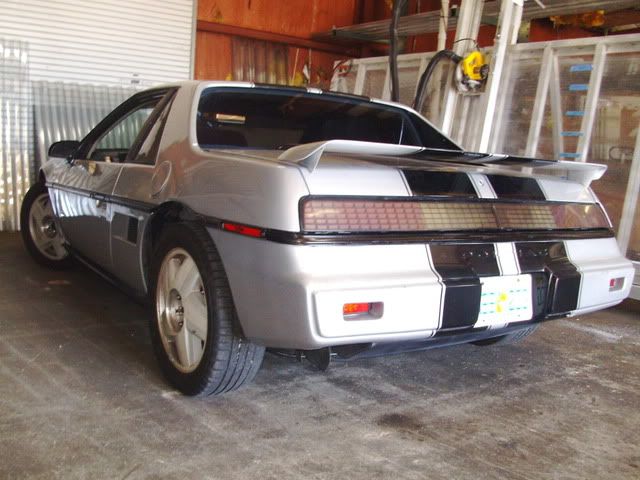
The car as it sits, the stance will probably get a little lower after I drive the car and the suspension gets a chance to settle in.
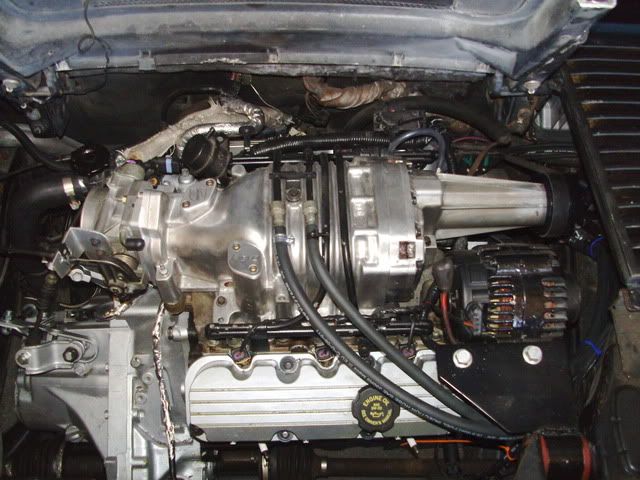
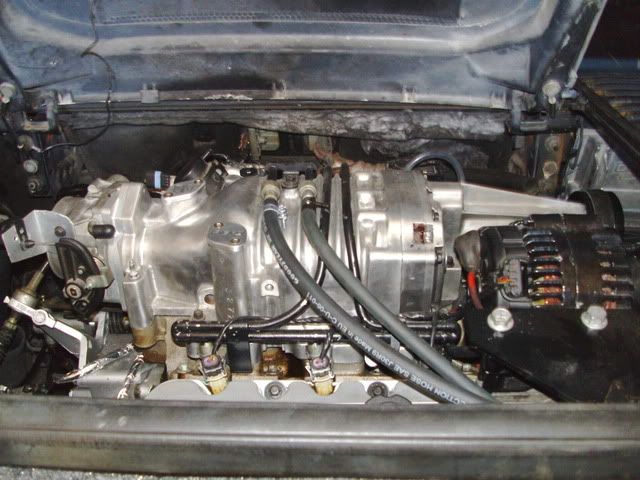
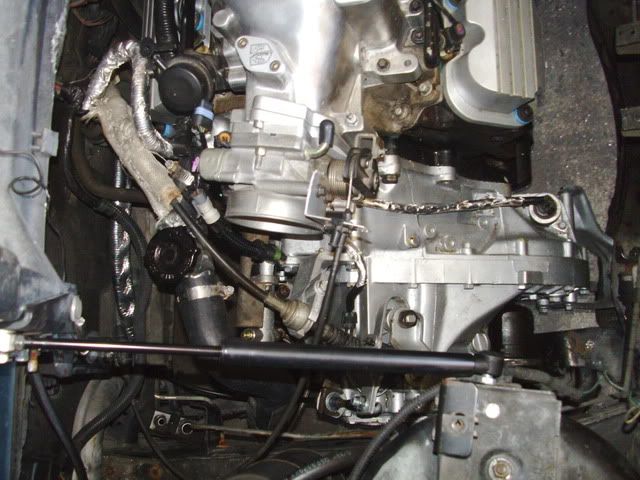
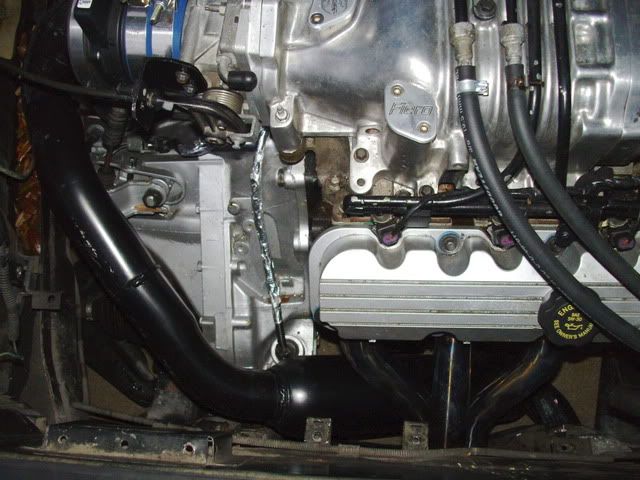
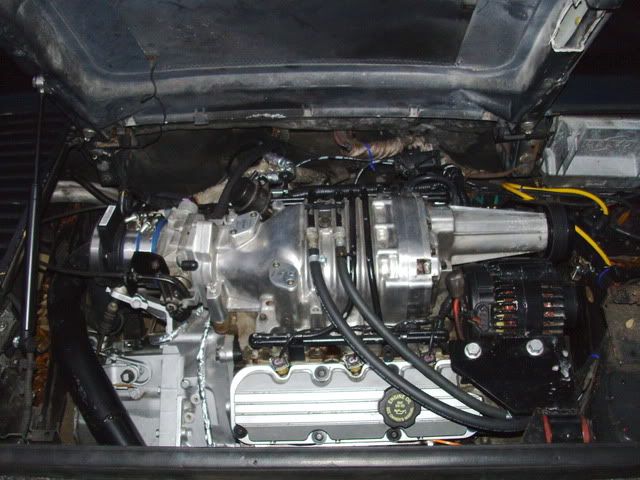
The motor in the engine bay, these pics show real good shots of the dogbone mount that I fabricated, very similar to the one on Jimmy's car. The only thing I wish I would have done while assembling the engine was paint or at least really clean the LIM and tensioner bracket/alternator mount. They kind of stick out like a sore thumb in these pics with the flash, but dont look that bad in person.
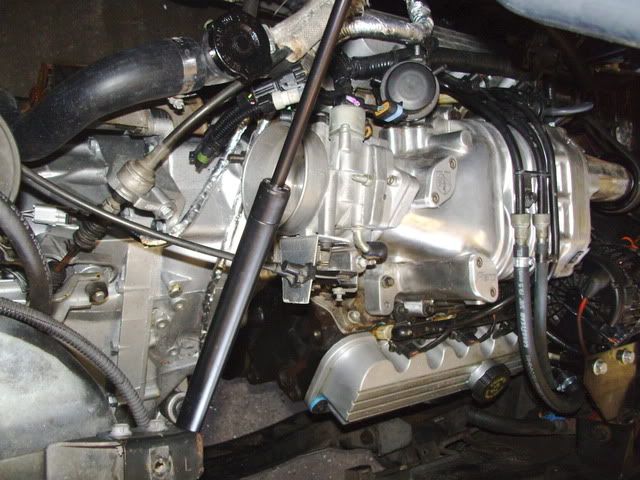
A good shot of the huge N* throttle body, coolant fill point and Rodney's decklid strut. You can also see the throttle cable bracket I made, but it is a bit too light of a gauge, I will probably remake it soon in 1/8" aluminum.
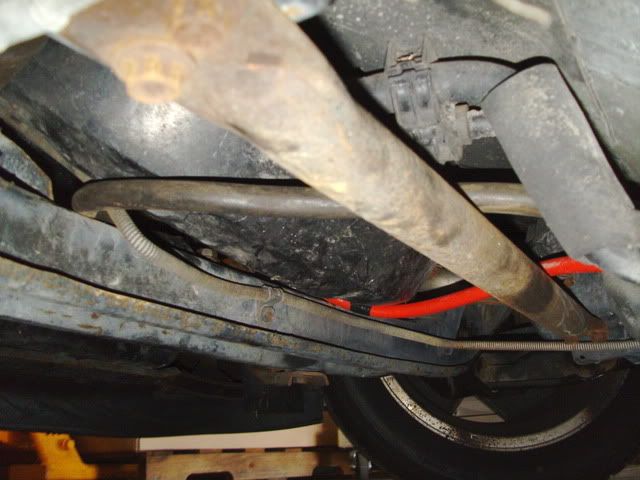
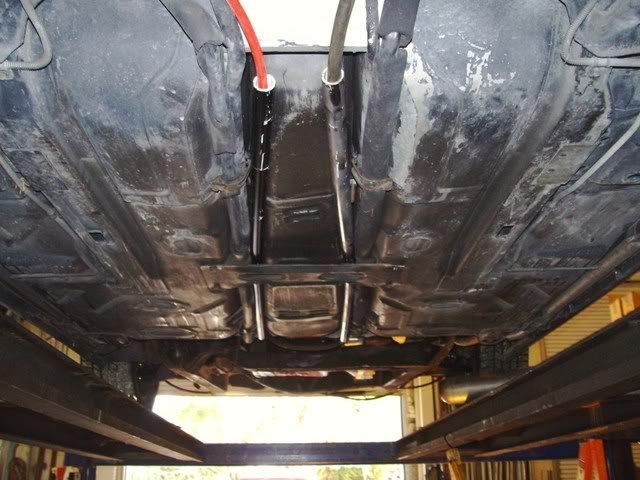
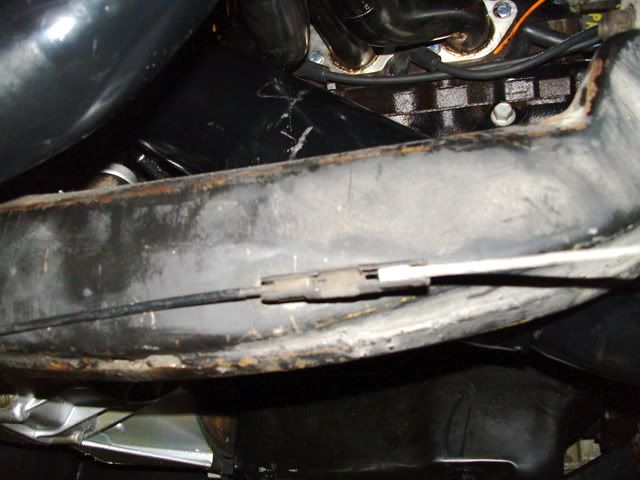
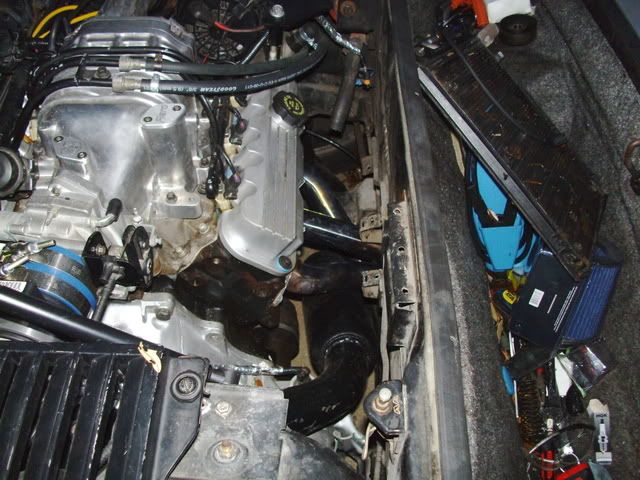
This pic is the front of the car, where my battery cables go to the box. I ran PVC pipe along both sides of the gas tank to house each wire and keep them safe against road junk. In this pic the PVC is just to the right. If you look just below the spare tire tub, and just above the brake line you can barely see a bolt head in there. That is where the neg. cable comes from the battery and bolts to the frame. From there, the neg. cable that runs to the engine also uses the same bolt so the car should be very well grounded. In essence, the two cables are bolted together and to the crossmember.
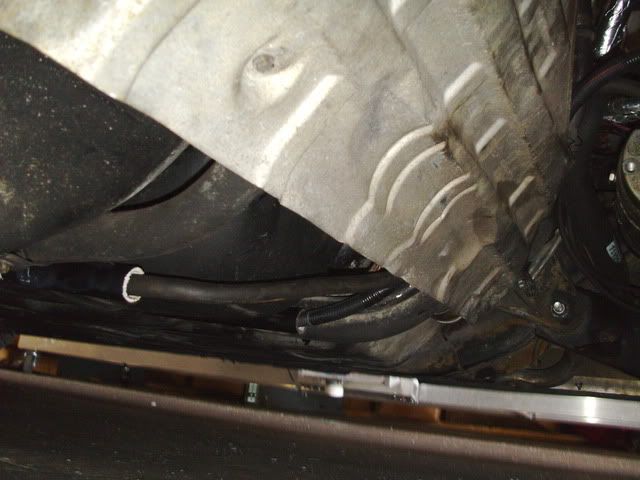
And here is the rear where the cables exit the PVC pipe and sneak behind the heat shield and continue to the engine.
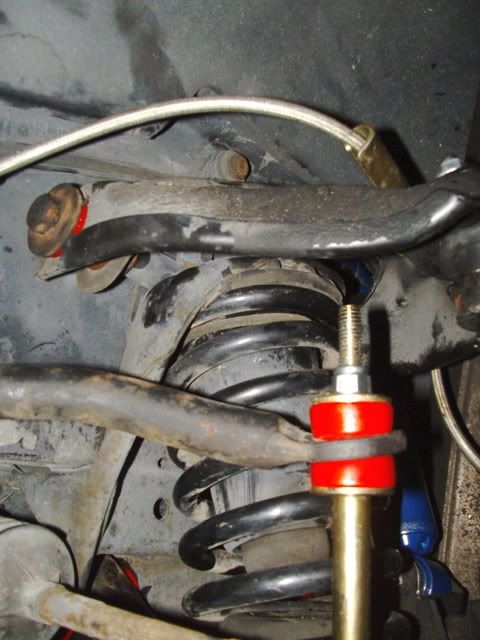
A shot of a coilover (you can also see the new strut) as well as some shots of both sides of the front suspension rebuilt.
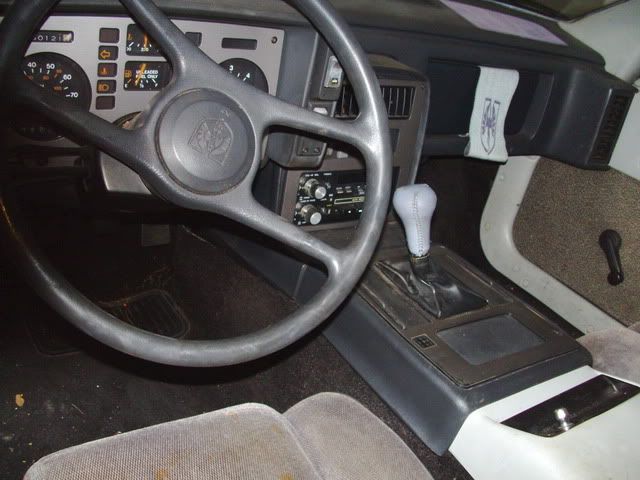
And finally the interior, its not the nicest or the cleanest, but it has new carpet, a real nice new leather shift knob, and an almost perfect unwarped rear center console. Hopefully in the near future, some Mr. Mikes seats as well.
Thats all for now.
-Joe
[This message has been edited by joesfiero (edited 02-10-2010).]
IP: Logged
10:30 PM
PFF
System Bot
Feb 11th, 2010
joesfiero Member
Posts: 2181 From: North Port,FL,USA Registered: Jan 2008
Looks like Tuesday the 23 of Feb. for the exhaust work according to my buddy. He likes the idea of going with a true dual, so we will try first to get some small straight through mufflers and see what it sounds like.
-Joe
IP: Logged
03:02 PM
darkhorizon Member
Posts: 12279 From: Flint Michigan Registered: Jan 2006
Try to find something with chambers and resonators, the loud annoying drone will get old real fast. The quieter your exhaust is the louder your winey little supercharger will be.
The dual exhaust isnt because I think it will sound better than a simple single exhaust. As I stated in the build thread, the headers I have dont even come close to coming together where they are supposed to without extensive cutting and rewelding. My friend that does exhaust and I think it will be easier to make it dual than to bust our butts to get them to merge. The other thought if this sounds worse than it should, is to get a 2 in 2 out muffler and merge them that way. I know they wont do much but I also have those C6 tips with the resonators in them.
The dual exhaust isnt because I think it will sound better than a simple single exhaust. As I stated in the build thread, the headers I have dont even come close to coming together where they are supposed to without extensive cutting and rewelding. My friend that does exhaust and I think it will be easier to make it dual than to bust our butts to get them to merge. The other thought if this sounds worse than it should, is to get a 2 in 2 out muffler and merge them that way. I know they wont do much but I also have those C6 tips with the resonators in them.
-Joe
Those same headers where supplied for the last swap I did for Norsac on here. His set had the same issue and where way off. He was able to return them for a refund and we went with PS headers(nightmare also). Should not be to hard to make a dual exhaust for the headers if you have someone with a pipe bender that can weld. With no more MODs then you have atleast if all else fells then you can go with stock manifolds.
IP: Logged
05:34 PM
Feb 14th, 2010
joesfiero Member
Posts: 2181 From: North Port,FL,USA Registered: Jan 2008
Those same headers where supplied for the last swap I did for Norsac on here. His set had the same issue and where way off. He was able to return them for a refund and we went with PS headers(nightmare also). Should not be to hard to make a dual exhaust for the headers if you have someone with a pipe bender that can weld. With no more MODs then you have atleast if all else fells then you can go with stock manifolds.
I figured mine werent the only ones out there that didnt fit. I would return them, but I already started cutting the flanges off the headers to modify them that way. The way I have it figured out, I should be able to pretty easily make that dual exhaust and still retain the trunk. Im going for the simplest design possible right now. If it goes according to plan, Ive got the front header with the crossover on the left, and the rear header on the right, One goes one way and the other goes the other way, nice and simple. I will post some pics as we get it done.
-Joe
IP: Logged
08:55 AM
PFF
System Bot
nosrac Member
Posts: 3524 From: Euless, TX, US Registered: Jan 2005
I figured mine werent the only ones out there that didnt fit. I would return them, but I already started cutting the flanges off the headers to modify them that way. The way I have it figured out, I should be able to pretty easily make that dual exhaust and still retain the trunk. Im going for the simplest design possible right now. If it goes according to plan, Ive got the front header with the crossover on the left, and the rear header on the right, One goes one way and the other goes the other way, nice and simple. I will post some pics as we get it done.
-Joe
I can't believe that they are still selling Headers they know have fitment issues....Makes me wonder what kind of shop they are running.... it gives ebay purchases a bad taste in your mouth. However, they seemed apologetic over the phone and gave me a refund after their 30 day return period but I still had to pay to ship them back.
[This message has been edited by nosrac (edited 02-14-2010).]
Originally posted by nosrac: I can't believe that they are still selling Headers they know have fitment issues....Makes me wonder what kind of shop they are running.... it gives ebay purchases a bad taste in your mouth. However, they seemed apologetic over the phone and gave me a refund after their 30 day return period but I still had to pay to ship them back.
He may have had his headers for a while and are from the same run you got yours from. But them again they may just be still making bad headers.
IP: Logged
10:09 AM
katore8105 Member
Posts: 1519 From: Upstate NY US Registered: Dec 2009
Actually, my headers are fairly "new" as in I bought them in Sept. 09. That doesnt mean that they werent made in the same run as yours, they may have just been on the shelf for a while not realizing they were made wrong. Of course thats where quality control should have come into play.
I thought $300 for some nice 304SS 3/8" flange polished headers was too good to be true. Thats like half the price of other decent headers for these motors.
-Joe
IP: Logged
03:08 PM
Feb 23rd, 2010
joesfiero Member
Posts: 2181 From: North Port,FL,USA Registered: Jan 2008
Pretty big update here, the exhaust is done and looks quite good IMO. I brought the car to my friend Aaron's house this morning and between fitting the headers, making the exhaust, working on a 69 Charger with a 440 six pack (wouldnt build oil pressure, turns out there was an old rag in the pan) and a few other minor things, it all got done at about 9:30 PM. It seems like a long time but we really only spent about 4 hours total on the exhaust. The biggest part was fitting those stupid headers I mentioned earlier, man what a pain they were. Im glad to have been able to work with someone that has all the right equipment because if I attempted this in my garage I would have given up and put the stock manifolds on.
Either way, it is a true dual setup using two long turbo mufflers that look like glasspacks, but they have chambers. The rear header fits beautifully, we didnt have to mess with the trunk and its a nice simple design. The front one though, we ended up not going over the trans like stock and opted to go more towards the framerail with the pipe. There were two reasons for this, one being the header simply would have taken way more work to go that route, as it was we spent enough time on it to piss me off and two, we needed to be against the LH framerail for the other muffler to fit where it went, its pretty long. We actually had to tilt it downward right behind the axle and come out the passenger side notch in the cradle. All in all I am happy at the moment. I havent heard it run yet but I am anxious to see what it sounds like, other than that it looks great from the rear of the car, none of the exhaust hangs too low and the tips are perfect.
I will be posting pics very soon.
-Joe
IP: Logged
11:42 PM
Feb 24th, 2010
doublec4 Member
Posts: 8289 From: Oakville, Ontario, Canada Registered: Jun 2003
First, some more under car shots, this one you can see the PVC pipe I used to protect the battery cables by the gas tank.
A little under car advertisement?
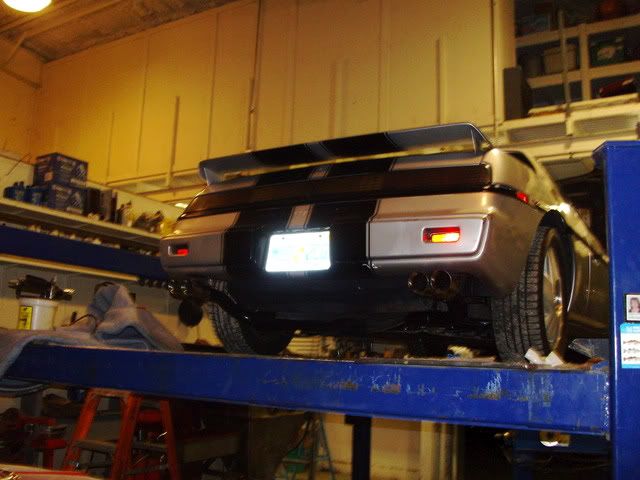
Ready for action
I dont currently have any good shots of the rear header and exhaust as it sits on the car, but here it is finished right after paint.
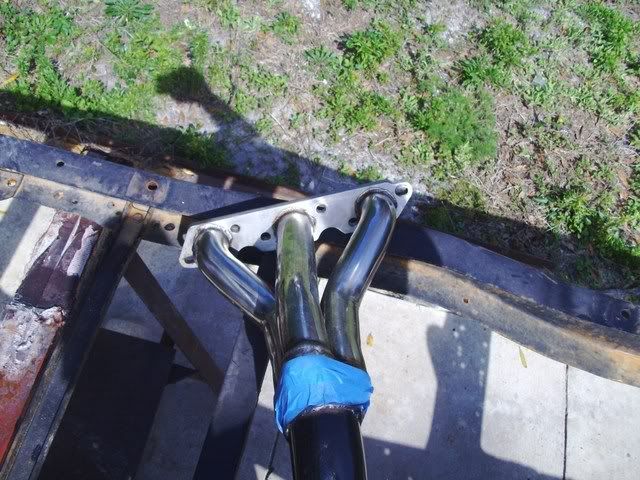
The front header in progress
Front header fitted. You can see what I mean about going around the slave towards the framerail.
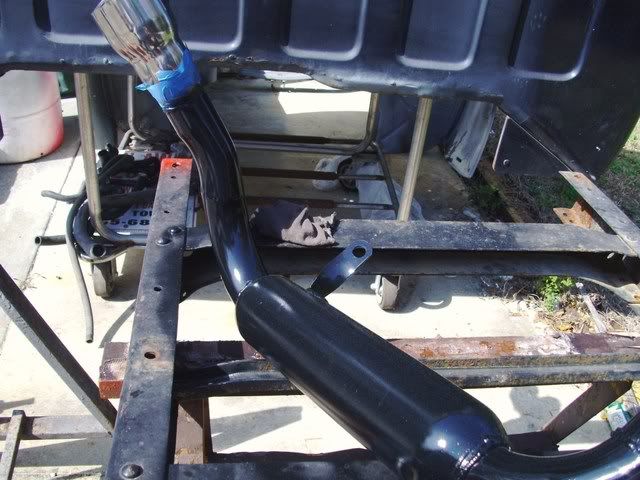
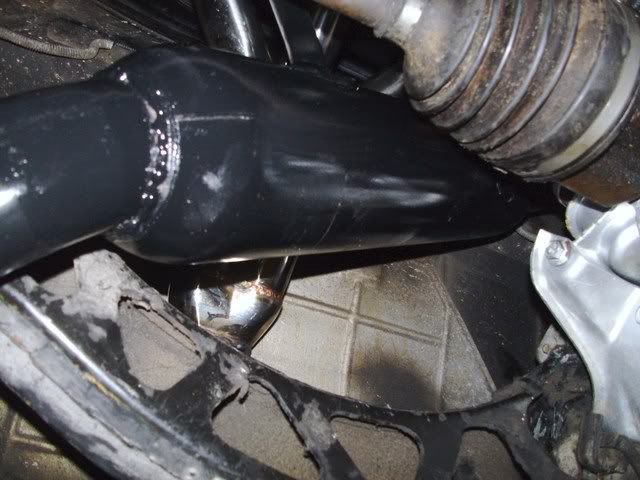
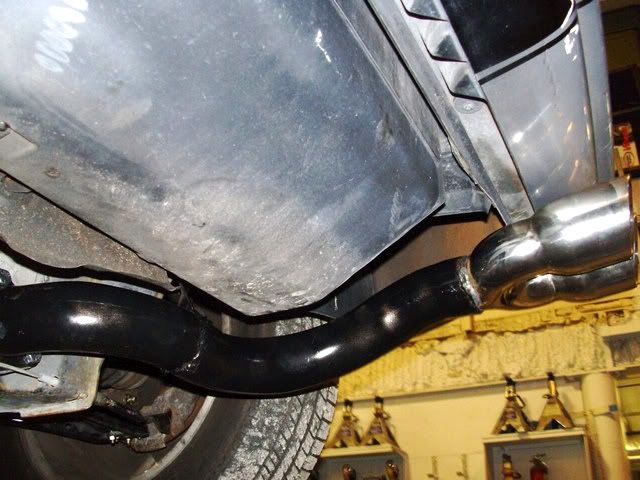
Here is the muffler for the front header, you can see how it tilts from up high on the drivers side to down low by the cradle on the pass. side.
Another crappy shot at it, you can barely make out how it crosses under the rear header.
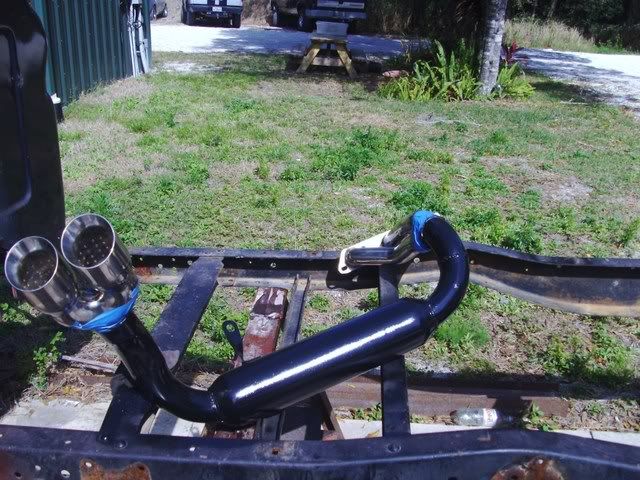
Front outlet
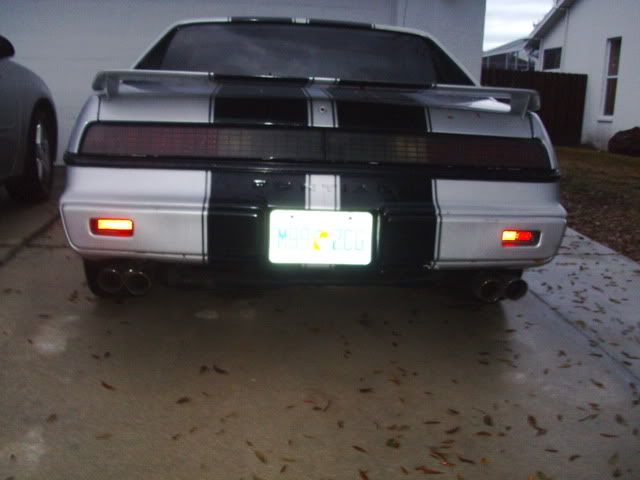
And how the car sits now
I did realize that I need to get a few more shots of the exhaust. I want to get a few from the top of the engine compartment and some better shots of the way the pipes snake around. I go to start the car for the first time (hopefully) on Friday so I will try to get a video and those new shots then.
-Joe
[This message has been edited by joesfiero (edited 02-24-2010).]
IP: Logged
11:55 PM
Feb 26th, 2010
joesfiero Member
Posts: 2181 From: North Port,FL,USA Registered: Jan 2008
As scheduled I went back to the shop to start her up for the first time today. One of my main concerns was building oil pressure, these motors have a tendency to lose their prime and it can be difficult to re prime it, plus I had my oil pan off for a while so I figured it was for sure gone. Disconnected the injectors and IM, cranked for a while then reconnected, did some final checks and cranked to start for the first time.........
Guess what? Fired right up. It missed for a couple seconds but quickly cleared up and idled nice and smooth. After checking and rechecking everything I could think of on top and bottom, I decided it was time for a little drive. The exhaust is a bit loud, but not as loud as I thought it was going to be. It has a very slight drone to it when cruising but its not raspy, nor does it sound as *scatter-y* to me as most other 3800s that I have heard. I dont know if thats a result of the mufflers we used, the dual exhaust, or both but I am happy.
For the first 15 minutes or so the car ran great. I am breaking the clutch in properly so no hard launches, nothing over 50% throttle yet. Also, I am running on a completely stock 99GTP tune as of yet. I have the N* MAF as well as the other mods I have listed so after warming up and driving it a little bit, the PCM started to act up and it ran rich and has a random miss. Those issues as well as a few other minor things need to be addressed soon, hopefully this weekend.
I will try to post more pics and a video of the exhaust note soon.
-Joe
IP: Logged
09:43 PM
darkhorizon Member
Posts: 12279 From: Flint Michigan Registered: Jan 2006
MAF tables and deleted DTCs imported today. Runs better now, still has a miss so Ill need to figer that out soon. Also yesterday the alt. wasnt charging. I checked it again this morning and it still wasnt charging but after reflashing the PCM it is charging now. I have the L terminal going through the PCM but I think I am going to get rid of the PCM controlling it and just hardwire it to the C500 charging light wire.
Another thing I noticed today is the huge difference in exhaust notes between the two sides. standing in the back of the car you cant tell, but if you get your ear closer to one side than the other you can hear it. I also think the miss is on the front bank because I can only hear it on that side.
The car is at my in-laws house because it was close to the shop and my house is 30 minutes away. For obvious reasons I want to get the car running right before I bring it home, so videos will have to wait a little.
I was going to scan after work, but forgot to bring my laptop with me. I have a strong suspicion that performing a CASE learn may help/fix it. On some cars when they set the P1336 I believe it is, you will get random misfires and I have even seen cases that were very severe and the CASE learn solved it. I know it needs to be done, so that is step one for me.
-Joe
IP: Logged
12:11 PM
darkhorizon Member
Posts: 12279 From: Flint Michigan Registered: Jan 2006
I was going to scan after work, but forgot to bring my laptop with me. I have a strong suspicion that performing a CASE learn may help/fix it. On some cars when they set the P1336 I believe it is, you will get random misfires and I have even seen cases that were very severe and the CASE learn solved it. I know it needs to be done, so that is step one for me.
-Joe
All a case learn does is give the PCM the ability to read misfires and or knock... it doesnt actually prevent it.
The reason for misfires may be from a different commanded timing.
IP: Logged
11:42 PM
Mar 2nd, 2010
joesfiero Member
Posts: 2181 From: North Port,FL,USA Registered: Jan 2008
Not trying to start anything here, but not performing the CASE learn does have an impact on the way the PCM reads the crank signal and can cause misfires. Every car handles it differently, Ive seen some where the car runs perfect and some where the car barely gets out of its own way because of misfires due to the not having the CASE learn.
However, I know that this may not be the only problem, the timing may be an issue. Just that CASE learn is step one and well go from there.
-Joe
IP: Logged
08:44 AM
Mar 12th, 2010
joesfiero Member
Posts: 2181 From: North Port,FL,USA Registered: Jan 2008
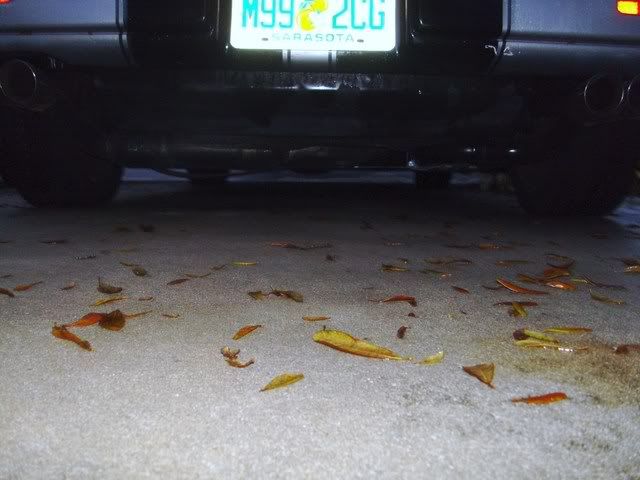
Bumping this back up with some new pics. These are some better shots of the exhaust and how its routed.
I havent driven it much, still working out a few bugs. I also need to take it to my buddys shop so I can align it, I have it real close it tracks straight and the wheel is even straight, but I am an alignment nazi, everyone I do HAS to be perfect. You can see some scratches on the exhaust paint, some leaves and dust all over the engine compartment and some other ugly stuff that needs attention that will probably be taken care of soon.
Also, I still need to make the rest of the intake to mount the filter in the original place, get rid of those ugly clamps on the MAF coupler, redo the fuel lines with braided ones and nicer fittings, etc. etc. It all will probably not be done for Daytona, but I plan on trailering the car there and only driving it very little onto the track and back so its technically ready to go. I have very few days to do anything to it and today when I had some time, it rained the whole day so that went out the window.
Looking good--But take the fuel rail connection, cut the center piece that bolts to the SC and use a tube bender to bend them torward the firewall. This gets them off the SC and put your fuel lines in the rear of the swap. It will clean the top up a little more and make it look better.
IP: Logged
10:44 PM
joesfiero Member
Posts: 2181 From: North Port,FL,USA Registered: Jan 2008
Thanks, thats pretty much where I want to go with them, but I need to find a good place to route the lines back there because theres a lot of stuff going on there now. I dont want to clutter up one area too much but at the same time, I want to keep the top of the motor clean too. I have time, these work for now until I figure it out.