I have been working on my swap for a few weeks now....Thought I'd better start a thread about it before I'm finished.
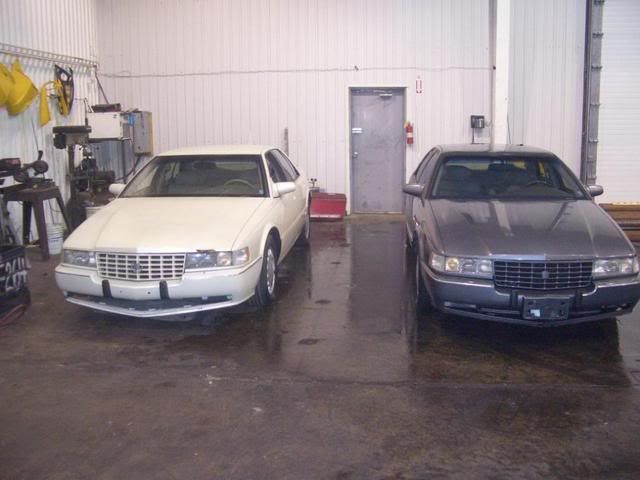
Started out buying a '93 and a '94 STS....pulled the motor and everything else I needed then sold them both again.
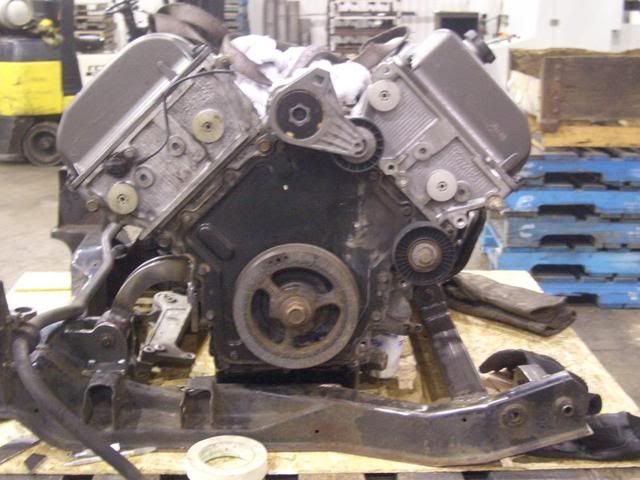
The '94 had lower K's but did need a head gasket so thats the one I pulled for my swap. I am waiting on headbolts to put the N* back together but I had the day off today so I pulled the motor from the stand and pretty much have it mounted.
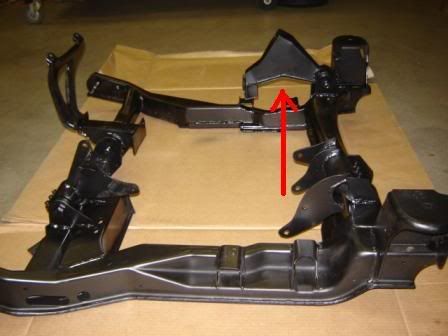
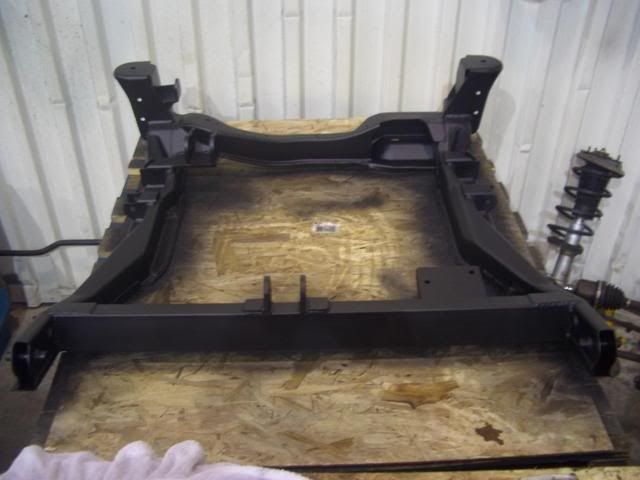
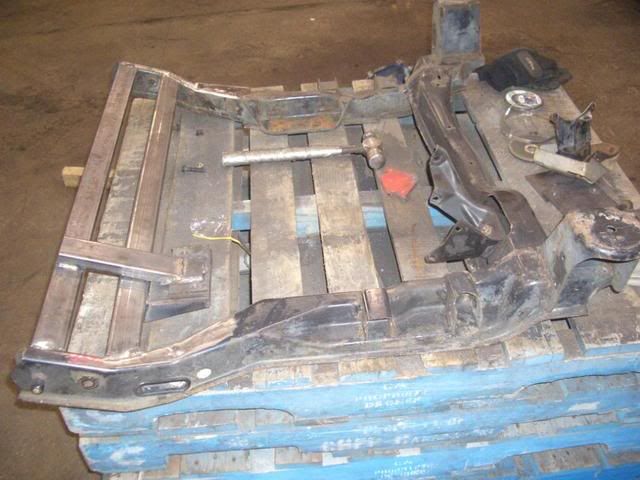
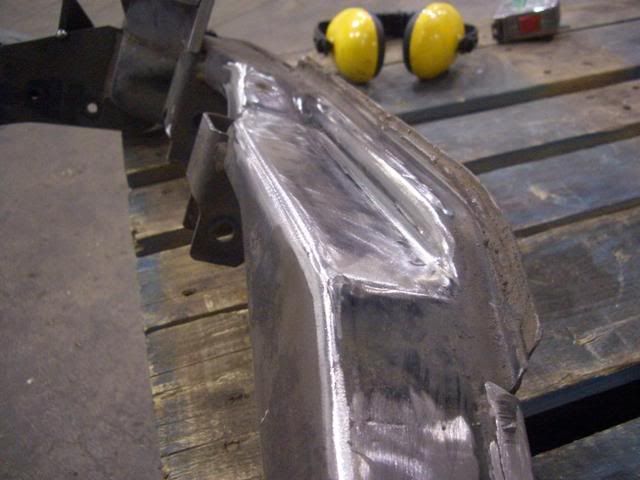
I modified the cradle last week leaving the original front cross member in until I welded in the new one. I also built a jig to keep the trans mount in the original place.
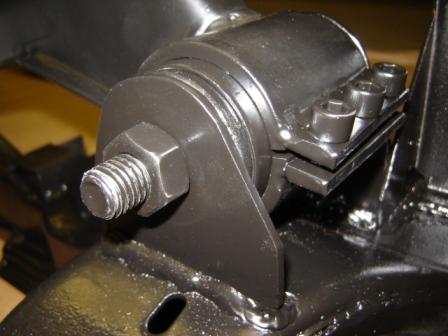
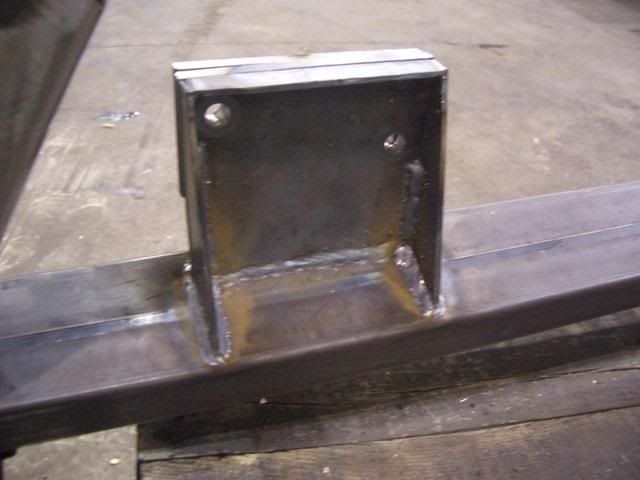
And the new mount.
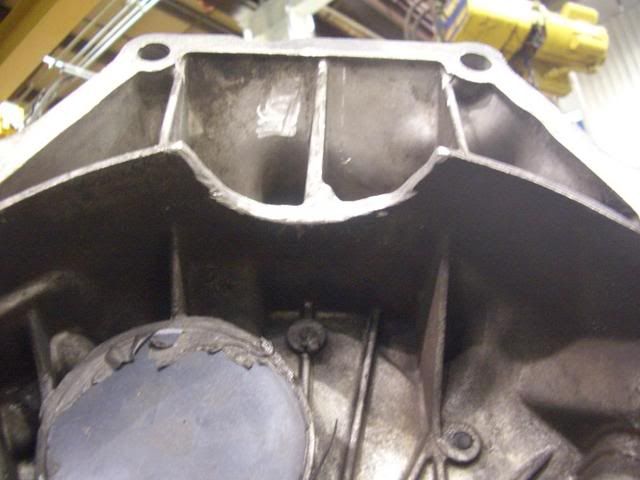
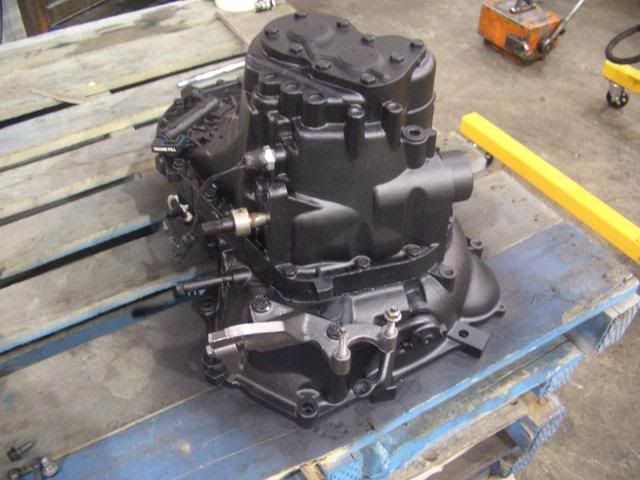
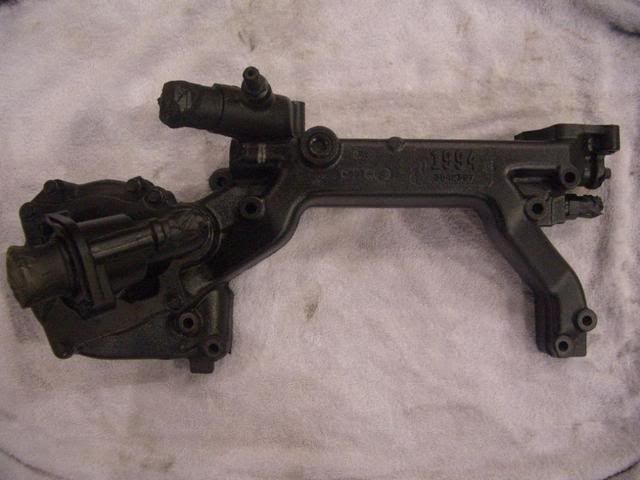
Here is the mods to the getrag trans
Also got a chance to clean and paint it.
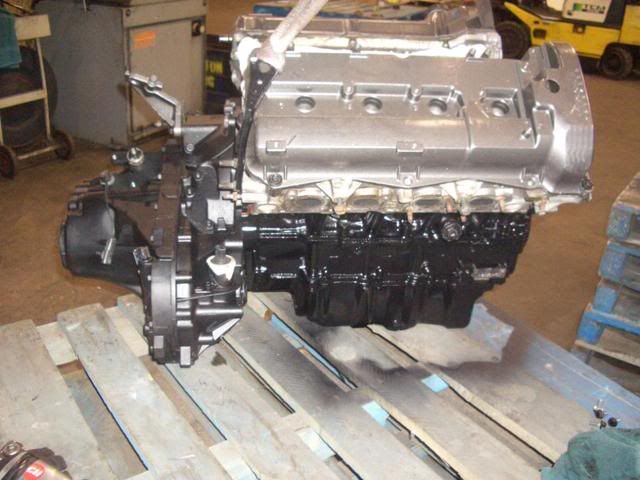
N* and trans meet for the first time
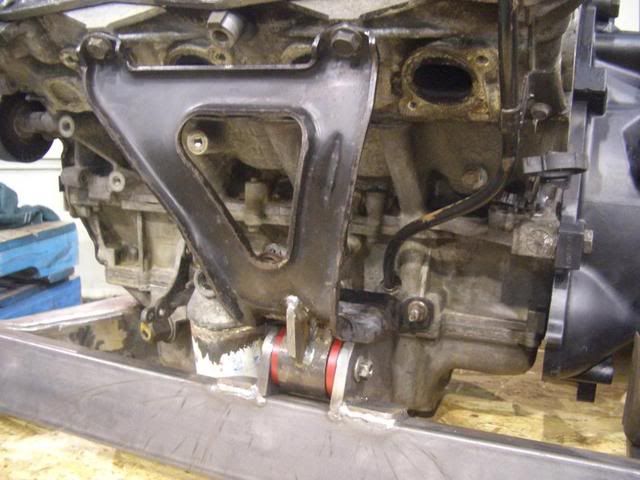
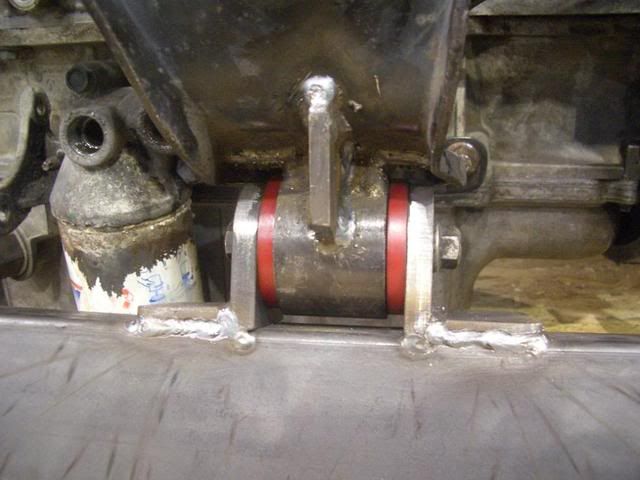
Then I moved engine and trans onto the cradle and bolted the trans using the stock mounts. I had a poly dogbone and thought I can't use it anymore so I am using the poly for my motor mounts.
I leveled the the motor and checked for clearance...Looks good
Very nice work! It is very obvious your not just a weekend worrior! I thought there was a ready made kit for this swap? forgive me if I am wrong I am new around here
Very nice work! It is very obvious your not just a weekend worrior! I thought there was a ready made kit for this swap? forgive me if I am wrong I am new around here
Thank you....I have been welding stuff since I was a kid but just self taught. I haven't heard of a N* kit but I am sure its only a matter of time.
I'm looking forward to starting on this same swap in my formula
what kind of clutch are you using? in my current 4.9 i had a local shop resurface the flywheel side with a performance ceramic material. i think that would still work but im wondering if there are other cost effective options
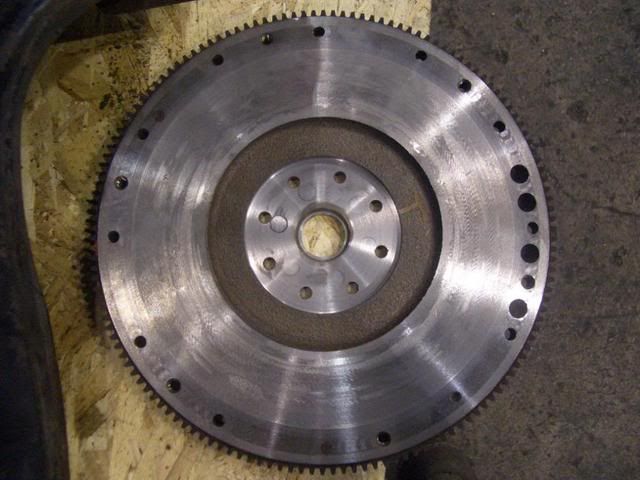
I haven't bought a clutch yet but I am leaning towards the Spec stage 3+ and just using a modified '88 flywheel which is now ready to go.
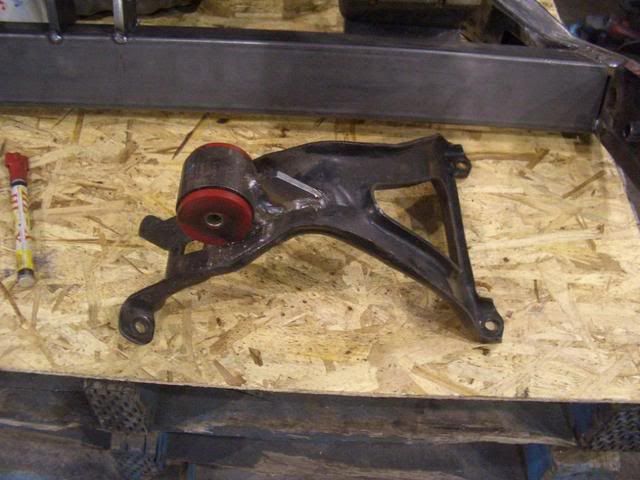
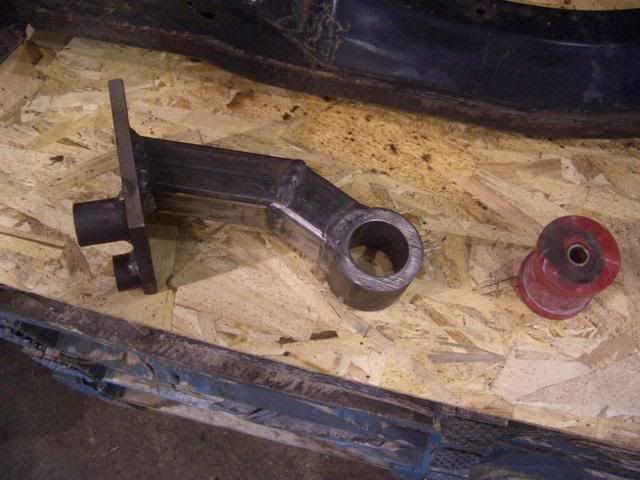
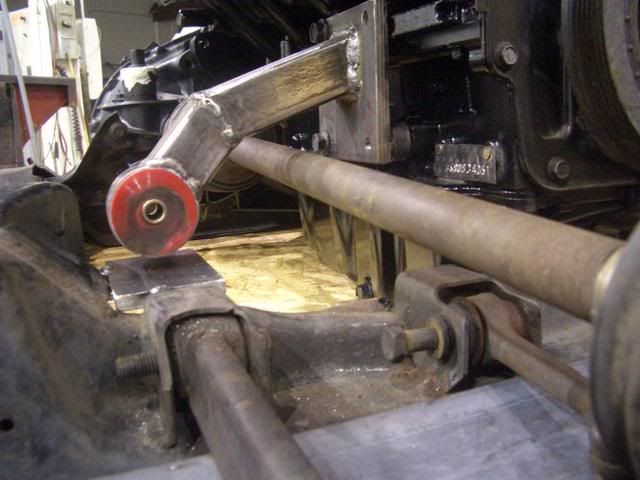
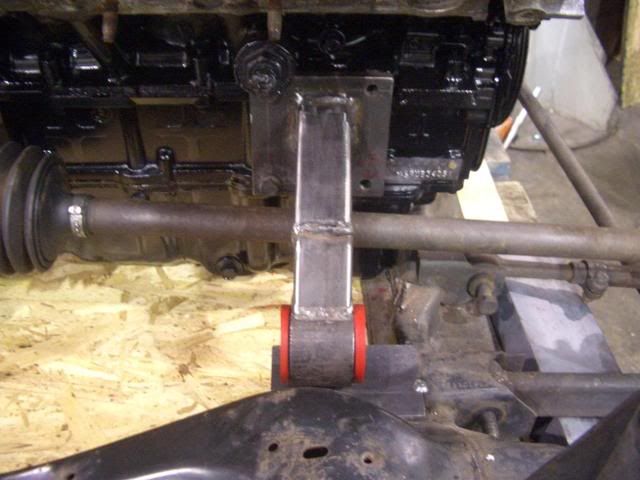
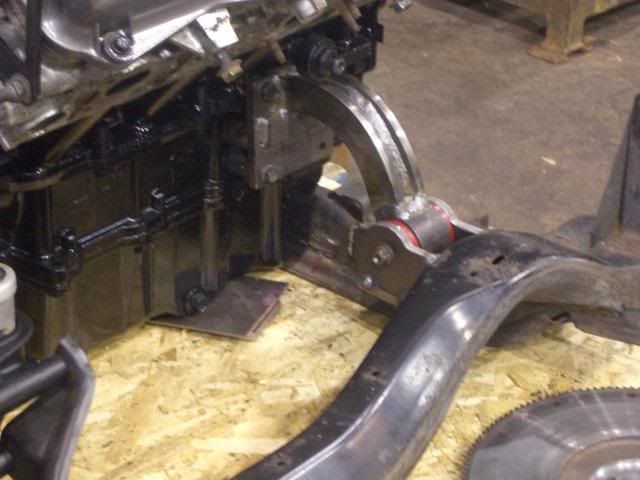
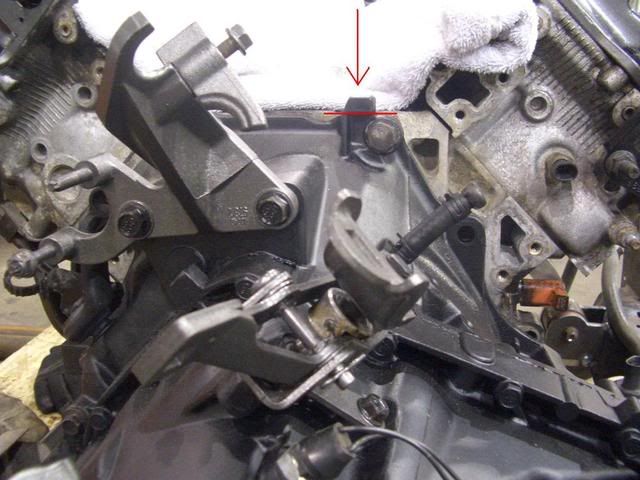
I redid the rear engine mount and gained 1.5" for axle movement and also fabbed up a bracket to put the belt tensior pulley where the power steering pump was mounted similar to what Russ did. (thanks Russ)
I will put some more pics up tonight.
Also thinking of doing a torque strut but not sure if its needed....Looking for input on this if anyone has any.
IP: Logged
01:35 PM
Russ544 Member
Posts: 2136 From: S.W. Oregon Registered: Jun 2003
I haven't bought a clutch yet but I am leaning towards the Spec stage 3+ and just using a modified '88 flywheel which is now ready to go.
I redid the rear engine mount and gained 1.5" for axle movement and also fabbed up a bracket to put the belt tensior pulley where the power steering pump was mounted similar to what Russ did. (thanks Russ)
I will put some more pics up tonight.
Also thinking of doing a torque strut but not sure if its needed....Looking for input on this if anyone has any.
I used 4 of the very soft Fiero tranny mounts for my swap, so yes, I needed _two_ dogbones, but even with your mounts I'd still recomend using one dogbone. it's fairly easy to cut the left flange off the old Fiero mounting point and move the dogbone to the other side of the remaining Fiero flange. that gets things lined up with the end of the N* head.
edit. a picture is worth a thousand words :
[This message has been edited by Russ544 (edited 01-09-2008).]
Thats a good looking set-up Russ....Do you have a larger pic of your dogbone ?
sure thing.
This is the dogbone itself. made from an old 4 cyl dog that I cut in half and bolted one of the ends into my fabricated arm. the other end has some nylon bushings I found laying around pressed into it.
I call this piece the "bridge" for lack of a better term. it bolts onto each head to hold the dogbone
a better pic of the modification to the Fiero bracket.
compleated
what do you do in your "shop". you must work on Cats or something . how the heck did you bend that new mount? hefty stuff.
lookin good, Russ544
[This message has been edited by Russ544 (edited 01-09-2008).]
We are a steel cutting shop capable of cutting upto 25" dia Inc 718 or as small as 1/4" round bar. Looks a little empty in this pic but it was taken right after we moved in and set-up our new location.
That dogbone is a work of art Russ It doesn't interfere with the tensior at all ?
[This message has been edited by buds (edited 01-09-2008).]
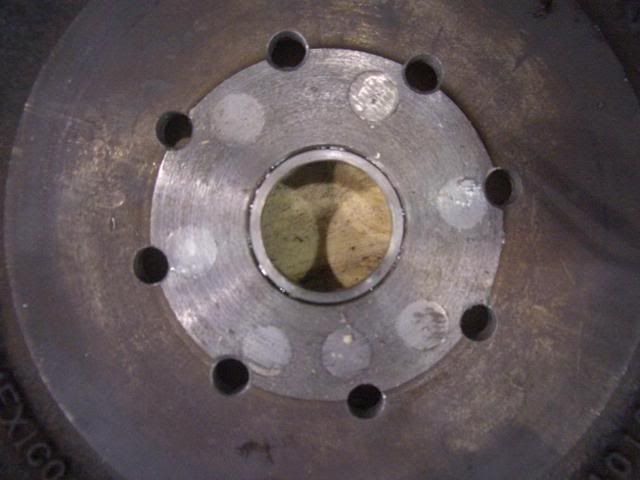
Had my 88 Flywheel Plugged and new bolt circle put on as well as a ring put in the ID to match the N* Crank
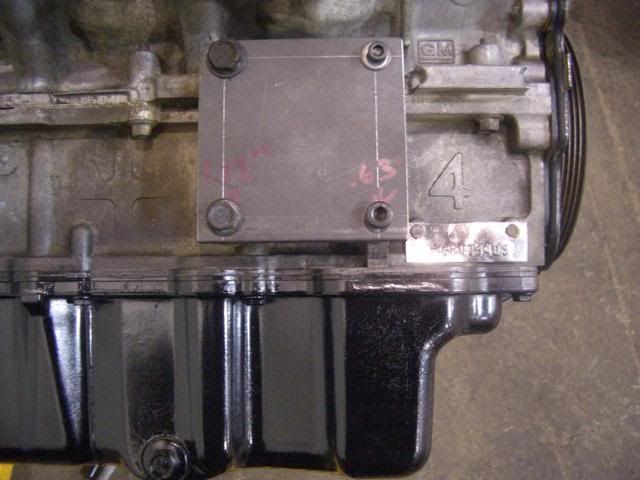
Now my Power steering delete/tensior mount which I am not sure will work for me as I want A/C and I haven't seen anyone run this setup with an A/C compresser but I had some spare time at work so I whipped it up. Worst case I'll use this to get it running and worry about A/C later.
Also did some more painting....I am going with a low gloss black like my trans and Graphite colour sceem (leaving the heads alone) and also plan to paint the car itself with the same colours.
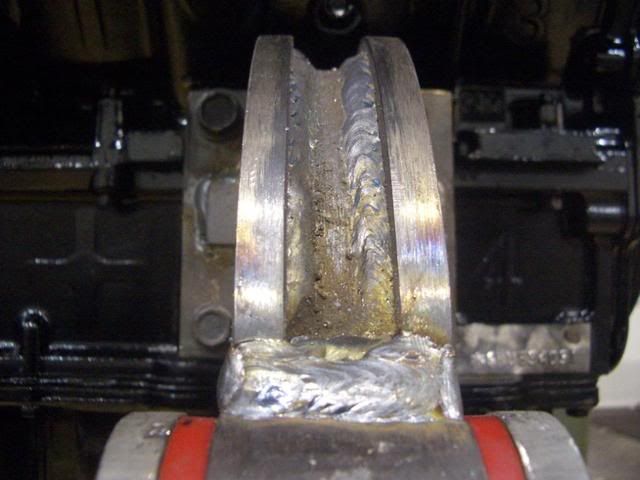
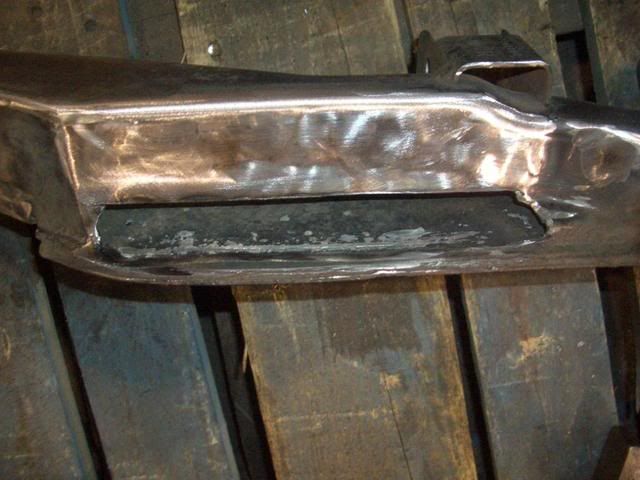
Also one more modification to the Getrag I just found out about and have not seen anyone mention is cutting off this snout.
IP: Logged
07:47 PM
PFF
System Bot
Will Member
Posts: 14305 From: Where you least expect me Registered: Jun 2000
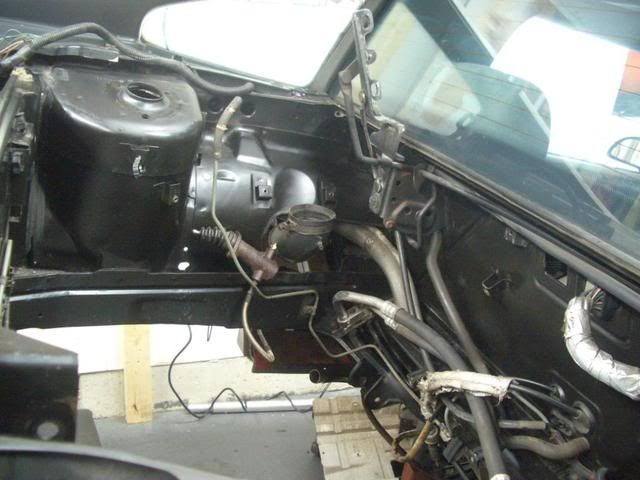
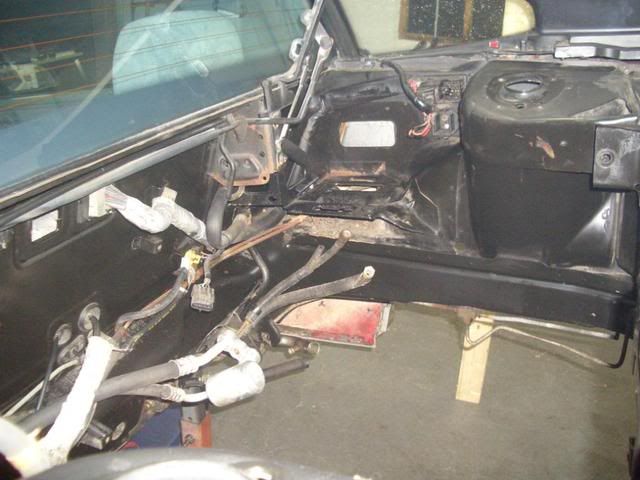
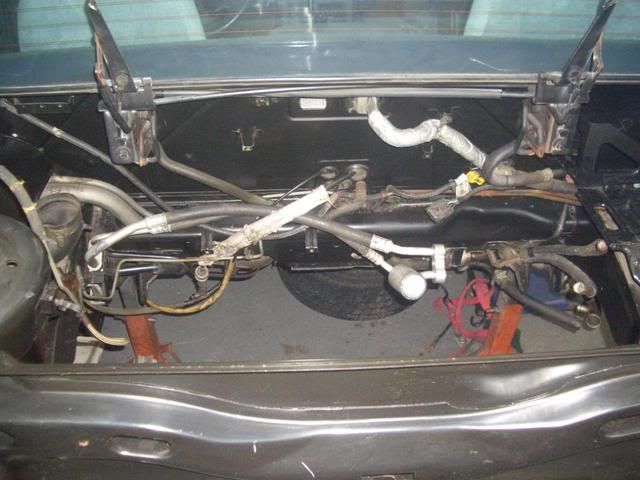
I started cleaning up the engine bay last night. Getting ready to cut open the strut tower and remove the battery tray. Very rare to find a fiero in this rust free state here in Ontario....Glad I drove the 12 hours each way to pick it up.
Had a very productive day today at work Started off this morning with getting the dogbone and brackets made similar to Zac's. Still need to make some poly bushings for the bone. Middle section is a nice polished SS tube.
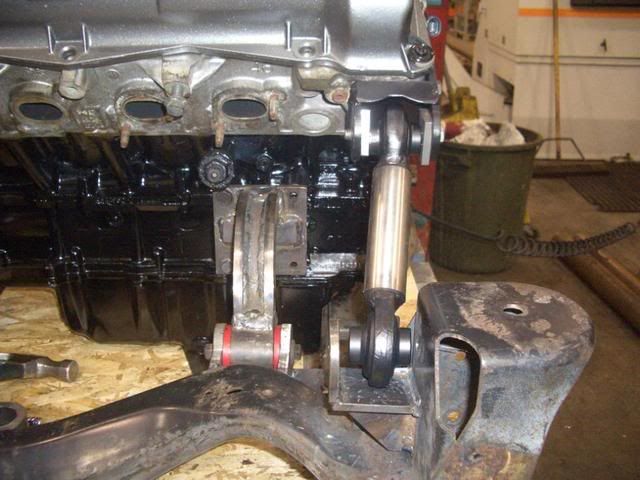
And mounted...I am tring to keep my costs down so I am using what I already have available.
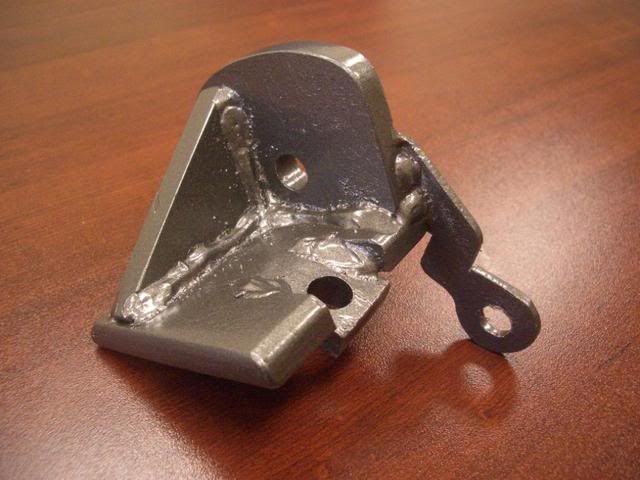
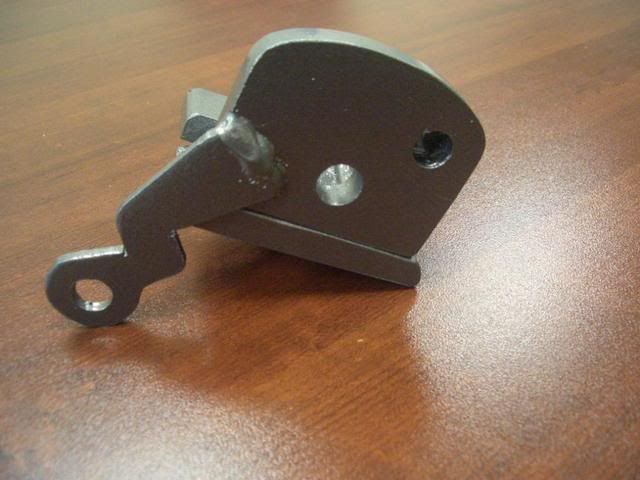
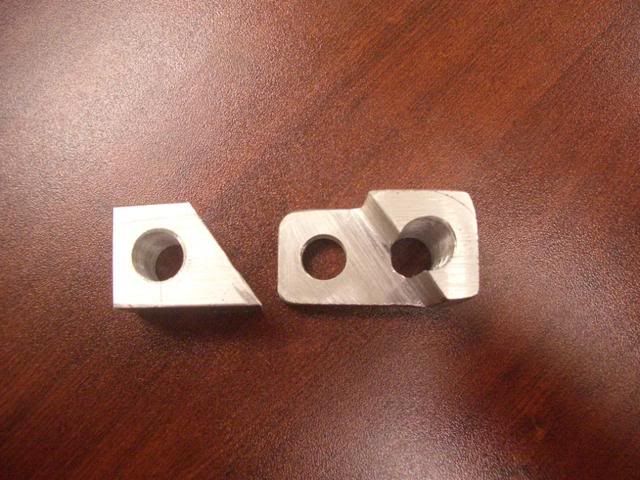
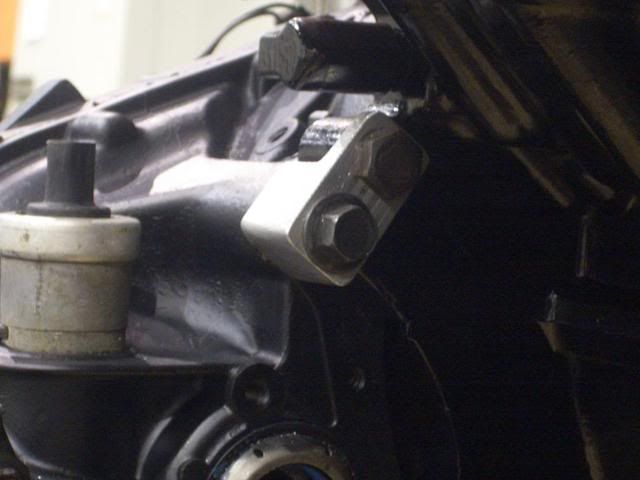
Next was the funny little bracket to catch that last hole in the getrag that does not line up.
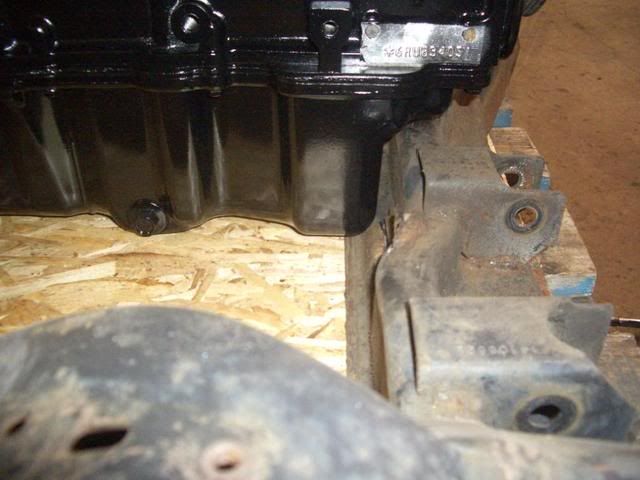
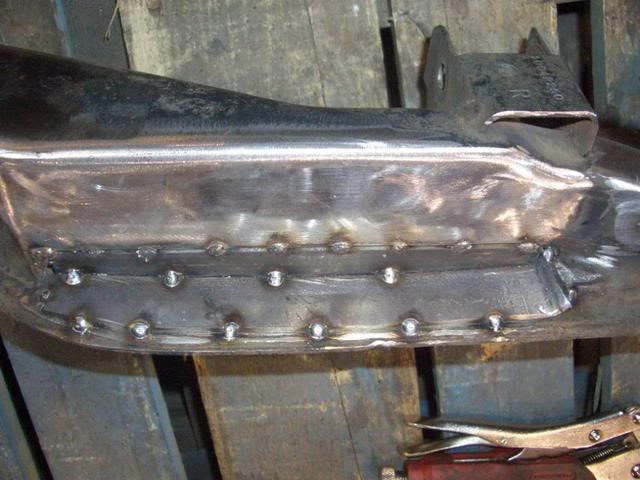
Finally all the brackets and mounts are done...Pulled everything off the cradle to finish off welding....Decided I wanted a little more room between the oil pan and the passenger side frame so I trimmed it down some,
This was just after grinding down the stock engine mount
Then went on to this
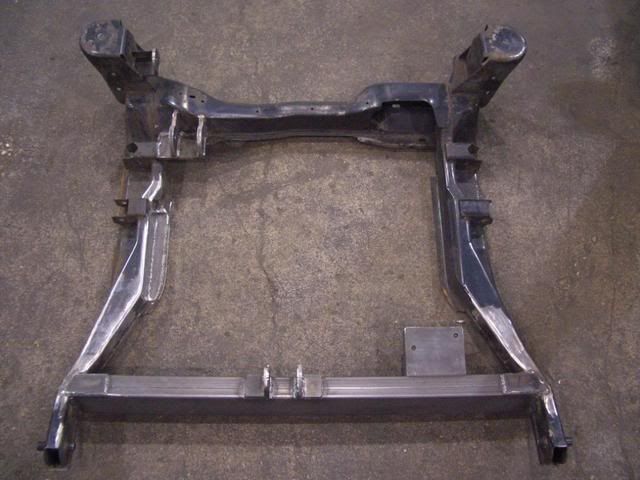
Cradle is now fully welded and ready for N*....I am going to bolt it in the car this weekend enpty just to make sure it hasen't twisted or shifted on me as I have put alot of heat to it.
Finished cradle
Also received a few Items in the mail today....1 was my new head bolts so I can finish the motor on sunday and the other was a large box from Zac in BC
IP: Logged
09:02 PM
Jan 12th, 2008
IXSLR8 Member
Posts: 674 From: Post Falls, ID, USA Registered: Sep 2004
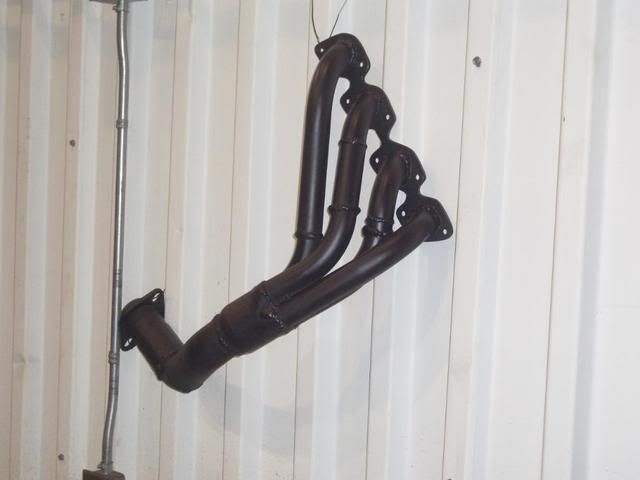
Also received a few Items in the mail today....1 was my new head bolts so I can finish the motor on sunday and the other was a large box from Zac in BC
Let me guess...Headers??
Good work, keep it up! JG
IP: Logged
09:24 PM
Jan 13th, 2008
motoracer838 Member
Posts: 3751 From: Edgewater Co. USofA Registered: Jan 2006
Had a very productive day today at work Started off this morning with getting the dogbone and brackets made similar to Zac's. Still need to make some poly bushings for the bone. Middle section is a nice polished SS tube.
Finally all the brackets and mounts are done...Pulled everything off the cradle to finish off welding....Decided I wanted a little more room between the oil pan and the passenger side frame so I trimmed it down some,
Then went on to this
Hmmm, this looks really familiar, oh yeah I did the same thing early last year.
The problem.
When I got the drive train in the car it was really tight on the right hinge, even after extensive trimming. this led to further modifications.
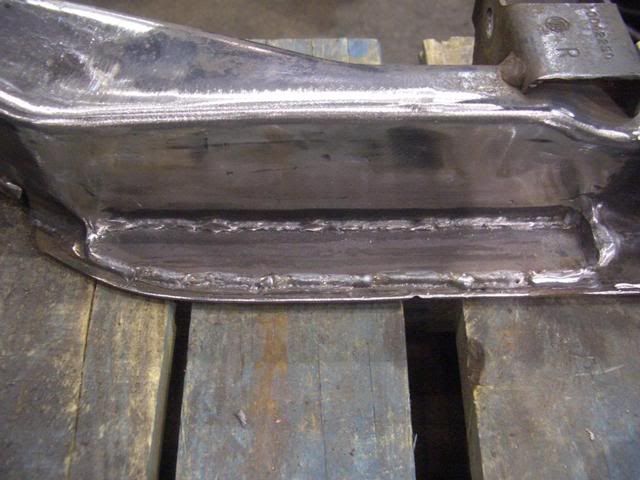
Here Iv'e trimed the lip away to clear the oil pan. This was part of a group of modifications that moved the engine and trans down and back a 1/2 inch.
Had my 88 Flywheel Plugged and new bolt circle put on as well as a ring put in the ID to match the N* Crank
Your setup looks great, but for future info:.. I picked up this setup on E-bay a wile back. it uses an S-10 flywheel. the adaptor he made (stainless steel) incorporates the hub adaptor as well as giving the correct spacing. a pretty slick unit actually. note that the machined flange on the S-10 flywheel is larger than the Fiero flywheel also, which gives full contact on the crank/adaptor.
[This message has been edited by Russ544 (edited 01-13-2008).]
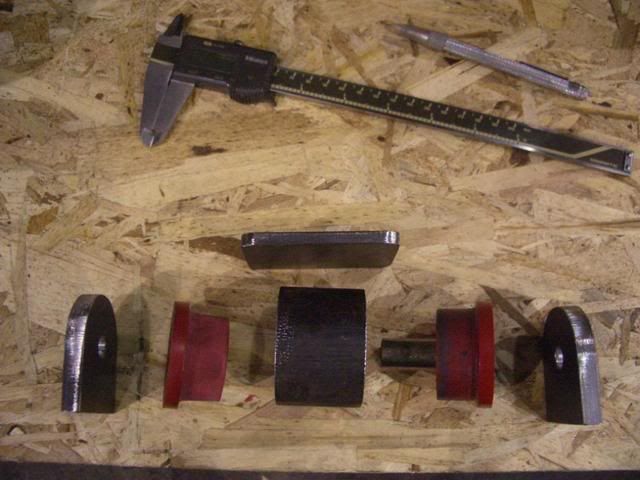
Very nice work. It is always interesting to see how others accomplish the task you did. I like your use of tubing. For engine mounts, do you think that using 4 harder mounts eliminates the requirement for torque strut(s)? I made 4 mounts for my setup, and used 2" diameter x 3.5" long rubber leaf sping bushings. Here is my cradle with all 4 new mounts..... and a detail of a typical mount using the leaf spring bushing.... The rubber bshings I am using have a steel sleeve on the ID and the OD, and the rubber is vulcanized inbetween, and the whole works is pressed and clamped in my split mount sleeve. In your opinion, do you think that I will need torque strut(s)?
Very nice work. It is always interesting to see how others accomplish the task you did. I like your use of tubing. For engine mounts, do you think that using 4 harder mounts eliminates the requirement for torque strut(s)? In your opinion, do you think that I will need torque strut(s)?
Thank you....The torque strut is hard to say...I know some of the swappers are using solid mounts and no strut so I guess it all depends on how stiff your mounts are. Its really not that hard to mount one so I went and put one in anyway. One thing I dont get about your mounts is in the first pic... Is this how this mount sits ? Doesn't look like enough room for the axle to move with the suspension.
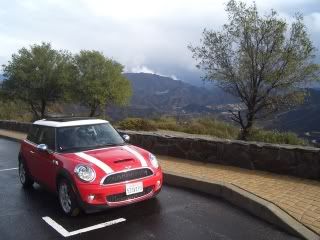
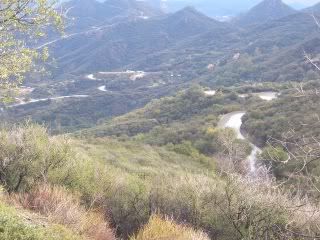
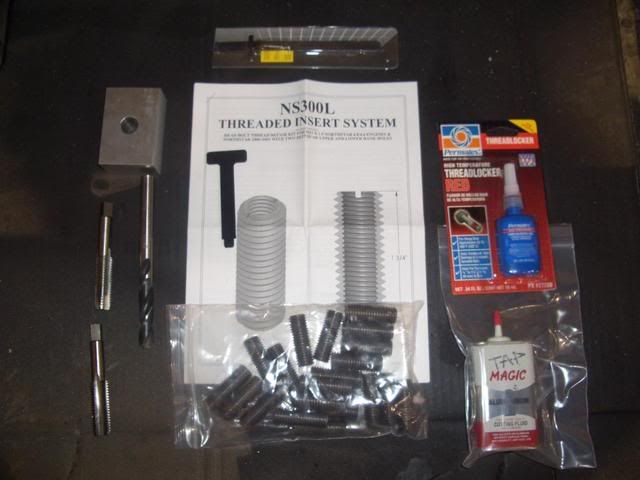
Not a whole lot of progress lately...I was in L.A.last week and had some fun in the mountains of malibu in a cooper S...This little car really surprised me....perfect car for running the twisties...I am also waiting on a time sert kit then I will get back at it......I have done some more painting and such...I'll take a few pics at work tomorrow.
[This message has been edited by buds (edited 01-27-2008).]
IP: Logged
09:51 PM
Daviero Member
Posts: 382 From: Thunder Bay, ON Canada Registered: Jan 2006
Thank you....The torque strut is hard to say...I know some of the swappers are using solid mounts and no strut so I guess it all depends on how stiff your mounts are. Its really not that hard to mount one so I went and put one in anyway. One thing I dont get about your mounts is in the first pic... Is this how this mount sits ? Doesn't look like enough room for the axle to move with the suspension.
Actually, I have since modified that mount, and the other rear mount too. I did not have a current picture of the cradle, so I posted that one for the idea of the 4 firm mounts hoping no-one would catch my blunders. You got one. There is another. Notice that the way I have both rear mounts sitting on TOP of the rear crossmember. I found it hard to mount the rear sway bar! Boy was I ever sour when I found I had mede that error. I think my revised mount has more clearance. I'll soon see when everything goes together. I drove a solid mounted N* and it was smooth and did not move. I hope mine is "almost solid". I think I'll skip the torque strut for now and hope for the best. Dave
[This message has been edited by Daviero (edited 01-27-2008).]


 ck your PMs


 :
:


 Started off this morning with getting the dogbone and brackets made similar to Zac's. Still need to make some poly bushings for the bone. Middle section is a nice polished SS tube.
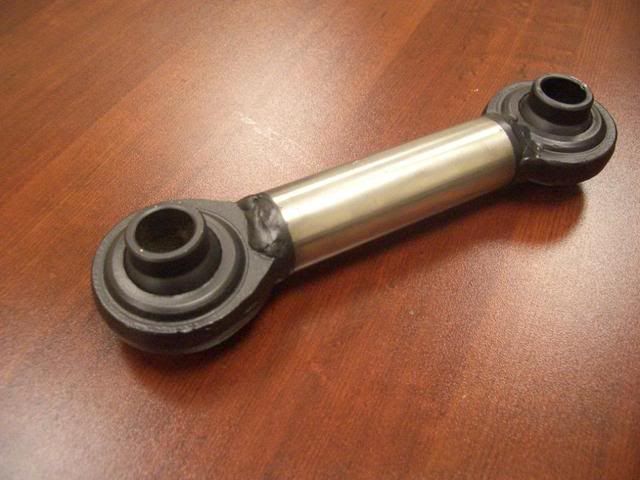


 I was watching that as well but at that time I was really wanting the spec alum. flywheel.