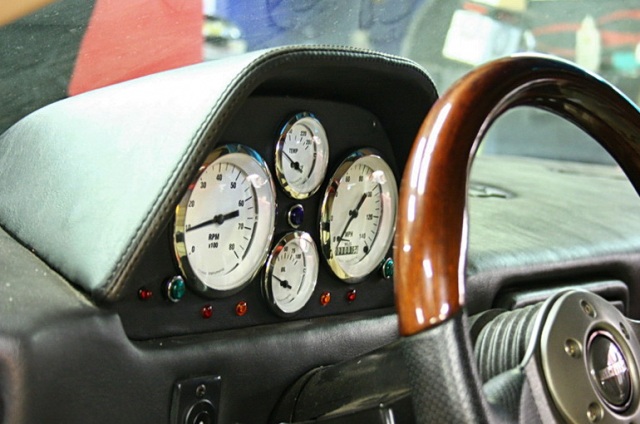
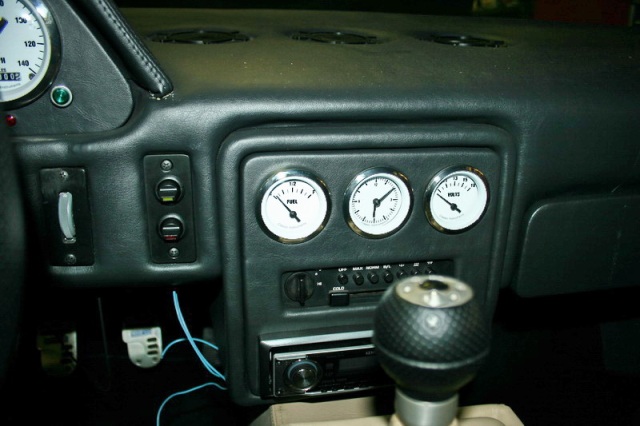
Time to work on the dash. I have a Pisa dash that I had covered locally. I didn't like the VDO gauges so...let's redo the car again! How about the Classic White Hot series guages.
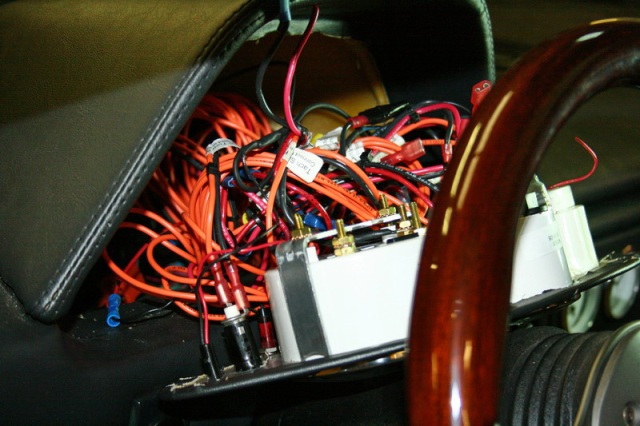
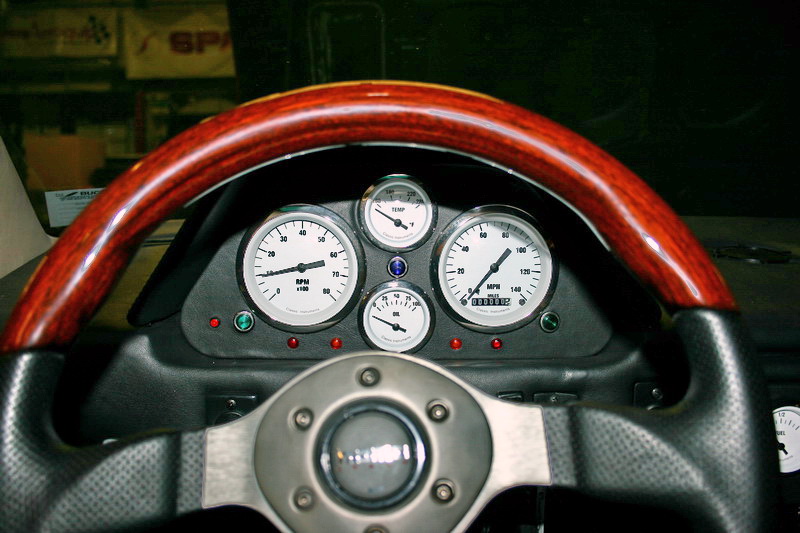
Wires, wires, wires...the jungle Nice curved lens...good reflections...shiney...good contrast with the black...
I've forgotten what all the little lights are...not good
Check out the light switches the top one is the running lights and the lower one raises the headlights.
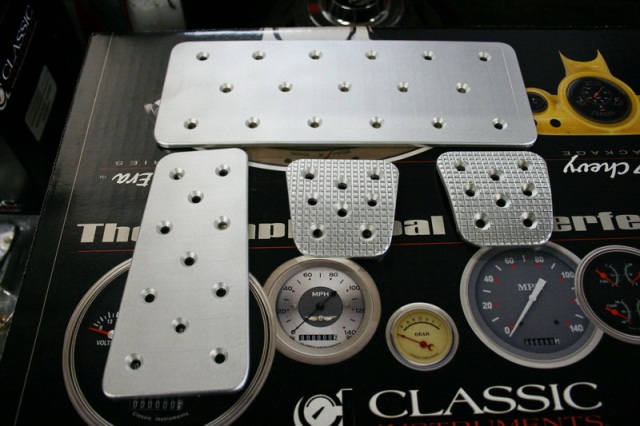
New pedals...Thanks to someone on the forum for this idea Lets do some trunk work. The car just looks slick with the chop top and I wanted to continue to slick up the exterior. In other words, take away all the distractions from the original design. Like the marketing pitchs, unnecessary holes, radio antenna, and any thing else that would be distracting to the eye. I started with the trunk lock. Lets get rid of hole number 1.
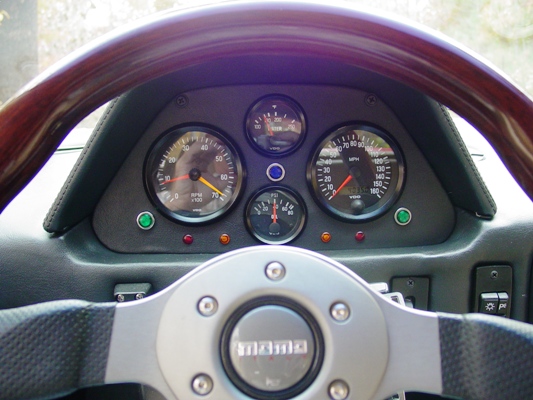
Rodney---it looks like you gained 1000 RPM but lost 20 MPH.
Kidding aside I think it looks great.
In a manner of speaking that's very true. I've just never been satisfied. I always see something that will make it better. So, yea. I agree. 1000 RPM forward and 20 MPH backwards. Some parts of this car have been done 3 or 4 times. AND thanks
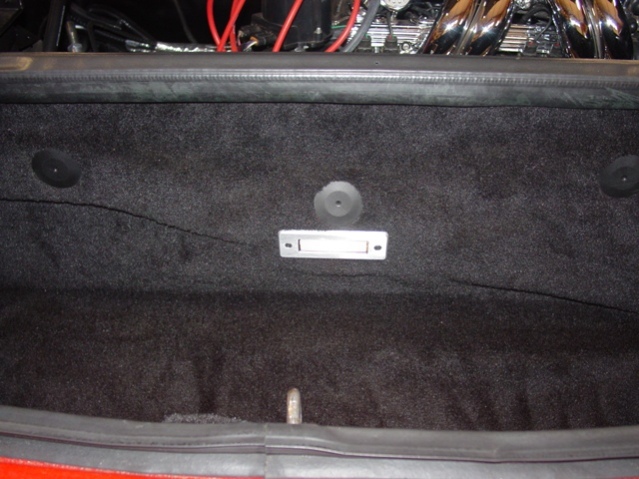
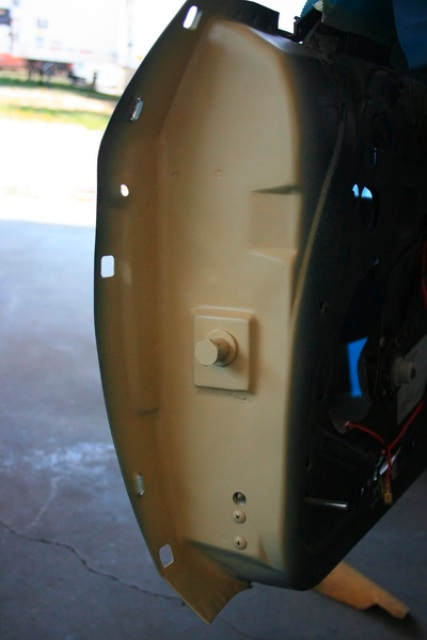
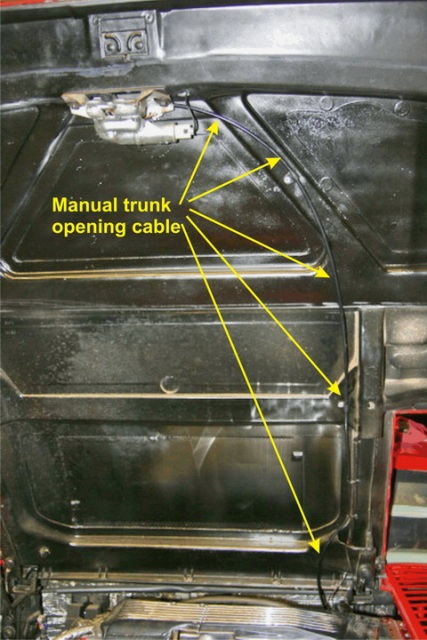
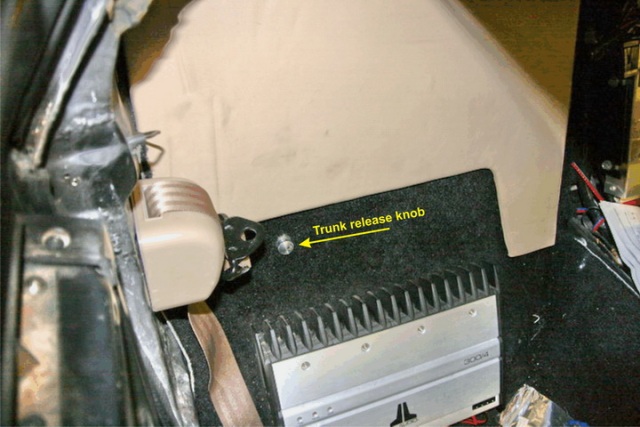
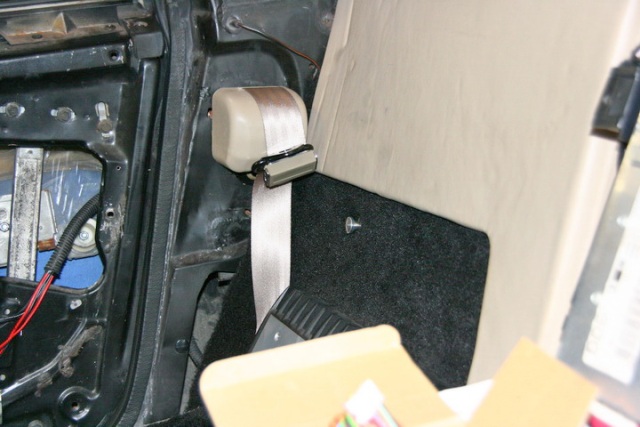
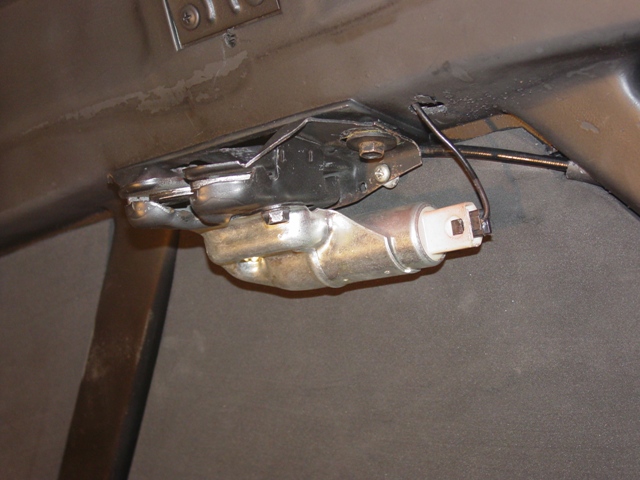
So, If I eliminate the trunk key, how am I going to get in the trunk. Wow, lets put in a remote pull. Sounds good to me! I ran the manual cable inside on of the stuuctural channels of the deck lid . When it was complete, it was invisible. I put the release knob behind the passenger seat and above the stereo amplifier (That was a fun project..Kenwood with a USB port run into the glove compartment)
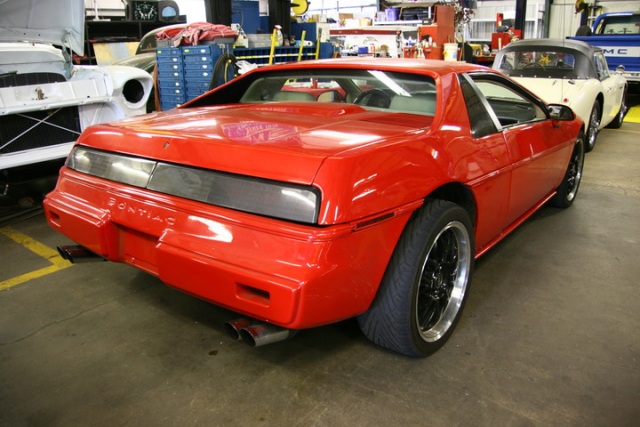
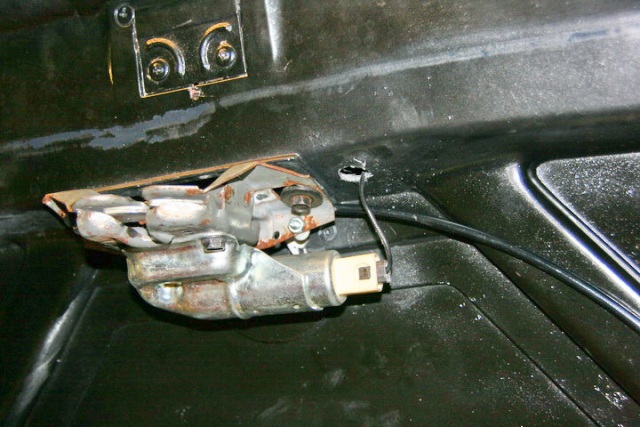
Finshed product...nice shiny latch release...covered wiring and slick insulation to look purddy. Now the rear end is slicked up with no key hole to catch your eye
Did you have to make any changes to the tranny/axels to get everything to mount up? I have some feelers out there for the same tranny, but I'm considering the matching 3.6 liter in the new G6 GXP if I can find one for a decent price.
Also, how smooth is the shifting once everything was complete? Did you use the same shifter bracket as stock or a different one?
quote
Originally posted by rodneybooth:
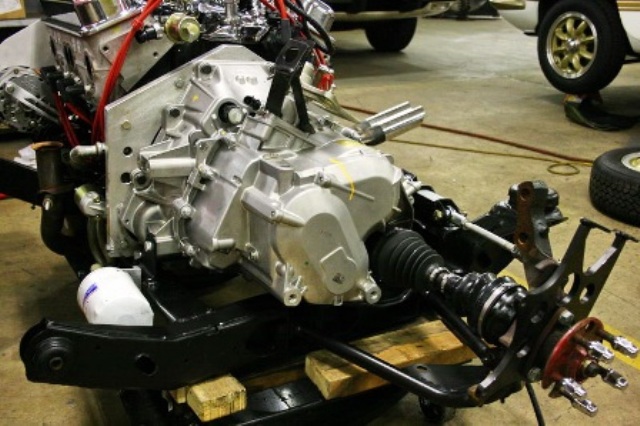
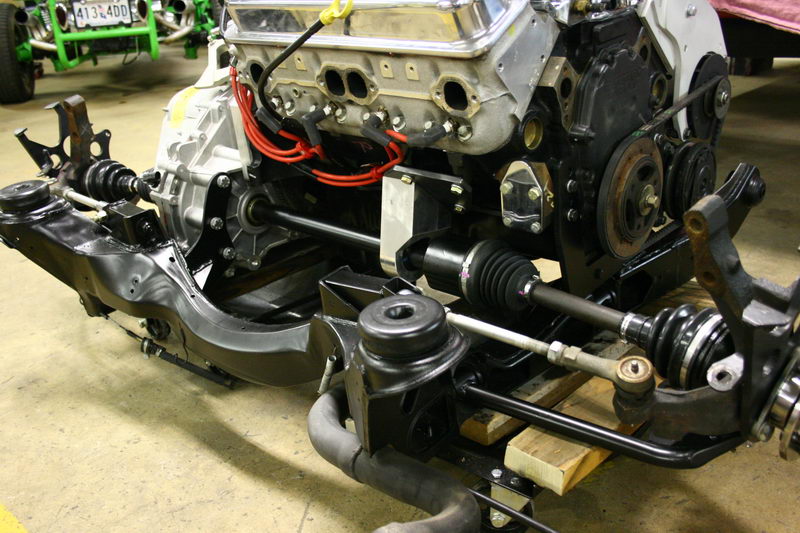
The axles installed on one side
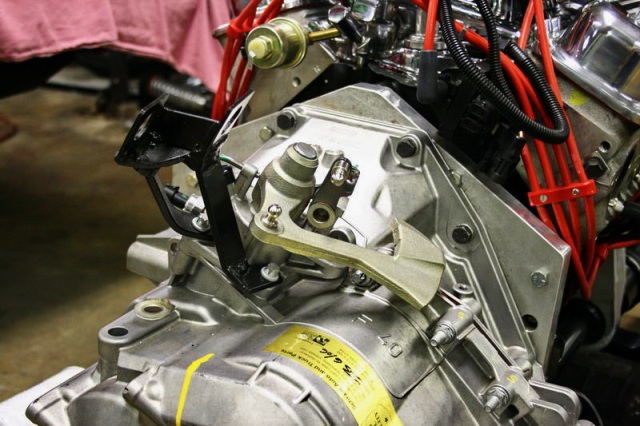
Shifter cable bracket installed
And the axles installed on the other side. I like this shot the best. This axle setup is undescribably beautiful. The perfect geometry and the sheer genius of this design can only be experienced to be appreciated. Thank you Archie.
[This message has been edited by thegreep (edited 11-13-2008).]
I've always loved the MOMO sterring wheel (you know it wouldn't kill them to offer it on more than one style ) and the back inside fire wall lining. Beautiful. I need to remove that crappy gray matting on all of my Fieros ASAP!
Did you have to make any changes to the tranny/axels to get everything to mount up? I have some feelers out there for the same tranny, but I'm considering the matching 3.6 liter in the new G6 GXP if I can find one for a decent price.
Also, how smooth is the shifting once everything was complete? Did you use the same shifter bracket as stock or a different one?
The tranny bolts right up. No problem...spot on. There was one very small area that needed to be caulked up (sealed) but not an issue. It bolts directly to Archie's adapter plate. So I can make the asumption that it will also bolt up to the 3.6. G6 prices are really good right now, but while you have the beast apart, do consider the Quaffe LSD. The shifting is not as smooth as a Lotus, but I am very happy with it. Reverse is really hard to the left and stays put. But that's not a bad thing. First is still somewhat short and then when you hit second it's got legs like a giraffe. The shifter needs modification. I sent the shifter off to be redone to make sure it was right. Oh yea, the new axels are supplied by Archie and part of his package. And a well thought out package it is.
I've always loved the MOMO sterring wheel (you know it wouldn't kill them to offer it on more than one style ) and the back inside fire wall lining. Beautiful. I need to remove that crappy gray matting on all of my Fieros ASAP!
I wanted to be the inside firewall with a nice foil flocking, but couldn't find the material on sale.
Well, that's the end of the transmission project but before I bow out, I want to post some more of the modification I have done in the last six months. Some are blatantly stolen and some others you may not have seen yet.
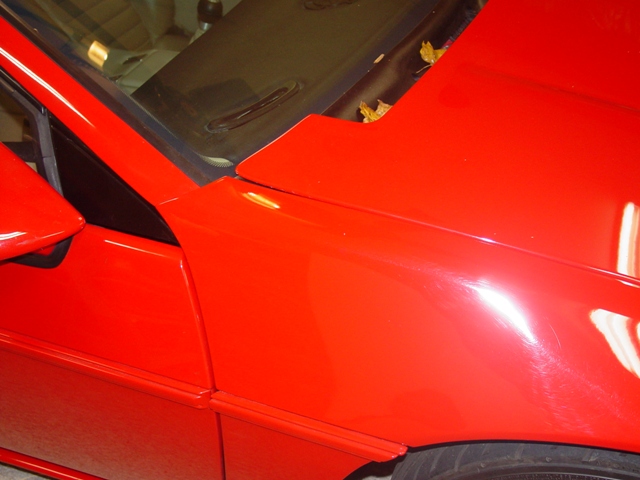
I decided to get rid of the antenna hole also. It was just something else to pull the eye away from the lines of the car So I found a antenna that fits up under the glass between the headliner and the frame Nice and clean. Look Ma, no flagpole!
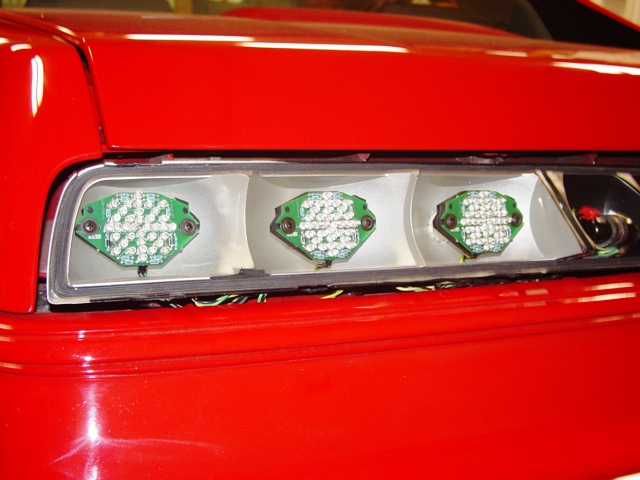
Can you also share the details on your tail lights? I can see the outer lens has been painted red, but it looks like the inner red lenses are somehow different... looks like there is no "grid"....
Do you mind sharing the details on this item? Looks like a great solution to me.
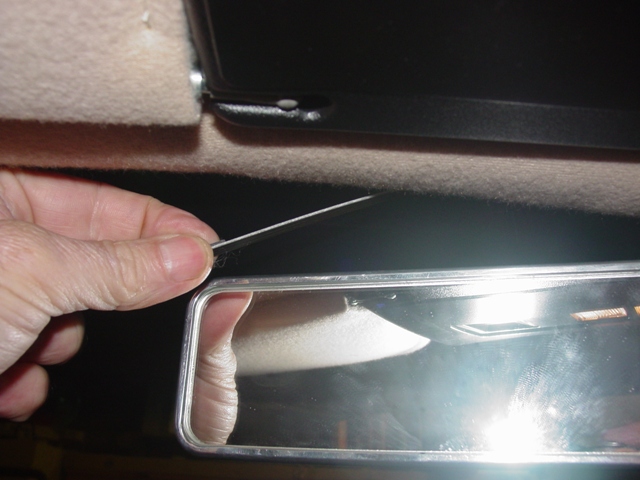
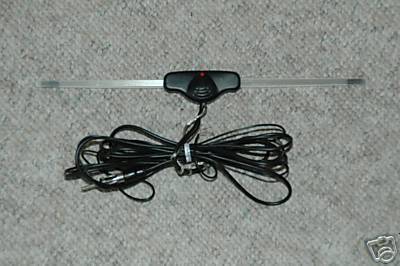
This is a interior glass mount am/fm antenna from ebay, easily searchable. There are more options once you get started looking. I'm not sure if this is the exact one I used but be aware that it is not as powerful as the orginal antenna. I think you could add a booster but I personally would rather hear the engine roar than Britney.
Can you also share the details on your tail lights? I can see the outer lens has been painted red, but it looks like the inner red lenses are somehow different... looks like there is no "grid"....
I'm glad someone noticed the lights. A lot of possibilities went into that project. They are sequential LED's and you are right sir, no grid! I have an engagement tonight but will post the light project tomorrow. Cheers
I'm glad someone noticed the lights. A lot of possibilities went into that project. They are sequential LED's and you are right sir, no grid! I have an engagement tonight but will post the light project tomorrow. Cheers
I will be looking forward to tomorrow's post. I've been searching for a way to get rid of the grid pattern. I would love a smooth red lens for my car.
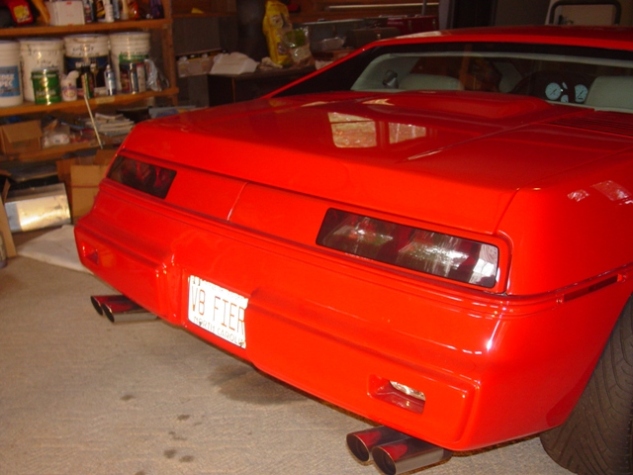
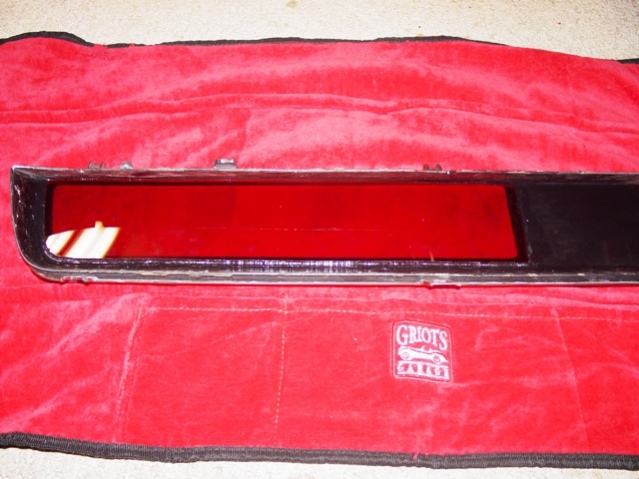
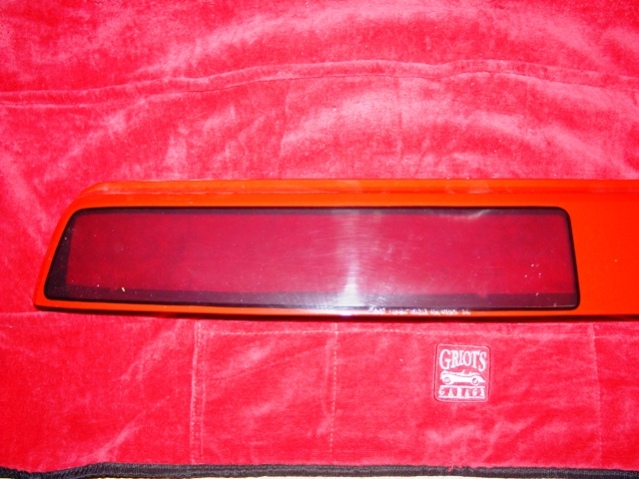
Ok...The tail light upgrade project. Challenge--how to bring the lighting up to modern stardards without changing the original design concepts. I also did not like the way the lens were continuous from one side of the car to the other. I felt that it made the car look "condensed" visually. So, we had the idea of creating the look of two seperate light assemblies. Notice that I took Madison Avenue off the bumper to clean the look up some more. I also thought that it was rather silly to have reflectors recessed into the bumper and no backup lights. Soooo, I put in 50 watt driving lamps into the recesses. I like visability to the rear in a chop top. The first trial was actually cutting out an area with the intent of filling it in with a red bezel. Mistake...it didn't work. But--what if we left the lens intact and glued red plexi to the inside?
That worked but the LED's were just too bright, almost blinding and you could see them from the outside. I don't want you to see too much of the lady, imagining what you can't see makes for sexy. So, after several more trial products, we landed on painting a "light blocker" of the lens. That worked. The LEDs were strong and bright and you could not see them from the outside with the lights off. The next challenge was how to dress out the paint job around the lens. Simple clean lines demand simple clean treatments. We had an adhesive template made with a peel off area for a simple black line about 1/4" wide to go between the red of the body and the "block out" clear of the tail light lens. The process we used was to spray on a coat of light blocker, buff it out, spray on the color, spray on the black line, buff it out for the final. The LEDs themselves were designed to fit in the existing parabolas and just to do something a little different we made them sequential. The final touch was to improve the design of the clip mechanism between the lens and the reflective parabola. With 25 year old material you have to compensate for the brittle that comes with aging. I thought that a small screw to lock the parts together was in order. We did this at every clip across the top.
I've always loved the MOMO sterring wheel (you know it wouldn't kill them to offer it on more than one style ) and the back inside fire wall lining. Beautiful. I need to remove that crappy gray matting on all of my Fieros ASAP!
I like the Momo wheels the best of any I was able to find. The styling is top drawer. But, It offends me to be someone elses advert shingle. I wish I could have gotten the wheel without "Momo" stamped on the horn button. When people look inside the car they say "Wow mister, that's a really cool Momo you drive!"
Ok...The tail light upgrade project. Challenge--how to bring the lighting up to modern stardards without changing the original design concepts. I also did not like the way the lens were continuous from one side of the car to the other. I felt that it made the car look "condensed" visually. So, we had the idea of creating the look of two seperate light assemblies. Notice that I took Madison Avenue off the bumper to clean the look up some more. I also thought that it was rather silly to have reflectors recessed into the bumper and no backup lights. Soooo, I put in 50 watt driving lamps into the recesses. I like visability to the rear in a chop top. The first trial was actually cutting out an area with the intent of filling it in with a red bezel. Mistake...it didn't work. But--what if we left the lens intact and glued red plexi to the inside?
That worked but the LED's were just too bright, almost blinding and you could see them from the outside. I don't want you to see too much of the lady, imagining what you can't see makes for sexy. So, after several more trial products, we landed on painting a "light blocker" of the lens. That worked. The LEDs were strong and bright and you could not see them from the outside with the lights off. The next challenge was how to dress out the paint job around the lens. Simple clean lines demand simple clean treatments. We had an adhesive template made with a peel off area for a simple black line about 1/4" wide to go between the red of the body and the "block out" clear of the tail light lens. The process we used was to spray on a coat of light blocker, buff it out, spray on the color, spray on the black line, buff it out for the final. The LEDs themselves were designed to fit in the existing parabolas and just to do something a little different we made them sequential. The final touch was to improve the design of the clip mechanism between the lens and the reflective parabola. With 25 year old material you have to compensate for the brittle that comes with aging. I thought that a small screw to lock the parts together was in order. We did this at every clip across the top.
Awesome, thanks for the details! Where did you buy the red plexi from? and do you have any pictures of the tail lights lit up during the day or night?
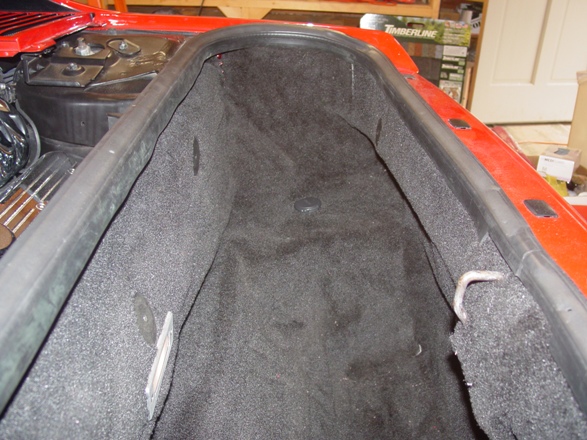
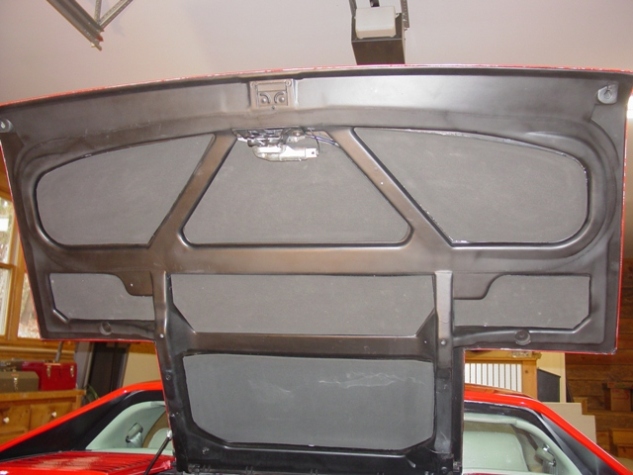
I don't have shots of the tail lights yet but I will take some in the next day or so... Meanwhile. Has anyone ever custom fit the carpet in the truck. Wow, was that time consuming. Glue, carpet tape, seam sealer, etc. I just never lilked the "wrinkled" look of the one size fits all carpet. Oh yea, here is a shot of the new trunk lamp.
I forgot to weigh in on the G6 tranny. The original engine in my car was the "Iron Duke" with a 5 speed. The Duke was in cardiac arrest after driving straight though to Archie's for the original work. He told me how shocked he was that the car actually made it there without the life support of a tow truck. I drove the ZZ4 with a rebuilt Getrag 5 speed for several years but the geometry of the gear ratios just wasn't right. Ergo, the G6. I have to tell you that the G6 is the go to tranny. It is the leap in technology between a 25 year old tranny and a modern design. The shifter could possibly be a little smoother, but it is a ten fold improvement. I felt like I could pull stumps in first gear with the Getrag 5 the gearing was so low. I like the G6 a lot and it is a major improvement but first gear is a little short. Bottom line...I would do the tranny swap again. A little story...My wife gave me the donor Fiero because I really wanted a Porsche. She said that she could not live with me driving a "Big Ego Car" and said "Here, if you really need a sports car take mine". I must say I was a little disappointed but I would put this car up against a european car any day and feel comfortable about coming out on top. This body design cleaned up is phenomenal and with a drive train redesign it rides smooth and just begs to run.
Very nice car! The torque of the TPI is just awesome. And the 6 speed with or without a LSD is a great upgrade. BTW the G6 weights about 117lbs compared to about 74lbs for the Getrag.
Very nice car! The torque of the TPI is just awesome. And the 6 speed with or without a LSD is a great upgrade. BTW the G6 weights about 117lbs compared to about 74lbs for the Getrag.
At some point in this career of a project, I tuned the suspension. A friend has four scales for balancing his dragster. We put the Fiero on them and adjusted the coilovers up or down so that side to side it was as near to 50/50 as we had the patience for. Front to back was 45/55 before the G6 install. That was done by adding a block of steel in place of the spare tire that weighed approximately 106 pounds. So my spare tire is now AAA. I just couldn't see adding any more weight. I might change my mind later, who knows. All in all -- not bad. Oh yea, since few are brave enough to ride with me, we put 170 pounds of stuff in the front seat so that the 50/50 side to side was with the driver only. I like that the balance of the weight is toward the back. It makes for good traction.
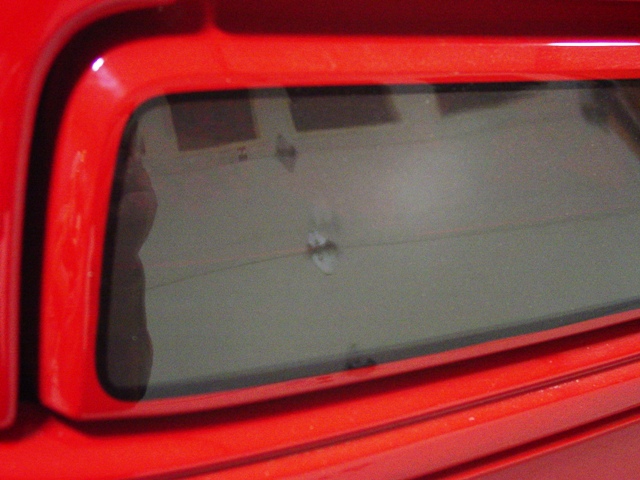
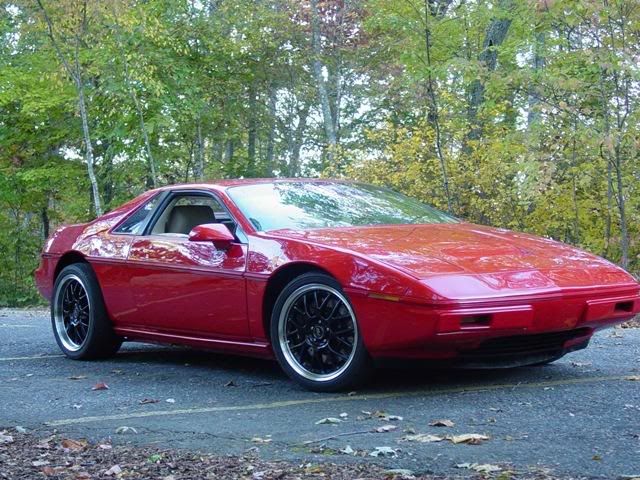
I think I've posted about all the pictures I want to. My next project is to work out how to get glass in the choptop. We plan to use formed sheet metal in place of the glass to get the geometry right. We can bend it into what will actually work on the door and get it tweaked. Then we can send the sheet metal panel to the glass bender. We think that a curvature half way between Archie's and "Brand X's" will work. We can't find a reason to be doubtful. The glass man is on hold and we just need some time. Archie will get the rights to the chop top glass...if we can get it to work. I will start a new thread when I have someting concrete to show. Cheers
I think I've posted about all the pictures I want to. My next project is to work out how to get glass in the choptop. We plan to use formed sheet metal in place of the glass to get the geometry right. We can bend it into what will actually work on the door and get it tweaked. Then we can send the sheet metal panel to the glass bender. We think that a curvature half way between Archie's and "Brand X's" will work. We can't find a reason to be doubtful. The glass man is on hold and we just need some time. Archie will get the rights to the chop top glass...if we can get it to work. I will start a new thread when I have someting concrete to show. Cheers
IMHO, you've turned a pretty neat car into what now is a work of art.
I think I've posted about all the pictures I want to. My next project is to work out how to get glass in the choptop. We plan to use formed sheet metal in place of the glass to get the geometry right. We can bend it into what will actually work on the door and get it tweaked. Then we can send the sheet metal panel to the glass bender. We think that a curvature half way between Archie's and "Brand X's" will work. We can't find a reason to be doubtful. The glass man is on hold and we just need some time. Archie will get the rights to the chop top glass...if we can get it to work. I will start a new thread when I have someting concrete to show. Cheers
get that glass done! I will take a set. let us know.
I think I've posted about all the pictures I want to. My next project is to work out how to get glass in the choptop. We plan to use formed sheet metal in place of the glass to get the geometry right. We can bend it into what will actually work on the door and get it tweaked. Then we can send the sheet metal panel to the glass bender. We think that a curvature half way between Archie's and "Brand X's" will work. We can't find a reason to be doubtful. The glass man is on hold and we just need some time. Archie will get the rights to the chop top glass...if we can get it to work. I will start a new thread when I have someting concrete to show. Cheers
Wow, you've done some incredible things with this car.
I never thought too much about choptops, but I have to say that I think the lines of a chop top notchie are even better than a fastback. This view was excellent.
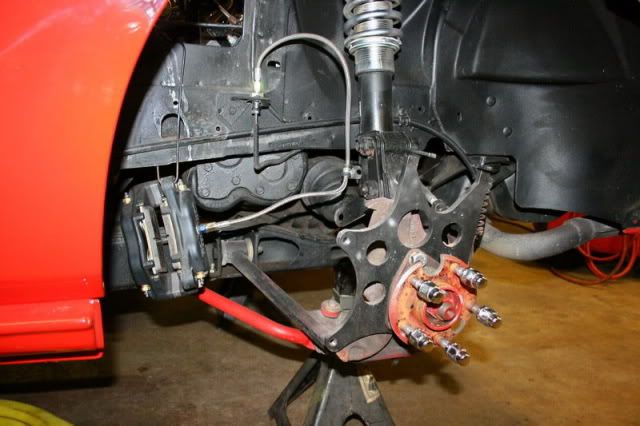
Way back in your first post you had this shot of the rear control arm and caliper mount:
Can you provide any additional info on those pieces? The control arm looks kind of like the Held Motorsports bumb steer reduction kit, but the tie rod seemed different.
Wow, you've done some incredible things with this car.
I never thought too much about choptops, but I have to say that I think the lines of a chop top notchie are even better than a fastback. This view was excellent.
Way back in your first post you had this shot of the rear control arm and caliper mount:
Can you provide any additional info on those pieces? The control arm looks kind of like the Held Motorsports bumb steer reduction kit, but the tie rod seemed different.
Cheers
I have the RCC Specialty Products bump steer correction kit and rear spindles and coilovers. He has a website. It is similar to Held. I think Held has a very good product and well thought out. In fact, the front end has the Held 1 1/2" drop spindles and they are the "owner" of the geometry patent for the Wildwood braking system which I love. However, I think Held "over-engineers" slightly. Anyway, I like and respect Dwayne at RCC. I had a good connect with him. He is down to earth and a serious player. In fact, he is a recovering attorney. I can respect a man the does what he loves. Kinda like that choptop guy, what ever his name is.


 ) and the back inside fire wall lining. Beautiful. I need to remove that crappy gray matting on all of my Fieros ASAP!