First post so a little introduction is in order. I am Dan, live in Austin TX, and fellow Austinites that want to meet up just send me a PM or email or whatever…
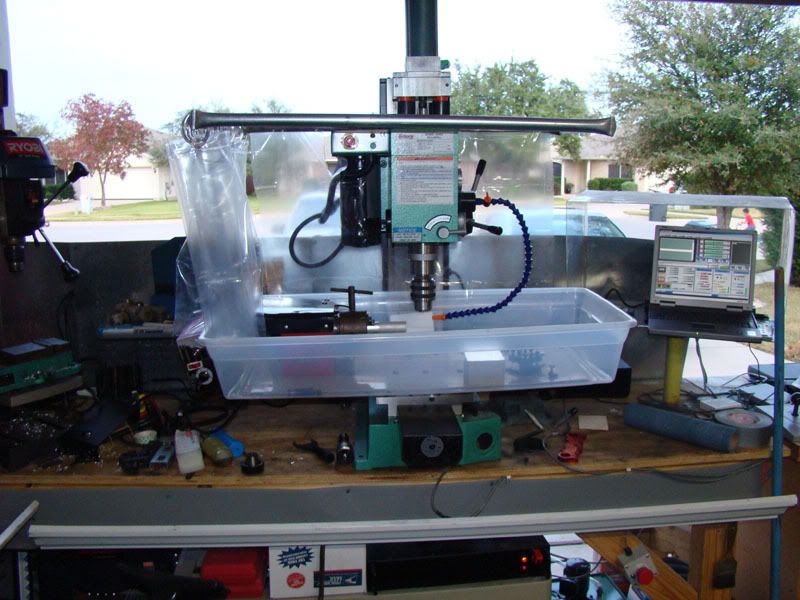
I have a small machine shop in my garage with a couple lathes, cnc milling maching that should soon have a lathe head attached and will be able to do small cnc turning operations. Do have some sheet metal equipment, along with polishing, powder coating and one of my fav’s anodizing J
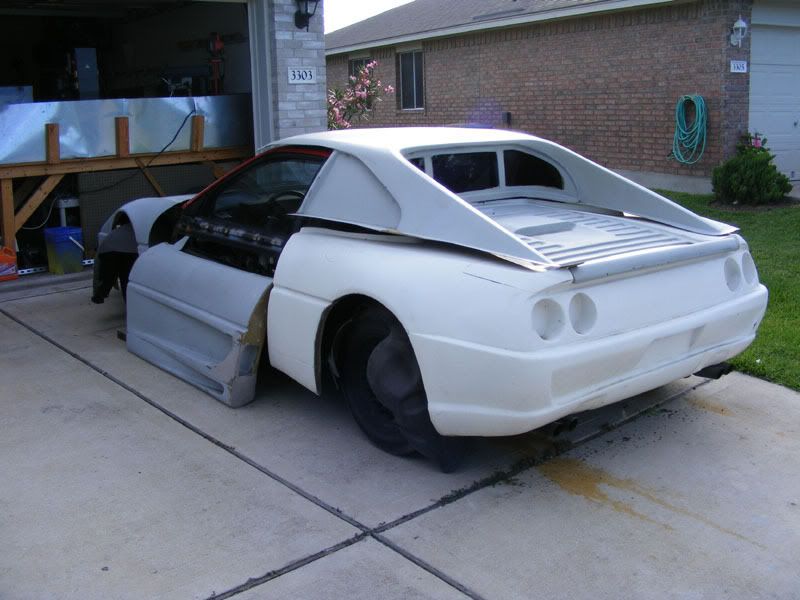
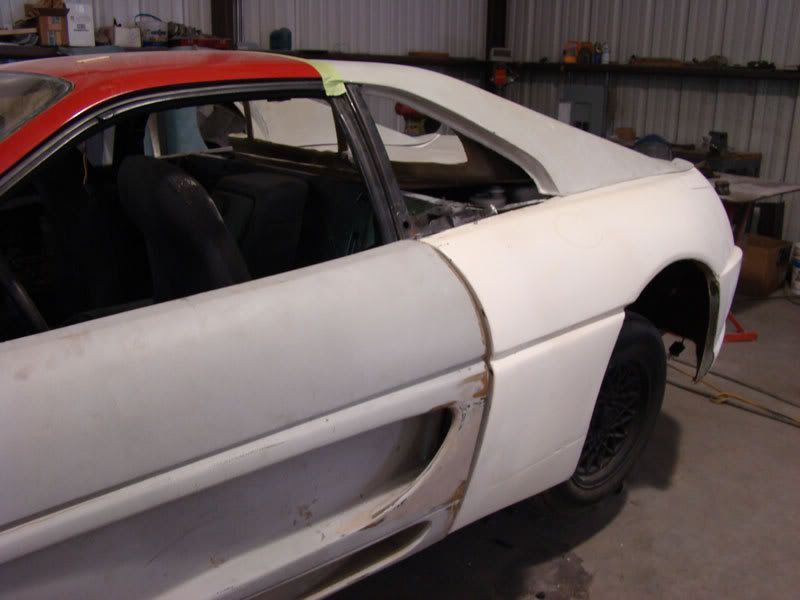
I have an 88 formula V6 5 speed which I am putting a Ferrari 355 kit on it. The kit is terrible…terrible…terrible. I pretty much got one of those too good to be true deals and I am paying for it now. I am just starting my build and found that the body work involved in getting this kit to look half decent is going to be a pain staking process, but I am up for the challenge.
My take on this is that it was either splashed from 2 different kits that weren’t designed to go together or the person who made it was incompetent. Either way it is going to be a nice looking car when it is done it just wont be anything close to an exact replica…more of a custom race car look.
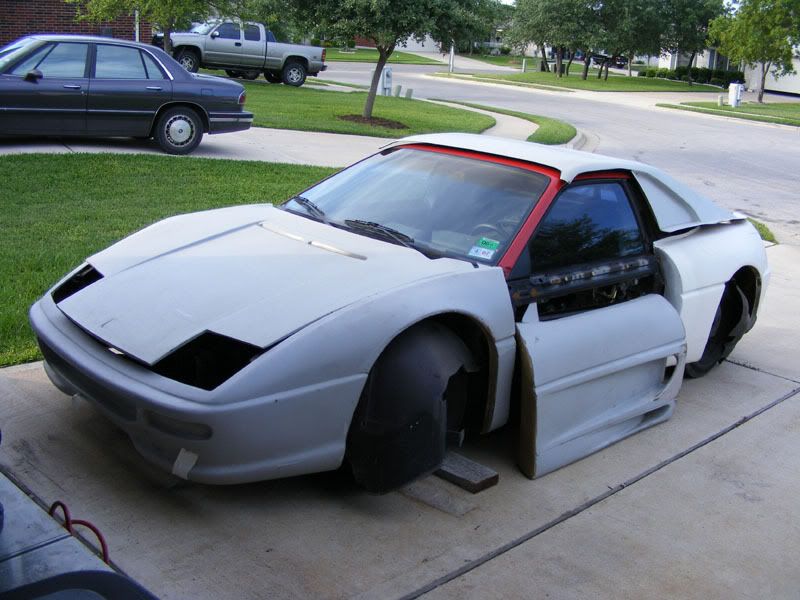
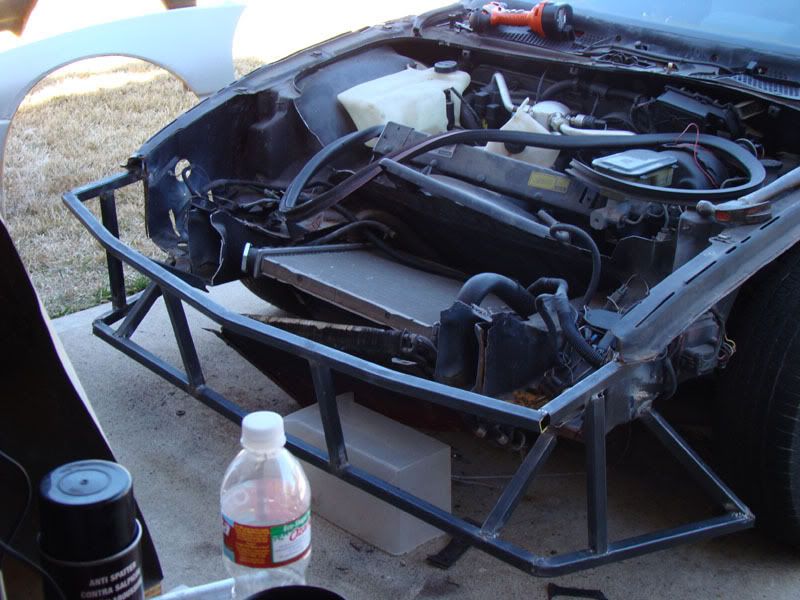
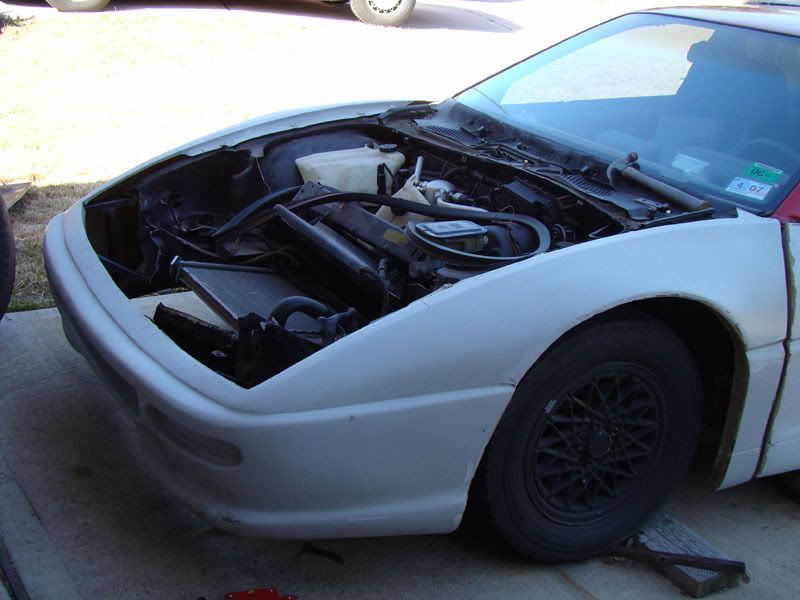
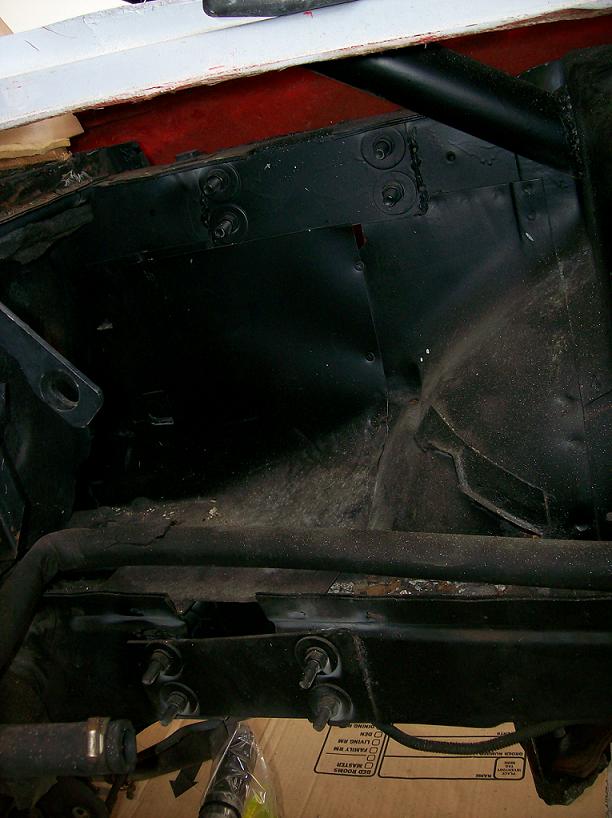
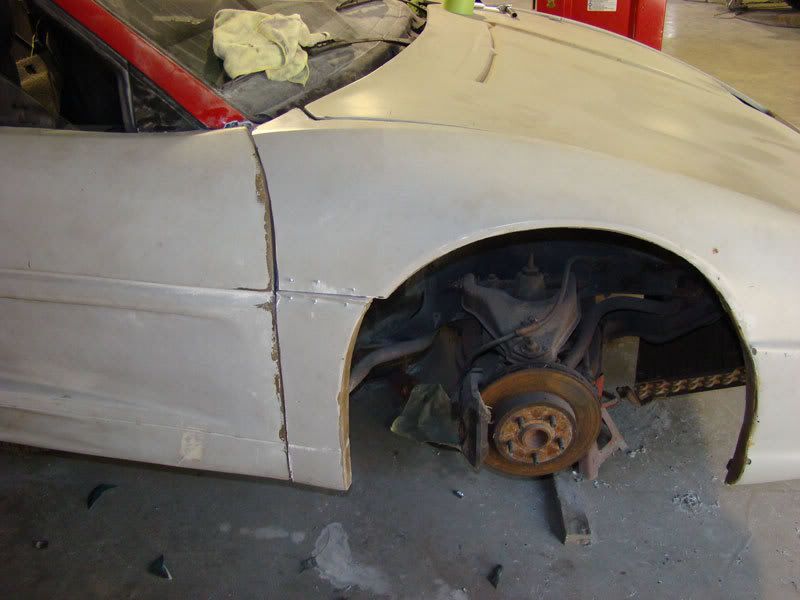
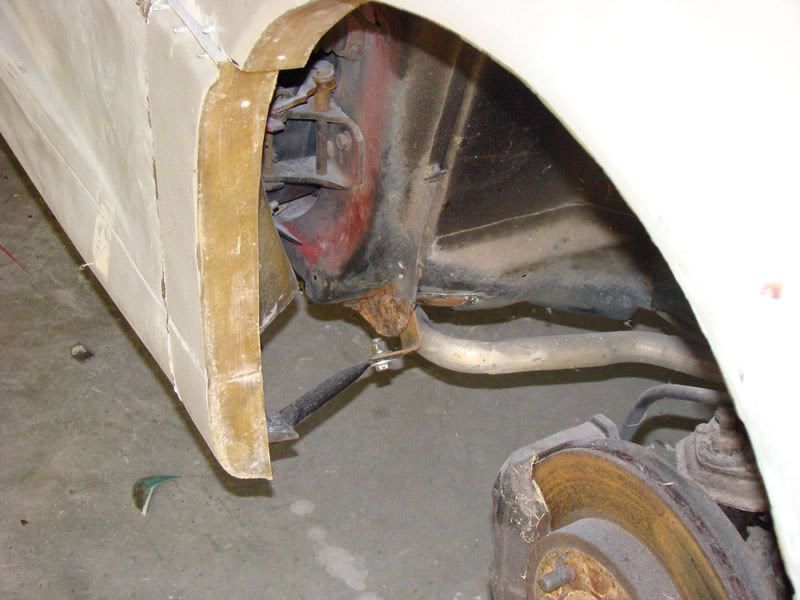
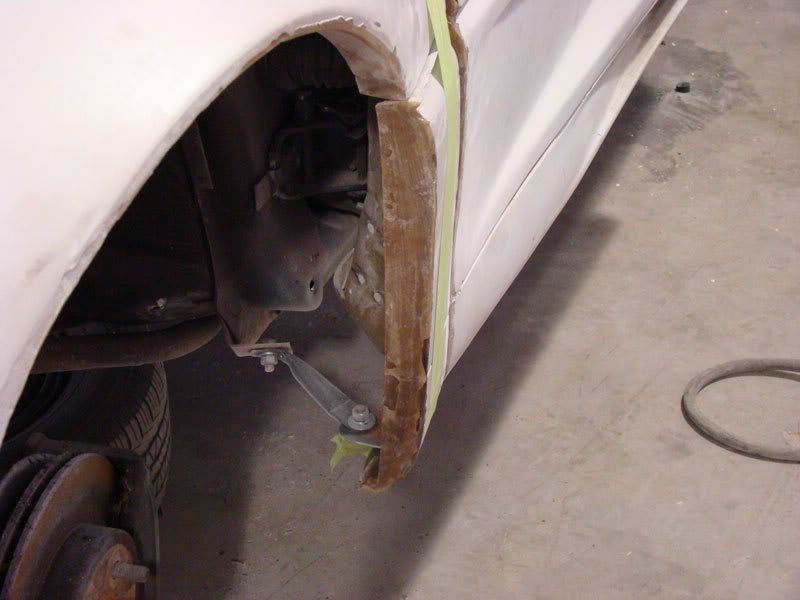
Here are some pics of the build so far. Chopped up the front of the car to prepare for the new front frame…
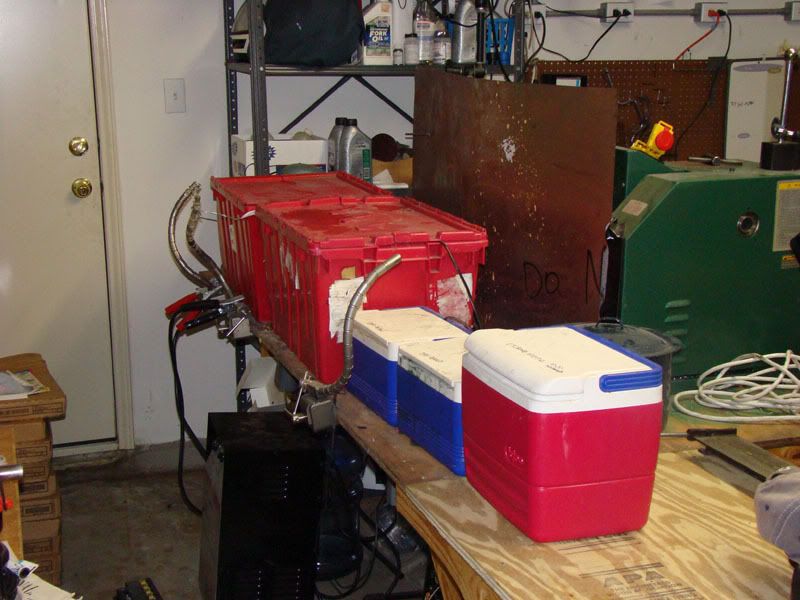
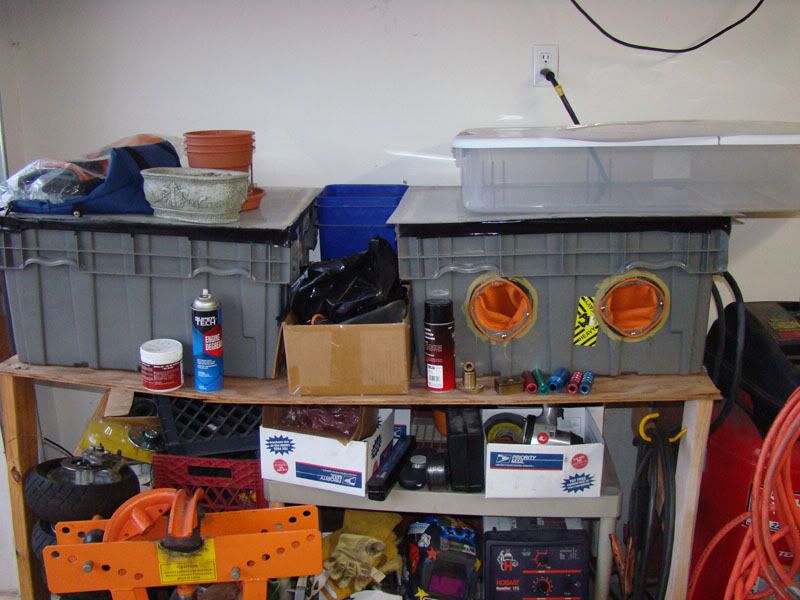
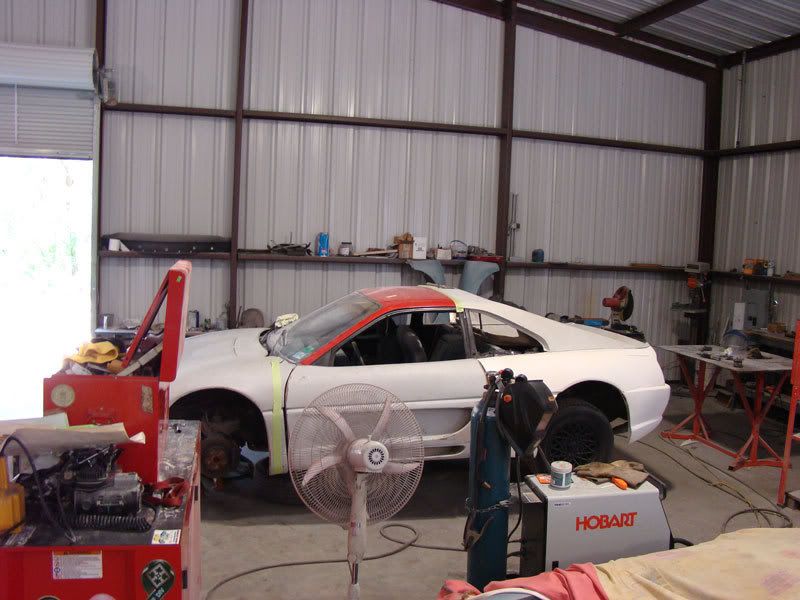
some shop pics
couple sheet metal
My Lathes
CNC mill
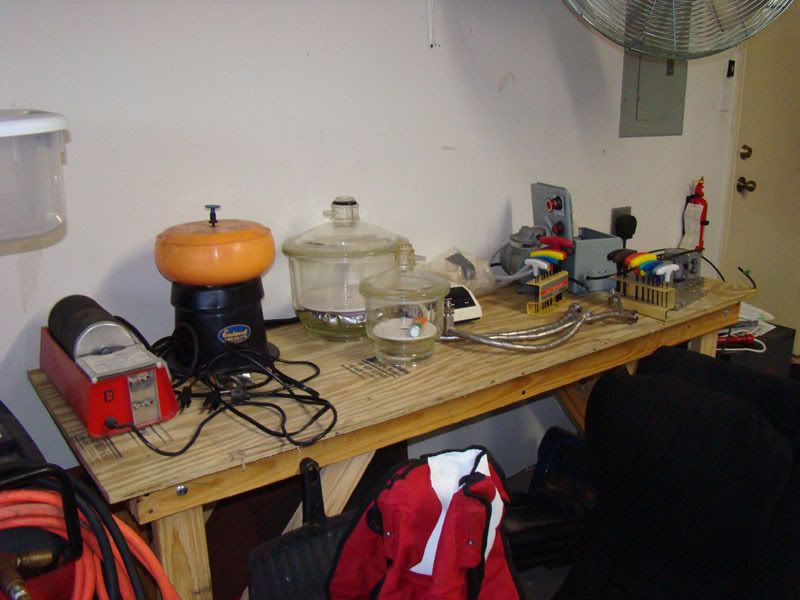
small polishing stuff
anodizing table
small blasting cab and powder coating cab yes the table needs to be rebuilt...
some pics of the kit while it was just sitting on the car..nothing had been started yet...
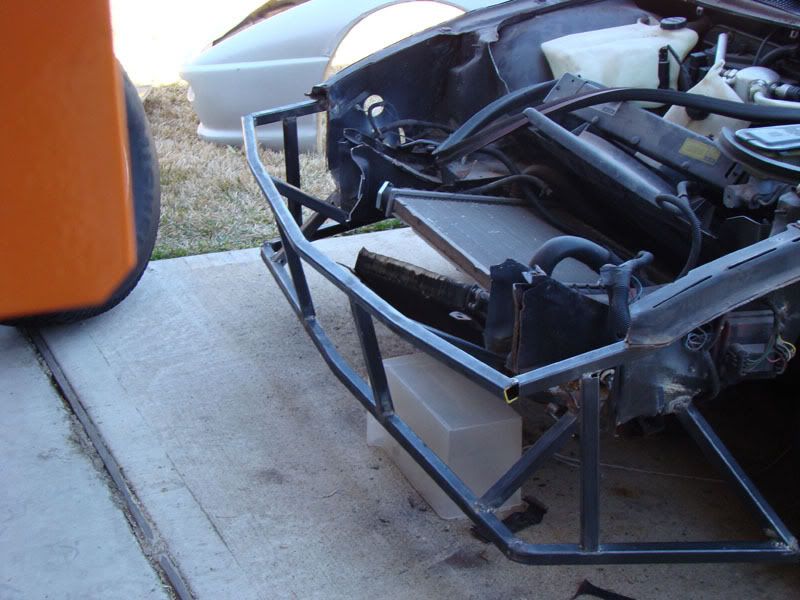
Here it is after some of the front was cut off and a new front frame welded in place...
obviously have a long way to go on this build...but that is a start
------------------ Dan Build it and they will come www.kosracing.com
Wow that kit does look bad... but based on your shop (dayum btw) you will make it turn out great. Nice tools man! Welcome to the forum, I will be following this build.
Cool. I think you may be the first 355 build thread on Pennocks. Goodluck! Looks like a full project. I think my spider was splashed from the same IFG mould. Rob
Good luck with the kit!! If you need any help putting it together check out the site listed below, also, if you really wanna sell that kit and get another then you should really check out the website below.. The best kit on the market is the AD355..... OH!! If your looking for an interior kit for your kit, talk to AMIDA, he is on this site and the kitcar site listed below........ Amida's kit is the one EVERYONE drools over!!
Yeah it is going to be a long build, but eventually it will get there. Just wish the guy who sold it to me was a bit more honest...long story on this one...
I am on that forum as well, but thanks for thinking of it. I have seen Amida's interiors and they are VERY nice, however I have most of the same tools to make an interior as well. If you look at the pic above with the polishing stuff you will see 2 glass jars, those are my vacuum jars for degassing rubber for molding. I have the rubber for molding as well as the plastic. I also have a manual injection molding machine and a half built air powered one so if needed I could put those to work, but for one off stuff I probably wont bother. So I plan on making my own interior at some point with some custom stuff as I want to put a computer in the car with a touch screen....well see how that all goes when i get there.
The lucky thing for me is that my mother is very talented and will be able to help with the interior as well, as in working with the leather, sewing. she has an embroidery machine so i can have stitching done...nothing like getting mommy's touch on a custom car build!!! lol.
My plan is for this build to be a budget build, but not to say that I dont want nice things for it, I have about $3375 (with the kit and car and rear glass and some metal) in it right now and plan to make most everything myself including custom emblems, the interior, wheel spacers, all new knobs, stick shift, brackets etc etc...with the cnc mill and my lathes I will be able to make most parts that I need, so not counting in my labor, it will be just the material cost which wont be too much. I hope the only things I need to buy are the things I am not able to make myself. Wheels and tires will be a huge expense, but I will be painting the car myself as well most likely. I am shooting for a total cost of about $8k, not sure how realistic that will be and that was based off a few rough numbers..
I will keep you updated as I move along with the build....thanks again!
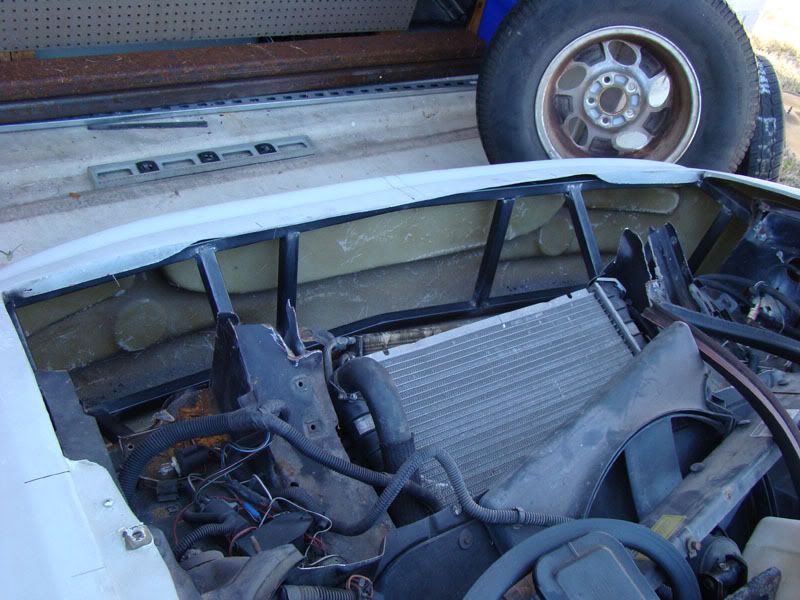
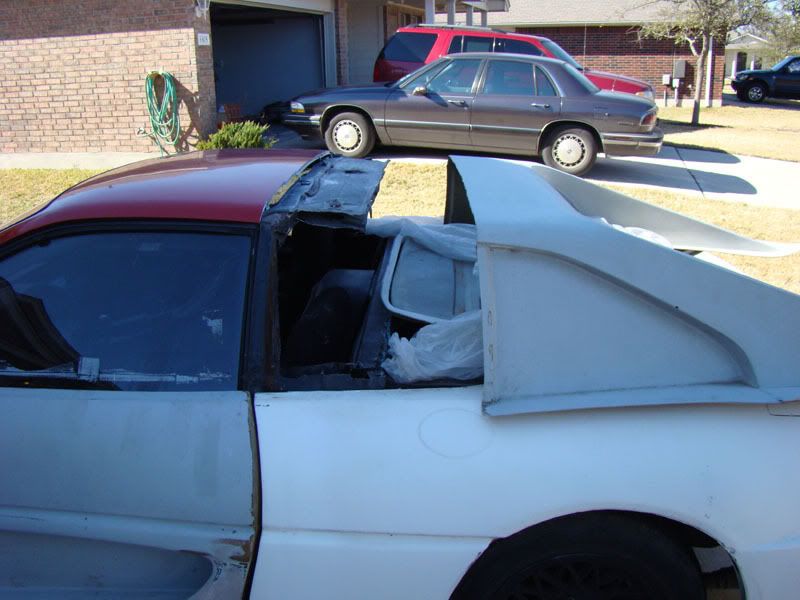
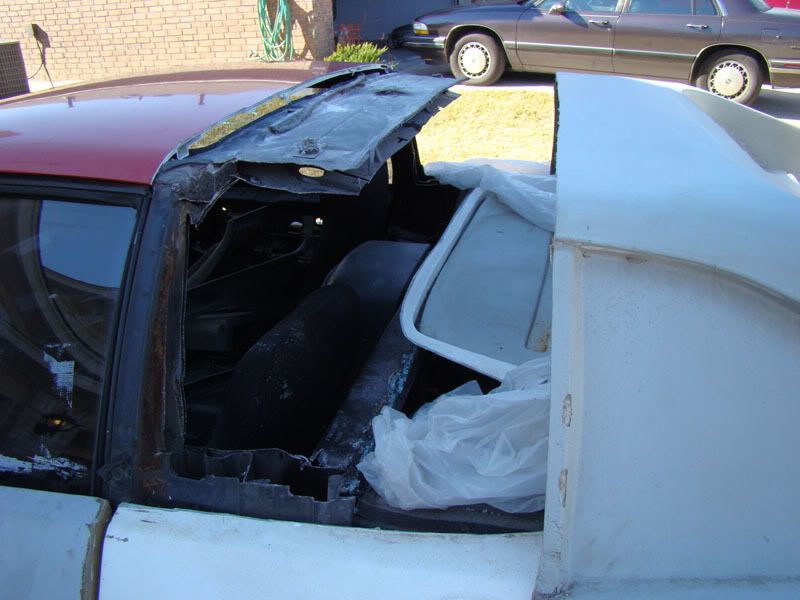
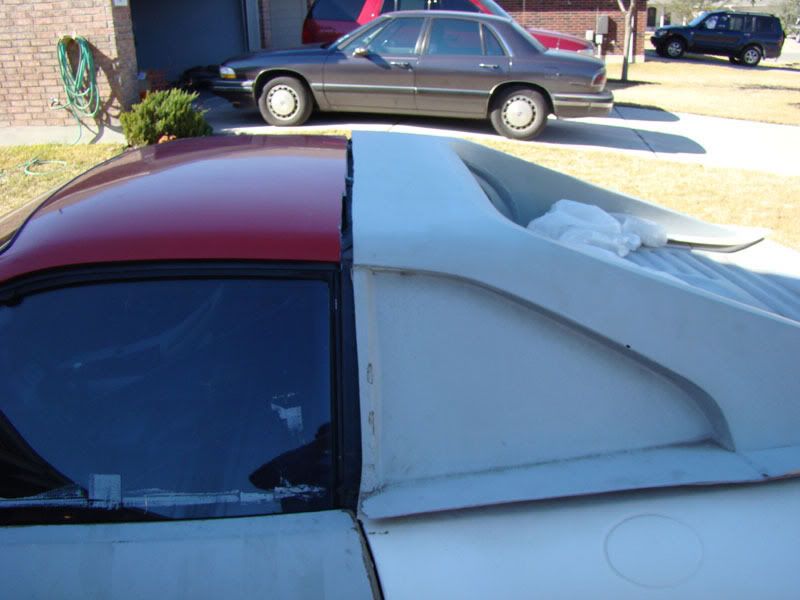
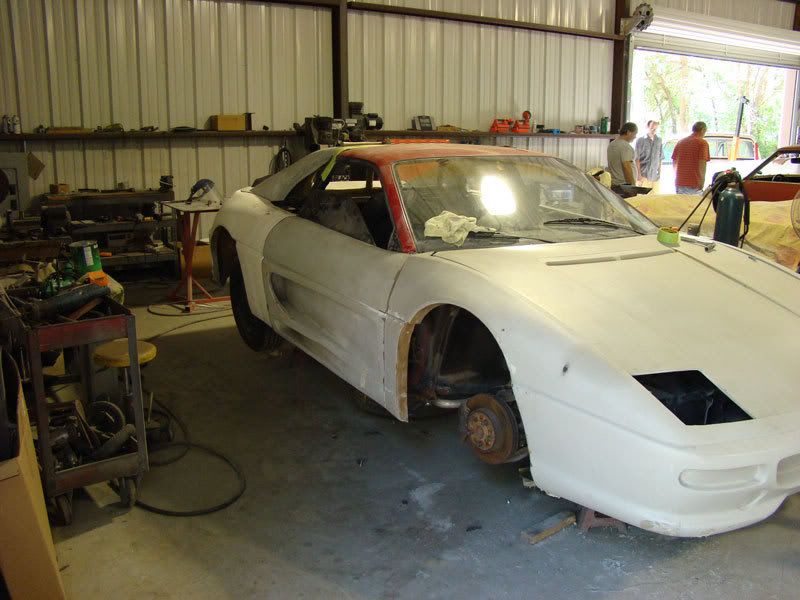
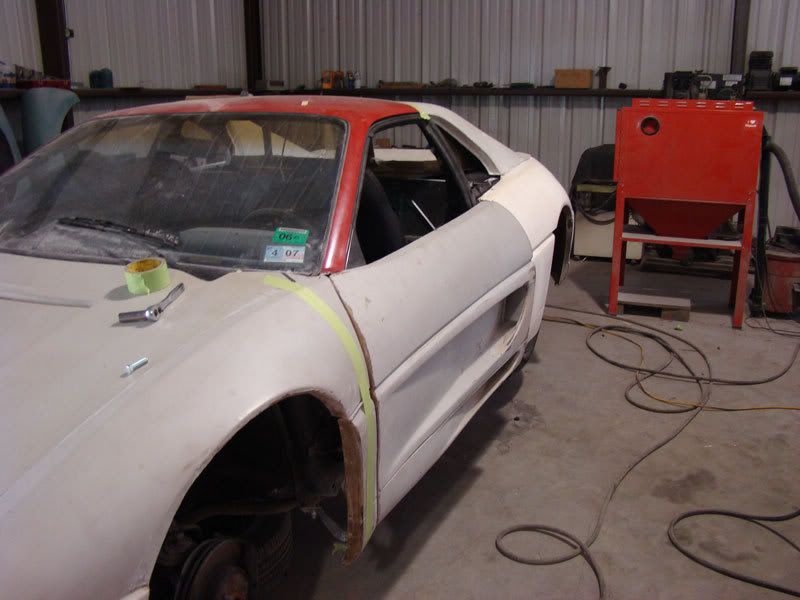
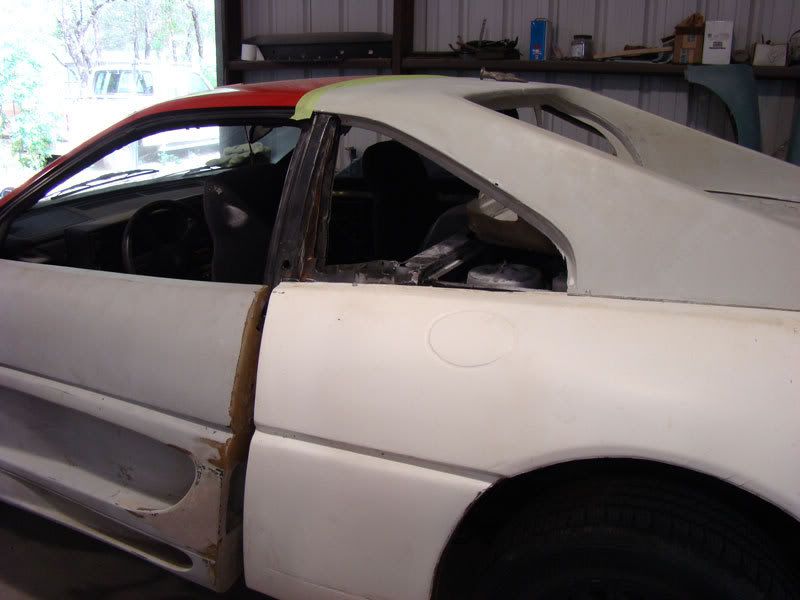
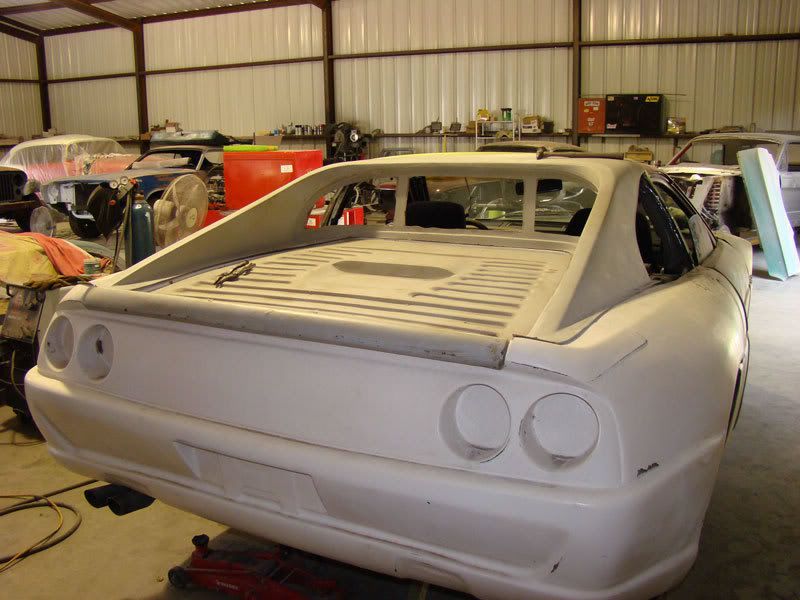
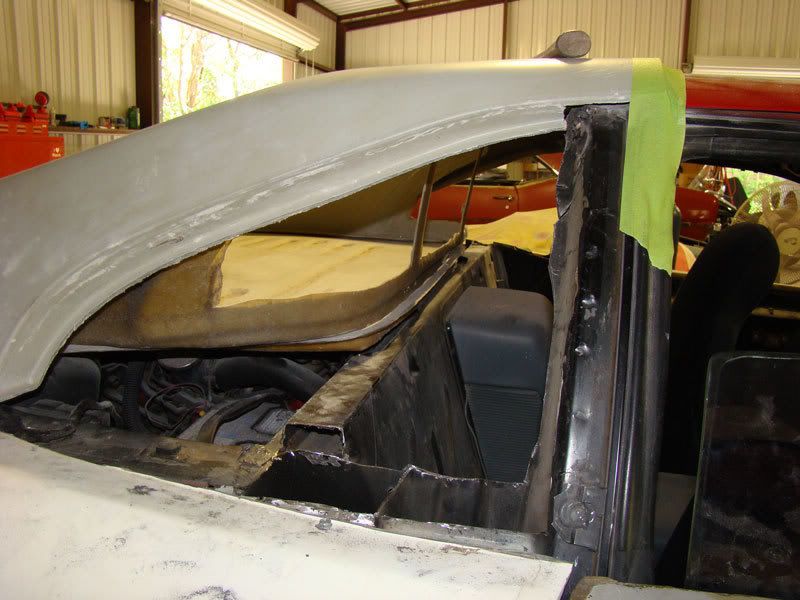
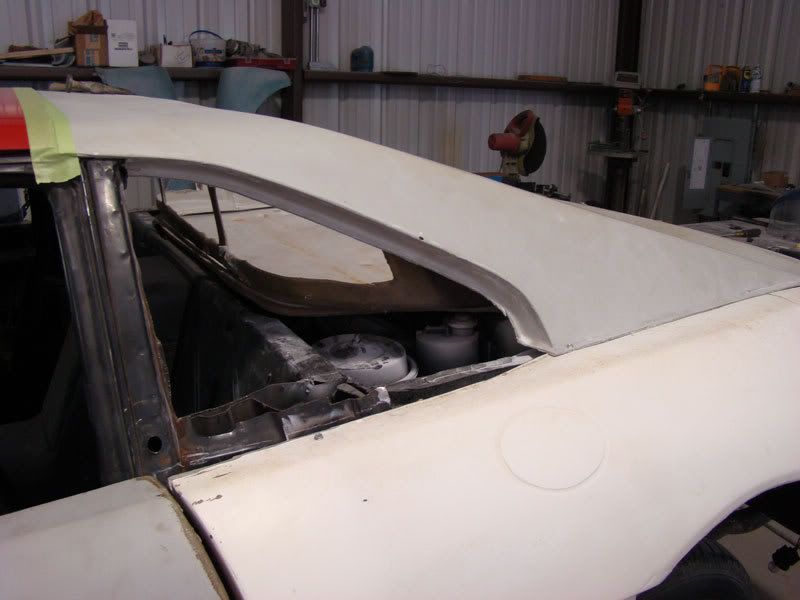
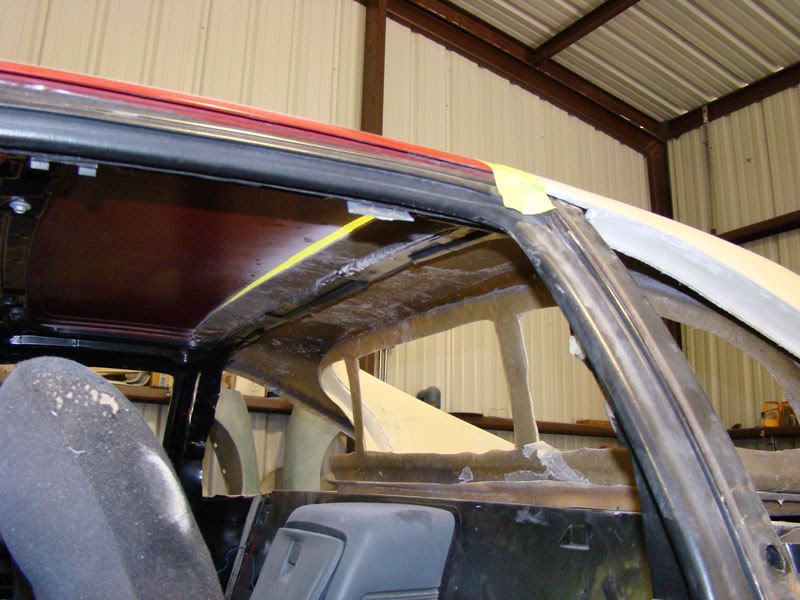
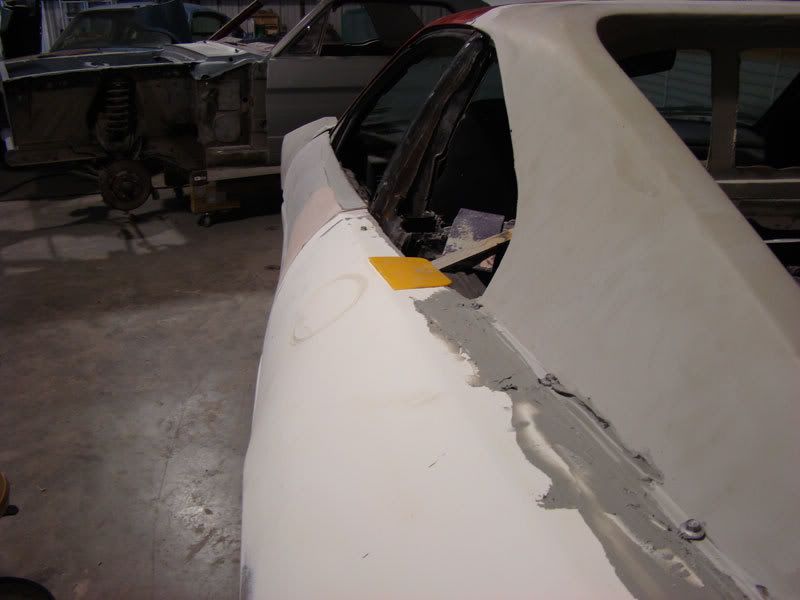
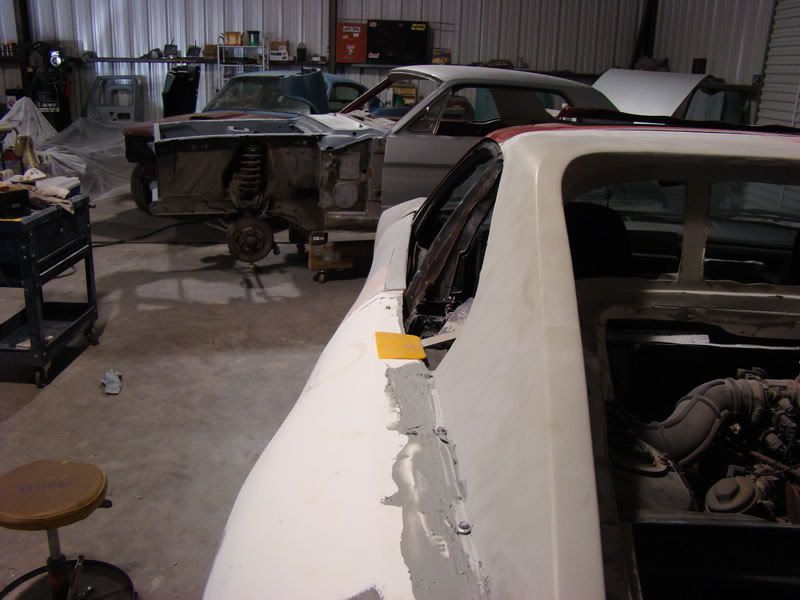
ok some pics of the build...I have one of the doors pinned in place, and the roof line has been cut along with some of the B pilar etc. I will be welding in a new support for that roof a little later. As you look at the pics keep in mind the rear clip is just sitting there and can be manipulated into place, as well as the front clip is just barely sitting there as well. No side supports are in place at the moment and probably wont be until I get everything set up in a temp position so I can have the enjoyment of going back and lining it all up as one unit....lucky me...cant wait till the freakin body is on so I can start working on all the permanent mounting tabs etc etc...
here are some of the roof shots...
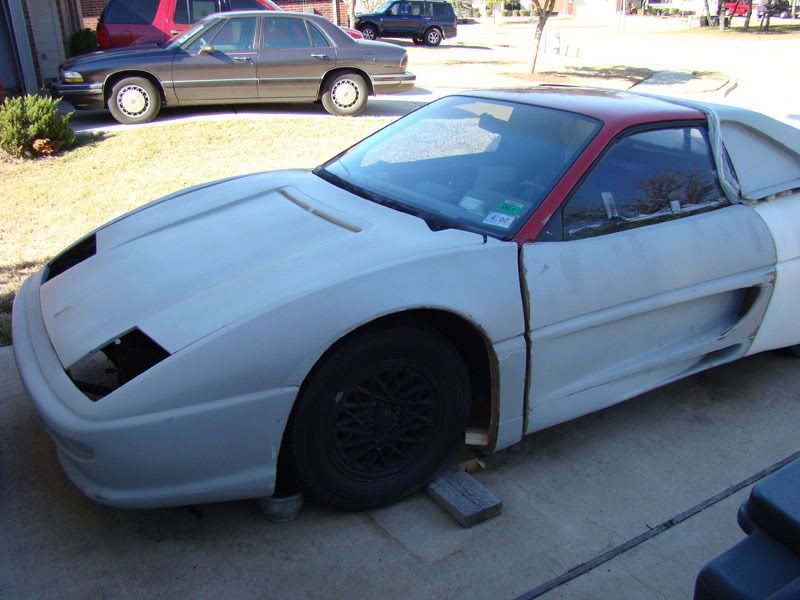
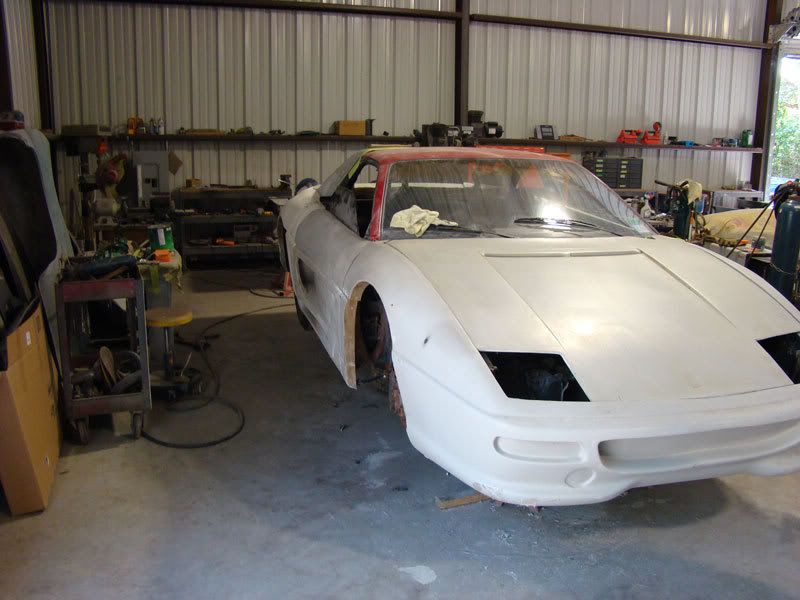
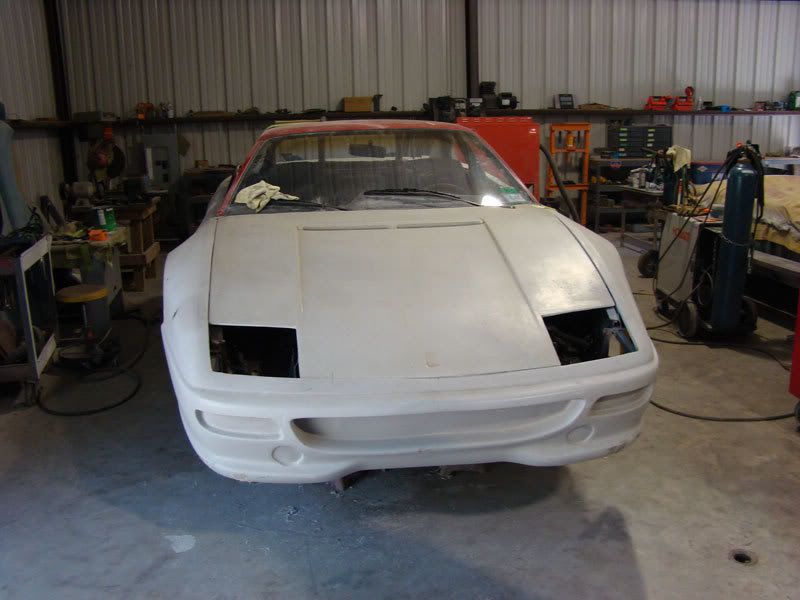
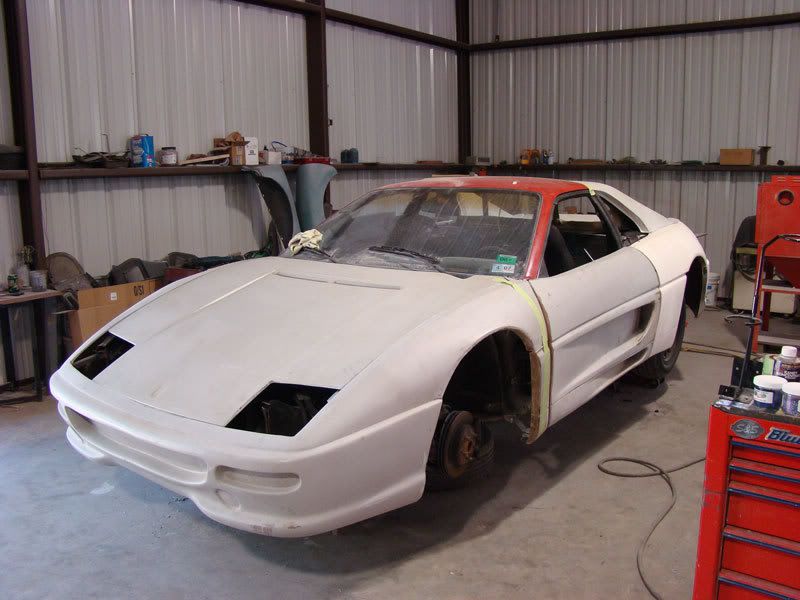
here is a shot of the front end with the hood sort of sitting in place...not mounted to anything though...
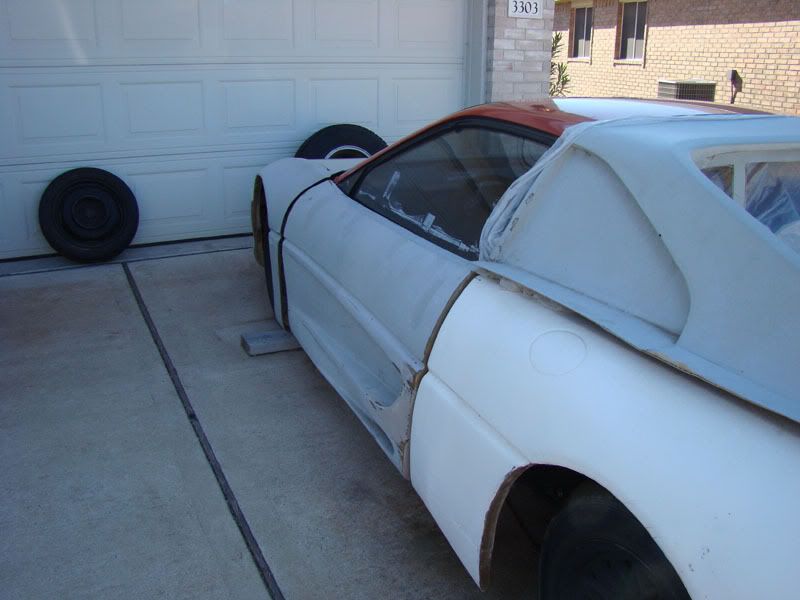
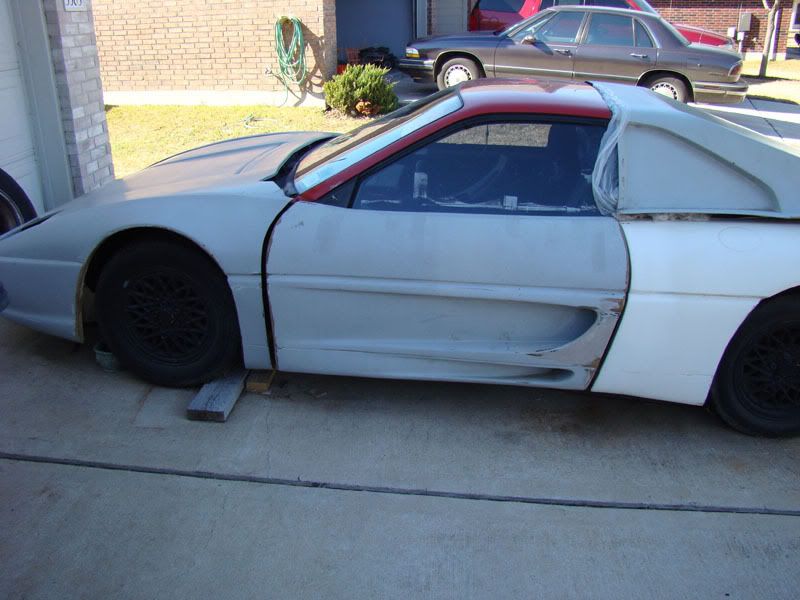
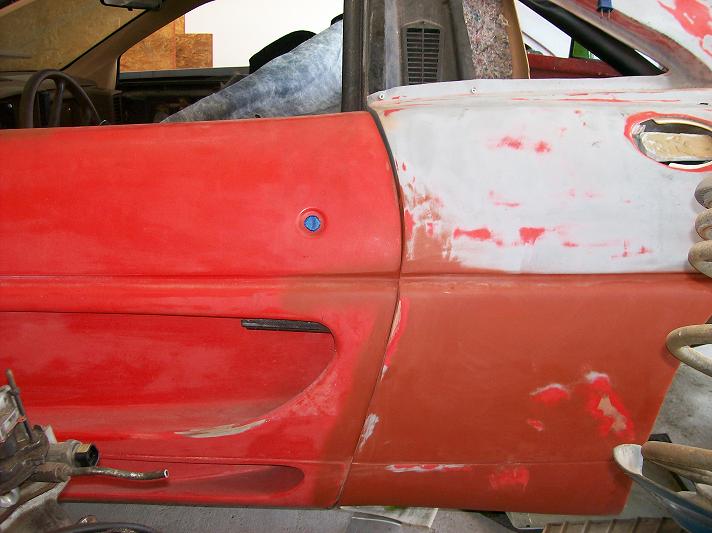
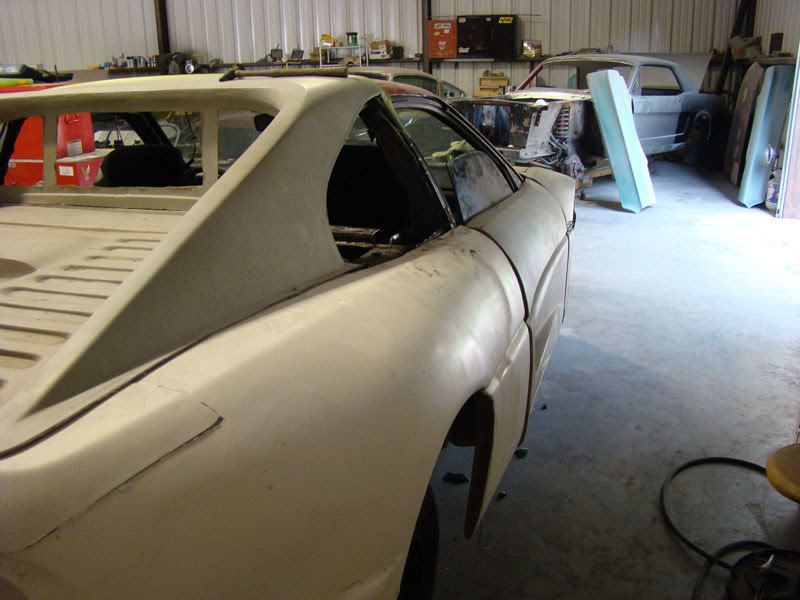
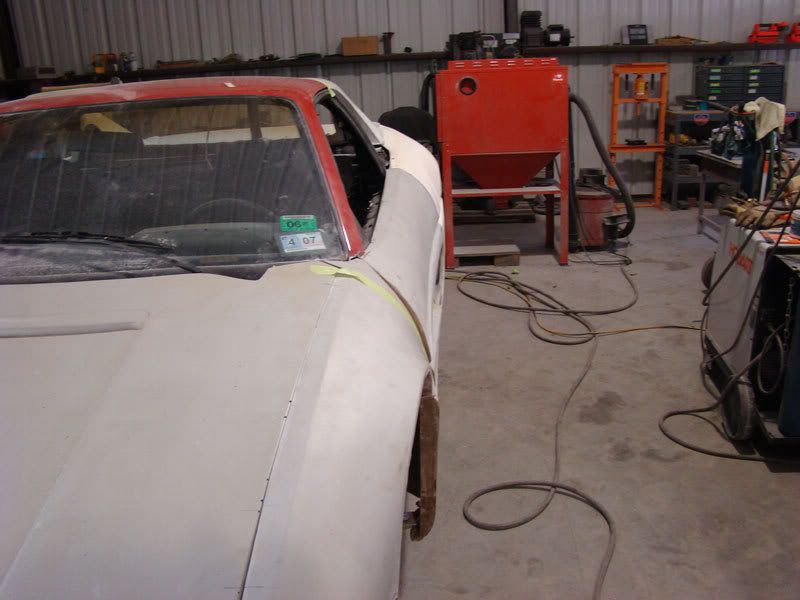
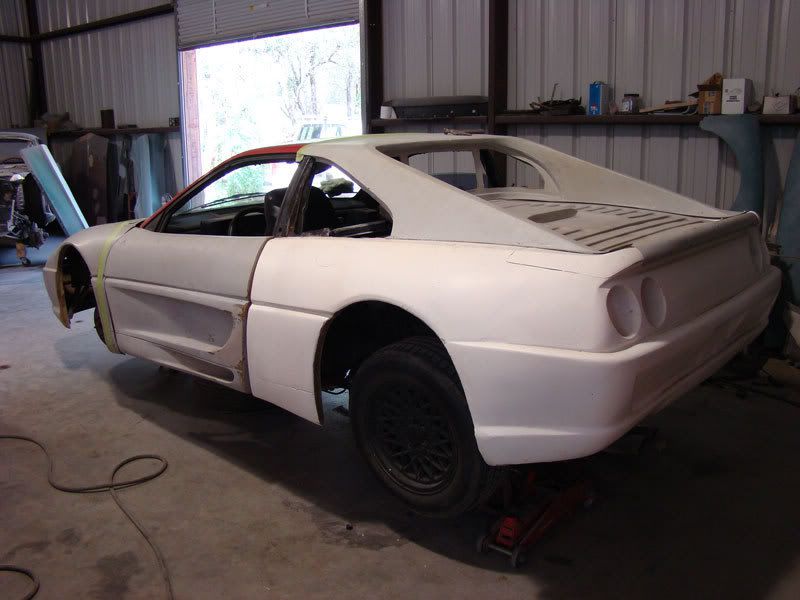
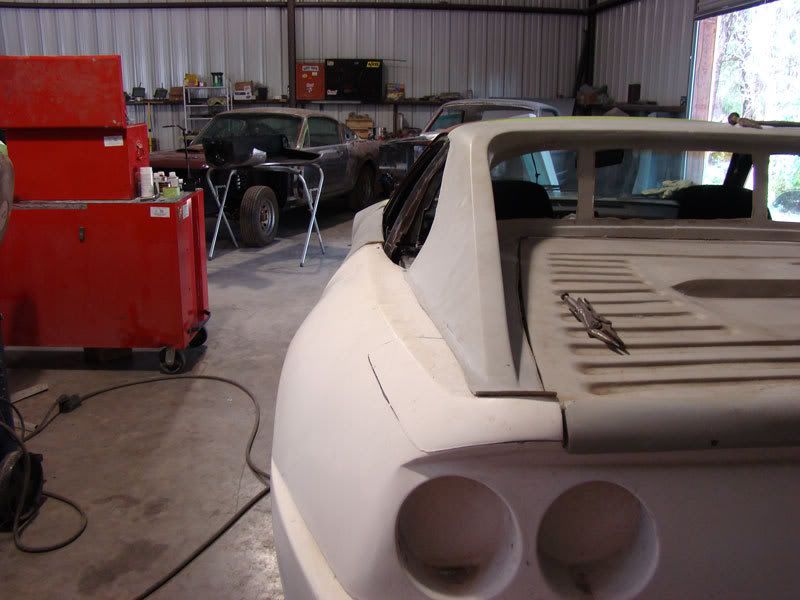
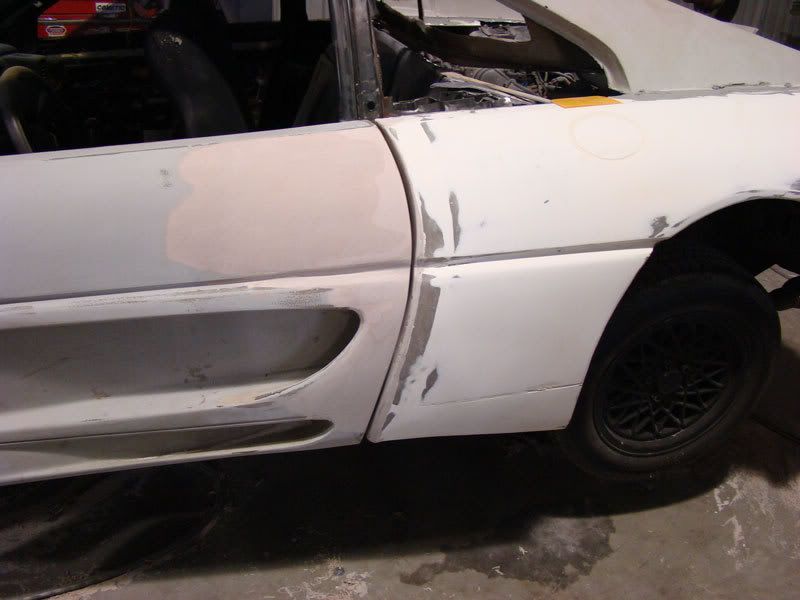
couple of side shots, just so you get the idea of how much work I have ahead of me..
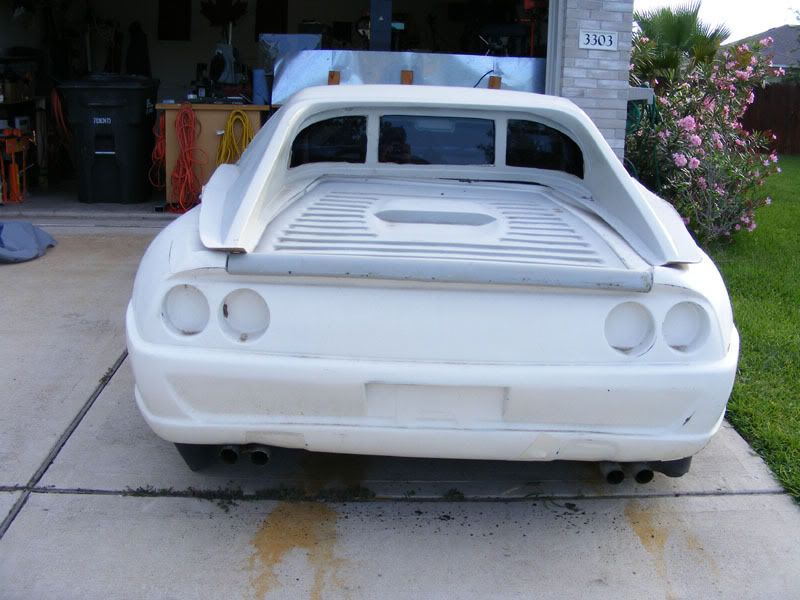
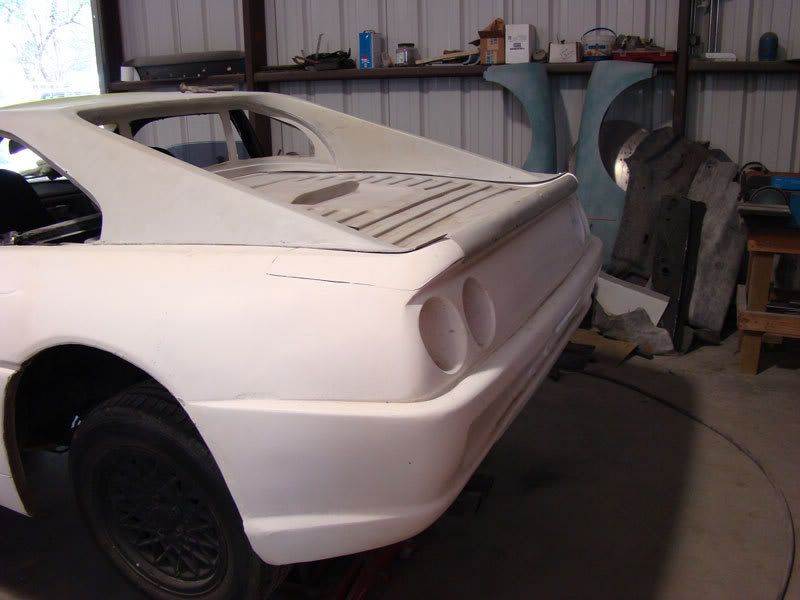
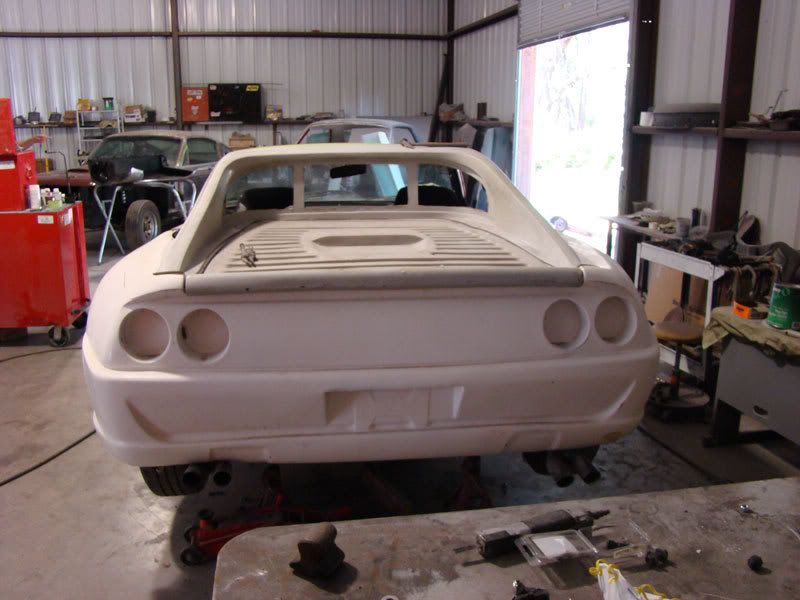
Heres the rear clip issue, your kit is a convertible kit (or so it appears) and the guy made a coupe clip to fit go with it. I think thats where your fit issues come from, its a version of amidas car but it has some other rear clip. Looking better by the post, come on I want to see more!
I was told, it was a splash of an IFG kit out of florida, then brought to Texas at a later date. To be honest I am not even sure if the front including doors are even supposed to go with the rear, and the roof/sail panel combo part could be like you said a complete different part all together. But I guess it is just one of those things now...it seemed like a good deal at the time...heh...good deal for the guy that sold it and couldnt build it I guess.
Anyways it will just be a BIGGER labor of love when I am done. Been a long time dream so I wont be giving up on this one...
Hope to continue to post more and more pics without large gaps inbetween!
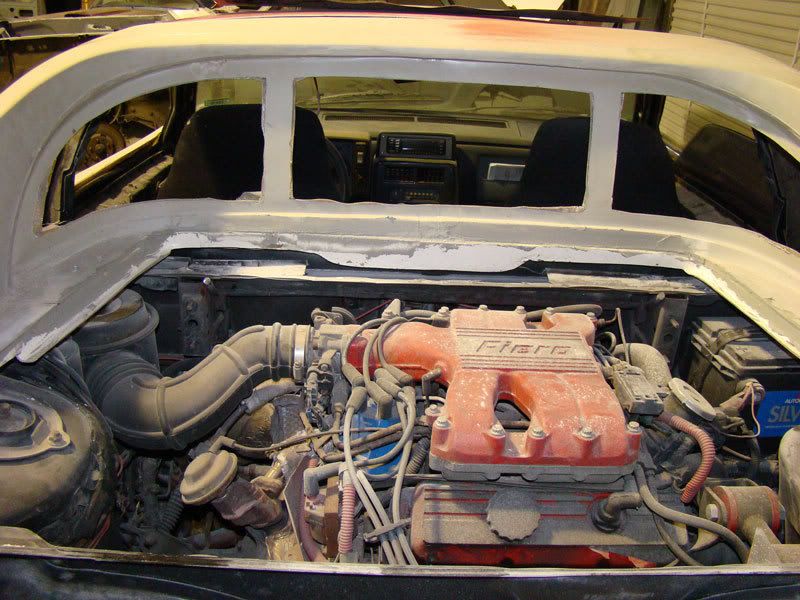
I havent touched the body in a couple of weeks due to school (yes back in school in my 30's :S) but I did look at the engine and just figured I would pull off the heat sheilds on my spark plugs, clean them up, give em a good polish and then anodize them...
So looking for some feedback on this one..My car is going to be black...But I do plan on dressing up the motor as much as I think looks good...any ideas OR pics of engines with color themes?
I have red, green, blue, black, and yellow in my anodizing right now, but could also go get different colors later..
I will get some progress pics to keep the thread going as I wont be on the car too much until next weekend..
Looks good so far! Let me know if you need some powder coating.....
Thanks Revin, I actually have the ability to powder coat as well in my shop, although small parts but I am still able to powdercoat. Thanks for the offer!
Hey KOS, I also have a 355 kit that is in bad shape. Its about 10 years old now and I don't know If I will ever get all the body work done, so much is bad... I need to post some pics.
At least your doors are the same size as your quarter panels!!!
Could I ask a favor of you? I would like to know the height of your door at the back from flat edge to flat edge. (Just open the door and measure it that way at the back)
My hoods, and rear section (the whole back of the car is one piece) are all warped due to the maker not using enough catalyst. Know anyway to fix that?
Also, Mine is a stretched frame, it was supposed to be an exact replica, HA! Is your a stretch too?
[This message has been edited by Dracor (edited 03-13-2008).]
Yeah my front and rear clip are one piece as well, and I do have some warpage. Depending where you parts are warped you may be able to cut slit marks in the panels, graft in metal bars on the back to help straighten then out, then glass back in your slits. I have a few major areas I have to fix as well on mine, so will require me to cut the part out and remake a new one.for example one area that is terrible is my exhaust cut outs.. the molder made a mess of it. I am thinking I am going to make a form, but out the bad sections and use the form to regraph in new ones that match.....
I was told my was a stretch, but if it actually is I am not sure how to make it work...I could get one area to line up but not another...in the end the doors would have huge gaps and wouldnt work..move the doors back and huge gaps between the doors and front clip. So basically when I fit it without a stretch I can make the lines look decent, and the gaps workable....so no it is not a stretch...
Did you already do you your stretch? If not you may be able to make it a non stretch and take care of some of the warping at the same time..
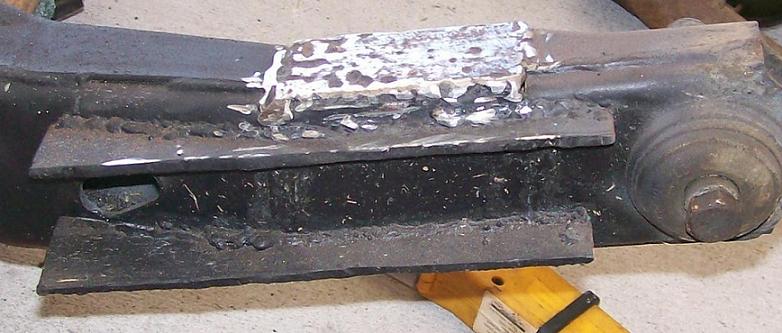
Originally posted by Dracor:I would like some advice from the pro welders out there. Do those welds look strong enough for roadracing?
No your frame needs work, the welds may hold but I wouldnt trust them. They are too small and not uniform. I would box the frame all the way around. Also I cant tell from the picture but do the bolts run through some pipe or is it just holes drilled into the tube, if so then they should have some pipe put inside the frame to keep it from collapsing.
[This message has been edited by Jake_Dragon (edited 04-19-2008).]
just thought I would give this a bump to keep it from going to archives. Will be starting on it again in about 2 weeks for the duration of the summer....
------------------ Dan Build it and they will come www.kosracing.com
No your frame needs work, the welds may hold but I wouldnt trust them. They are too small and not uniform. I would box the frame all the way around. Also I cant tell from the picture but do the bolts run through some pipe or is it just holes drilled into the tube, if so then they should have some pipe put inside the frame to keep it from collapsing.
Like Jake said I would put some tubing inside then weld it then box it around since it is going to see extreme duty racing, not a pretty sight to see the back passing you around the curves.
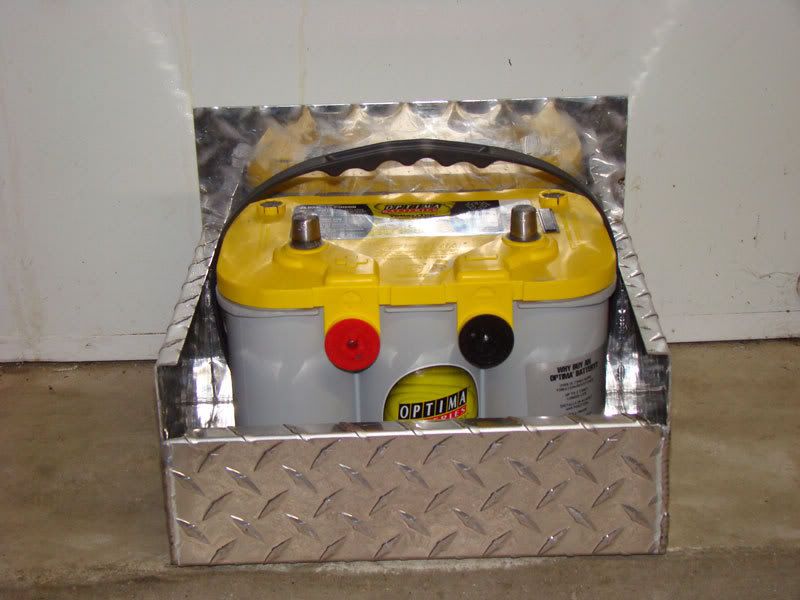
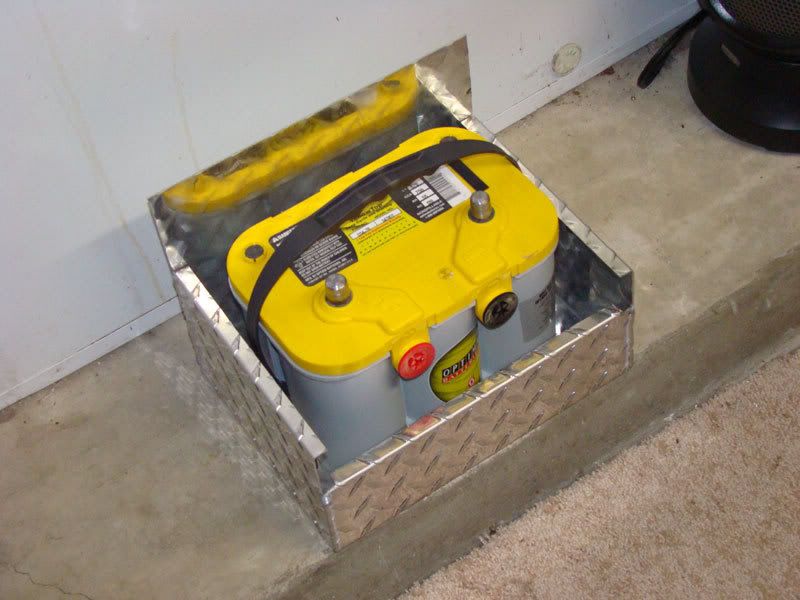
Yeah I am hoping the majority of the body will be done in the next couple of weeks, have a few things to do like relo the batter, and set up the cold air intake from the doors. Also need to fab up the hinges for the front and back.
At least there is some major progress being made now!
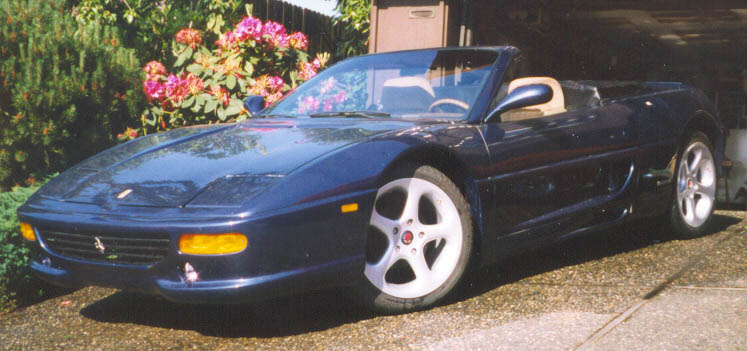
you have your work cut out for you. I am not sure who's kit that is but there are a lot of things that were not done right. but if you got a good deal thats great. by the way it does not matter what kit you buy you have to twik and fit everyone of them. it takes a lot of time and frustration to finish one. good luck you are doing well so far. here is a picture of a friend's car I worked on for him to give you some insperation!
oh yeah this kit is a mess. But hopefully it will all be able to be worked out and have a decent looking car when it is done. Just keep pluggin along and working the lines and see where it all ends up.
Nice looking car, just hope i get to that point one day!
WOW!! A few days past 4 months and no updates! Jus kiddin wit ya......... Would you happen to know the maker of this kit?
Edit to add: On one other note.. Any chance you have a pic, or could take one of the passenger side of your kit, about the same angle and distance away, like the pic below.......? PWEASE???
pic of fiero:
------------------ Me, I sell engines, the cars are for free, I need something to crate the engines in.... Enzo Ferrari....
Aerodynamics are for people who can't build engines.... Enzo Ferrari...
Today they are called garage's, yesterday, they were stable's! Eric Jacobsen....
[This message has been edited by pavo_roddy (edited 12-13-2008).]
I know!!! Havent touched it at all. I think a big part of that is that my wife is expecting twins now and I just got a new job, so things have been nuts. Let me see what I can do about getting you that pic
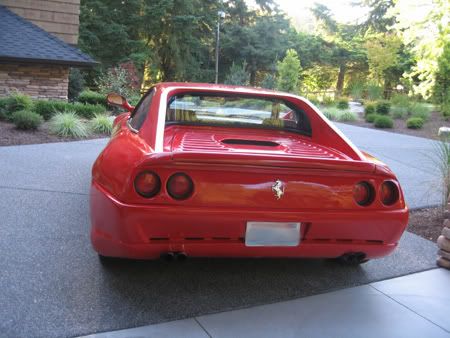
On my F355, I installed drag wheels to the front. Even though my car is not driving yet, I have used the wheels many times. The best part is that I got very lucky with the color of the wheels is almost exactly the same color as the car.
[This message has been edited by Brastic (edited 03-10-2009).]
The nose is very low and will scrap on everything. I also like to use the wheels to jack the front end up. With the 355 bumper and the 1" lowering, I cannot get my low profile jack under the front end. I use the low profile jack on the little wheels to jack up the front enough to get the bigger floor jack under the middle and jack up the car high from there.
Another solution would be some sort of actuator/hydraulics that temporarily raise the front end.
I've seen it on real Lamborghinis and thought it's cool. Side note: For Lamborghinis the kit car version is actually more reliable than the factory part. Quite a few owners of real Lamborghinis replace the broken part with the kit car version.
I'm curious if there would be a cheap solution that could accomplish the same thing.
Maybe even combine it with a proximity sensor (i.e. cannibalize one from a LEGO Next system), which then automatically raises the front end if it's in danger of scraping. (i.e.: 3" of clearance), then as soon as there is enough clearance (more than 3" + the amount it was just raised) it resets the car to ride height again.
I think the 355 looks cool. I had a 355 body kit on my 86 which I bought as a project after the body was on; I ended up redoing the interior. A few things I learned:
I had a rear glass backlight from an MR2 (do not know the year). I tried to get trim molding and found out that Toyota only used molding on the bottom. I ended up buying the stick-on molding that you would normally put along the sides of the car to keep from getting parking lot dings. I think the stuff I bought was about 3/4" wide. I was able to glue it over the seam between the backlight and the body. I did it in two pieces (lower) and one curved to follow the rest of the glass. It ended up looking very good.
When the guy installed the body, he did not remove the battery. It is now permanently mounted in the stock location. I think the only way to get it out is to drop the cradle to get enough clearance. The same goes for the air cleaner. I ended up retaining the stock air cleaner, but mounted it with only the rear bolt (for the lower frame). That way, I could change the filter br removing the entire air cleaner assembly as a unit. There was no way to get the top off while the assembly was still in the car.
The mirrors on mine were fixed mounted to the body and glassed on. I was always nervous about them breaking off. If I did it in the future, I would consider some kind of folding mechanism, or at least some sort of break away, so that if they get clobbered, the damage is minimized. The rear view out of the right mirror was not very good.
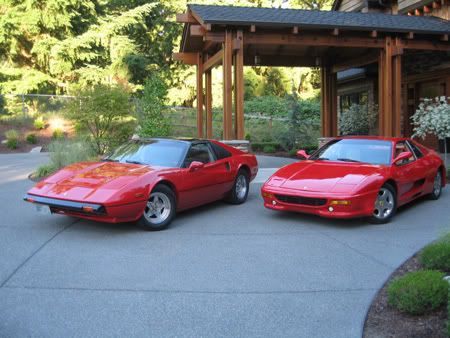
Also, my car had no provision for outside mechanical unlockers for the doors and trunk. A dead battery always concerned me. I found that I could unlock the doors with a pair of long needle nose pliers by laying on the ground and reaching up around the door handles. I have seen a post on PFF in the past from someone who did a mechanical remote for the trunk. Here are a few pictures (the car on the left is an 85 with 308 conversion. Let me know if I can be a help. Amida does great work on custom 355 interiors.
Jim
I
------------------ Jim 86 SE 355 Body Kit w/3.1 Auto (Sold) 87 T-Top Coupe 2.8/5 Speed new project


 Jus kiddin wit ya......... Would you happen to know the maker of this kit?