Hey everyone,
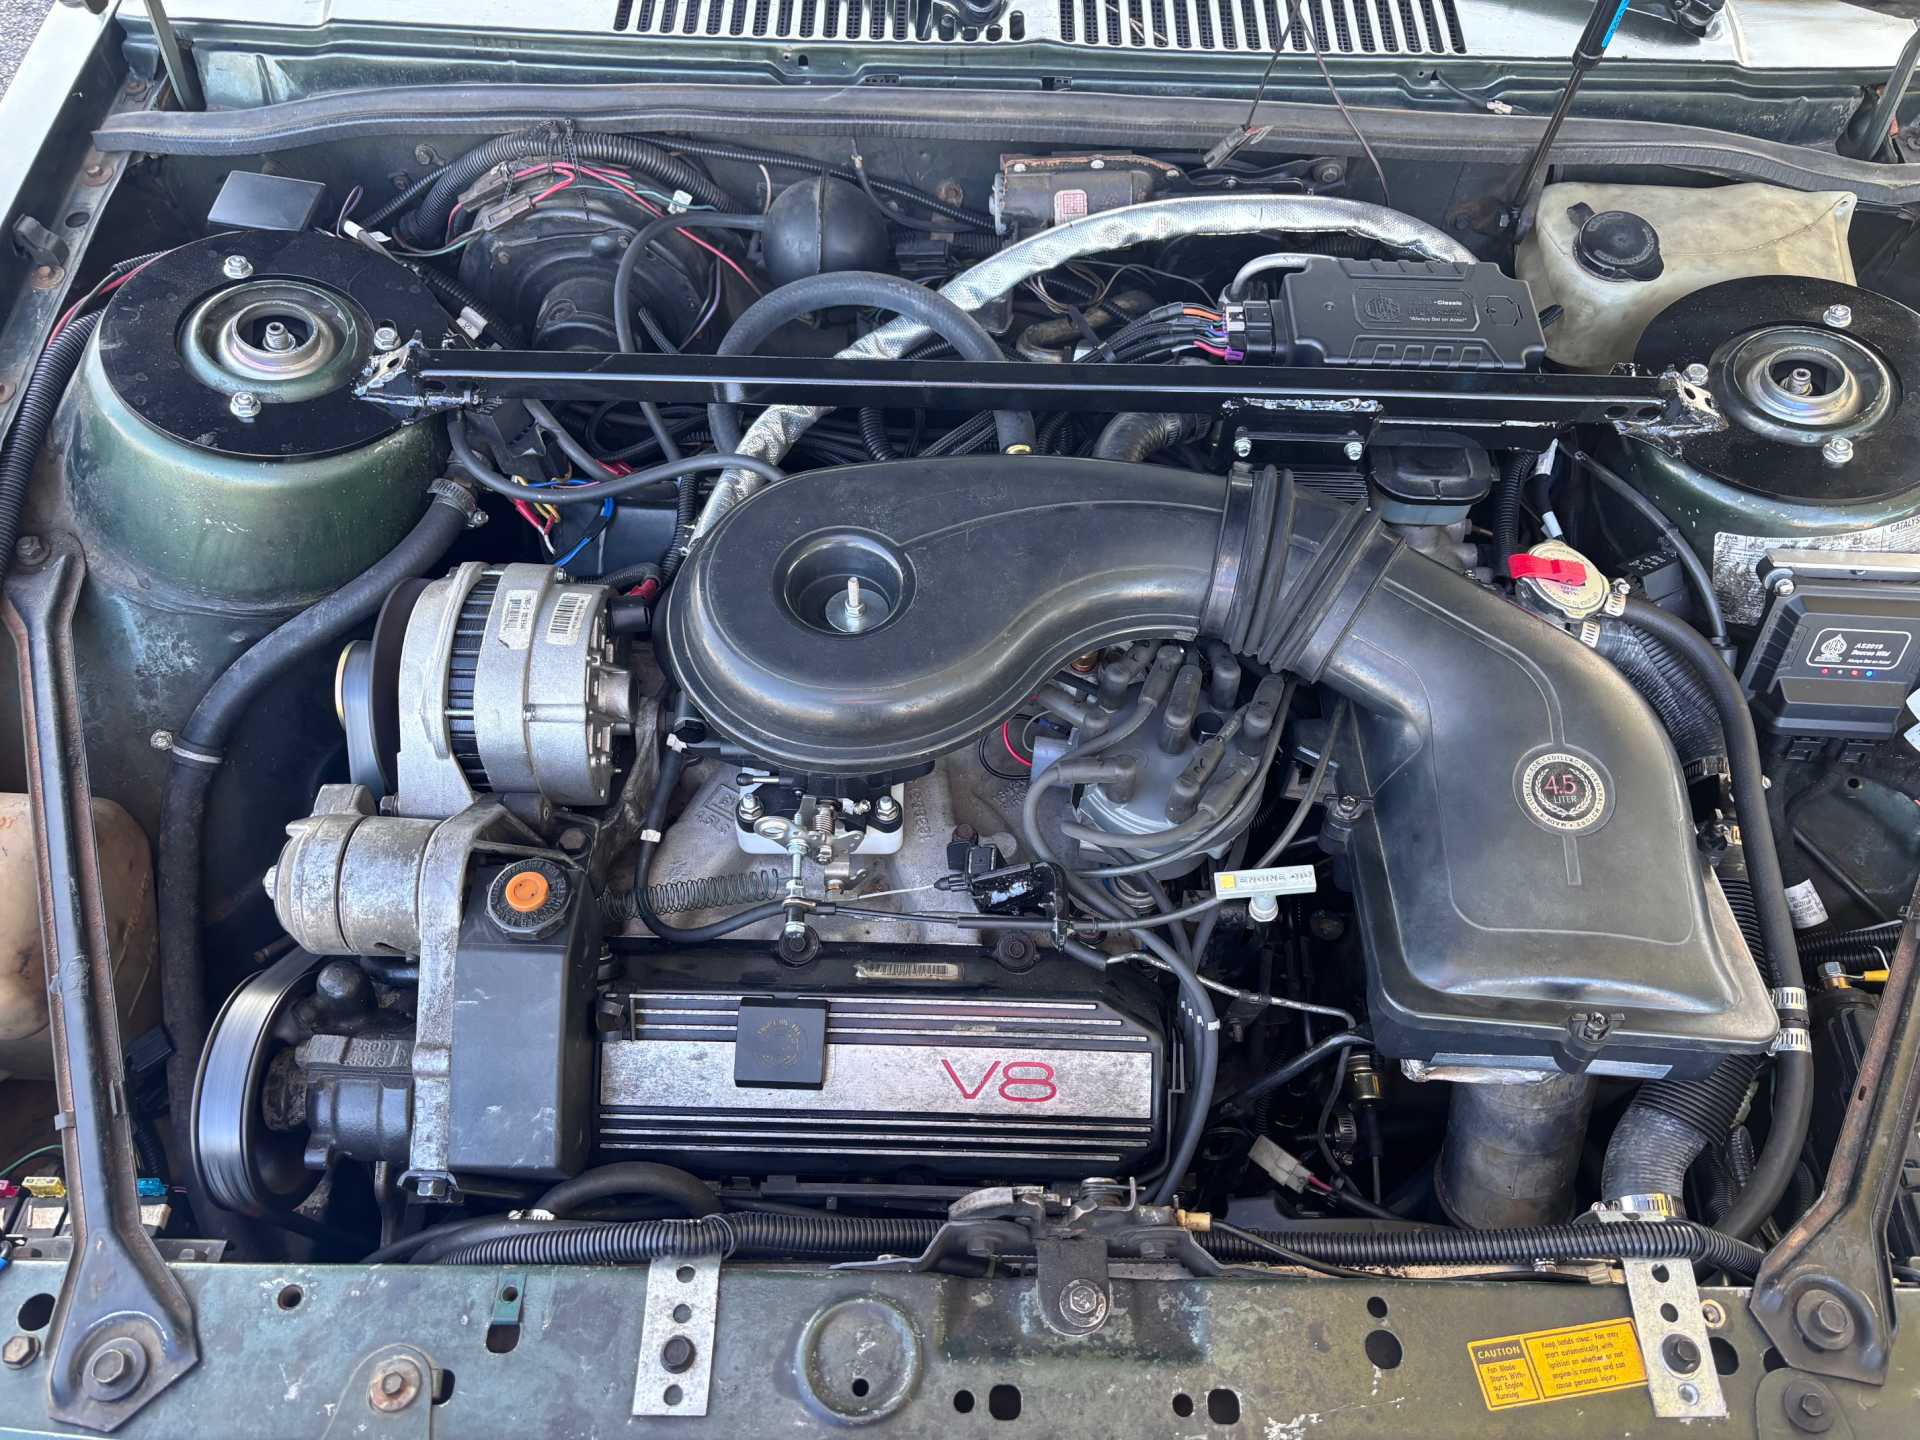
I’ve been running my 4.5 Caddy swap using a modified Ford 7+1 Duraspark 2 distributor without issue, so I figured I’d do a step by step build thread on how to do the mods.
The Duraspark 2 is an OEM version of the 7+1 Dual Sync distributors that most after market fuel injection companies use/prefer for MPFI. I did this mod to make it possible to run after market EFI systems on Cadillac 4.5/4.9 motors so swapping cams, adding turbo or nitrous is not just possible, but relatively easy. I ran a modified HEI distributor before figuring out this mod, and can say this is a better setup = it runs better and timing is more accurate.
Why do you need a Dual Sync? To run multiport injection sequentially to achieve the best combo of power and efficiency. Here’s Holley’s article
https://www.holley.com/blog...en_do_you_need_one_/I am a fan of Aces EFI, it is DIY budget friendly and high quality. I worked on this mod to use their standalone multiport (Wild Card) system on a future 4.9 build. It comes with a wideband O2, 3-bar MAP for boost and is self-tuning (still requires configuration). Holley and others have similar systems, so you have your choice there, this mod should work with all of them.
If you look, the aftermarket Dual Sync distributors are a bit pricey, but the Ford units can be had for under $100 on Rockauto or Amazon. I’m all about the best bang for the buck, so here’s how to make/ mod one yourself.
What you need:
Cadillac 4.X distributor gear (cheapest to pull off used one)
Distributor for 1990 Mustang 5.0 (other years should work provided it is for small block Ford only)
Hammer
1/8” punch
3/16” punch
3/8 – 5/8” chisel (size of this is not critical)
Angle grinder with cut off wheel (or another way to cut distributor shaft)
3/16” drill bit
3/8” drill bit
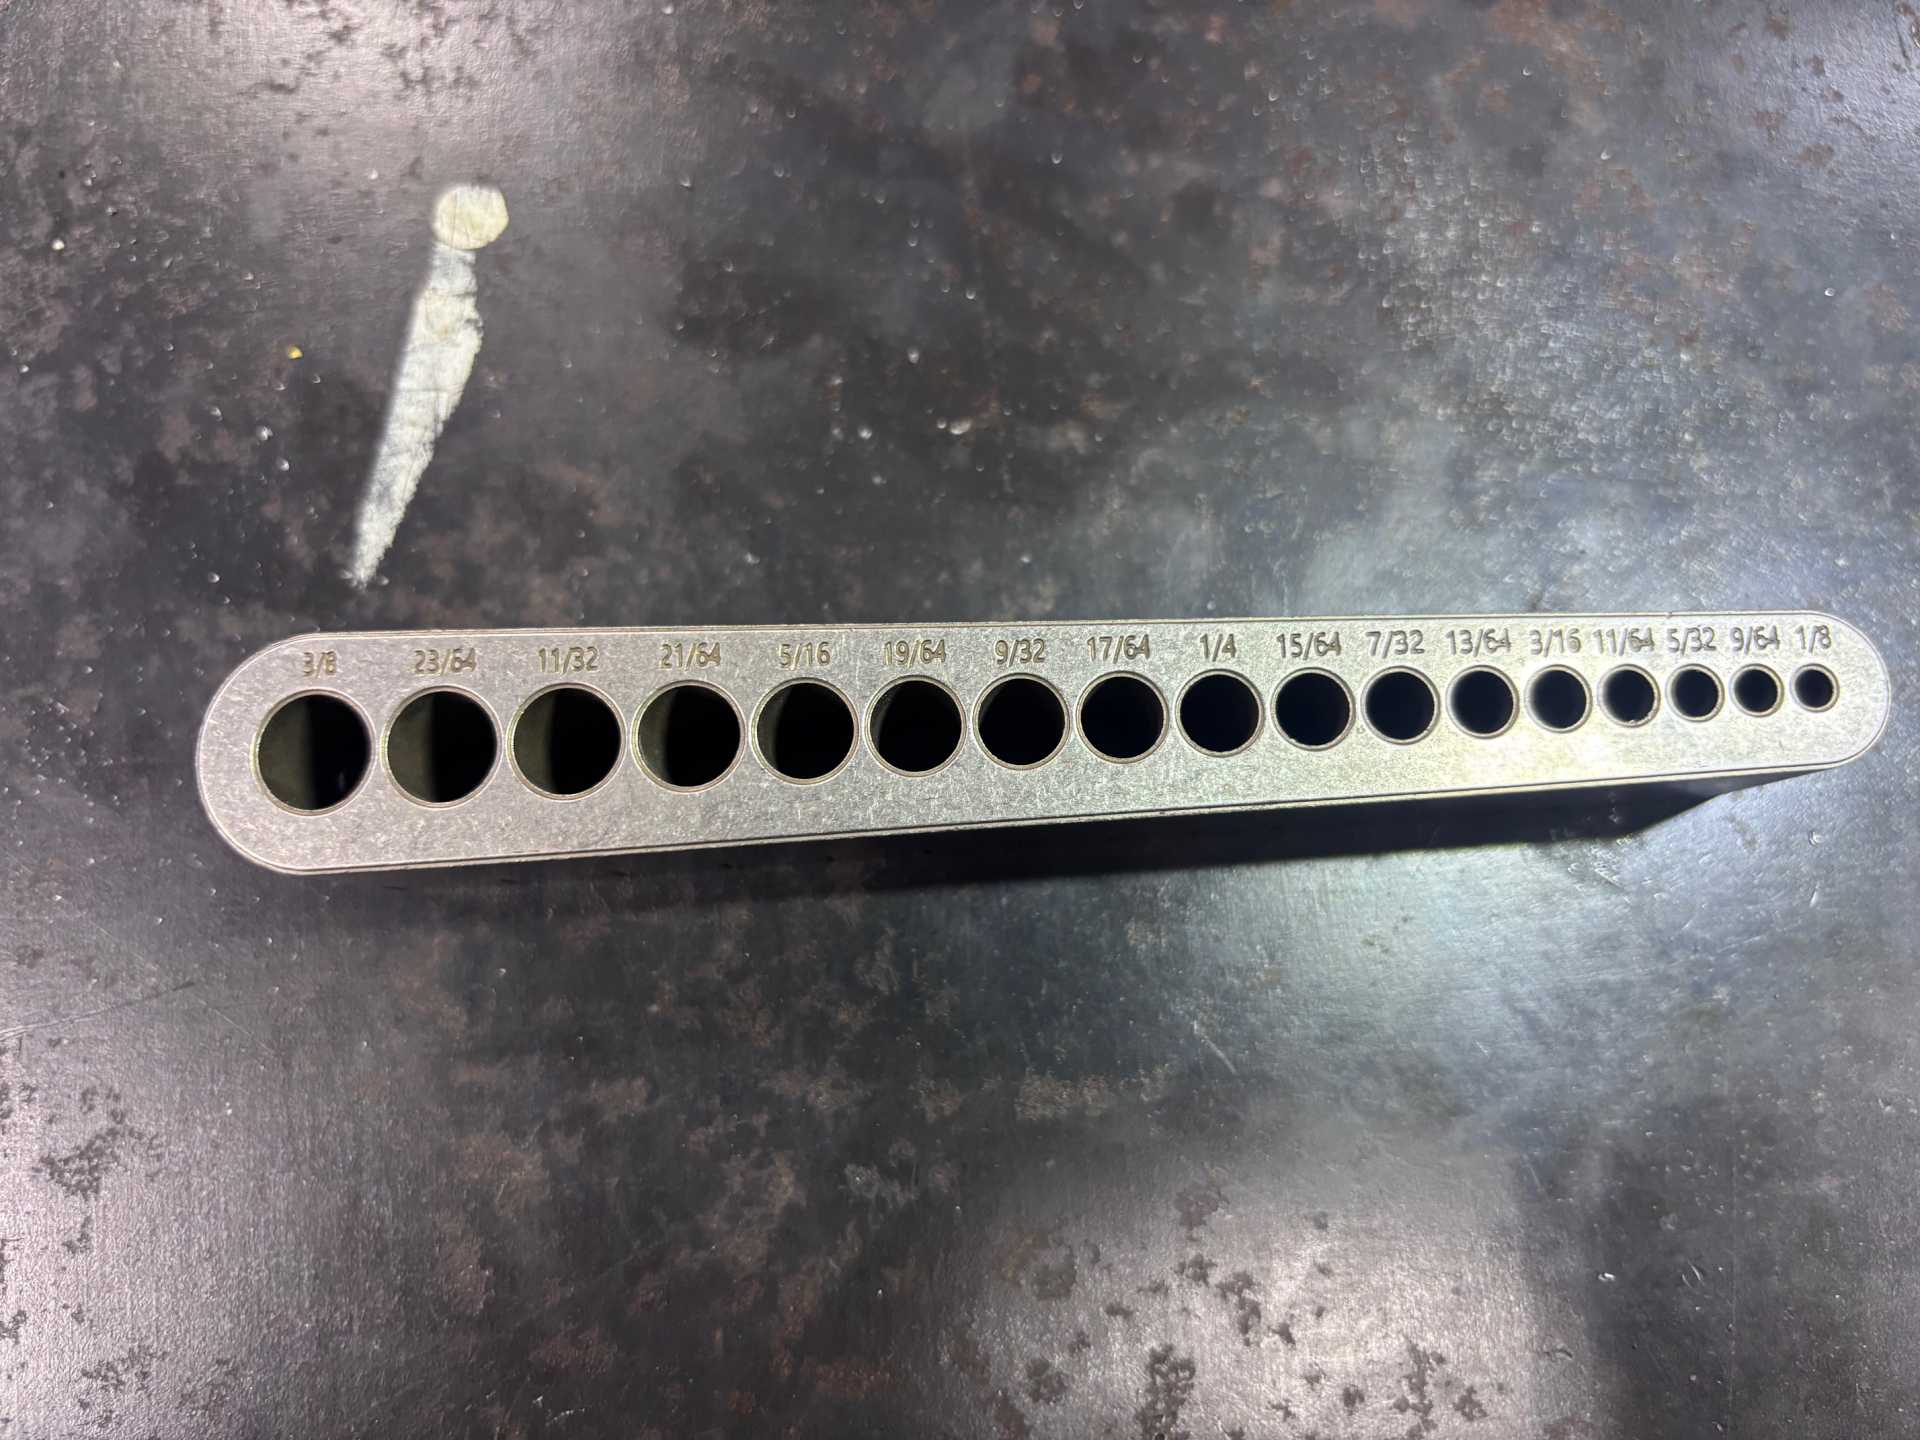
Drill guide
https://www.amazon.com/dp/B..._dt_b_fed_asin_titleDrill press or large vise and hand drill
.525 and .531 ream bits (or take down to local machine shop)
Section of 40mm OD 38 mm ID aluminum tubing/ pipe
Remote mount coil and coil to cap wire
Optional – 1990 Mustang ignition module and pig tail connector or your own wiring solution – I’ll show both.
Safety glasses and gloves, don’t hurt yourself and don’t sue me! LoL

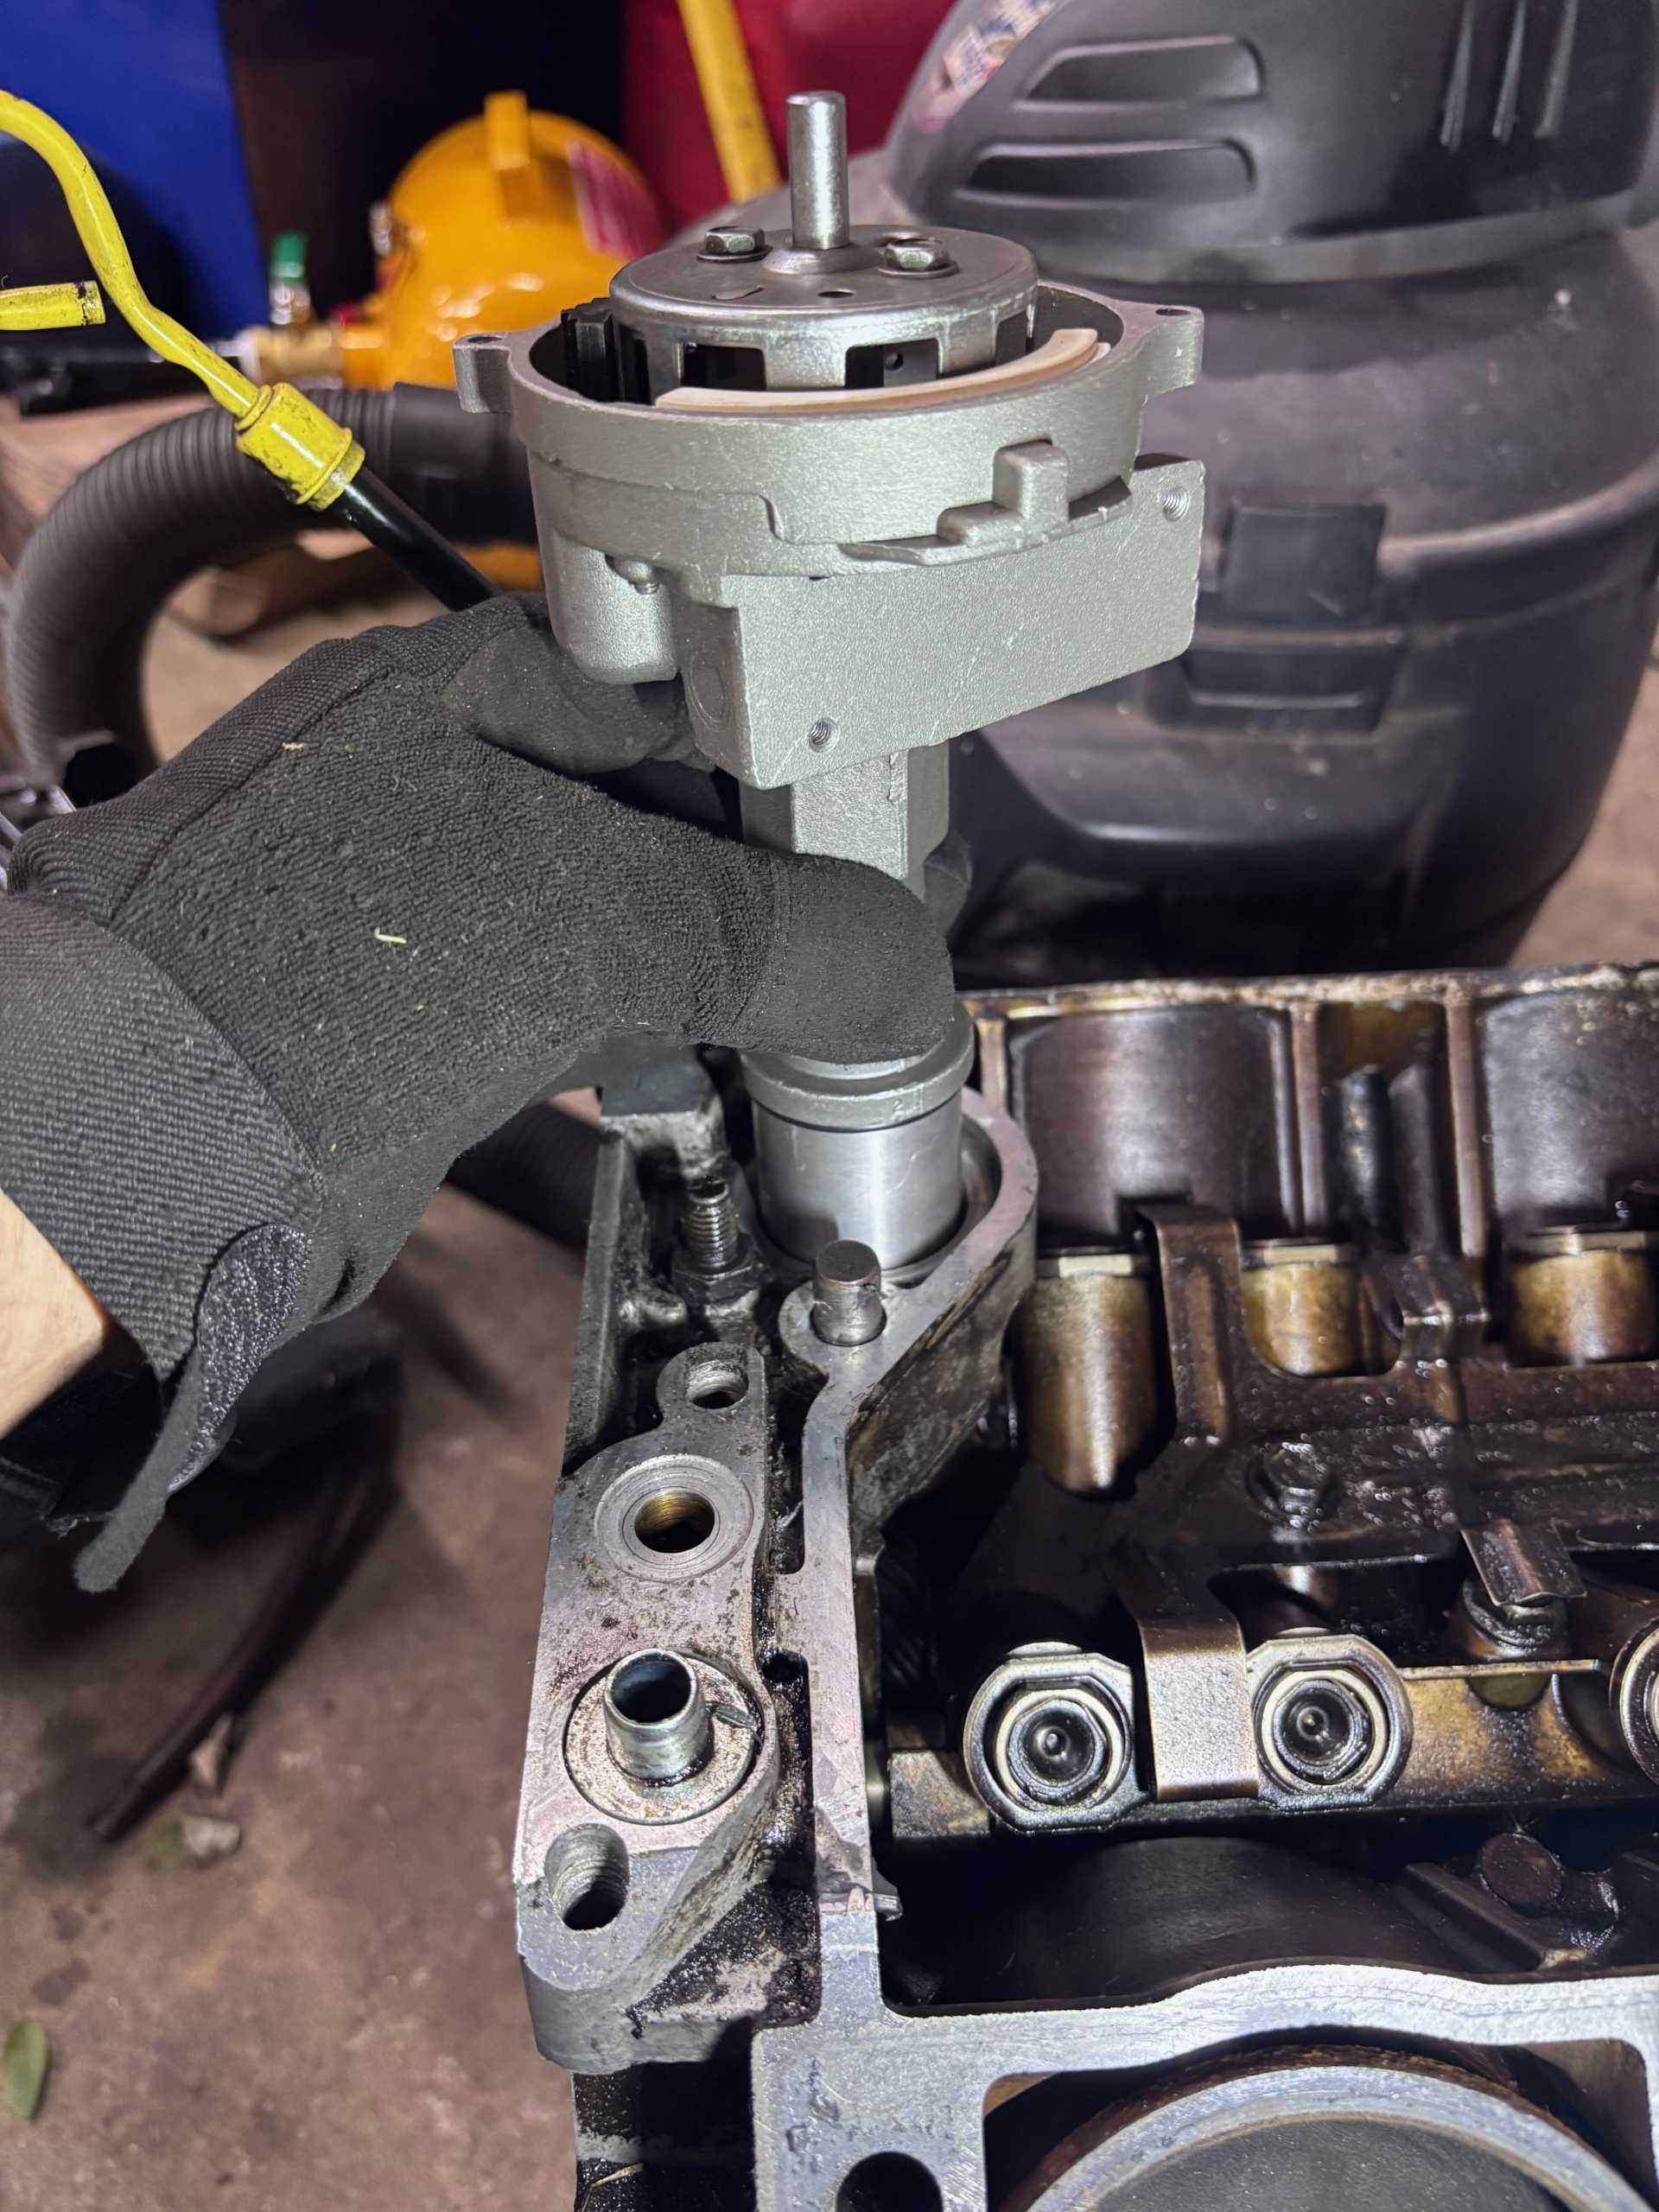
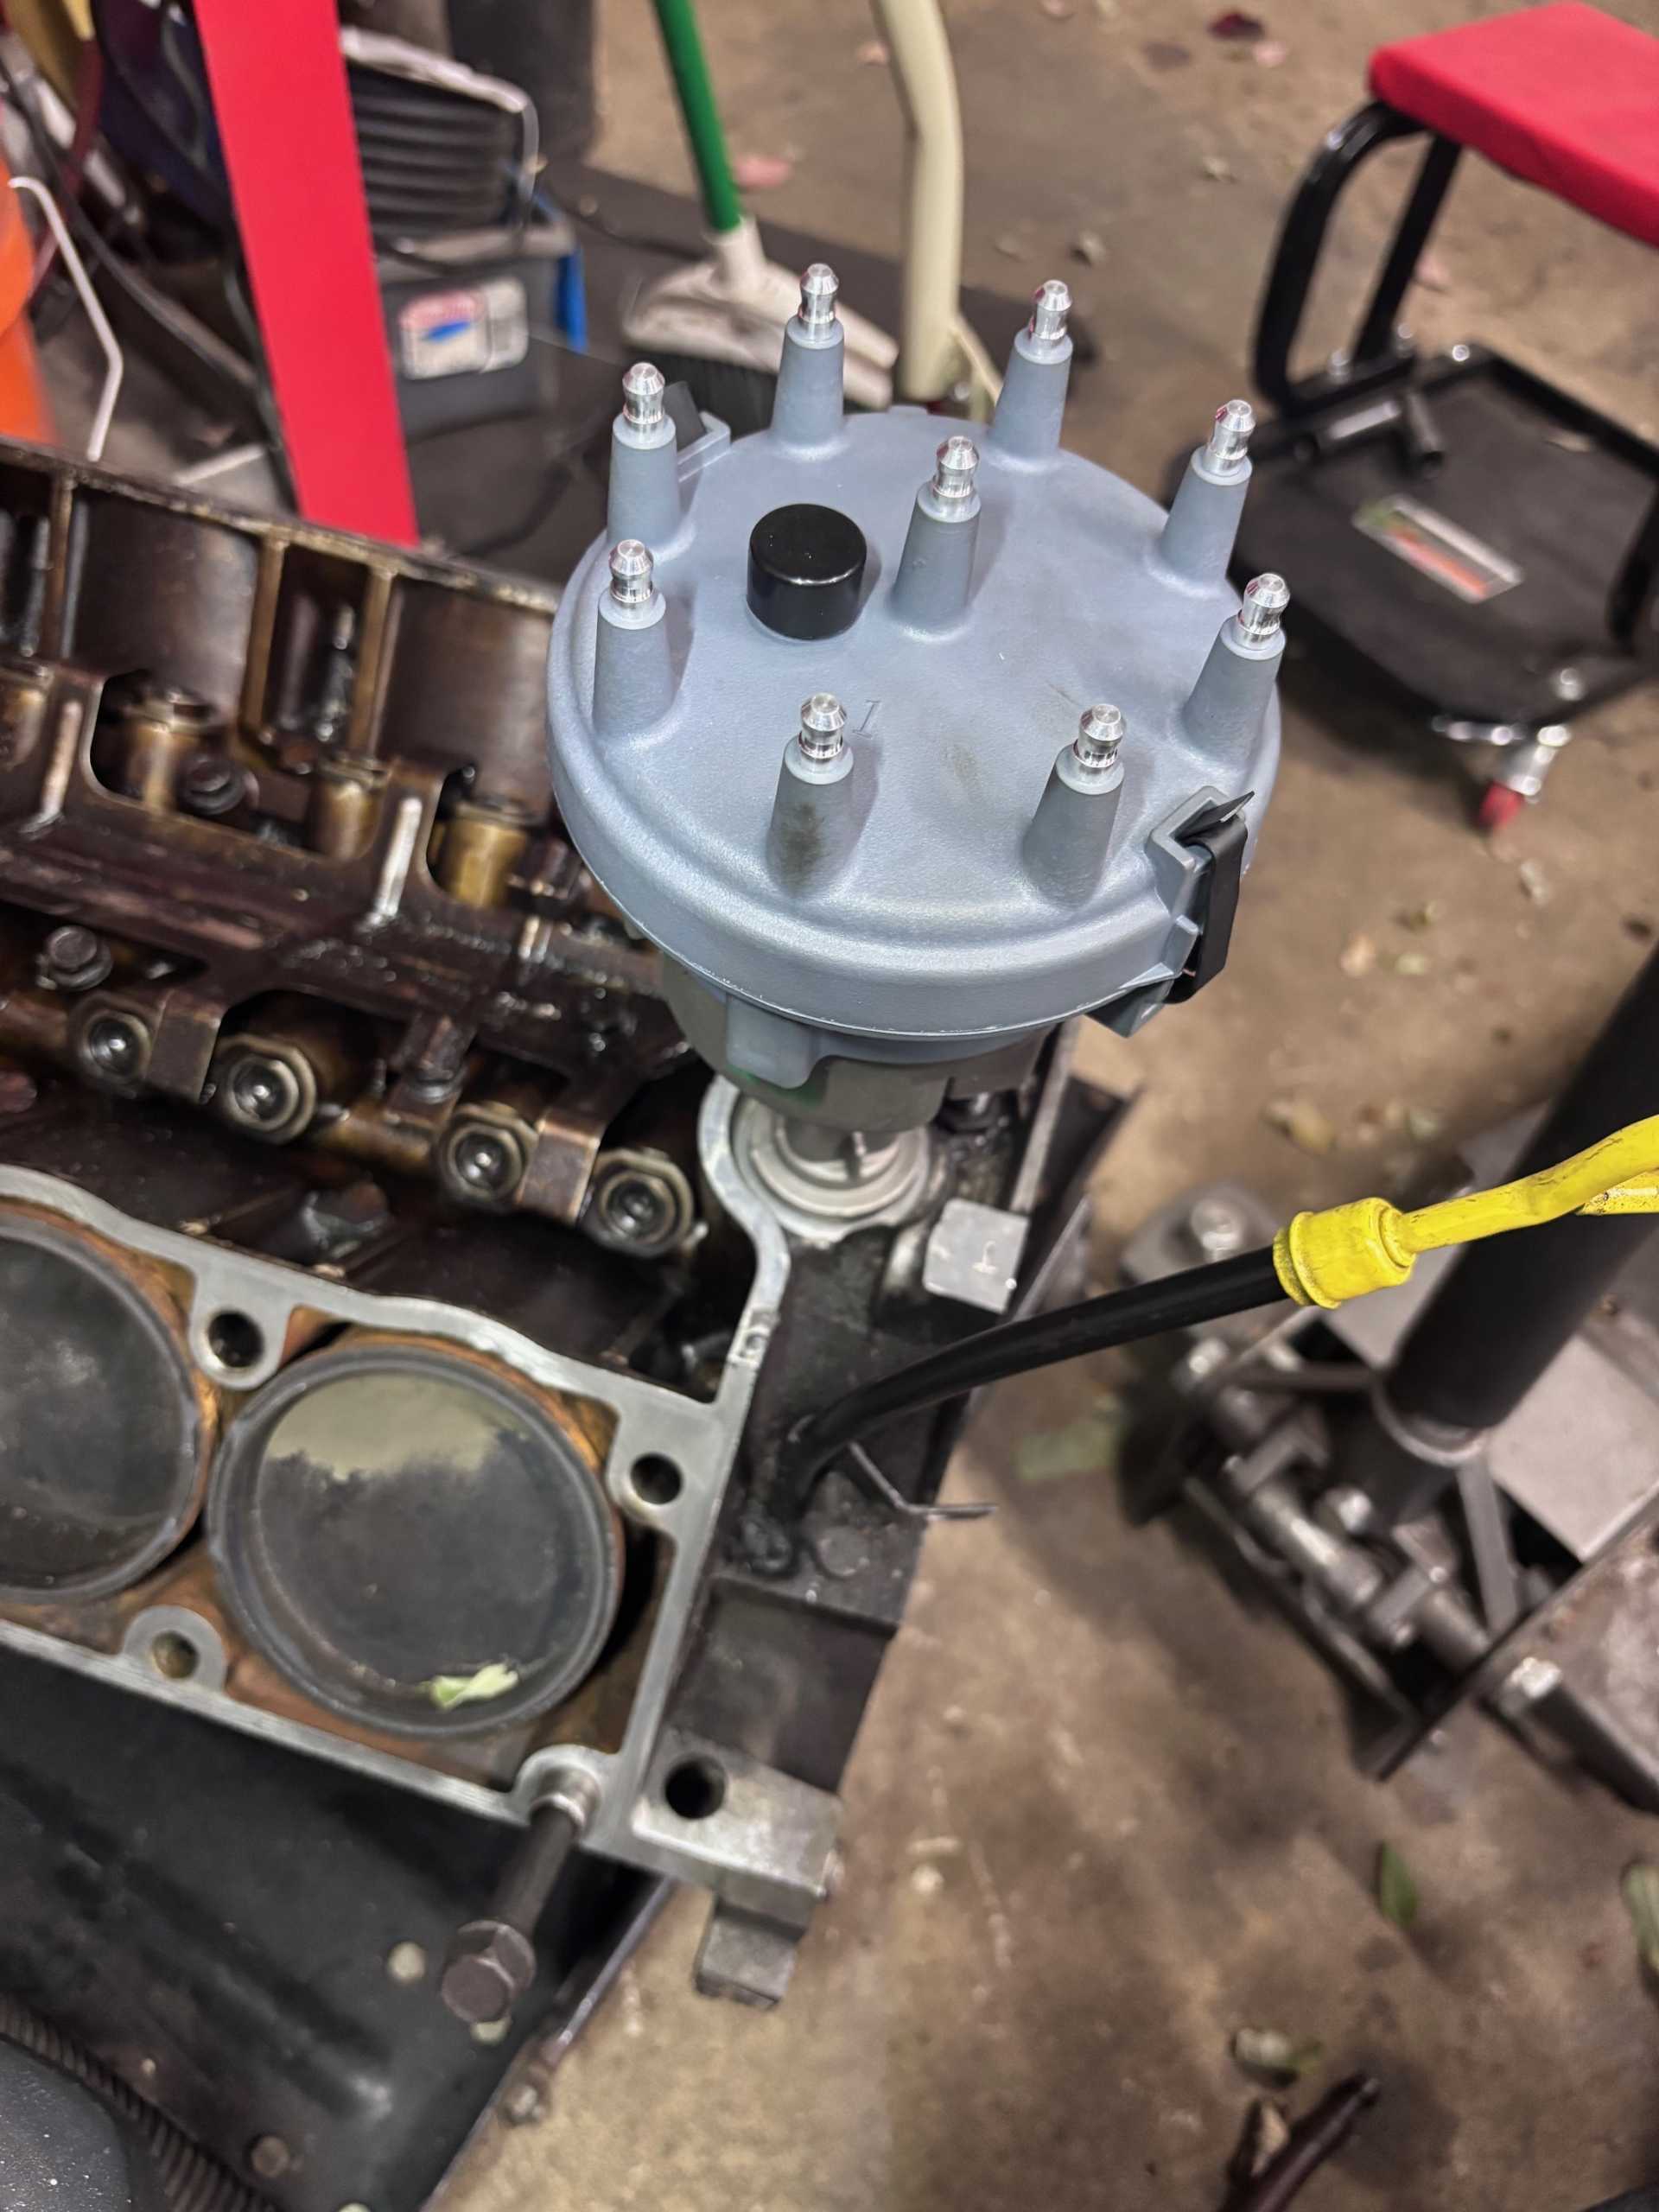
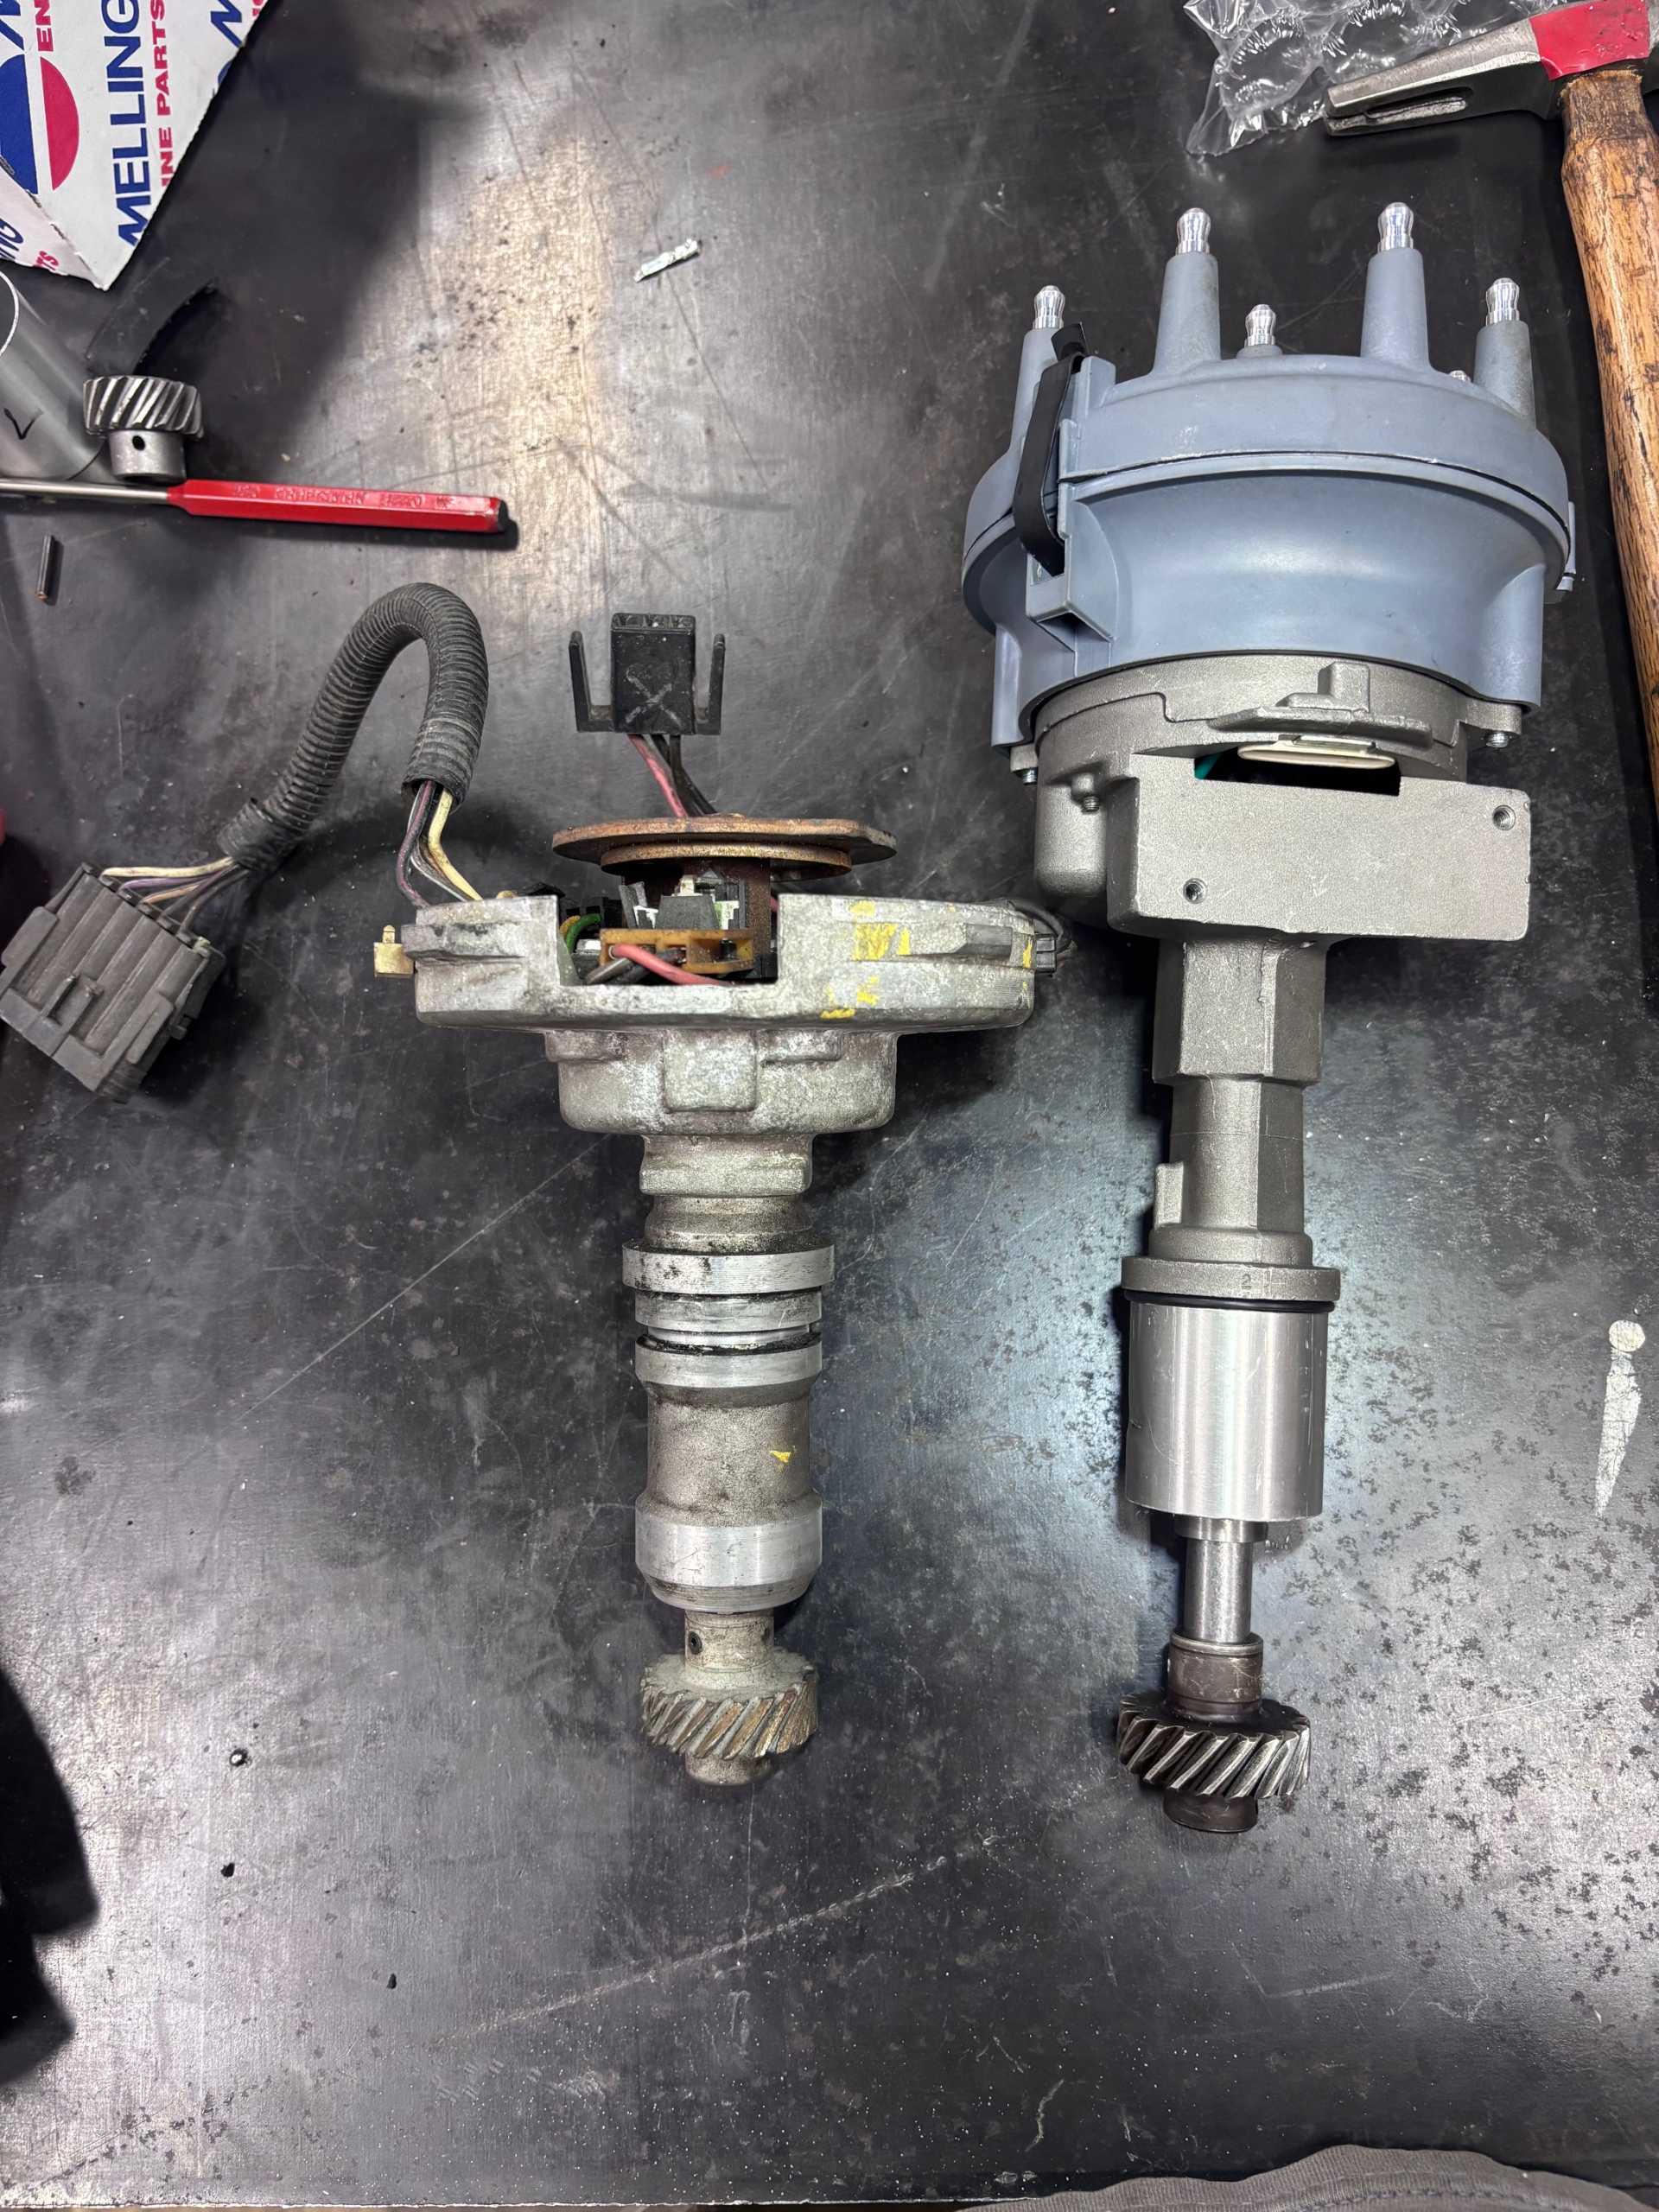
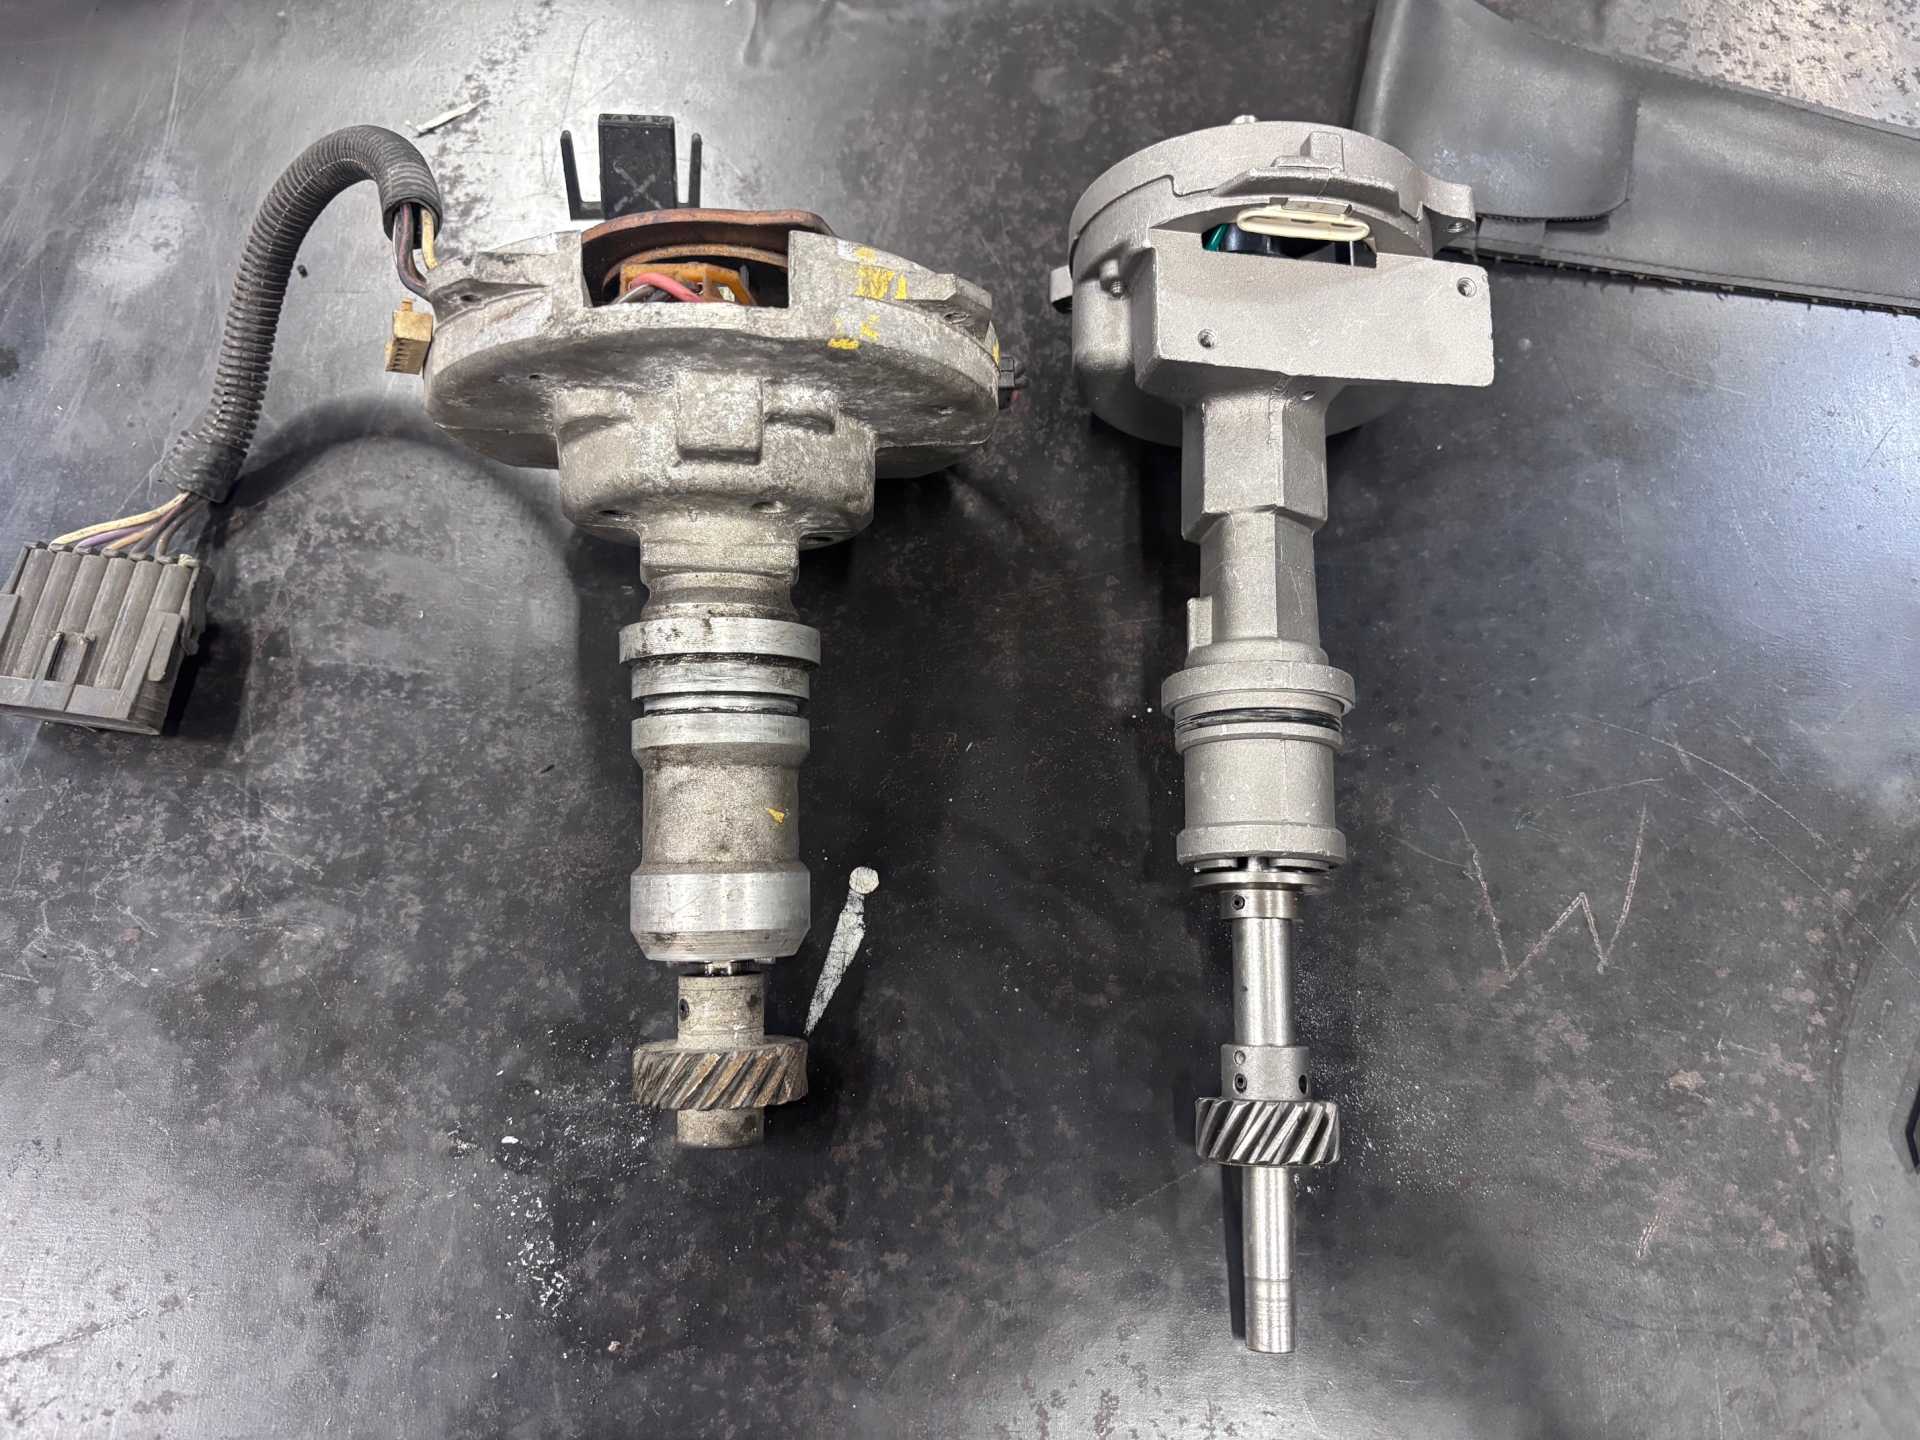
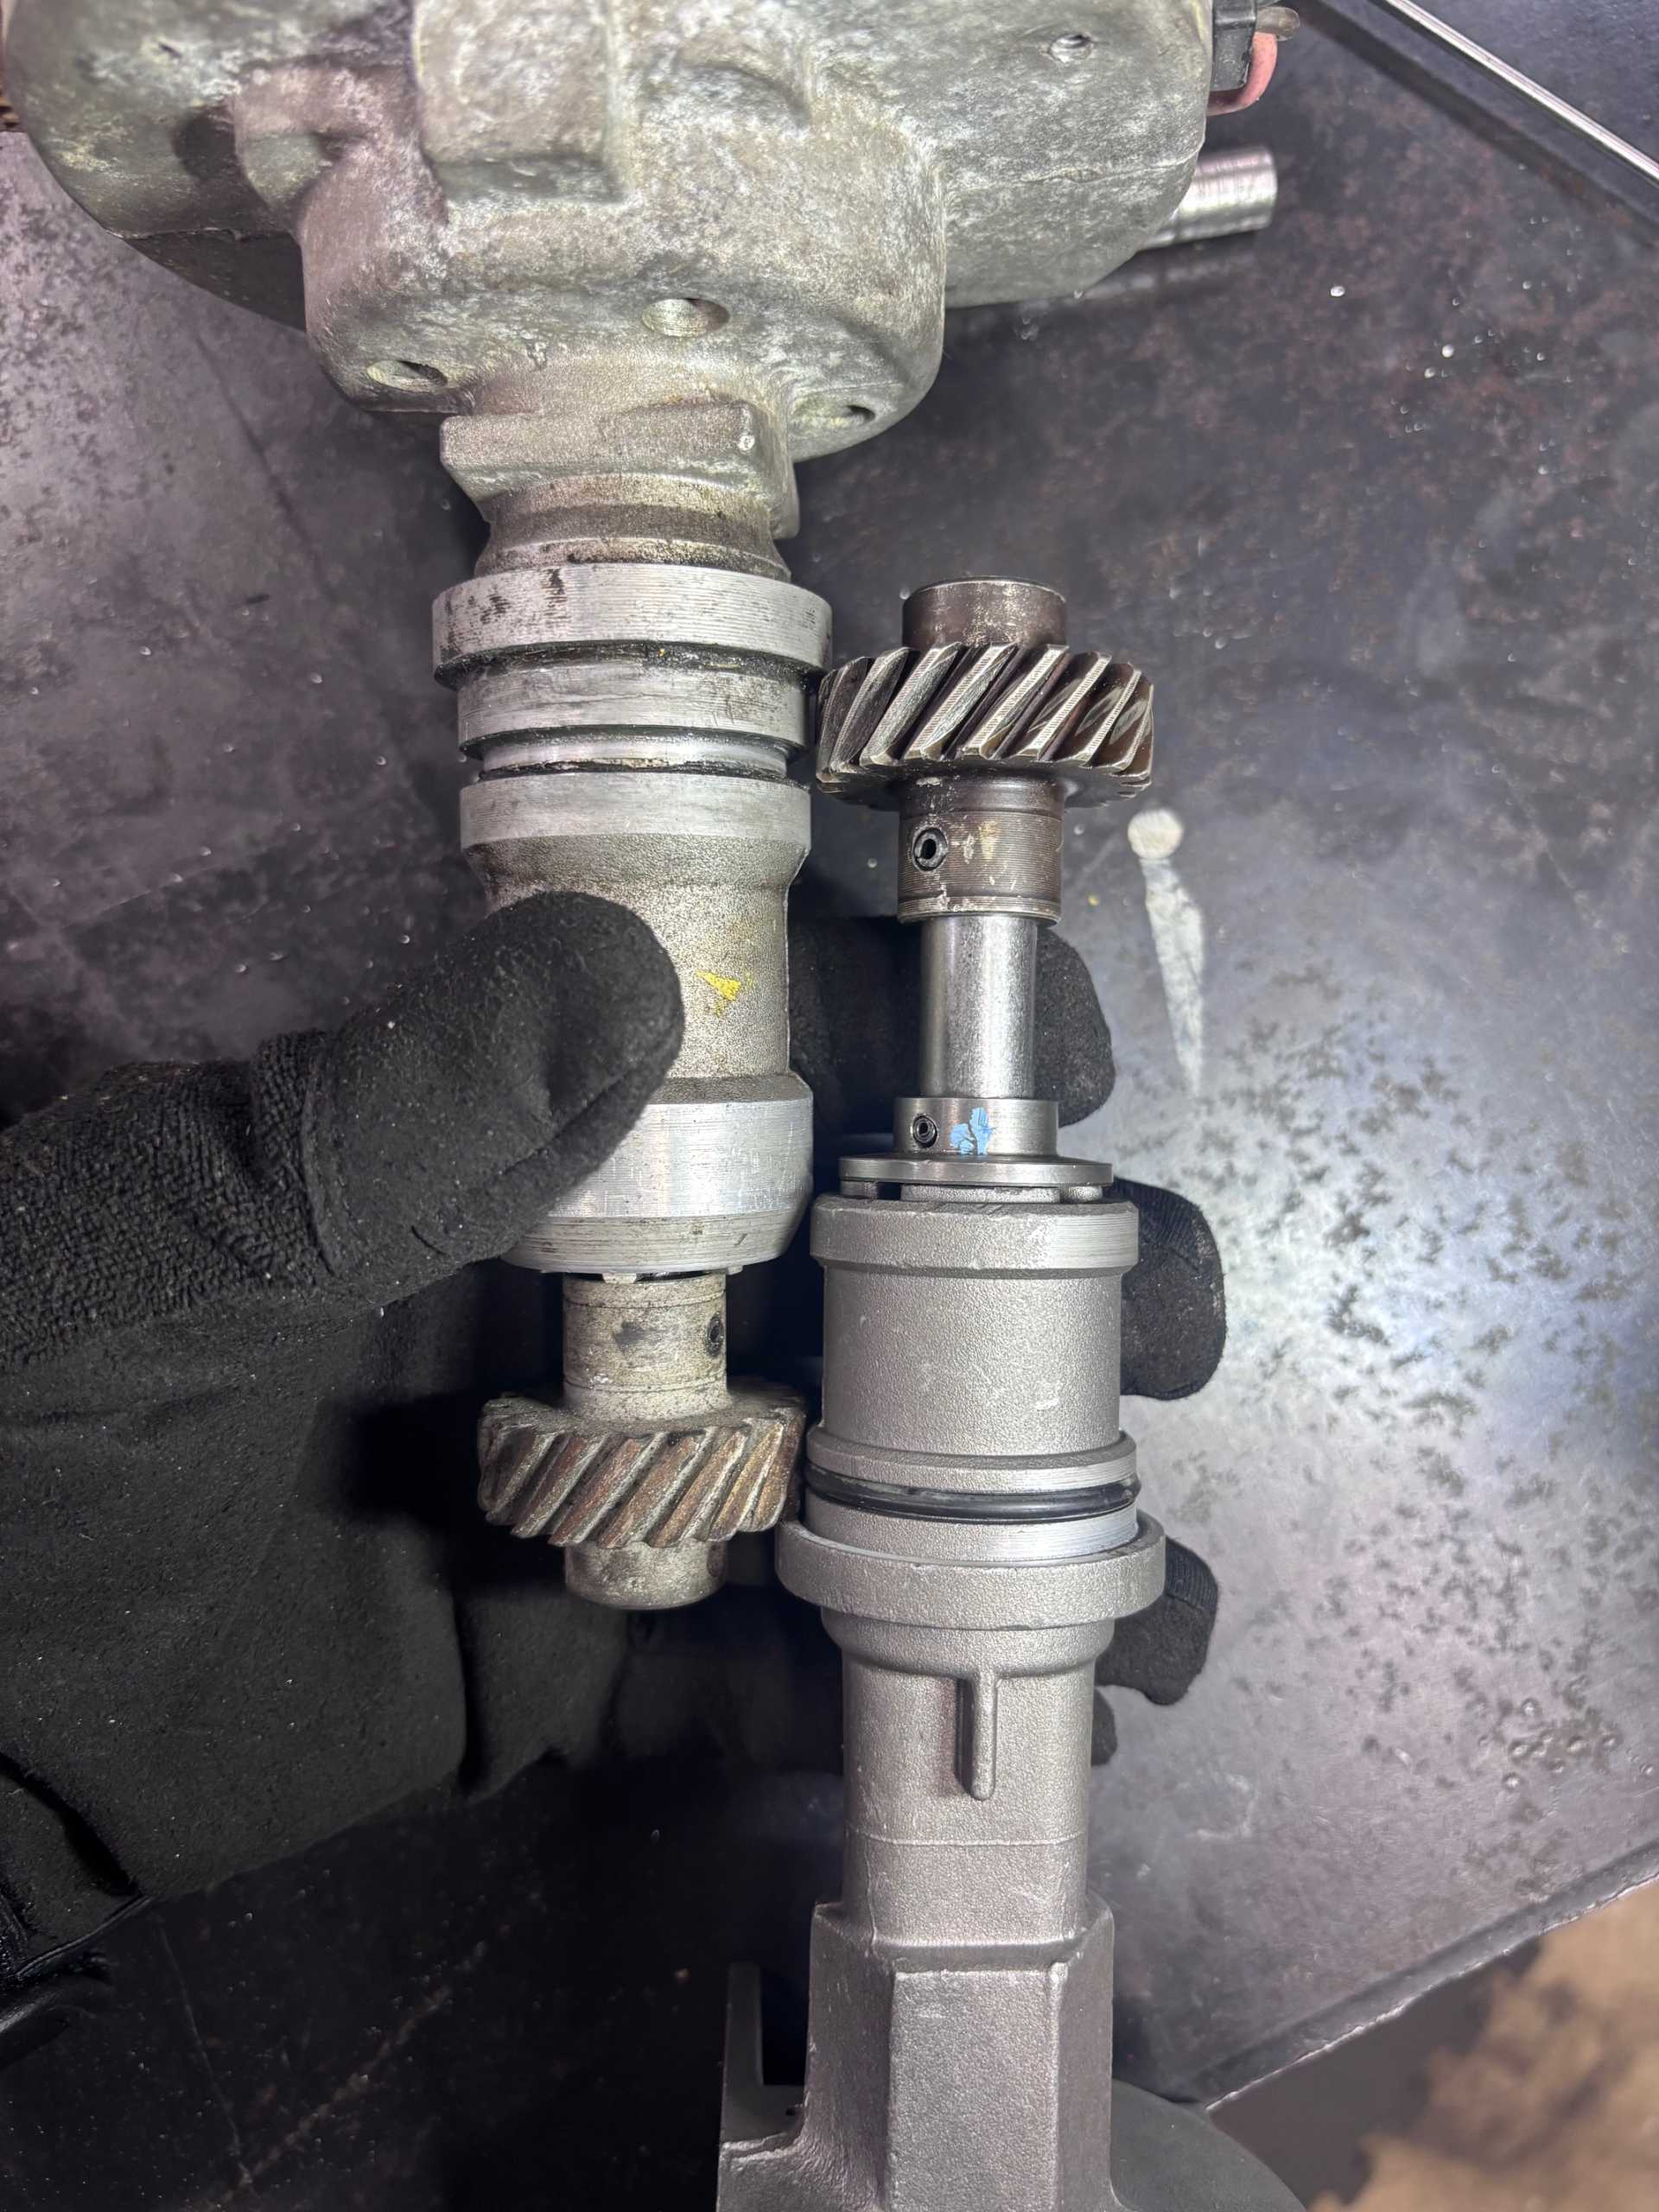
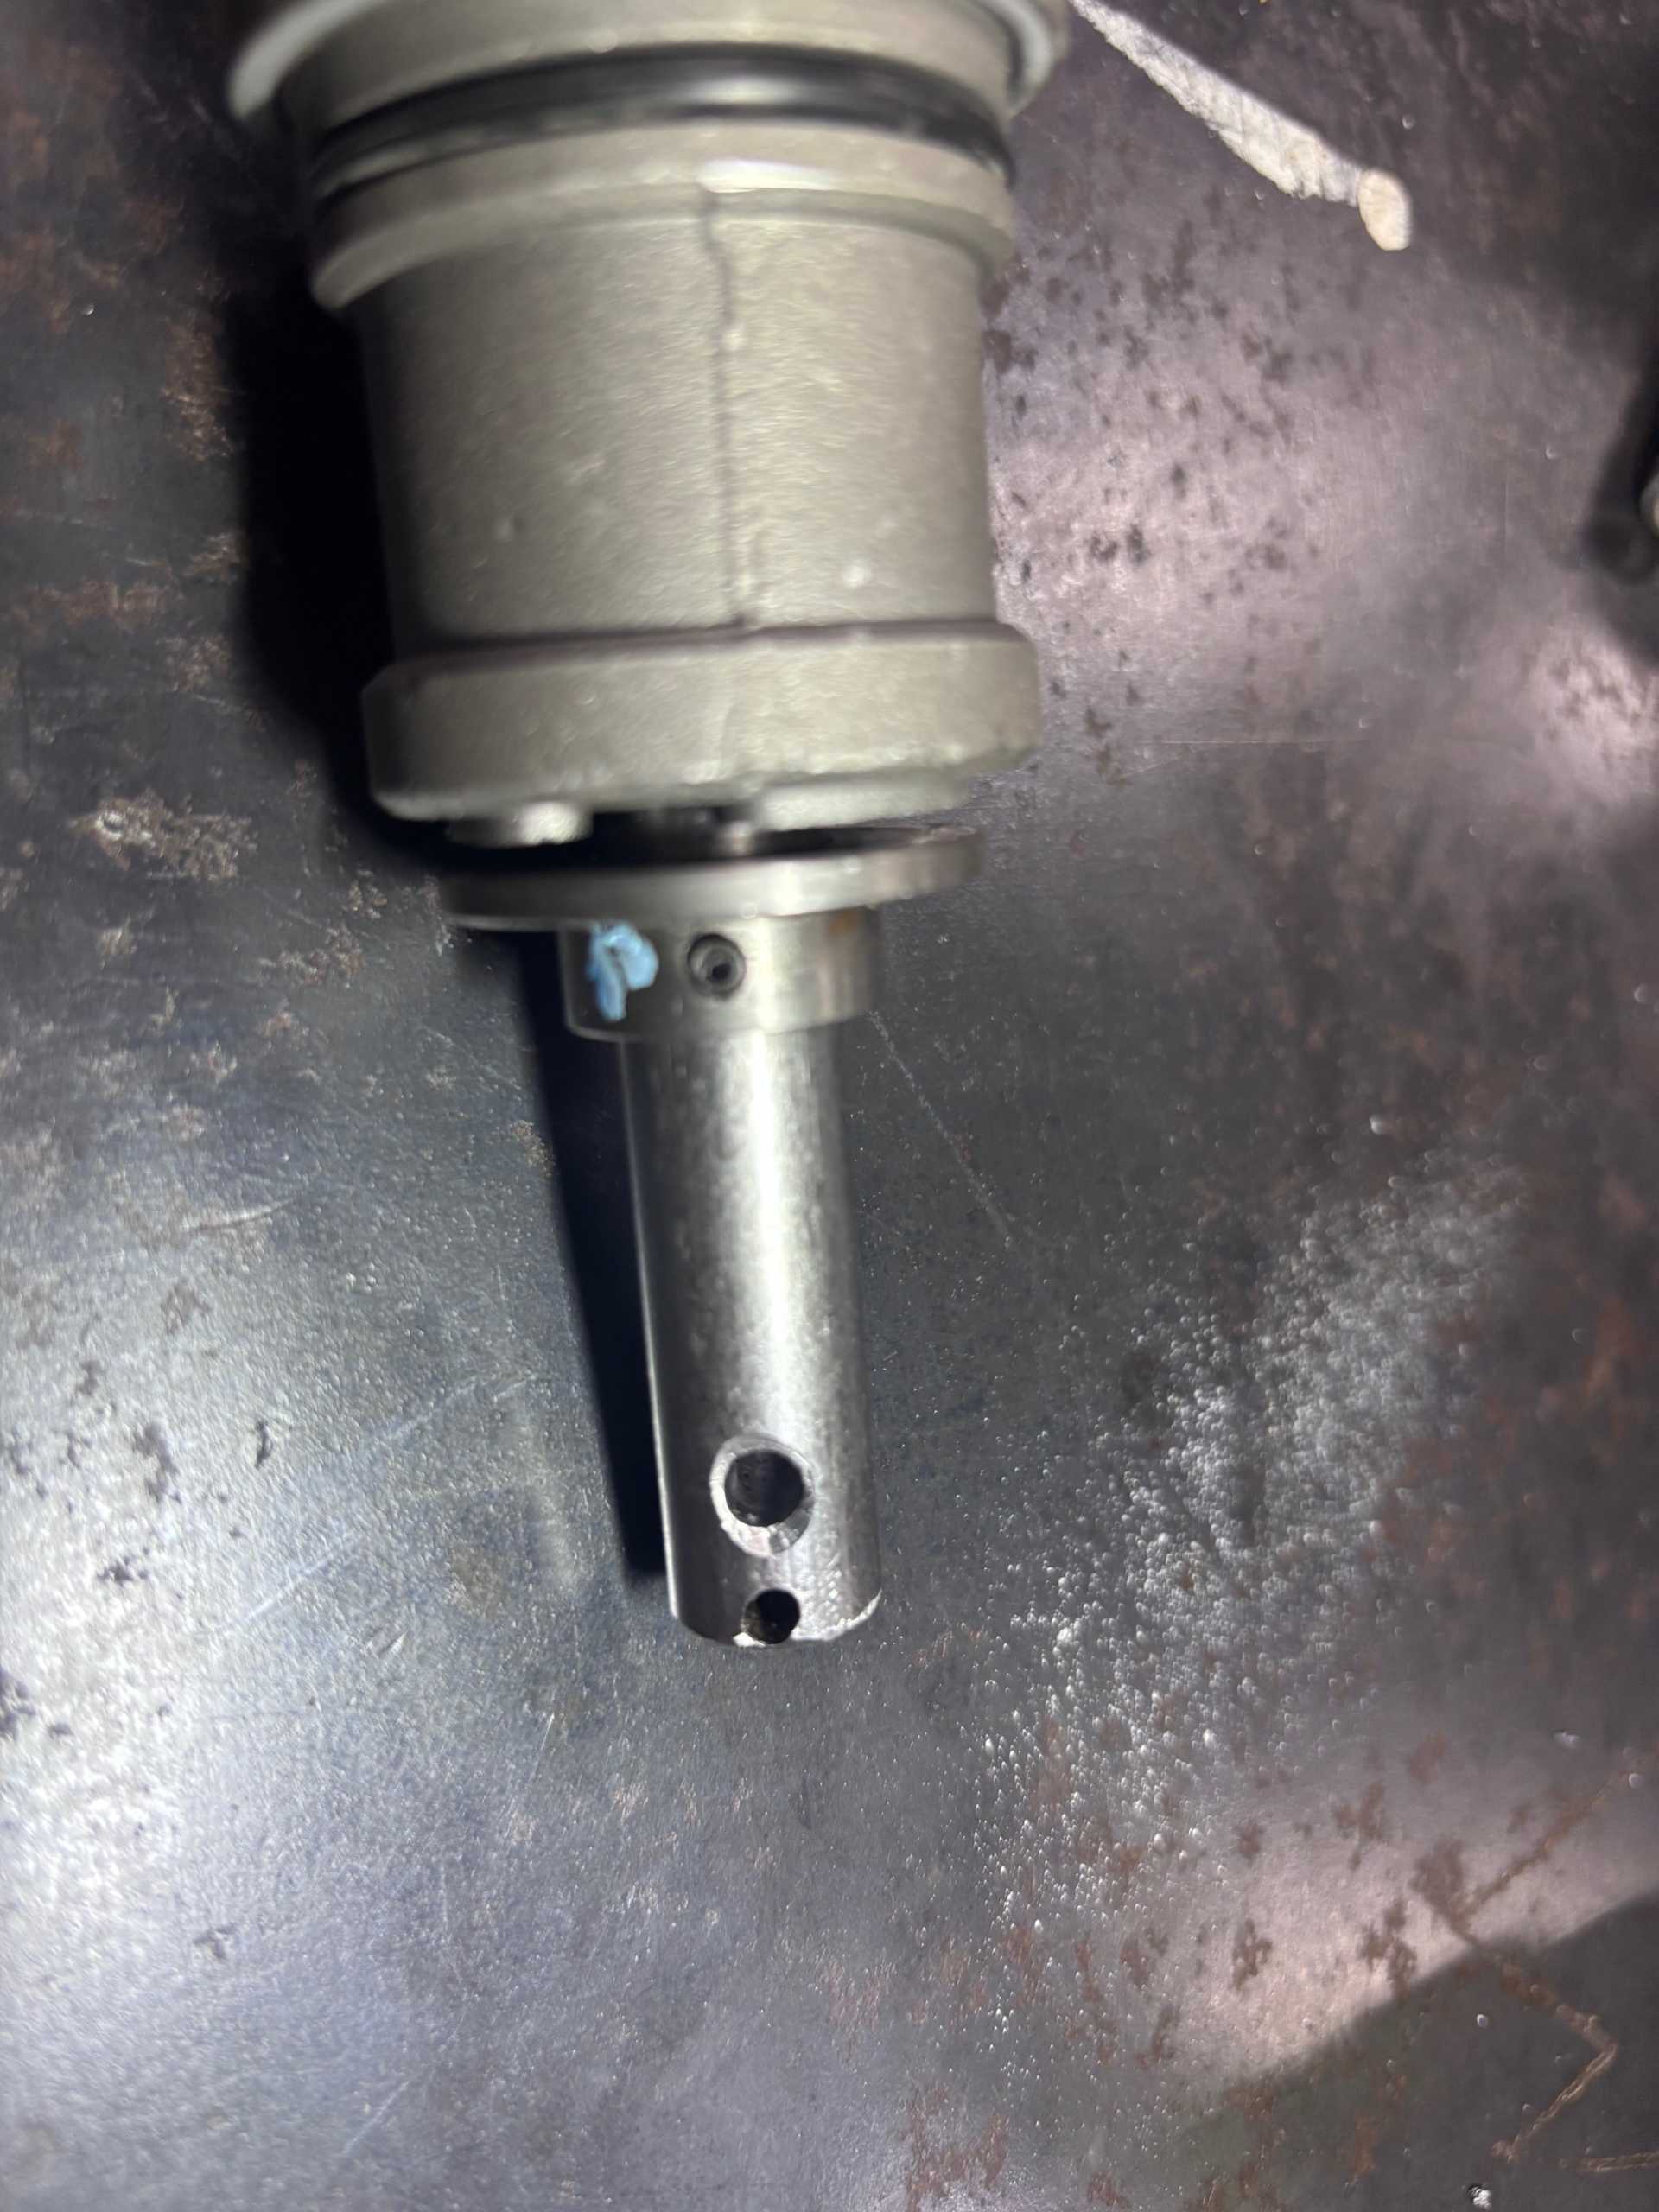
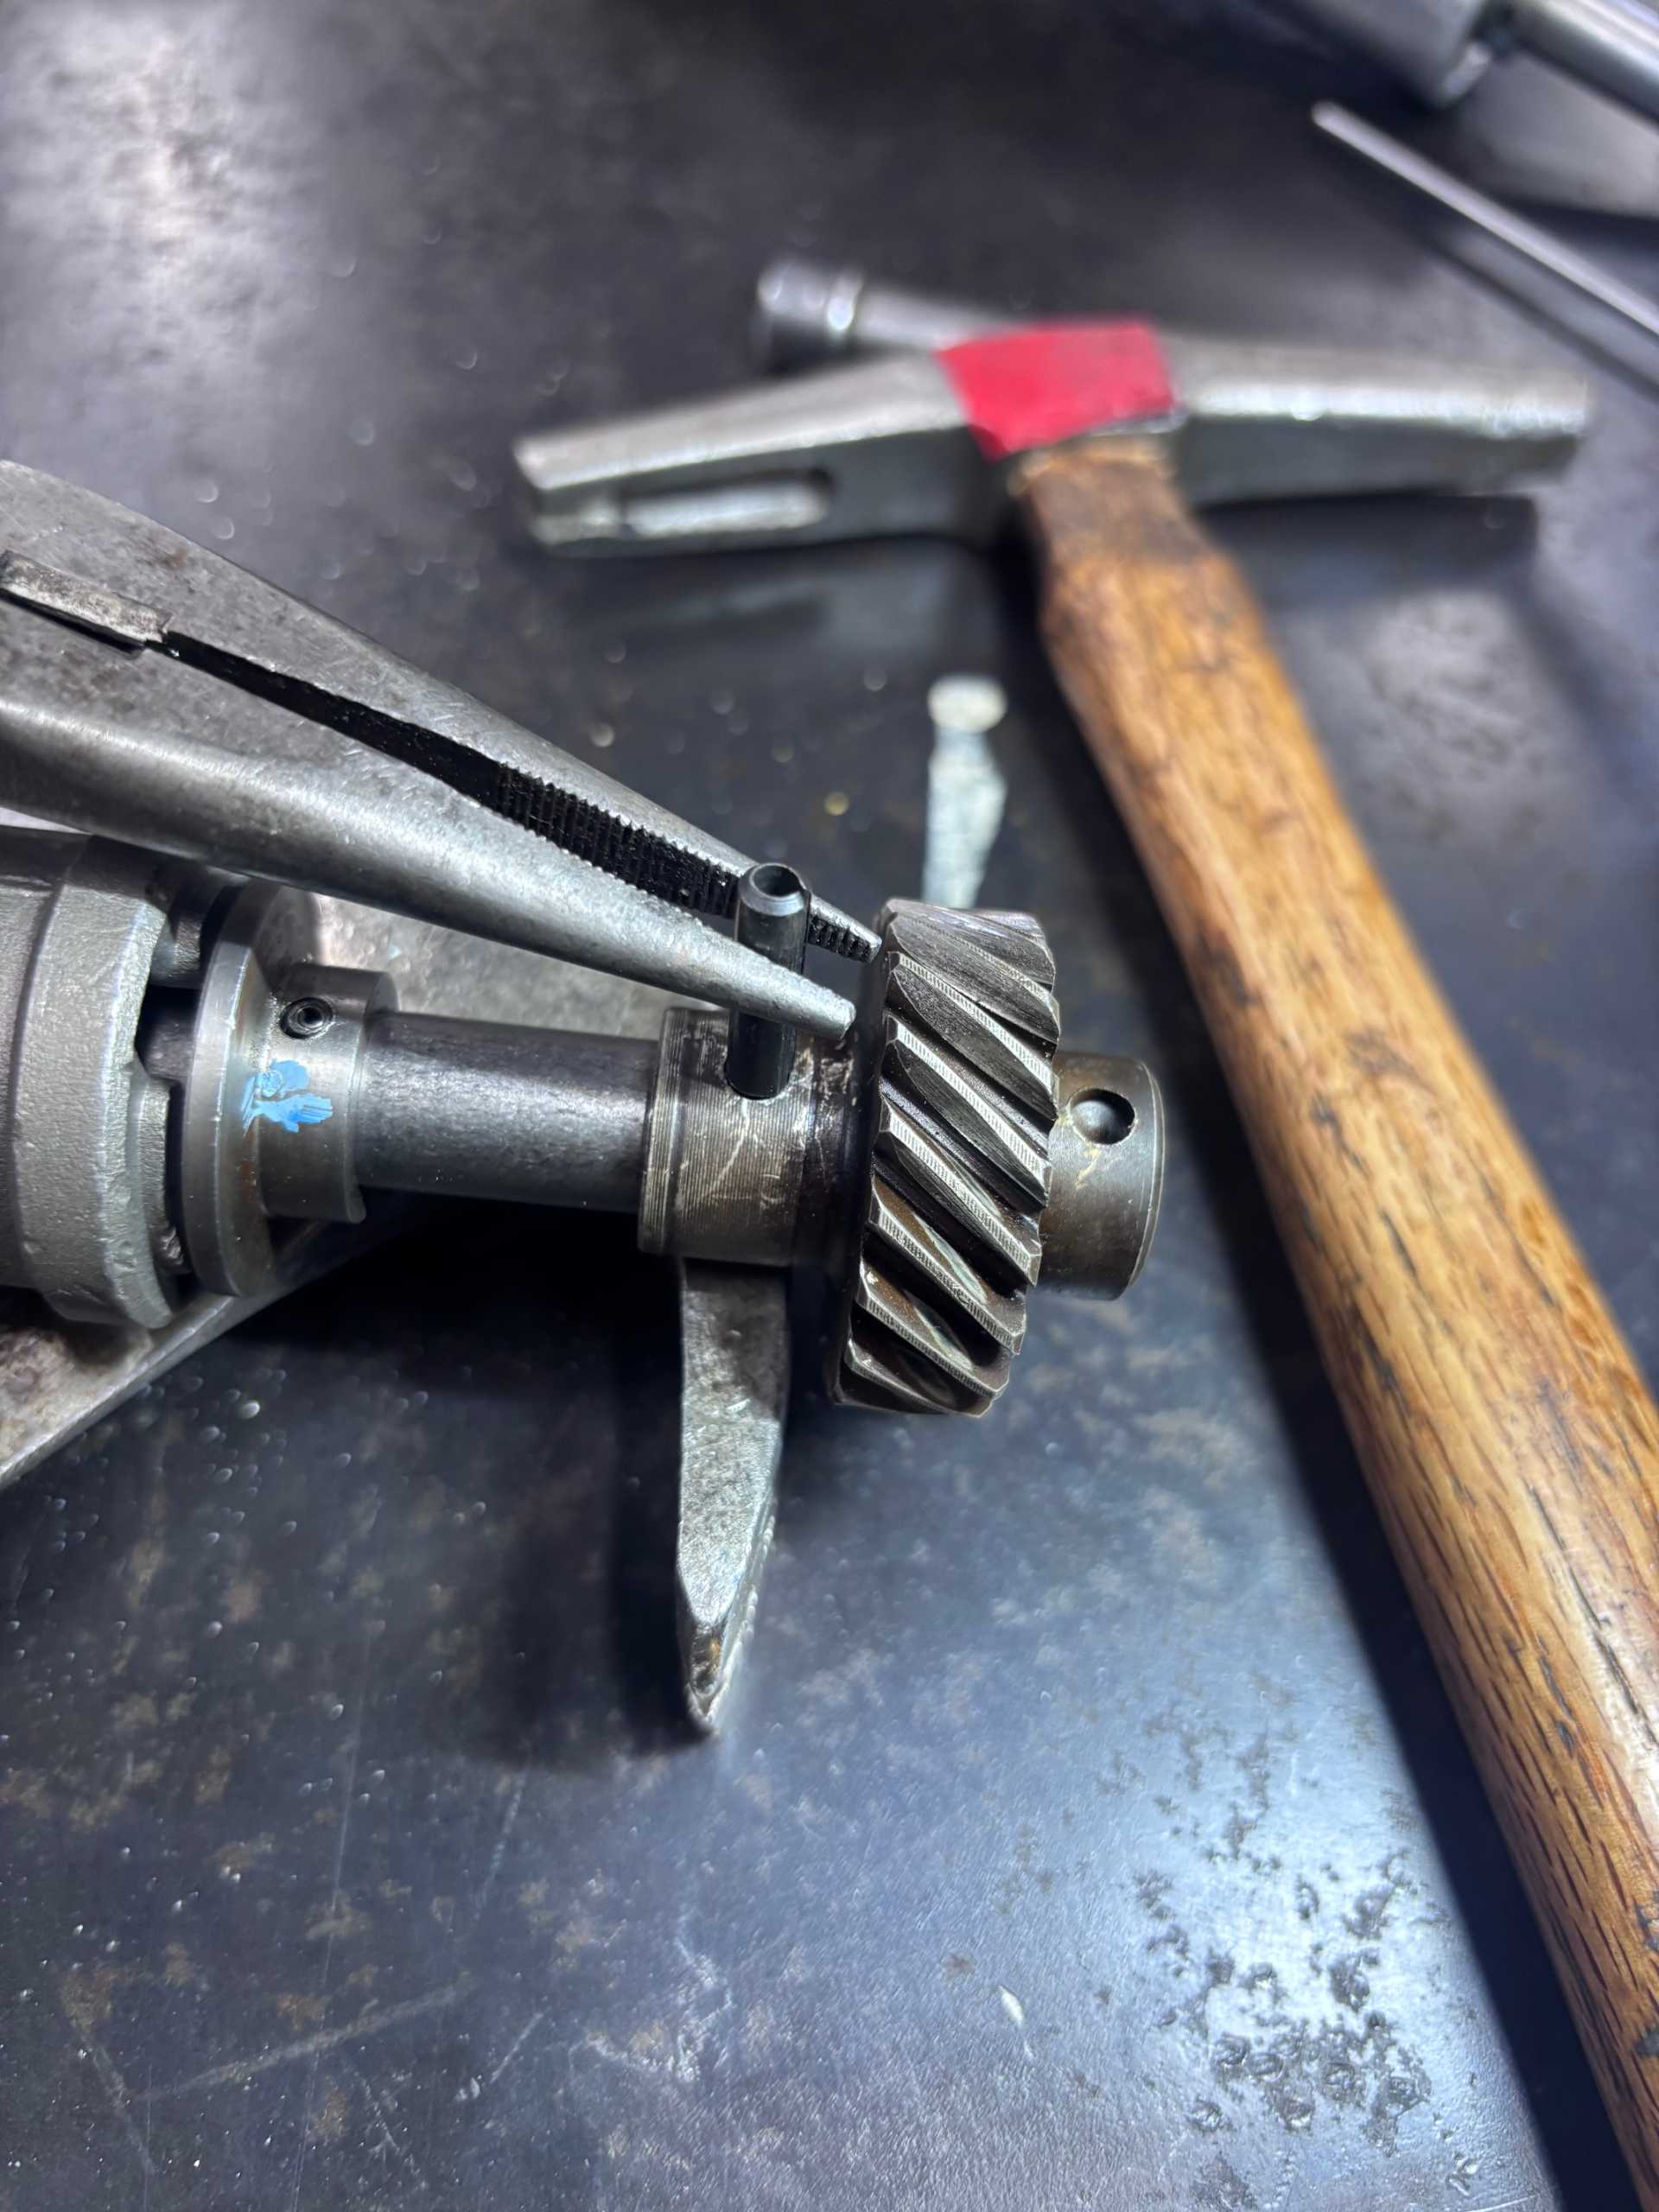
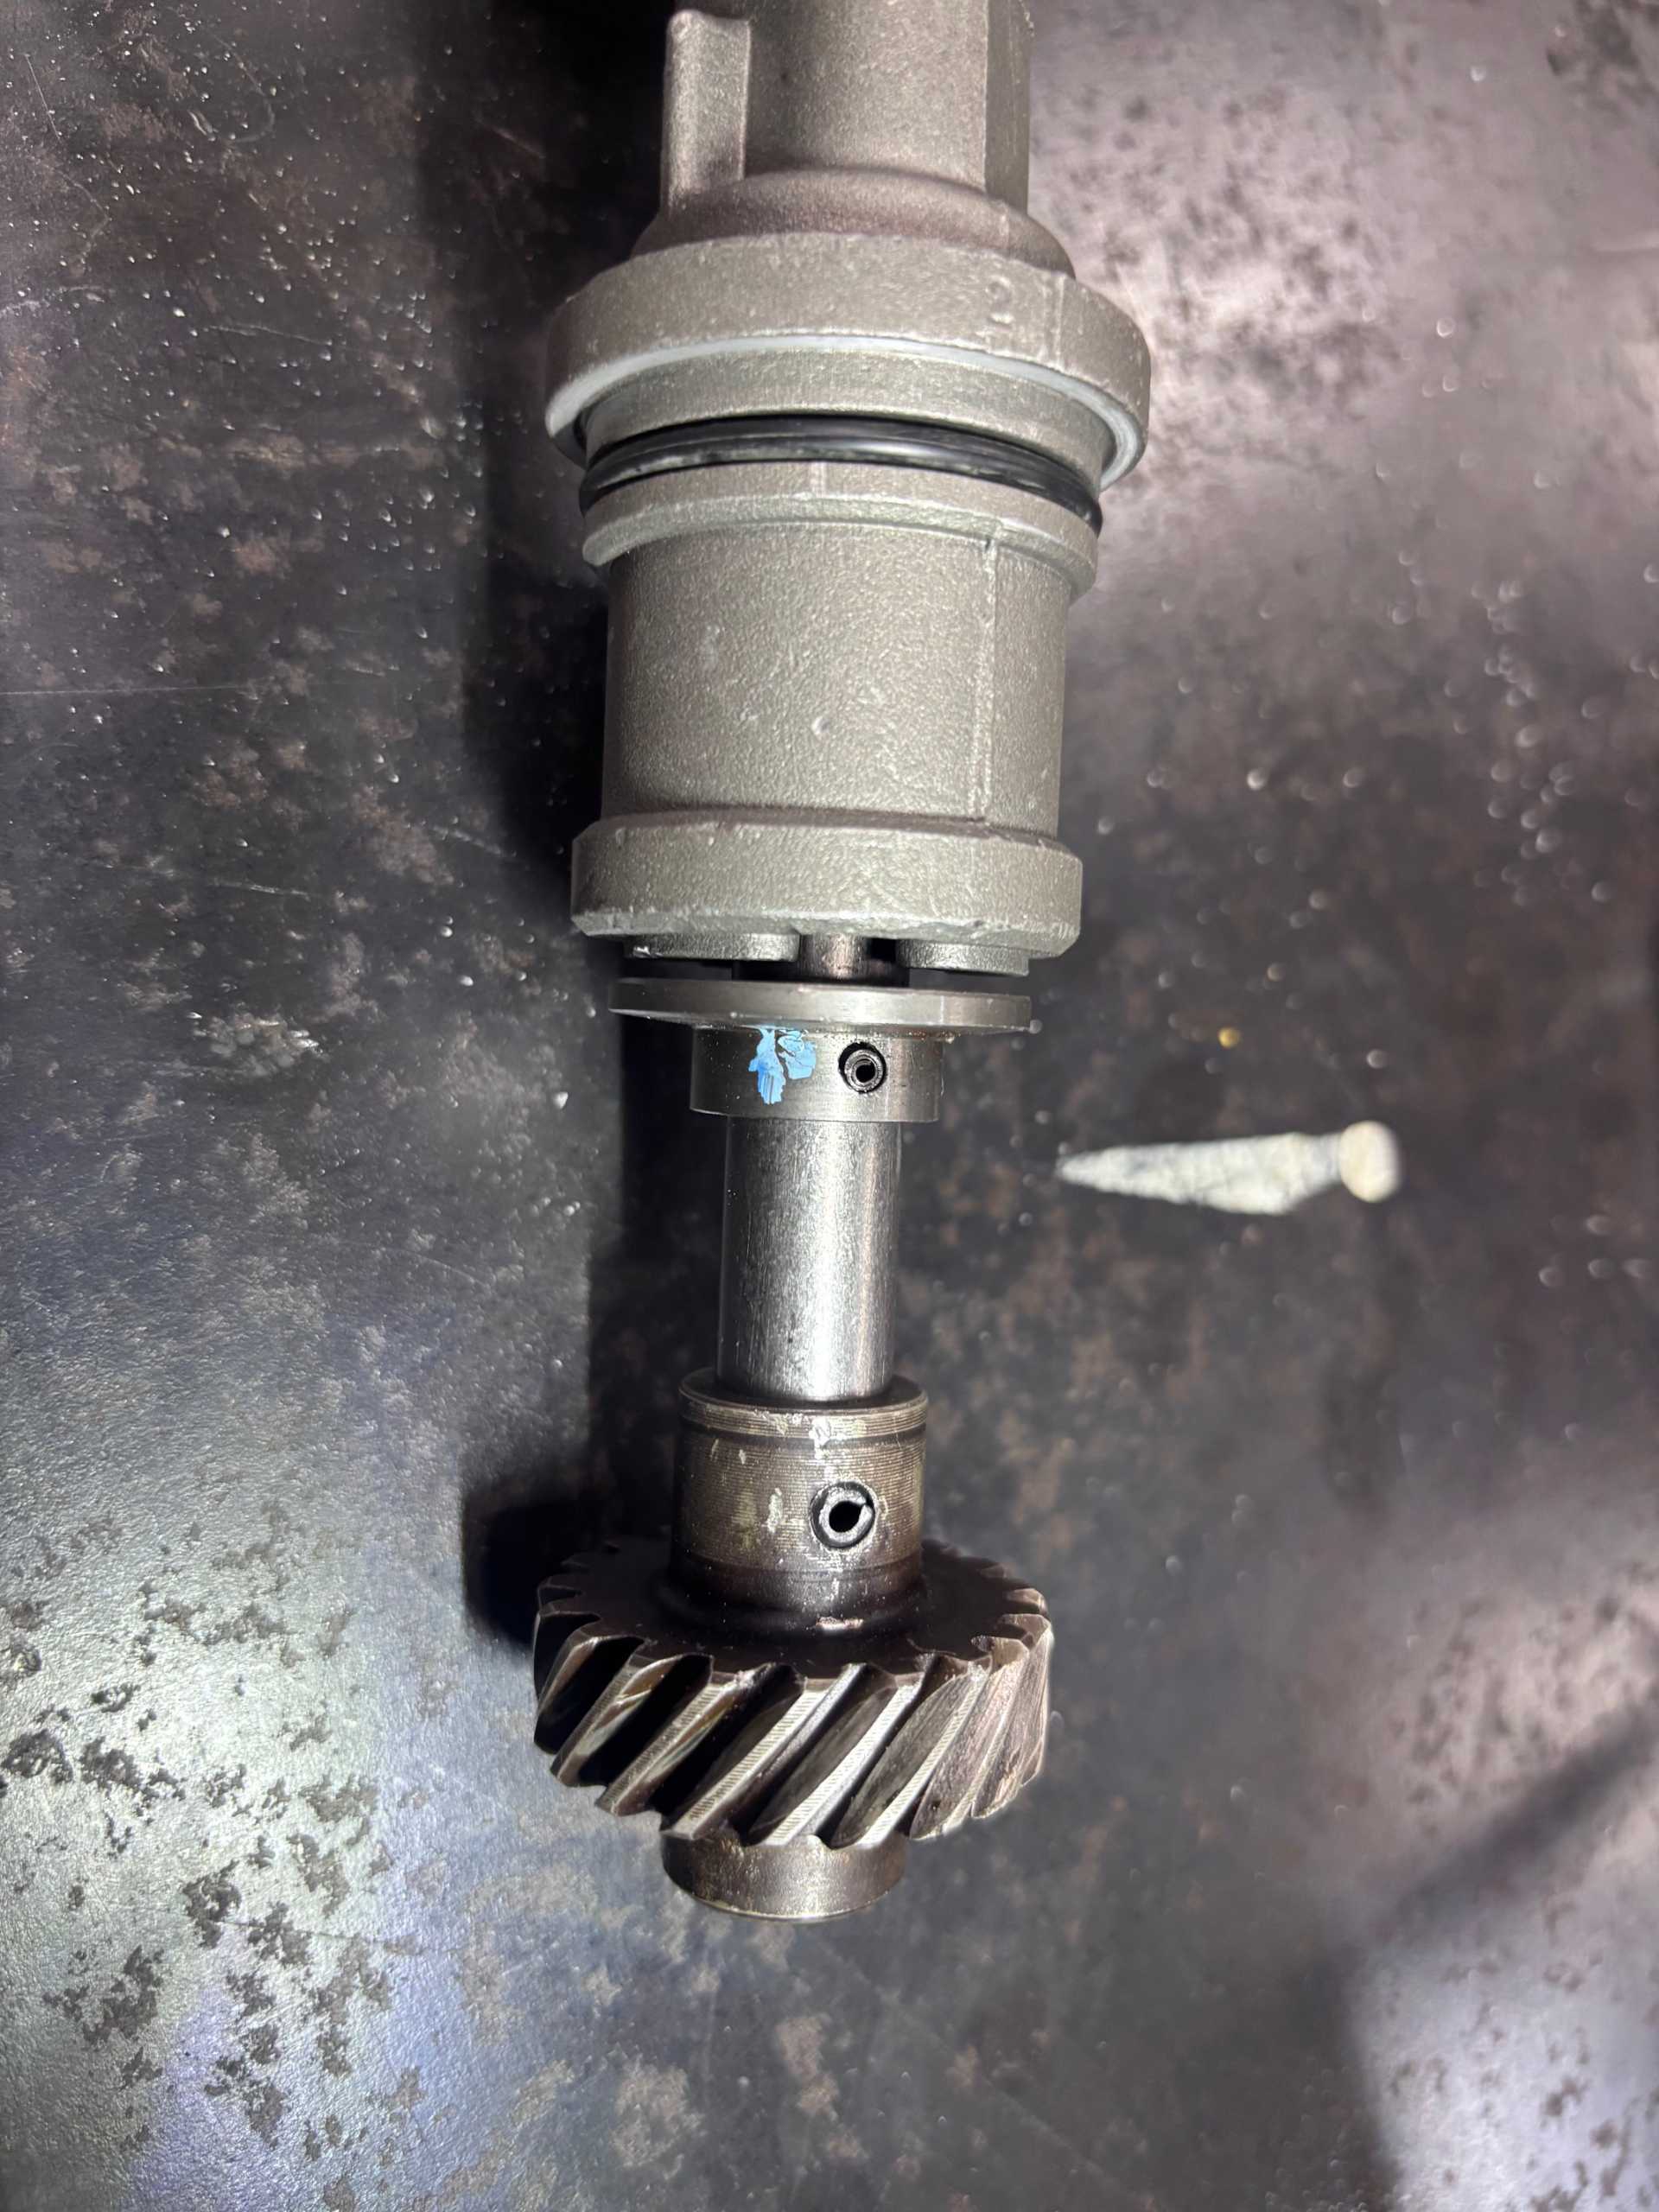
Comparison pics – the most important dimension is the depth of the distributor gear. The second pic shows a finished mod sat apposed to a stock Cadillac distributor to show the same length between the top of gear teeth and base that mounts to the engine block – this determines how far it sits in the block on top of oil pump shaft.
Setup: Measure the distance between the Cadillac mounting flange to the top of the gear teeth and write it down for use later. If you want this to go smoothly, order this drill guide:
https://www.amazon.com/dp/B..._dt_b_fed_asin_title 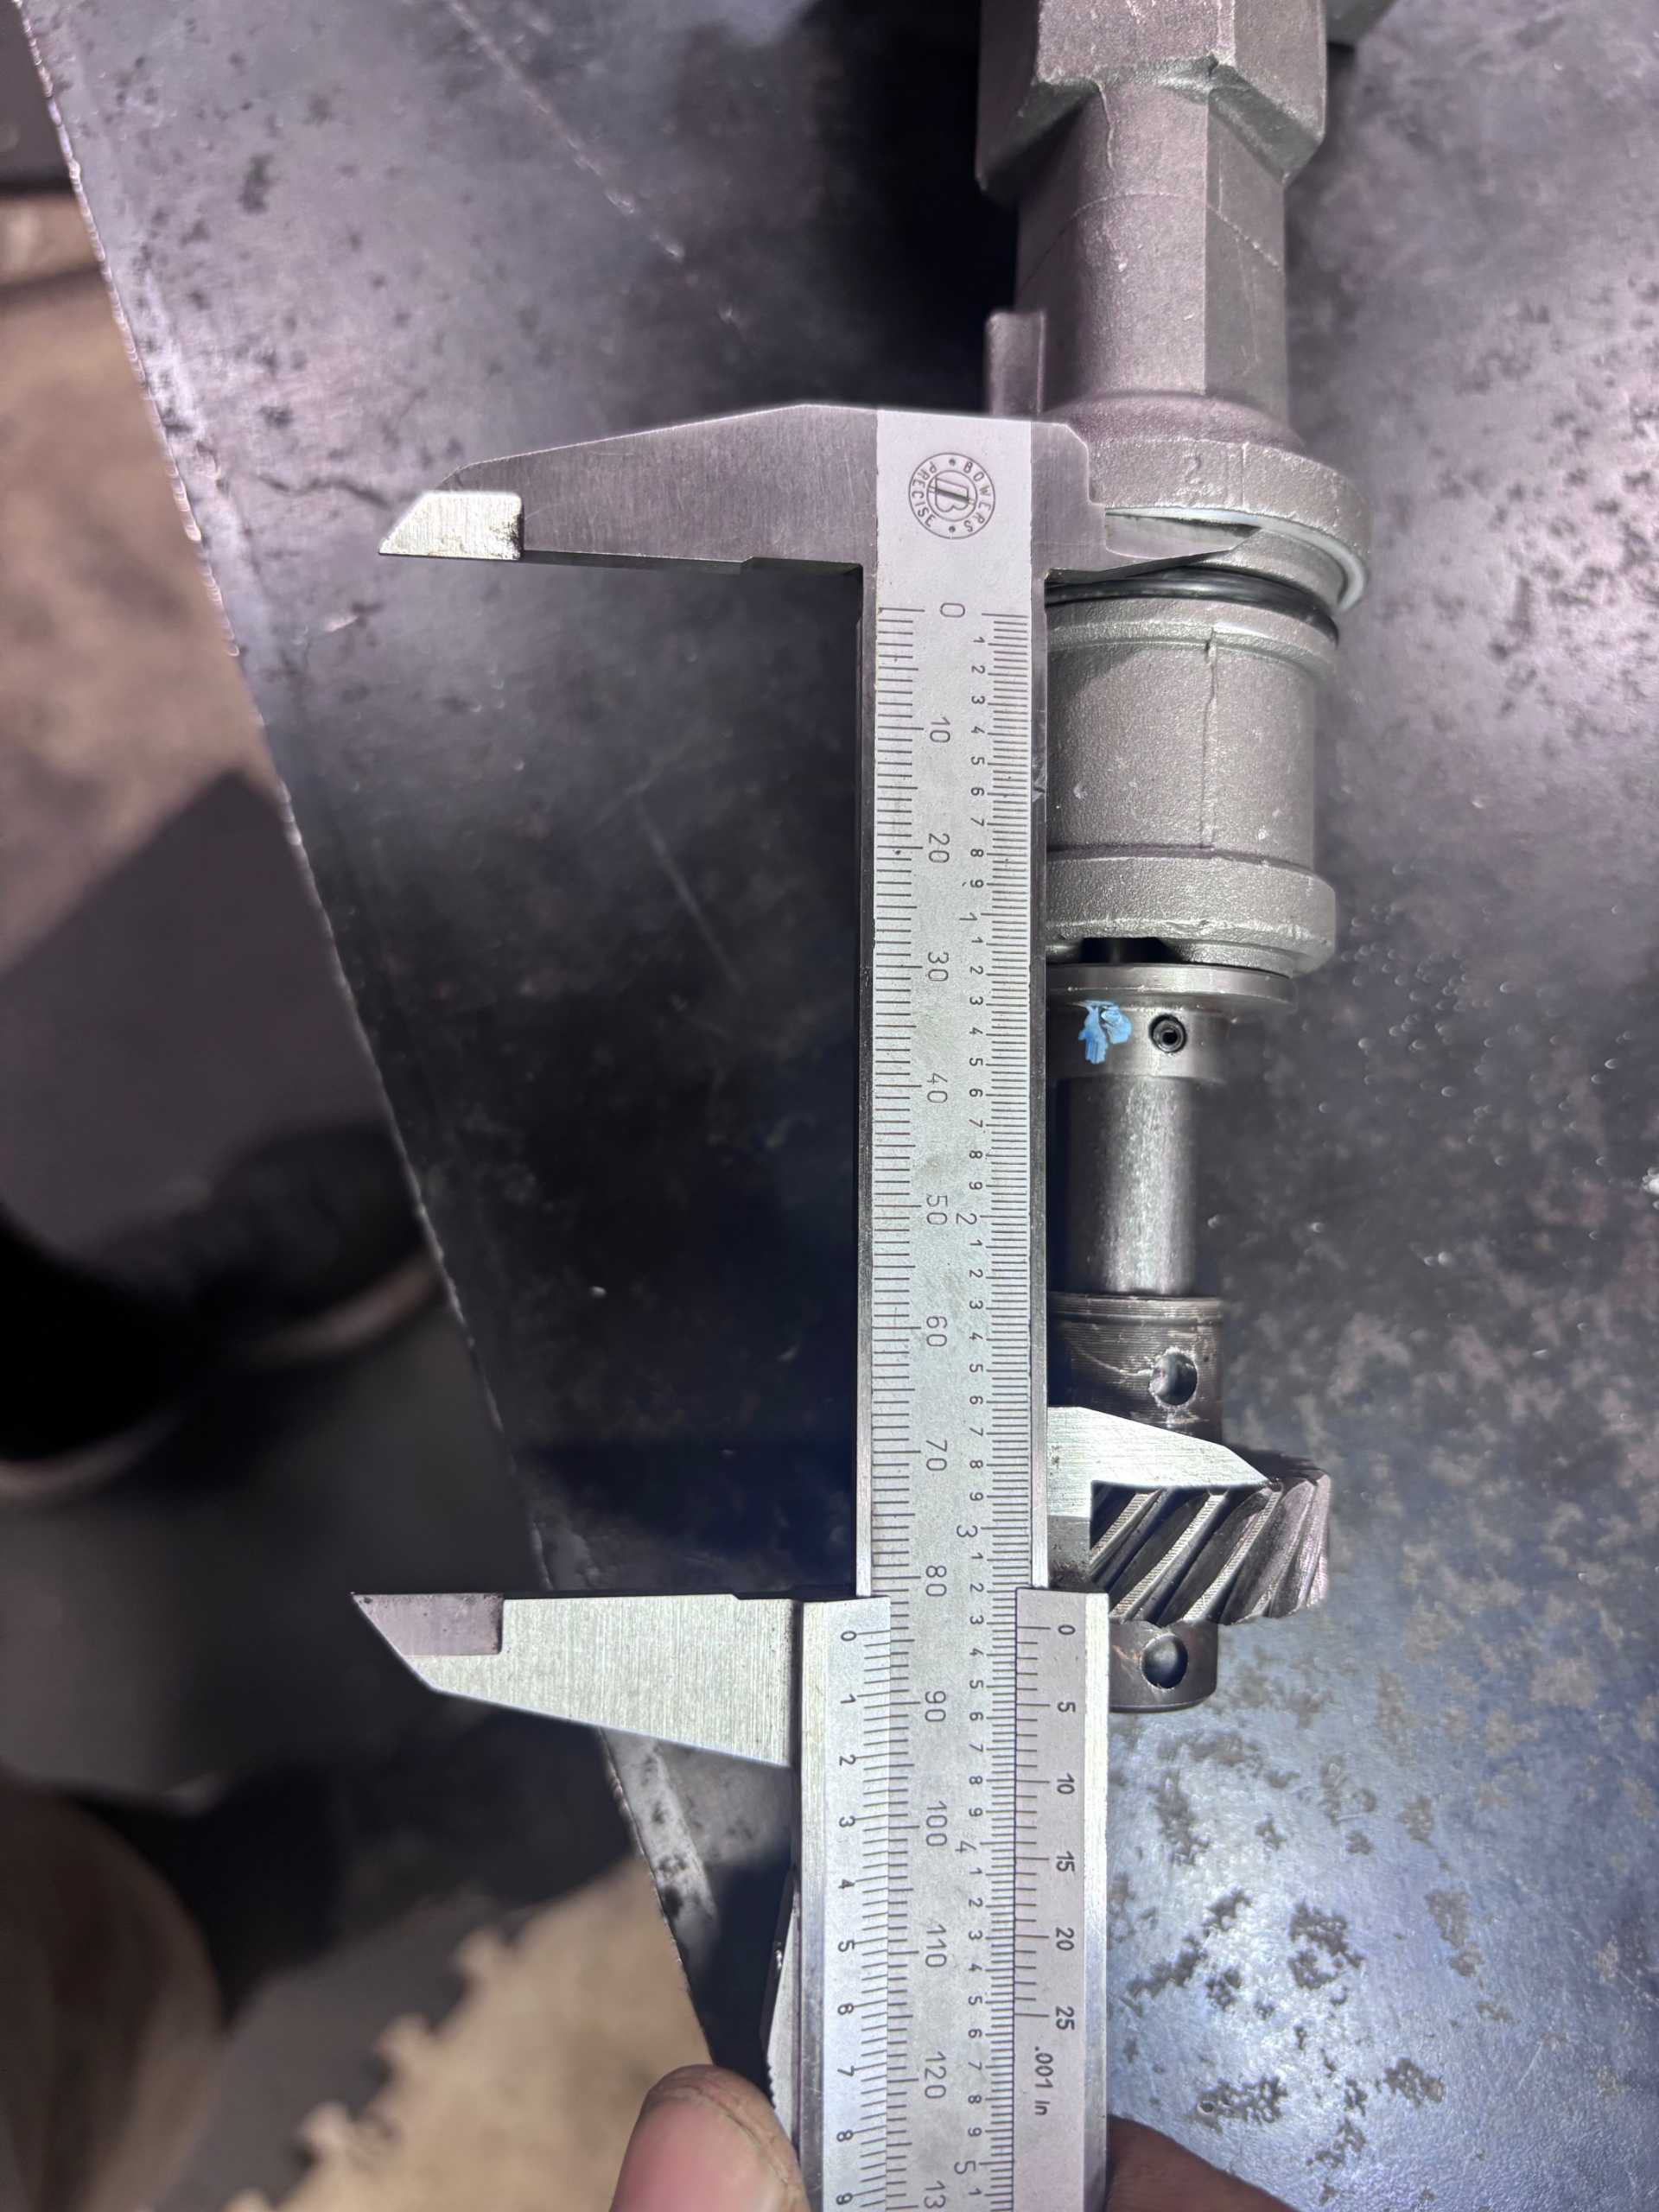
Step 1: (Skip if you bought a gear by itself)
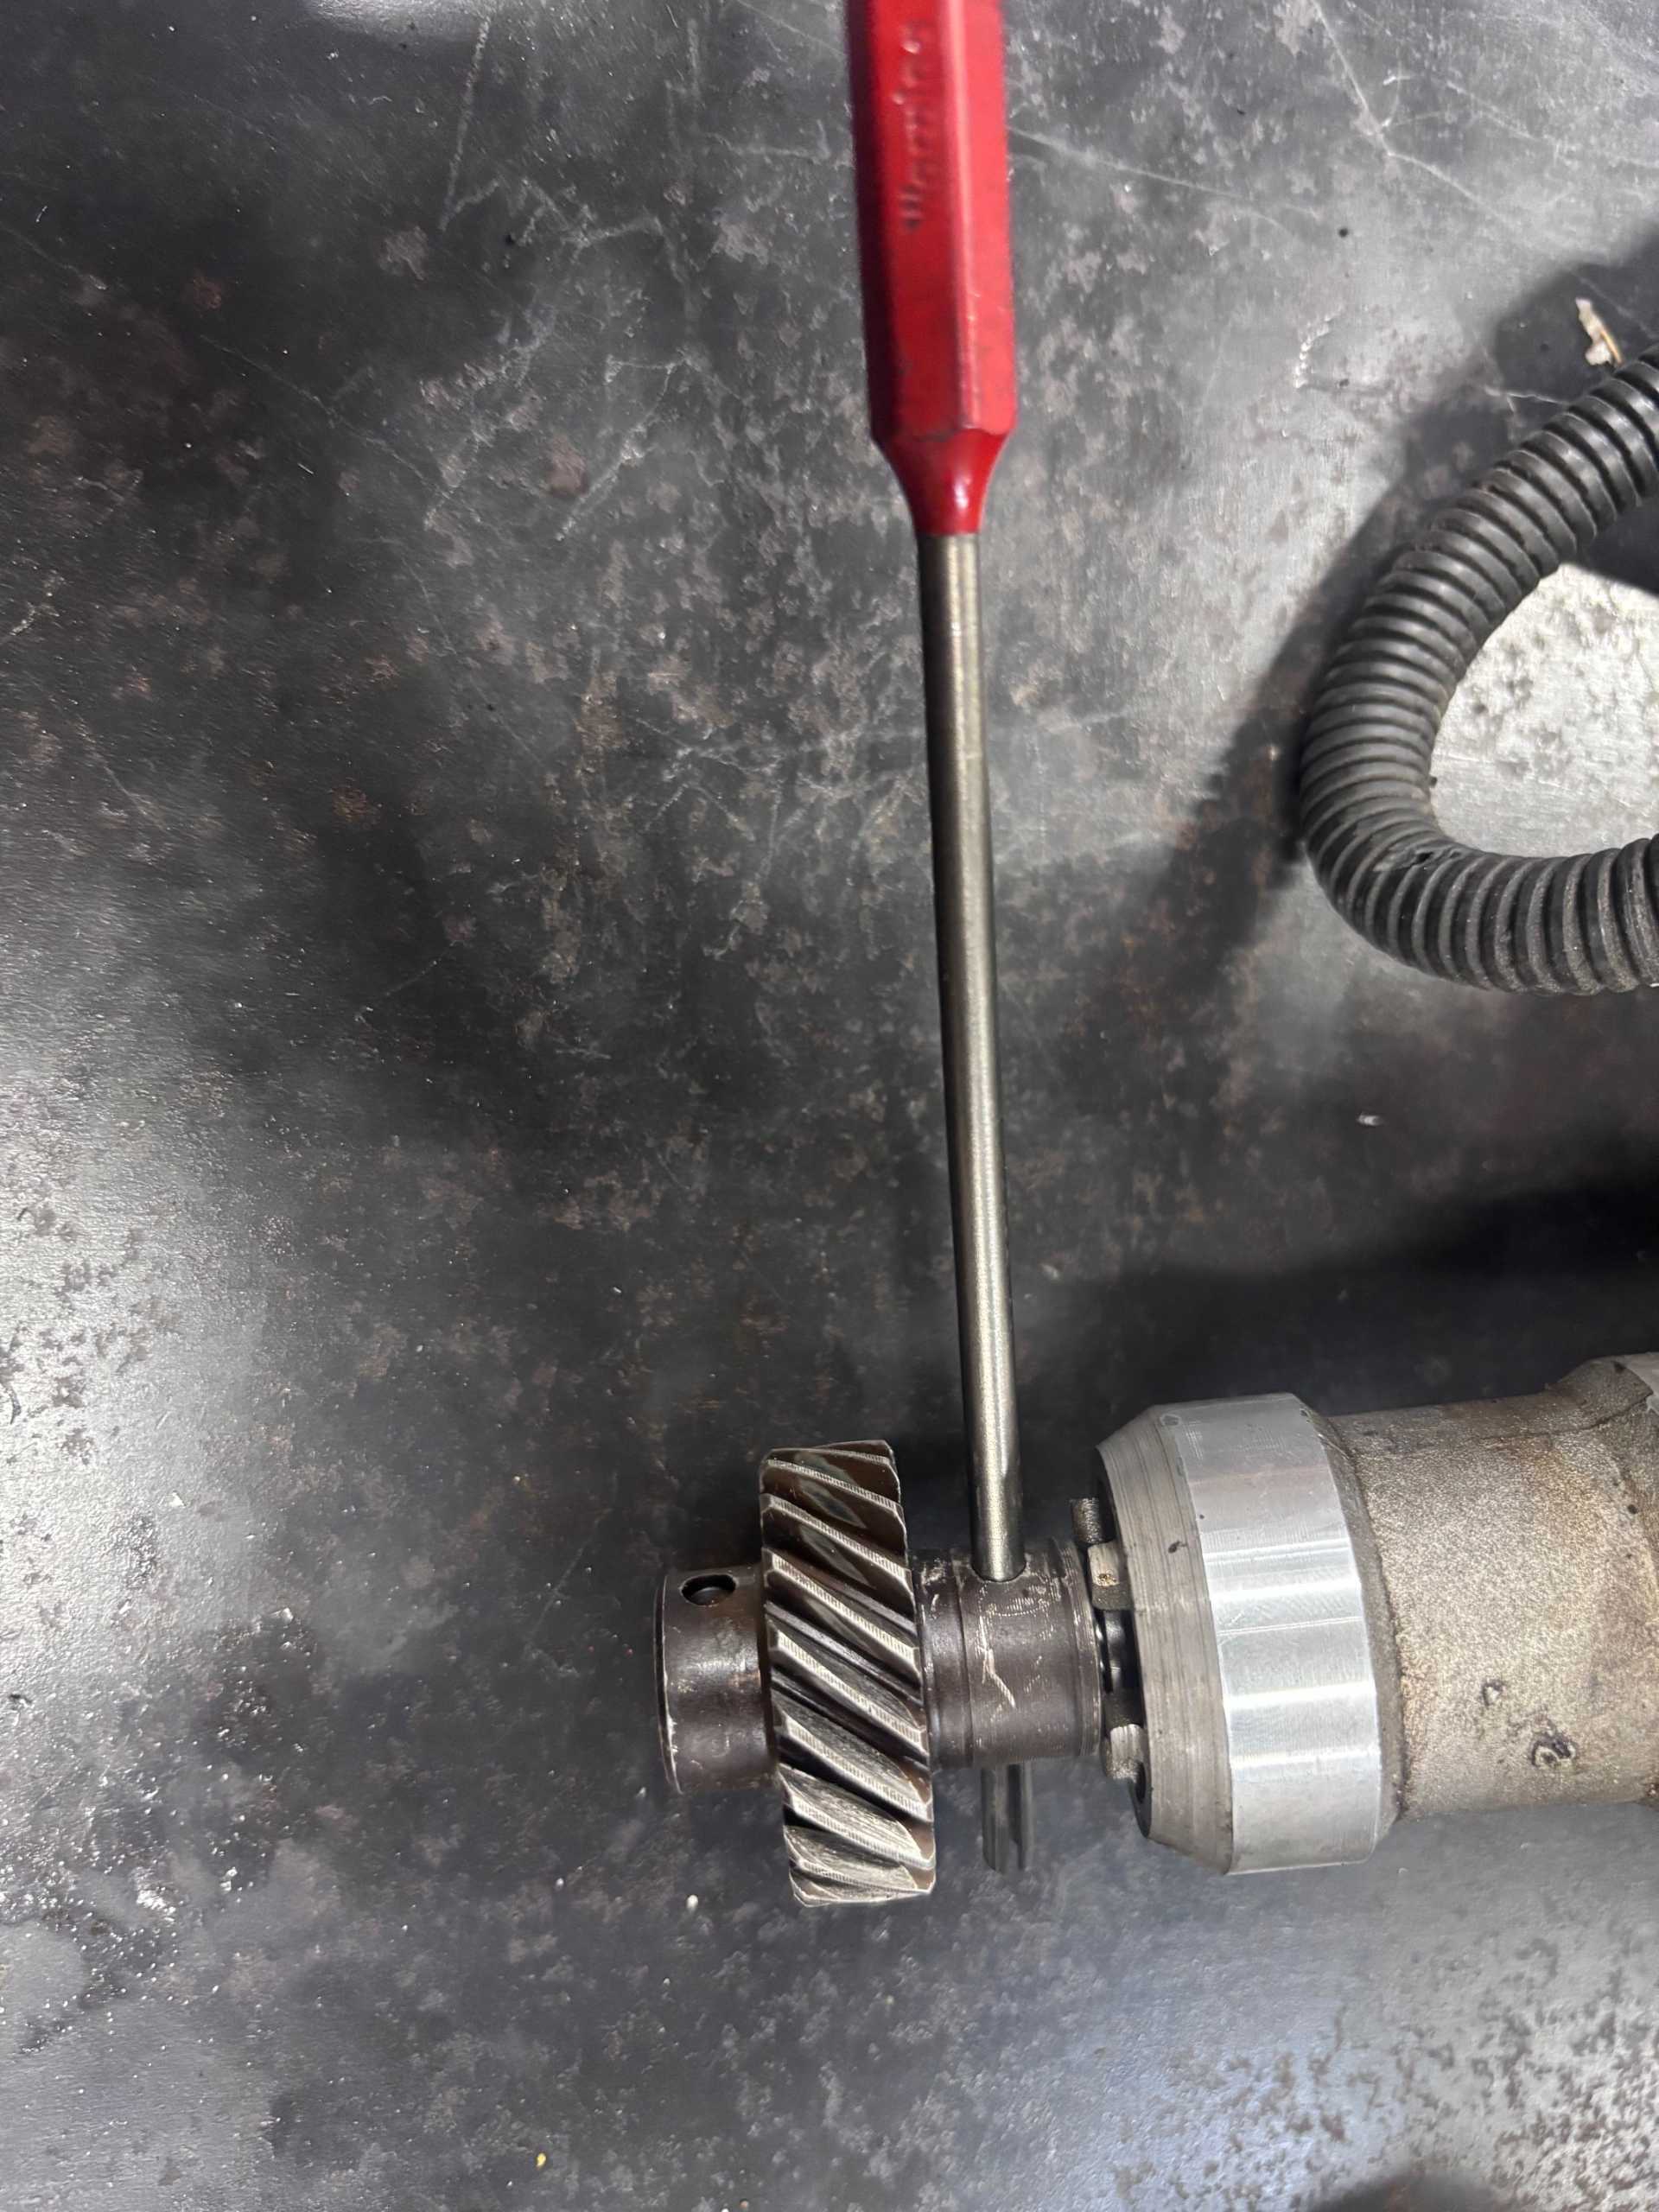
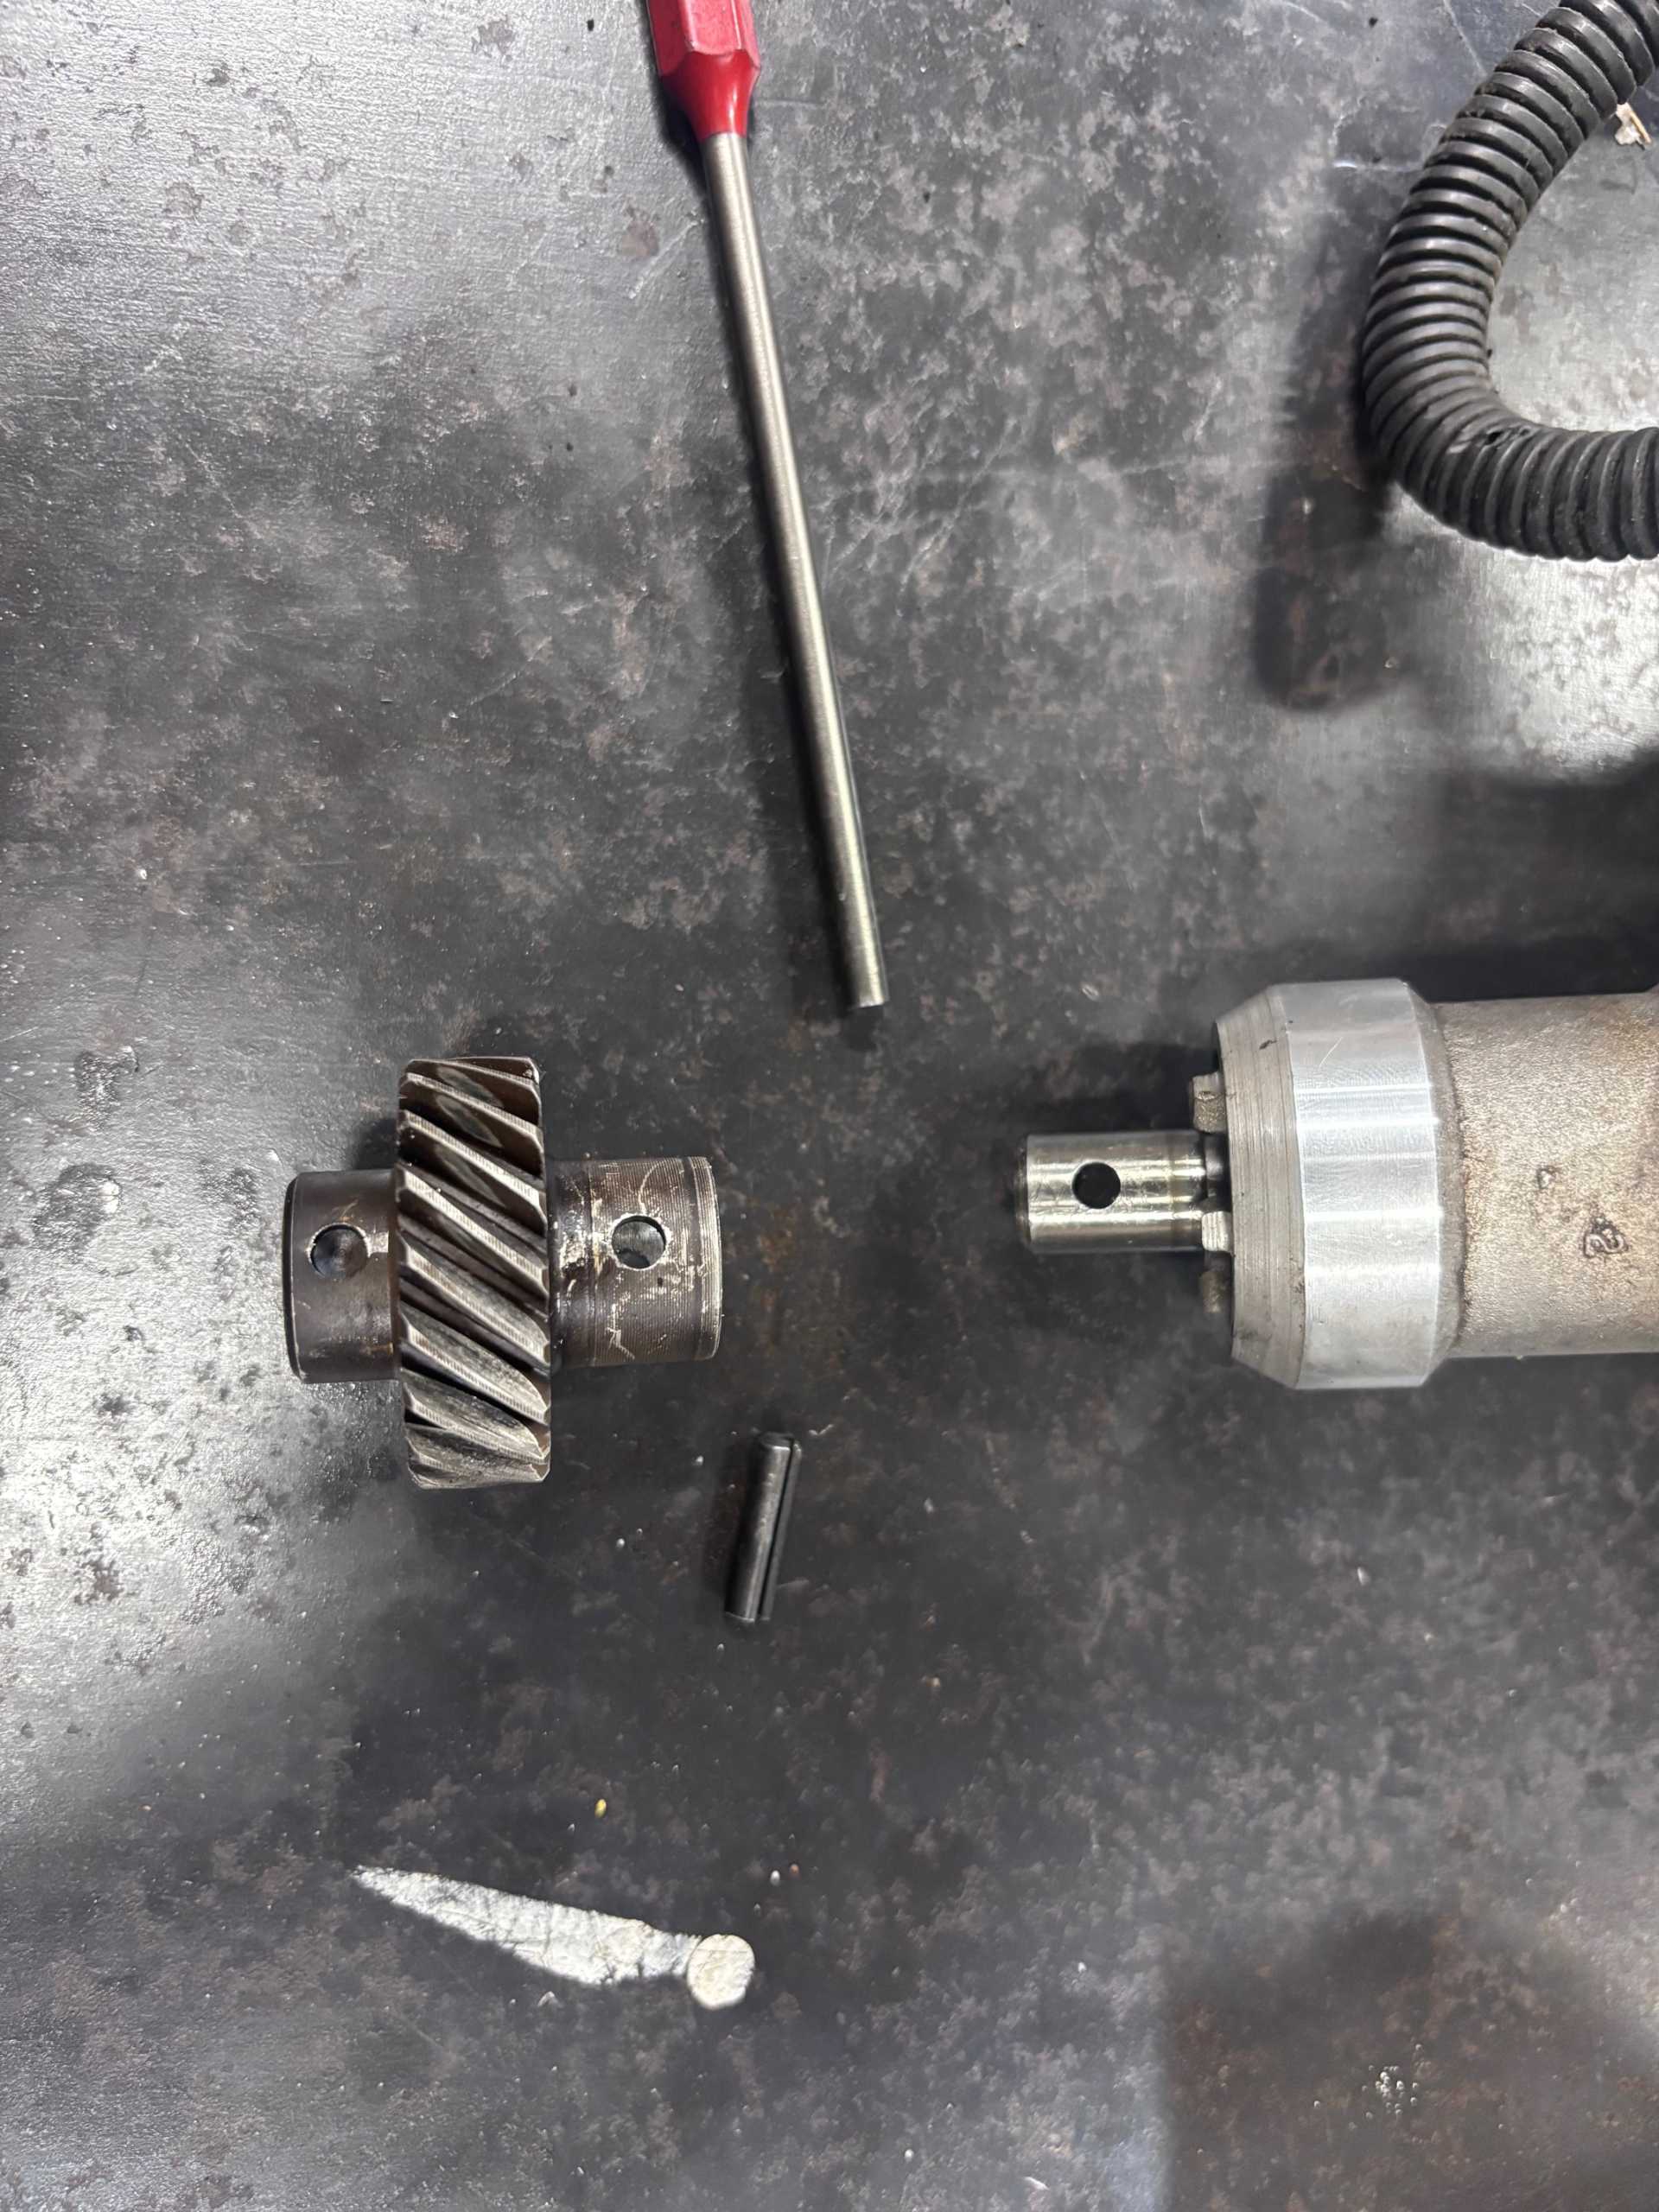
Remove gear from Cadillac distributor using 3/16” punch and hammer (brace it so the gear is supported). Keep the 3/16” roll pin and gear, the rest of the Cadillac distributor is not used.
Step 2: Recommend using local machine shop, it should cost @$30.
Ream the center bore of the distributor gear using a .531 reaming bit. It is best to start with a smaller bit and work up – I used .525 first then .531. Standard drill bits are not advised because the lower half the gear is hex shaped for mounting on to the oil pump shaft, and the drill bit tip would cut into that area.
Step 3:
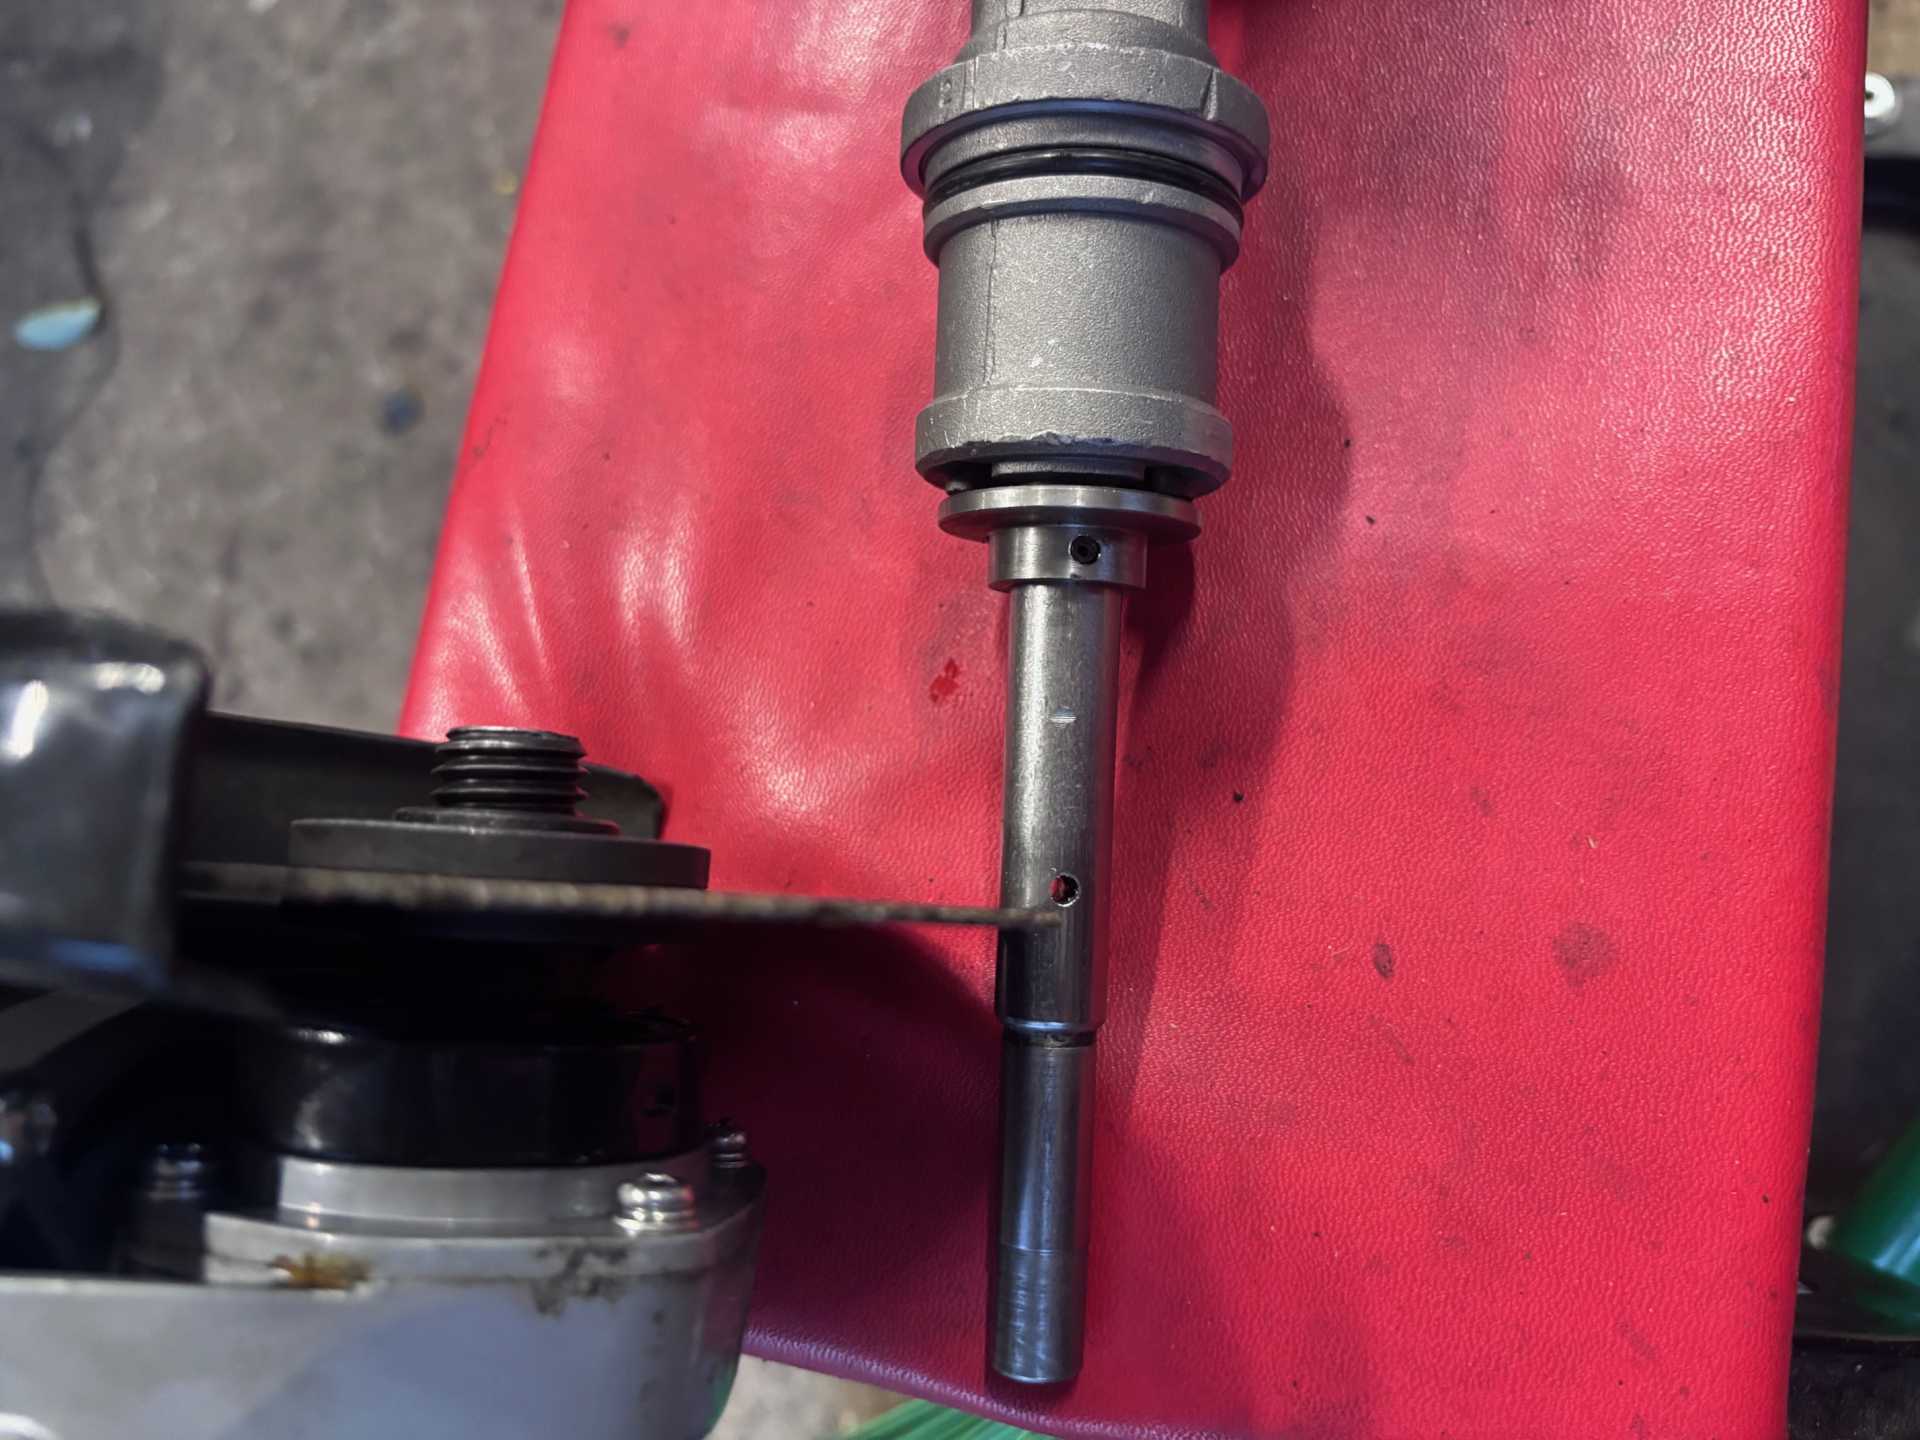
Remove gear from Ford distributor using 1/8” punch and hammer (brace it so the gear is supported). Discard the 1/8” roll pin and gear.

Step 4:
Use angle grinder and cut just below the roll pin hole.

Step 5:
Grind or debur the edge of shaft (angle grinder or file).
Step 6: The Hot Rod Gods have blessed us, the distance on the drill guide (3/16") listed above is perfect to line up the Caddy distributor gear – I highly recommend getting it, if you did skip to step 7.
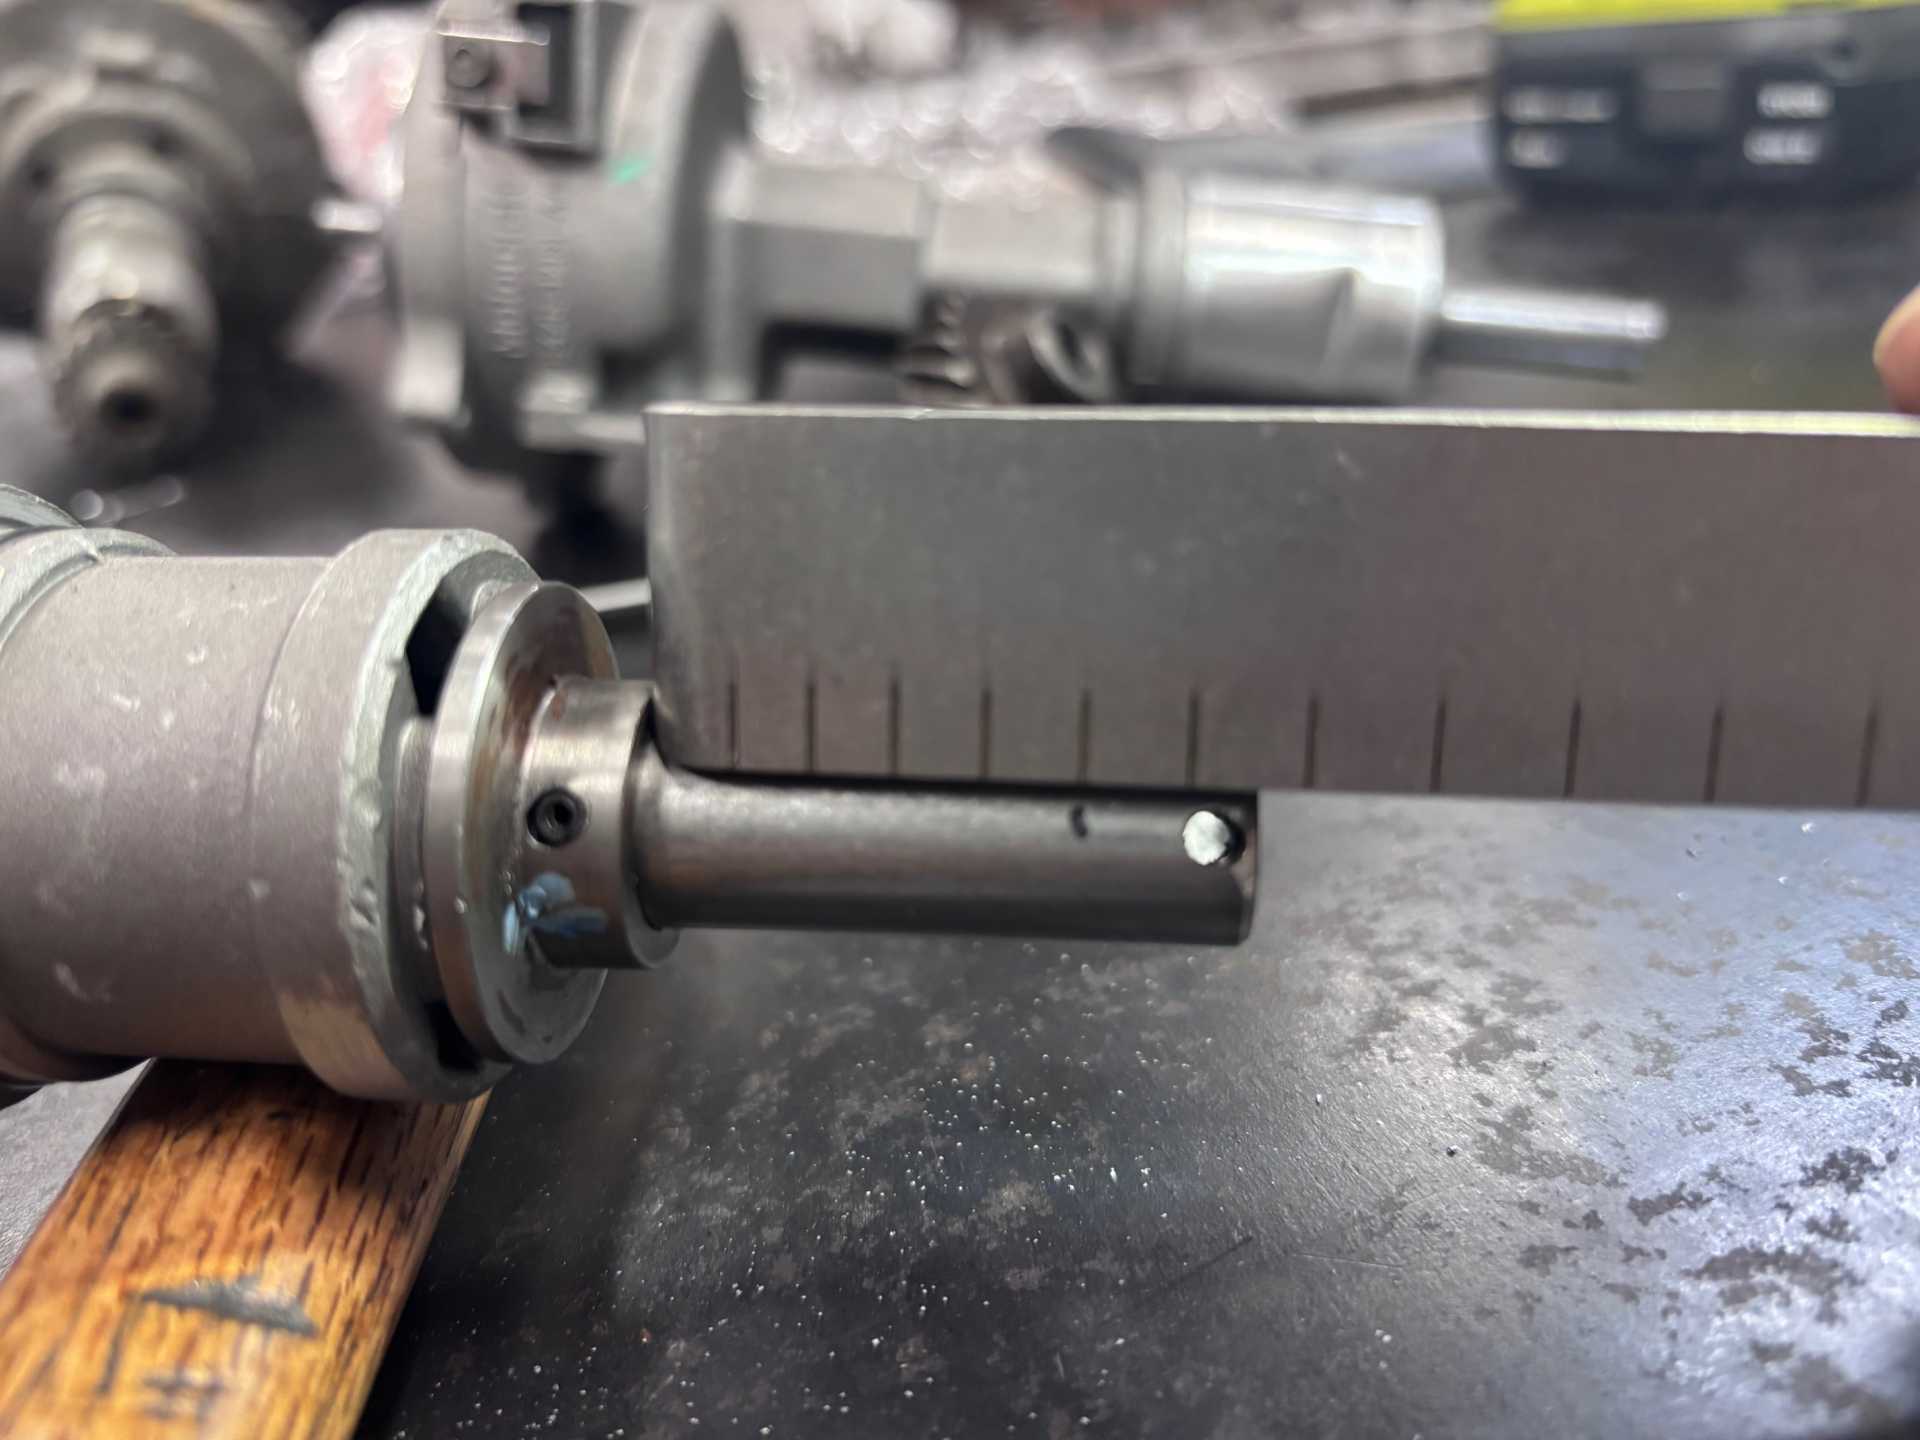
If you’re a sadist &/or a perfectionist, use the measured distance between then Cadillac mounting flange to the top of the gear teeth and set the gear to mark shaft to drill.
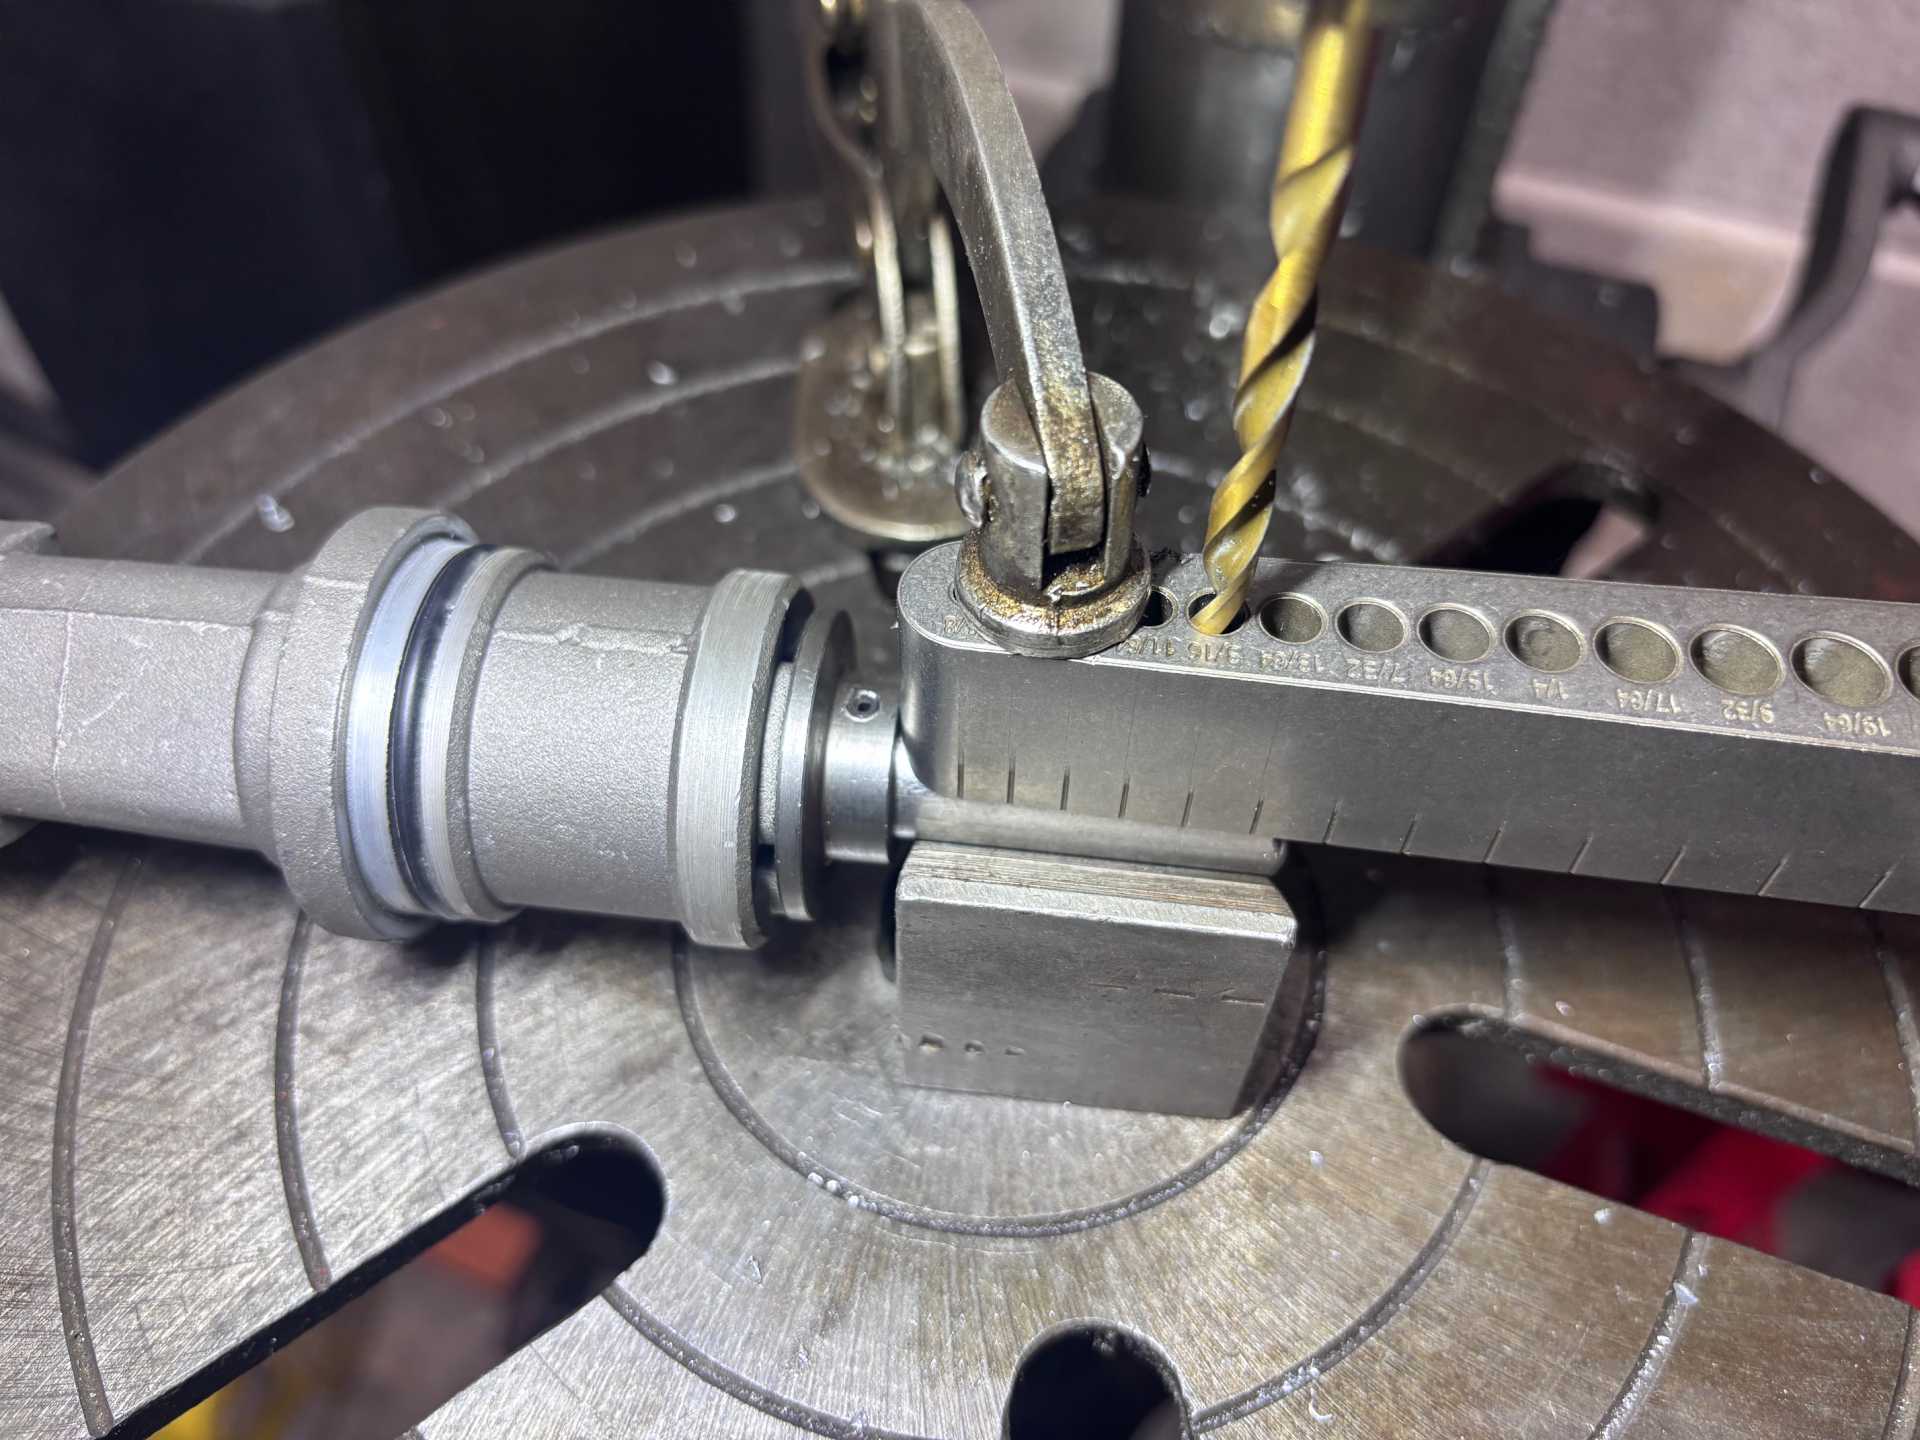
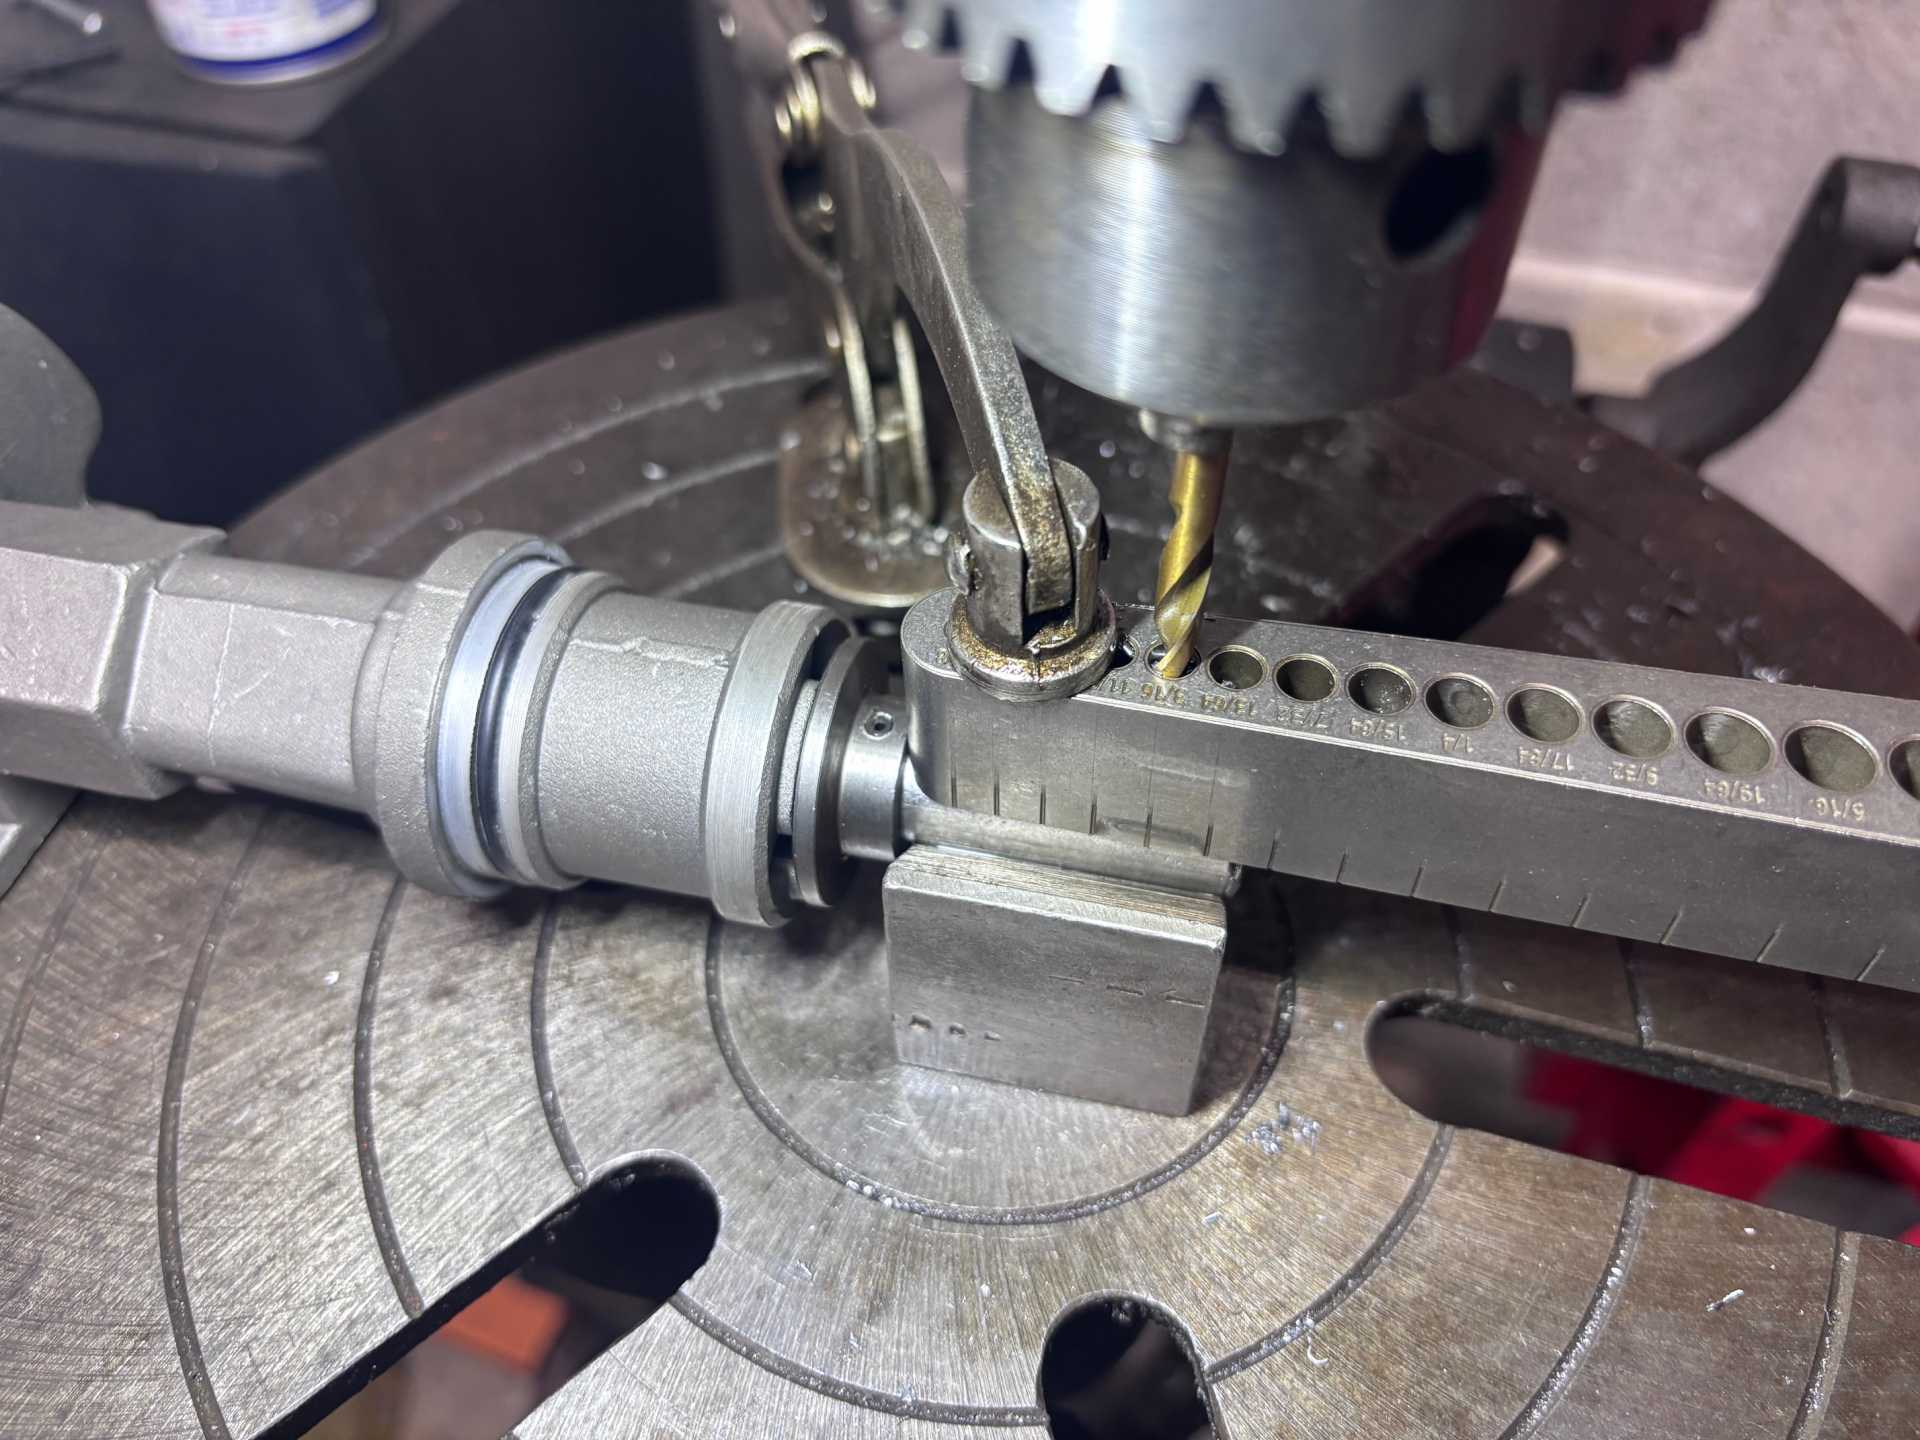
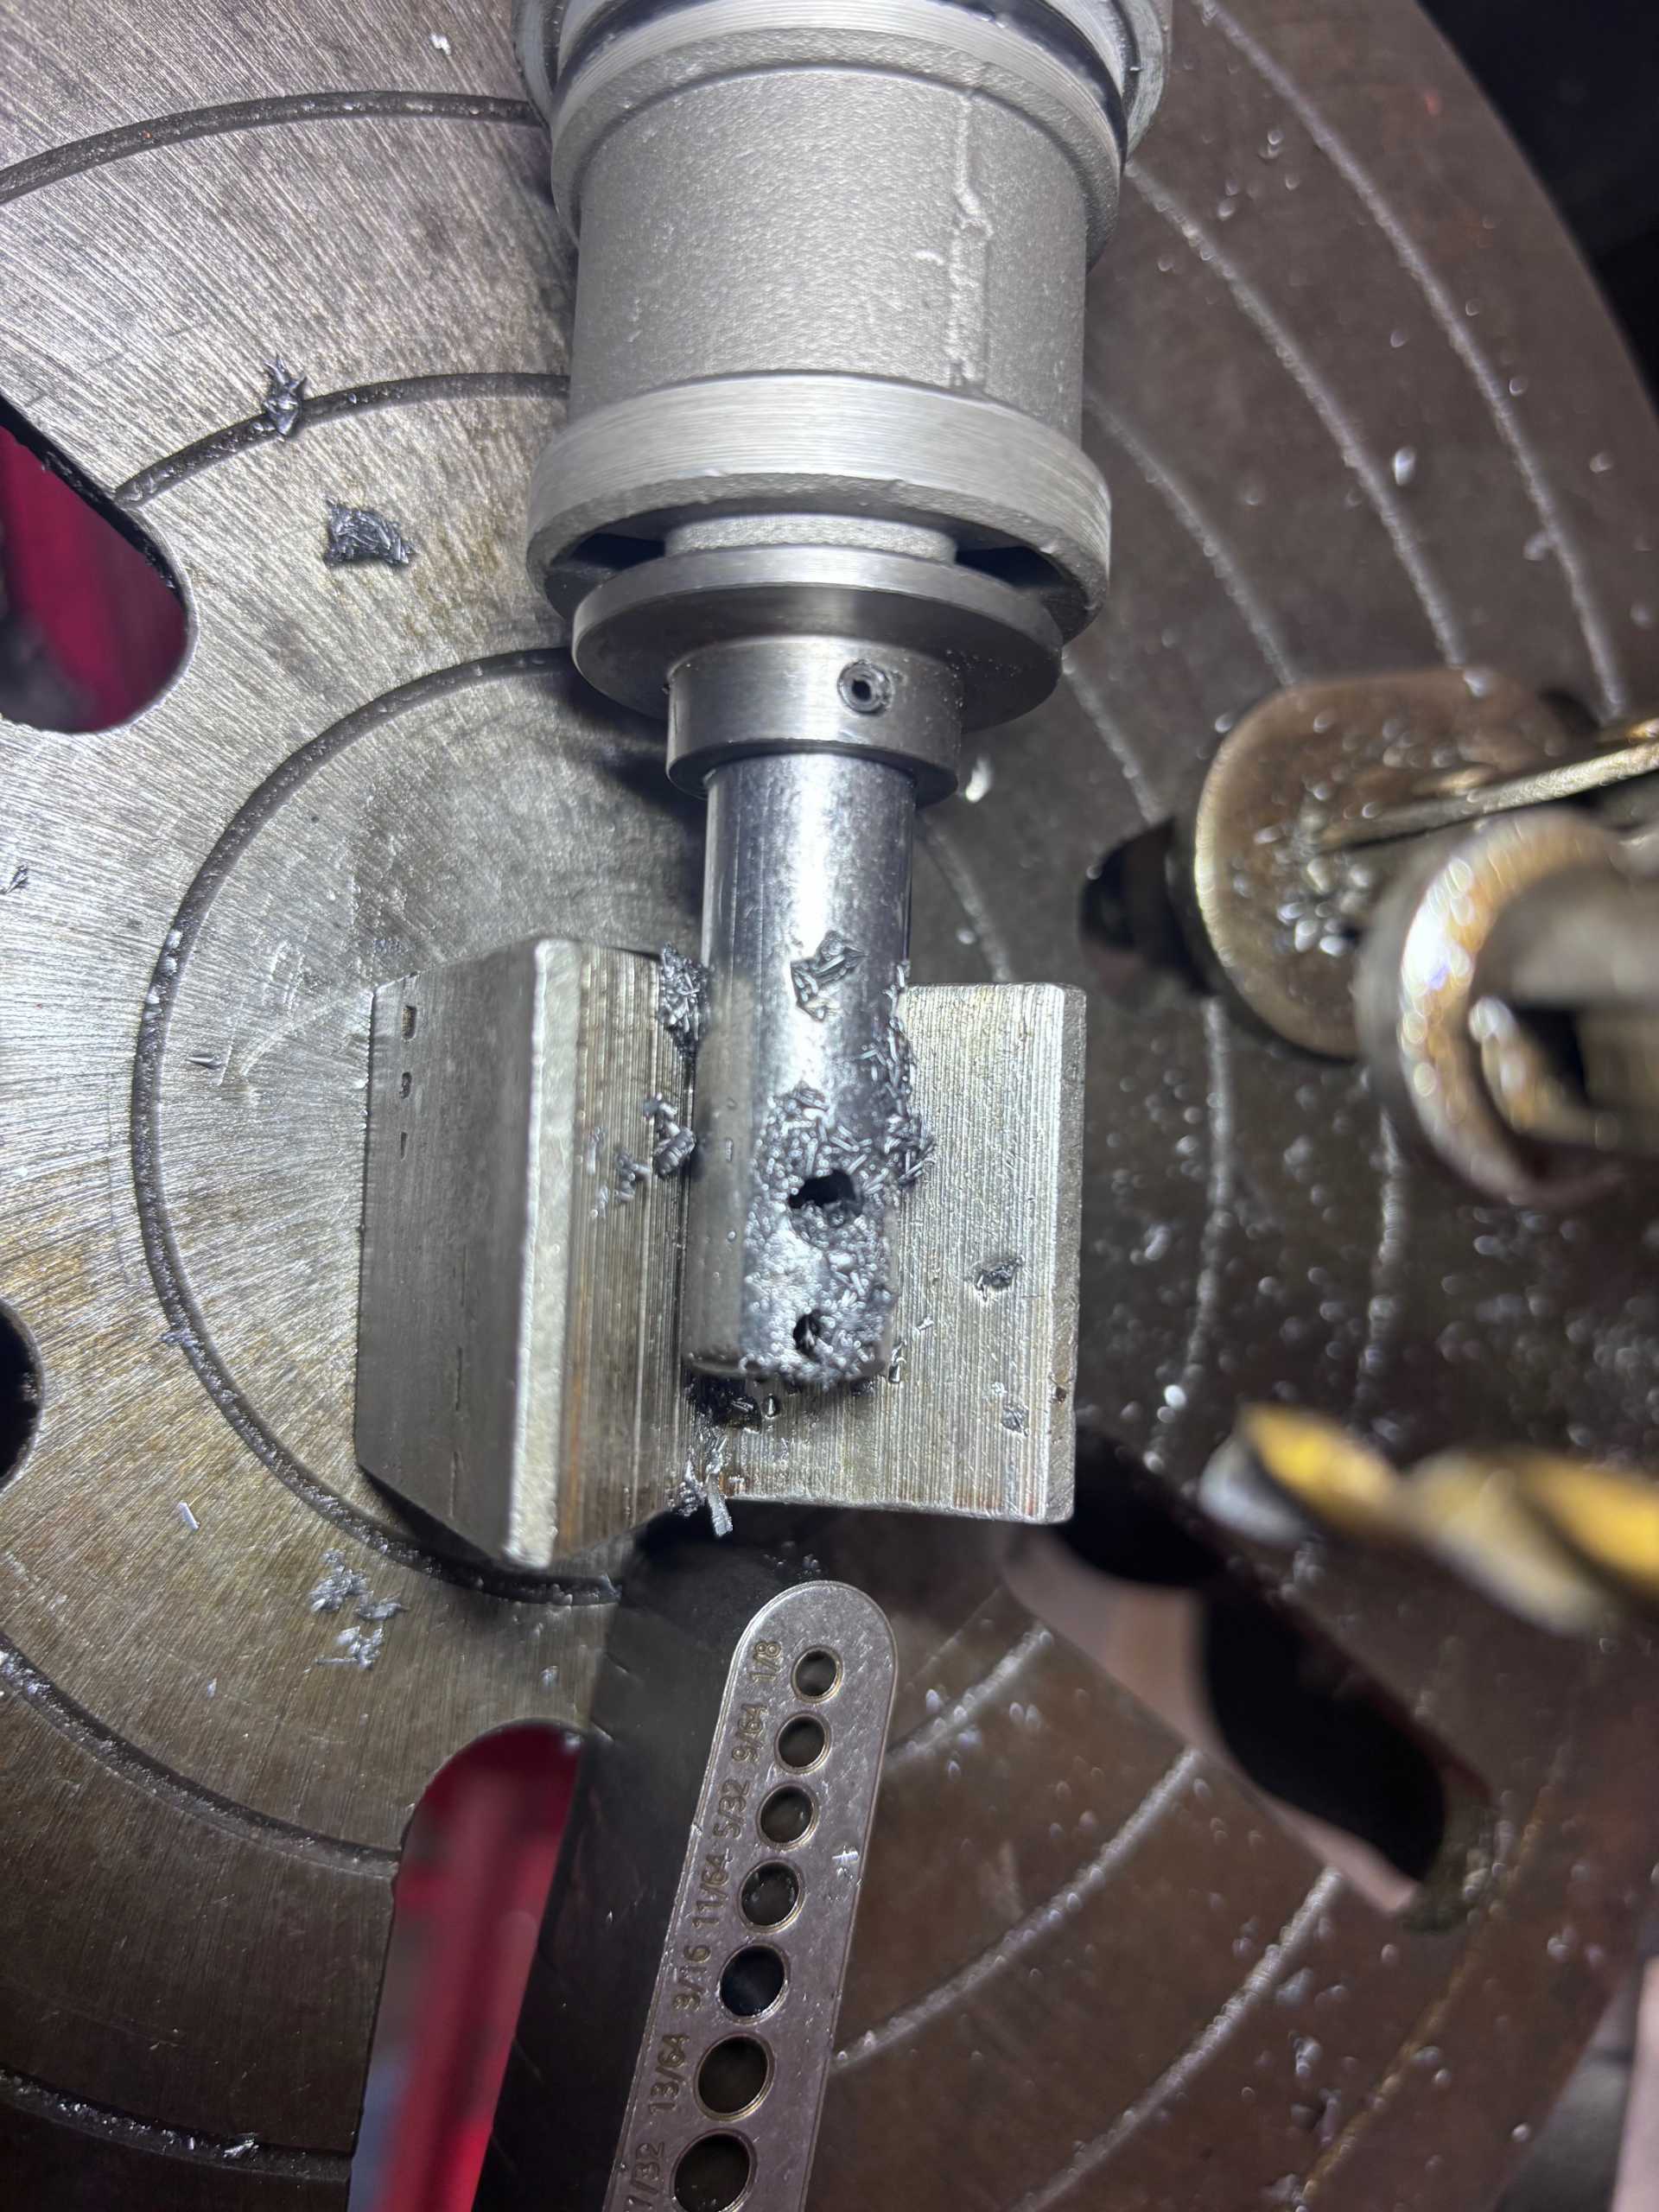
Step 7:
Setup distributor shaft in a brace on drill press with 3/16” drill bit. Ensure drill guide and shaft are clamped securely, use oil and drill slowly. Clean when done.
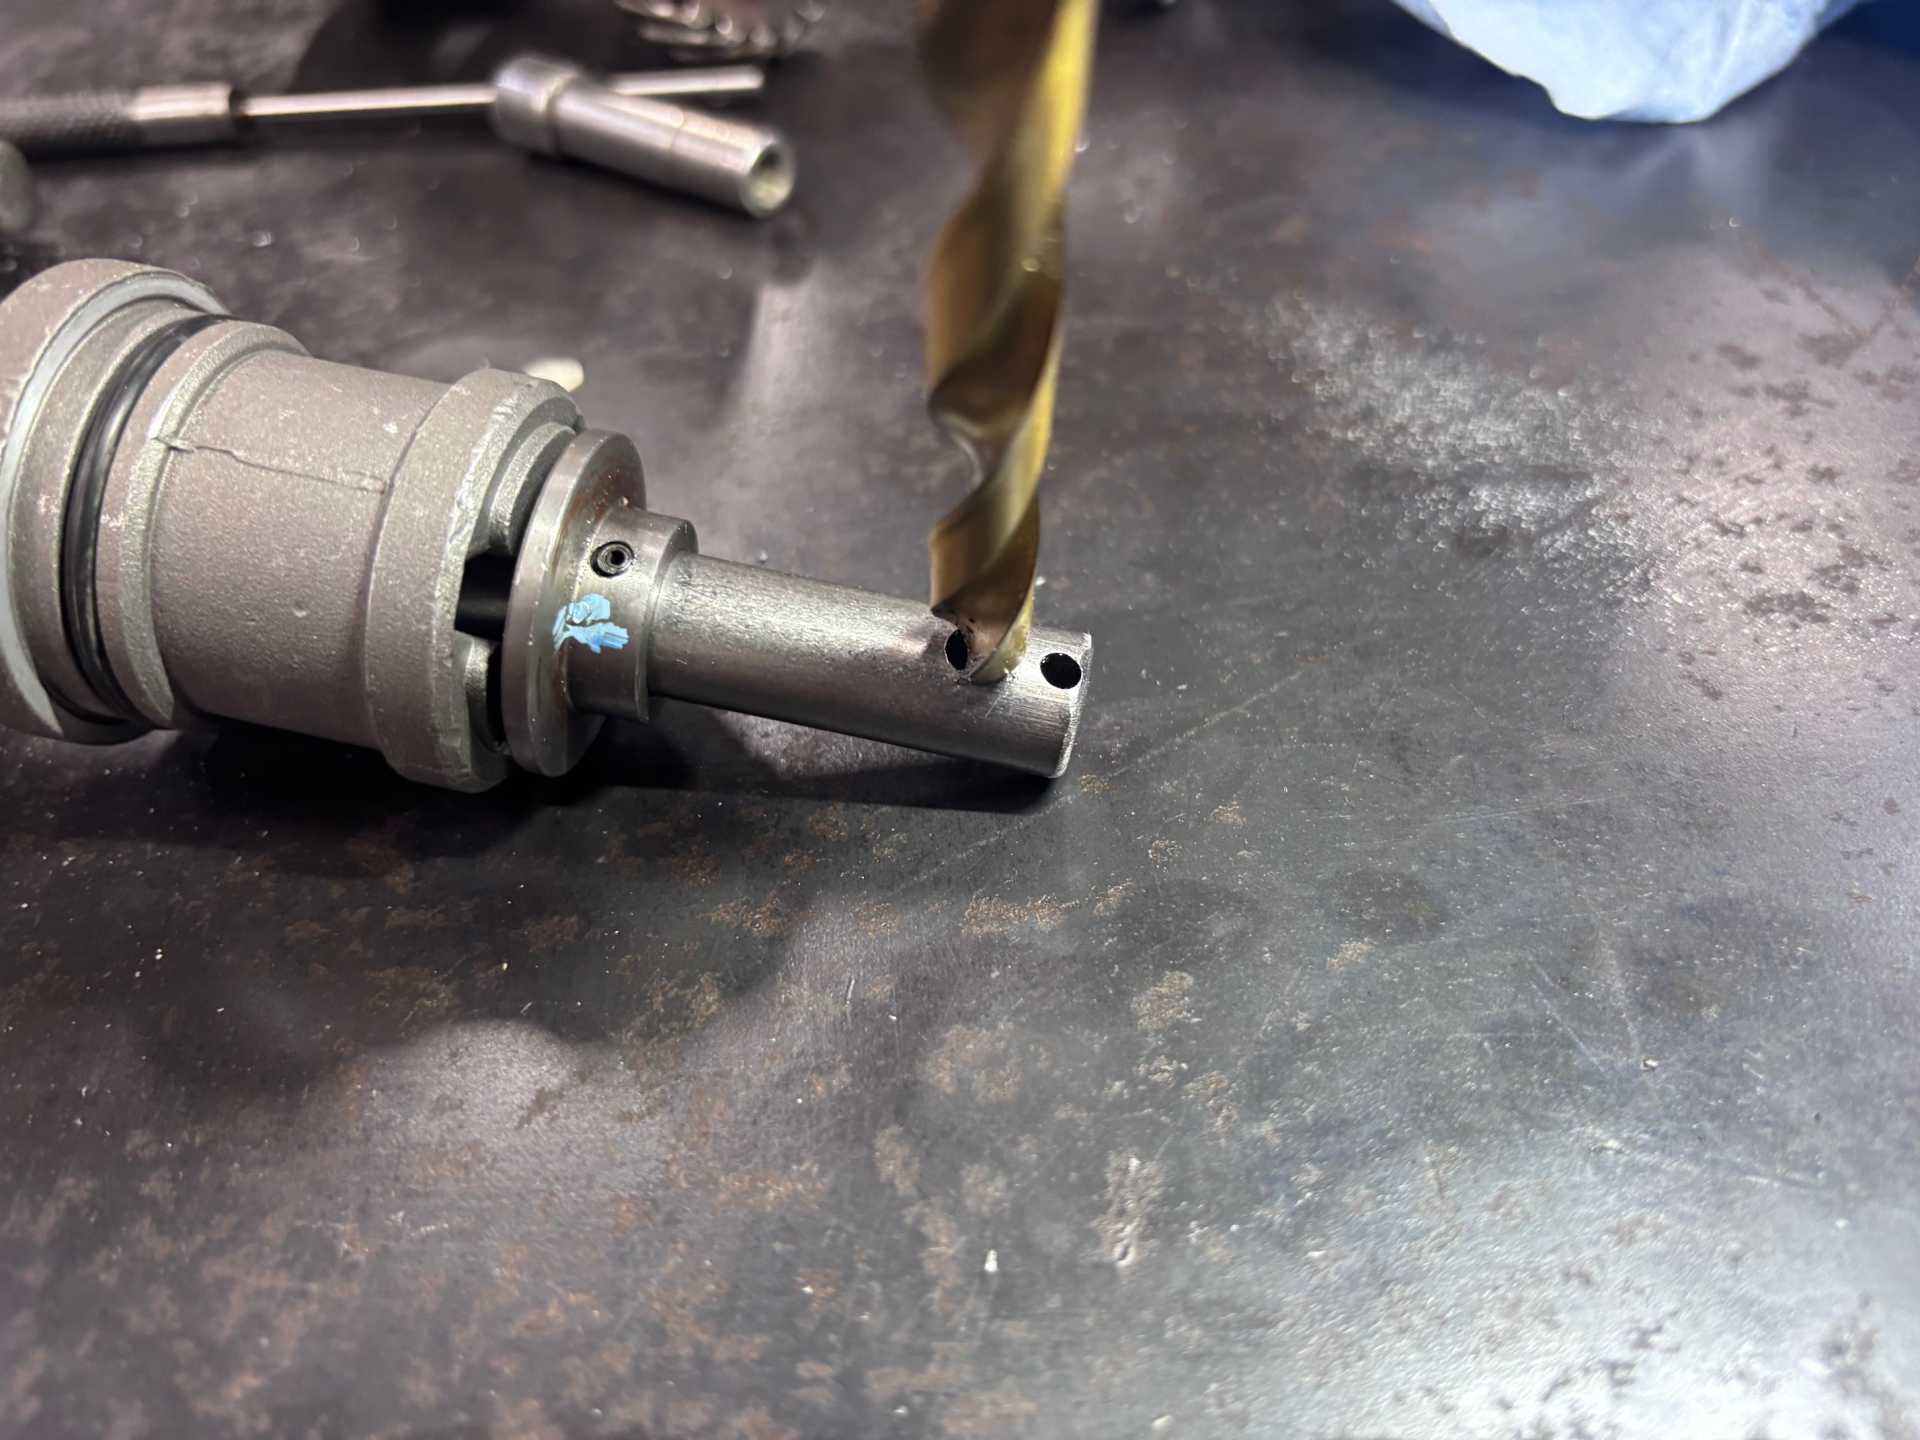
Step 8:
Use 3/8” drill bit to debur and chamfer the 3/16 hole for the roll pin. Clean when done.
Step 9: (pics may seem out of order, but you have to do the sleeve before the gear or you will be taking the gear off unnecessarily).
Remove distributor O-ring from groove and move up to the mounting flange. Set the aluminum pipe next to the housing and mark just above the lowest flange on both sides.

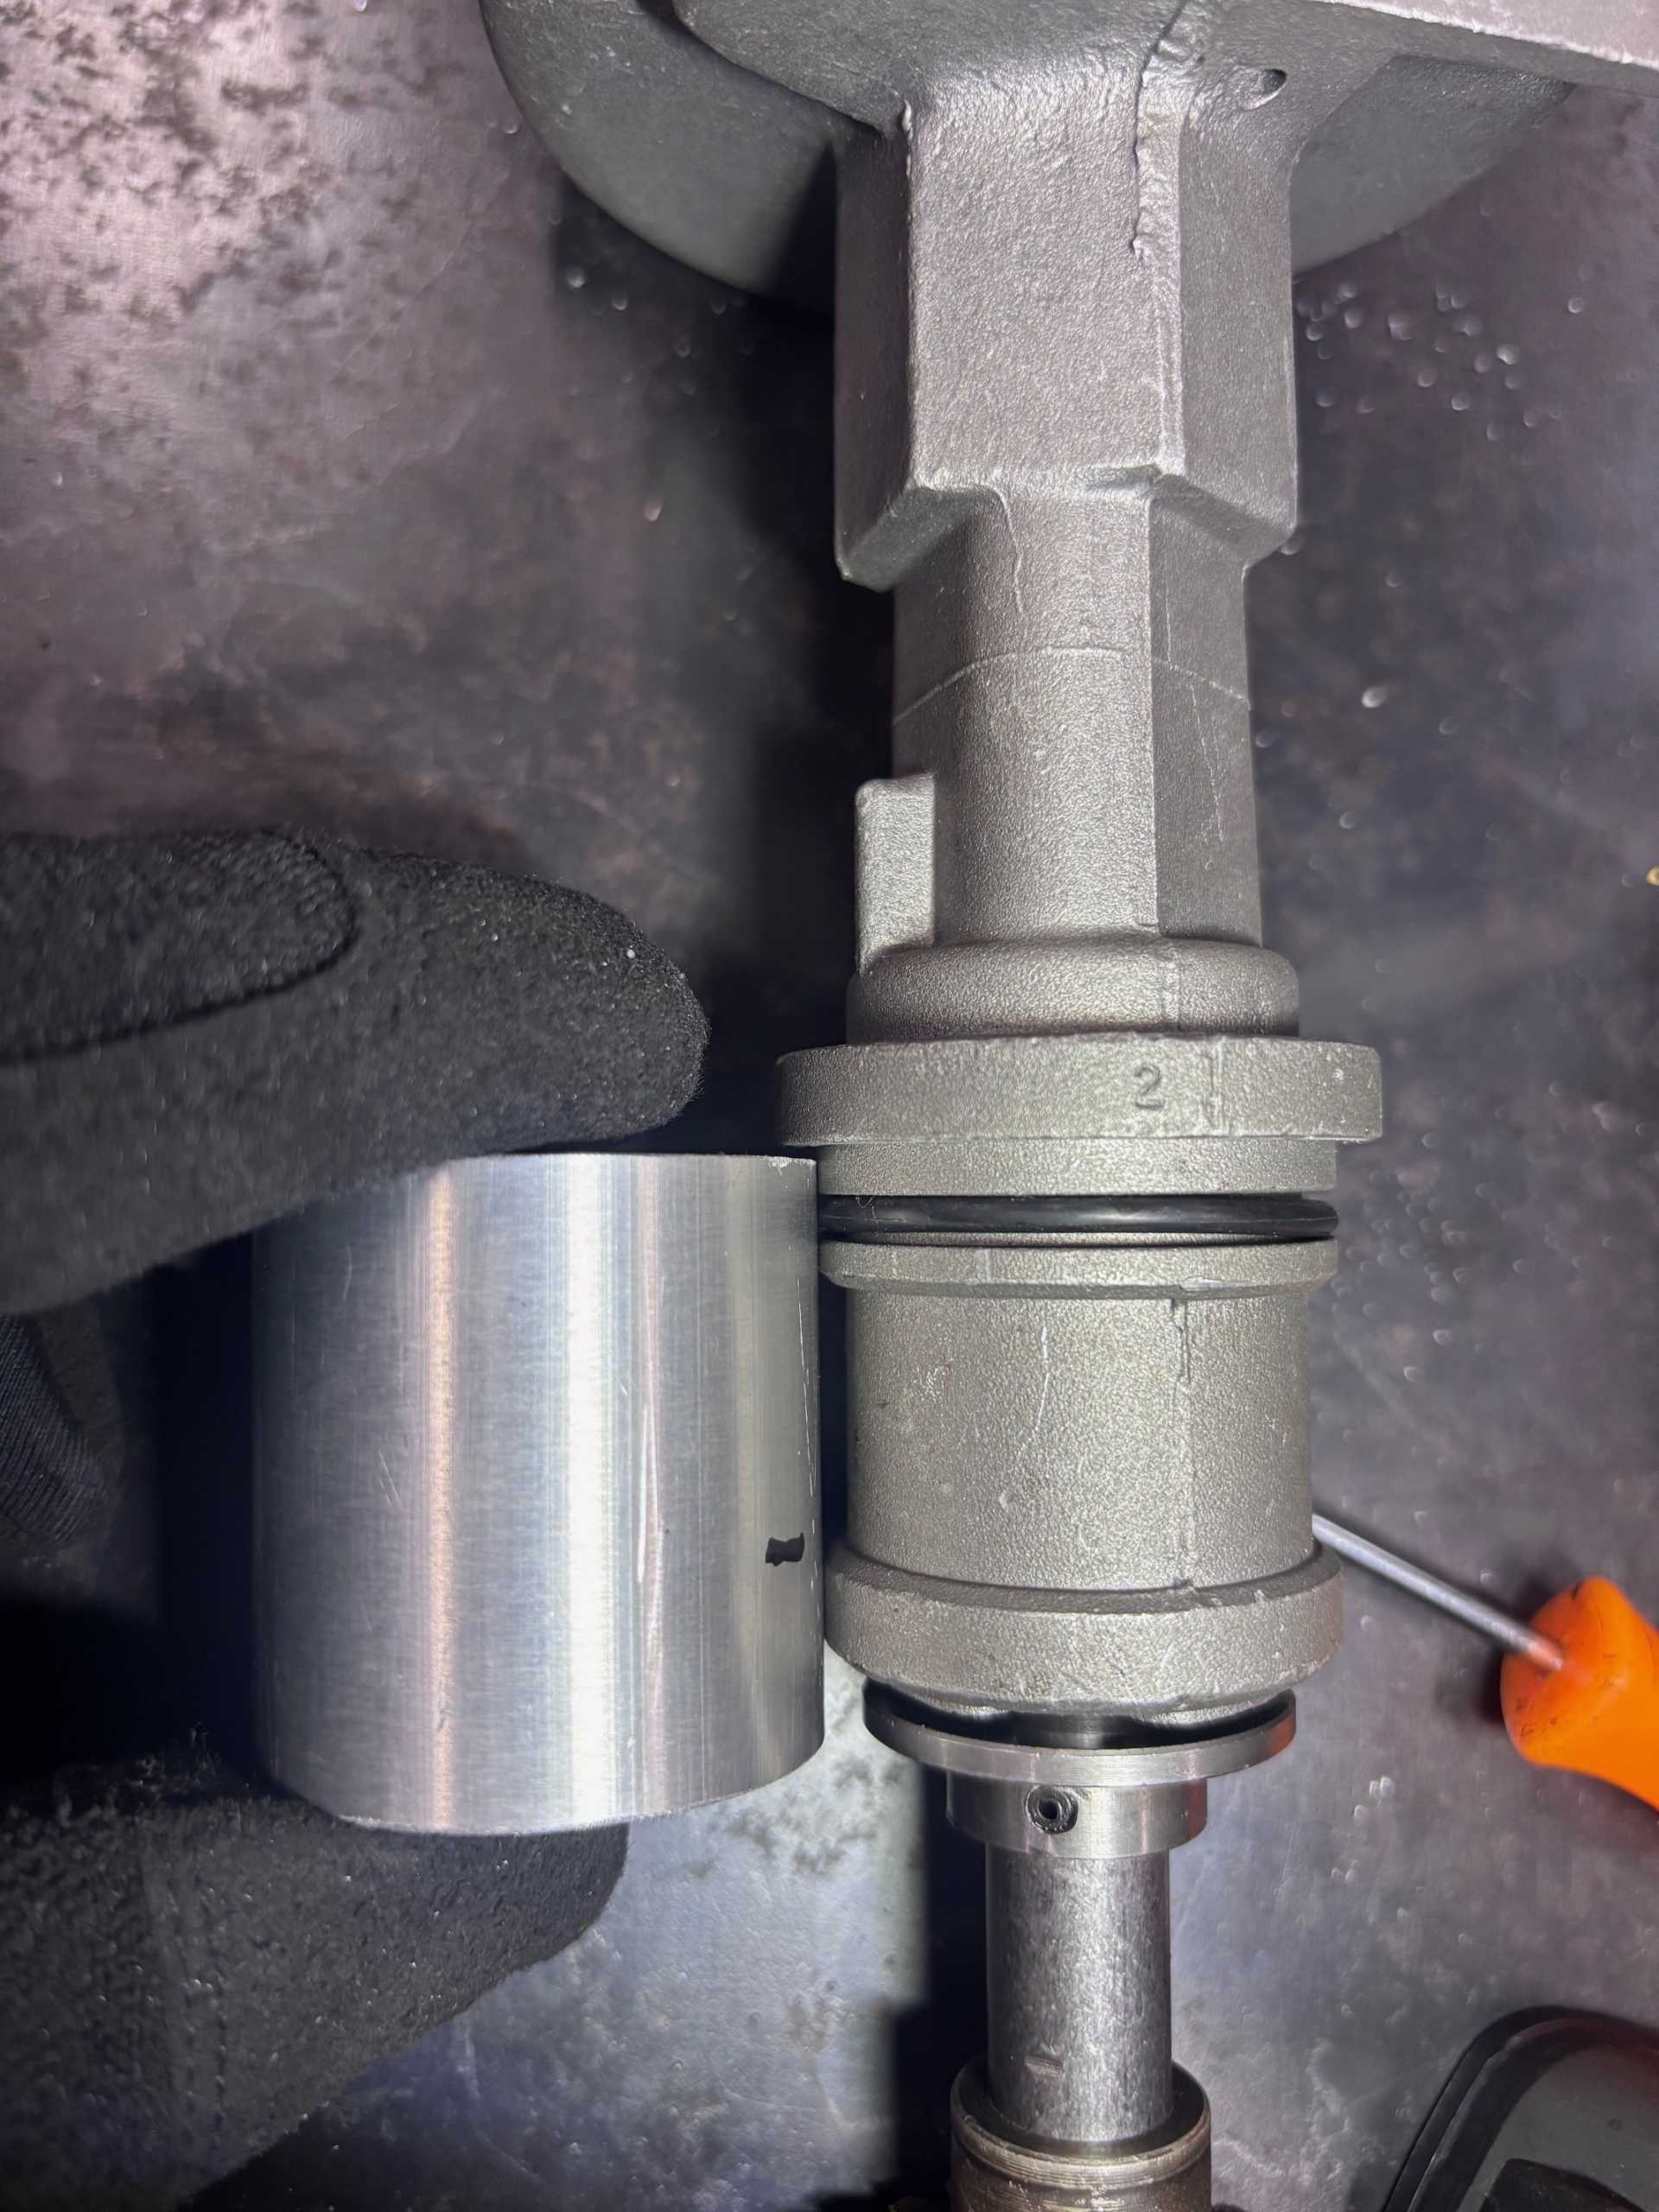
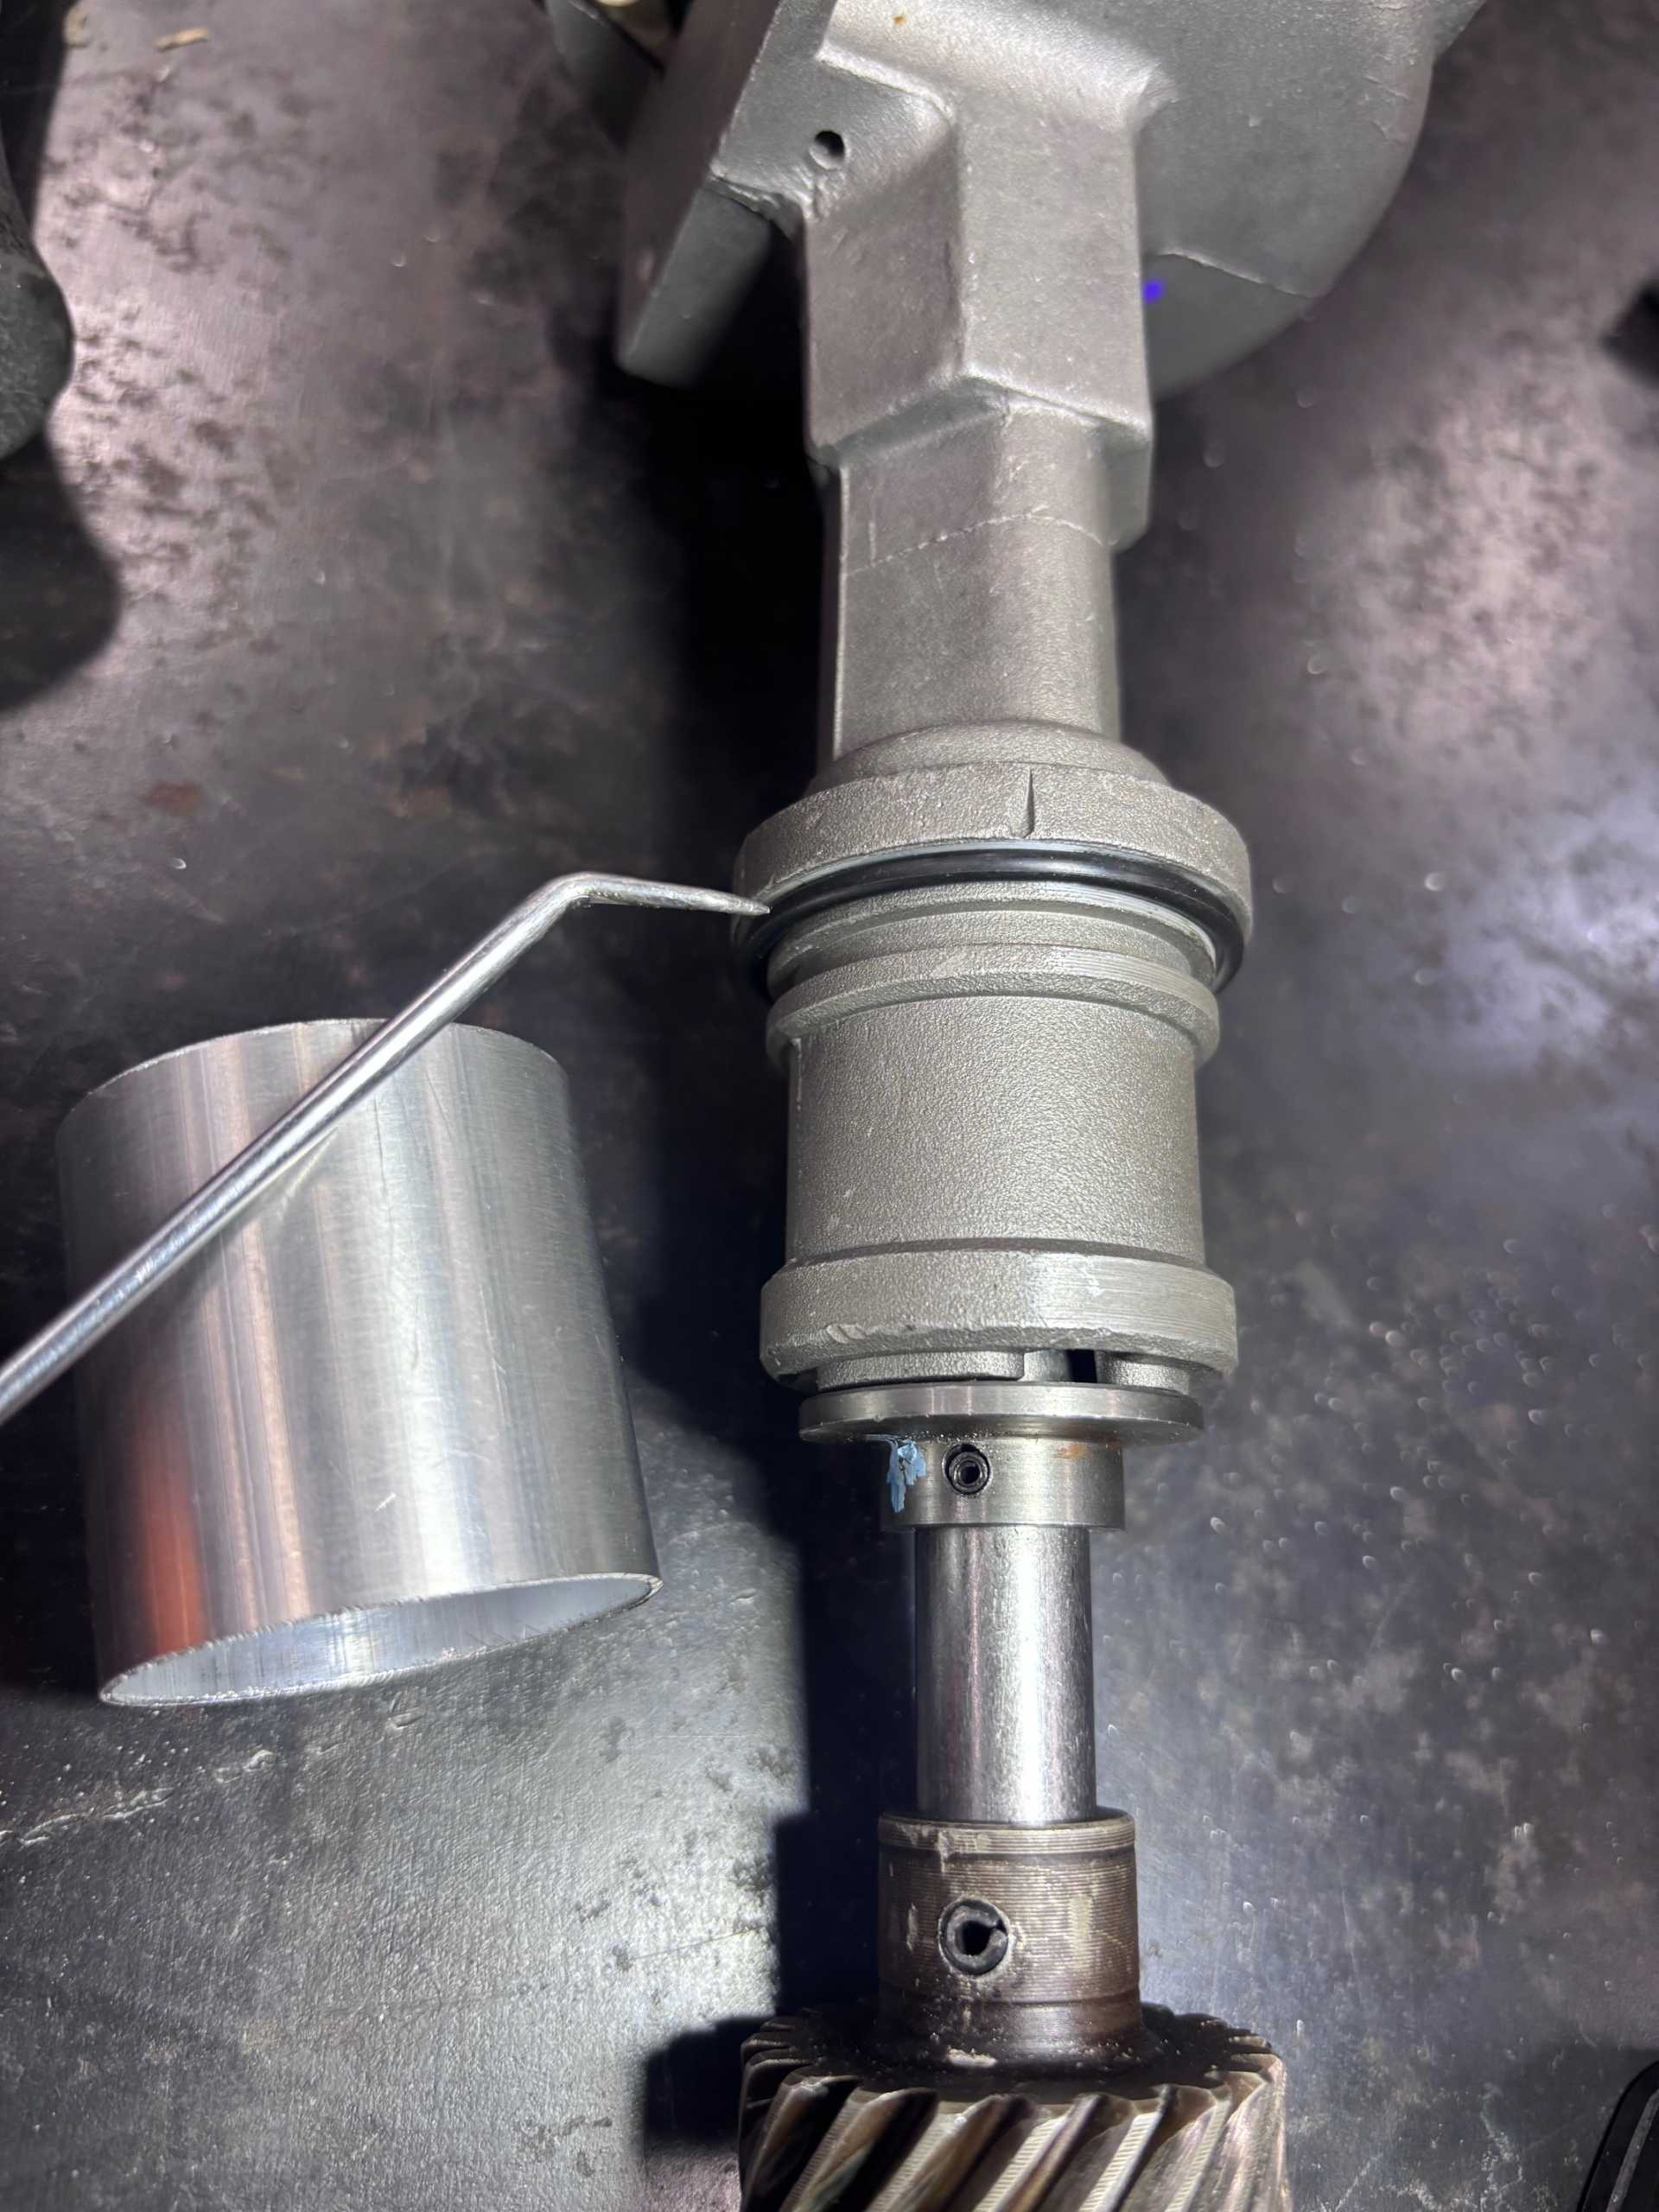
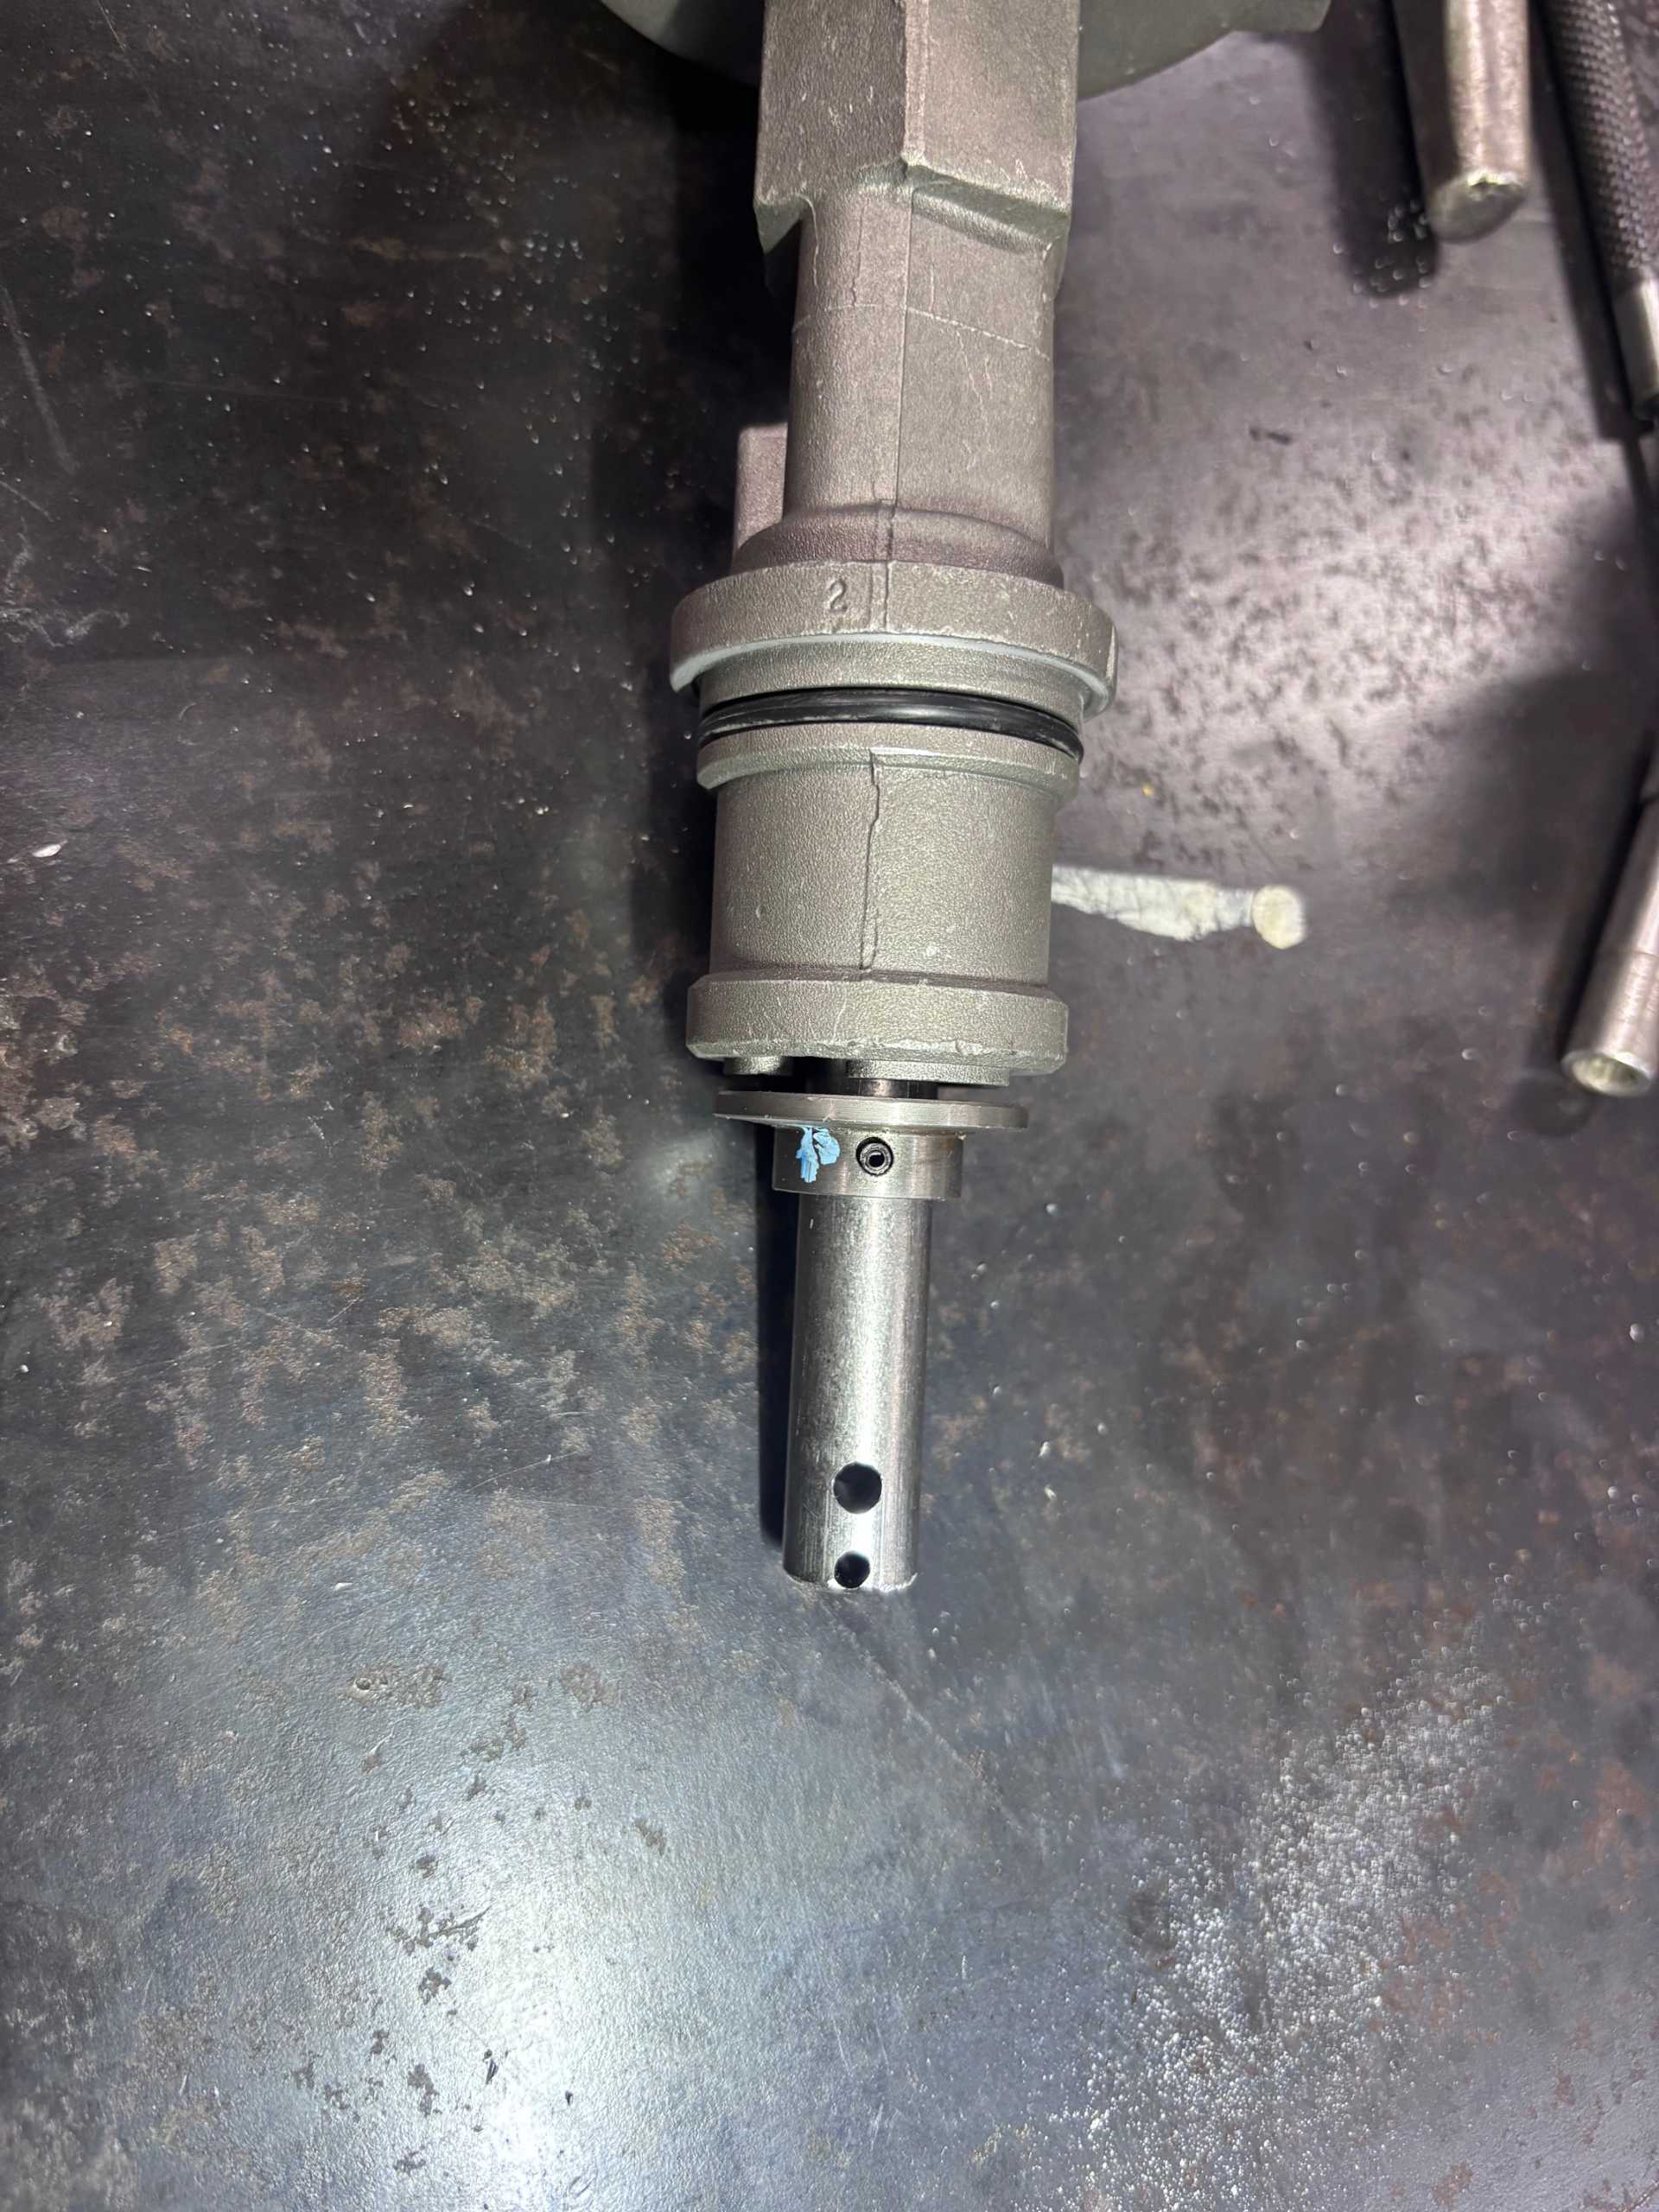
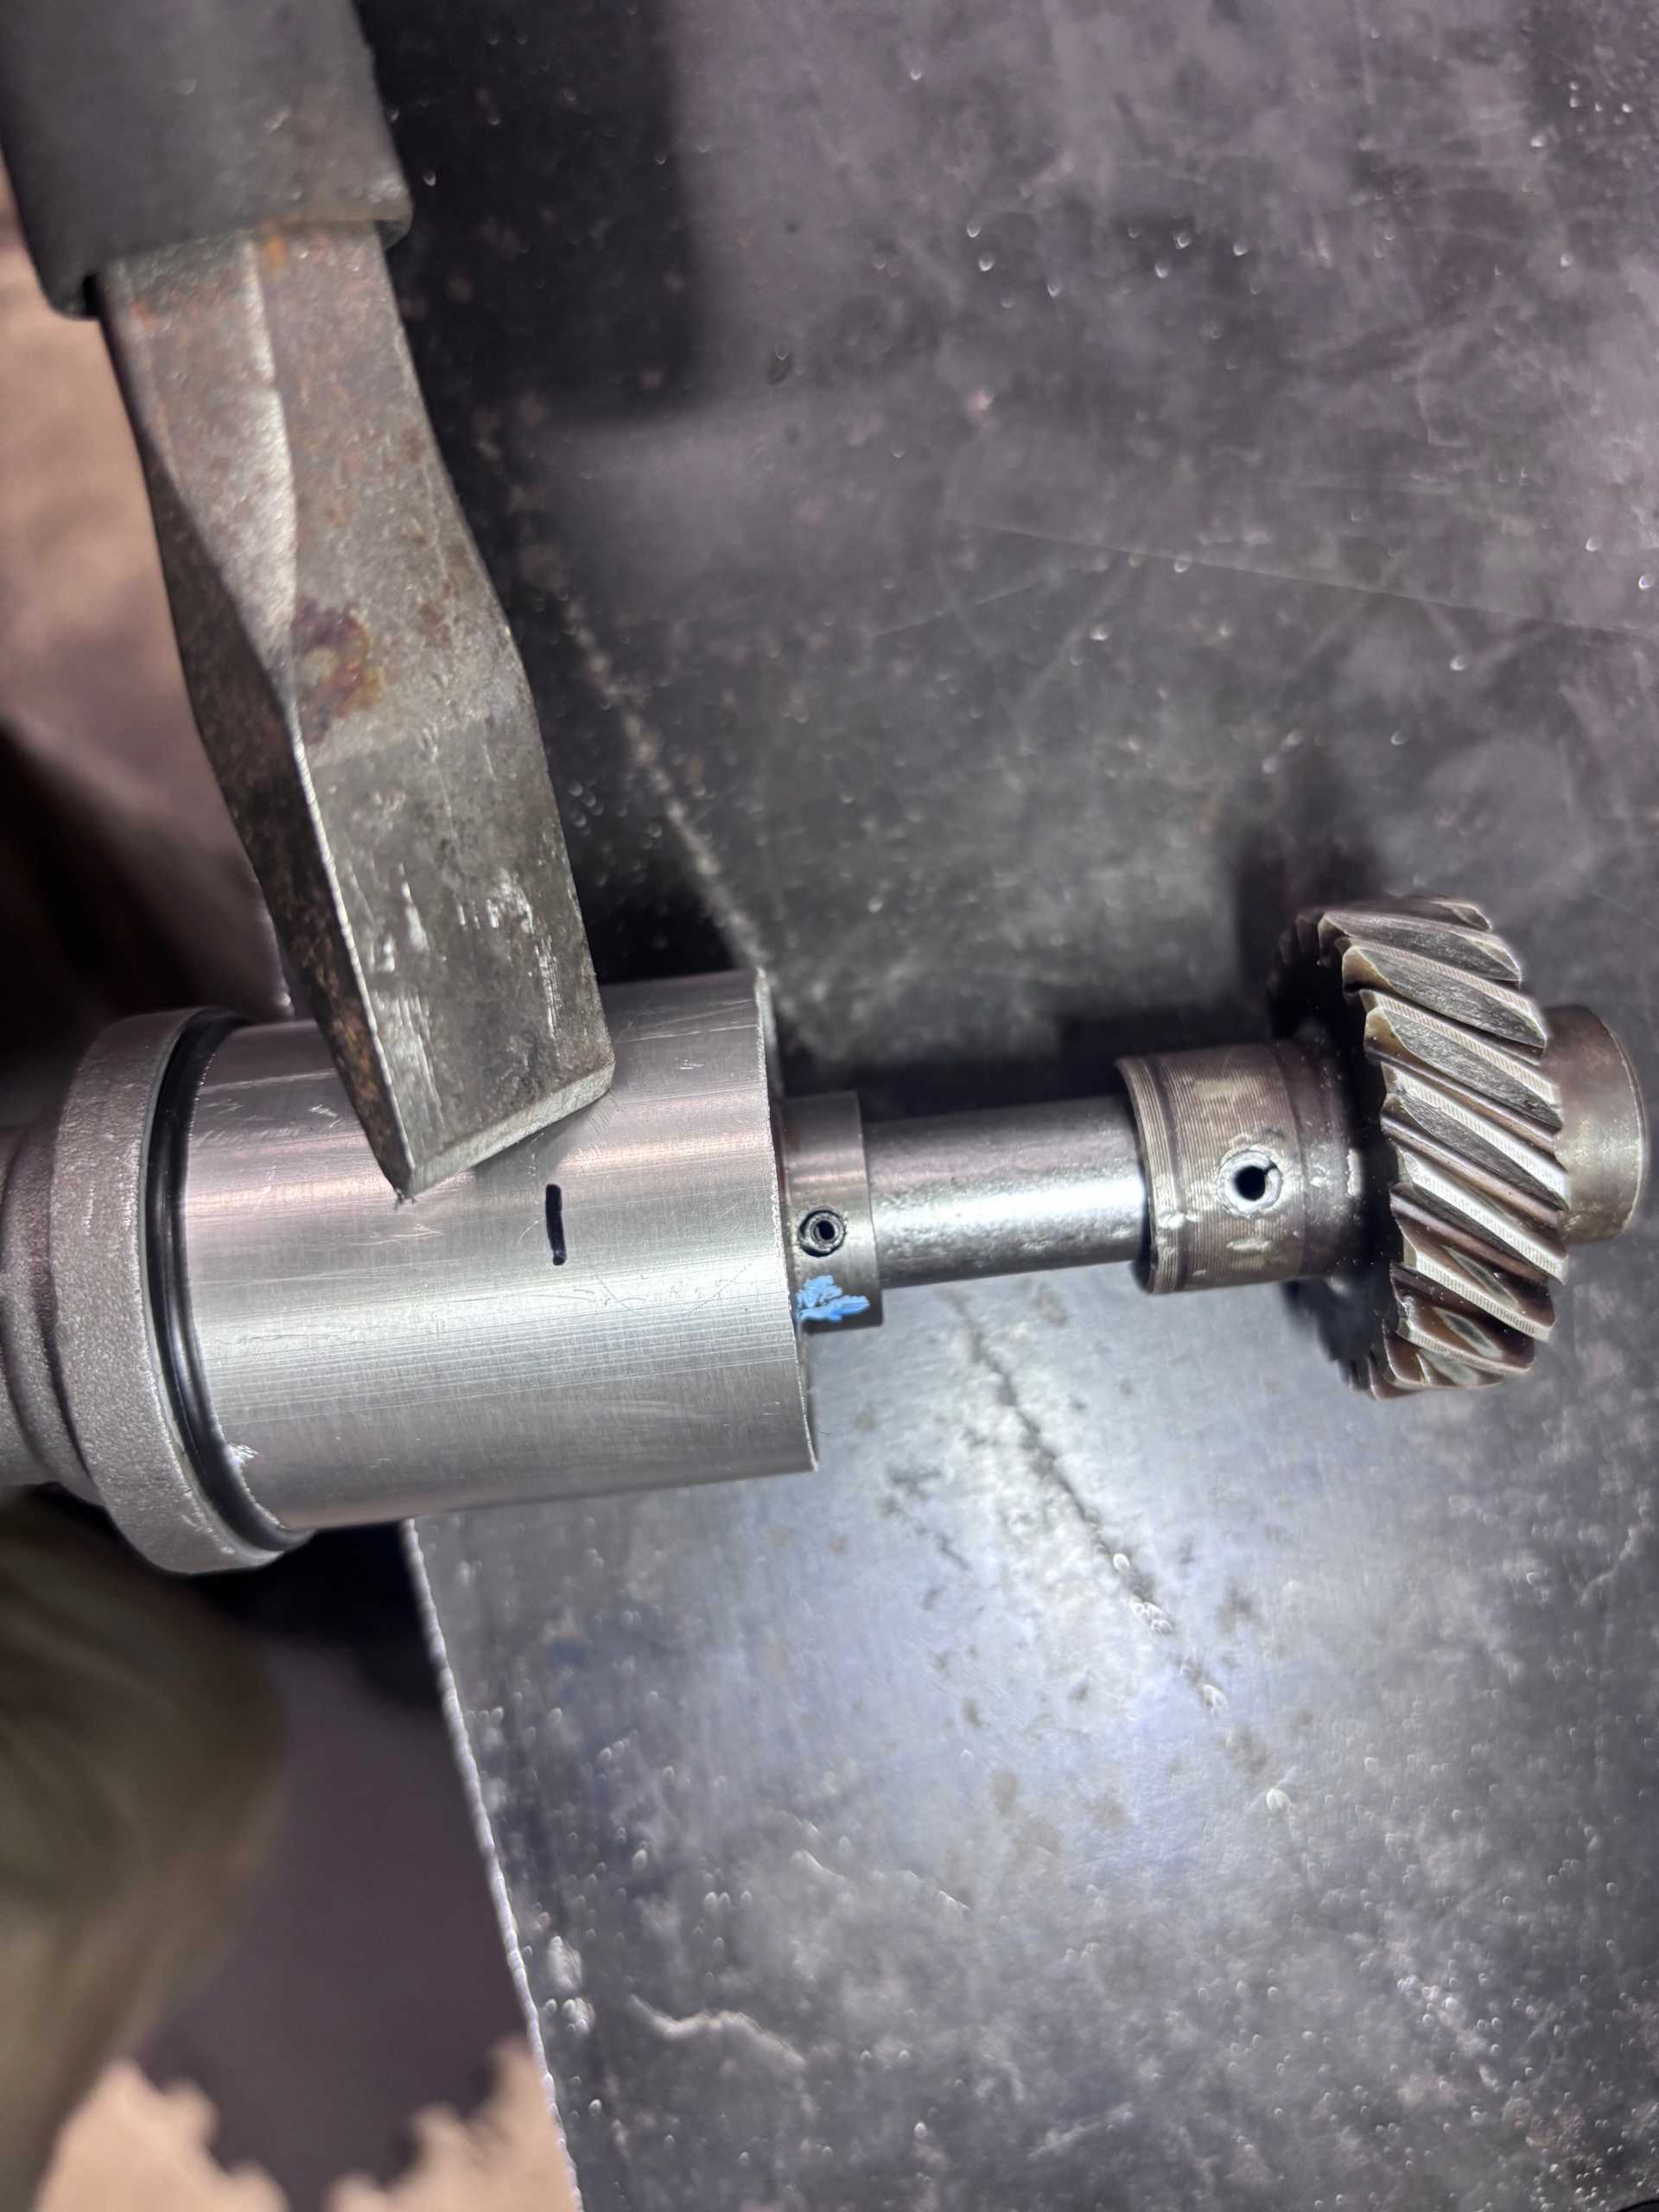
Step 10:
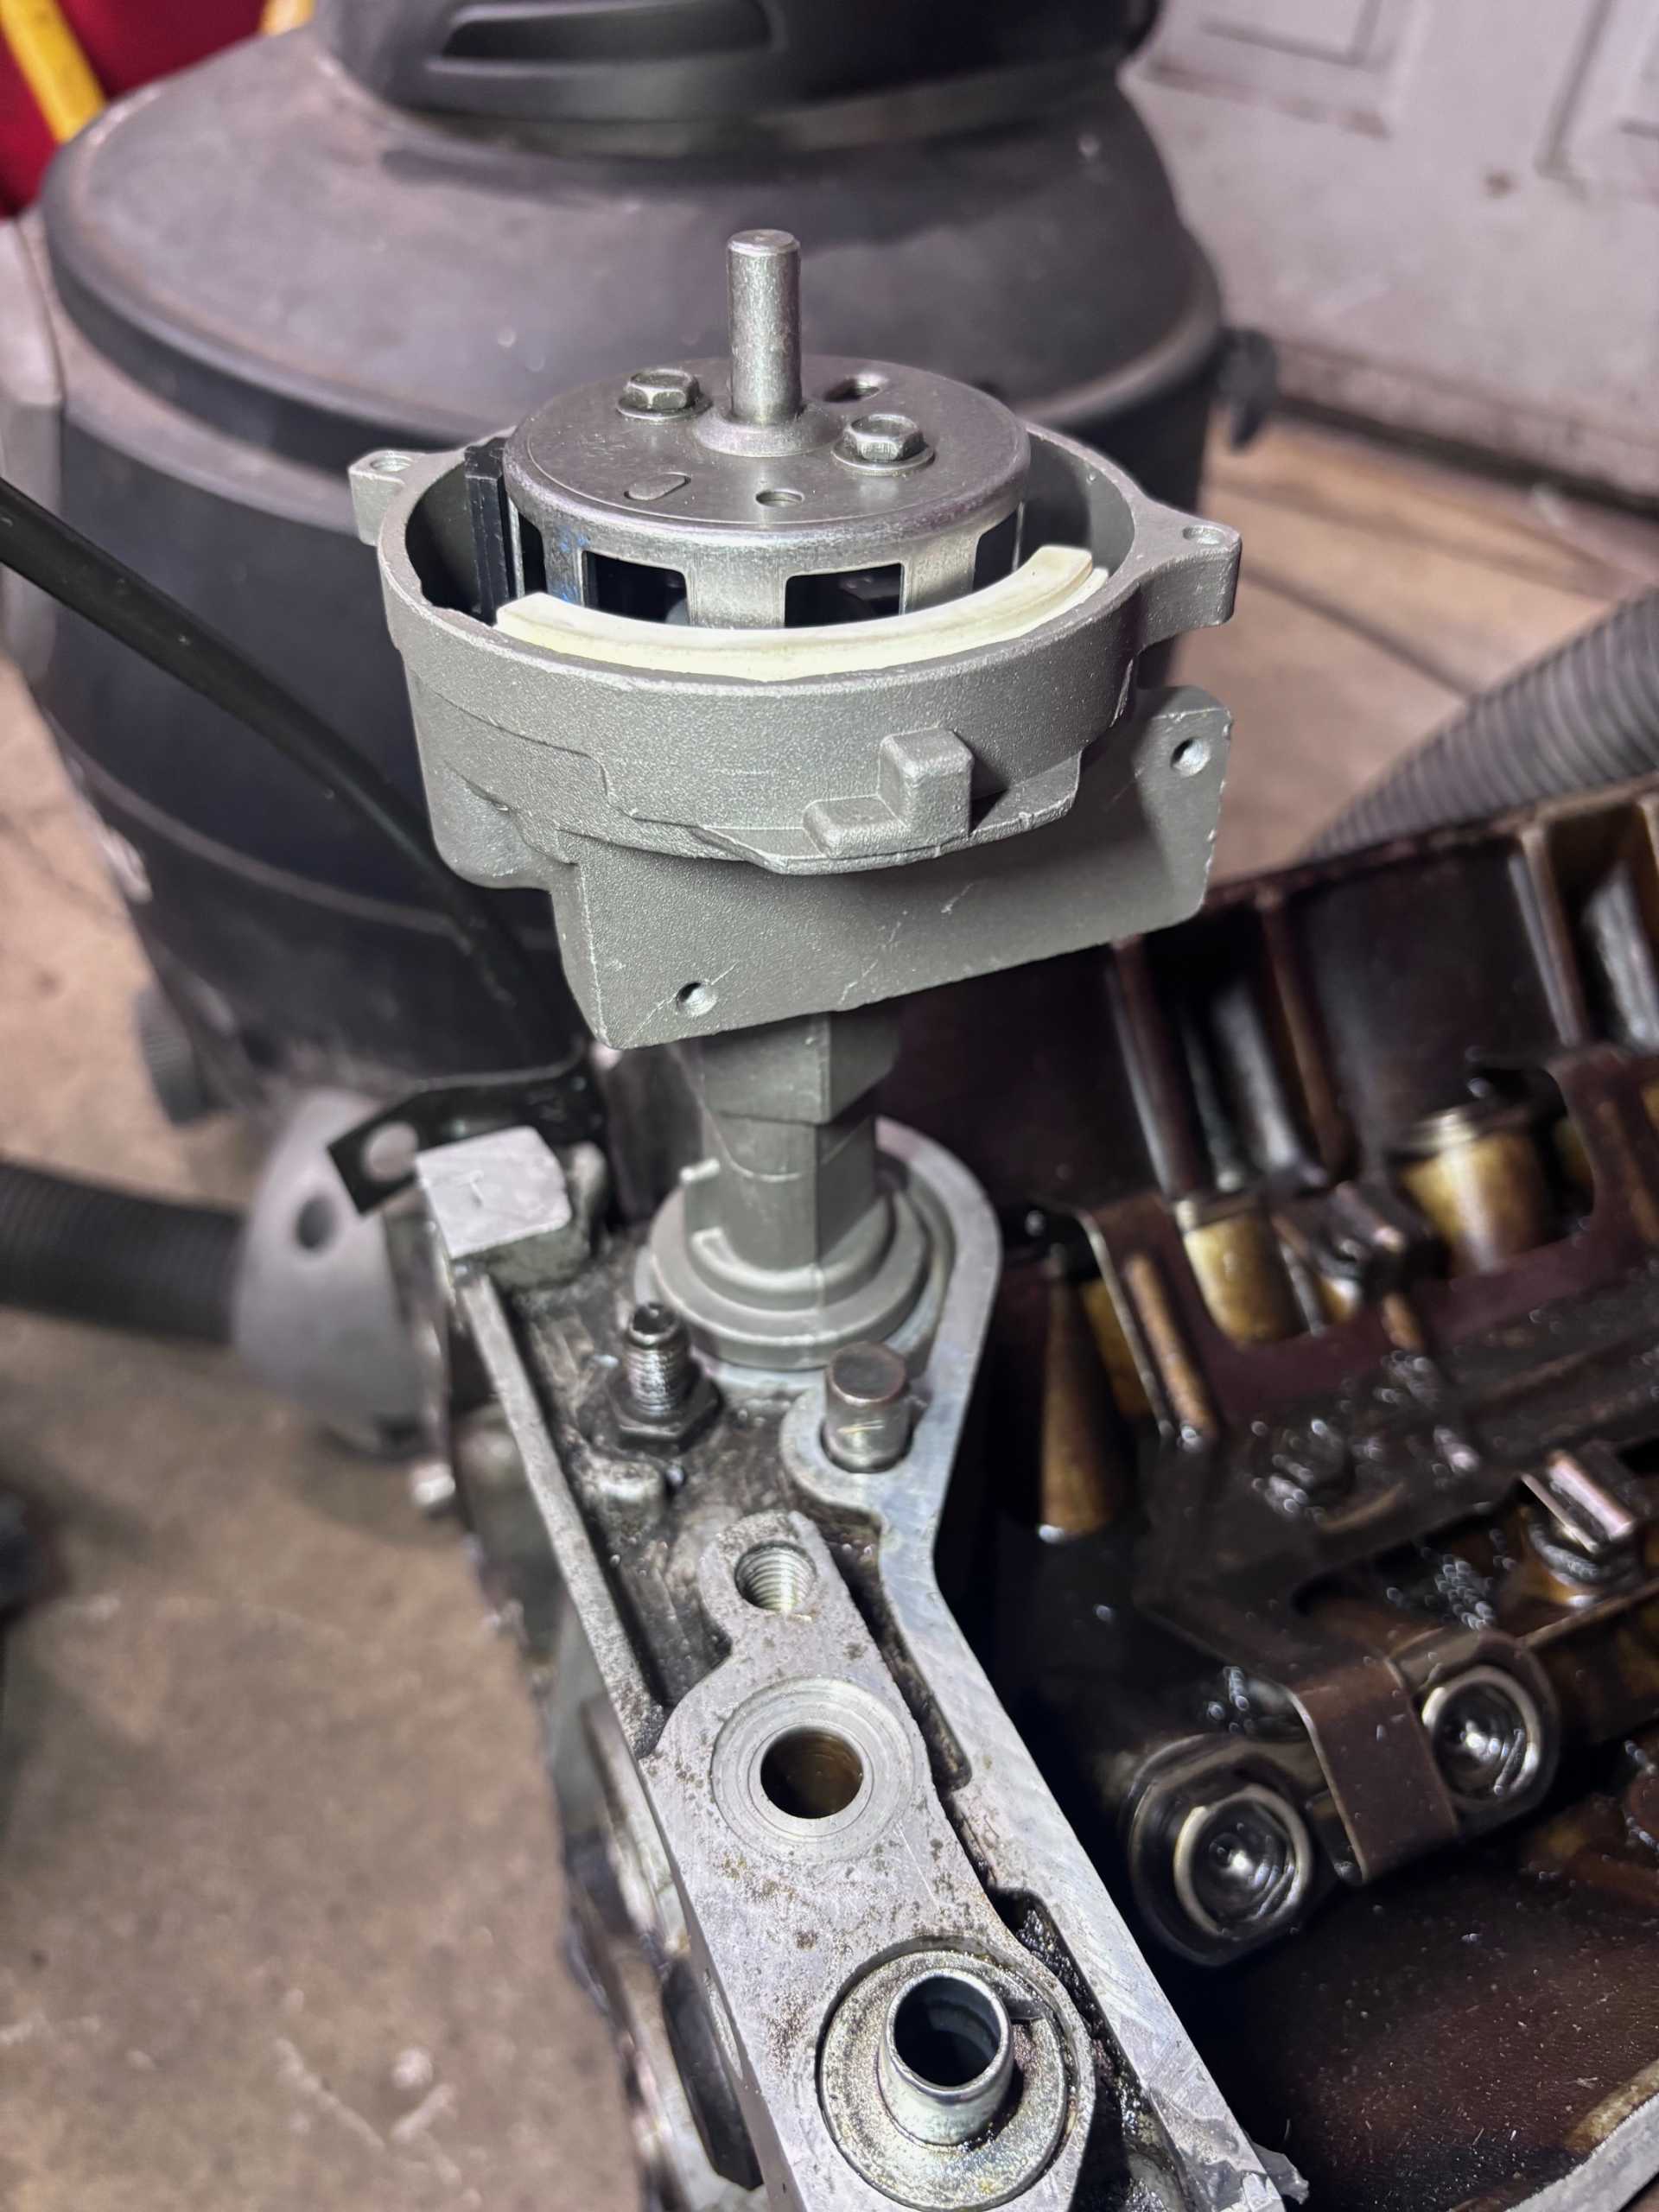
Slide the pipe over the lower housing, and smack with chisel/ hammer on the marks. This is all that is needed to ensure the pipe/ sleeve does not slide down into the block. Note the location of the upper stop on the shaft – if this is covered, then the sleeve would have to be cut in order to access the stop/ to pull the shaft to service or replace pick up sensor.


Step 11:
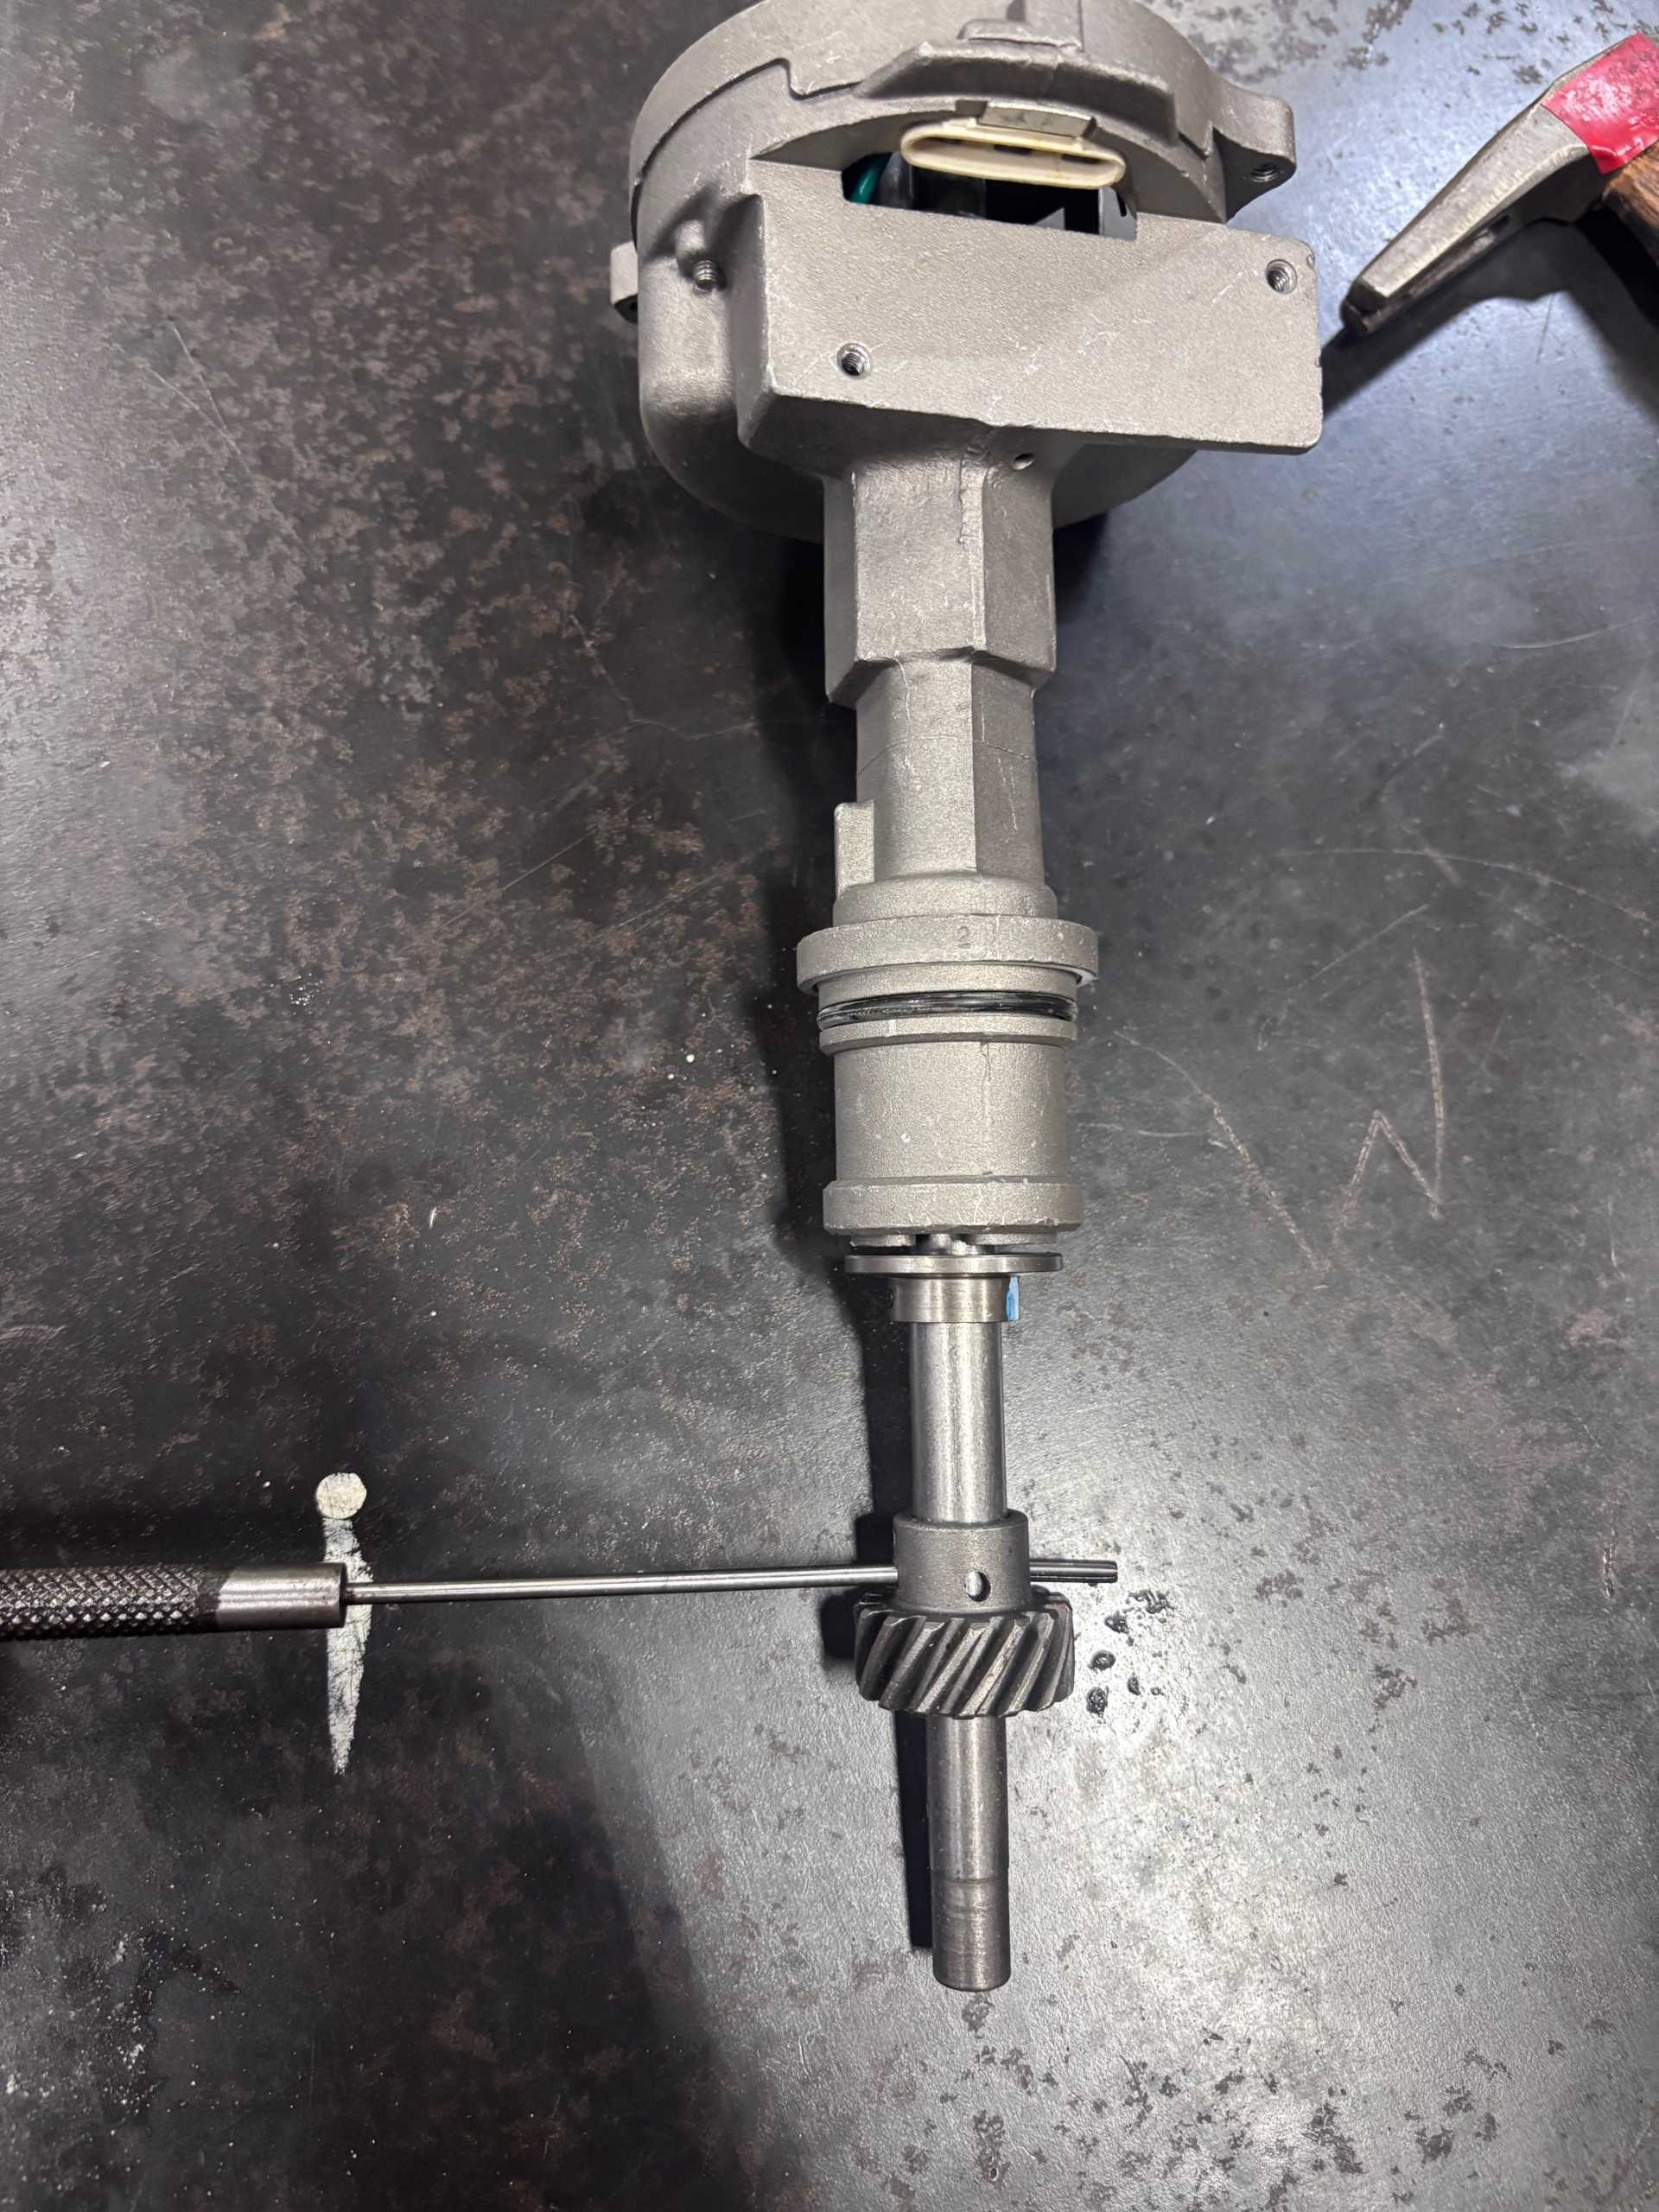
Install reamed Cadillac gear onto Ford distributor shaft using 3/16” roll pin and punch.
Step 12:
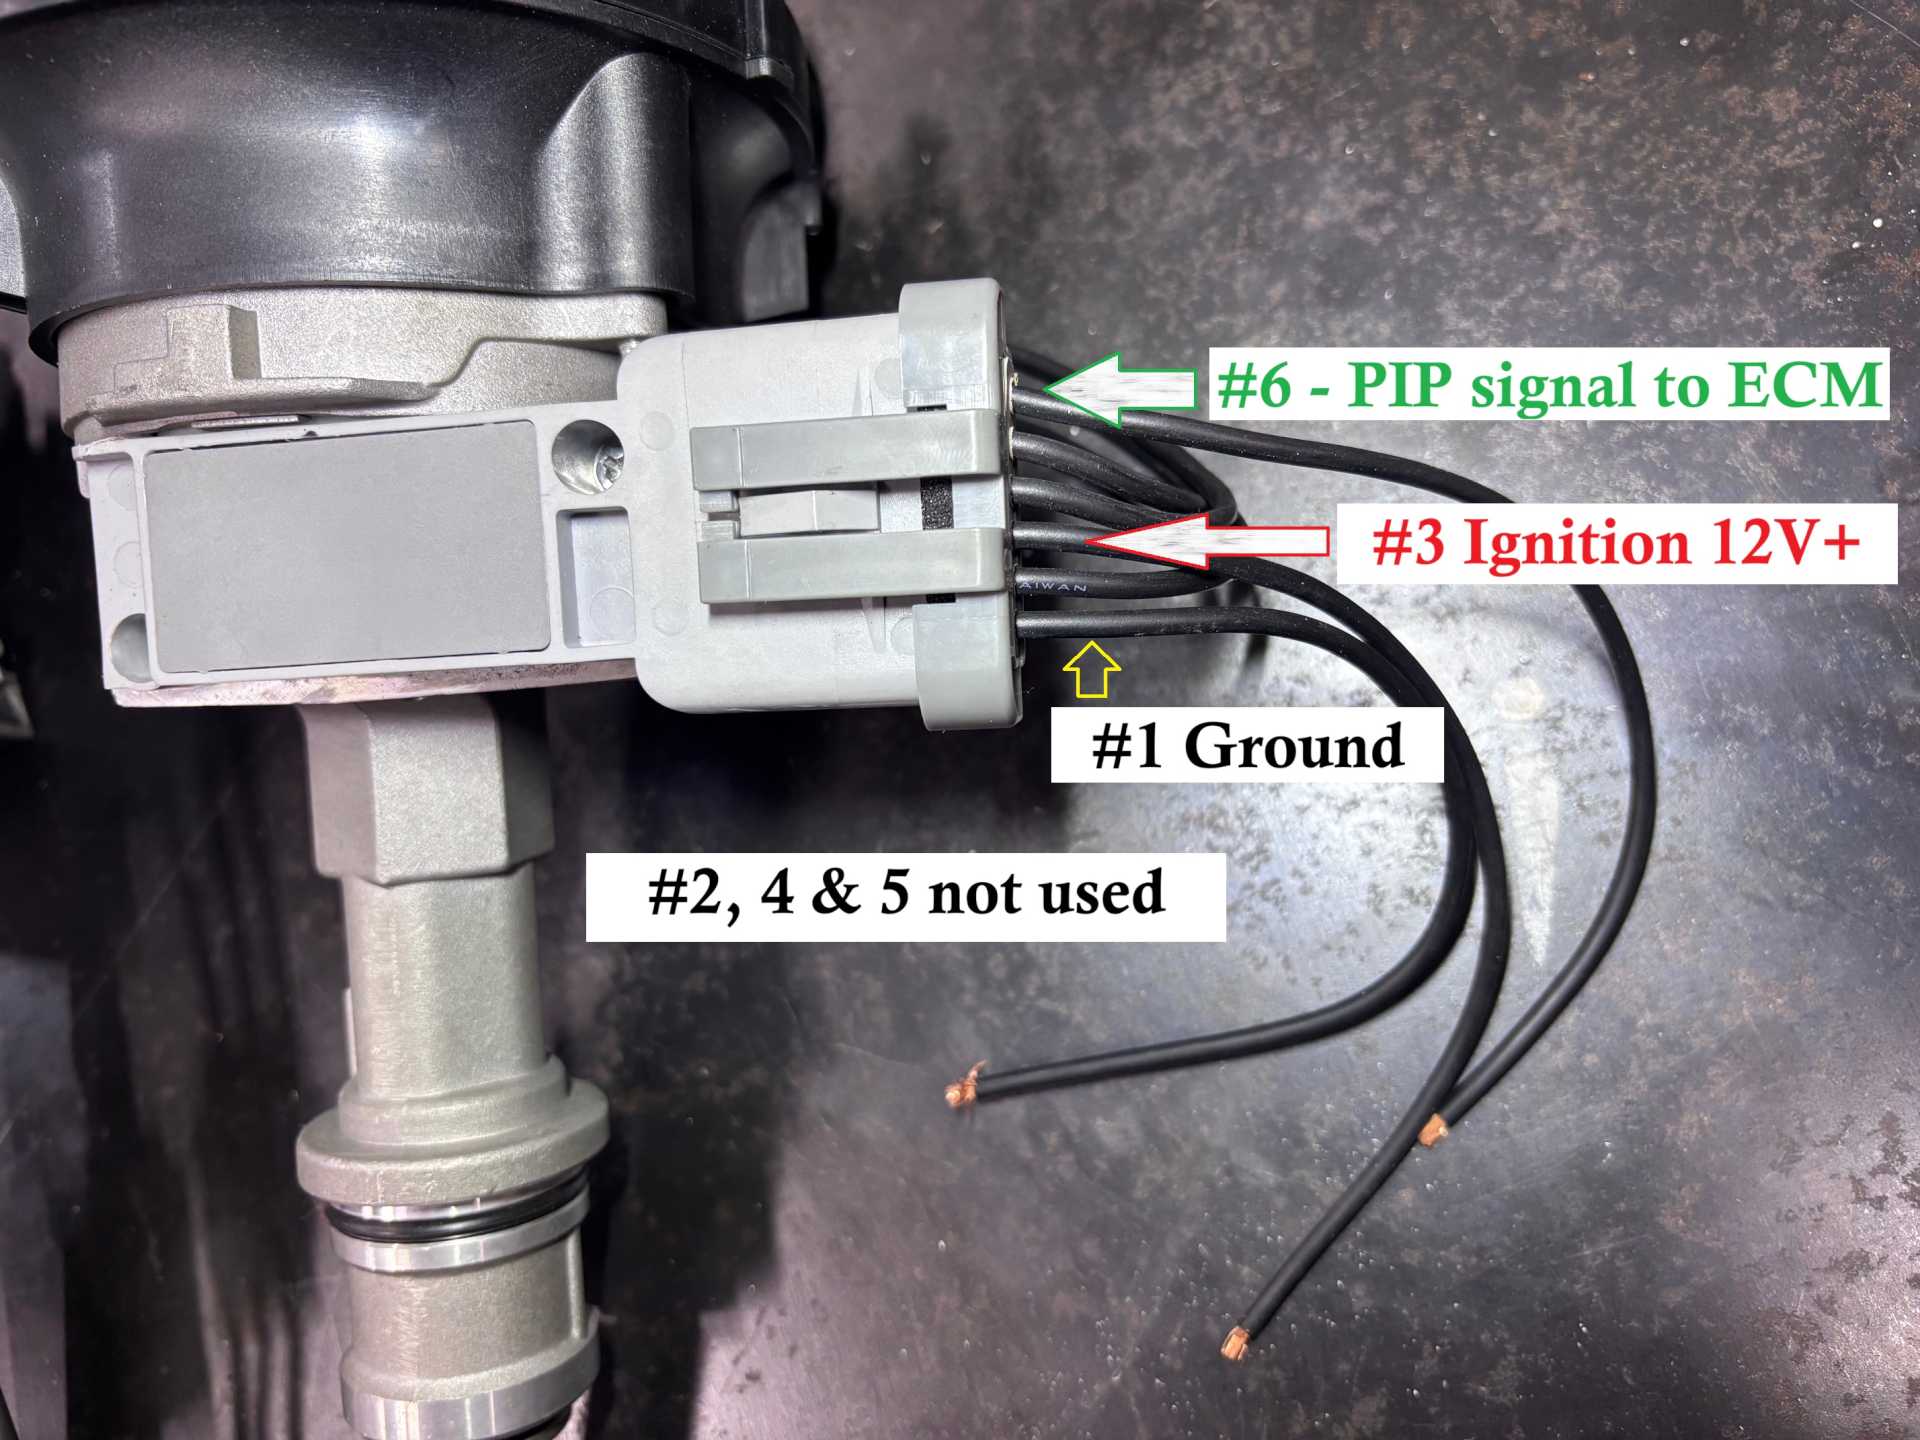
Install ignition module and/or wiring option of choice. If using the Ford ignition module, it will only function as a passthrough for power, ground and the pick up signal. Since the other wires are not used and it is not controlling timing as it would in a Ford, it shouldn’t fail – I used it to secure the connections.
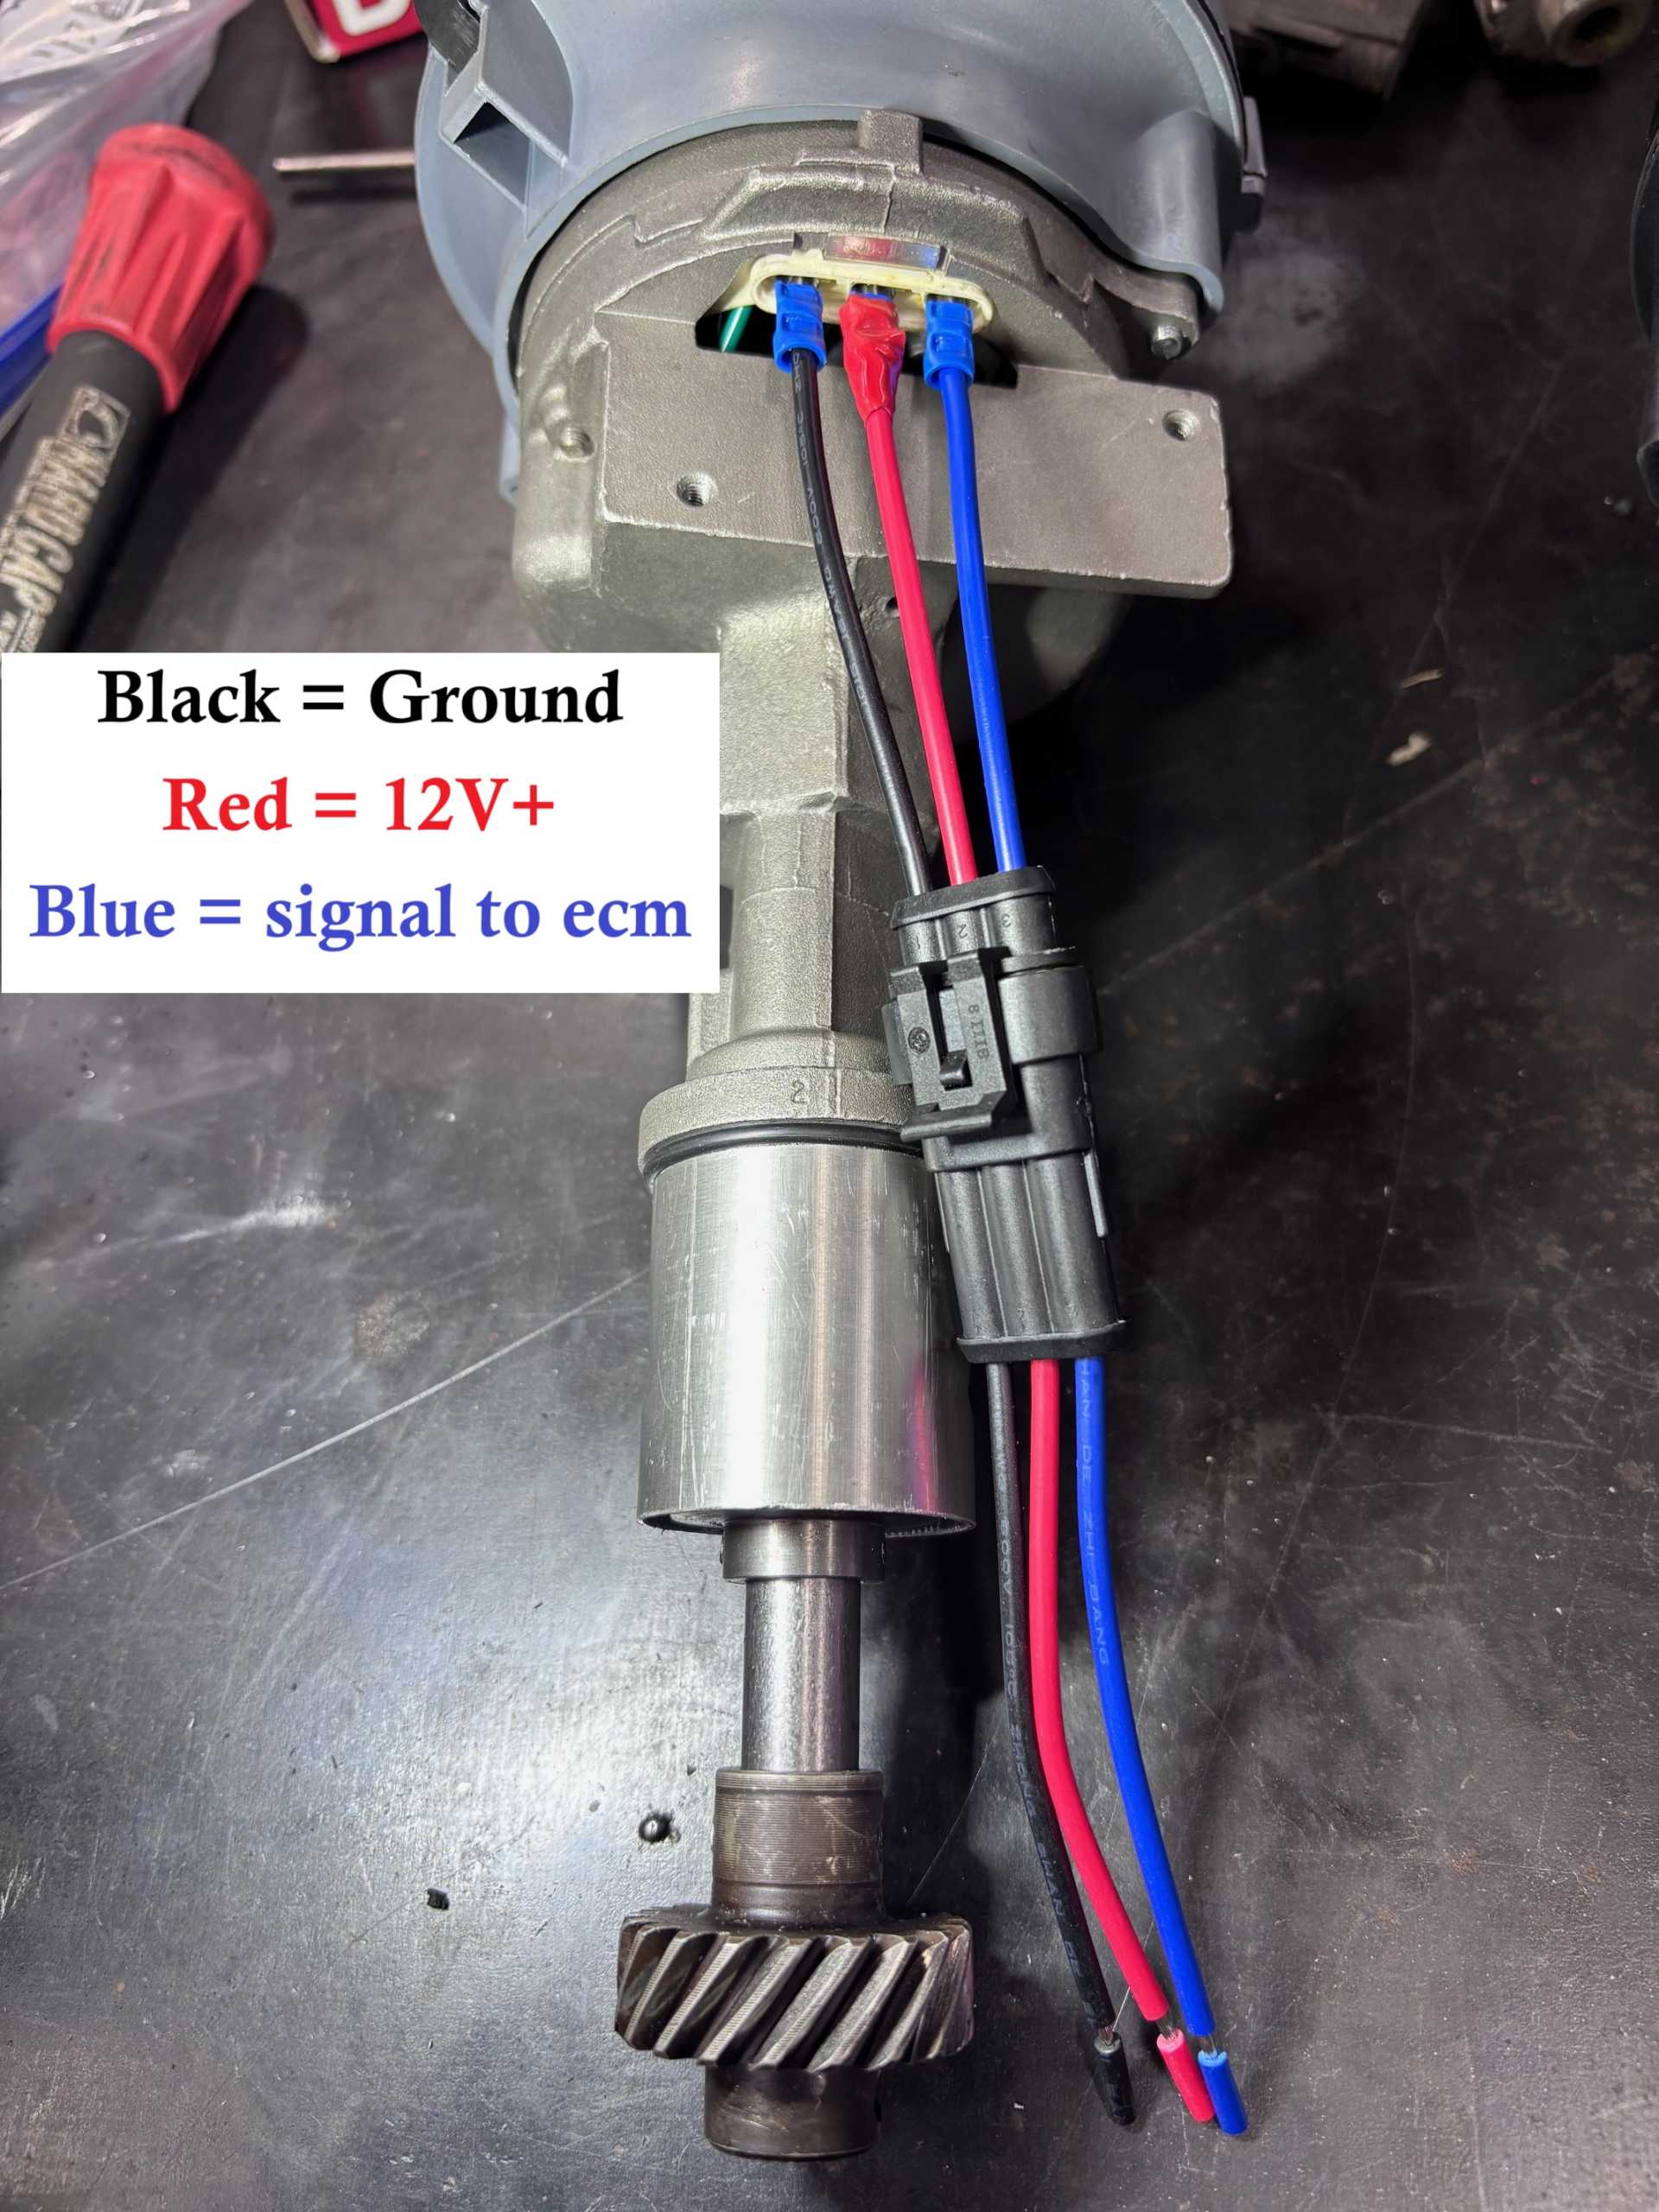
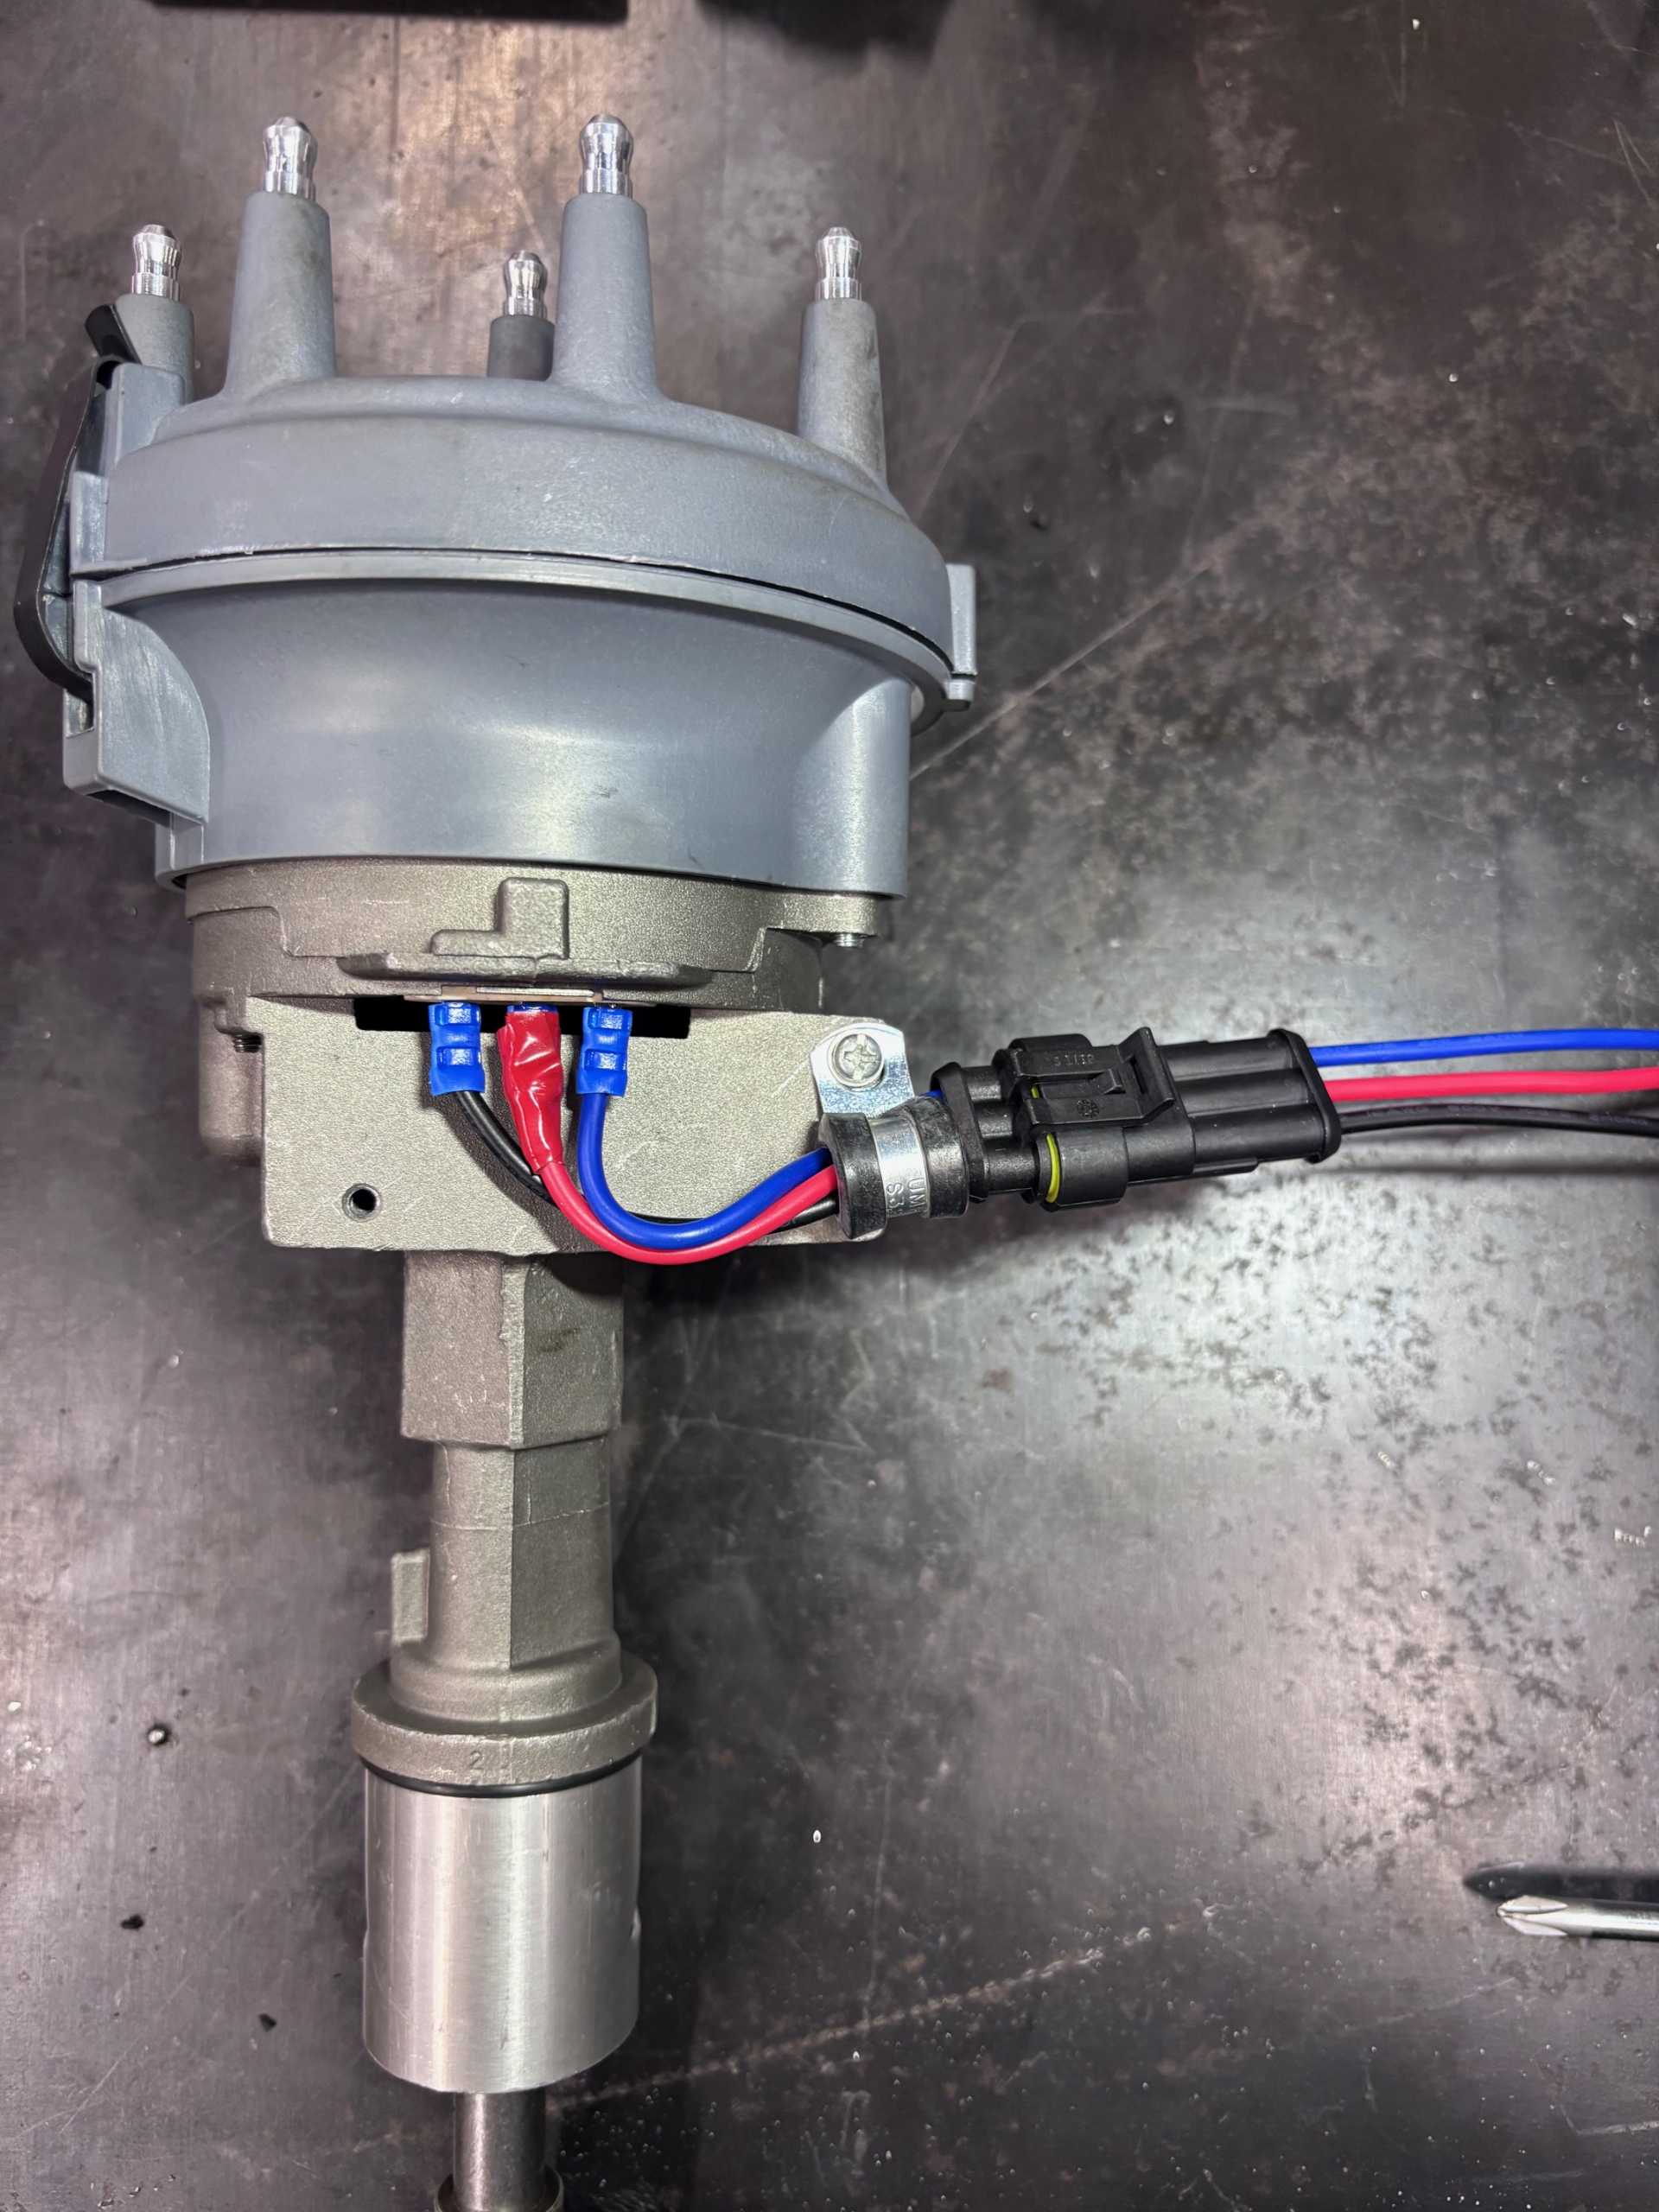
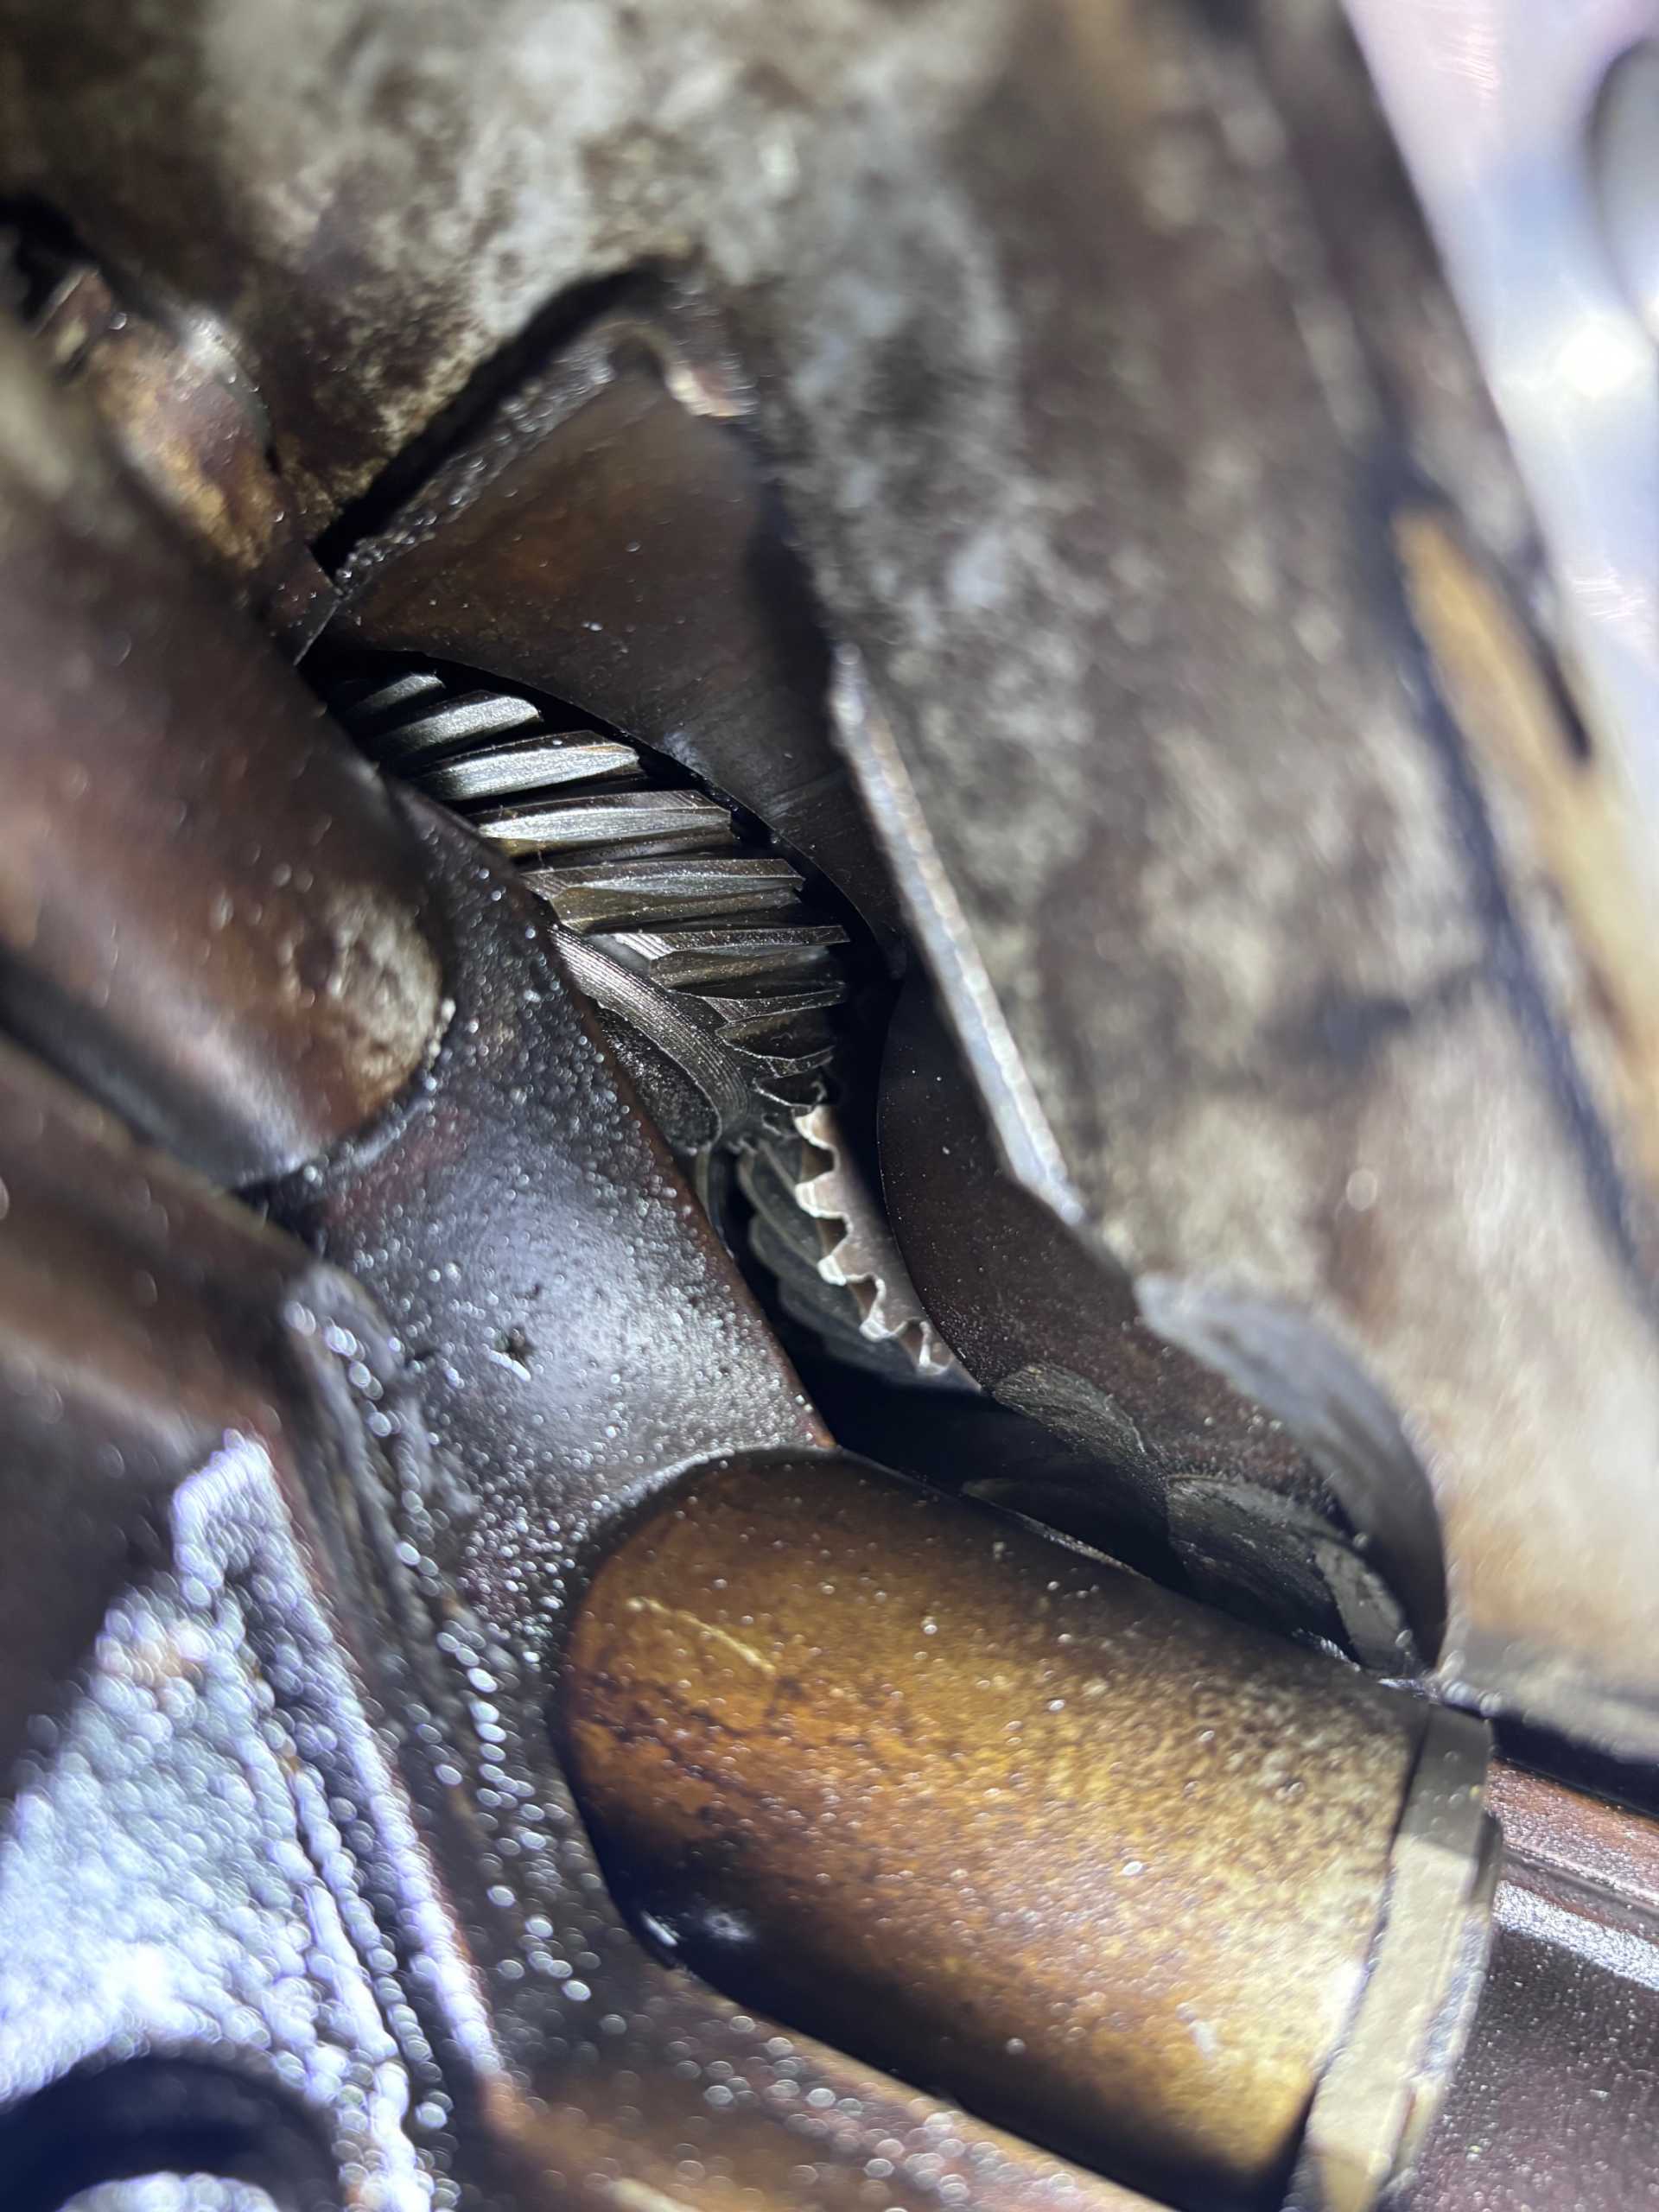
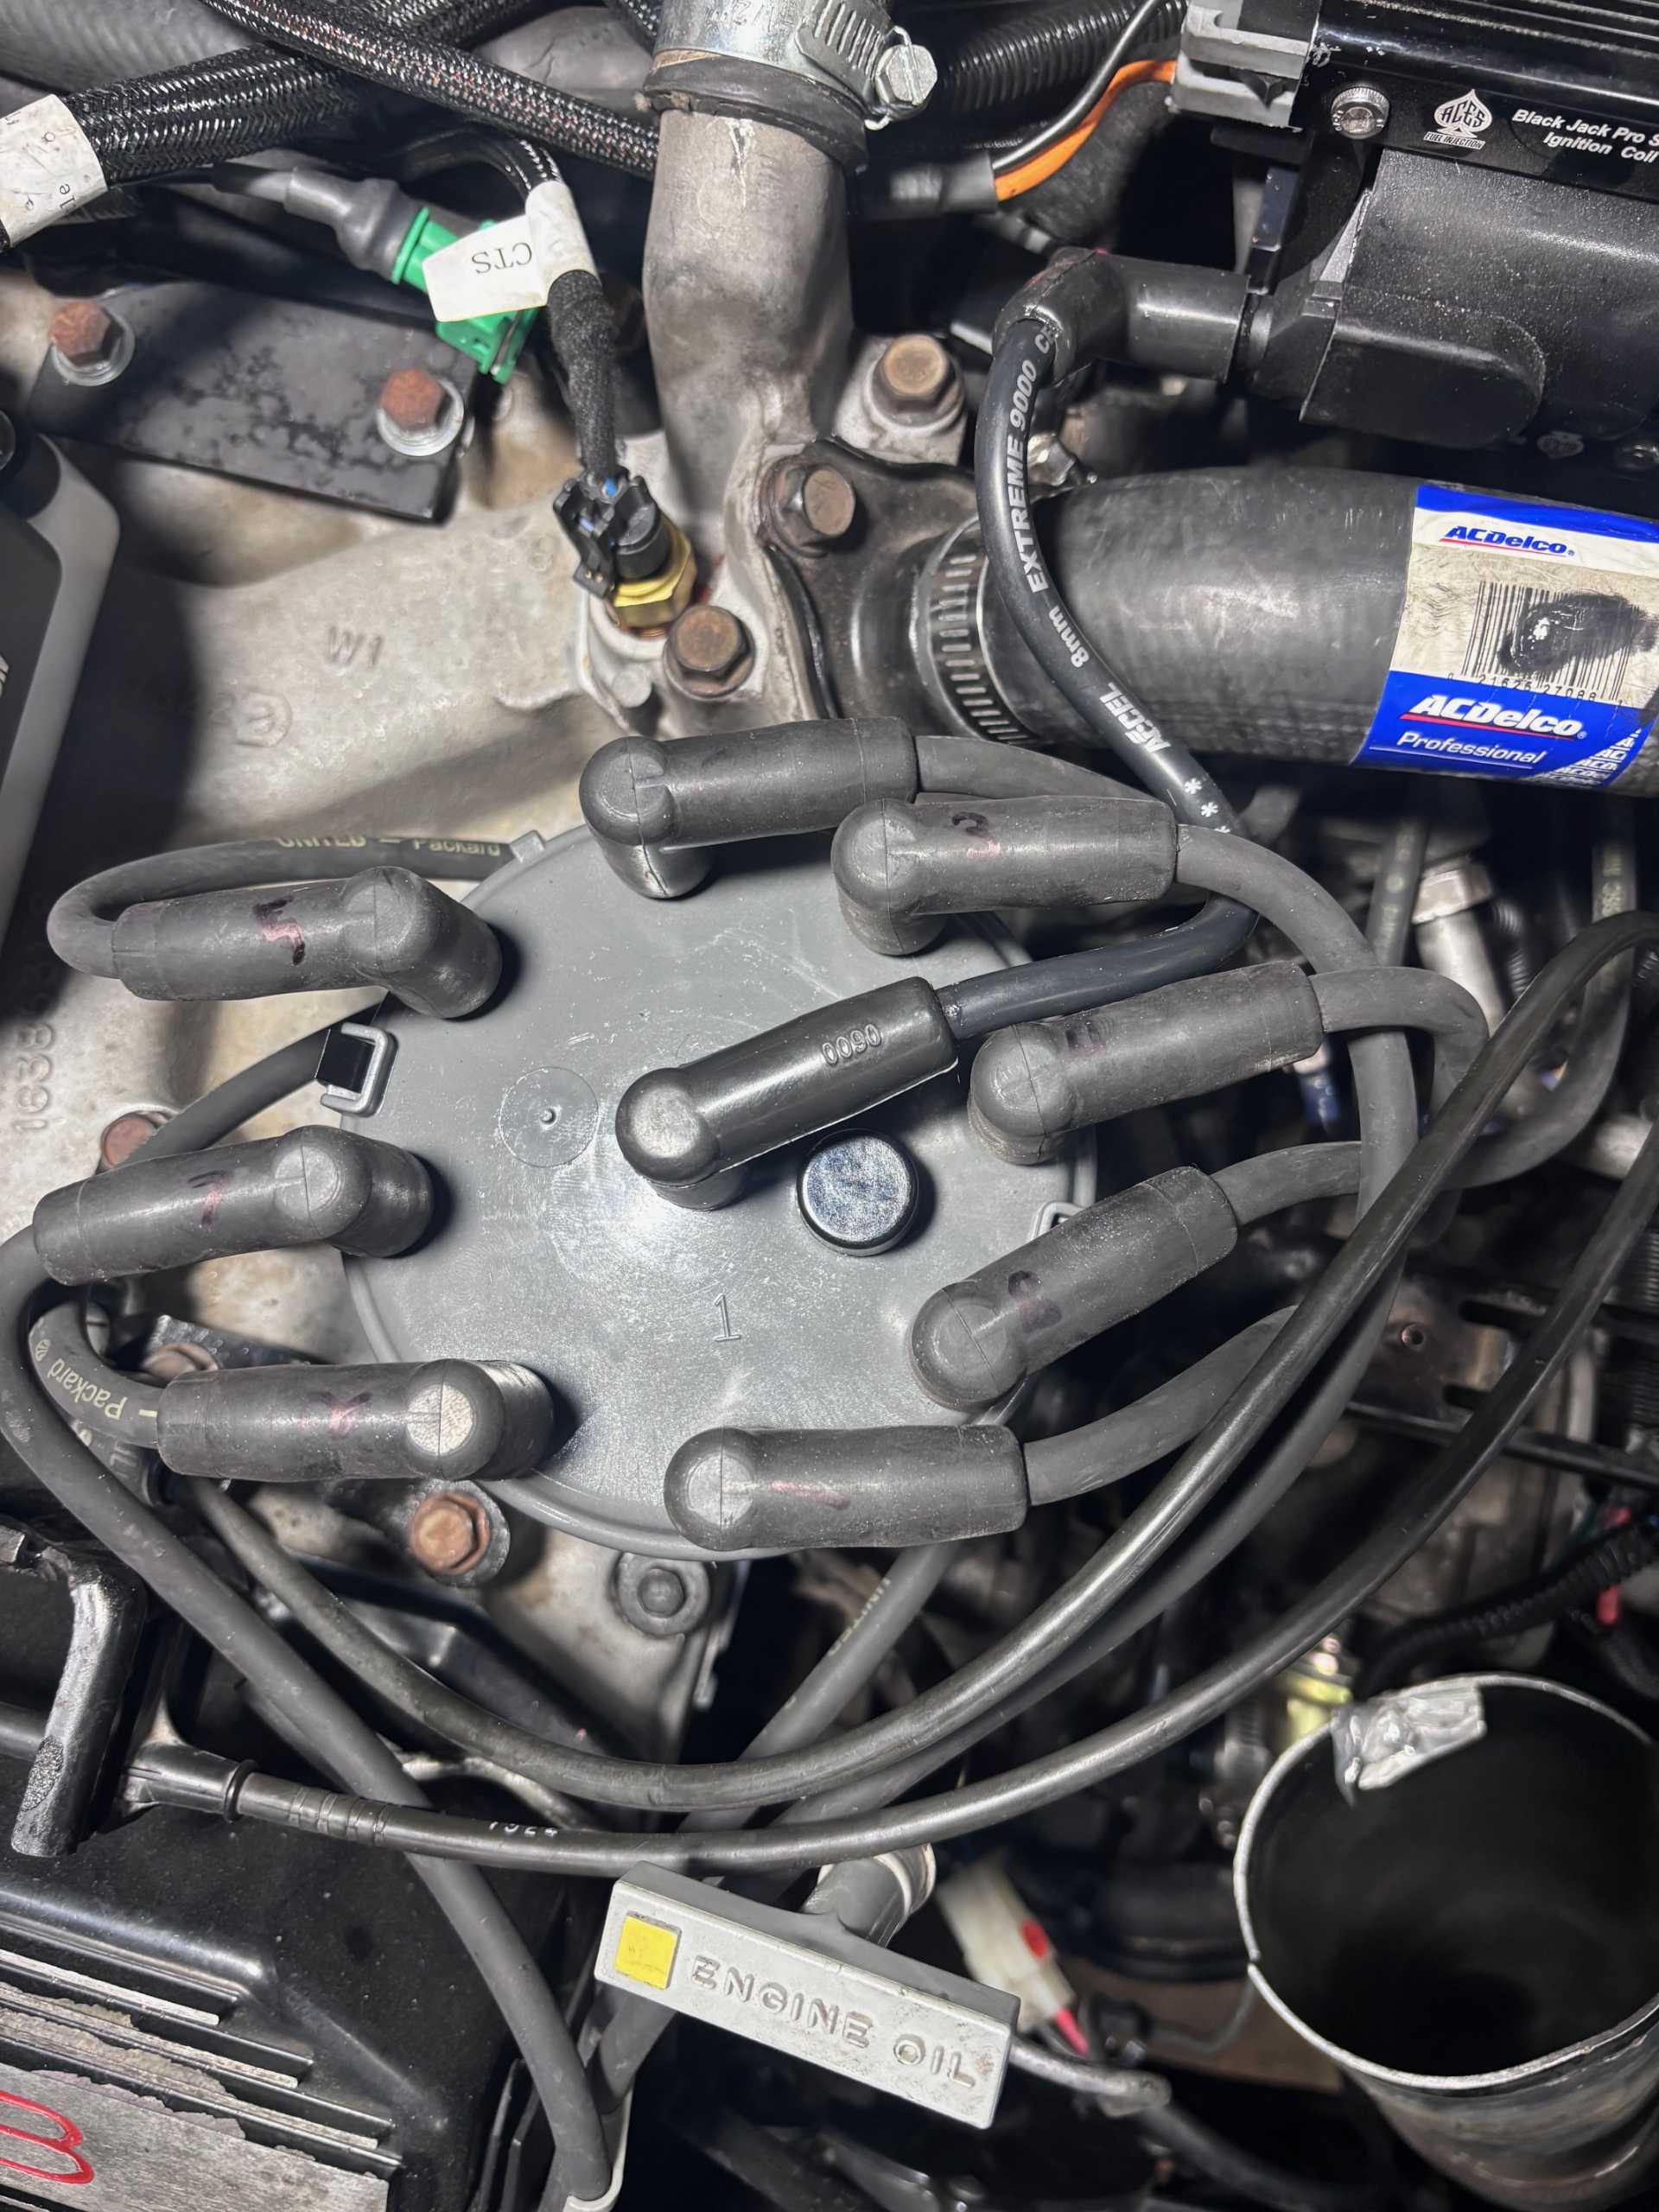
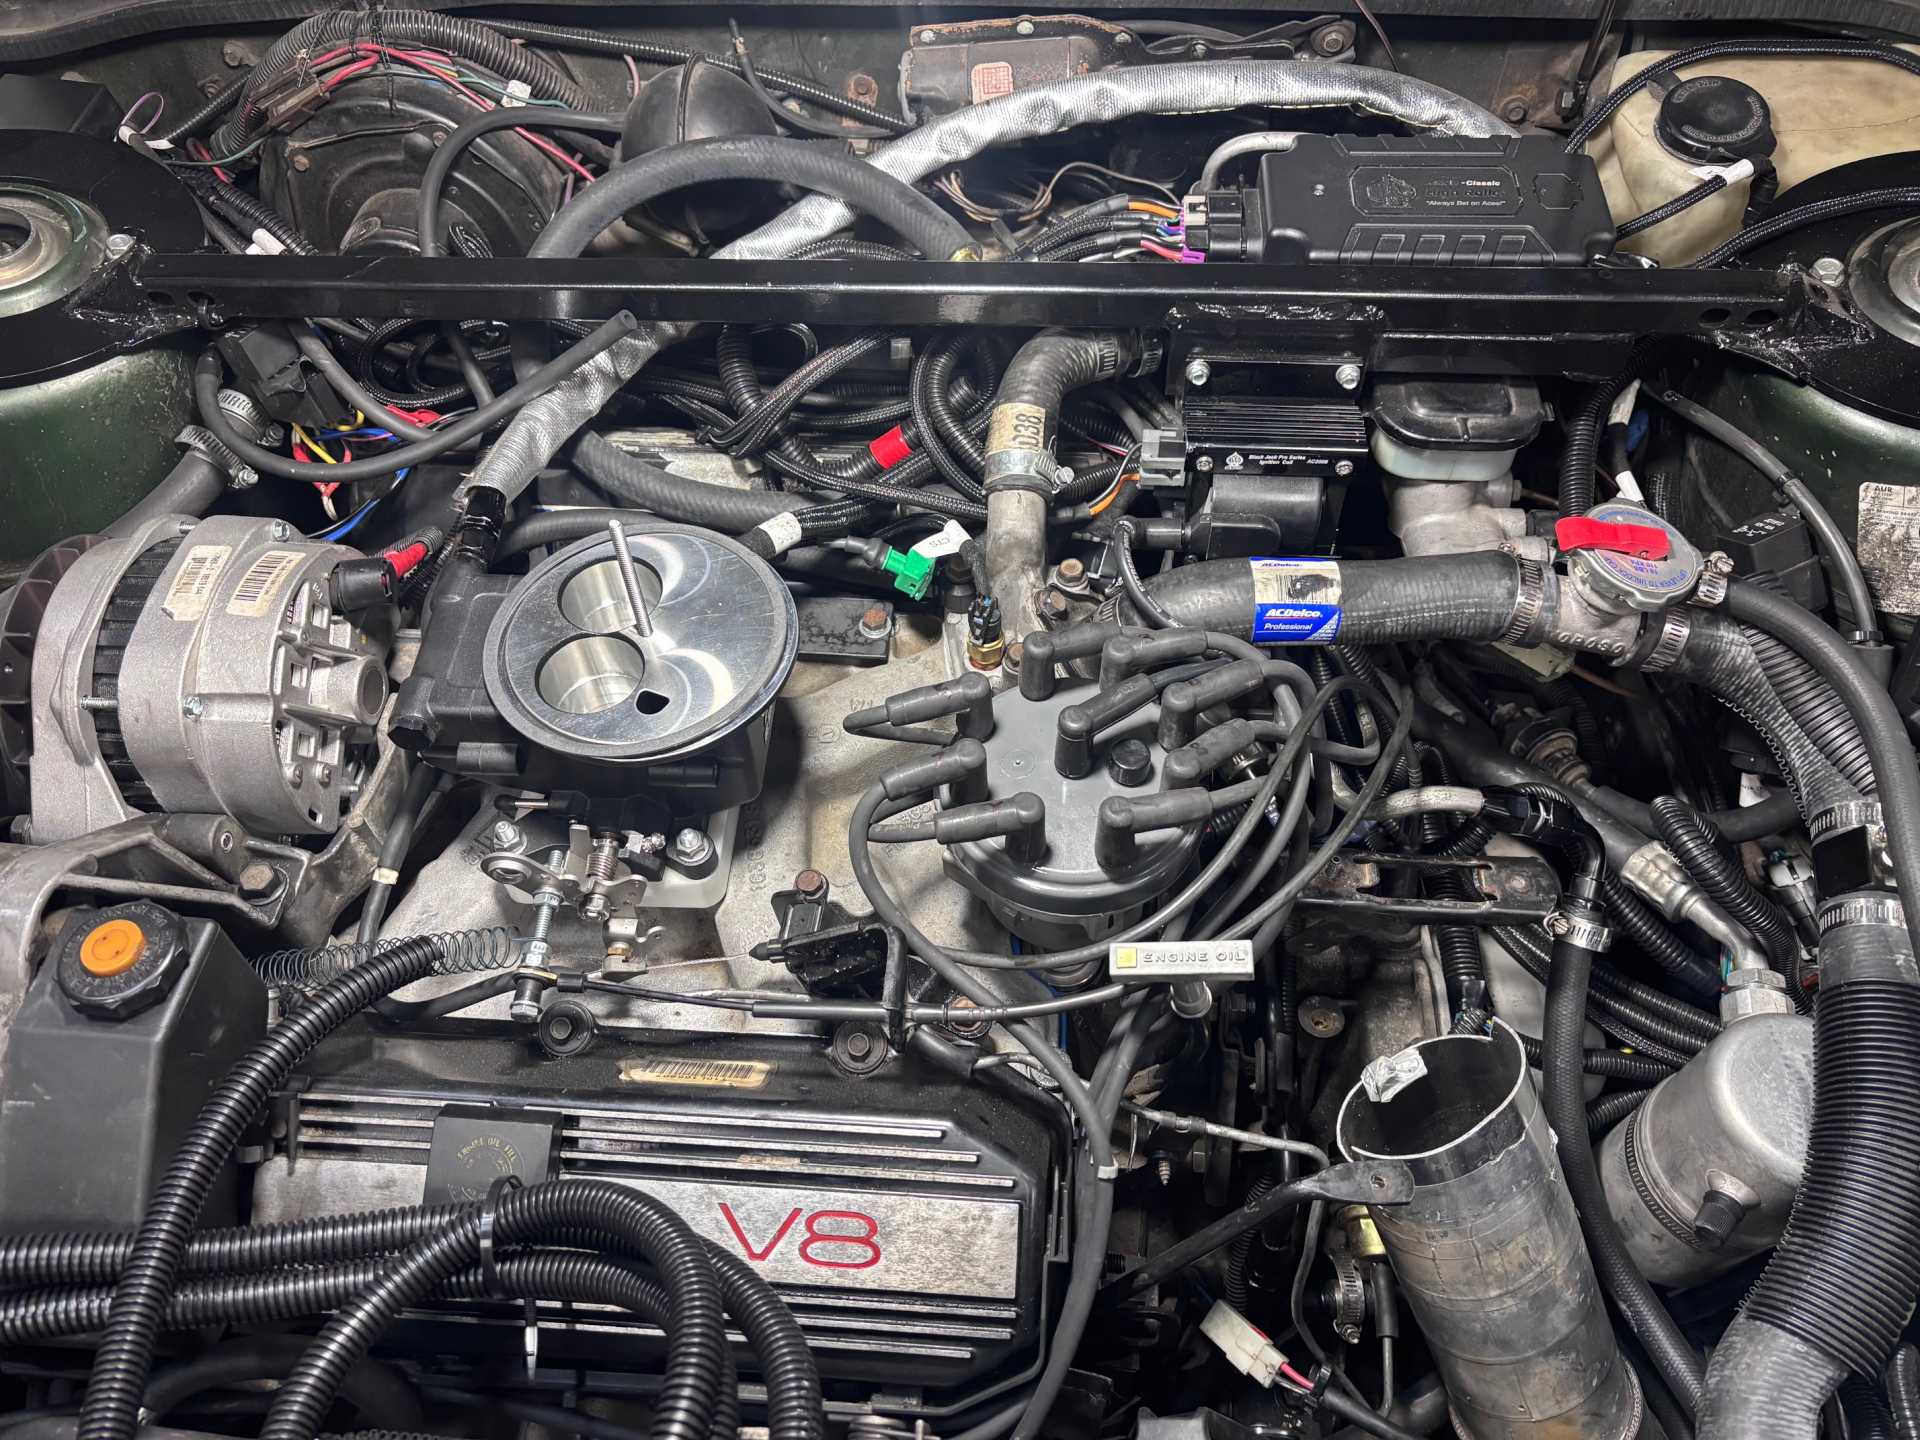
Some photos installed to show gear engagement and in running swap: