Pennock's Fiero Forum
  Technical Discussion & Questions
  Cajun tach board install

Post New Topic  Post A Reply
Email This Page to Someone! | Printable Version


next newest topic | next oldest topic
Cajun tach board install by Kitskaboodle
Started on: 05-19-2025 05:39 PM
Replies: 15 (221 views)
Last post by: Kitskaboodle on 05-27-2025 09:04 PM
Kitskaboodle
Member
Posts: 3184
From: San Jose, Ca.
Registered: Nov 2004


Feedback score:    (8)
Leave feedback

Rate this member

Report this Post05-19-2025 05:39 PM Click Here to See the Profile for KitskaboodleSend a Private Message to KitskaboodleEdit/Delete MessageReply w/QuoteDirect Link to This Post
Just got my new tach board in the mail today.
Here’s what you get when you order a new tach board for the 86-88 V6’s. (see pic below)
This is being installed in my 85 GT, which was upgraded to the 120 Speedo and aux. gauge pkg. years ago. The reason for the tach swap is my current one is showing +500 rpm than is actual. (as verified by my Scantool program) Also, I know that some modify/adjust/recalibrate the old one but I felt it was wiser to simply go with a new one as the components are “fresher” than the original ones, which are fast approaching 40+ years now.
I’ll be getting started in a few days and will post pics along the way.
And, to verify that the new one is calibrated correctly, I’m going to run my scan tool program before I put the instrument cluster back in its place. Kit

[This message has been edited by Kitskaboodle (edited 05-19-2025).]

IP: Logged
PFF
System Bot
Vintage-Nut
Member
Posts: 1591
From: California
Registered: Apr 2020


Feedback score: N/A
Leave feedback

Rate this member

Report this Post05-19-2025 07:39 PM Click Here to See the Profile for Vintage-NutSend a Private Message to Vintage-NutEdit/Delete MessageReply w/QuoteDirect Link to This Post
I rotated the image for you Kit...


------------------
Original Owner of a Silver '88 GT
Under 'Production Refurbishment' @ 136k Miles

[This message has been edited by Vintage-Nut (edited 05-19-2025).]

IP: Logged
richard in nc
Member
Posts: 415
From: charlotte nc
Registered: Jun 2023


Feedback score: N/A
Leave feedback

Rate this member

Report this Post05-19-2025 08:03 PM Click Here to See the Profile for richard in ncSend a Private Message to richard in ncEdit/Delete MessageReply w/QuoteDirect Link to This Post
i used one on my 1987 2.5.it was way off before.it agrees with the scan tool now.
IP: Logged
Frenchrafe
Member
Posts: 510
From: Locmiquelic France
Registered: Feb 2017


Feedback score: N/A
Leave feedback

Rate this member

Report this Post05-20-2025 05:10 AM Click Here to See the Profile for FrenchrafeSend a Private Message to FrenchrafeEdit/Delete MessageReply w/QuoteDirect Link to This Post
Please let us know how it goes?
I will need to replace mine sometime as I've already done the repair with a variable resistor many years ago to recalibrate the reading.
But now the tacho just dies intermittently, especially on a hot day.

------------------
"Turbo Slug" - '87 Fiero GT. 3800 turbo. - The fastest Fiero in France! @turboslugfiero
https://youtu.be/hUzOAeyWLfM

IP: Logged
jibby212
Junior Member
Posts: 5
From: Sarasota
Registered: Feb 2024


Feedback score: N/A
Leave feedback

Rate this member

Report this Post05-20-2025 09:58 AM Click Here to See the Profile for jibby212Send a Private Message to jibby212Edit/Delete MessageReply w/QuoteDirect Link to This Post
I just installed mine. Realized there were instructions after I finished. Works great.

IP: Logged
Kitskaboodle
Member
Posts: 3184
From: San Jose, Ca.
Registered: Nov 2004


Feedback score:    (8)
Leave feedback

Rate this member

Report this Post05-20-2025 05:51 PM Click Here to See the Profile for KitskaboodleSend a Private Message to KitskaboodleEdit/Delete MessageReply w/QuoteDirect Link to This Post
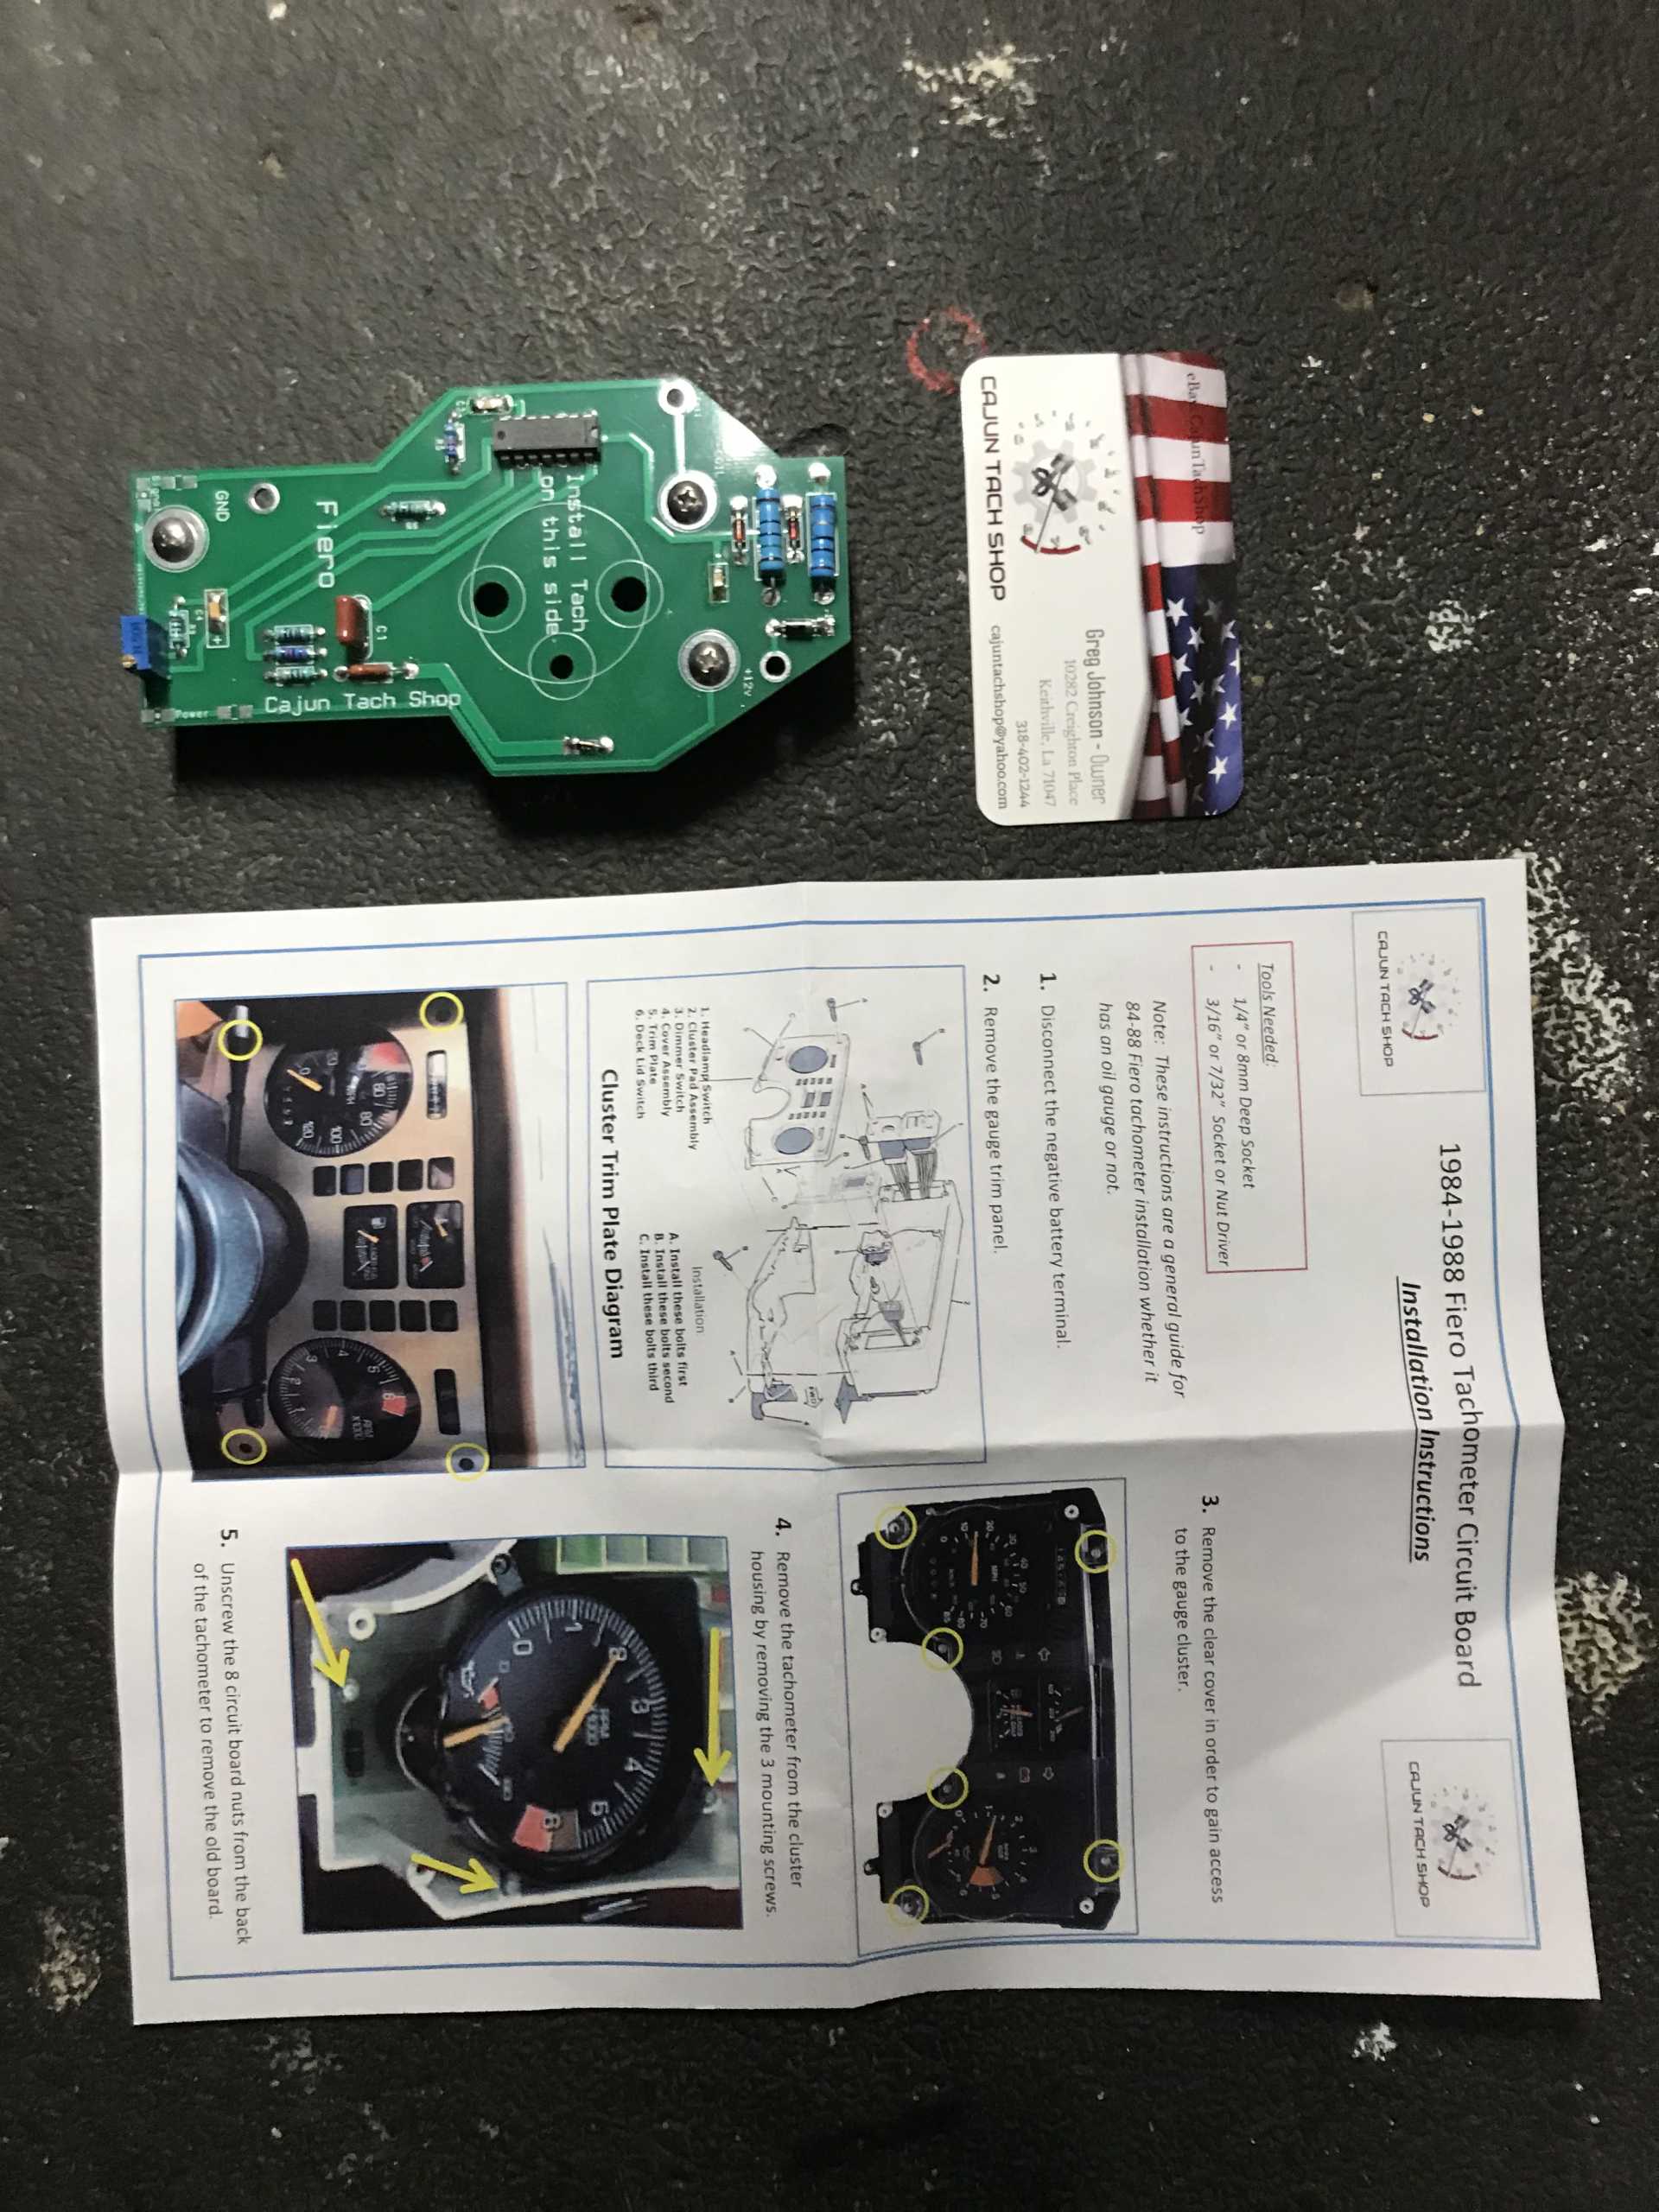
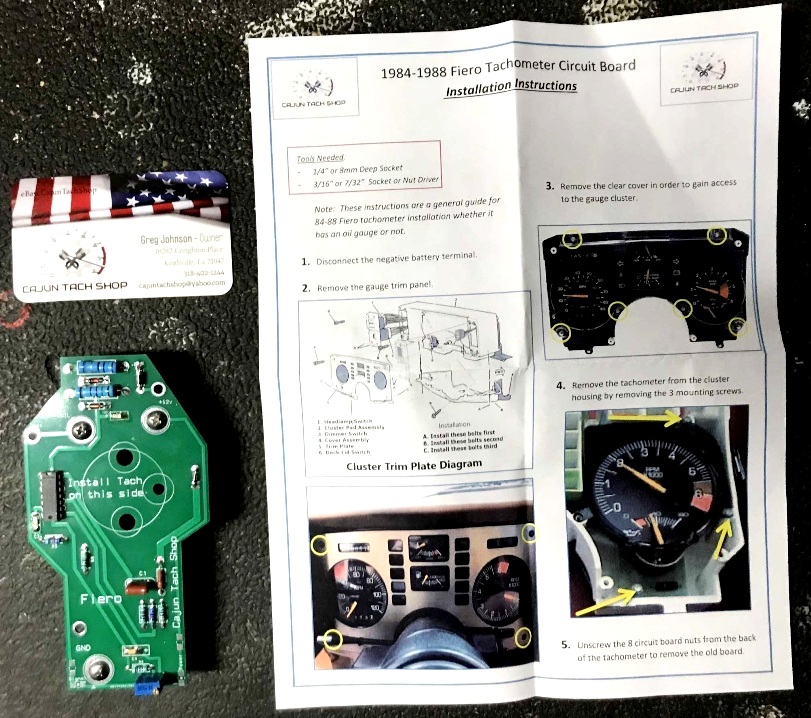
Ok, I made a lot of progress today. Here is what I have done:

1) Removed cluster pod and put it on my workbench.
2) Removed instrument cluster from pod assembly.
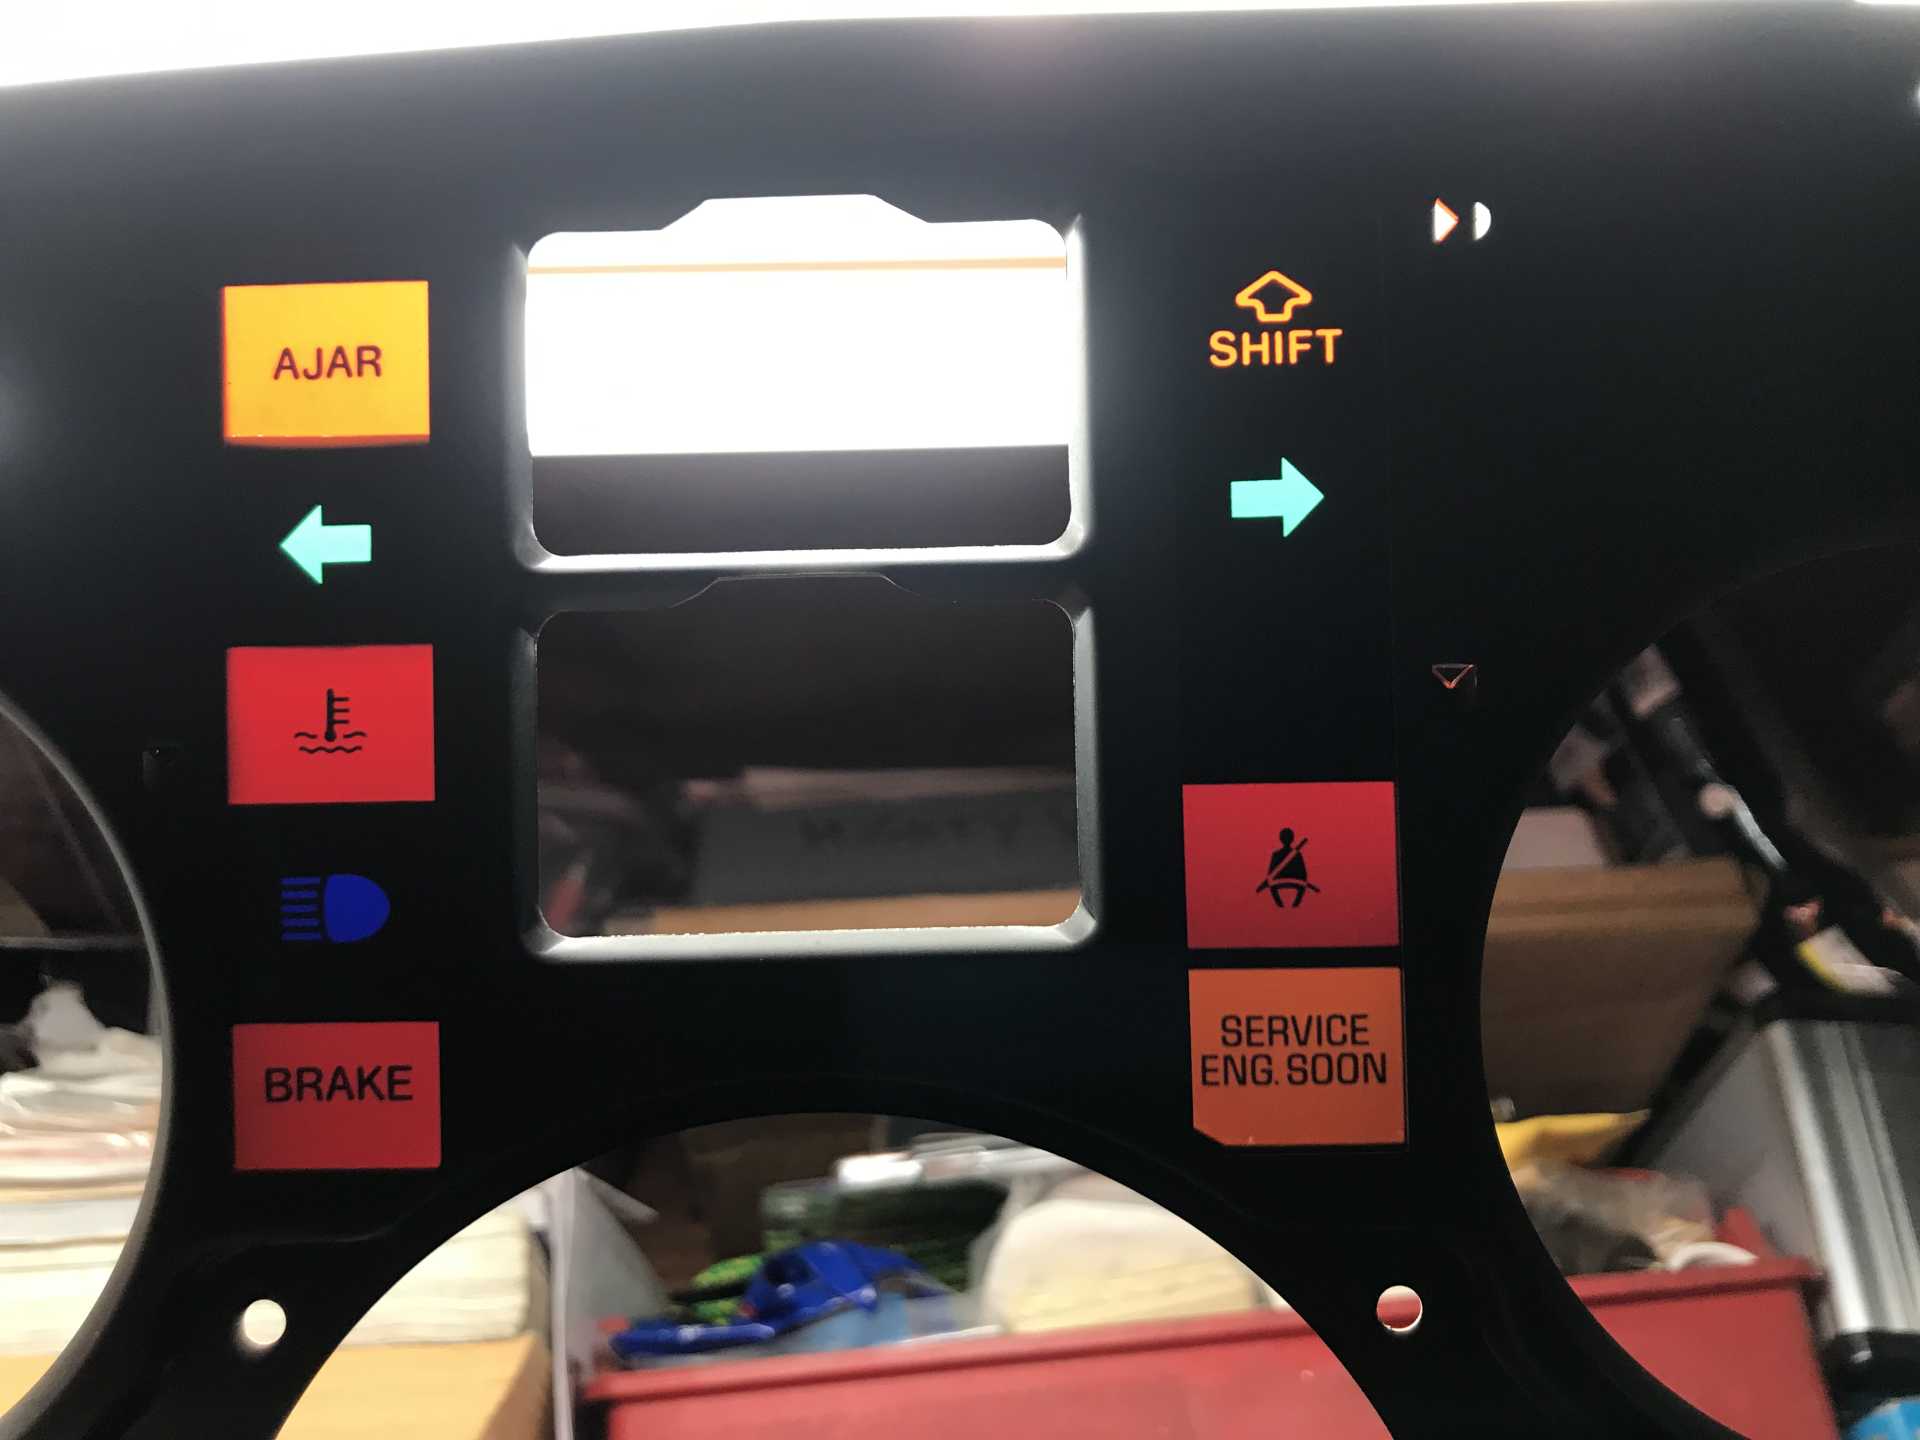
3) Removed clear plastic bezel and black/orange cover plate from cluster.
4) Removed speedo assy. from cluster (white) housing. (pulls up & out / no screws to undo)
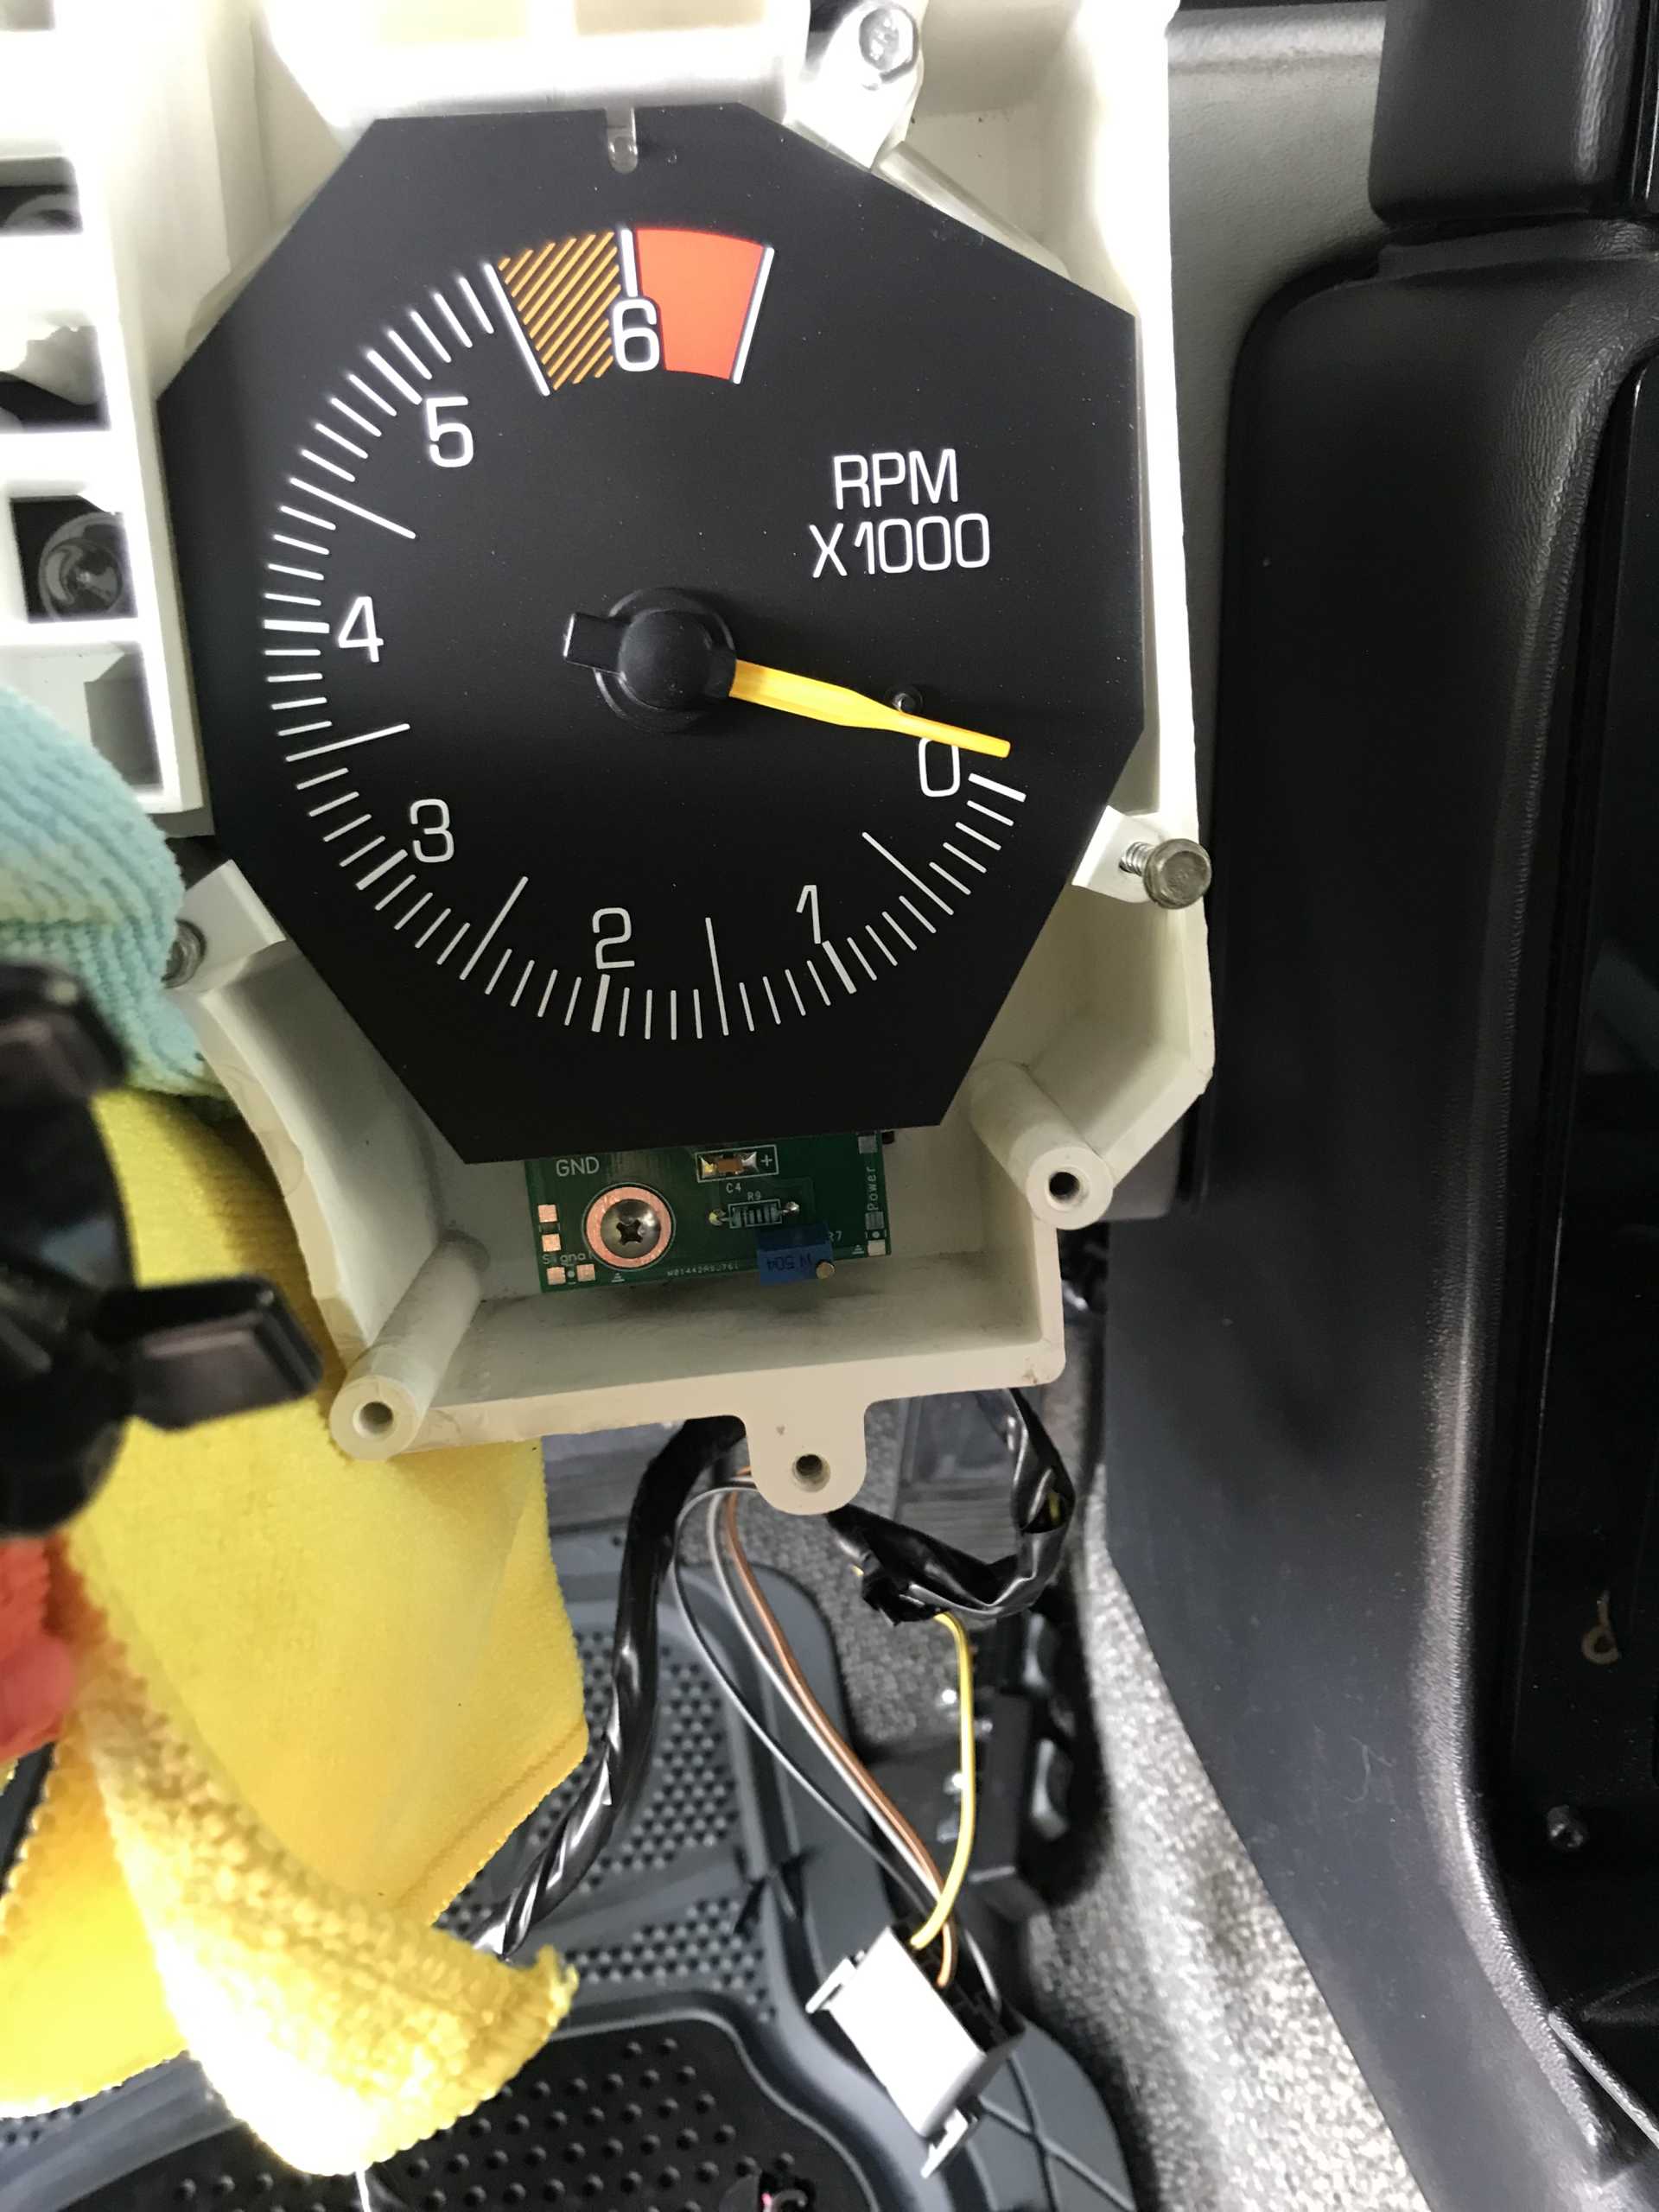
5) Removed screws that hold in tach assy., carefully placed my fingers under the tach and lifted tach assy. up & out of the housing.
6) Removed old tach board from the back of the tach gauge round can metal housing. (3 standoff screws)
7) Installed new tach board onto tach gauge round metal can housing.
8) Installed tach board assy. back into cluster white housing.
9) Re-installed speedo assy. back into cluster white housing.

Important suggestions & notations:
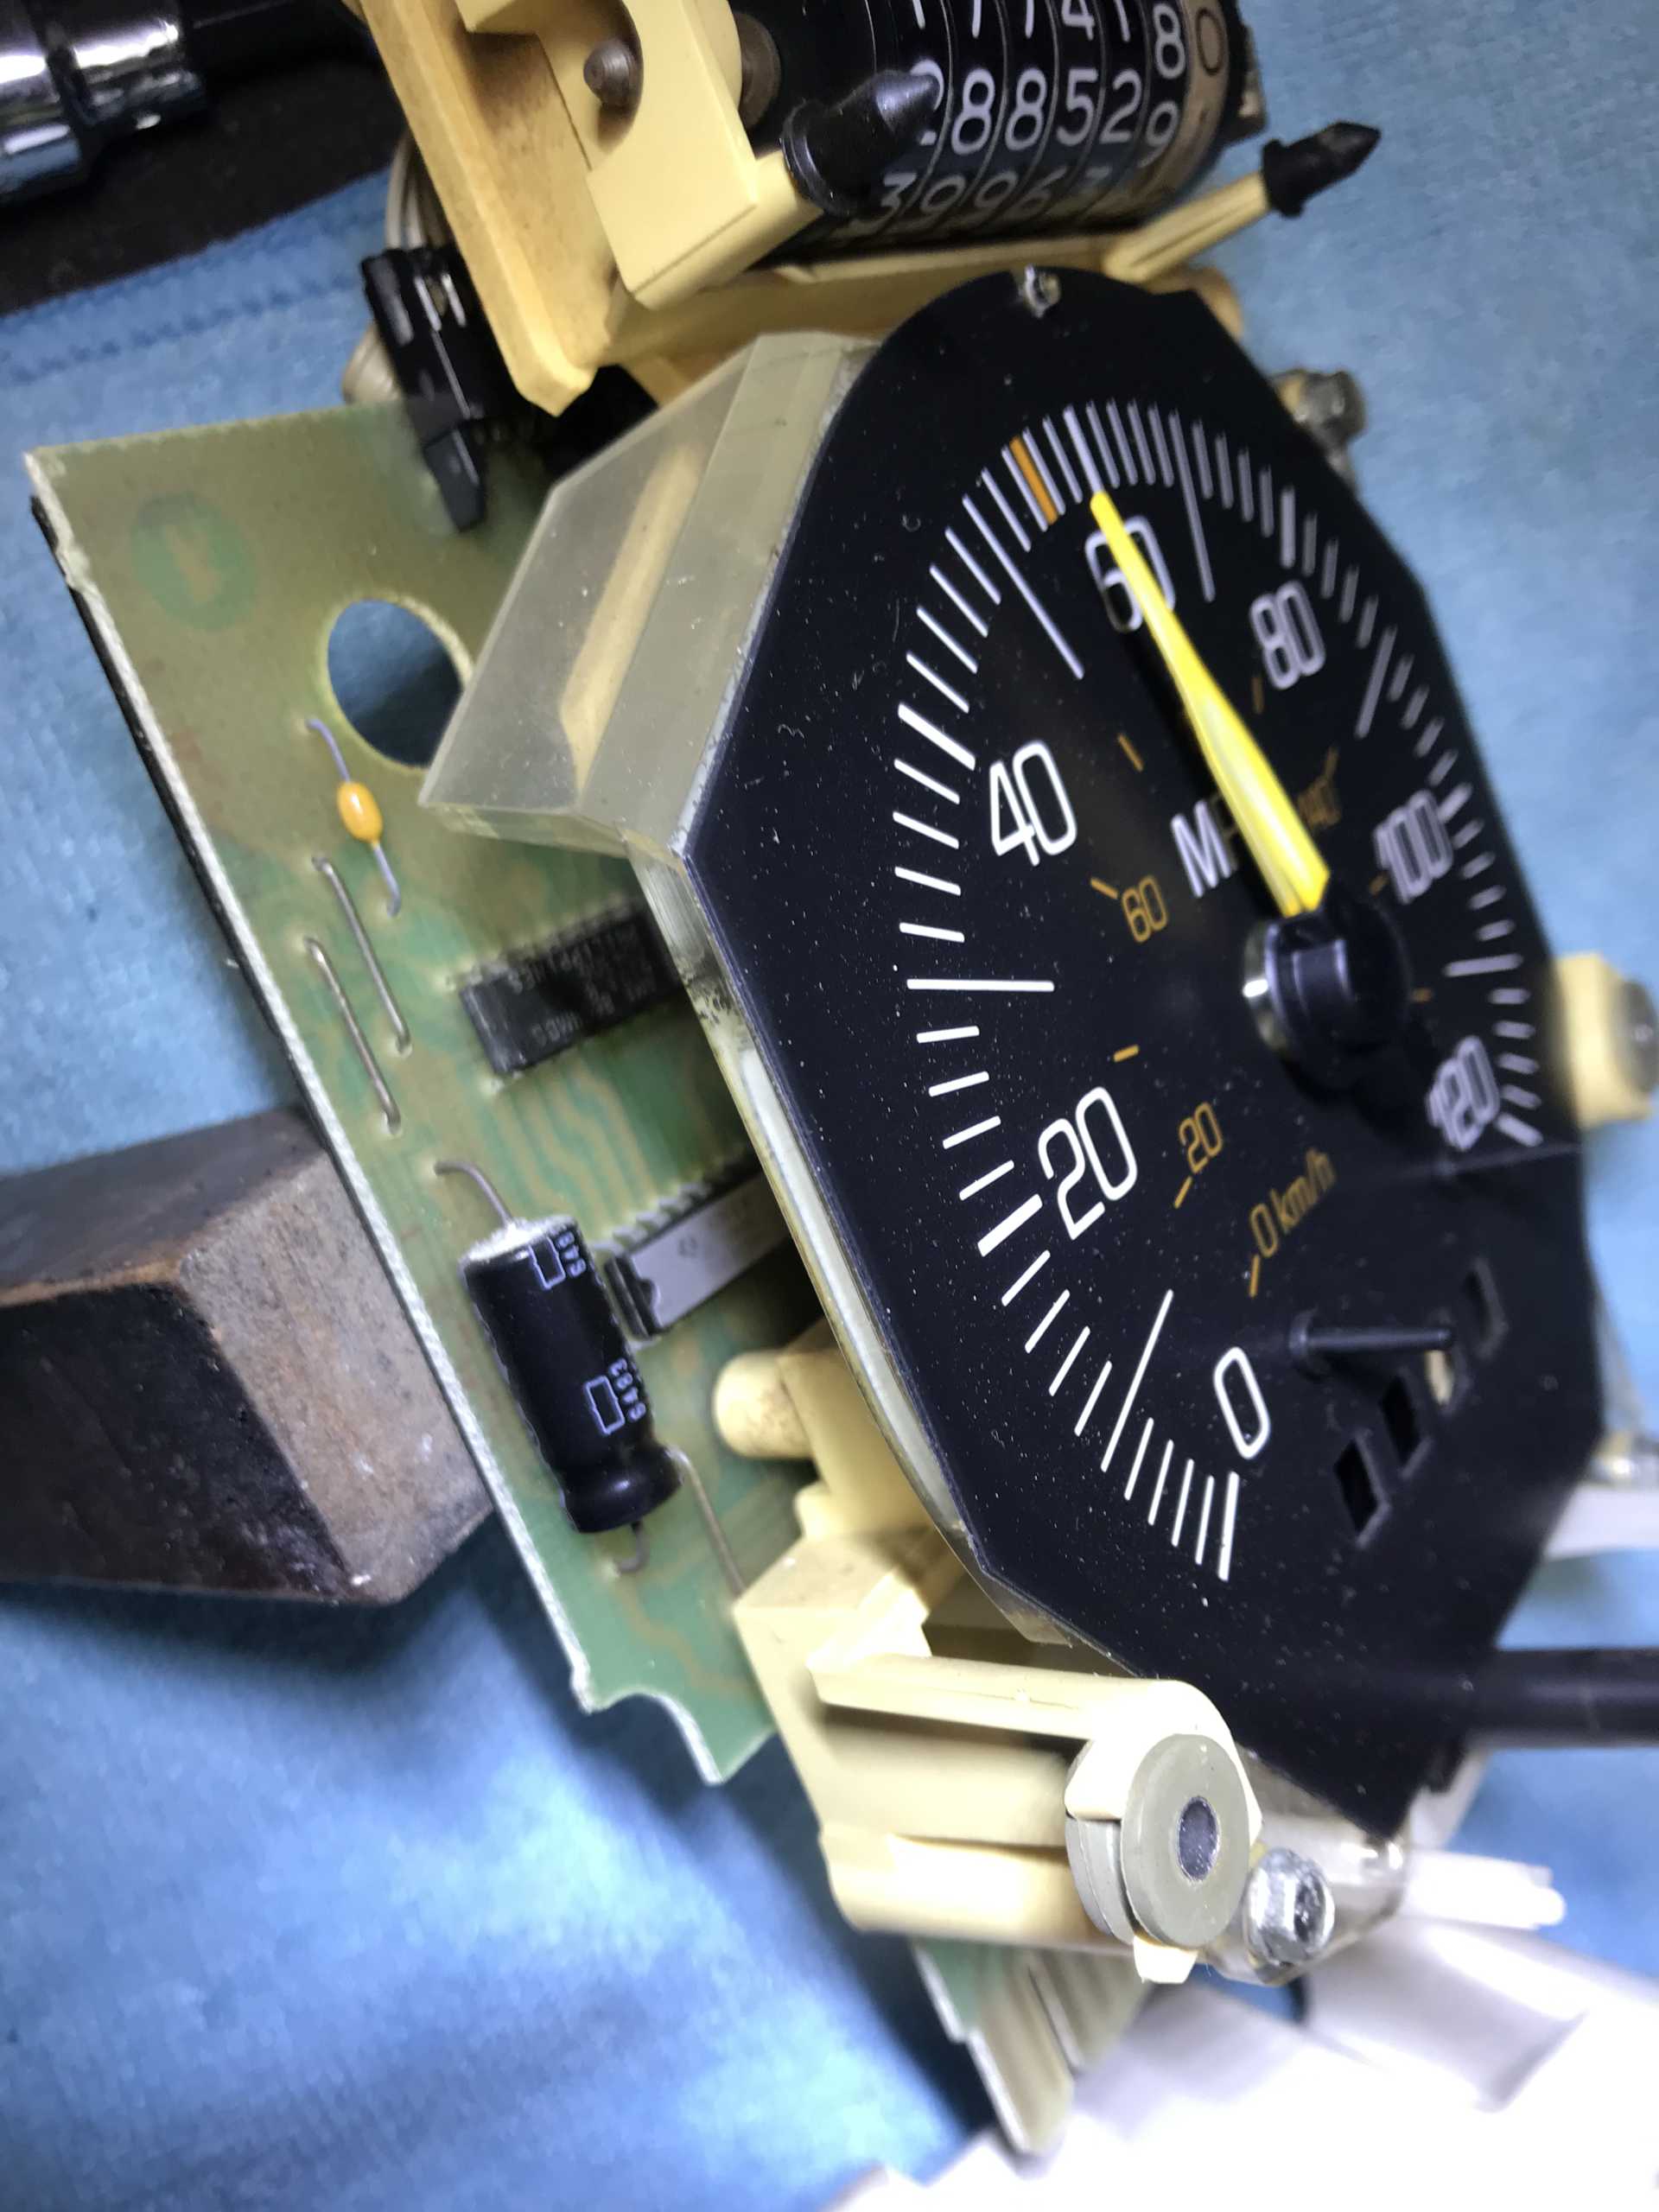
It pays to be thorough & detailed when taking apart 40 year old stuff. Here’s why….
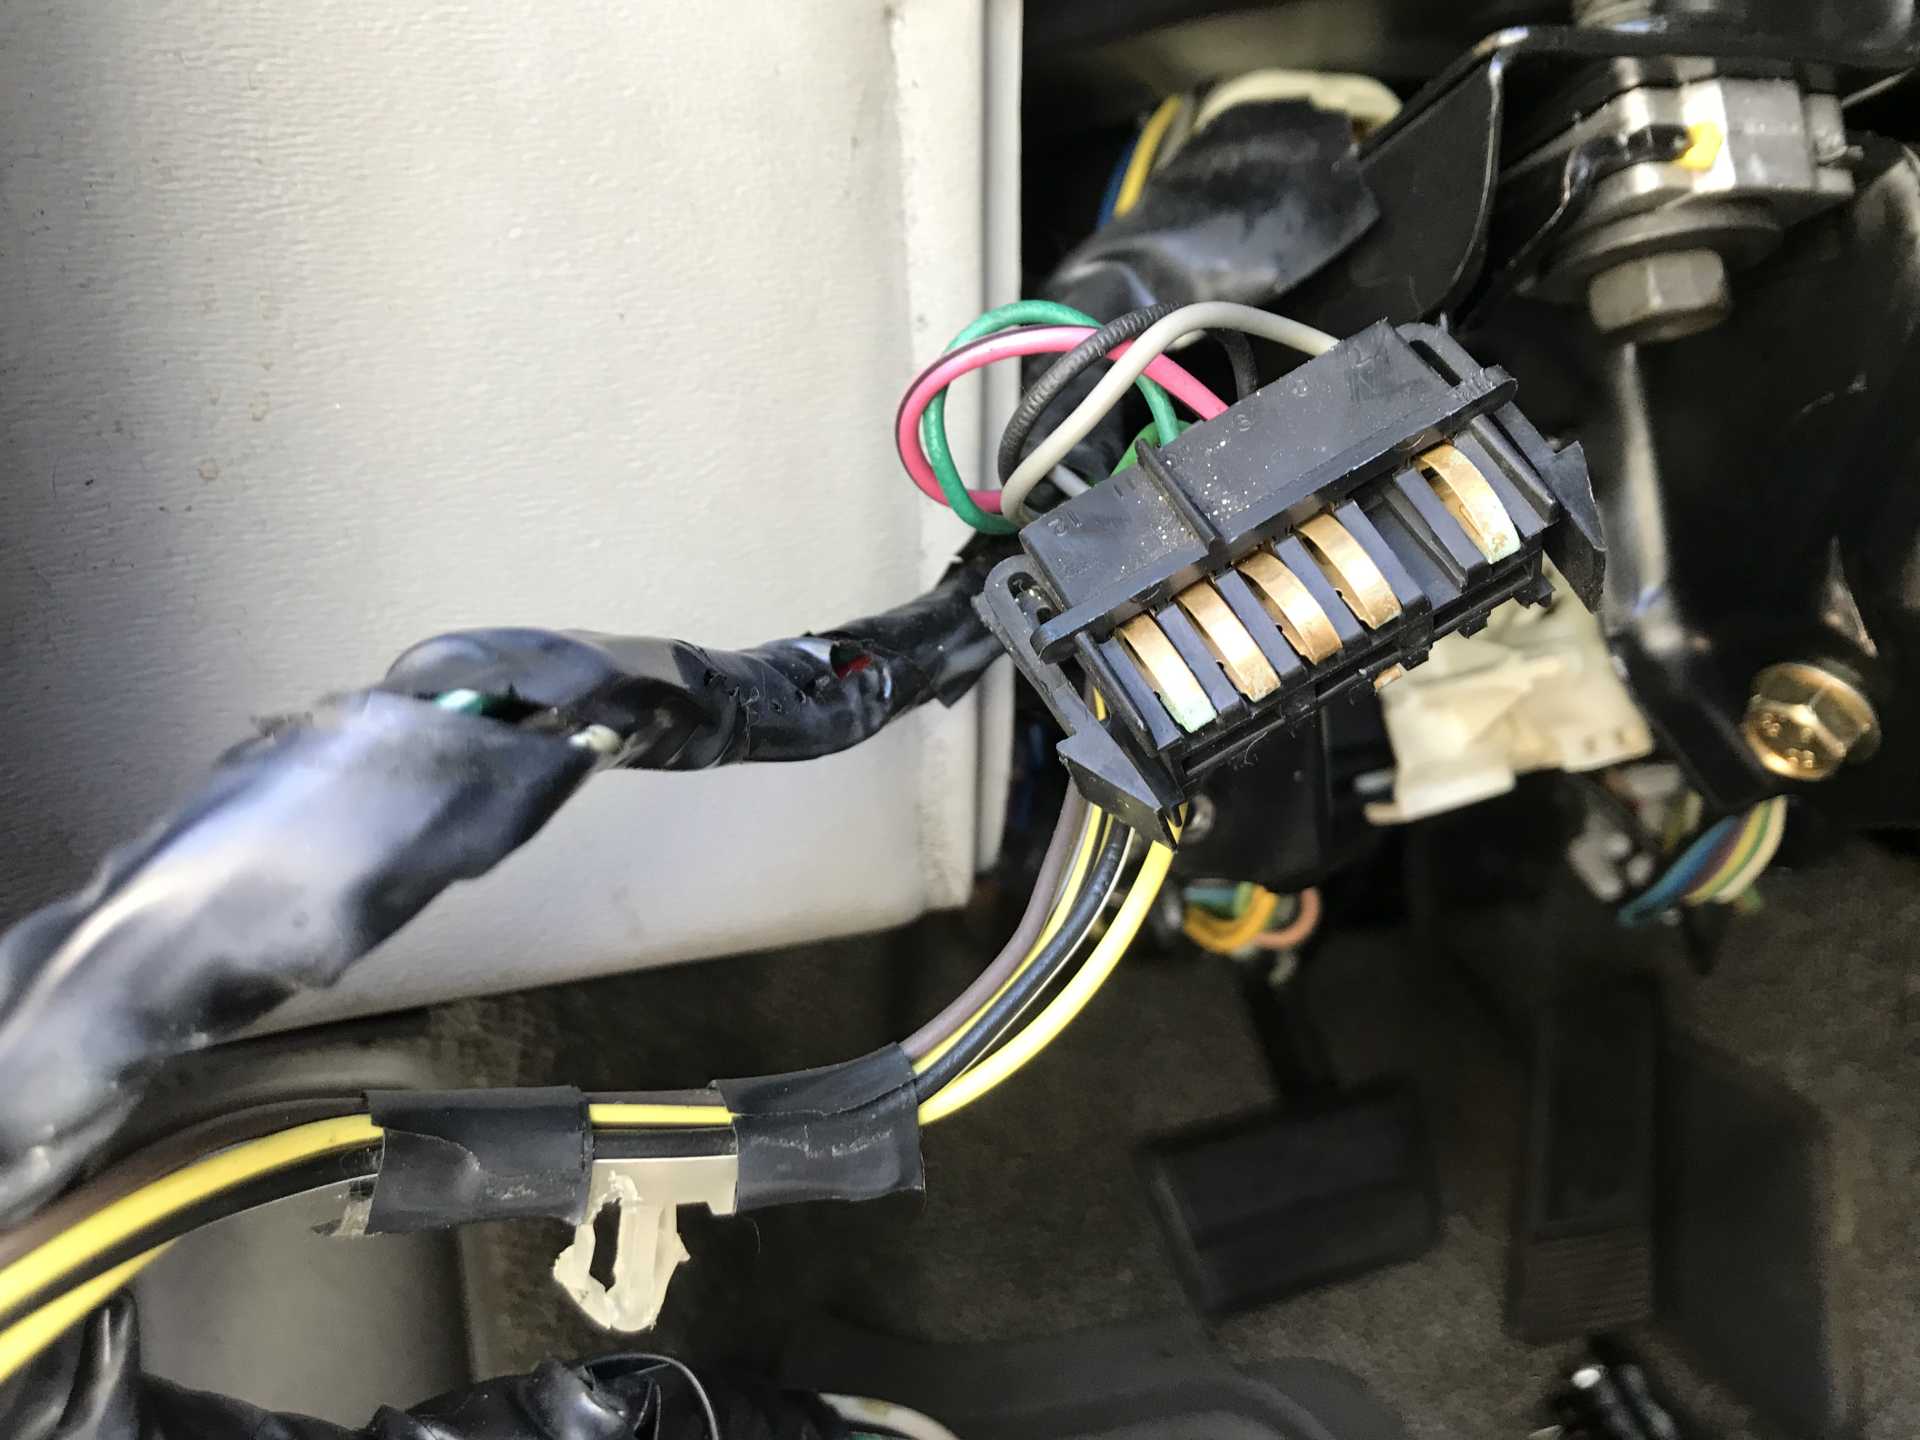
Notice in the pic above that I have some green corrosion on the copper traces of the connector that is on the left (drivers) side of the cluster. (not sure if you can really see the green corrosion but it’s there on the first and last pins) I will clean this up but my point is to examine stuff when you take electrical connectors apart.
Next post will address a change I made to the Speedo pc board.
P.S. See that plastic doo-dad at the lower left of the pic? It’s kind of “T” shaped, has a single plastic post that snaps into a hole and is meant to hold a loom of wire in place? What do you call this type of fastener? My Reatta uses these also and I could never find them on Amazon. I know what they’re for but I don’t know what you call them. What specifically are they?

[This message has been edited by Kitskaboodle (edited 05-20-2025).]

IP: Logged
Kitskaboodle
Member
Posts: 3184
From: San Jose, Ca.
Registered: Nov 2004


Feedback score:    (8)
Leave feedback

Rate this member

Report this Post05-20-2025 06:26 PM Click Here to See the Profile for KitskaboodleSend a Private Message to KitskaboodleEdit/Delete MessageReply w/QuoteDirect Link to This Post

Kitskaboodle

3184 posts
Member since Nov 2004
Post# 2:
While I was in the cluster housing, I decided to check over & examine the Speedo assy. Sure enough, the one and only electrolytic cap on the Speedo pc board had some corrosion on the negative end of the cap. For this reason plus the fact that this lytic is 40 yrs old., I decided to replace it. For those who don’t know, this cap is 150uf / 25 volt. I
replaced it with a 220uf / 63 volt cap, which should be fine. Here’s a pic of the old cap before I replaced it. (not sure you can see the white corrosion in the pic) Good news is you can replace it without removing the pc board from the Speedo assy. Kit

[This message has been edited by Kitskaboodle (edited 05-20-2025).]

IP: Logged
Kitskaboodle
Member
Posts: 3184
From: San Jose, Ca.
Registered: Nov 2004


Feedback score:    (8)
Leave feedback

Rate this member

Report this Post05-20-2025 06:41 PM Click Here to See the Profile for KitskaboodleSend a Private Message to KitskaboodleEdit/Delete MessageReply w/QuoteDirect Link to This Post

Kitskaboodle

3184 posts
Member since Nov 2004
Post#3:
On a different note (and in a different thread) we were all talking about the Fiero shift light and which clusters had the shift light capability and which ones didn’t. Well, I don’t remember exactly what car I took this cluster from but my suspicions are that all Fiero clusters had this capability. (I could be wrong though)
Here’s a pic of the shift light lens from my cluster that’s
from an 86-88 V6 car.
Kit

[This message has been edited by Kitskaboodle (edited 05-20-2025).]

IP: Logged
Kitskaboodle
Member
Posts: 3184
From: San Jose, Ca.
Registered: Nov 2004


Feedback score:    (8)
Leave feedback

Rate this member

Report this Post05-20-2025 06:56 PM Click Here to See the Profile for KitskaboodleSend a Private Message to KitskaboodleEdit/Delete MessageReply w/QuoteDirect Link to This Post

Kitskaboodle

3184 posts
Member since Nov 2004
 
quote
Originally posted by Frenchrafe:

Please let us know how it goes?
I will need to replace mine sometime as I've already done the repair with a variable resistor many years ago to recalibrate the reading.
But now the tacho just dies intermittently, especially on a hot day.


And to use your situation as my example, you may modify and/or add a few components to your old tach to suit your needs / recalibrate it but the majority of the components on the board are still 40+ years old and they’re bound to give you trouble.

[This message has been edited by Kitskaboodle (edited 05-20-2025).]

IP: Logged
Patrick
Member
Posts: 38478
From: Vancouver, British Columbia, Canada
Registered: Apr 99


Feedback score: (1)
Leave feedback


Total ratings: 465
Rate this member

Report this Post05-20-2025 11:44 PM Click Here to See the Profile for PatrickSend a Private Message to PatrickEdit/Delete MessageReply w/QuoteDirect Link to This Post
 
quote
Originally posted by Kitskaboodle:

On a different note (and in a different thread) we were all talking about the Fiero shift light and which clusters had the shift light capability and which ones didn’t.


I don't like those nasty SHIFT lights!

IP: Logged
Kitskaboodle
Member
Posts: 3184
From: San Jose, Ca.
Registered: Nov 2004


Feedback score:    (8)
Leave feedback

Rate this member

Report this Post05-22-2025 05:00 PM Click Here to See the Profile for KitskaboodleSend a Private Message to KitskaboodleEdit/Delete MessageReply w/QuoteDirect Link to This Post
Ok, I have finished the project.
It turns out that it’s a good idea to double check the accuracy of these new tach boards before you button everything up. Mine was about 75 rpm above what the computer said. The good news is it’s quite easy to adjust/calibrate it while the engine is running. It is adjusted with a very small flat head screwdriver at the blue
potentiometer at the bottom of the tach board. See pic of the tach gauge in the cluster (installed temporarily above the steering column) but without the template/cover.
Kit

[This message has been edited by Kitskaboodle (edited 05-22-2025).]

IP: Logged
PFF
System Bot
Patrick
Member
Posts: 38478
From: Vancouver, British Columbia, Canada
Registered: Apr 99


Feedback score: (1)
Leave feedback


Total ratings: 465
Rate this member

Report this Post05-22-2025 05:03 PM Click Here to See the Profile for PatrickSend a Private Message to PatrickEdit/Delete MessageReply w/QuoteDirect Link to This Post
 
quote
Originally posted by Kitskaboodle:

The good news is it’s quite easy to adjust/calibrate it while the engine is running.


Care to elaborate?

IP: Logged
Kitskaboodle
Member
Posts: 3184
From: San Jose, Ca.
Registered: Nov 2004


Feedback score:    (8)
Leave feedback

Rate this member

Report this Post05-22-2025 05:08 PM Click Here to See the Profile for KitskaboodleSend a Private Message to KitskaboodleEdit/Delete MessageReply w/QuoteDirect Link to This Post
I was editing my post with this very info but you were quick on the draw. 😊
Kit
IP: Logged
Patrick
Member
Posts: 38478
From: Vancouver, British Columbia, Canada
Registered: Apr 99


Feedback score: (1)
Leave feedback


Total ratings: 465
Rate this member

Report this Post05-22-2025 06:06 PM Click Here to See the Profile for PatrickSend a Private Message to PatrickEdit/Delete MessageReply w/QuoteDirect Link to This Post
 
quote
Originally posted by Kitskaboodle:

It is adjusted with a very small flat head screwdriver at the blue potentiometer at the bottom of the tach board.


Thanks Kit, that's good to know.

IP: Logged
FormulaGT
Member
Posts: 791
From: Santa Barbara, CA USA
Registered: Sep 2003


Feedback score:    (6)
Leave feedback

Rate this member

Report this Post05-25-2025 11:27 PM Click Here to See the Profile for FormulaGTSend a Private Message to FormulaGTEdit/Delete MessageReply w/QuoteDirect Link to This Post
The tach in my '88 GT used to continuously spin erratically. I Installed the same board you did and the readings seem within reason out of the package to what other V6 Fieros I have had in the past. Good to know it can be calibrated though.
IP: Logged
Kitskaboodle
Member
Posts: 3184
From: San Jose, Ca.
Registered: Nov 2004


Feedback score:    (8)
Leave feedback

Rate this member

Report this Post05-27-2025 09:04 PM Click Here to See the Profile for KitskaboodleSend a Private Message to KitskaboodleEdit/Delete MessageReply w/QuoteDirect Link to This Post
Forgot to point out that unlike the Cajun tach board, the factory tach board has no provision for rpm adjustment. (another reason to go with a new tach board)
Also, if you’re going to go to all the trouble of pulling your whole instrument cluster out, remove the gauge assy., then swap out the tach board, you might as well go the whole distance and check and/or tweak the rpm’s on the new tach board. In fact, the instructions imply that you might have to do this anyways. Kit

[This message has been edited by Kitskaboodle (edited 05-27-2025).]

IP: Logged

next newest topic | next oldest topic

All times are ET (US)

Post New Topic  Post A Reply
Hop to:

Contact Us | Back To Main Page

Advertizing on PFF | Fiero Parts Vendors
PFF Merchandise | Fiero Gallery
Real-Time Chat | Fiero Related Auctions on eBay


Copyright (c) 1999, C. Pennock