Pennock's Fiero Forum
  Technical Discussion & Questions
  What gives ?!? This front suspension isn’t !!

Post New Topic  Post A Reply
Email This Page to Someone! | Printable Version


next newest topic | next oldest topic
What gives ?!? This front suspension isn’t !! by MERATIME
Started on: 05-10-2025 06:07 AM
Replies: 10 (146 views)
Last post by: Patrick on 05-10-2025 06:27 PM
MERATIME
Member
Posts: 102
From: Arizona
Registered: Aug 2022


Feedback score: N/A
Leave feedback

Rate this member

Report this Post05-10-2025 06:07 AM Click Here to See the Profile for MERATIMESend a Private Message to MERATIMEEdit/Delete MessageReply w/QuoteDirect Link to This Post
1987 SE manual

Hello all .

Trying to figure out why the front oem springs are not coming out? Note: All the suspension components on this car is OEM / original and overtime. Dust and rust did accumulate in the wheelwell area and is now cleaned. My project is to add performance springs. I did as instructed removing the required nuts to the sway bar. shock absorber & ball joints. To me. It seems that the ball joint assembly is sticking and is not allowing the lower control arm to freely fall. I hit against the knuckle & spindle without any luck. Have any of you had a similar outcome? Are there specific applications involved with the Fiero in order to get these springs out? Any suggestions would be great

Thank you

[This message has been edited by MERATIME (edited 05-10-2025).]

IP: Logged
PFF
System Bot
I Lean
Junior Member
Posts: 6
From: Magna, UT
Registered: Feb 2025


Feedback score: N/A
Leave feedback

Rate this member

Report this Post05-10-2025 08:16 AM Click Here to See the Profile for I LeanSend a Private Message to I LeanEdit/Delete MessageReply w/QuoteDirect Link to This Post
 
quote
Originally posted by MERATIME:

1987 SE manual

Hello all .

Trying to figure out why the front oem springs are not coming out? Note: All the suspension components on this car is OEM / original and overtime. Dust and rust did accumulate in the wheelwell area and is now cleaned. My project is to add performance springs. I did as instructed removing the required nuts to the sway bar. shock absorber & ball joints. To me. It seems that the ball joint assembly is sticking and is not allowing the lower control arm to freely fall. I hit against the knuckle & spindle without any luck. Have any of you had a similar outcome? Are there specific applications involved with the Fiero in order to get these springs out? Any suggestions would be great

Thank you


You'll probably need to disconnect more things to let the lower control arm drop farther. I popped out one of the ball joints, and still the spring was under tension and needed to be levered out with a prybar.

If you have a spring compressor that will fit, that will help a lot. (mine did not fit, there isn't much space to work with)
IP: Logged
1985 Fiero GT
Member
Posts: 1016
From: New Brunswick, Canada
Registered: May 2023


Feedback score: N/A
Leave feedback

Rate this member

Report this Post05-10-2025 08:33 AM Click Here to See the Profile for 1985 Fiero GTSend a Private Message to 1985 Fiero GTEdit/Delete MessageReply w/QuoteDirect Link to This Post
Yeah the front and rear springs are under compression even at full suspension droop (the rear is held captive by the shock, the front by the suspension geometry).
IP: Logged
Vintage-Nut
Member
Posts: 1576
From: California
Registered: Apr 2020


Feedback score: N/A
Leave feedback

Rate this member

Report this Post05-10-2025 10:18 AM Click Here to See the Profile for Vintage-NutSend a Private Message to Vintage-NutEdit/Delete MessageReply w/QuoteDirect Link to This Post
INJURY / DAMAGE CAUTION:

In my How-To Replace '88 Ball Joints 'On the Car' post, it shows the process to remove the knuckle assembly from the upper and lower control arms.
https://www.fiero.nl/forum/Forum9/HTML/000054.html


After the knuckle assembly has been removed, carefully and slowly; lower the bottom control arm to remove the springs...

[This message has been edited by Vintage-Nut (edited 05-10-2025).]

IP: Logged
IMSA GT
Member
Posts: 10656
From: California
Registered: Aug 2007


Feedback score:    (8)
Leave feedback


Total ratings: 253
Rate this member

Report this Post05-10-2025 10:53 AM Click Here to See the Profile for IMSA GTSend a Private Message to IMSA GTEdit/Delete MessageReply w/QuoteDirect Link to This Post
 
quote
Originally posted by MERATIME:

.........not allowing the lower control arm to freely fall.


quote
Originally posted by Vintage-Nut:


After the knuckle assembly has been removed, carefully and slowly; lower the bottom control arm to remove the springs...


Keyword.....SLOWLY lower the control arm. When I see the term "freely fall" so will the spring......freely shoot across the room.
IP: Logged
MERATIME
Member
Posts: 102
From: Arizona
Registered: Aug 2022


Feedback score: N/A
Leave feedback

Rate this member

Report this Post05-10-2025 01:34 PM Click Here to See the Profile for MERATIMESend a Private Message to MERATIMEEdit/Delete MessageReply w/QuoteDirect Link to This Post
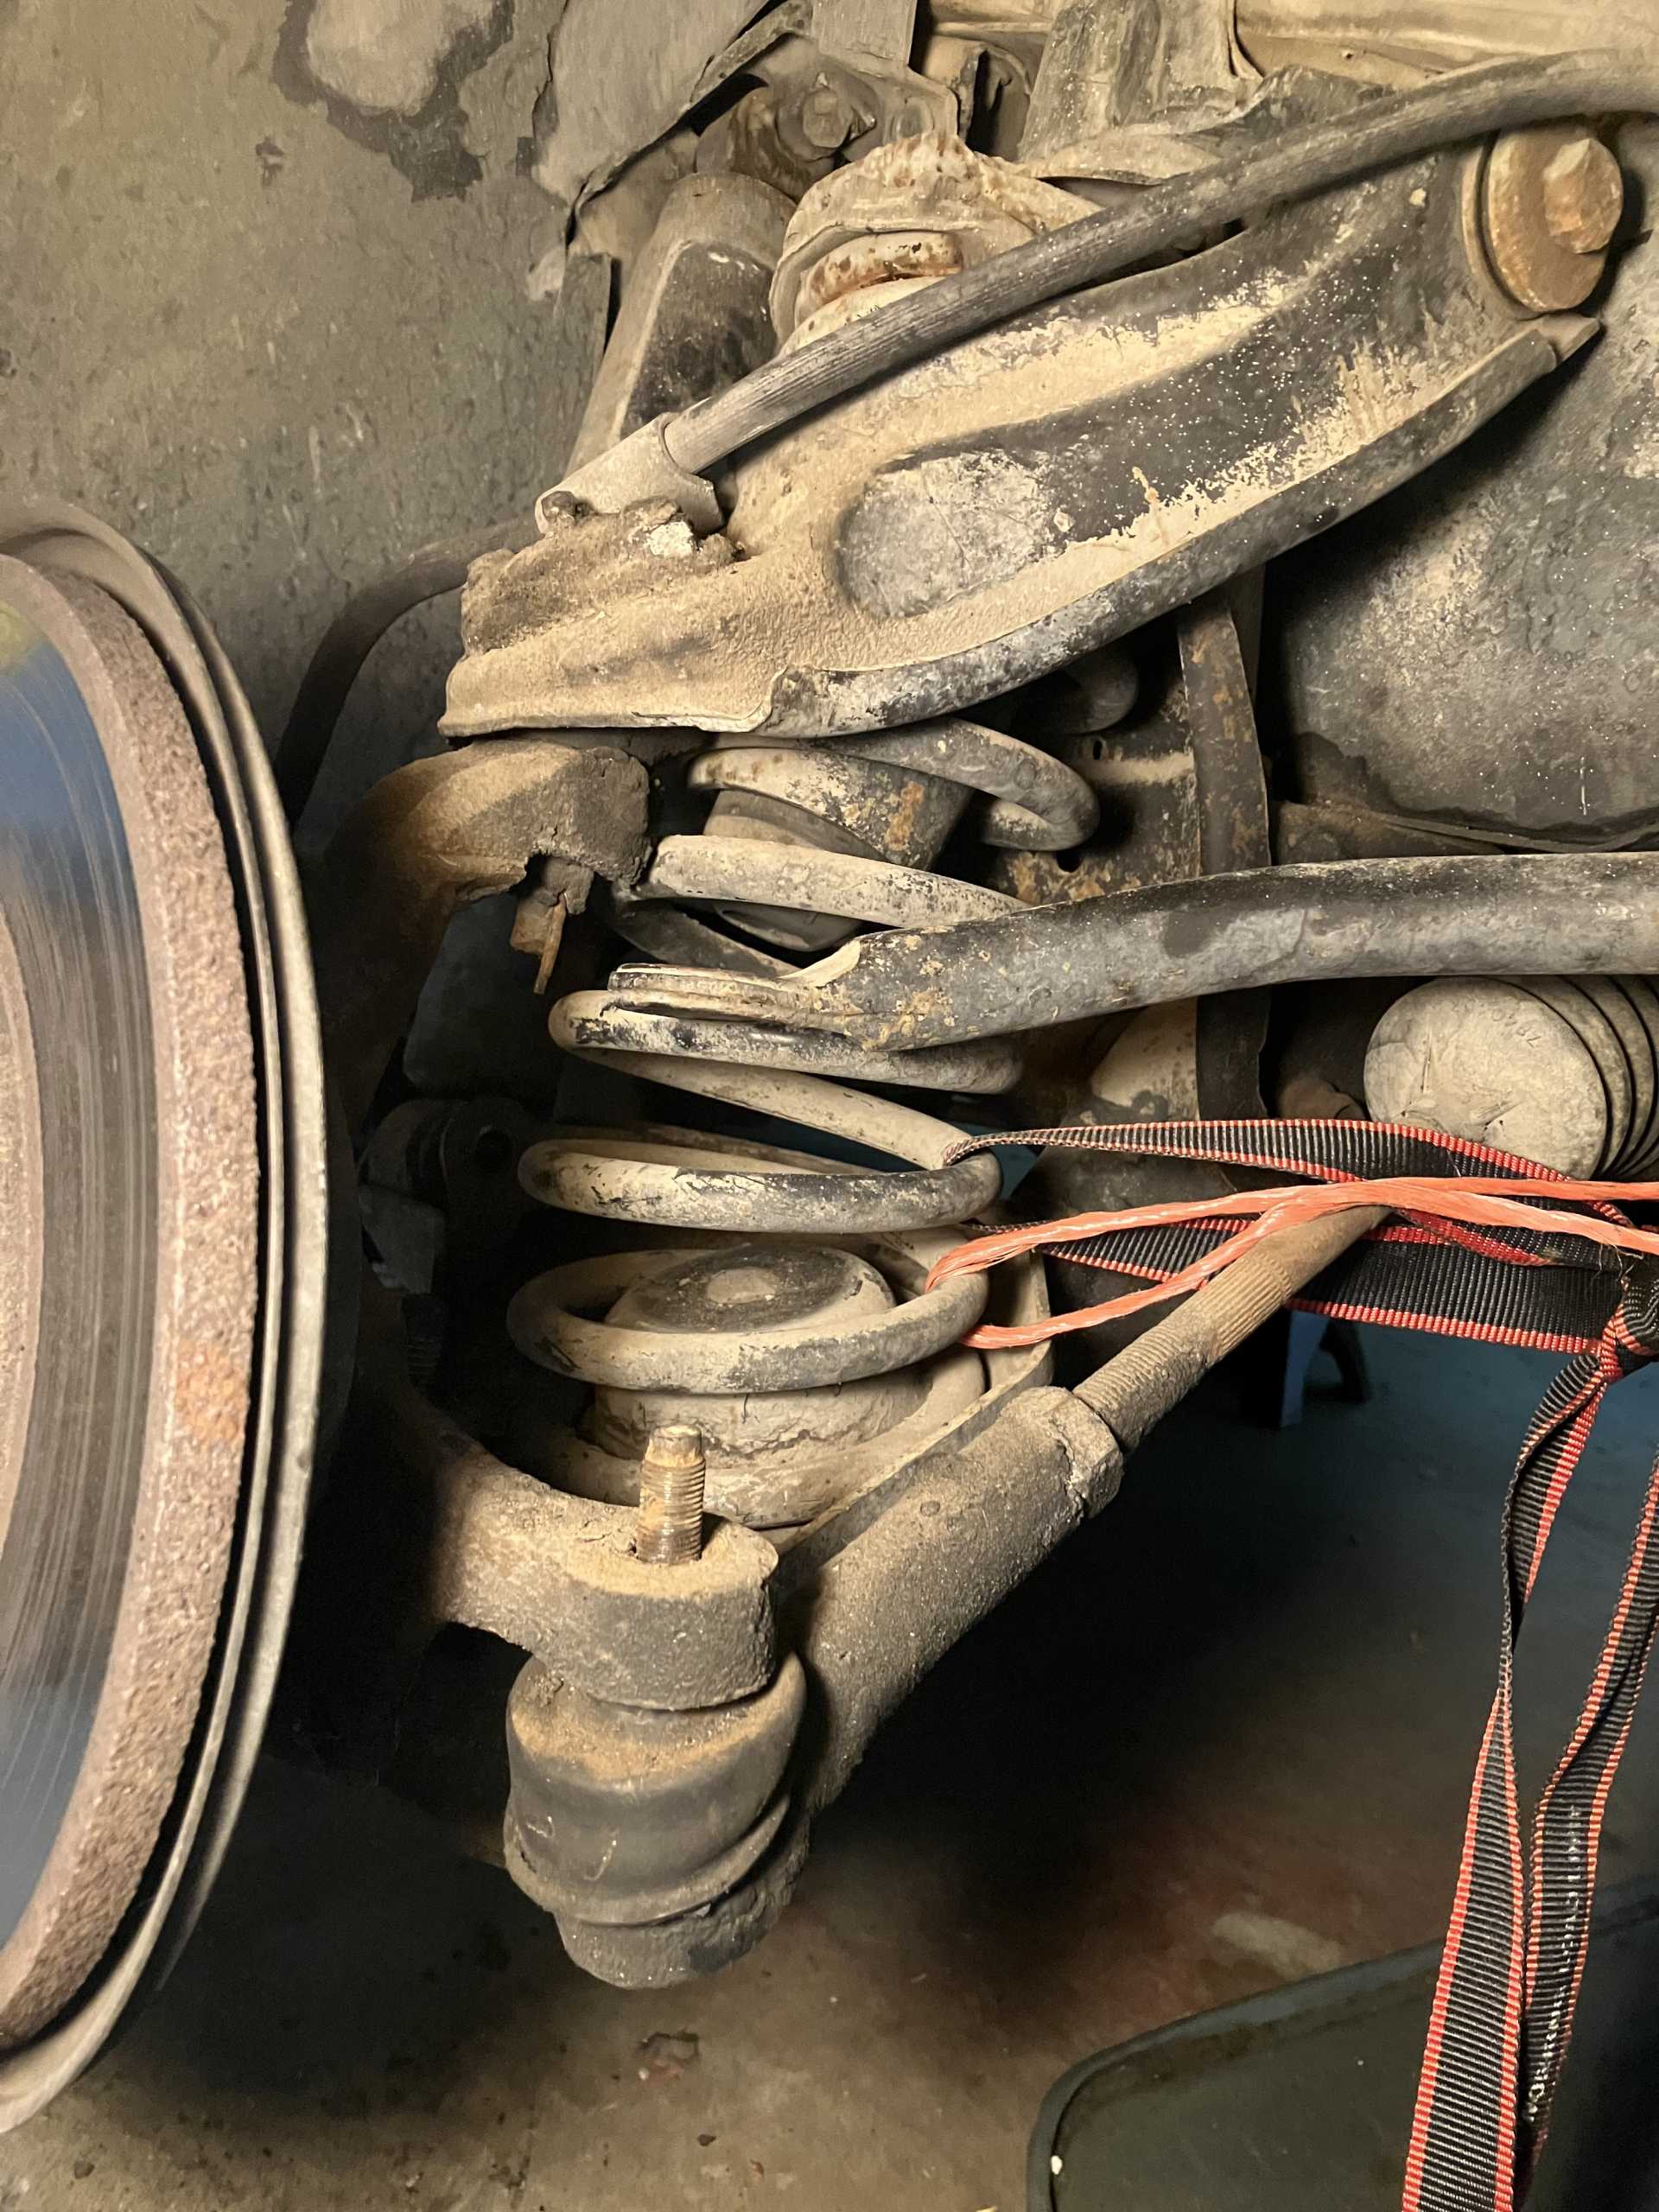
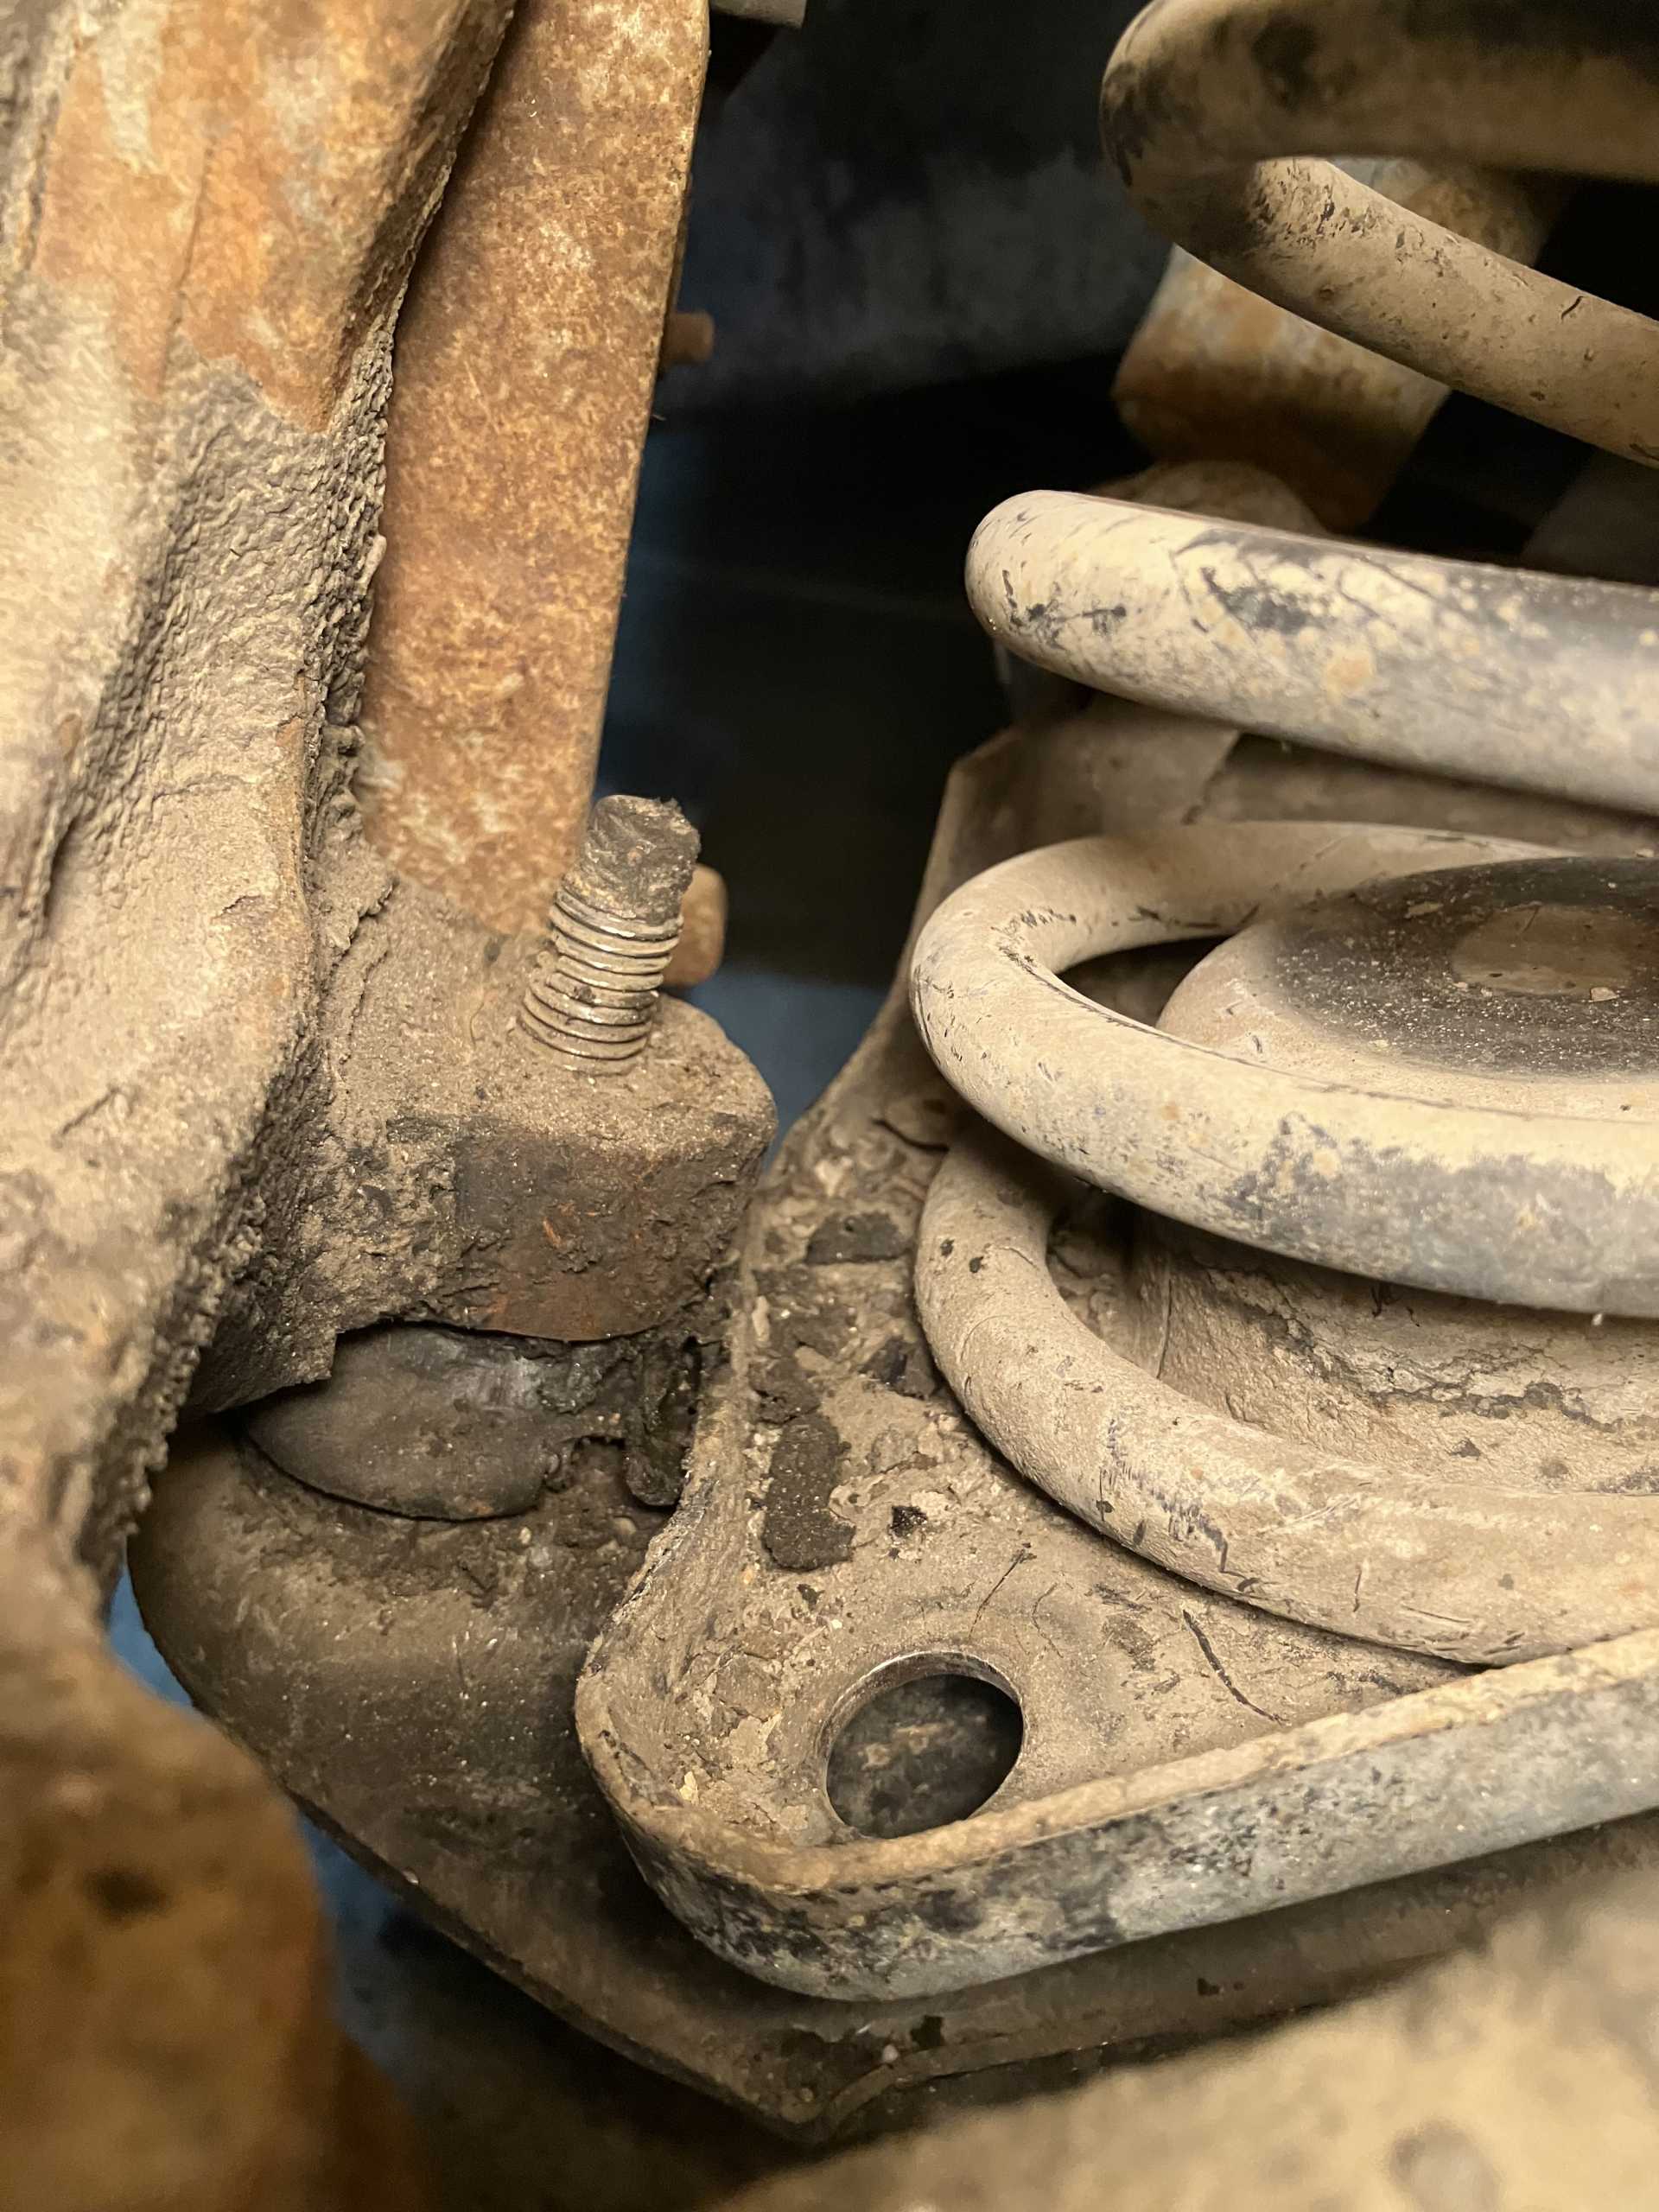
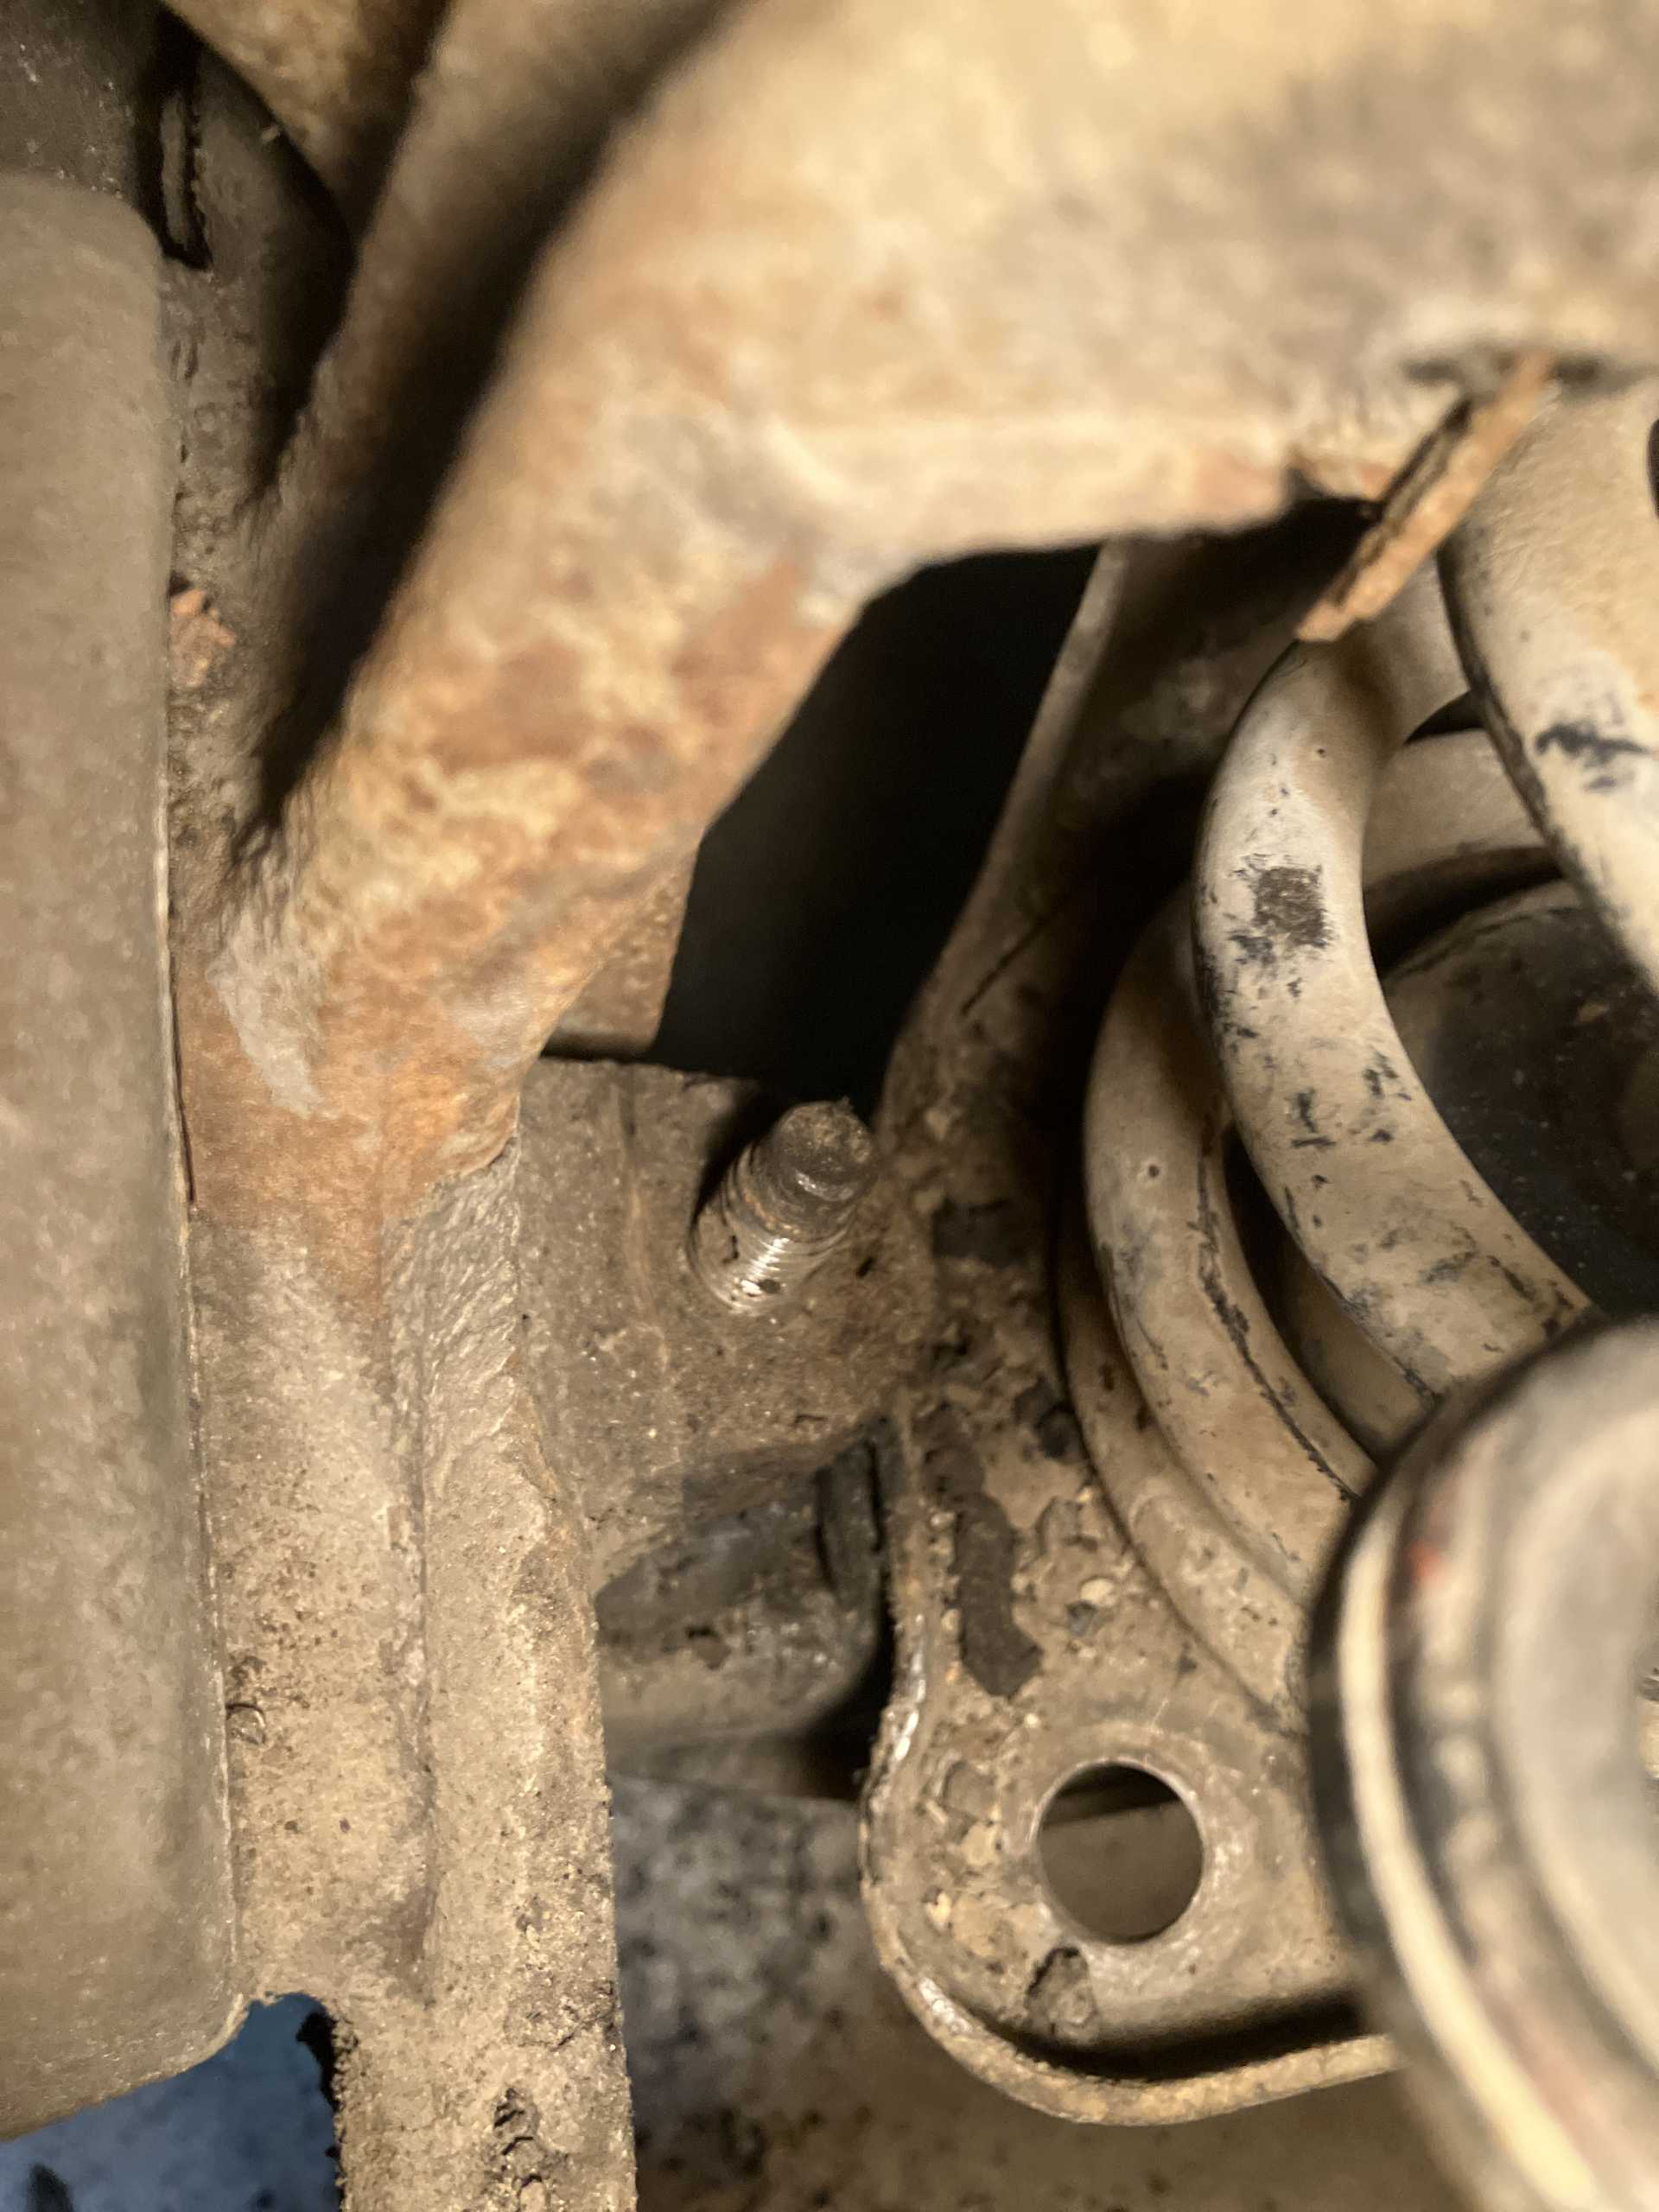
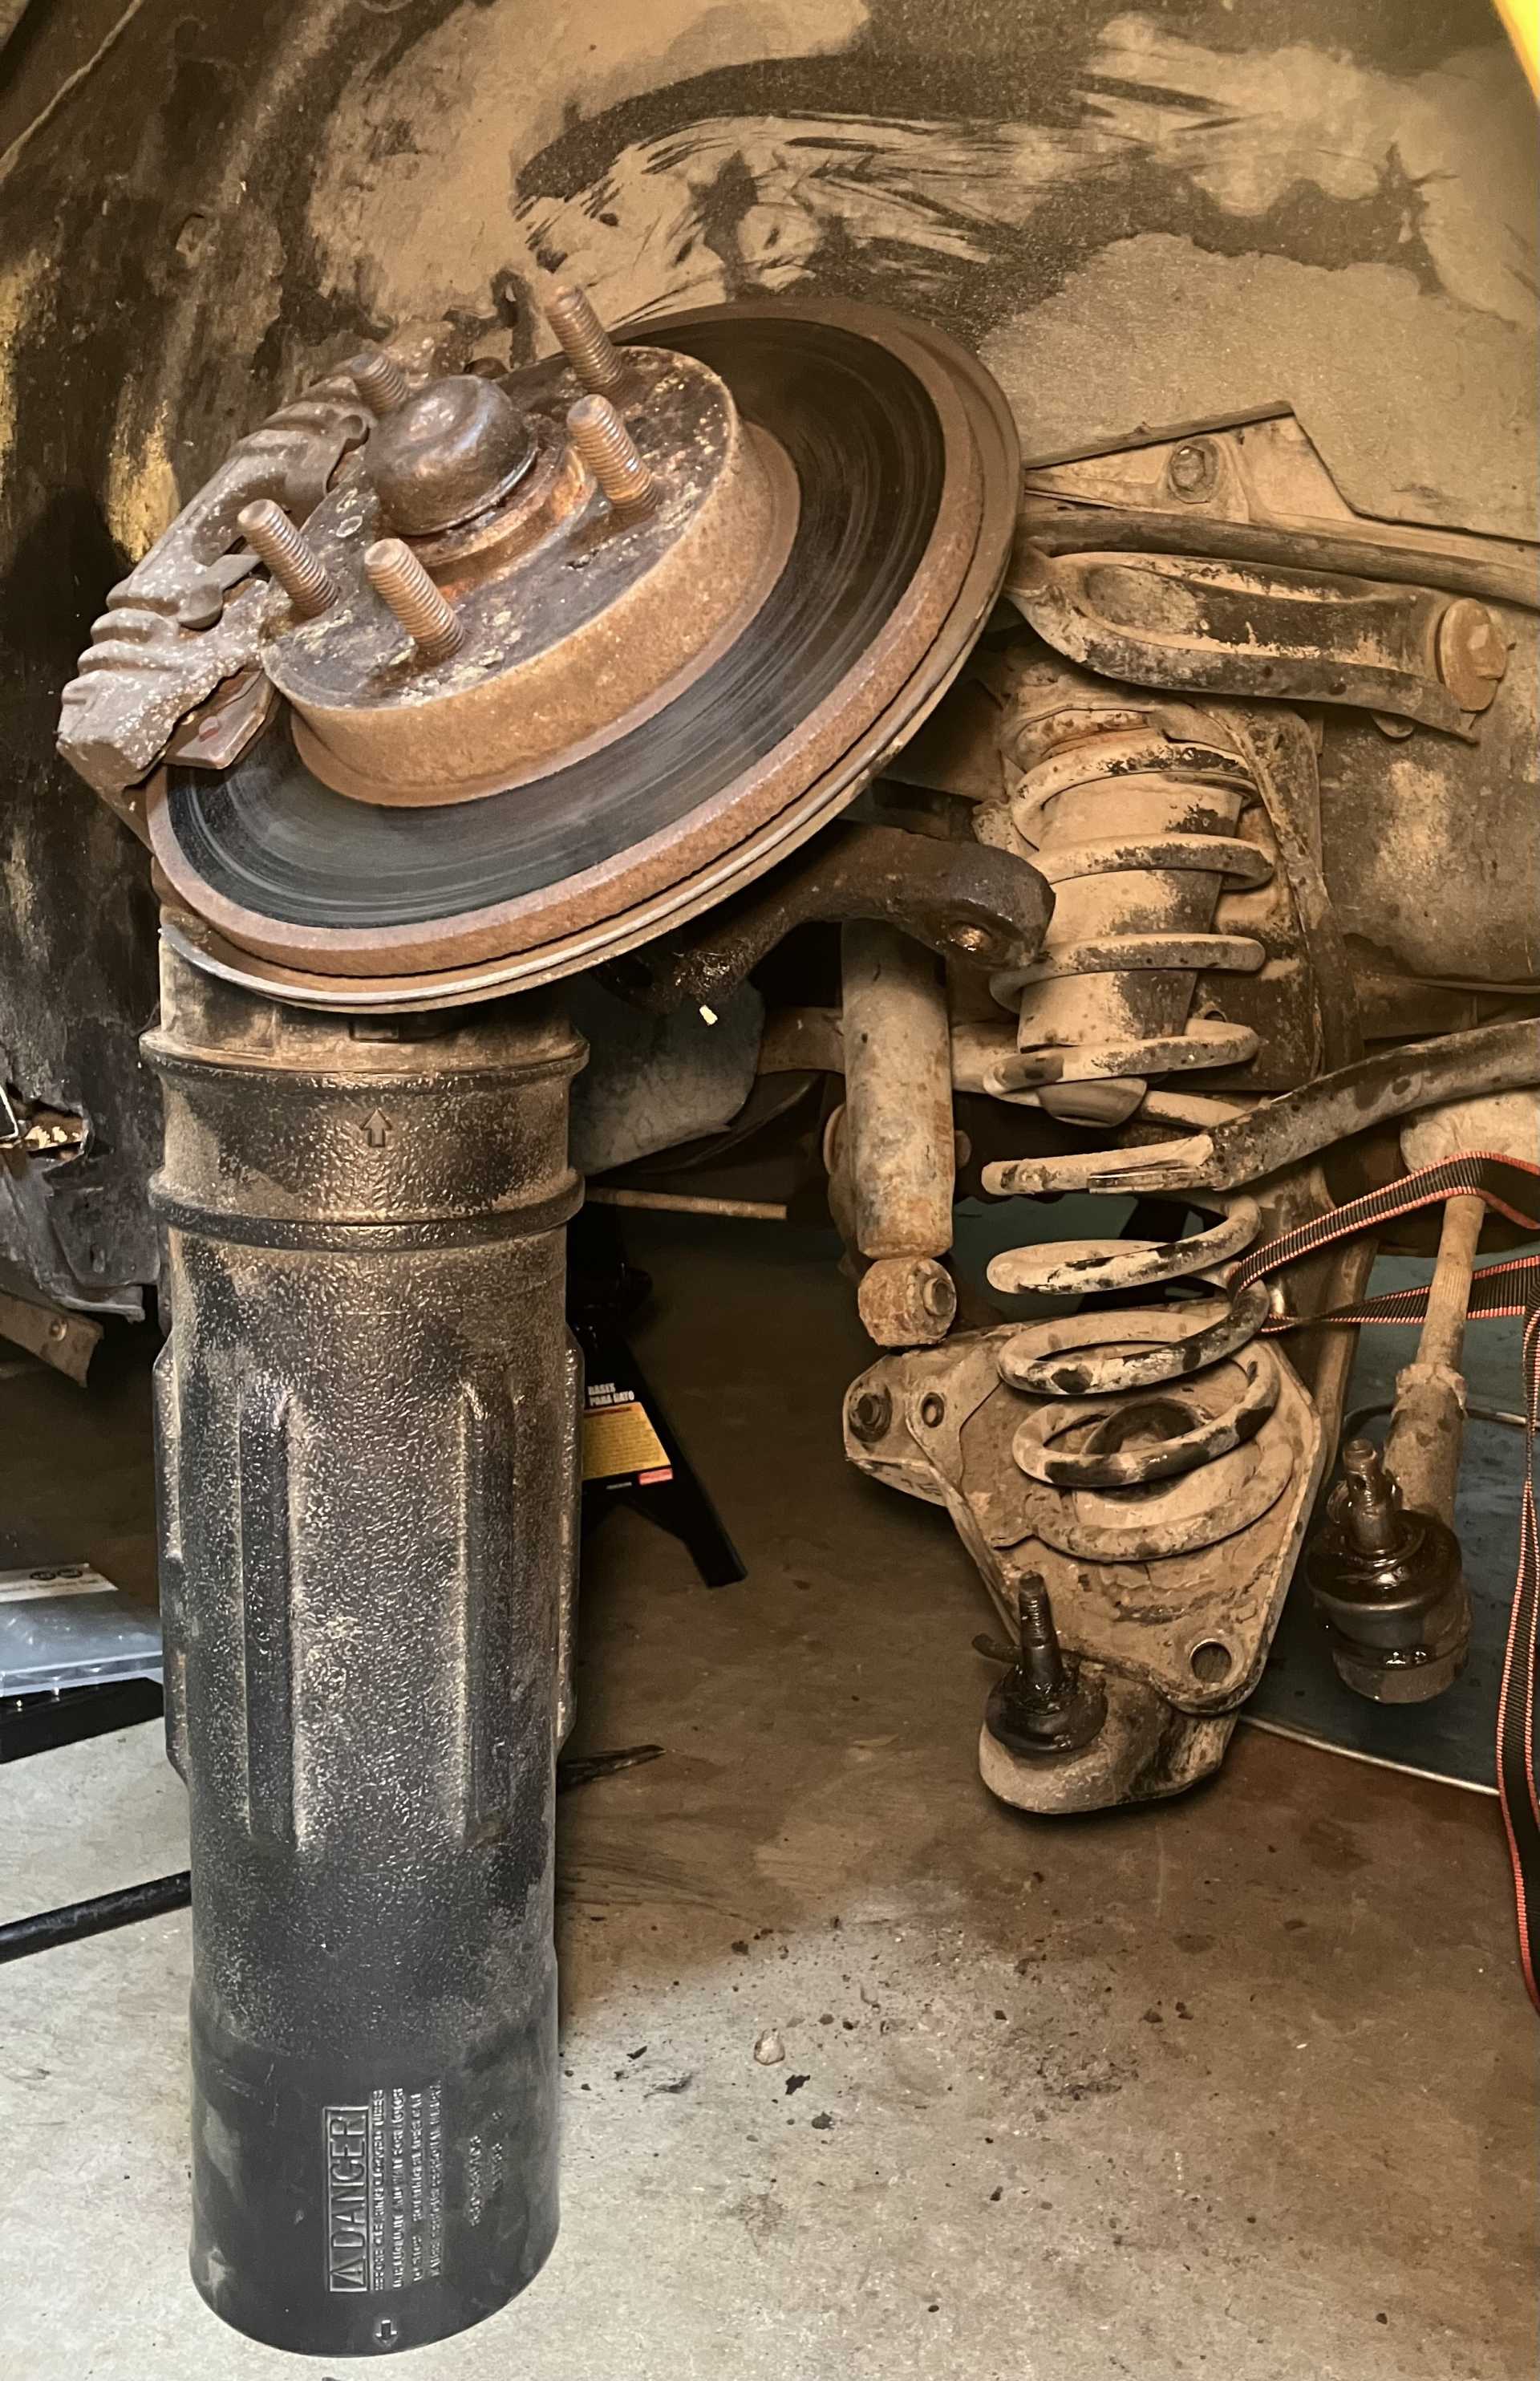
Thank you all for your response. I will look at these comments and use them towards this process. Enclosed are photos of the current status. I meant to mention earlier that prior to this posting, that I double tied the springs to the front member with two different ropesfor security when that moment comes when the springs pop out.


[This message has been edited by MERATIME (edited 05-10-2025).]

IP: Logged
Patrick
Member
Posts: 38467
From: Vancouver, British Columbia, Canada
Registered: Apr 99


Feedback score: (1)
Leave feedback


Total ratings: 465
Rate this member

Report this Post05-10-2025 03:33 PM Click Here to See the Profile for PatrickSend a Private Message to PatrickEdit/Delete MessageReply w/QuoteDirect Link to This Post

This is how my lower control arms were hanging when I popped the front springs out of my '84 years ago. I remember I had to pry the bottom of the springs up and over the centering hump in the LCA. I used a chain to prevent the springs from inflicting damage to my face.


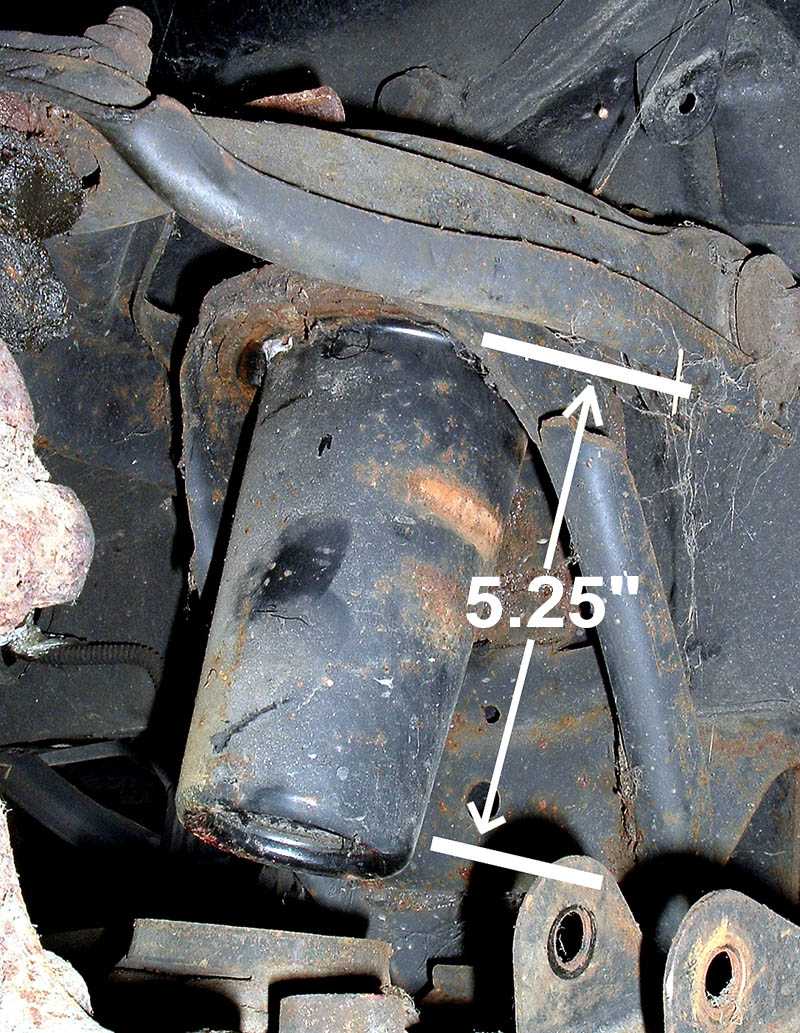
If you plan on installing lowering springs, I hope you're planning to shorten the metal "cones" which center the top of the springs. Otherwise, you'll be riding/bouncing off the bump stops. They need to be shortened from 5-1/4" to 4-1/2". (The rubber bump stop is missing in the photo below.)

IP: Logged
Vintage-Nut
Member
Posts: 1576
From: California
Registered: Apr 2020


Feedback score: N/A
Leave feedback

Rate this member

Report this Post05-10-2025 04:23 PM Click Here to See the Profile for Vintage-NutSend a Private Message to Vintage-NutEdit/Delete MessageReply w/QuoteDirect Link to This Post
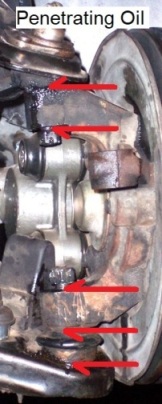
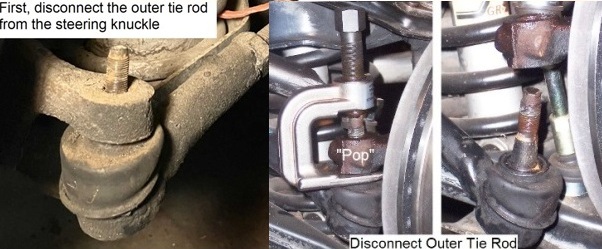
*If the job includes replacing the outer tie rods; first measure from the outer tie rod grease fitting to a fixed reference point on the steering rack on both the driver’s and passenger’s side. These references numbers are to set the toe alignment close as possible when changing out the outer tie rods. Then before disconnecting each outer tie rod from the steering knuckle; clean the inner tie rod threads and then loosen the jam nut.

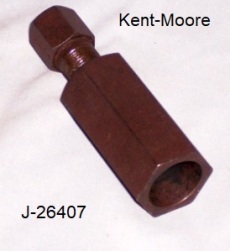
Don't be a caveman, use the proper tool which are listed in the service manual. Yeah, Kent Moore tools are 'big bucks' these days; but search equivalent "Tie Rod End Tools" like OEMTOOLS 25112 - $55


Support the lower control arms effectively under the coil springs on a firm surface

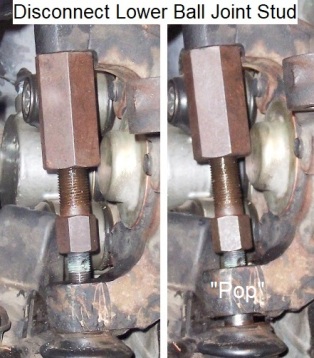
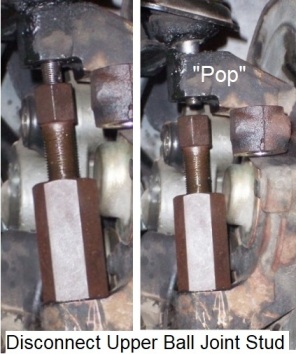
Ball joint studs are tapered into the knuckle boss...

Use Kent-Moore J-26407 tool {or equivalent} to "Pop" the ball joint studs from the tapered boss of the knuckle


With the knuckle from the car.......carefully and SLOWLY lower the control arm.....
IP: Logged
MERATIME
Member
Posts: 102
From: Arizona
Registered: Aug 2022


Feedback score: N/A
Leave feedback

Rate this member

Report this Post05-10-2025 06:12 PM Click Here to See the Profile for MERATIMESend a Private Message to MERATIMEEdit/Delete MessageReply w/QuoteDirect Link to This Post
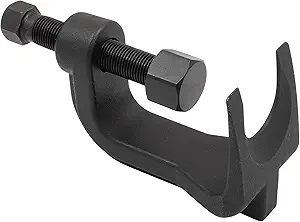
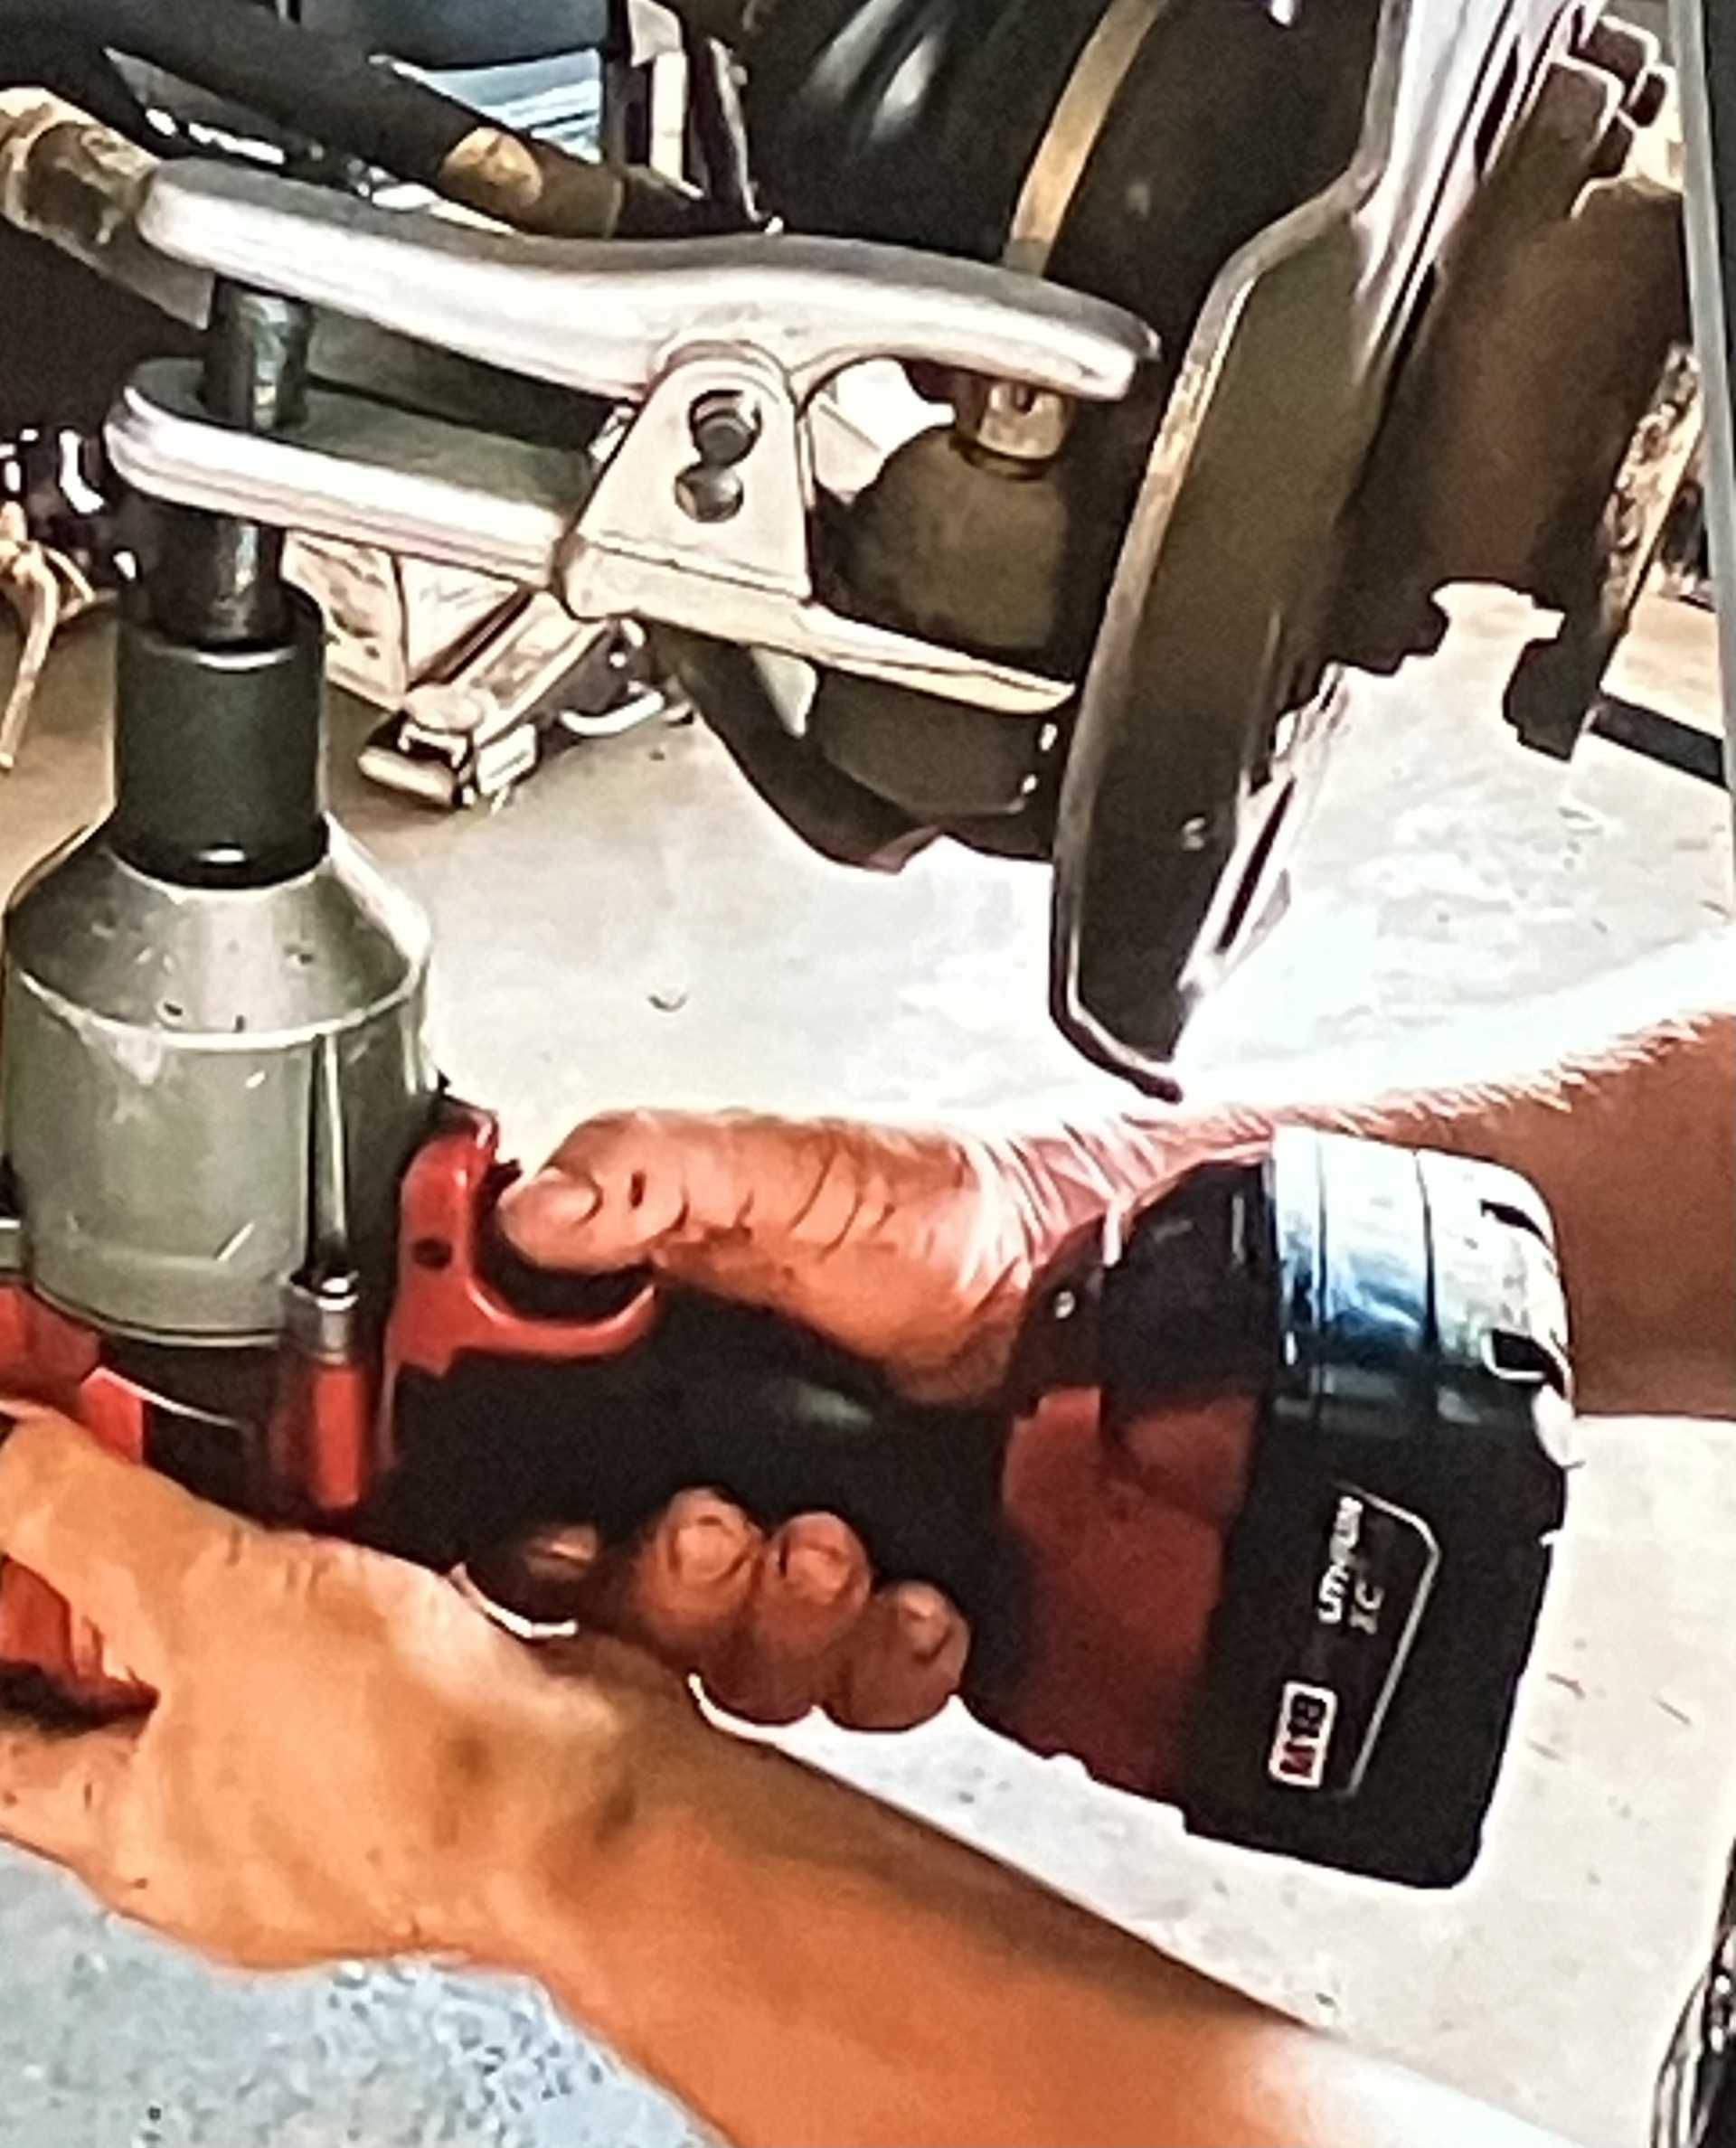
THANK YOU ALL …. For all your help After looking for availability on all the tools you all mentioned , I ended up using this one showing in the image below and it worked successfully Patrick. I cannot thank you enough for your photo and advice to hold up the rotor assembly. Here is a photo of what I did to temporarily remove the springs. I really appreciate all your help!


IP: Logged
MERATIME
Member
Posts: 102
From: Arizona
Registered: Aug 2022


Feedback score: N/A
Leave feedback

Rate this member

Report this Post05-10-2025 06:15 PM Click Here to See the Profile for MERATIMESend a Private Message to MERATIMEEdit/Delete MessageReply w/QuoteDirect Link to This Post

MERATIME

102 posts
Member since Aug 2022
Regarding the bump stop, the replacement springs are about an inch shorter than the OEM‘s. How much of the bump stop should I cut?
IP: Logged
Patrick
Member
Posts: 38467
From: Vancouver, British Columbia, Canada
Registered: Apr 99


Feedback score: (1)
Leave feedback


Total ratings: 465
Rate this member

Report this Post05-10-2025 06:27 PM Click Here to See the Profile for PatrickSend a Private Message to PatrickEdit/Delete MessageReply w/QuoteDirect Link to This Post
 
quote
Originally posted by MERATIME:

How much of the bump stop should I cut?


Remove a band of metal 3/4" wide from the "cones", and then weld them back together.

 
quote
Originally posted by Patrick:

They need to be shortened from 5-1/4" to 4-1/2".


There's some discussion Here about it.

[This message has been edited by Patrick (edited 05-10-2025).]

IP: Logged
PFF
System Bot

next newest topic | next oldest topic

All times are ET (US)

Post New Topic  Post A Reply
Hop to:

Contact Us | Back To Main Page

Advertizing on PFF | Fiero Parts Vendors
PFF Merchandise | Fiero Gallery
Real-Time Chat | Fiero Related Auctions on eBay


Copyright (c) 1999, C. Pennock