Pennock's Fiero Forum
  Technical Discussion & Questions
  Upgrading to Larger Windshield Washer Tank!

Post New Topic  Post A Reply
Email This Page to Someone! | Printable Version


next newest topic | next oldest topic
Upgrading to Larger Windshield Washer Tank! by 82-T/A [At Work]
Started on: 01-26-2025 01:54 PM
Replies: 5 (215 views)
Last post by: Spadesluck on 06-16-2025 03:01 PM
82-T/A [At Work]
Member
Posts: 25153
From: Florida USA
Registered: Aug 2002


Feedback score: (1)
Leave feedback


Total ratings: 202
Rate this member

Report this Post01-26-2025 01:54 PM Click Here to See the Profile for 82-T/A [At Work]Send a Private Message to 82-T/A [At Work]Edit/Delete MessageReply w/QuoteDirect Link to This Post
Hey guys, I bought a bunch of parts for my daughter's Fiero... and as she was taking apart the front-end yesterday, it hit me that the new washer tank I just bought is literally twice the size of the original one in her 85. I could return it or sell it, but I'm wondering how hard it would be to just upgrade to the larger one. It seems GM changed this perhaps in ~1986? as I know my 87 has the larger one.

Best I can figure thus far, the only impedance that I can see is that I would need to remove the lower stud (from the original washer bottle), and drill a hole in the tire jack retaining bracket for a bolt to go through.

Anyone else done this? Just don't want to cut off that lower stud unless I need to.
Thanks!!!
IP: Logged
PFF
System Bot
fierosound
Member
Posts: 15240
From: Calgary, Canada
Registered: Nov 1999


Feedback score: N/A
Leave feedback


Total ratings: 287
Rate this member

Report this Post01-26-2025 03:05 PM Click Here to See the Profile for fierosoundClick Here to visit fierosound's HomePageSend a Private Message to fierosoundEdit/Delete MessageReply w/QuoteDirect Link to This Post
I bought a new overflow tank and larger washer tank from Fiero Store for my 84 Indy.

It installed fine. I don't remember doing anything special.
But I also added a later model jack bracket and jack.

------------------
My World of Wheels Winners (Click on links below)

3.4L Supercharged 87 GT and Super Duty 4 Indy #163

IP: Logged
82-T/A [At Work]
Member
Posts: 25153
From: Florida USA
Registered: Aug 2002


Feedback score: (1)
Leave feedback


Total ratings: 202
Rate this member

Report this Post01-26-2025 05:10 PM Click Here to See the Profile for 82-T/A [At Work]Send a Private Message to 82-T/A [At Work]Edit/Delete MessageReply w/QuoteDirect Link to This Post
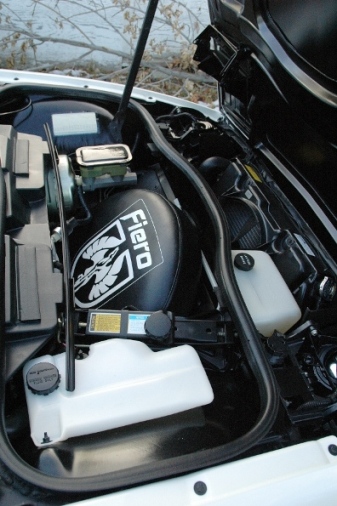
That's a really nice front compartment. I want my daughter to clean up the one in the front of her car the same way. Rodney Dickman doesn't sell those spare tire covers anymore either, which is kind of sad. I have one too that I got from Rodney... actually, it was the very first one that he ever officially sold. He sent it to me for like $25 bucks back in the 90s, and told me to give him feedback. Anyway, it appears as though he still had one left, which was the original prototype that he made, which I ended up buying from him in his "second chance" section. It has all the measurements and stuff written in sharpy on the inside, but no logo. I seriously just got distracted, haha... I looked it up and the product has changed hands twice from Rodney, and now they're being made at Fiero Interiors: http://www.fierointeriors.com/fiero-products.html

... only thing is, they're not allowed to use the Fiero logo anymore. I know that Mr. Mike was also given a cease and desist order... so now he'll only sew on the original Fiero logo if you take it from another (older) seat.


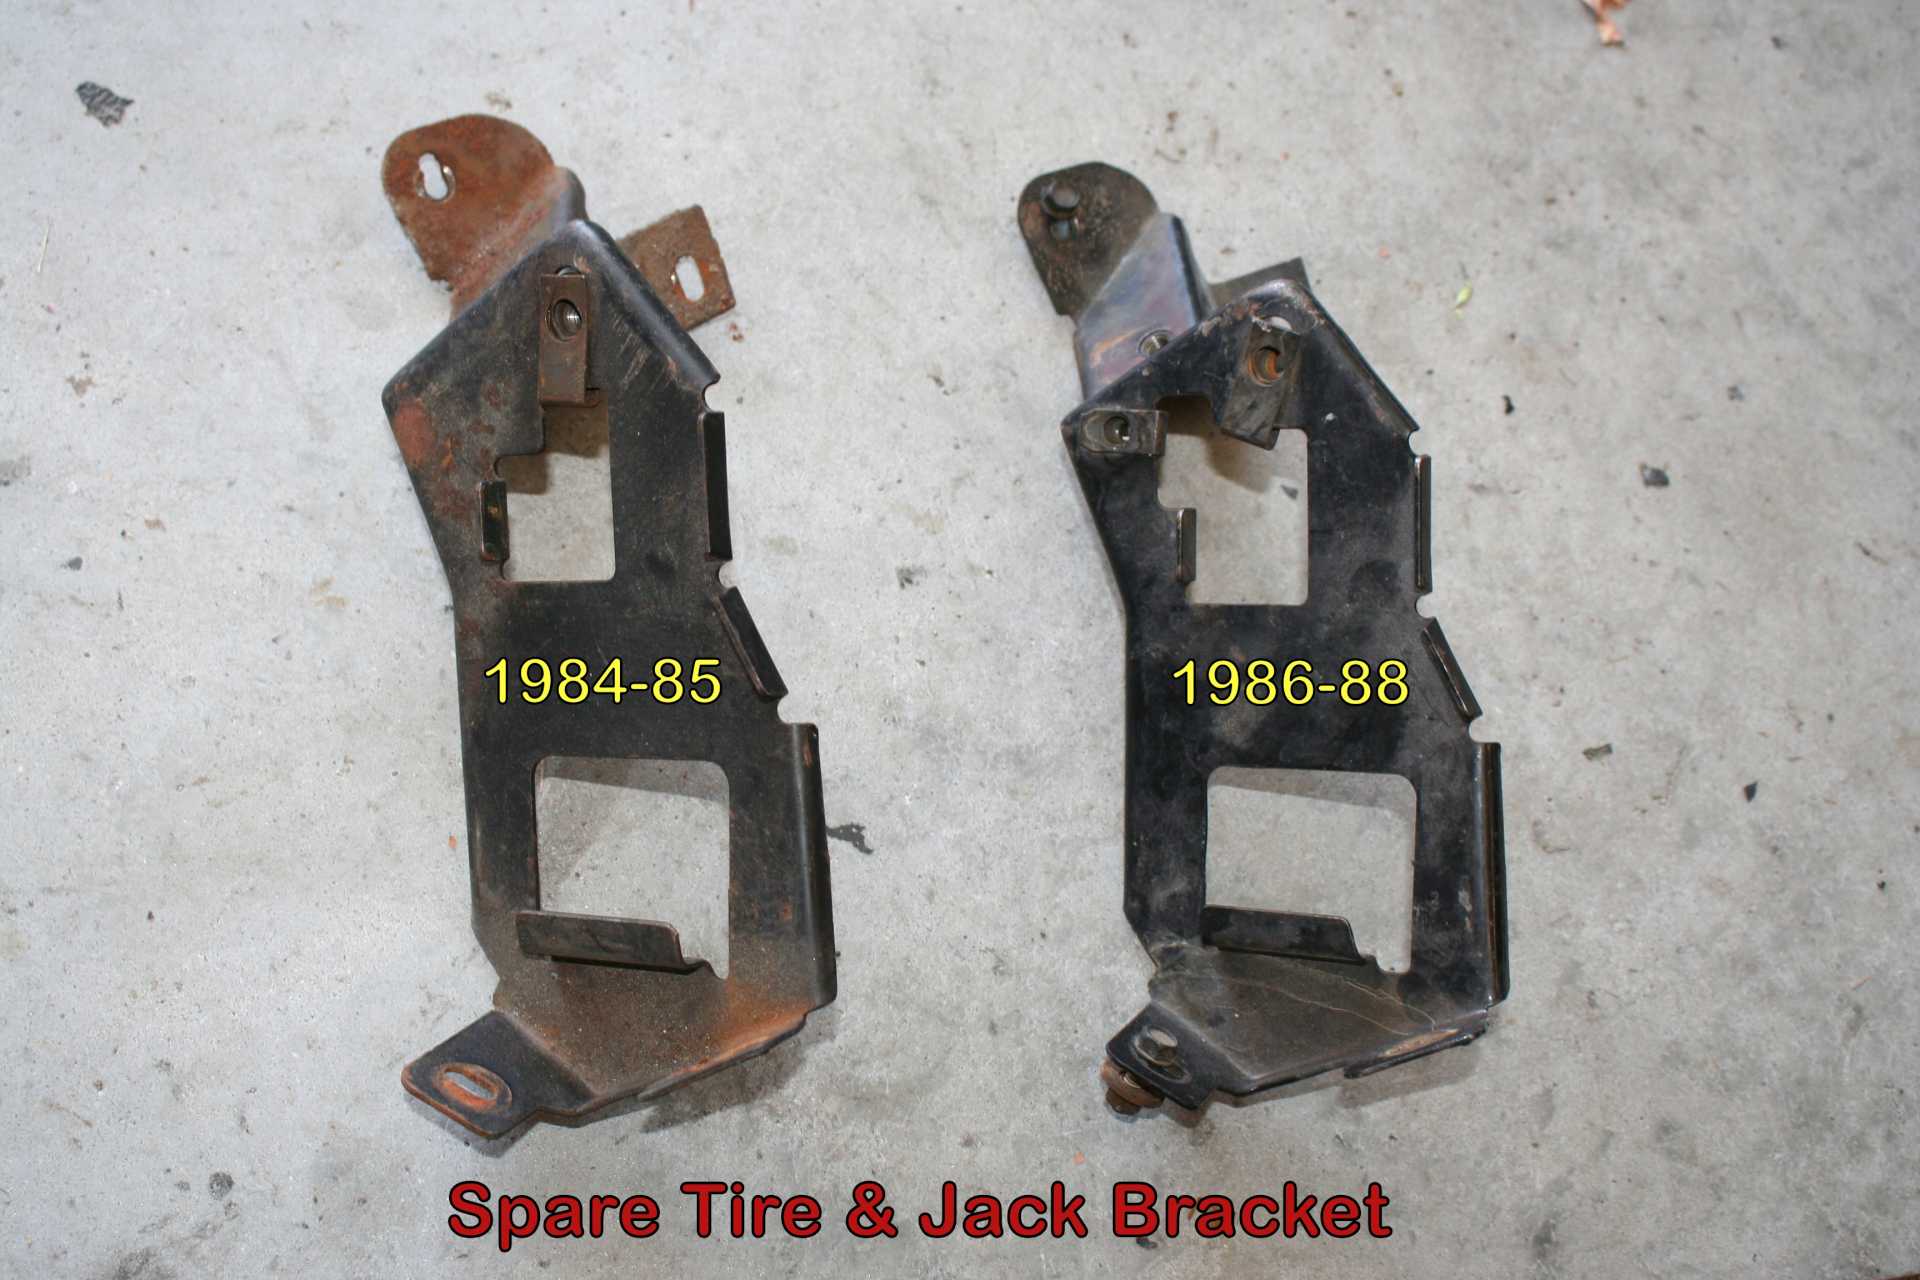
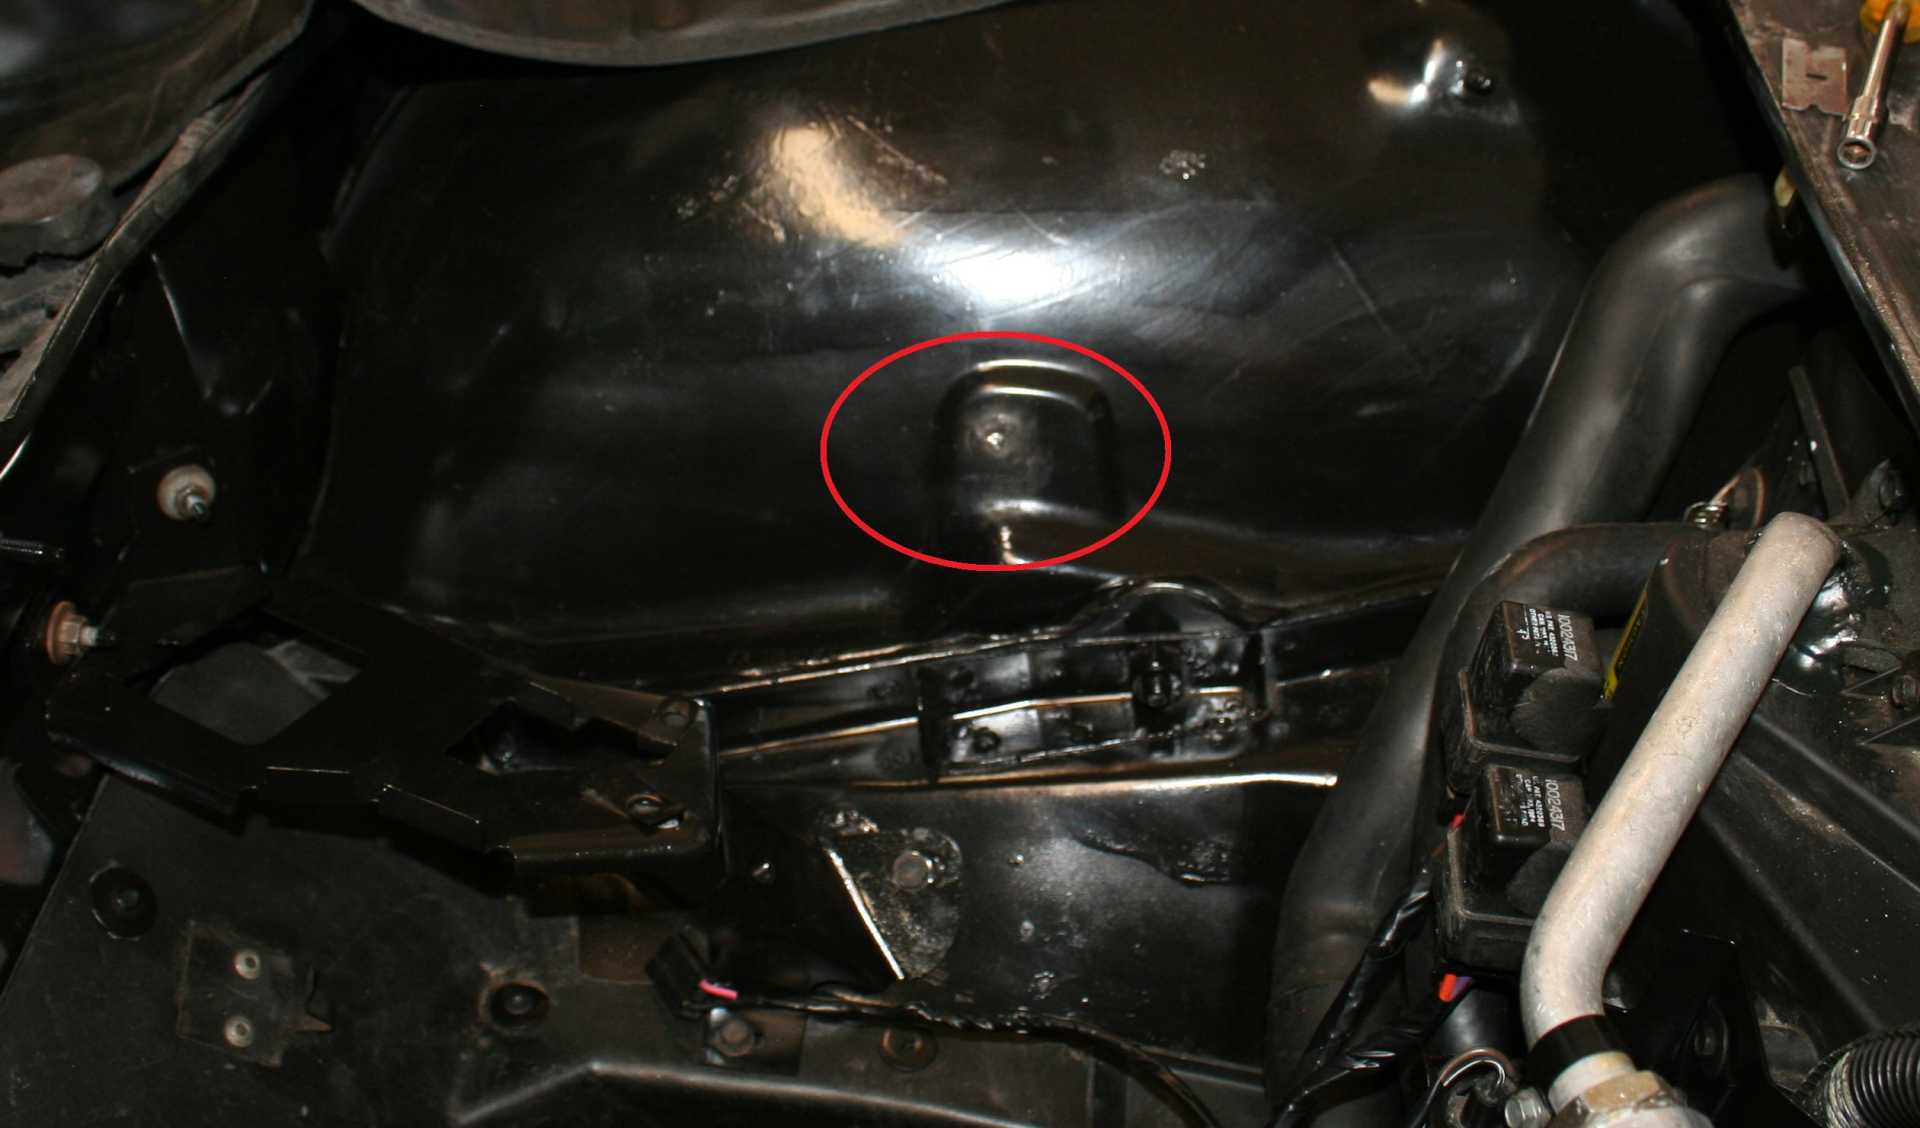
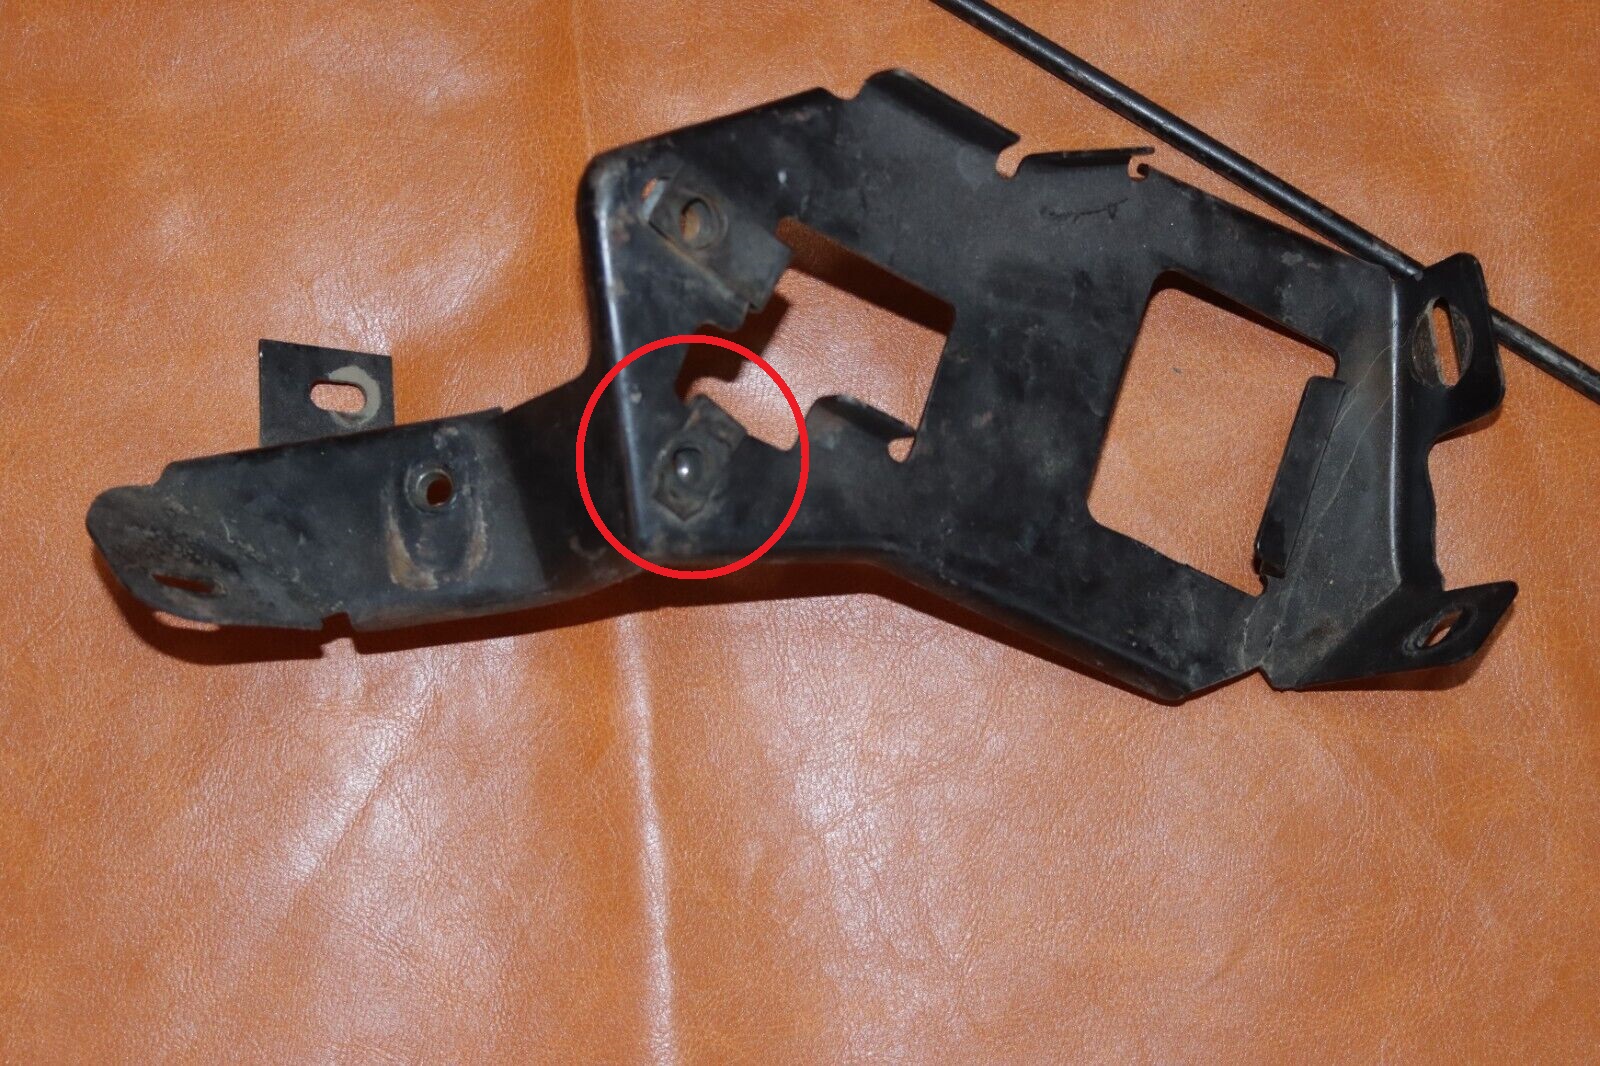
Anyway, back on the topic... I just looked on eBay and found a jack mounting bracket. Turns out they're basicaly identical from 1985-1988. It was a 1-year only design for 1984 for some reason, but they changed it in 1985. I'll take pictures of the one my daughter took off later (and compare them), but the one I just bought on eBay looks like this (below). The ONLY difference between hers and the one I just bought, is a little cut-out and the hole drilled (with the slip-on nut). I circled it in red... otherwise, they're totally they're identical. So she can re-use her old jack, and literally just replace this bracket.


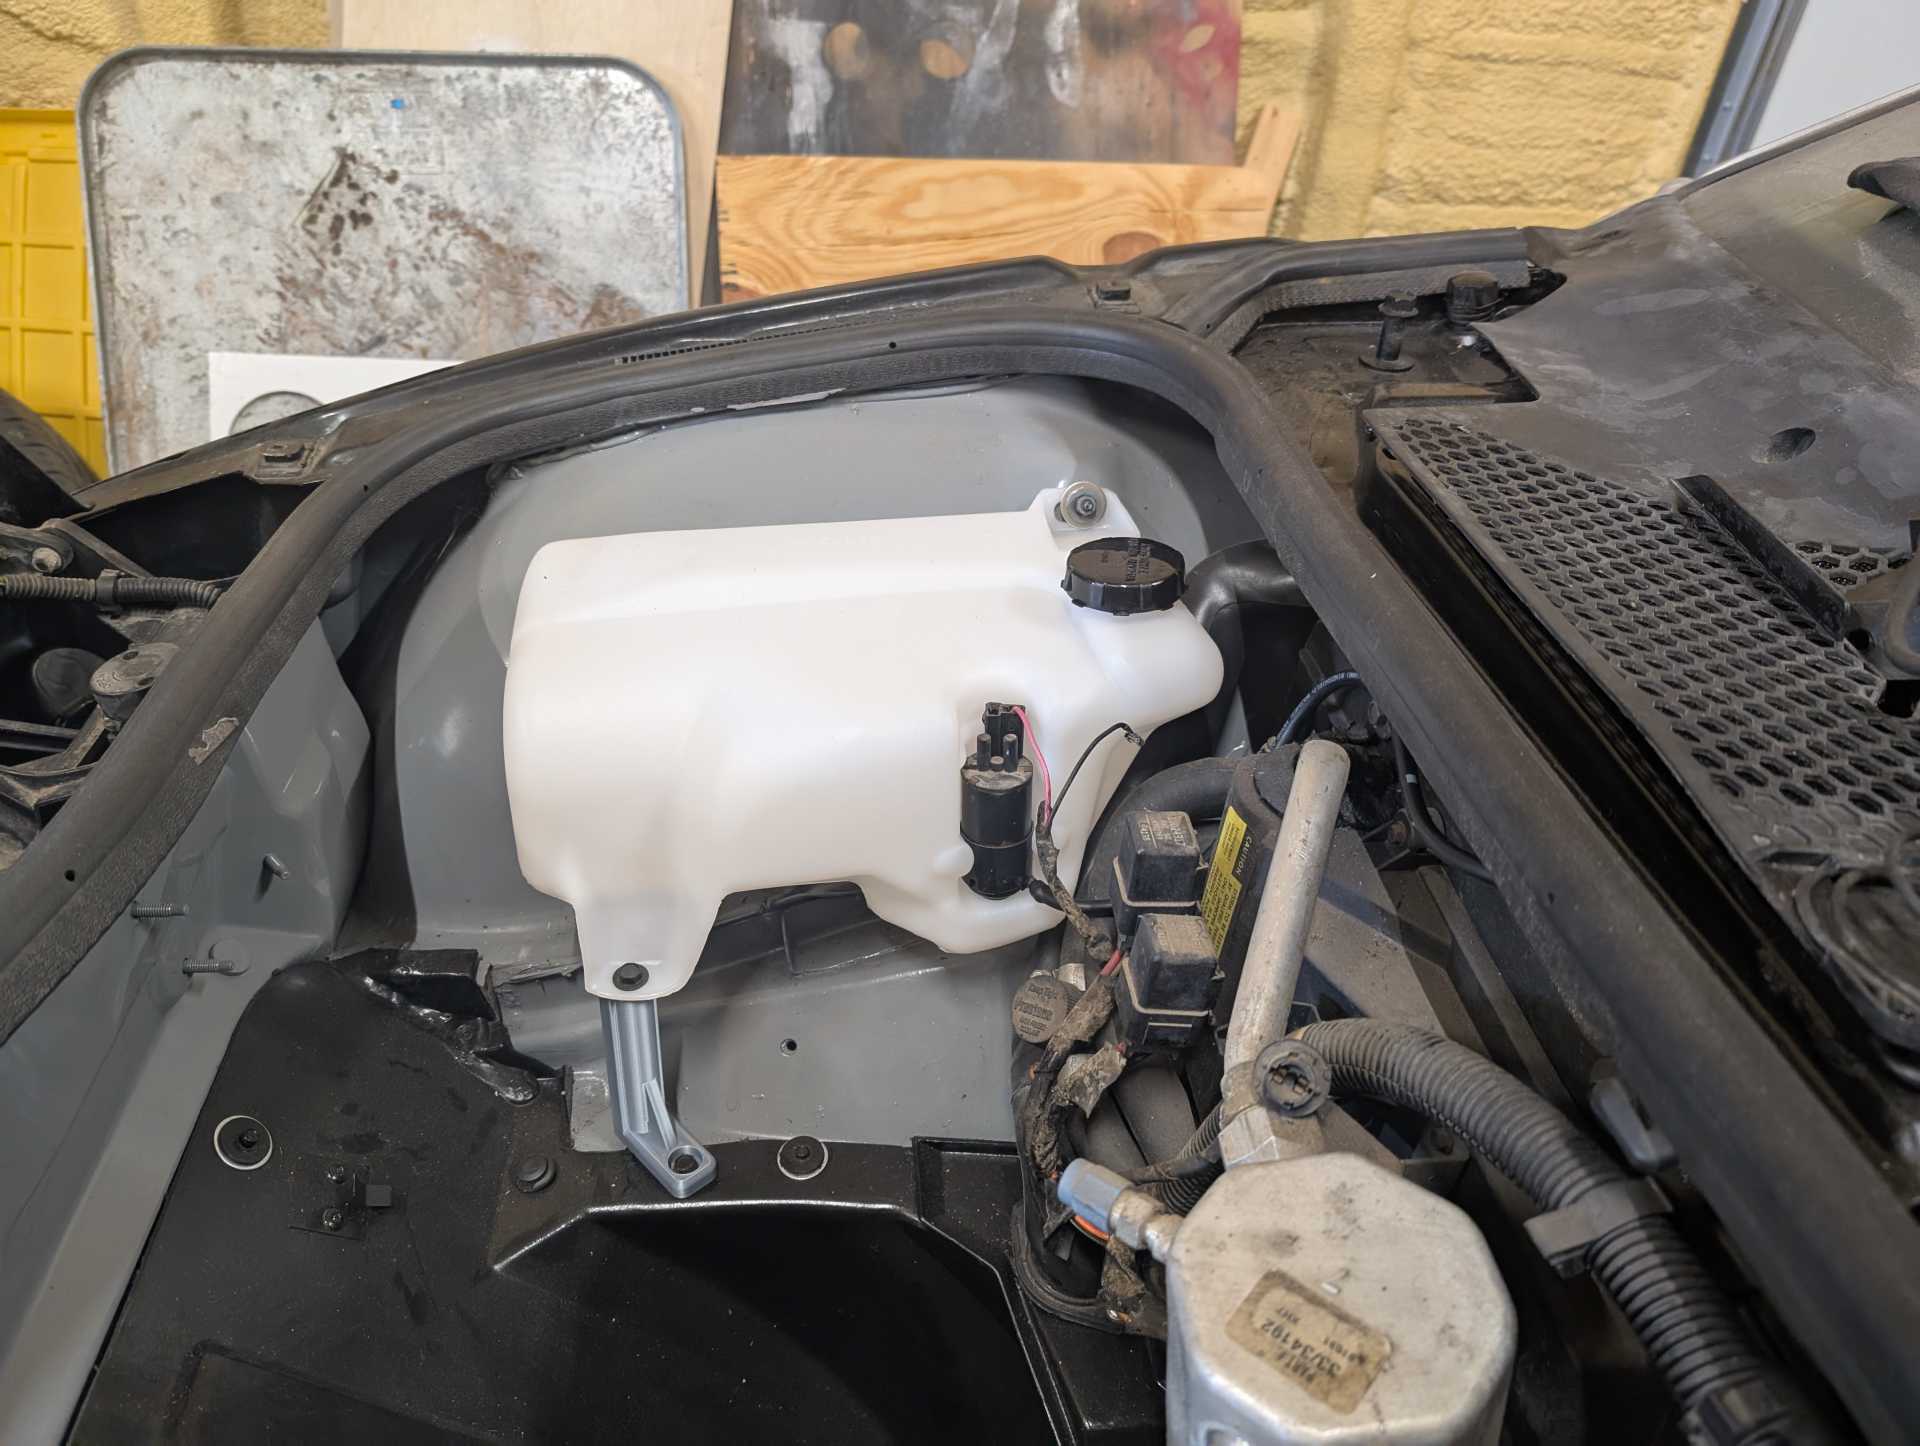
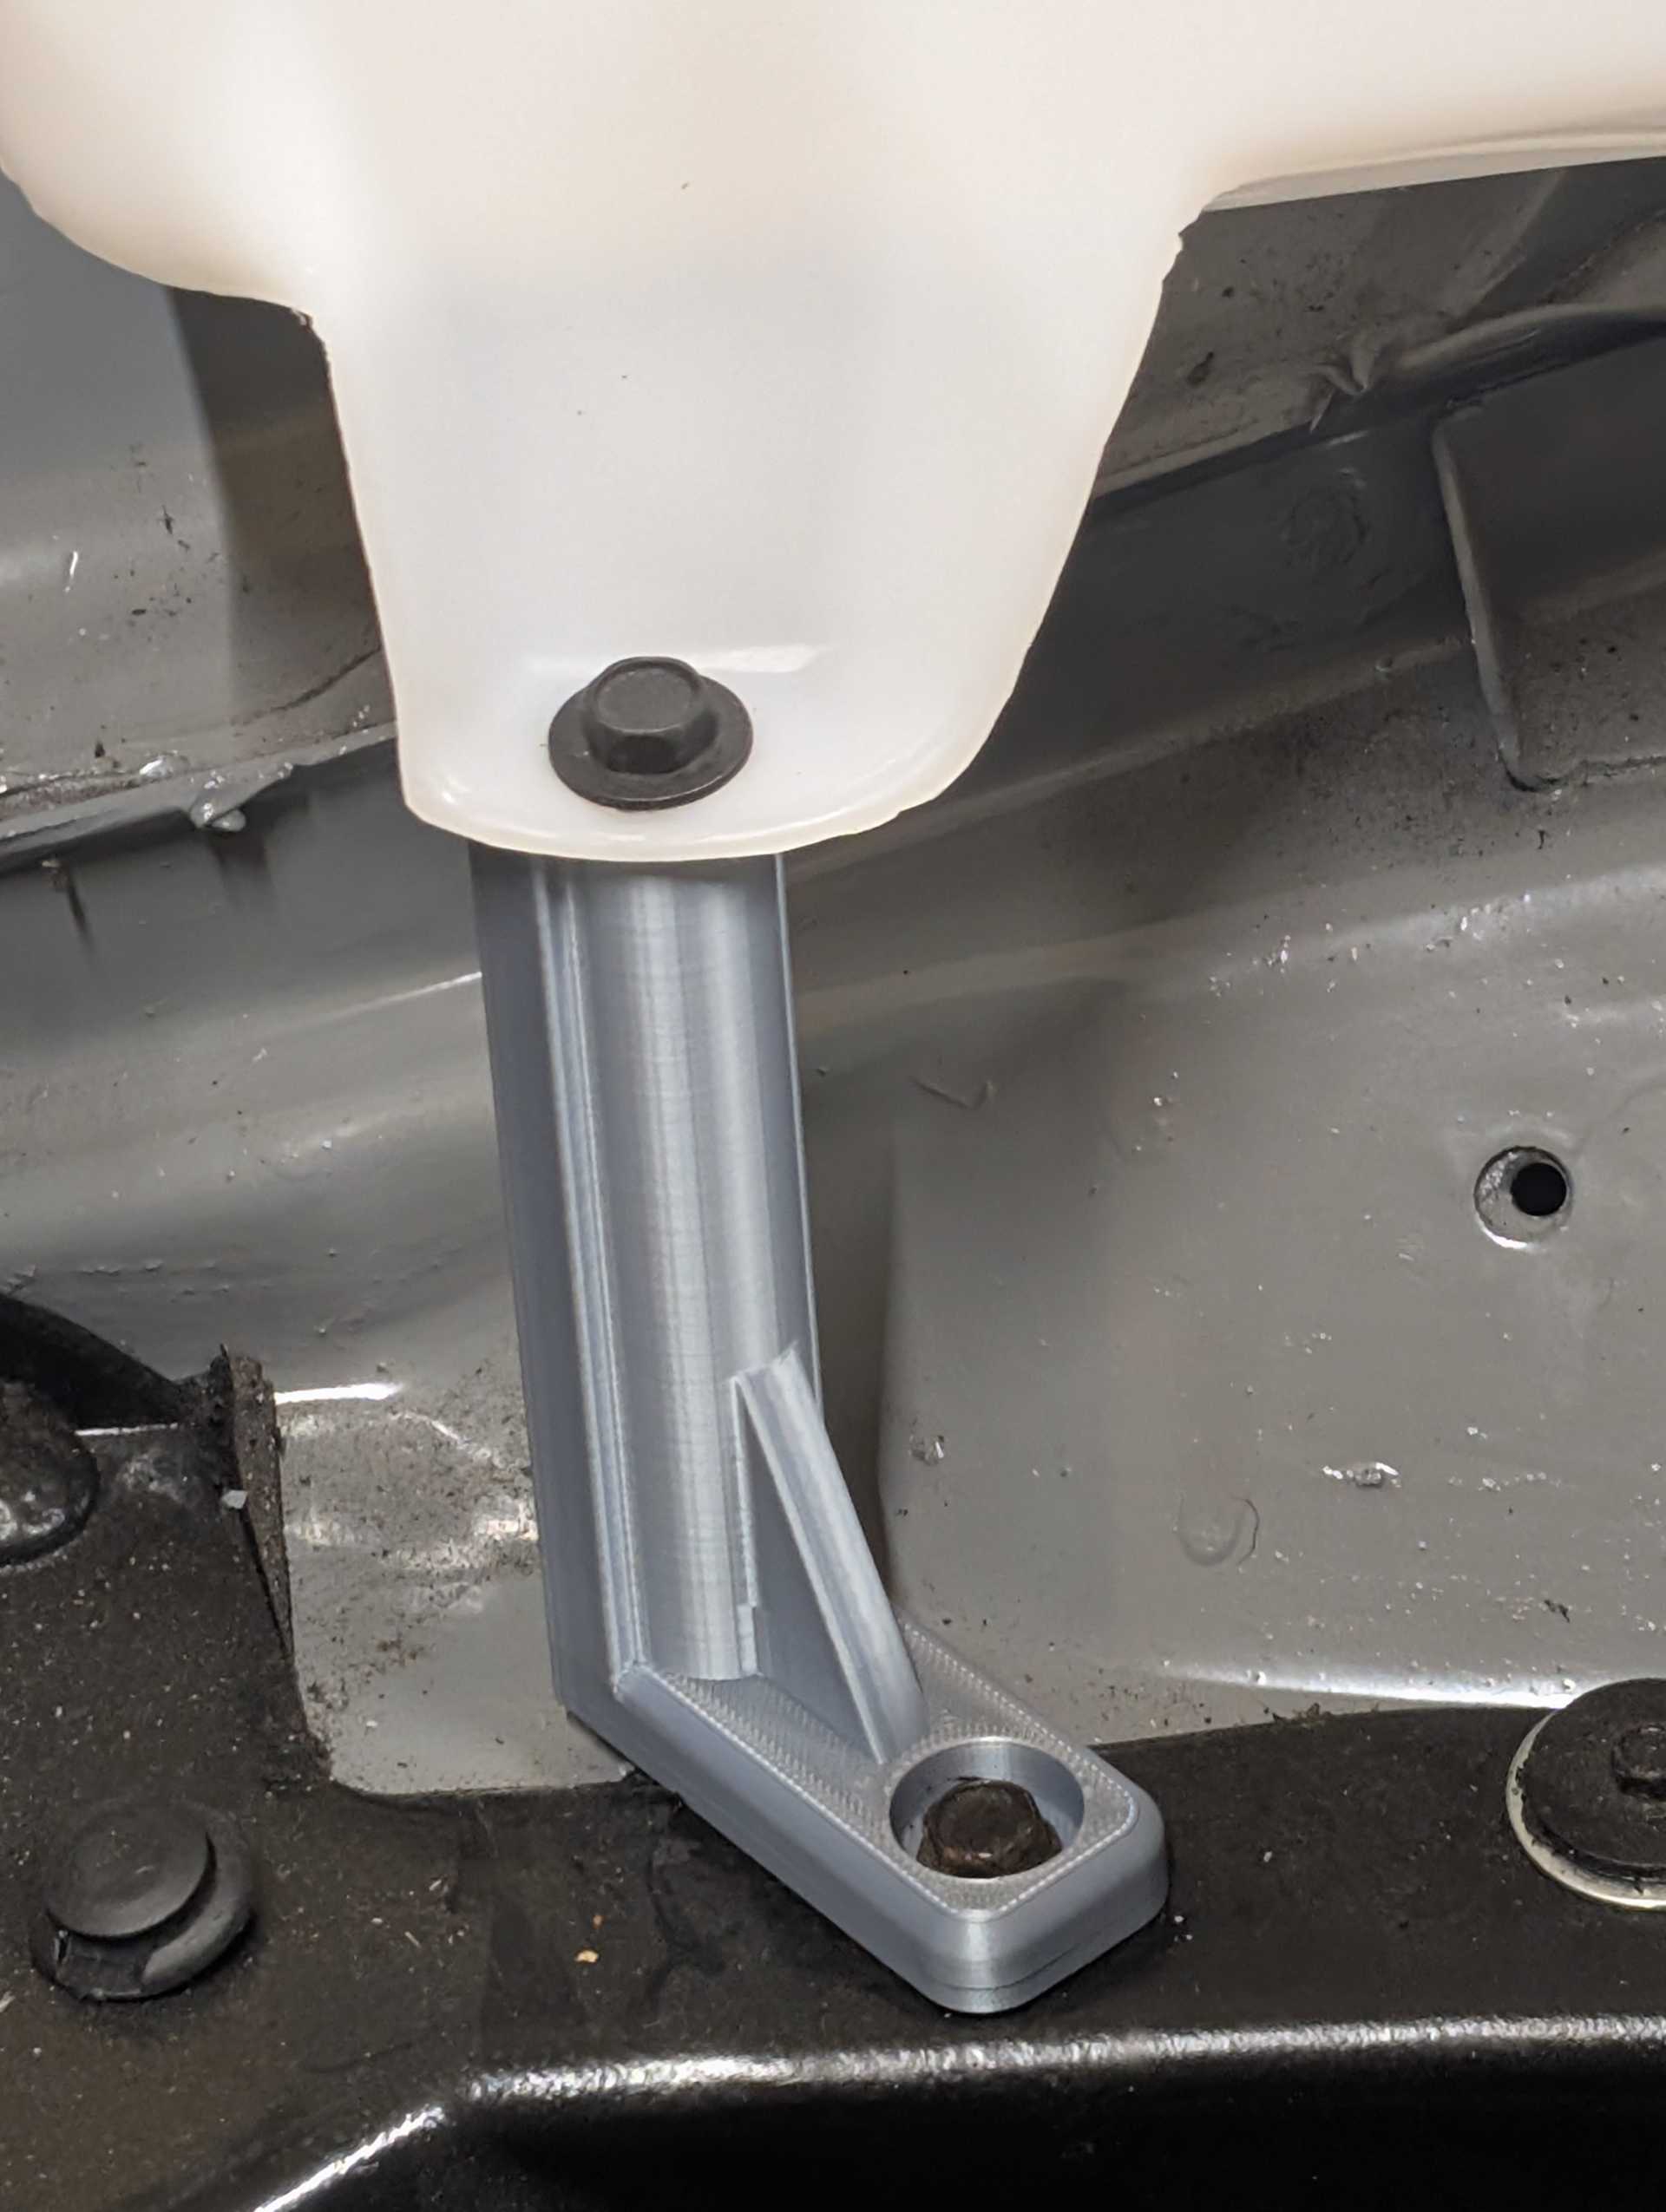
There's still a stud that comes out of the firewall where the lower part of the coolant bottle would attach to. It appeared as though it might have clearance issues with the big tank, but I'll have to see when she gets the new bracket back in.
IP: Logged
82-T/A [At Work]
Member
Posts: 25153
From: Florida USA
Registered: Aug 2002


Feedback score: (1)
Leave feedback


Total ratings: 202
Rate this member

Report this Post03-03-2025 03:30 PM Click Here to See the Profile for 82-T/A [At Work]Send a Private Message to 82-T/A [At Work]Edit/Delete MessageReply w/QuoteDirect Link to This Post
Just wanted to update this, since we're finishing up the front compartment... as FieroSound said... it does require you to replace the jack bracket... or to be honest, you could just drill a hole in the one that already exists.

We bought a replacement one, since the one that was in there had some pitting and rust on the bracket, and there was one on eBay that was nearly perfect (which we ultimately just painted)... here are the two side by side:


And there's one stud, the lower stud that the original (smaller) washer tank attached to. It needs to be ground down or removed as it will interfere with the tank. You could hammer it down and bend it down, and then it would fit... but I figured I'd just cut it (circled in red). This is before we painted back over it after she ground it off. If not removed, it rubs against the bottom of the tank and would likely eventually wear through the tank.


IP: Logged
fierojcr84
Junior Member
Posts: 2
From: Tennesse
Registered: Feb 2021


Feedback score: N/A
Leave feedback

Rate this member

Report this Post06-16-2025 12:51 PM Click Here to See the Profile for fierojcr84Send a Private Message to fierojcr84Edit/Delete MessageReply w/QuoteDirect Link to This Post
I wanted to share what I did to upgrade to the larger Windshield washer tank found from the Fiero Store. Like the other users I removed the lower welded mounting screw and created a new 3D generated mount as shown in the pictures below.


The following shows wow this new part utilizes the existing lower mounting home and also utilizes an existing screw mount found on the front tub.


IP: Logged
Spadesluck
Member
Posts: 2174
From: Georgia
Registered: Jul 2016


Feedback score:    (8)
Leave feedback

Rate this member

Report this Post06-16-2025 03:01 PM Click Here to See the Profile for SpadesluckSend a Private Message to SpadesluckEdit/Delete MessageReply w/QuoteDirect Link to This Post
fierojcr84, very nice. Good way to make use of a 3d printer. I at some point will be doing something similar but with metal. Figured I am a welder, might as well use the tools.
IP: Logged

next newest topic | next oldest topic

All times are ET (US)

Post New Topic  Post A Reply
Hop to:

Contact Us | Back To Main Page

Advertizing on PFF | Fiero Parts Vendors
PFF Merchandise | Fiero Gallery
Real-Time Chat | Fiero Related Auctions on eBay


Copyright (c) 1999, C. Pennock