I decided it would be a fun little project to show off (and vent) about all the steps, mistakes, wins, and losses of my first engine swap. I've already made some decent headway on the swap, and have gaps of times where no vids/pictures were taken to show for it unfortunately. The victim I have chosen for this swap is my first Fiero. I had the car for about a year, and during that time have touched every corner of the car except the engine with this being the light at the end of the tunnel.
Going way back to my acquisition of a (hopefully) suitable engine for this swap. It was a ~2000 round trip to get a parts car, with a partially done swap along with a couple of other goodies for the swap. Including a 70 something mm hot side turbo
Then the parts car and motor sat until spring time
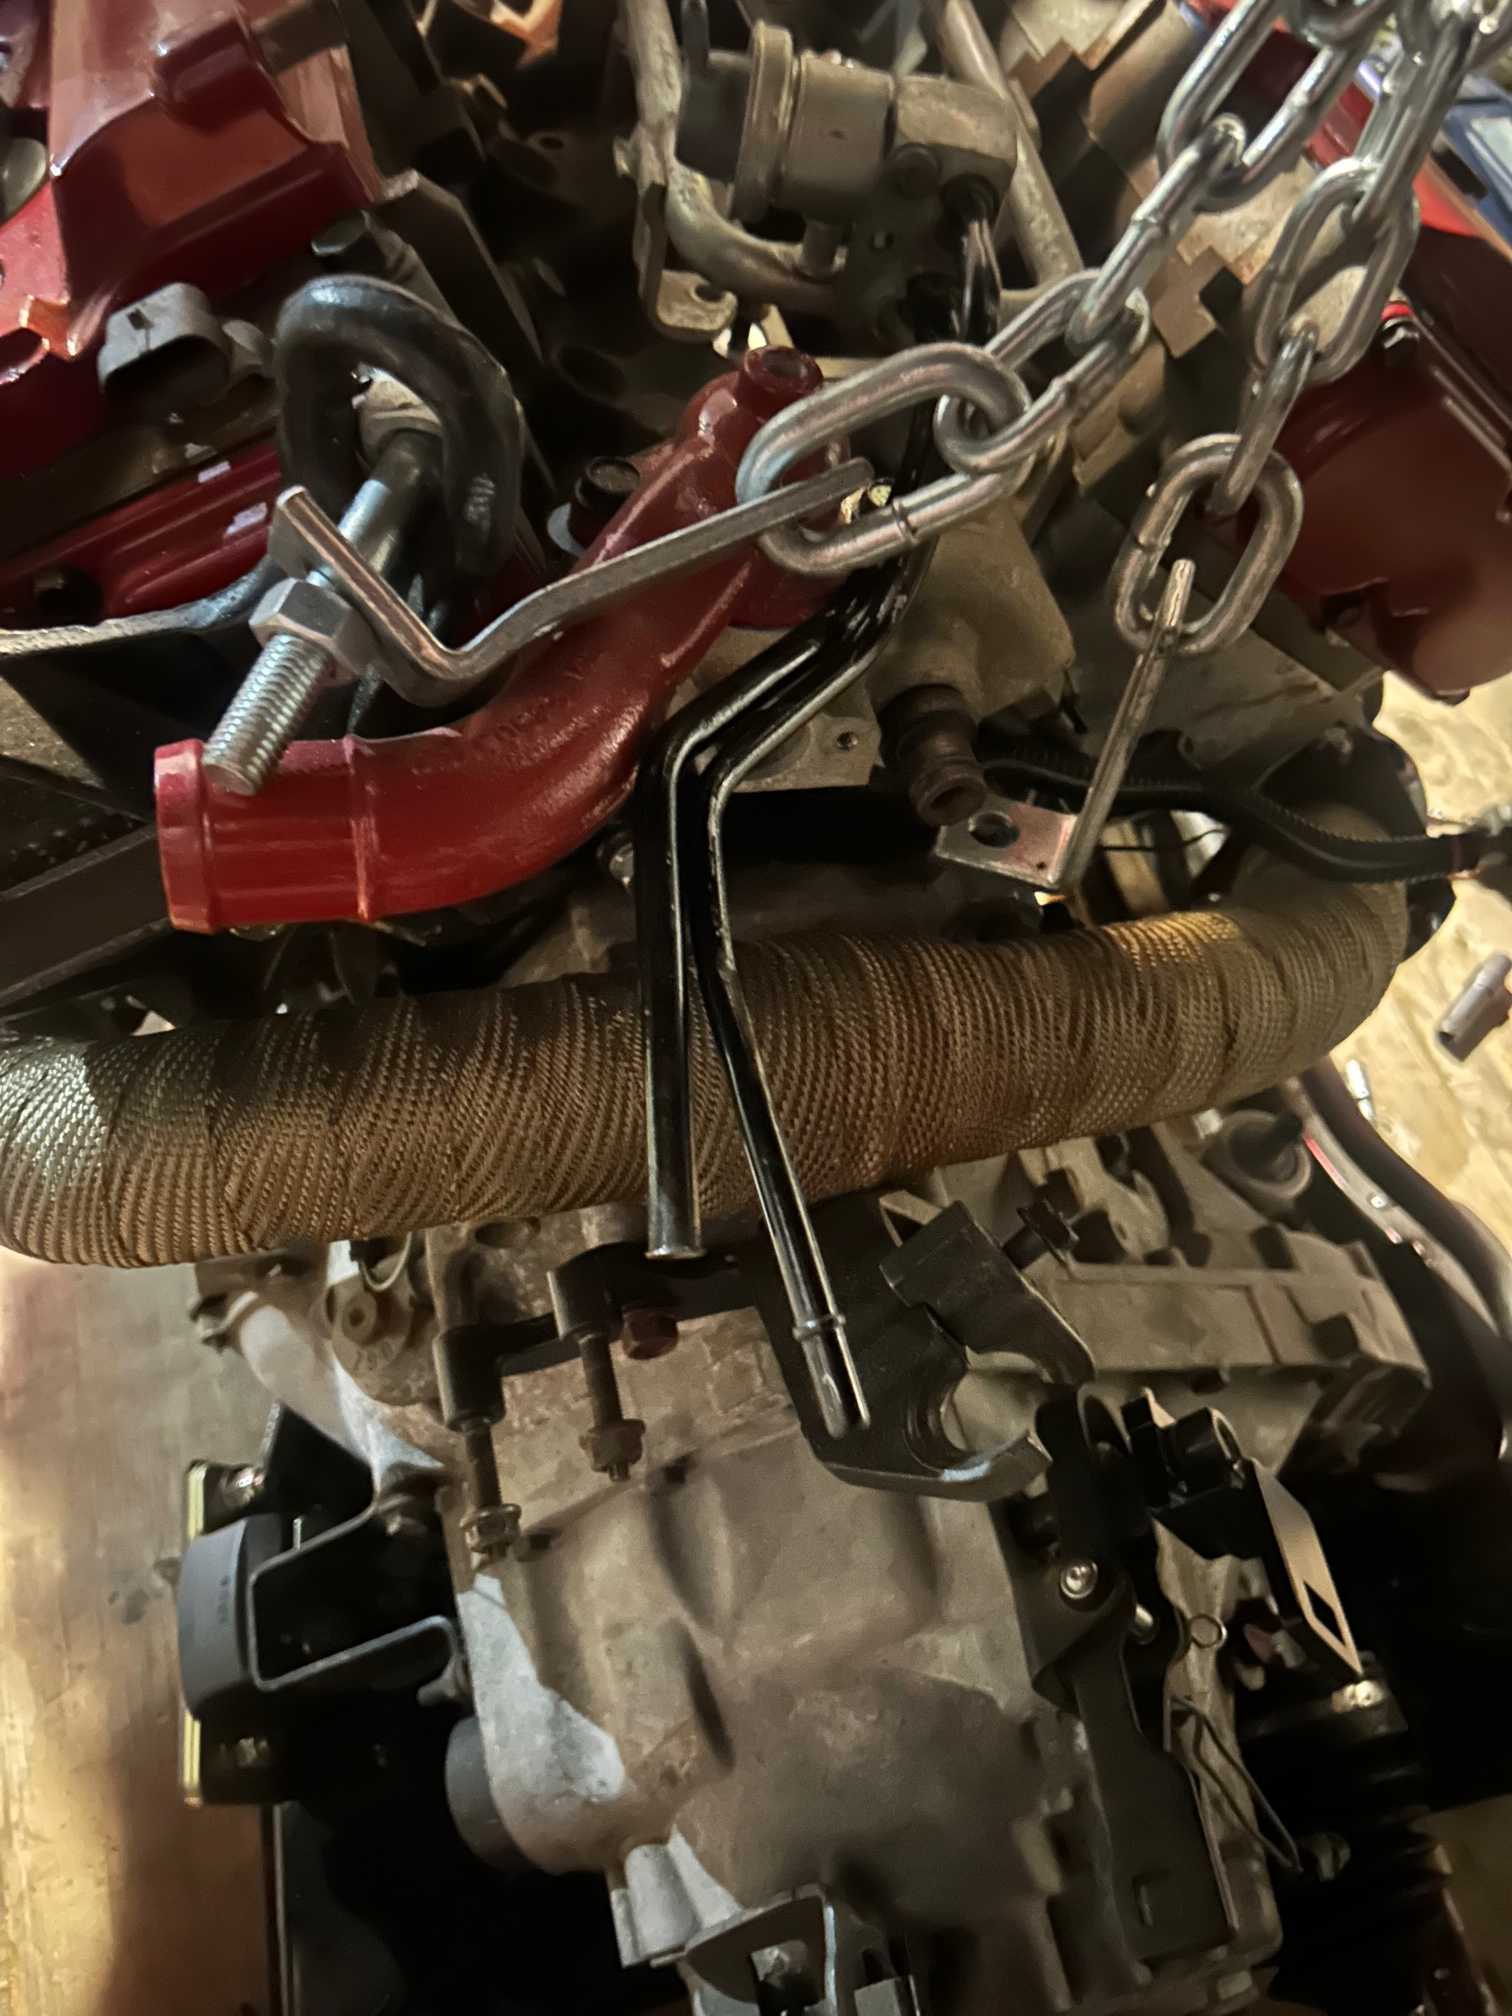
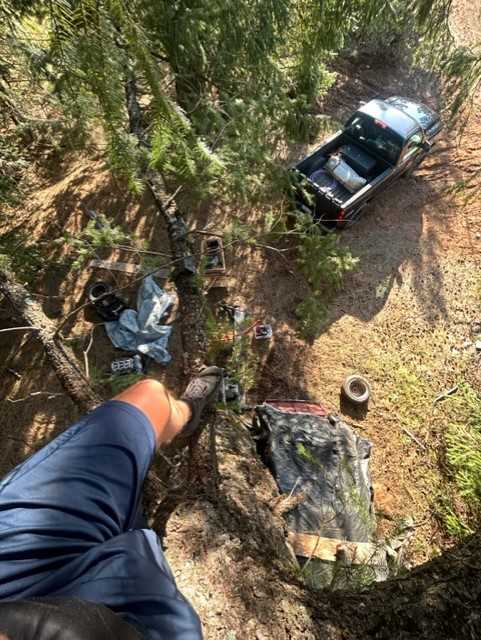
I wish I had more photos of me actually pulling the partially done swap, but I was exited and trying to finish before the sun went down. Using a hobo freight chain hoist, a couple different tree branches, and my truck with a tow strap; I was able to get the motor pulled in a little under an hour
I bought a....home brew....powder coating set up and started cleansing everything up topside
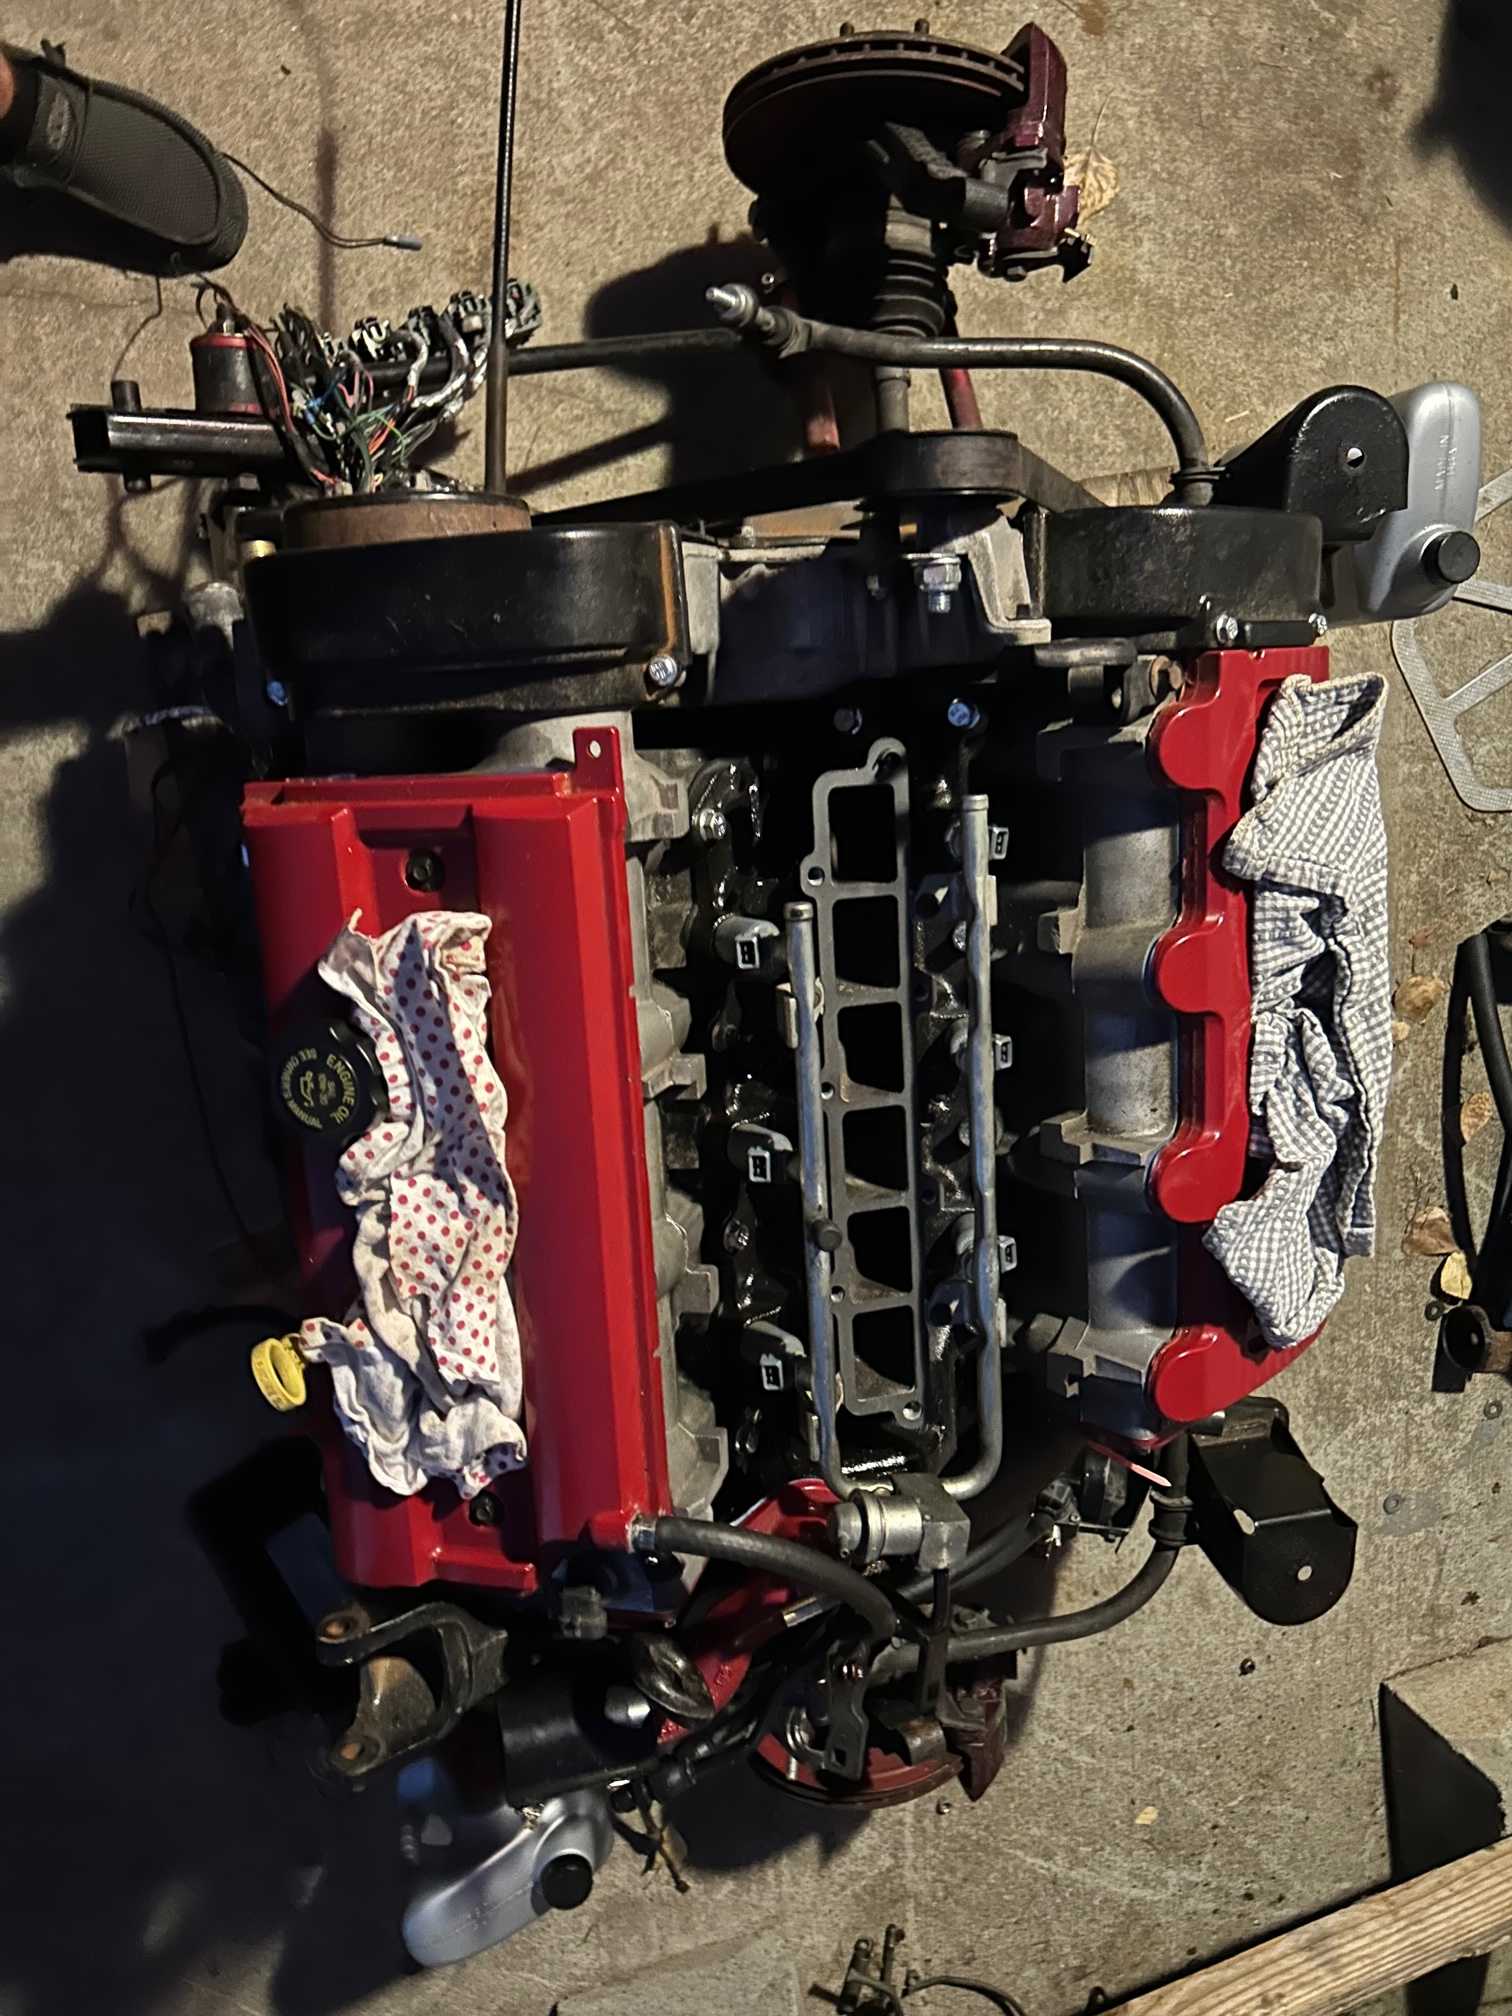
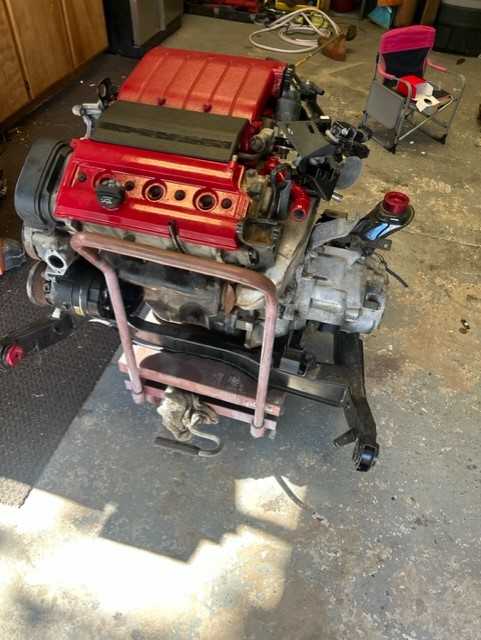
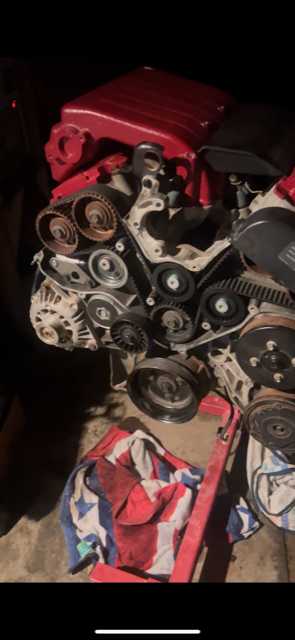
Got the engine onto a stand and started going to work, first of was timing belt/idlers. This went pretty smooth, it took my a minute to figure out how to reset the tensioner since NOS ones are made of unobtanium. But other than that it was a pretty strait forward process
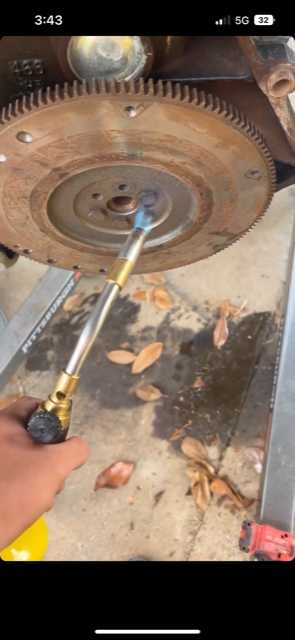
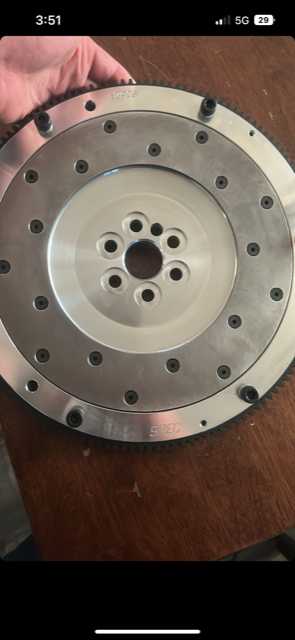
Next was pulling the old flywheel (with a broken stud in it) and putting on a shiny new Spec lightweight one
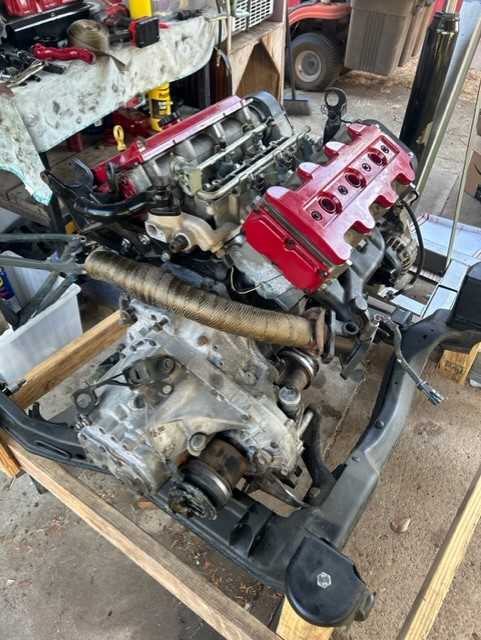
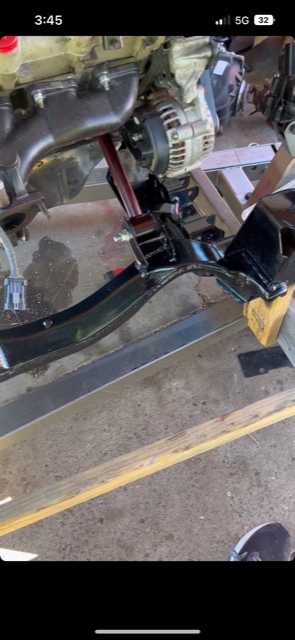
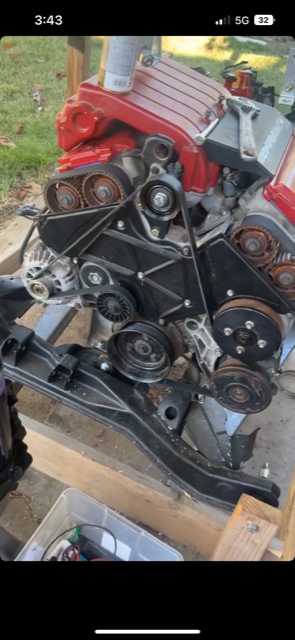
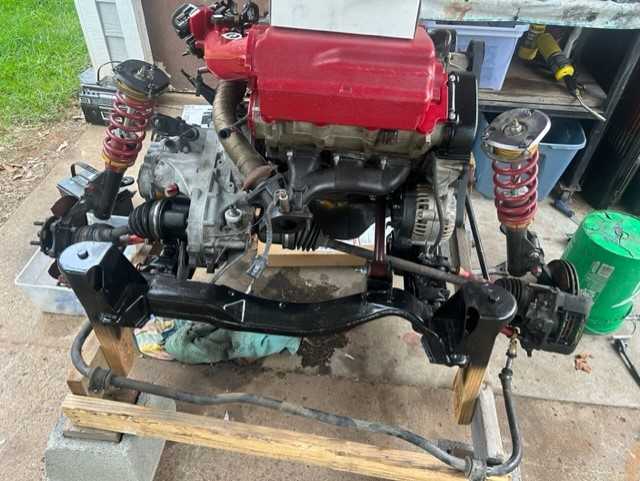
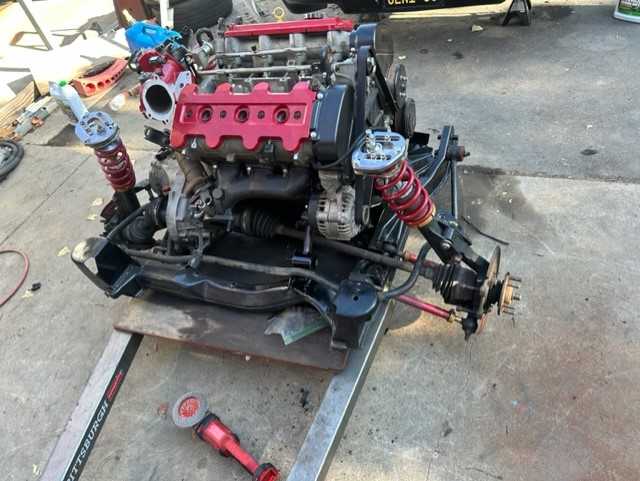
After that the engine got mated to a Getrag 282 and onto a 88 cradle that i will be working from.
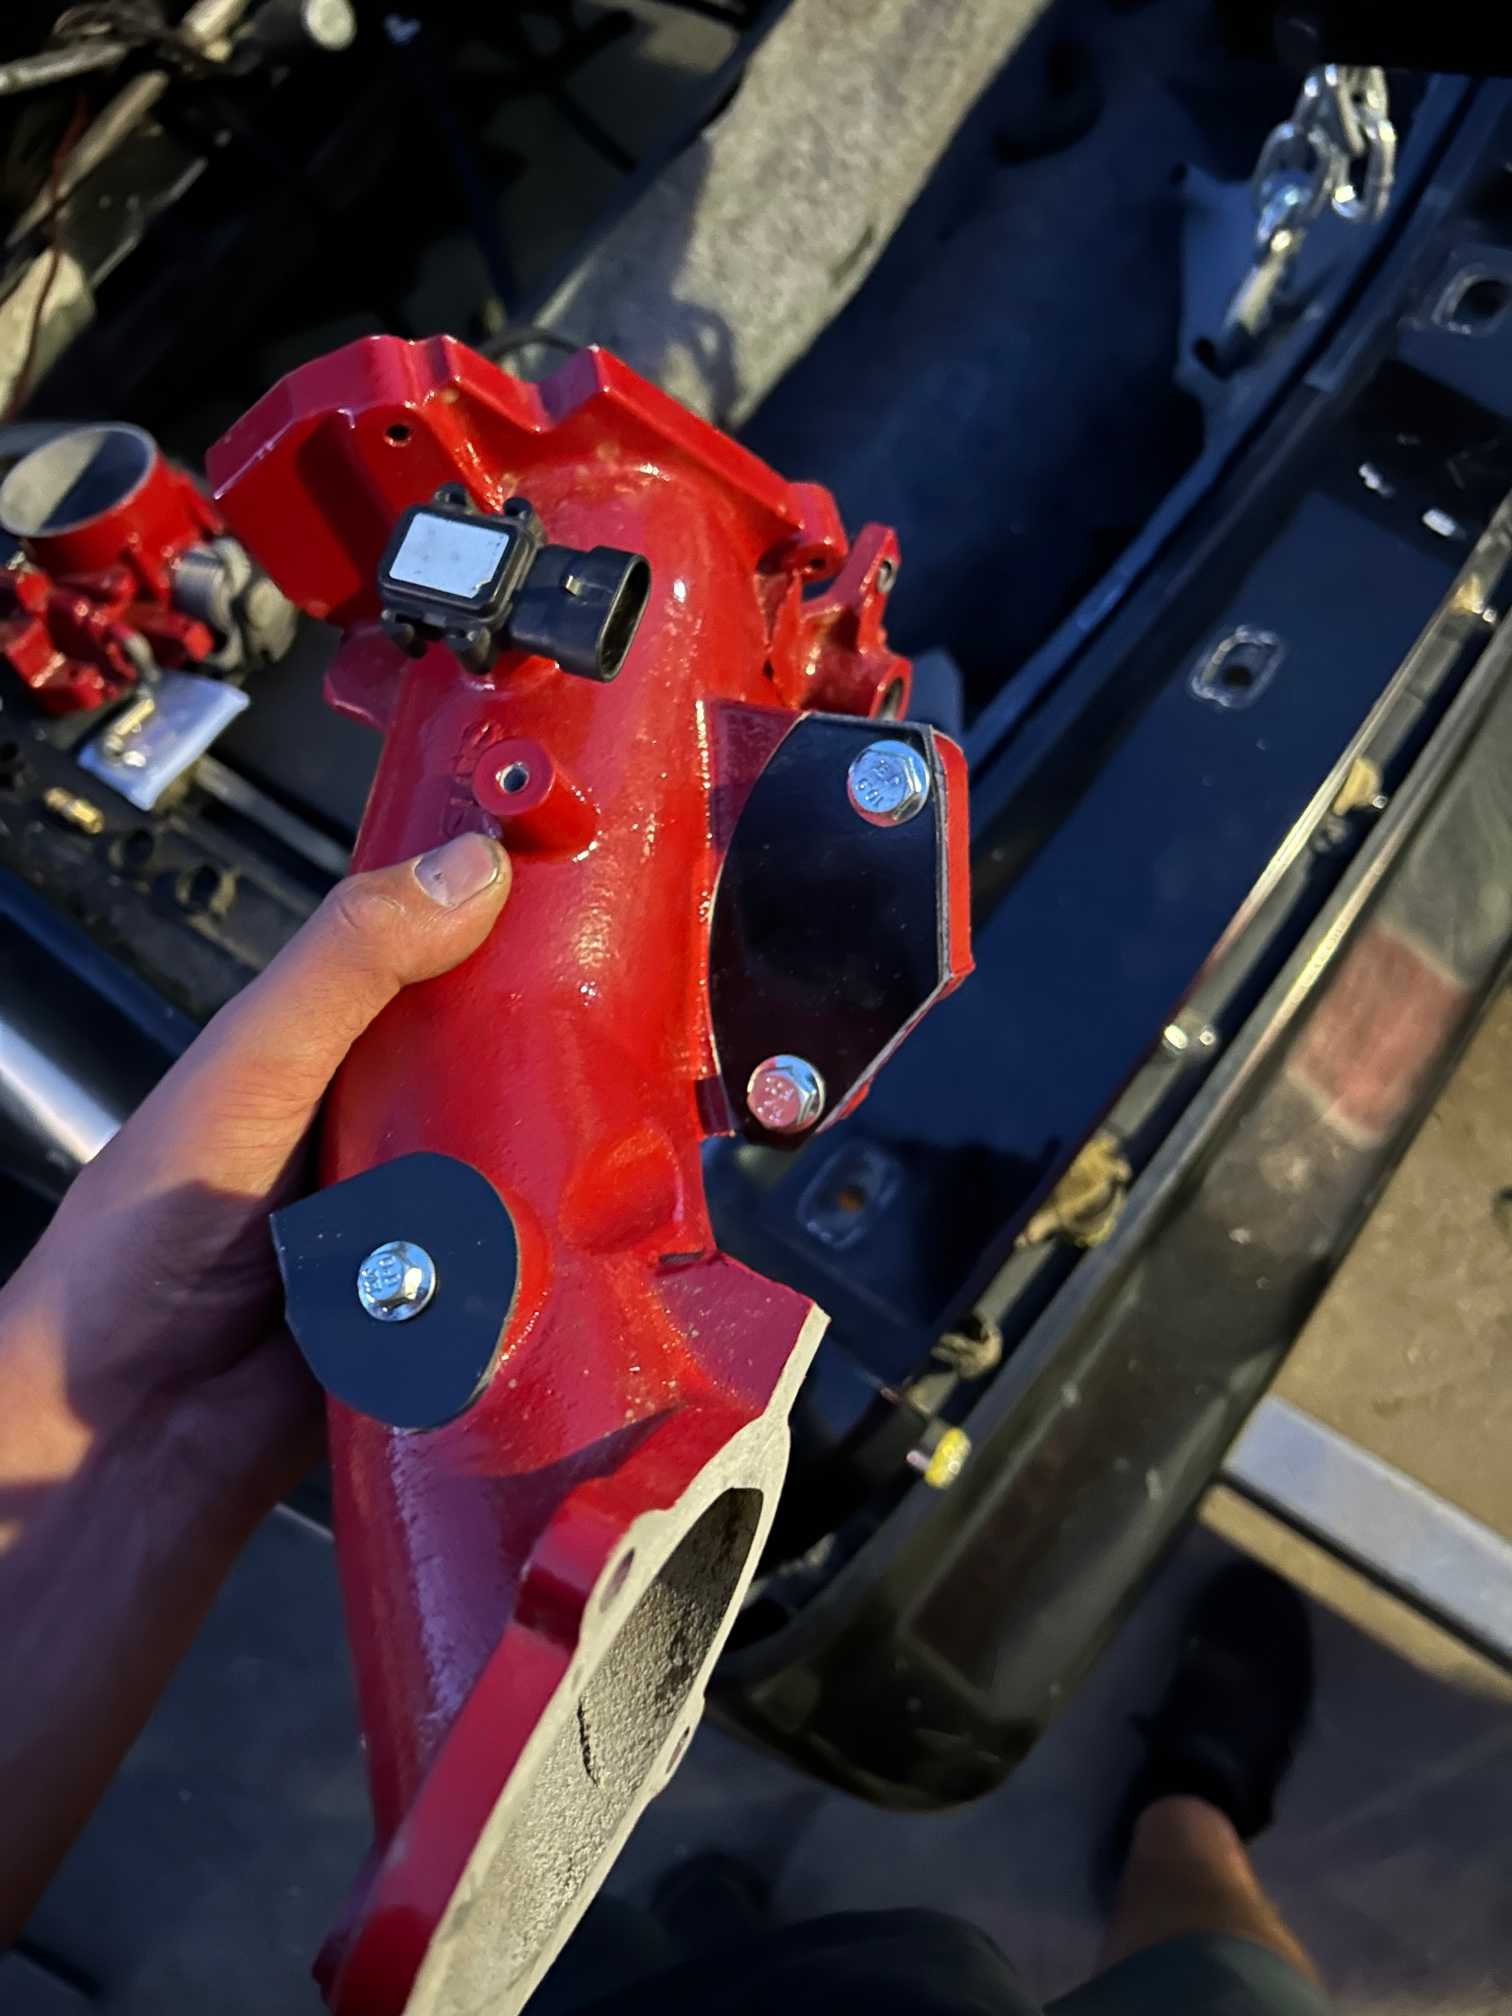
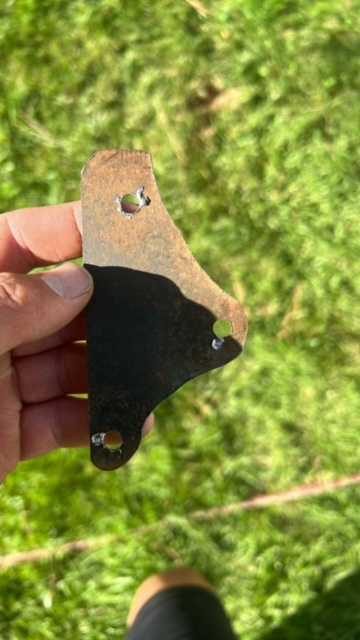
I couldn't find a universally agreed upon dog bone method, so i decided to use CC Riders/Cool Cat's method and made another mount on the cradle. Along with full poly mounts and a second smaller dog bone that I'm going to try and fab up once the engines in, I'm hoping that my mounts should be strong enough to support this motor and my canyon runner/track car intensions.
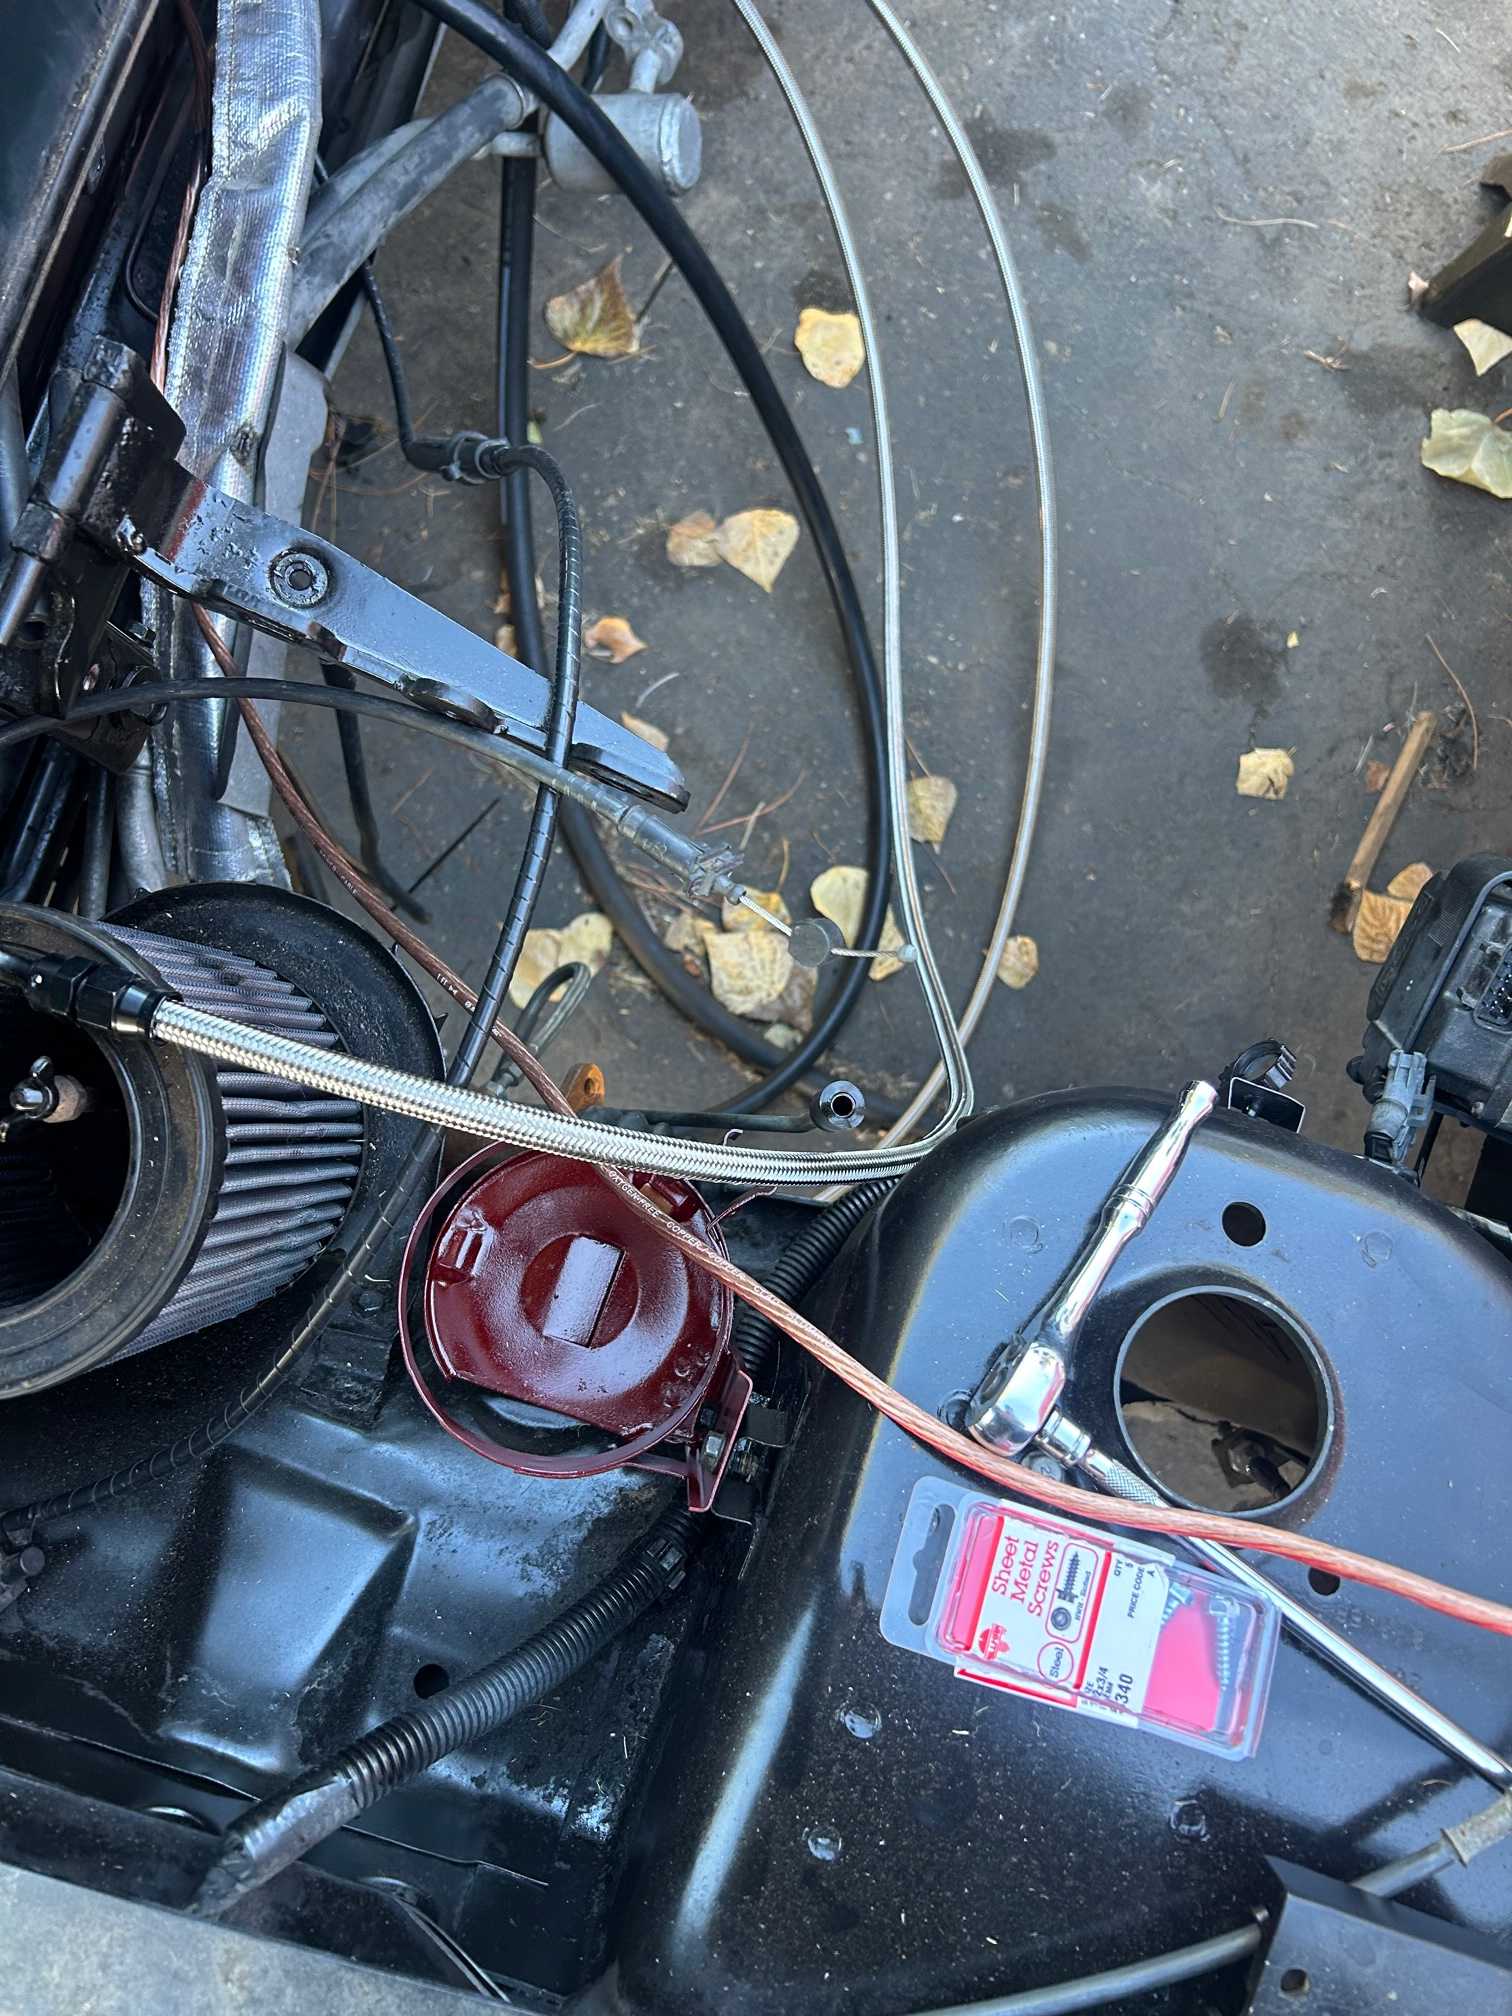
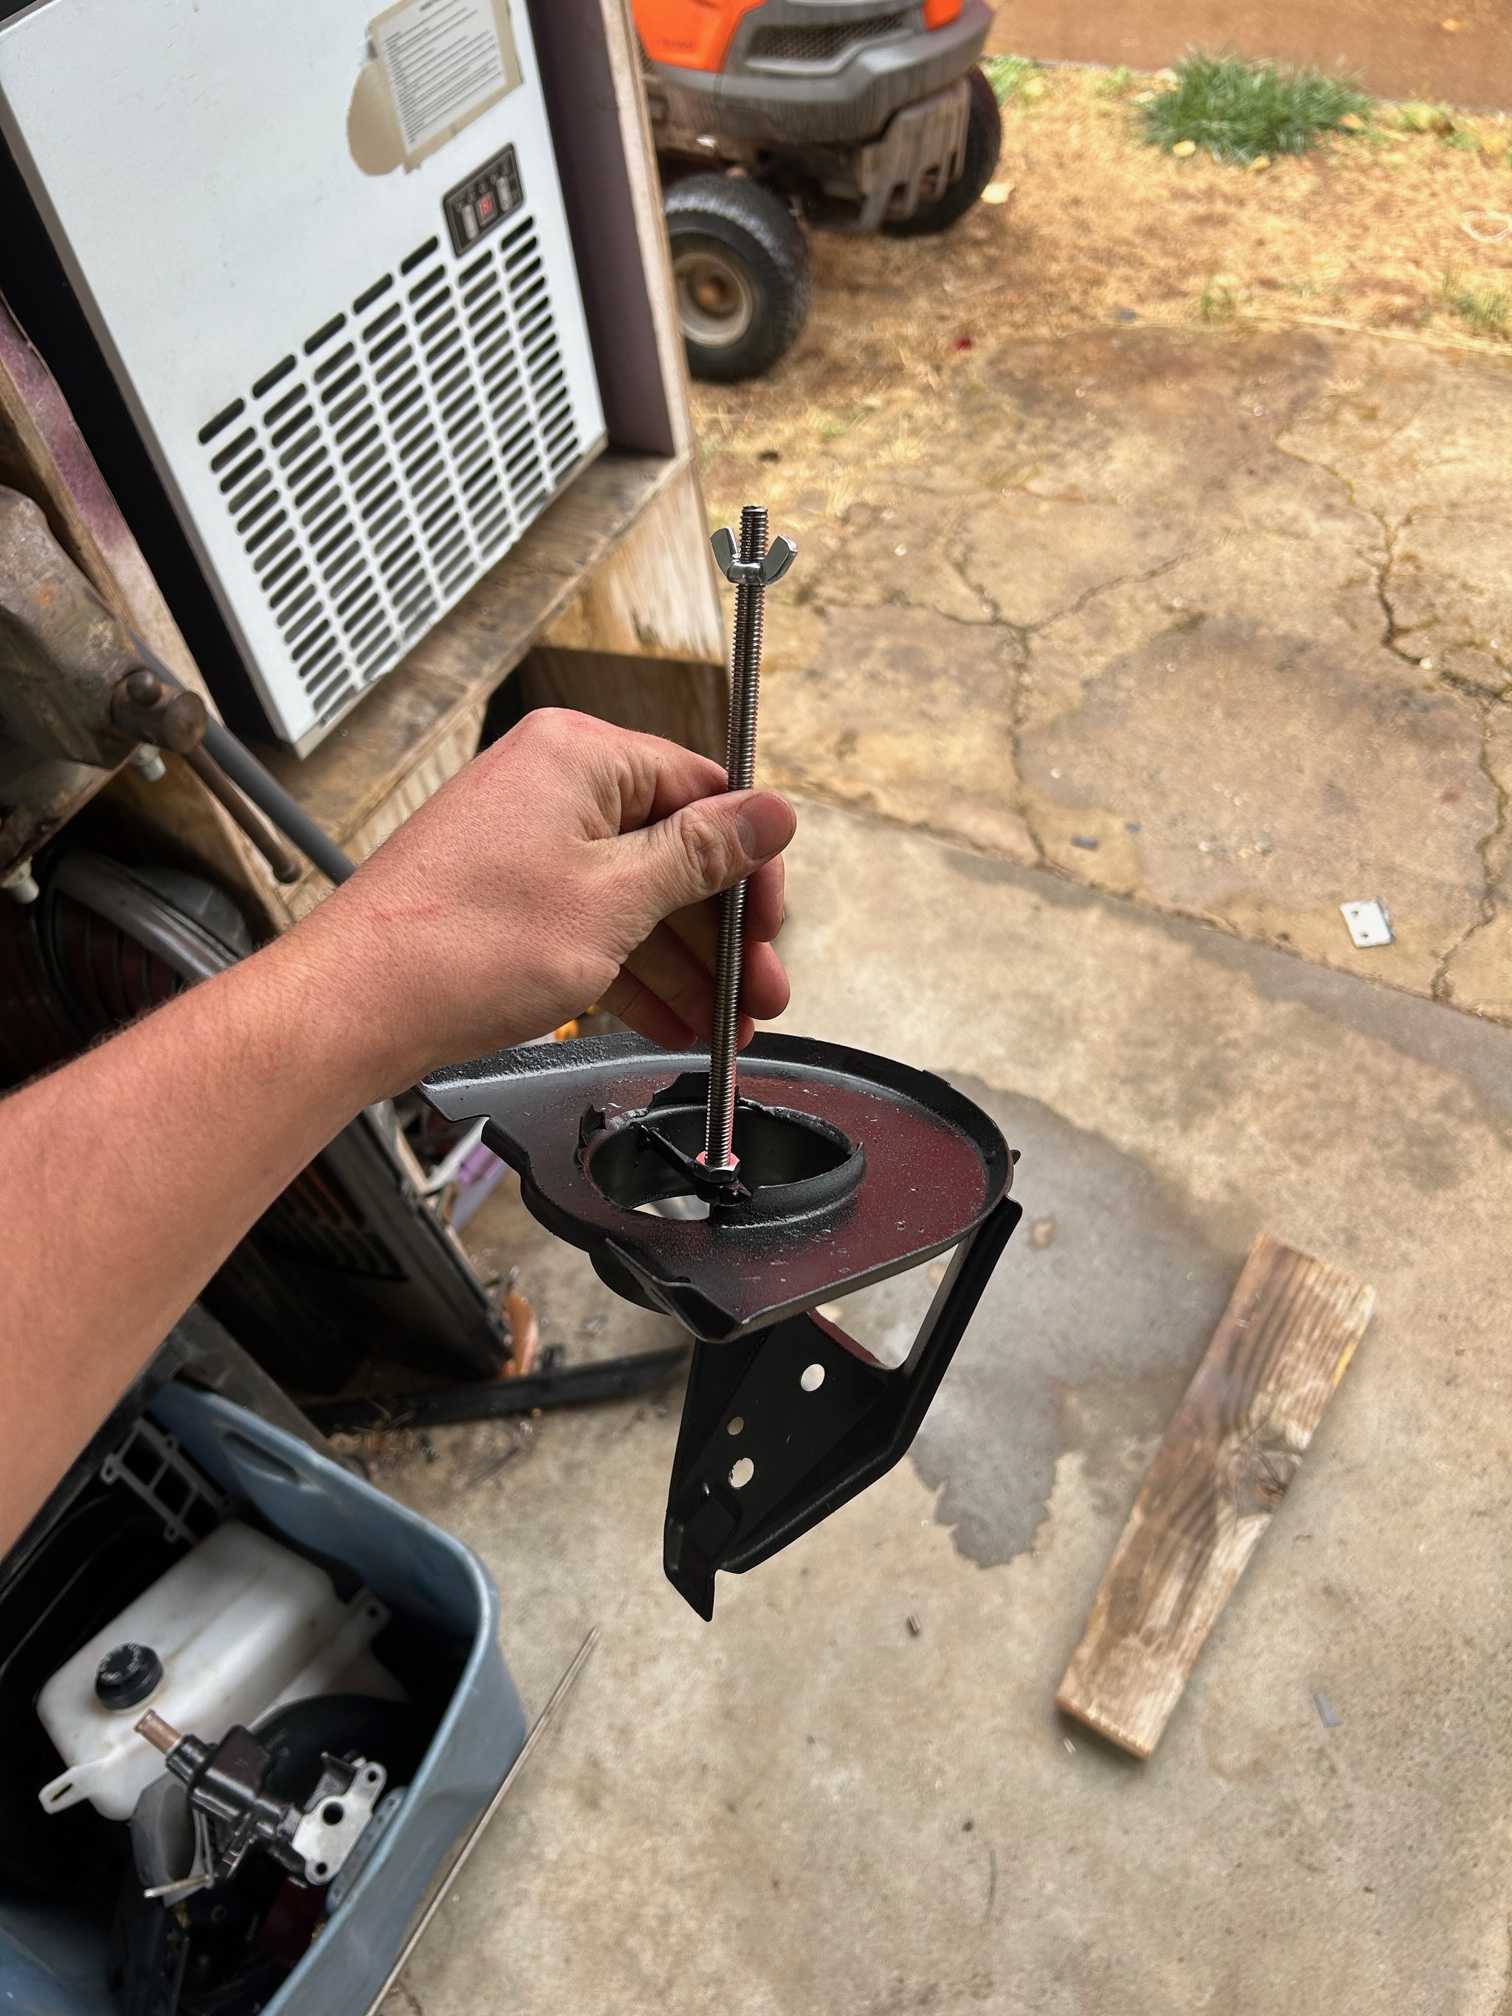
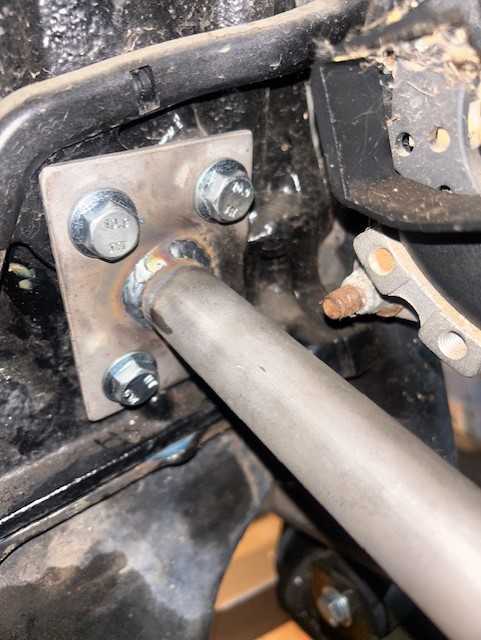
Along side that project, was getting the power steering pump delete in place. I'm unable to give the part number, BUT i can tell you how to easily get it. I just went into oriels', asked for a 6(?) rib pully that was 70 something mm big and boom. I got a metal idler that fit the bill for 20 something bucks. I reinforced the aluminum arm doodad with two little steel plates that i just mocked up and cut with a grinder. I hada buddy with a laith who made me a spacer to run a m14 bolt in the idler and i was off to the races.
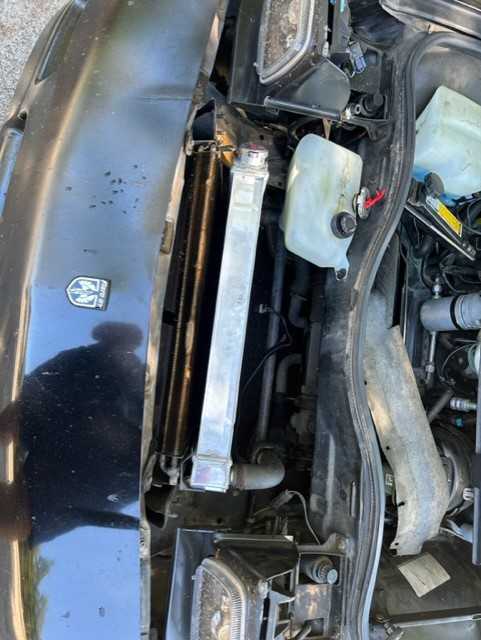
Tossed in a 3 core champion radiator for good measure, along with an upgraded cooling fan
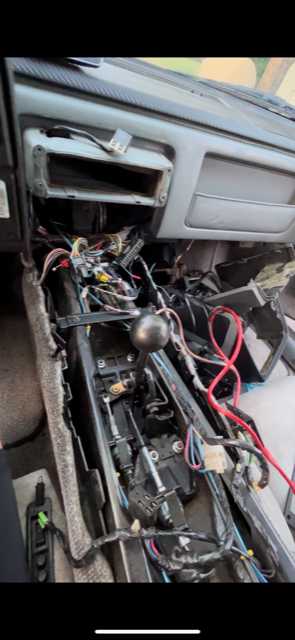
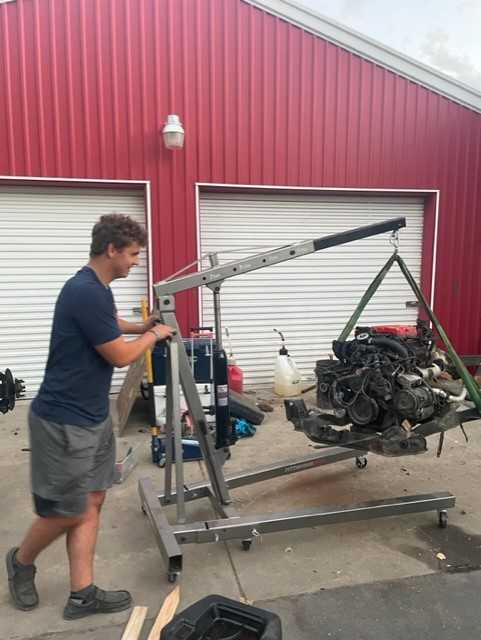
After one last last weekend with old 2.8, it was time for your boys first time pulling an engine. I spent Thursday and Friday night after work getting miscellanies odds and ends pulled, planned on getting it pulled Saturday but got a little tied up with another project (more on that later). So Sunday morning it was! About 2 and a half hours after work and another hour and a half on Sunday and she was out! I was fortunate to have a very smooth removal, especially for doing it solo. I didn't get the classic frame in the air engine on the ground pick, I again was to exited to snag a pick.
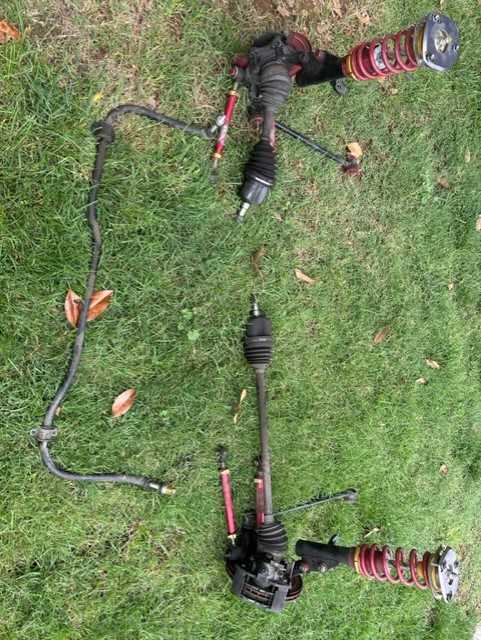
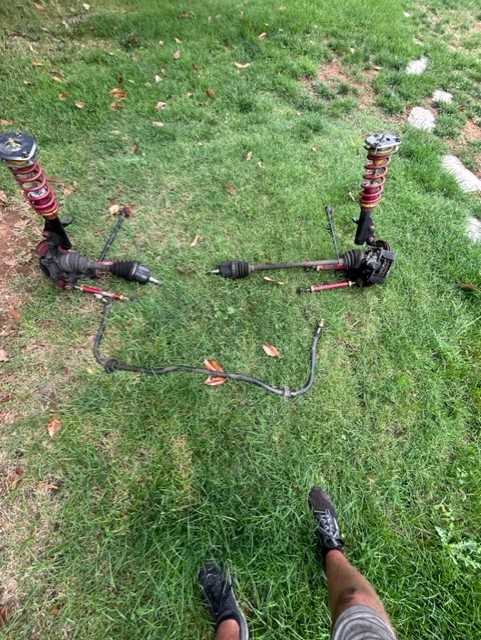
In my case I was reusing my cars suspension/axles. So a couple hours later and the rear suspension was in place, minus the sway bar (It couldn't fir on my 2x4 cradle stand)
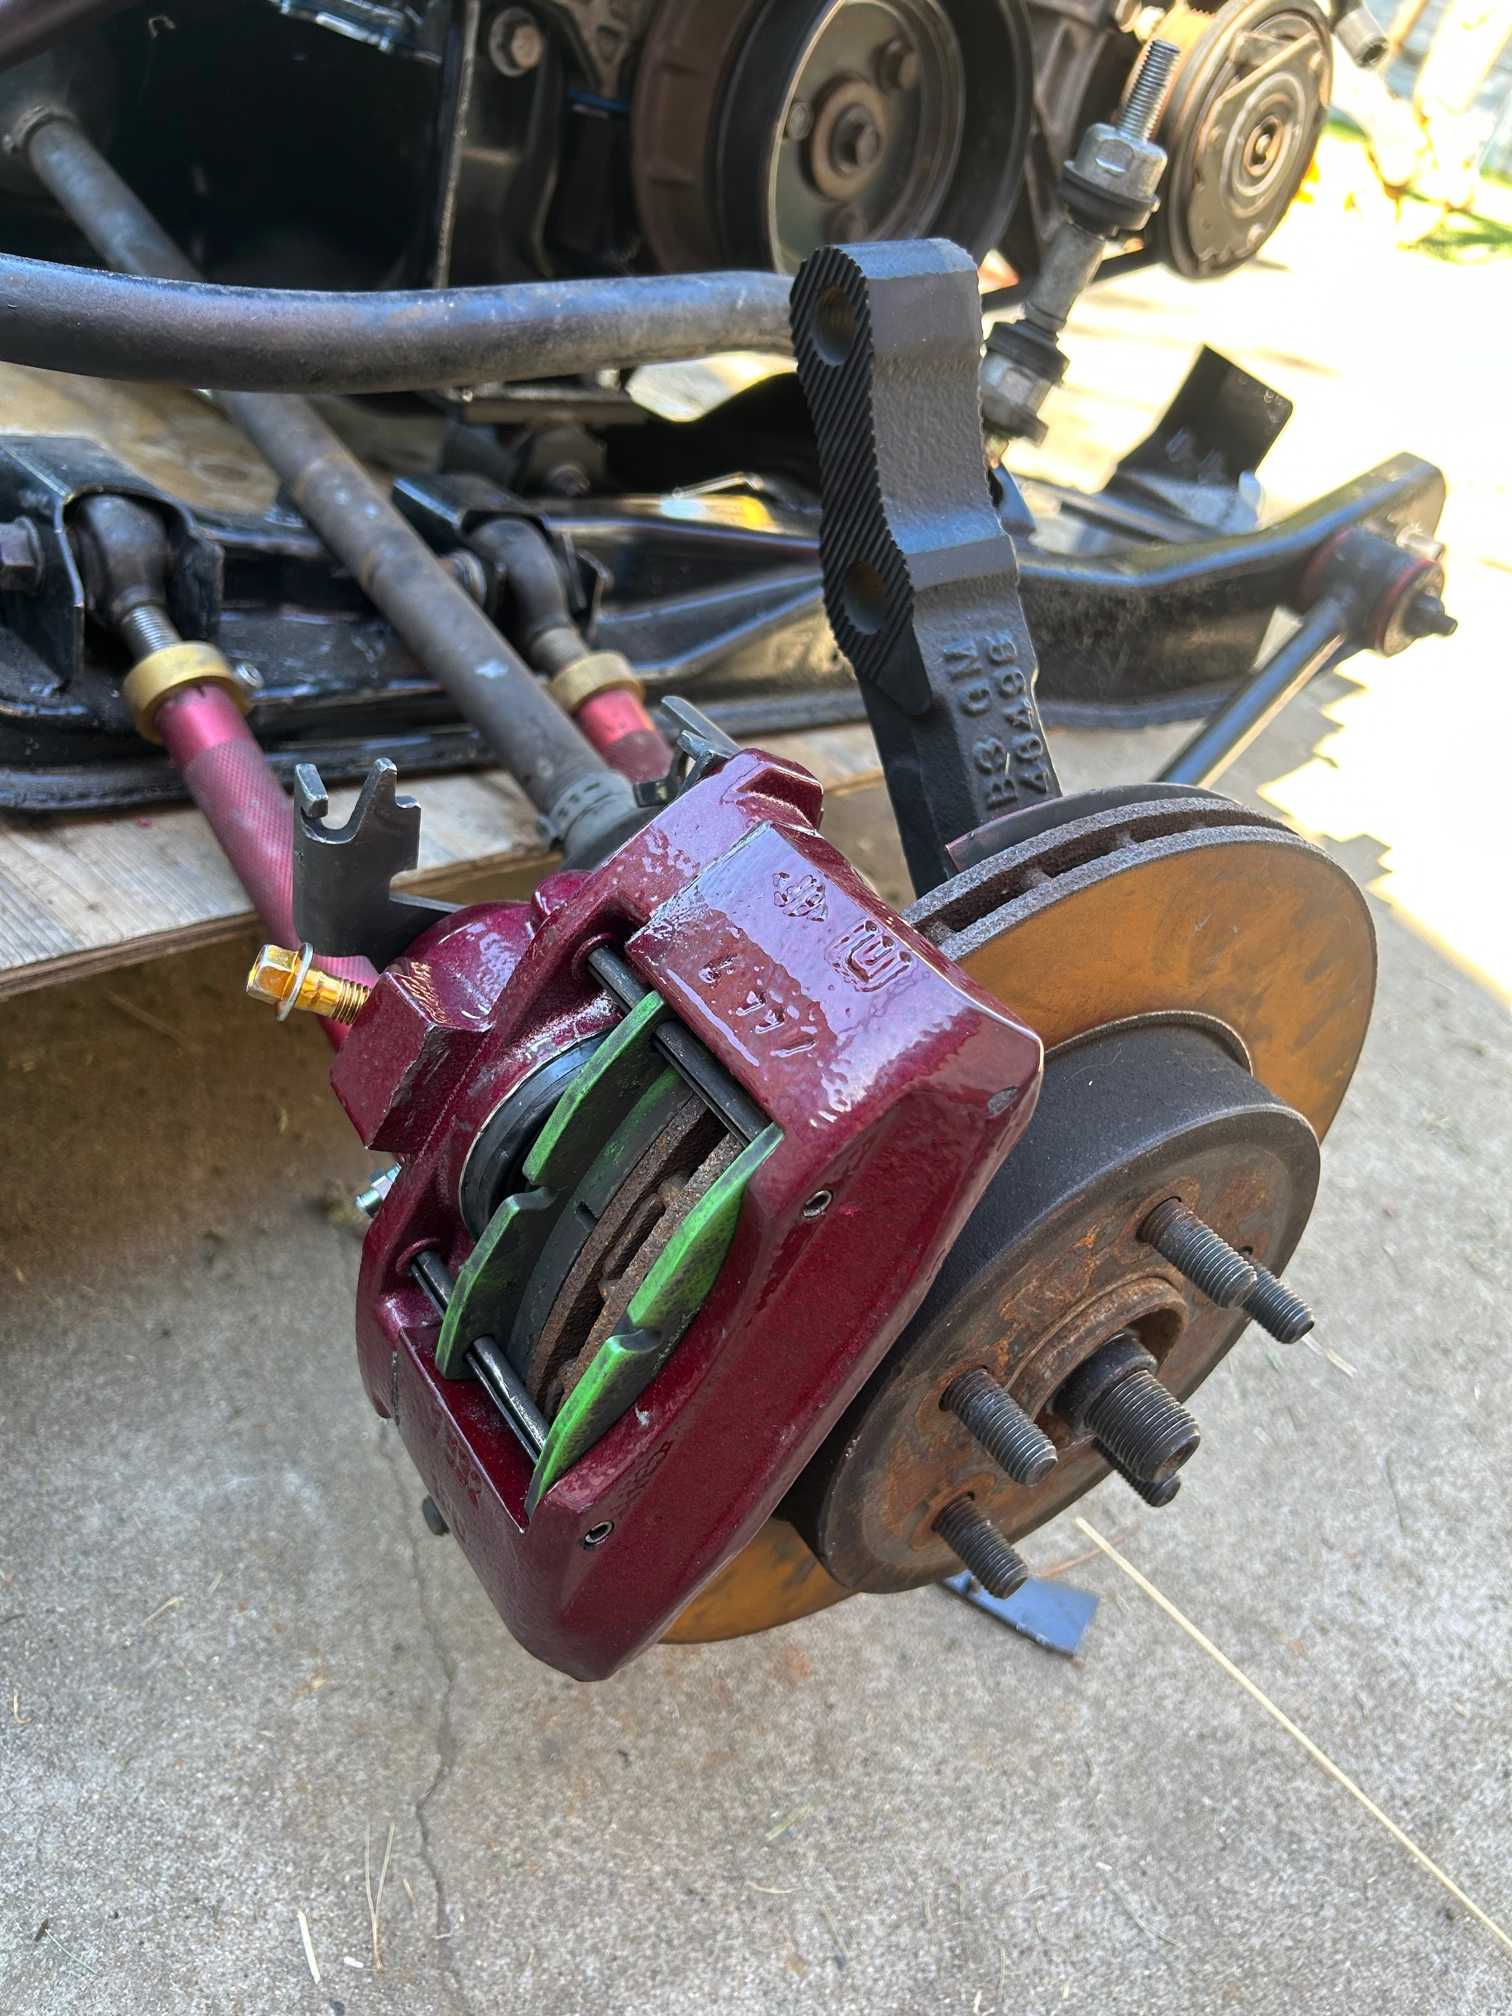
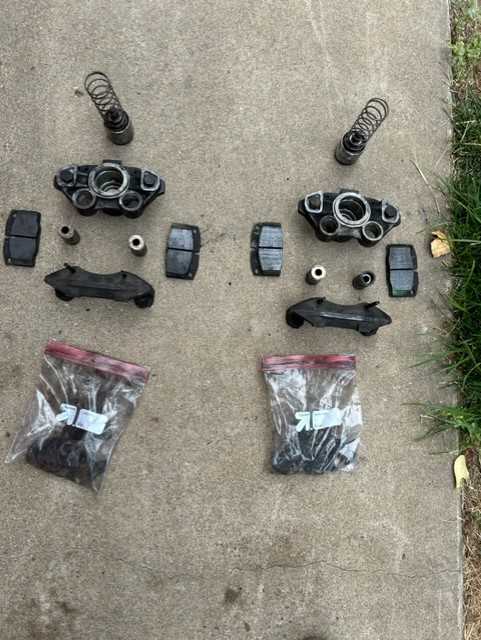
I got the brake calipers all pulled apert so i can powder coat them, going to try and get a little fancy with the powder for the first time!
Then it was working on a now dead in the water car. Got an archie battery relocation kit, and just kinda started cutting (I've been a notorious cut first measure later kinda of guy ) Got the rough shape all cut of for the box, to clean it up I'm just going to grab some thick double sided tape foam strip stuff and toss it in there unless something else comes to mind.
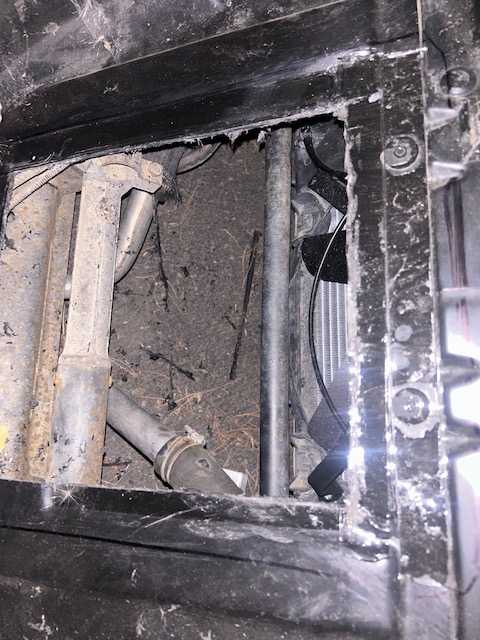
Last night I was able to finally get the passenger side hinge box off with a grinder, a dremal, and a hammer to get it all off. Tonight I will be cleaning up the fire wall, and starting work on the replacement hinge
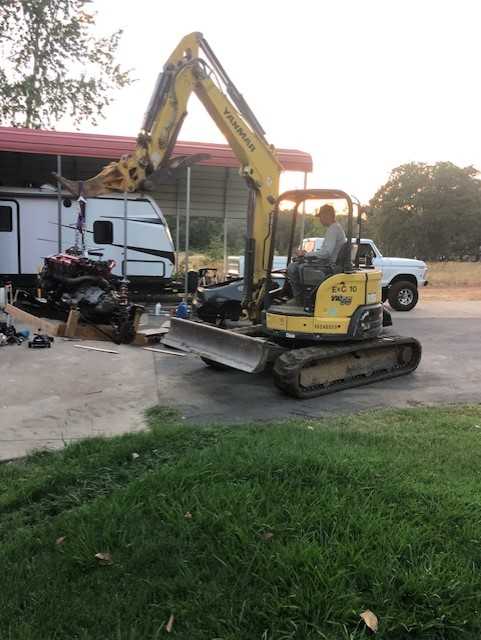
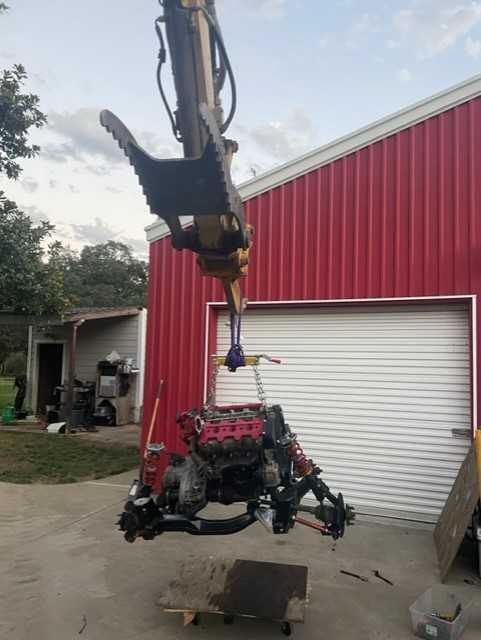
The other big thing I did last night was move the LQ1 cradle from its previous home over to the super high tech cart where I'll be able to move it around. That Saturday where i was originally going to pull the motor? It was helping rebuild our road, and I was able to pull a favor and use one of the excavators to move the LQ1 cradle over the grass to the car. Admittedly i don't even remember how i got the motor over to my shed in the first place, but I'm sure this was the easier move
Here was my pile of "weight reductions" as of last night
That pretty much catches ya'll up to today, where this morning before work i was able to get the sway bar onto the LQ1 since its on the cart while the stock L44 got delegated to the permanent stand
The though of this swap being done definitely helps keep the mojo going, and I want to do everything I can to keep the Fiero spirit alive with us younger generations.
------------------ Zander Holmes 19 year old who's here about 20 years to late Black 88GT - LQ1 swap on the way
I want to do everything I can to keep the Fiero spirit alive with us younger generations.
When I was 19 years old (back in 1975), I was swapping engines in my '67 Chevelle SS396... so it's nice to see some car traditions continue. Great post!
I like it. A lot. I've got an LQ1/F23 swap that I've been procrastinating on for a while, now.
But I've got to ask... LQ1/Manual/Turbo? In California? Is it possible to be 20 miles from Sacramento and not have to deal with the smog refs?
Smog you say
Luckily I have family in one of the few smog exempt counties in CA, allowing me to keep my CA plate along with never having to smog the car. As for the turbo, that isn't going to be happening for a few years. I need the fun money account to refill, I also have a career that i should be working towards as it is
------------------ Zander Holmes 19 year old who's here about 20 years to late Black 88GT - LQ1 swap on the way
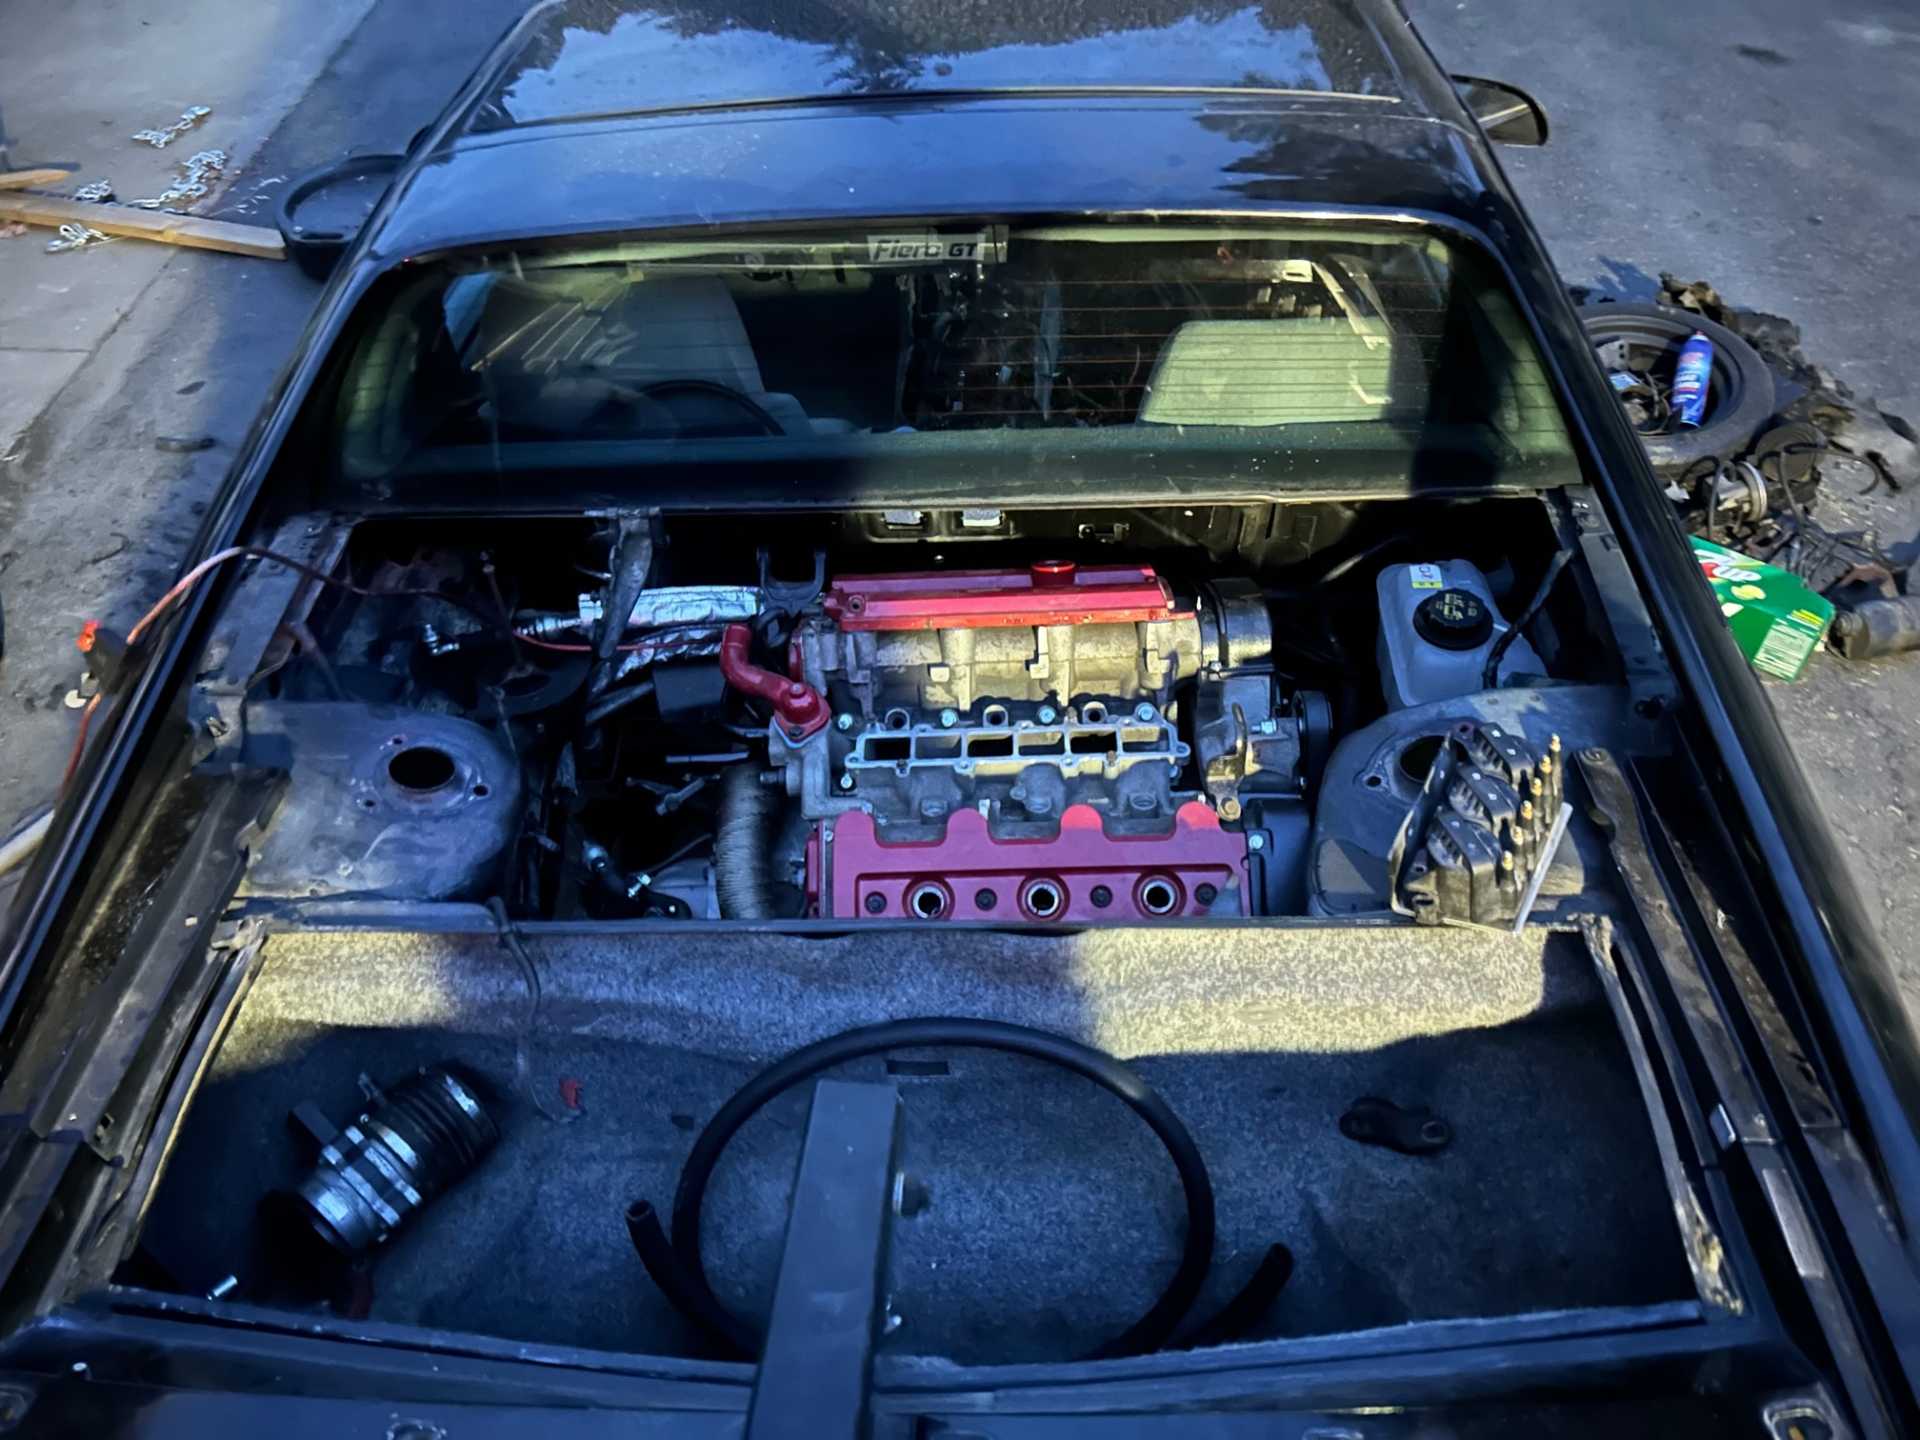
Tonight was a pretty big night as it was the first test fit of the engine. My front bumper/air dam are definitely getting a workout with how much they are pressing into the ground to have enough room to squeeze the engine in. I've got a lot of things in the oven at the moment, so this weekend will be more "grunt work" and touching everything up in the engine bay. I do have an idea I would like to ping off you guys, possibly Ogre(?) regarding coolant routing. Would there be any issues if I route the coolant bypass through the heater core putting it on its "own" coolant loop and plugging off the factory coolant return? I see two issues that might be in my way, one being will that be a ticking time bomb of pressure in the heater core? And the other concern being once the thermostat opens up, will the heater core still have a sufficient amount of warm coolant flowing through it to keep the heater hot?
Testing out posting images on a different laptop, might or might not work
------------------ Zander Holmes 19 year old who's here about 20 years to late Black 88GT - LQ1 swap on the way
I wish i had a little more to show for a full Saturday, but progress is progress. I made a Pick-n-Pull run in the AM, and was able to acquire relays for my wiring harness along with an OEM battery relocation kit.
Every car with a N* motor that i saw today (which was 6 or 7) utilize a under the backseat battery location, meaning that they also have super long battery cables that can be used as a battery relocation kit. These are plenty long enough for a battery relocation in a fiero, and also cost my 5 dalla out the door and about 15 minutes to pull.
After that, it was all about putting the L44 oil pan onto the LQ1. I swapped the oil pans because the PO (very poorly) welded a return bung onto the stock LQ1 oil pan, so it would leak oil until it was at the bottom of their welds. They also put it right behind the passenger side TriPot, leaving zero room for any form of line to actually run into the fitting. I also moved the bell housing dust shield from the L44 onto the LQ1, along with a fresh coat of rattle can paint for everything i pulled off. I would hate to pull the oil pan with the motor in the car, as my approach was to pull the motor mount on the passenger side for clearance. A few hours later after watching paint dry, I started burning the night time oil to get everything back together.
I did "trim" the sheet metal next to the factory fiero dogbone in between watching paint dry and napping today. I still need to clean it up a bit, but the rough shape is there. This should allow me to use the cam covers on both heads.
I really need to start on the passenger side decklid hinge, i keep plowing that one off Although most of this process i wouldn't change a thing, I really wish i could say I have enjoyed every minute I've put into this car. Unfortunately then i would be lying, and I'm really hoping Santa brings me a NOS F40 this year
------------------ Zander Holmes 19 year old who's here about 20 years to late Black 88GT - LQ1 swap on the way
Every car with a N* motor that i saw today (which was 6 or 7) utilize a under the backseat battery location, meaning that they also have super long battery cables that can be used as a battery relocation kit. These are plenty long enough for a battery relocation in a fiero, and also cost my 5 dalla out the door and about 15 minutes to pull.
There are GM vehicles with their batteries under the back seat. These battery cables are perfect. Even have the correct connections for side-post batteries.
The best part... $3.95 apiece at the auto wreckers.
Splurge and buy two. Run the negative cable right up to the engine block.
Although the world has passed that engine by, Huge props for your install, the custom engine mounts, Keeping the AC, putting the Alternator in the correct place^^
I was really shooting for a lazy Sunday, but every time i sat down I would get right back up and start working on a different part of the car. Yesterday's big project was getting my calipers all powder coated and rebuilt. If you are doing a large rebuild like this, I would highly recommend getting a beginner powder coating set up, as I've been able to powder coat in my engine bay with the only recurring cost being powder which is only slightly more than rattle cans.
In between the powder coating I also cleaned up the stock heat shield and fixed a rust spot.
Apart from that i started laying down doable sided tape onto my front battery tray, although no pics were taken.
------------------ Zander Holmes 19 year old who's here about 20 years to late Black 88GT - LQ1 swap on the way
Although the world has passed that engine by, Huge props for your install, the custom engine mounts, Keeping the AC, putting the Alternator in the correct place^^
Hope it runs good and strong for you!
Thank you!
I do have an idea I would like to ping off you guys, possibly Ogre(?) regarding coolant routing. Would there be any issues if I route the coolant bypass through the heater core putting it on its "own" coolant loop and plugging off the factory coolant return? I see two issues that might be in my way, one being will that be a ticking time bomb of pressure in the heater core? And the other concern being once the thermostat opens up, will the heater core still have a sufficient amount of warm coolant flowing through it to keep the heater hot?
------------------ Zander Holmes 19 year old who's here about 20 years to late Black 88GT - LQ1 swap on the way
Originally posted by fliphone: ... Would there be any issues if I route the coolant bypass through the heater core putting it on its "own" coolant loop and plugging off the factory coolant return? I see two issues that might be in my way, one being will that be a ticking time bomb of pressure in the heater core? And the other concern being once the thermostat opens up, will the heater core still have a sufficient amount of warm coolant flowing through it to keep the heater hot?
I'm not sure I understand your question, or if I'm missing something. I suspect I'll find out when I get cracking, on mine. But... First... I'll mention that on the Fiero, the "hot" coolant leaves the thermostat housing, is piped to the left side coolant pipe, and to the top of the radiator. The "cooled" coolant comes out of the bottom of the radiator, to the right side coolant pipe, and back to the water pump, where it is pumped back into the hot engine. (This really confuses some people. I had this same conversation last week with a local. He thought it ran the opposite direction.) The 2.8 also uses the heater core circuit for a bypass. The thermostat, and the regular coolant hose, are just above the outlet to the heater core. The heater core "feed" is the smaller of the two fittings on the firewall side of the housing. When the thermostat opens, the heater core and the radiator are effectively in parallel. There is plenty of hot coolant to go around. The return from the heater core is connected to the small fitting on the rear of the passenger side coolant pipe, just in front of the rear wheel. From the very rear of that pipe is a hose that routes the "cooled" coolant back to the engine. On the 86 and earlier cars, the heater return was piped all the way up to a fitting on the water pump. If you look at your 2.8 water pump, you will see the plug where that fitting would have gone, if your car had been an 85 or 86.
Hope that helps.
[This message has been edited by Raydar (edited 08-28-2023).]
on my car, I plumbed the heater core return into the passenger side coolant tube, at the front of the car, and used the now unused heater line as an intercooler line.
------------------ "I am not what you so glibly call to be a civilized man. I have broken with society for reasons which I alone am able to appreciate. I am therefore not subject to it's stupid laws, and I ask you to never allude to them in my presence again."
I invited Lou Dias to trash me in my own thread, he refused. sorry. if he trashes your thread going after me. I tried.
I've taken the past couple days a little slower to help recharge the batteries and keep the mojo going.
Tonight I started to dip my toes back in by rebuilding the shift linkage on the getrag with Rodney parts. It was only about 10 minutes to do, and just from the fiddling around i did the shifting felt much tighter. I'm sure I've got on rose colored glasses but the selector pin thingy %100 made a noticeable improvement.
Also snagged a pic of the battery relocation double sided tape action (or the start of it anyway)
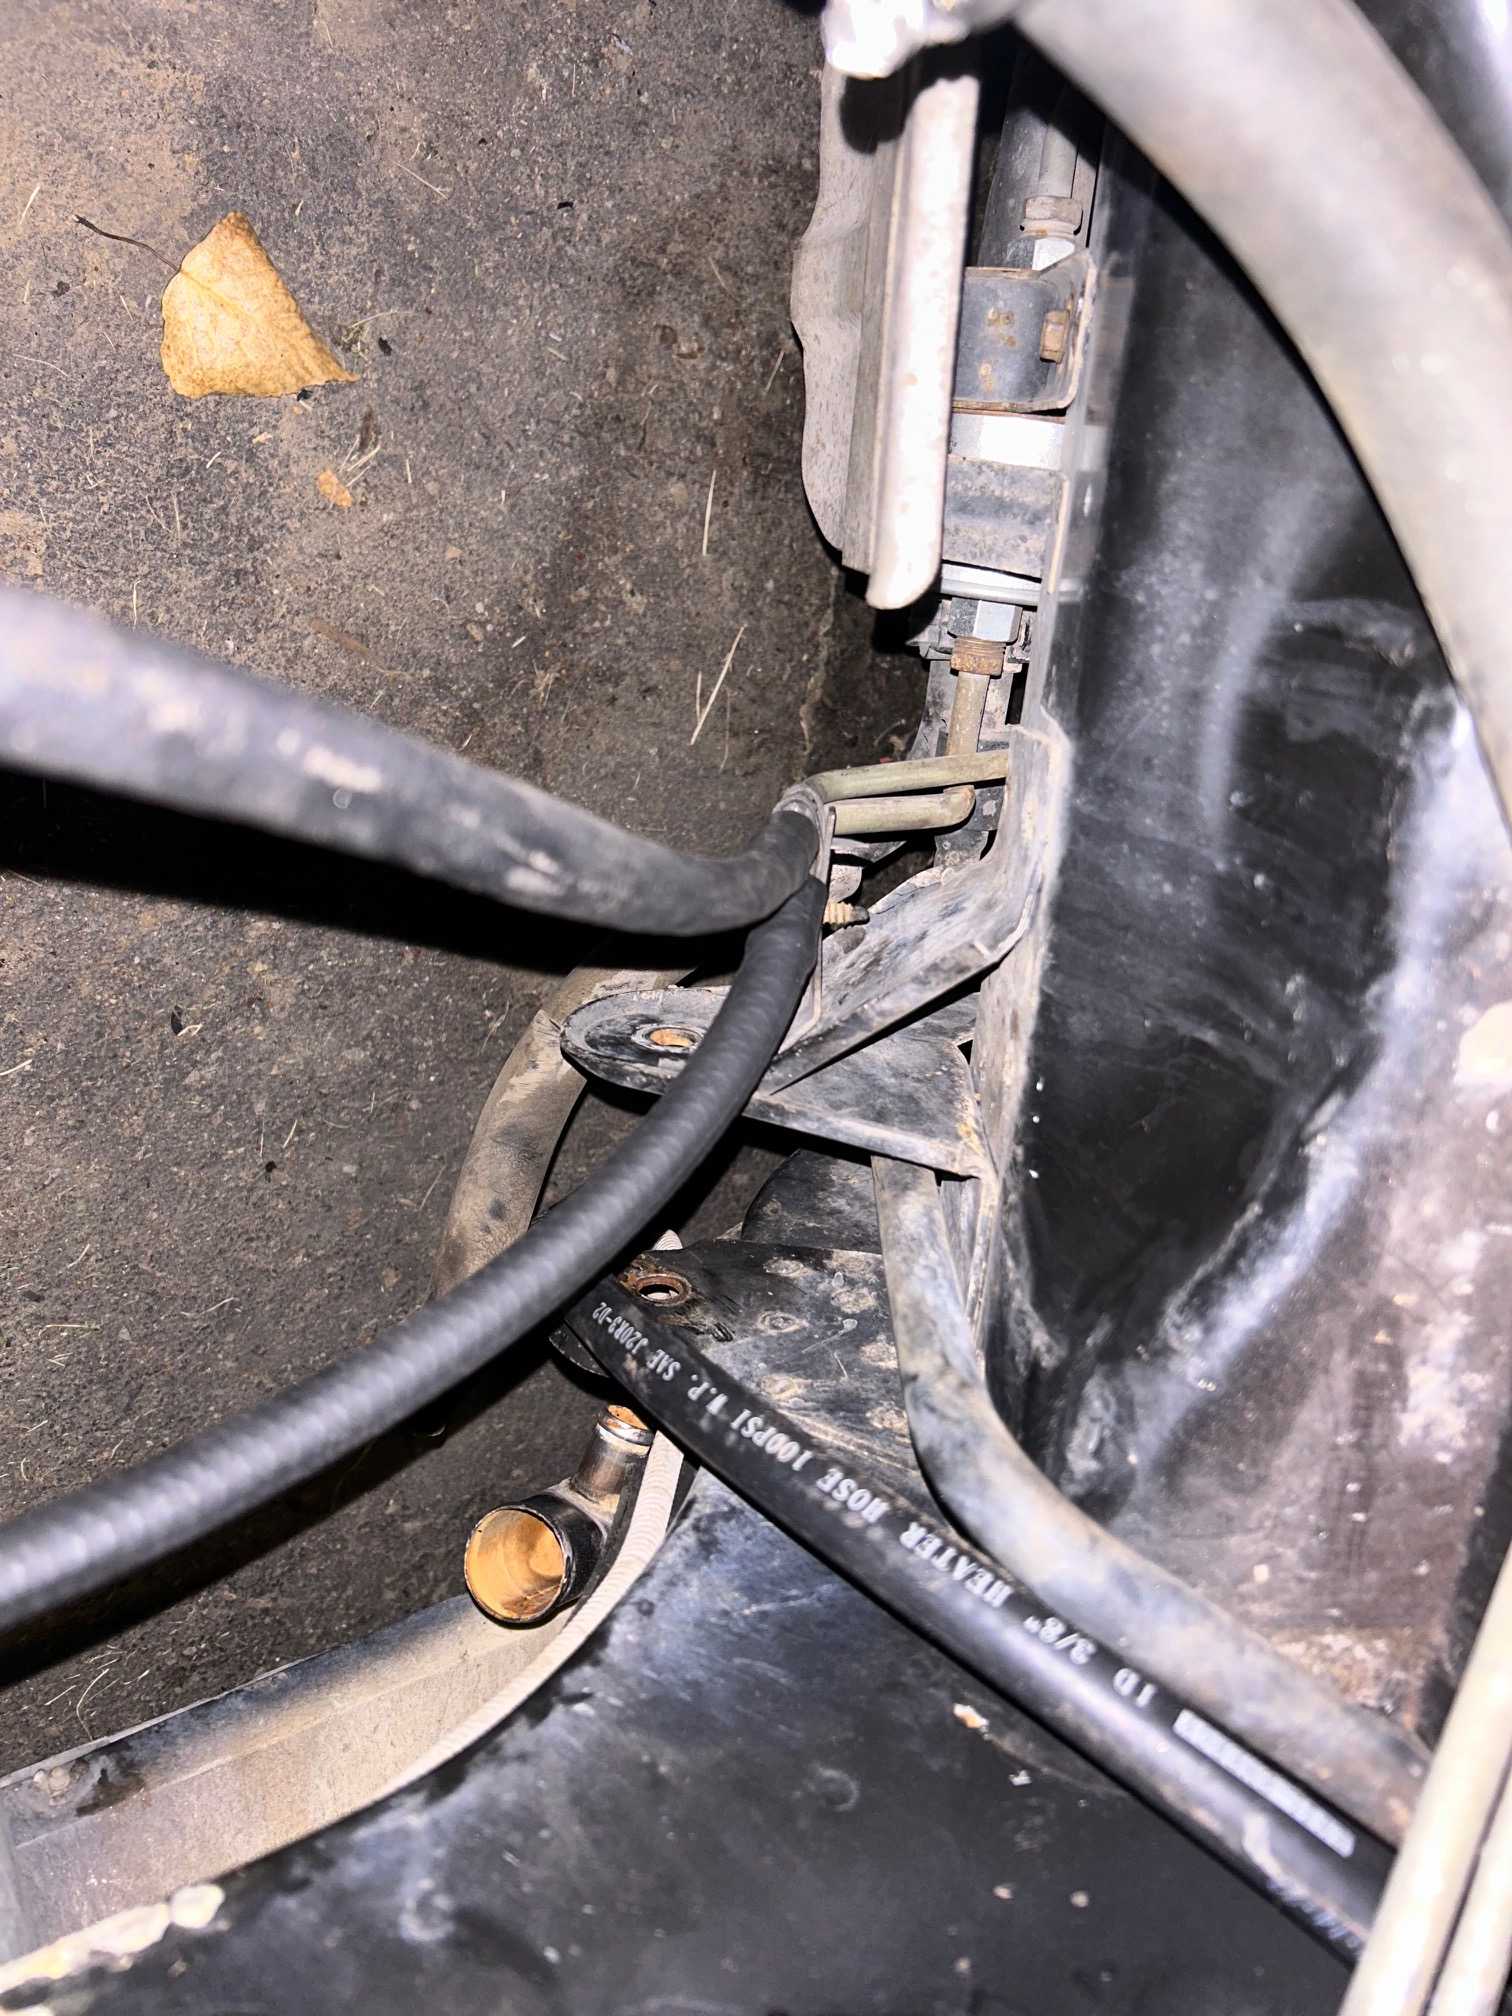
The big hang up at this point is the wiring harness. And I'm hoping to have that ready by next weekend, which maybe means the first time trying to start this LQ1 in over 15 years . Also, does anyone know how to go from AN lines to these hard lines?
------------------ Black 88 GT, a 19 year old here about 20 years to late -LQ1 Swap in progress-
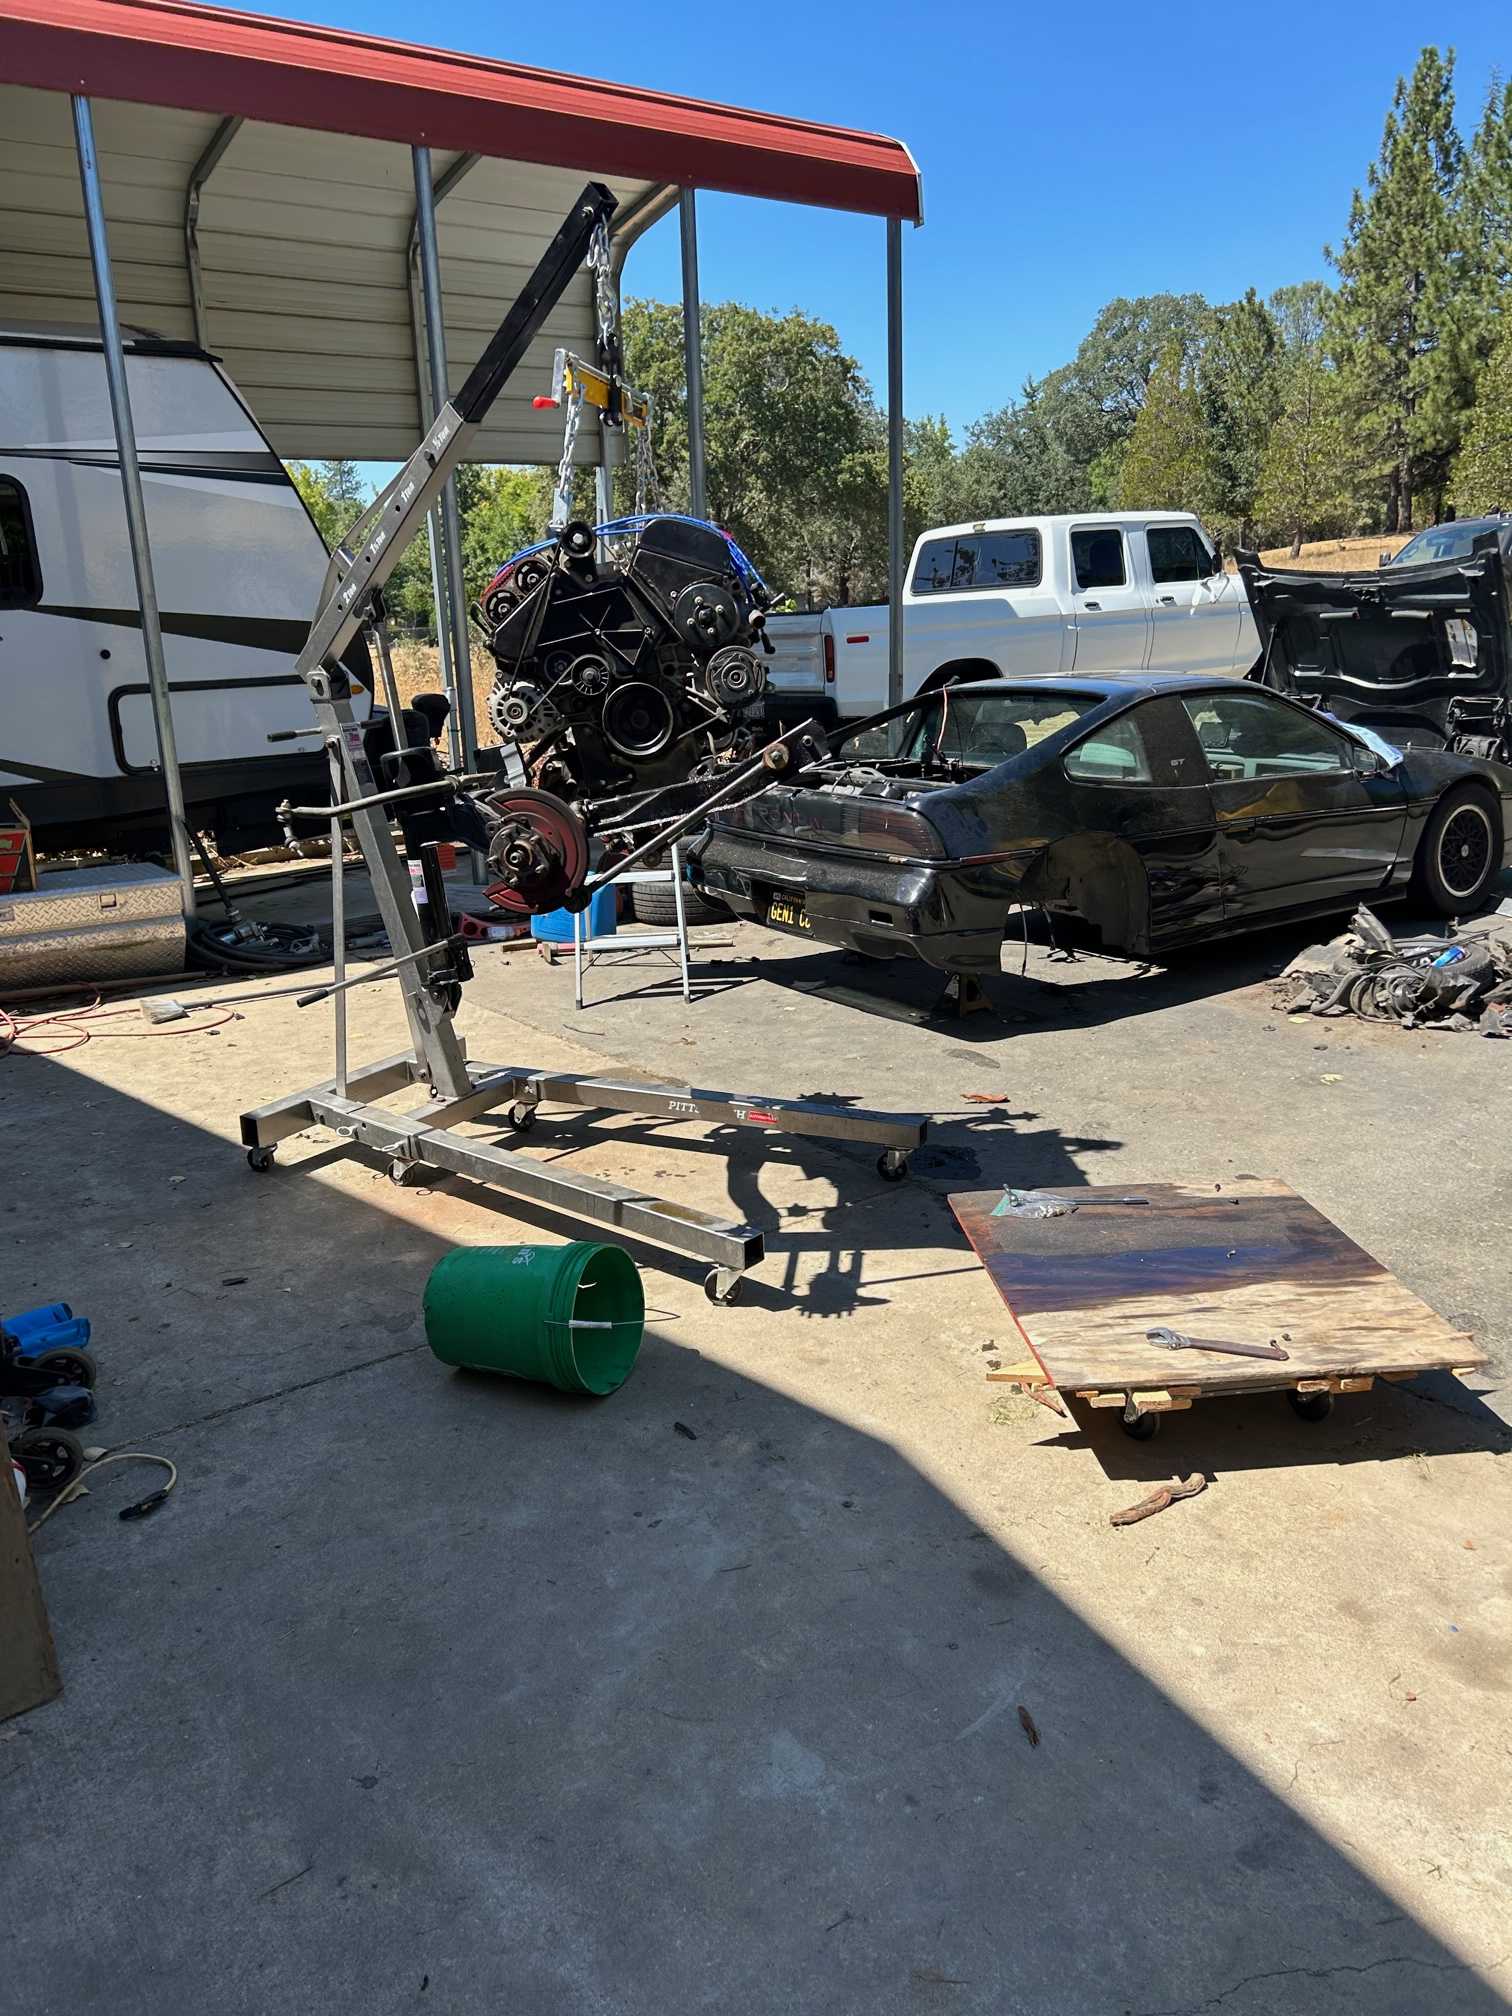
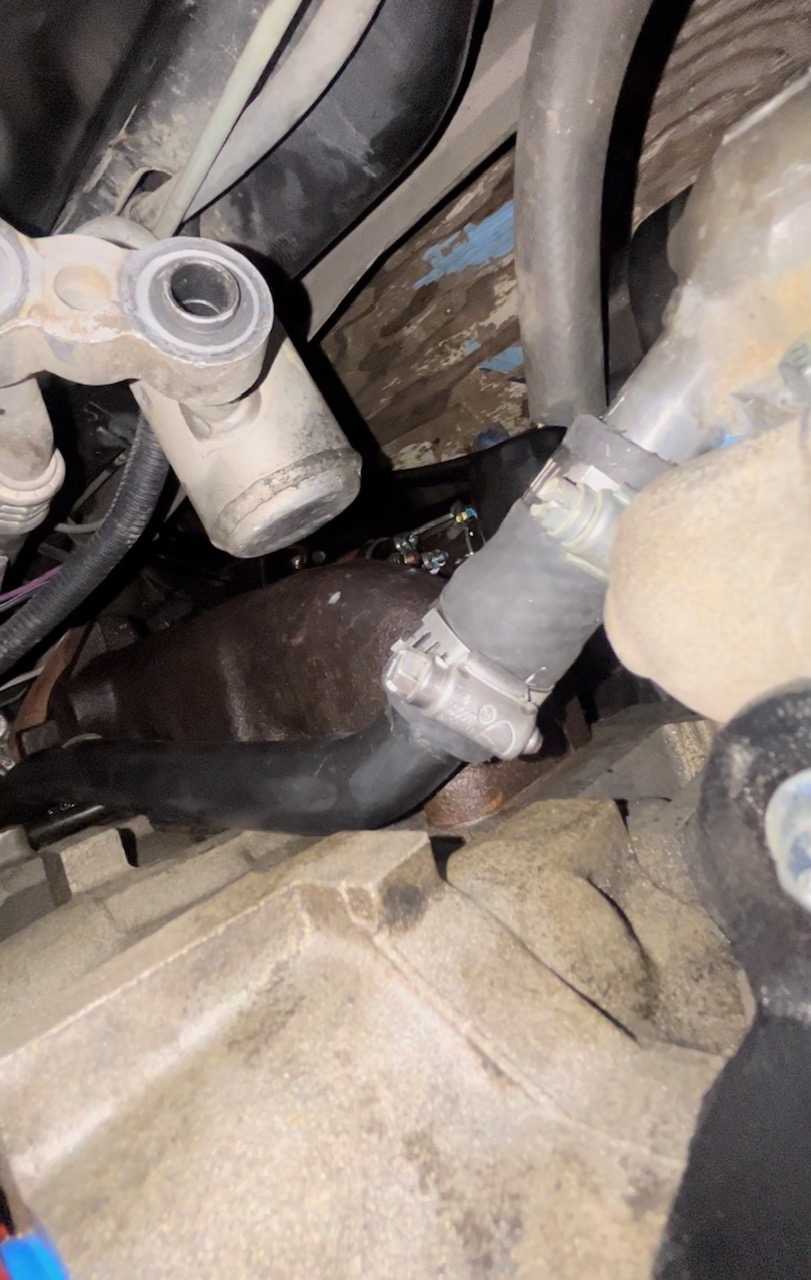
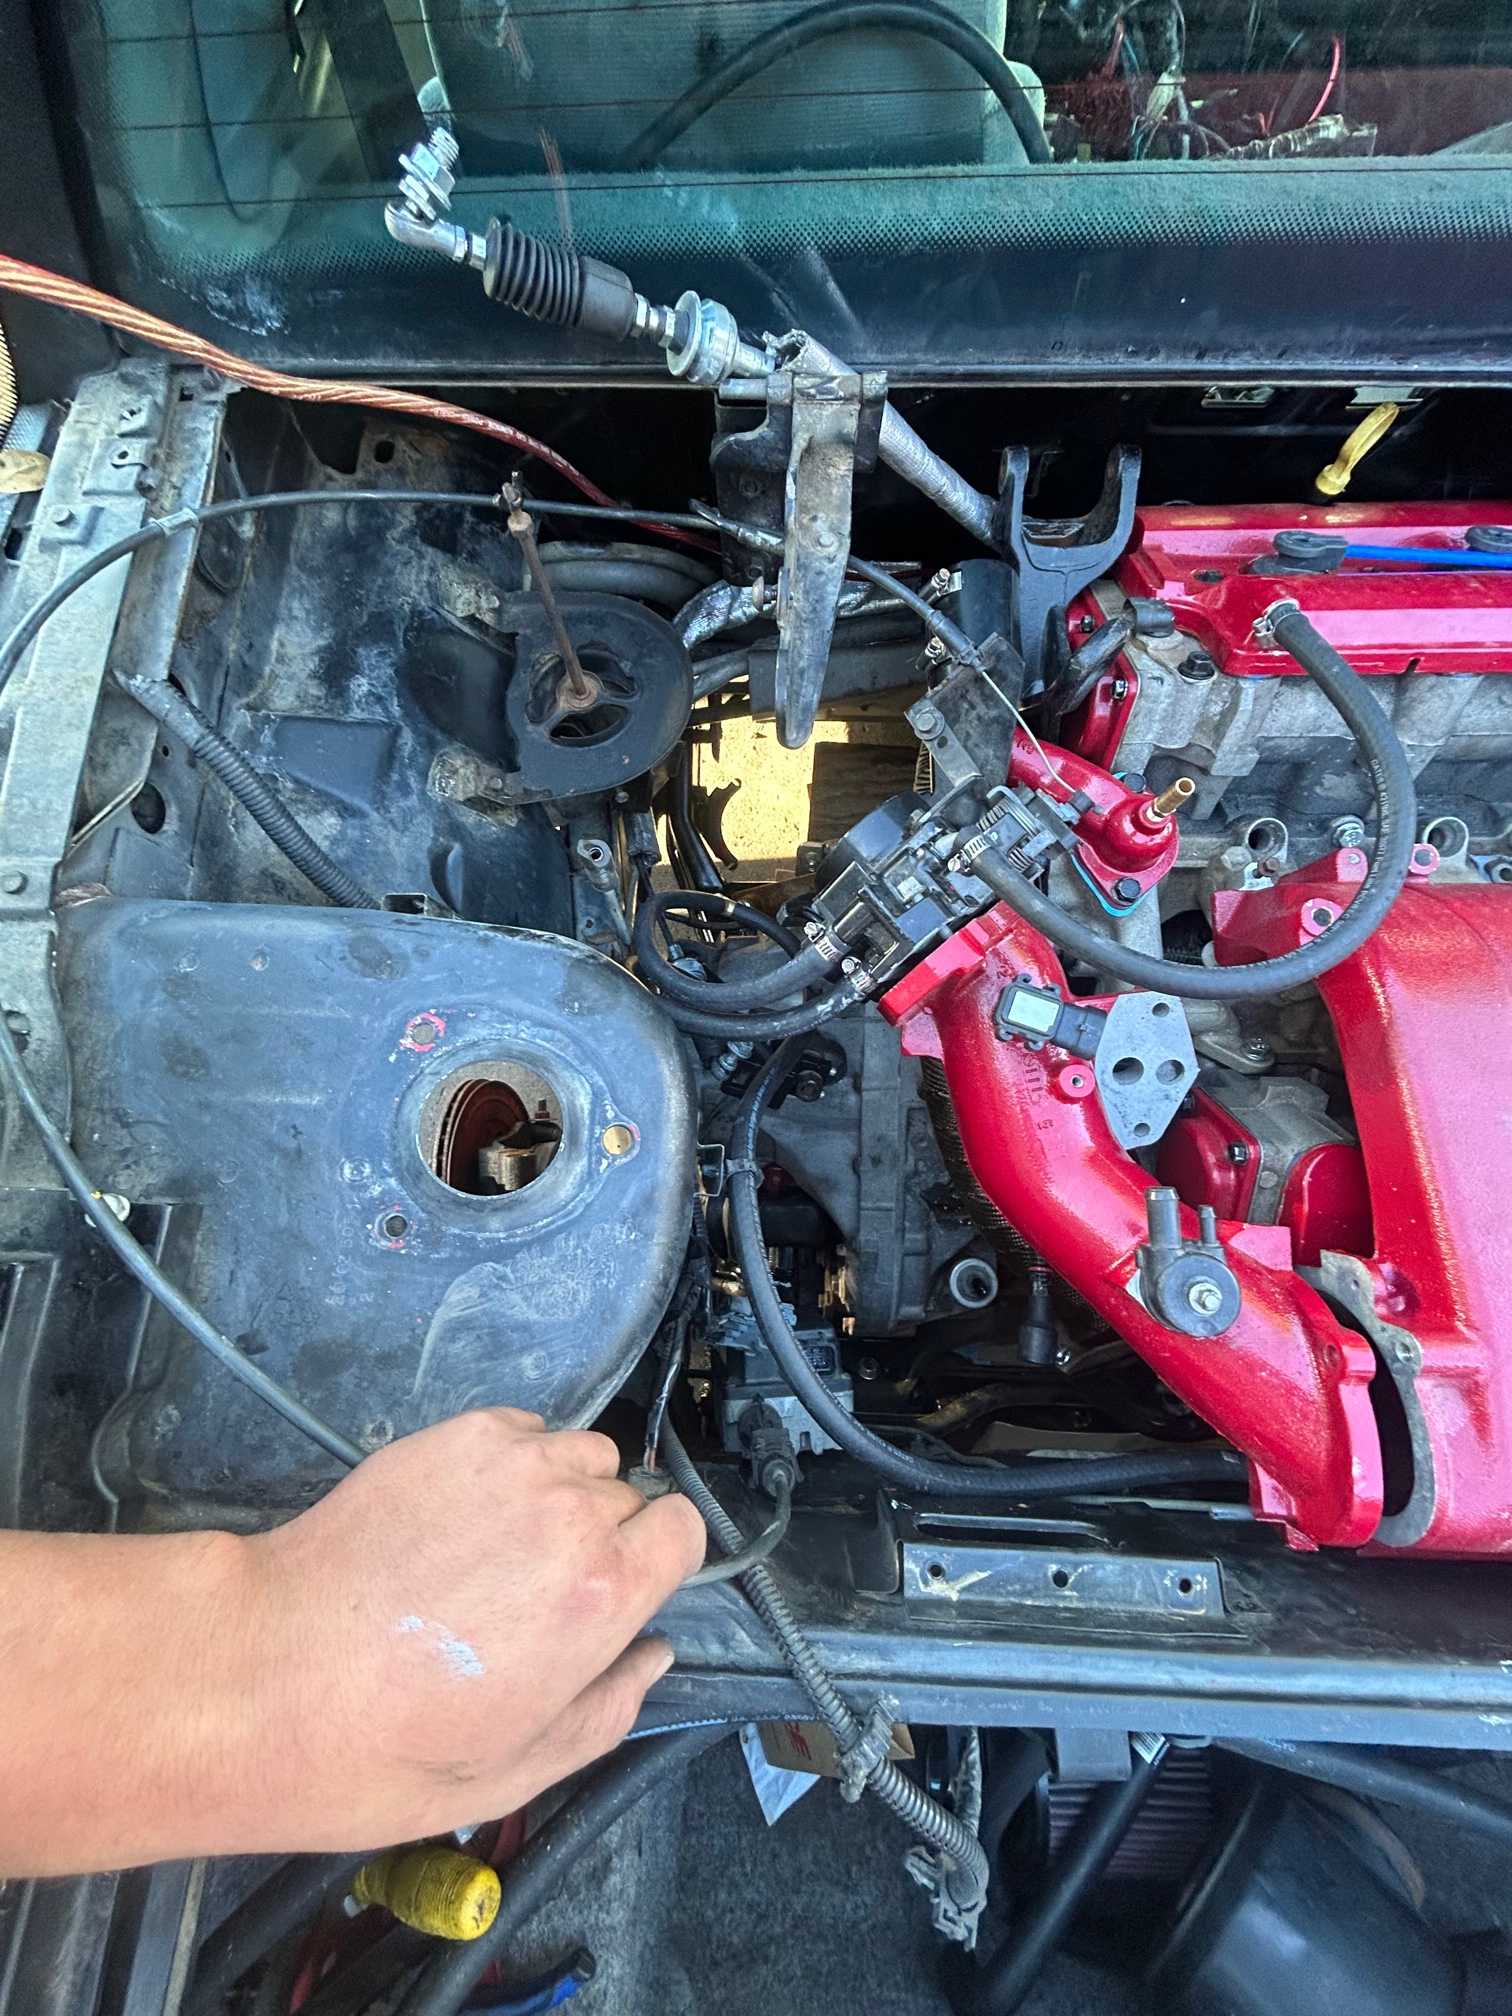
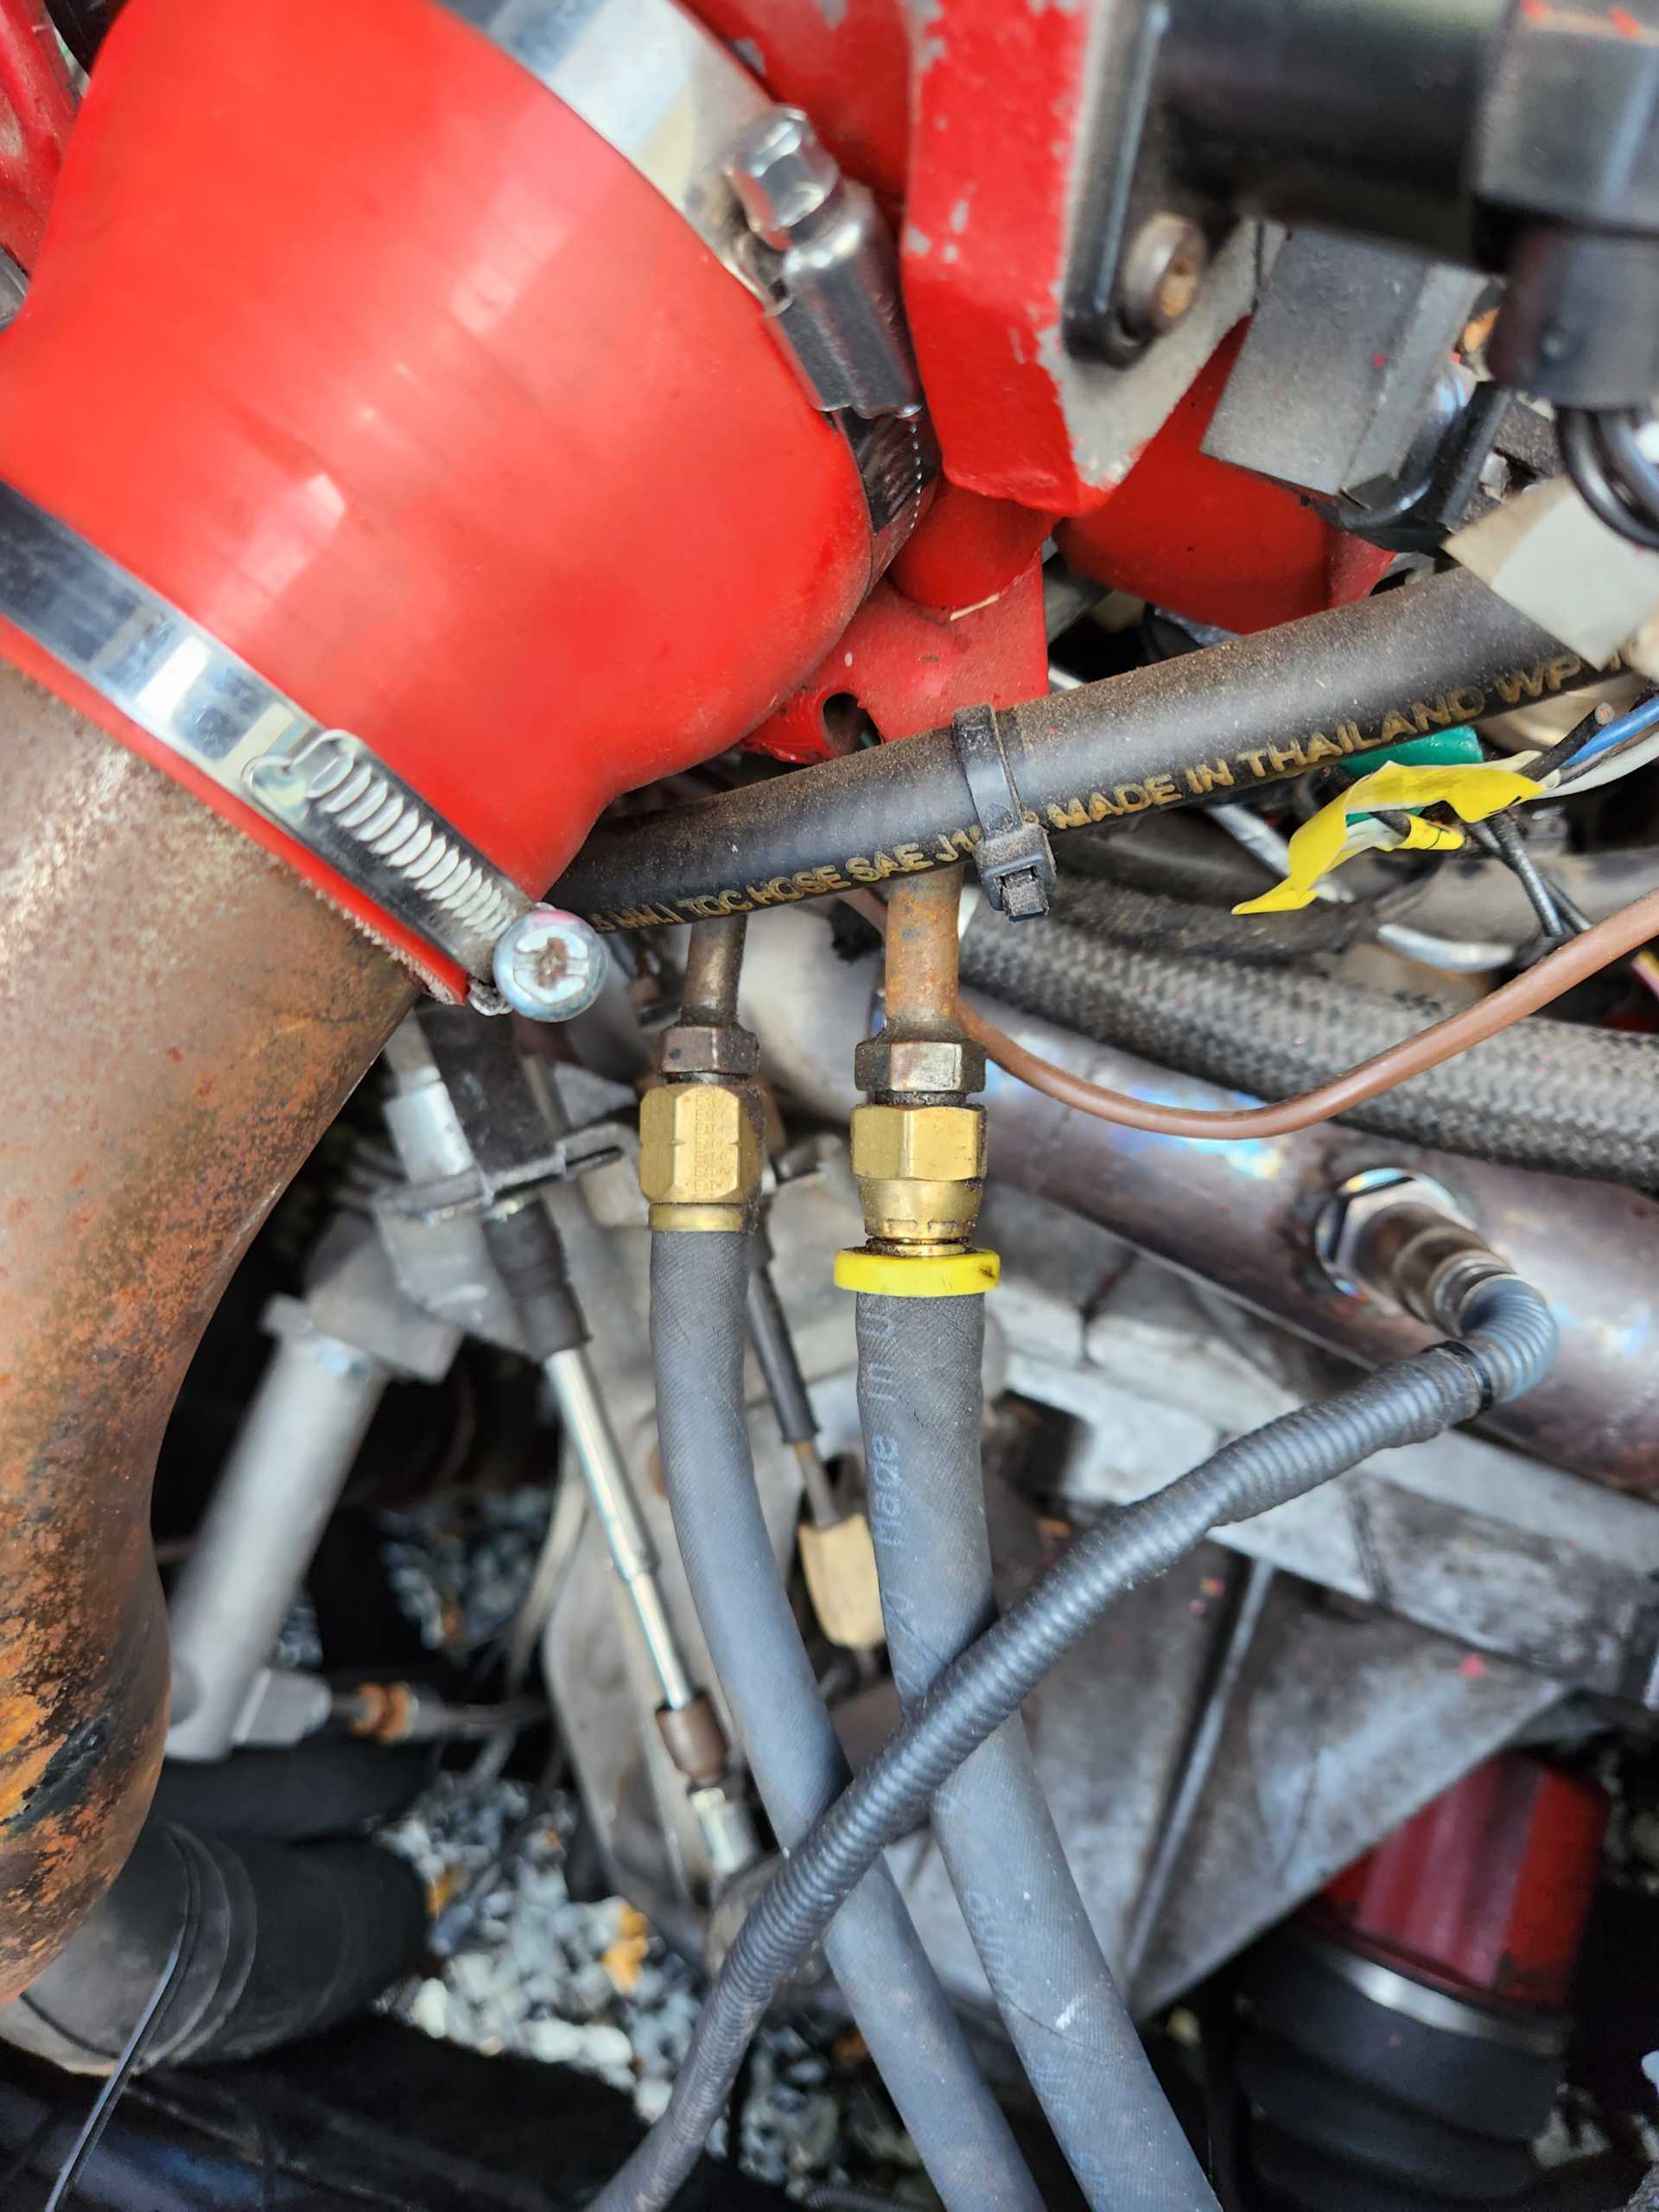
2 steps forward one step back, worked on the second engine test fit today to start sizing up coolant lines/Plug wires/vacuum lines and all that good stuff.
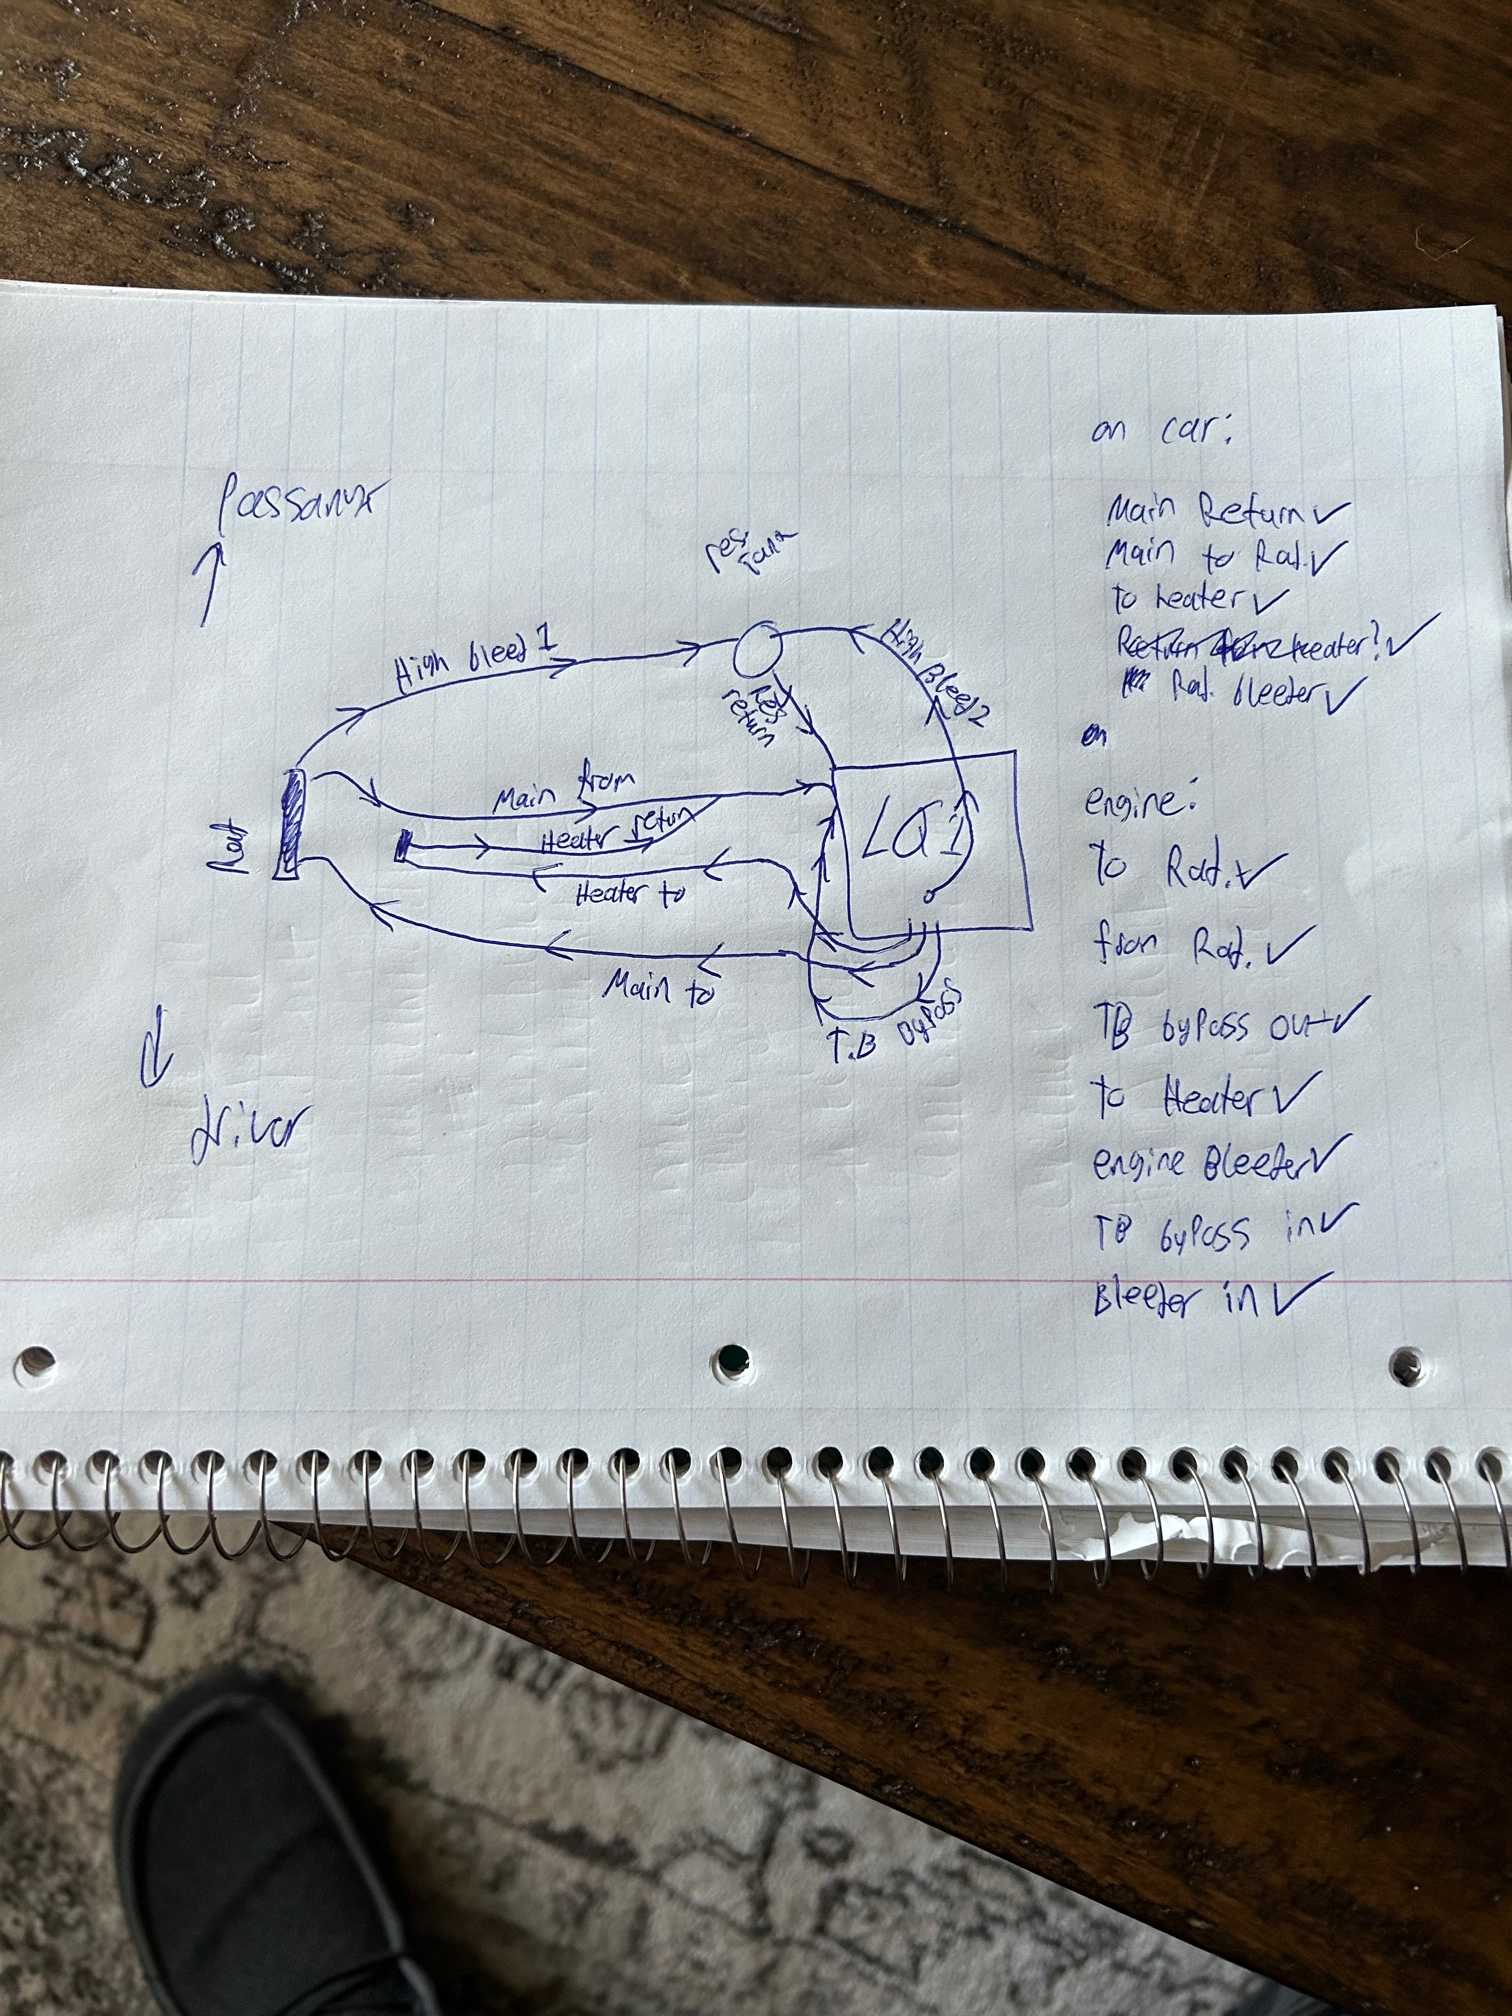
Let's start with the 2 steps forward. one big step is I believe I got the coolant routing all situated, on paper that is. I do have a couple of "universal" coolant hoses showing up so I'm going to start test fitting the 2 large lines running to the radiator and back.I got one cut and bent to length tonight for the line heading to the radiator, with the hose i think I'll be using for the return line showing up tomorrow. Below is my HD 4k Blueprints for how I plan to run coolant throughout the car, it is a mix of stock Fiero, Steven Snyder's self bleeding coolant setup, and a dazzle of the stock LQ1 for good measure.
The other positive thing I did was install the shift tower I've had made for this for like 3 months now, which at this point was only about a 15 minute detour but progress is progress.
Although I do have my vacuum line diagram pretty much done, it's time for the step back . I got the front cradle bolts in place meaning the cradle is strait, and the engine is sitting in the engine bay crooked :banghead. So back out it comes. I believe i found the problem, and it involves slotting out the two motor mounts to make everything line up in the engine bay.
The goal tomorrow is to have the engine mounted for the final time (again). And really start working on getting at least the vacuum lines ran before the weekend.
------------------ Black 88 GT, a 19 year old here about 20 years to late -LQ1 Swap in progress-
A little bit of a slow day today, but was able to get the engine almost completely squared up in the engine bay. Man is it a tight fit ...
Looks great! You work fast!
If it's posted earlier in your thread, I missed it. Did you have to cut the bottom off of your right side hinge box? I understand that's "a thing" with LQ1 swaps.
[This message has been edited by Raydar (edited 09-02-2023).]
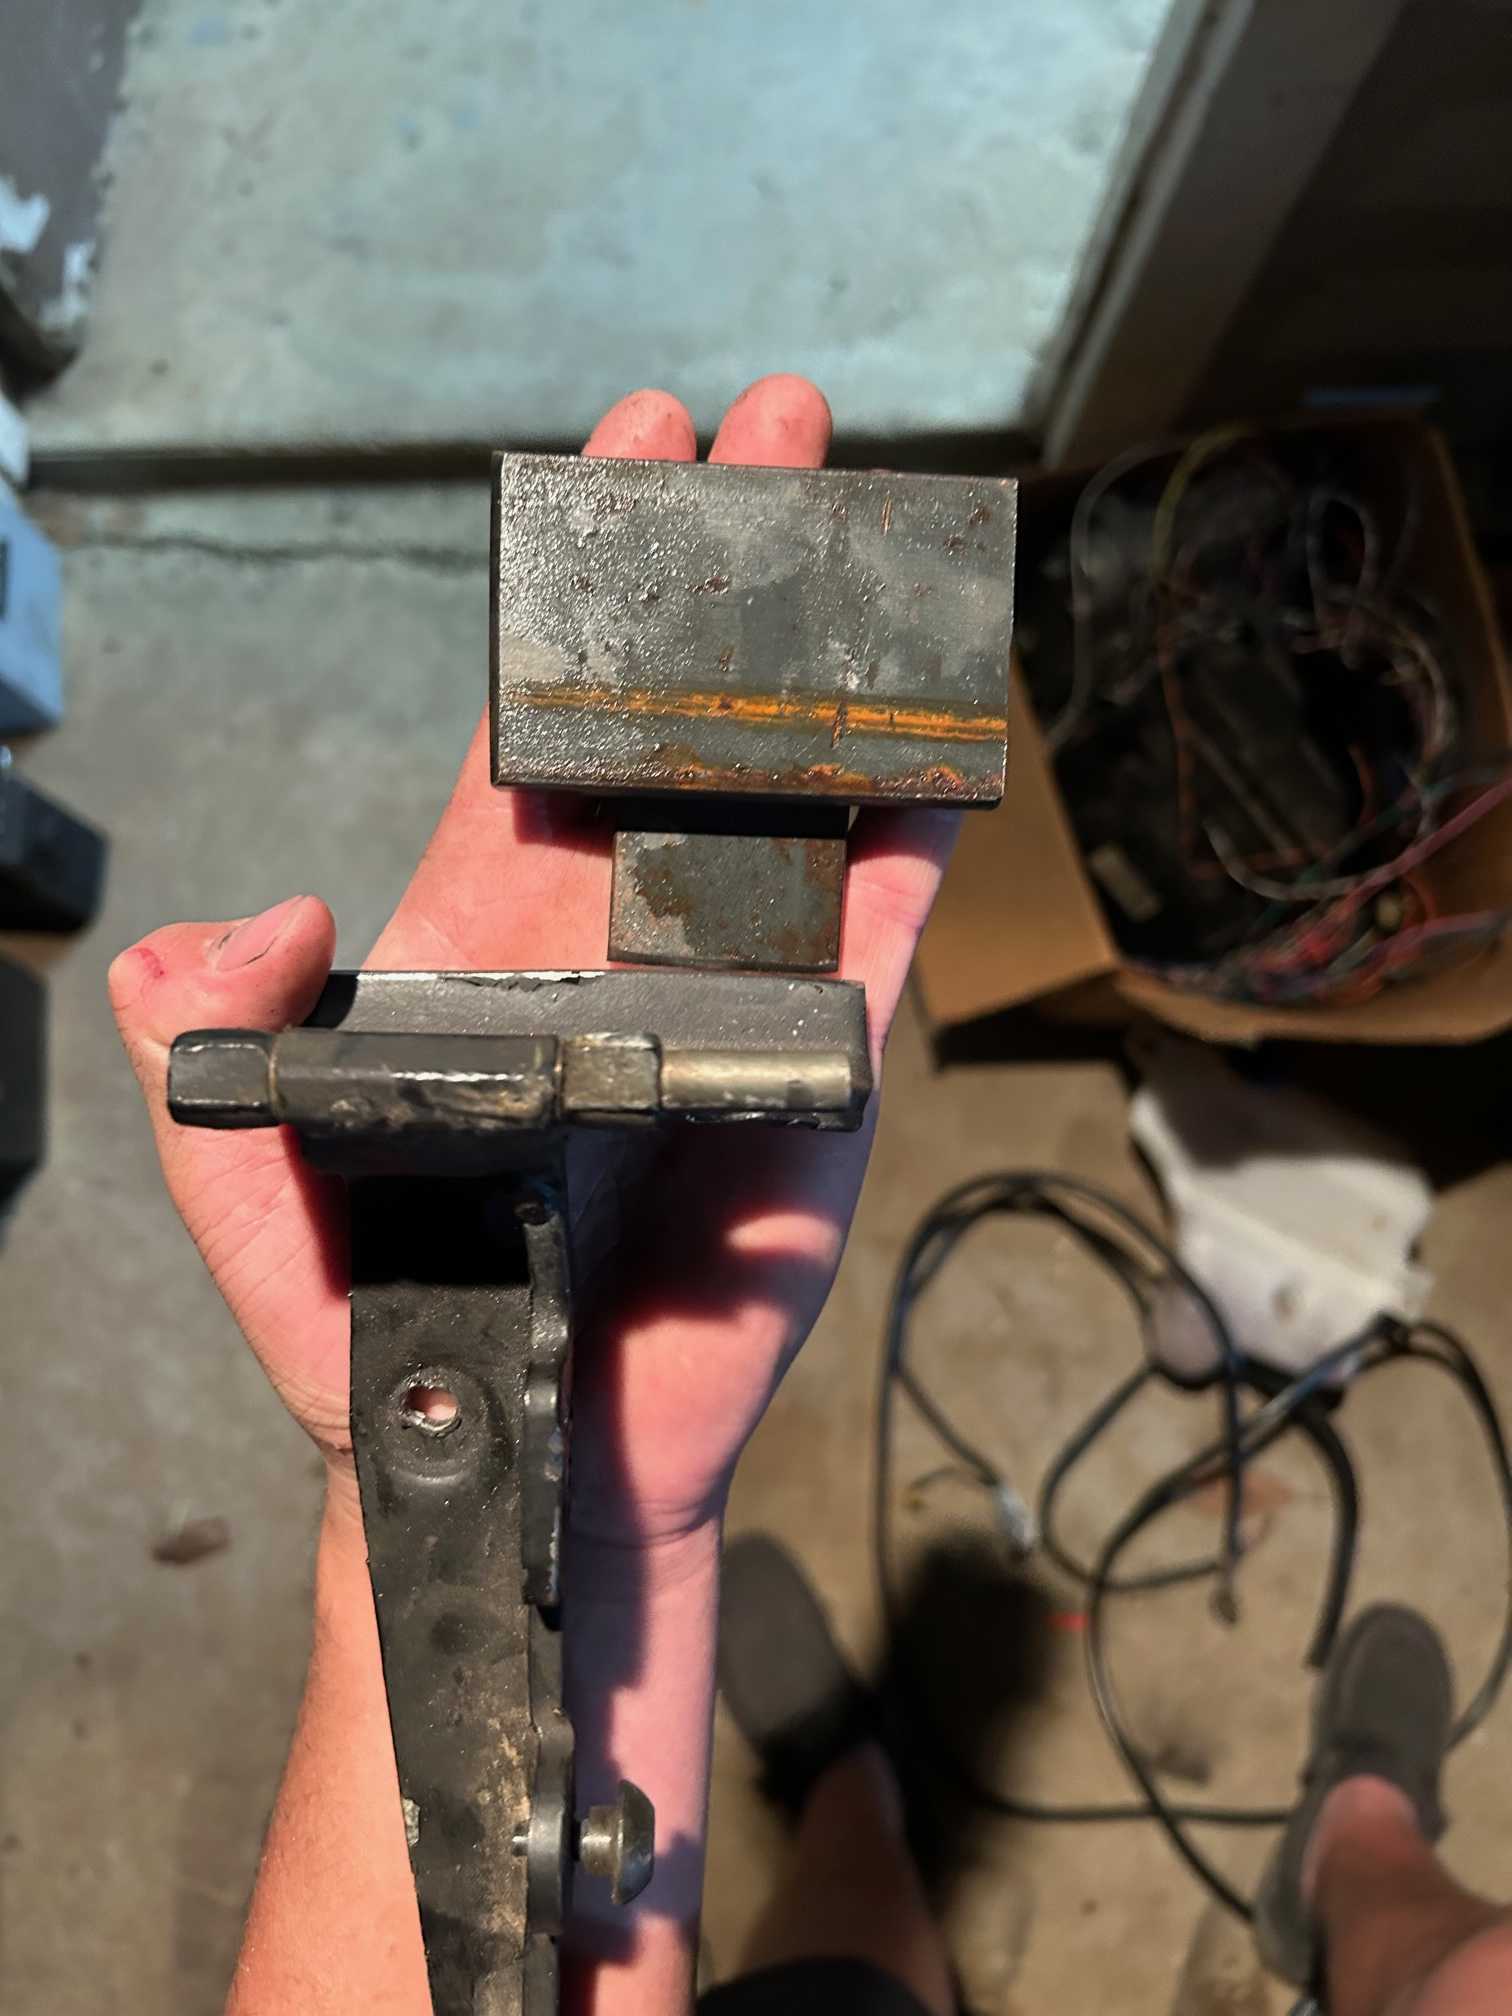
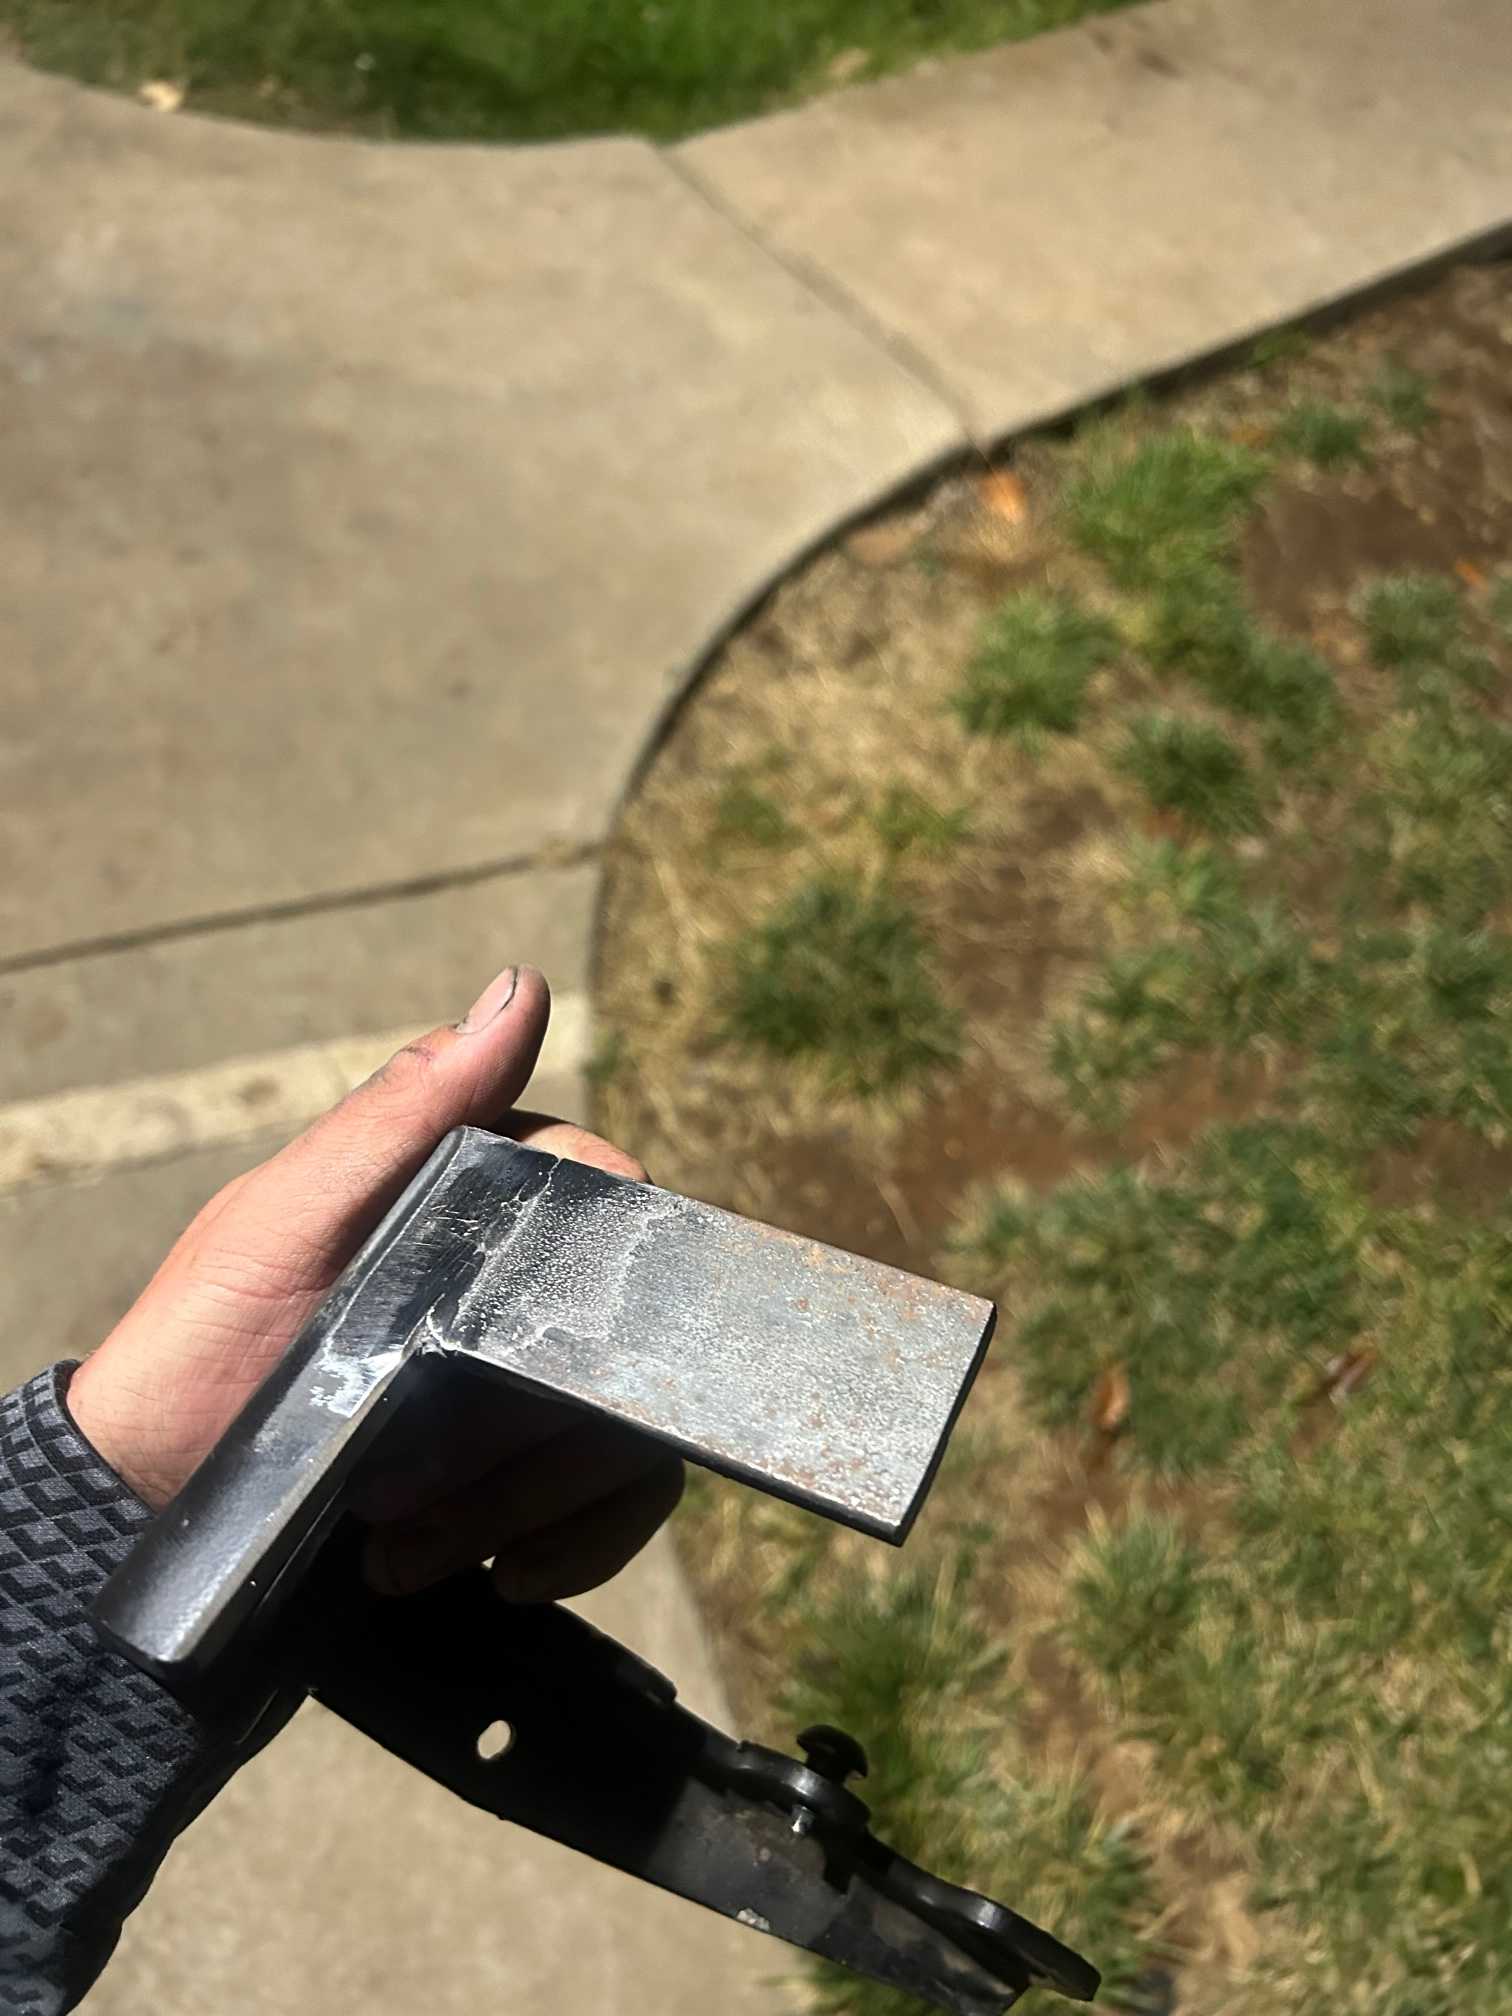
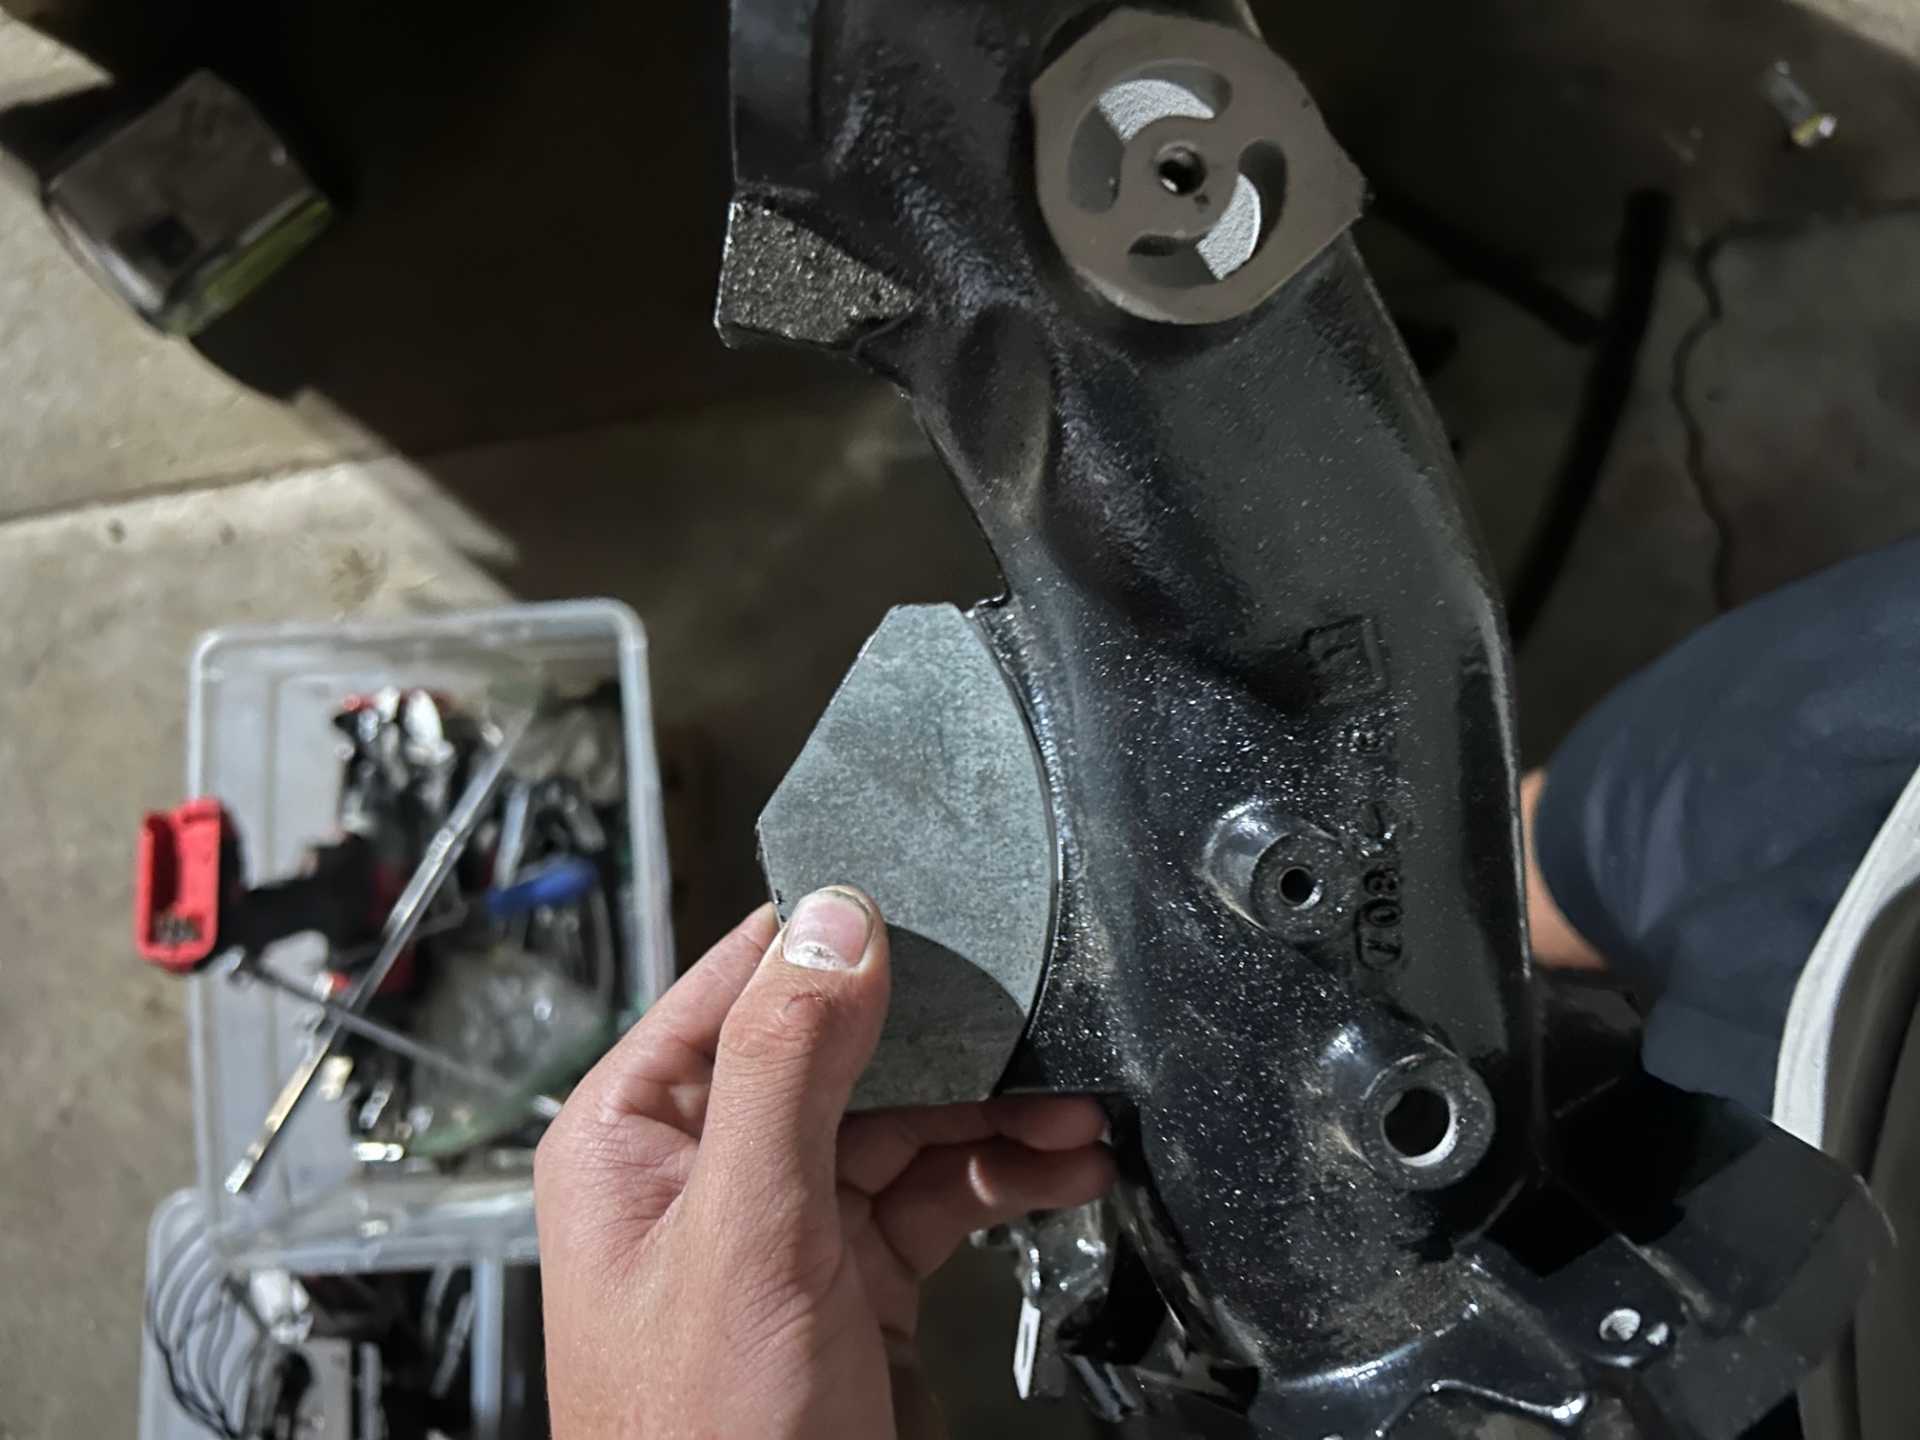
Yes, although I over estimated how much needs to be trimmed. I opted to cut out the whole hinge box and replace it with a getto version of Fiero Gurus Hidden hinges. I'm just going to weld the hinge onto the car after getting the deck lid fitment as good as possible. Below is my overly engineered (probably won't work) precisely cut (eyeballed) passenger hinge set up. Haven't welded it on yet as i haven't been in the mood and it's started raining.
Progress is starting to slow down as I am now waiting on the final parts of the build to arrive from various sources.I still have to sus out all my hose routing in the engine bay, but I've got pooly drawn routing on paper. Just gotta actually put it all together
------------------ Black 88 GT, a 19 year old here about 20 years to late -LQ1 Swap in progress-
Got bored right before the sun went down, and welded part of the hinge together. What I lack in laying gorgeous dimes, I hope to make up for it with the grinder (Kinda).
The only thing I don't have all the pieces of the puzzle for at the moment is fuel delivery. I can't figure out for the life of me what the stock rubber line connection(s) are. I plan for now just running rubber lines until I have the time, patience, and money to make the move to stainless lines. Does anyone know the thread pitch/fittings from these stock rubber lines?
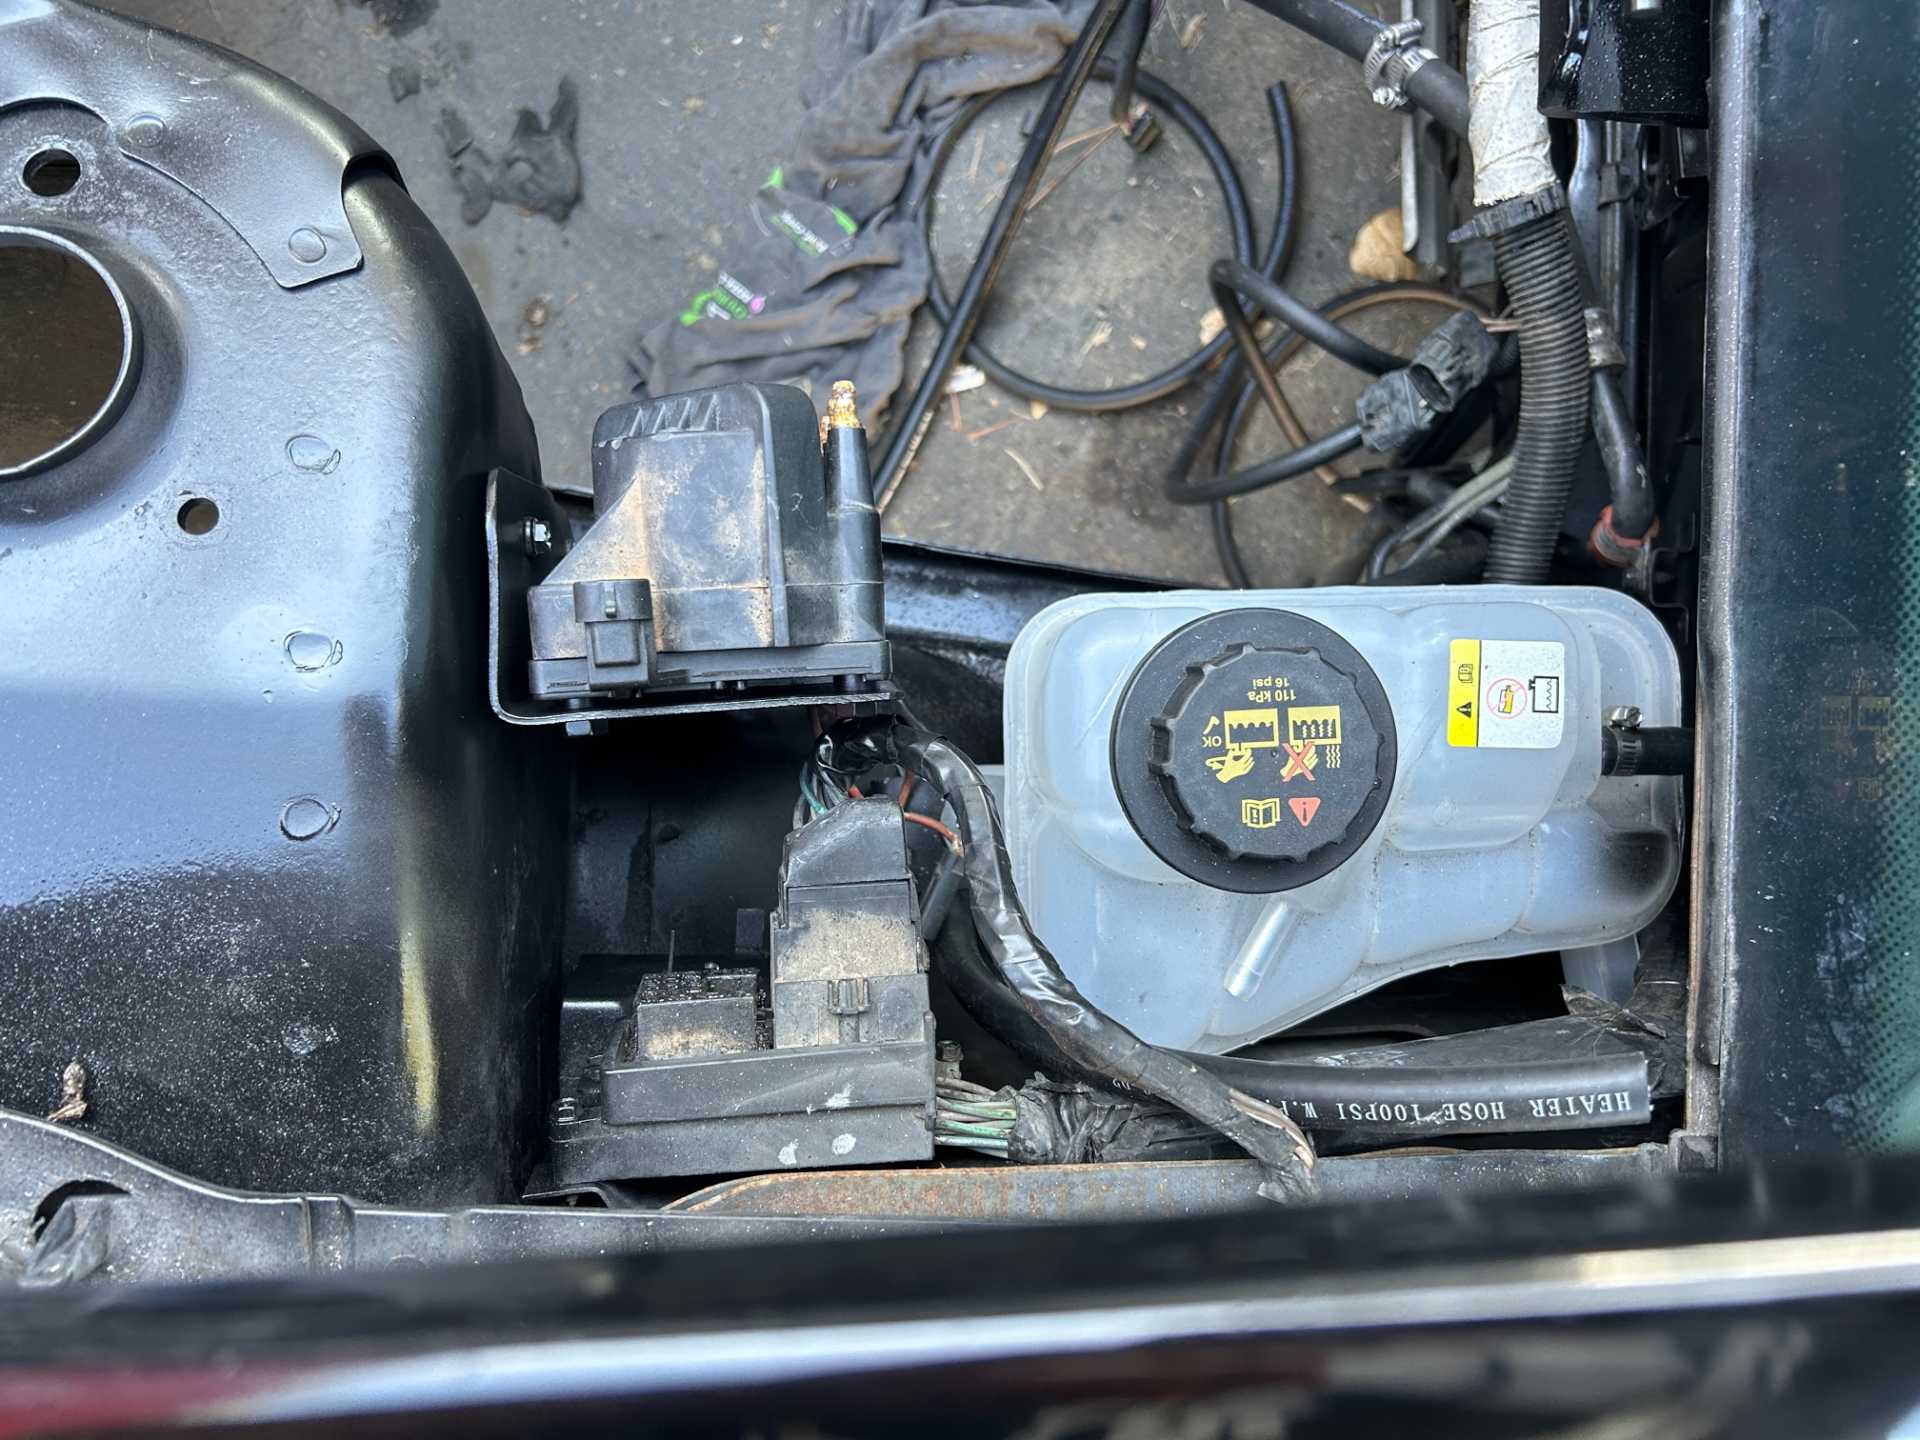
Progress is definitely slowing down as I start to wait for the final pieces of the puzzle to arrive via snail mail. Today I was able to get all but 1 vacuum line in place (arriving tomorrow) and get all the coolant lines "made", along with sizing up the cruise box/coil packs/coolant reservoir.
I've got injectors and a chip from Darth arriving later this week, and the harness I'm hoping will be ready by next weekend. After that its a drive to a buddy's house who is not terrible at welding to fab an exhaust up and boom.
------------------ Black 88 GT, a 19 year old here about 20 years to late -LQ1 Swap in progress-
the stock rubber line connections are "sawginaw" fittings. also called "Metric O-ring" fittings. I forget what sizes are needed though.
------------------ "I am not what you so glibly call to be a civilized man. I have broken with society for reasons which I alone am able to appreciate. I am therefore not subject to it's stupid laws, and I ask you to never allude to them in my presence again."
I invited Lou Dias to trash me in my own thread, he refused. sorry. if he trashes your thread going after me. I tried.
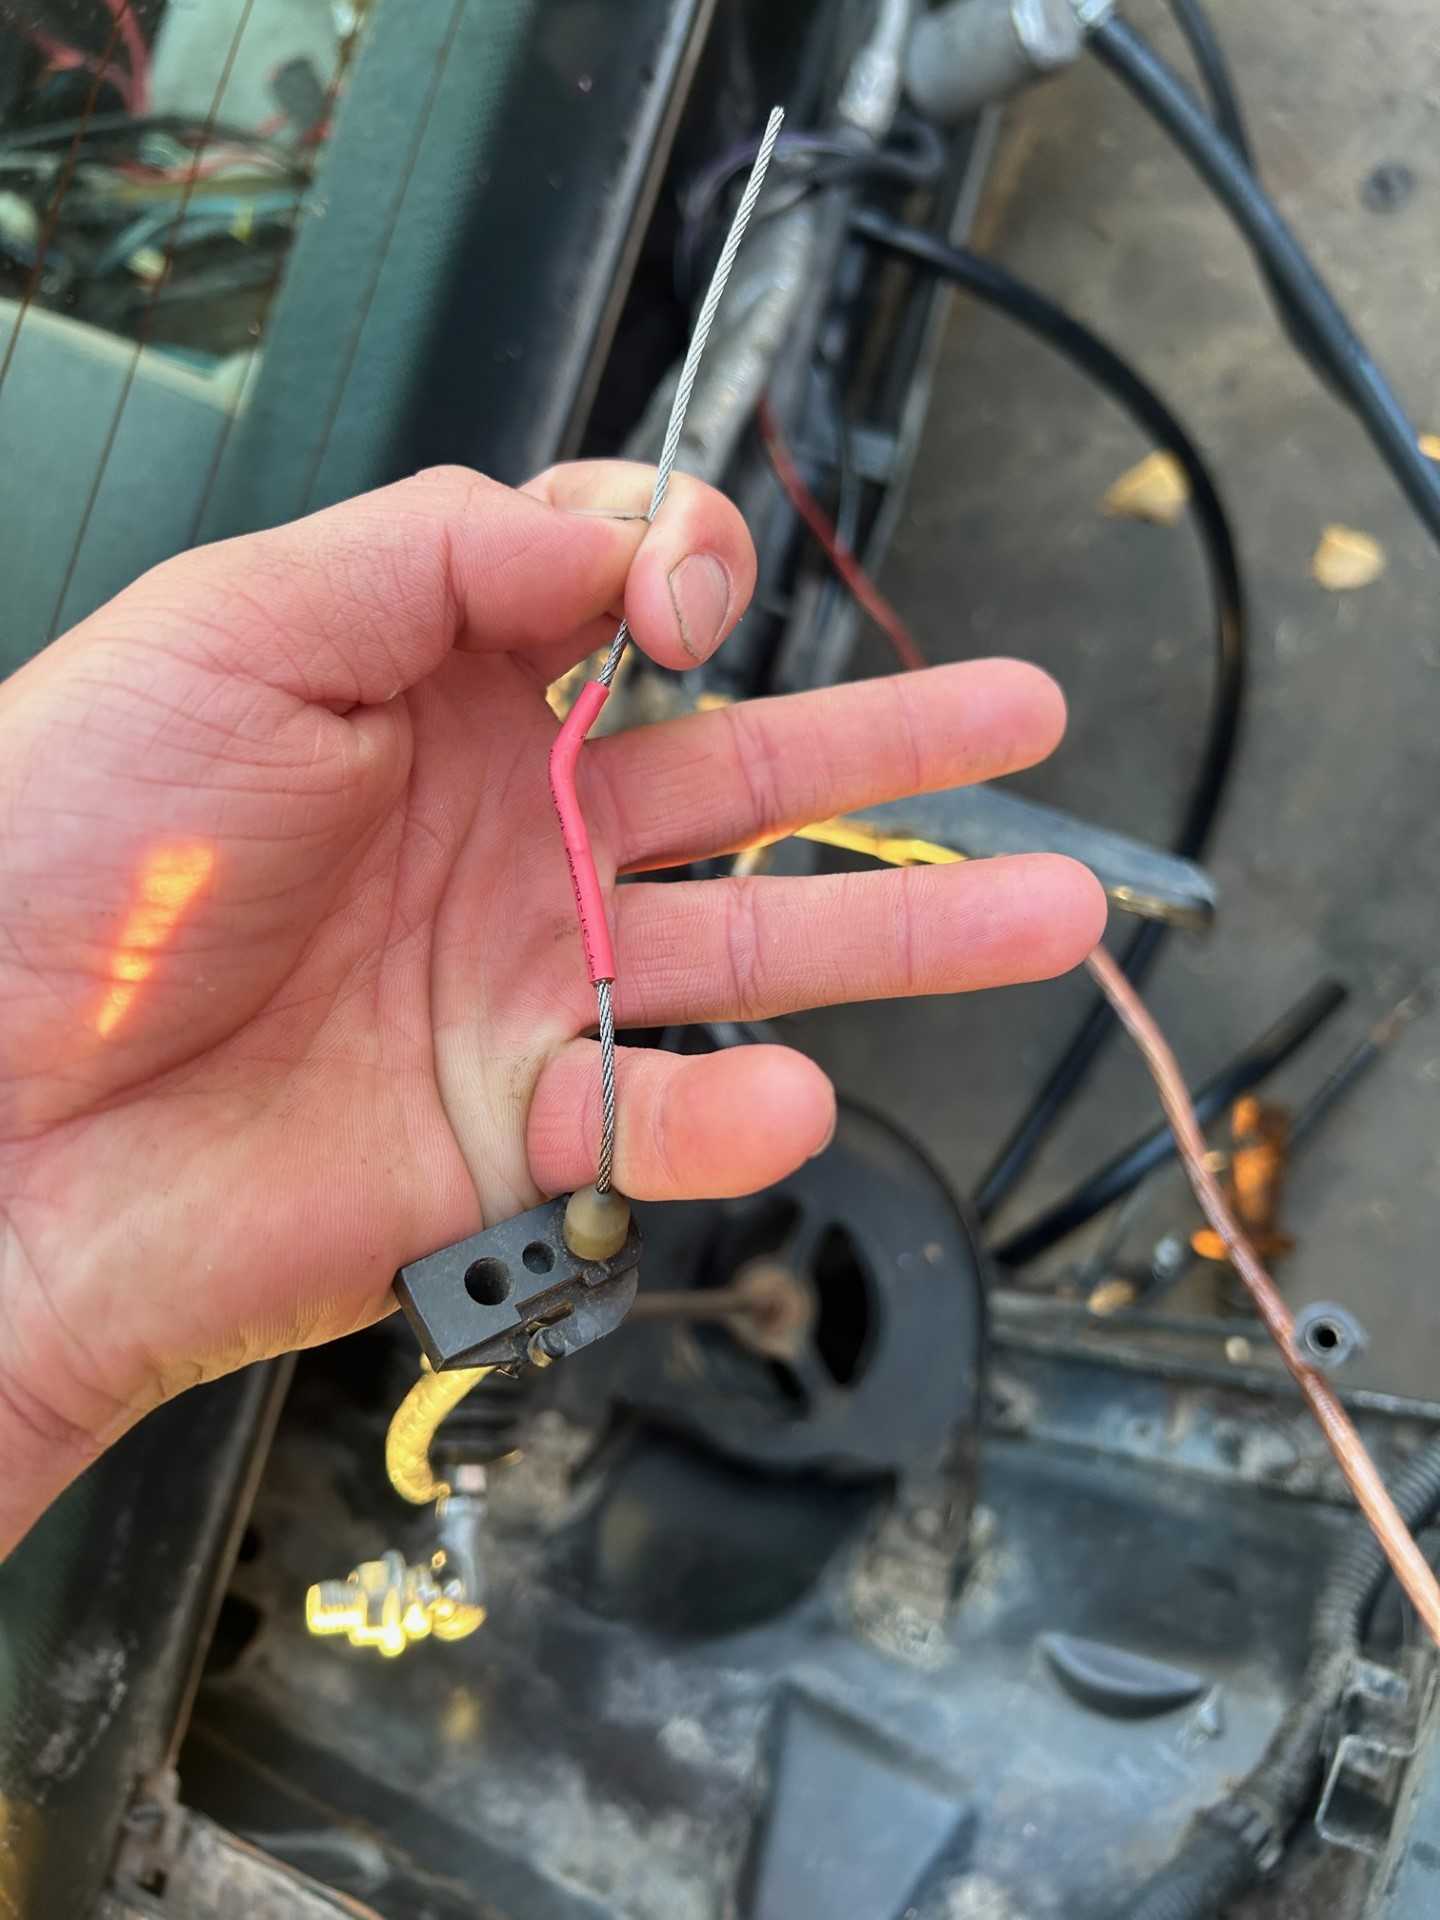
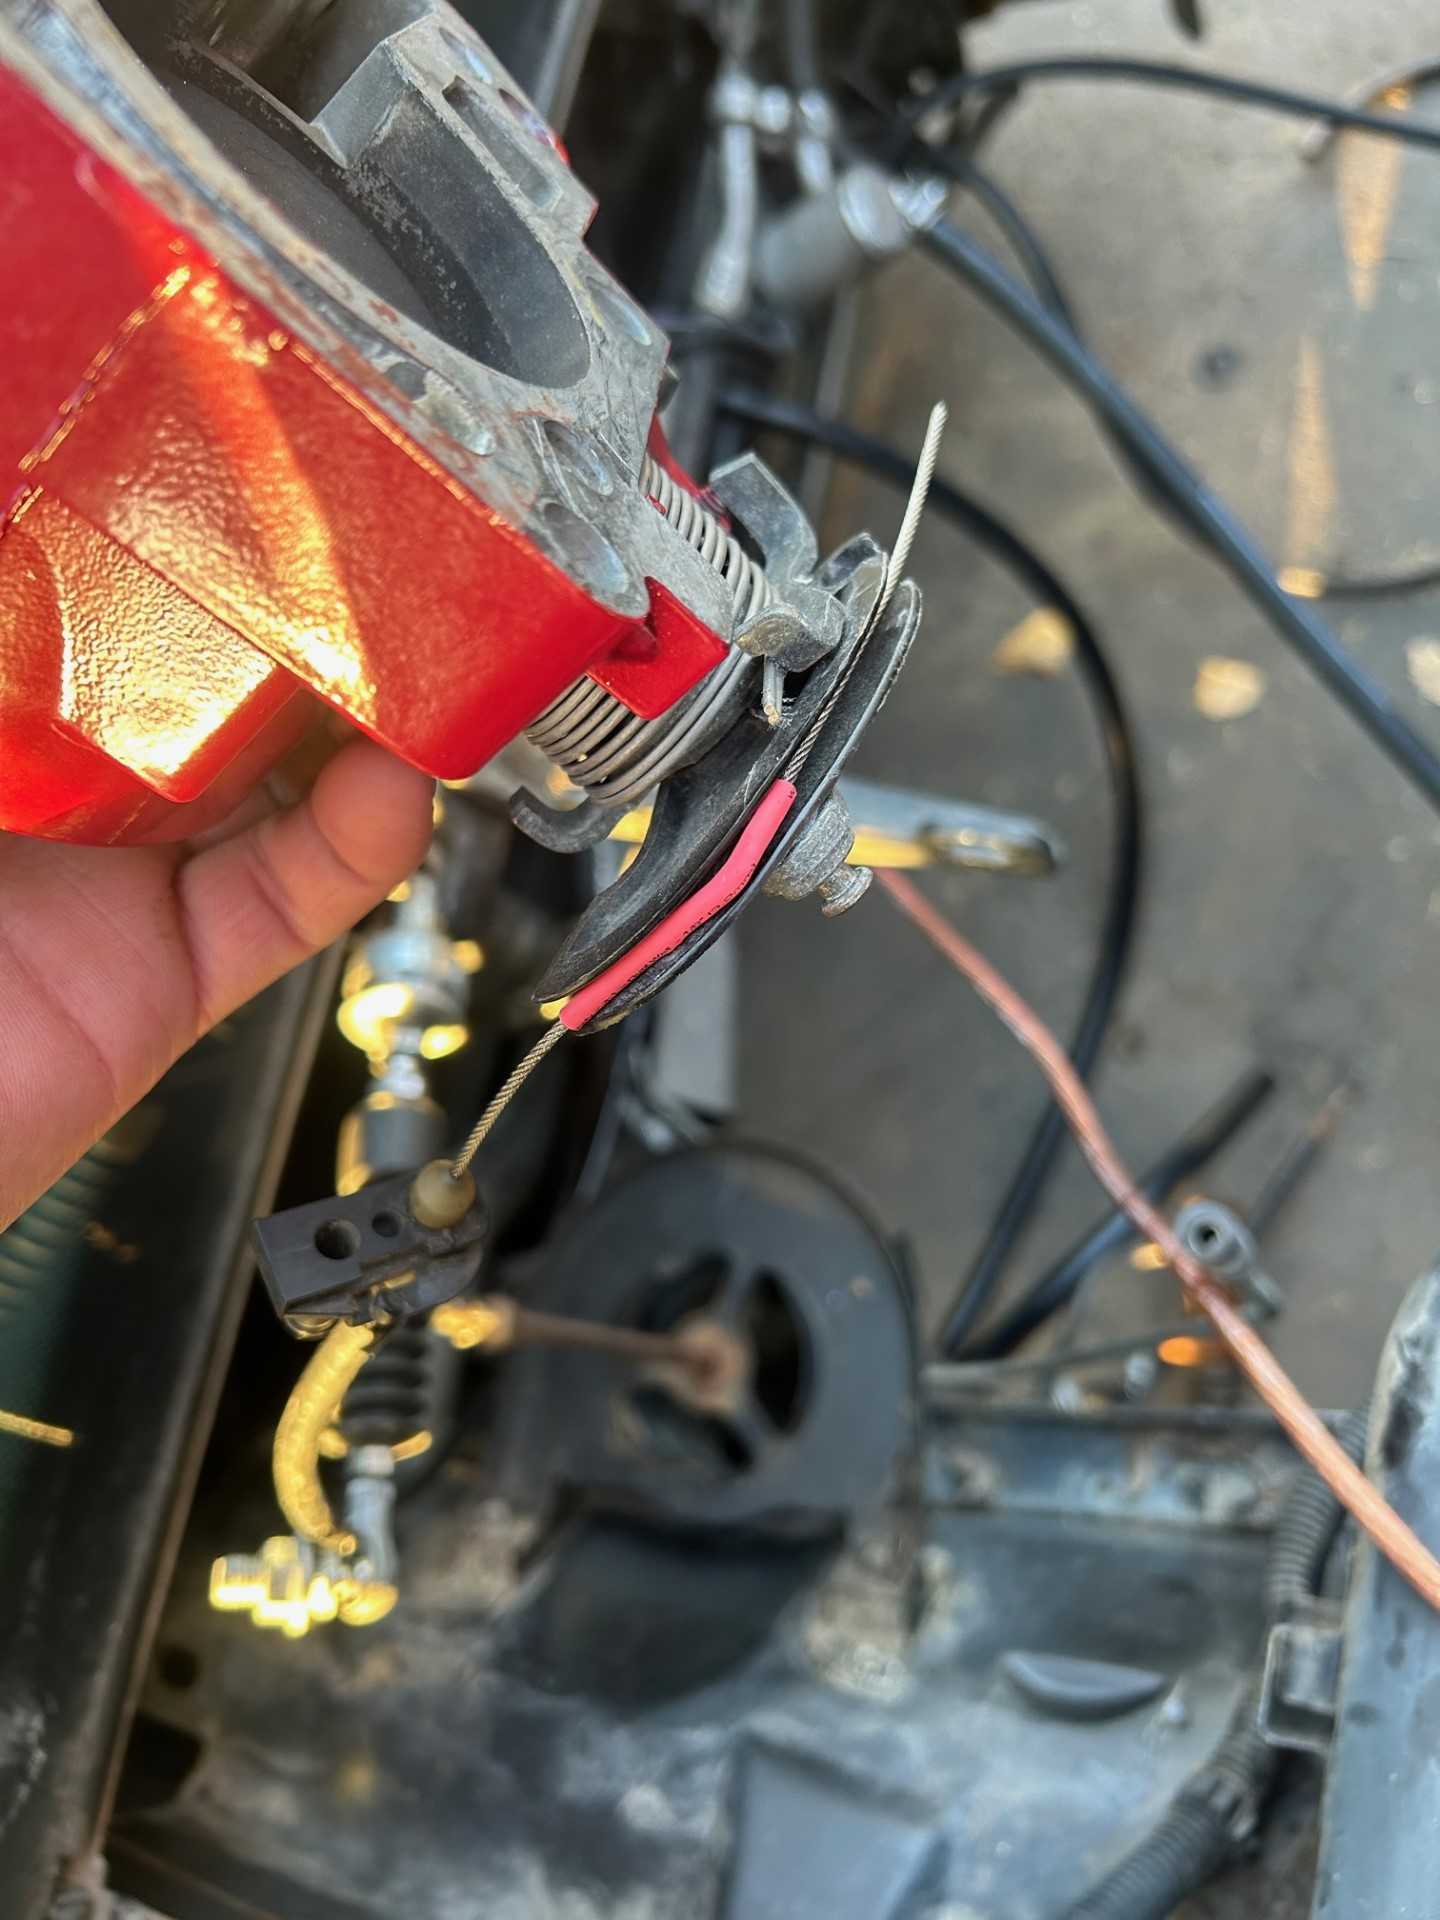
Today's main focus was on the throttle cable, I got my hands on an 88 Duke cable because from what I've read it is the closest match to the LQ1. When i pulled my accelerator pedal it was busted, so a quick drive to the parts car and that problem was solved. I got the duke cable all in place and the pedal all bolted up to the car. Although it's a very close fit, it's not quite perfect so I'll have to figure out how to modify the cable.
I also "fabbed" up one of the EGR delete plates, then the grinder ran out of battery so I'll finish up the other side tomorrow.
------------------ Black 88 GT, a 19 year old here about 20 years to late -LQ1 Swap in progress-
Really nice job. I've seen few 3.4L TDC swaps in Fieros at the shows but the guys that I spoke to that run them with the stick really like them and appreciate the high redline. In CA you will need to get by the emissions police. Since the TDC engine came with both sticks and autos with a CAT you should be fine for approval but it may take some maneuvering before a referee.
------------------ " THE BLACK PARALYZER" -87GT 3800SC Series III engine, custom ZZP /Frozen Boost Intercooler setup, 3.4" Pulley, Northstar TB, LS1 MAF, 3" Spintech/Hedman Exhaust, P-log Manifold, Autolite 104's, MSD wires, Custom CAI, 4T65eHD w. custom axles, Champion Radiator, S10 Brake Booster, HP Tuners VCM Suite. "THE COLUSSUS" 87GT - ALL OUT 3.4L Turbocharged engine, Garrett Hybrid Turbo, MSD ign., modified TH125H " ON THE LOOSE WITHOUT THE JUICE "
In CA you will need to get by the emissions police
I have the car registered in a one time smog county, meaning dictator Newsom doesn't have to look under the hood for me to get my registration sticker every year. That being said, I am hanging on to parts that will be needed to fully register the car if I'm ever forced to do so. I just don't have the time, patience, and money to deal with all the right now. It also helps the engine breathe a little better without all that stuff
Speaking of smog (or lack there of), I got the lower EGR delete plate finished tonight. Still needs paint but that's easy
------------------ Black 88 GT, a 19 year old here about 20 years to late -LQ1 Swap in progress-
Every time I say I'm almost done another thing I have to do pops into my head. I decided to spend the 5$ and get some FelPro gasket material and make gaskets for the EGR delete and one of the Vacuum covers. It only took about 10 minutes before work to get all of them finished up. Definingly not going to be getting a job at FelPro anytime soon, but they'll work fine for sealing a little vacuum.
Won't get much work done this weekend because the car is starting to take a back seat. It's so close to the first start, just a little more to go!
------------------ Black 88 GT, a 19 year old here about 20 years to late -LQ1 Swap in progress-
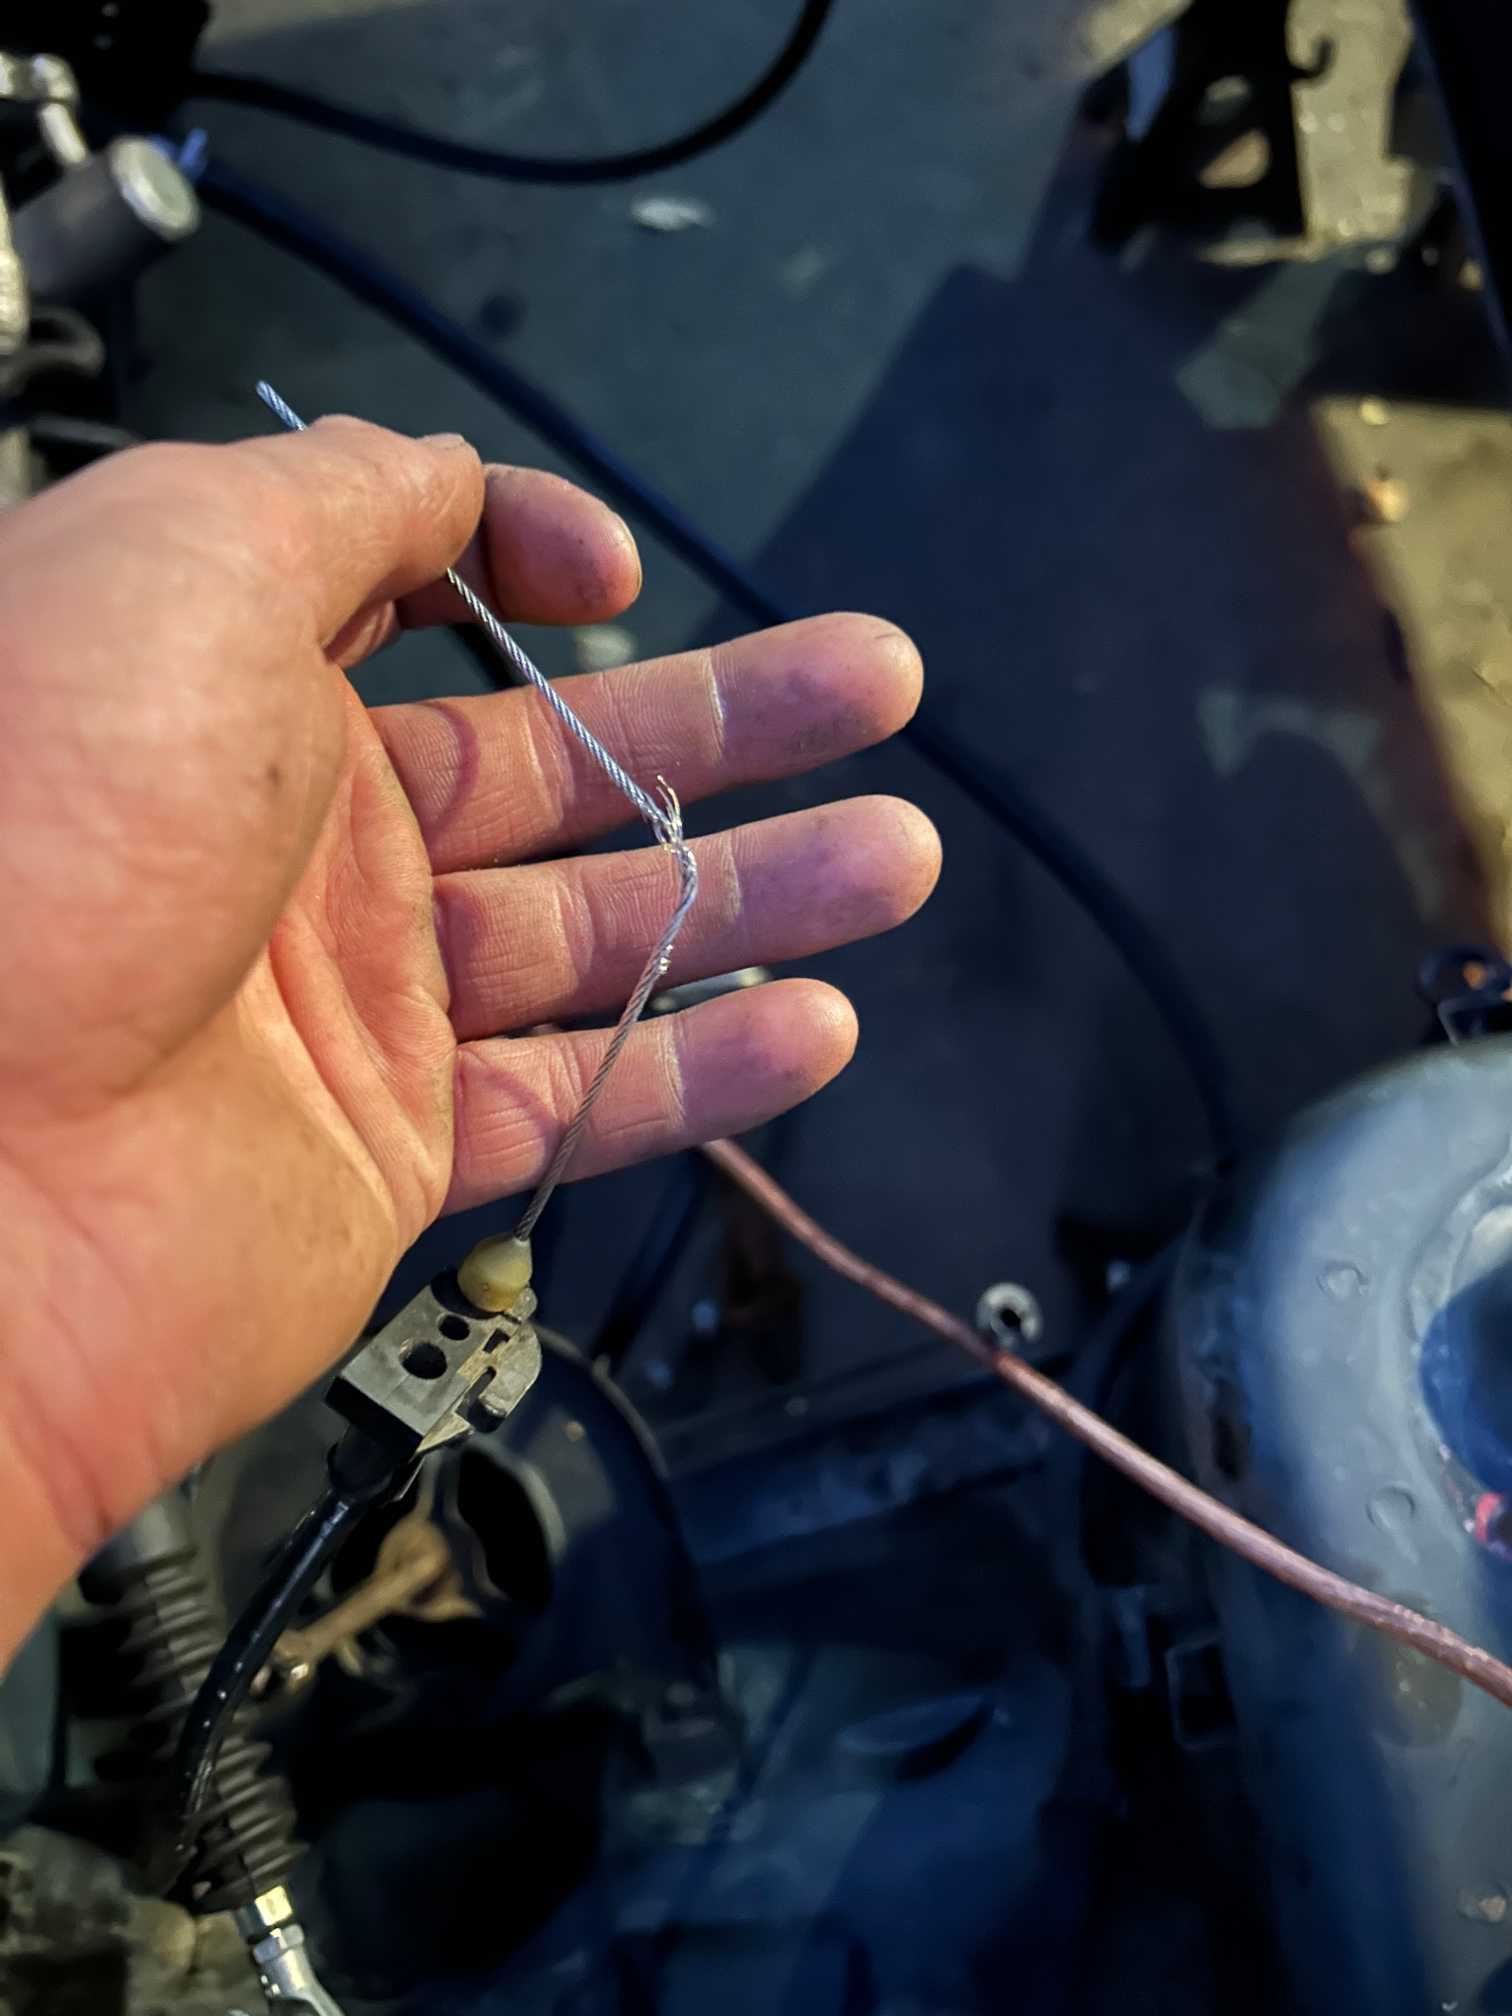
If i was ever going to throw in the towel and sell the car it'll be this week. That means all I gotta do is make it through this next week and i should be good. I got the duke cable pin things cut off at the cost of chewing up the cable, so I'm using some marine grade heat shrink on the bad spots to hold it together. I know that isn't the end all save all method but i at least need to hear this thing start and am doing everything i can to make that happen as fast as possible (I'm sure I'll regret this decision later).
I did get all my plates put into place, and that went without a hitch
I also cut back and flared out the fuel lines to fit on the rubber hoses. Again, SS AN line would be the best way to go, but i just don't have the patience to deal with that at the moment.
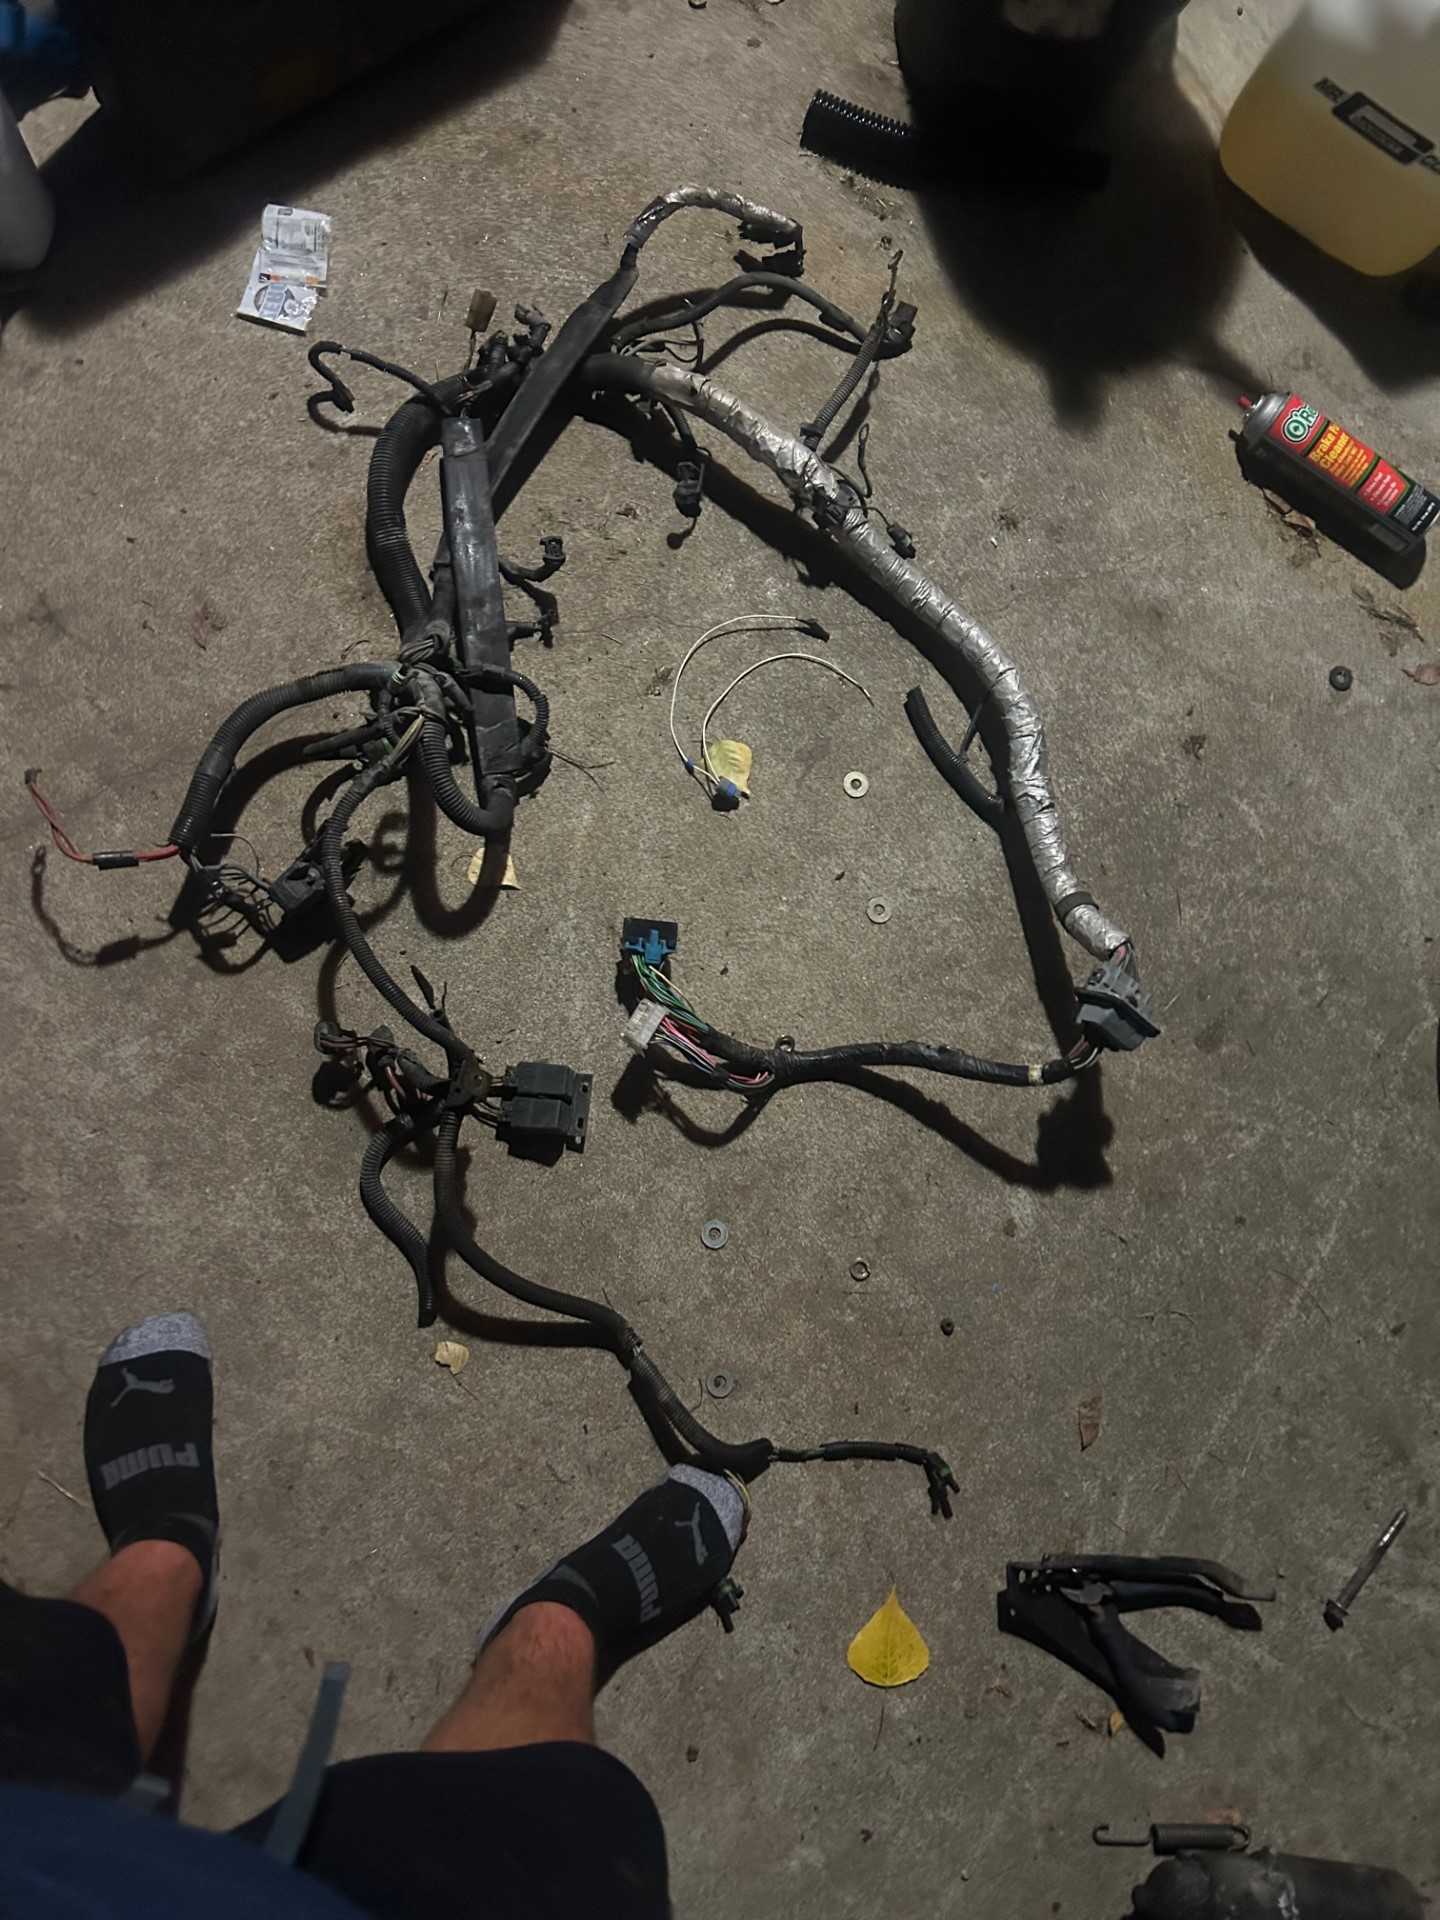
I'm not even going to try my luck with the wiring harness, and have contacted Erik about a Swap Harness and will probably be sending the pieces his way soon.
EDIT: Fixed a photo ------------------ Black 88 GT, a 19 year old here about 20 years to late -LQ1 Swap in progress-
[This message has been edited by fliphone (edited 09-10-2023).]
A little progress over the past couple of days, I got ahold of some marine heat shrink and "fixed" the throttle cable. It's not perfect but it should at least get the car on the road. I also got the parts car wiring harness pulled, meaning i should be able to get the harness(s) sent off to Erik by the end of the week
------------------ Black 88 GT, a 19 year old here about 20 years to late -LQ1 Swap in progress-
Little Saturday project was getting the old battery location filled up. By no means is that corner of the car going to be winning any awards, but it'll do its job and that's what matters. Tomorrow I'll try and finish the under-the-spare battery
I didn't post it, but earlier this week I also finished putting in the passenger side decklid hinge.
I also pulled the cruise box from a LQ1 Monte Carlo, can anyone confirm or deny if that's the correct cruise box to put into a fiero? I've read that the northstar cruise box is the best, but haven't made a pick and pull run since I've read that. tia!
------------------ Black 88 GT, a 19 year old here about 20 years to late -LQ1 Swap in progress-
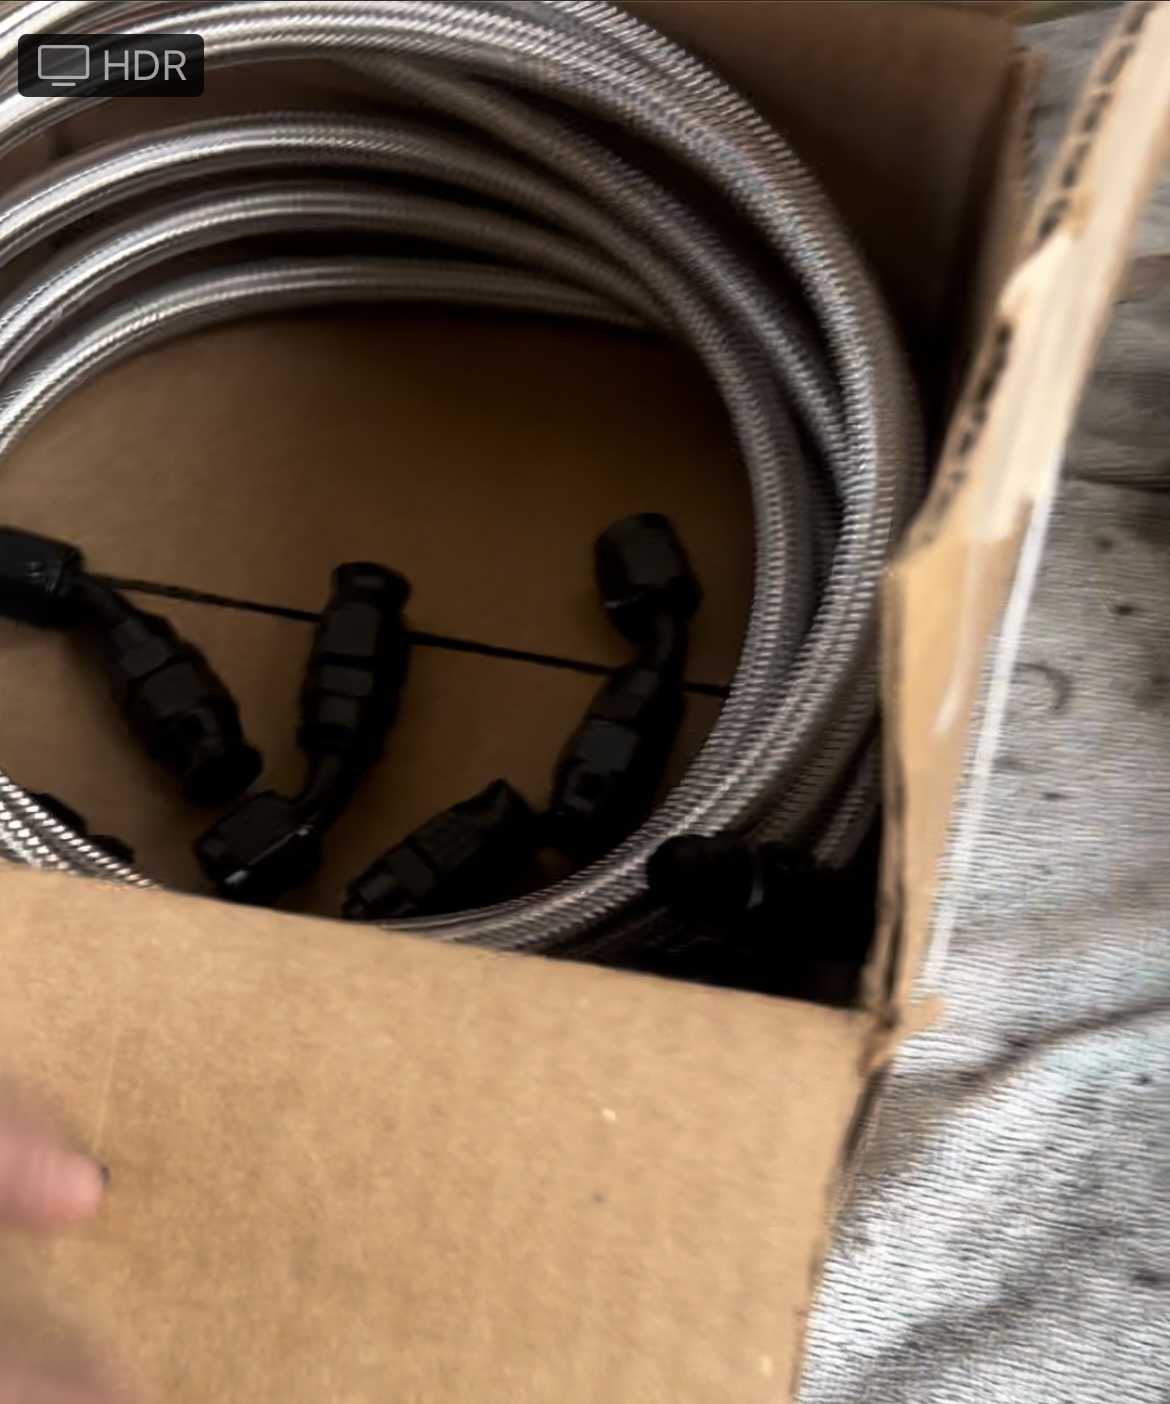
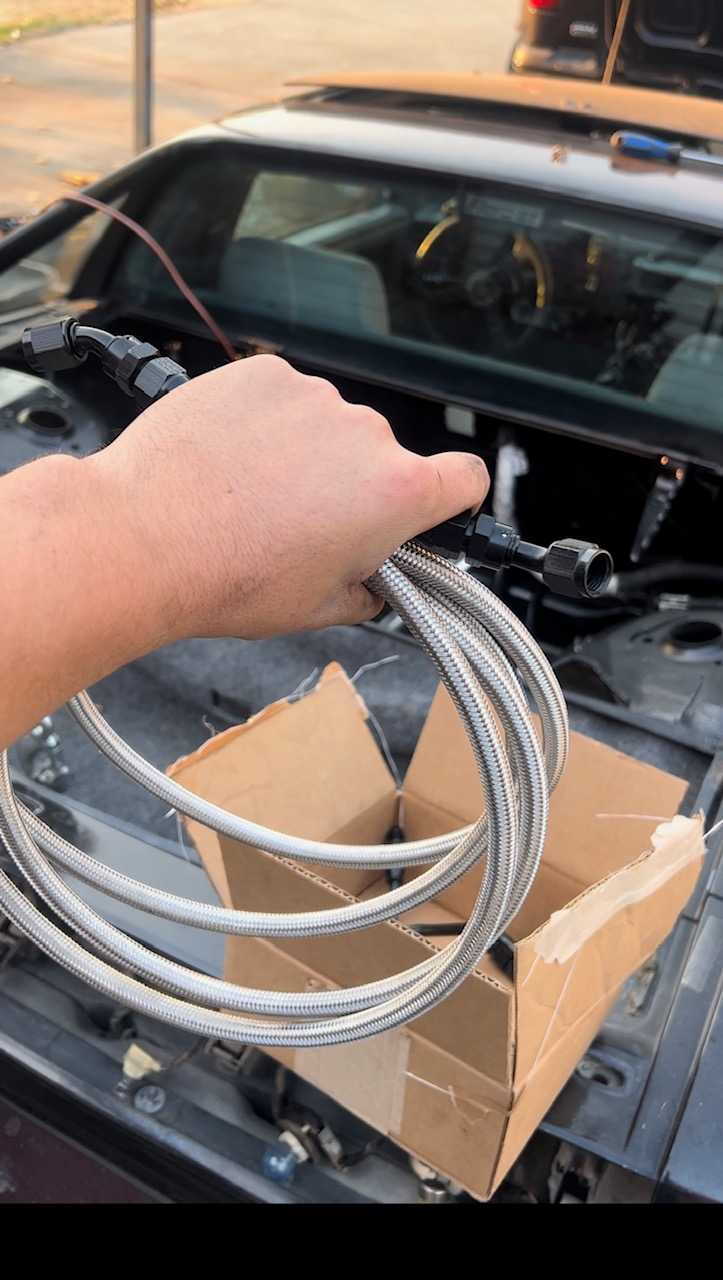
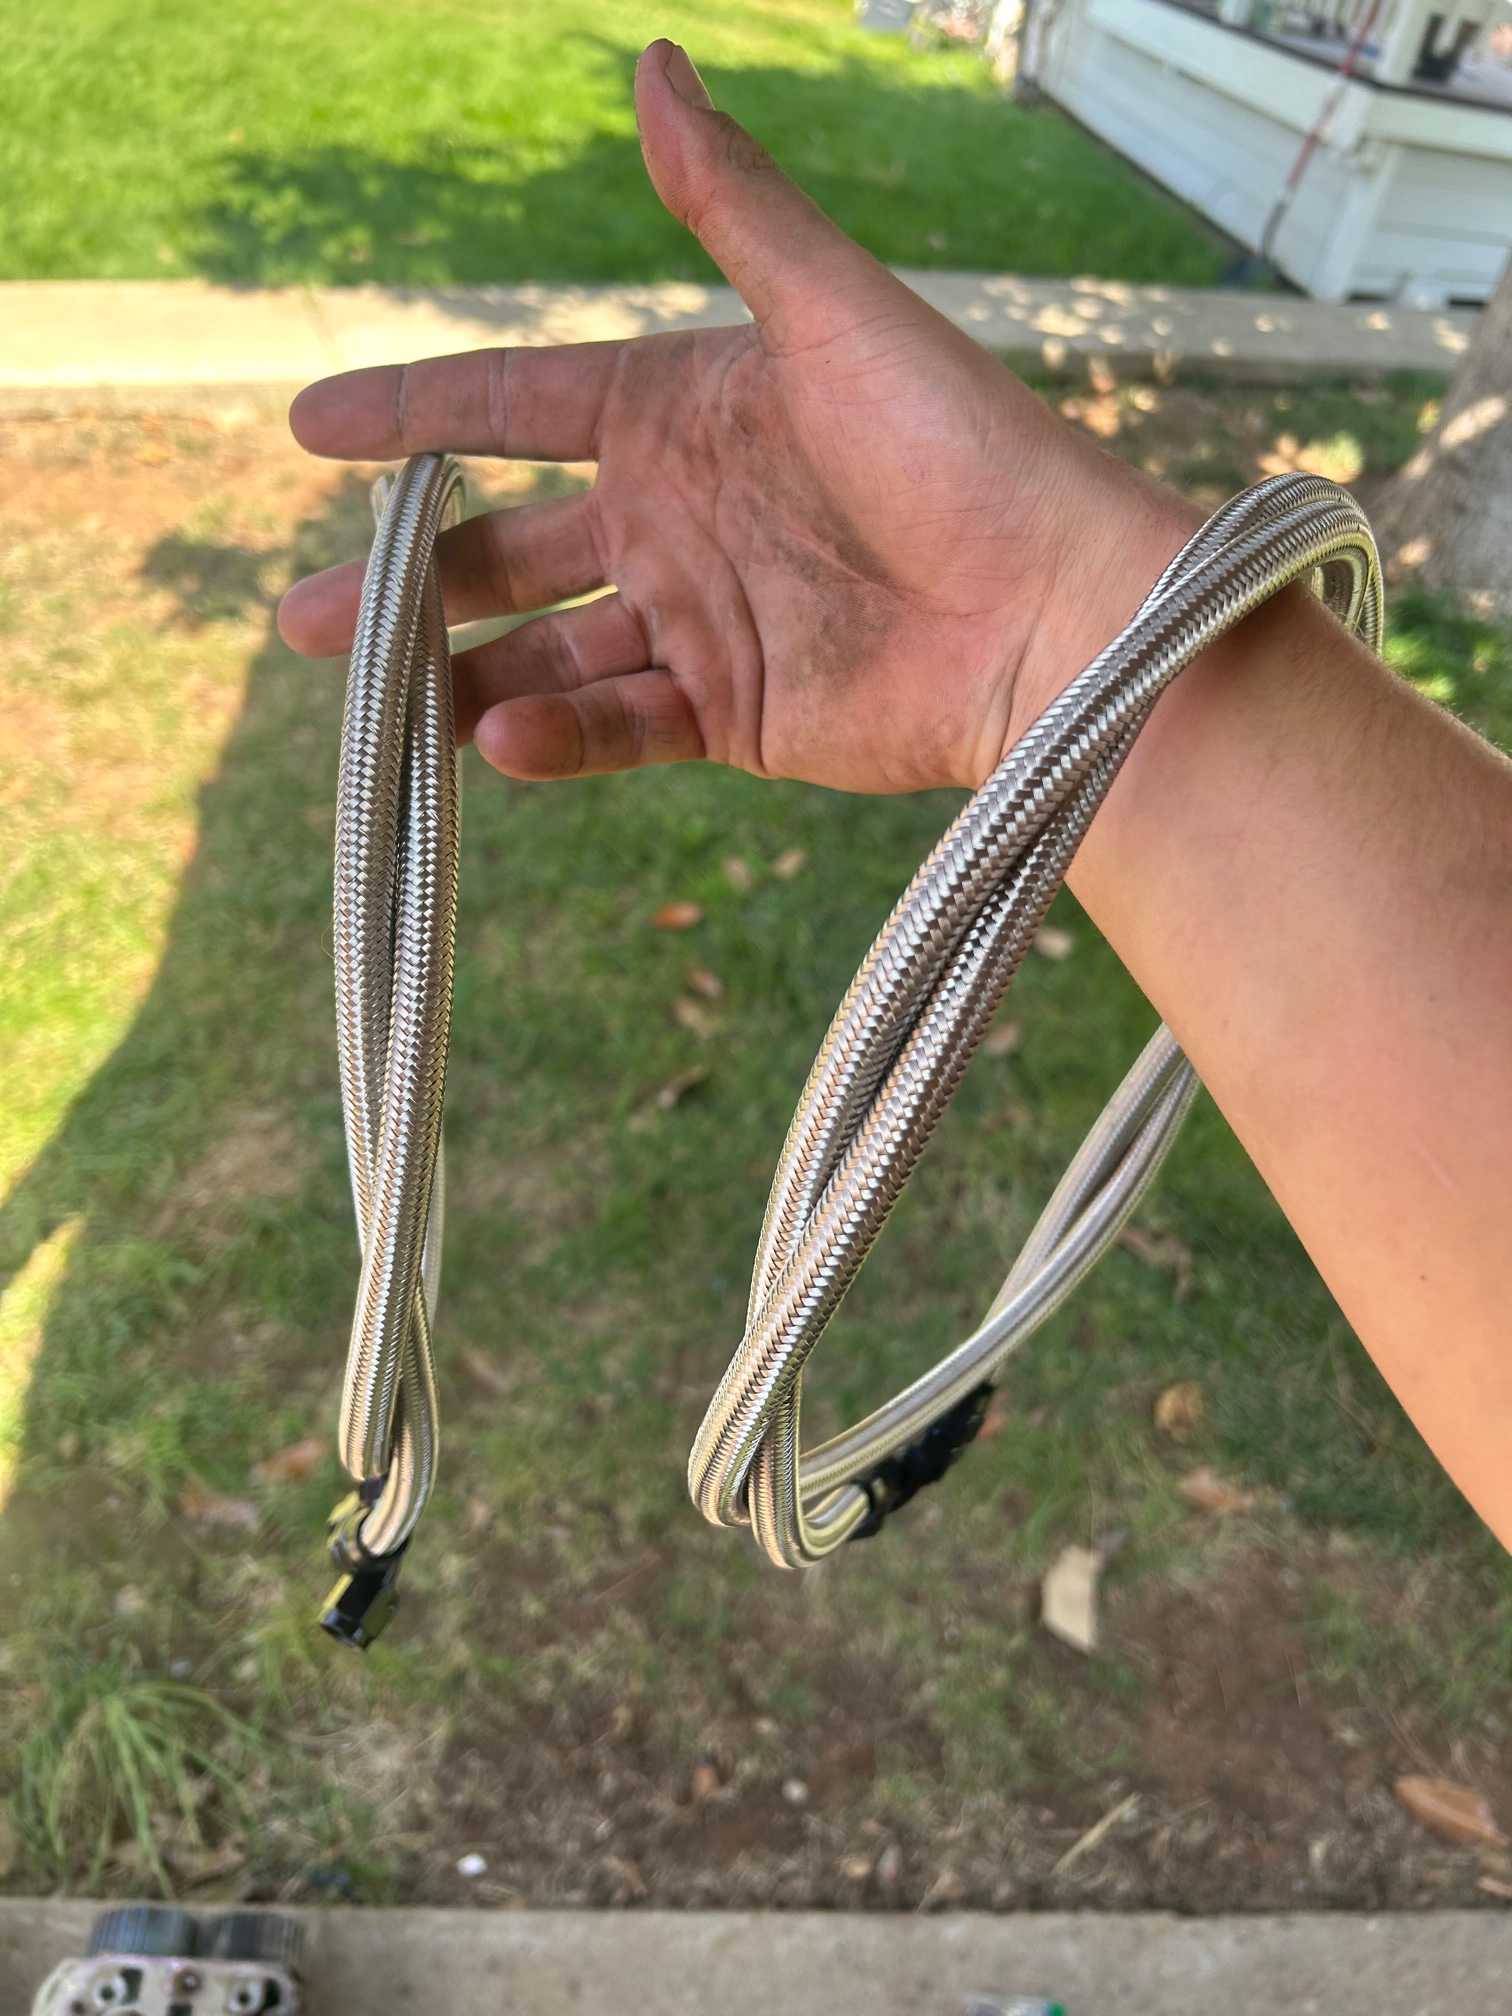
I made the decision to go with stainless fuel lines, and I couldn't have been happier. I think i was a little over $100 and i just put on most of the fittings in about 30 minutes.
I also got the wiring harnesses sent off to Erik to have the harness put together by someone you knows the difference between a blue with a yellow stripe wire and yellow with a blue strip wire. So everything should be done and ready to go by the time the harness gets back in my hands
------------------ Black 88 GT, a 19 year old here about 20 years to late -LQ1 Swap in progress-
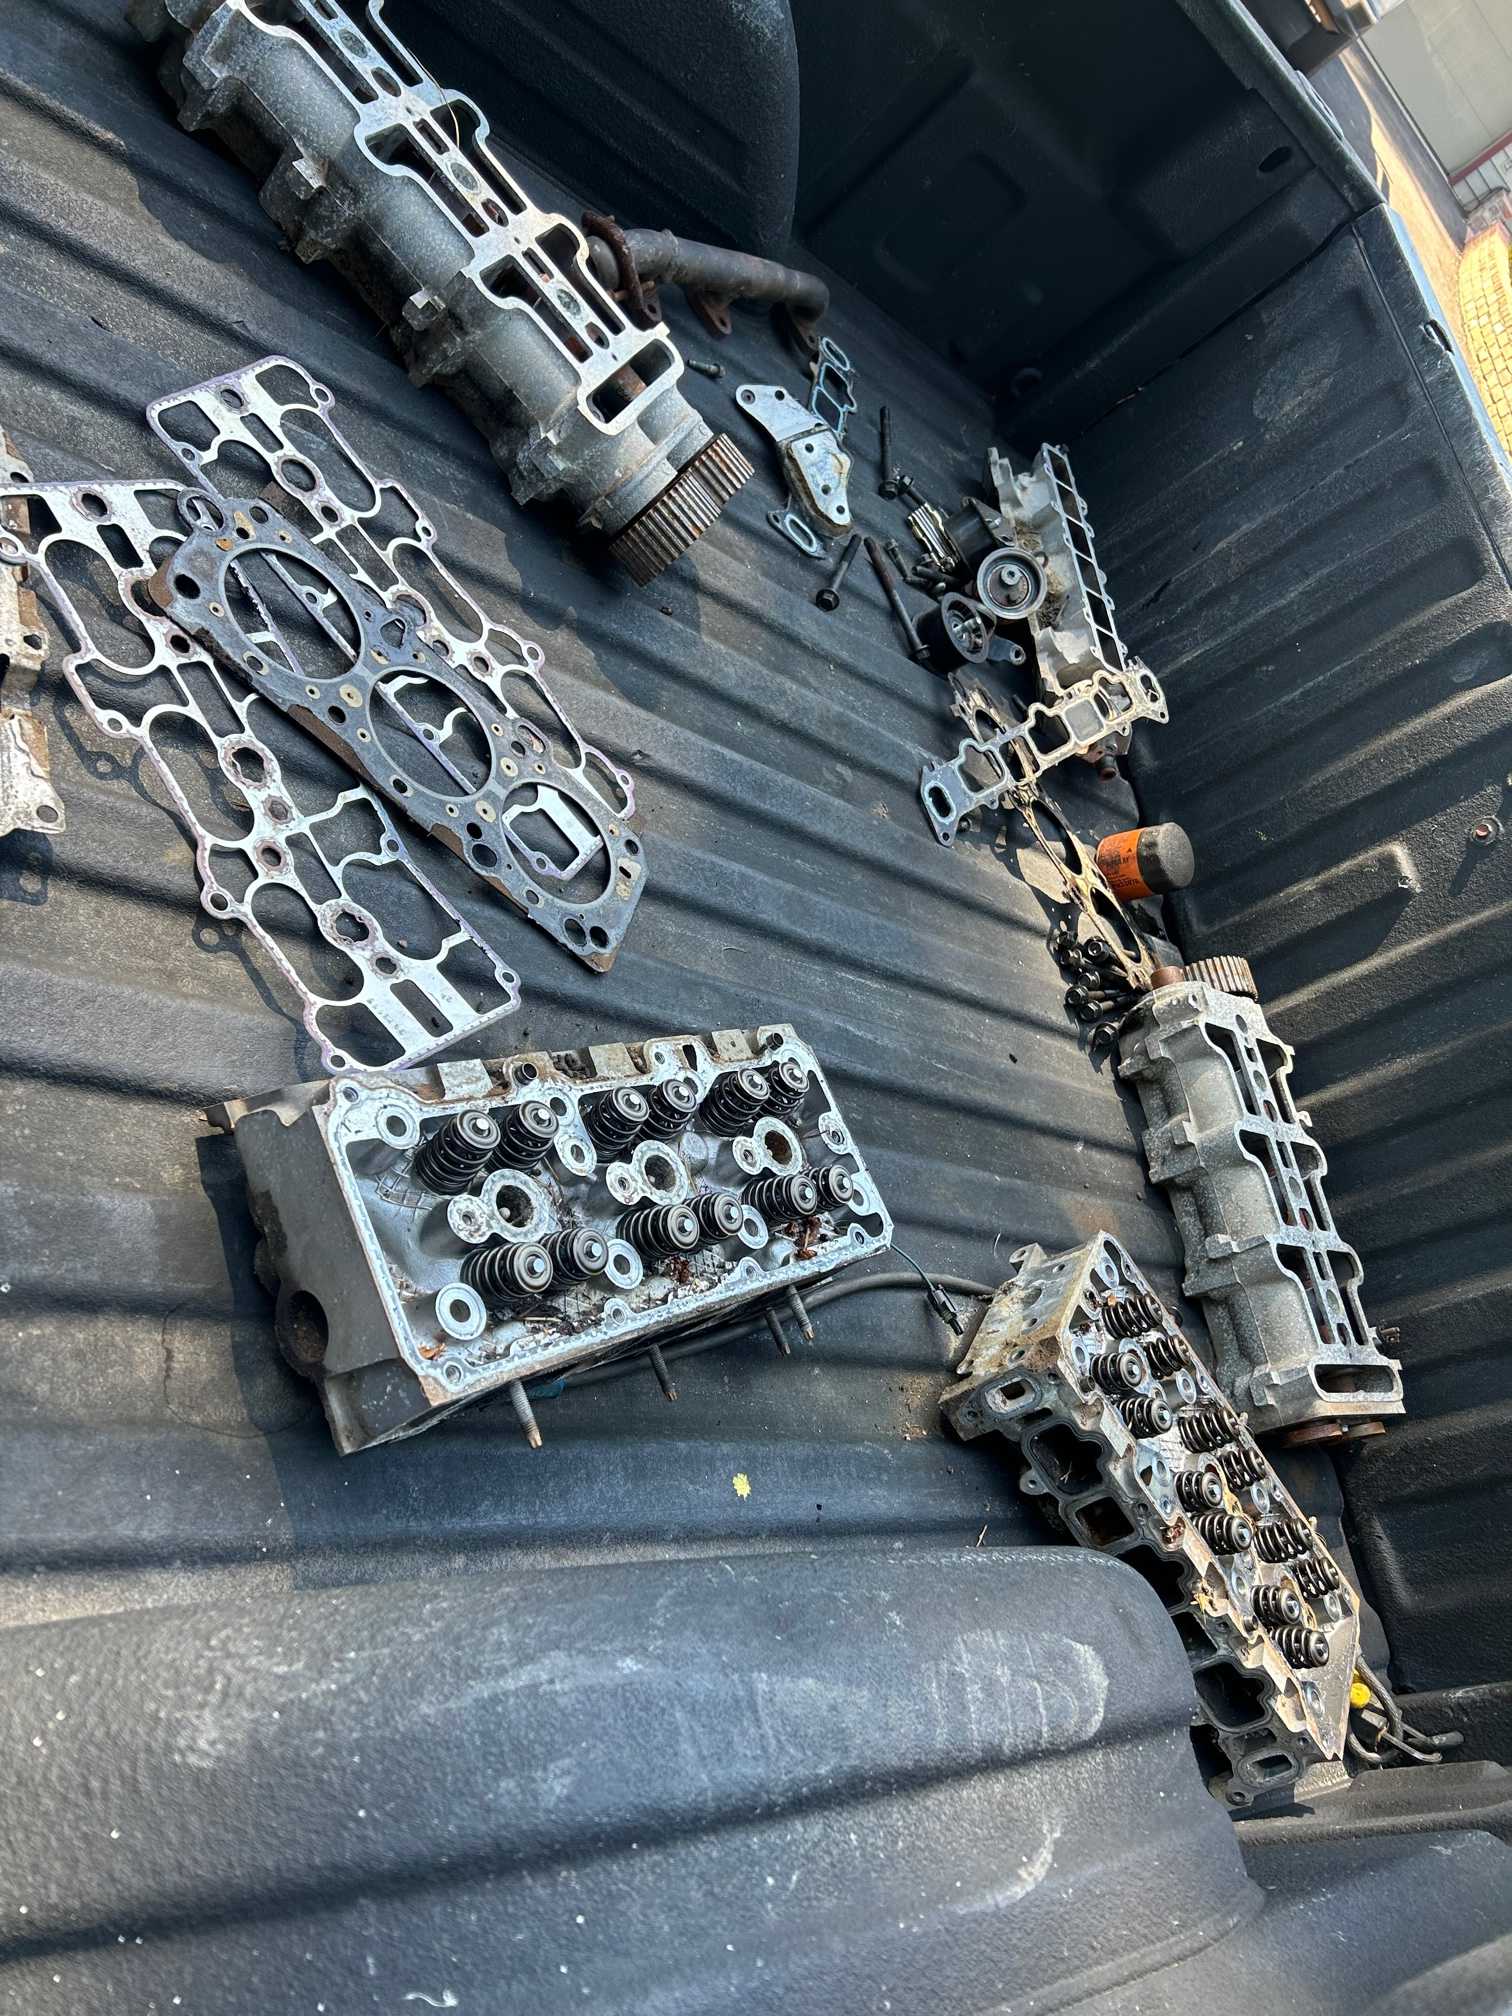
Little bit of progress over the last few days. I've started to figure out the wiring harness plug by plug, it's slow but steady progress on that front. I've pulled the heads from my donor motor for someone who wants to build a flow testing rig on Saturday, but I hung onto them over the weekend just so I can study them a little in case something happens down the line. Slightly unrelated but I got a time-lapse of pulling the heads and I think I'm going to start filming more of what i do for fun
The other reason I went up to the parts car was to snag the lower plenum as i discovered a crack in the one I originally planned on using. So a little sandblasting and some high temp paint and I was back to where I started.
I also finished the fuel lines, I don't know why I didn't do this originally. I just made two 5' lines as that seems like it might have a chance at possibly being in the ballpark of being close to what the would be if I lined things up in the engine bay like I planned.
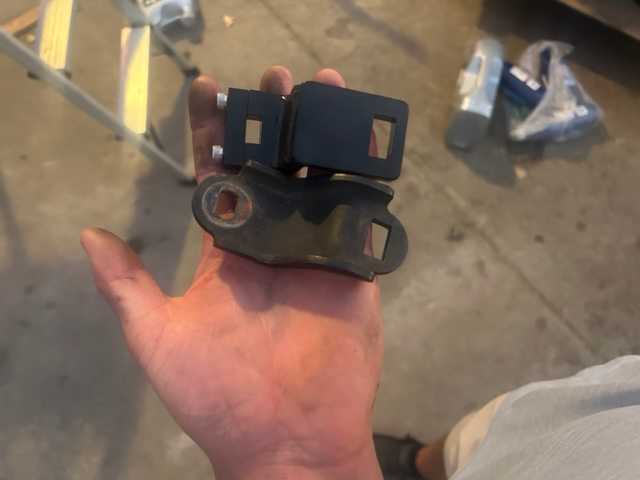
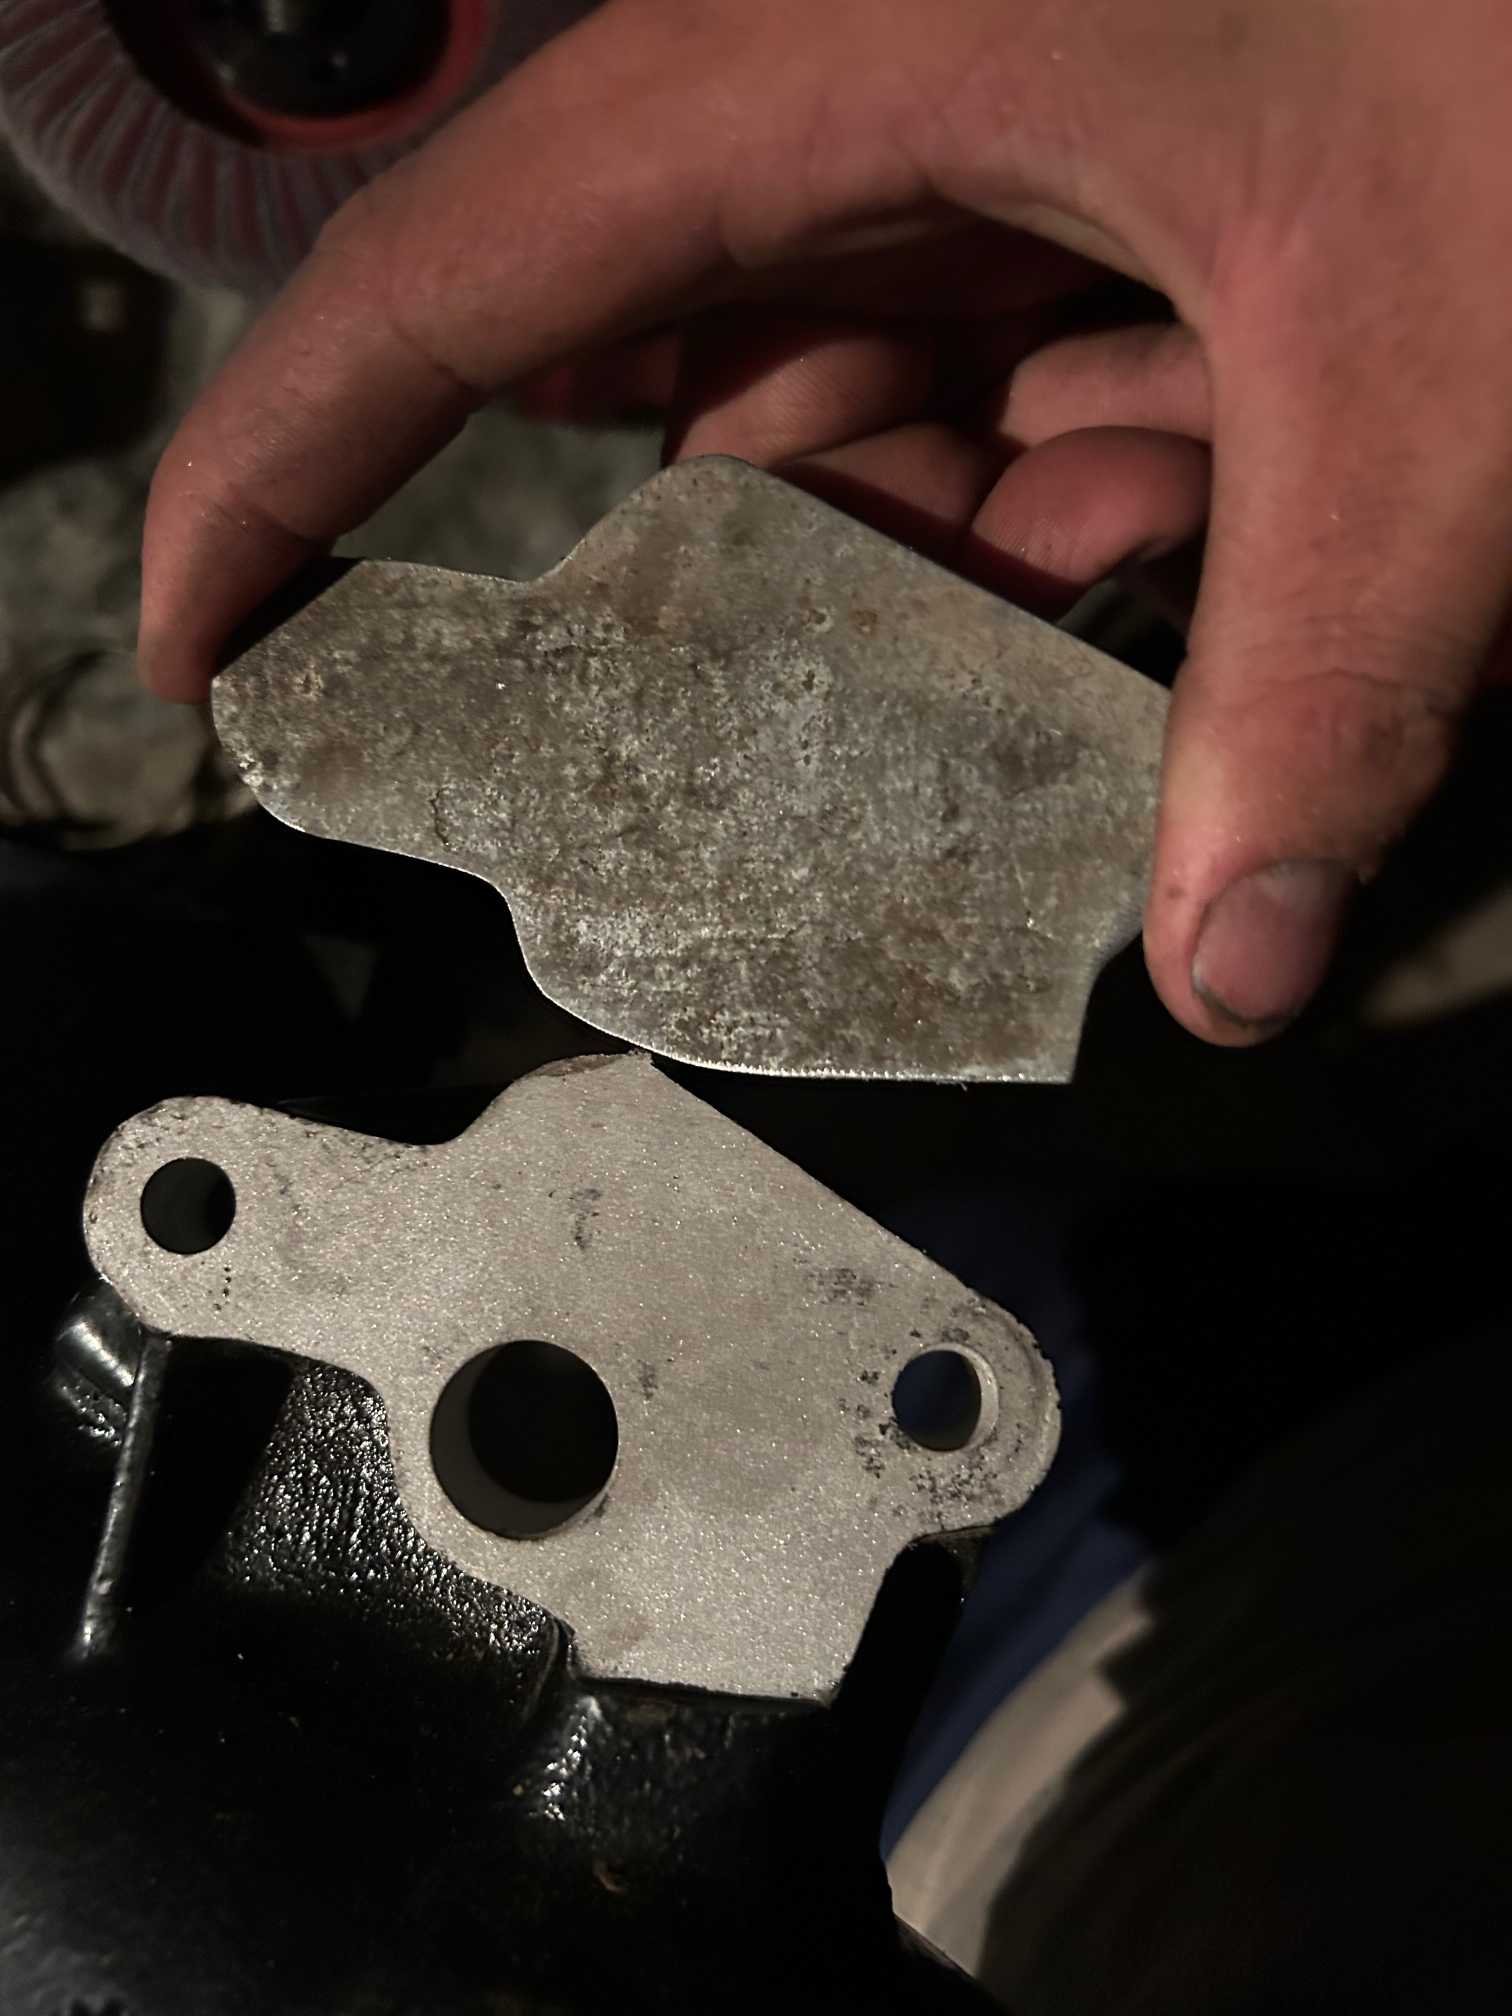
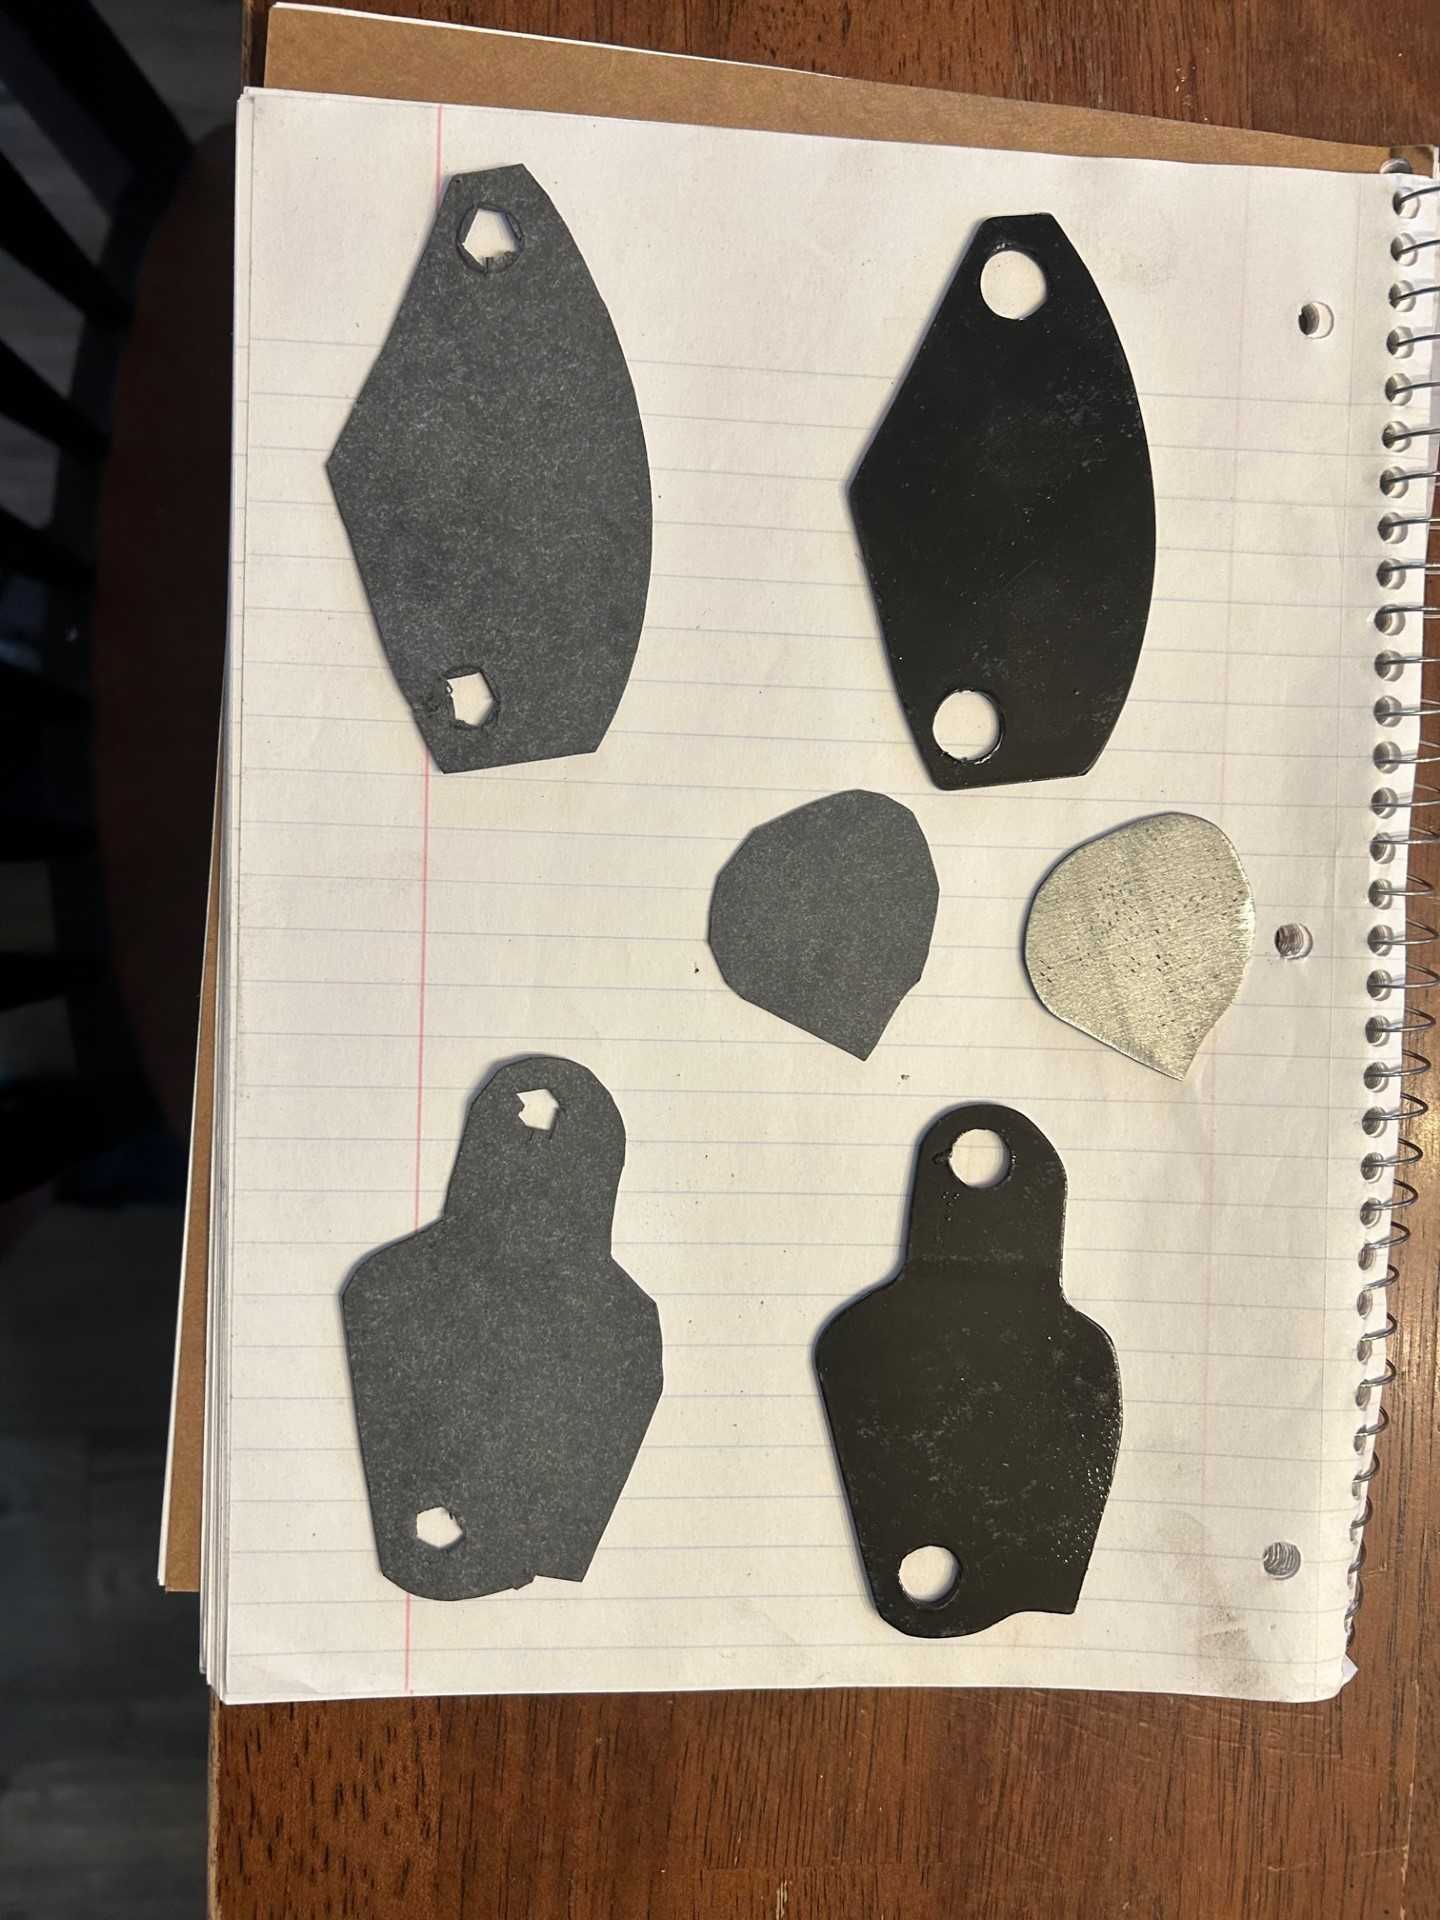
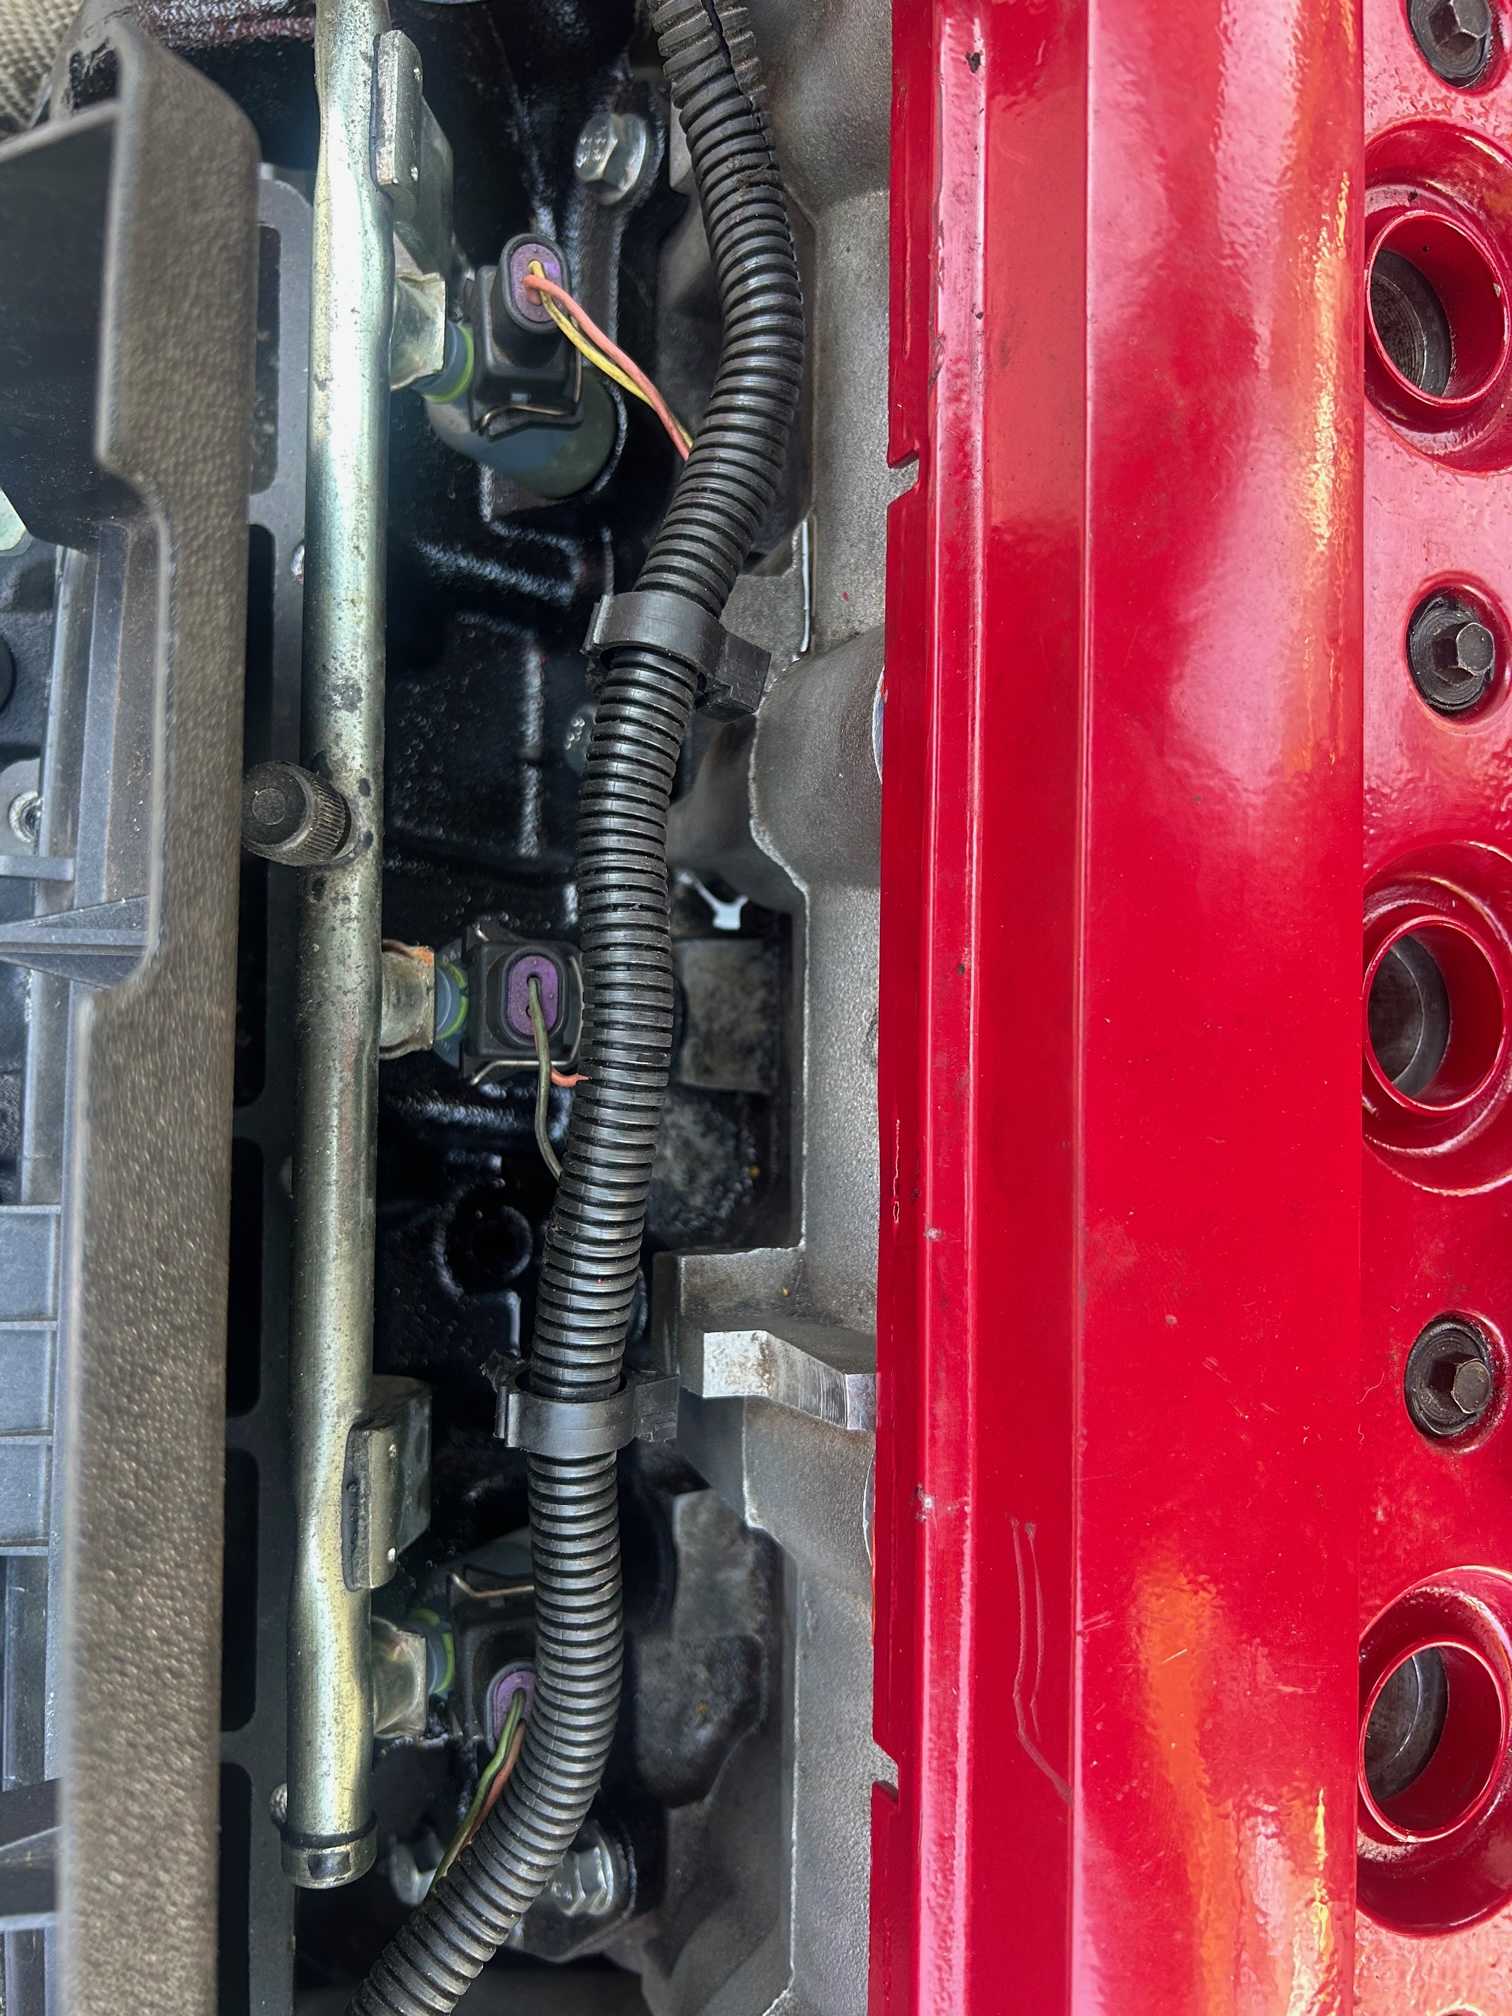
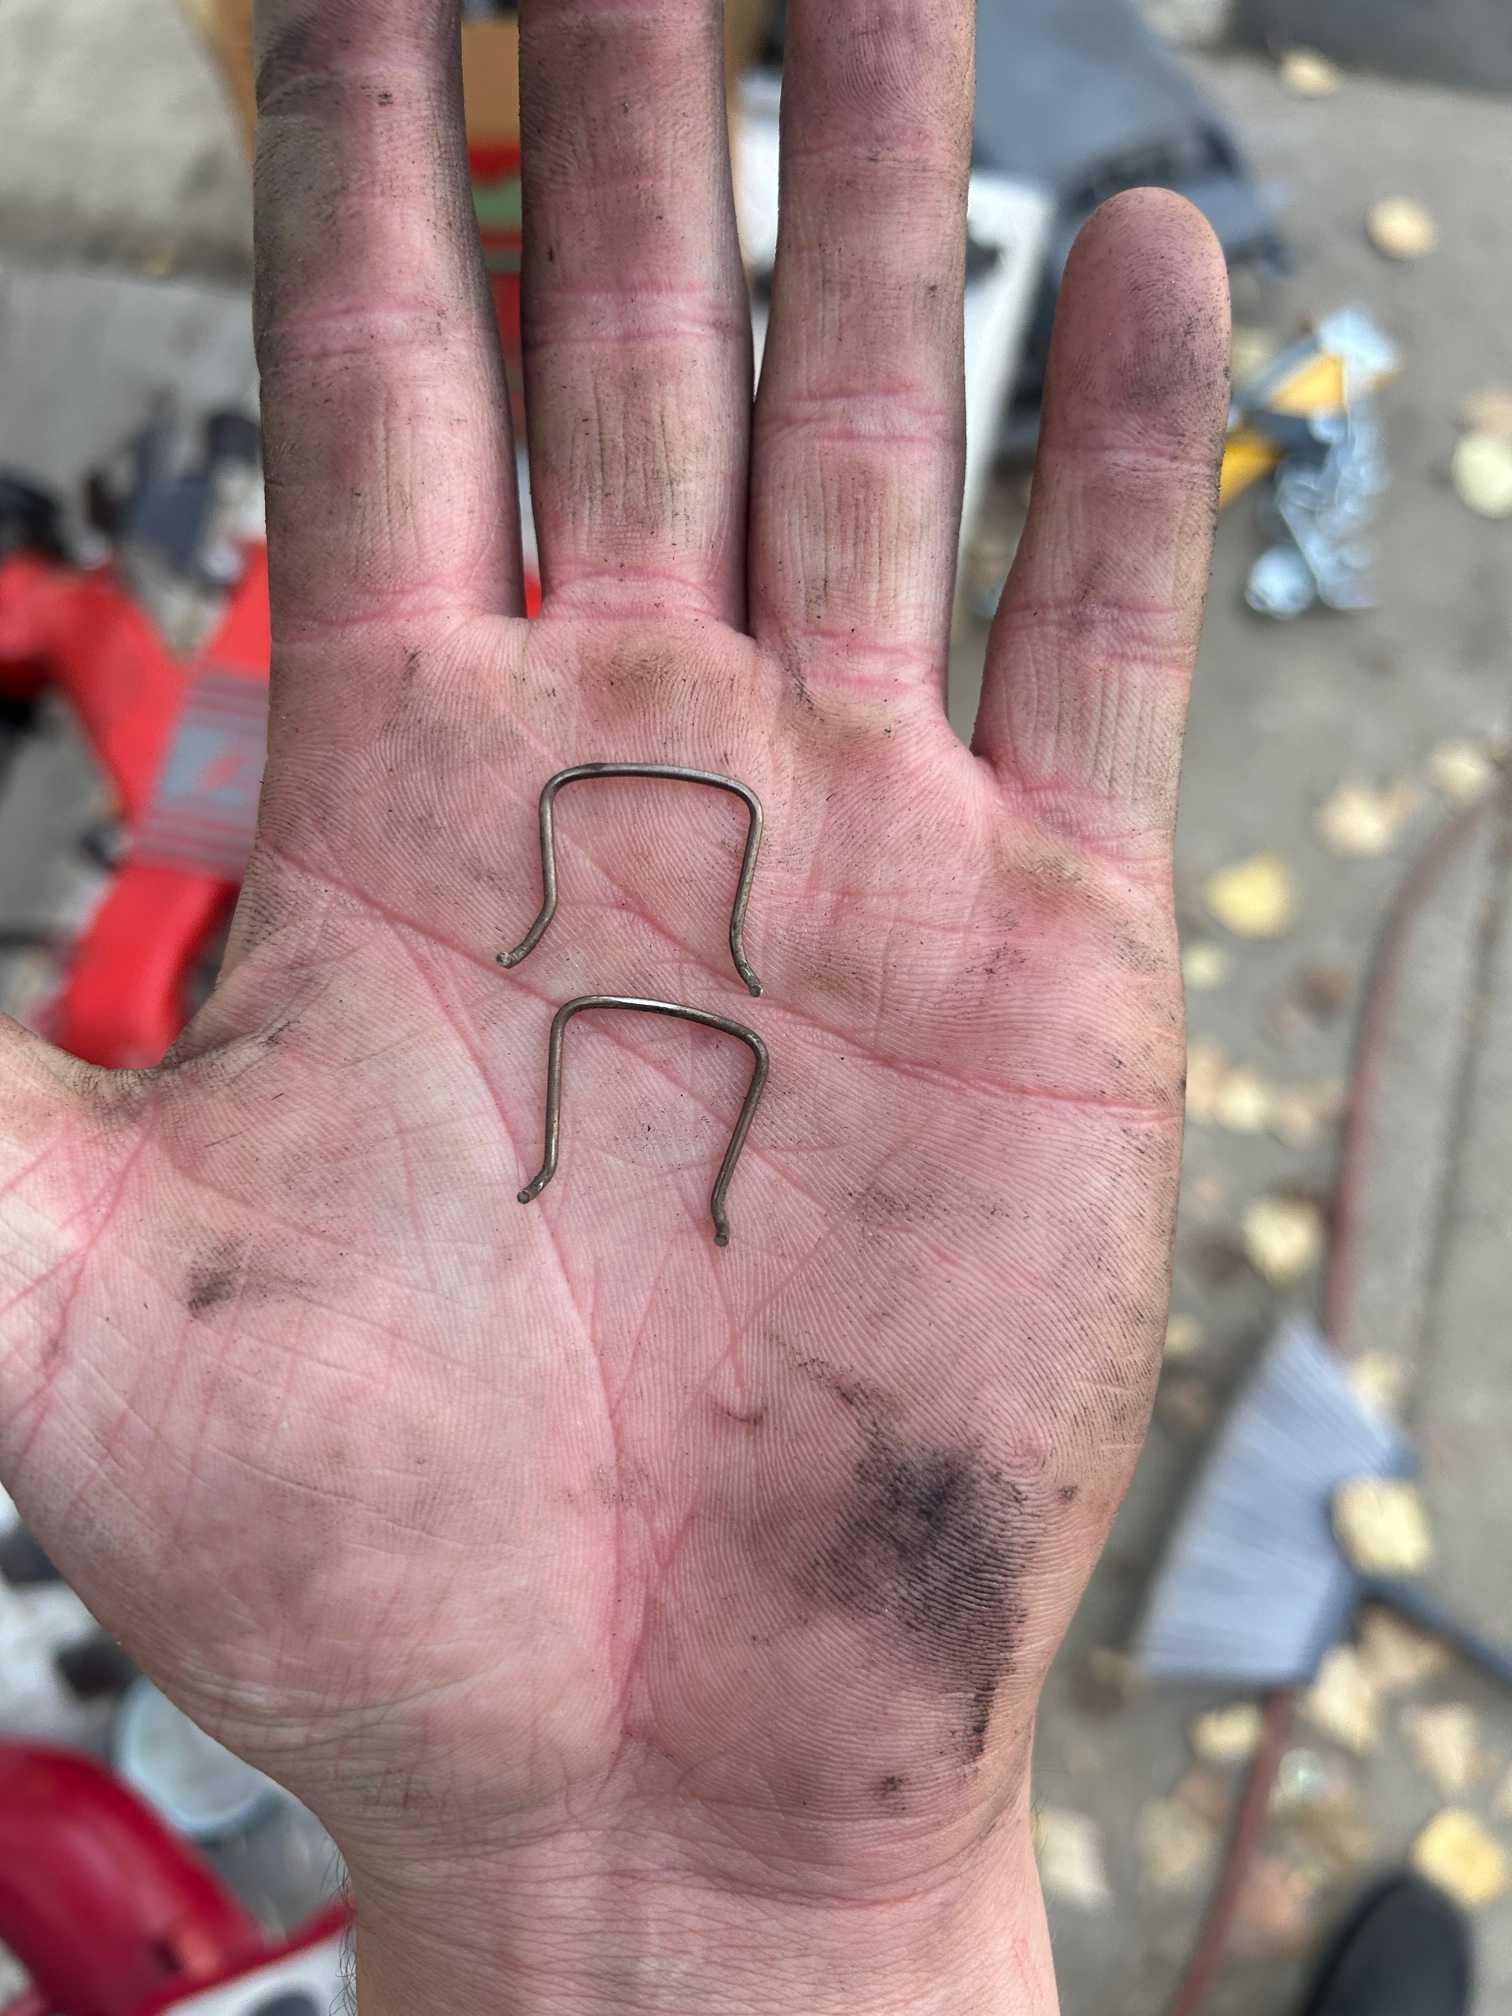
A small project side project was obtaining a injector plug spring clip thing. I found that the fiero and the LQ1 springs were very similar, so with a little help from a vice and a little persuasion I made one that works surprisingly well. Bottom is stock fiero, top is the "new" LQ1
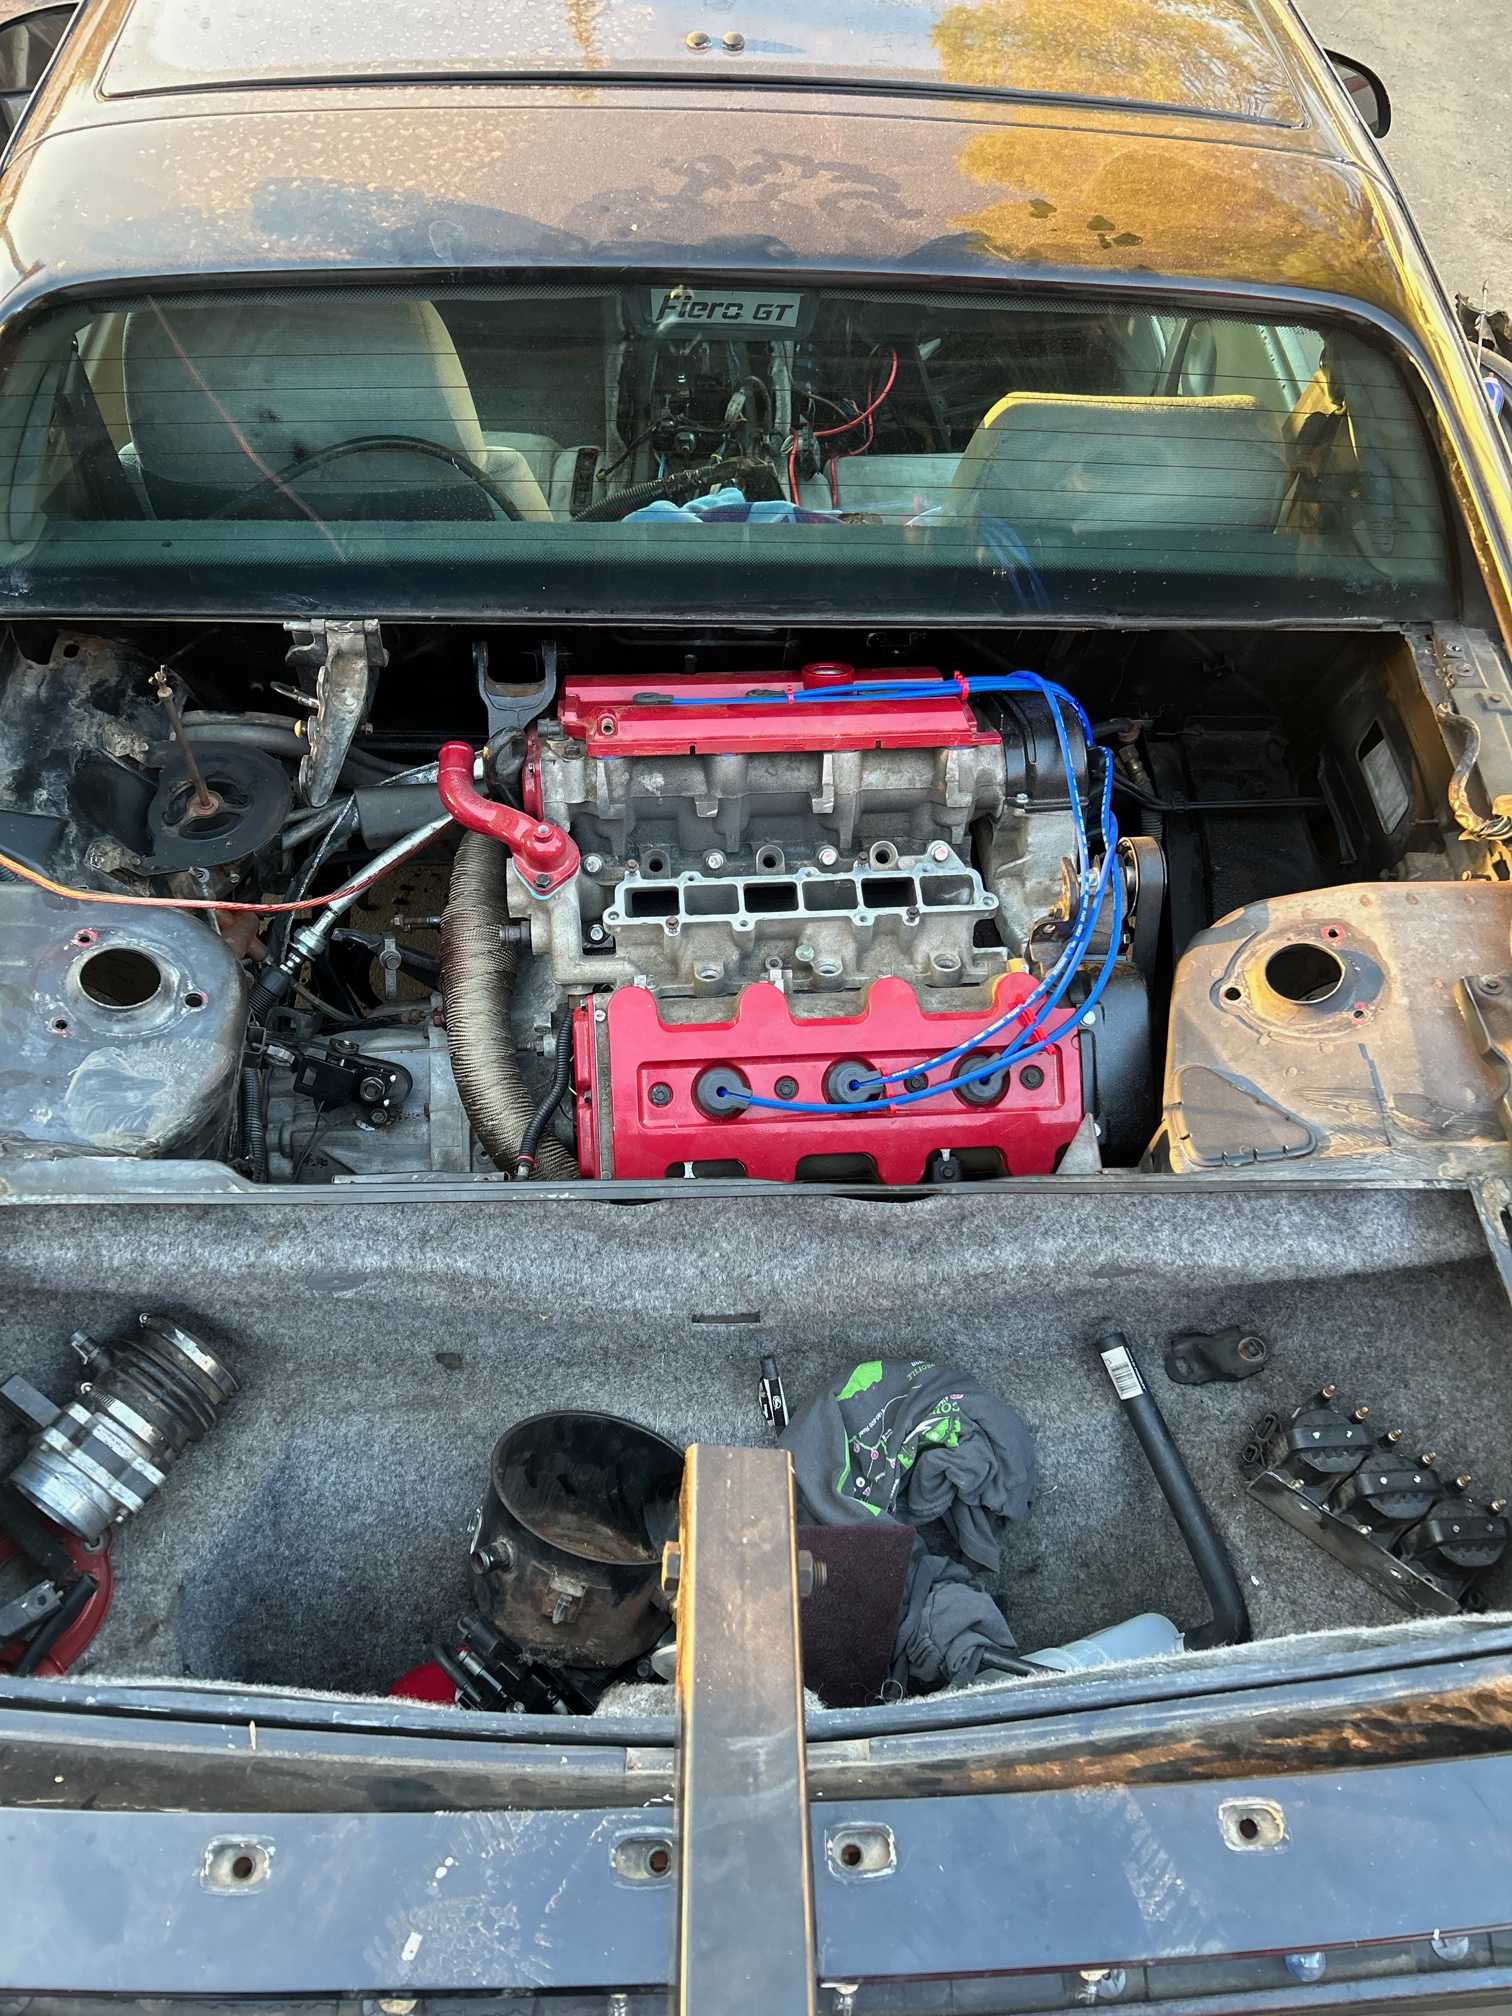
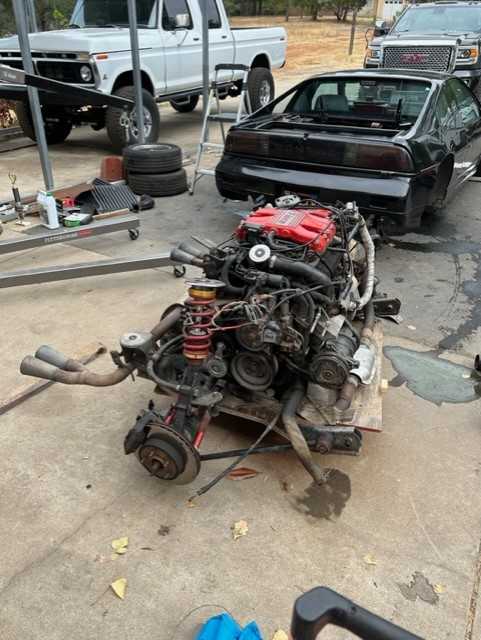
I got everything bolted together for a quick pick pic showing what the engine will look like. I would clean up some of the hoses and still have some wires that aren't hooked up, But it gives me a glimmer of hope seeing everything coming together
I'm having Erik work on the wiring harness for me, so that will help speed up the process from if I was making the harness.
------------------ Black 88 GT, a 19 year old here about 20 years to late -LQ1 Swap in progress-
Today was mostly buttoning up loose ends and putting things on for the "Final time". The biggest item on the list was finally finishing the battery relocation. It didn't even take that long to do, like 30 minutes tops. I still need to toss a strap to hold it down for when i decide to let all those screaming eagles (7 more horse power then stock) loose.
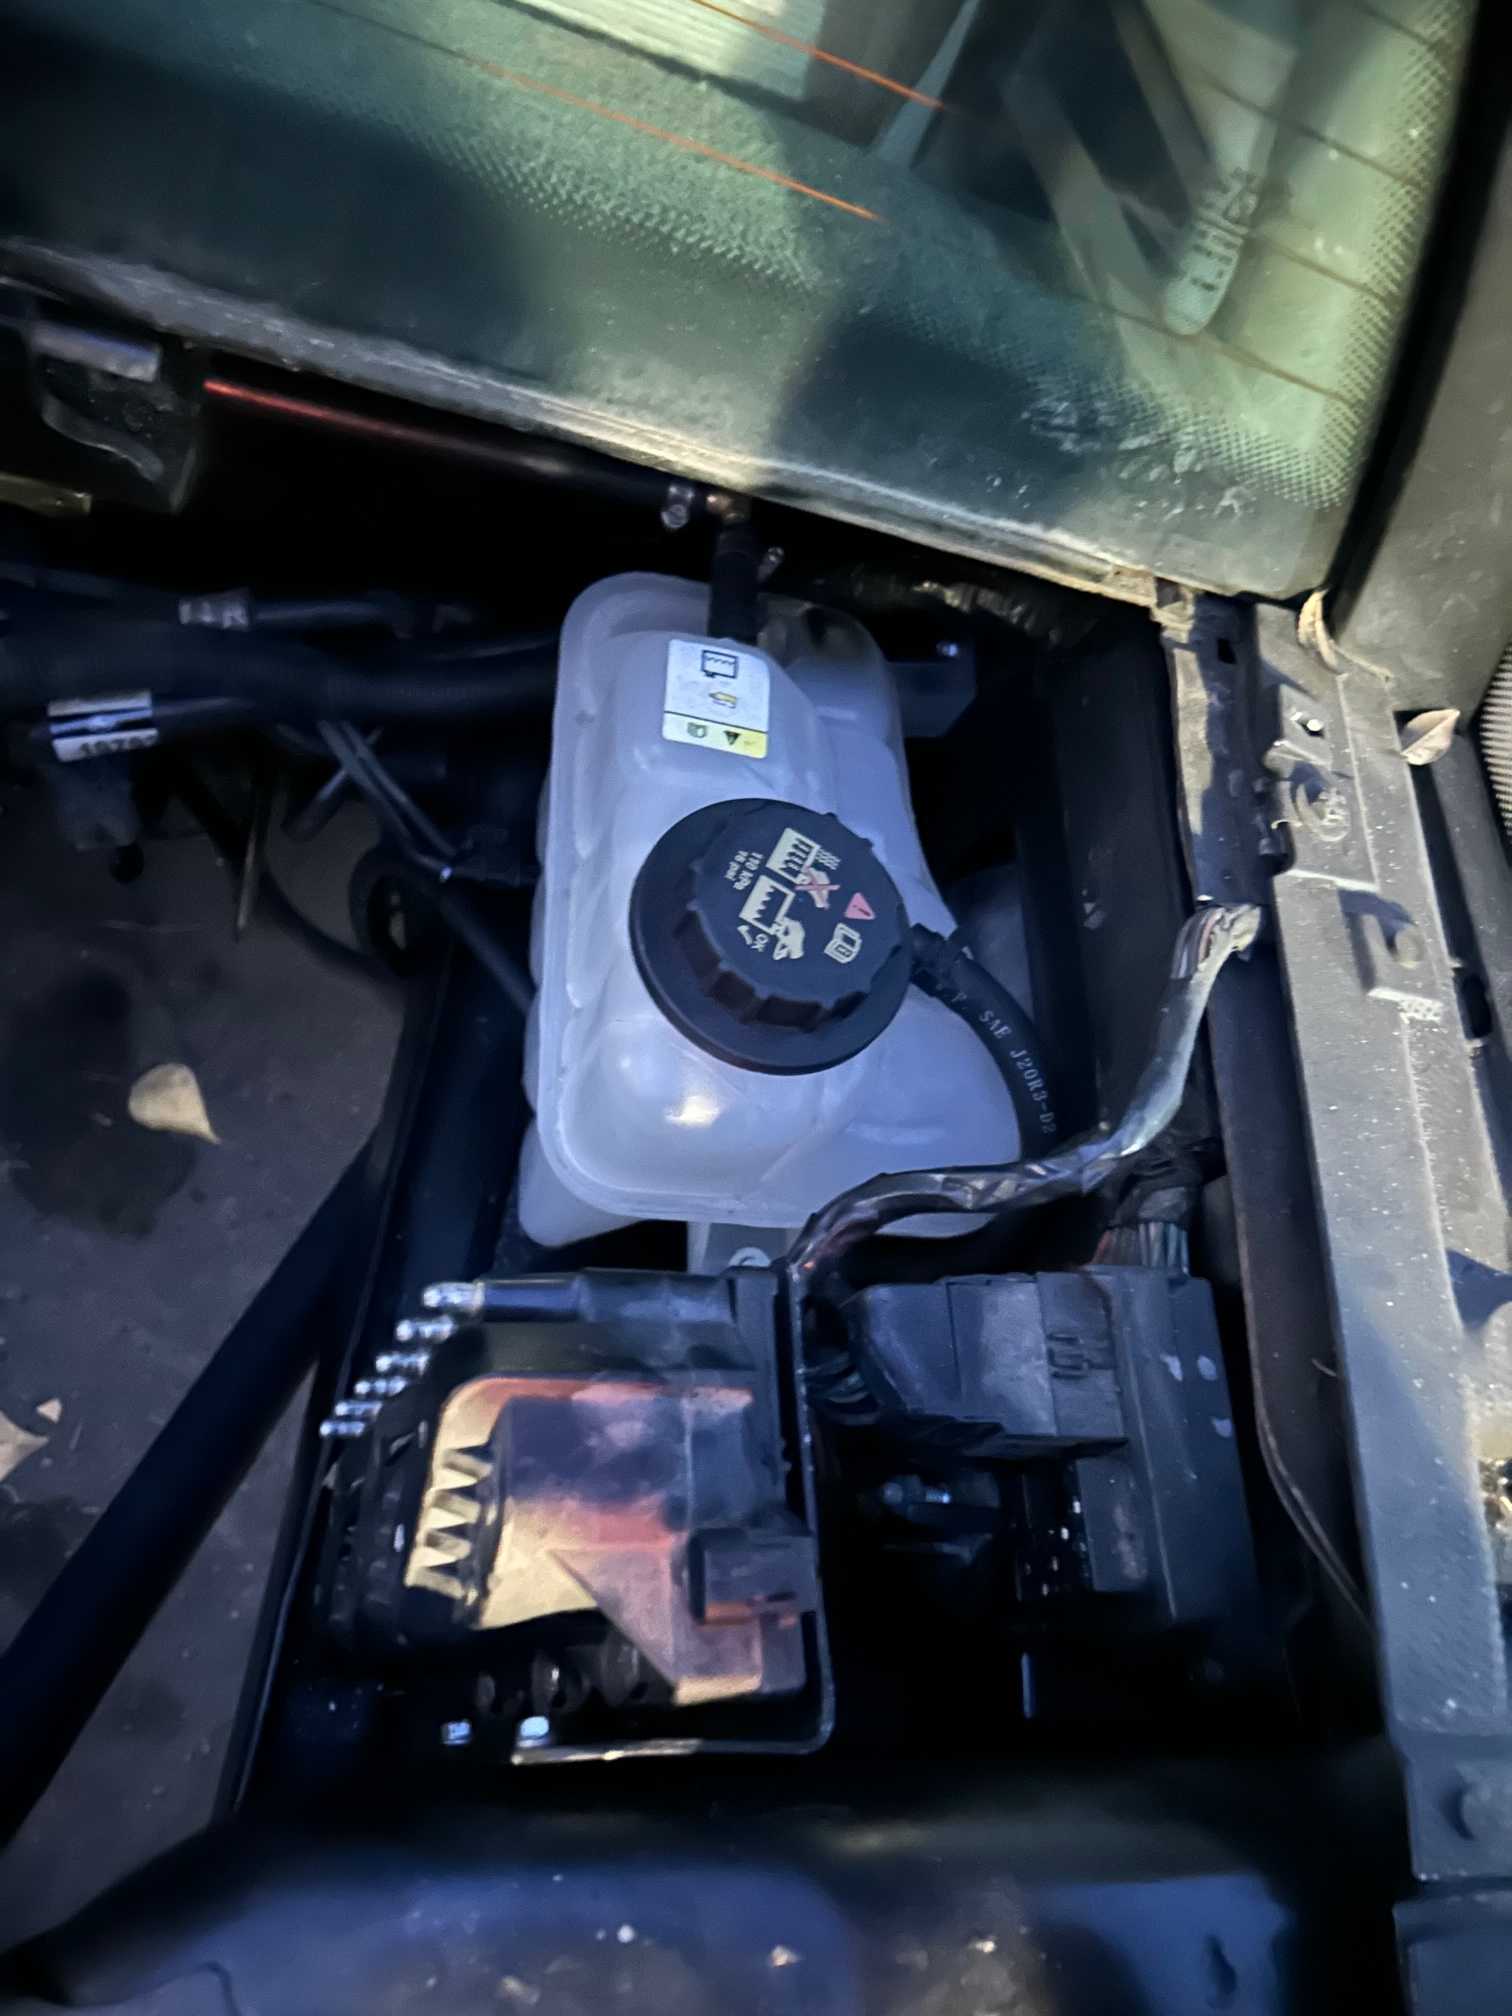
Everything else revolved around the engine bay. I got the fuel lines hooked up, the coolant reservoir tank hooked up, all the coolant line ran (apart from one that needs to be put after the motor), and the brake booster vacuum line in place.
Oh, I did prep the motor for the slight rainfall we might be getting over the next few nights. Nothing special just plugging spark plug wholes and tossing on the upper plenum (post picture)
I'm hoping to have this all finished all before winter, but I may have to toss up an easy up or two if the rain gets a little too heavy. I'm hoping to have everything %100 ready for when the harness gets into my grubby hands. I'm glad Erik's still got some skin in the game, otherwise this would probably have a 2024 completion date.
------------------ Black 88 GT, a 19 year old here about 20 years to late -LQ1 Swap in progress-
Repeat it with me everyone, "The project is never done, there is always something else you could do". Realizing that i'm running the stock air intake, I decided it was in my best interest to improve the stock intake that i'm reusing. The biggest part that I've seen people make improvements on is the intake into the air can. So I got the old one all cut out tonight, and started getting the arms for the nut fabbed up. A trip to Ace tomorrow and a couple little tack welds and it should help the engine breath a tad better.
The other thing I did today was get the charcoal canister mount mounted up along with the cruise box. I don't recall what vehicle I pulled the cage from but it was a minivan with a 3100 and the stock LQ1 cruise box is what I'm going with. Still need to get that connector all wired up and done but that can be at a later date if things run long.
I'm running to the junk yard to snag some generic GM connectors to retro fit the 91 harness I'm using onto the 97(?) motor tomorrow, as well as snag a fancy new three piece center console skeleton so I don't have to tear my car down to the frame to work on the shifter. Goodnight Y'all
------------------ Black 88 GT, a 19 year old here about 20 years to late -LQ1 Swap in progress-
Repeat it with me everyone, "The project is never done, there is always something else you could do". Realizing that i'm running the stock air intake, I decided it was in my best interest to improve the stock intake that i'm reusing. The biggest part that I've seen people make improvements on is the intake into the air can. So I got the old one all cut out tonight, and started getting the arms for the nut fabbed up. A trip to Ace tomorrow and a couple little tack welds and it should help the engine breath a tad better.
That should do well for you. Ours is the same air filter element that was used on some 5.0 Trans Am applications. As I recall, it was placed in the passenger side corner of the engine compartment and piped over to the throttle body.
Original plan was to make a bomb trip to Vegas to help a body out and make a little coin on the side but that fell through. Decided to finish up the air box and get some parts ordered for the finishing touches. Should be able to plug off the exhaust manifold by tomorrow night.
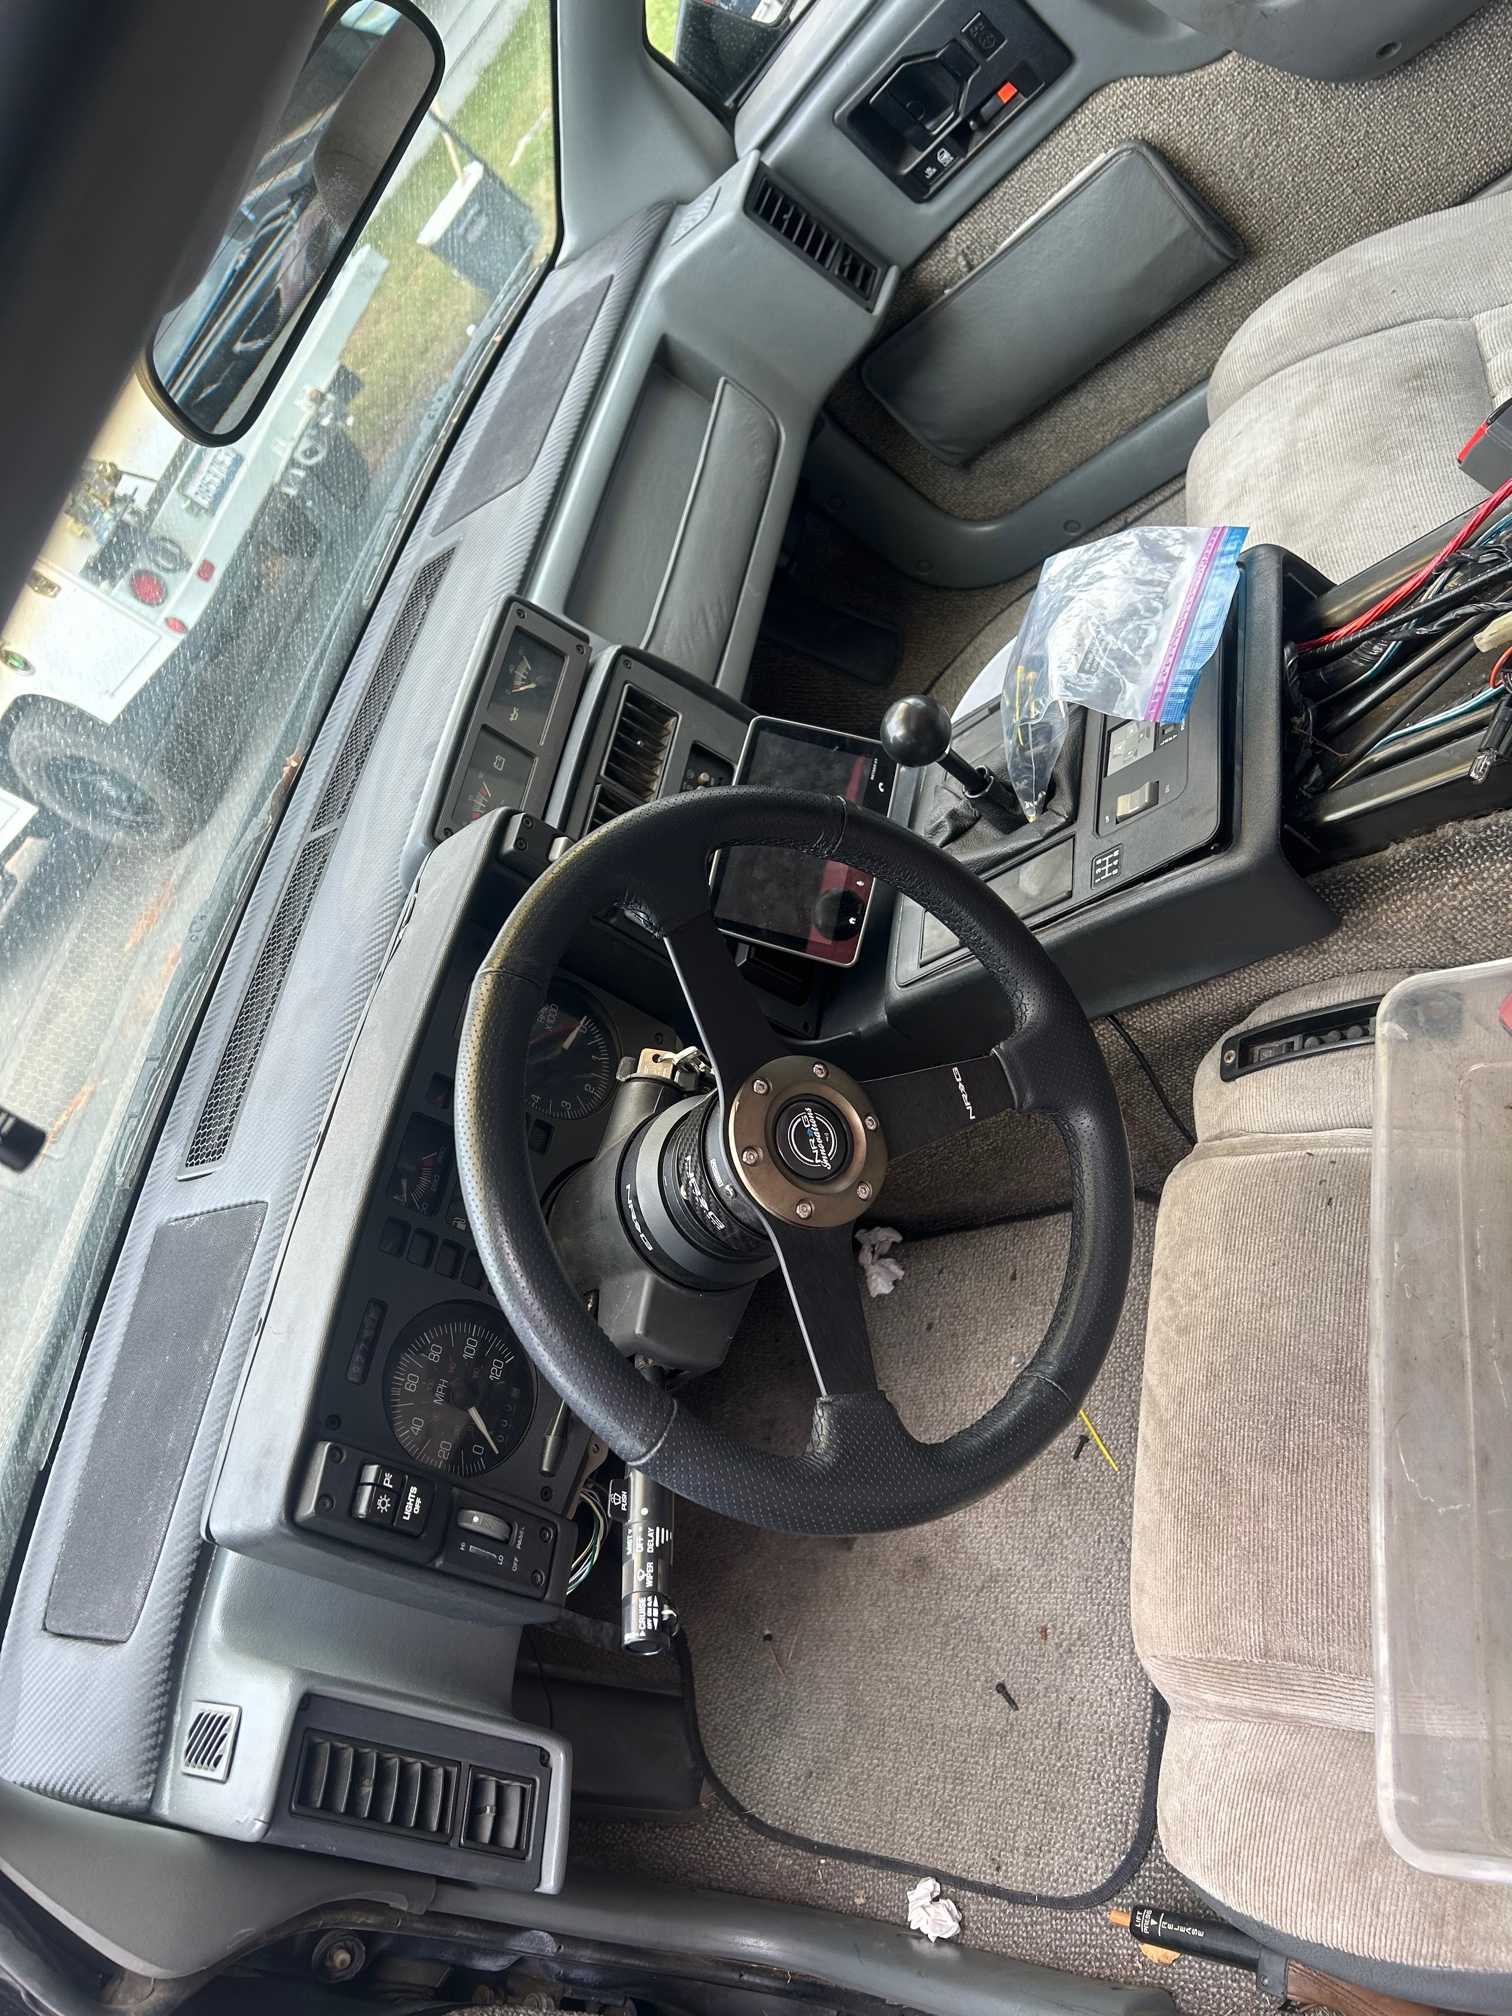
I also got a hold of 3d printed center console from Matt so I started resembling the interior of the car which is nice to be putting things together for once. Would 100% recommend the new center console skeleton, the brass threads make everything so much nicer and I can just pull off certain pieces for access instead of tearing the interior down to the frame.
Tomorrow should be a pretty chill day (knock on wood). Just need to get the manifolds plugged up
------------------ Black 88 GT, a 19 year old here about 20 years to late -LQ1 Swap in progress-
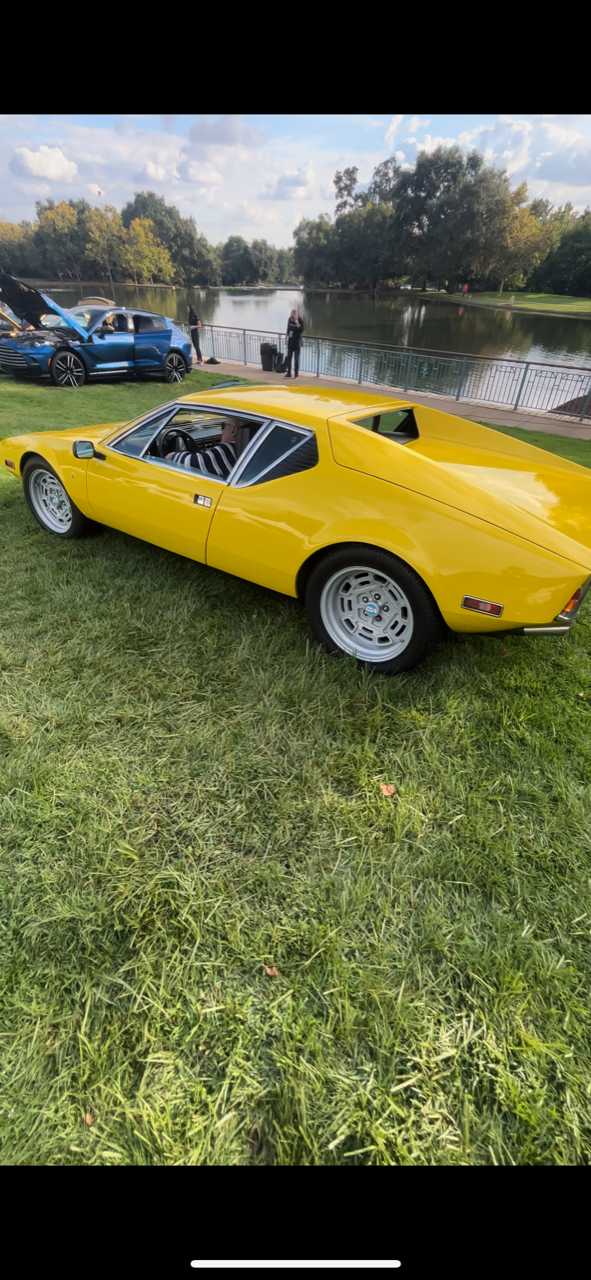
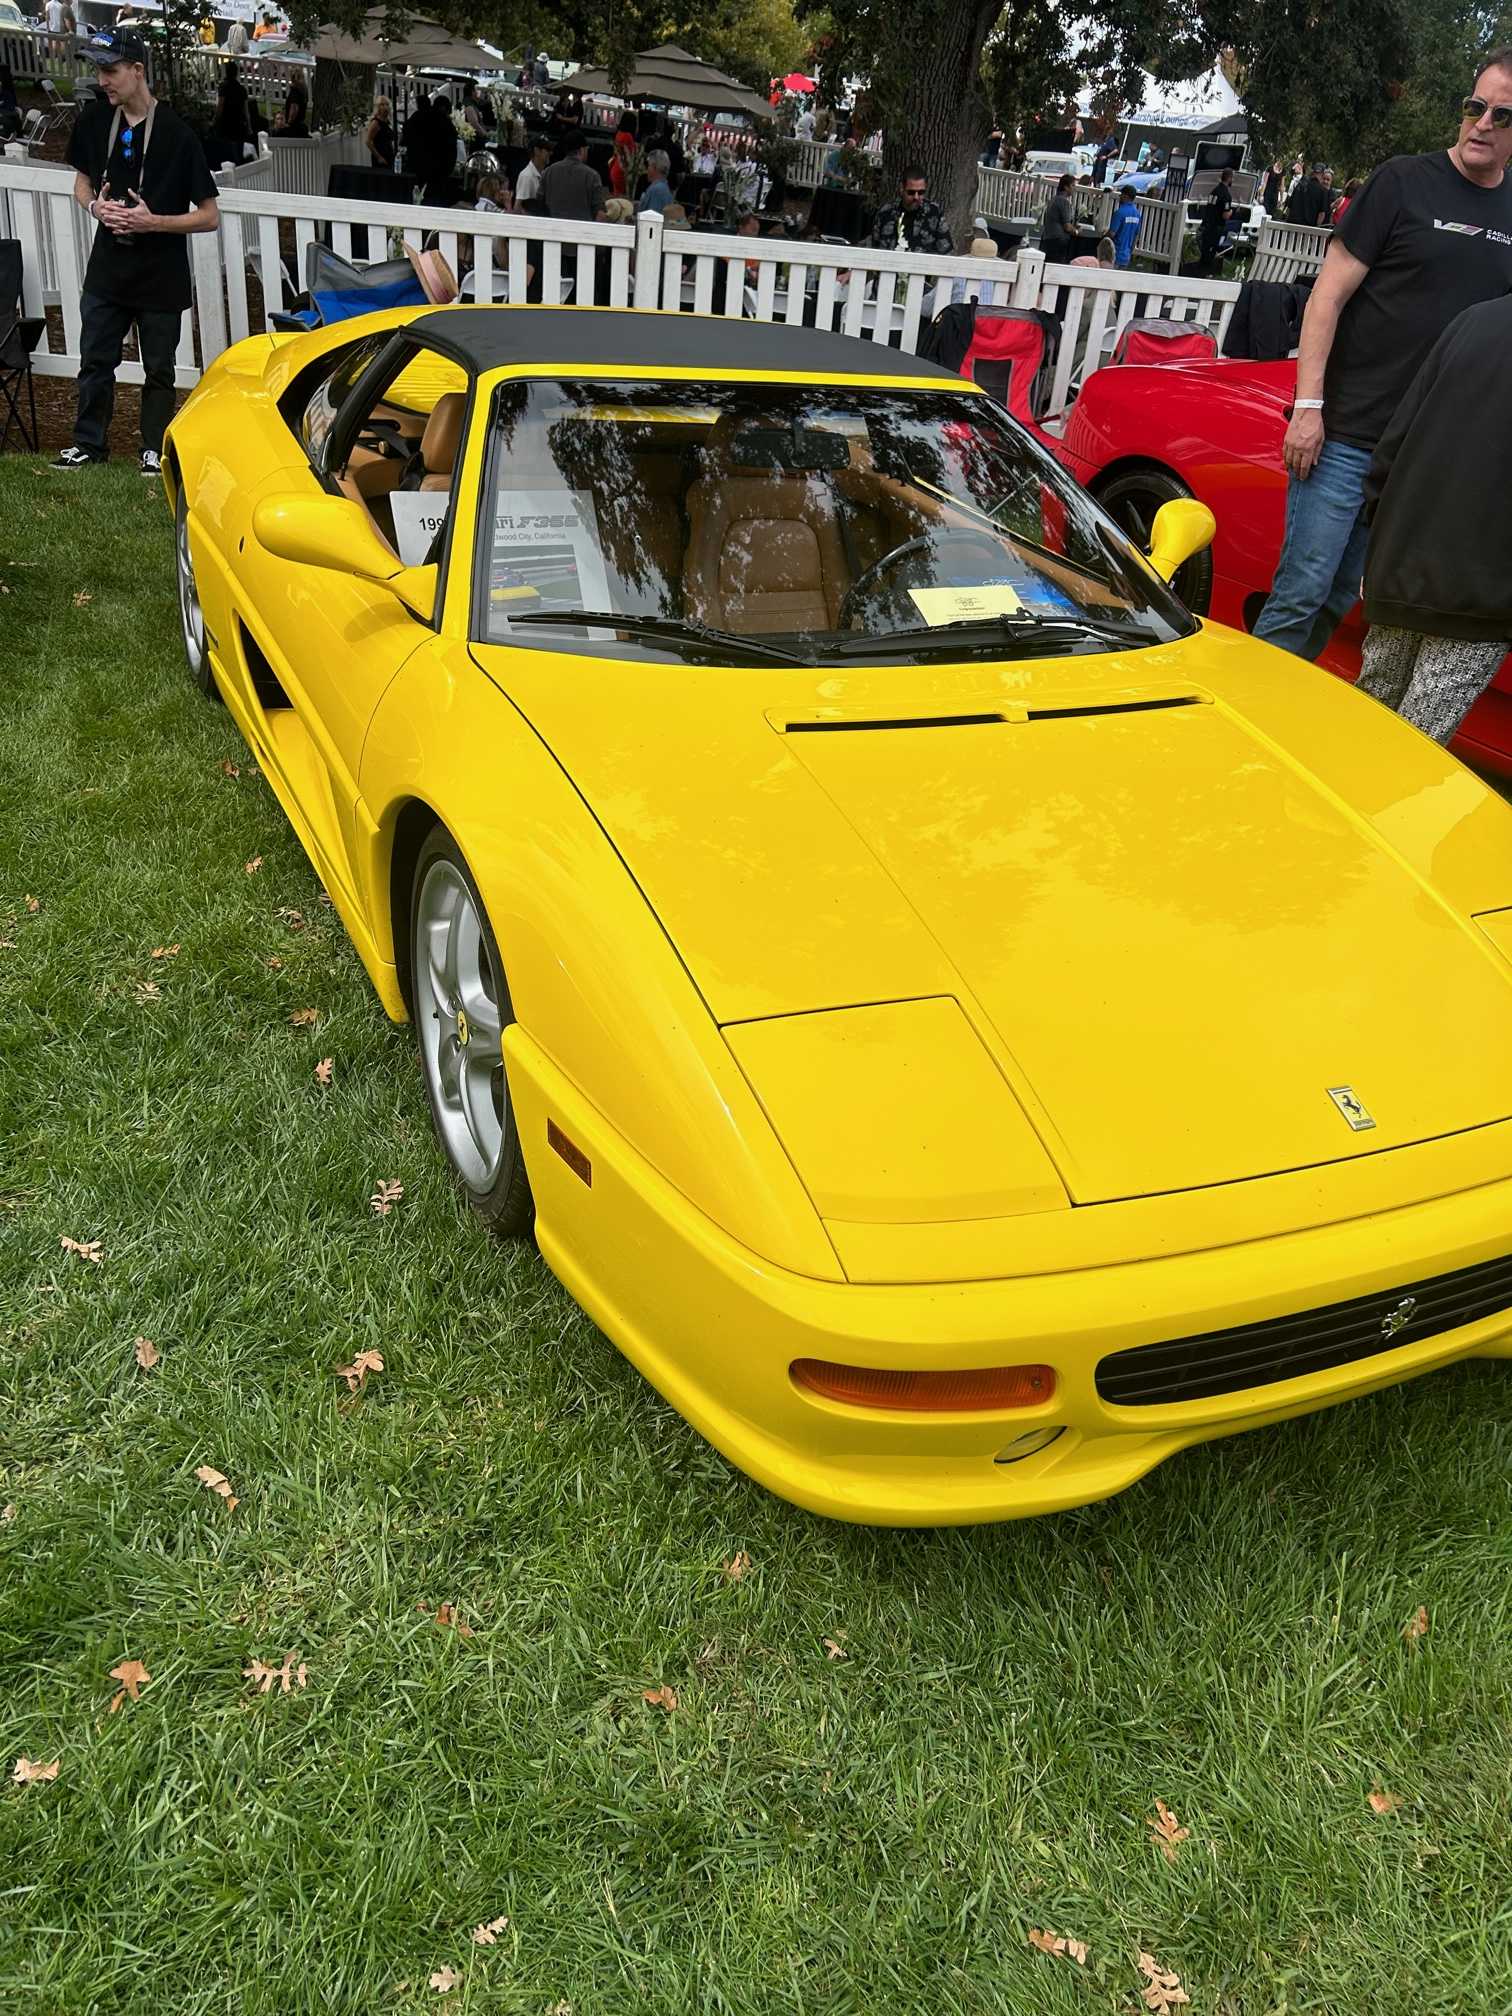
Slightly off topic, but got to go to my first concourse and couldn't be happier. Stand out would have to be e real 440 4 speed Dodge Daytona, talked with the owner and he has a legendary car from every american manufacture in his fleet (Boss 429, Yanko Camero #13, Dodge Daytona, and the list goes on). Another stand out would be a Gorgeous yellow De Tomso Pantera (dream car of mine). Last cool thing I'm going to list (I promise) was a 197,XXX mile Tracked 355, always makes my day seeing high millage collectors cars.
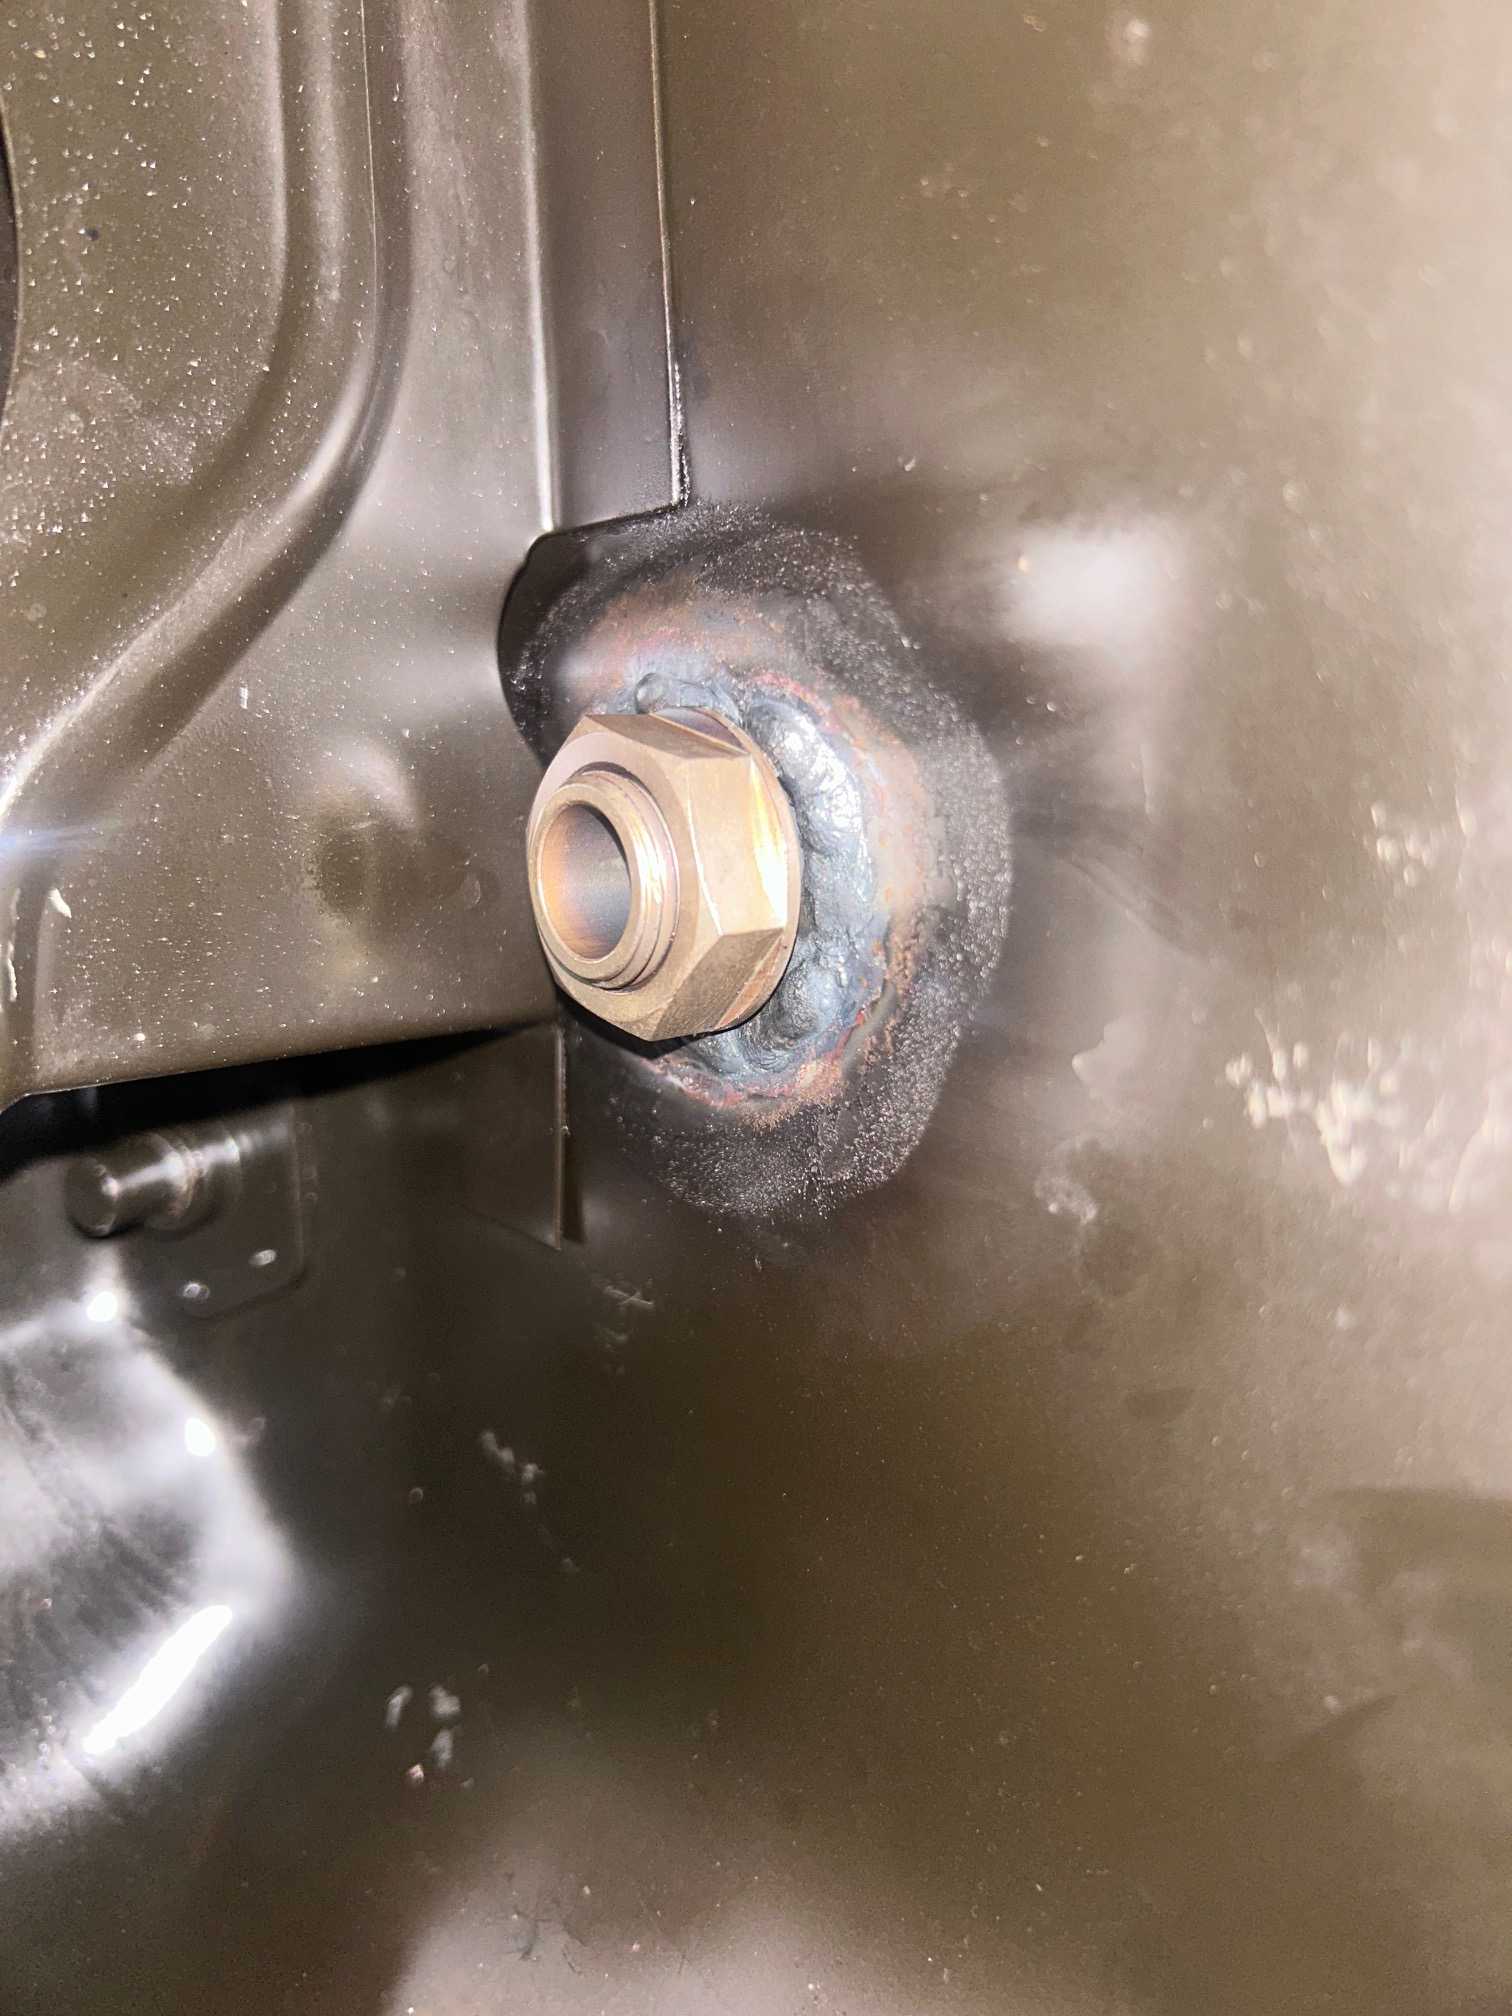
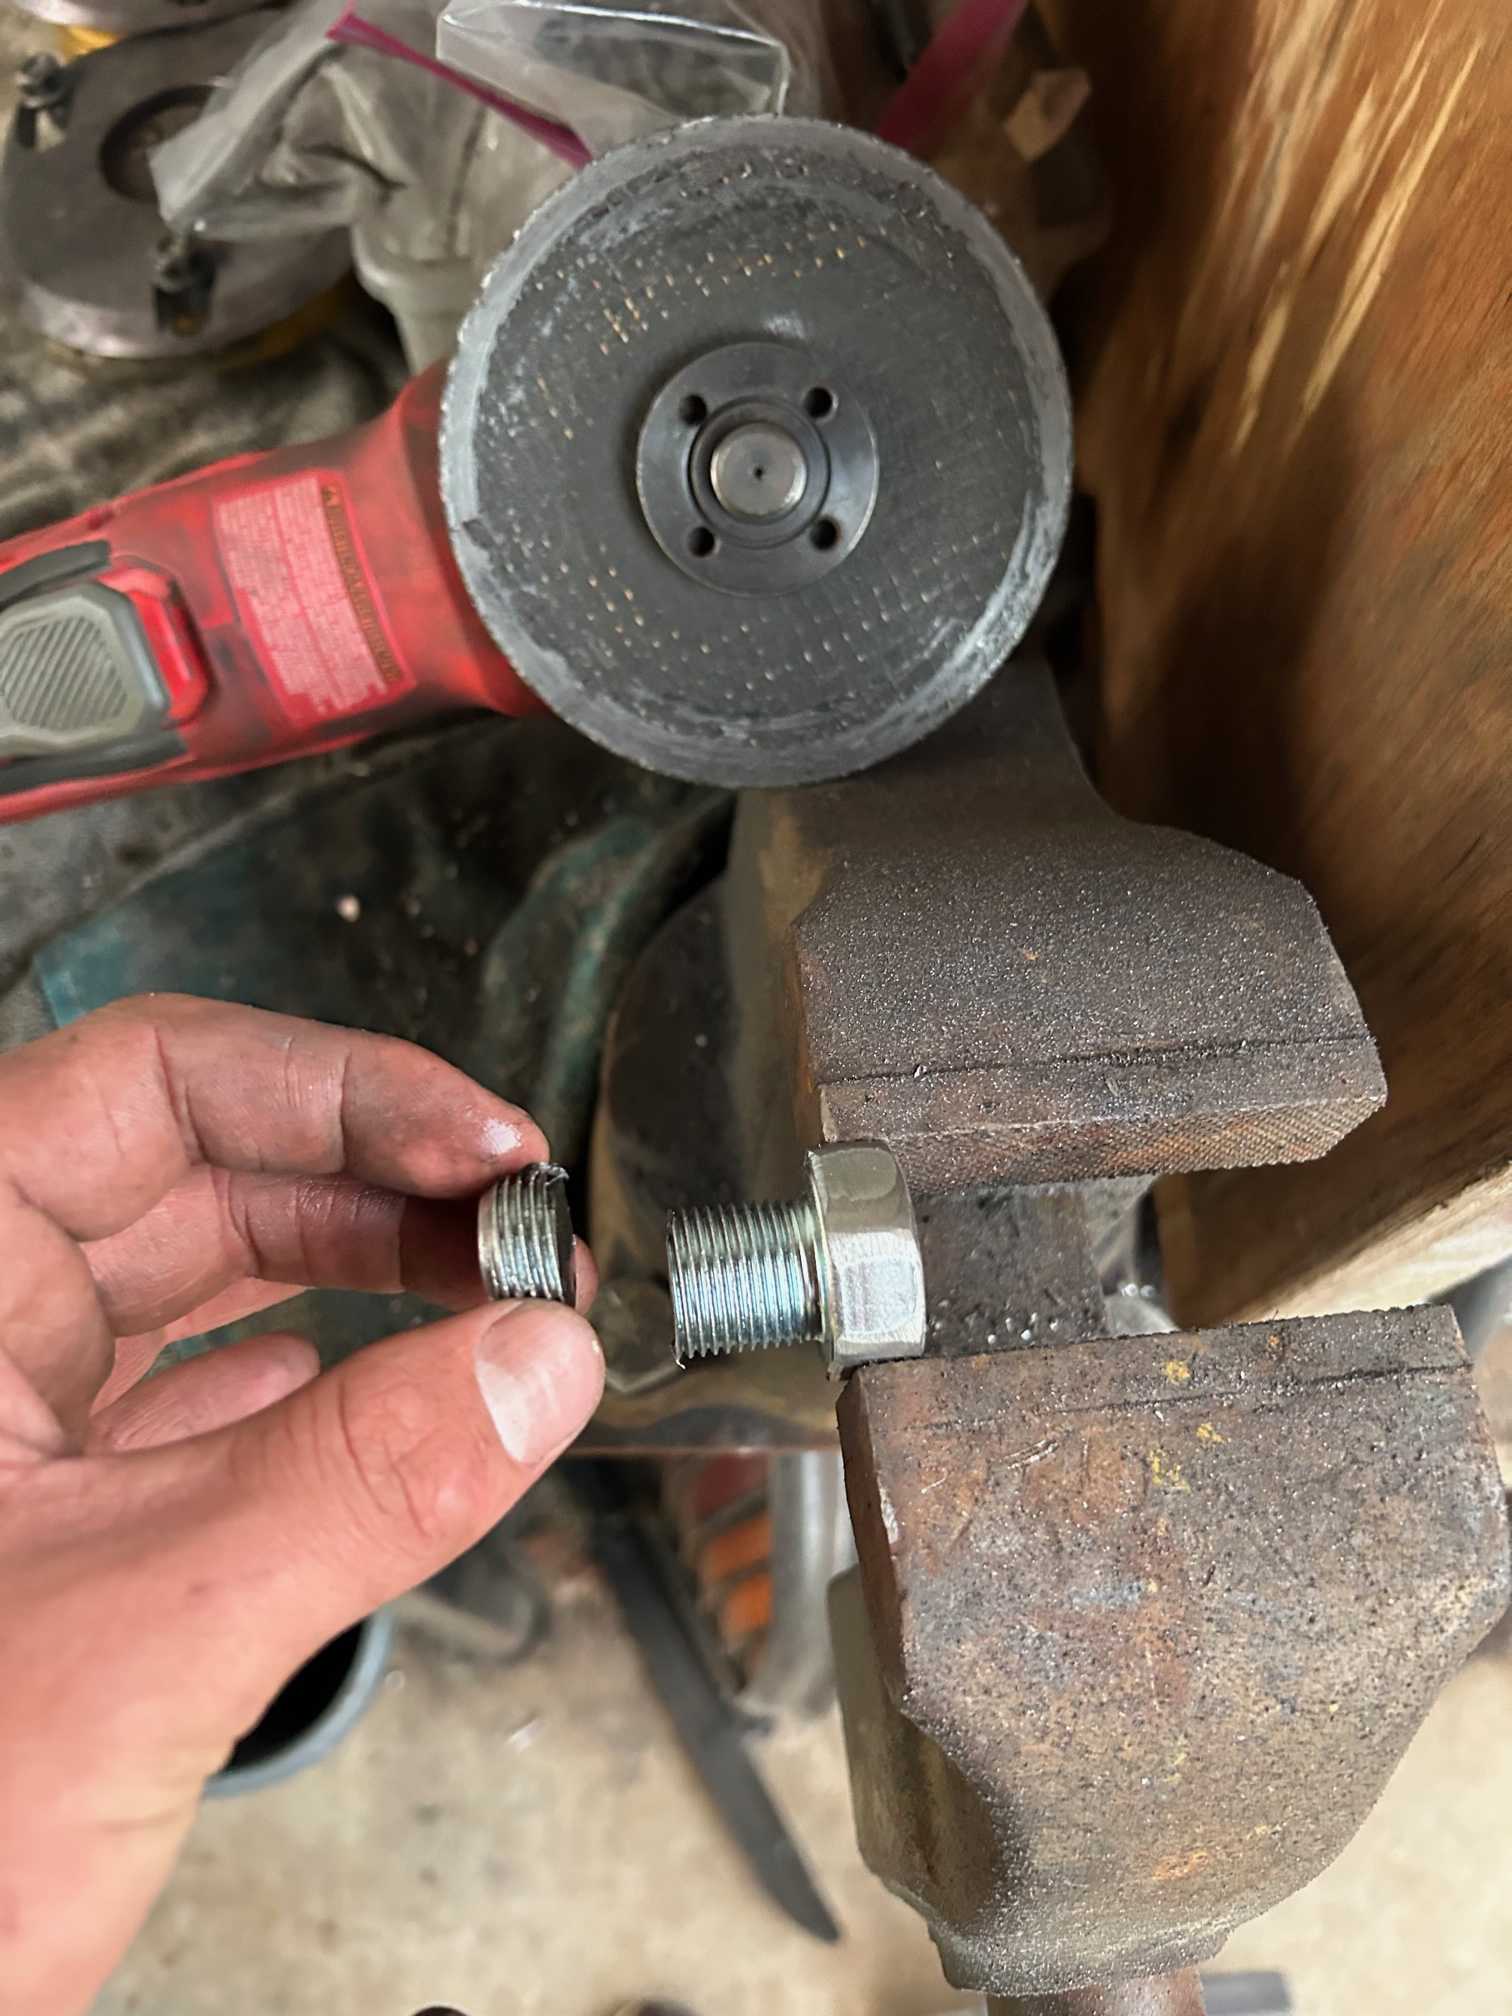
Now back to the regularly scheduled programming. Today's project was getting the EGR and the factory O2 blocked off. For the EGR I have to be a little strategic as I need to have the option to install the EGR tube at a later date. But the way the EGR is laid out it has outer threads then a step down then into the manifold. So I found that I could use the whole to tap in some 14-1.5 threads on that step down part. While the threads are A-OK, I'm not satisfied with my bolt choice so tomorrow I'll find a better bolt/washer combo and really check off the boc next to this part of the project.
The O2 sensor is being relocated for the sake of trunk clearance, so I'm ok to do whatever it takes to fill the hole. The O2 is very close to 3/4-16, but no cigar. So I drilled out and re-tapped that whole to just fit in a 3/4-16 bolt that was shortened as to not block any airflow in a set of already restrictive manifolds. I also had to round off the bolt I was using for clearance sake.
I forget if I listed it above or not, but I got all the missing connectrs and sent them off the Erik for the harness. -Project ETA 2-3 Weeks-
------------------ Black 88 GT, a 19 year old here about 20 years to late -LQ1 Swap in progress-
[This message has been edited by fliphone (edited 10-01-2023).]
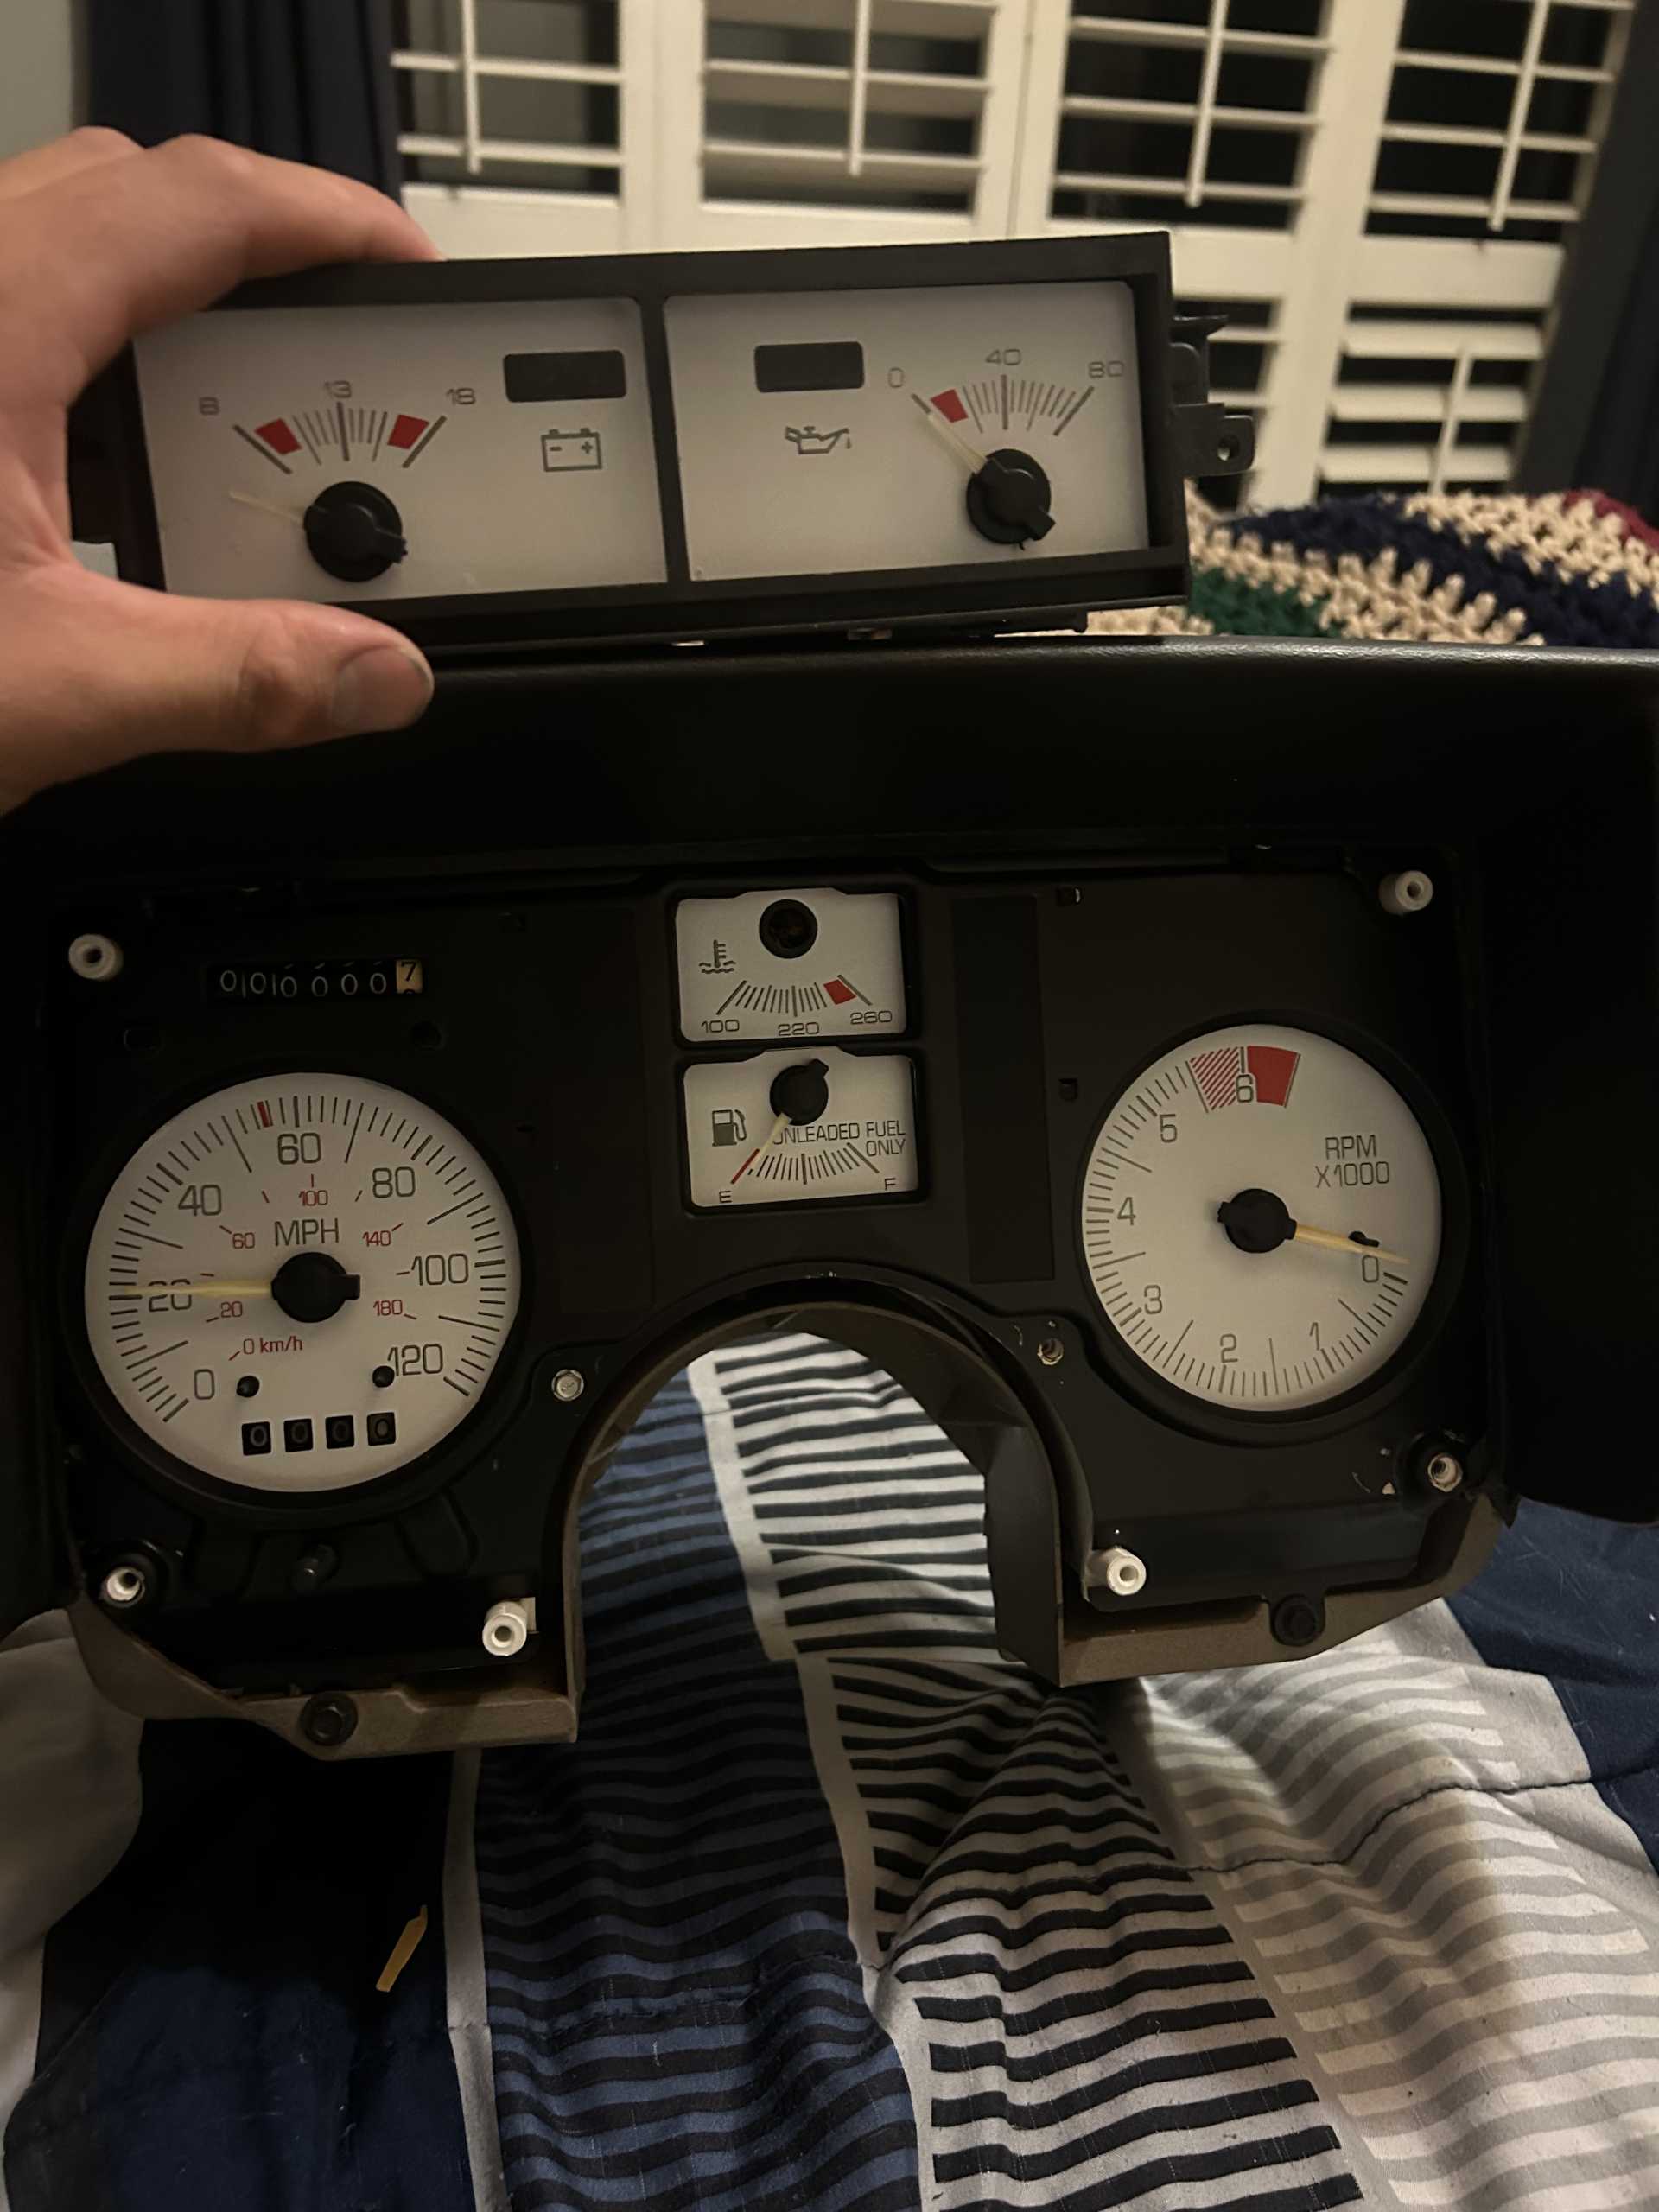
First update in a minute, and its not exactly part of the swap but I'm tossing it in anyway. I pulled the gauge cluster(s) from the donor car to make them the white faces along with reset the Odo for the swap. It took my ape brain a minute to figure out how to actually roll back the Odo and I broke the plastic piece that holds all the little slider dudes in place, but getting it back in it's home i'm pretty sure it won't hurt anything (I hope). The white faces took a couple of tries to get everything lined up but I'm happy with how it turned out.
I'm not gonna put this onto the car quite yet, as if something cluster related doesn't work then I'll know it's not the cluster as the one in the car worked great. Once that's all tied up then this'll be one of the first things I do post-swap
------------------ Black 88 GT, a 19 year old here about 20 years to late -LQ1 Swap in progress-


 ) Got the rough shape all cut of for the box, to clean it up I'm just going to grab some thick double sided tape foam strip stuff and toss it in there unless something else comes to mind.
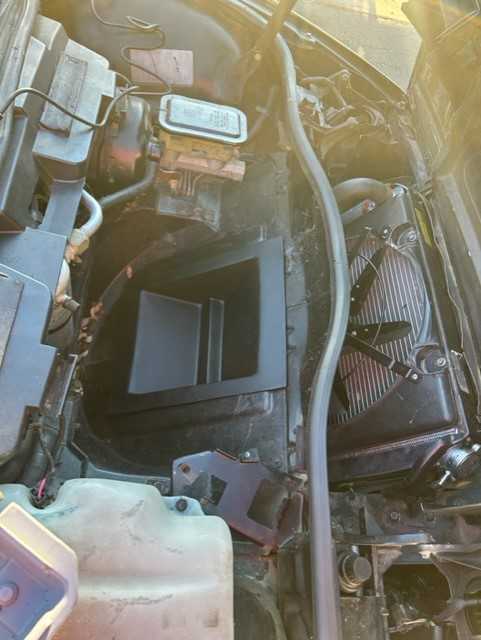


 Great post!